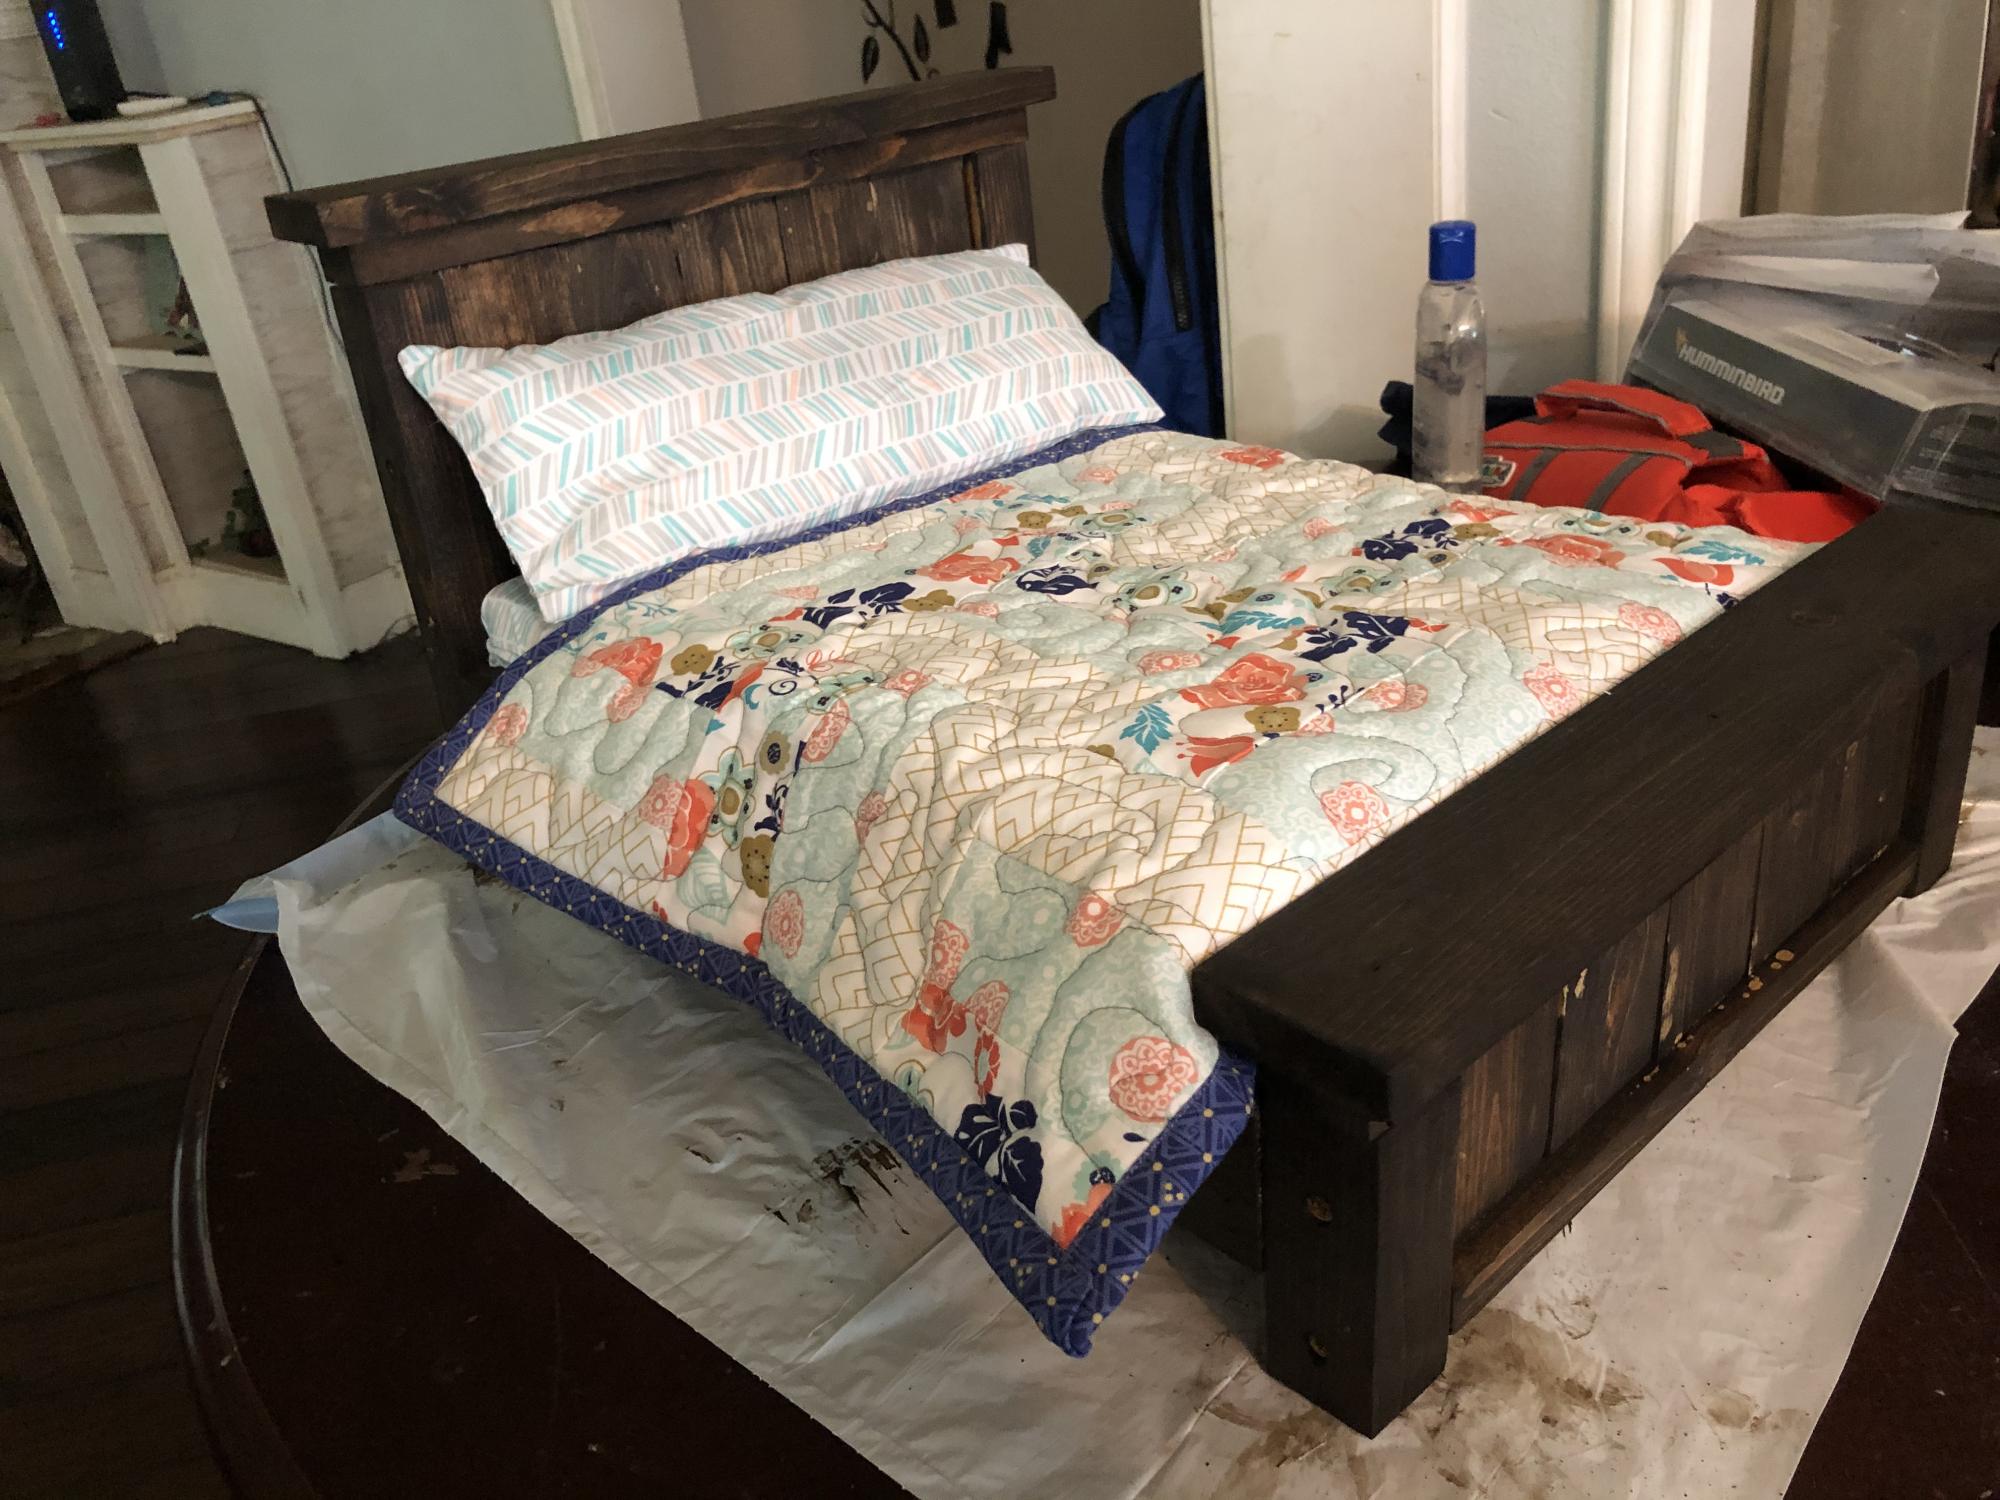
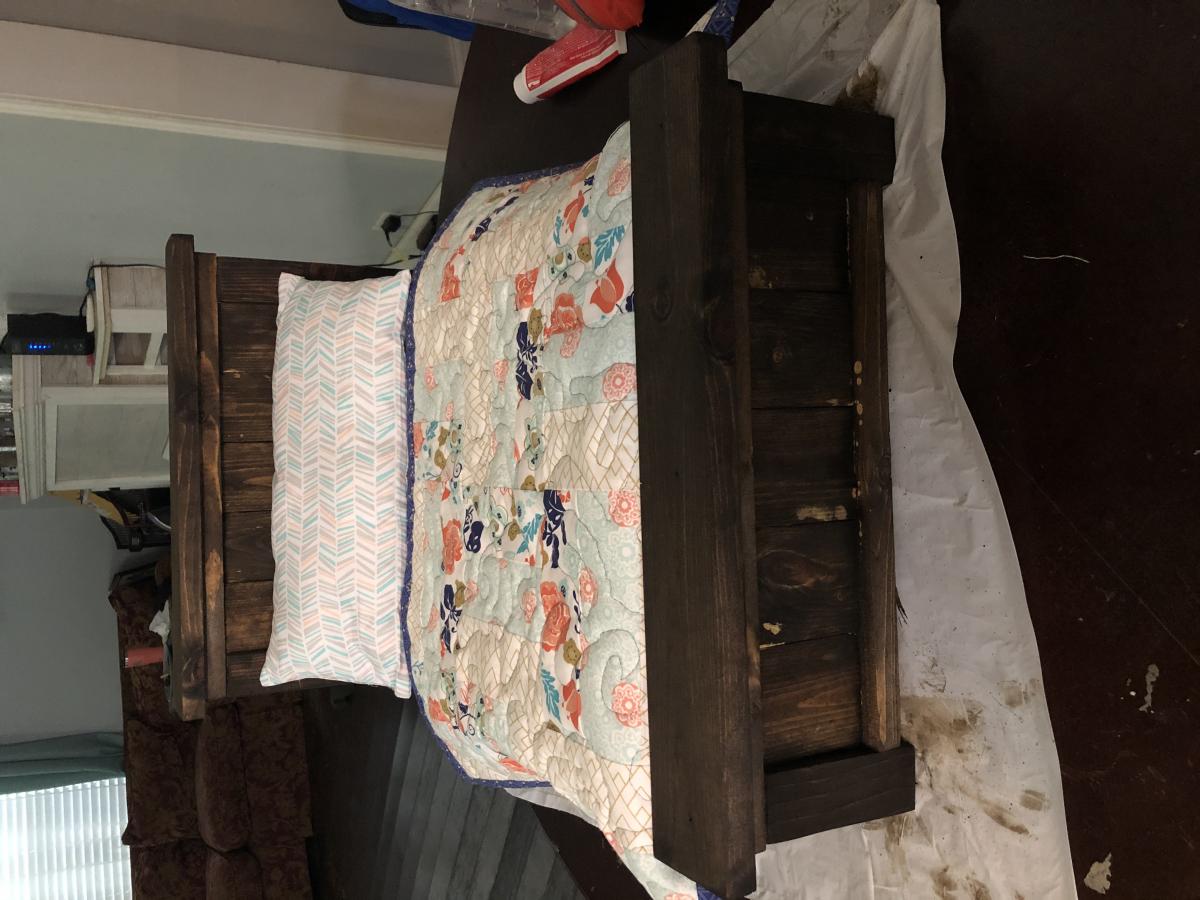
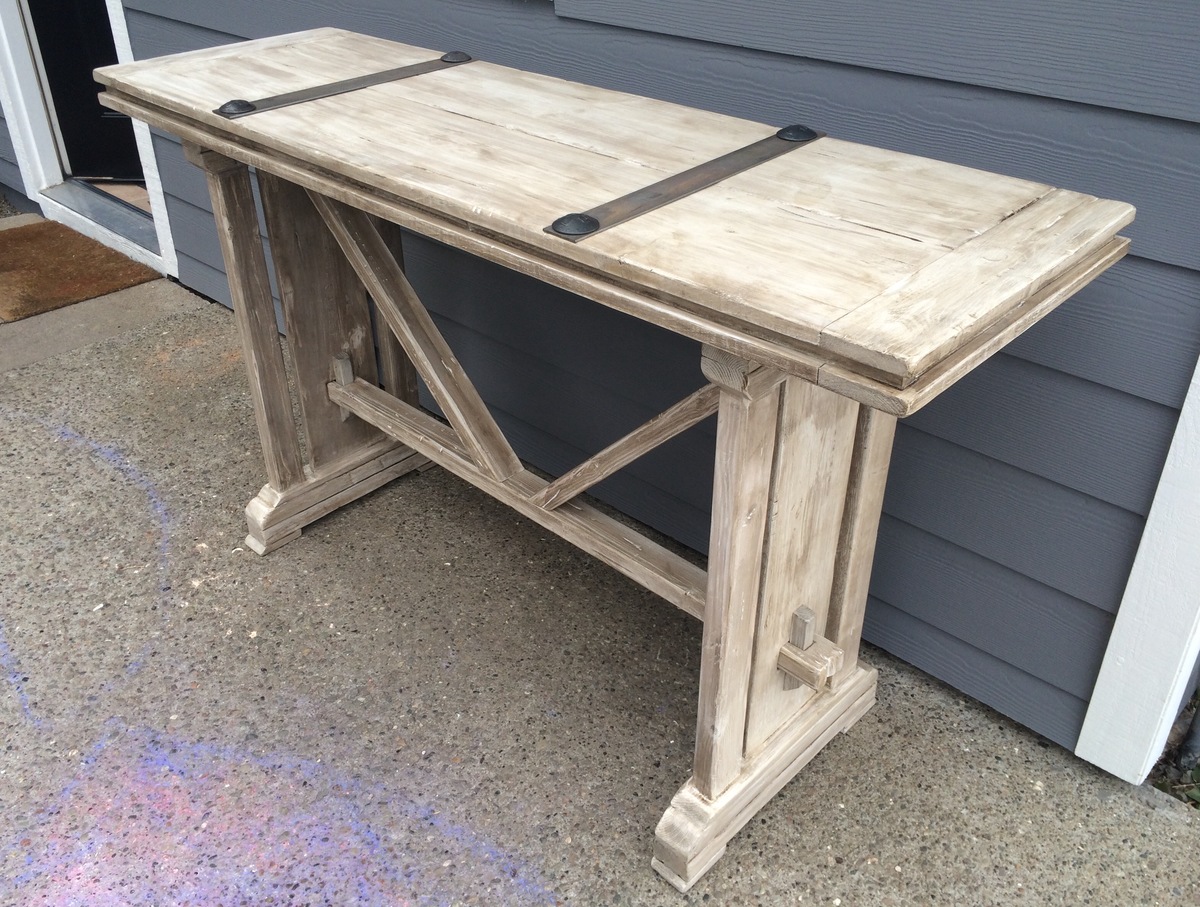
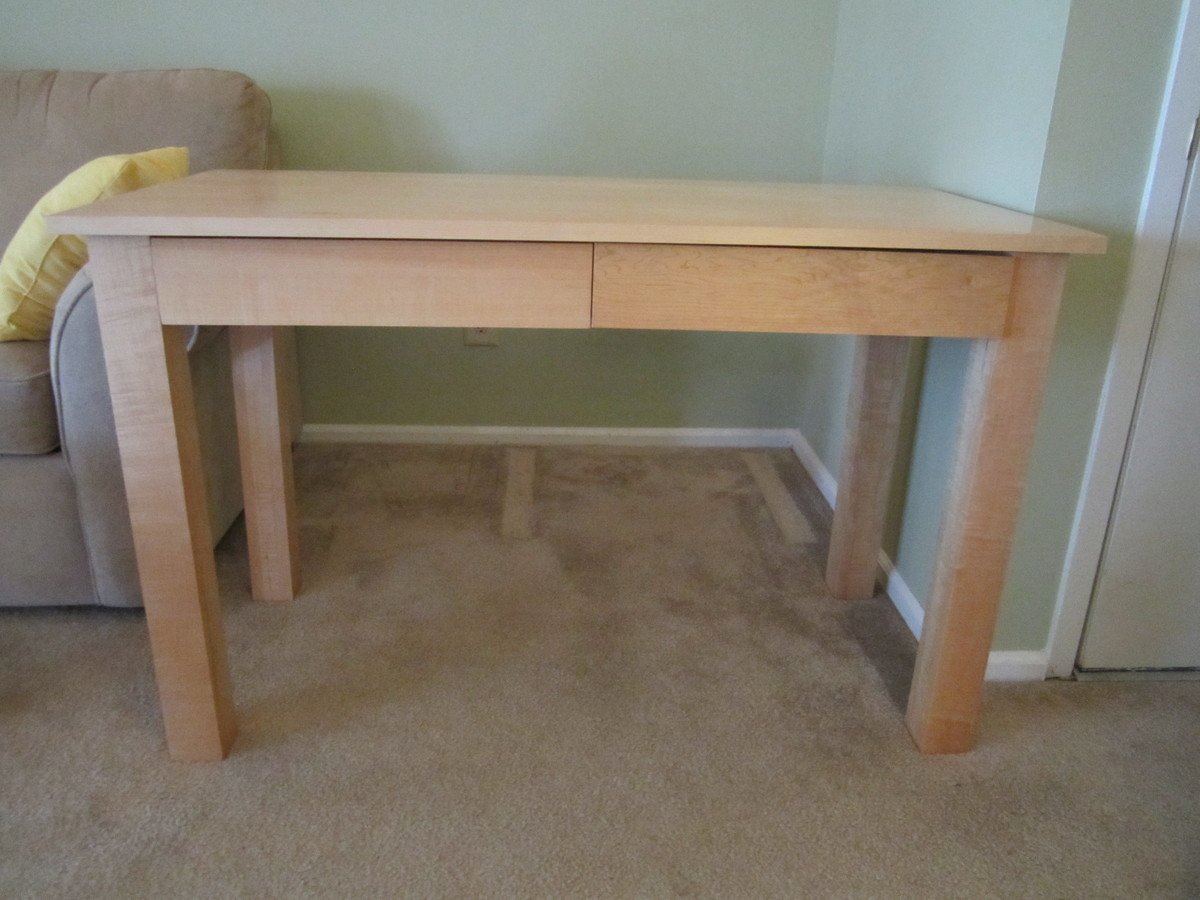
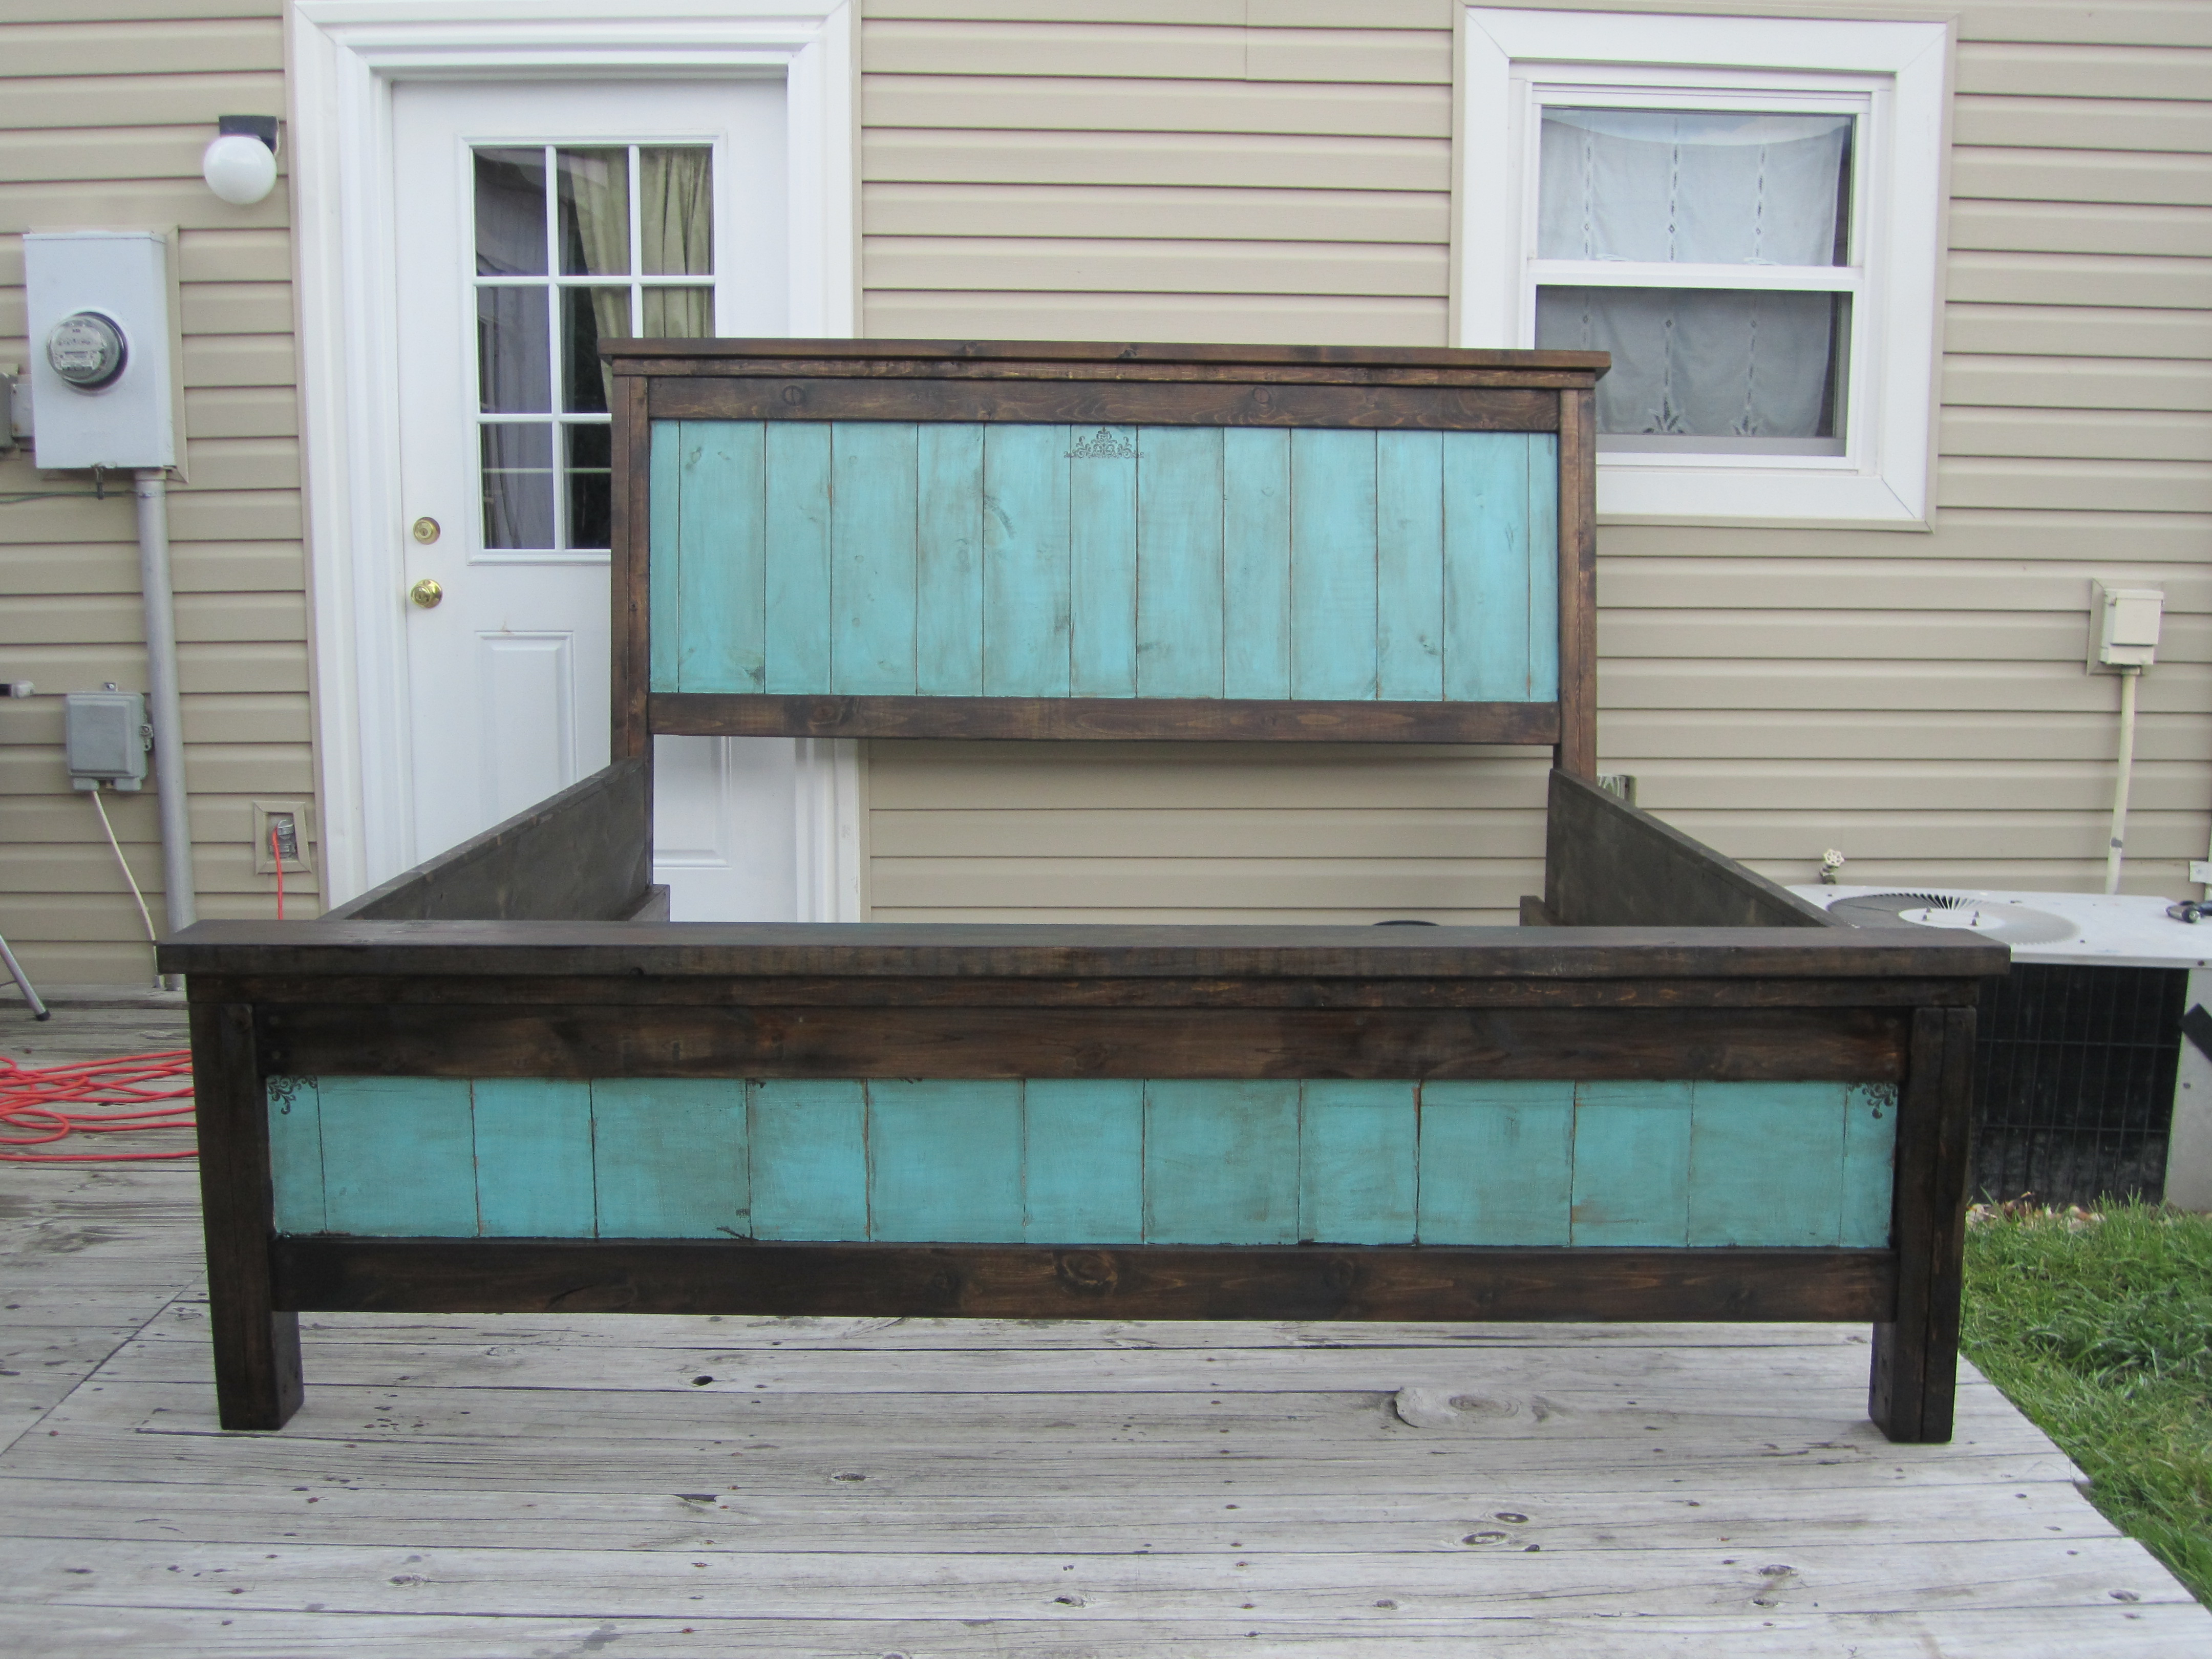
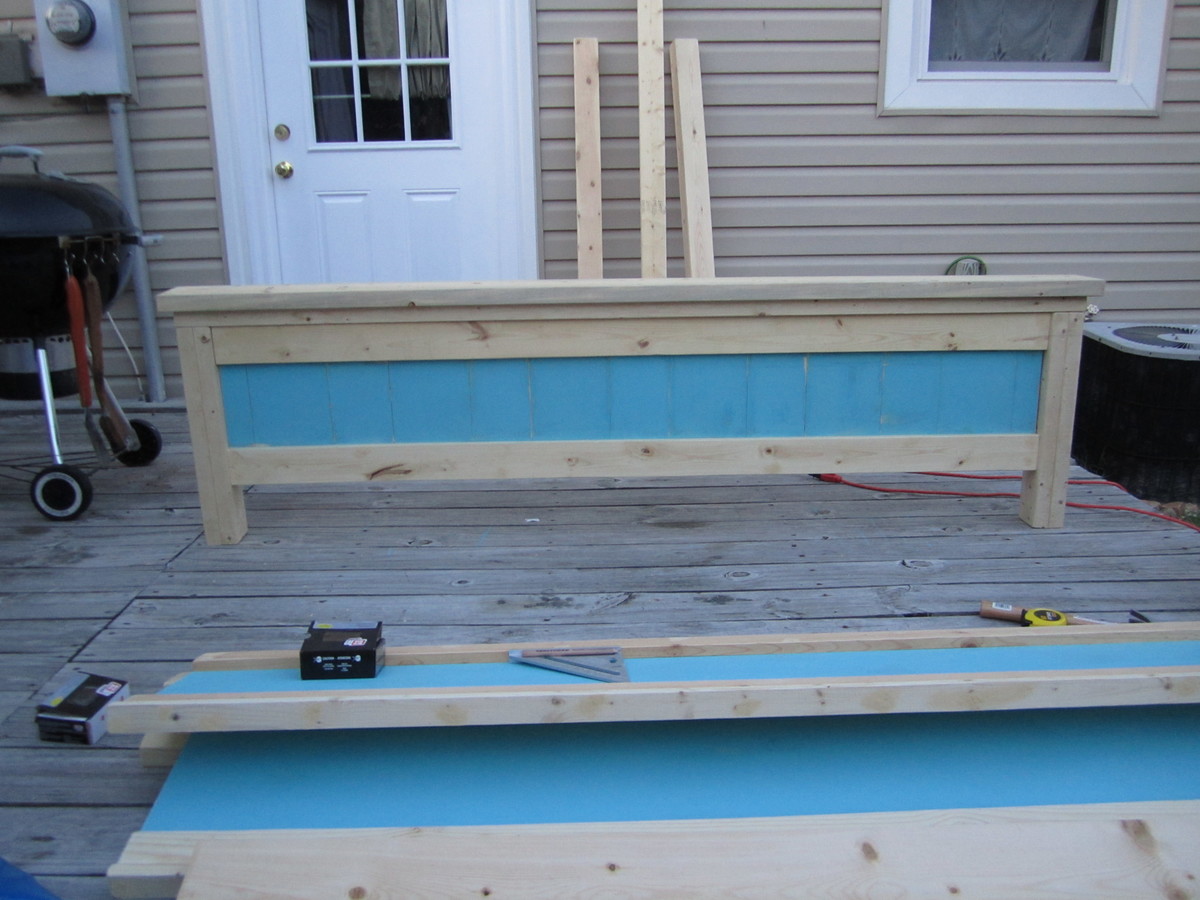
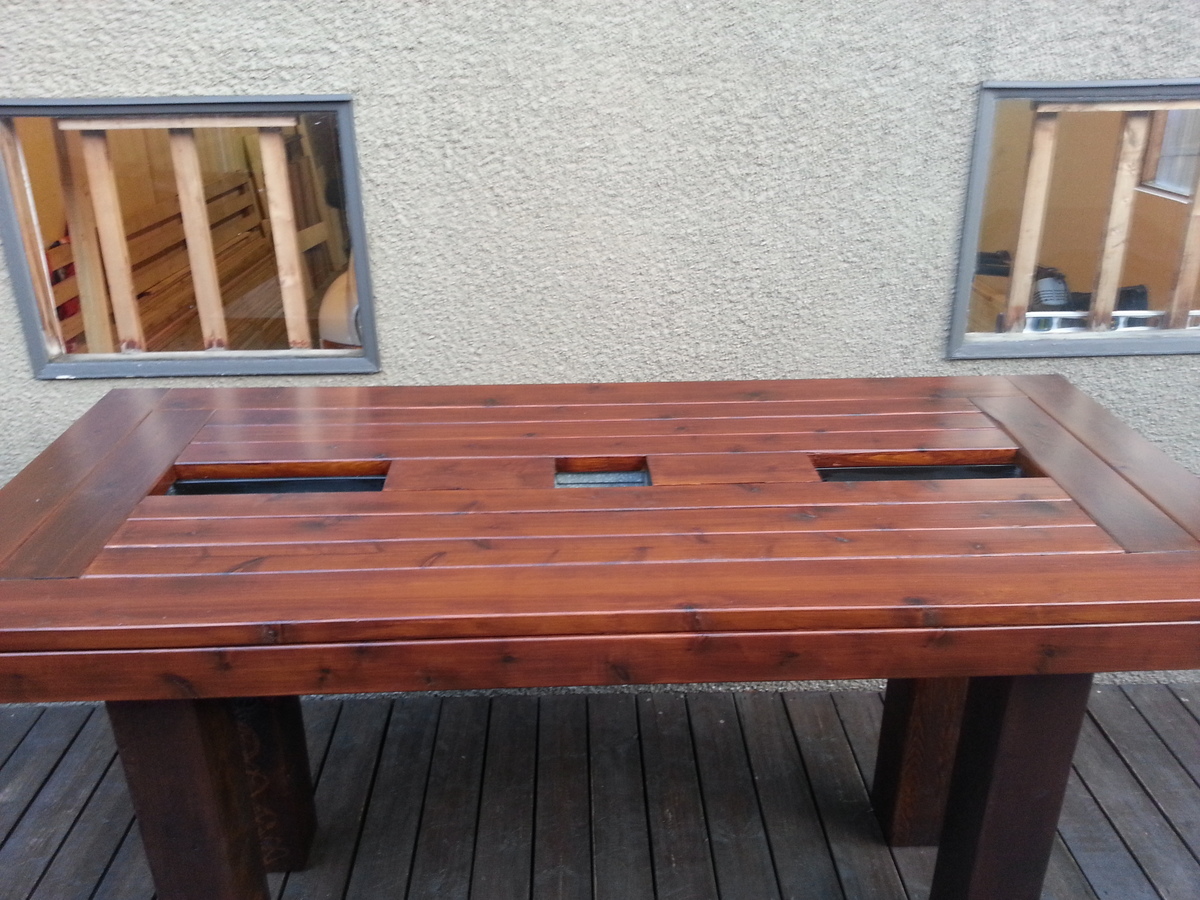
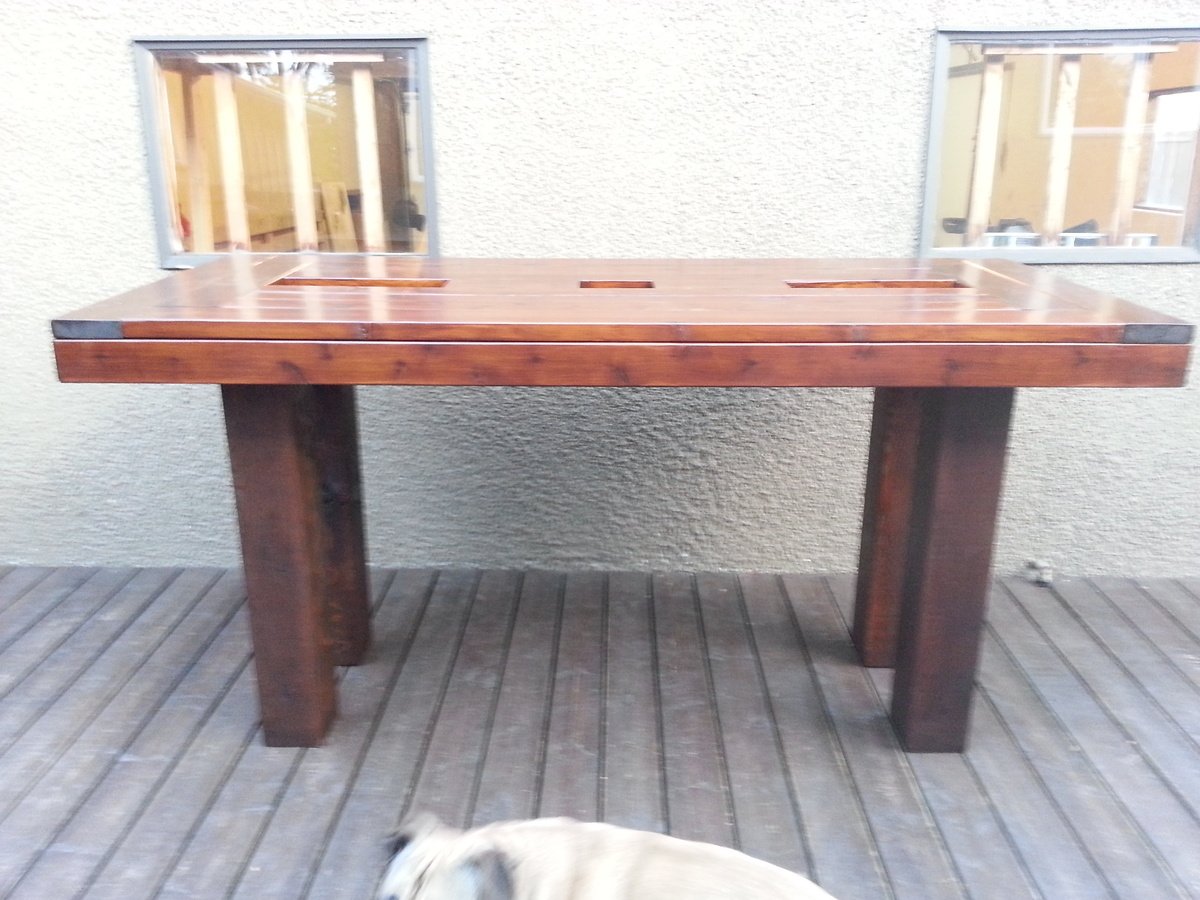
Community Brag Posts

Farmhouse Table

Submitted by normansm on Fri, 05/30/2014 - 07:17

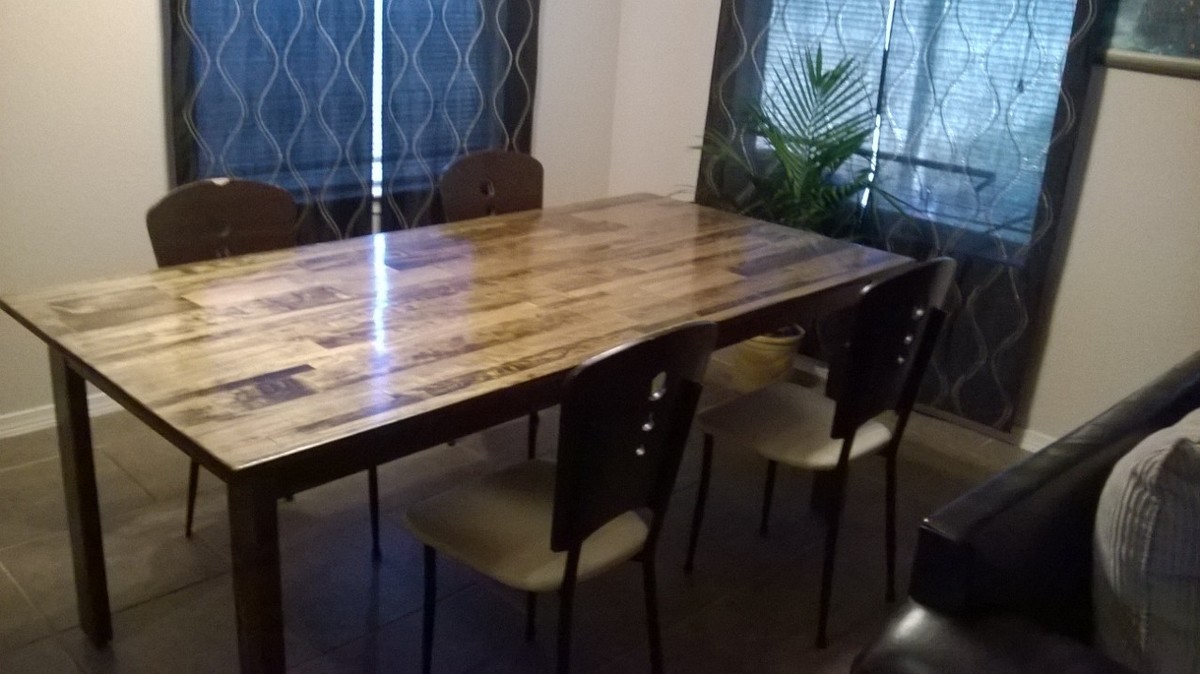
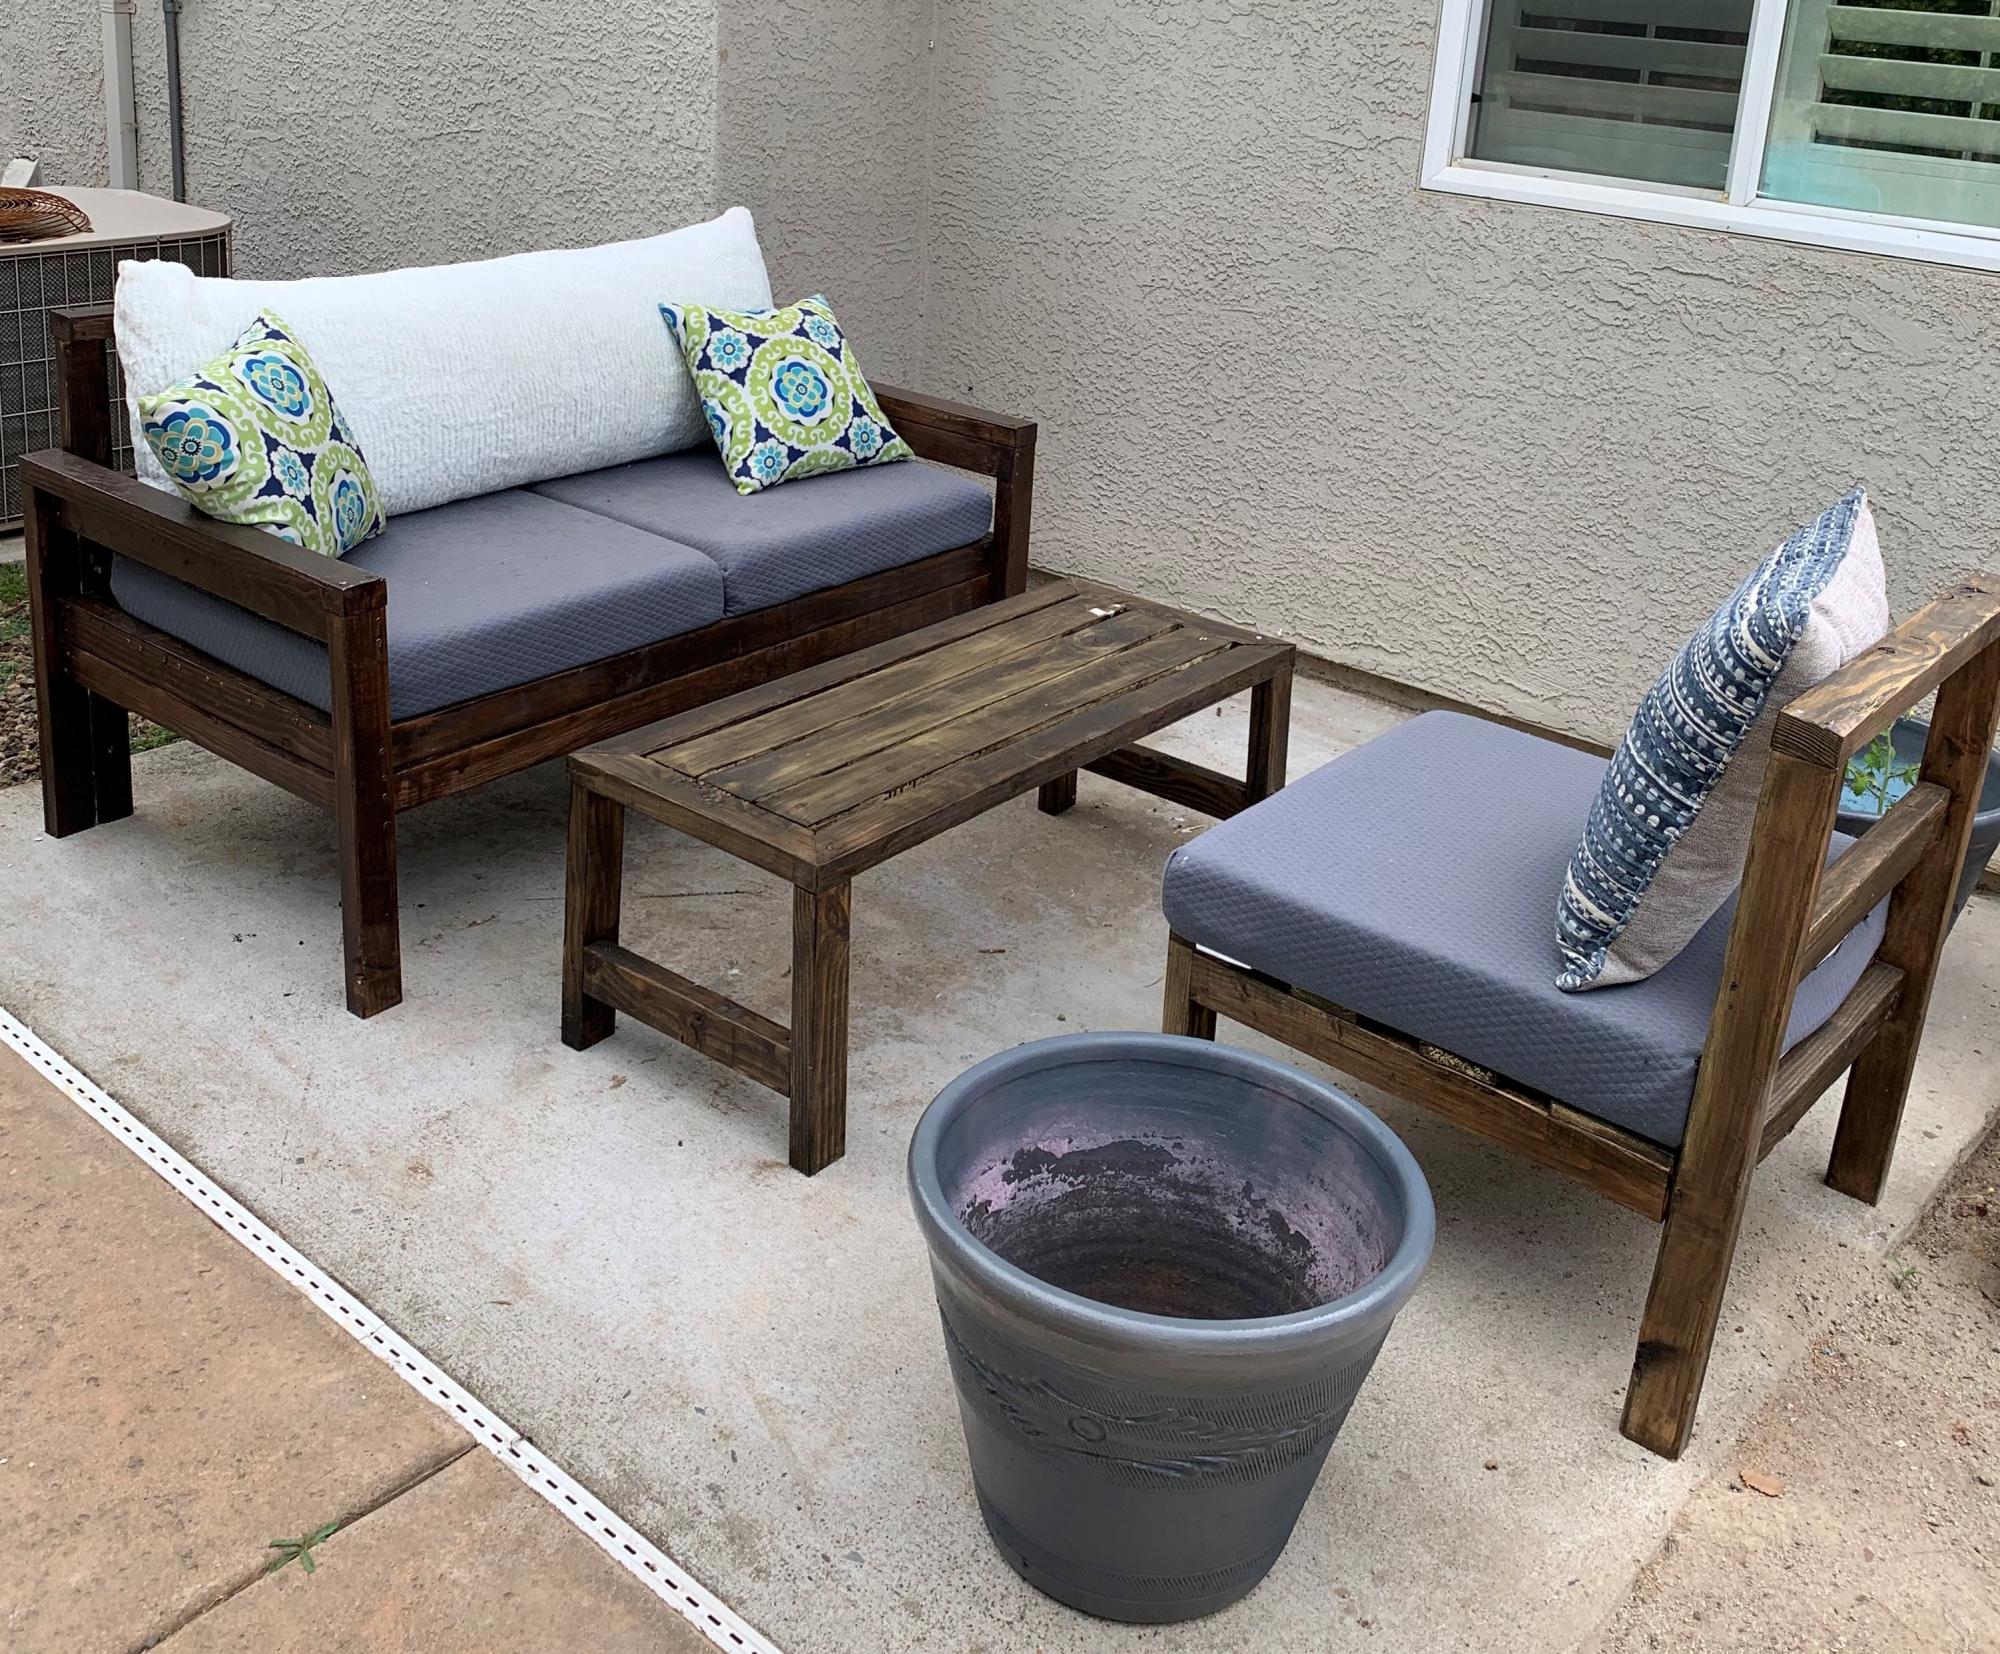
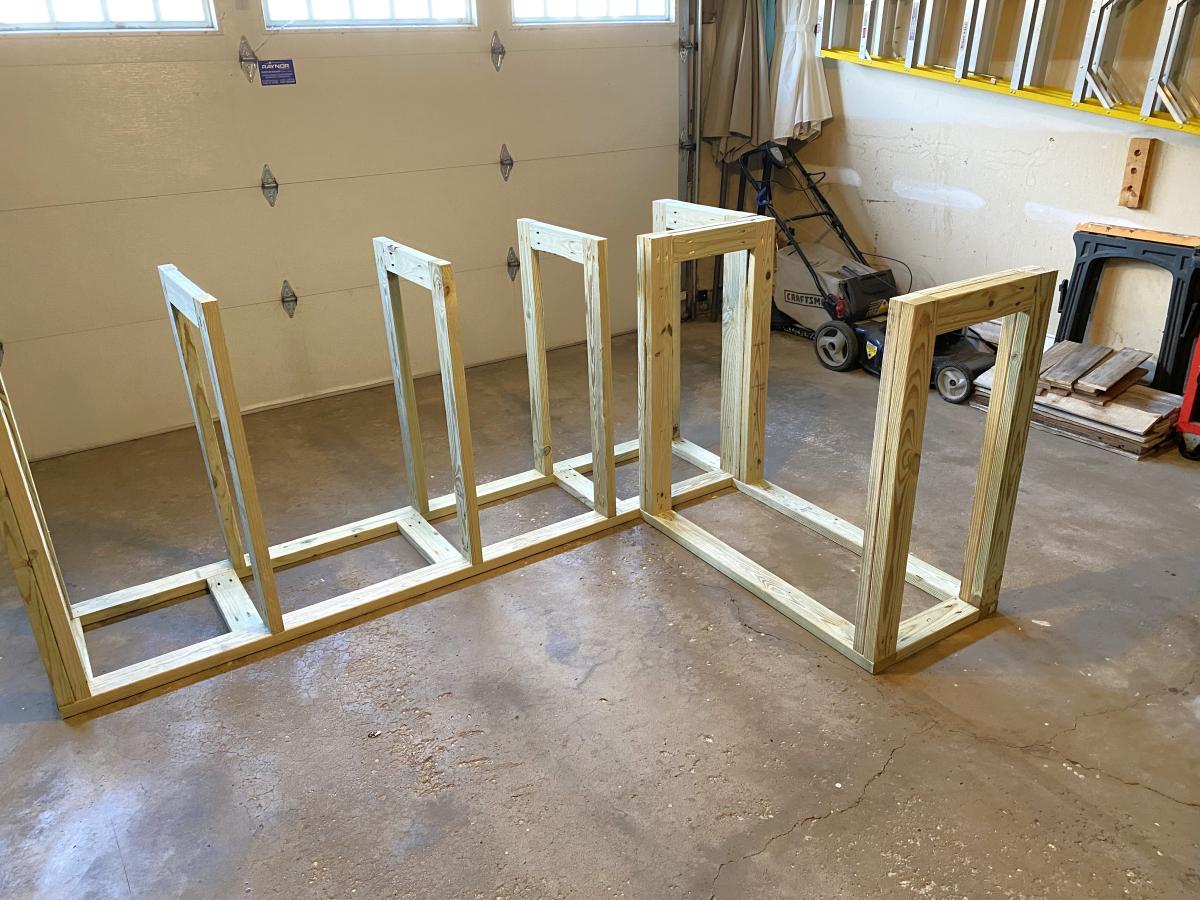
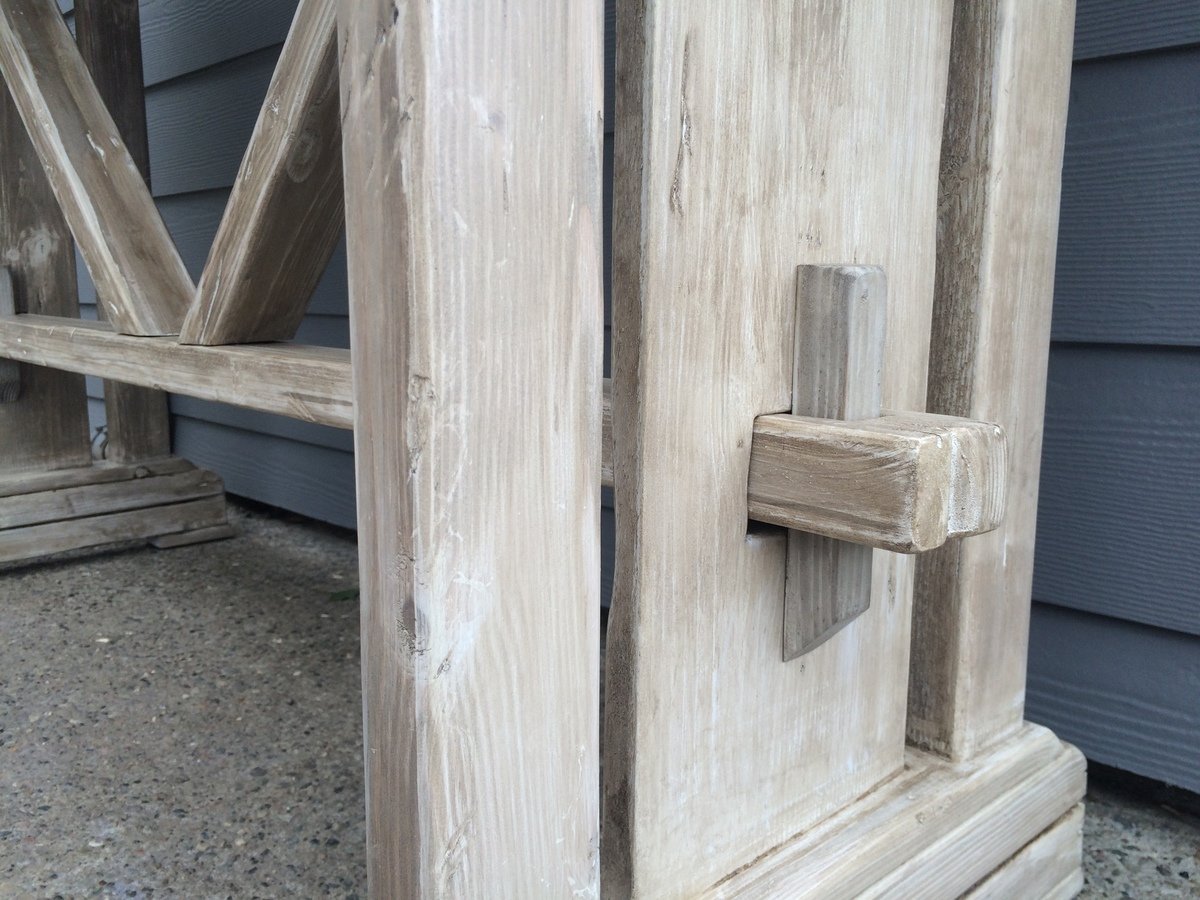
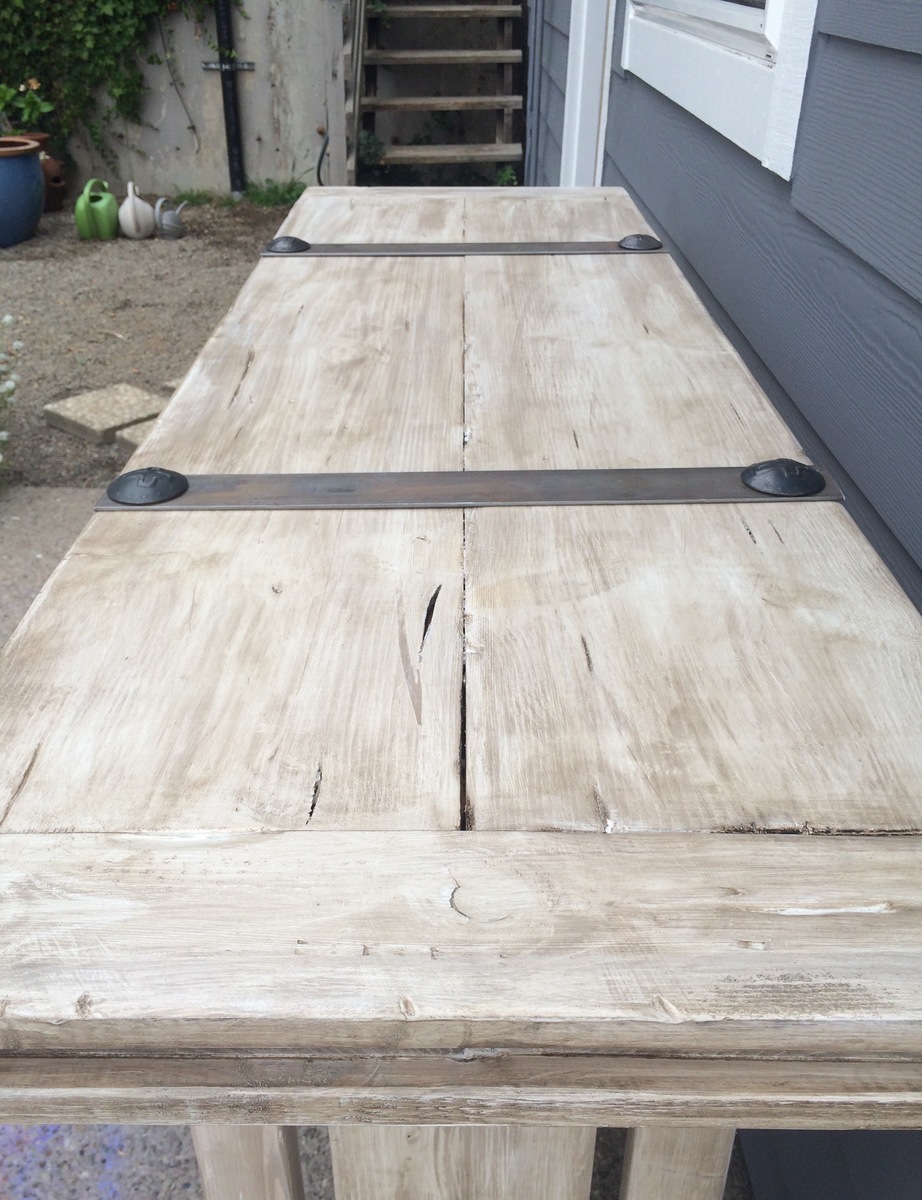
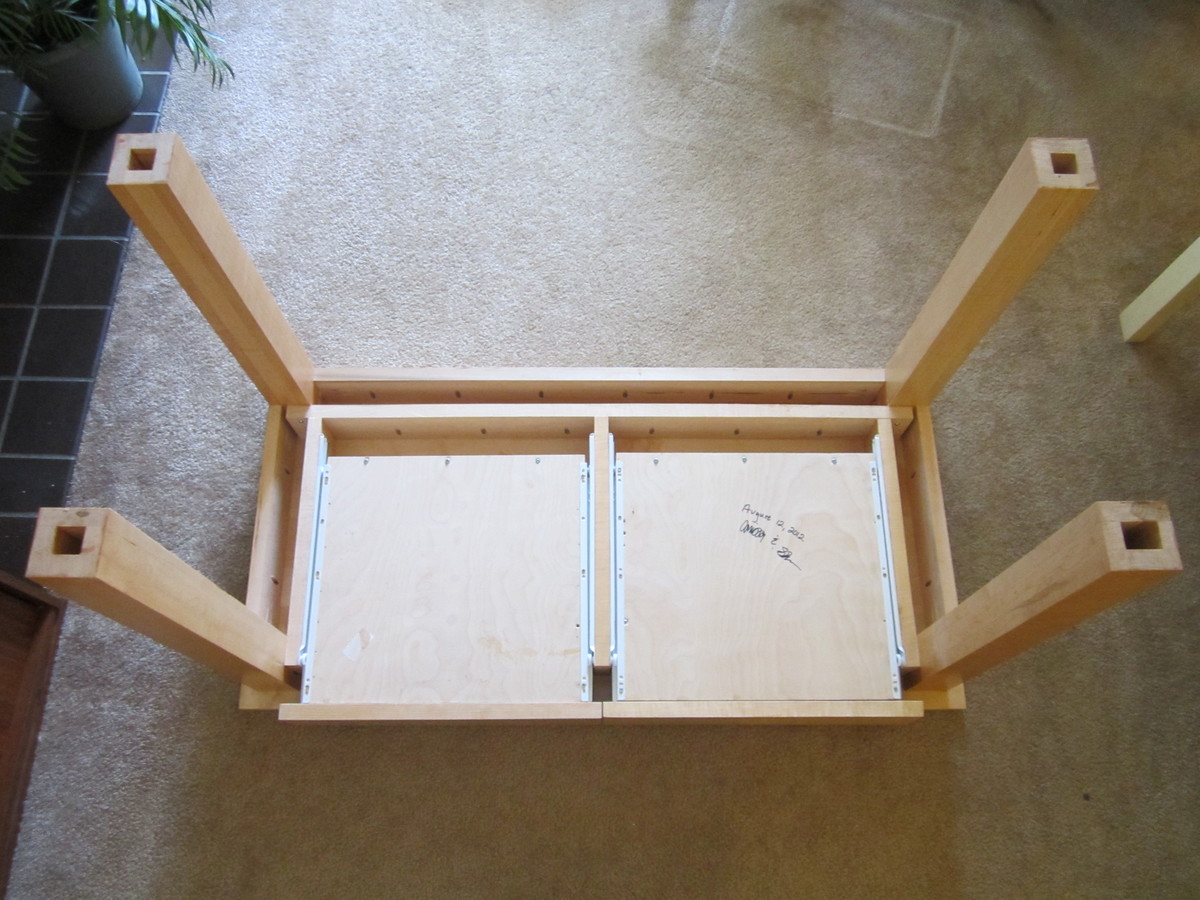
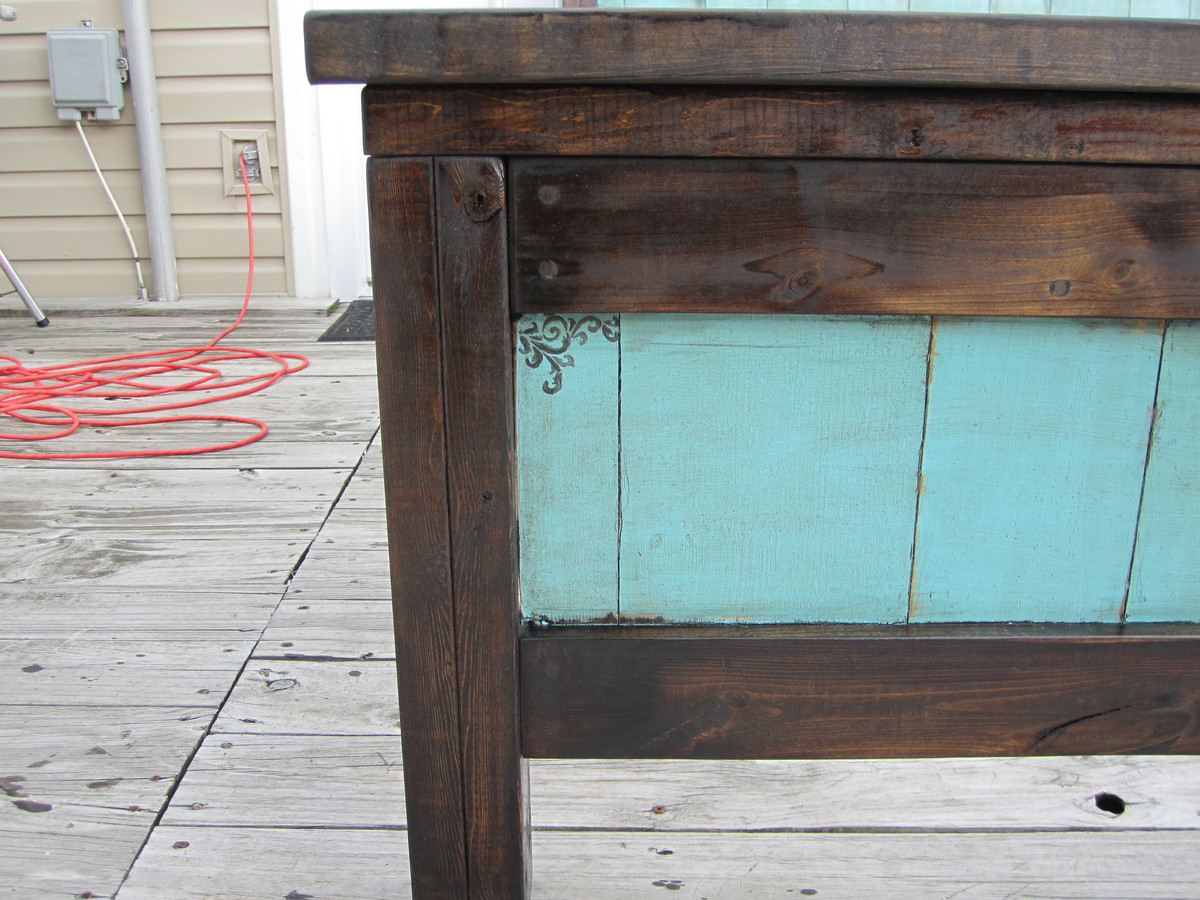
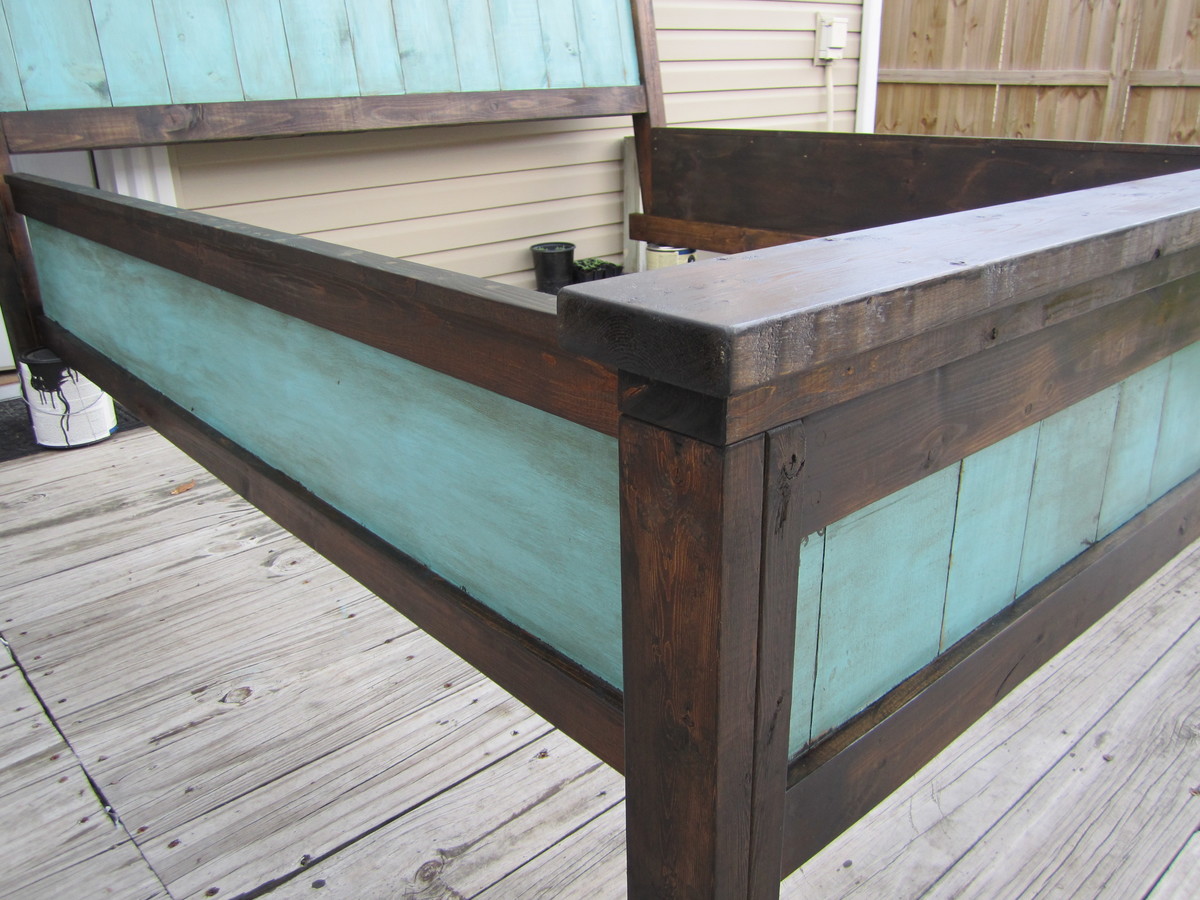
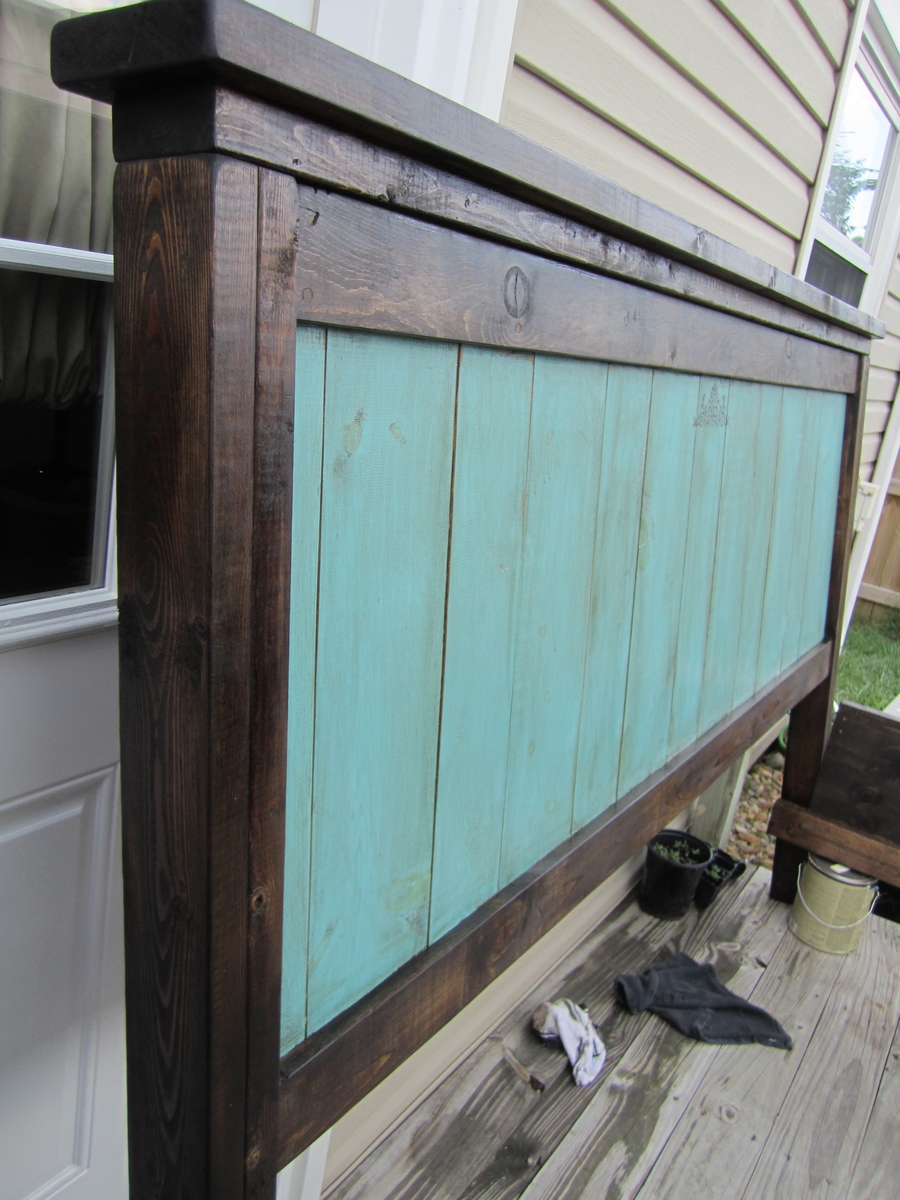
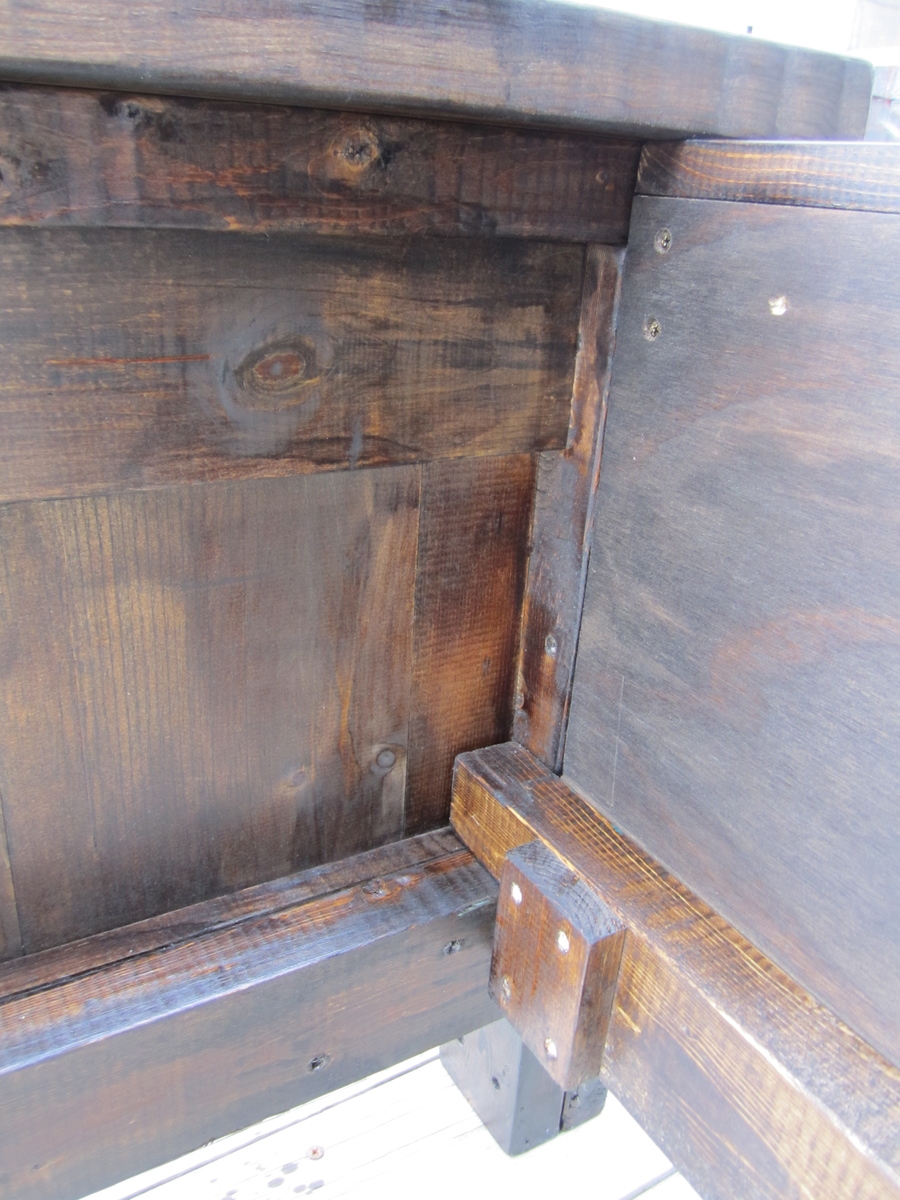
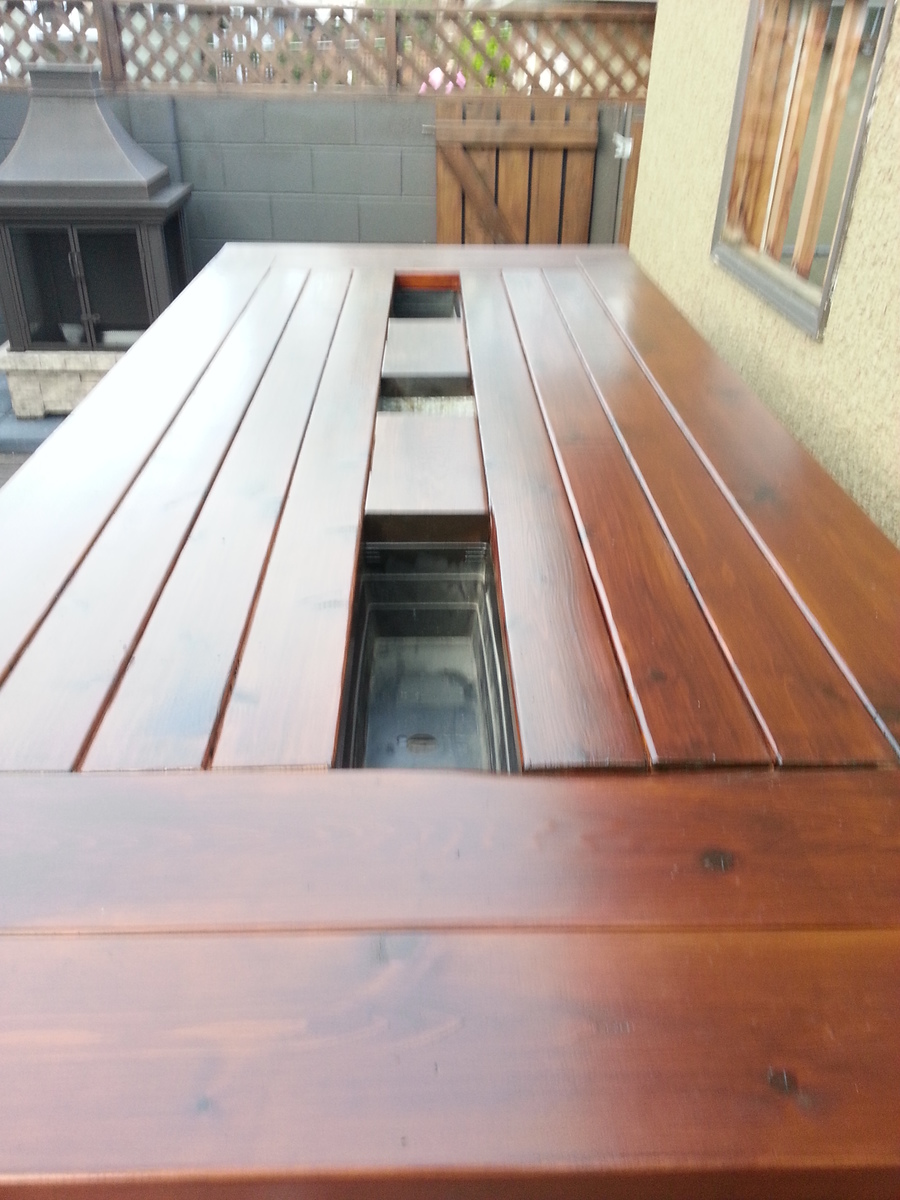
This build was done with all pocket holes. I used some pre-made project boards for the top and joined them with pocket holes and glue. Also I used all pine for this project. The chairs are just old chairs from my previous table. Stained with special walnut and finished with semi-gloss poly and finishing wax. I rubbed and buffed the finish to get the nice shine. This project took a while because I decided to let the poly cure for about a week before finishing and placing in my dining area.

Estimated Time Investment
Weekend Project (10-20 Hours)
Finish Used
Minwax Special Walnut and Minwax Polyurethan (Both of them were Oil based)
Recommended Skill Level
Beginner

Storage Daybed

Submitted by hilt_m on Thu, 08/09/2012 - 08:06

This is the 3 box storage daybed, as you can see I added an armrest on one end as it sits in a corner.

Tips for building this project: Buy a decent circular saw, I used a cheap one and really regretted it. Square your timber, I ended up squaring my timber using a sander, which wasn't as easy as it sounds. Check you measurements, the bottom of one of my boxes was a little short because I didn't double check the measurements and I ended up having to fix it with an extra piece of timber. 2 or 3 saw horses are a real help and lots of clamps.

I used the cutout outline from the link below but had to convert it all to metric since I live in Sweden, also a standard single mattress here isn't as wide but longer then the one used in the linked project. I didn't take this into account and ended up having to buy an extra piece of plywood.
http://ana-white.com/2009/12/plan-stratton-daybed-as-request-by-you.html

I got the single mattress and the pillows from IKEA.

This was a lot of fun and I look forward to spending many hours relaxing on my new daybed.

Built from Plan(s)
Estimated Time Investment
Week Long Project (20 Hours or More)
Finish Used
white paint
Recommended Skill Level
Beginner

Comments

Rusty Cottage

Thu, 08/09/2012 - 10:48

Nice job on the daybed, I like that you got through all your "dilemmas".

Your saw's bevel function (hopefully it has it) might be nicer than mine but you can try to adjust it.

I have a $50 dollar skil saw and my only complaint is how difficult it is to set the base plate 90 degrees to the blade. I even take care to set the circular saw between two 2x4 when not in use so that setting it on the ground doesn't change the angle of the foot plate to blade. I can cut 90 degrees with a speed square as a guide, but I can't adjust the saw right.

I will be starting assembly of my first furniture project with the wood I cut two days ago. I will see how the pieces go together.

Best of luck on your next project!

hilt_m

Sat, 08/11/2012 - 06:27

Thanks, I'm pretty pleased with it. Yes that was one of my problems as well, trying to get the base plate set at 90, I found that if I leaned on it too much it flexed a bit which isn't good. Also by the end I had a pretty blunt blade or I was getting pinching or something thing because the plywood had some shocking edges with splintering. What I would really like is a proper saw table, but for now that's just a dream. Good luck on your project.

AmandaKay

Wed, 08/21/2013 - 10:50

Hi there! I was hoping that someone on here had added the armrest! Would you be willing to post a pic of the end of the bed so that I can see how you configured it? Im goint to be starting this project soon for my daughter, and need to strategize some armrest ideas for hers.

Thanks so much!!

6 cubby book case - nursery

This was my first project. It is for our nursery. Painted white to match the crib and dresser. So much fun. Plan was great and very easy to follow. Thanks to the other brag post which mentioned there was a missing cut for the box (bottom shelf). 28 3/4. I used countersink screws with a 1/2" countersink drill bit. I also used shelf pins to secure the shelf. With the paint I noticed the shelfs were very snug. I would probably take off 1/4" off the shelf size if I built it again. Can't wait for the next project! Thanks.

Built from Plan(s)
Estimated Cost
130
Estimated Time Investment
Day Project (6-9 Hours)
Finish Used
White paint. Eggshell finish.
Recommended Skill Level
Beginner

Spanish entry table

Submitted by Anonymous (not verified) on Sun, 09/04/2016 - 16:25

Built this entry table as a gift for my aunt. She has a beautiful Spanish style home, and I wanted to create a piece that looked as though it would have come from one of our California Spanish missions. I used the Honey Bear Lane staining technique. I used HD pine lumber and accented with metal straps from HD and clavos. This was a challenging but very fun project!

Estimated Time Investment
Week Long Project (20 Hours or More)
Finish Used
Honeybearlane.com technique- dark stain over white wash. Three coats of matte polyurethane varnish to seal.
Recommended Skill Level
Beginner

Potting Bench/Stand

Submitted by MikeO on Tue, 06/16/2020 - 09:58

Built this for my girlfriend's birthday present. Added a 1x4 backsplash and a 2x6 for the top shelf to give a little more shelf room instead of the 2x4 called for in the plan. Stained with Varathane "Vintage Aqua" color and then 3 coats of Helmsman Spar Urethane for outdoor durability. Set the whole thing on caster wheels (not pictured) so she can move around the deck as needed.

Built from Plan(s)
Estimated Time Investment
Afternoon Project (3-6 Hours)
Finish Used
Varathane Vintage Aqua
Helmsman Spar Urethane
Recommended Skill Level
Intermediate
Seasonal And Holiday

DIY Outdoor Wood Furniture

Submitted by Anonymous (not verified) on Thu, 03/21/2024 - 07:36

My daughter wanted patio furniture but did not want to spend a ton of money. The total project cost around $400. We used treated 2x4’s for the frame. We found $45 cushion sets, the rug and accessory pillows at Big Lots. I love we used different colors for the chair s and love seat.

Jennifer Poarch

Seasonal And Holiday

Solid Maple Desk

Submitted by ccbuilder on Sun, 08/12/2012 - 14:29

This is a solid maple desk with two drawers finished with shellac and paste wax. I altered the plan by giving the desk and overhang, as well as changing the way the legs were built.

Built from Plan(s)
Estimated Cost
$250
Estimated Time Investment
Week Long Project (20 Hours or More)
Finish Used
Shellac and paste wax. I sanded until the surface was incredibly smooth and then used a high quality brush to apply the shellac.
Recommended Skill Level
Intermediate

Floating Bedside Table

I’ve been in need of a bed side table in my room for quite some time now. I need storage for things like my keys, wallet, the remote, as well as other little items that seem to get kicked around and lost. I figured it would also be nice to have a place to keep my alarm clock, I’m guessing it will be a lot more convenient to hit the snooze button in the morning if the clock is closer to me.

Estimated Time Investment
Day Project (6-9 Hours)
Recommended Skill Level
Intermediate

Beverage Station

Submitted by davis7029 on Thu, 06/18/2020 - 06:29

After seeing this same cabinet on Etsy for $2000+ I decided to try building my own. This was built using Ana's plans for the Barn Door Cabinet with Mini Fridge and Microwave. On top of the cabinet is a custom chalkboard which I anchored to the back of the cabinet. Attached to the chalkboard is a shelf for liquor. The rail is made from 3/8" black iron pipe from Home Depot & Amazon. Unfortunately, my Home Depot did not have nipples larger than 6 inches so we had to source 12" from Amazon. The fittings and shorter nipples came from Home Depot. The supports for the shelf and coffee mug rack are made using 1/2" black iron pipe and fittings which were 100% sourced from Home Depot. The finish for the borders of the chalkboard and cabinet top were stained using Varathane Stain + Poly. The color is called "Mission Oak" and it is a satin finish. The hardware for the barn door was purchased from Amazon.

NOTE: If you decide to build a similar version of this I'd consider leaving at least 33.5" on the inside where the refrigerator sits so you can fit a 120-can refrigerator instead. Most are 33.5" tall. I prefer to drink beer from a bottle and the space in a 2.2 cu. ft goes quick when bottles are placed inside.

Estimated Cost
$1000
Estimated Time Investment
Week Long Project (20 Hours or More)
Finish Used
Varathane Stain + Poly (Mission Oak)
Recommended Skill Level
Intermediate

Farmhouse Bed

Submitted by ValBryant on Wed, 08/15/2012 - 14:24

This was our first build alone. I've helped my dad build various things through out the years but was this first time me and my husband built something together.
The bed plans were great and it went together easily. We couldn't find untreated 4x4 posts so we went with two 2x4 sandwiched together, and then we bolted the headboard posts to the footboards. The side rails are plywood trimmed with 1x3's and topped with a 1x2. We also used L brackets to attach the side rails to the head and footboards and addition to bolts on the headboard and 2" screws on the footboard. We needed to assemble the bed in a way we could easily disassemble because we are moving soon.

Estimated Cost
160+
Estimated Time Investment
Weekend Project (10-20 Hours)
Finish Used
I followed one of Ana's featured finishes, distressed turquoise with chocolate glaze.
I used dark walnut stain and Valspar's semi-gloss Sea Exposure, and Valspar's Glaze.
Recommended Skill Level
Beginner

Comments

Bar Height Patio Table

Submitted by VincentP on Thu, 06/05/2014 - 12:24

Built this from a couple of the plans on here and ideas I have seen around the web. This is the very first project I did and with plans from Ana White I found it pretty easy to get through the whole thing. I built this to be bar height and now that it is done I might cut it down to be regular table height just because I didn't realize how big it would actually be. But first I will build a couple chairs and a bench to go along with it.

Estimated Time Investment
Week Long Project (20 Hours or More)
Finish Used
I used Sikkens Cetol 123 system, 3 coats and the colour is dark oak.
Recommended Skill Level
Starter Project

Comments

Washer and Dryer Pedestal

Found these awesome plans from Ana's site here and thought I could definitley make that!  My mother needed a new laundry room makeover so it was the perfect opportunity.  I made my stand only 56" long to fit perfectly into the spot.  Which still allowed enough room for washer and dryer to be on there and enough room if they shook a little.  I had to adjust my plans as I wanted it to fit snug against the wall but needed to allow for the dryer hose to connect to wall so I cut out a 4.5"x 5" spot on both the bottom and top platforms to allow for hose and cord to plug in.  I put in extra supports going vertically and horizontally to replace the strength for the holes being cut.  The result was perfect!


I got creative and added a floating rustic tabletop to the washer and dryer to make the space useful and also added a floating shelf above that.  Both stained in a dark walnut.


Happy builder right here!!!

www.facebook.com/RW.Creations.Blackfoot.AB

Estimated Cost
$150
Estimated Time Investment
Weekend Project (10-20 Hours)
Finish Used
Painted a dark chocolate brown and sealed with
Recommended Skill Level
Beginner

Adirondack Chair

Submitted by Ulrike on Sun, 06/21/2020 - 09:24

Followed Ana’s plans and turned out great. Stained it after it was assembled but would recommend doing that before assembly. Very comfy.

Estimated Cost
$35
Estimated Time Investment
Afternoon Project (3-6 Hours)

Stone Bird House

Submitted by sawdust on Sun, 06/08/2014 - 16:59

I've been collecting small flat rocks off the road every time I take the dog for a walk. Unfortunately my grout cracked, I probably used the wrong type. Anyone who can tell me what I should have used instead? Suggestions very welcome, as I might try this again.

Estimated Cost
$5.00
Estimated Time Investment
An Hour or Two (0-2 Hours)
Finish Used
Tiled road rocks. No finish.
Recommended Skill Level
Starter Project

Comments

Lady Goats

Mon, 06/09/2014 - 14:28

I love this idea! What kind of grout did you use? I would imagine that for such large gaps between the rocks, you'd have to use a sanded grout (most state whether they're for indoor/outdoor use, but I've only seen ones that say both). But it could have cracked because the wood underneath expanded or contracted or the grout wasn't the right consistency.. Love, love, love!

In reply to by Lady Goats

sawdust

Wed, 06/18/2014 - 09:30

Thank you for your comment on my birdhouse! I talked to a contractor who suggested that my grout was too watery when I started. I also used Polyblend non-sanded grout. I may use sanded next time. Trying to decide if I should give it another go, I kind of want to!

Ryobi Nation Bathroom Ladder

This leaning bathroom ladder was the perfect final touch to our budget bathroom re-do.

I used all reclaimed wood - old barn wood, pallet, and scraps - and had the nails/screws on hand. The only cost will be for stain, which the jury is still out on. Likely I will use the Danish oil in medium walnut.  Loved doing this project and the result!

Estimated Cost
$10 (reclaimed wood and hardware was on hand)
Estimated Time Investment
Day Project (6-9 Hours)
Finish Used
I rounded off the edges of the shelves like the "tip" recommended so they weren't so sharp. I don't have a nail gun, so I pre drilled very small holes and hammered in the nails after the glue set for a bit. I also cut a 10degree angle off the bottoms of the sides (to match the leaning angle at the top) so they would sit flat.
Recommended Skill Level
Beginner

Comments

Idahofischer

Fri, 09/09/2016 - 11:01

I posted this brag post before registering with a user ID. I'm not sure how to "claim" my (first ever!) brag post. Anyone know if this can be done?

Farmhouse Dog Bed

Submitted by KWhitt92 on Mon, 06/22/2020 - 14:23

Followed the Farmhouse Doll Bed build! It worked out great! It’s the perfect size for my tiny pup. Cost and time to finish includes everything you see here. The bed frame, the sheets, pillow, and mini quilt all made by hand.

Estimated Cost
$65
Estimated Time Investment
Afternoon Project (3-6 Hours)
Finish Used
Minwax Dark Walnut
Recommended Skill Level
Beginner