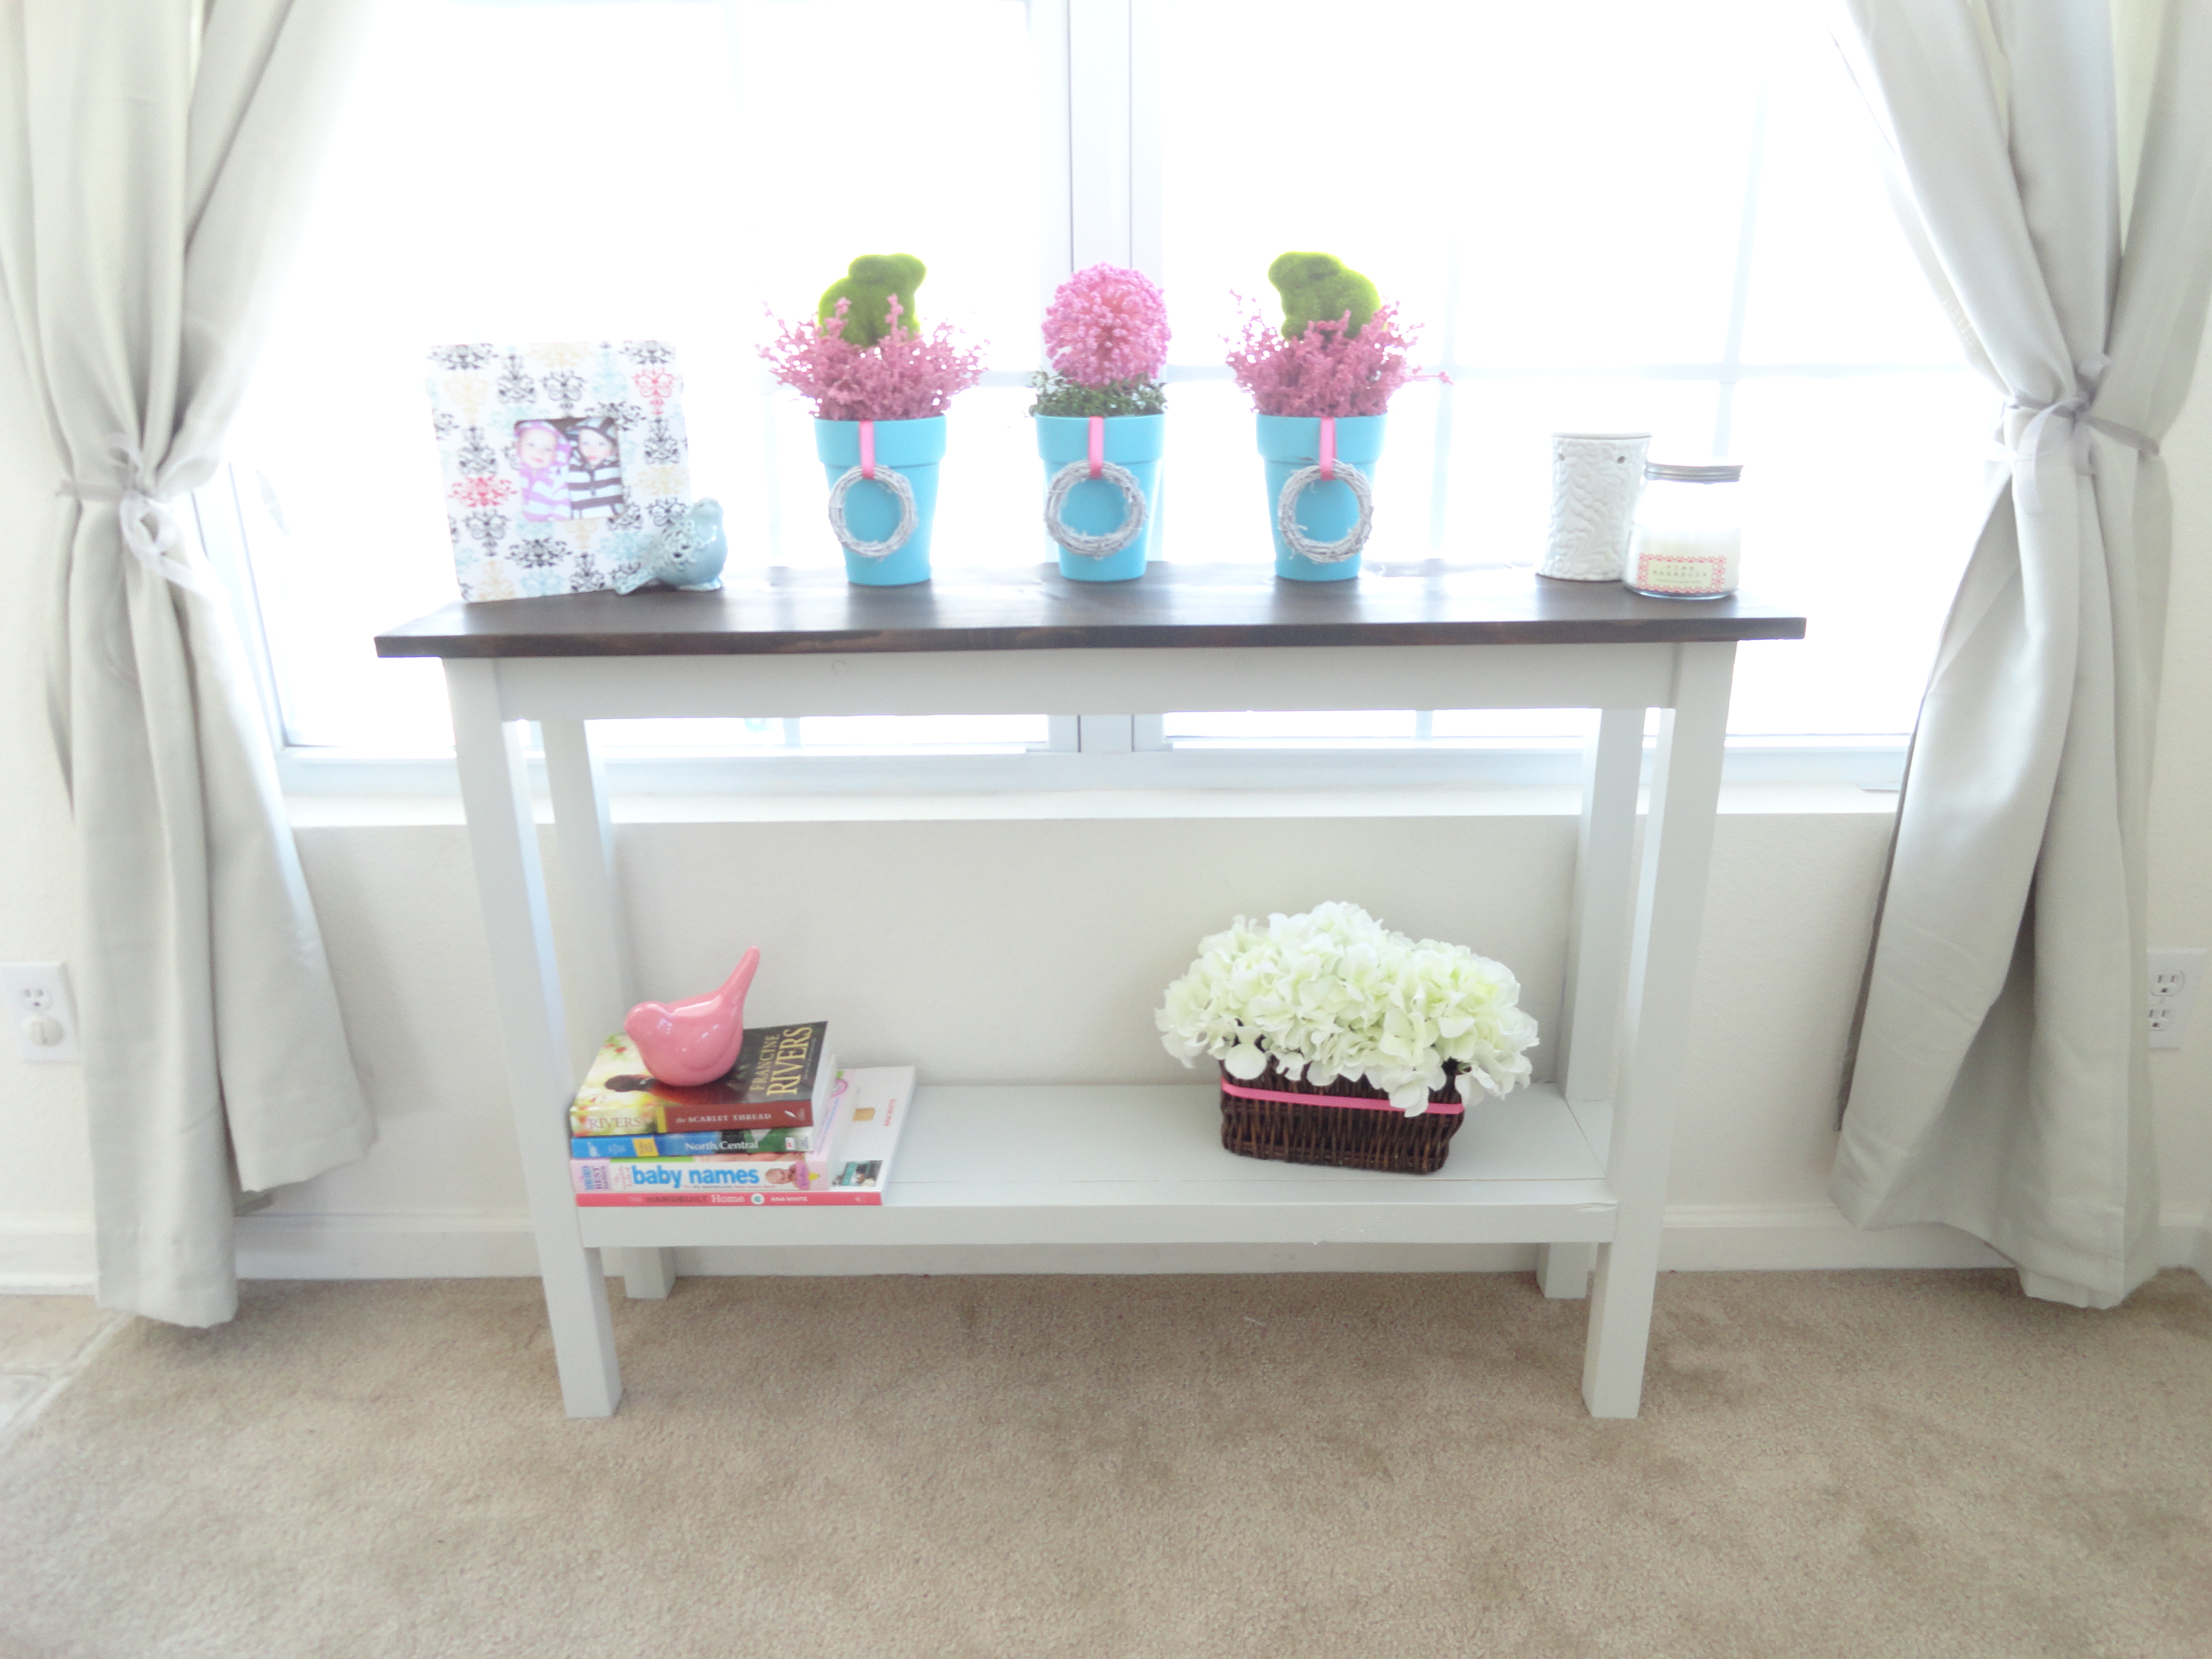
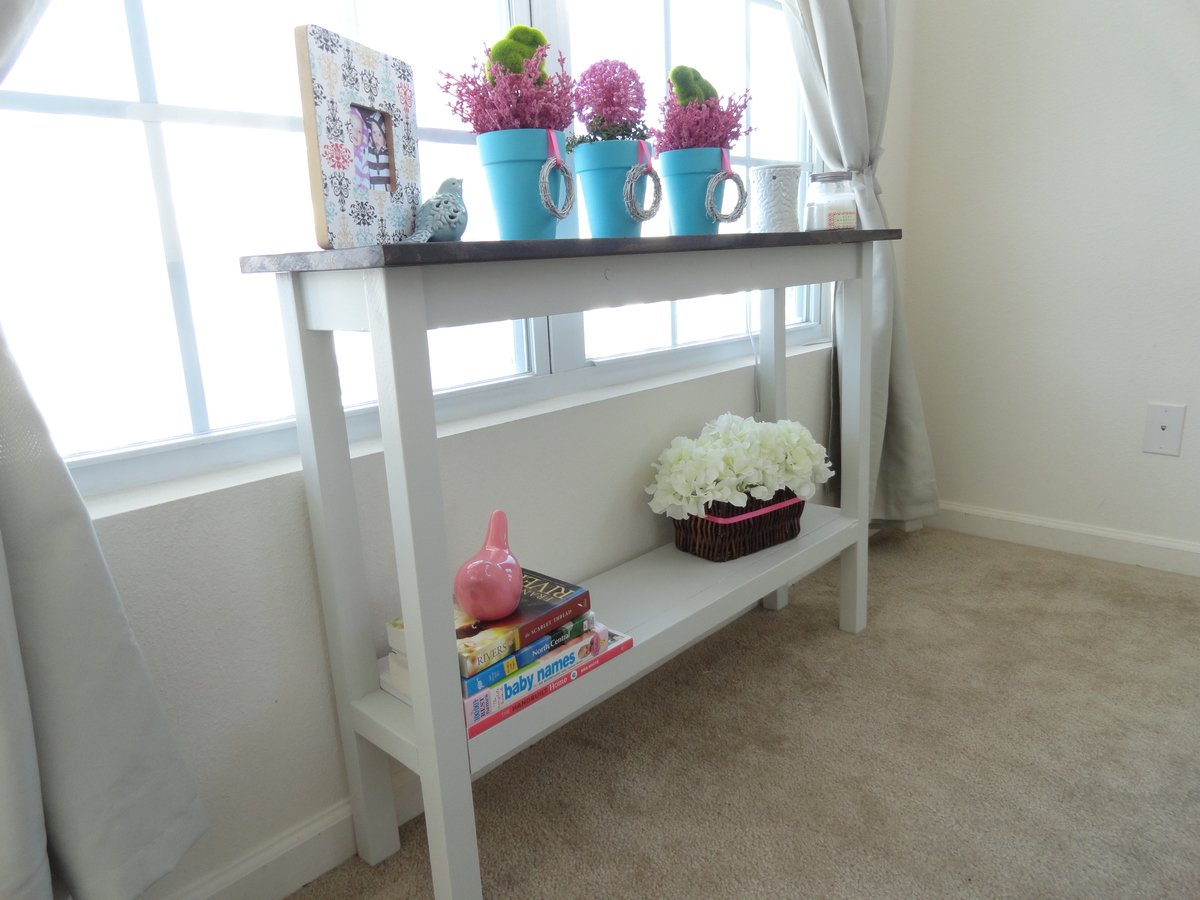
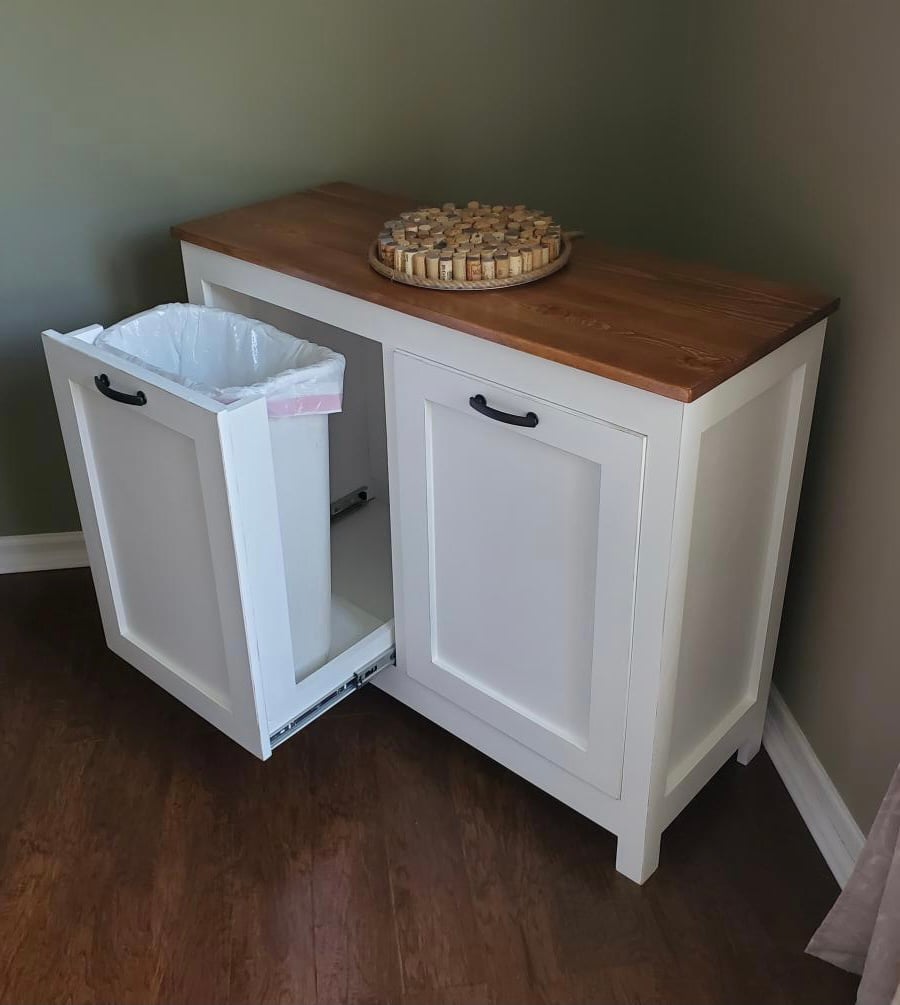
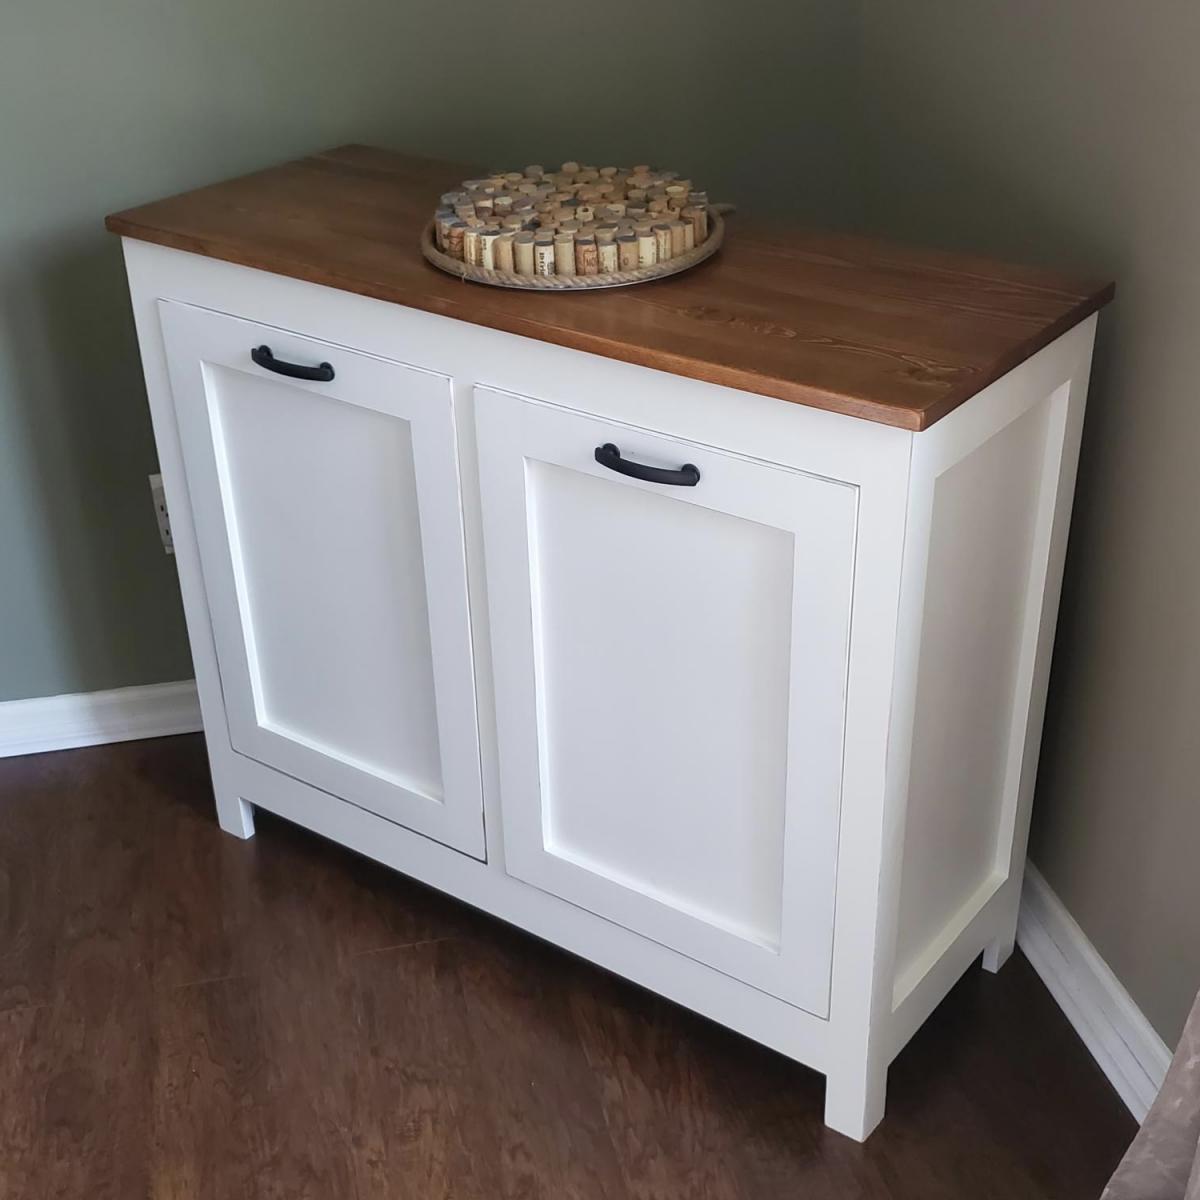
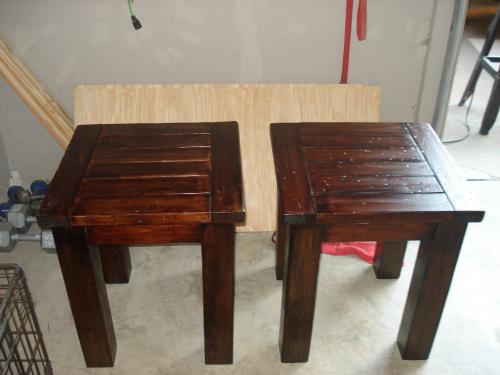
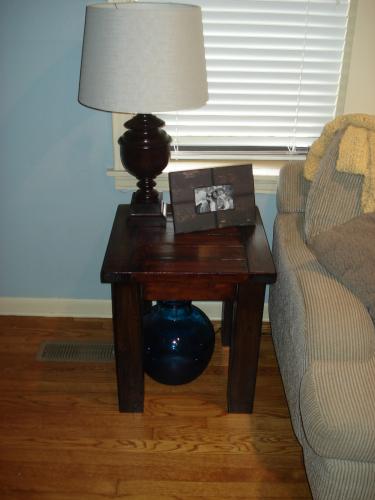
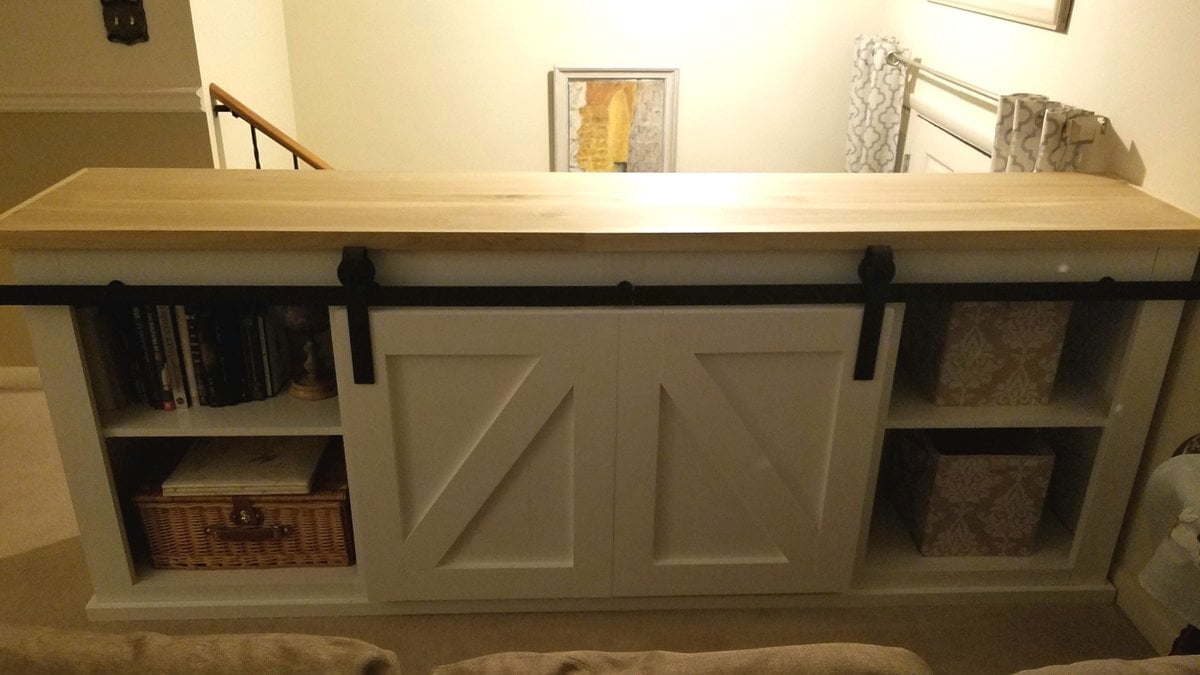
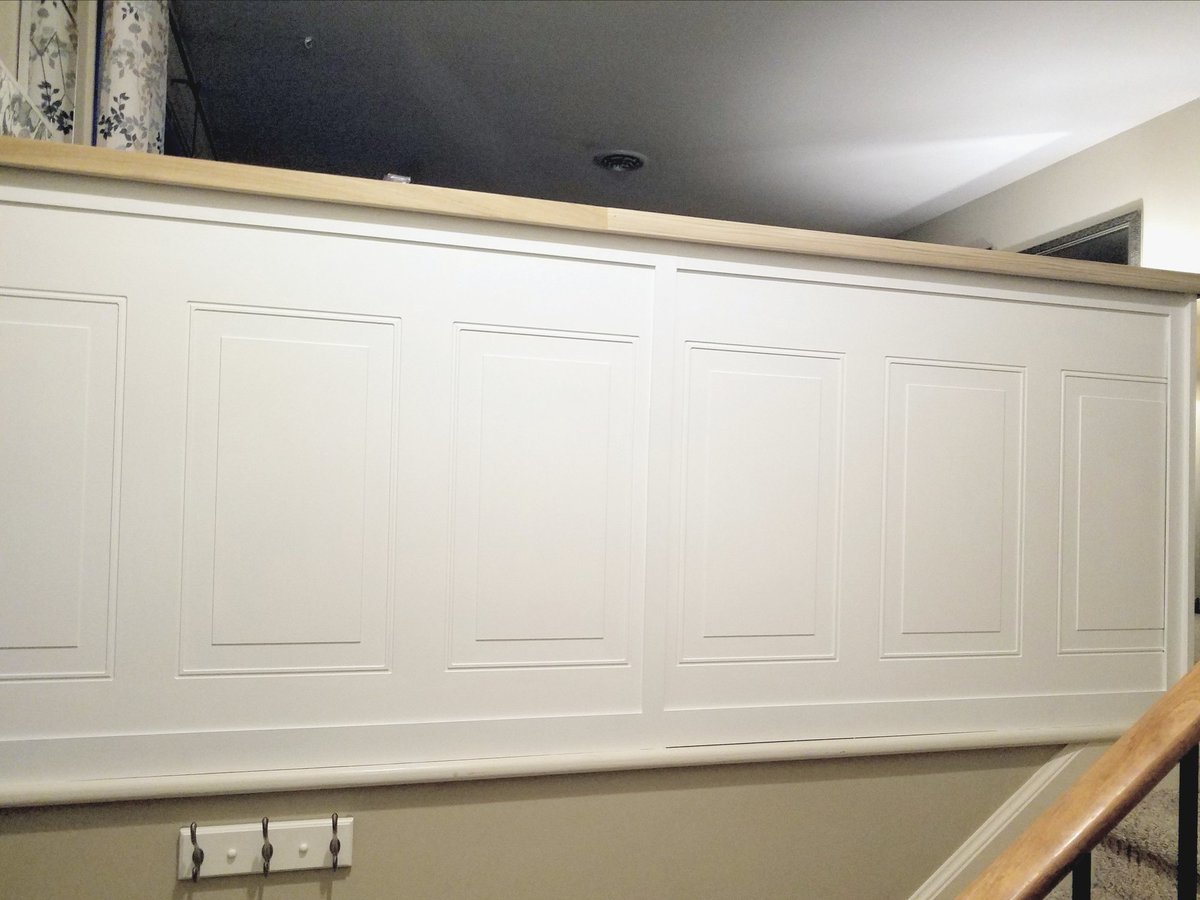
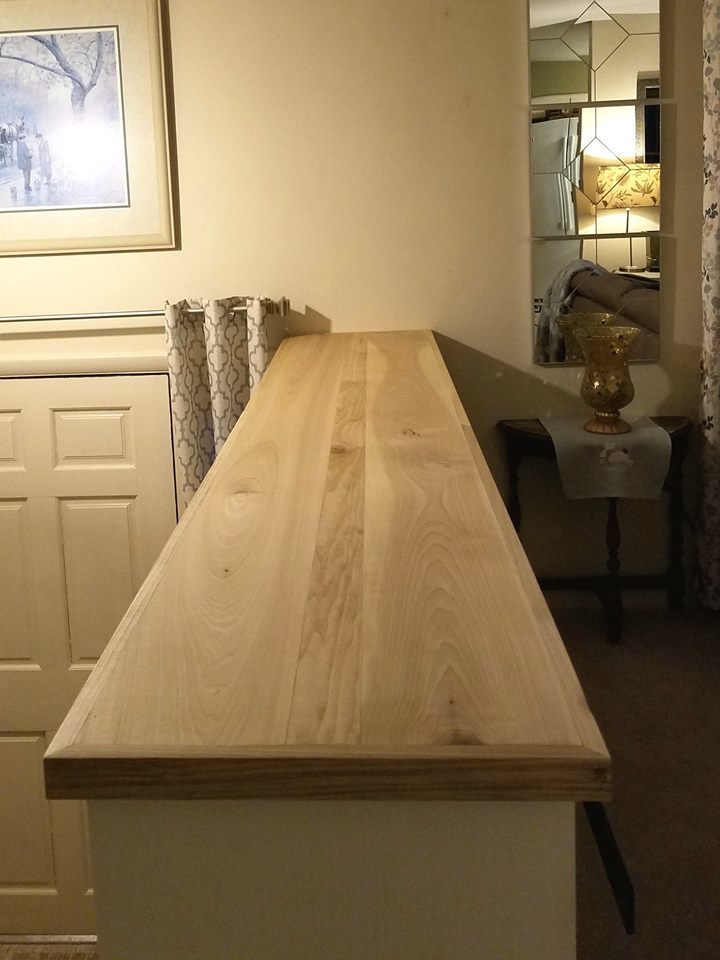
Community Brag Posts

Small Console Table

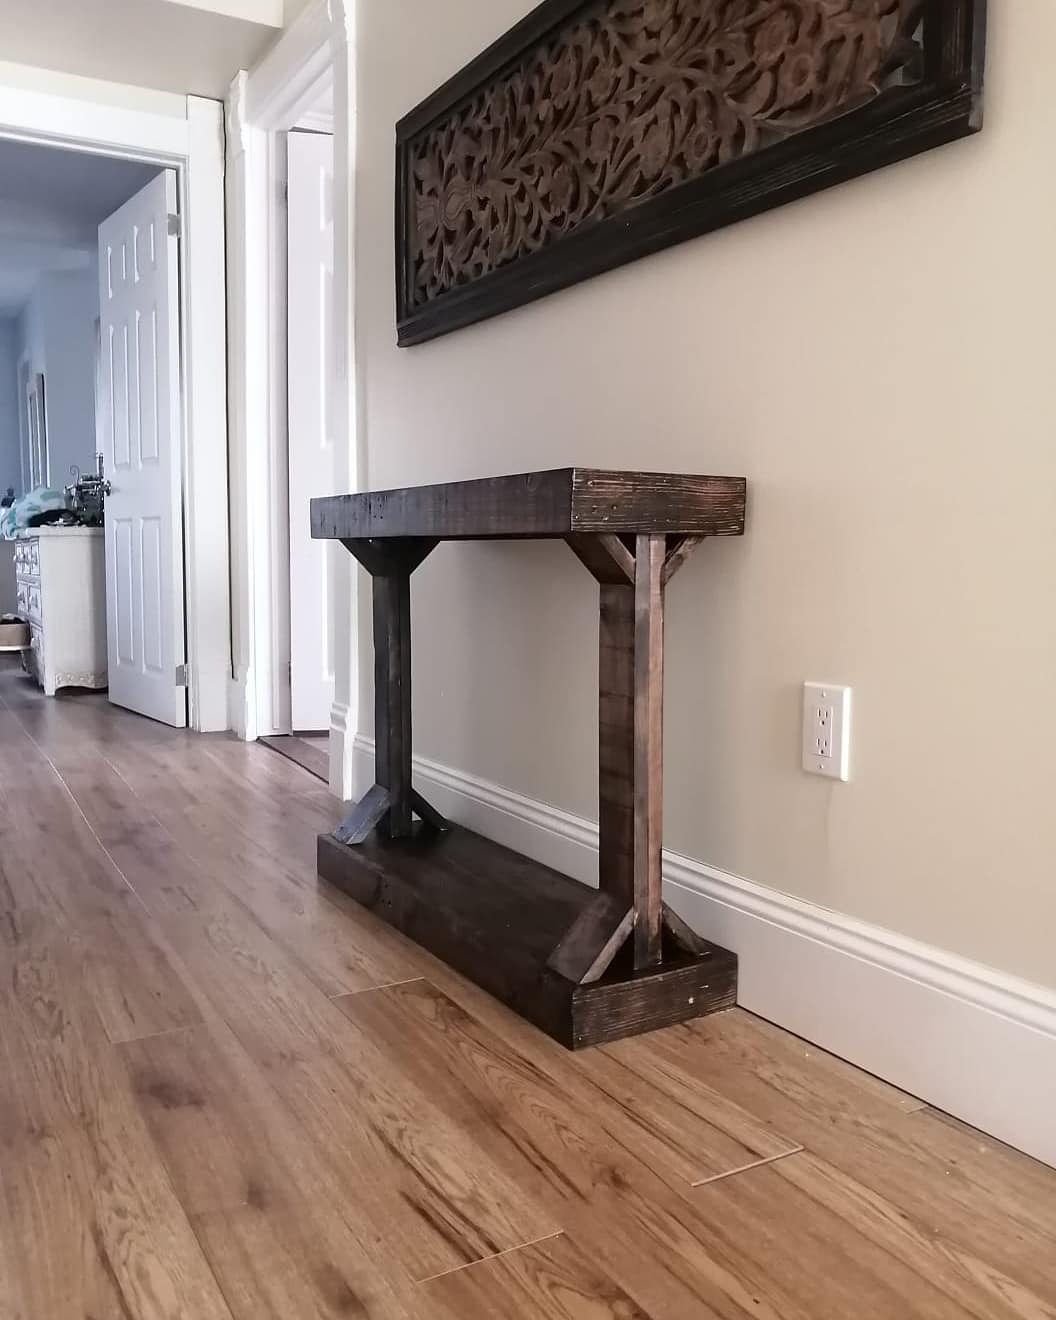
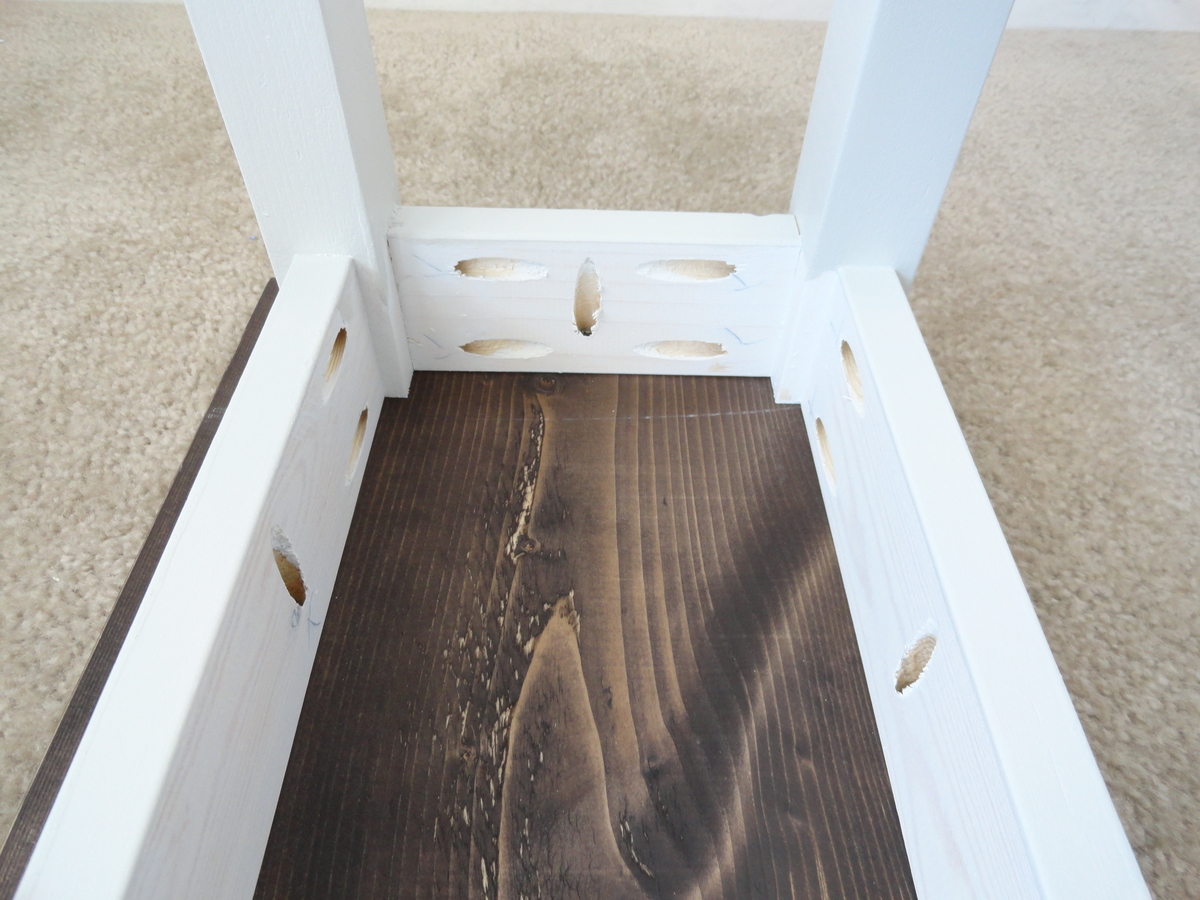
I made this table completely out of pallet wood. We have true 1x4 pallet wood which is hardwood. for the legs, I doubled up 2 pieces of pallet wood for strength. Every piece of wood is a 1x4. It turned out perfectly as I needed a narrow table for our 2nd-floor hallway. This took us a little longer than with cut lumber as there was a lot of planing and sanding since it was pallet wood. If we had used lumber it would have taken a few hours less.

Estimated Cost
20.00
Estimated Time Investment
Weekend Project (10-20 Hours)
Finish Used
We used Jacobean Mini Wax stain and the one coat satin polyurethane. It was the first time I had used the 1 coat but it is a lot thicker than the average polyurethane.
Recommended Skill Level
Intermediate

Comments

Narrow Console Table

Submitted by sraper2 on Thu, 03/14/2013 - 06:57

I built this table after seeing a similar one on your site. Mine is built with 2x2 legs, a shelf, and just one piece of 1x12 for the top. I was wanting something for in front of my window but this one is to small so I will eventually build a bigger one for in front of my window and move this one. Thanks for the inspiration!!

Estimated Time Investment
An Hour or Two (0-2 Hours)
Recommended Skill Level
Beginner

Comments

Garden Shed Douglas

Submitted by sambelg on Sat, 04/22/2017 - 07:45

Garden Shed out of douglas wood

i added wooden floor .

Built from Plan(s)
Estimated Cost
700 euro , wood is very expensive where i live
cedar would have made it very pricey
Estimated Time Investment
Week Long Project (20 Hours or More)
Finish Used
Pine stain Xyladecor
Recommended Skill Level
Intermediate

Comments

whitedog9

Thu, 06/15/2017 - 12:48

Greetings, I like your workmanship - It looks great! I have a couple questions if you would be so kind as to answer them. I like how you turned the studs sideways. How did you attach the studs to the 2x4 plate that you have turned on its 1 1/2" edge both top and bottom. I am thinking of toenailing or driving 3 1/4" GRK screws through the 1 1/2" sides of the 2x4's and into the 1 1/2" edge of the top and bottom plate. I know that Kreg has a jig out that uses oversize screws-it is specifically designed for 1 1/2" and larger (up to 3 1/2").


How did you secure the bottom plate to the wooden floor. I am thinking that you may have used 1/4" or 5/16" lag bolts down through the 2x4 and on into the frame of your wooden floor.


Thanks for your reply,

Cliveous (Reggie) Ogg

Wishing Well Planter

Submitted by RobKelly3 on Sat, 03/16/2013 - 16:57

This is a wishing well I made for my sister for her wedding. It will be used during the wedding for people to drop "wish you well" cards into and afterward she can use it as a planter in her yard.
I followed ideas from multiple plans here on Ana-White.com, but I didn't follow any specific plan. Mostly I followed tips and instructions for cutting angles, drilling pocket holes and some finishing tips. This is the first "big" project I've done and I"m quite proud of it.

With everything, it measures 44.5 inches high. The well measures 21 inches across and 15 inches high. The roof measures 22.75 inches by 23.75 inches.

I hope y'all like it. I worked hard on this! :)

Thank you, Ana and everyone who contributes to this site. It's been so much fun and I've got lots of ideas for more stuff. If I was any good at all at Google Sketchup I'd put up the plans but I'm not. If anyone could help me with that, that would great. :)

Have a great day!

Estimated Cost
about $100
Estimated Time Investment
Weekend Project (10-20 Hours)
Finish Used
Olympic Maximum Stain and Sealant in One, Semi-Transparent, in Oxford Brown. Use 2inch stain brush. Used 100, 150, and 220 grit sandpaper before staining.
Recommended Skill Level
Intermediate

Comments

bellows86

Mon, 07/21/2014 - 20:04

Anyway you can please tell me the angle for the boards ont the walls. I reallly like your well, and would like to build this for my wife but im not sure on what angles to use thank you

Trash / Recycling Cabinet

Submitted by Anonymous (not verified) on Tue, 07/27/2021 - 11:21

This was a build I was able to check off my Honey-do List. We use it as a Trash / Recycling Cabinet. Basic cabinet build with tray drawers for the trash cans.

Estimated Time Investment
Weekend Project (10-20 Hours)
Recommended Skill Level
Intermediate

Comments

Farm table for my sister

Submitted by Anonymous (not verified) on Mon, 10/04/2021 - 14:09

So my sister moved back to Southern California from New York. She found a great place but needed a table. I made one table and one bench. My sister then found two chairs for the other side. This is the second or third thing I have made/built from Ana’s site. Thank you for making me feel more manly with great instruction. I also built this pre Covid-19 when lumber was not so expensive.

Comments

Bigger Tryde Coffee Table

My sister put in request for bigger coffee table and 2 end tables, again, the building part was not that difficult, the time consuming portion was staining. But they turned out great!

Estimated Time Investment
Week Long Project (20 Hours or More)
Finish Used
I "distress" the wood by using a piece of chaing and just beat it until I get a desired, uniform look. I used 3 coats of stain on each piece and sealed it once complete. I did not sand between coats and I use the cheap foam brushes and just toss them after each coat.
Recommended Skill Level
Beginner

Traditional Farmhouse Bed with Storage

Hello, fellow makers! 

I really enjoyed this build - it was a challenge for me, but in the end, I'm thrilled with the results!

I modified two of Ana's plans to come up with this storage bed and I share more pictures of the process and how I finished this project over on my blog Tinsel + Wheat.

I used the Twin Bed Farmhouse plans to create the headboard and footboard, which turned out beautifully, but because of the storage base needing to be installed flush with the edges of the 4x4 posts - this made the bed a little wide for a standard twin size mattress. I don't mind the extra 2.5" of base on each side of the mattress but if you decide you would rather have the mattress edges match right up to the bed you will need to subtract one of your center 1x6 panels from both the headboard and footboard. This will give you the perfect size headboard and footboard for this build.

So grateful to Ana for these plans!  

Happy building!

Miranda


Estimated Cost
$200
Estimated Time Investment
Day Project (6-9 Hours)
Recommended Skill Level
Intermediate

Comments

vstroud

Sat, 03/02/2019 - 10:02

Might you have the lumber shopping list for the storage boxes to go with this modified Twin Farmhouse with storage bed? I looked at you personal website but you just have the cut list for them not lumber list. Desperate  need to purchase my wood Monday.Thank you so very much!

Coffee station

Submitted by Anonymous (not verified) on Wed, 10/20/2021 - 14:39

I was inspired by your coffee station plans to build this unit. I added an upper shelf with gas pipping, along with LED lights under the shelf. This station has been very popular in our house.

Comments

Bookcase wall unit

Submitted by kwhitt on Tue, 05/12/2015 - 08:38

This is the project that inspired me to start woodworking. I'm a bookaholic and have always used cheap, particle board bookcases from Walmart for storage. They're fine for the price, but over time the shelves bow and they NEVER survive a move. When I outgrew the three units I had, I balked at buying a fourth, which I didn't really have room for anyway. Enter Ana White! This is actually based off a brag project under the IKEA Lack Inspired Bookcase. What I love best about building my own is that I can customize to suit my needs. I was able to put almost twice as much shelving into about the same area. And if I outgrow these, I can just build another!

Built from Plan(s)
Estimated Cost
about $175
Estimated Time Investment
Week Long Project (20 Hours or More)
Finish Used
Miniwax Espresso Stain, Varathane Satin Triple Thick Polyurethane
Recommended Skill Level
Beginner

Comments

Outdoor Sectional

Submitted by Anonymous (not verified) on Thu, 12/16/2021 - 13:18

Built this for my daughter in law for Christmas. Turned out awesome. Plans and directions were great!

Comments

Farmhouse King Headboard/Barn Door

I found a barn door headboard in a rustic furniture store years ago. They wanted $2700 for a Queen size....no thank you! I followed the plans for the Farmhouse King Bed and added cross pieces for barn door look using instructions from the Brookstone Headboard. I cut the legs at 56” to add some height and I set the bottom of the back panel at 18” above the floor to make sure no gap is seen with our thinner, memory foam mattress. I couldn’t be happier with our headboard and the total cost, including screws & stain, was about $150! Boom! Thank you Ana White for sharing plans! I’m working on the Mini Farmhouse Bedside Table now & feel like I can build anything! I would highly recommend Power Pro Premium Interior screws (no splitting or stripped heads, no pre-drilling & they counter-sink great in soft wood). For the 4x4 posts I used GRK UberGrade R4 multi-purpose 4” screws, which had the same quality, all from Lowe’s.

Estimated Cost
$150
Estimated Time Investment
Weekend Project (10-20 Hours)
Finish Used
I used wood conditioner, as recommended. Then 2 coats of Minwax Special Walnut with light sanding in between. I chose 2 coats of clear satin polyurethane, lightly sanding in between for a great rustic finish that’s not too glossy. I did beat up the wood and sanded off all square edges prior to applying any finish.
Recommended Skill Level
Beginner

Using Ana White’s Garage Cabinet Plans

Submitted by Anonymous (not verified) on Wed, 04/20/2022 - 09:23

Thank you so much for the two videos we watched of you and your husband explaining and demonstrating how to build garage shelves. We used your plans as a guide. We chose to add shaker style doors to create cabinet shelves. We absolutely love them. We are not handy as you can see we had a living room lamp for a work light and a lifetime table as a work bench. Thank you!
The Paulsons

Comments

Sliding Door Console to replace split level railing

My wife wanted to get rid of a railing above our steps and wanted some additional storage. I had this plan saved but though about doing something smaller. Once I realized that wasn't going to work, I decided to go with this plan. It worked great. 

Estimated Time Investment
Weekend Project (10-20 Hours)
Finish Used
Natural Danish Oil for the top and white paint for everything else
Recommended Skill Level
Intermediate

Reclaimed lumber Adirondack chair

Submitted by rkyount on Thu, 08/08/2013 - 13:23

For my brother's 35th birthday, I helped him build a fence and side deck on his house. Using the leftover lumber scraps and screws, I adapted the DIH Adirondack chair plans to build this for him. He wanted a big, sturdy chair with a wide arm rest that looks "rustic". I used 4x4 and 2x4 post scraps, deck boards, and fence pickets. I also widened the seat just a bit for comfort. This is definitely the perfect chair for him!

Estimated Time Investment
Afternoon Project (3-6 Hours)
Finish Used
Since it's all treated lumber, we'll just seal it whenever we do the deck with Thompson's Water Seal.
Recommended Skill Level
Beginner

Comments

rkyount

Fri, 08/09/2013 - 14:38

Thanks! I always enjoy building with your plans, and it was a bonus that I didn't have to buy anything to build this, since I used leftover materials.

Garage Storage

Submitted by wabilinski on Mon, 09/28/2015 - 10:48

My wife was needing some extra storage in the garage for seasonal decor totes.

So, of course, I first go to Ana White's website. Voila, I found the perfect plans for the space I had to work with.

- The final product ended up being 72"Hx54"Lx21"W

- I used a counter sink bit to pre-drill screw holes so the heads would be slightly below the surface of the boards. This way the totes would not get caught on or damaged by the screws.

Estimated Cost
$90 for wood and screws
Estimated Time Investment
Day Project (6-9 Hours)
Finish Used
N/A - left unfinished
Recommended Skill Level
Beginner

Modern Park Bench Plan

Submitted by Anonymous (not verified) on Sun, 08/14/2022 - 11:53

I love the plans for this bench! Very well thought out plans, easy to cut the wood and easy to put together. Thank you for all the hard work in coming up with all of these great plans!
Reanna Tovar

Built from Plan(s)

Comments