Community Brag Posts
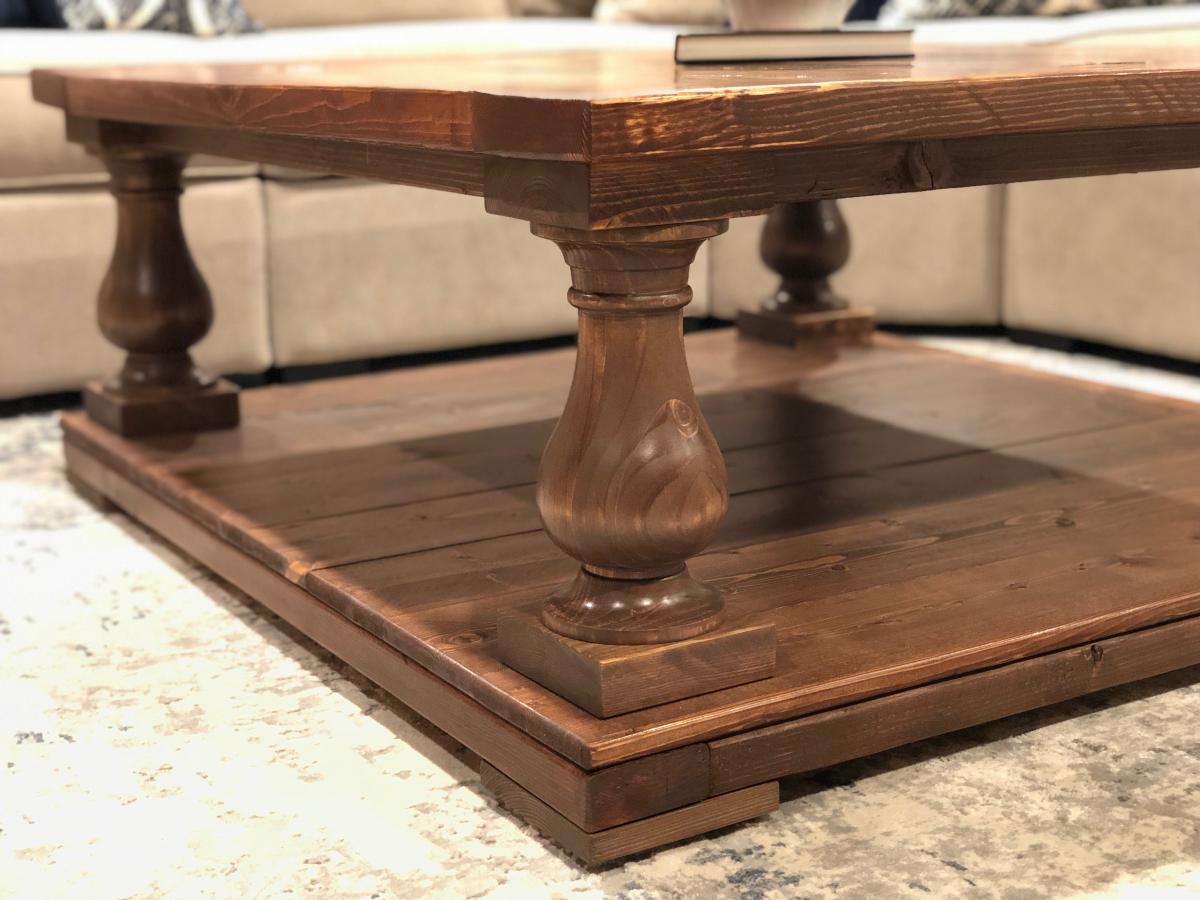
How to Quit Woodworking in 8 Simple Steps (Almost) - Coffee Table Edition
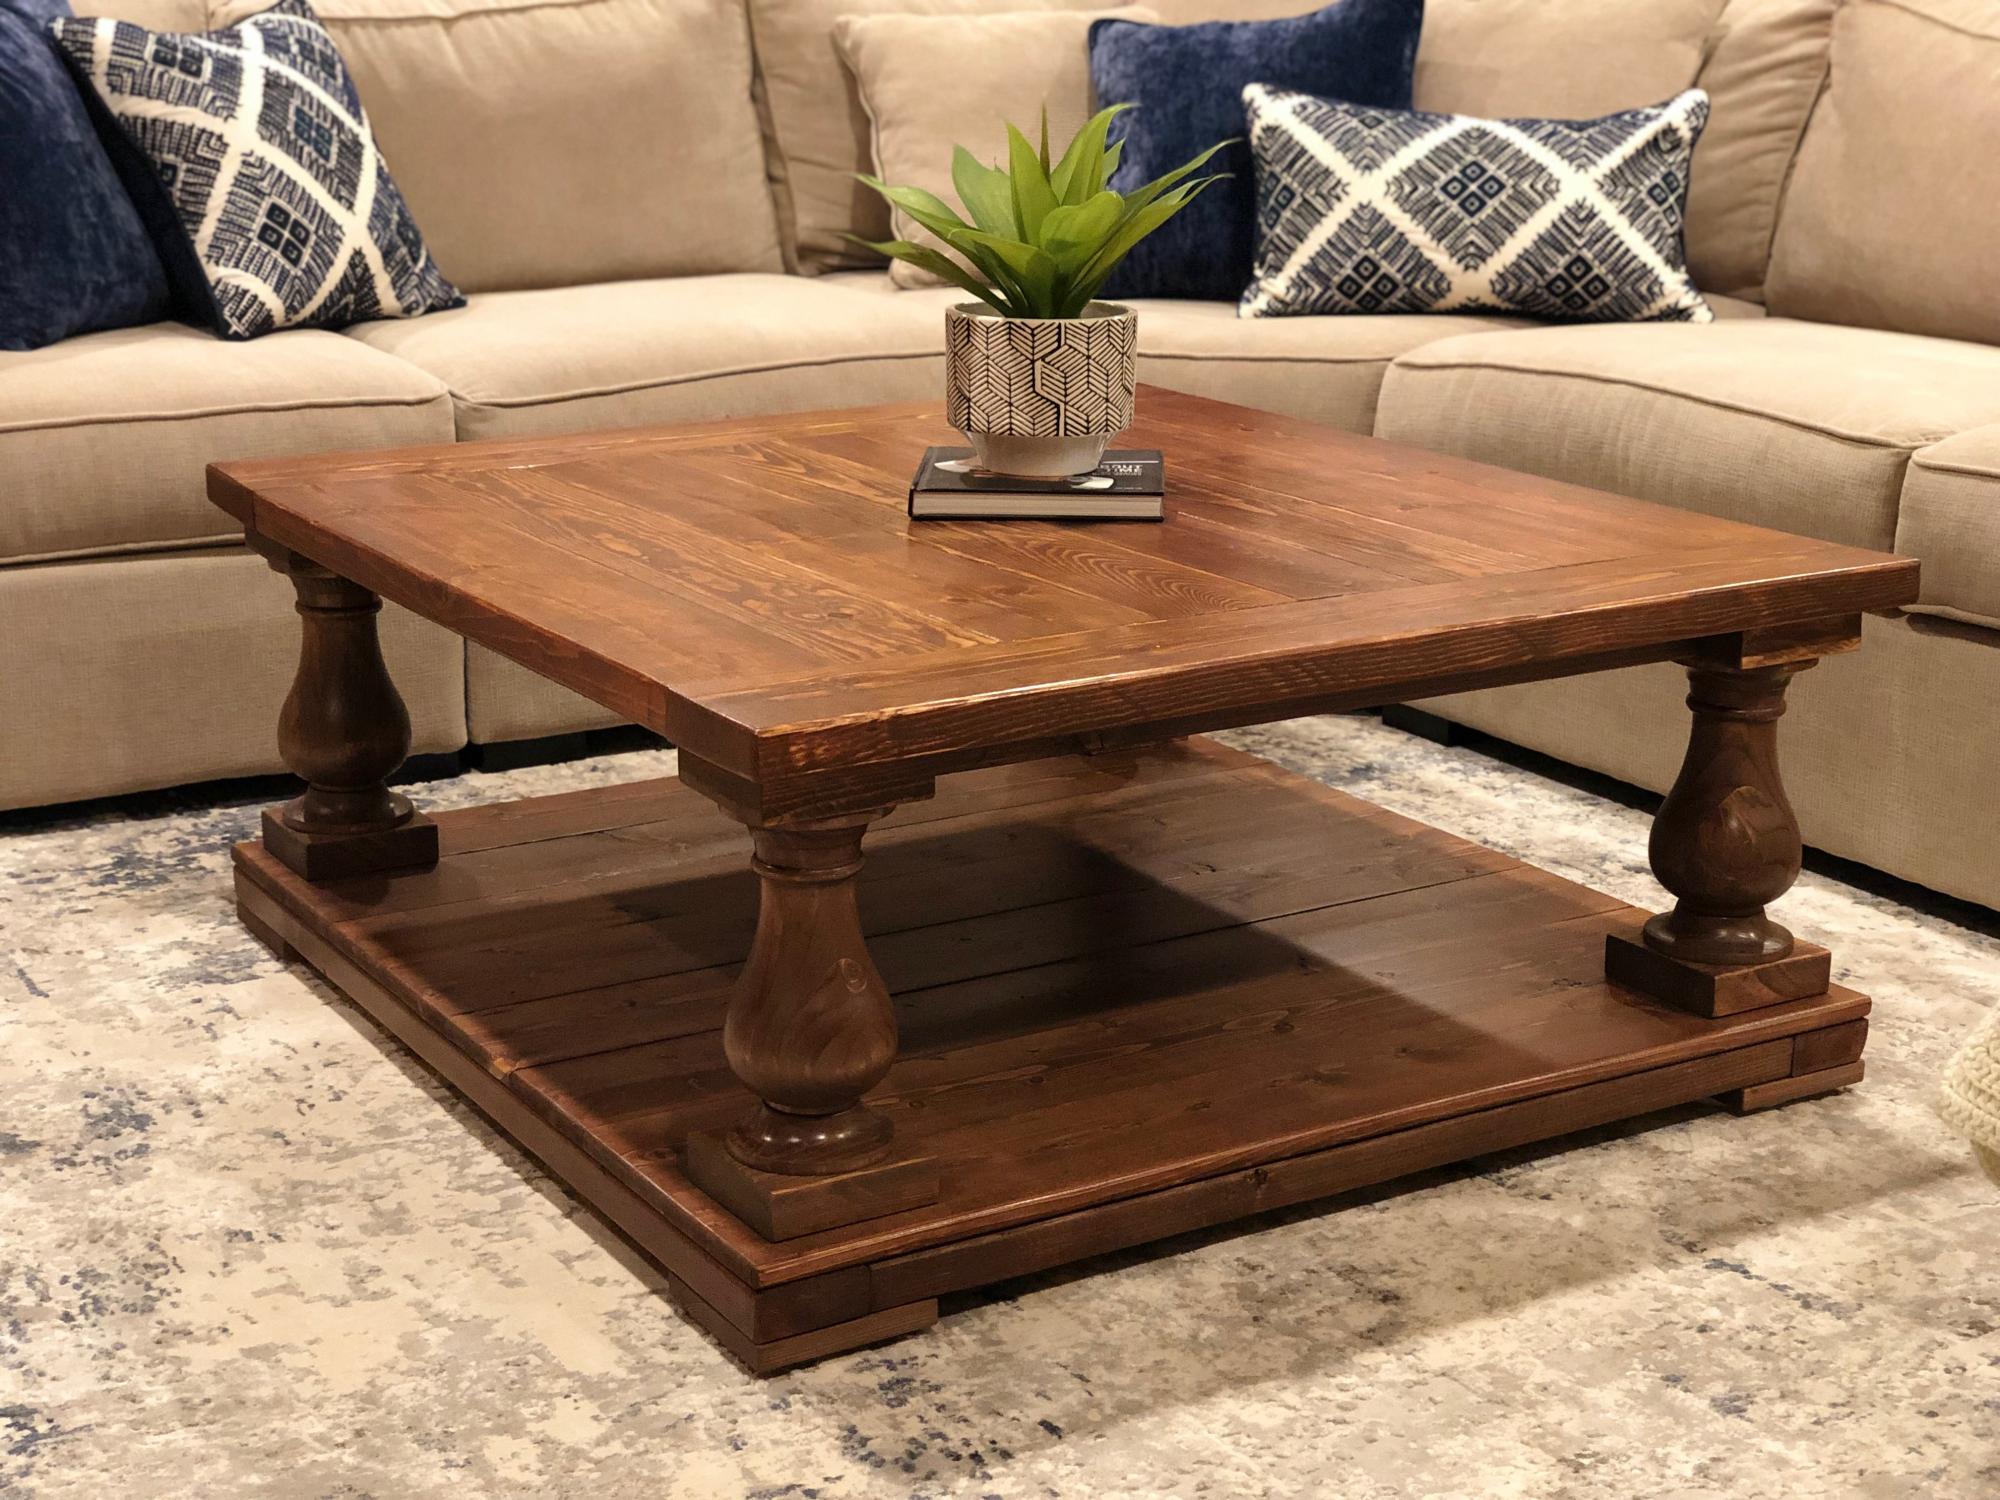
First off, I appreciate you for taking the time to click on my project. Rest assured, this project didn't make me quit woodworking, I know the title was a little "click-batey". I don't want to discourage you from replicating this table because of the title of this post, as this has been my favorite project I've done to-date. The struggles that made me want to quit were laughably self inflicted and by my own doing, they weren't due to the instructions online. That being said, it did make me second guess whether I bit off more than I could chew. I promise not to disappoint with the story behind this build, so lets get into it.
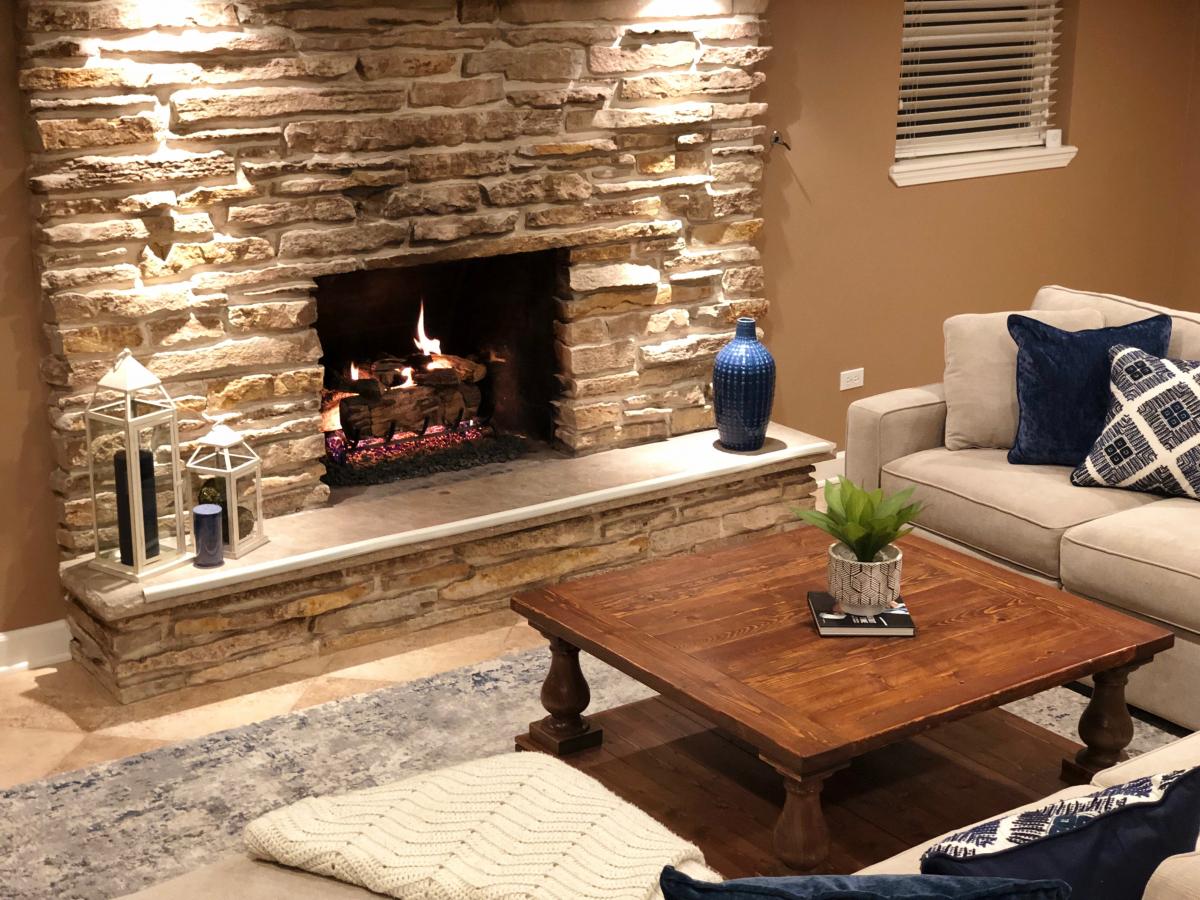
My wife and I moved into a new home in the suburbs of Chicago and like many first time homeowners thought to ourselves, "We'll have no problem filling the house with all of our stuff." Then after settling in we had the realization of, "Wow...we really don't own that much furniture, this is going to get expensive FAST!" So after a decent amount of DIY and woodworking "research", I decided to give furniture building a shot. It all started with a desk...or so I thought it would. I fell into the hobby first by thinking that I needed to build an L-Shaped desk for my office. After having a few meals in our new home, I realized a new dining table would have to take precedent. After building the dining table, I was ready to tackle the desk, but then quickly realized that we didn't have anywhere to sit and eat. So I ended up doing more "research" and found a beautiful design based upon a Williams Sonoma box-joint bench. Following the bench build, I was ready to build the desk for my office...WRONG again! I was getting quite good at building furniture now, so the new couch we just purchased required a new coffee table that wasn't 30 years old and purchased 11 years ago at a garage sale for $5.
After finding the coffee table design on Ana White's site, I knew the build would not only be a challenge, but rewarding in the long run. About a day into the build I thought to myself, I really need to get the office desk done. So *Enter* a really terrible idea, "I'll do both the coffee table and the desk at the same time, it'll be no problem!" Hind sight is 20/20, because I was a moron for thinking that. We're fortunate enough that space wasn't an issue, I have about a 20' x 12' workshop that was able to accommodate both projects simultaneously. Unfortunately, I gave myself a deadline and the 3-4 days a week of traveling for work wasn't helping. I don't suggest doing that. I had all the pieces joined after the first week, but wanted to stain and finish each piece before putting the table together. This was due to the fact that I didn't want to be crawling on the ground and under the table trying to stain and finish. Finishing each individual component was painstaking to say the least, but glad I built the table the way I did. Luckily, the coffee table along with the L-Shaped desk took about 2 weeks total, and I could't be happier with both project.
Thank you again for taking the time to view my post, the story was a bit long winded but hopefully entertaining and insightful. I would appreciate you adding this as a pin or engaging the post socially and sharing. Please feel free to reach out if you have any questions, I'll do my best to respond in a timely manner.
Sincerely,
Jeff G.
Built from Plan(s)
Estimated Cost
$250 USD
Estimated Time Investment
Week Long Project (20 Hours or More)
Finish Used
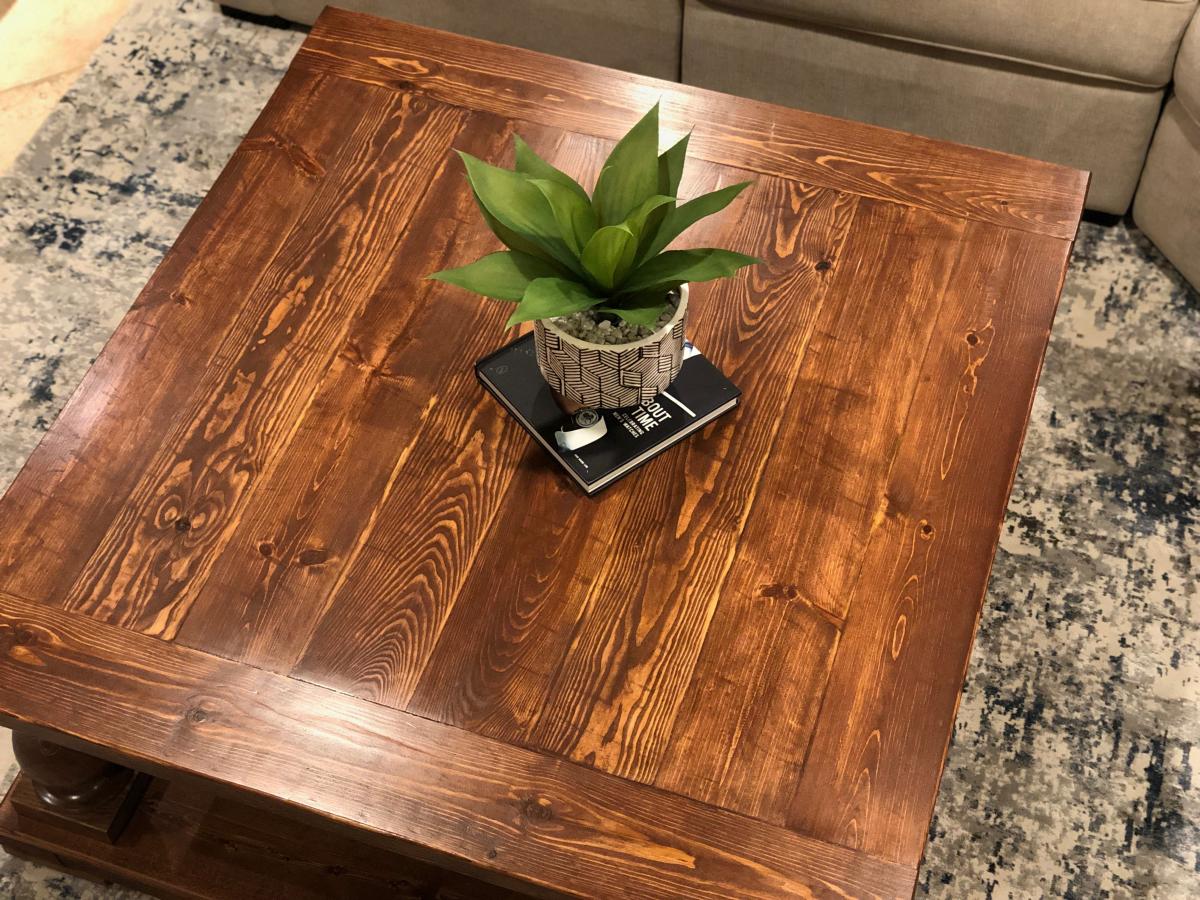
The stain utilized:
1. One coat of Minwax English Chesnut (Sand to 220, apply stain and wipe off after 10 minutes)
2. One light coat of Minwax Weathered Oak (Paint on a light coat of stain and wipe off after 3 minutes)
Finish:
1. Three coats of General Finishes Arm-R-Seal Satin (Oil Based)
2. Lightly sand after each application of finish, thoroughly clean before next application
Recommended Skill Level
Intermediate
Comments

In reply to Wow it’s so beautiful!!! by Ana White
Tue, 10/01/2019 - 21:11
Thank you Ana, much…
Thank you Ana, much appreciated!
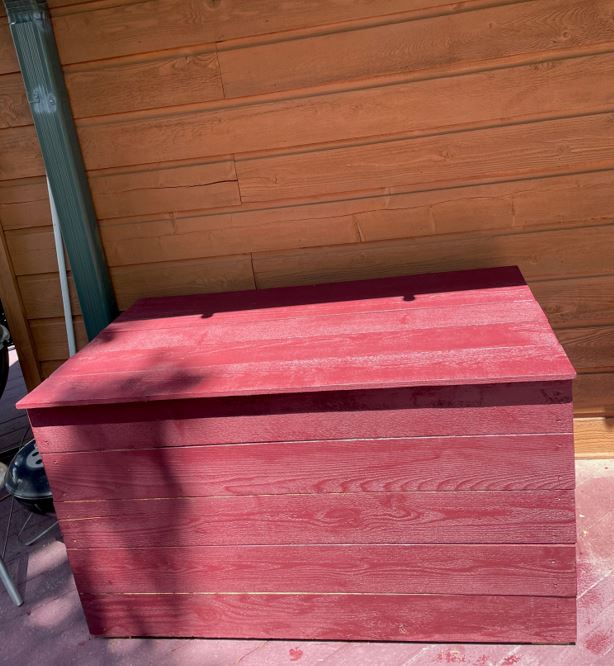
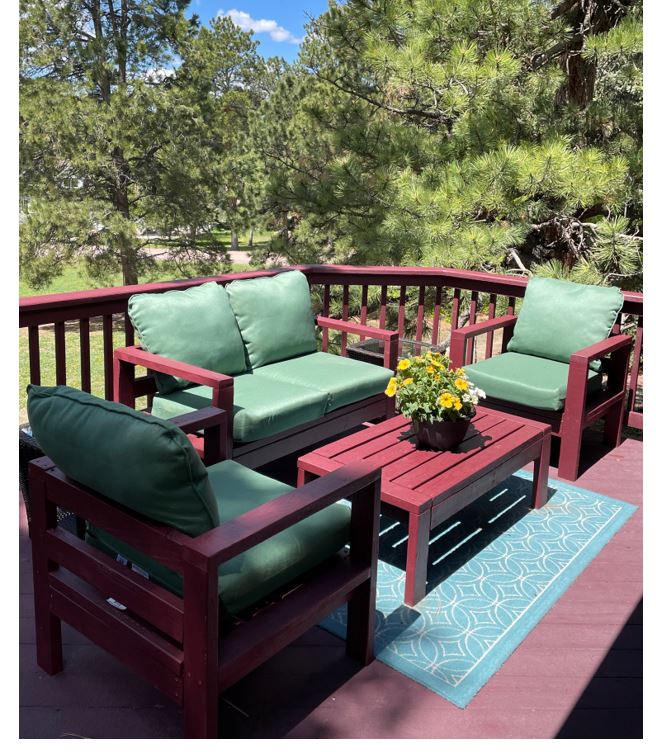
Modern Cedar Outdoor Storage Bench
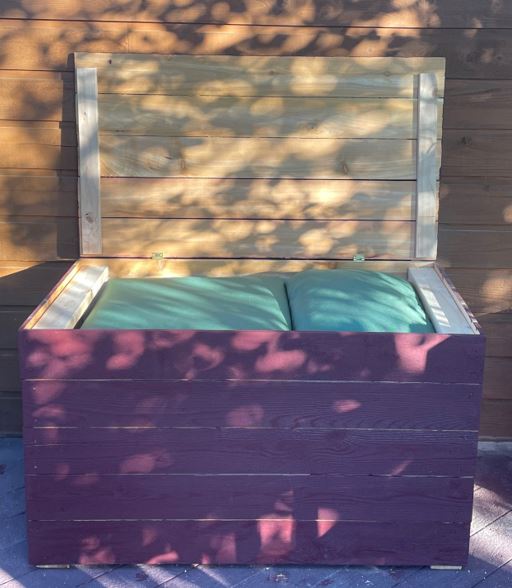
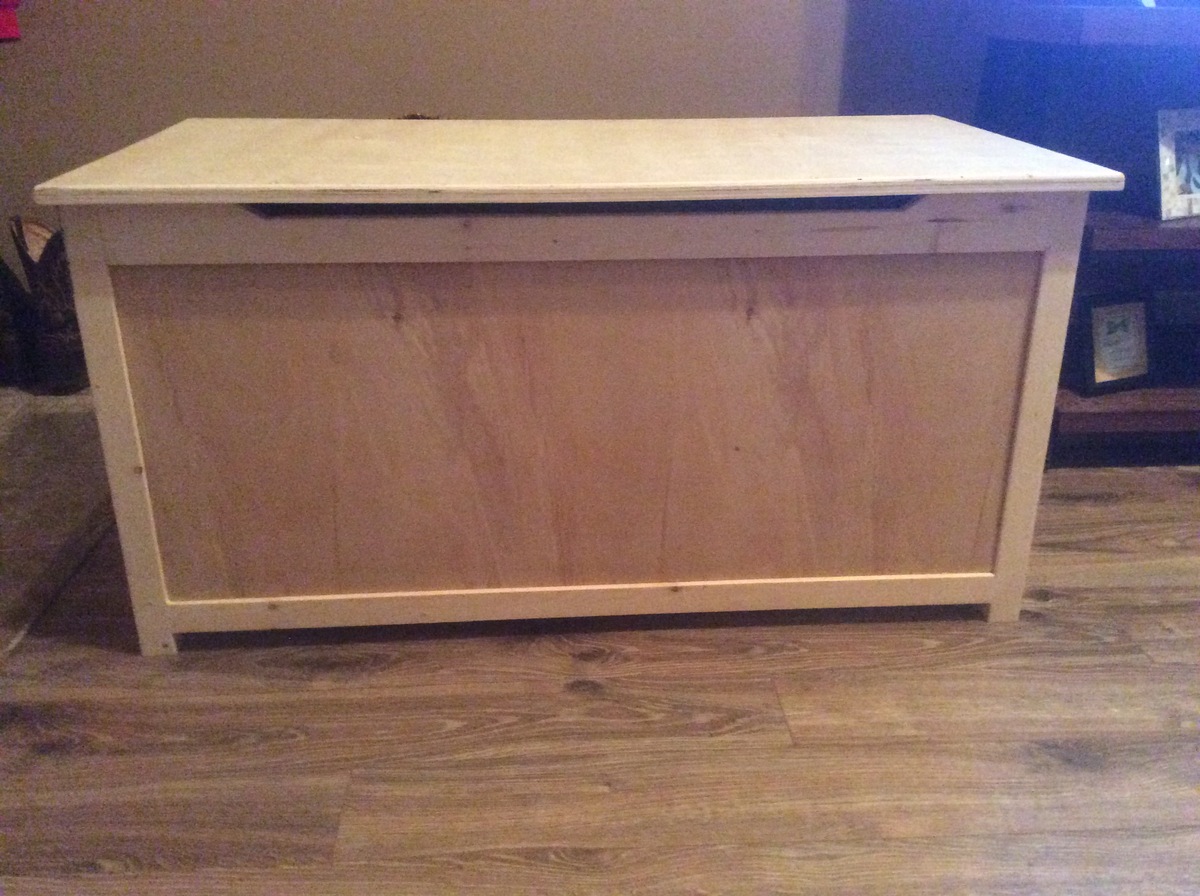
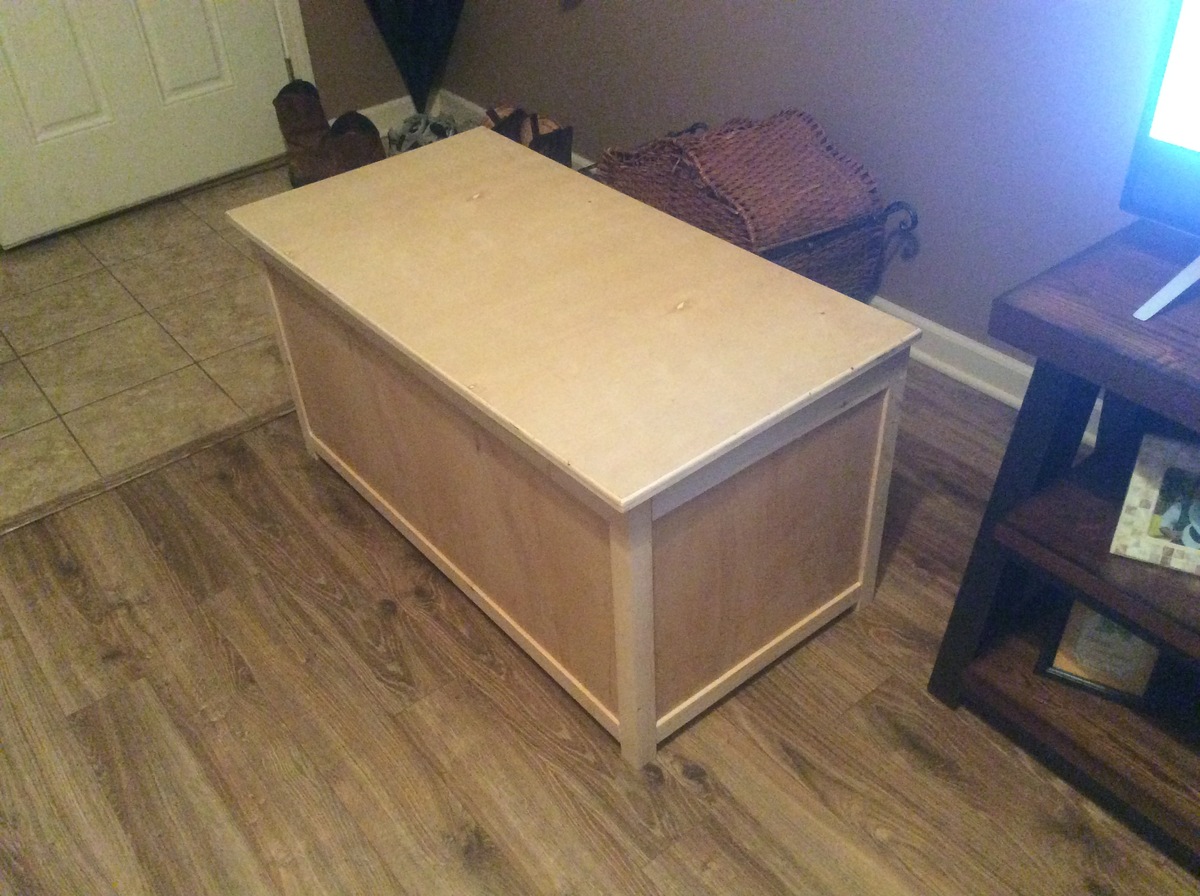
I had built two outdoor chairs with love seat (modified from the sofa plans) with 2x4s. The cushion seats were 24" x 24". Where to store them? I modified the Modern Cedar Outdoor Storage Bench plans to make the box wider, higher, longer to accommodate the cushions. With five boards comprising the top, it's a bit wider than the box so I didn't need to carve in an opening.
Built from Plan(s)
Comments
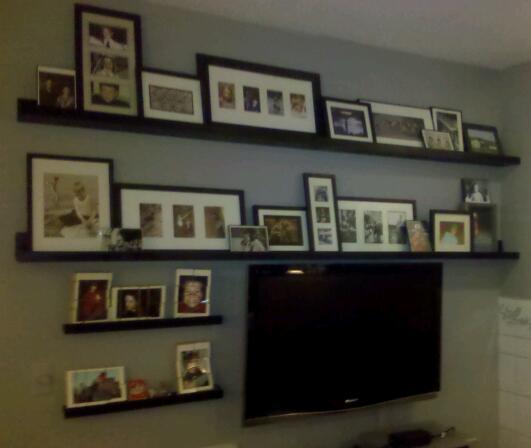
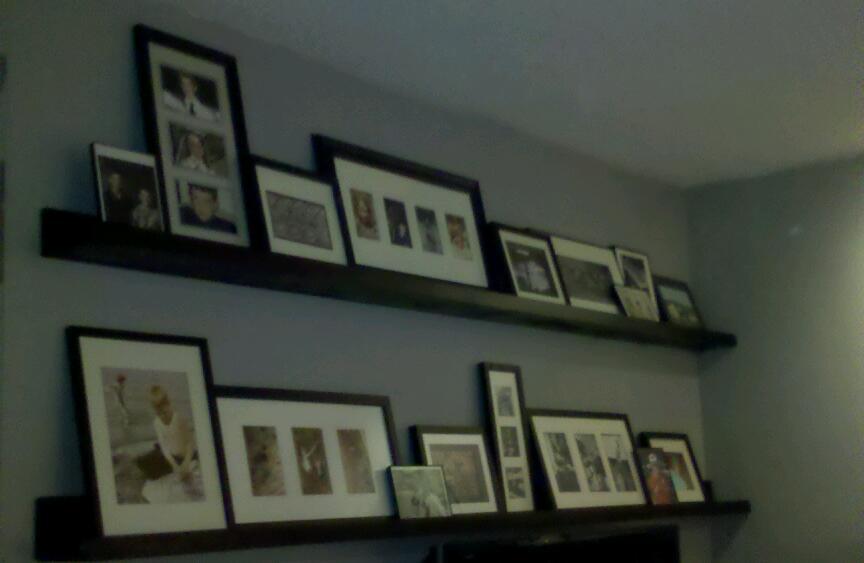
Ten Dollar Ledges (which were free - sort of)
Thanks for a great plan! I've been procrastinating in posting, since I have plans to start blogging and wanted to link. Unfortunately, my blog remains a pipe dream as I still can't come up with a name.
The two long ledges were the ones I made (smaller ones are ancient.) These have helped me a great deal in my efforts to pull together/put my own stamp on the most awkwardly laid out and chopped up house imaginable! The 'in your face effect' created by my piling nearly every photo I own on them should be temporary - wall space will open up as other rooms get done. I do think they soften up the gigantic television (Ok, stop laughing. It was worse before.).
While the Ten Dollar Ledges were the inspiration for these, I didn't follow the instructions, since I have lots of leftover plywood and buying lumber when you live in the country and drive a VW Bug is not much fun. I'm very pleased with both the shelves and the garage space their creation opened up. There was a tradeoff, though, as it took me far longer than the hour or two each would have took had I used dimensional lumber. Four inch rip cuts are a pain! (especially since I was a bit too perfectionistic.) But I'm very happy with the results. Thanks again!
Built from Plan(s)
Estimated Cost
very little (always have screws on hand and used paint I had)
Estimated Time Investment
Weekend Project (10-20 Hours)
Finish Used
Black semigloss spray paint.
Recommended Skill Level
Beginner
Comments
Sat, 01/21/2012 - 16:20
$10 ledge
Hi - I am SO EXCITED - just made a $10 ledge! I have been wanting a photo/art ledge for a long time and actually purchased one from Pottery Barn which I returned. I hated the finish on it an found it very difficult to hang, not to mention that it was expensive! I had some idea how I might make one but wasn't sure, so went on line looking for instructions. So glad I found yours - it was really easy and looks great. The best part is that you can make it whatever size and finish that you want. Now i have to get busy making art to fill it! Thank you so much for your great ideas - i see quite alot of others on your site that I just might try.
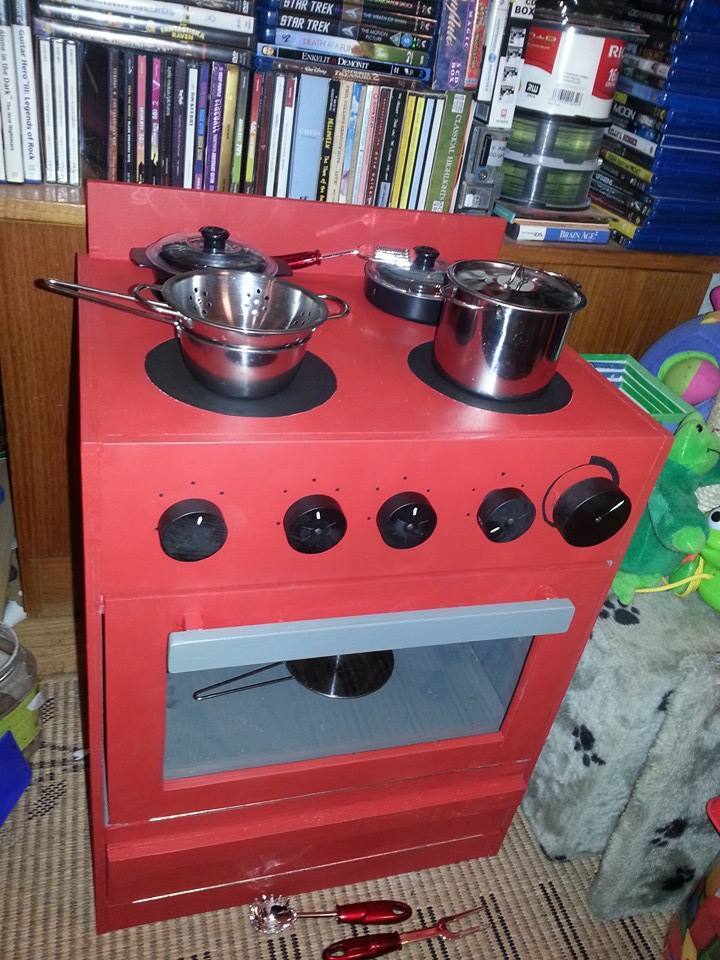
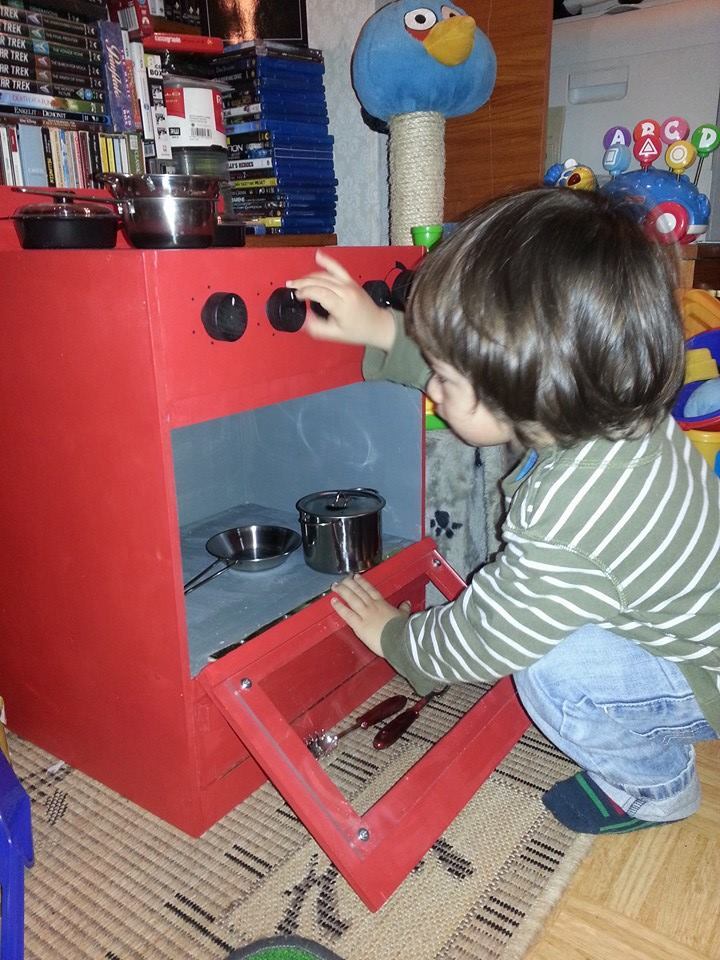
My red stove :3
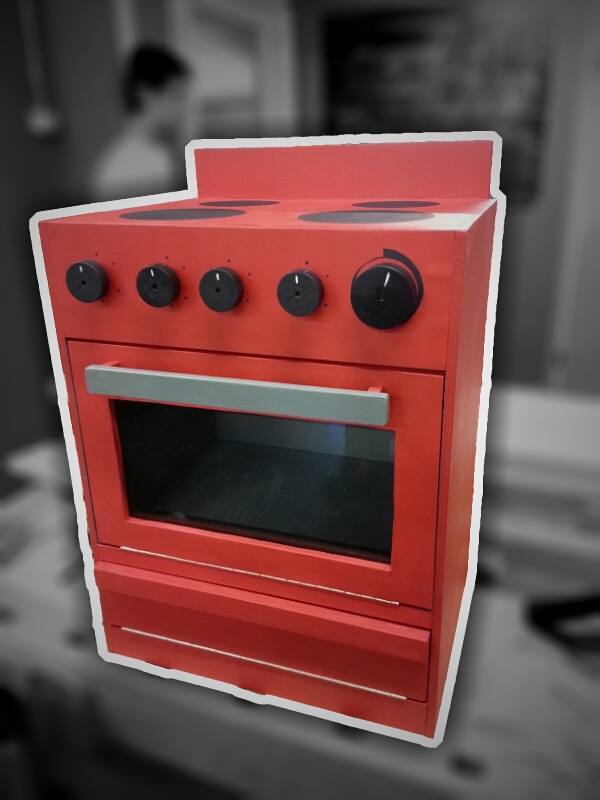
I made it a little different, with a small door on the bottom as a little storage.
I loved making this for my kid, and as my first project ever I feel very proud of it.
I don't remember the exact amount of hours it took because I had little time to work on it (maybe 3 hours/week) so it took quite a bit of weeks to complete but it was really easy and fun! :D
I like how it's tall enough for my 2 year old to play standing, before we had a plastic one that was very very short, also it's sturdy enough for climb on it. xD
By the side I made a super easy, varnished, cupboard, following the same main steps from the stove, I only didn't put a front door and added on one side a towel holder and on the other side a small shelf/bar table

Estimated Cost
45€
Finish Used
Paint
Recommended Skill Level
Starter Project
Comments
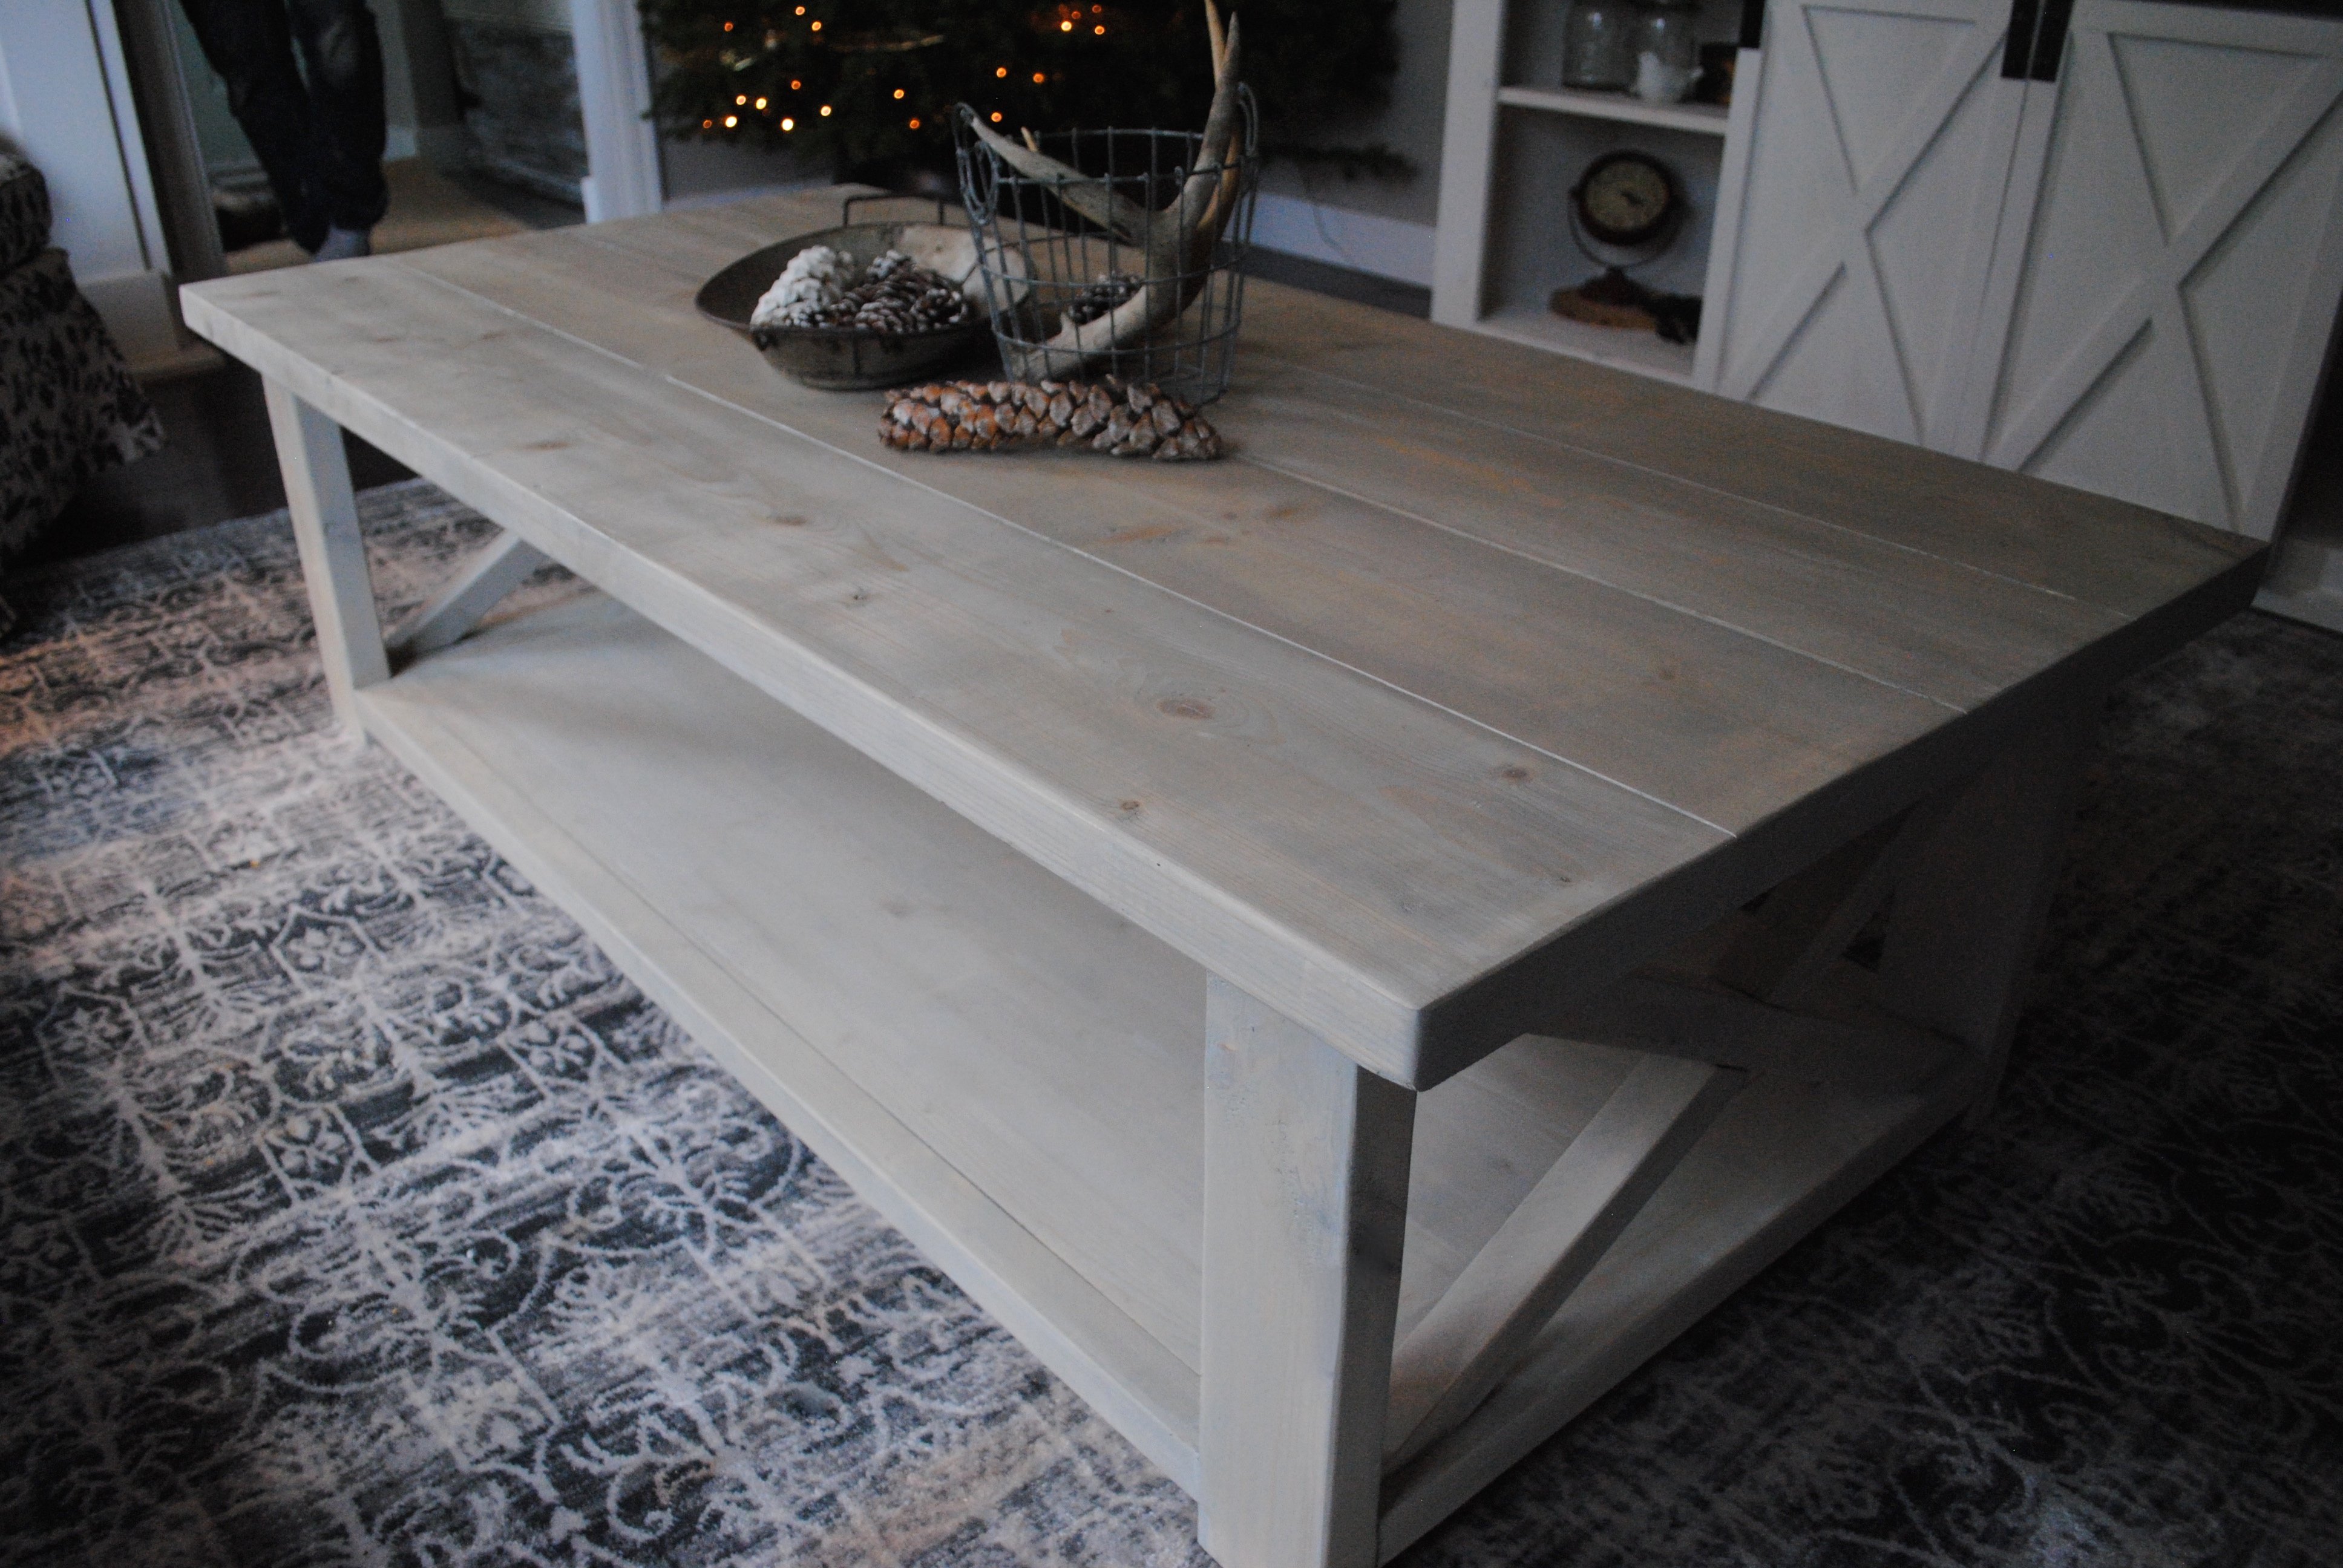
Rustic X-Frame Coffee Table
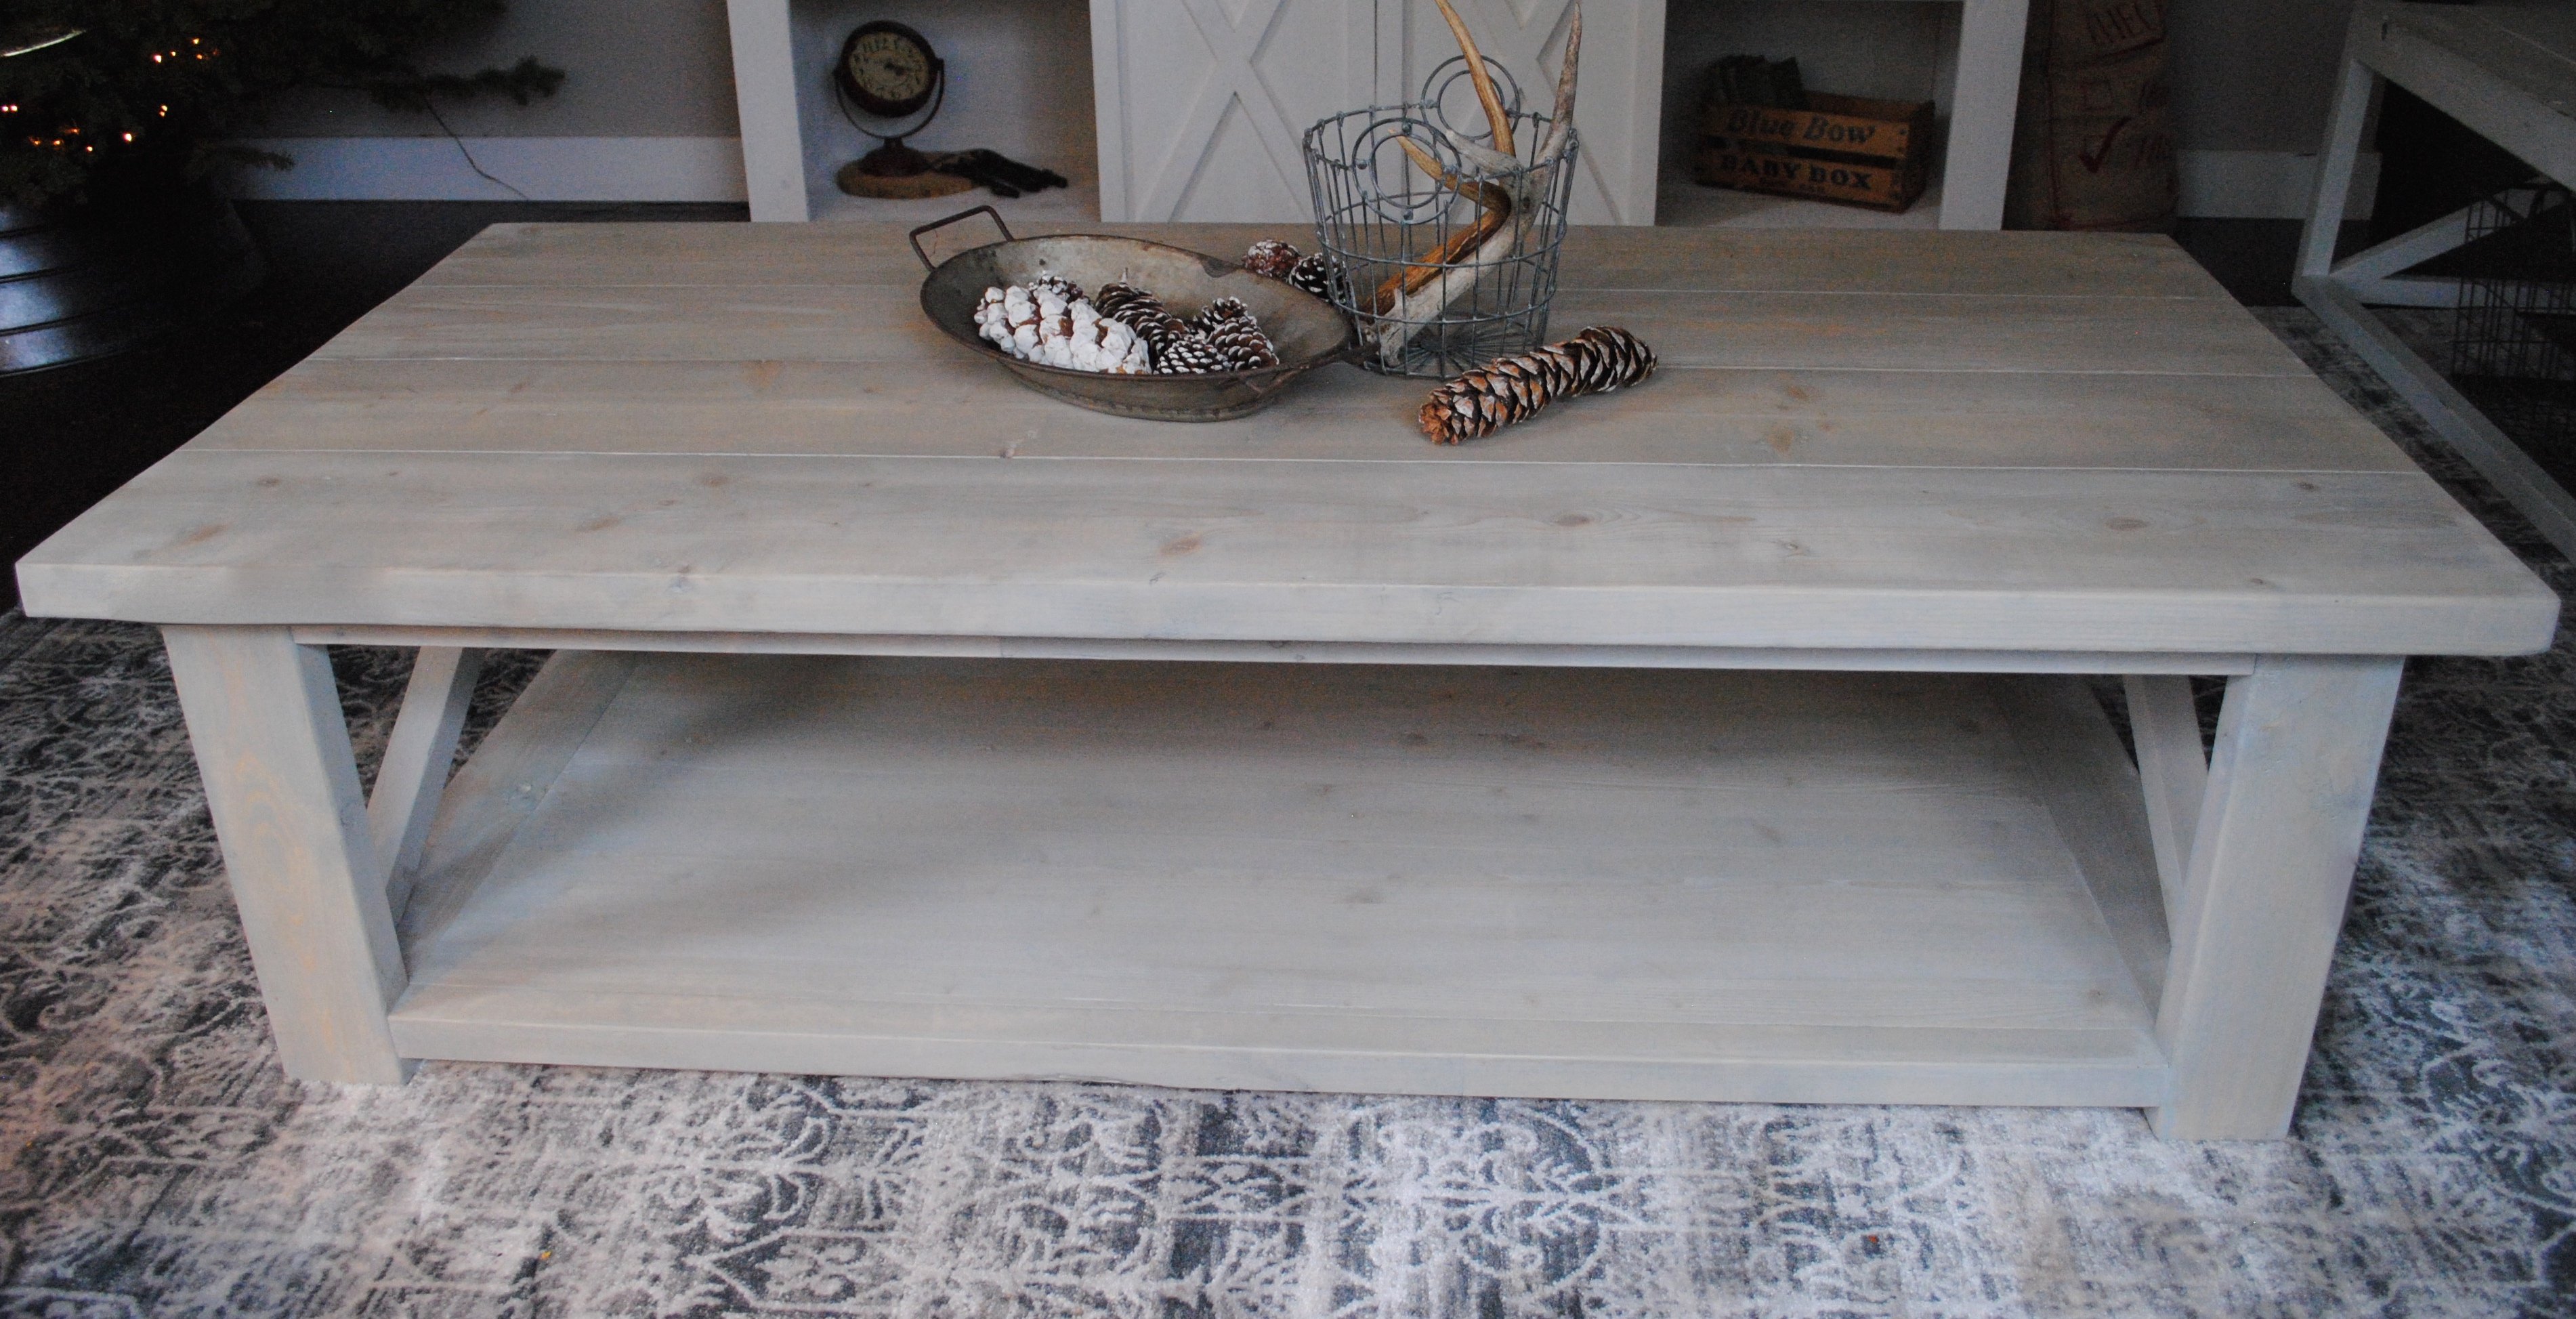
We've built so many of these coffee tables, but this one has got to be my favorite. Isn't the stain so dreamy?
I think the biggest thing about this coffee table is to finish it properly. We like to plane our boards down so it gives it a bit more of a seamless look - but real rustic lovers don't need to do this.
We sanded the coffee table down with 120 grit paper & then stained this table in Sunbleached Oak by Varathane. It's literally the most stunning color. Blends with almost any decor.
Once that was dry, we applied two coats of polyurathane
Built from Plan(s)
Estimated Cost
75.00 CA
Estimated Time Investment
Afternoon Project (3-6 Hours)
Finish Used
We sanded the coffee table down with 120 grit paper & then stained this table in Sunbleached Oak by Varathane. It's literally the most stunning color. Blends with almost any decor.
Once that was dry, we applied two coats of polyurathane
Once that was dry, we applied two coats of polyurathane
Recommended Skill Level
Starter Project
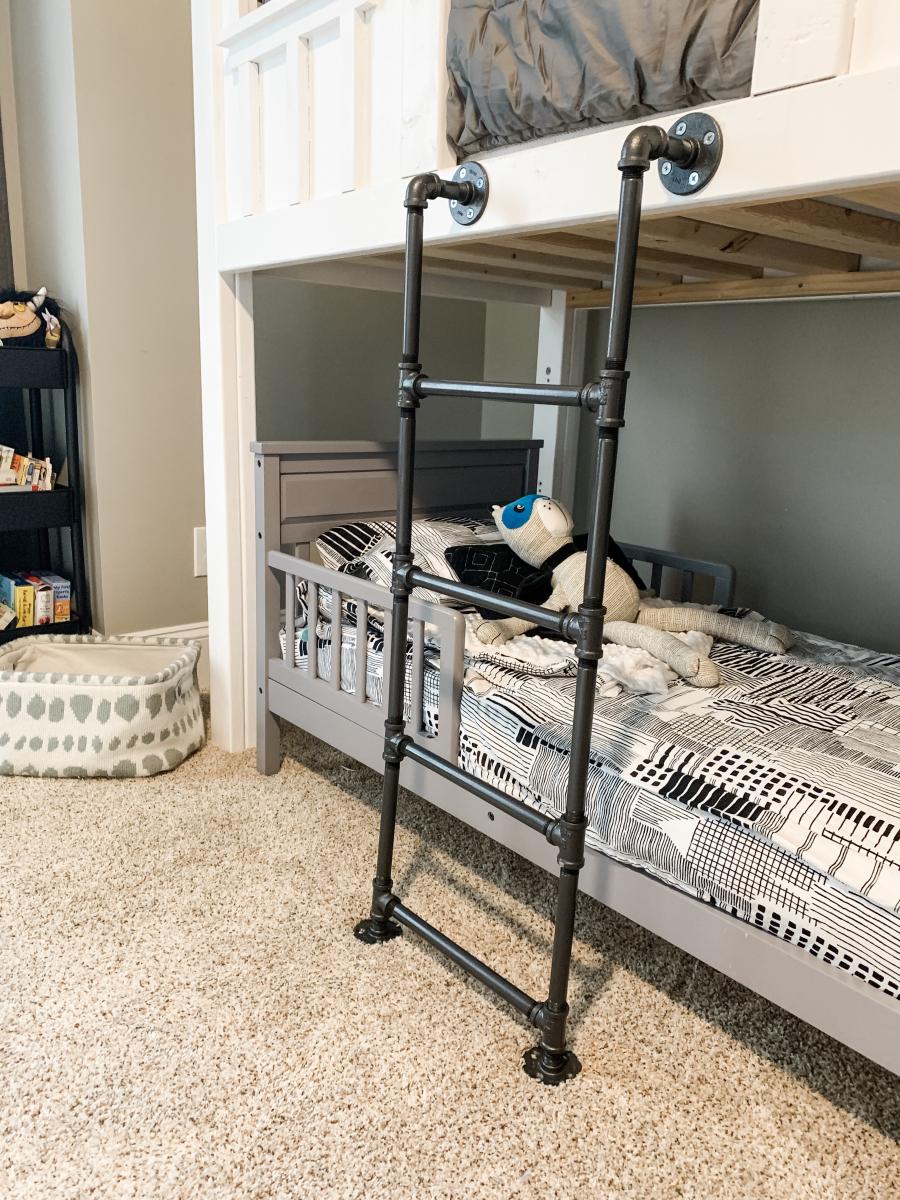
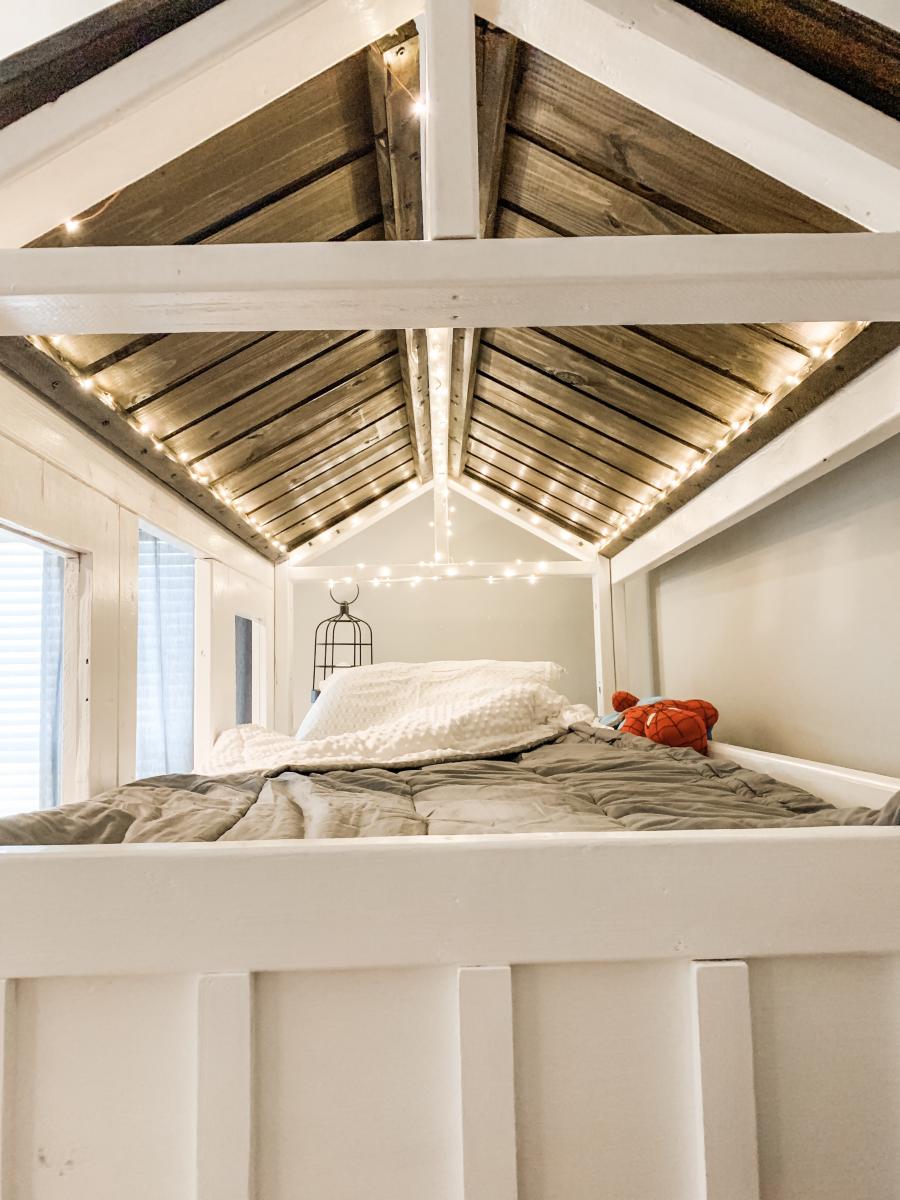
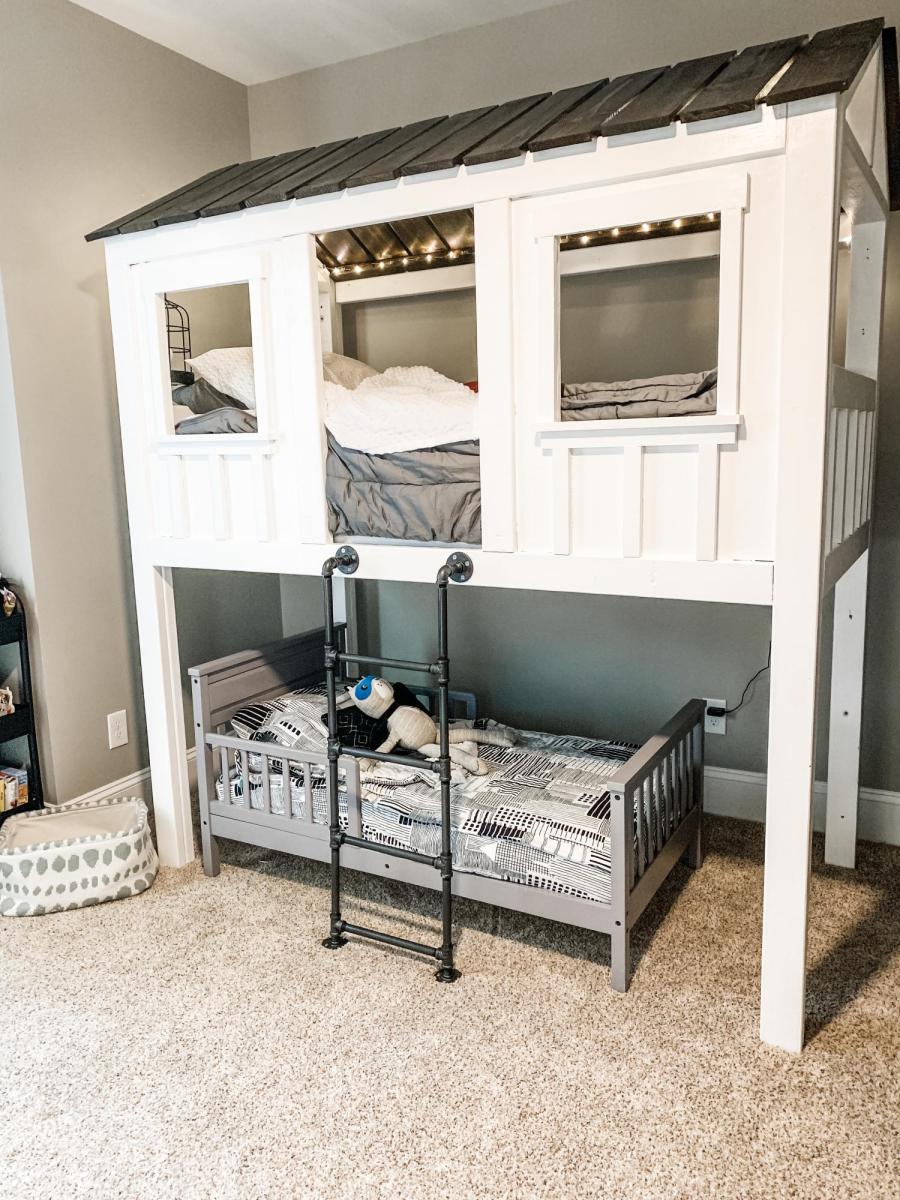
Cabin loft bunk bed
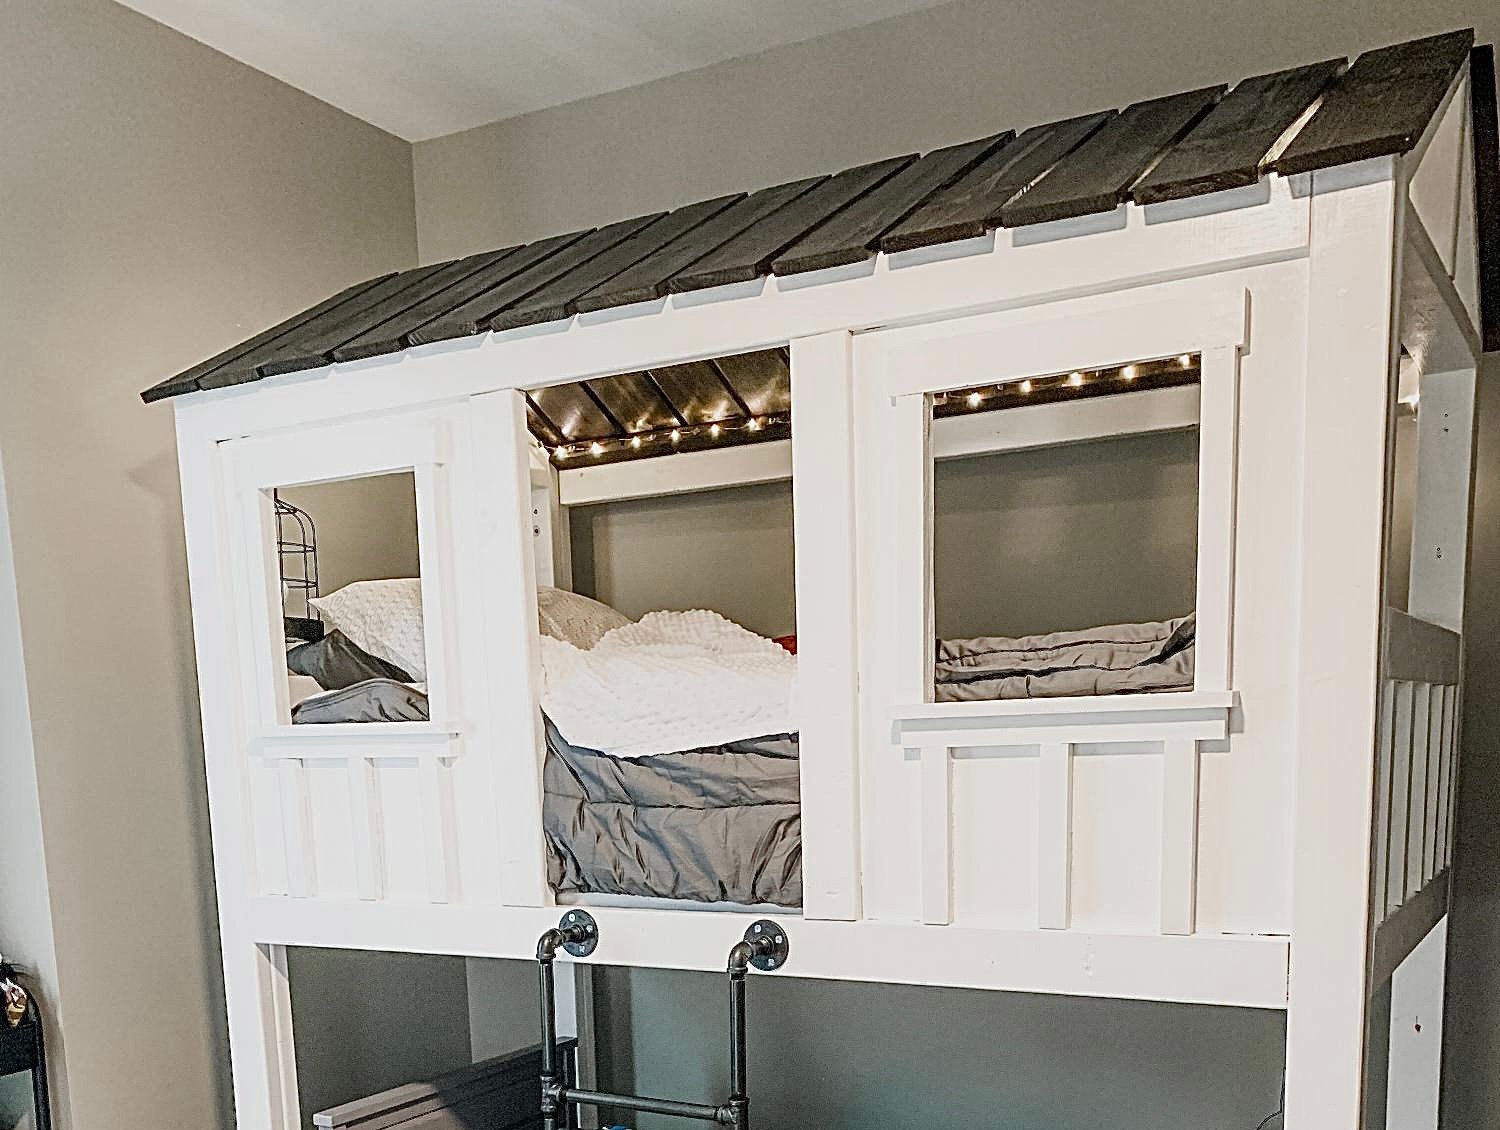
Elevated loft bed for my two boys! Easy build with the plans from Ana White! I modified this version and elevated it so I could fit my youngest underneath. It was my first time using a Kreg Jig and I’m obsessed now. I would recommend buying top quality wood and increasing all numbers by 2-3 inches to make getting the mattress in easier. I would also recommend a lower profile mattress than I used. Happy Building!
Built from Plan(s)
Estimated Cost
$300
Estimated Time Investment
Weekend Project (10-20 Hours)
Finish Used
I used SW marshmellow and stained the roof walnut. Ladder is made out of steel piping that I spray painted (with primer) black.
Recommended Skill Level
Beginner
Comments
Workbench Console Project
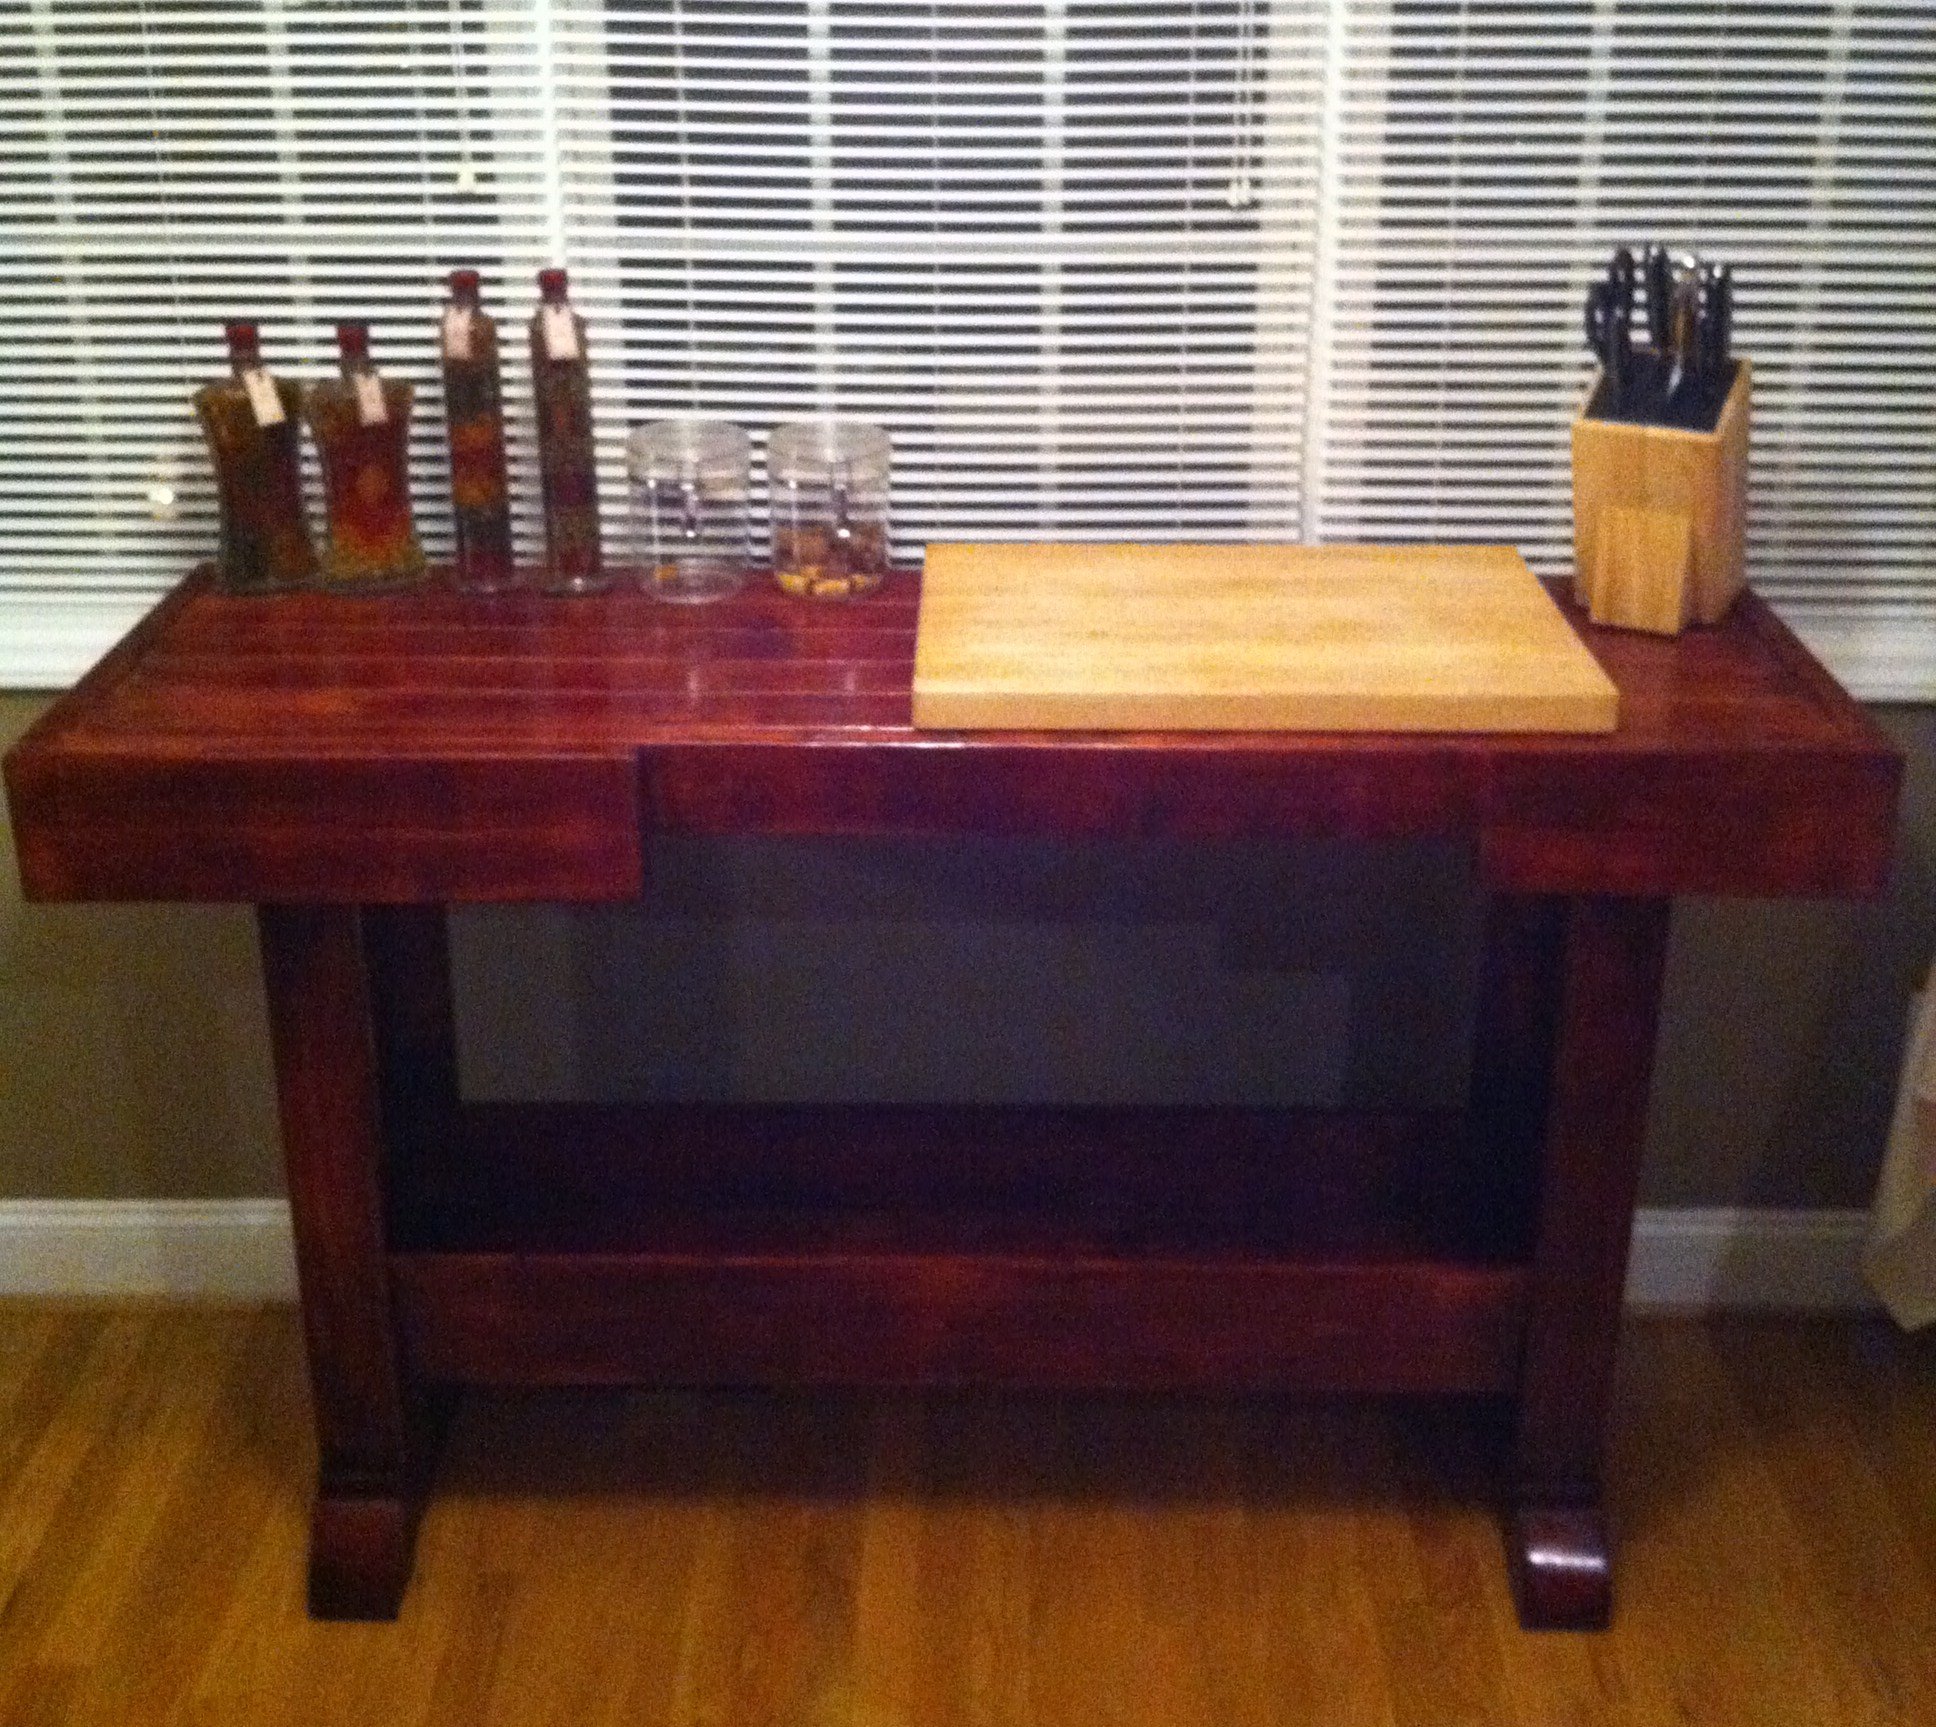
This was a fun and relatively easy project. Thanks Ana for all you do!
Built from Plan(s)
Estimated Time Investment
Week Long Project (20 Hours or More)
Finish Used
Minwax Bombay Mahoghany (3 coats)
Recommended Skill Level
Intermediate
Comments
Tue, 01/24/2012 - 09:49
Kitchen island
This is great. You did wonderful for a first project. I could see this as a kitchen island...Thank you for sharing...
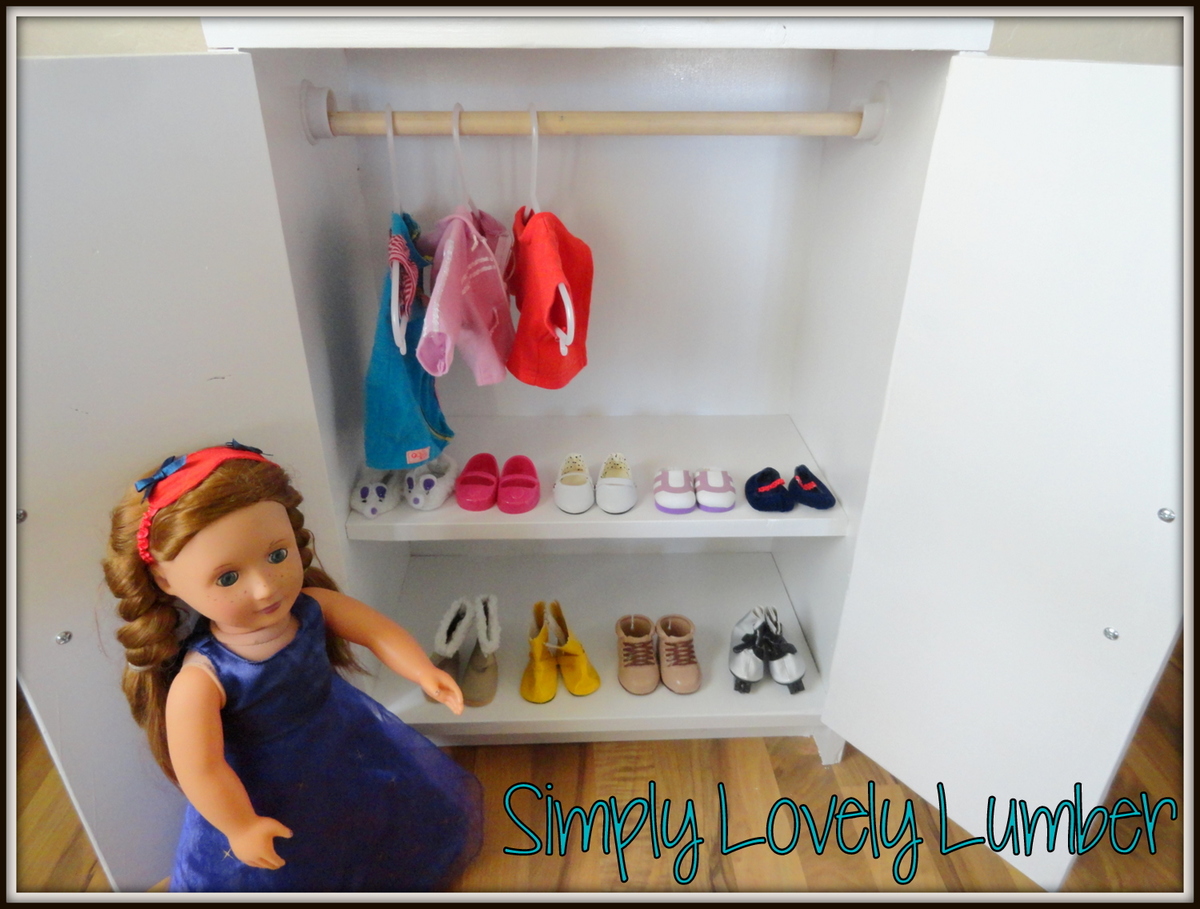
Americna Girl Closet
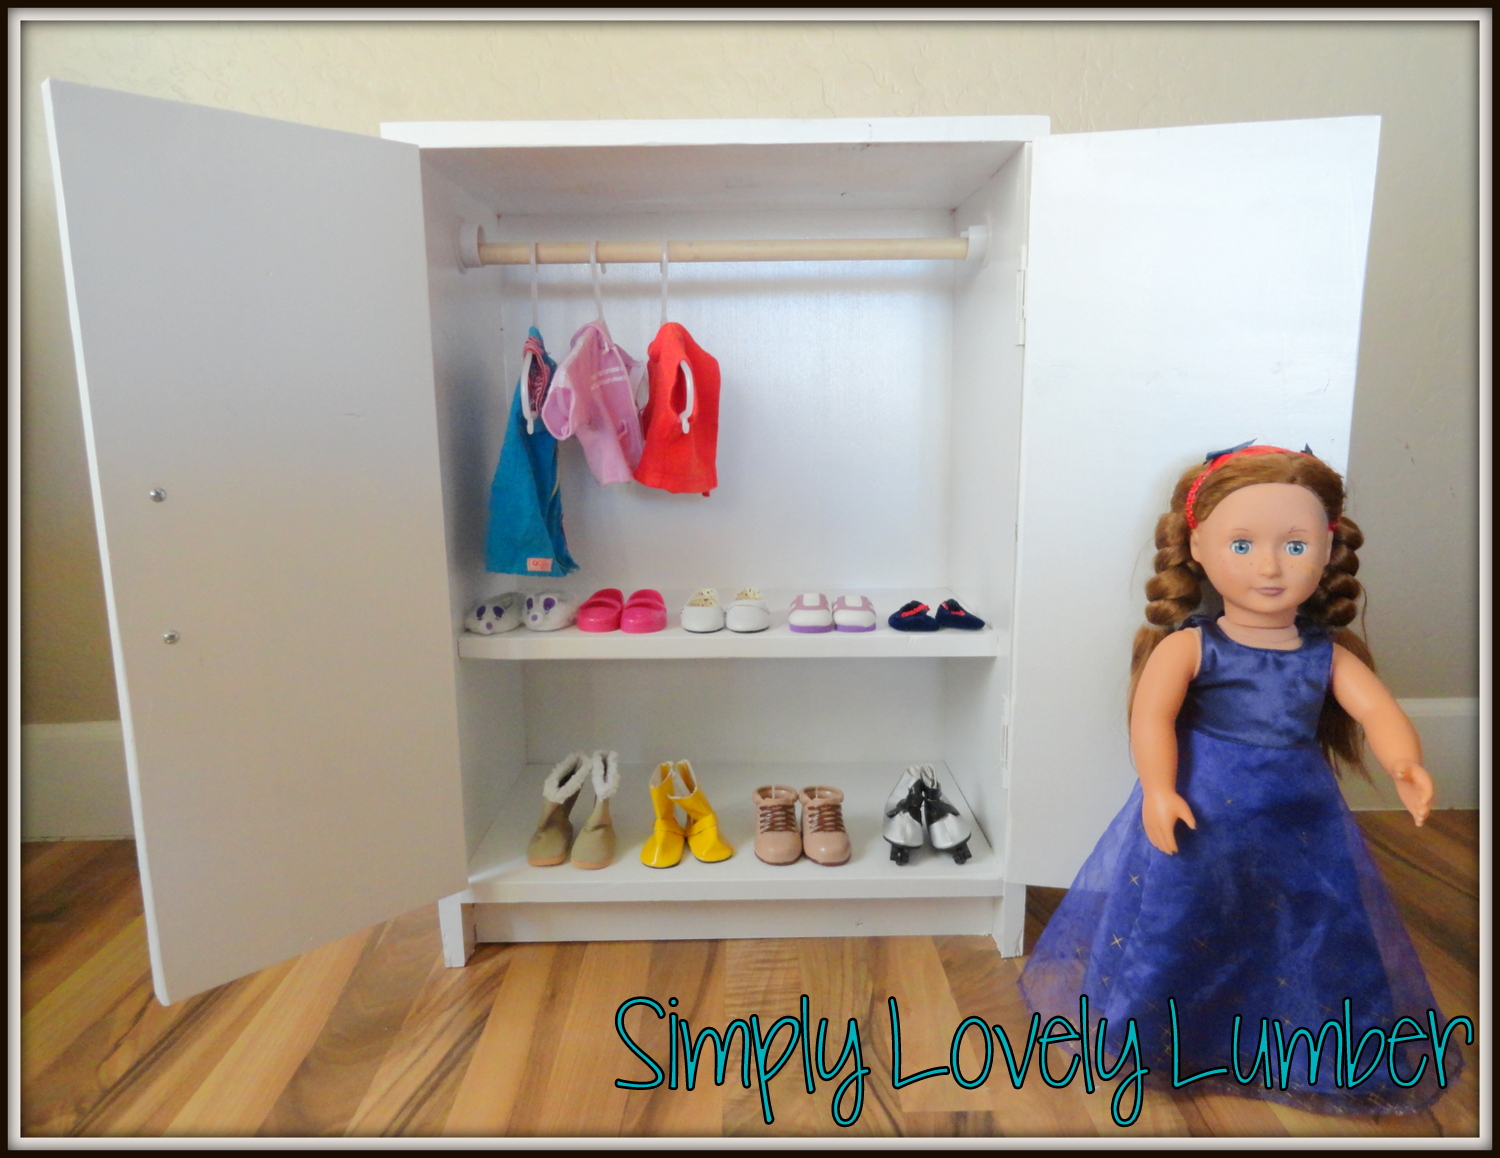
I made this doll closet to go along with the canopy bed. It came out great! I put some pictures of the build on my blog.


Built from Plan(s)
Estimated Time Investment
An Hour or Two (0-2 Hours)
Recommended Skill Level
Beginner
Workbench
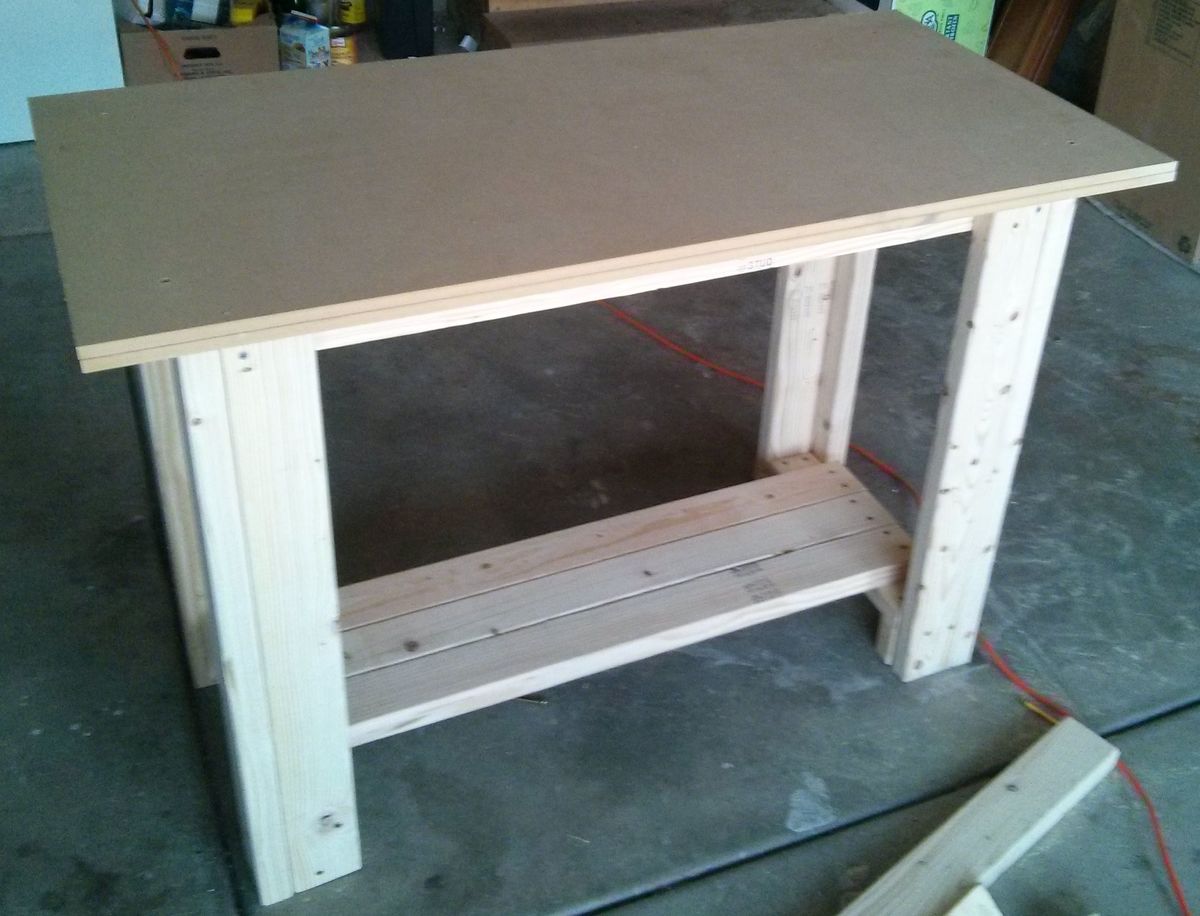
I built this workbench in about two hours.
It is a nice, sturdy bench that I plan to use often.
For the top I used two sheets of 1/2" MDF.
Built from Plan(s)
Estimated Cost
$50
Estimated Time Investment
An Hour or Two (0-2 Hours)
Recommended Skill Level
Beginner
DIY Toddler Bunk Bed
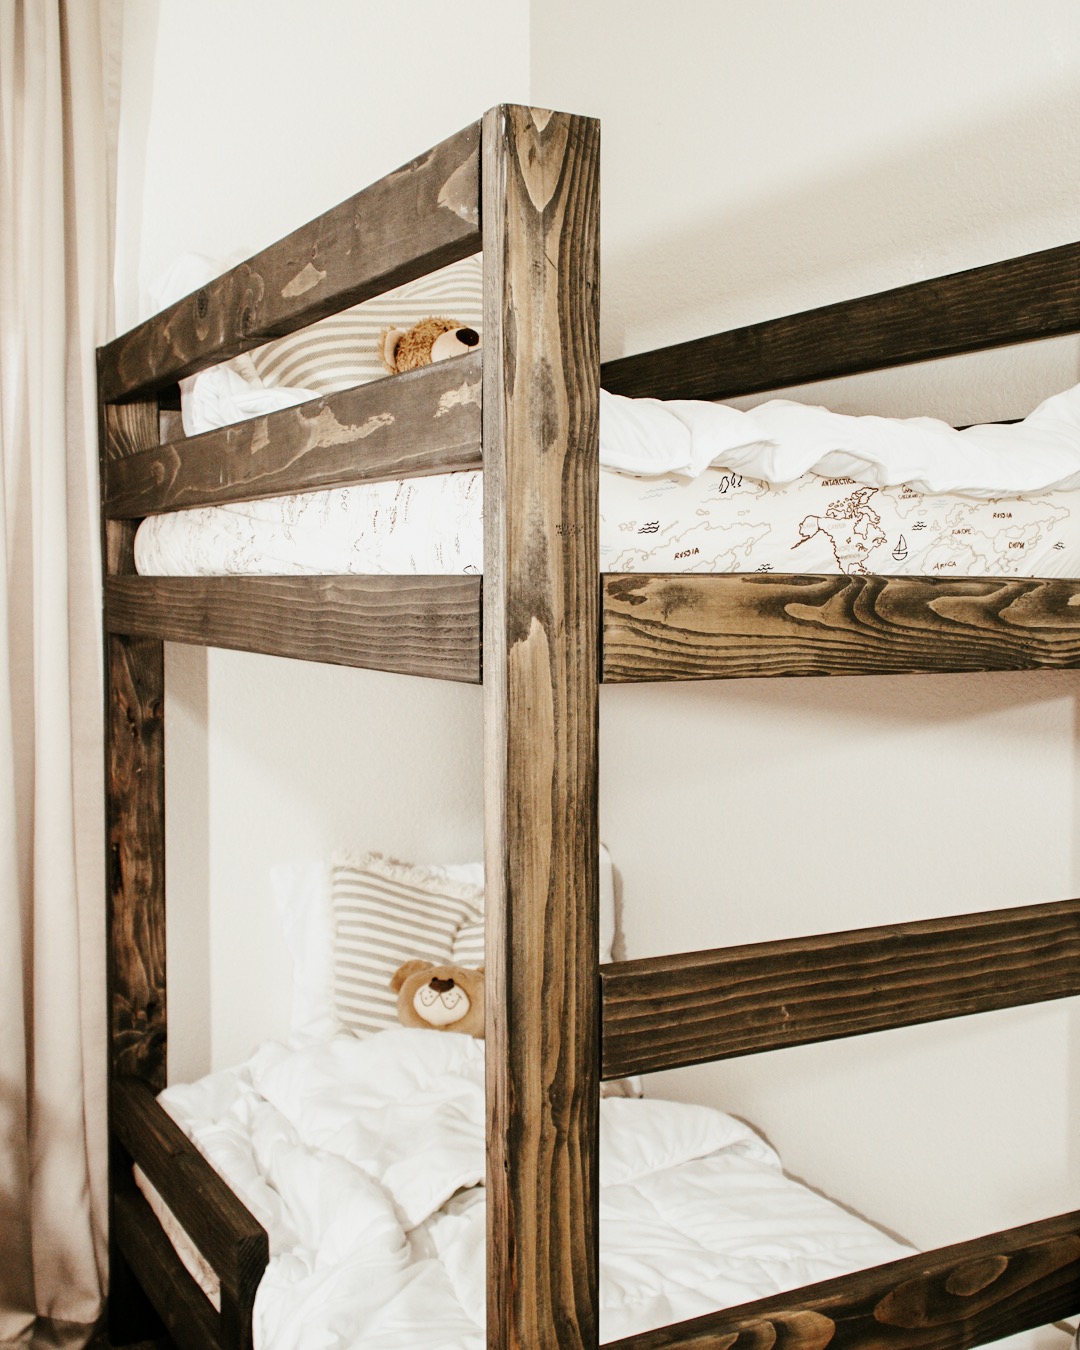
I needed a solution to getting my bed back from my children. Since we live in a small apartment, this toddler bunk bed was the best option for our family! We are a military family so I wanted to build something that could be taken with us every time we move. The plans were easy to follow and has such a professional result!

Built from Plan(s)
Estimated Cost
$200
Estimated Time Investment
Weekend Project (10-20 Hours)
Recommended Skill Level
Beginner
Comments

Wed, 10/02/2019 - 18:10
Oh my goodness! I saw your…
Oh my goodness! I saw your project on Instagram and was hoping you’d share it here too! Thank you so much you made my day!
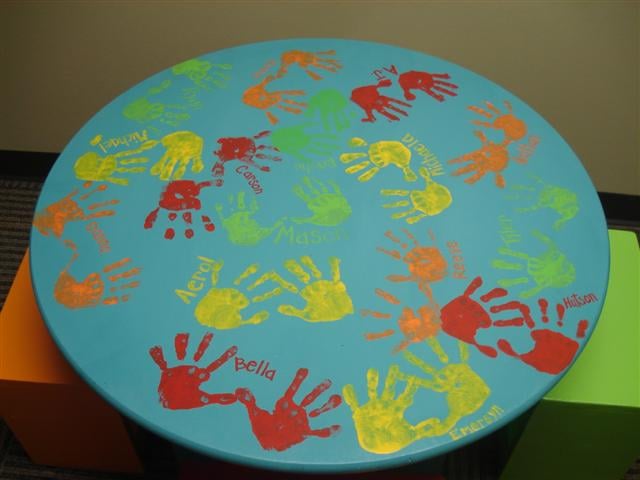
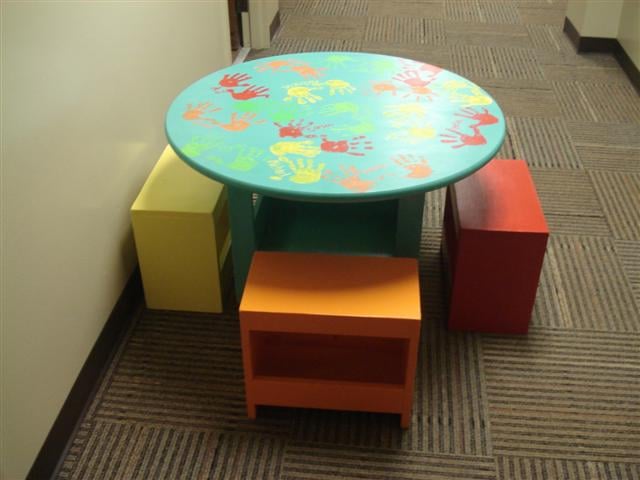
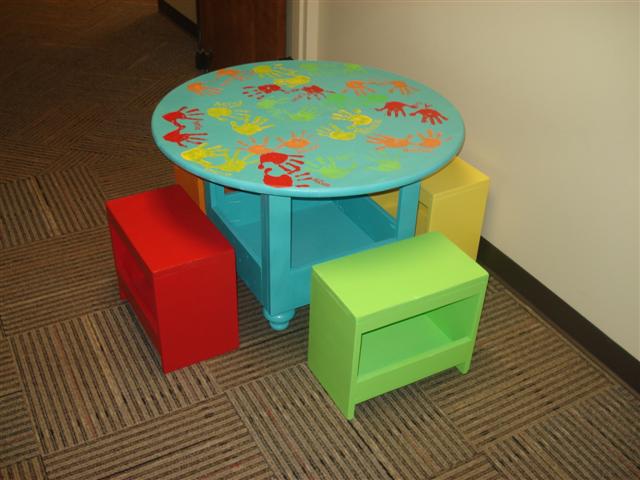
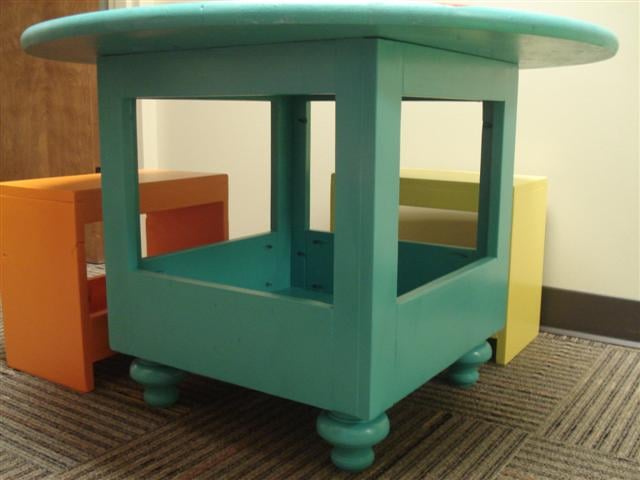
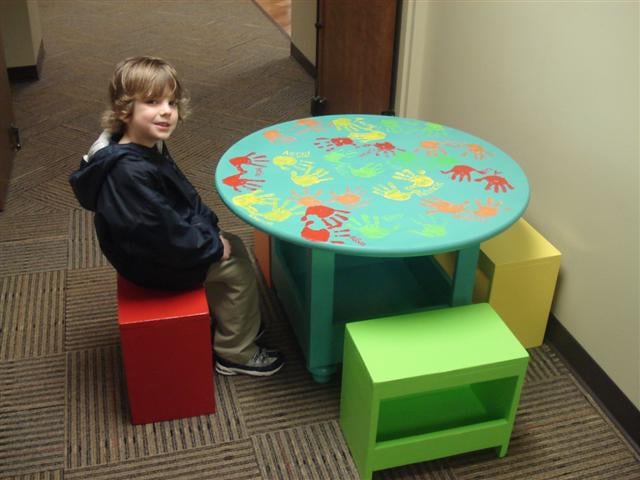
Kid Table & Stools
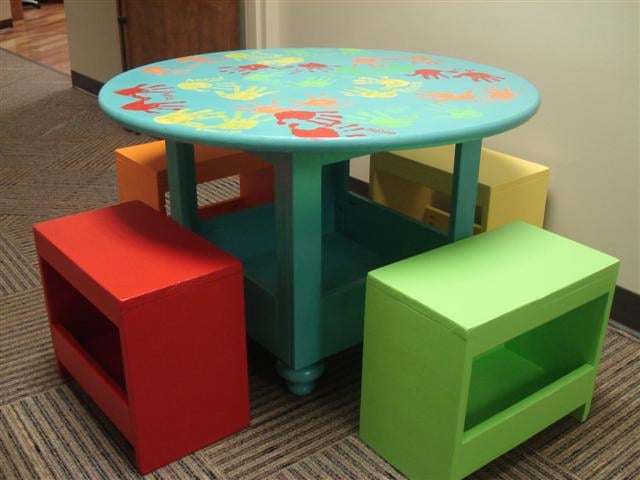
My wife and I did this table and stools for our son’s class art project. We did something similar last year and they auction the items off in a fund raiser in March. More details and information on the blog – www.atouchofarkansas.com.
Built from Plan(s)
Estimated Cost
$100.00
Estimated Time Investment
Weekend Project (10-20 Hours)
Finish Used
Extra paint we had from other projects, so the estimated cost includes buying paint, but if you have some already, obviously you can take that off the total costs.
Recommended Skill Level
Beginner
Comments
Tue, 07/03/2012 - 09:03
Part of a class I am taking
Part of a class I am taking involves this particular subject and I am researching for information to use in an upcoming report. Your post is really helpful; do you have any others on this topic?
http://www.britecarpetcleaners.com/
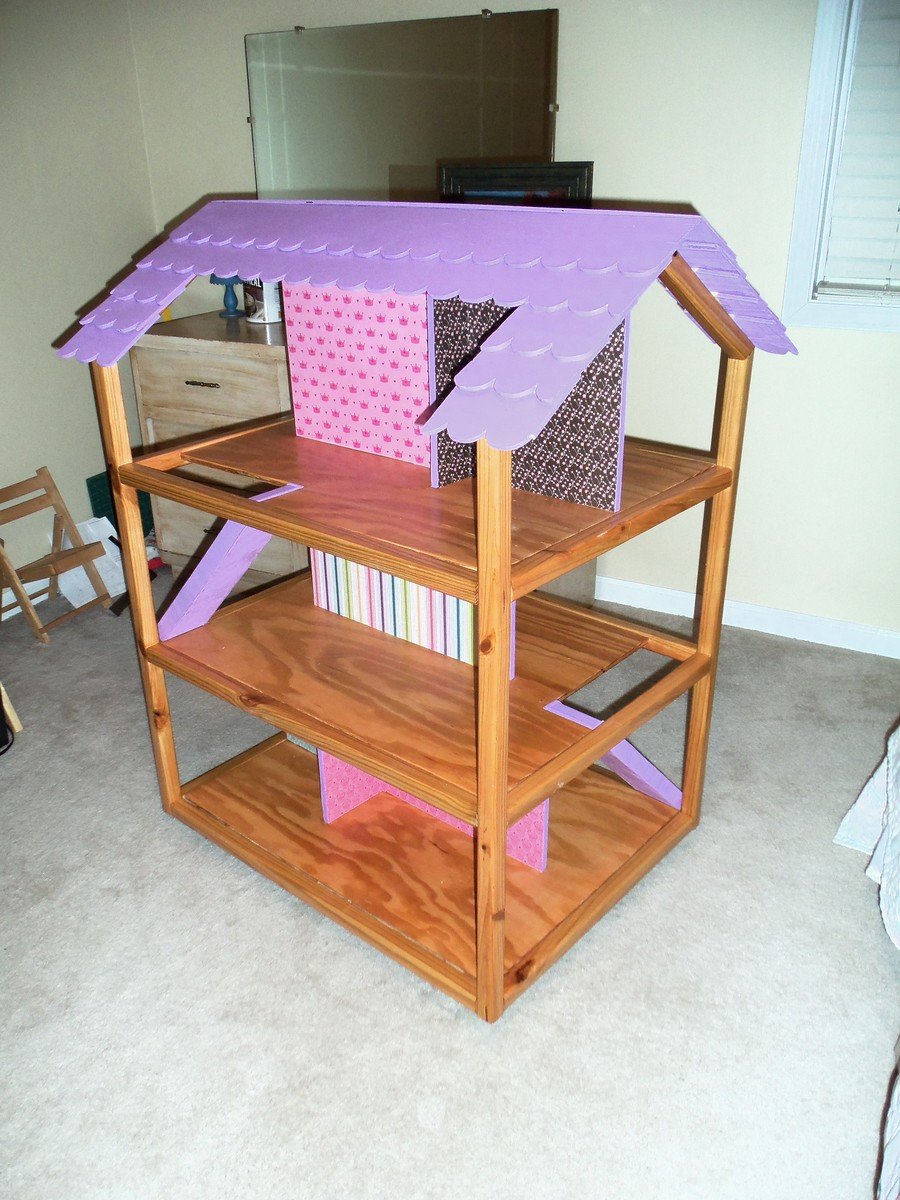
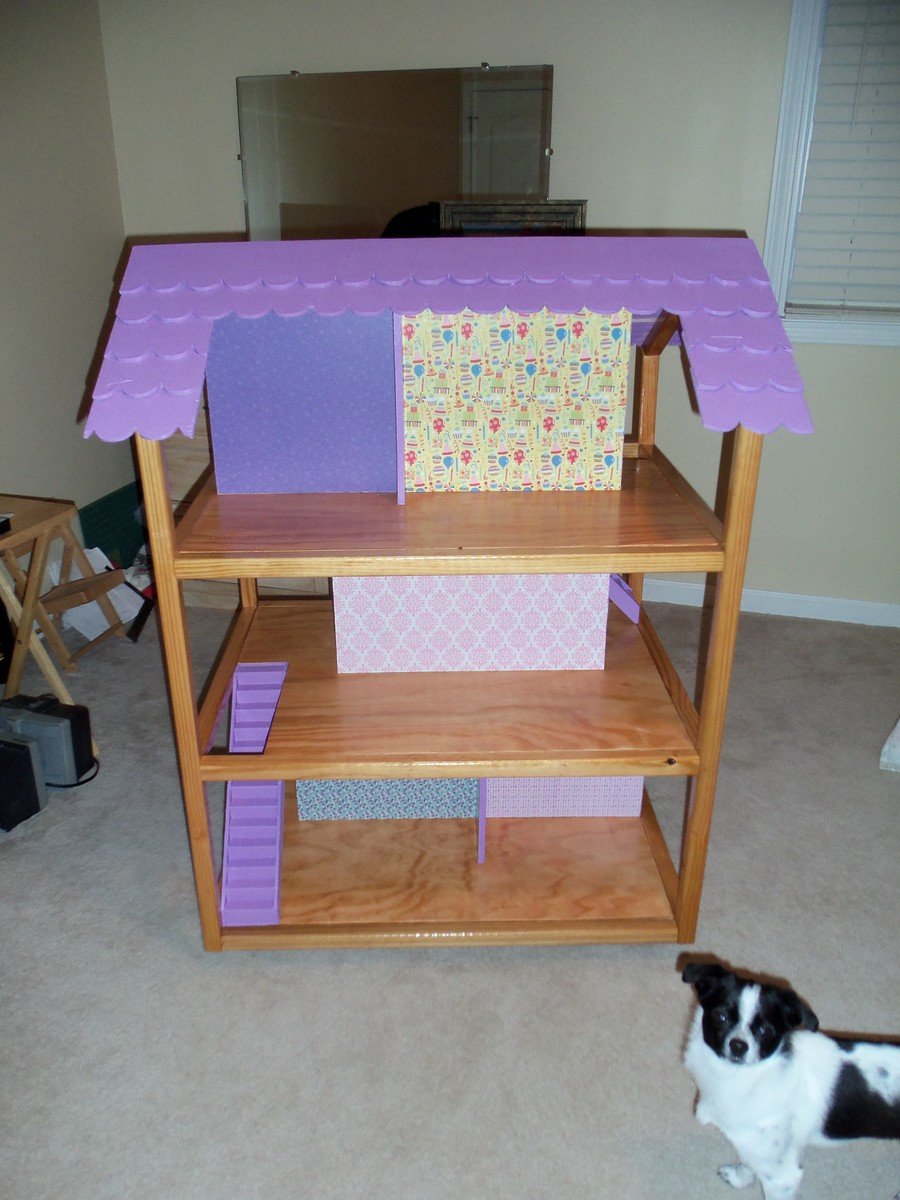
Dream dollhouse just in time for Christmas!
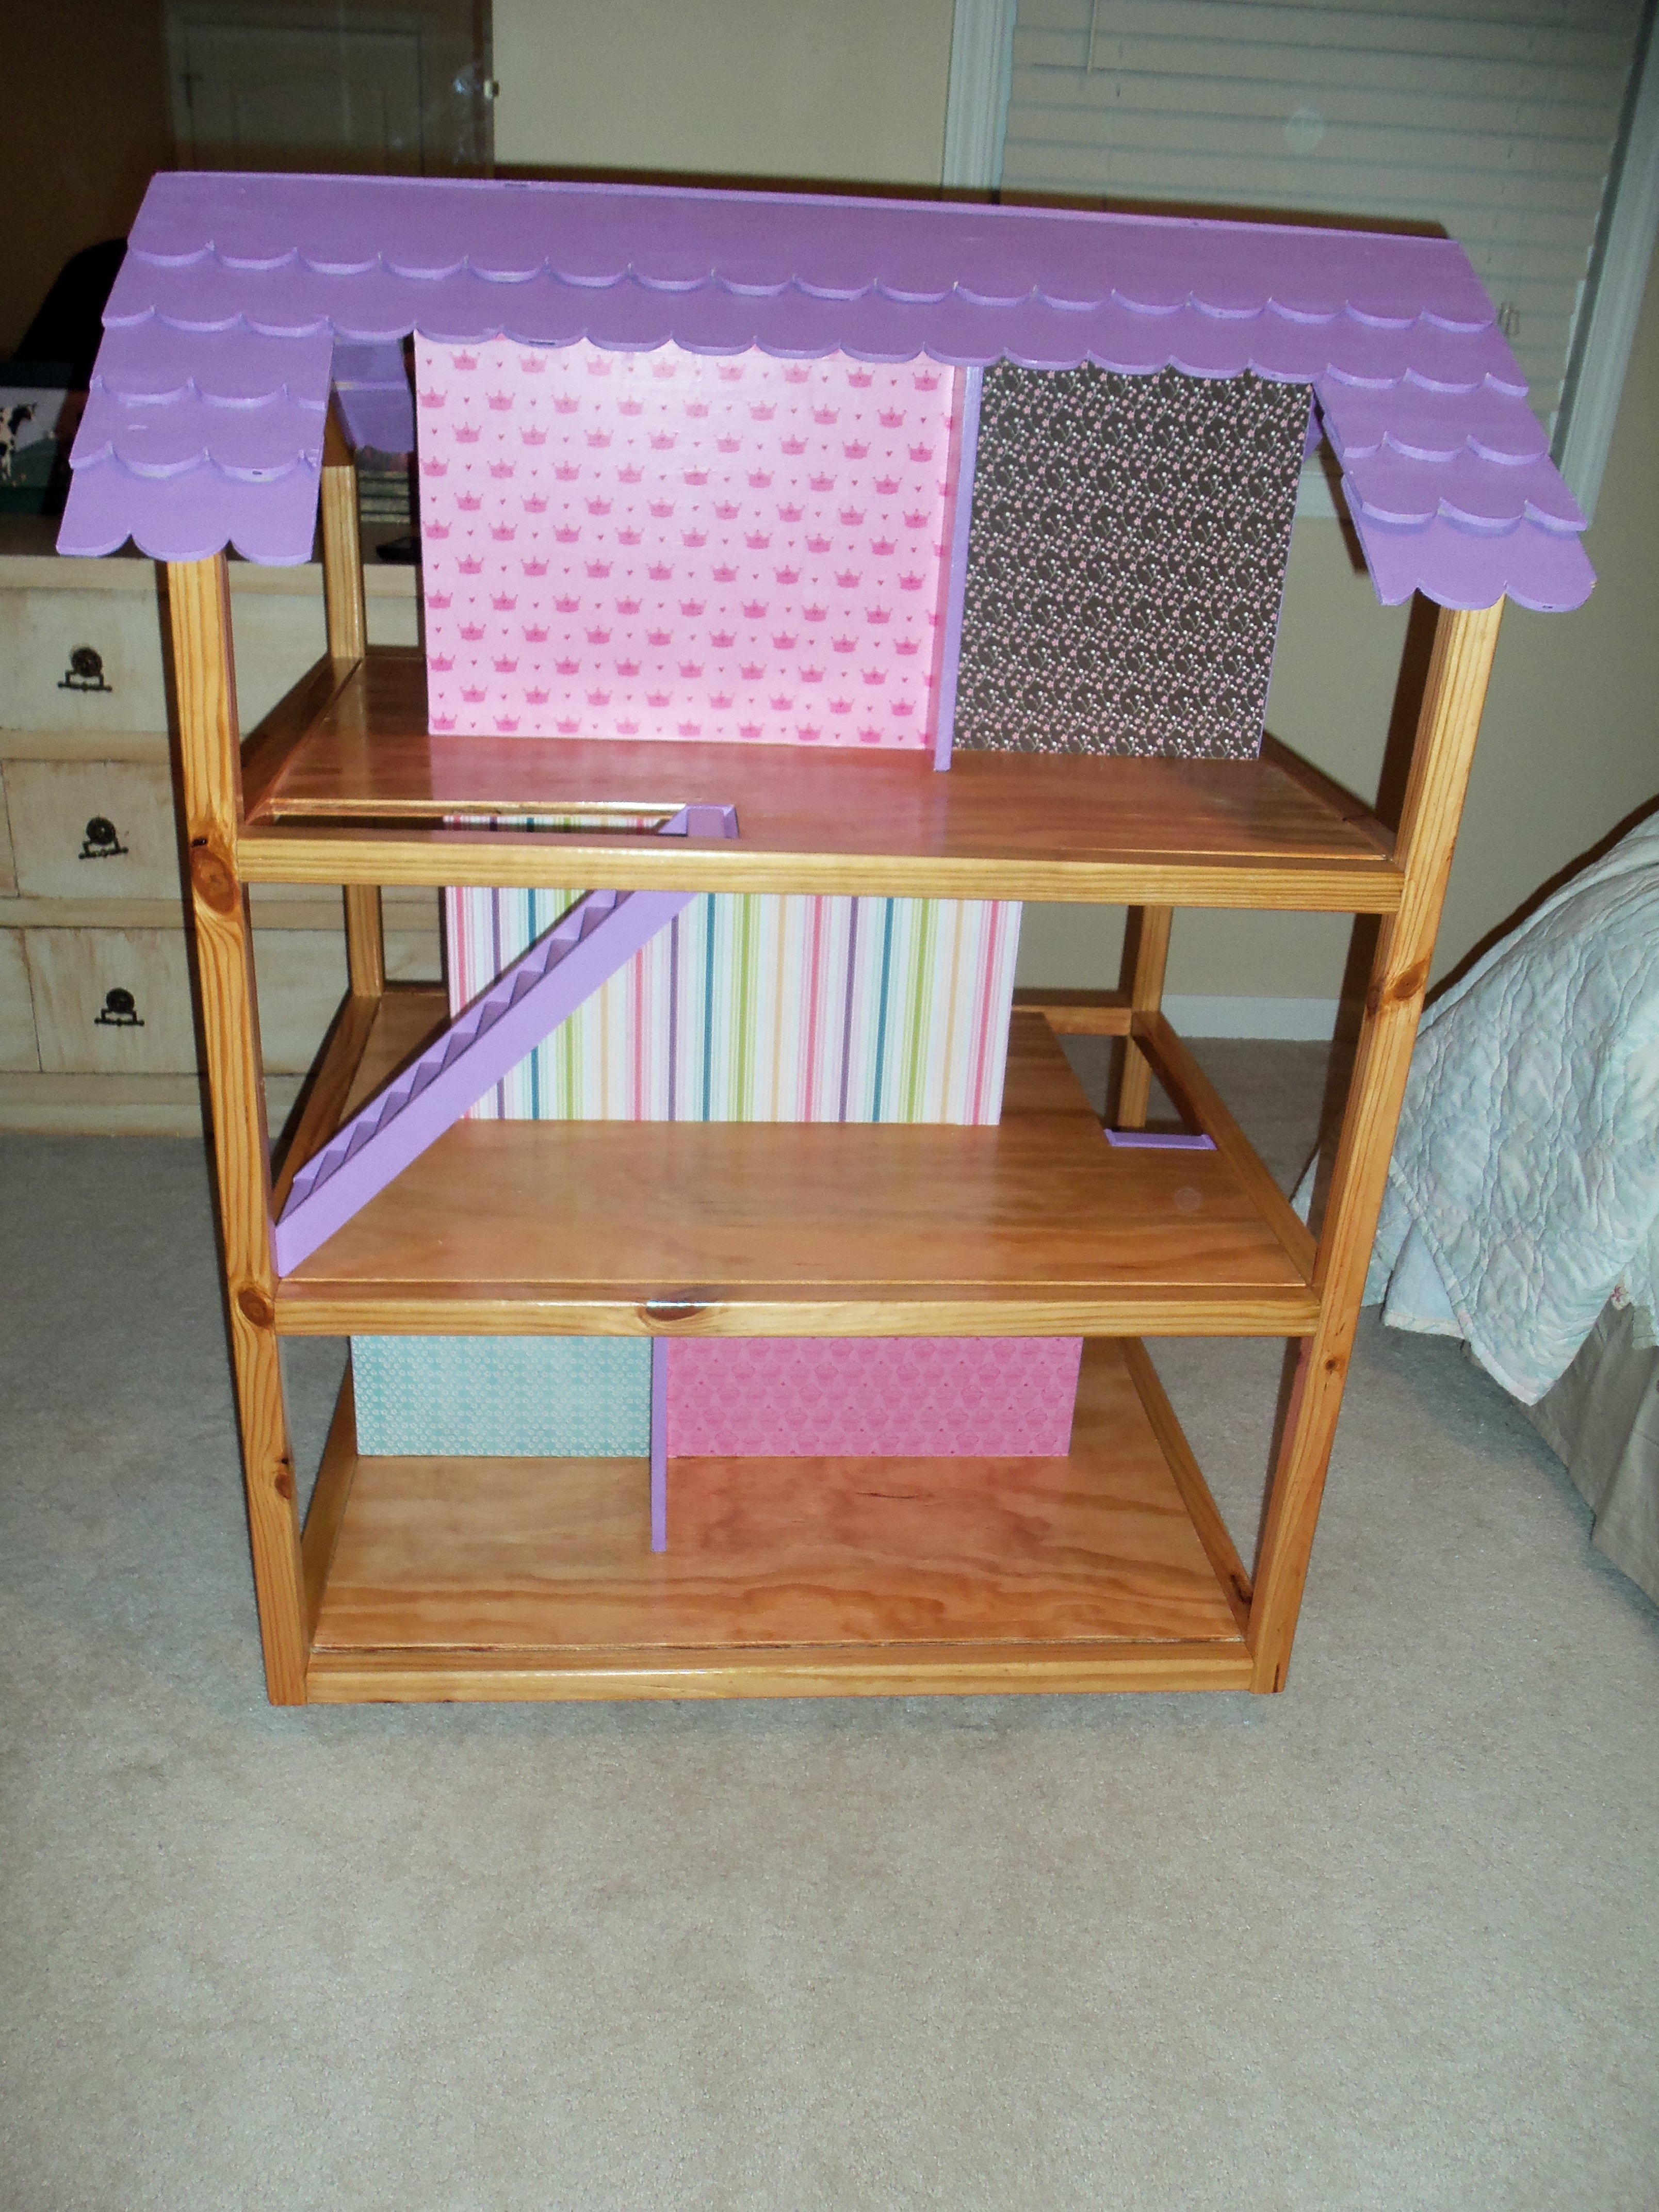
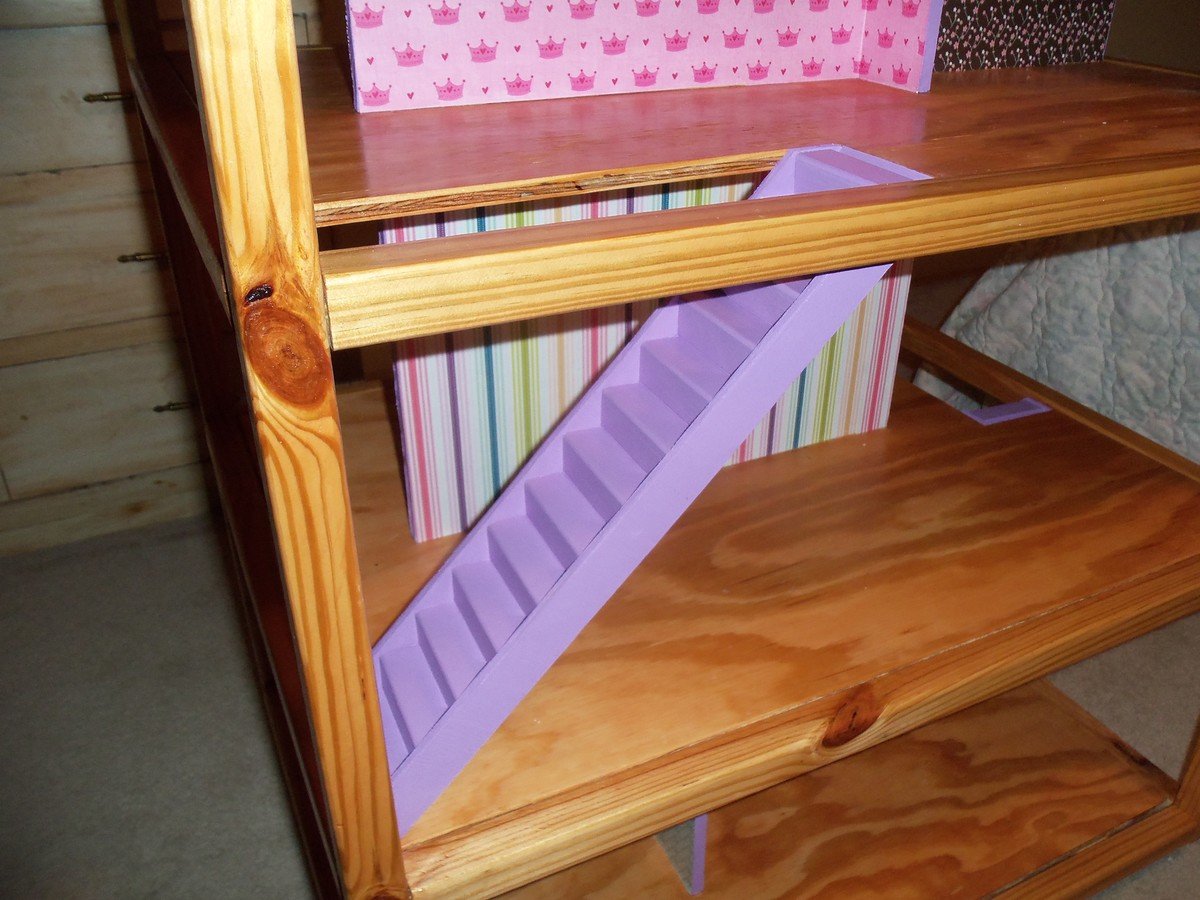
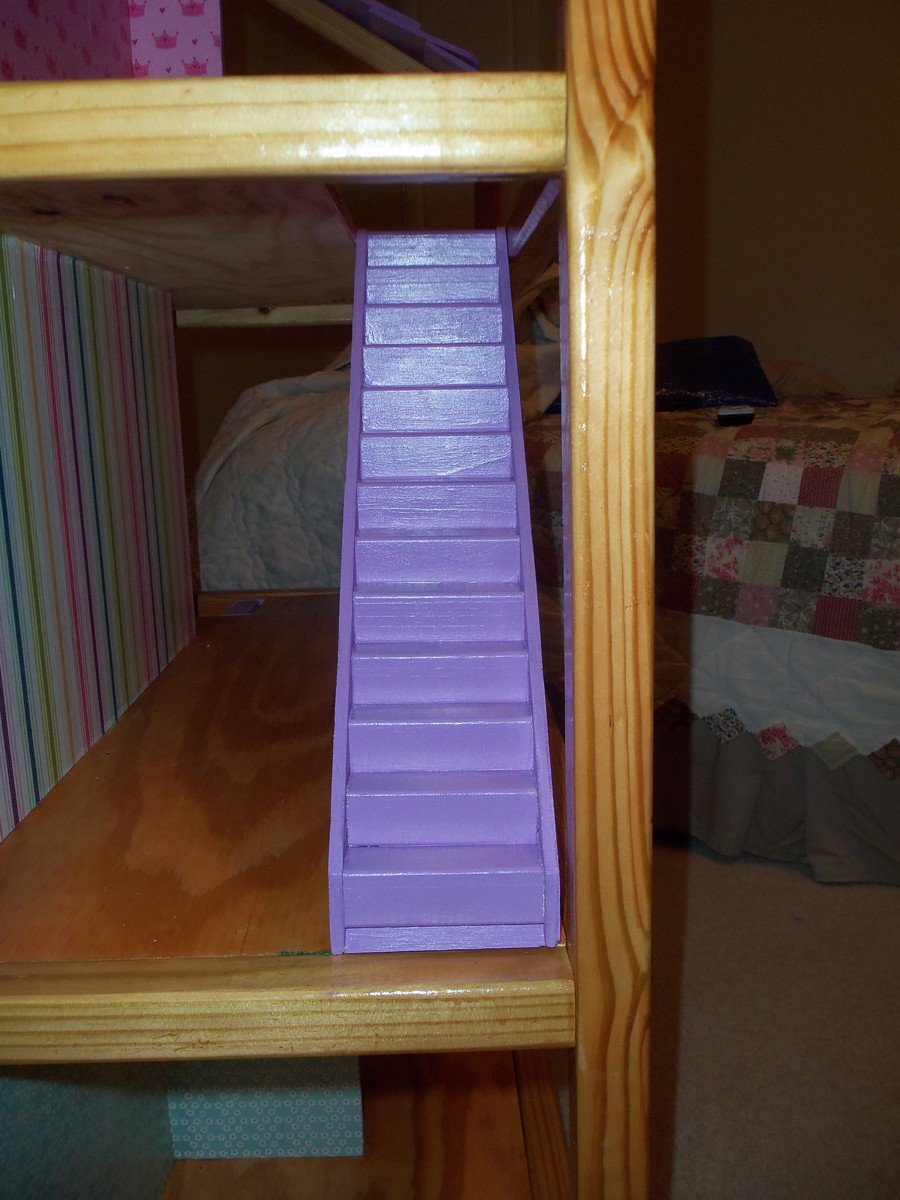
This project took me a while to do just because I had to fit the time in to complete it. Plus I changed the stairs up from the plan because I didn't like how they turned out. They seemed to sag in the middle when you pushed down on it like a kid would when walking the dolls upstairs. I then tried the 2"X4" method suggested somewhere in the posts but that didn't turn out well either. So I searched online and found Wayne of the Woods website here: http://www.wayneofthewoods.com/dollhouse%20plans.html
Scroll down and find the stair plans I adapted to fit the dollhouse I built. I used scrap 1/4" plywood and 1 1/4" (I think) "L" trim/molding. I think I'm most proud of those stairs! :)
Built from Plan(s)
Estimated Cost
$75
Estimated Time Investment
Week Long Project (20 Hours or More)
Finish Used
Golden Oak, I believe.
Recommended Skill Level
Beginner
Comments
Sat, 12/21/2013 - 14:18
This is beautiful! It's
This is beautiful! It's exactly how I envision ours turning out when its done, but gender neutral. THANK YOU SO MUCH for the stairs idea, I really didn't like either other option.
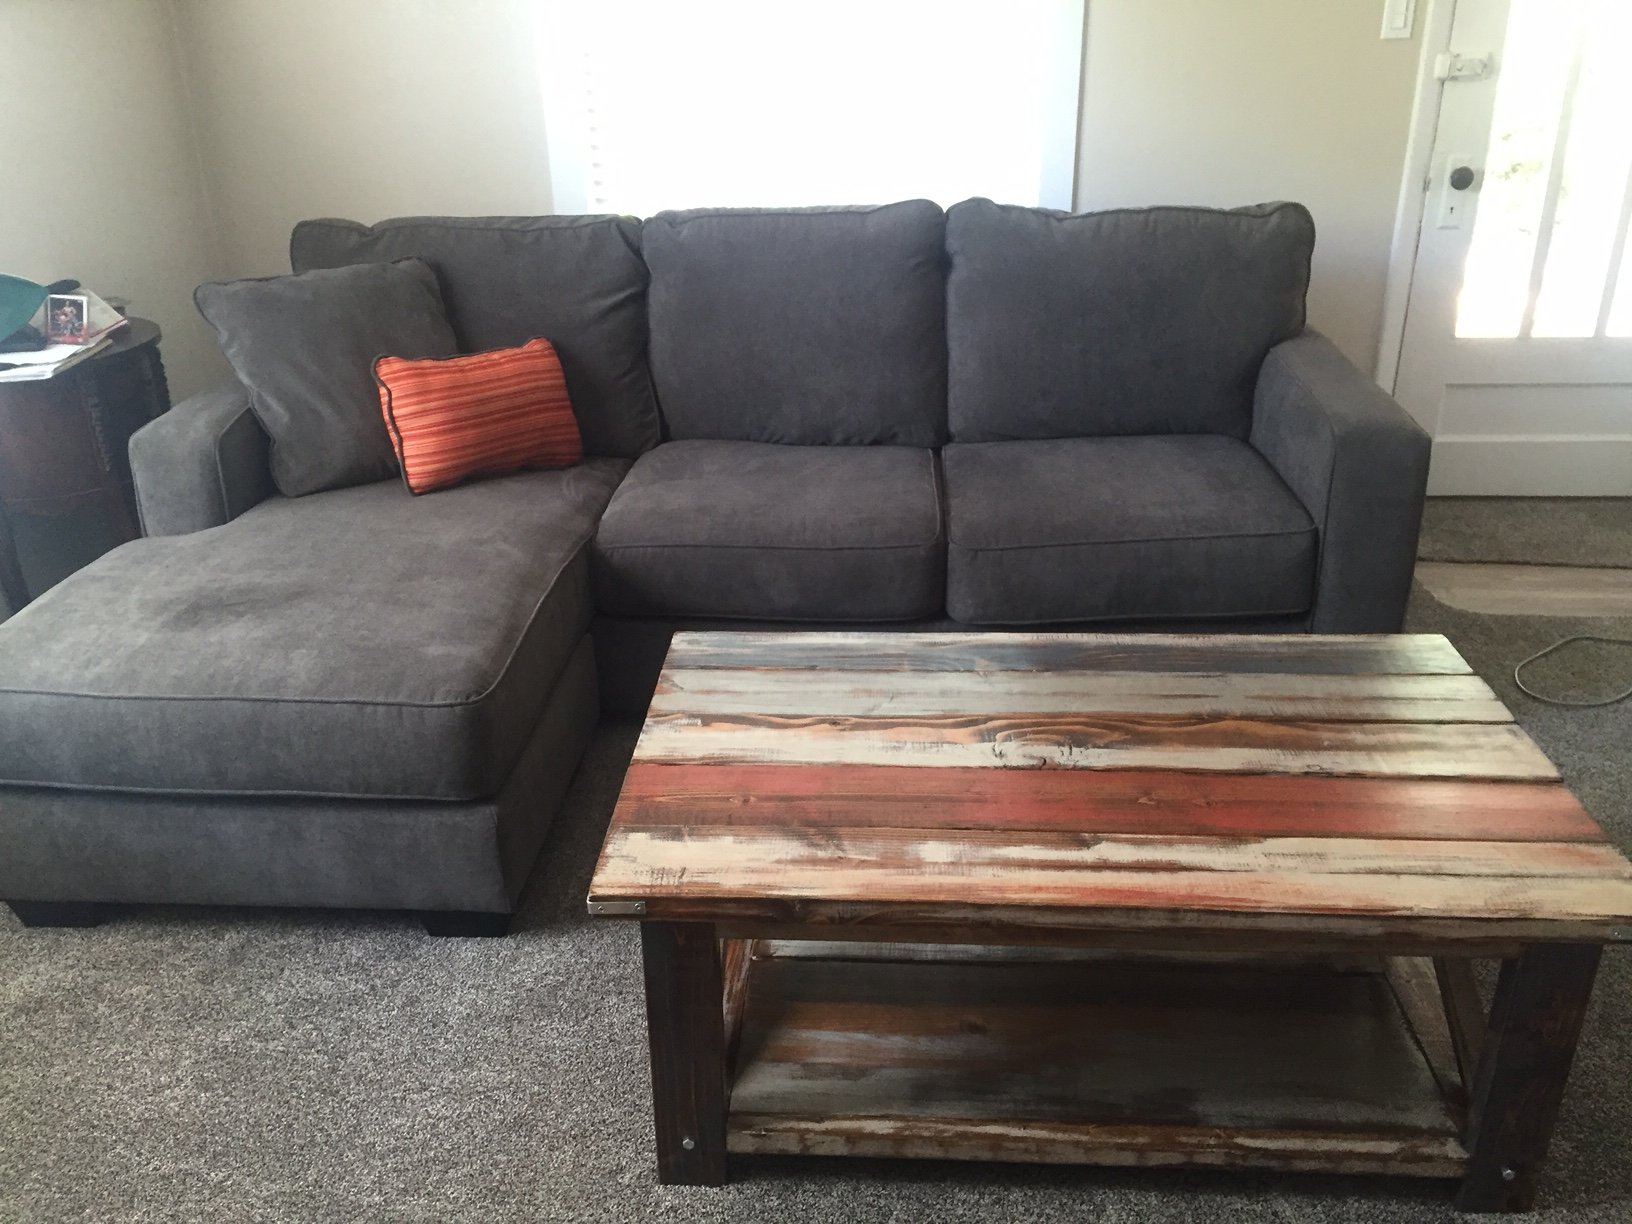
Rustic Coffee Table
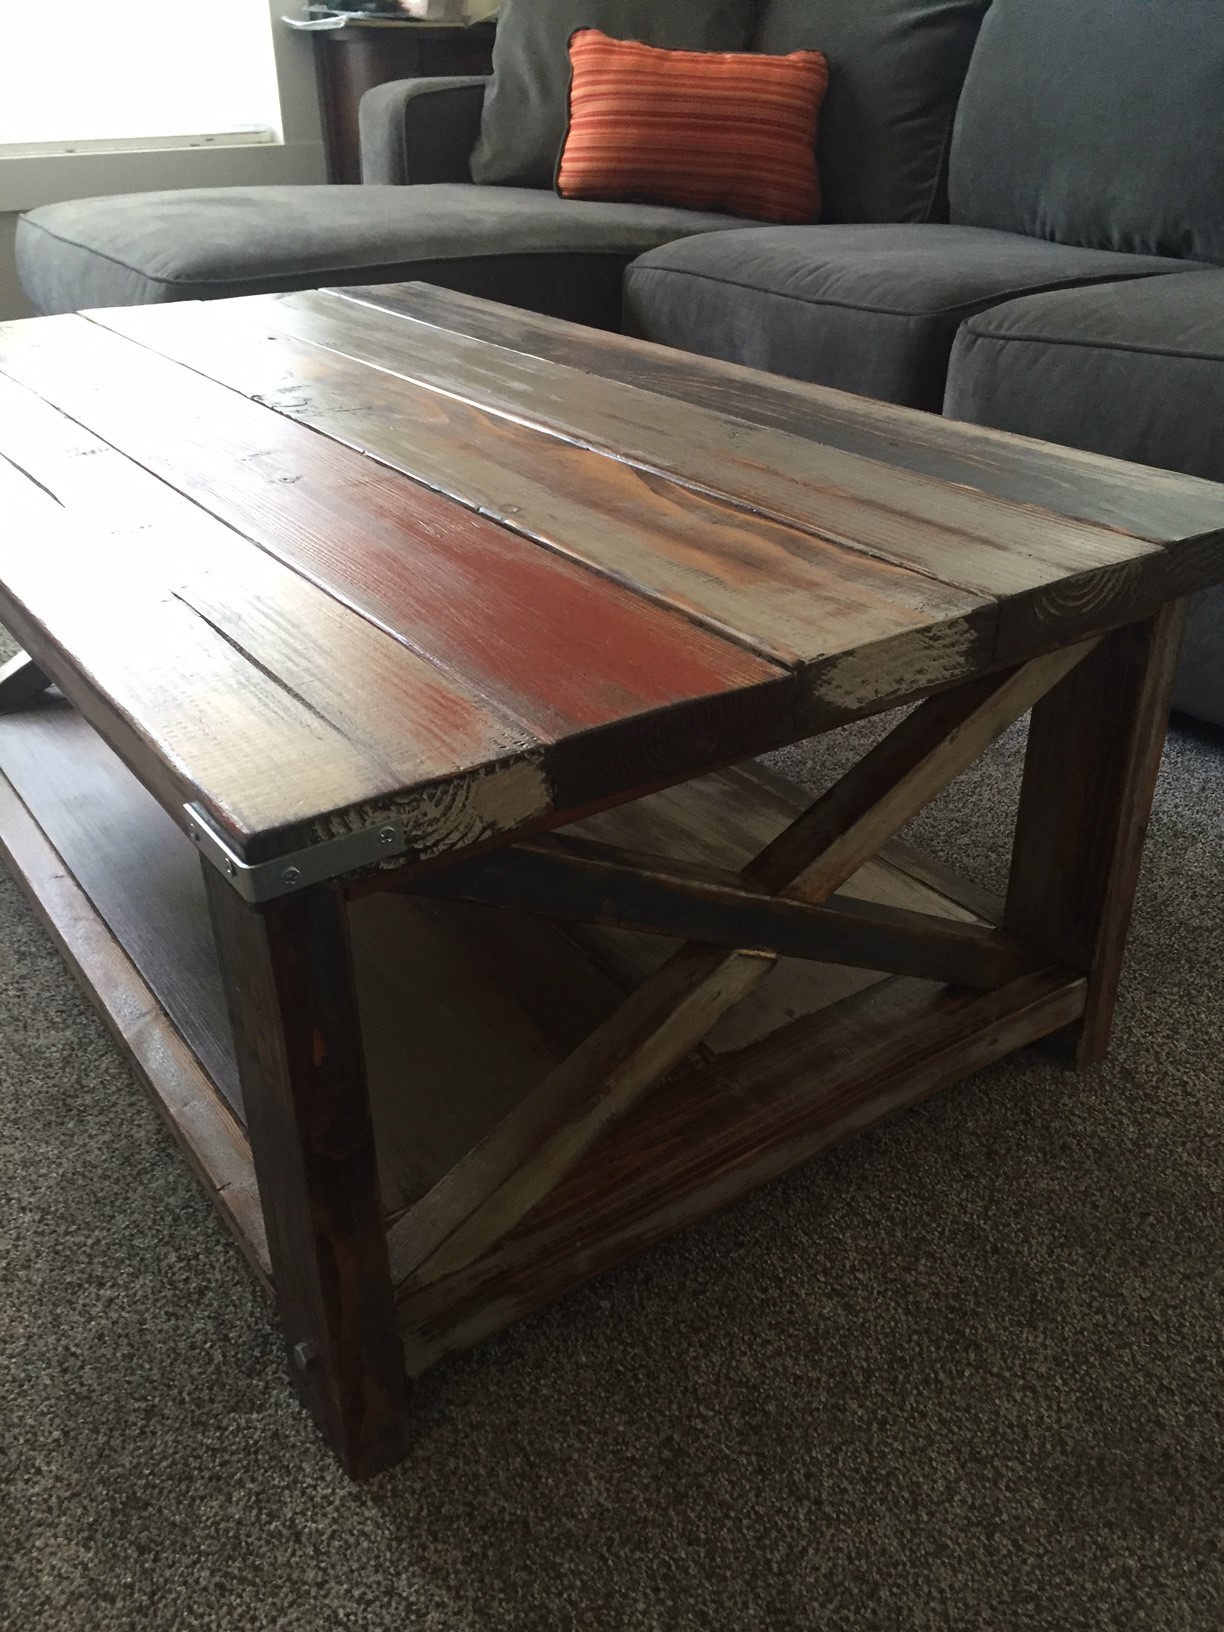
Because we needed this coffee table for a small living room, we scaled the length down a bit from the plans. It worked really well.
Built from Plan(s)
Estimated Time Investment
Weekend Project (10-20 Hours)
Finish Used
To achieve a rustic look I "sloppy painted" with 2 shades of grey, white, rust and some black. Once the paint was thoroughly dry, I used a course grit sandpaper to lightly take off paint in some areas, leaving it thicker in spots. I then applied minwax provincial stain and immediately wiped it. I finished with a satin poly.
Recommended Skill Level
Intermediate
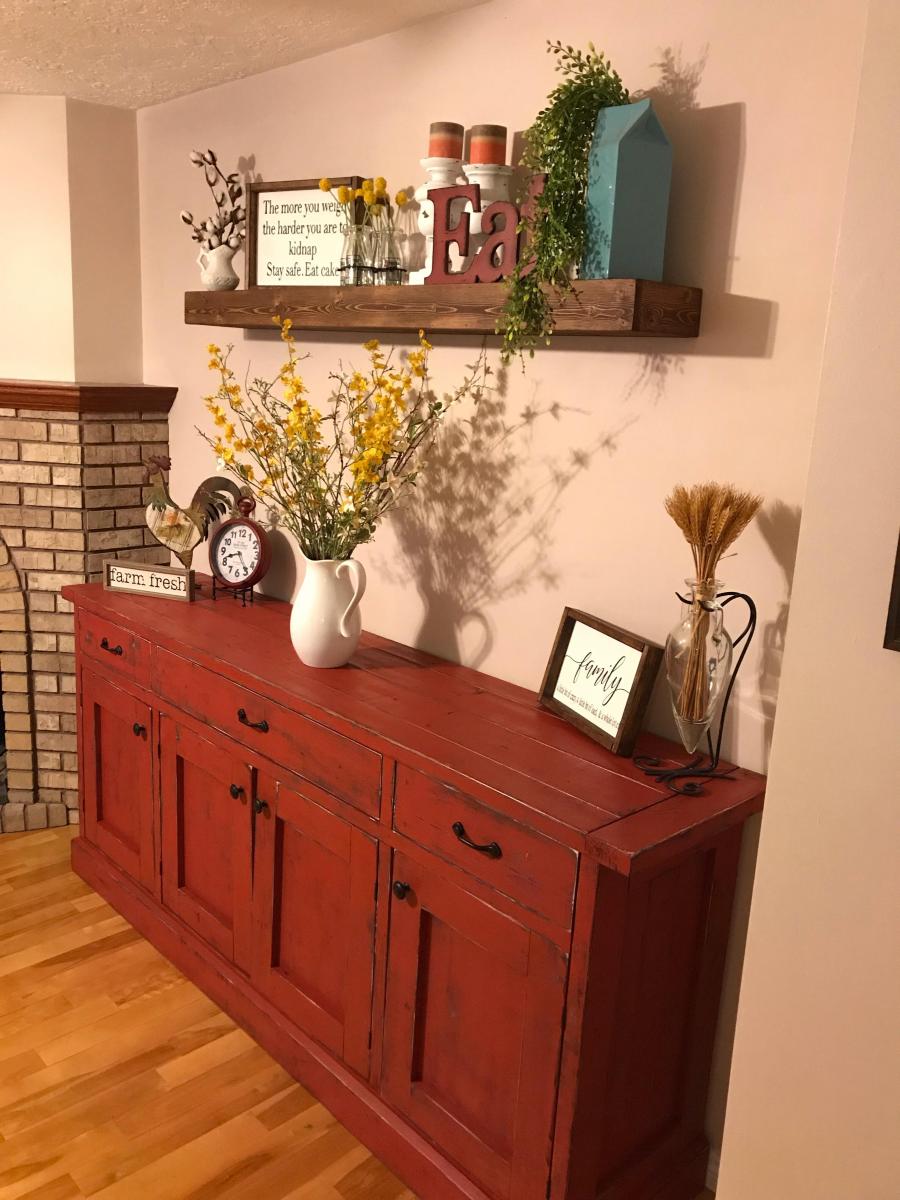
Wood Sideboard
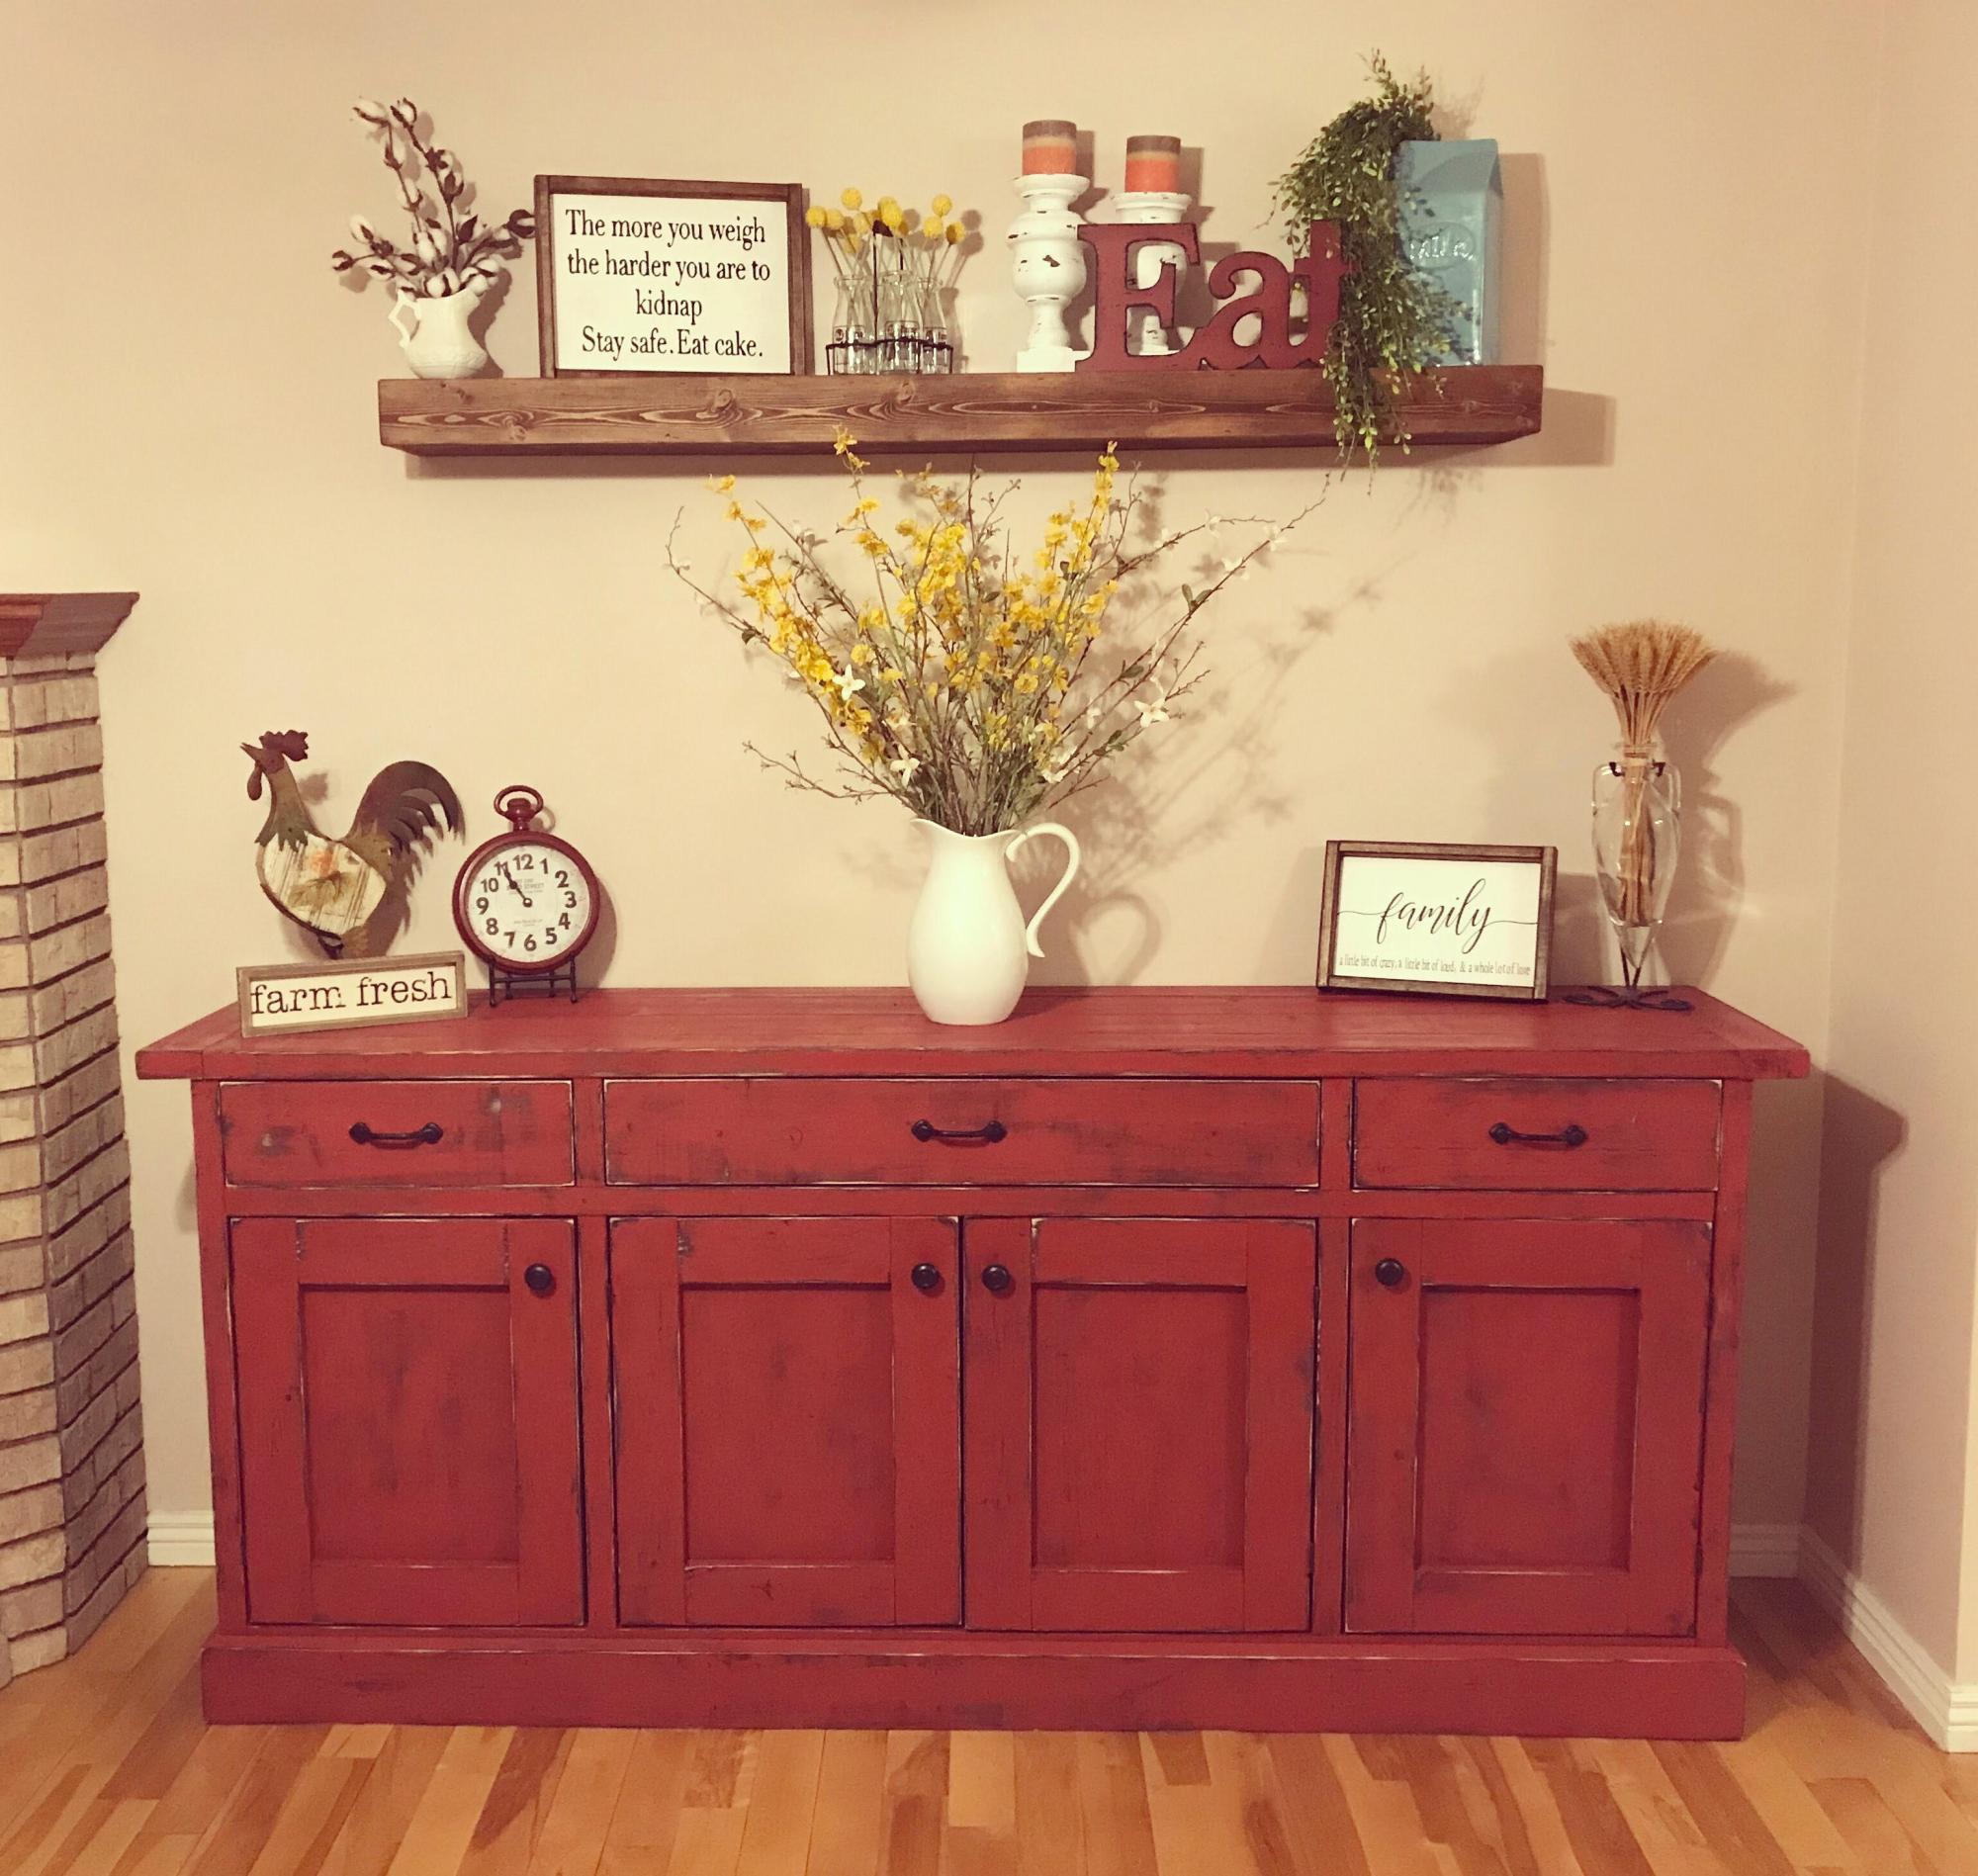
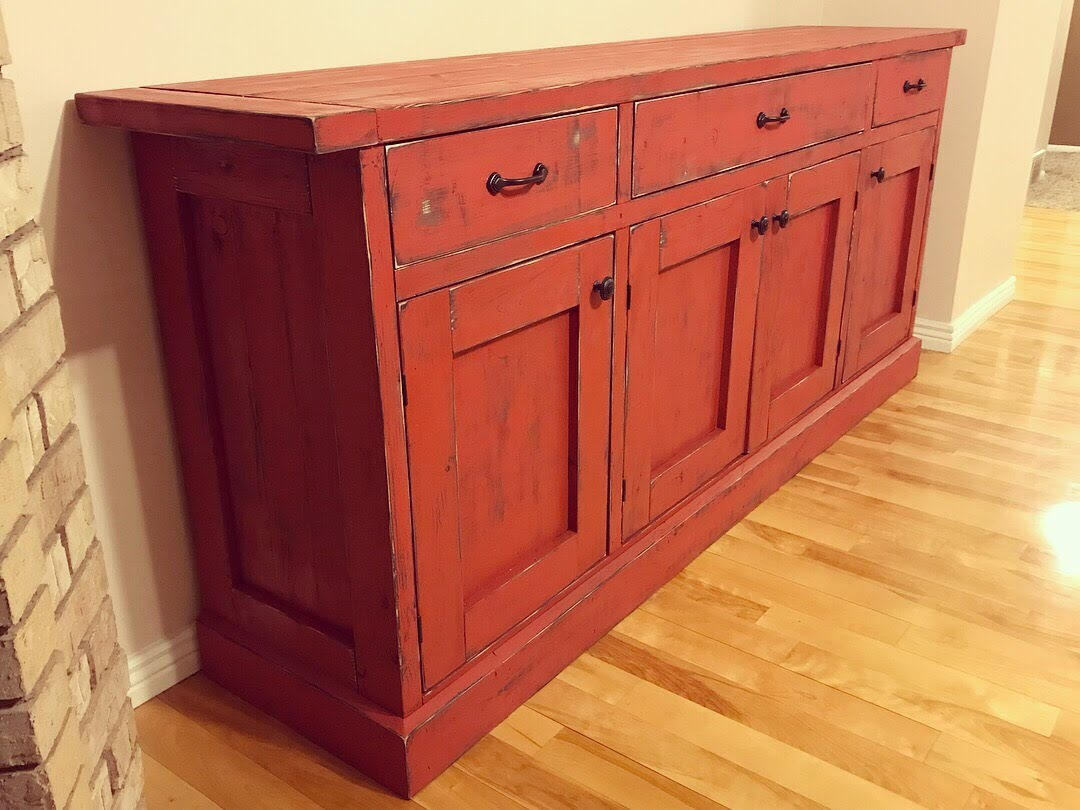
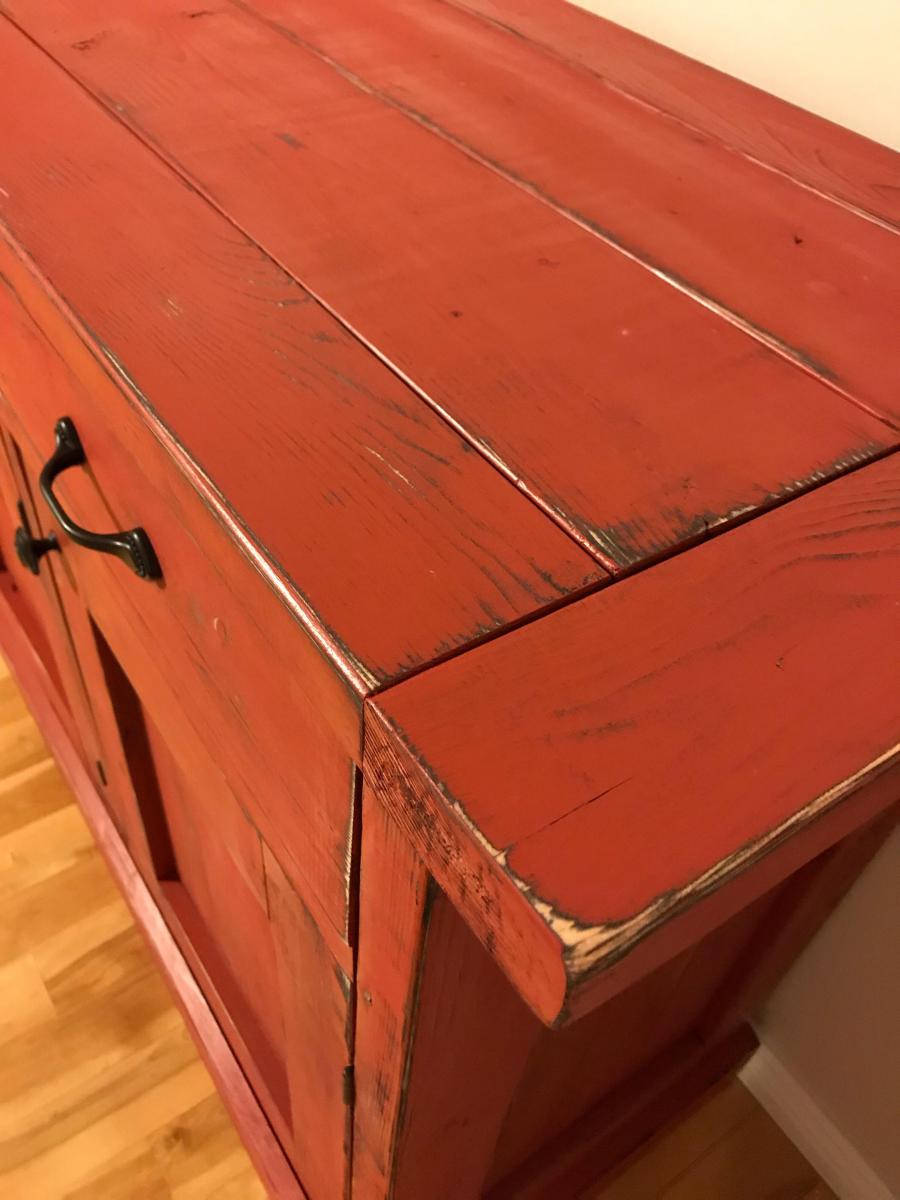
My wife and I originally saw this Ana White planked sideboard and knew it was exactly what our dining room needed! We had the perfect spot for it! The plans were generally easy to follow and it was actually my first time installing drawers! It turned out amazing and we all love it! We love the added storage it provides for dishes and other kitchen accessories.
Built from Plan(s)
Estimated Cost
$250
Estimated Time Investment
Weekend Project (10-20 Hours)
Finish Used
We wanted a unique distressed finish, so after sanding everything good I actually used a black spray paint on most of project (mostly cracks and edges). After the black spray pain dried I Brush painted the entire project with Behr ultra paint (sorry I cannot find the color anywhere!). After the paint dried I sanded in random places, especially the edges to let the black come through, as well as some of the bare wood. This way it had a very rustic worn look of the three different colors (red, black, raw wood).
Recommended Skill Level
Intermediate
Comments
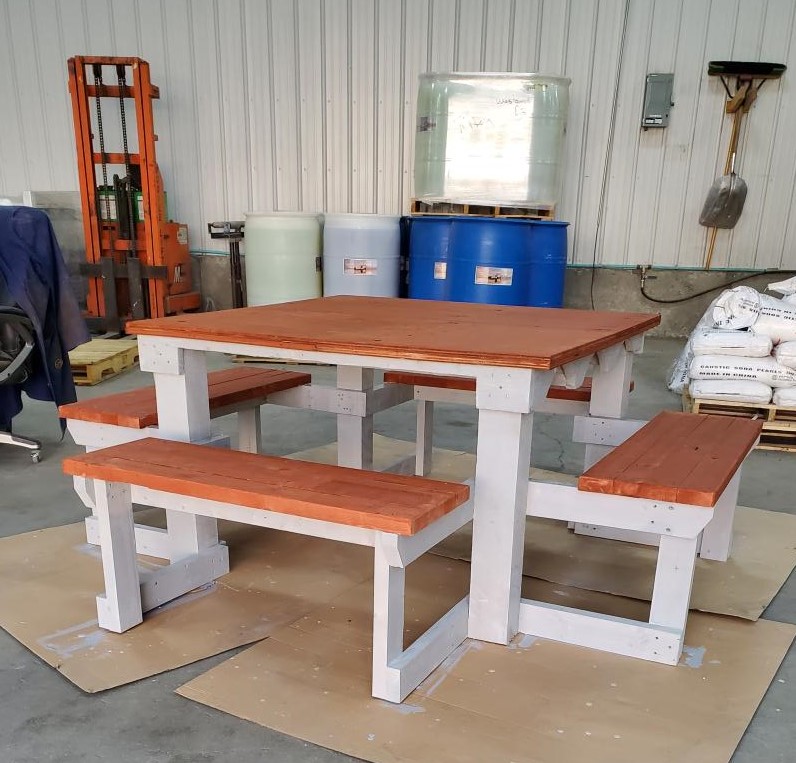
4 sided picnic table
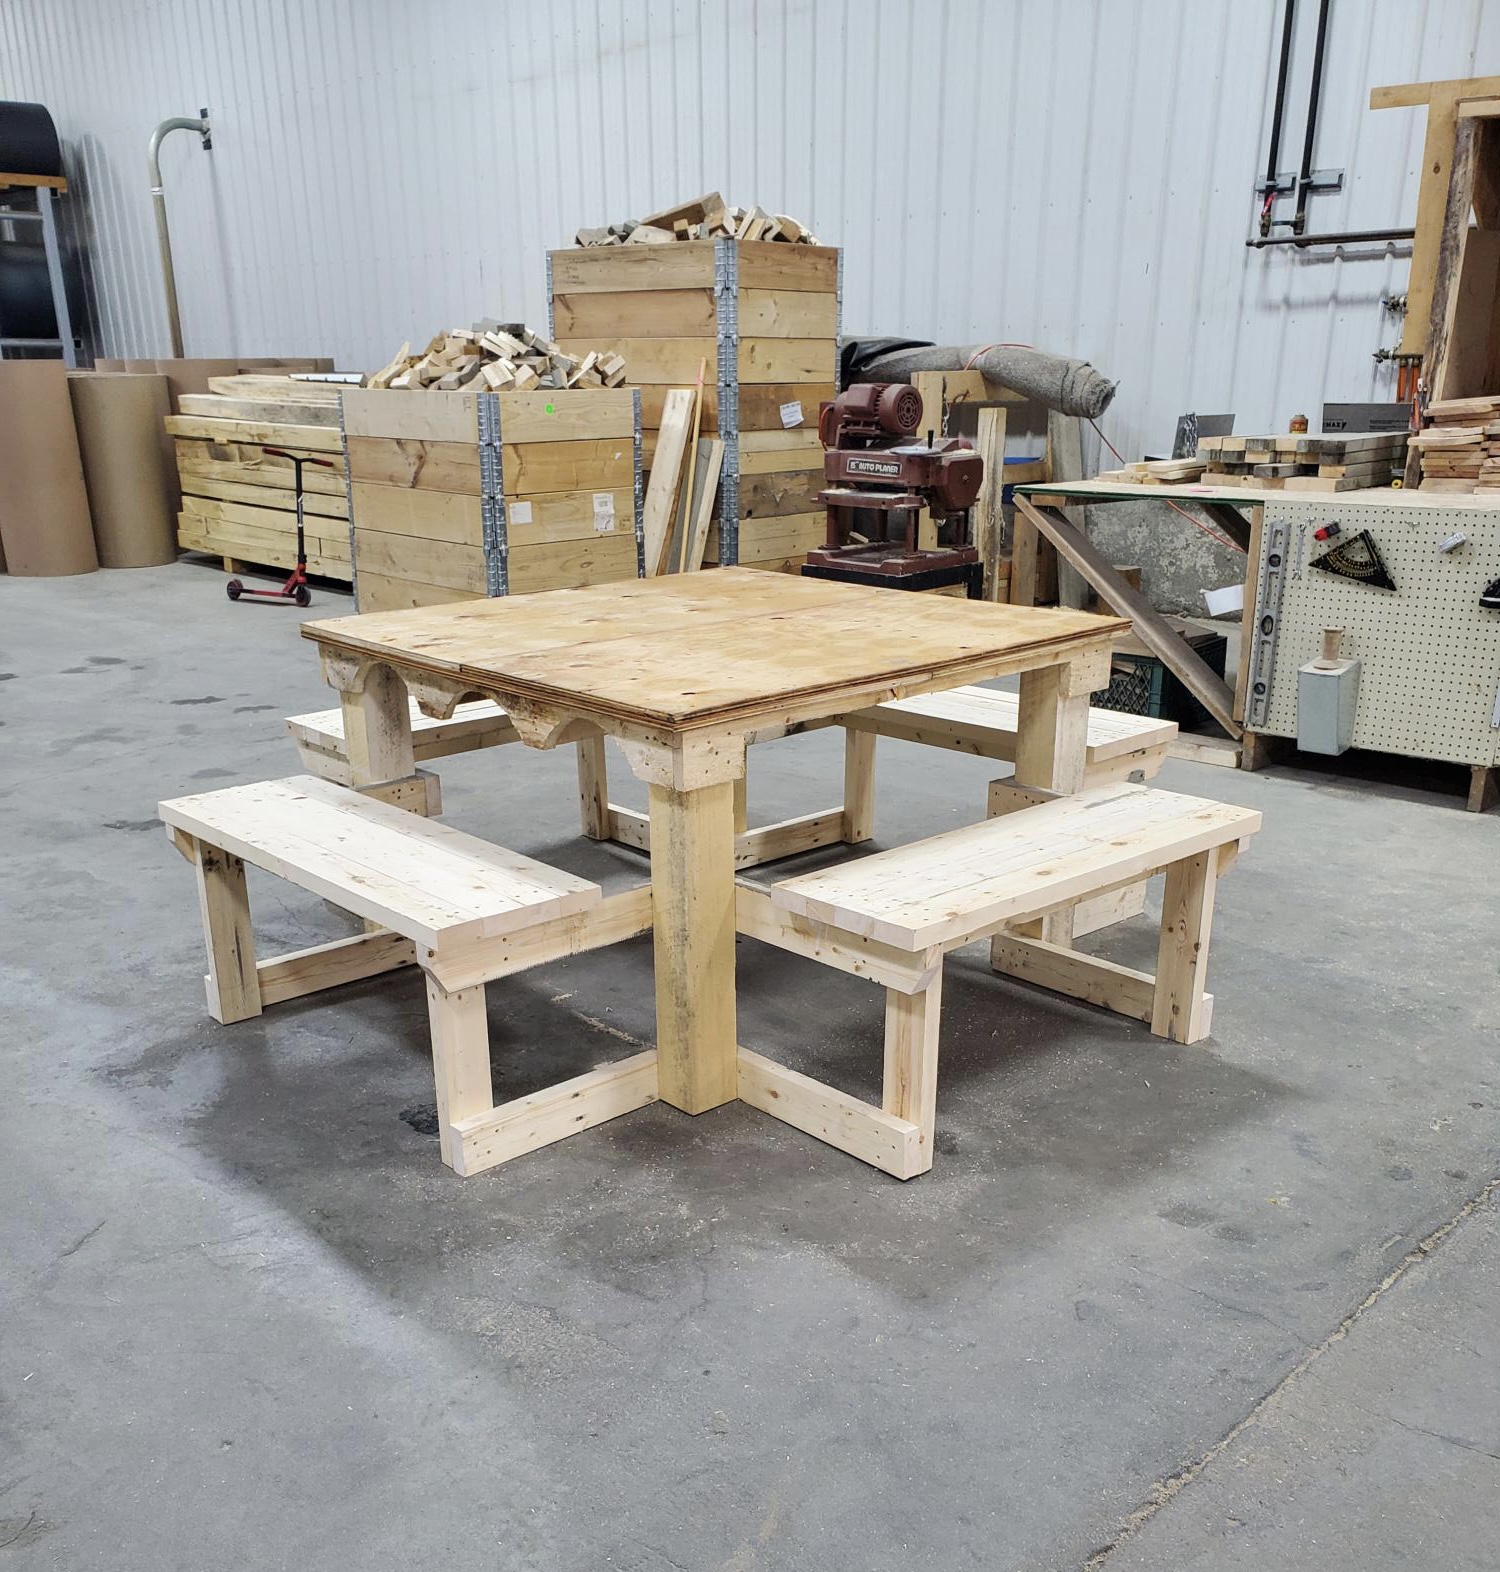
4 sides for the whole family to sit.
Built from Plan(s)
Comments
DVD hutch

Living in a small house, 1100 sq feet, really needed an area devoted to DVD storage, then I thought, why not build my own Entertainment center? This is 1 of 6 pieces.

Built from Plan(s)
Estimated Cost
35.00 combined with logan base total 75.00 including paint!!! such a great price!
Estimated Time Investment
Weekend Project (10-20 Hours)
Finish Used
Stained a lot, 2 coats of White KILZ waterbased latex primer, with 220 grit sanding in between each coat. Think this is VERY important, as it gives you a wonderful canvas to work with.
2 coats of Behr Premium Ultra White High Gloss, again light sanding between each coat.
Modifications: 32 inches wide, 12 inches deep, 5 shelves, each 8.5 inches high, customized to fit dvd's, puck light inserted on top shelf, beadboard to the backing, 1x3 used as trim across top, put together with Kreg
Recommended Skill Level
Beginner
Comments

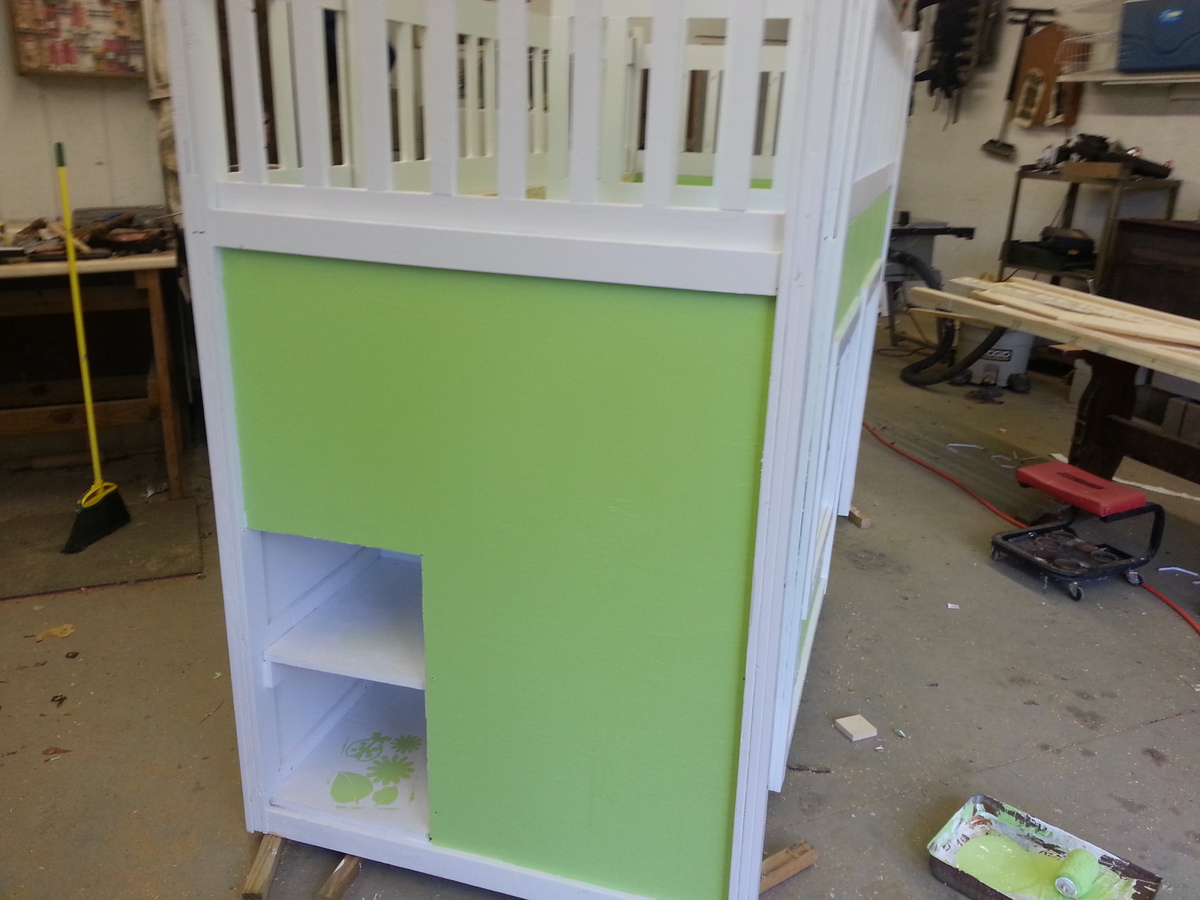
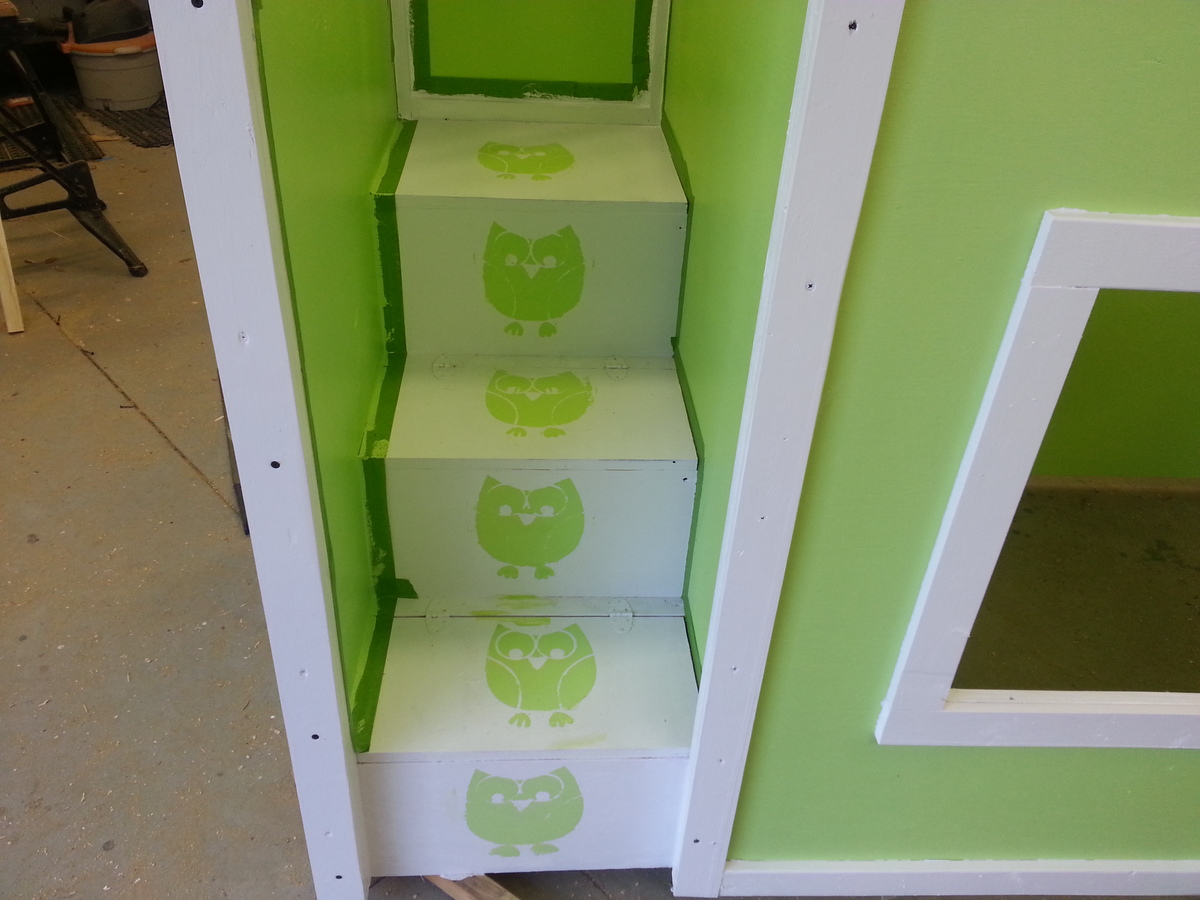
playhouse bed

I altered the plans a bit so this would fit along the wall where we wanted it. I basically shortened the width of the steps. I left the storage under the hinged 1st and second steps but I put in a shelf style cubby under the top step. This worked out to more useable space for us. I used cheap wood and just plained them down. I think I spent around 300 dollars including paint. But I also used a full sheet of plywood on the back as well.
Estimated Cost
300
Estimated Time Investment
Weekend Project (10-20 Hours)
Finish Used
Paint by Valspar.
Recommended Skill Level
Intermediate
Rustic farmhouse bed
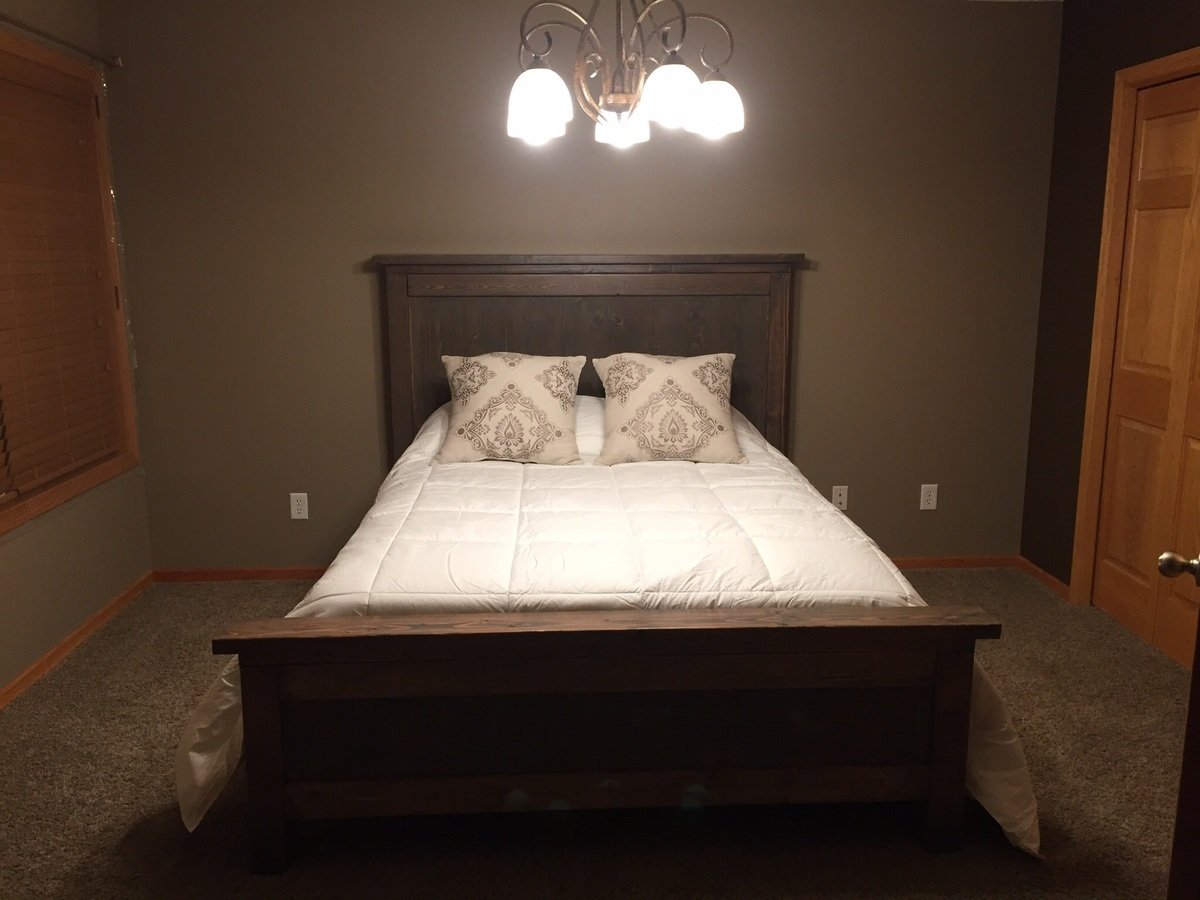
My second Ana project. Only modifications I made where to use 2x10 for side rails with a cleat system. Heavy duty bed rail hardware purchased from Amazon....Used 2 coat stain process followed with matte poly to finish
Built from Plan(s)
Estimated Time Investment
Weekend Project (10-20 Hours)
Finish Used
Weathered grey stain initially. Light sand. Followed by dsrk kona stain
Recommended Skill Level
Beginner
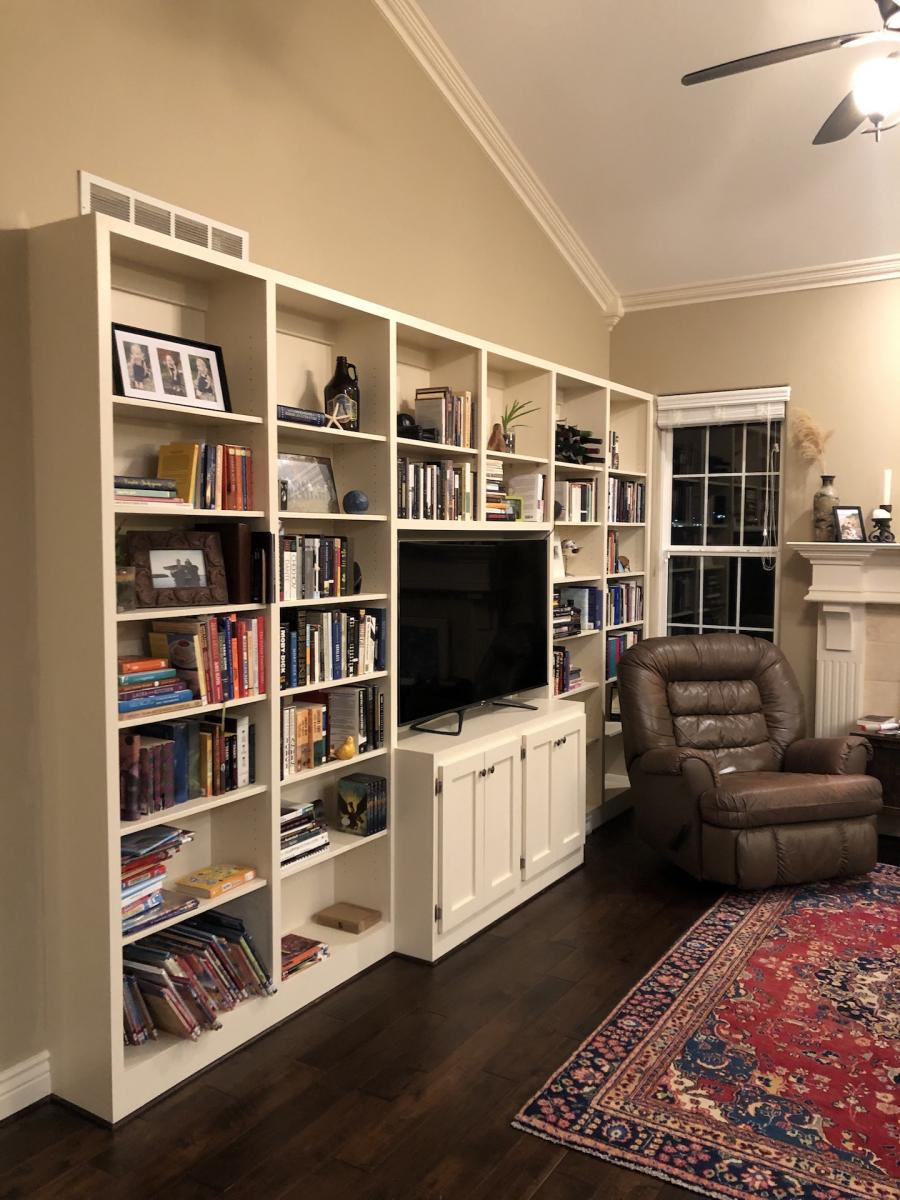
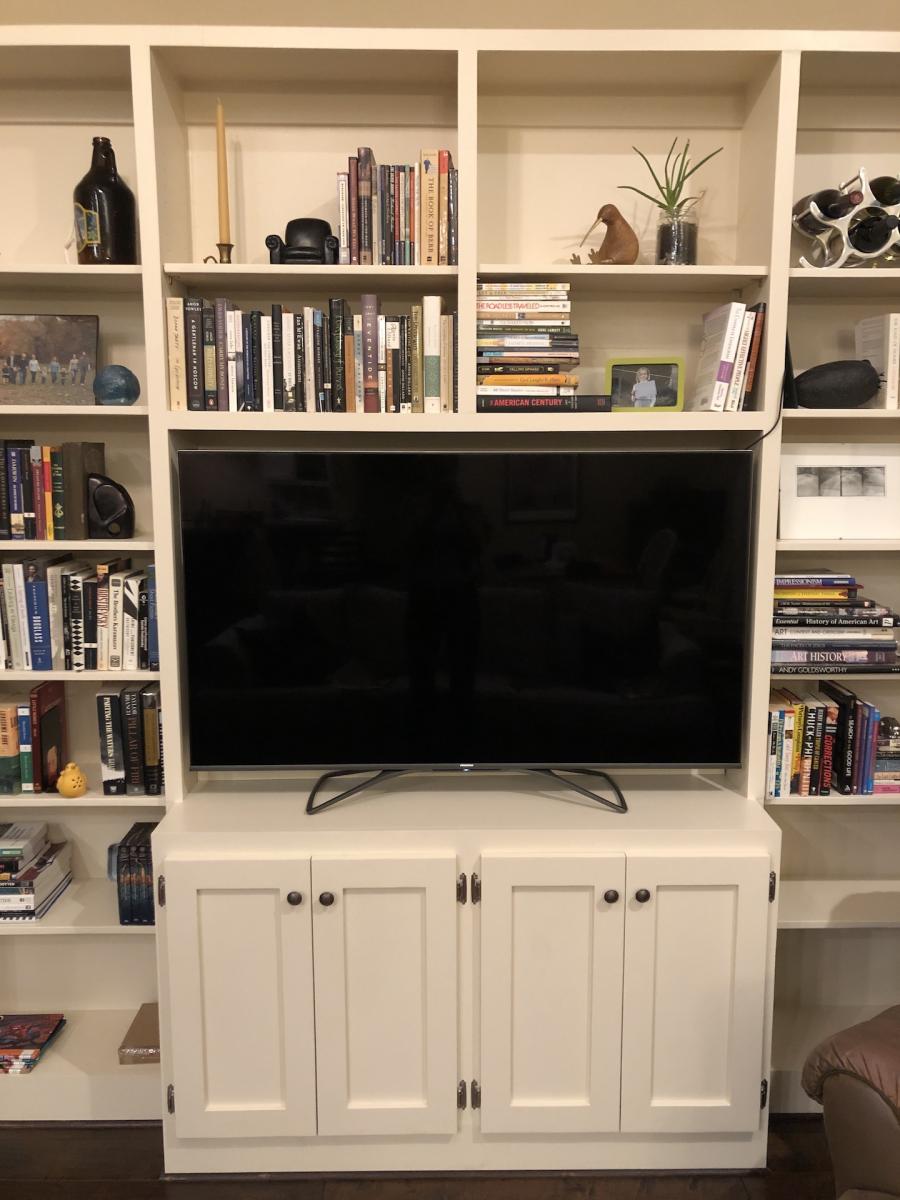
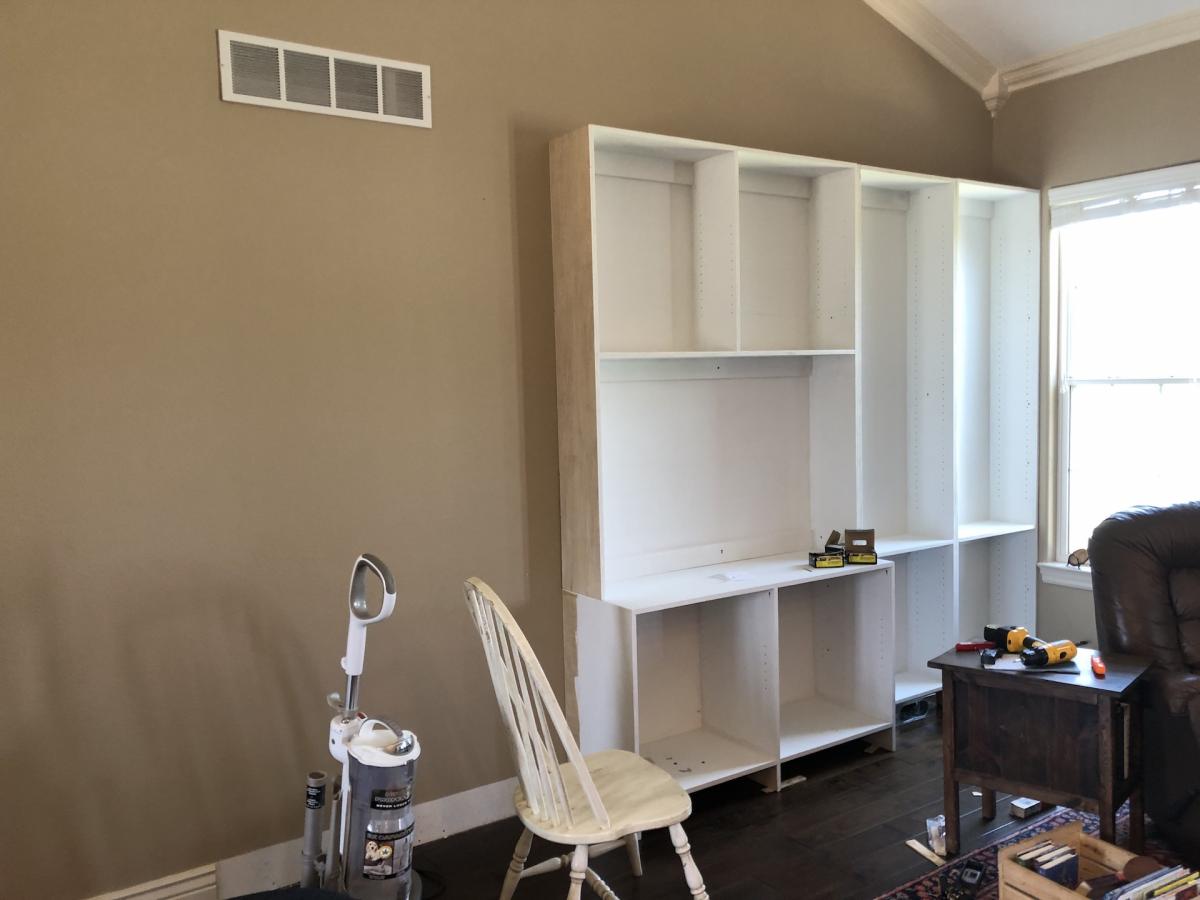
Built-in Bookshelves
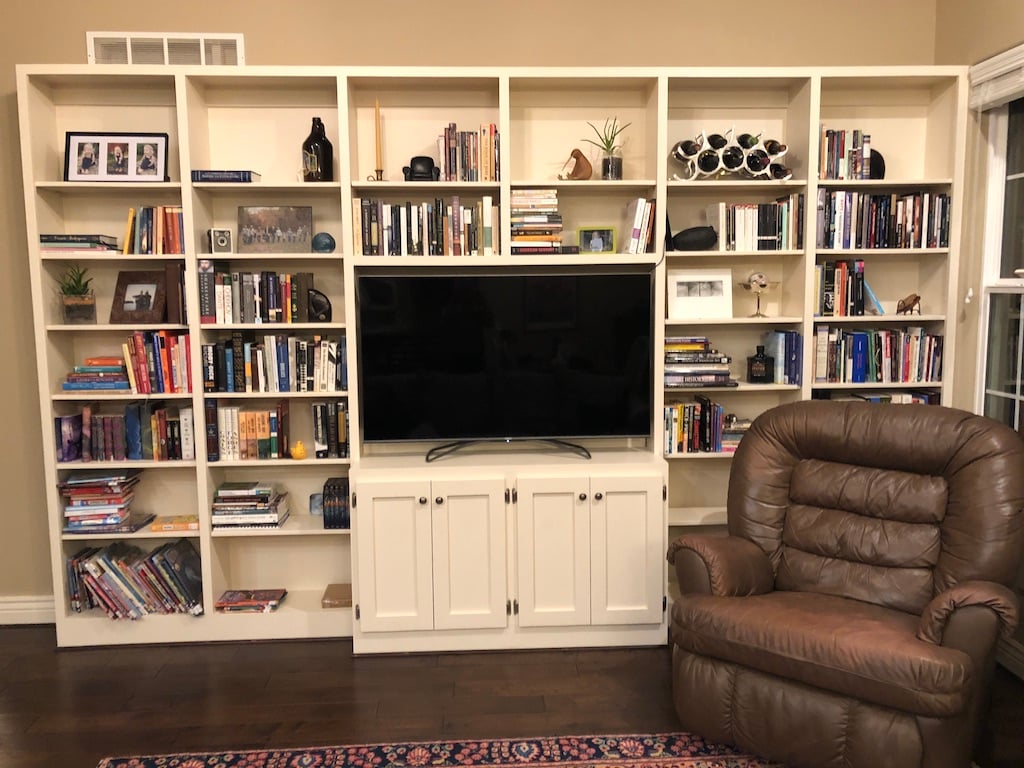
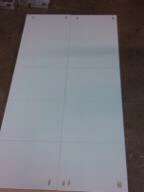
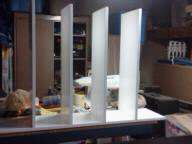
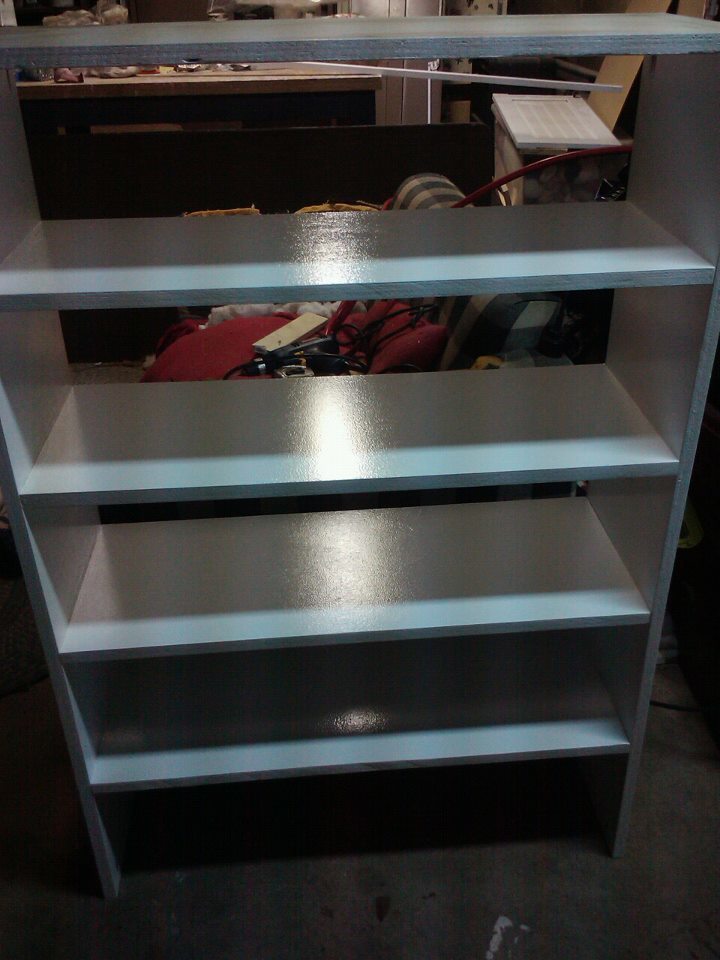
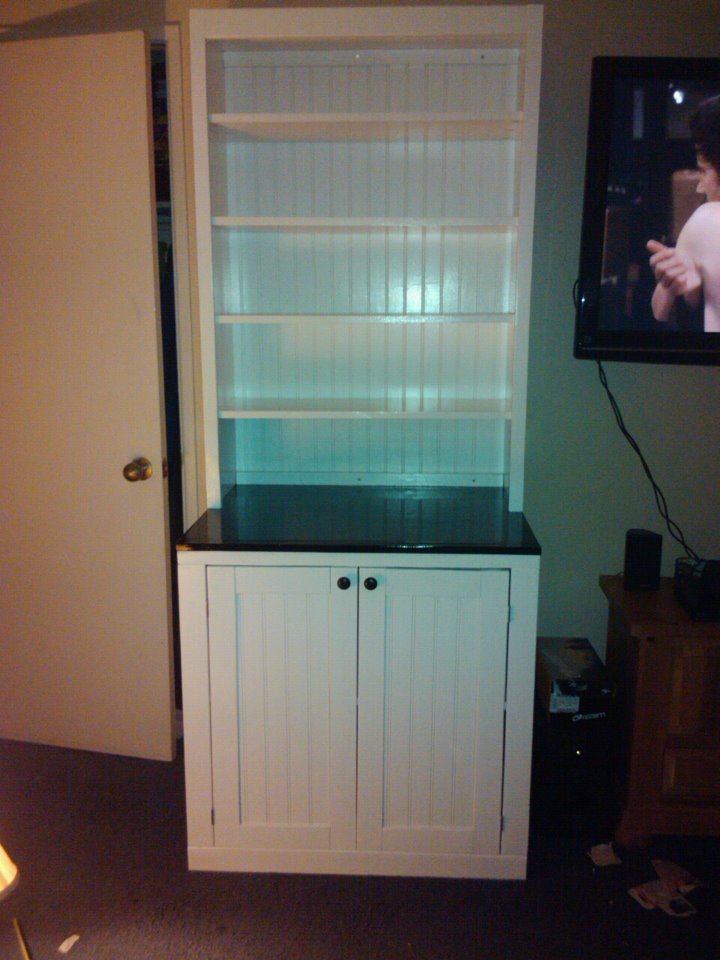
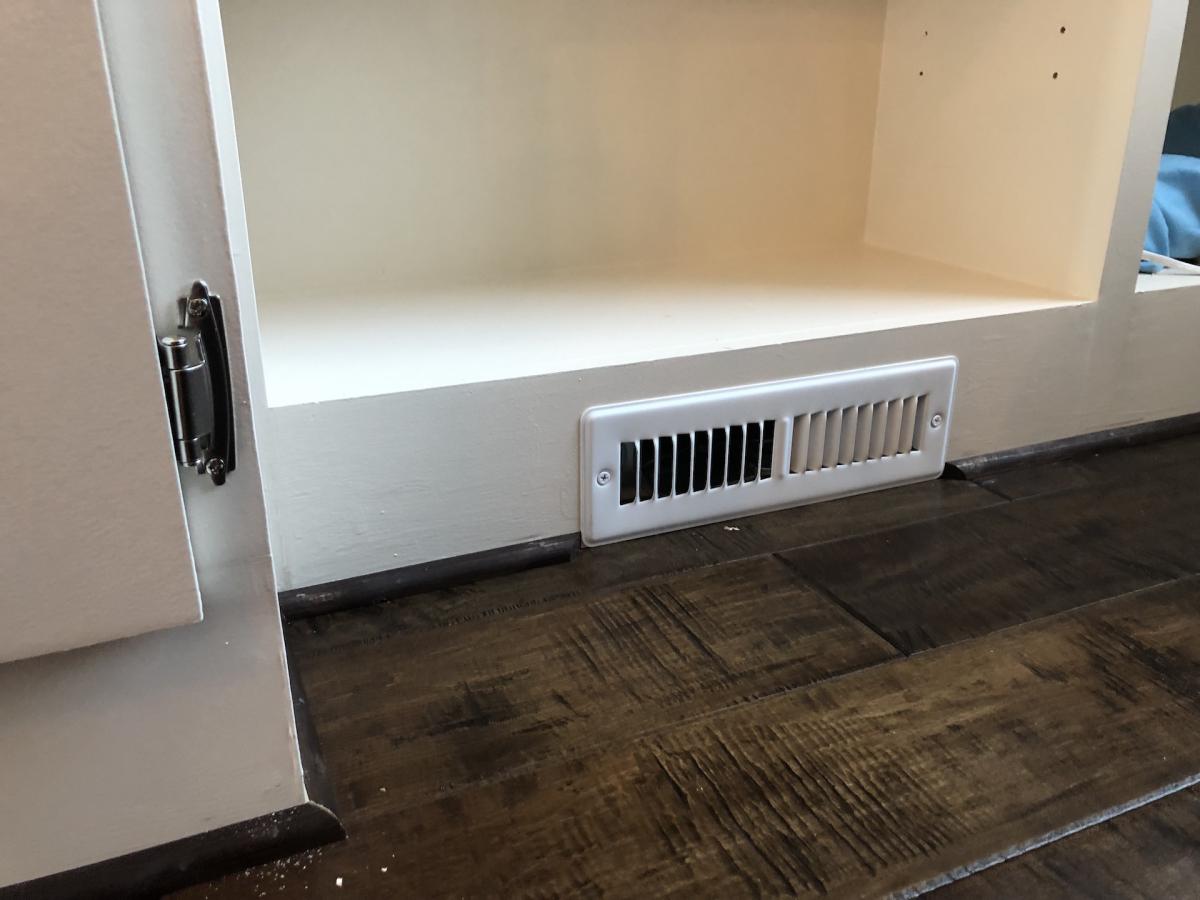
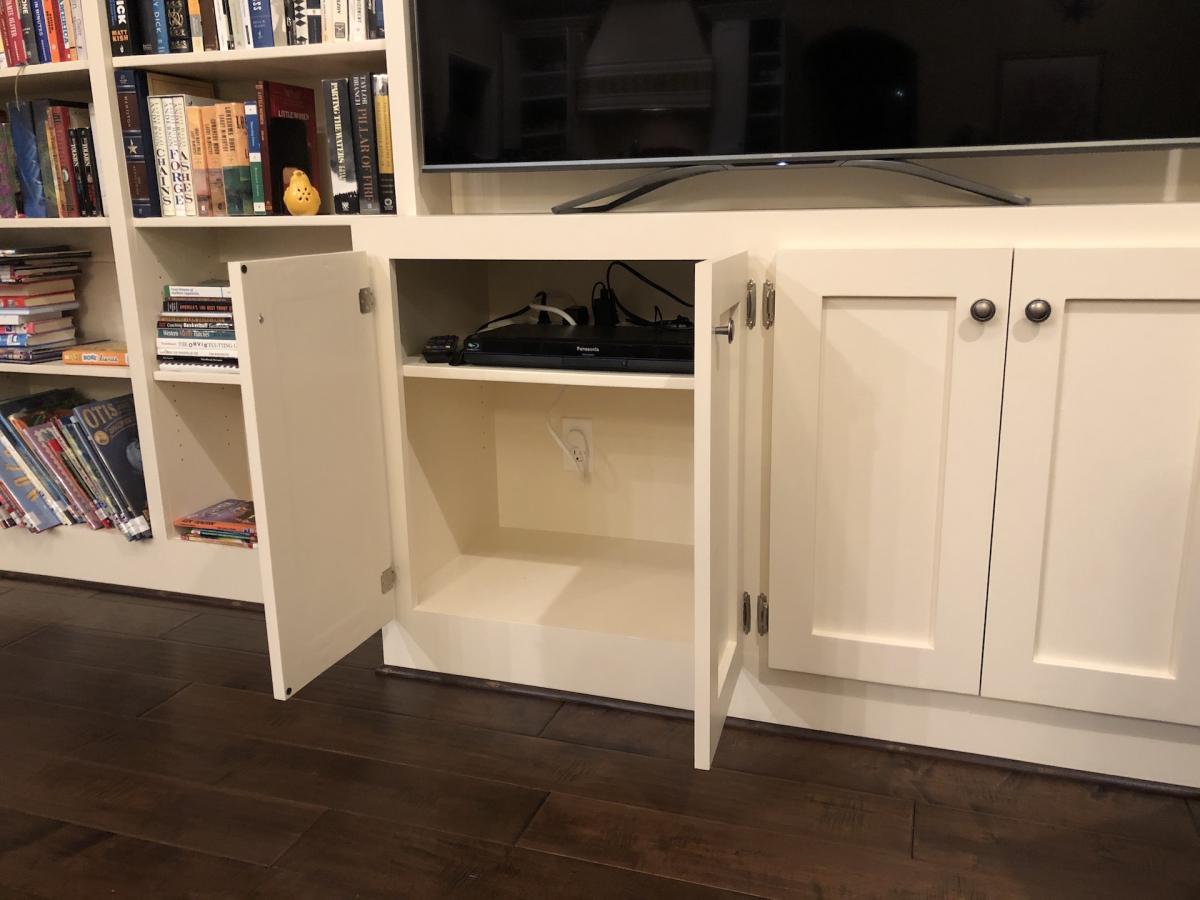
I built this project in 6 separate pieces before installing it in our home. I pulled the baseboard and attached it to the wall to give it a built-in feel. For the majority of the project, I used 3/4" plywood with the exception if 1/4" plywood for the back of the shelves as well as the centers of the cabinet doors. For the trim, I used select pine boards. I had to work around an airconditioning vent that was in the floor. I was able to divert it to run out the bottom of the bookcase.
This build is loosely based on the Willy Bookcase. I actually found another brag post on the Willy Bookcase that was immensely helpful in constructing my project. I'm so grateful for the brag boards! Instead of fixing all of the shelves like the Willy, I used a Kreg shelf pin jig to make the shelves adjustable. The shelf that lines up with the TV is fixed for stability.
The estimate below covers all of the wood, paint, screws, hardware, etc. For fun, I'm including an in progress photo to illustrate the process. Thanks for looking!
Also, a note - this is a relatively easy project, however, I listed it as "intermediate" because of the cabinet doors. They definitely made it more complicated!
Built from Plan(s)
Estimated Cost
600
Estimated Time Investment
Week Long Project (20 Hours or More)
Finish Used
Sherwin Williams paint custom matched to trim.
Recommended Skill Level
Intermediate
Comments
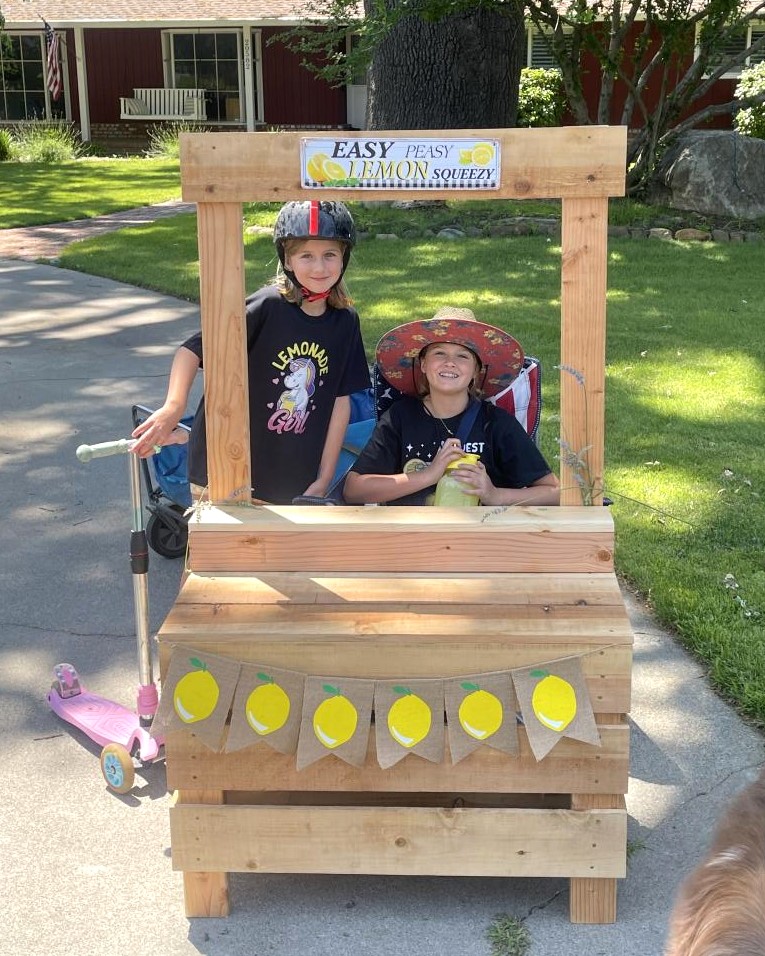
LEMONADE STAND
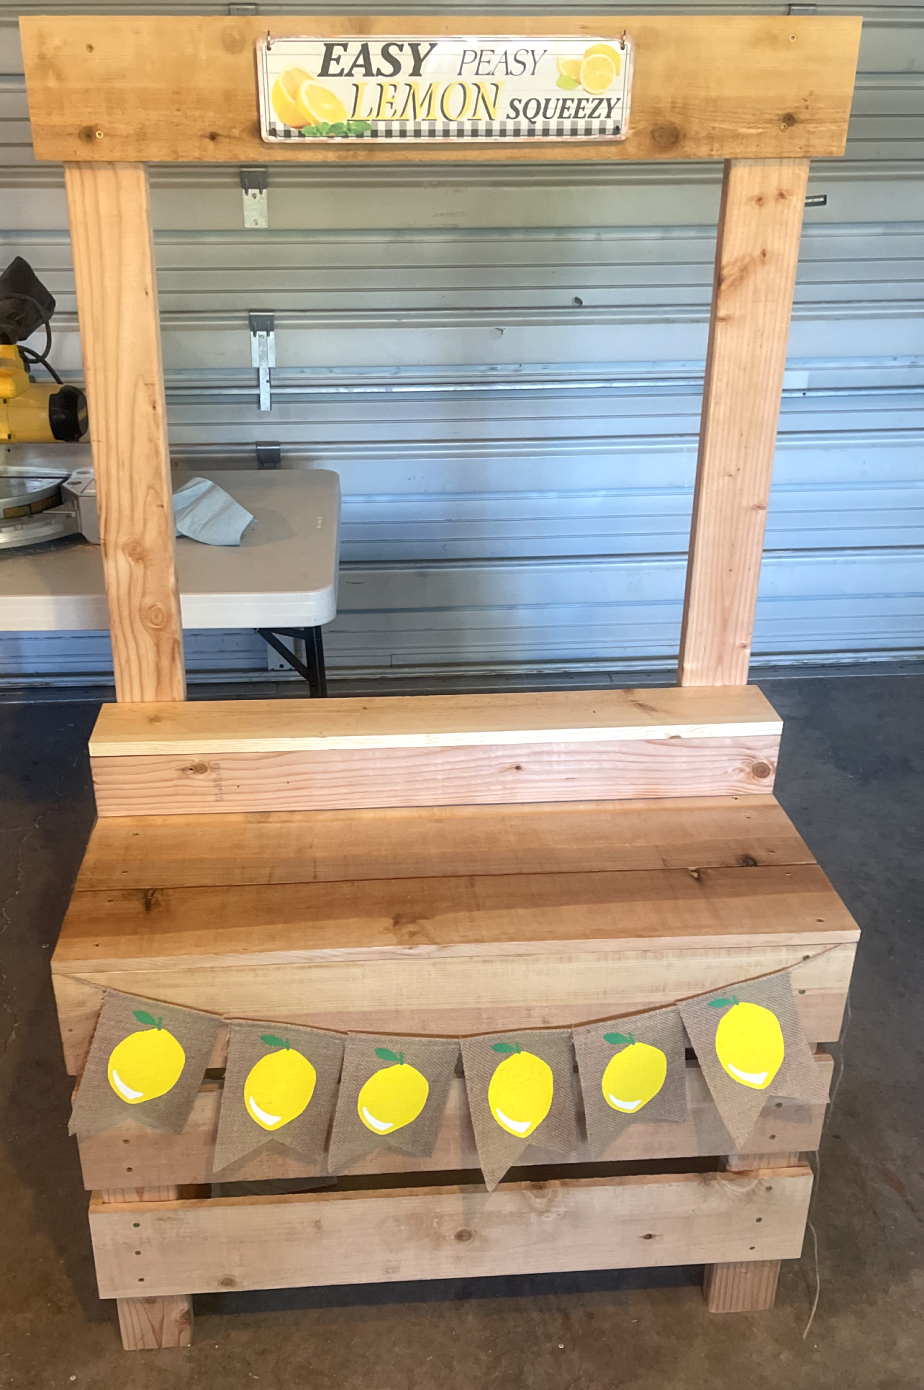
My granddaughters took this home today and had a sale right away. SO MUCH fun to build this for them! Can’t wait to start another project! Thank you Ana!!!
Built from Plan(s)