Playhouse - Drew Gaffke
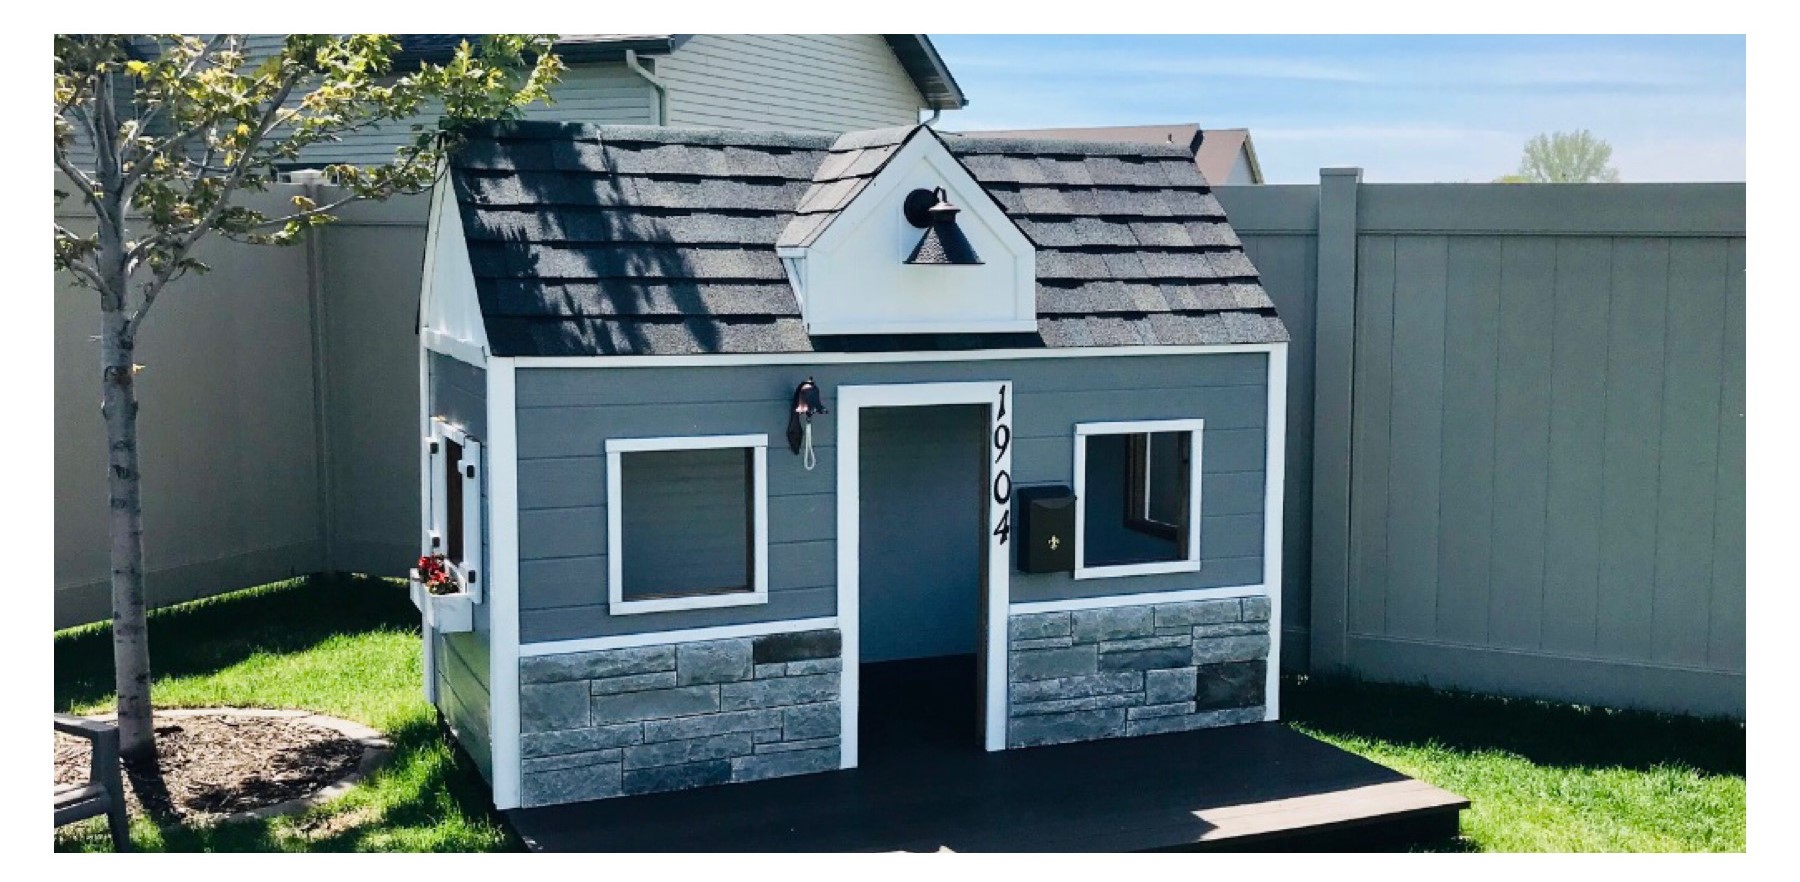
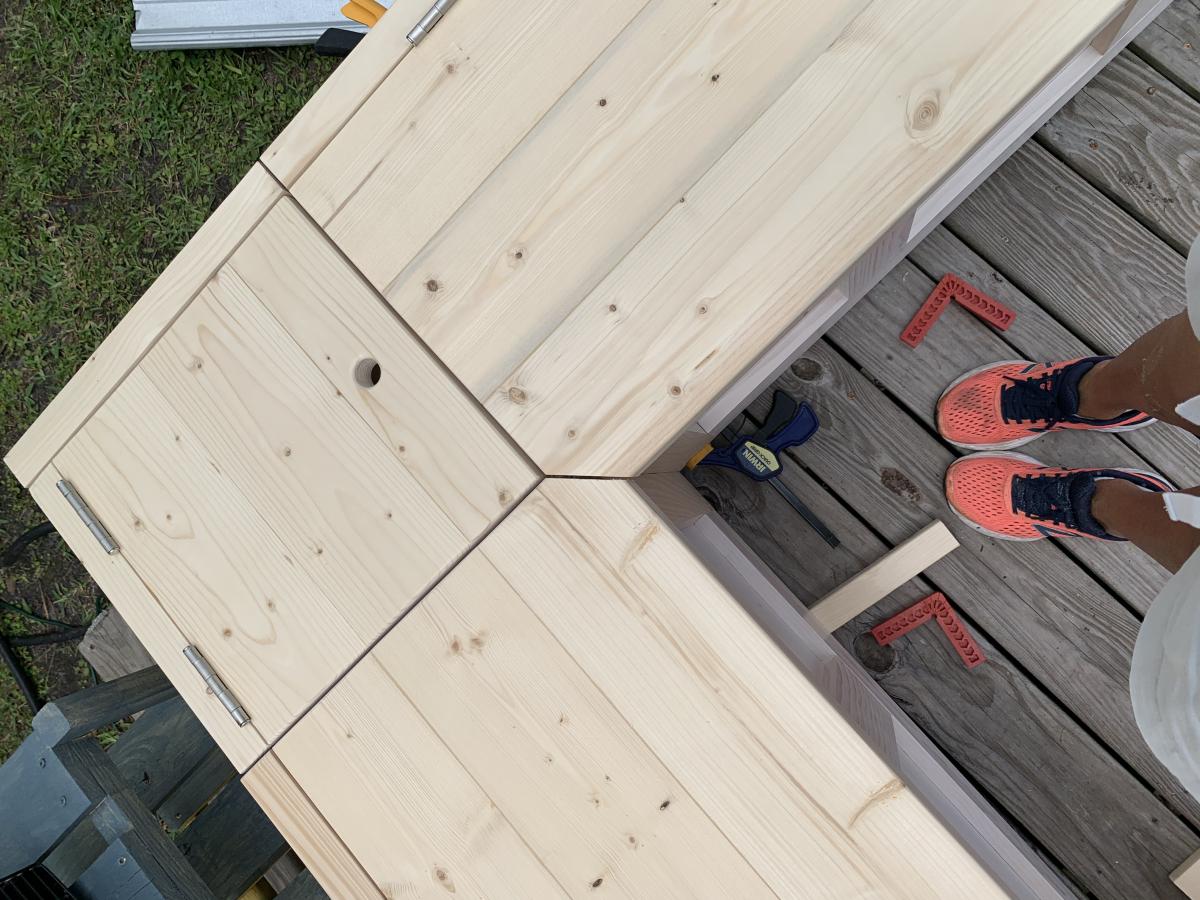
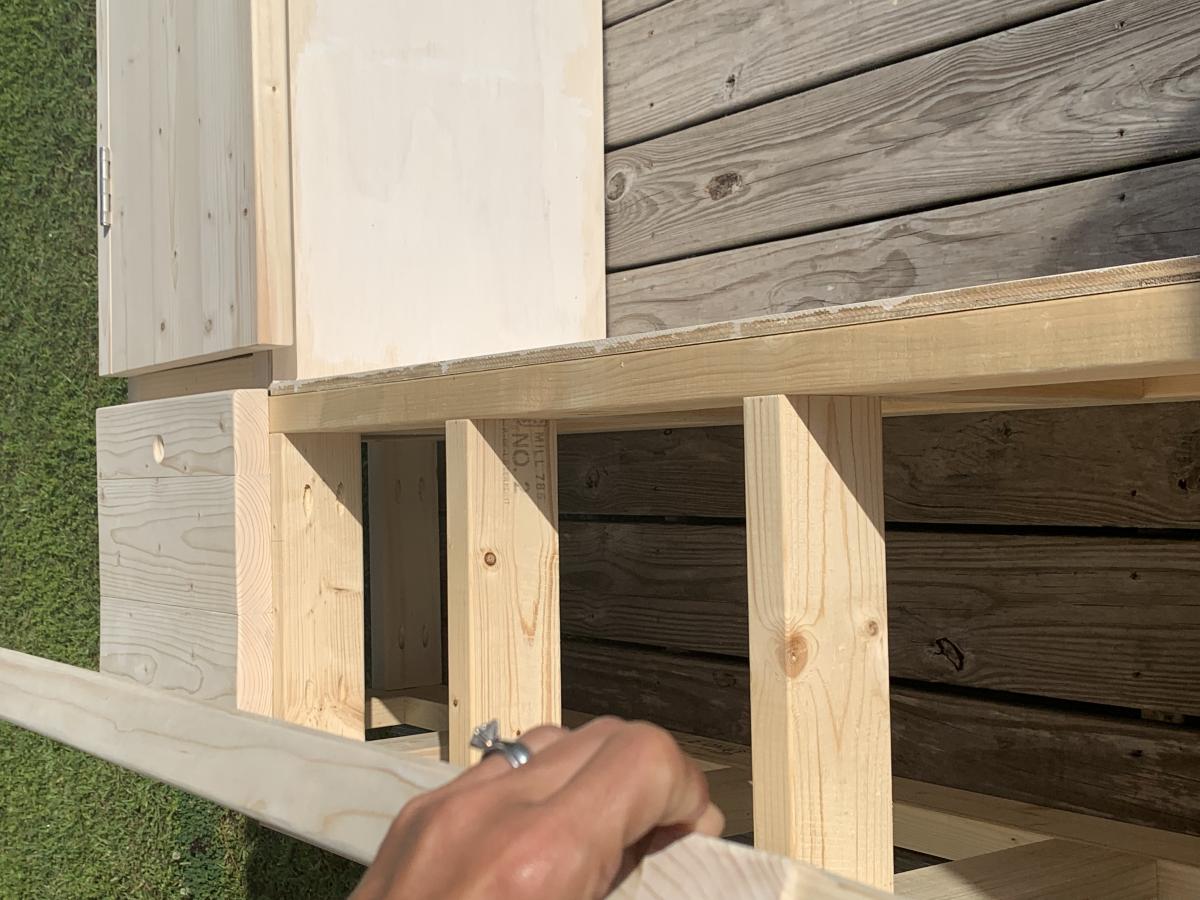
I combined a couple of playhouse plans for this one. The framing is 2x2 treated pine. The front is real stone. I tried to match our home the best that I could. The floor is made out of composite decking.
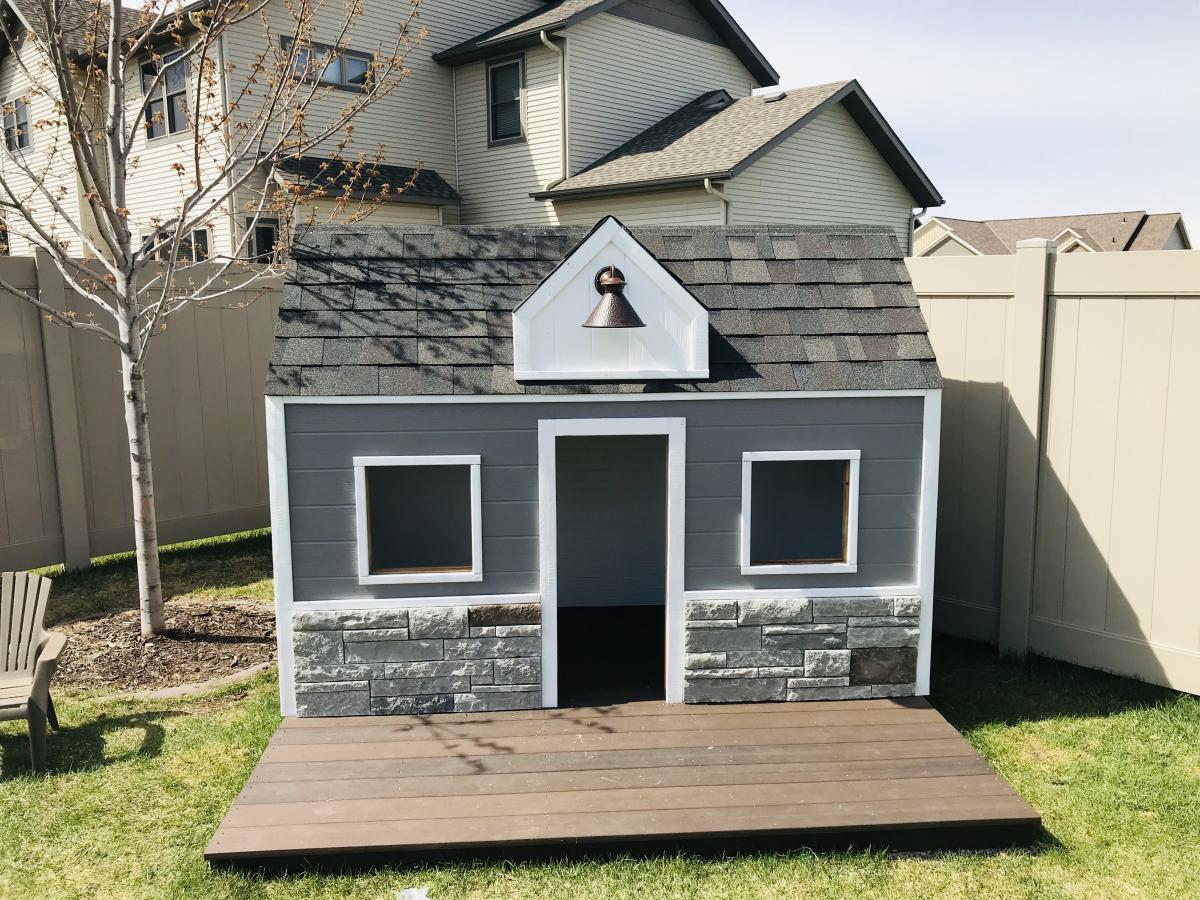
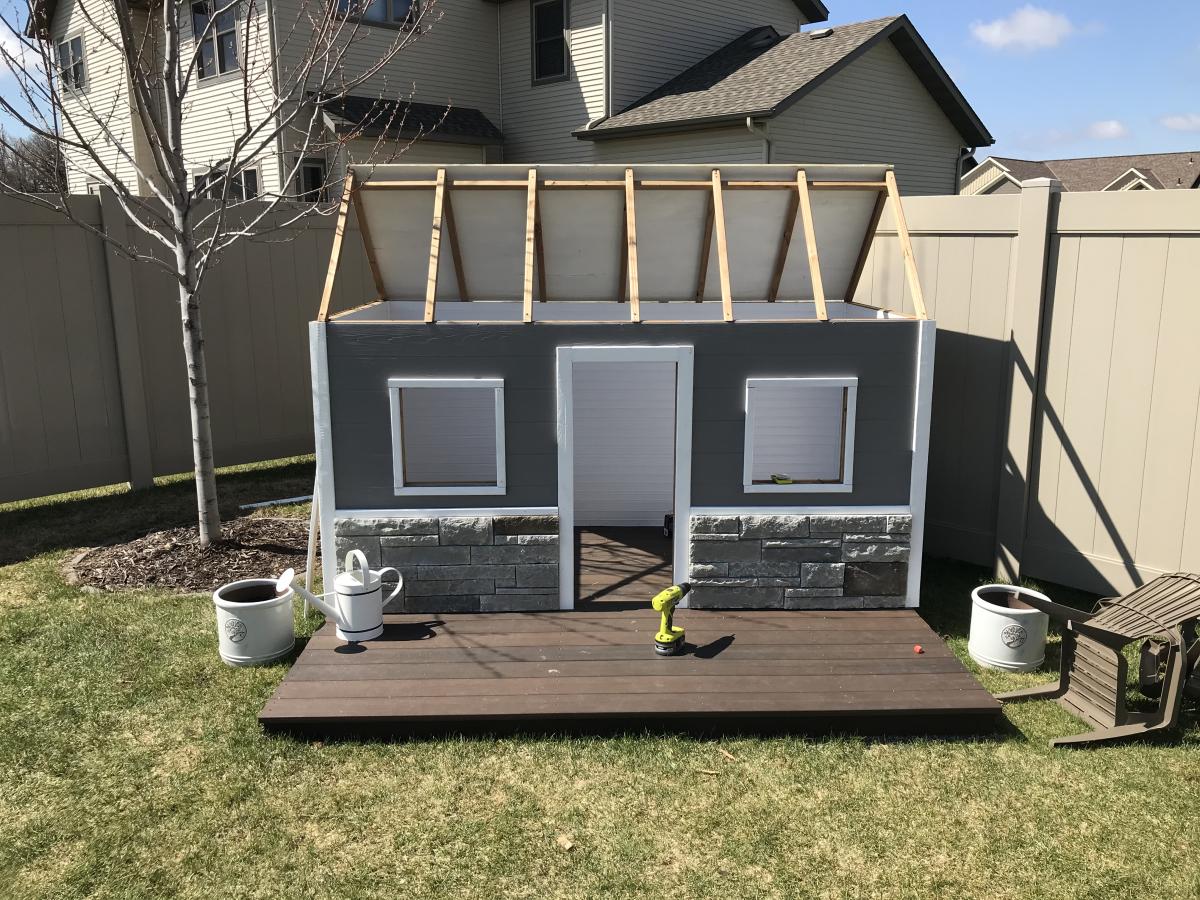
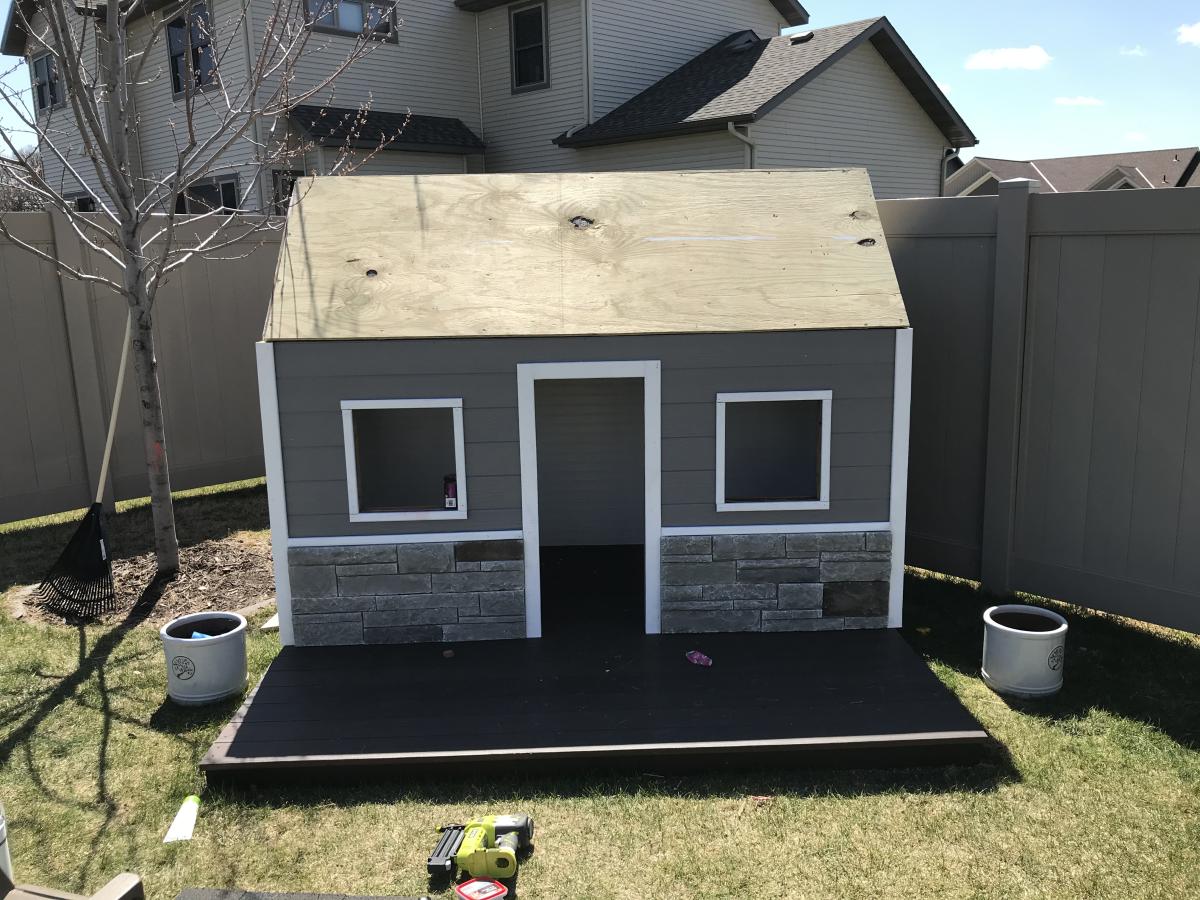
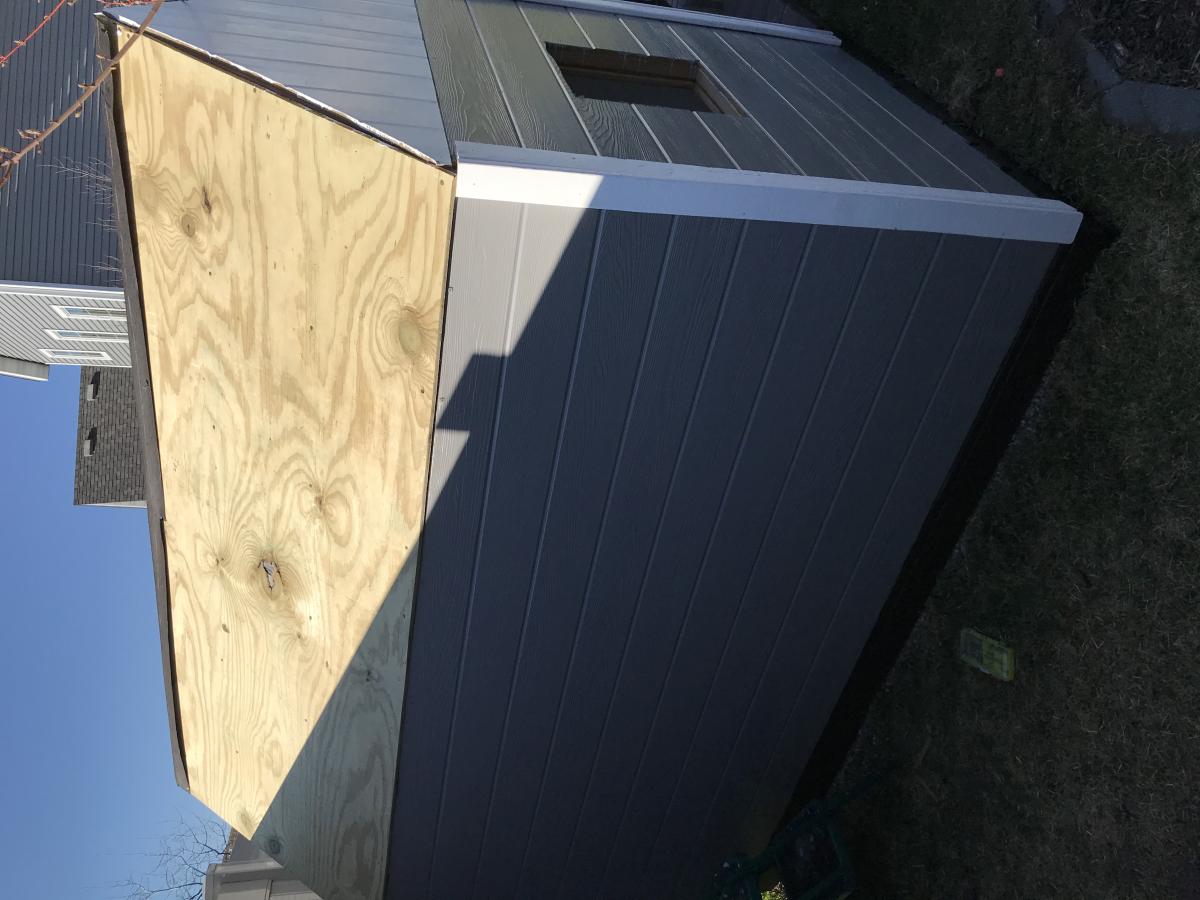
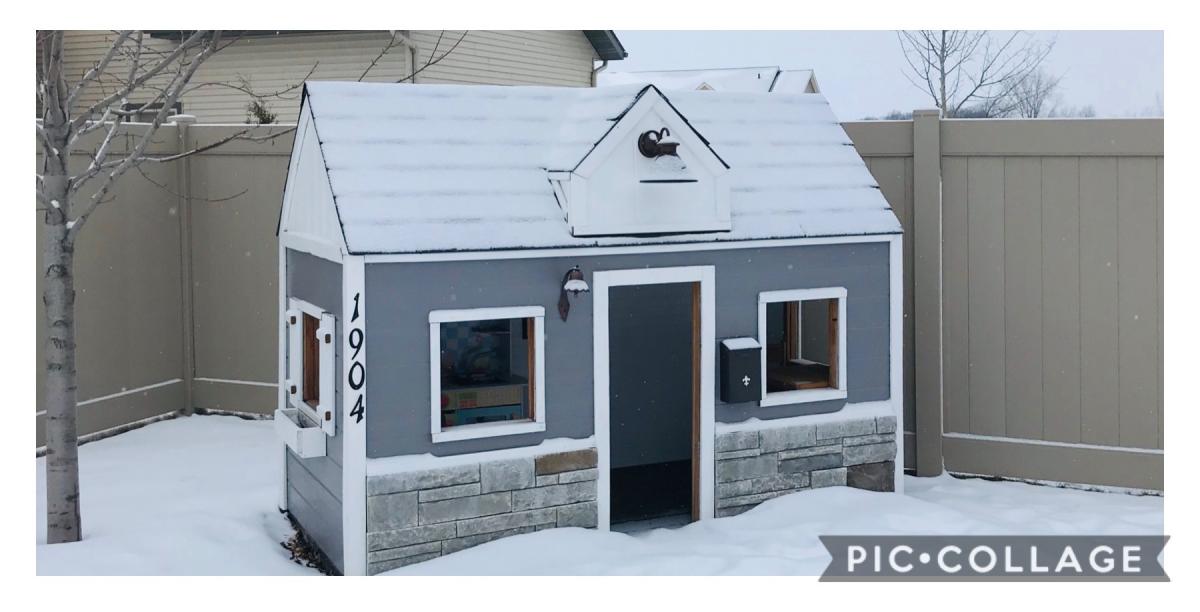
I combined a couple of playhouse plans for this one. The framing is 2x2 treated pine. The front is real stone. I tried to match our home the best that I could. The floor is made out of composite decking.
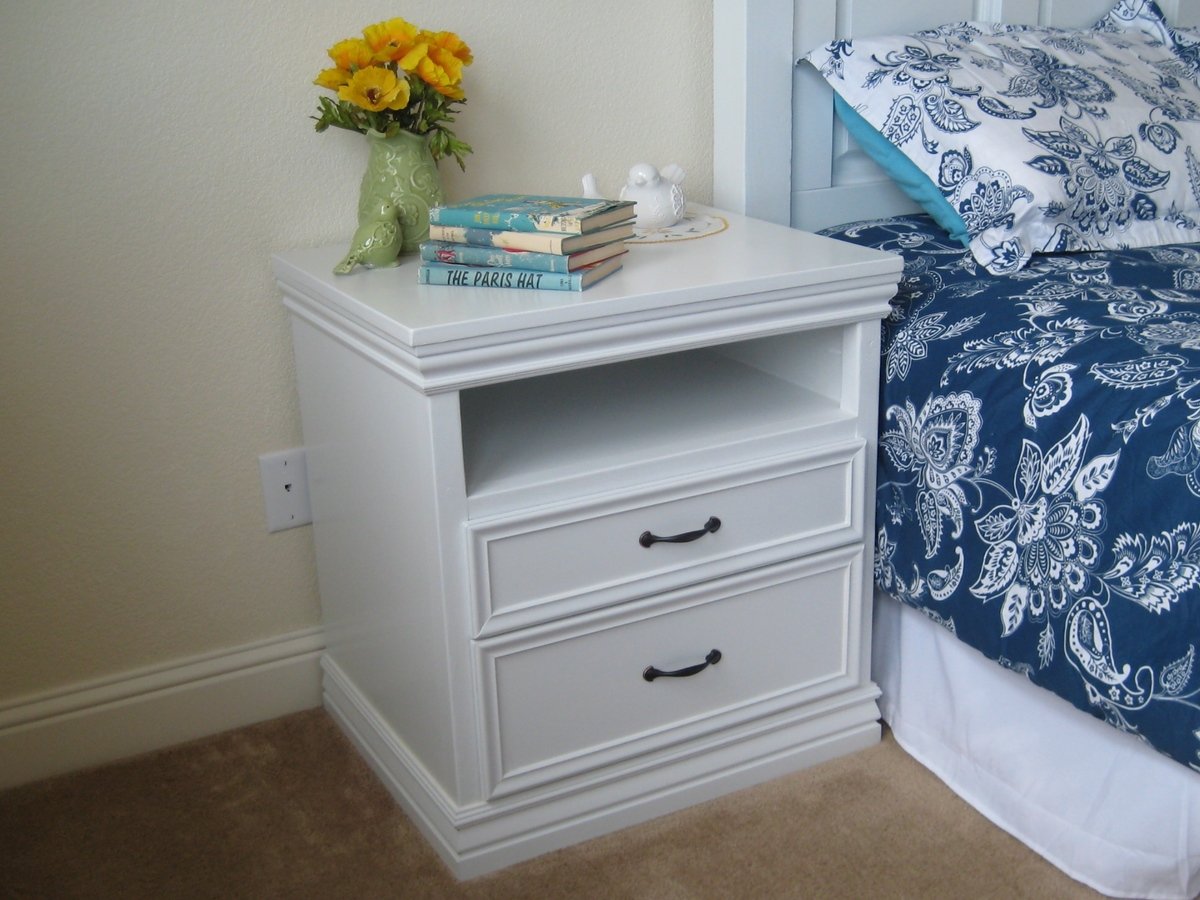
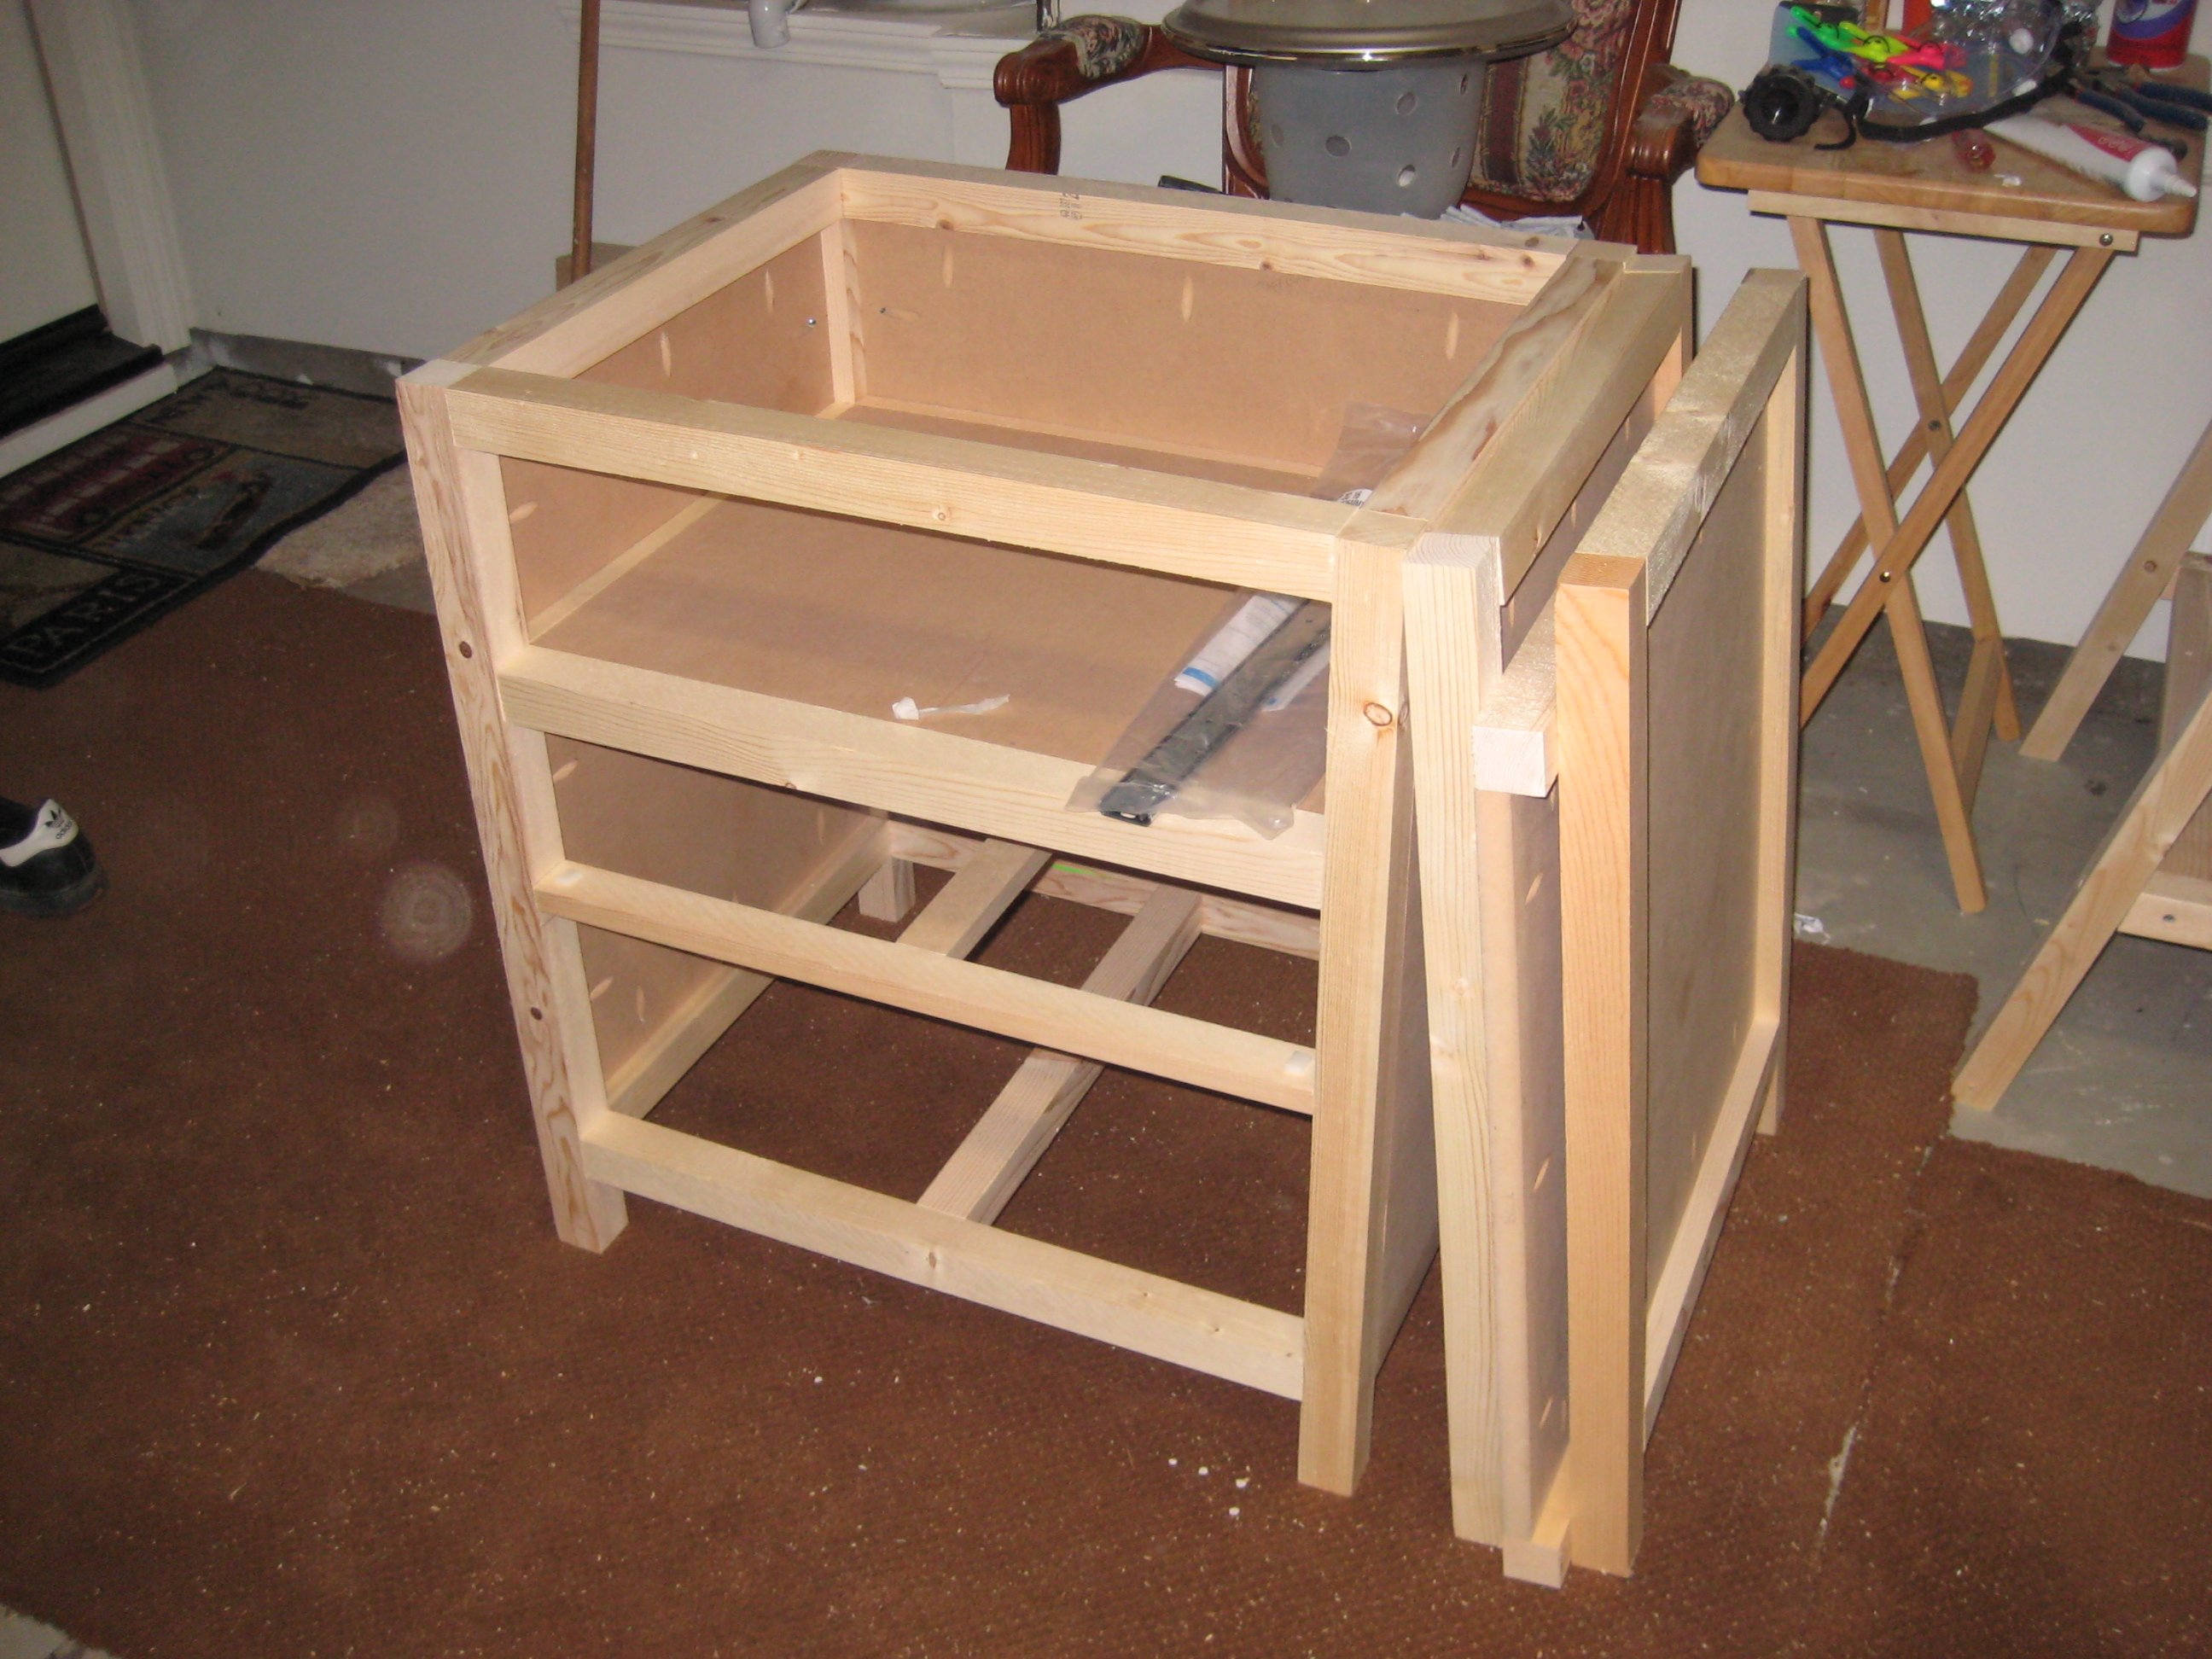
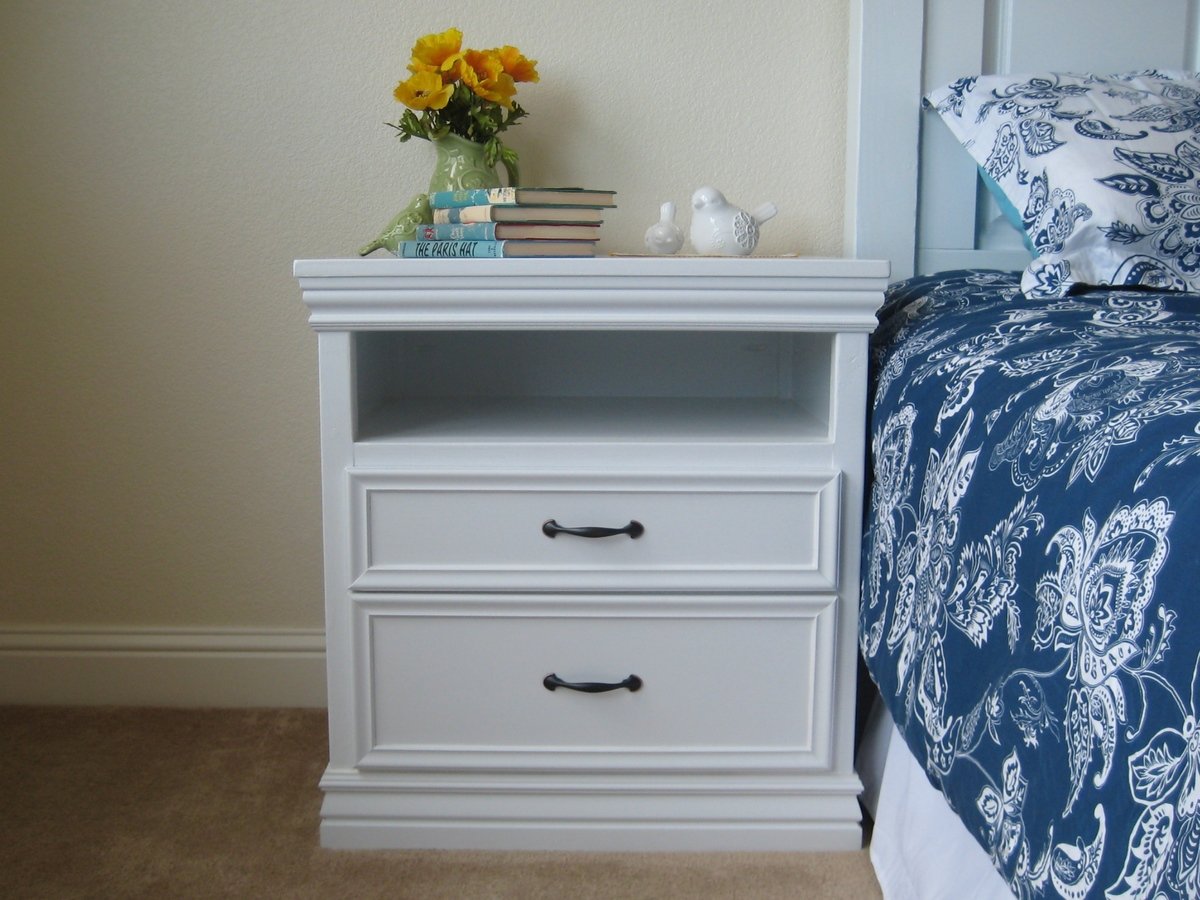
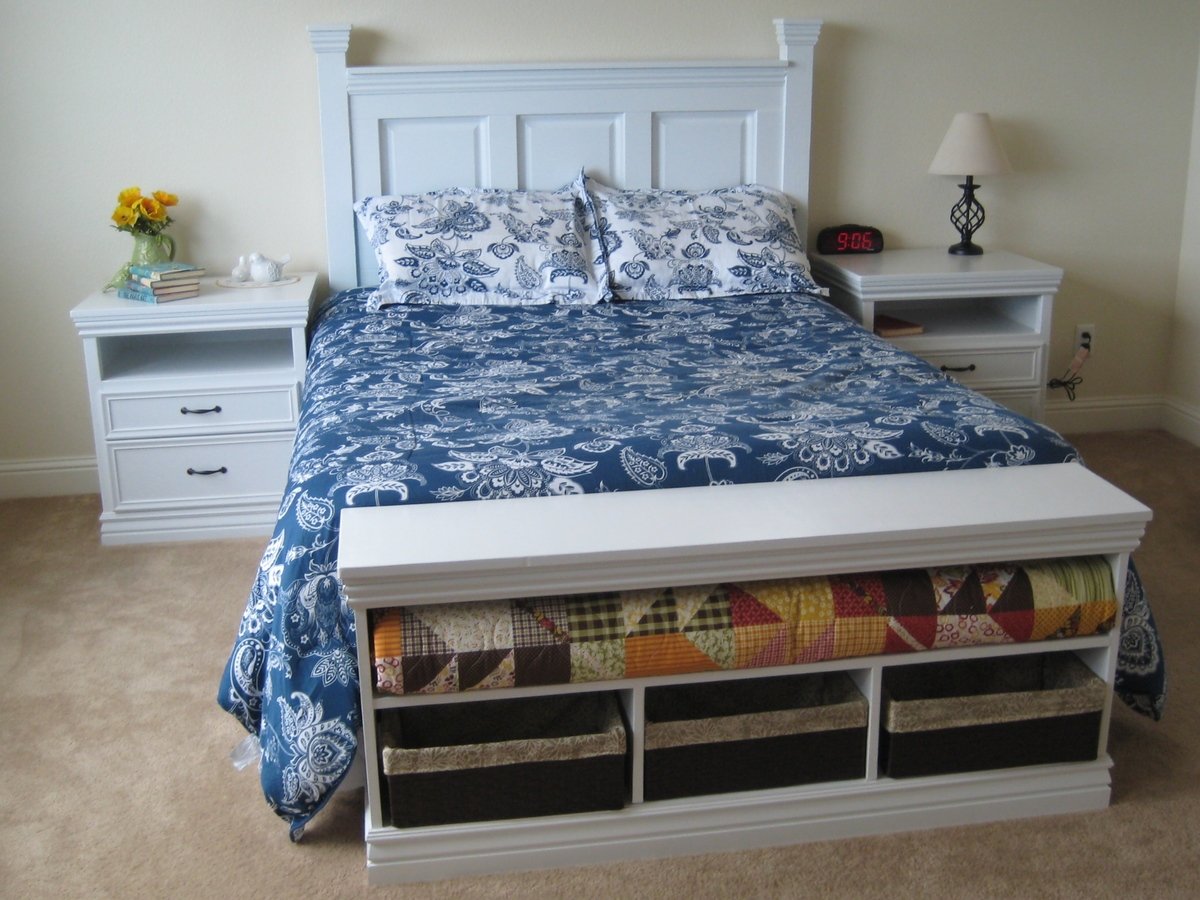
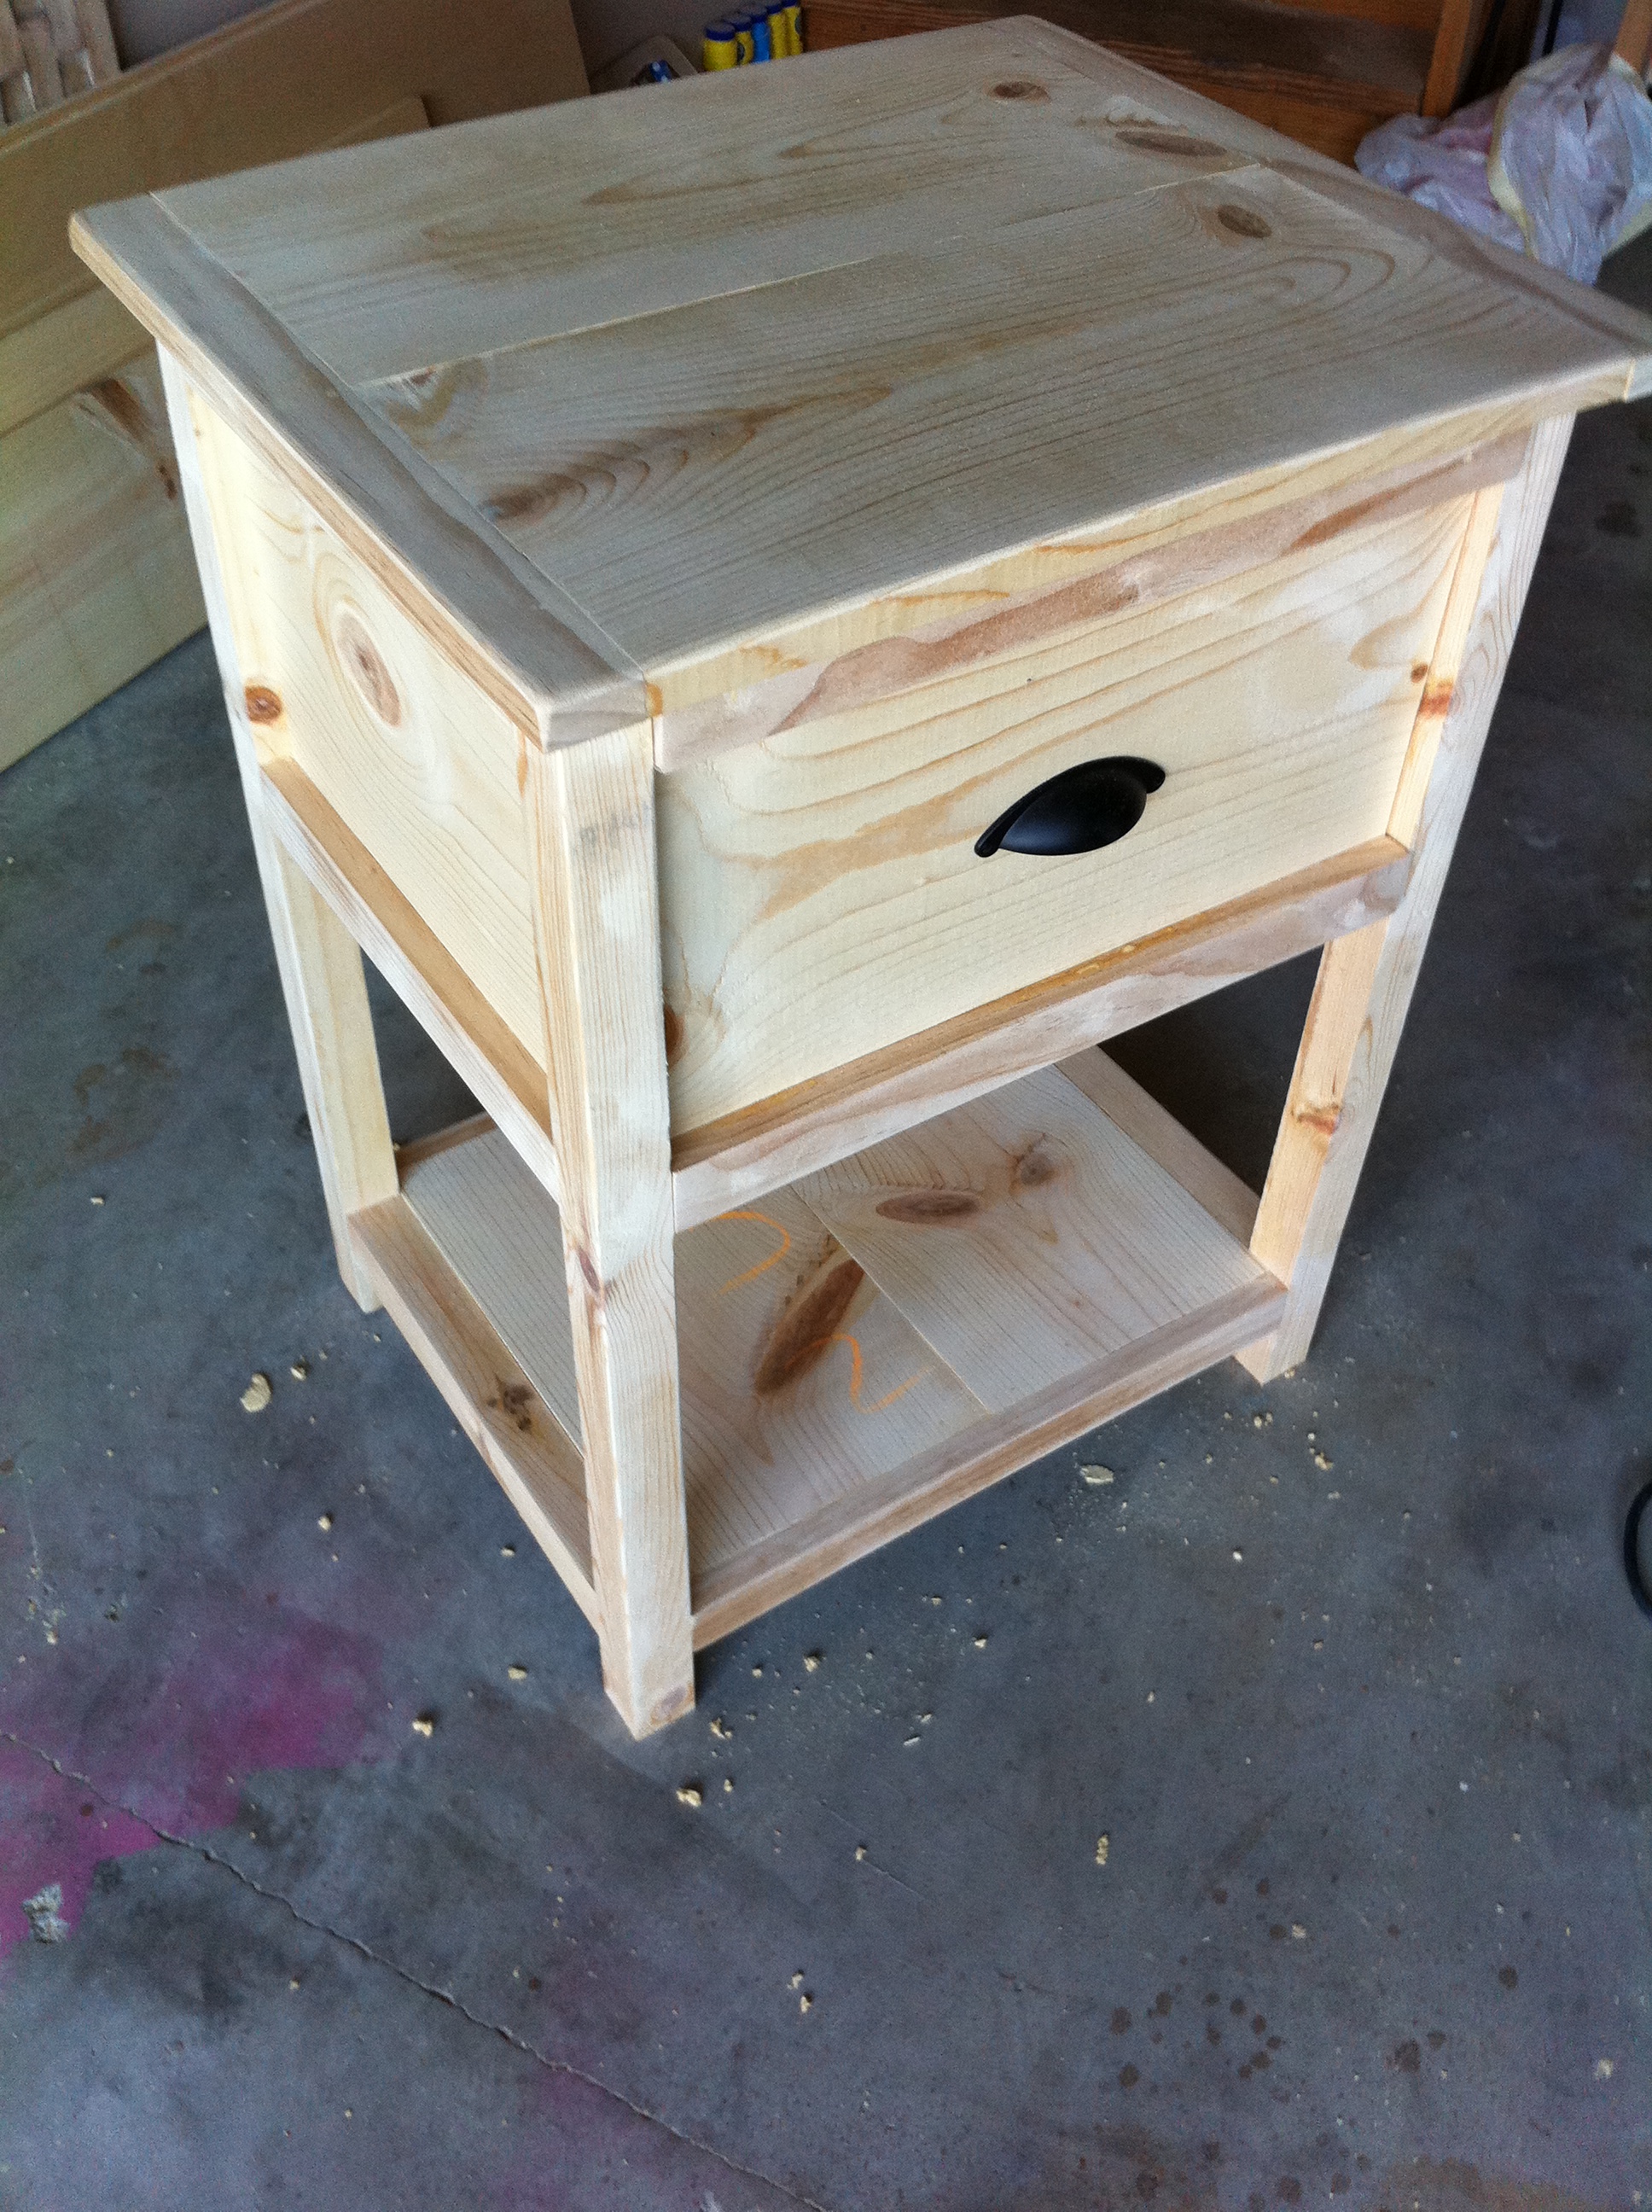
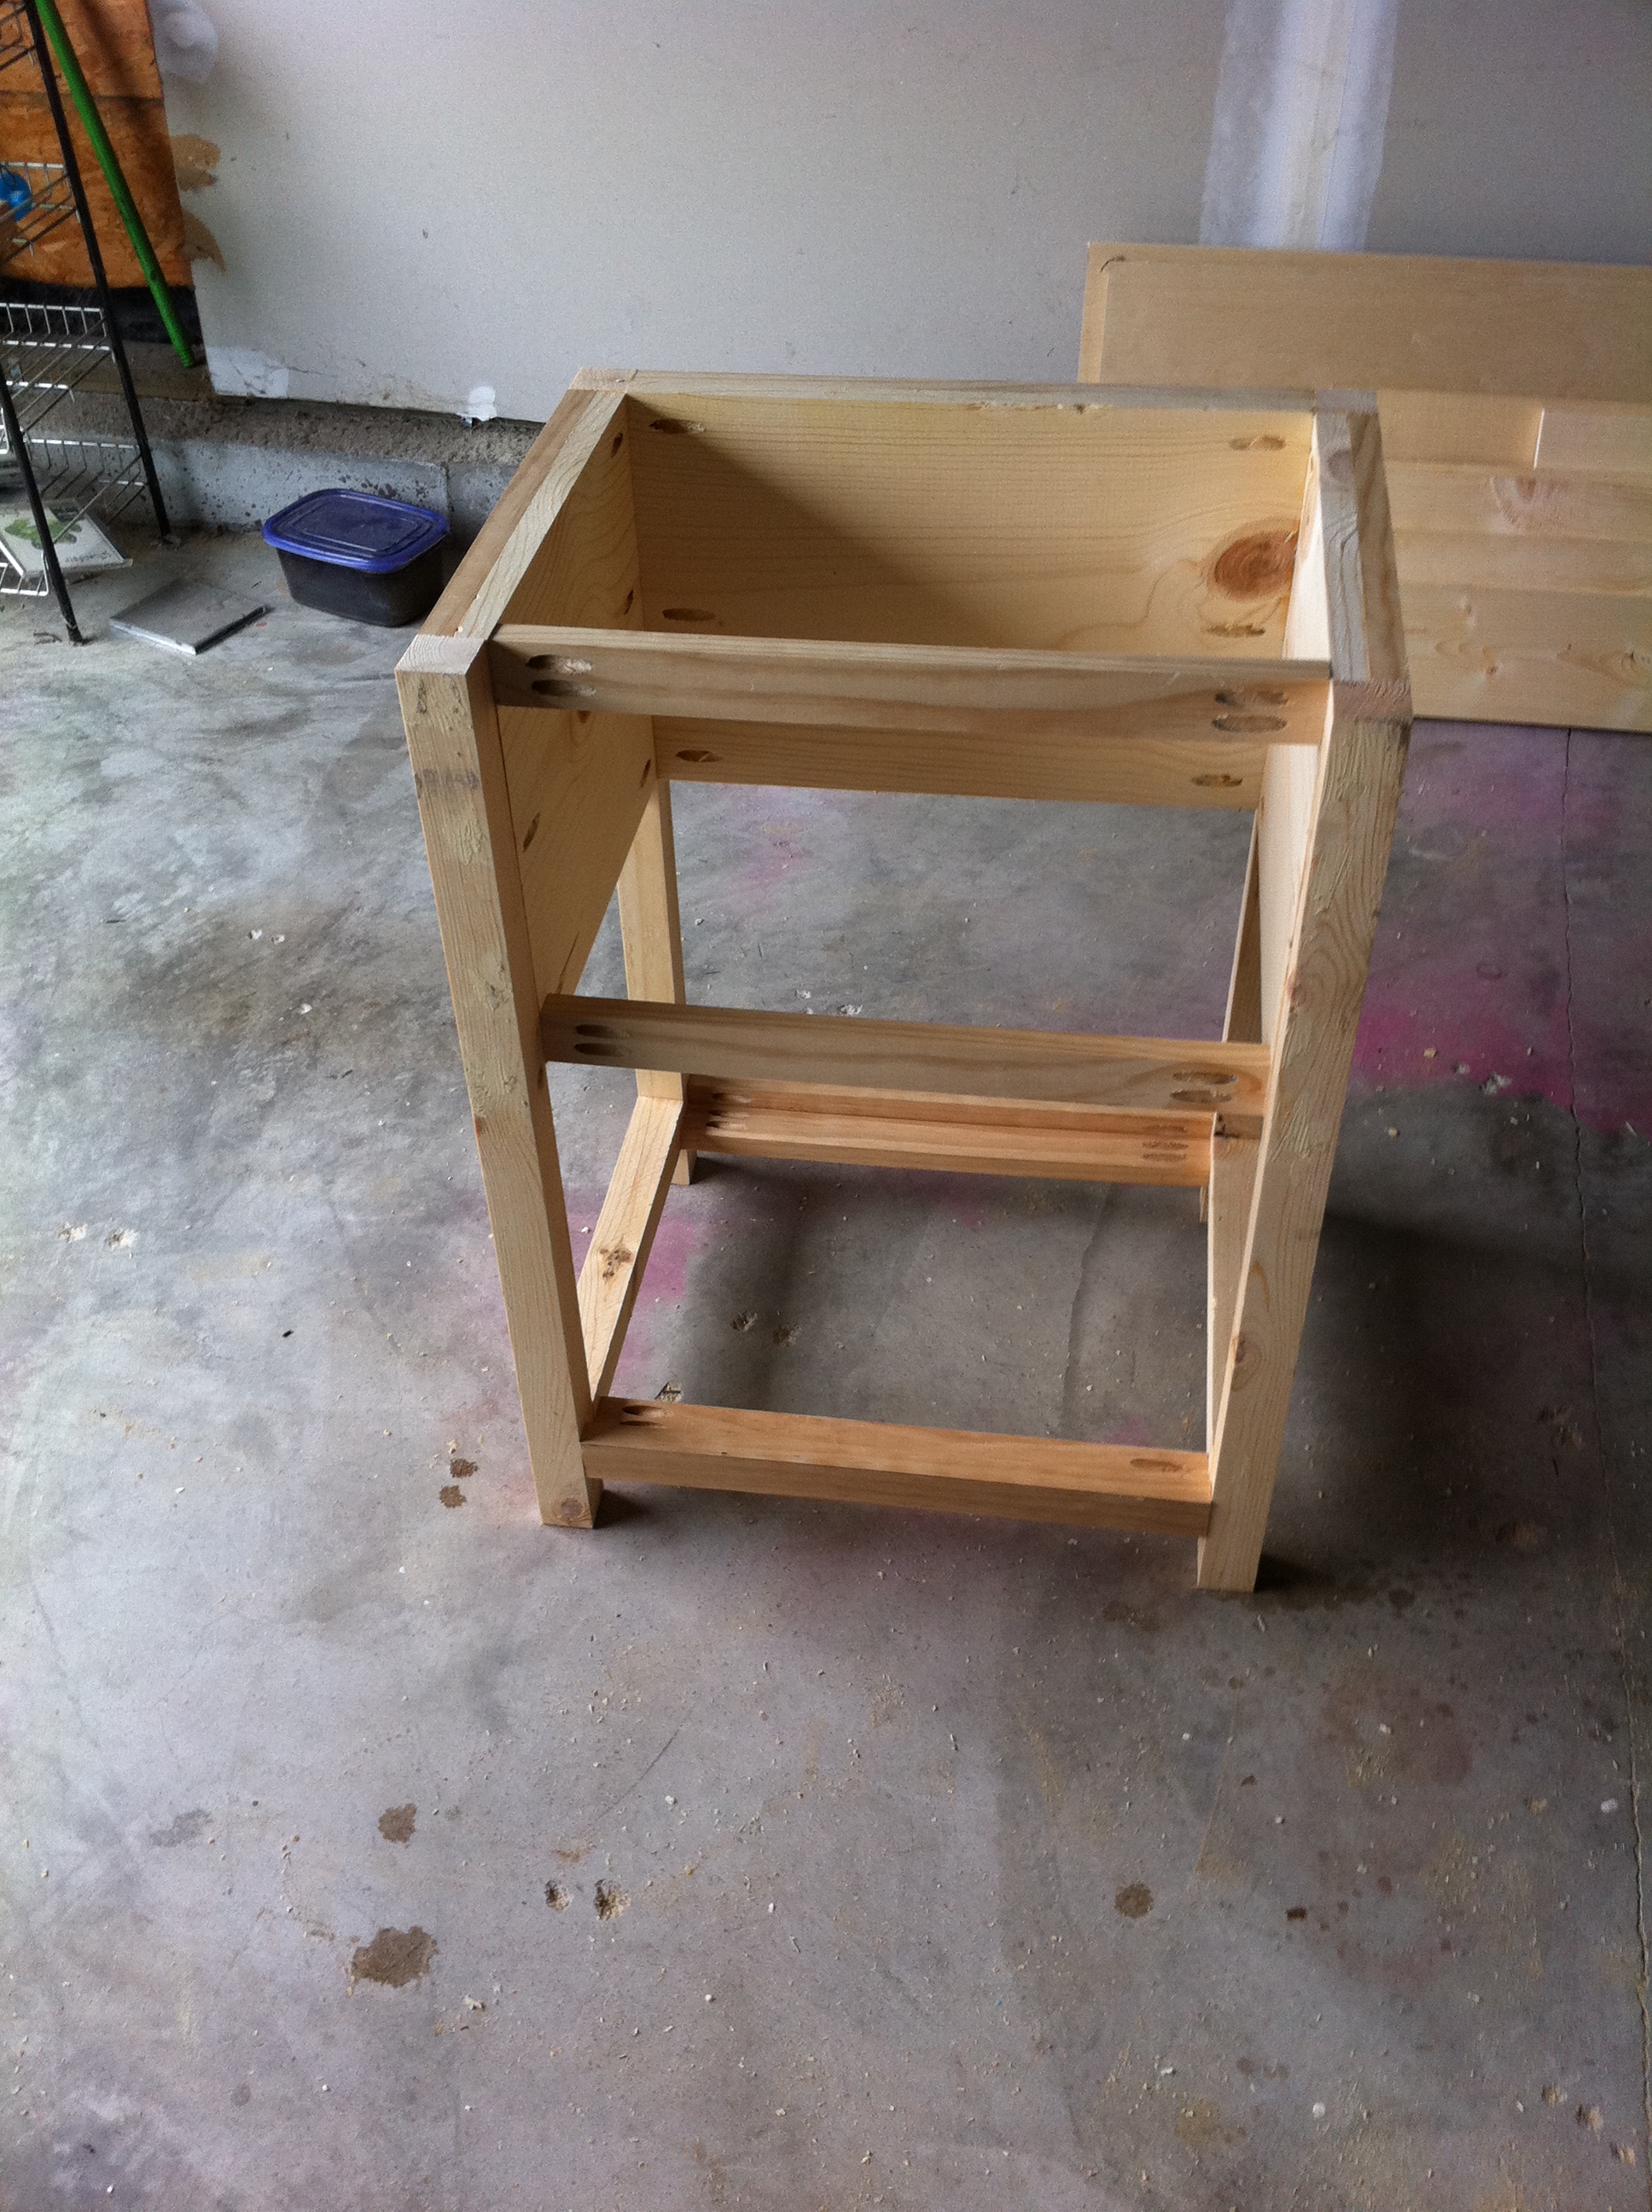
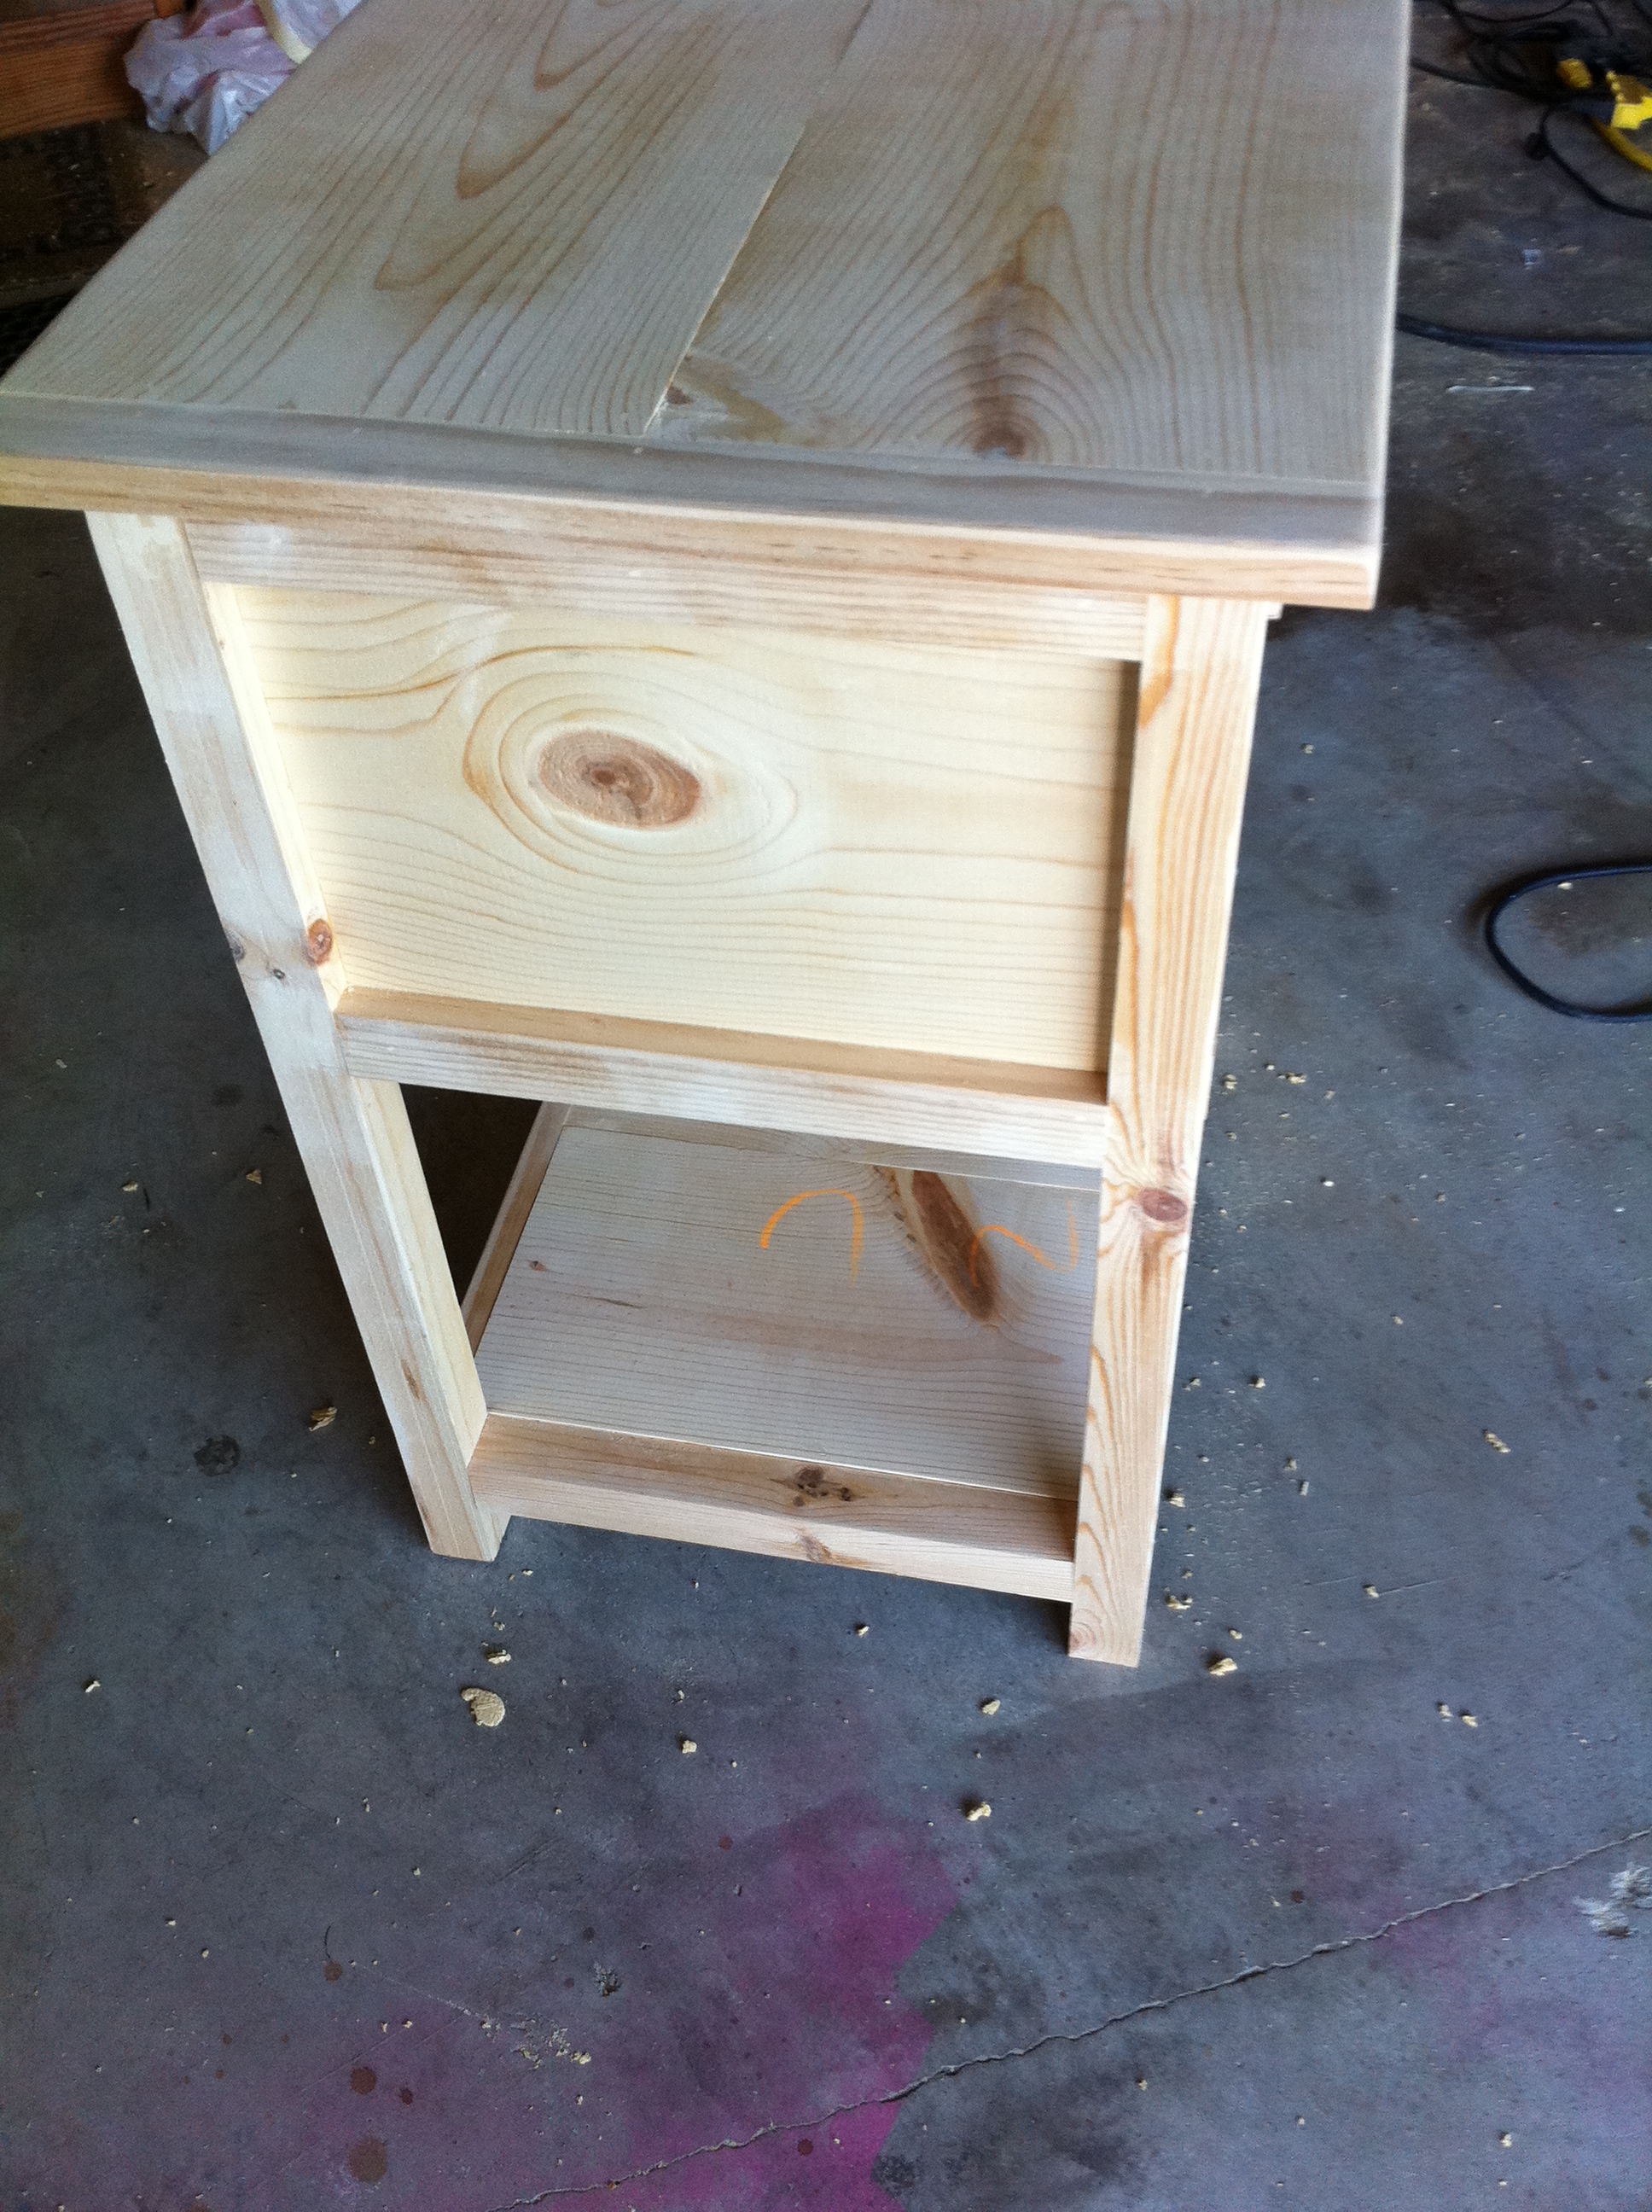
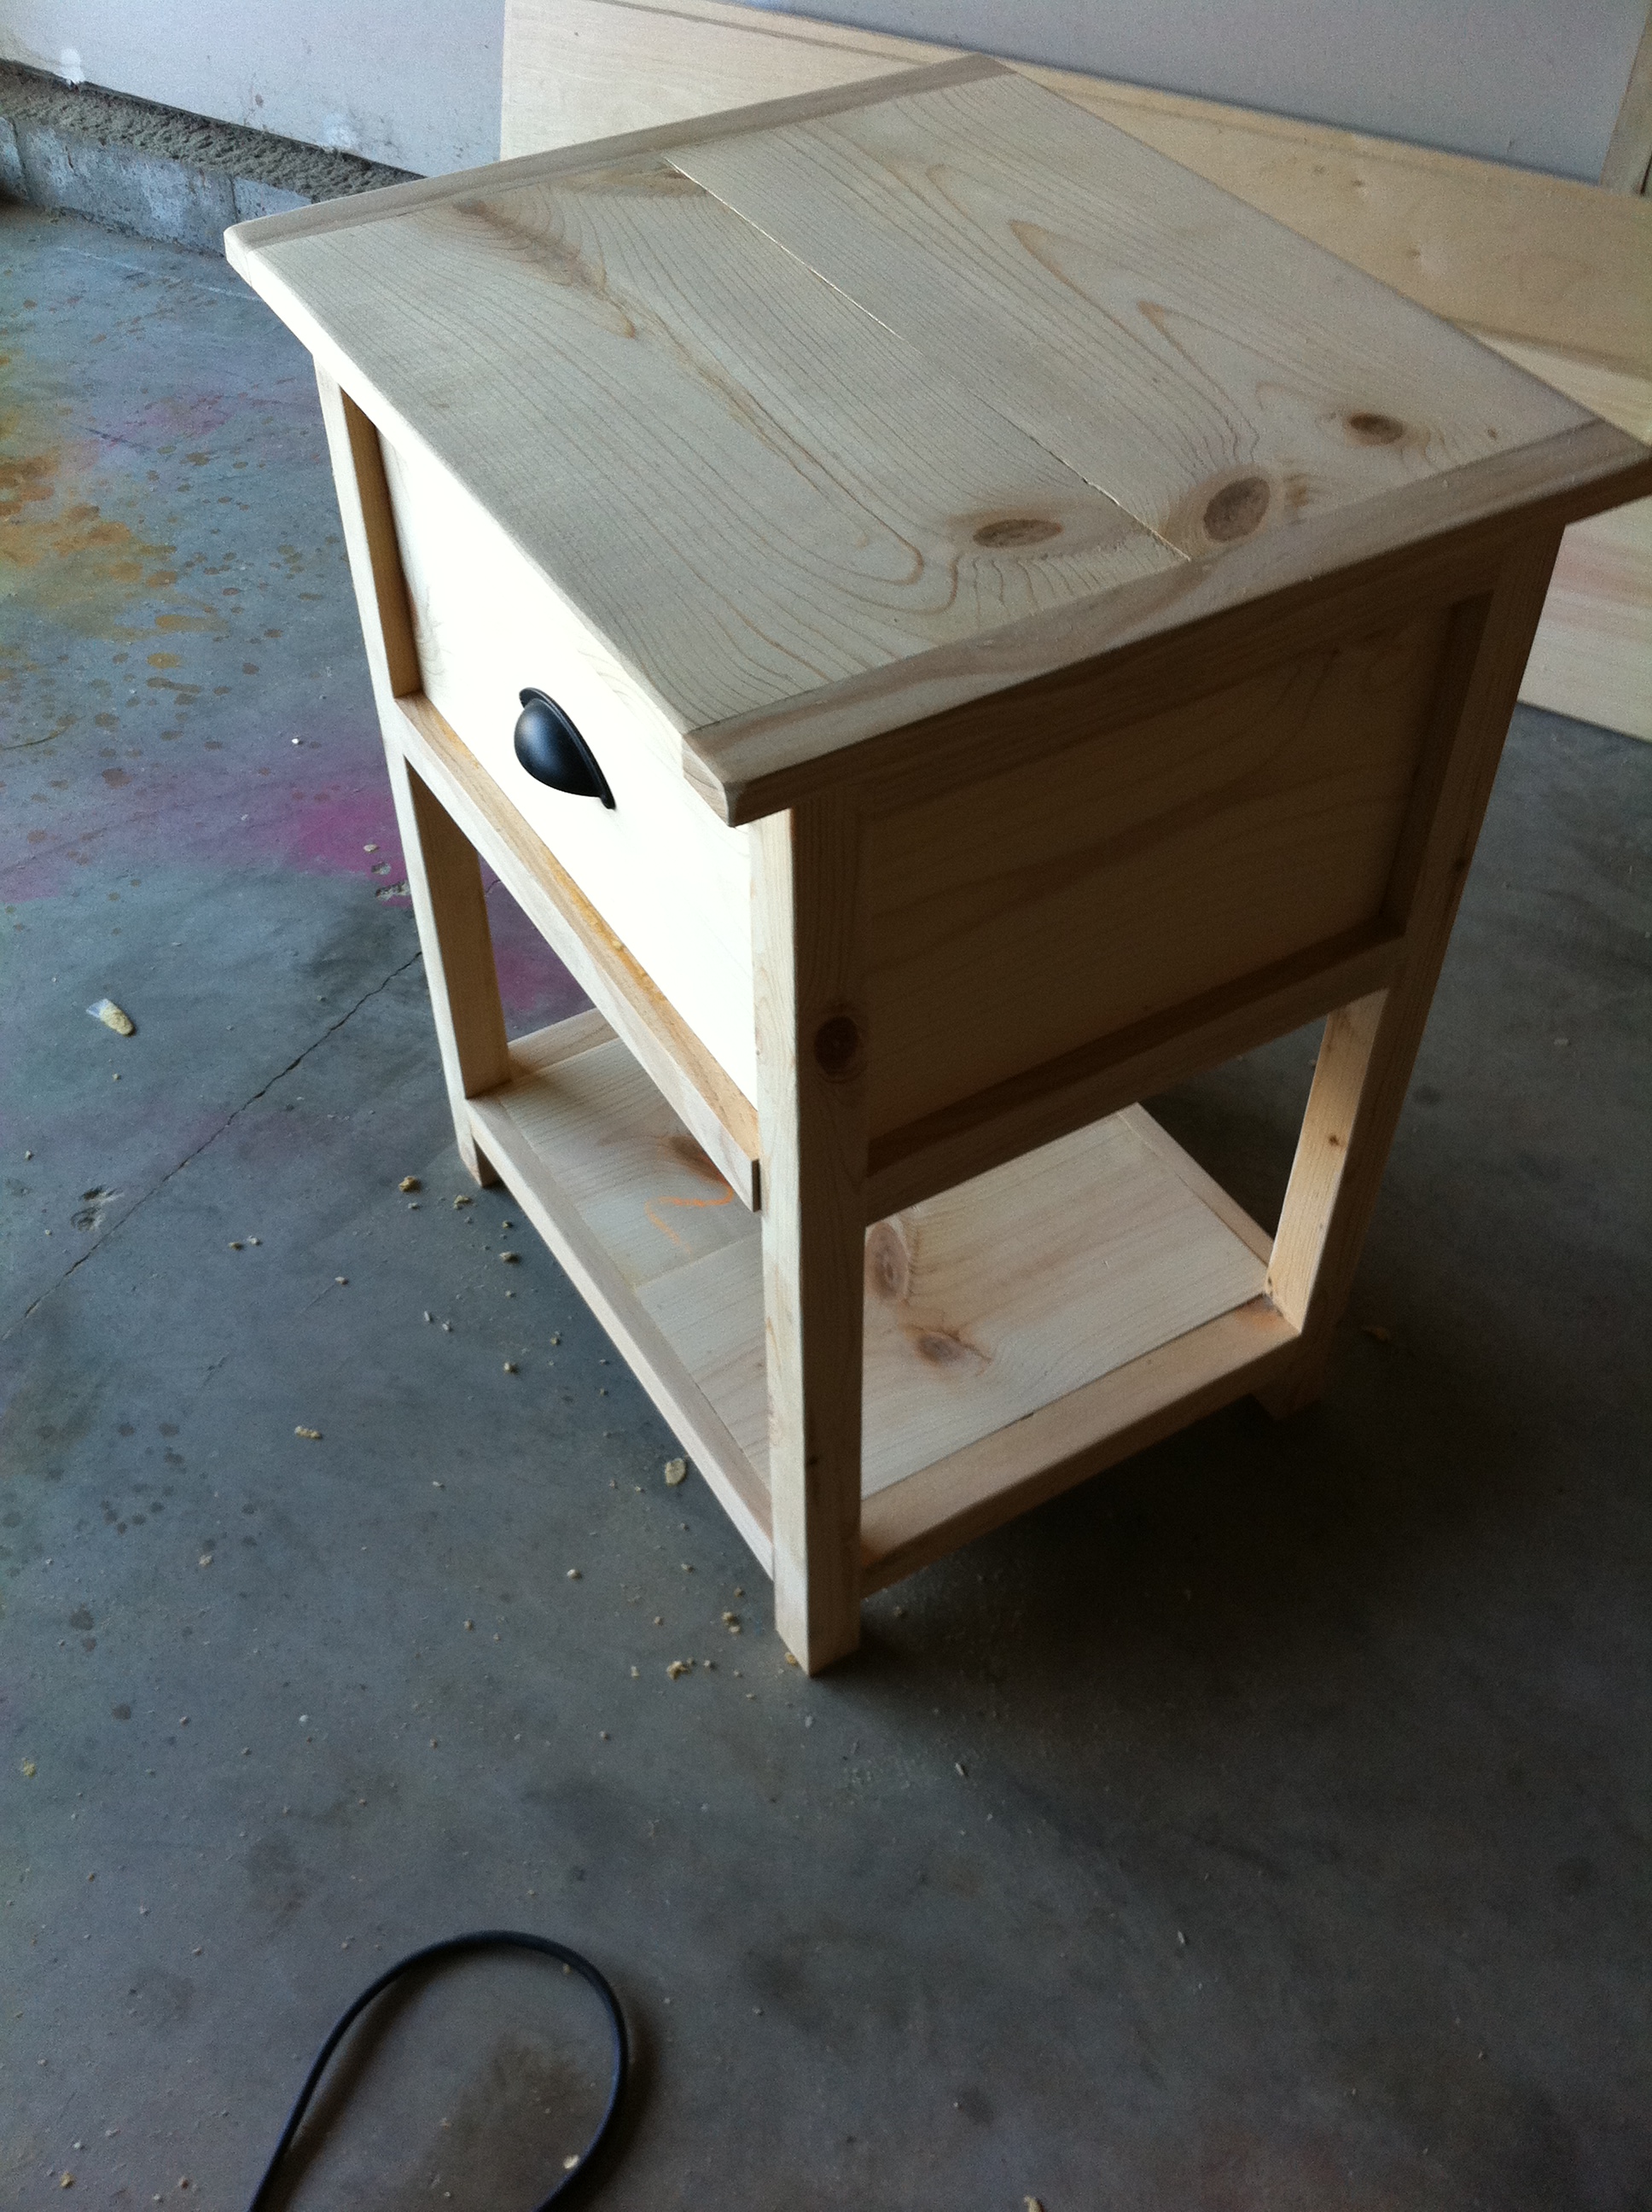
I used the Rhyan end table plan (with a few alterations) to make my nightstands. I changed the dimensions so mine turned out to be 20”D, 25”W, 27”H, I extended the side and back panels all the way to the top to close in the shelf and I made the bottom drawer larger. I decided to use under mount drawer slides but I think I will try out the side mount slides in the future though.
I wanted them to match the headboard and bench that I made for my bed so I added the same molding that I used on those pieces to finish it off.
I pre cut every piece for the main body of the nightstand and predrilled all of the Kreg holes which made it a really quick piece to put together! I purchased the Mini Kreg jig for this project and am so glad I did. Totally worth the money!

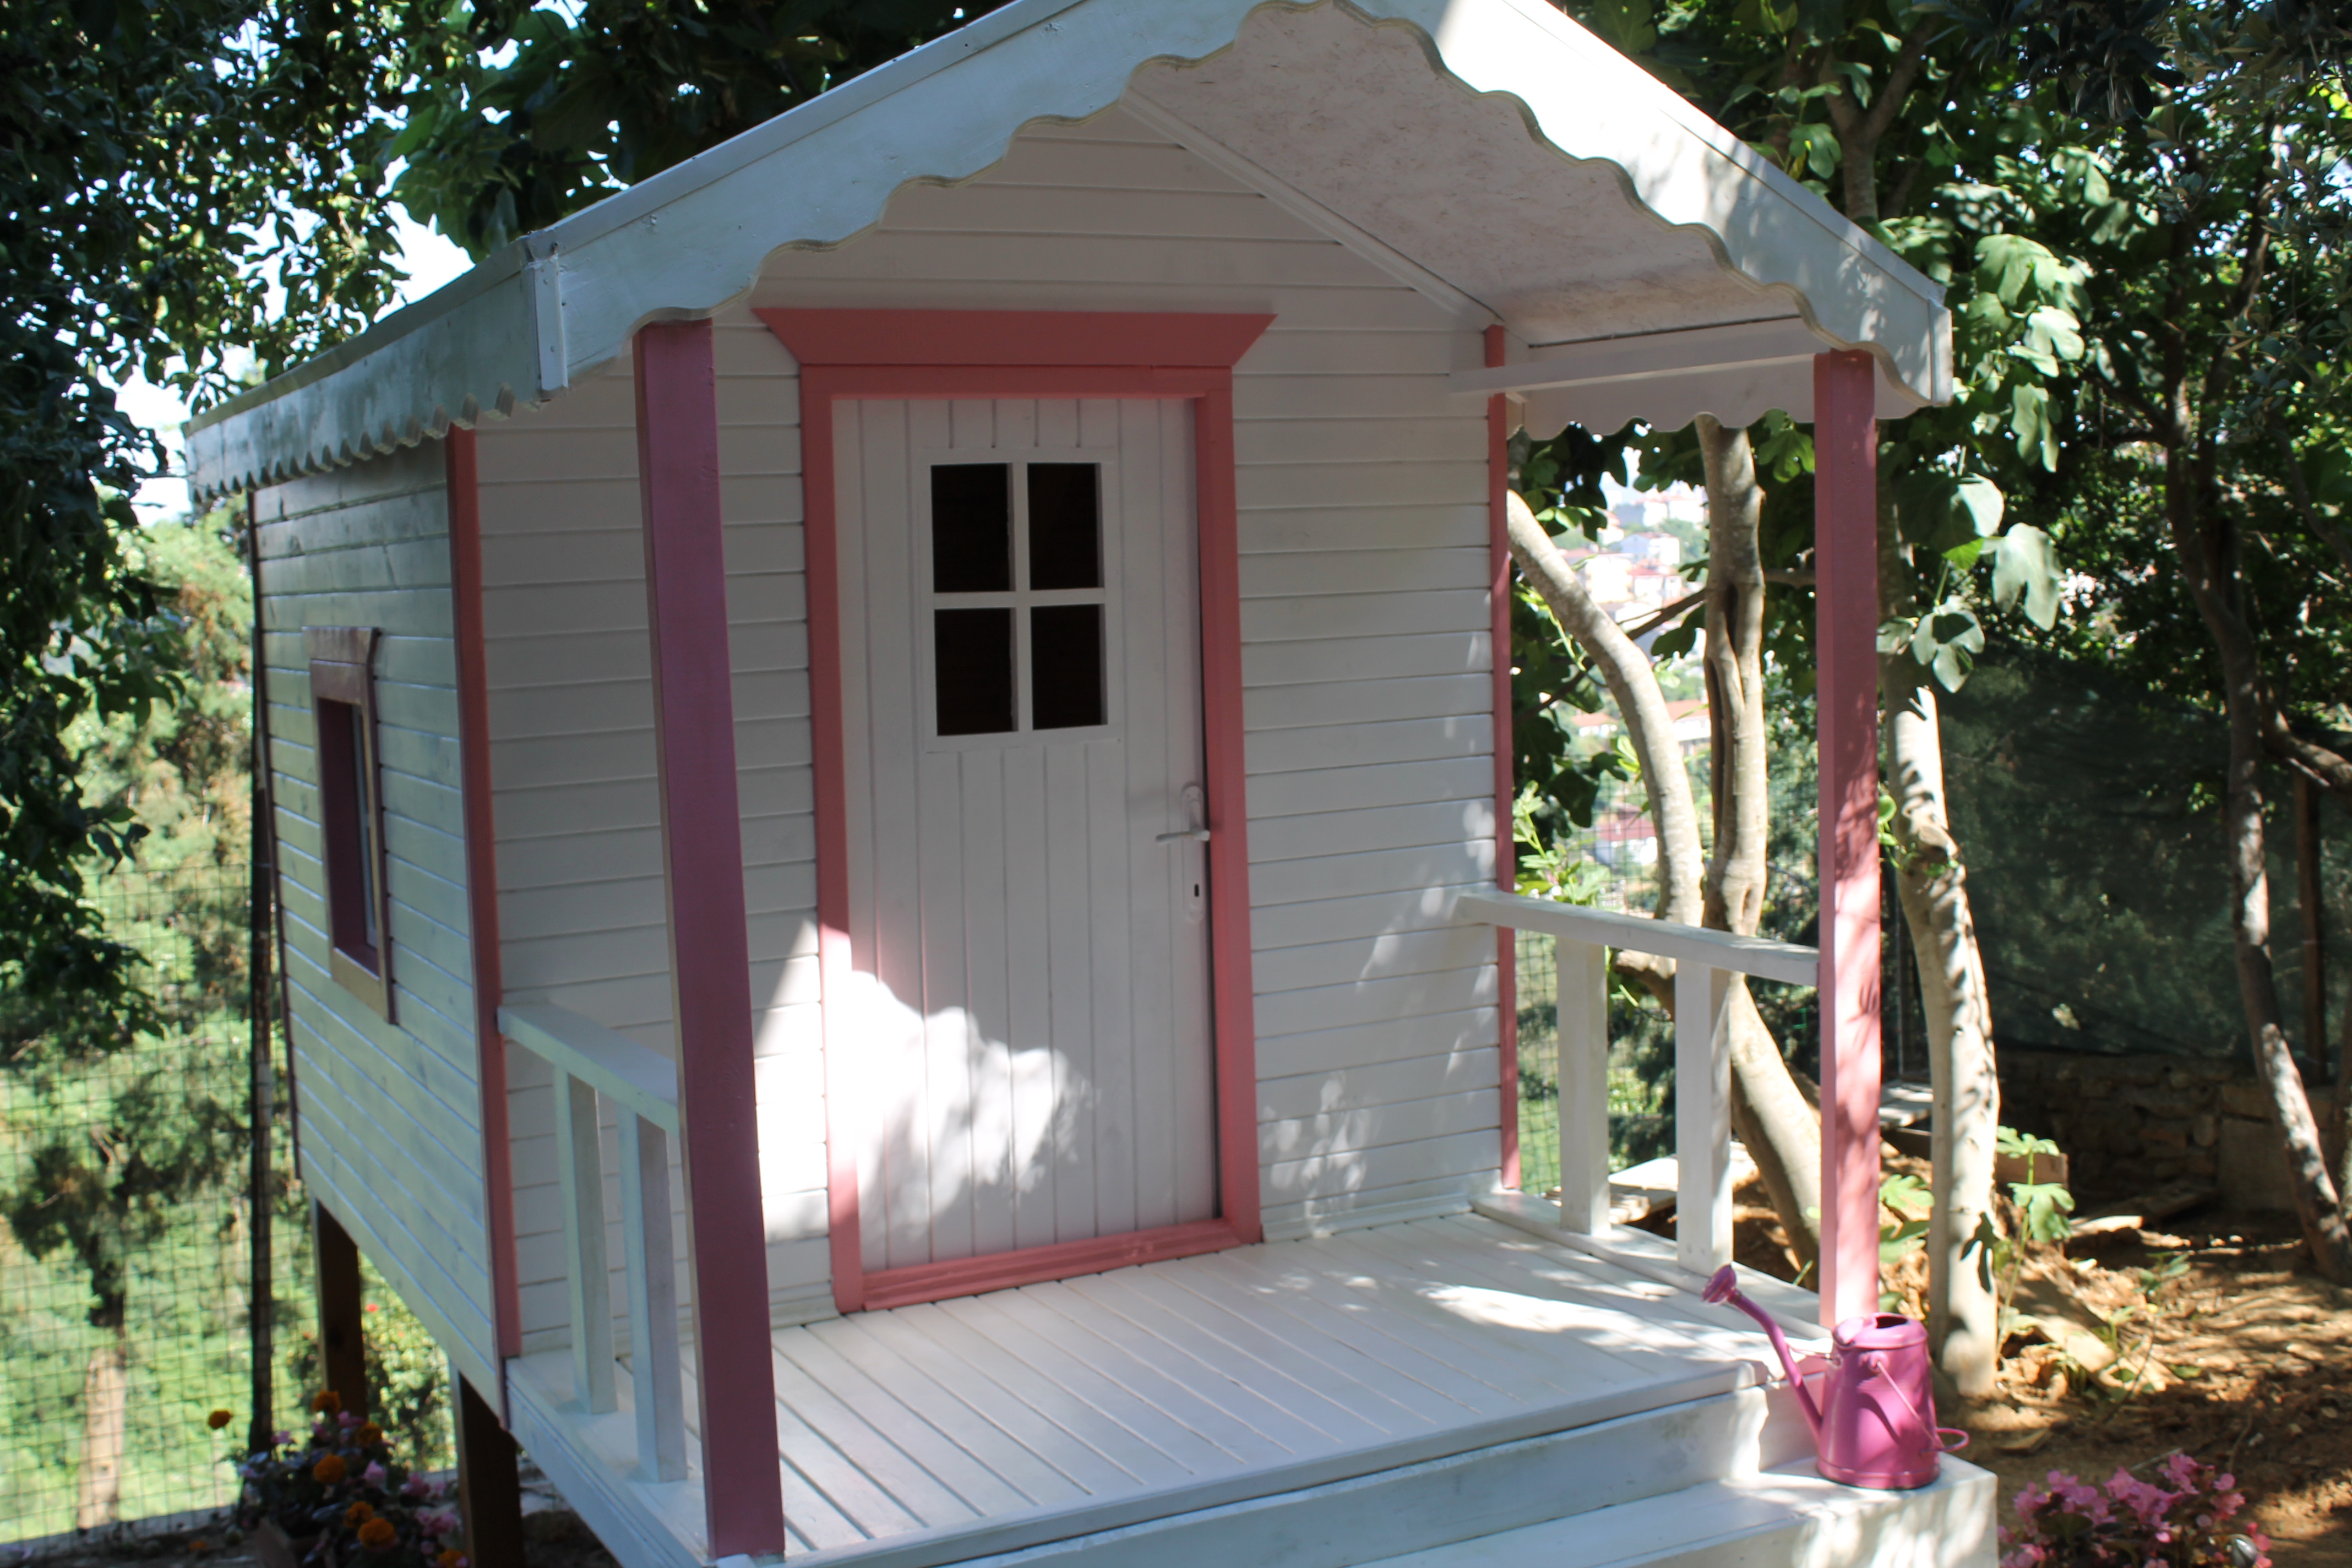
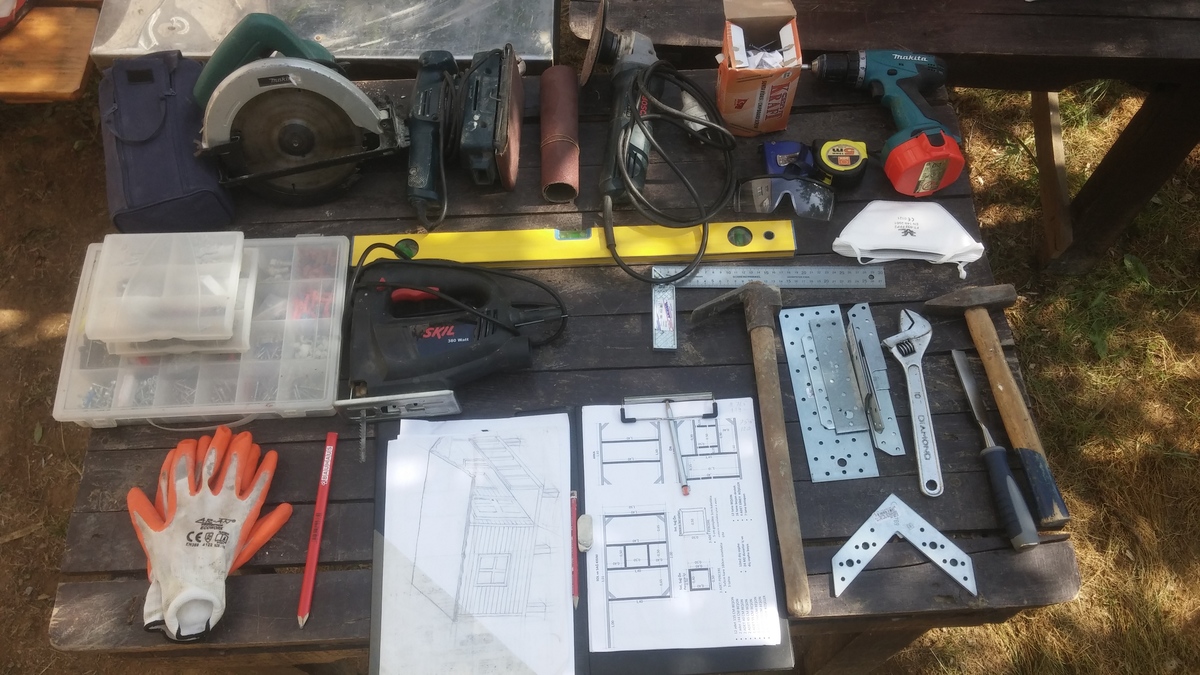
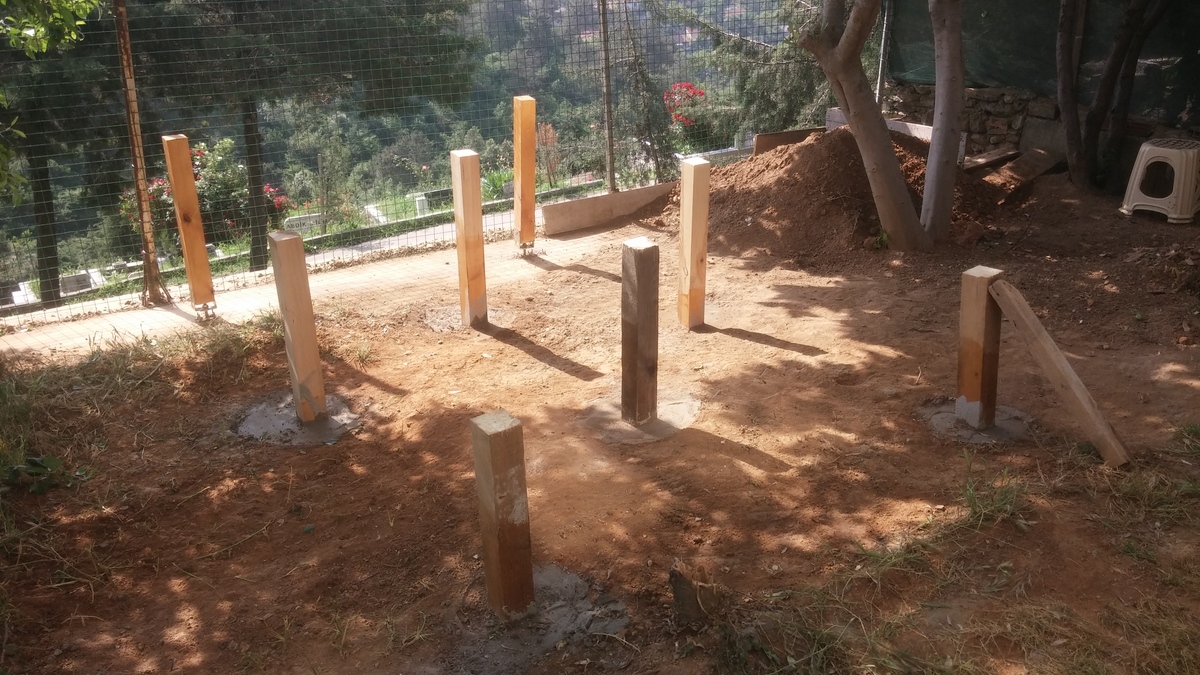
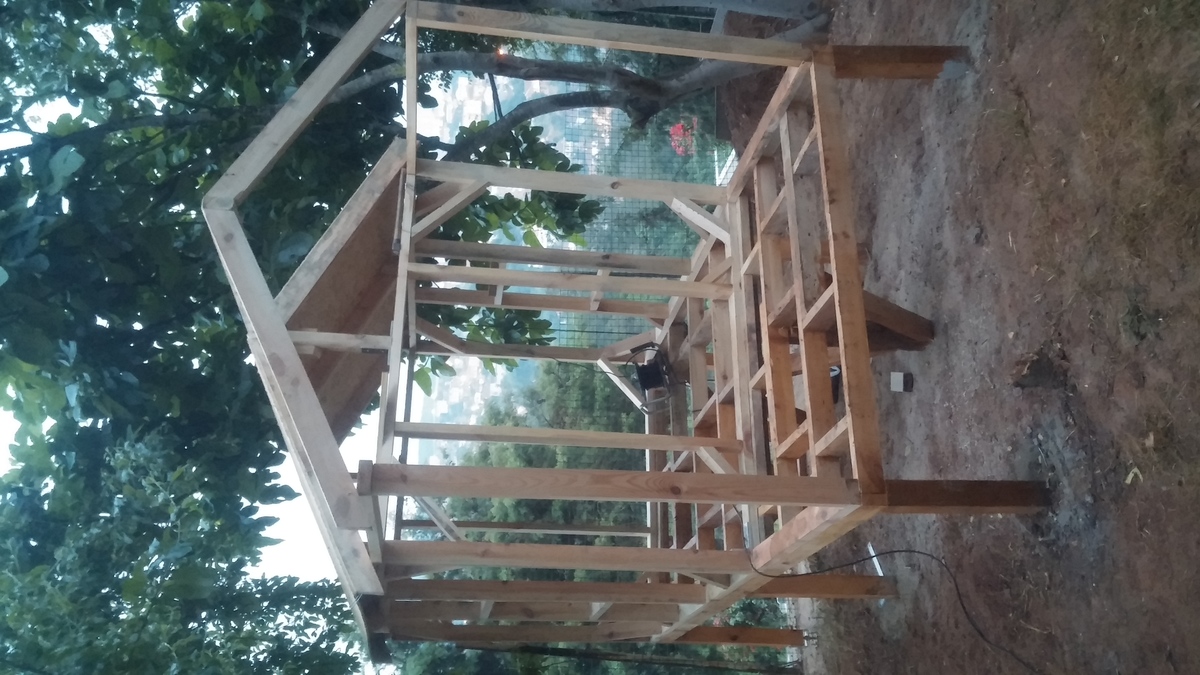
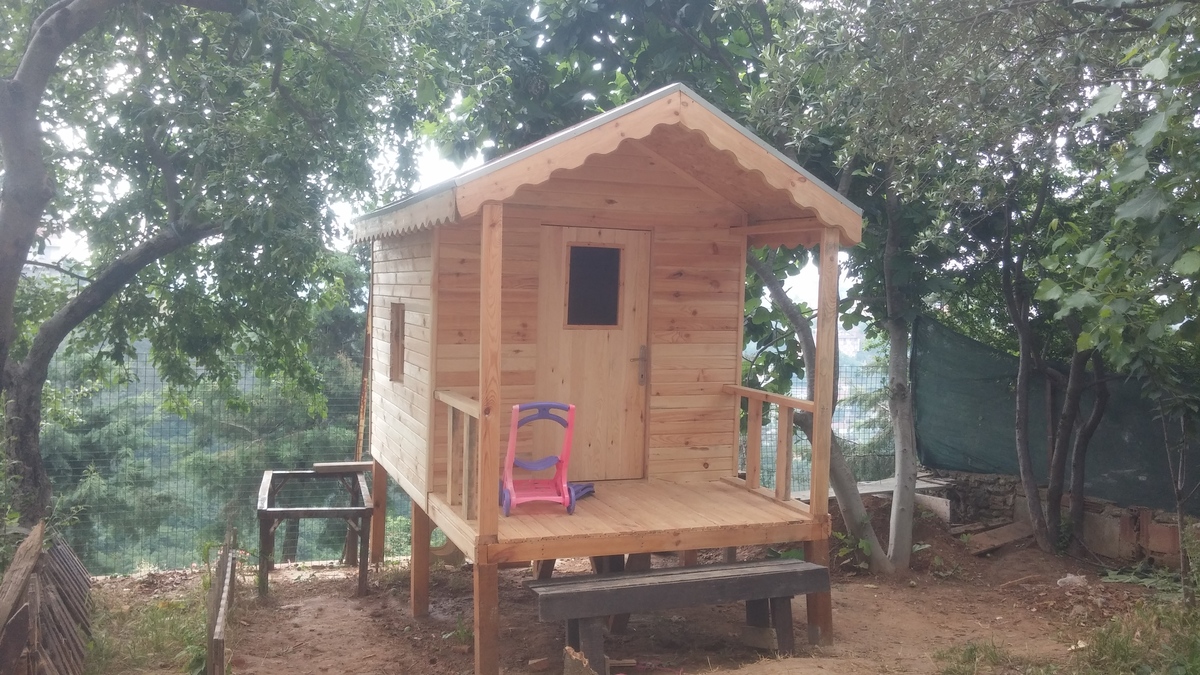
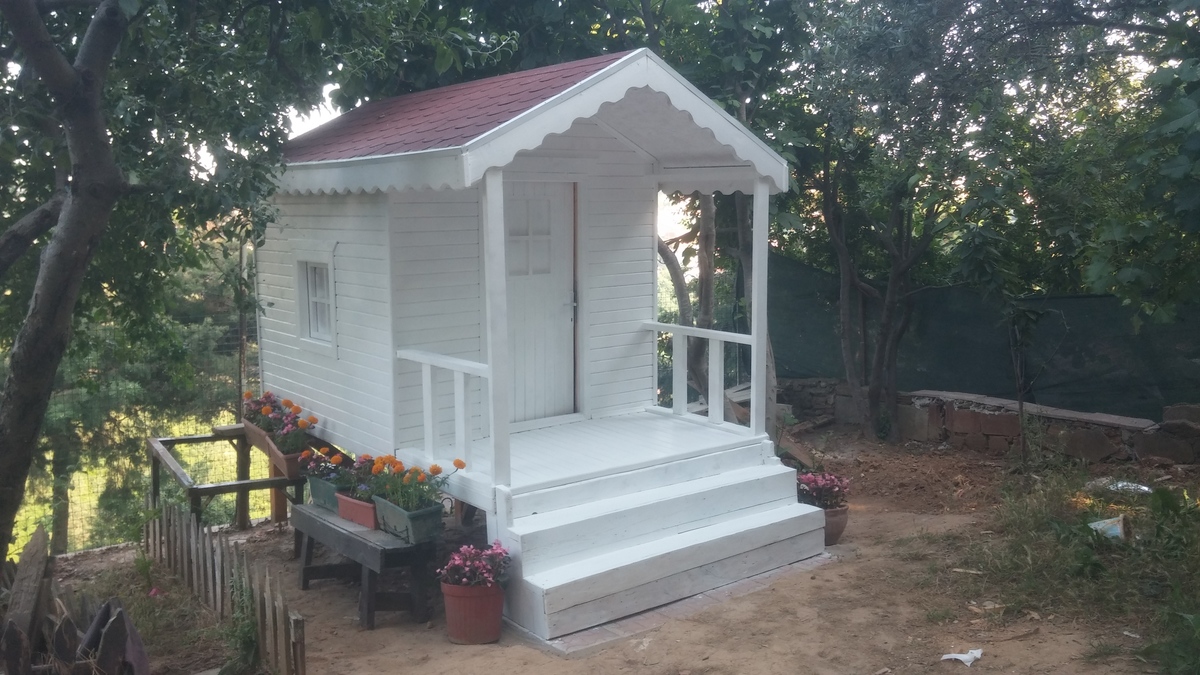
Hi, My name is Ibrahim I am a Project management Unit Manager in an Information technologies. I have two daughters, 3 and 8 years old. We have garden around 150m2. I want to do play house in our garden to play. First of all I searched how can do it in internet. Than I did preliminary work. I provided equipment and materials. And I take a holiday my company as a week. I started my first project which is wooden house.
My daughter and all around me was liked wooden house. I hope you like it:)
Sorry my English :)
.

Fri, 06/26/2015 - 19:37
This is too cute, I bet your little girls love it :)
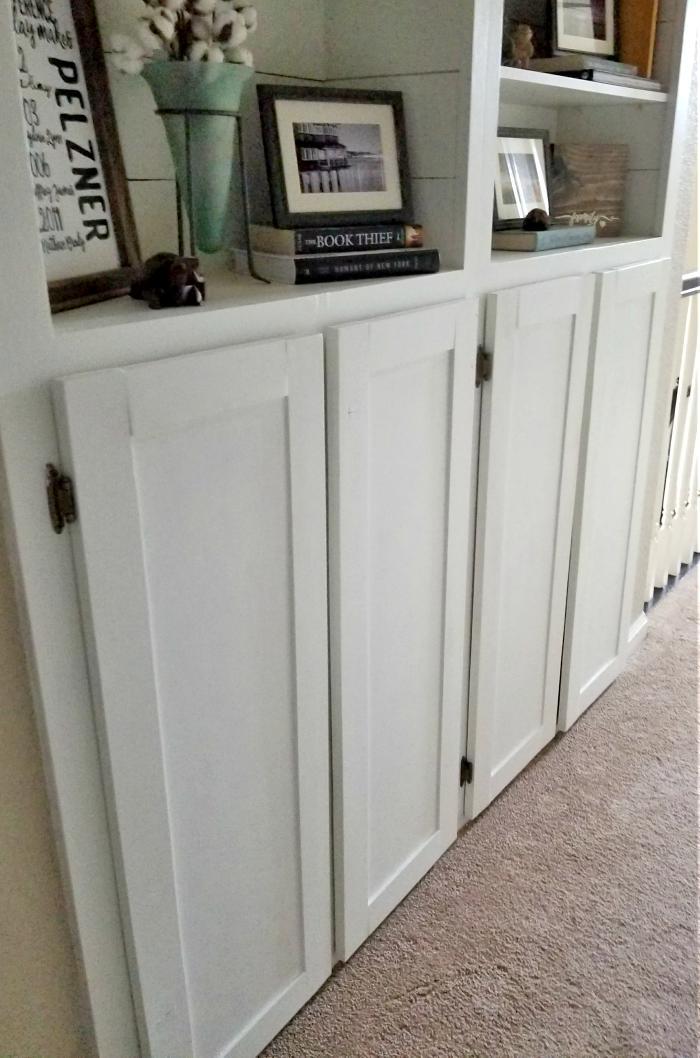
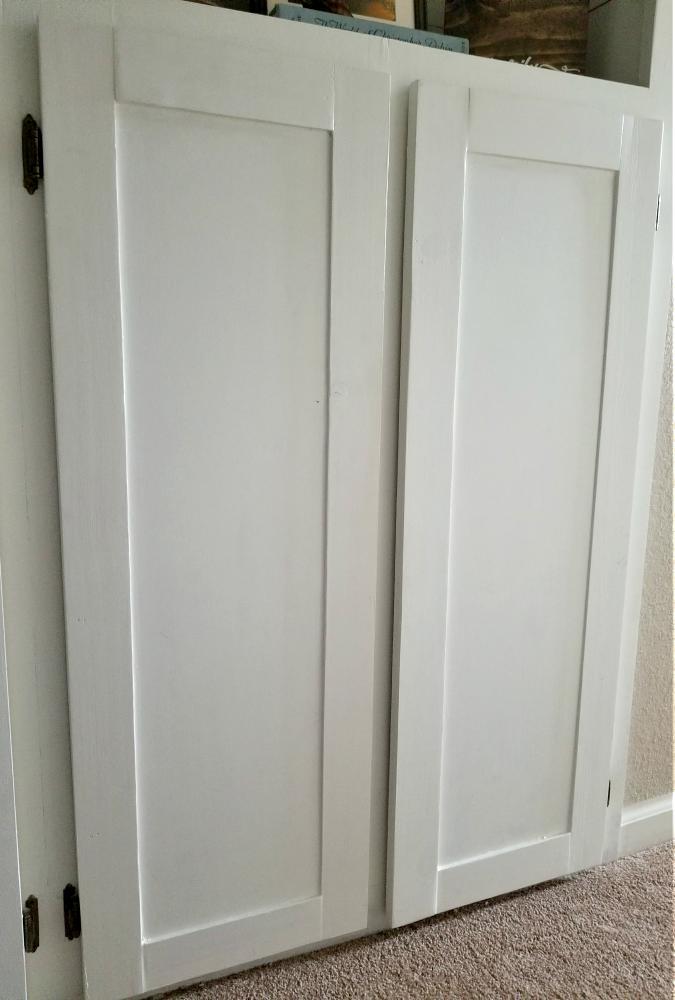
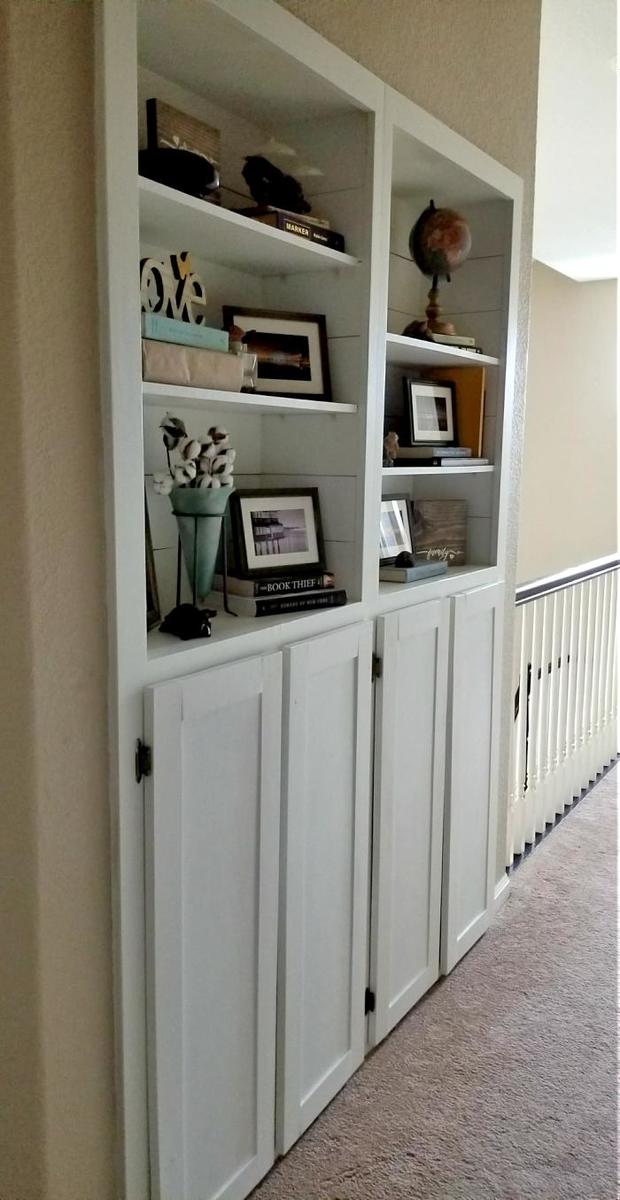
I used the easy frame and panel doors instructions to build 4 new large cabinet doors for my hallway cabinets! I painted them Sherwin Williams Alabaster. You can find my full blog post about them here: http://www.leapoffaithcrafting.com/make-shaker-cabinet-doors/
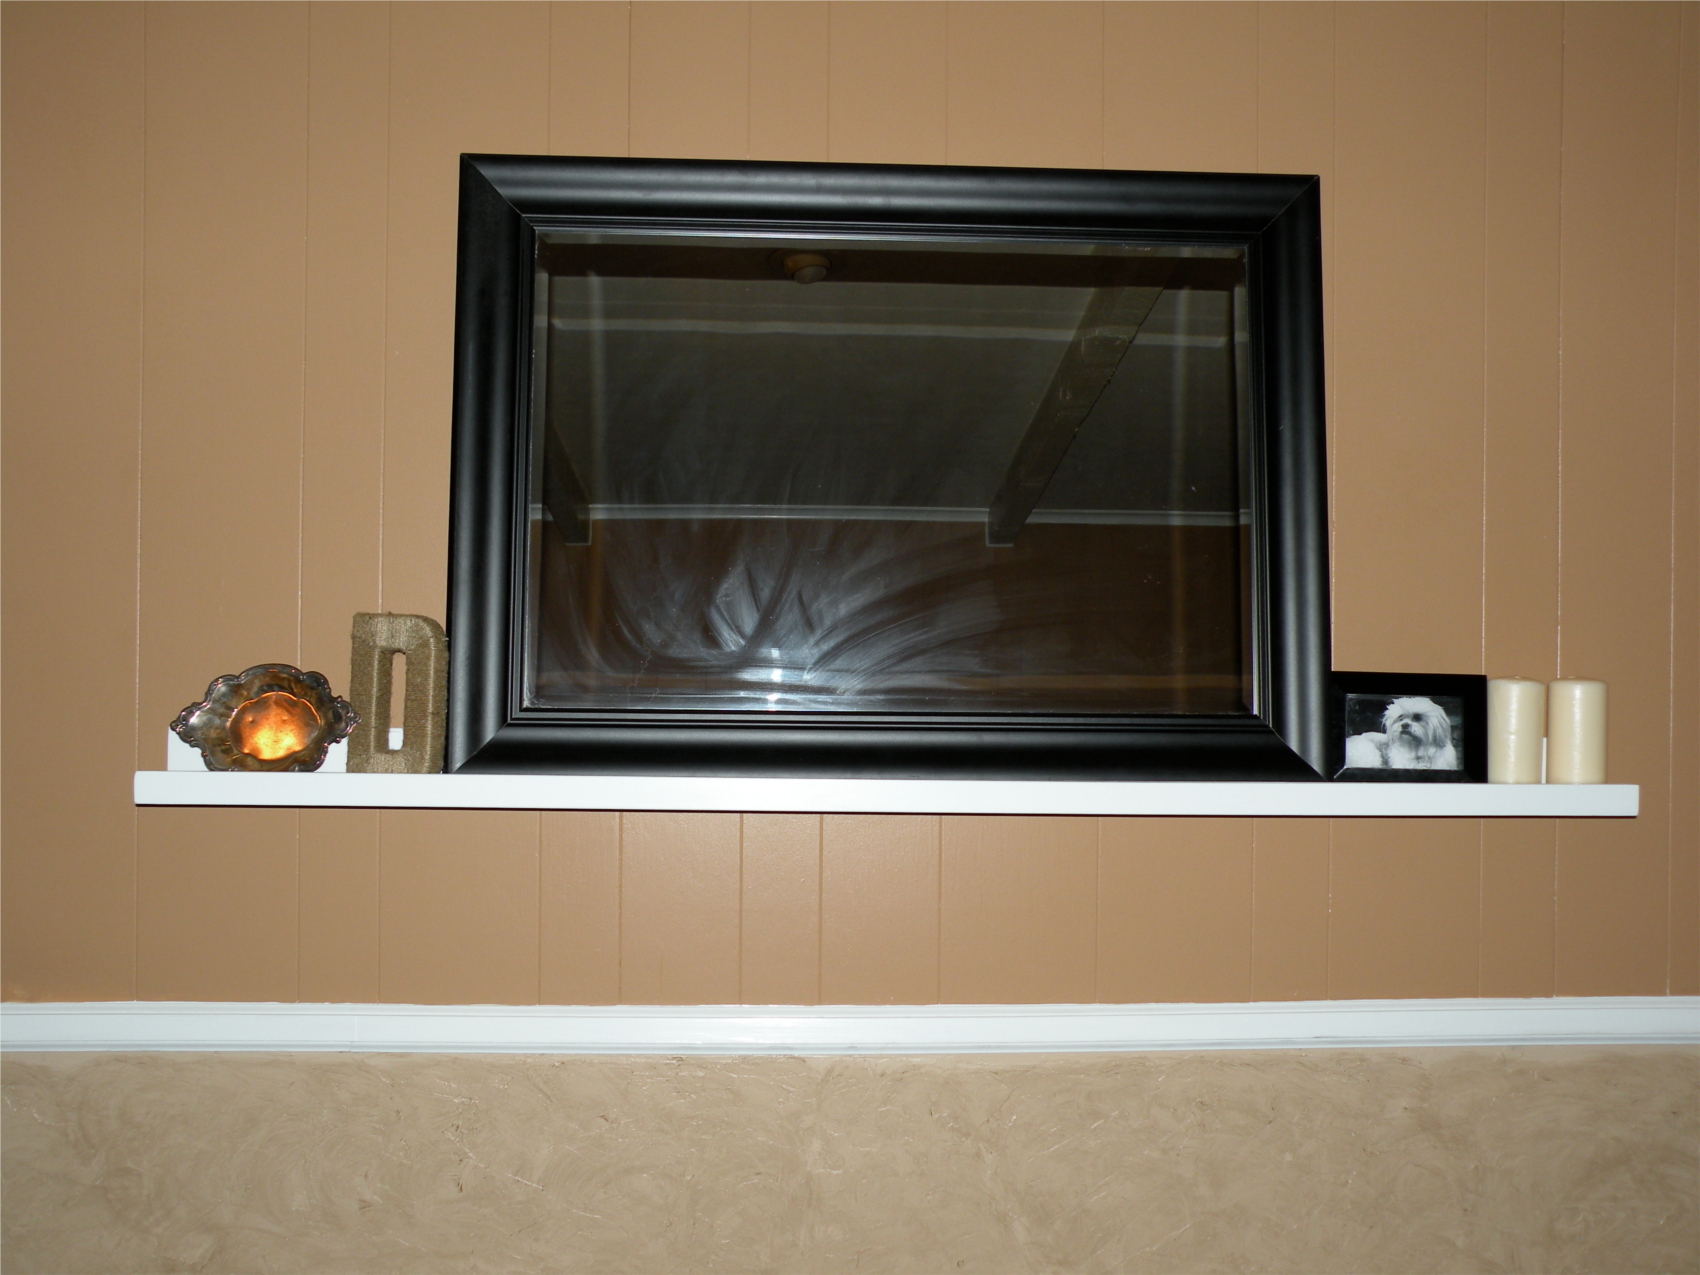
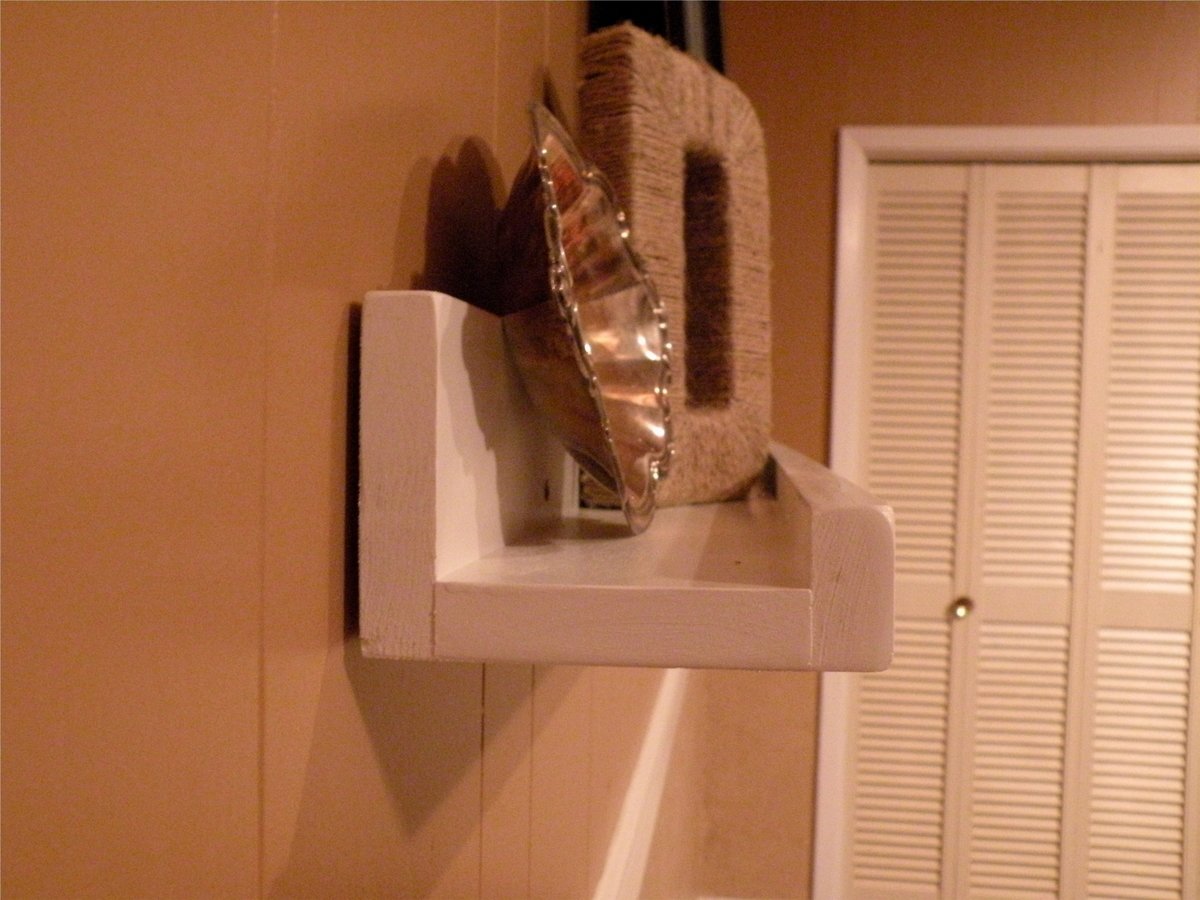
A quick shelf for a blank wall.
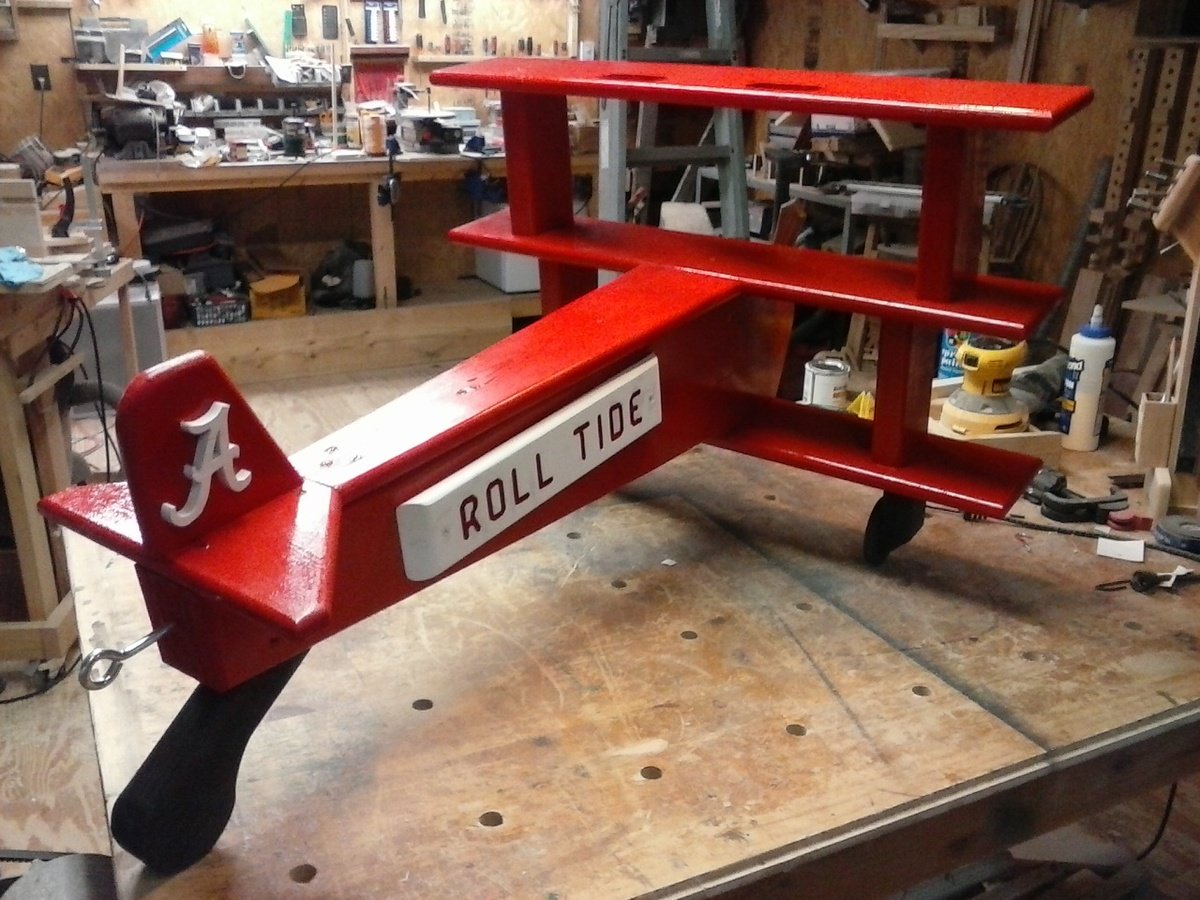
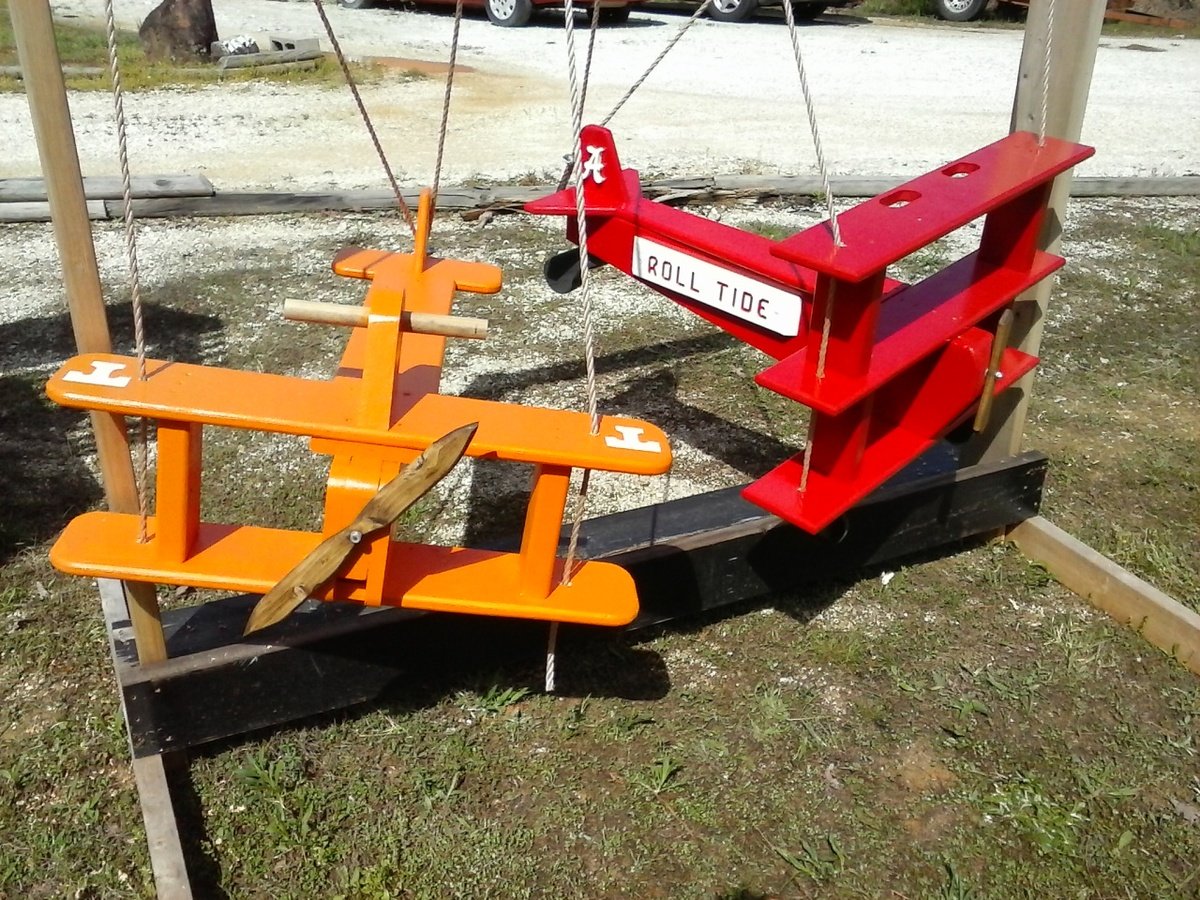
Built in an afternoon. I built them from a picture on Ana White website and modified a bit with both planes. Roll Tide was routed into a piece of wood and glued to the sides of the plane. The "A" was cut out on the band saw and finished on the scroll saw. The "T" on the orange plane was painted on The tri plane is the favorite. Roll Tide !
You didn’t have plans, so I had to “wing it” without you; however, I couldn’t have done it without all the practice I’ve had from all your plans on this website these past several years!
Tue, 04/26/2022 - 11:34
Job well done, that looks amazing! Thank you for sharing.
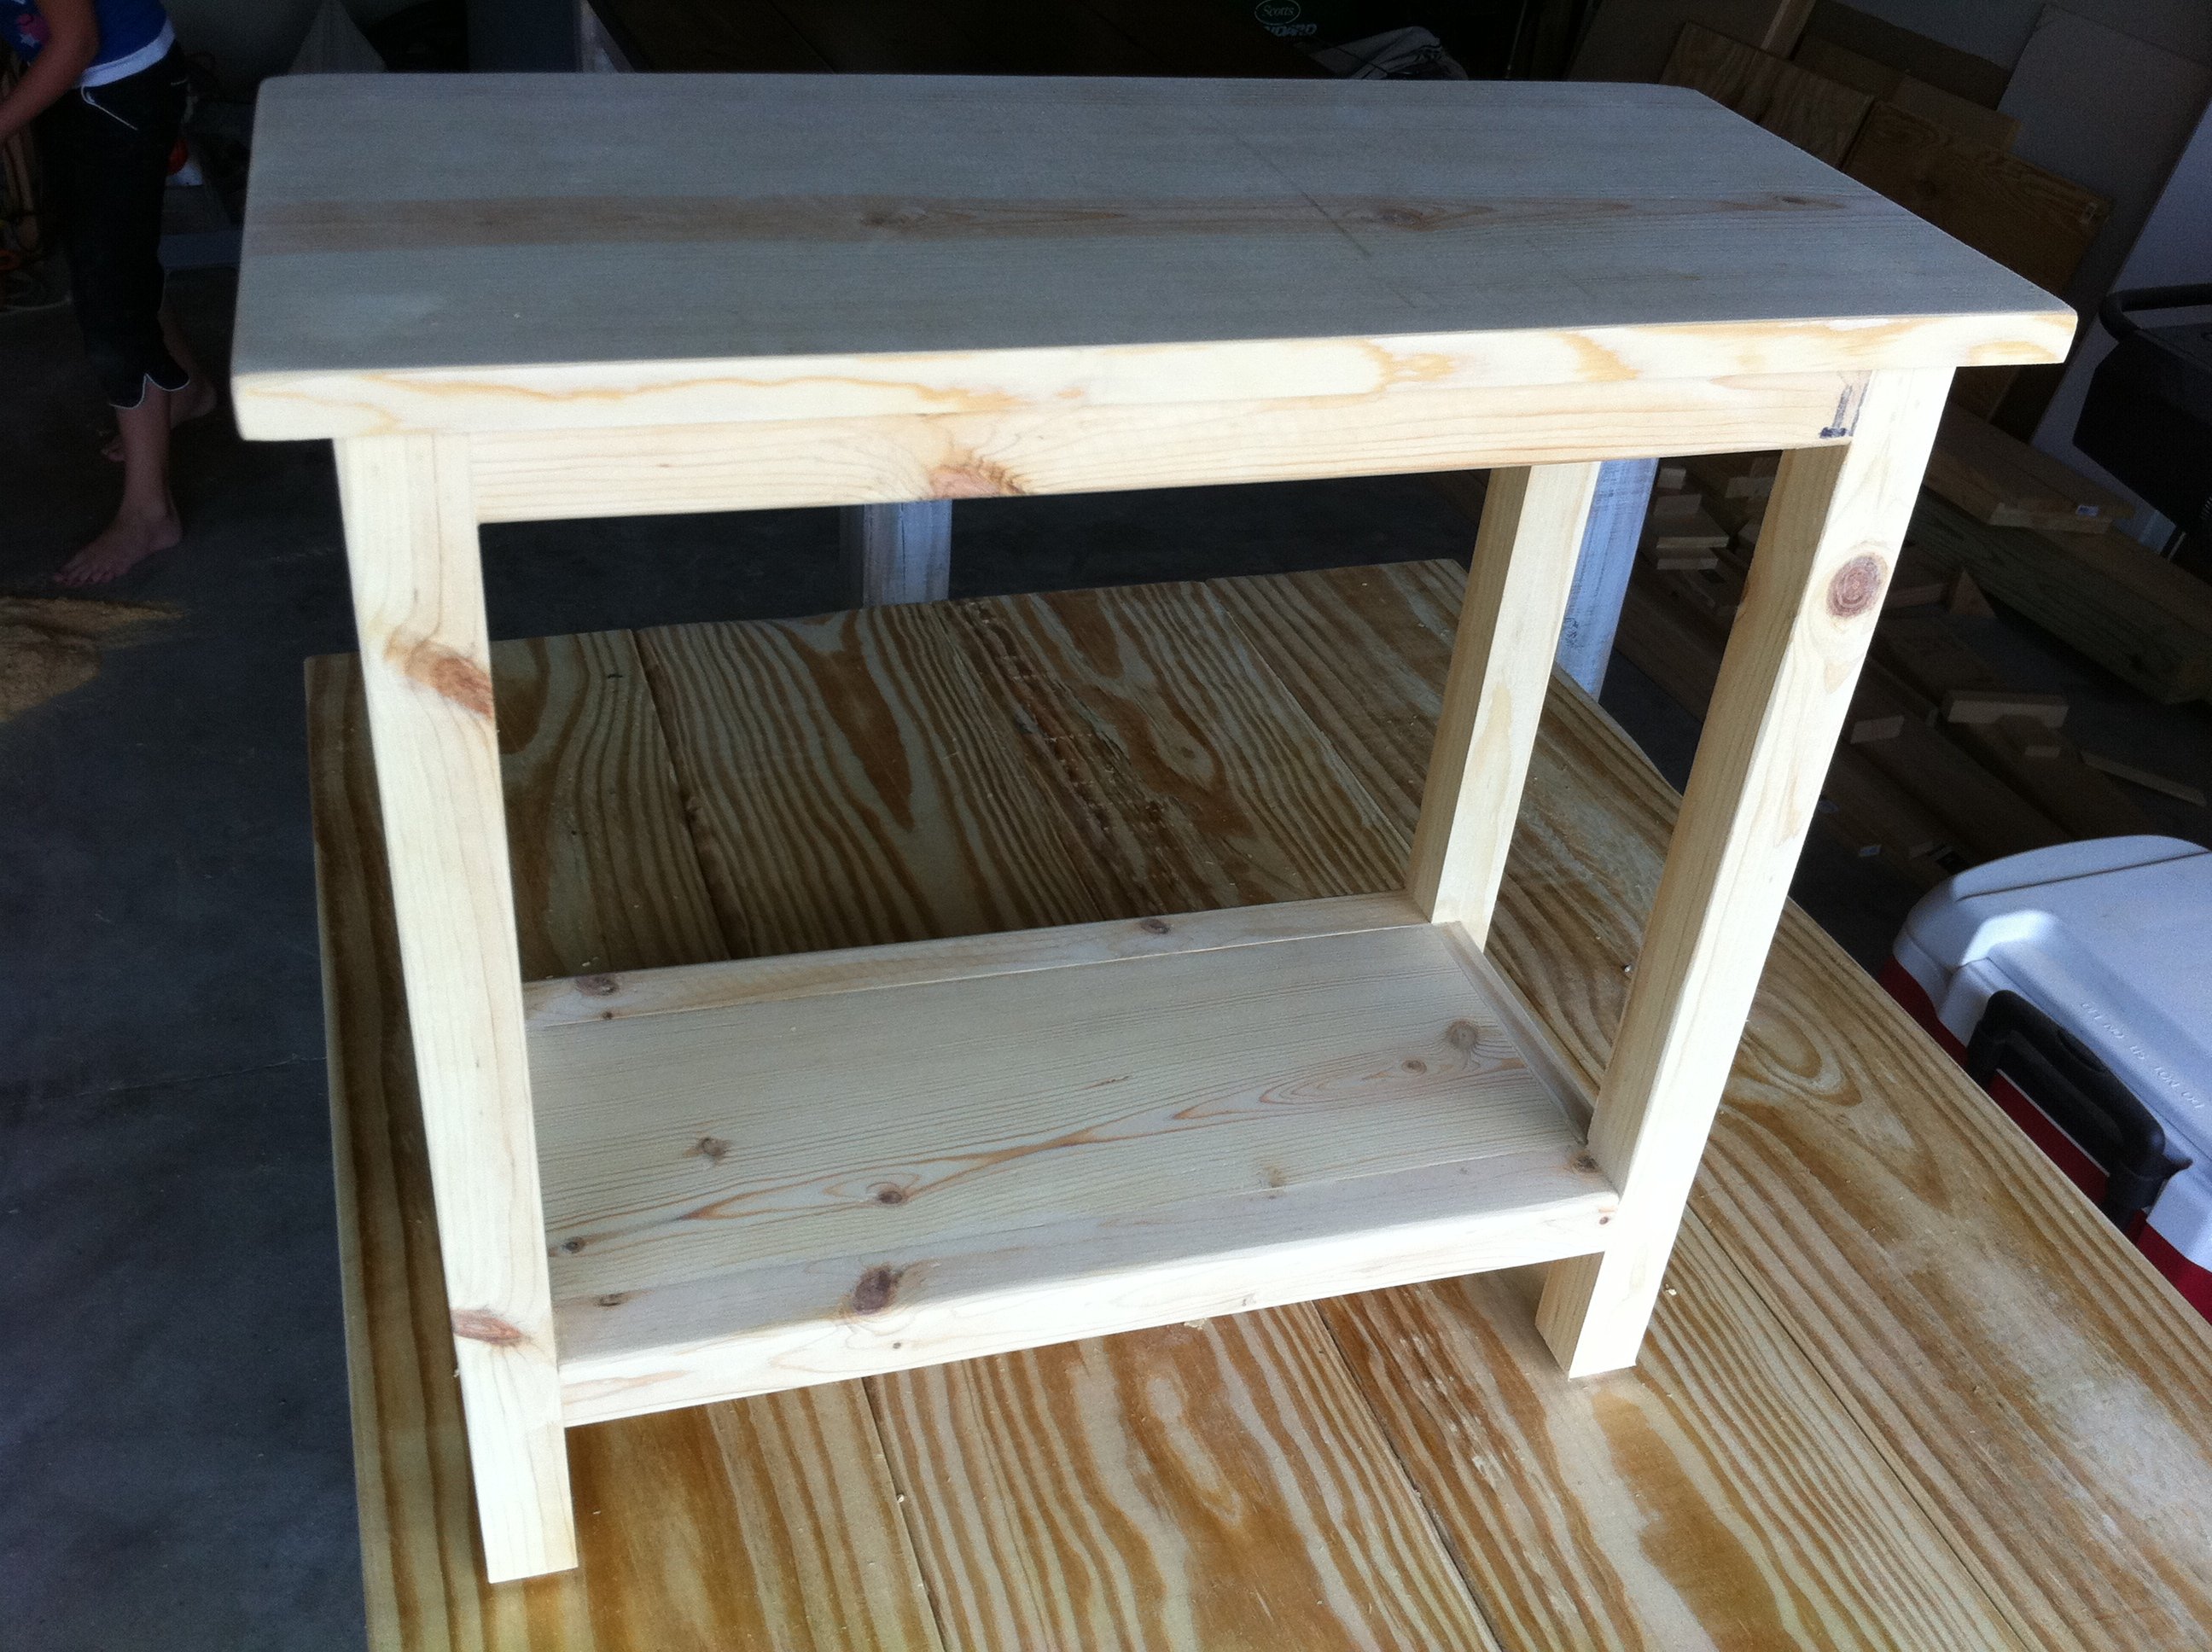
I wanted a table like Ana's narrow cottage table, except I just wanted an open shelf instead of a drawer for a basket.
Here is my version modified to fit my needs. Thanks to Ana, of course. :)
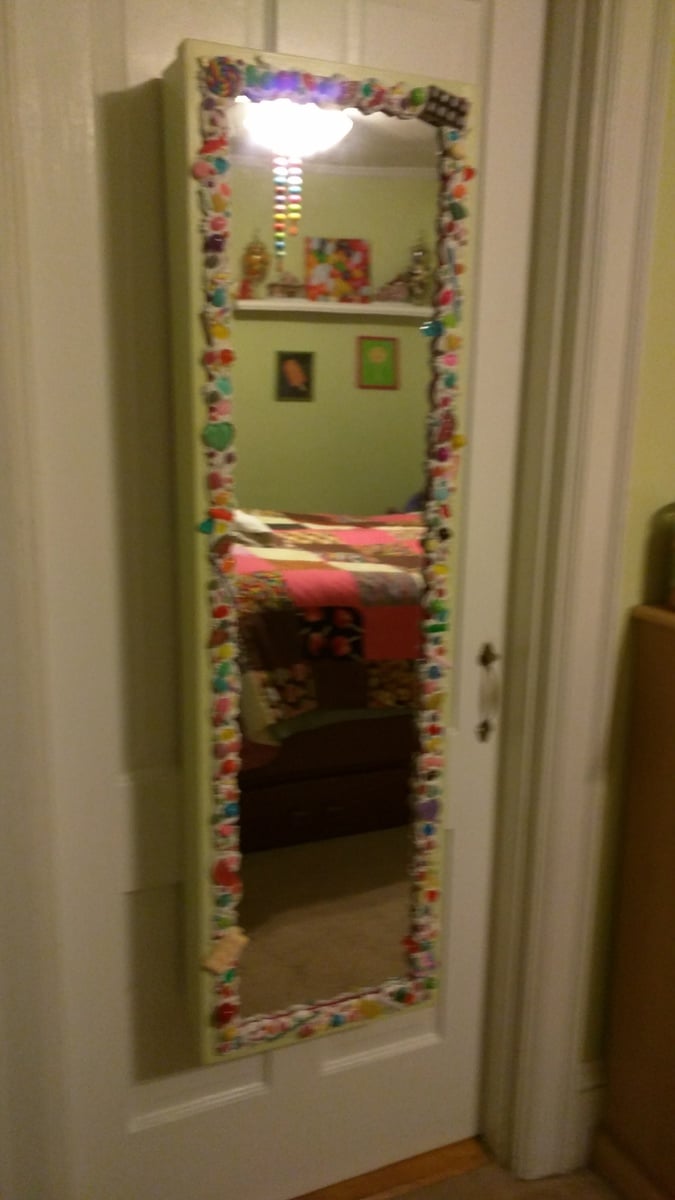
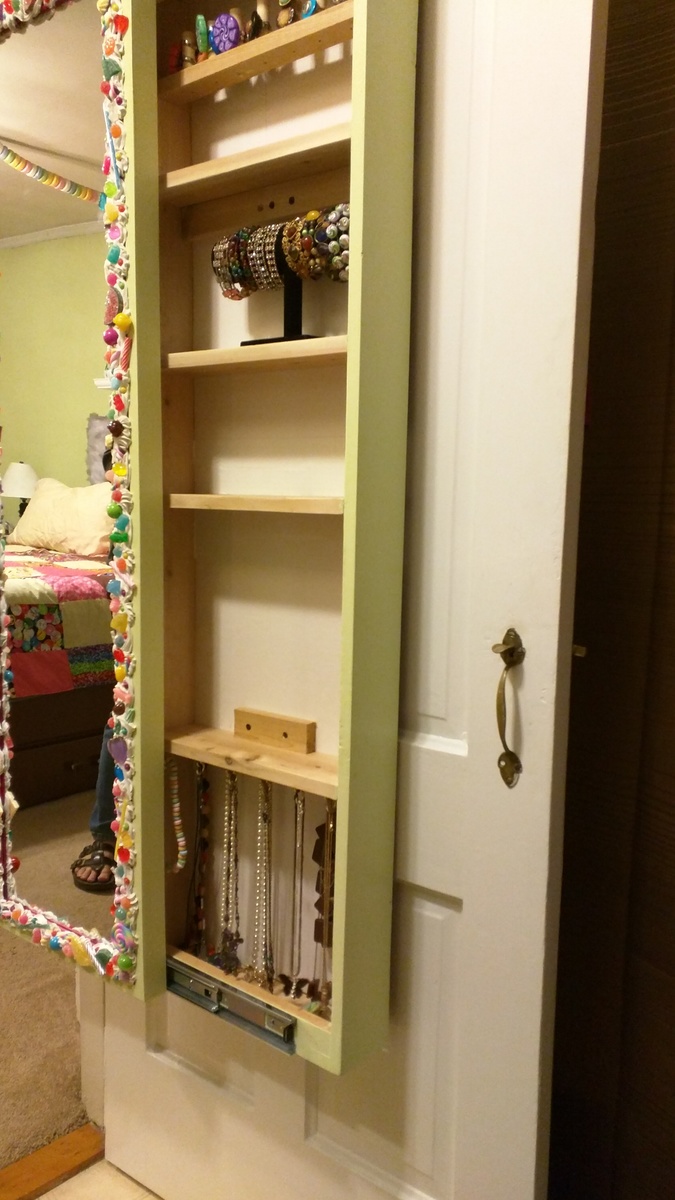
Hi Anna, I really had fun making our version of your sliding mirror project! Thought you might enjoy the photos! I made it into a jewelry cabinet.
Sun, 09/17/2017 - 20:48
How did you attach rails? I still cannot figure out the best way to do it...
Great plan and great instructions (especially the cuts). My only two deviations from the original design were to use carriage bolts to secure the long apron pieces to the legs (I like to have the bench frame be more flexible while I add the components and then tighten everything up once all the pieces are in place) and to add adjustable feet (You might have stellar tradesmen up there, but down in the Pennsylvania woods, we tend to get the C & D graduates from Trade School; hence, level, evenness, & square are rare qualities to be celebrated when encountered and not taken for granted). My only other comment regarding the instructions would be to mention in the tools required that either a big honking set of clamps (36" span) or maybe ratcheting straps would be a good thing to hold the shell together while you are trying to screw the cross pieces into the shell. Maybe you are good enough to do it without clamps / straps , but I sure couldn't get the (slippery) glued cross pieces to stay put without some kind of support. Other than that, great design and instructions. Thanks!
I needed new bedside tables to replace mine that were falling apart. I love the whole Stratton line at PB. I wanted to make something similar, but a bit more sturdy.
So, I made this table with a much more solid bottom shelf and a deep drawer with a full face to mimic the sides and the back panels.

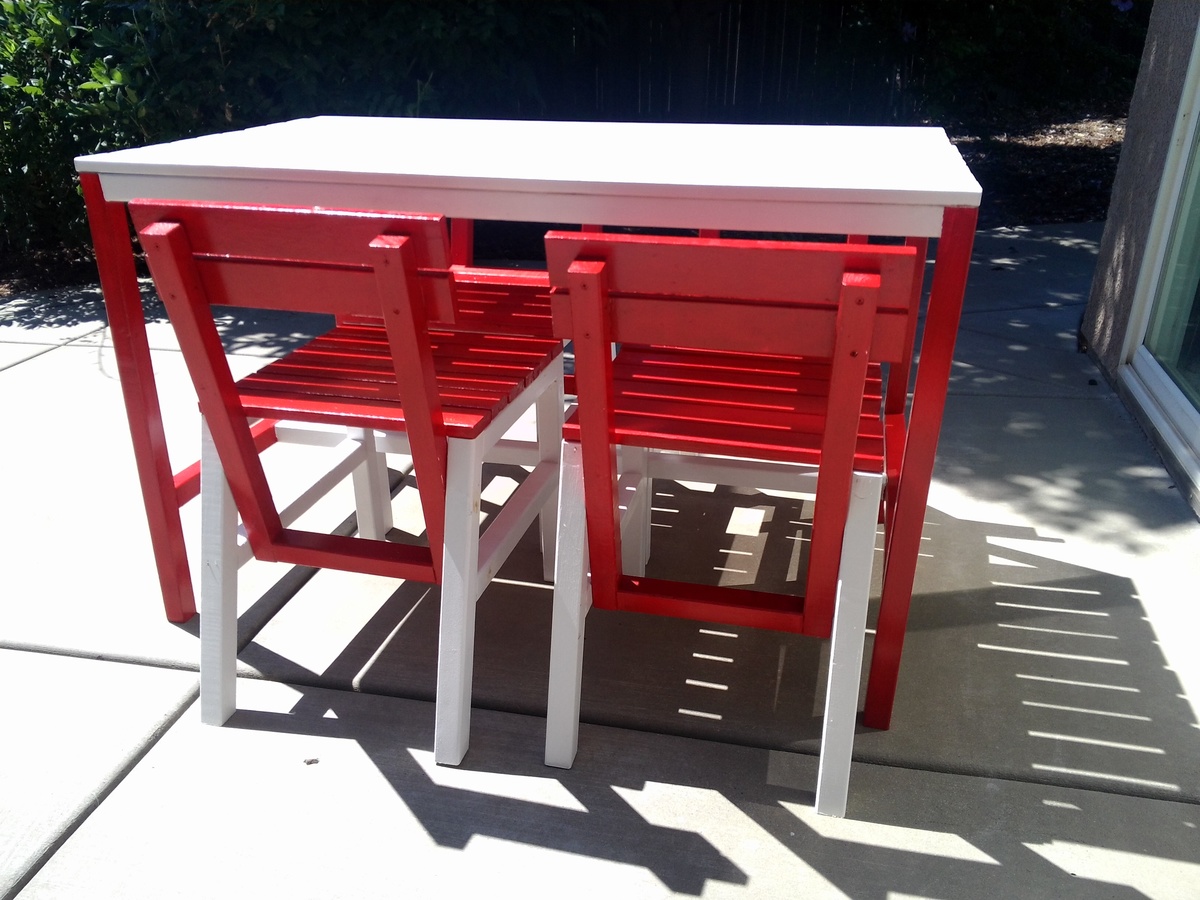
It took me a long time to finish the chairs, although the table was a snap. The time consuming thing was my desire for two paint colors. Painting is not my strong suit. But I got it done, just in time for our annual Labor Day house party.
I cut the lumber using our radial arm saw. I sanded with an random orbital sander, and used really great cordless drill and driver. My husband likes to buy good tools, but hardly ever uses them.
I had never used pocket screws before: I love them and found it very necessary to use the face clamp and right angle clamp Kreg sells to prevent splitting. My assortment of speedclamps were not getting the job done.
For the table, I tried masking off the white when I painted the red on the legs, which did not go so well as there was annoying paint-creep under the tape. I also decided that the red paint needed two coats to look good (it actually seemed to do better on bare wood then on primed wood.) So that took more time.
I finally bought a really good paint brush and that made a huge and positive difference.
I had intended to paint the chairs' slats red, but the back frame white, and the side supports red. To do this I intended to paint individual pieces and assemble the painted pieces, but the splitting (before I invested in the specialized clamps) was heartbreaking after all the sanding and painting. So I took a month off from the project, ordered clamps, recut a few pieces, and simplified my paint scheme. Much better!
I'm looking forward to starting my next project (NO paint!)

Tue, 08/27/2013 - 16:27
Awesome! Definitely dressed to impress! Love the colors and your chairs & table look beautiful! Great job!

Tue, 08/27/2013 - 17:32
Love it! That color combo is one of my favorites!
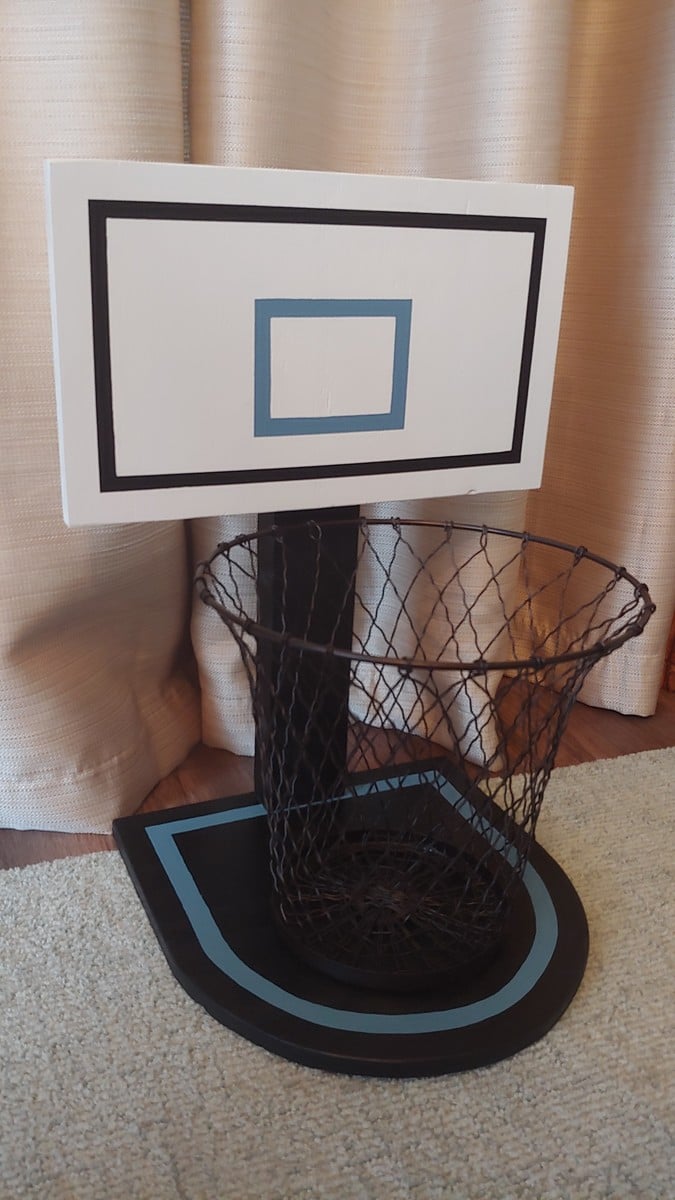
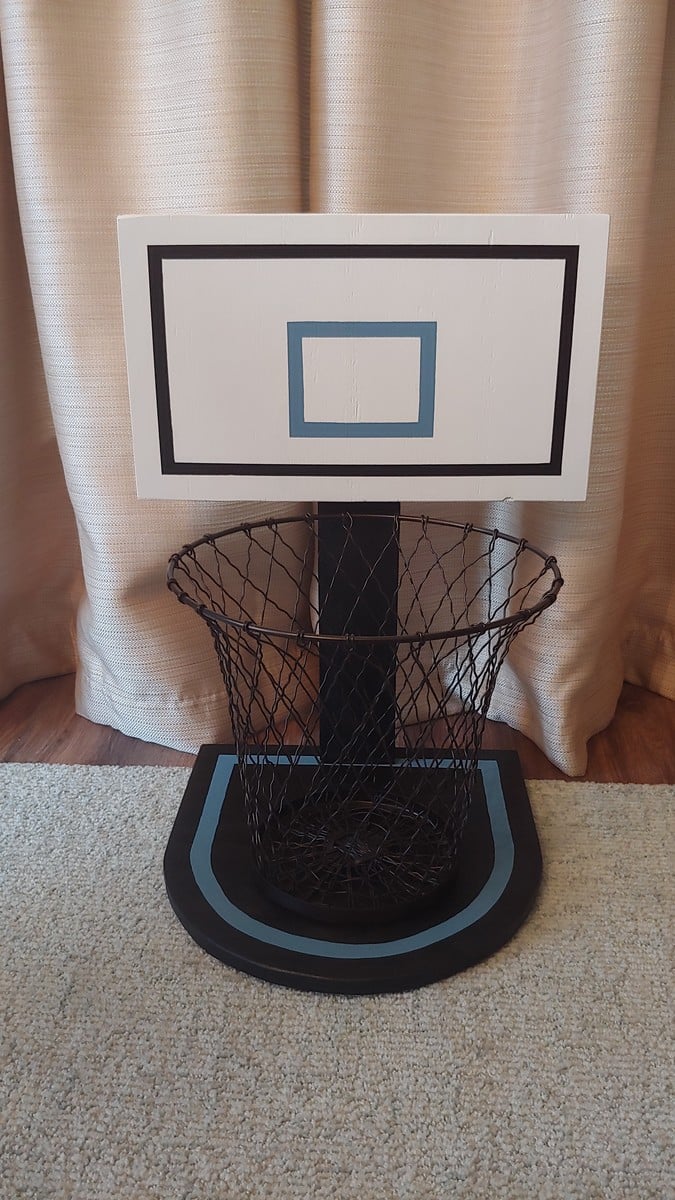
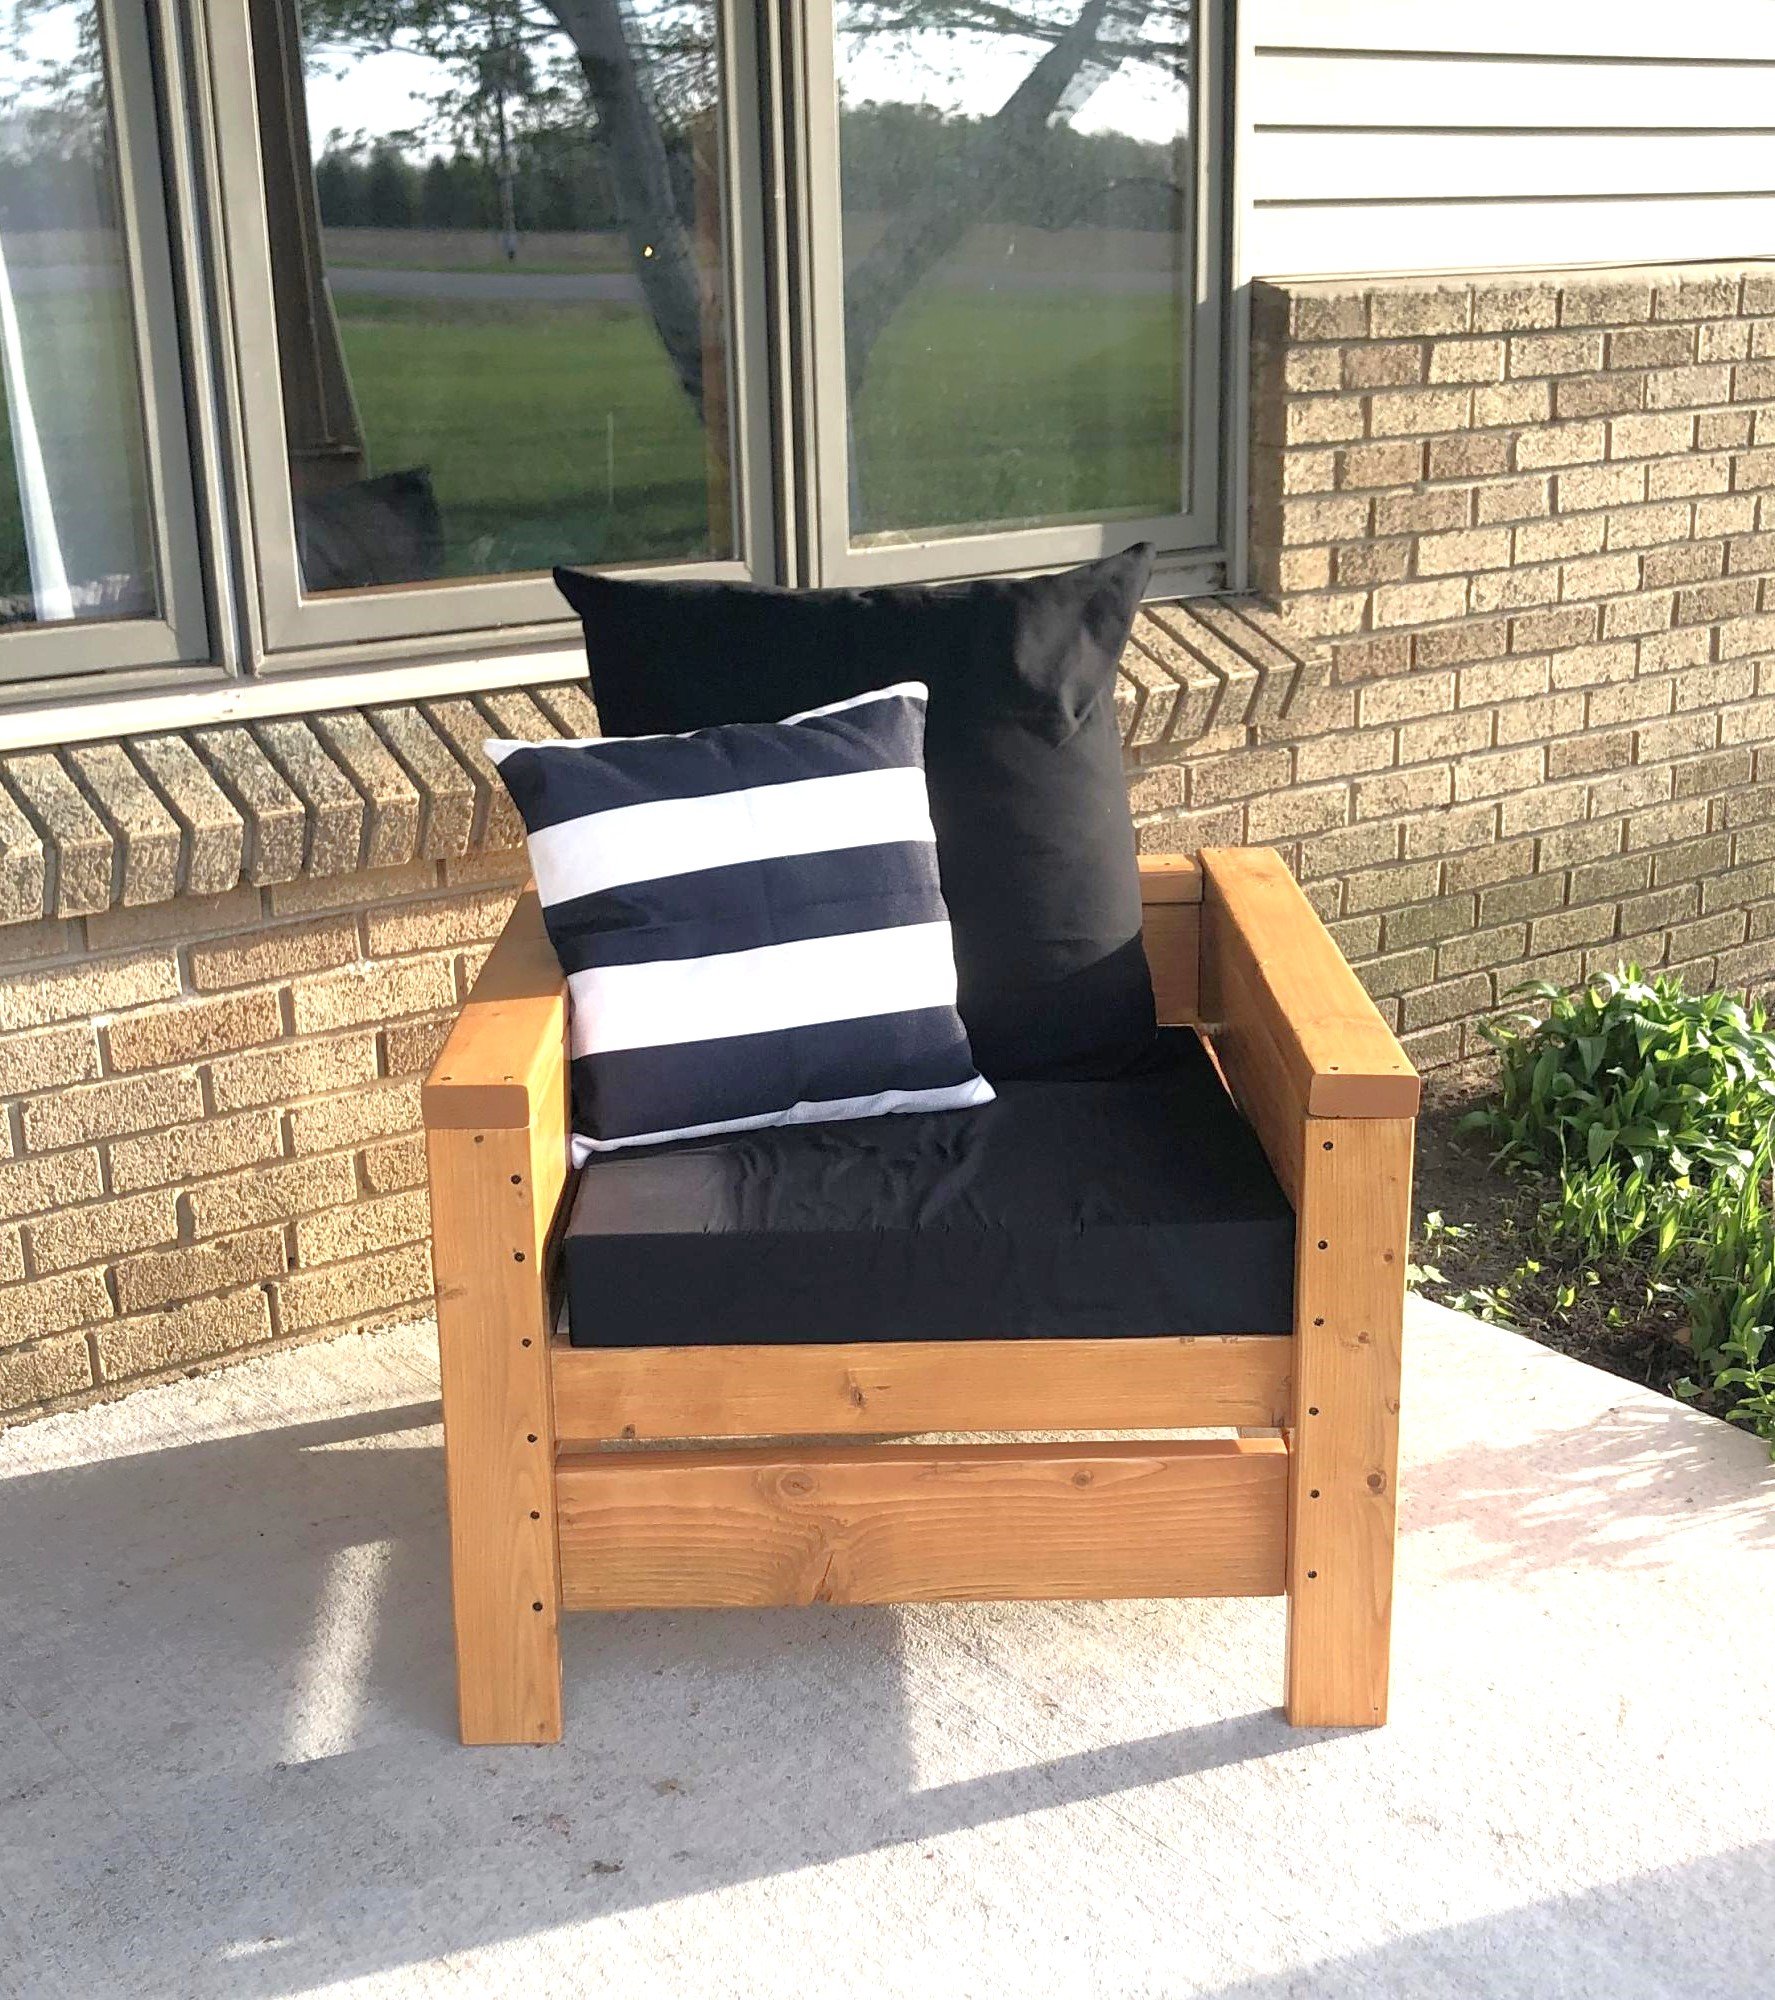
My family is doing a home made Christmas this year. I fell in love with this plan the first time I saw it. While out shopping, I happened upon this trash can on sale which reminded me of a basketball net and knew I had to build this project. We used leftover plywood which necessitated using paint to hide blemishes. The size was modified a bit to fit this trash can. I think it is really cute!
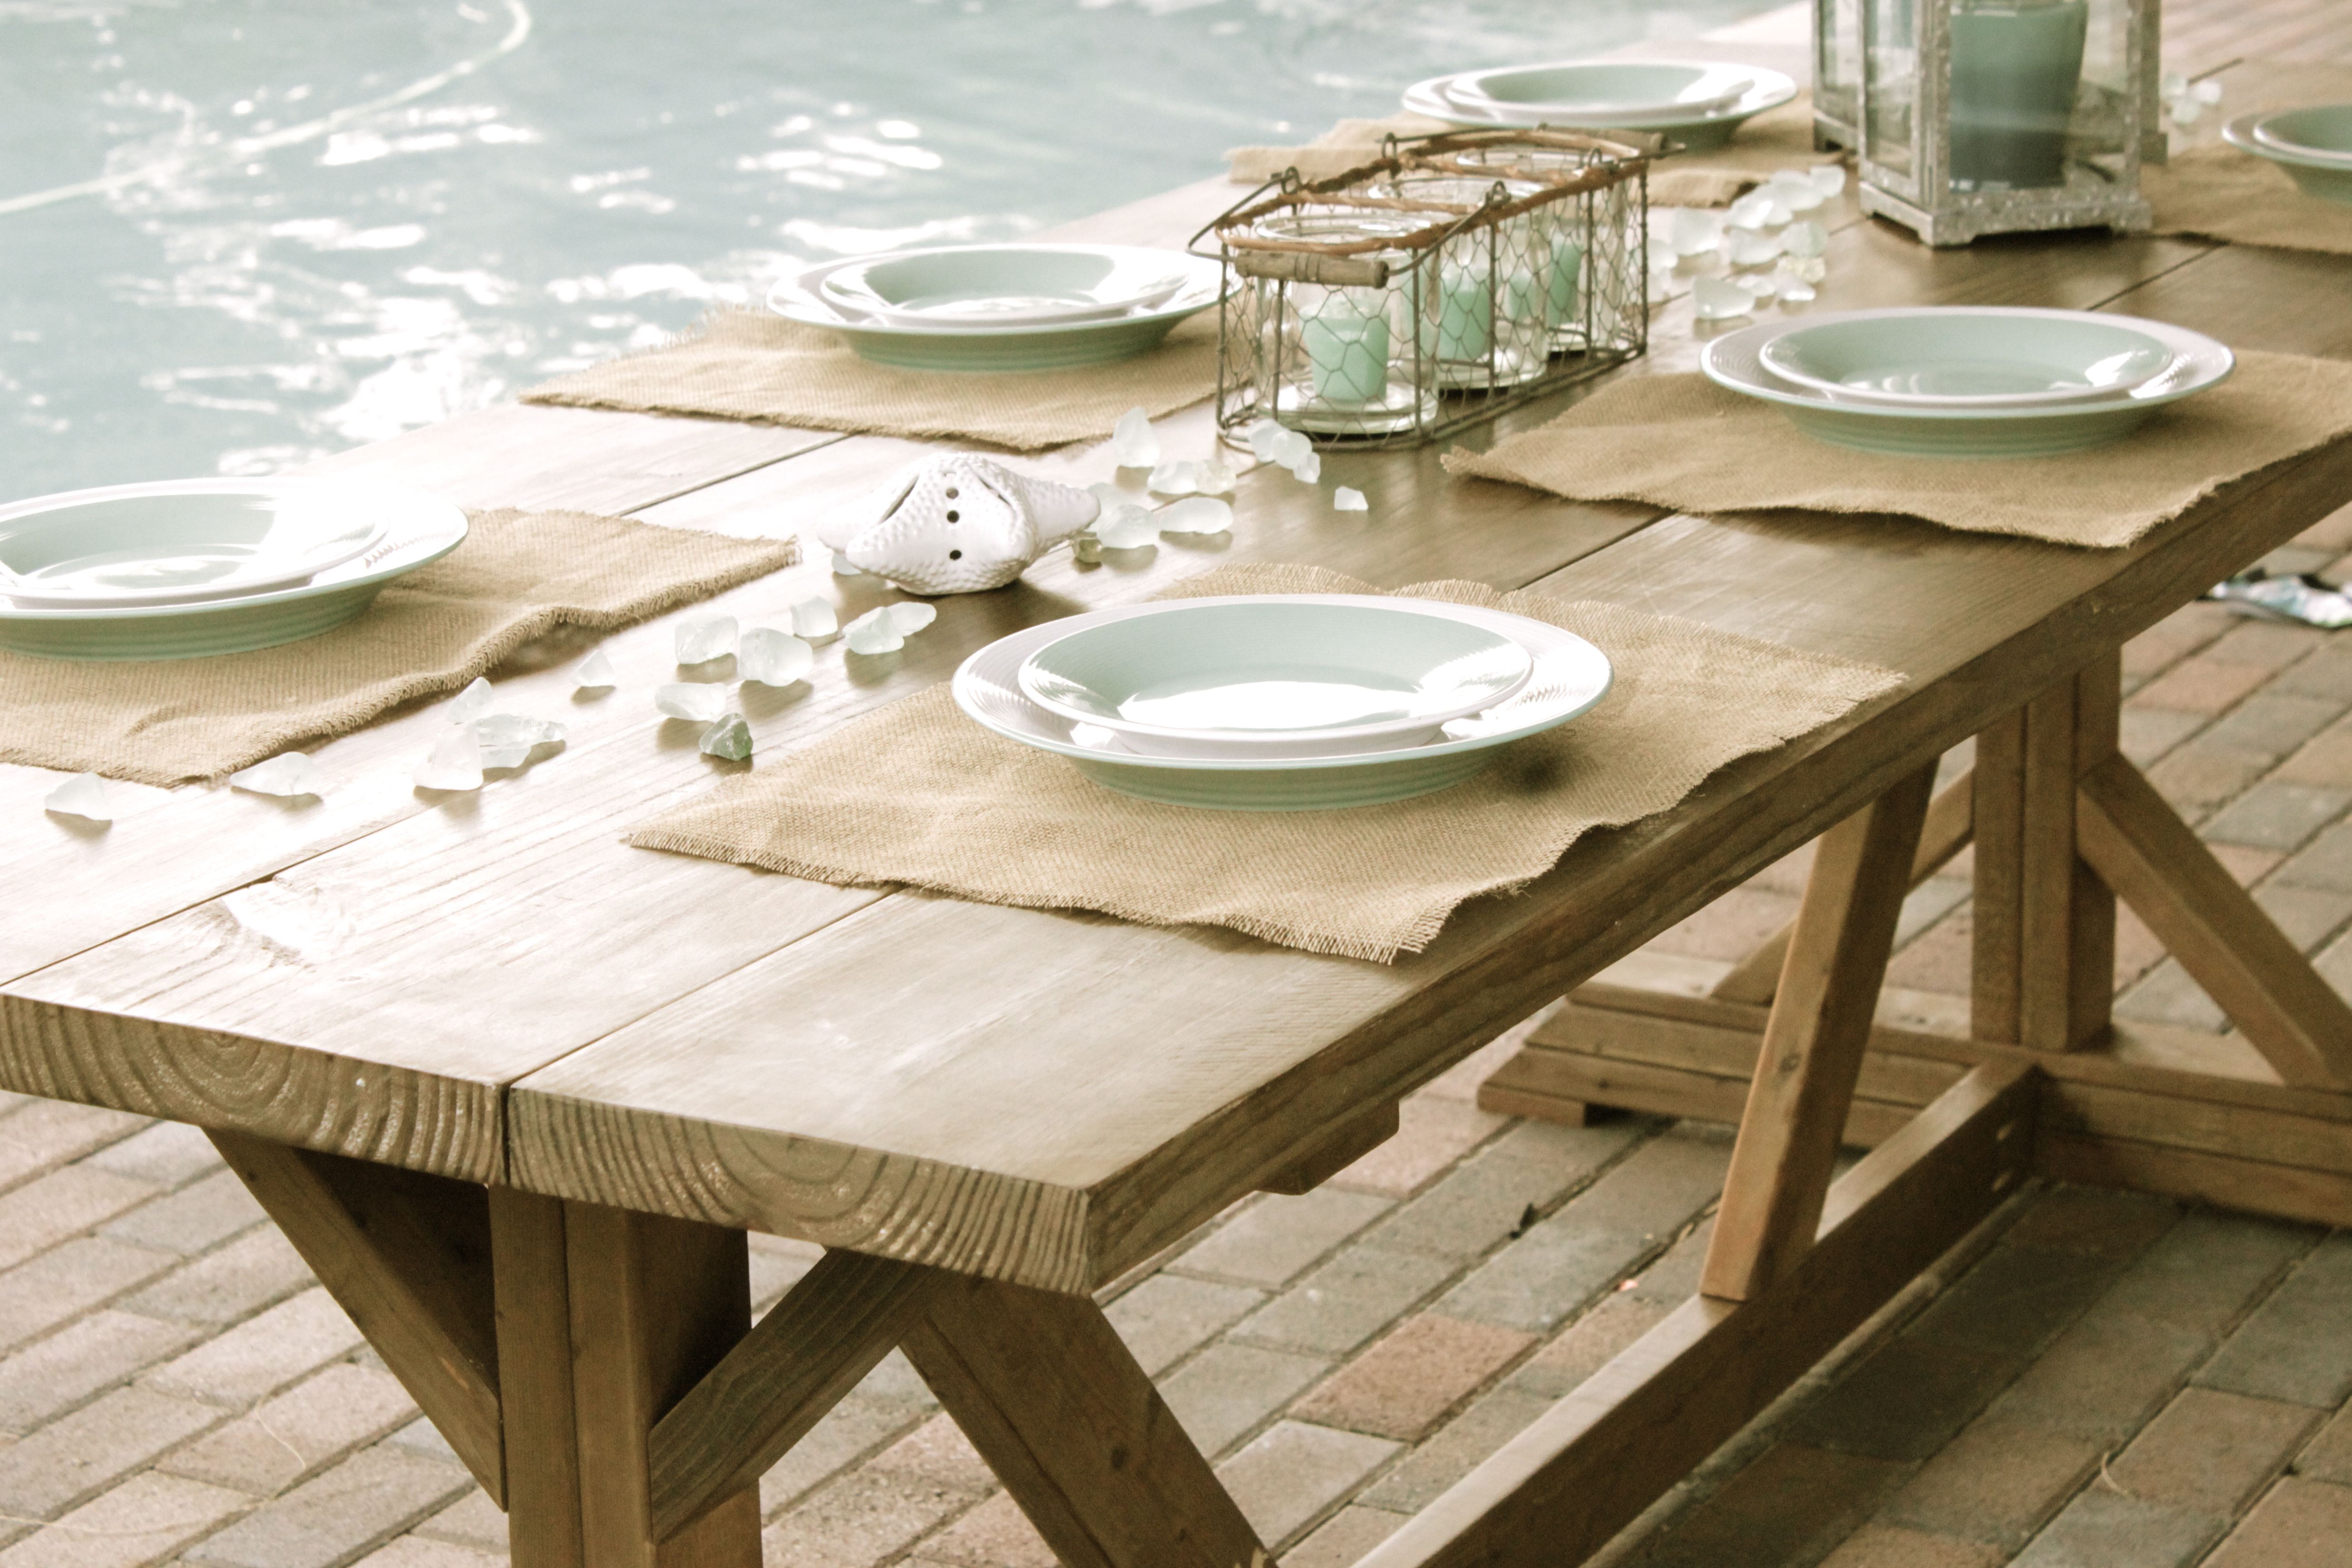
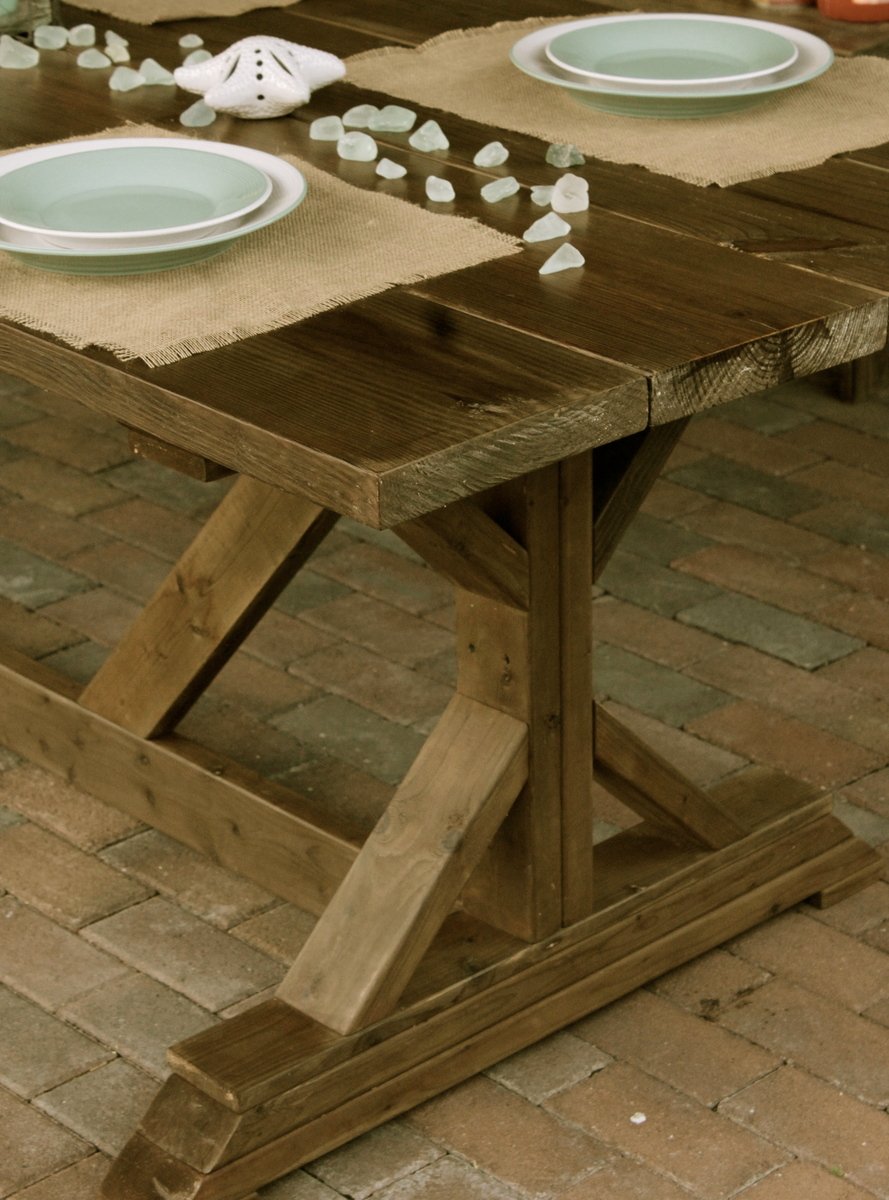
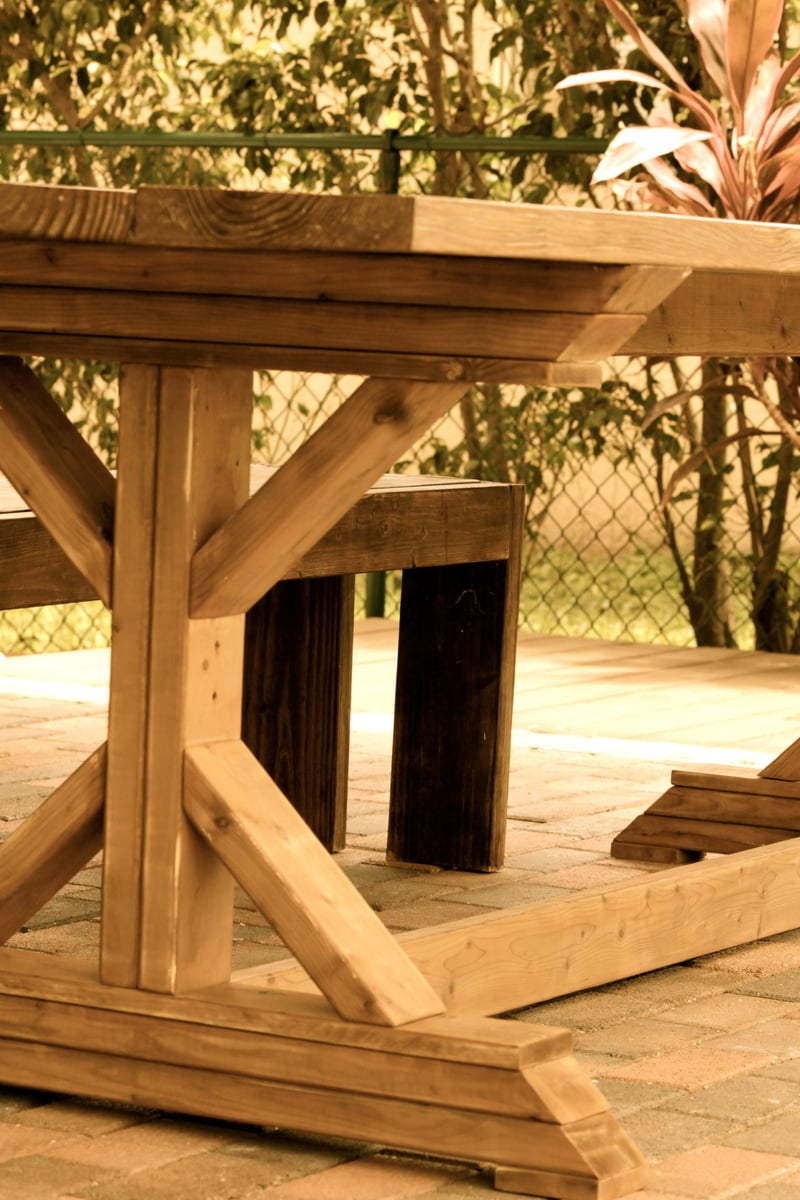
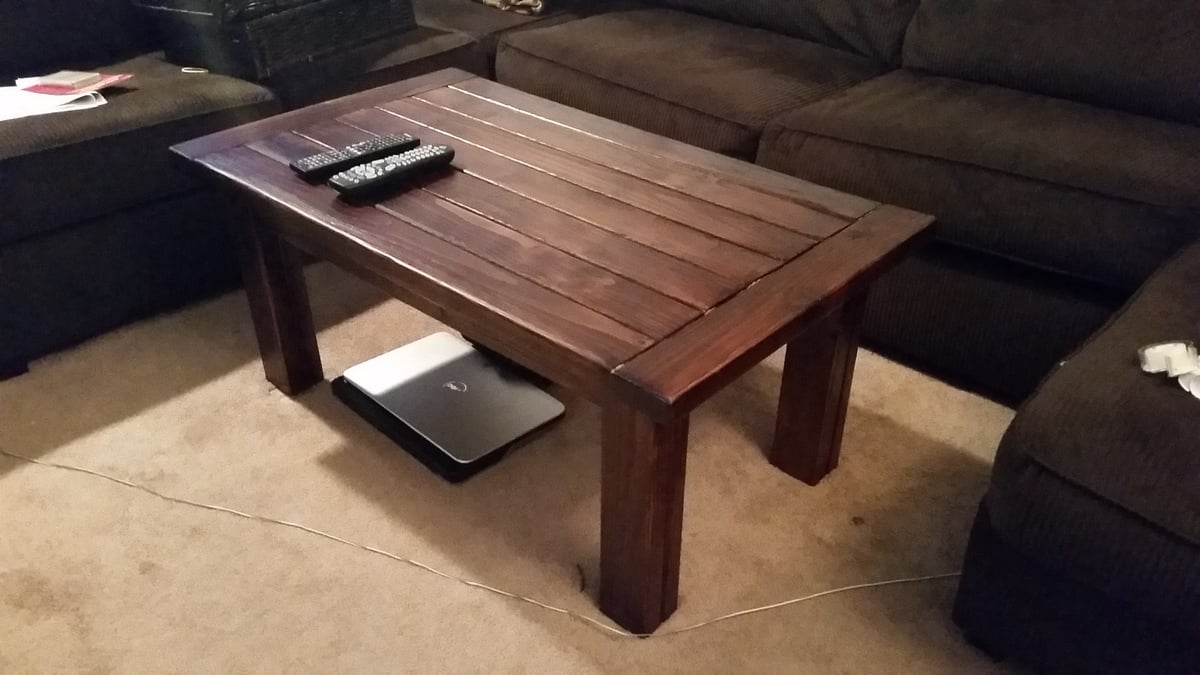
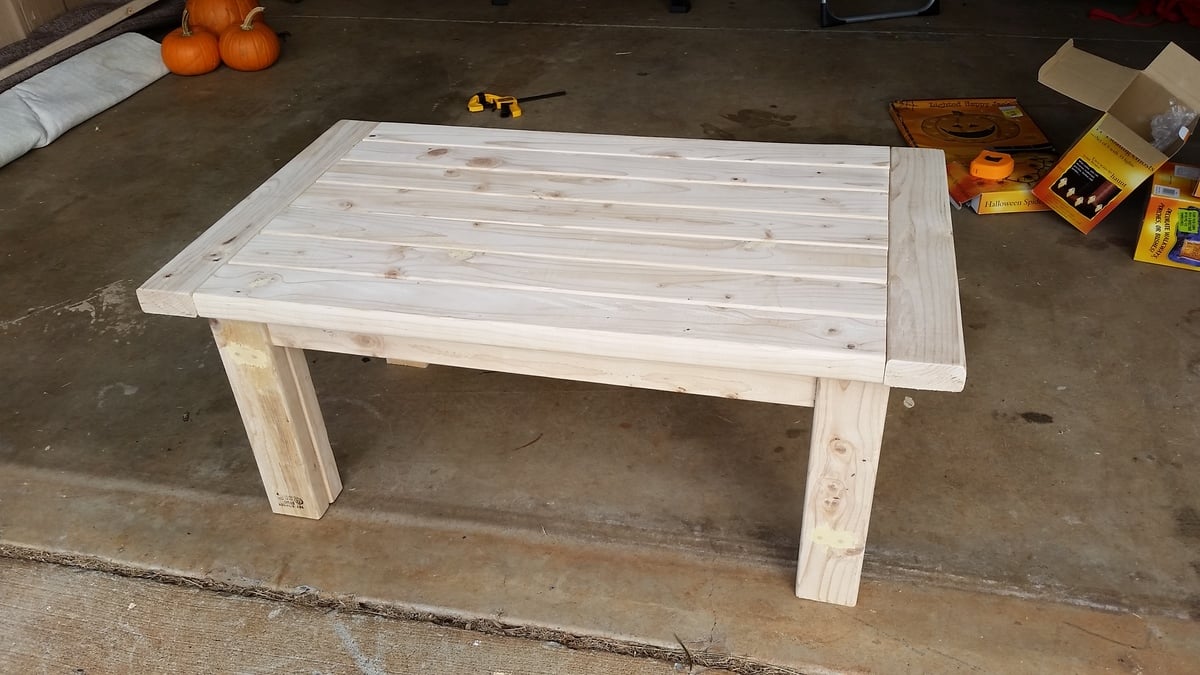
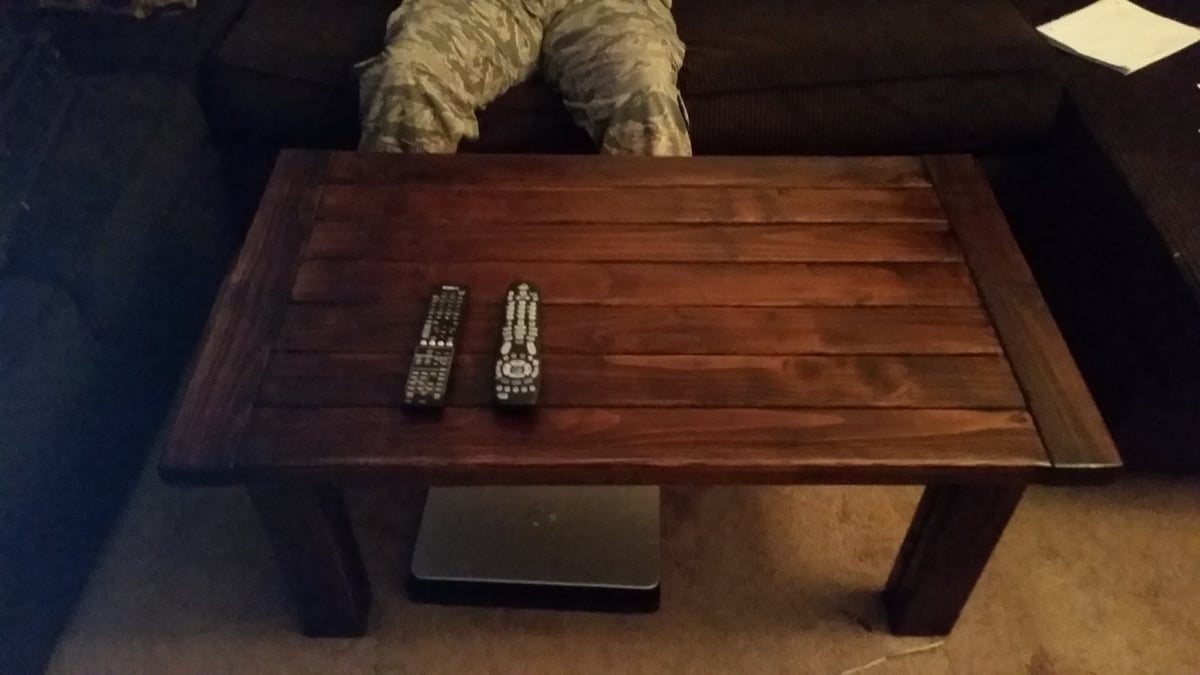
I built this table a year ago just never got the chance to post pics. It was an easy build.
Sat, 09/07/2013 - 17:16
Your table looks beautiful! Love the finish, and the way you arranged and photographed it is wonderful, great job!
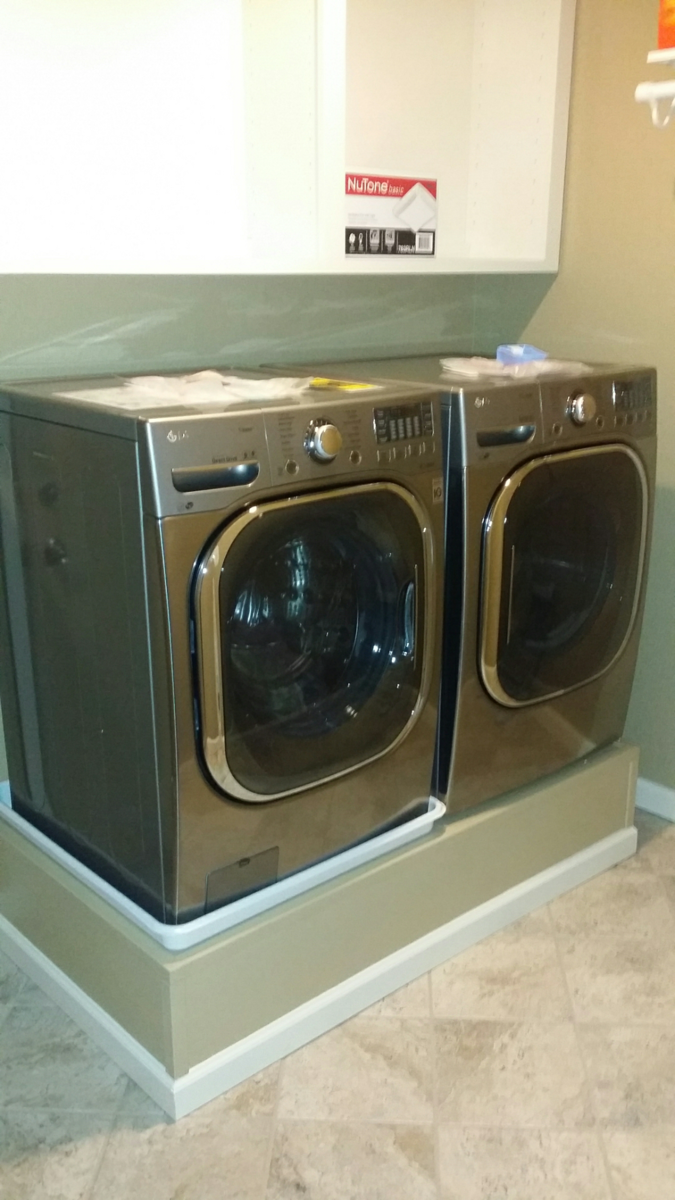
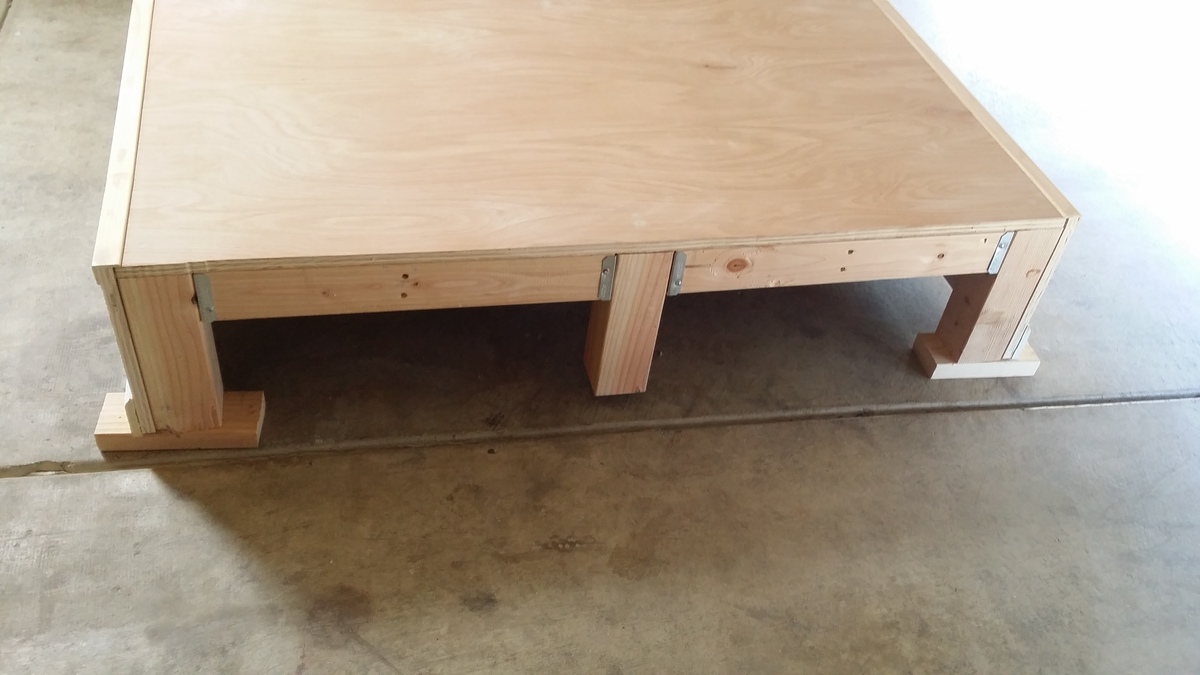
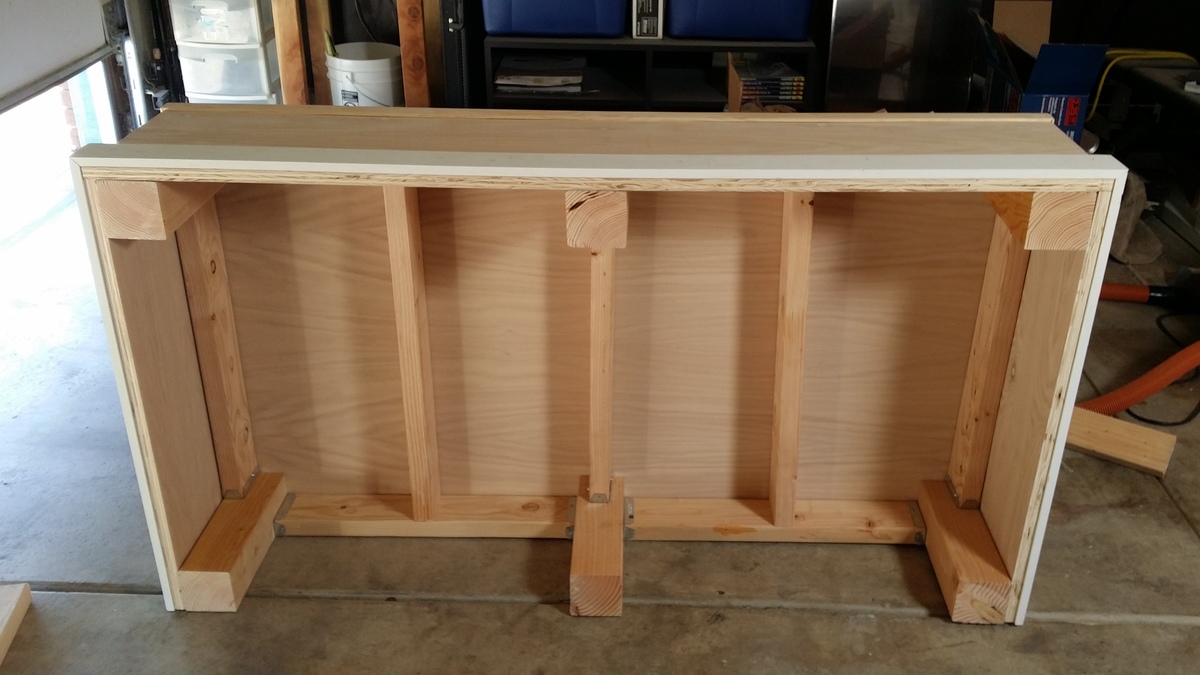
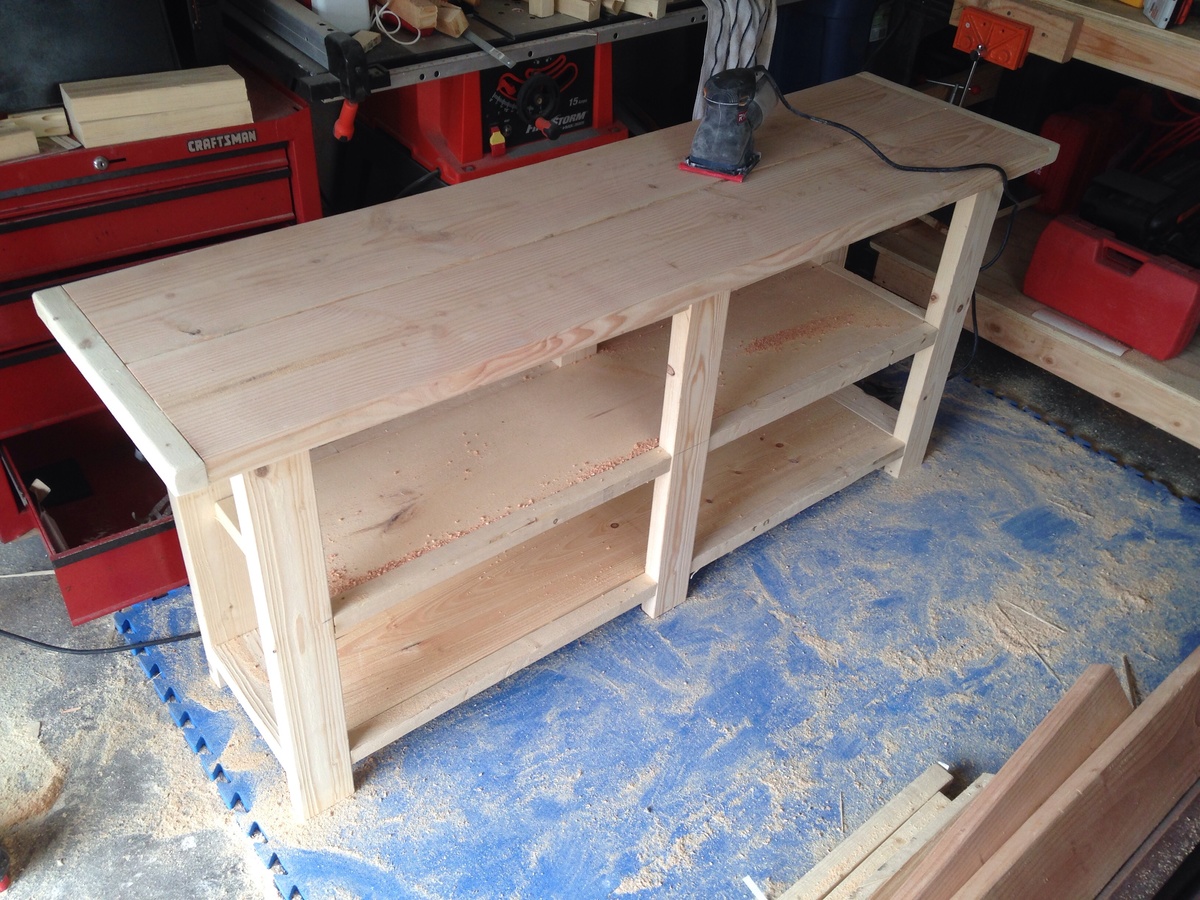
I got this Idea from Sausha's washer dryer pedestal post. Before then i didnt know people even built pedestals for their washer and dryer. Just purchased new front load washer and dryer and they wanted 250 bucks extra for each pedestal. That is 500 bucks and is absolutely rediculous. So i opted out of those and thought to myself maybe I can build something instead. So I began my search online and stumbled across this post which seems to be the most popular pedestal build on the web. I think sausha's build is fantastic and absolutely beautiful though I went another way with mine.
I tend to like to overbuild things. Especially in this case, seeing as the washer weighs a beastly 200 pounds by itself. I figured with clothes and water it would be about 235 pounds just for the washer. I noticed that with the aluminum drawer pedestals that you can purchse with the washer and dryer the support is only where the legs from the washer and dryer will sit. That was all I needed to get on my way. Purchased some regular old douglas fir 2x4's, 4x4's, and a 4'x8' sheet of 3/4 inch plywood. I opted to use fence post brackets to tie everything together because I didnt feel like driller pocket holes in each 2x4 when you were not going to see them once its all said and done. The fence brackets are not structural so they lack ridgidity untill you tie everything together with the legs, slats, and top. Cut the top from the 3/4 plywood sheet and used the left over plywood to cover the front and the sides. I left the back open as it is not seen anyway.
Total size of the pedestal is 56" wide x 31" deep x 12 3/4 inches tall, but you can build it as wide, deep or as tall as you need it. When i was done putting it together. I tested it by jumping up and down on it and I weigh 230 pounds. So this thing is quite strong. I finished it up by covering the edges where the plywood meet with Edge moulding and the bottom with baseboard to match my laundry room. I used Behr premium plus ultra paint on most of it and, behr alkyd paint for the baseboards. Gave the top a couple coats of General Finishes High Performance Polyurethane. Which isnt neccessary but I opted to do so because of the weight of the washer and dryer and the General Finishes High performance dries harder than most other polys that I have used. I only used it on the top though.
Taking into account that I used the paint and baseboards left over from renovating my laundry room. This project cost about 150 bucks. 200 if you have to purchase the paint and moulding. Quite easy to do and though I made the cutes I needed with my table saw. This can be done with a circular saw and a drill. No exotic tools are needed. Will post finished pictures when my washing machine and dryer are delivered on friday and they are sitting on top of the pedestal.

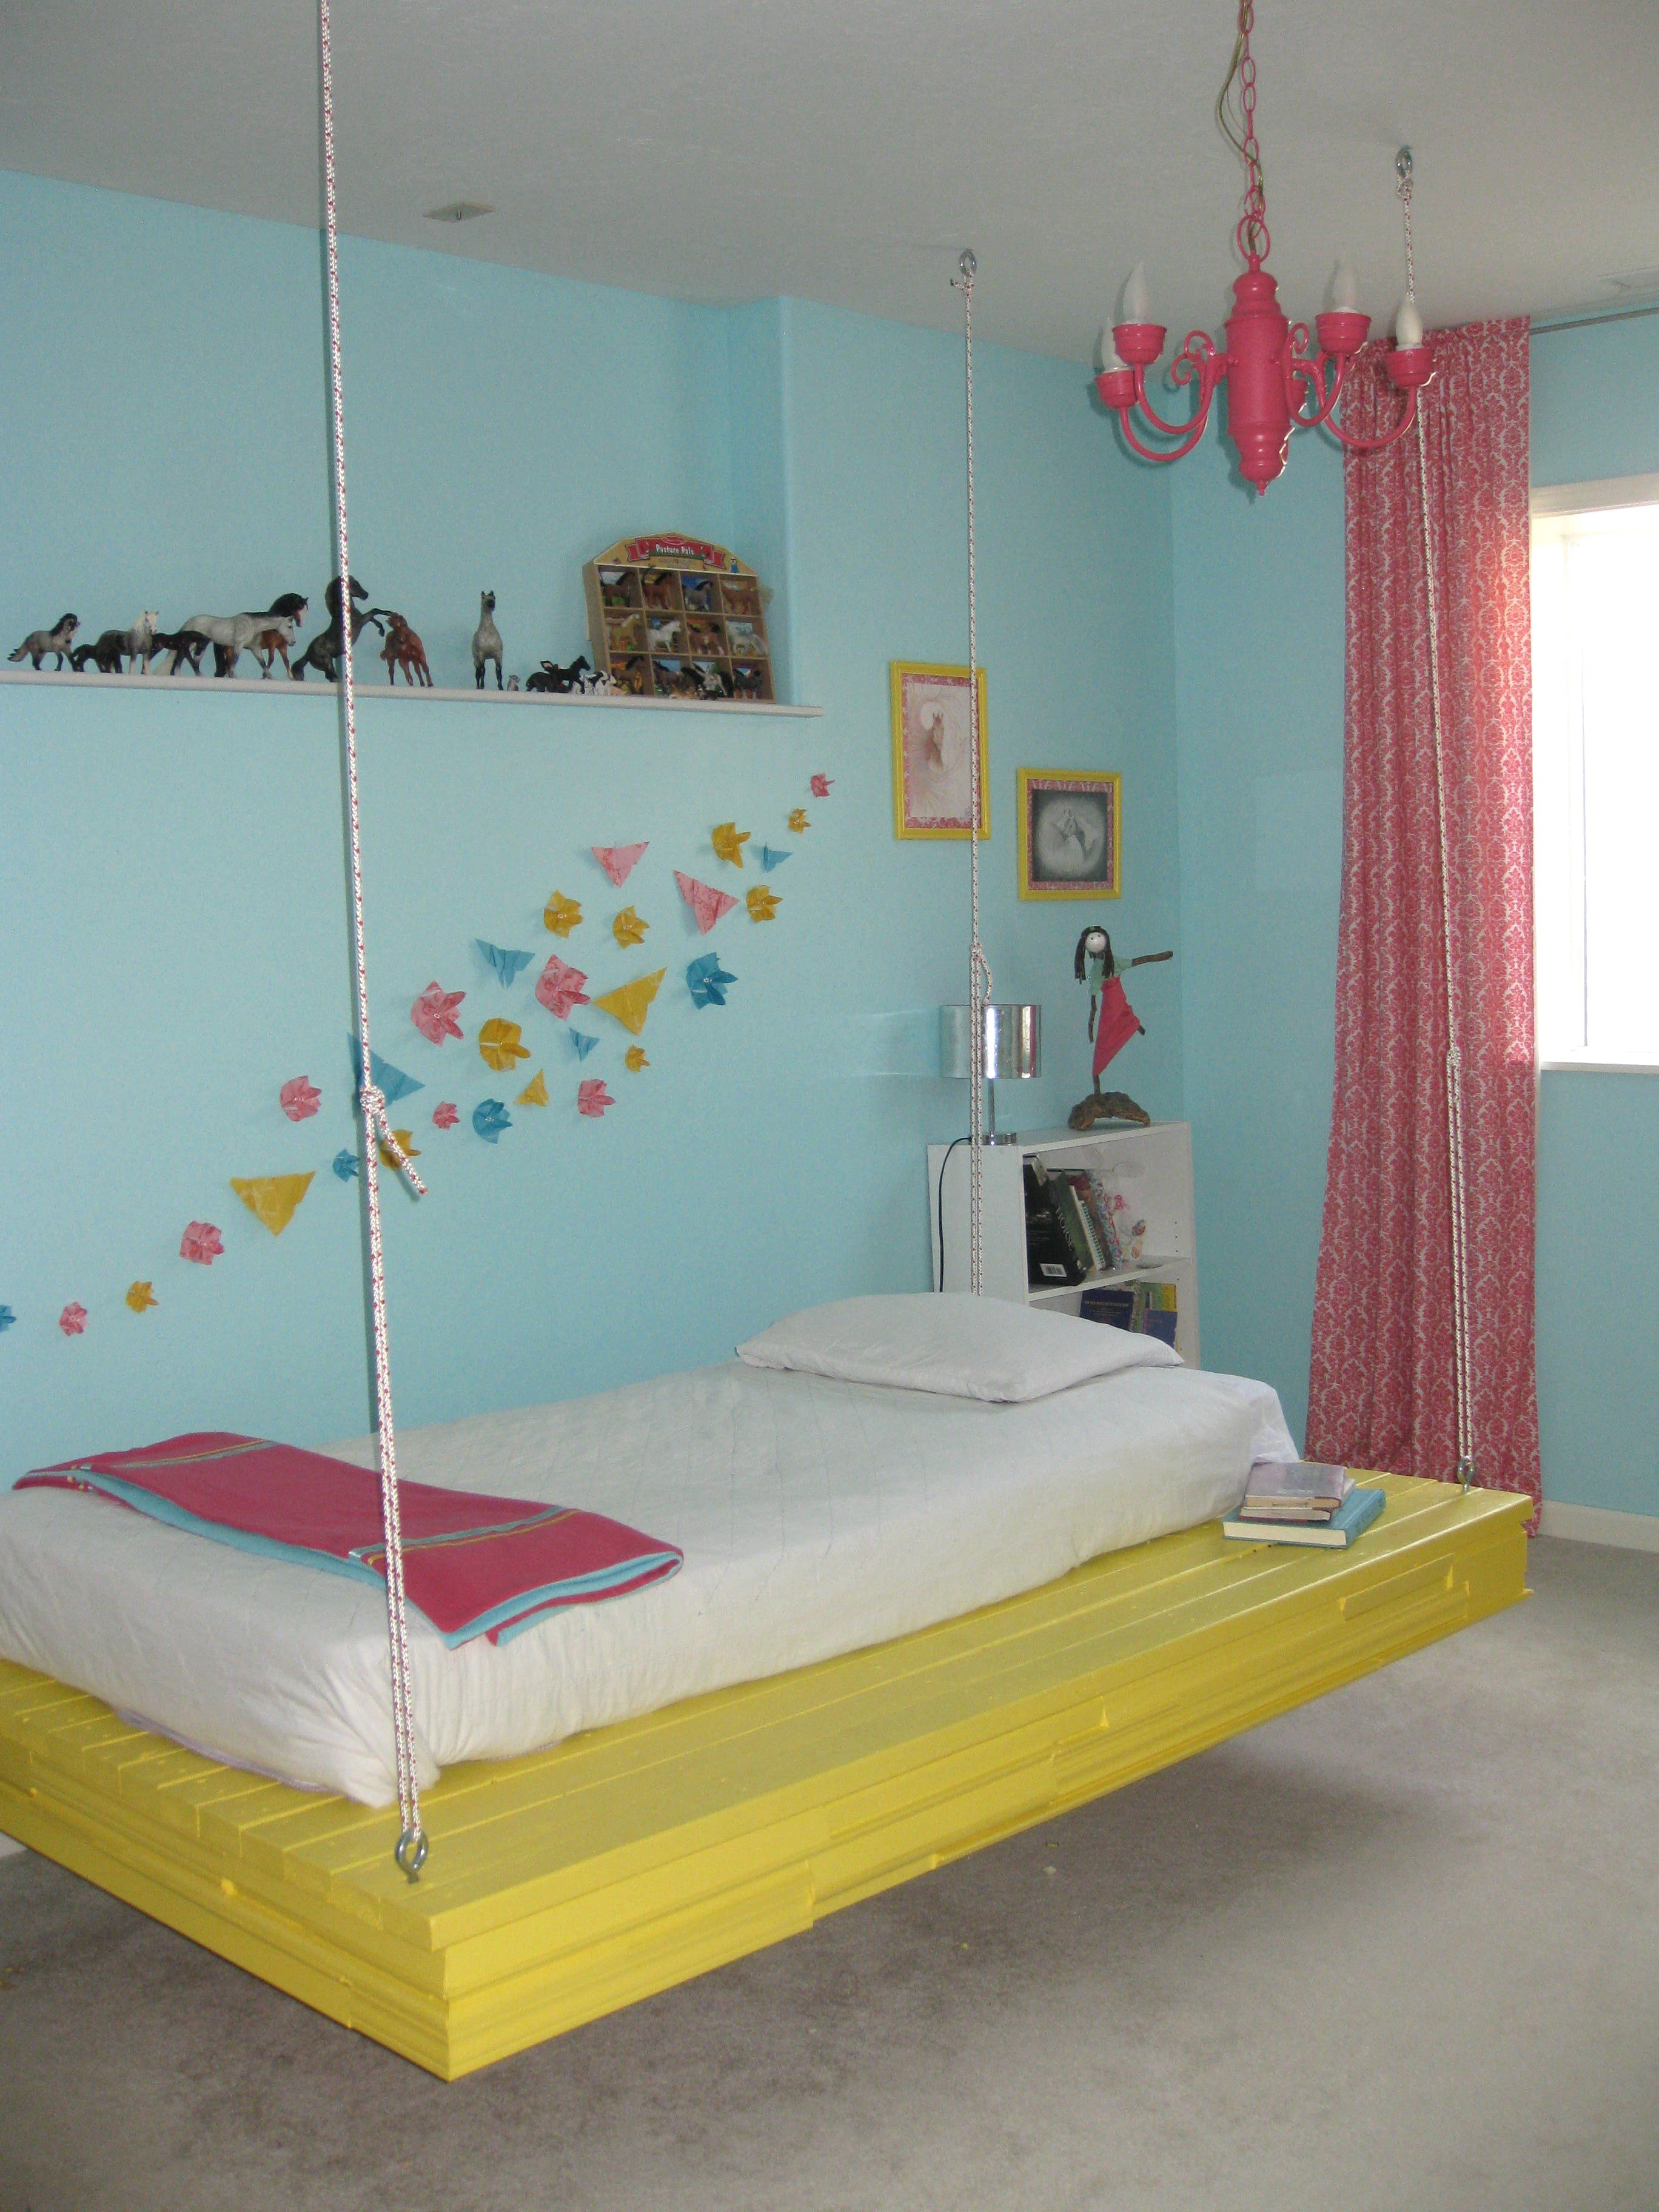
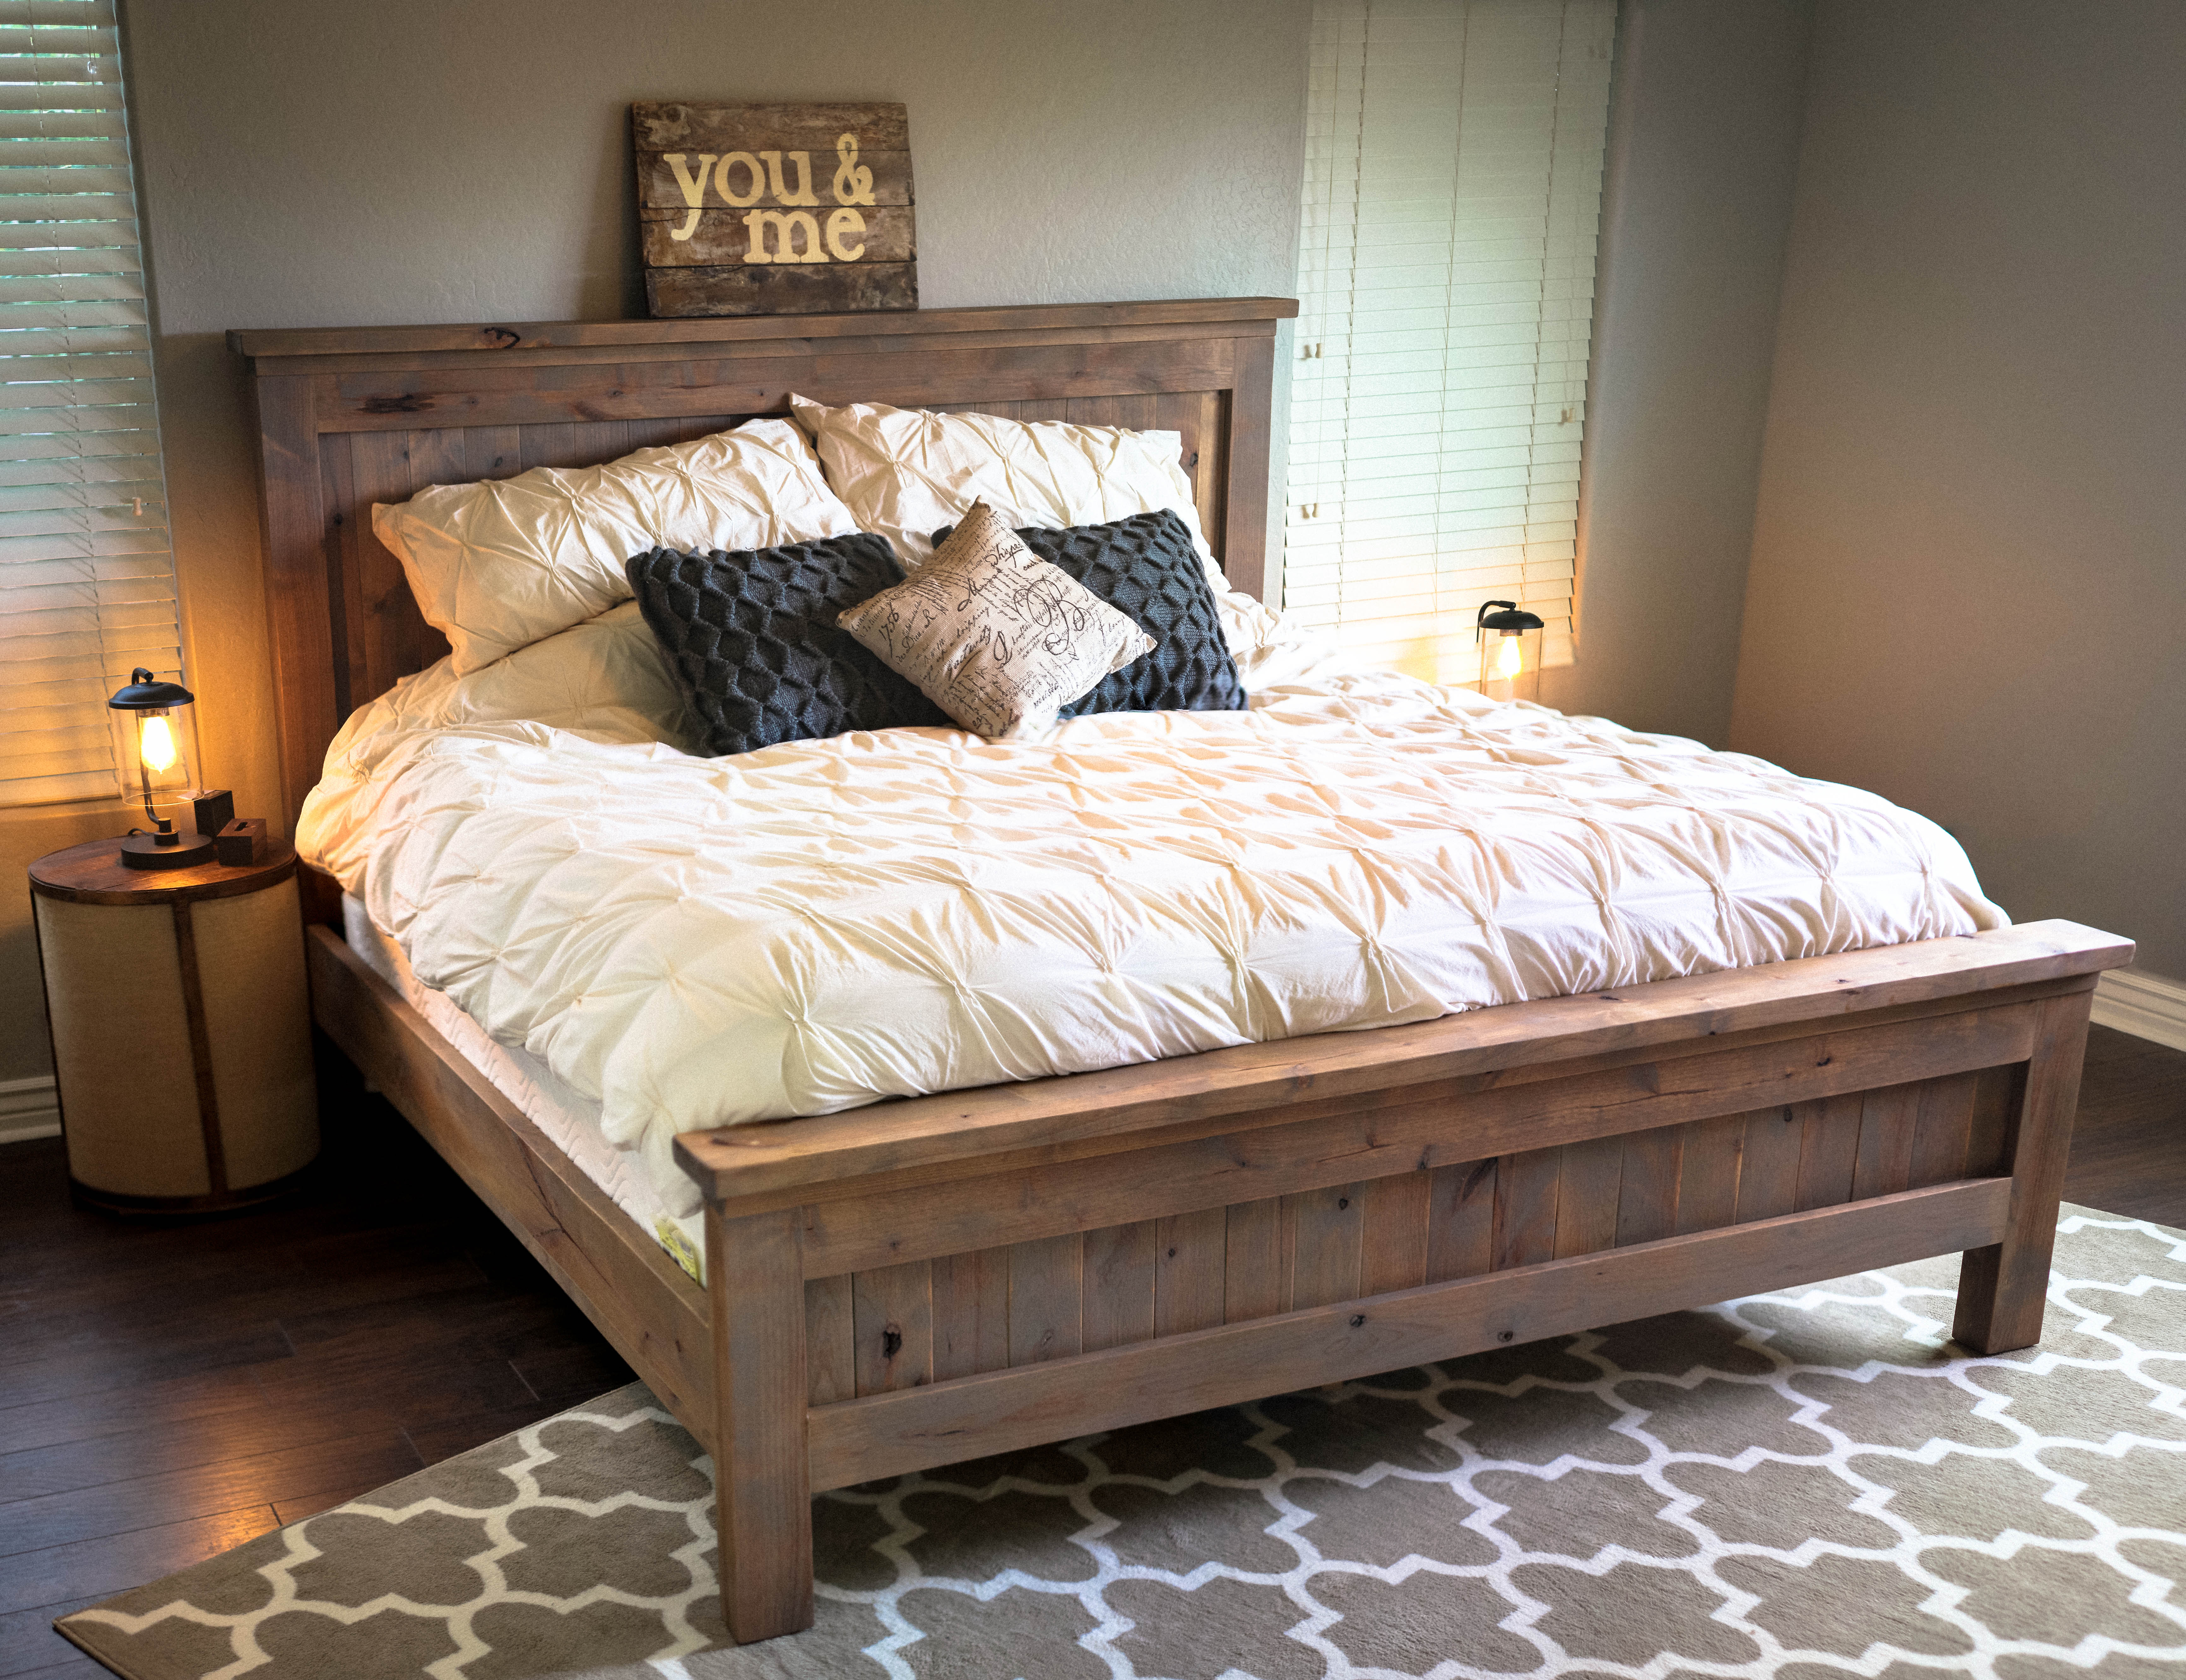
I saw this bed and just had to have it for my daughter. She loves it so much and it looks great in her room. It was easy to make, but very heavy. We were very meticulous to hang, we might have spent more time hanging it than building it :) There is more info on my blog.
Sat, 05/19/2012 - 01:31
Thu, 08/04/2016 - 18:45
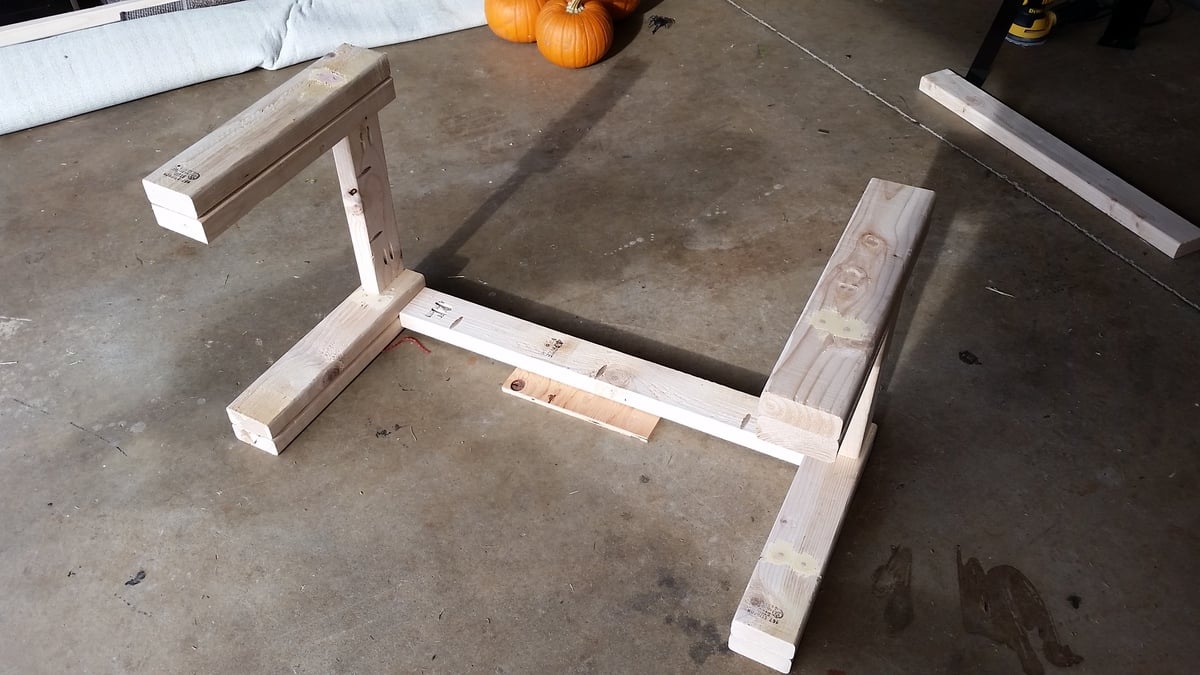
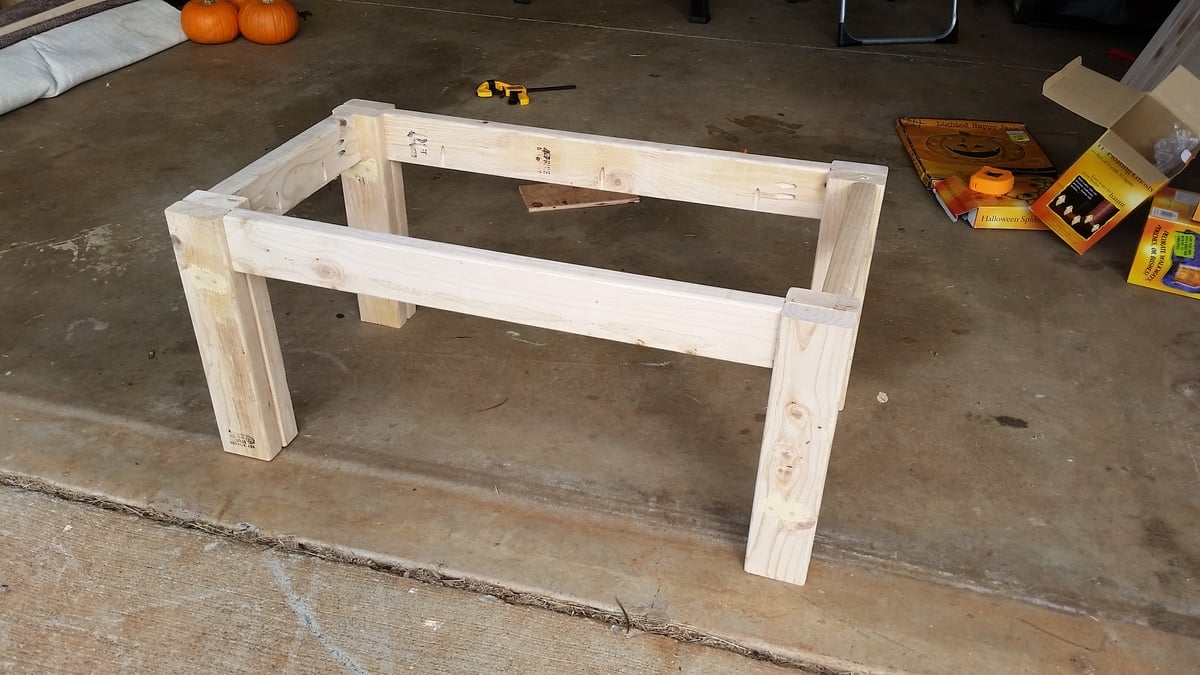
This is my first DIY build project and it turned out awesome. For some reason I was unable to find untreated 4x4's anywhere in Hawaii, so I took two 2x4's and attached them by countersinking wood screws. Beware, the dimensions of this project are massive. I scaled down the measurements drastically to fit in my living room with my sectional.
This was my first building project! I had so much fun with it ... for a guy that can't even hang a photo on the wall! My dad helped and he had all the tools. I spent a few weekends with him so not only was a good father/son project we had something to show off at the end. I think I've caught the woodworking fever.

Sat, 12/21/2013 - 18:55
Your bed turned out beautiful. I love the finish, that grey stain ads so much character!
Mon, 12/23/2013 - 12:10
I really like the look of the stain. I would be interested to know what changes you made to the original to achieve this look. Also, where did you find the lumber? I can't find knotty alder around here.
Thu, 10/23/2014 - 06:32
Is there a way to find the materials needed and specific instructions on how to make this bed? I LOVE IT!
Tue, 11/25/2014 - 19:22
Hello,
This is awesome, I've been looking to build a bed frame for my new apartment. Does anyone know where I can find the plans for this project.
Similar to the person above me, I am new to this and not quite sure what to do. If anyone can provide me with a little insight to this project I would really appreciate it!
Thanks!
Sun, 11/30/2014 - 20:41
I would love to see the plans for this bed. Please post them if you can! Thanks
Tue, 12/23/2014 - 09:23
Here is the plan http://ana-white.com/2009/10/farmhouse-bed-save-158100_7467.html
Thu, 02/26/2015 - 15:36
Love the bed! Where did you get the lumber? Specially ordered or just regular pine from the store like Lowes or Home Depot?
I built this for my mom after finding plans online. Since then I have been inspired by Ana and Jacob to build all furniture I ever need from this point on. No more over priced cheap store bought furniture. Thanks Ana and Family for your plans and helping me find peace in the workshop.
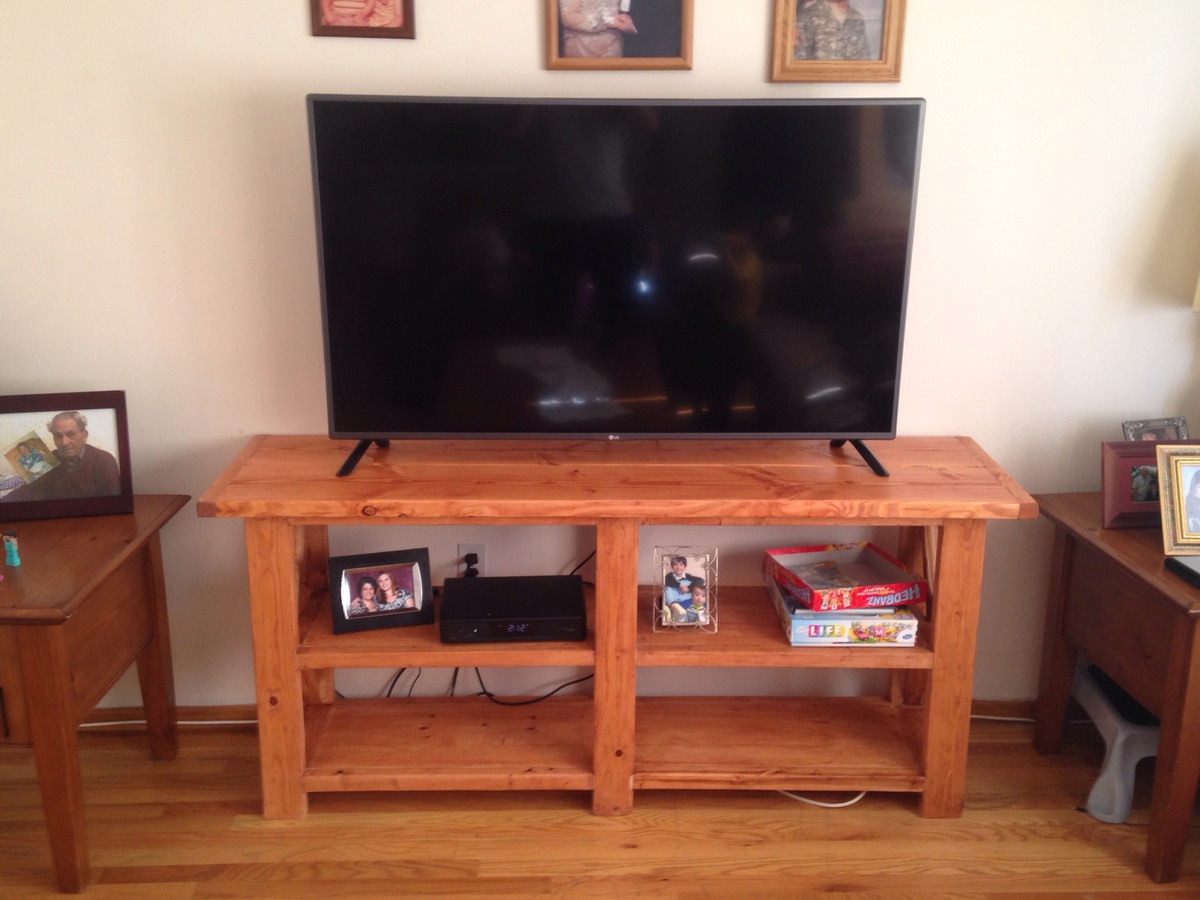
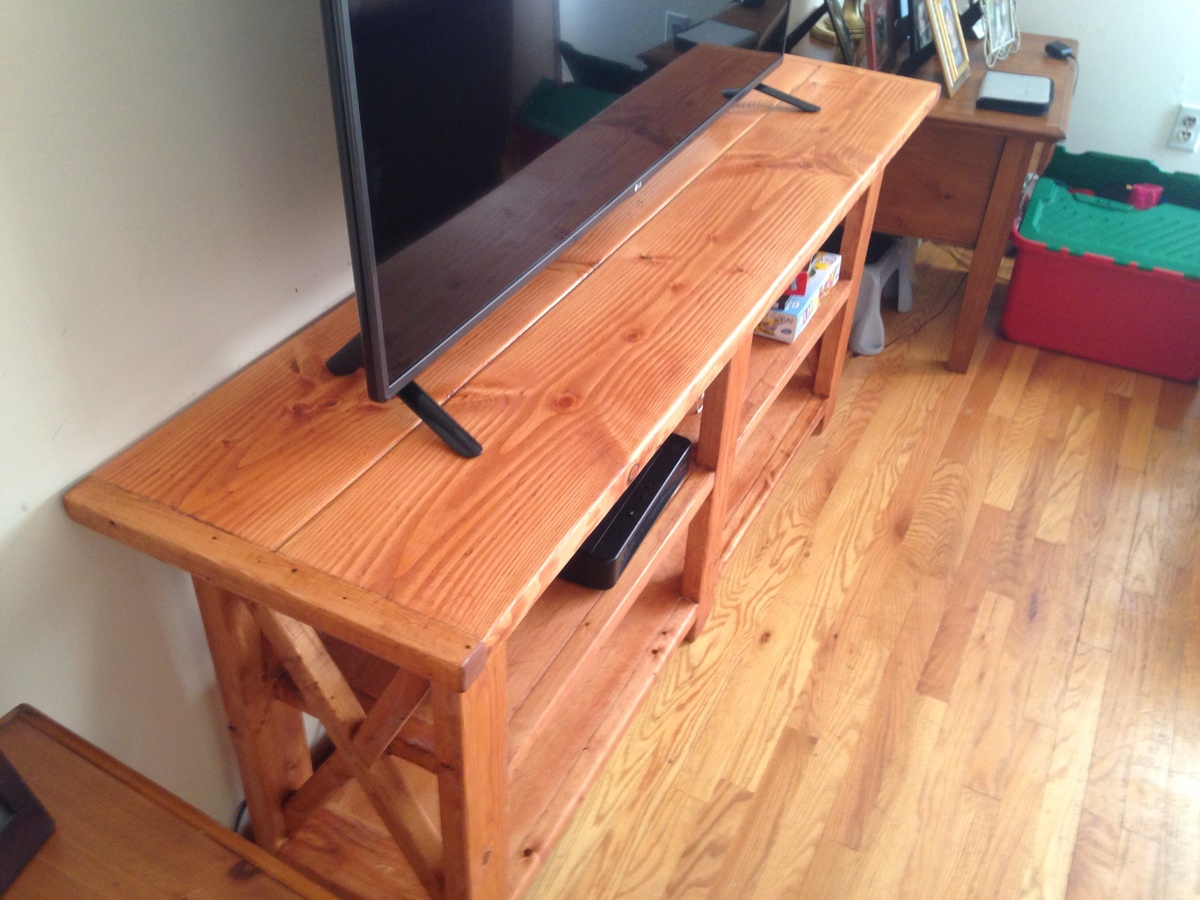
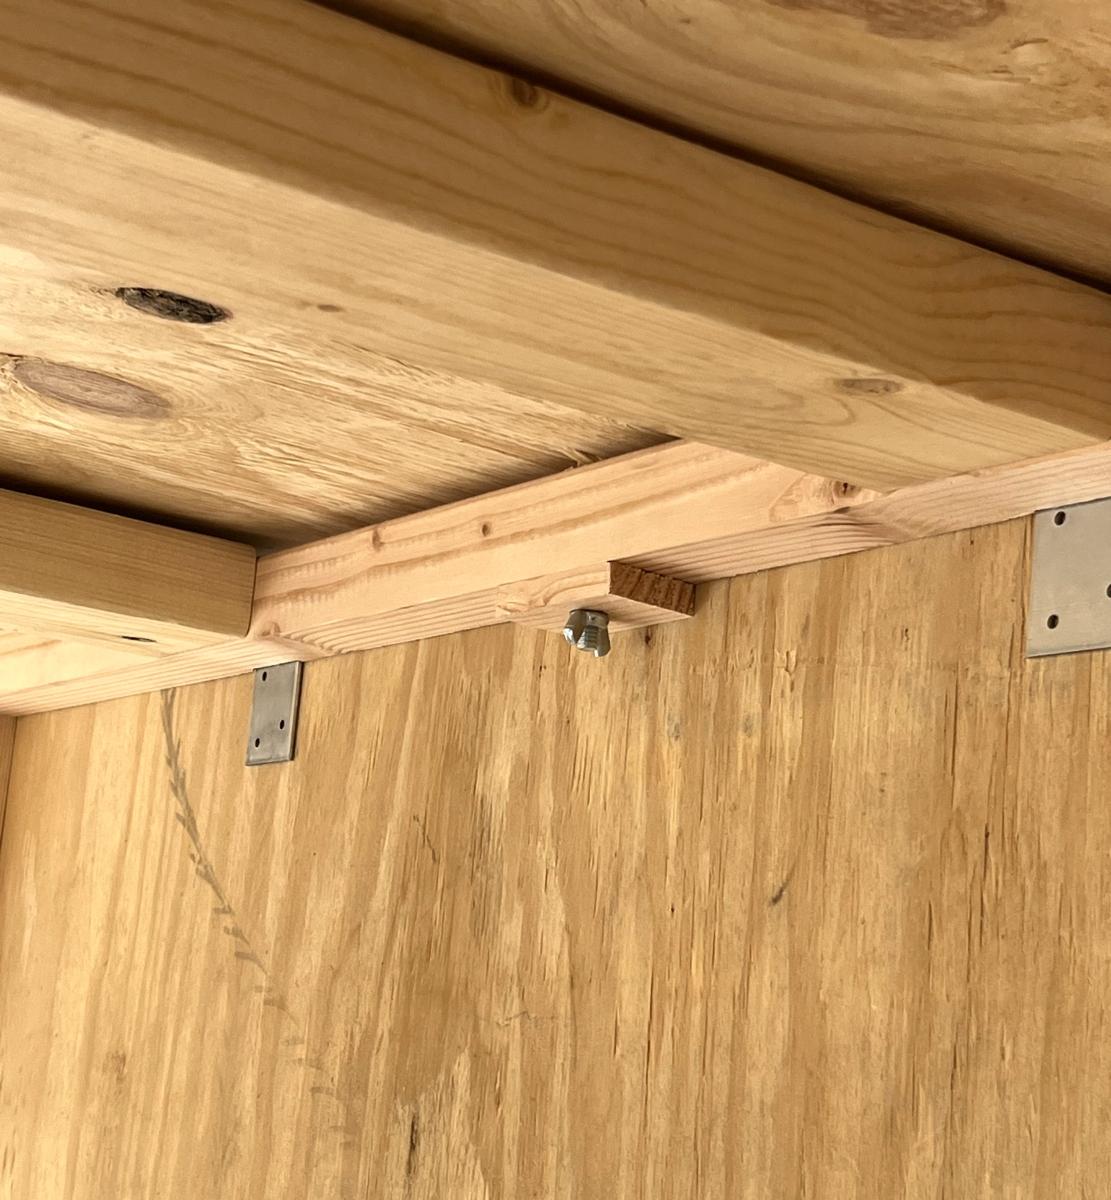
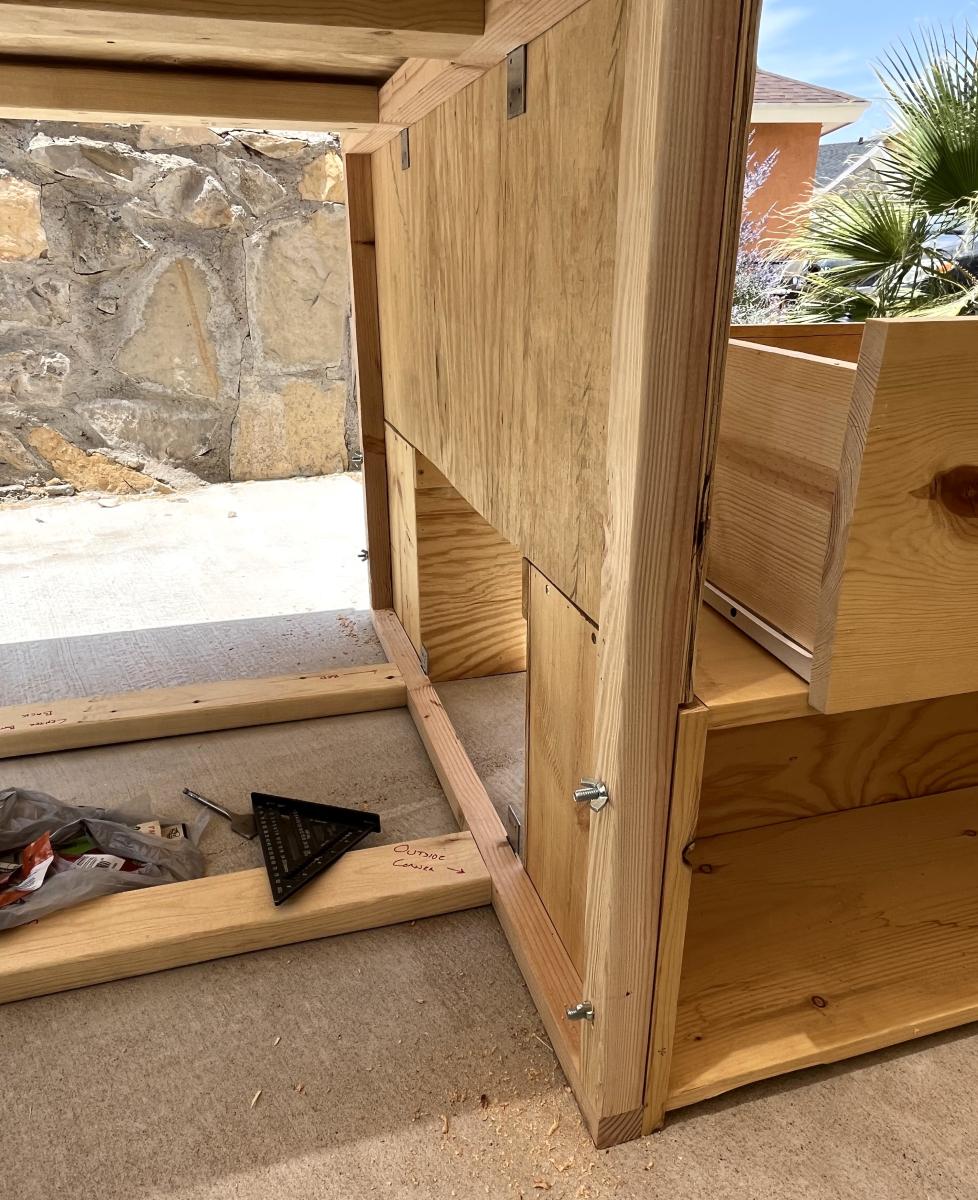
Built this plan, added bolt hangars and flat face mounts, and corner braces to make it easily assemble or disassemble for moving
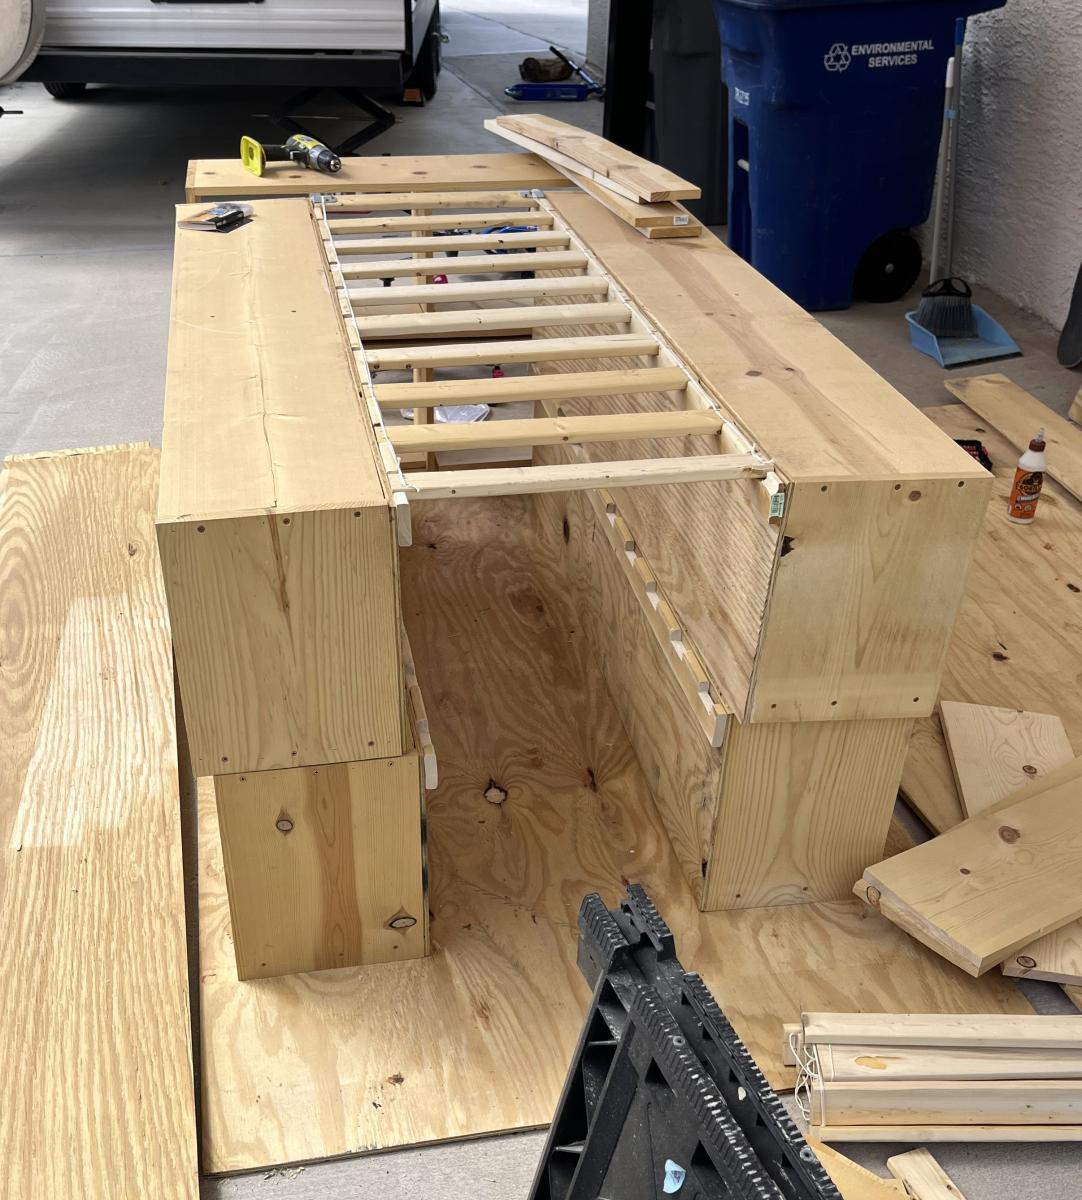
Fun project!


Comments
Ana White Admin
Sun, 12/26/2021 - 17:23
Amazing Playhouse!
WOW, that is so awesome, love the real stone, composite decking and that you matched your house!