Community Brag Posts

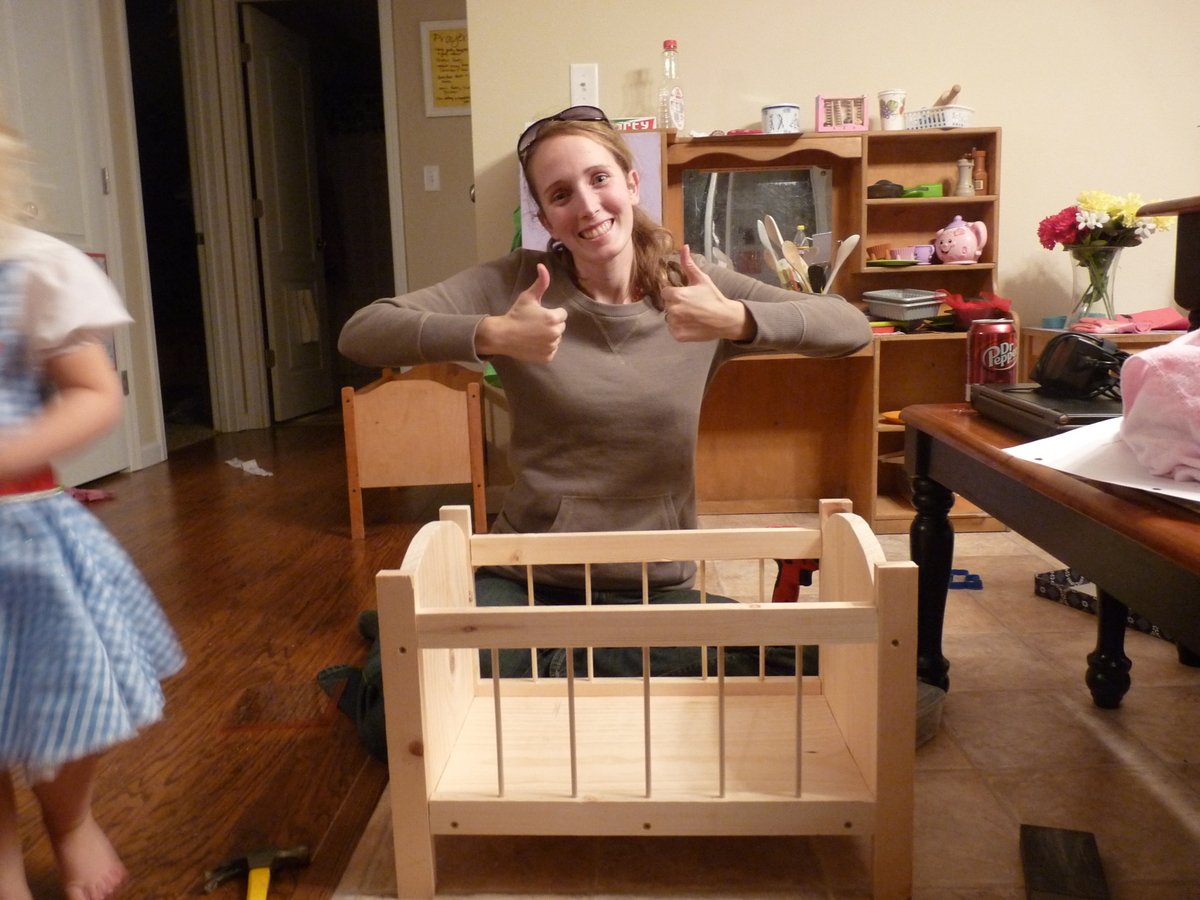
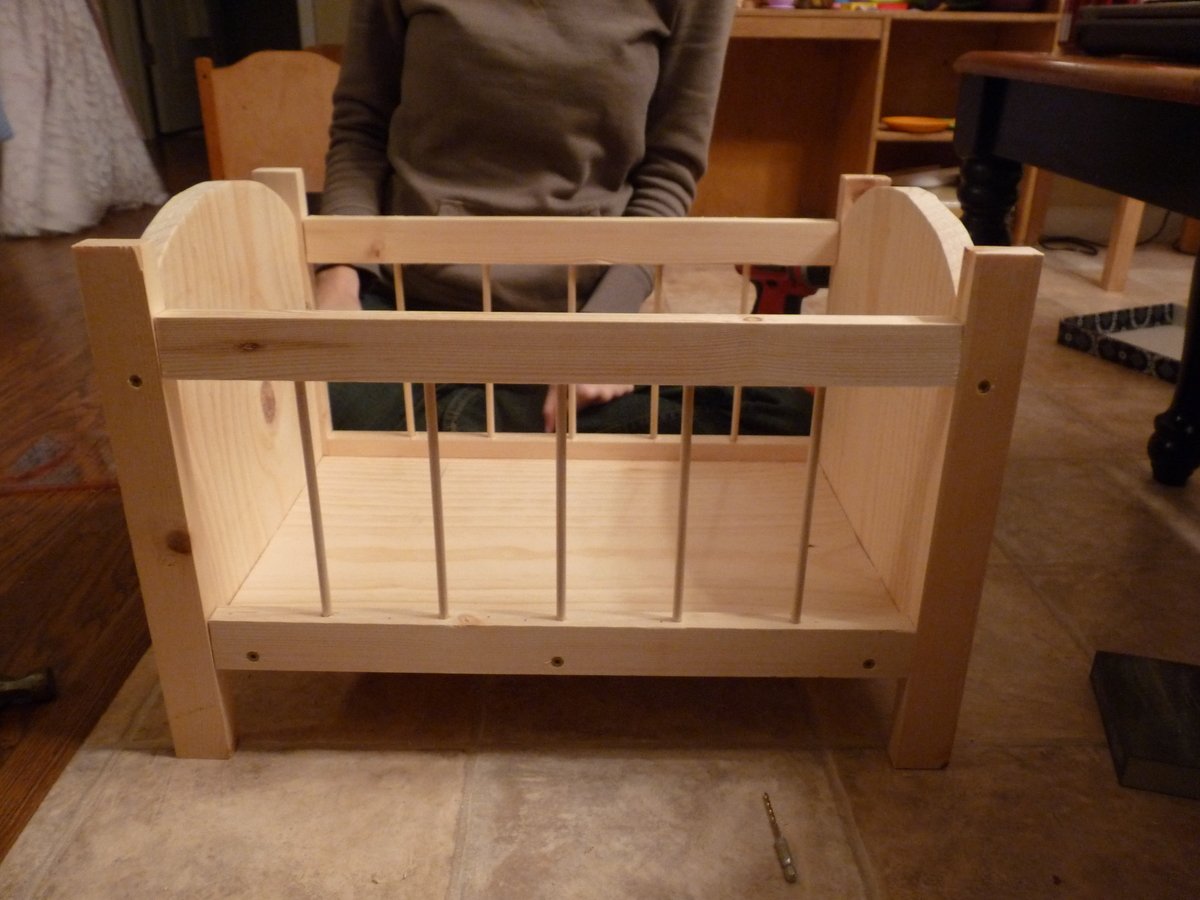
Annabelle's Doll Crib

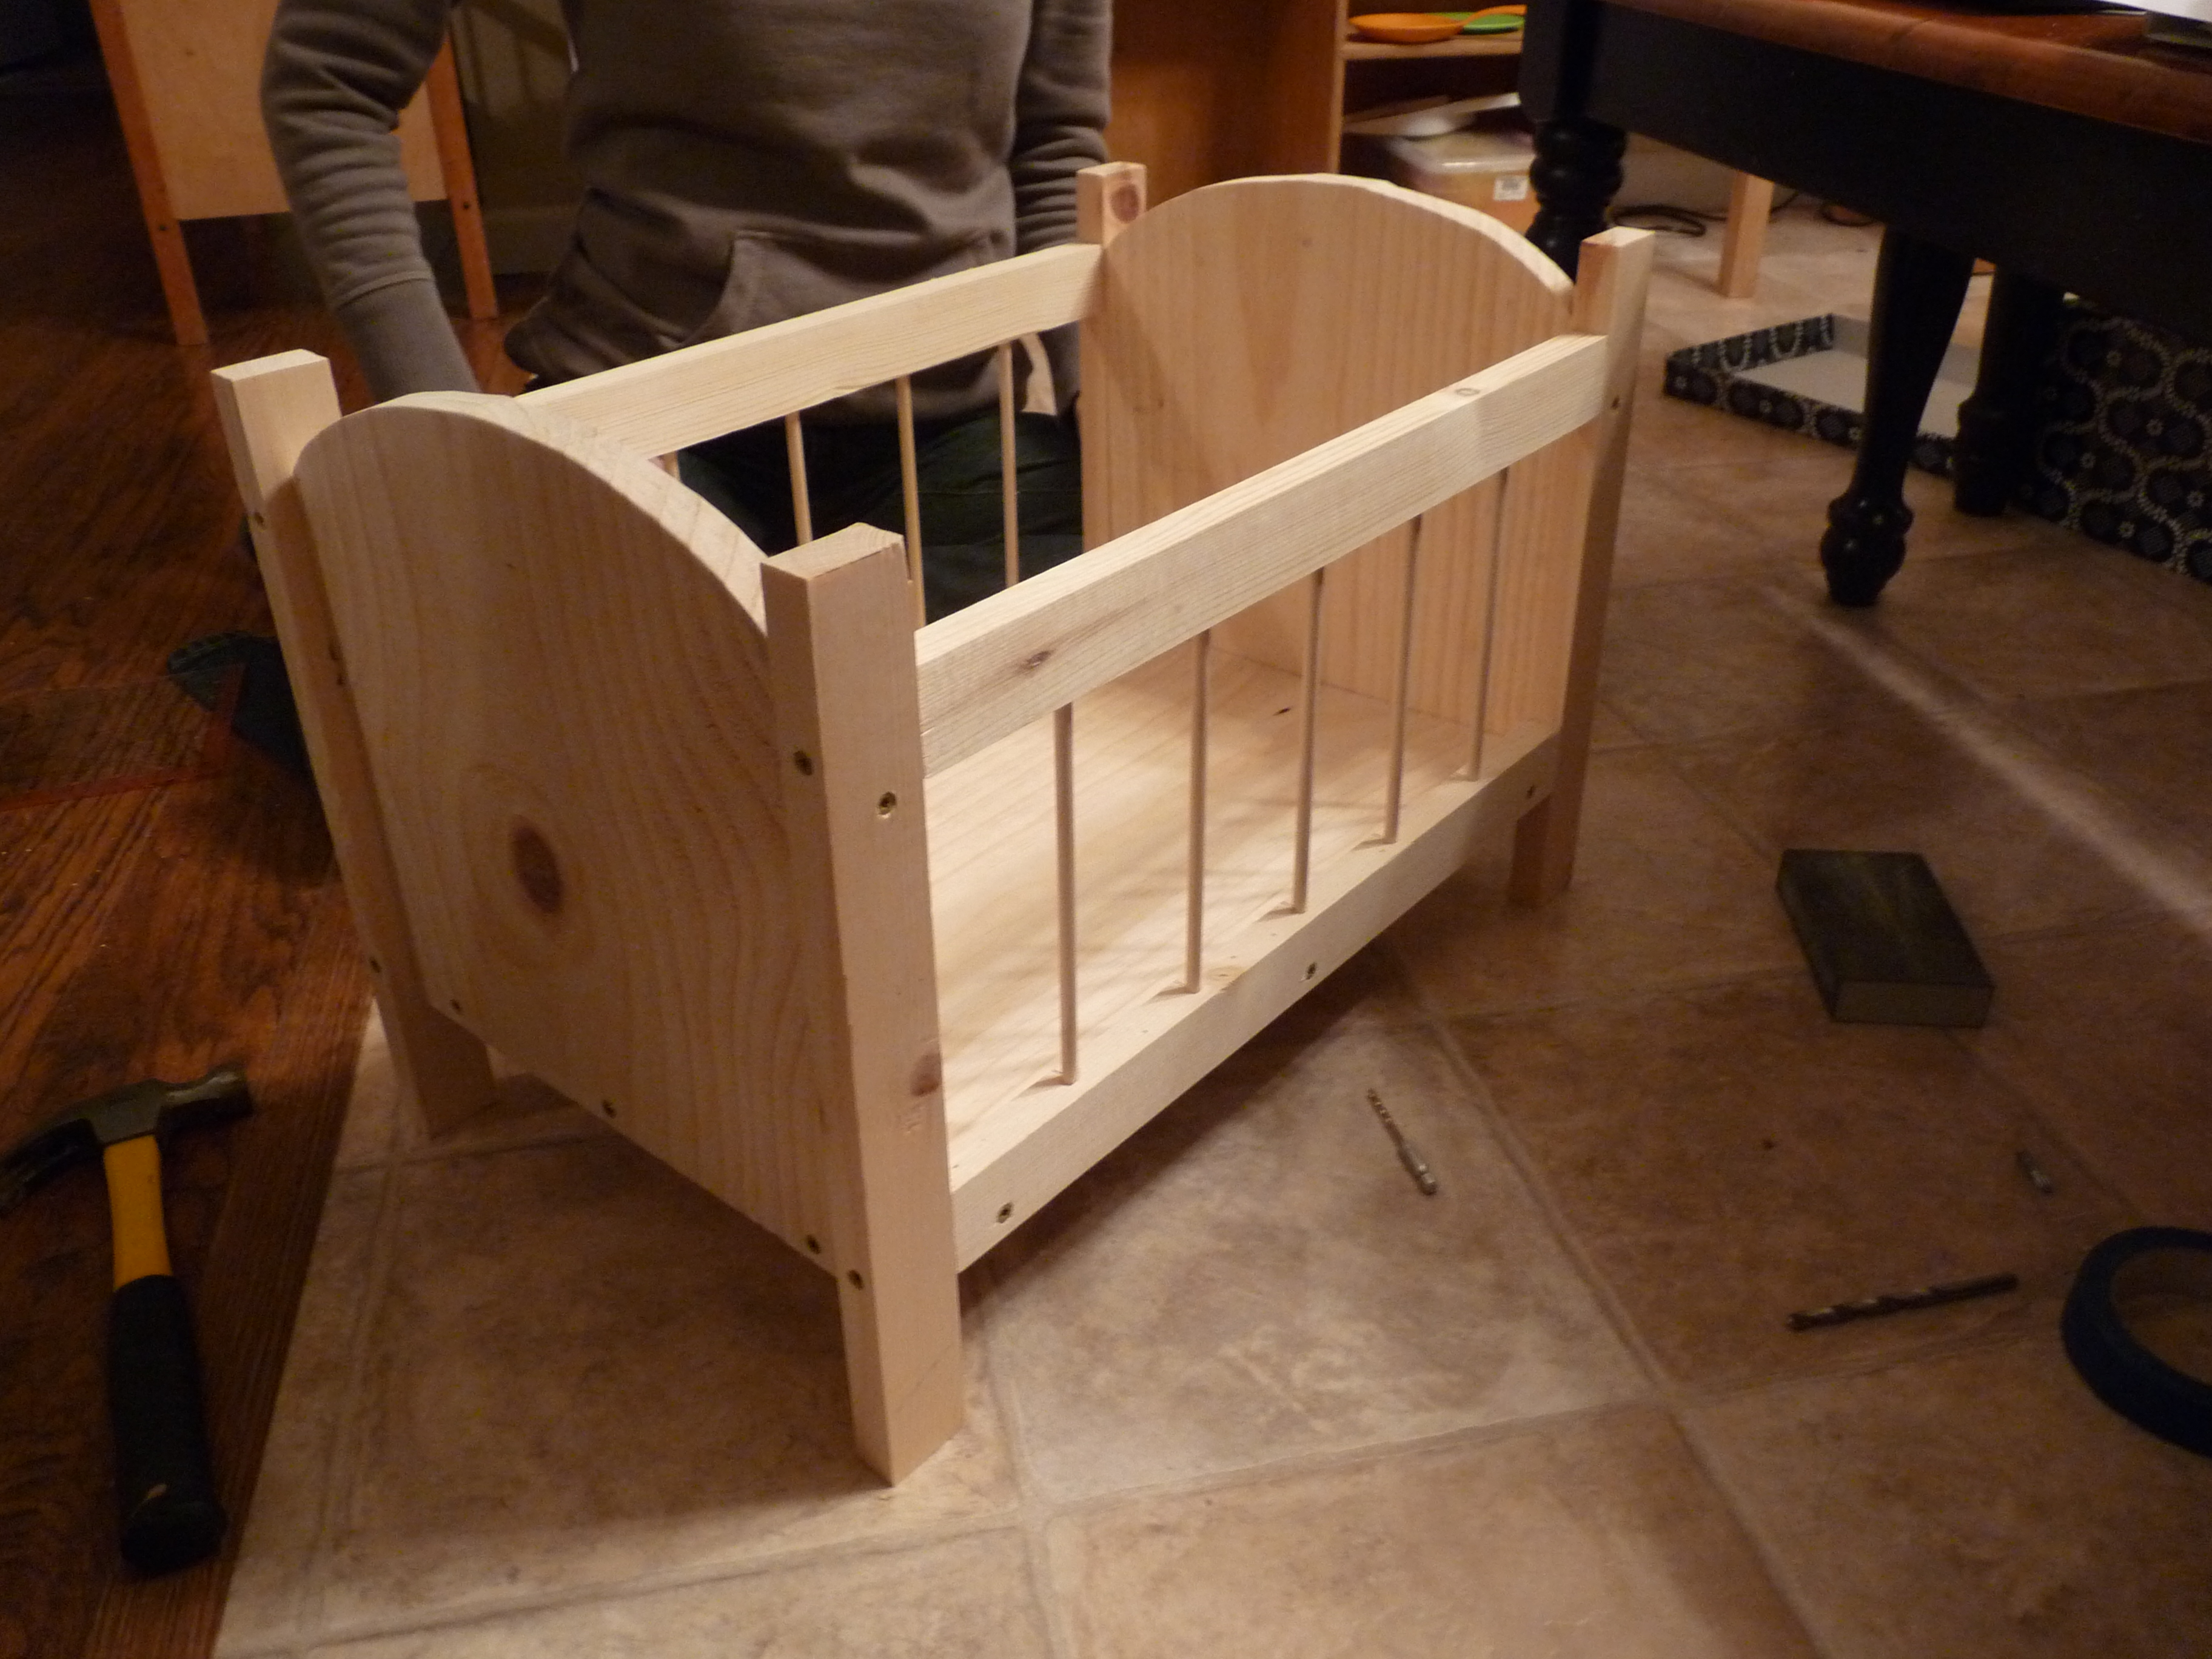
My husband did the cutting and we worked together. Everything was great. We used screws to attach the sides instead of finishing nails because we didn't have the right length.

Built from Plan(s)
Estimated Cost
$20
Estimated Time Investment
An Hour or Two (0-2 Hours)
Finish Used
unfinished
Recommended Skill Level
Beginner

Outdoor Sofa - Front Porch

Submitted by mclaudeg3 on Fri, 11/06/2020 - 16:47

This project was quite easy and did not require many tools. The plan allowed me to adjust the measurements easily so it could fit in that space. I used regular 2x4’s and treated the wood with Mountain Ash colour in a semi-transparent stain from Sherwin Williams, I just love the colour! I build 2 - 2 seaters exactly the same. The one side has no arm, as I wanted it to look like a lounge chair. I love to sit in the corner and stretch my legs 😊. I bought the cushion covers from IKEA, and got good quality foam.

Estimated Cost
Wood ~$300
Estimated Time Investment
Weekend Project (10-20 Hours)
Finish Used
2 coats of semi-transparent Mountain Ash stain from Sherwin Williams.
Recommended Skill Level
Beginner

Comments

Seasonal And Holiday

Adirondack Chair with a Bahamian Accent

Hey Ana -

You're plans have been such a great help to me here in the Bahamas. You've saved us thousands of dollars. Really! Here's one of my many adirondack chairs under construction. I added a Bahamian accent. 

Built from Plan(s)
Estimated Cost
$50 (Bahamian)
Estimated Time Investment
Afternoon Project (3-6 Hours)
Finish Used
Unfinished (waiting for PT to dry)
Recommended Skill Level
Intermediate

Desk & Hutch

Submitted by Wildlife26 on Mon, 12/29/2014 - 08:04

I was not able to get to this desk last year and thought my 15 year old teenage daughter had forgotten about it and was getting too old. Around Thanksgiving she made a comment with a sigh that it would never happen and she understood. I immediately went to work in the garage to have this ready on Christmas morning. She had no idea and was very surprised to find it near the Christmas tree!

Desk included a power strip with USB ports, an under the hutch light, magnet board & dry erase board w/ magnet markers to stick on the magnet board.

Thank you so much for putting these plans on-line.

Estimated Time Investment
Weekend Project (10-20 Hours)
Recommended Skill Level
Intermediate

Comments

Truss Beam Dining Room Table

Submitted by td_tx on Wed, 02/03/2021 - 08:57

We built this table for our dining room. The project followed the plans for cuts and dimensions except for the top. Instead of using 2x10, we used 2x12 and ripped an inch off each side to have flatter top with out needing to plane.

We used pine for the top and douglas fir for the 4x4 base. Before staining we used a pre-stain conditioner. The table was stained using Minwax Early American and then finished with a clear satin polyurethane.

Built from Plan(s)
Estimated Cost
200
Estimated Time Investment
Weekend Project (10-20 Hours)
Finish Used
Minwax Early America and clear satin polyurethane
Recommended Skill Level
Beginner

Comments

RH Inspired Shanty Sideboard & Hutch

Submitted by jhavinga on Wed, 12/31/2014 - 14:34

Have been wanting to build this for 6 months now and just havnt had the time. Finally completed it!
I made some small changes to the design, different trim layouts, different dimensions, and went with a plank look for the back of the hutch instead of a solid peice of 1/4" plywood.

Built from Plan(s)
Estimated Cost
$500.00. This price includes wood, stain, and hardware.
Estimated Time Investment
Weekend Project (10-20 Hours)
Finish Used
1 coat of Minwax Weathered Oak, then 1 coat of Minwax Special Walnut.
Recommended Skill Level
Beginner

Comments

In reply to by ehays216

jhavinga

Thu, 01/01/2015 - 22:48

Thank you ehays216! Ive looked at your Farmhouse Storage Bed a few times.. Have always wanted to try the Steel wool/Vinegar trick.

Cheers,
Justin

timberandsoul

Sat, 01/03/2015 - 07:40

Great job! The love how the color turned out. May I ask where you purchased your backdrop from? And what size it is?

Thanks!

In reply to by timberandsoul

jhavinga

Sun, 01/04/2015 - 16:09

Thanks a lot timberandsoul!
Photo was taken on an empty wall in my living room, Which is currently a light gray wall. thought it looked boring so I did a quick switch of backdrops in PS. I just typed in brick wall in google.

Cheers,
Justin

Singhs

Sun, 01/04/2015 - 16:27

What type of wood did you use, home depot/lowes regular pine or some specialty wood ?

jhavinga

Sat, 01/24/2015 - 13:08

Sure! the plans call for 2 solid sheets of 1/4 plywood for the backing.. I simply just ran the plywood through a table saw at 5.5" wide and brad nailed it the back. =)
The stain is weathered oak and let sit for 15min. Then right away special walnut and let sit for 15 min.
repeat until desired colour. let me know if you have any more questions!

Cheers,
Justin

Sschoono

Sun, 01/08/2017 - 07:33

How many coats did you have to do to achieve this look?  The weathered oak looks so light...and gray.


Thanks!

Painterlyrhett

Sun, 05/17/2015 - 19:40

What was your strategy on attaching the sideboard to the Hutch. I haven't seen where there is any instructions or conversation around this. What and how did you accomplish this and/or is there anywhere to go that discussed this that helped you.

Thanks,

Modern Adirondack Chairs & Outdoor Side Table

Submitted by j_bowman on Sun, 04/11/2021 - 11:35

These modern Adirondack chairs were my first wood working project ever and they turned out awesome! I wanted to build a small table to complete the set and Ana’s new side table plans were exactly what I was looking for. I am truly amazed at how easy these projects were to make and how great they look on our front patio. Ana’s step-by-step plans make it so simple. My wife and I can’t wait to build some more of these projects for our backyard lanai and pool area.

Finish Used
General Finishes Red Mahogany stain
Spar Urethane

Comments

Seasonal And Holiday

Farmhouse Media Cabinet (modified)

Submitted by Anonymous (not verified) on Sat, 07/17/2021 - 20:08

This is a modification to the Patrick Hosey Plan. Being my first ever furniture build it took considerable time to plan out the dimensions for the project before I even began. The Mrs and I both felt strongly the media cabinet needed the ability to store large amounts of media thus the design you see was born.
Each of the 6 pull outs are on a pair of 10 inch full extend drawer glides for complete access. The body was painted with an Oxford White furniture paint, and the top is painted with a Mocha Paint. The sliding doors are inset with a pre-finished Barnwood found at a local box store ripped to width and fitted into the 3-rail door. The angled trim is ripped from the edge of 1 x material and planed to thickness.

Estimated Cost
$625.00
Estimated Time Investment
Week Long Project (20 Hours or More)
Finish Used
Paints: White and Mocha
Recommended Skill Level
Intermediate

Comments

New Green House

Submitted by Anonymous (not verified) on Fri, 10/01/2021 - 06:26

My wife and I built your green house! It is turning out awesome! I just want to take the time to say thank you for the plans. You are a great designer and generous with your sharing.

Built from Plan(s)

Comments

Sewing Table for Small Spaces

Love the sewing table! It was a surprise Christmas gift from my parents.

Estimated Time Investment
Afternoon Project (3-6 Hours)
Finish Used
We used Bombay Mahogany stain.
Recommended Skill Level
Beginner

Lack Inspired Entertainment Center

Submitted by eralben on Mon, 04/20/2015 - 07:24

The IKEA Lack Inspired Bookcase plans became my inspiration for the entire entertainment center.  I made a few changes to the bookcase plans.  I increased the height of the bookcases to 84 inches and added adjustable shelves.  I also included some major extras including a console for the TV, a bridge to connect the bookcases, and doors inspired by www.shanty-2-chic.com.

Built from Plan(s)
Estimated Time Investment
Week Long Project (20 Hours or More)
Finish Used
Red Mahogany
Recommended Skill Level
Intermediate

slightly modified x console table with added hutch

I have been dreaming about this piece of furniture for 3 yrs....I used Ana's plans for the rustic x console but took out the front middle support and made it a little deeper I also turned the 2x4 vertically and added an extra 2x4 behind it to add extra strength.....because I wanted to fit 3 baskets from Target underneath...the hutch i just winged!....Thank you so much Ana for giving me a place to start!...I am in love!......

Built from Plan(s)
Estimated Cost
$230
Estimated Time Investment
Week Long Project (20 Hours or More)
Finish Used
Maison Banche in Wrought Iron and vinegar stain (2cups vinegar 1/2 cup hydrogen peroxide and 2 things of steel wool)
Recommended Skill Level
Intermediate

Simple Farmhouse Bed Single

Submitted by lindslar on Fri, 10/15/2021 - 05:40

This was my first project and I’m beyond proud. Thank you for the instructions!!!

Comments

Full Storage Bed

I built Ana's Full Storage Bed.  This was fairly easy to build and it is a perfect bed for a child's room.  I LOVE the added storage!  You can see the plans for the crates I built to fit at our blog http://www.shanty-2-chic.com/2011/03/crates-for-storage-bed.html 

Built from Plan(s)
Estimated Cost
$120
Estimated Time Investment
Day Project (6-9 Hours)
Finish Used
Minwax Dark Walnut Stain and Minwax Polycrylic Gloss
Recommended Skill Level
Intermediate

Playhouse - Drew Gaffke

Submitted by Anonymous (not verified) on Sun, 12/26/2021 - 14:46

I combined a couple of playhouse plans for this one. The framing is 2x2 treated pine. The front is real stone. I tried to match our home the best that I could. The floor is made out of composite decking.

Comments

Seasonal And Holiday

Not so "Rhyan" Nightstands

Submitted by Kimbers on Sun, 05/08/2011 - 19:05

I used the Rhyan end table plan (with a few alterations) to make my nightstands. I changed the dimensions so mine turned out to be 20”D, 25”W, 27”H, I extended the side and back panels all the way to the top to close in the shelf and I made the bottom drawer larger. I decided to use under mount drawer slides but I think I will try out the side mount slides in the future though.

I wanted them to match the headboard and bench that I made for my bed so I added the same molding that I used on those pieces to finish it off.

I pre cut every piece for the main body of the nightstand and predrilled all of the Kreg holes which made it a really quick piece to put together! I purchased the Mini Kreg jig for this project and am so glad I did. Totally worth the money!

Built from Plan(s)
Estimated Cost
About $80 For 2 Nightstands
Estimated Time Investment
Weekend Project (10-20 Hours)
Finish Used
I painted with Rust-oleum painters touch semi gloss white and then sprayed a few coats of polyacrylic on the top.
Recommended Skill Level
Beginner

Play House For Ece & Zeynep

Hi, My name is Ibrahim I am a Project management Unit Manager in an Information technologies. I have two daughters, 3 and 8 years old. We have garden around 150m2. I want to do play house in our garden to play. First of all I searched how can do it in internet. Than I did preliminary work. I provided equipment and materials. And I take a holiday my company as a week. I started my first project which is wooden house.

My daughter and all around me was liked wooden house. I hope you like it:)

Sorry my English :)
.

Estimated Cost
all inclusive around 1.500 TL (Turkish Lira) around 564$
Estimated Time Investment
Week Long Project (20 Hours or More)
Finish Used
I painted white and pink the project.
Recommended Skill Level
Starter Project

Comments

Shaker Cabinet Doors

I used the easy frame and panel doors instructions to build 4 new large cabinet doors for my hallway cabinets!  I painted them Sherwin Williams Alabaster.  You can find my full blog post about them here:   http://www.leapoffaithcrafting.com/make-shaker-cabinet-doors/

Built from Plan(s)
Estimated Cost
$40
Estimated Time Investment
Afternoon Project (3-6 Hours)
Finish Used
Lowe's paint in Alabaster Sherwin Williams color
Recommended Skill Level
Beginner

Airplane Swings

Submitted by samueldodd on Thu, 08/06/2015 - 06:57

Built in an afternoon. I built them from a picture on Ana White website and modified a bit with both planes. Roll Tide was routed into a piece of wood and glued to the sides of the plane. The "A" was cut out on the band saw and finished on the scroll saw. The "T" on the orange plane was painted on The tri plane is the favorite. Roll Tide !

Built from Plan(s)
Estimated Cost
$20.00 plus paint
Estimated Time Investment
Afternoon Project (3-6 Hours)
Finish Used
Oil Based paint
Recommended Skill Level
Intermediate

Comments

Banquette Seating with storage

Submitted by Anonymous (not verified) on Mon, 04/25/2022 - 13:58

You didn’t have plans, so I had to “wing it” without you; however, I couldn’t have done it without all the practice I’ve had from all your plans on this website these past several years!

Comments