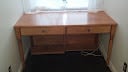
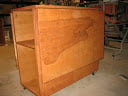
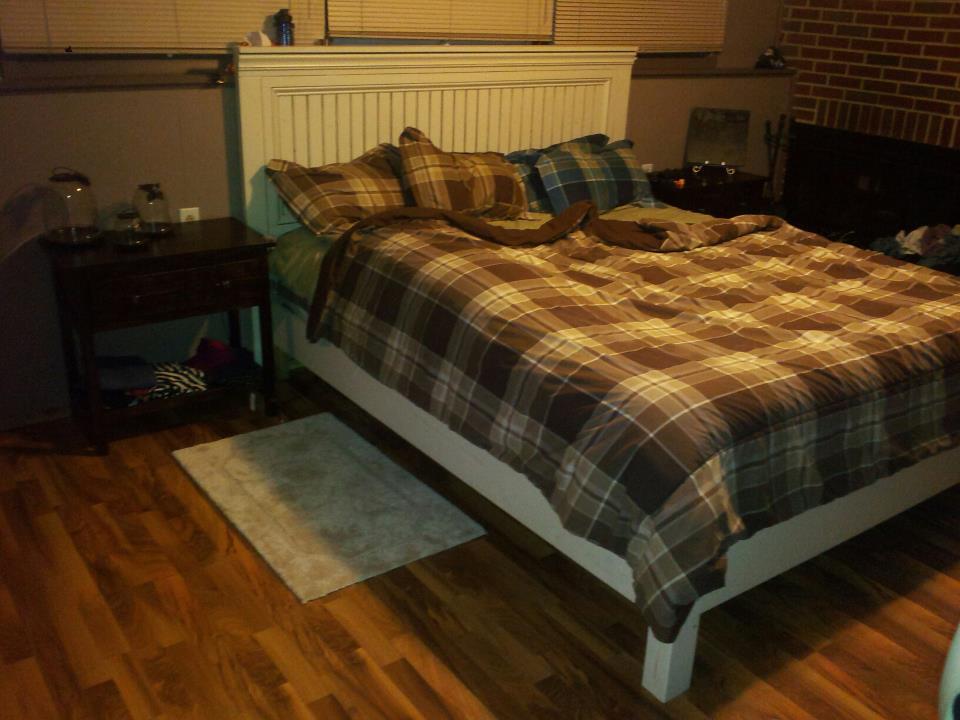
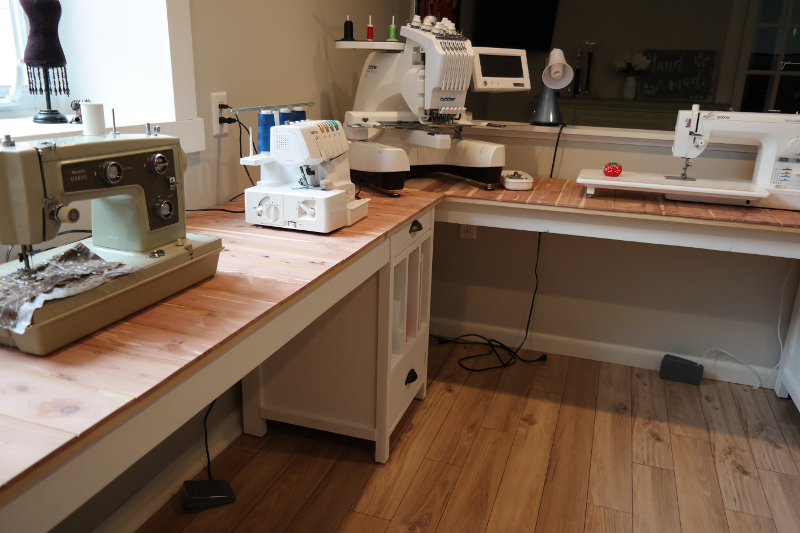
Office Desk
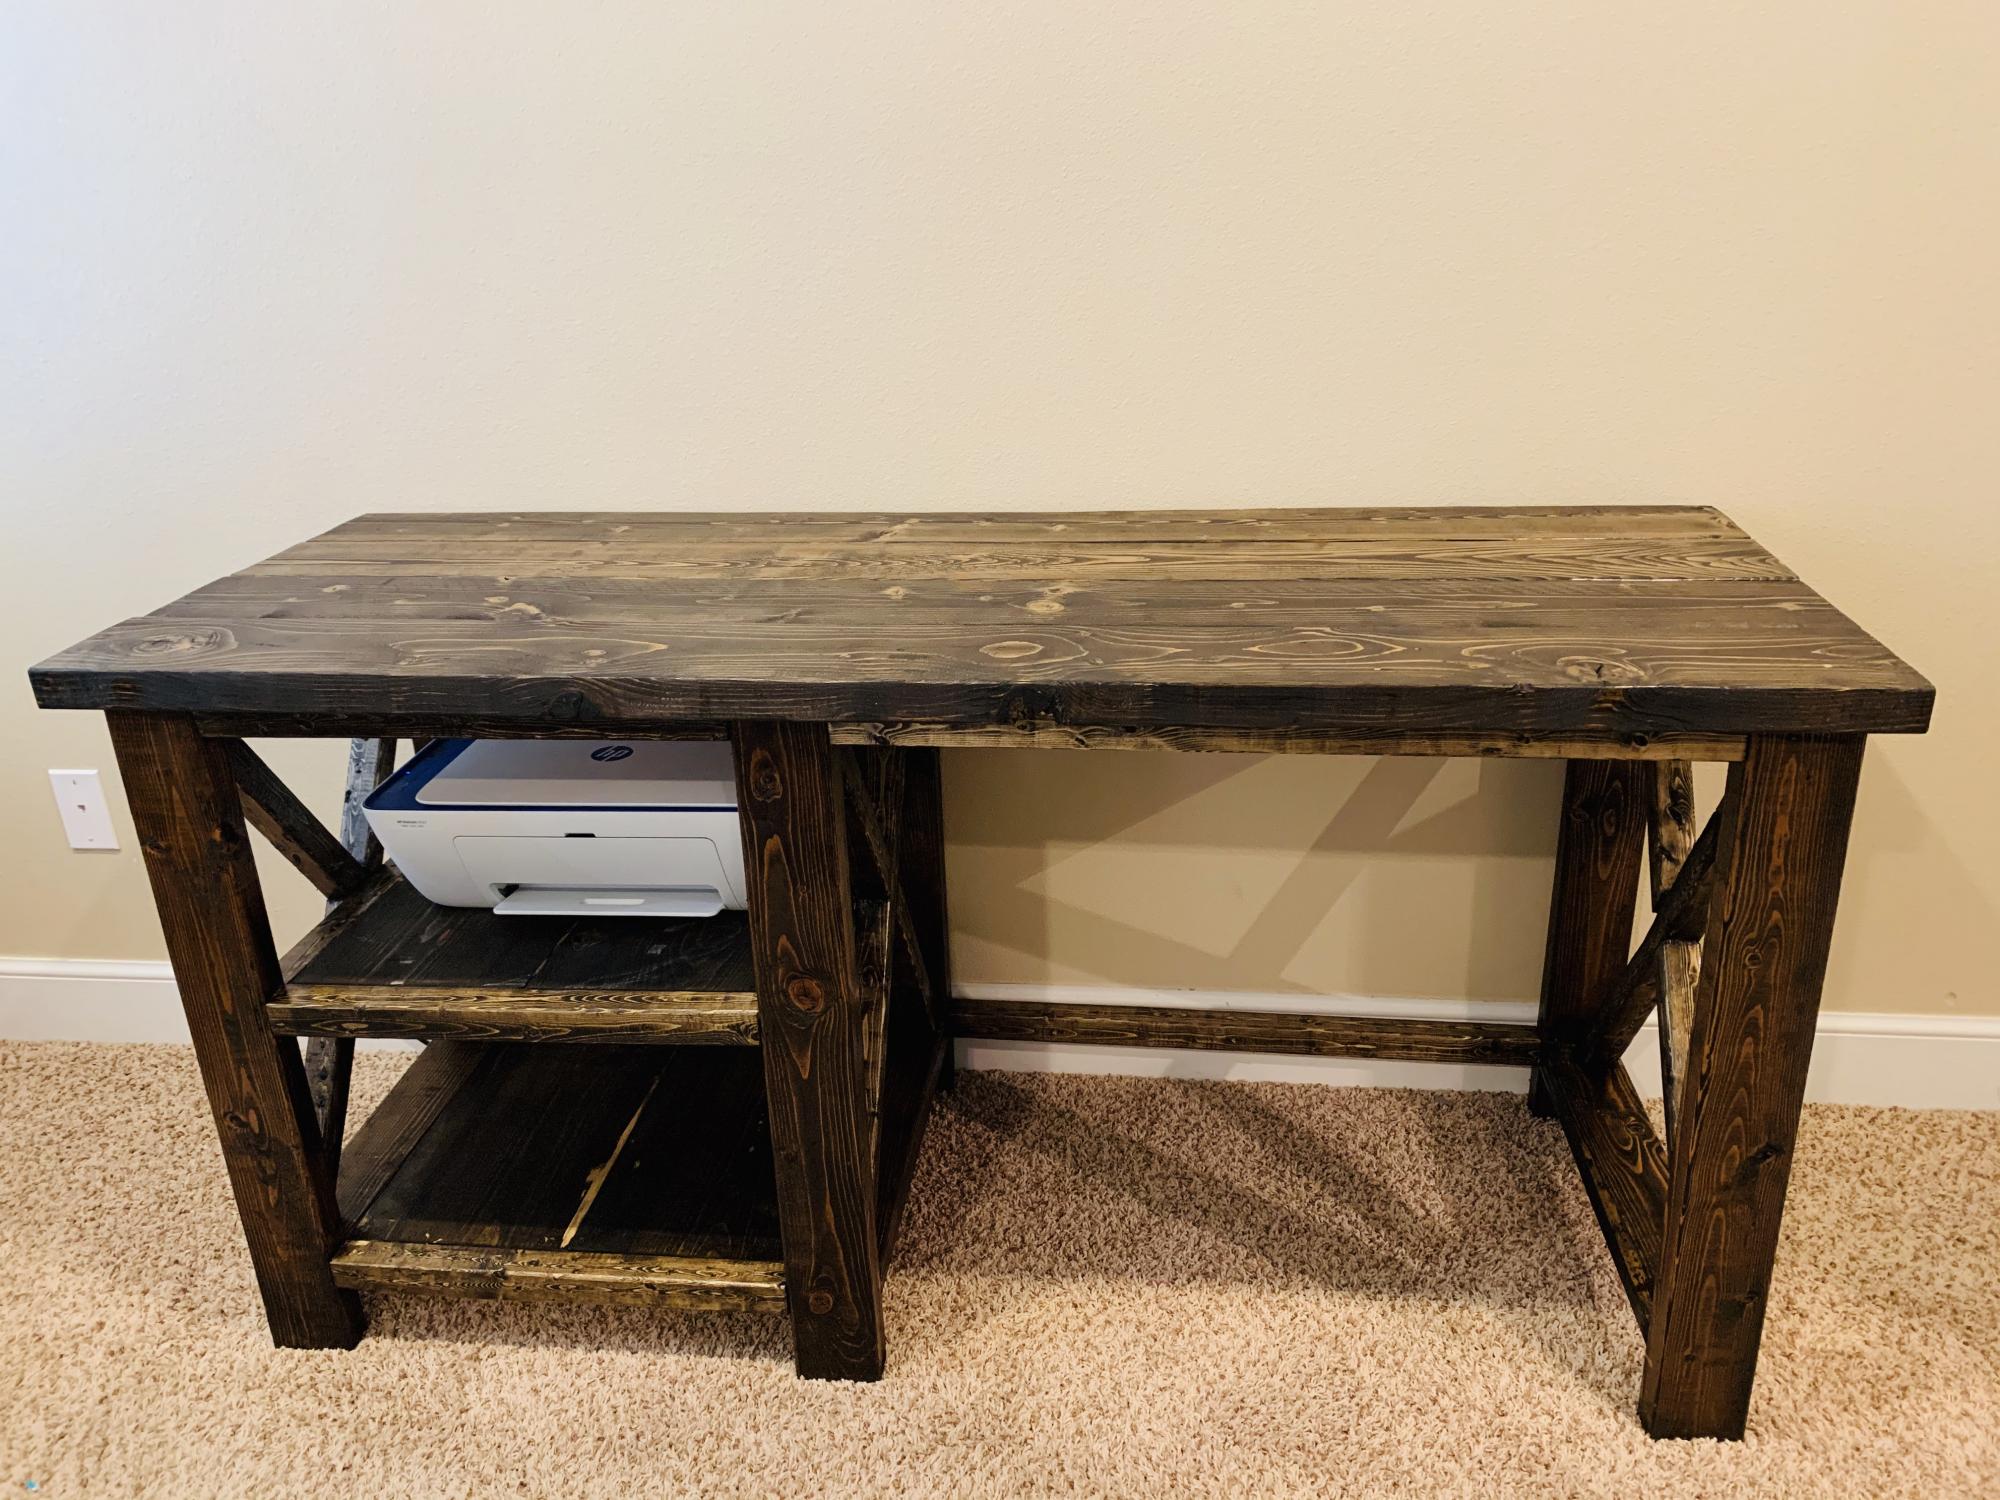
This was my first project. I followed the plans exactly! I LOVE it! It is a perfect desk that I will be using to work through this remote teaching I'm having to do. Thank you for the plans. Next up-Rustic X Console!
Chose the small firewood shed project as a "template" if you will .. built this to house our garbage cans and eventually put a gate on it to "help deter" the Florida black bears (we do multiple things to keep them at bay) but this will also just be a nicer looking way to keep the cans outside.
I modified the floor since the firewood shed had a floor that was suitable for, well, firewood but not so much for rolling garbage cans. Had to leave the one slat off the back for the depth of the can which I didn't completely account for in the beginning. Overall, still need to paint it and water seal it but happy with how it turned out.
Modified with a high back and modern adirondack arms.
The base of the chair is built exactly to the plan except that the arms are done in a modern adirondack style.
The back was made independently to fit inside the base and then attached to the plan base.
Very comfortable but very heavy chair even without the modified back.
Not stained yet obviously.
Cushions are hard to find I think I would make it slightly smaller next time and maybe even find the cushions first and alter the plan to fit.
Tue, 06/09/2020 - 09:11
Stained with Saman: Urban Grey mixed with some left over brown 4:1 and now has a companion side table
Wed, 06/24/2020 - 07:33
Do you have the plans for the table you built? Im a brand ne beginner. I am trying the modern outdoor chairs and live this table with them.
Great outdoor builds!
by Dennis
I used your plans to create this pair of grandchild Christmas gifts. They were a huge hit!
I have a friend who makes beautiful quilts. She's been doing this by sitting on the floor to cut her fabric and plopping her sewing machine on a wobbly folding table. When she decided to turn her guest room into a dual purpose sewing/guest room she asked me to build her something that would fit into a niche under her dormer window.
The built in table has two large drawers for sewing notions and is supported at the back by a shelving unit with adjustable shelves. She plans to store items that she seldom uses here. They will be accessible, but out of the way and barely visible when she has guests using her room.
I suggested that I also build Anna's sewing table for small spaces so that she use that as a night stand when not in use as a cutting table.
I usually don't finish projects I build for others - I'm just not good at it! But, my friend asked me to put a finish on it. She picked out the Minwax polyshades product, and I have to tell you that it was a nightmare! (You can read about that here: http://thewidowsworkshop.blogspot.com/2012/06/lessons-learned-again.html)
I ended up using a stripping product to remove that finish. The final finish, just a stain and rub on poly, turned out beautifully!
Installation was also a challenge, but using brute force - and a hammer! - I was able to fit it between those very out-of-square walls!
She's happy, I'm happy to be done!
Not pretty, but not bad for a start while working with an 11,7 and 5 yr old.
Modern Adirondack chairs with added cup holder holes. Will be adding cup holder inserts as well.
My bench build is a replacement for our old banister. We will be adding pipe rails for a backrest to bring it up to code.
Replaced our wire metal shelving with this easy to follow plan. My first time doing a project like this and it turned out amazing!
Lindsey
Mom's Fancy Farmhouse in California King, Glazed.
I used the headboard measurements from the original plan, and the width/length measurements from the California King plan. My first plan was to distress (above picture) and I loved it, but when I brought it downstairs it didnt really match... So I repainted and Glazed :) Not to bad for buying my first "power tool" less than a month ago!!
I bought a whole workshop full of Ryobi tools second hand from my brother over a year ago. I started researching workshop plans and came across Anna White’s Ryobi Nation Dream Workshop. I downloaded the plans and spent about 2-3 months working on it in my spare time. I made a lot of mistakes along the way but I’m pretty happy with it overall!
Sun, 07/05/2020 - 08:42
Lovely desks/space! And the sewing machines look like they're going to bring hours of fun! What kind of wood did you use for the tops? Did you route it to make it tongue and groove?
I built a slightly smaller version of the full sized dollhouse. I used MDF for the house with the roof and pine for the and windows.
Tue, 08/13/2019 - 18:45
Love this! How did you come up with the dimensions?
This was my first project. It was relatively easy but I did make some mistakes that are now design features
I've been wanting to build an outdoor farmhouse table for quite some time. Getting it to look old with new materials was the idea.Using notches to hold part of the base and experimenting with finishes got the 'rustic' look. I took a few ideas from the Gaby Kitchen Island and implemented my own; it turned out to be a great weekend project!
Fri, 10/26/2012 - 23:43
Love the table, especially the finish you used, it looks amazing. just have a question about if it is waterproof...i know it is an outdoor table, but is it protected by a veranda or is it completely exposed to the elements. i want to make one but am hesitant as it will be completely outside! Thanku!
Update 8/2017: This project started with the Storage daybed, which I built in 2014. My daughter is a book lover and I wanted to provide her with more space for her books. I recently added the following plans to the Daybed with Storage Trundle Drawers:
- Twin Storage Headboard Base
- Small Hutch for Storage Headboard
- Cubby Hutch Plans for the Storage Headboard
I also made one extra storage headboard base and added more shelves along the long side of the bed so she could be surrounded by books. There are two additional supports under long bookshelf and I placed them roughly behind each of the trundle drawers.
For the bed (I built two), I opted to use the alternate slat system. I also used 2" caster wheels and added dividers to the drawers--one drawer has three compartments, and the other two drawers were divided in half.
Note: In my main brag photo it looks like the drawers don't close flush... I didn't notice when I took the photo because I was focused on the new shelves. But they do close and line up perfectly!
I chose to modify the outdoor daybed with canopy for my finished basement, to replace a secondhand sleeper sofa.
The only power tool I used was a drill, including screwdriver bit -- with hand tools it took longer, but wasn't impossible.
About 2 years ago when we were redoing our kitchen, I made these ledge shelves inspired by Ana White's $10 Ledges. I originally wanted to use them as storage for spices and our olive oil, but once our vent hood was installed, there just wasn't room for them, at least not as I had originally intended. Since mine are made of yellow pine (harder wood) and I used a 1 x 6 for my platform instead of a 1 x 4, my ledges cost more than $10.
My husband did the cutting and we worked together. Everything was great. We used screws to attach the sides instead of finishing nails because we didn't have the right length.