Community Brag Posts

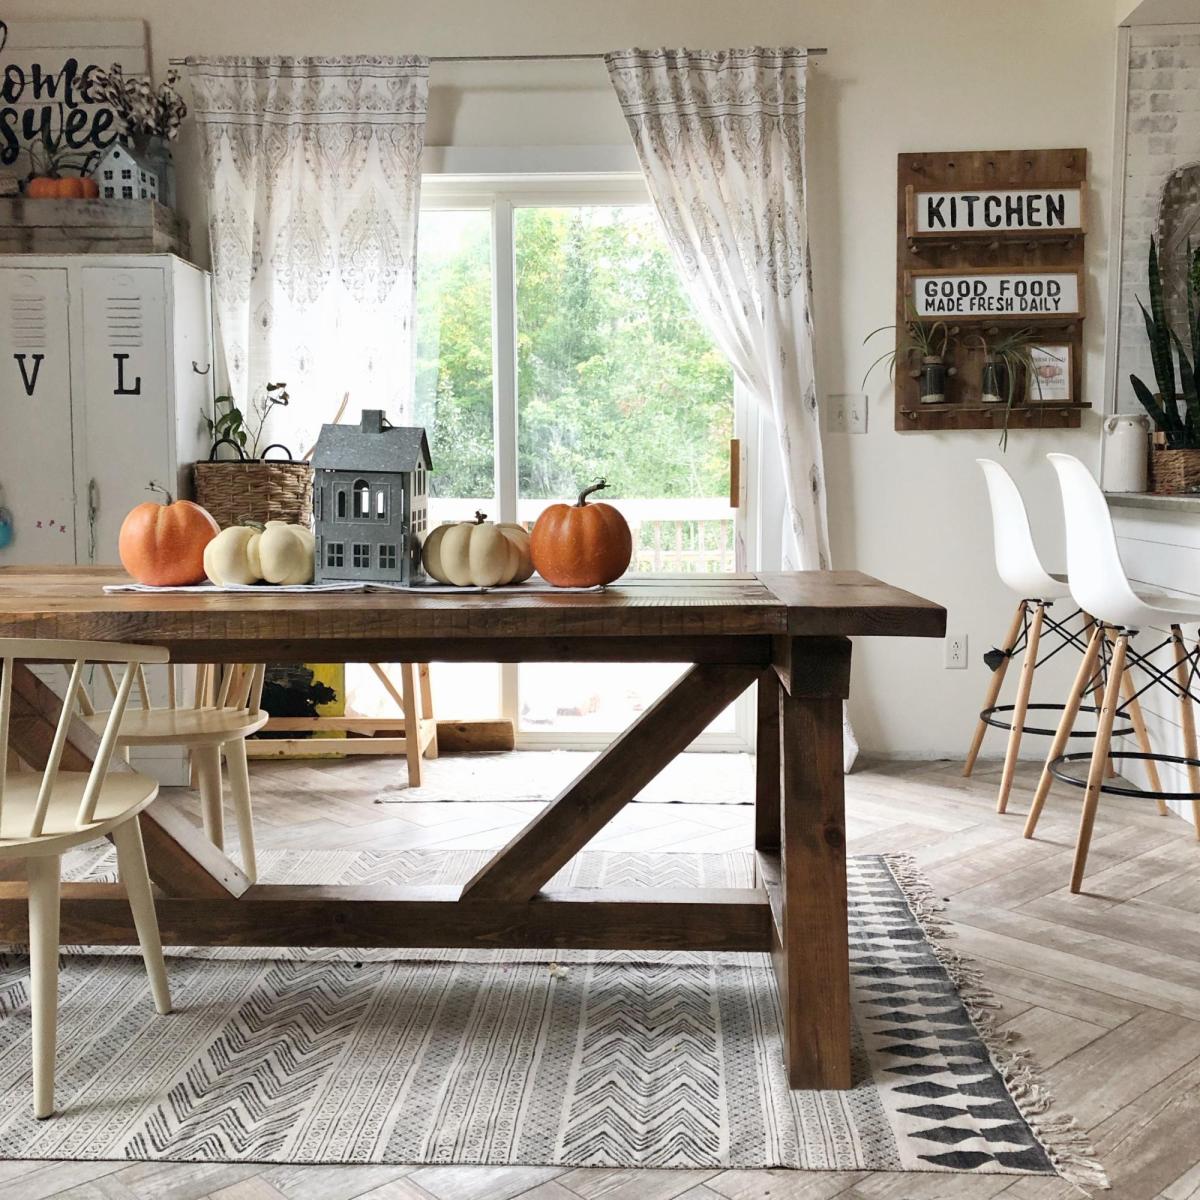
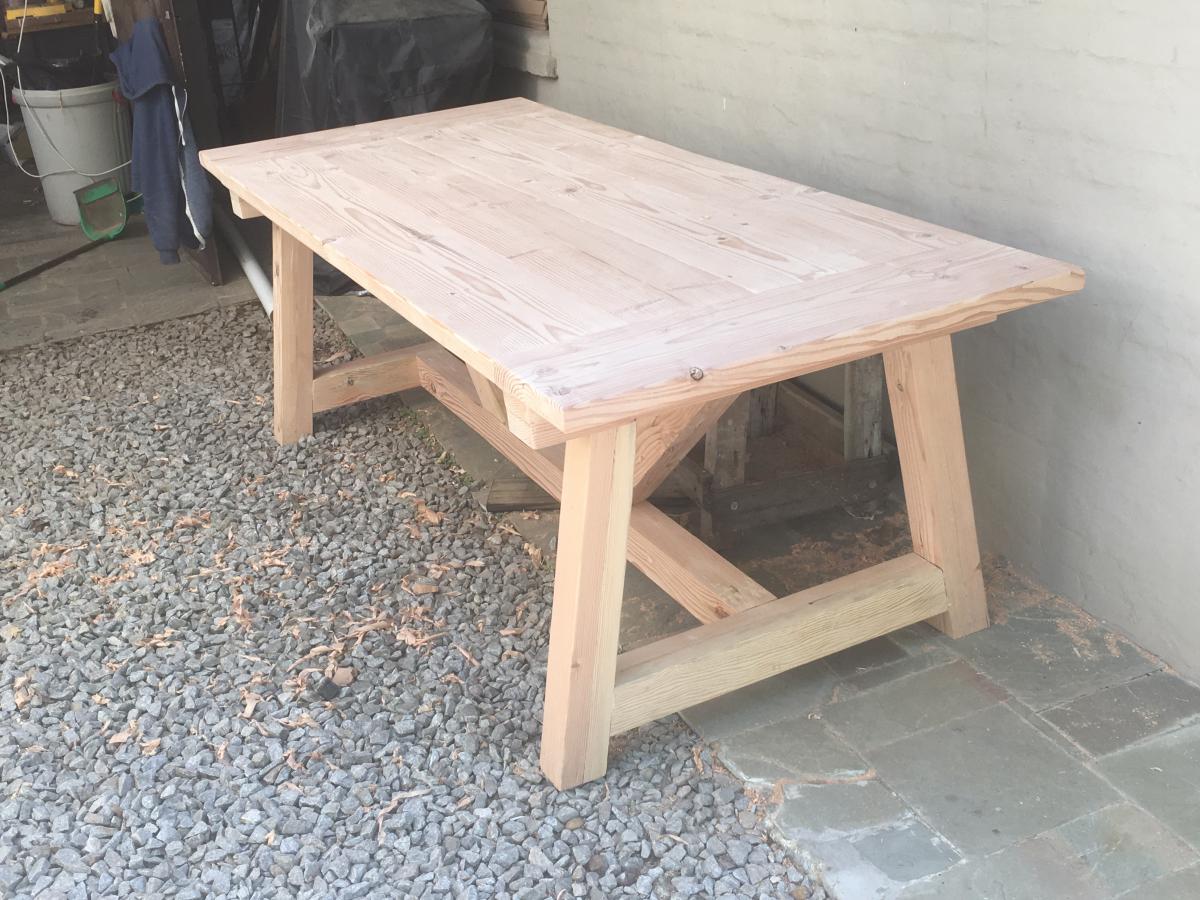
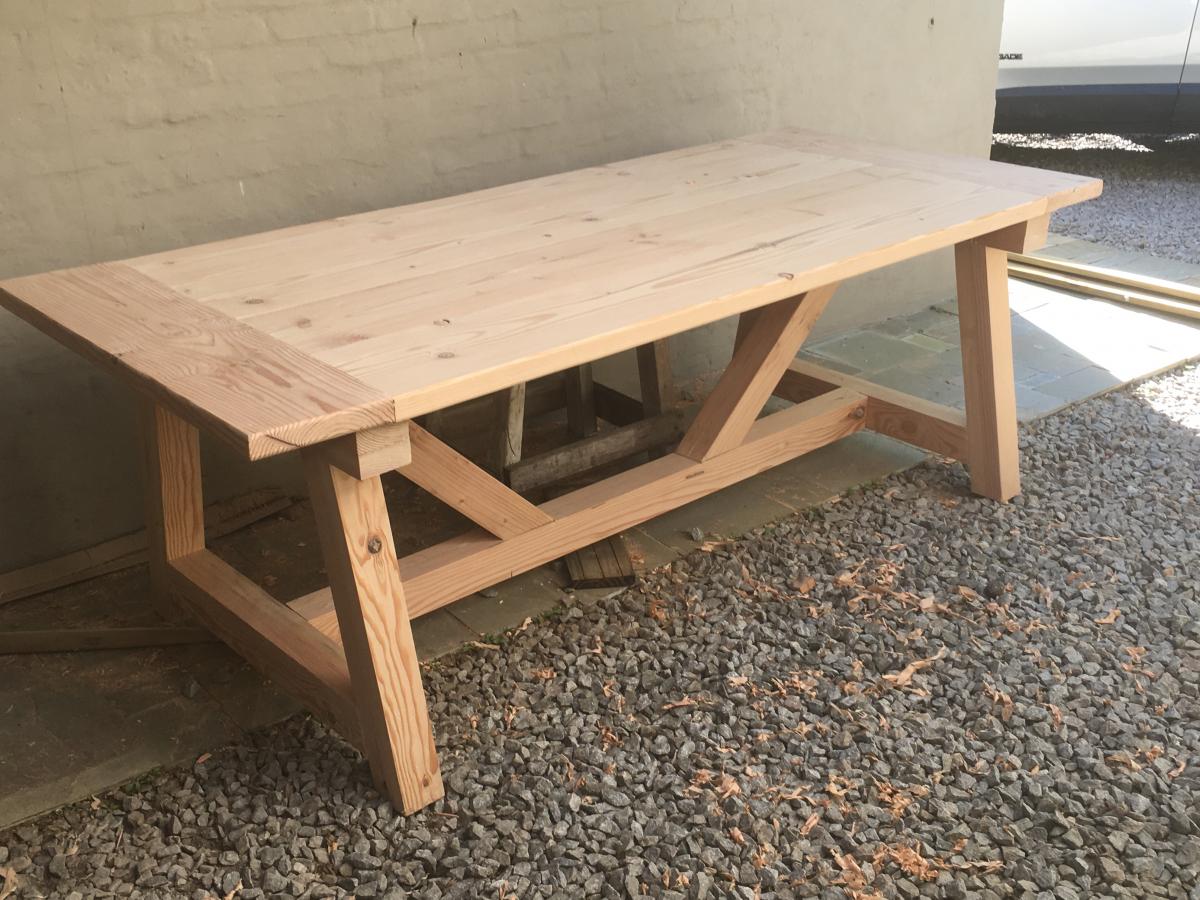
From Logs to Famhouse Table
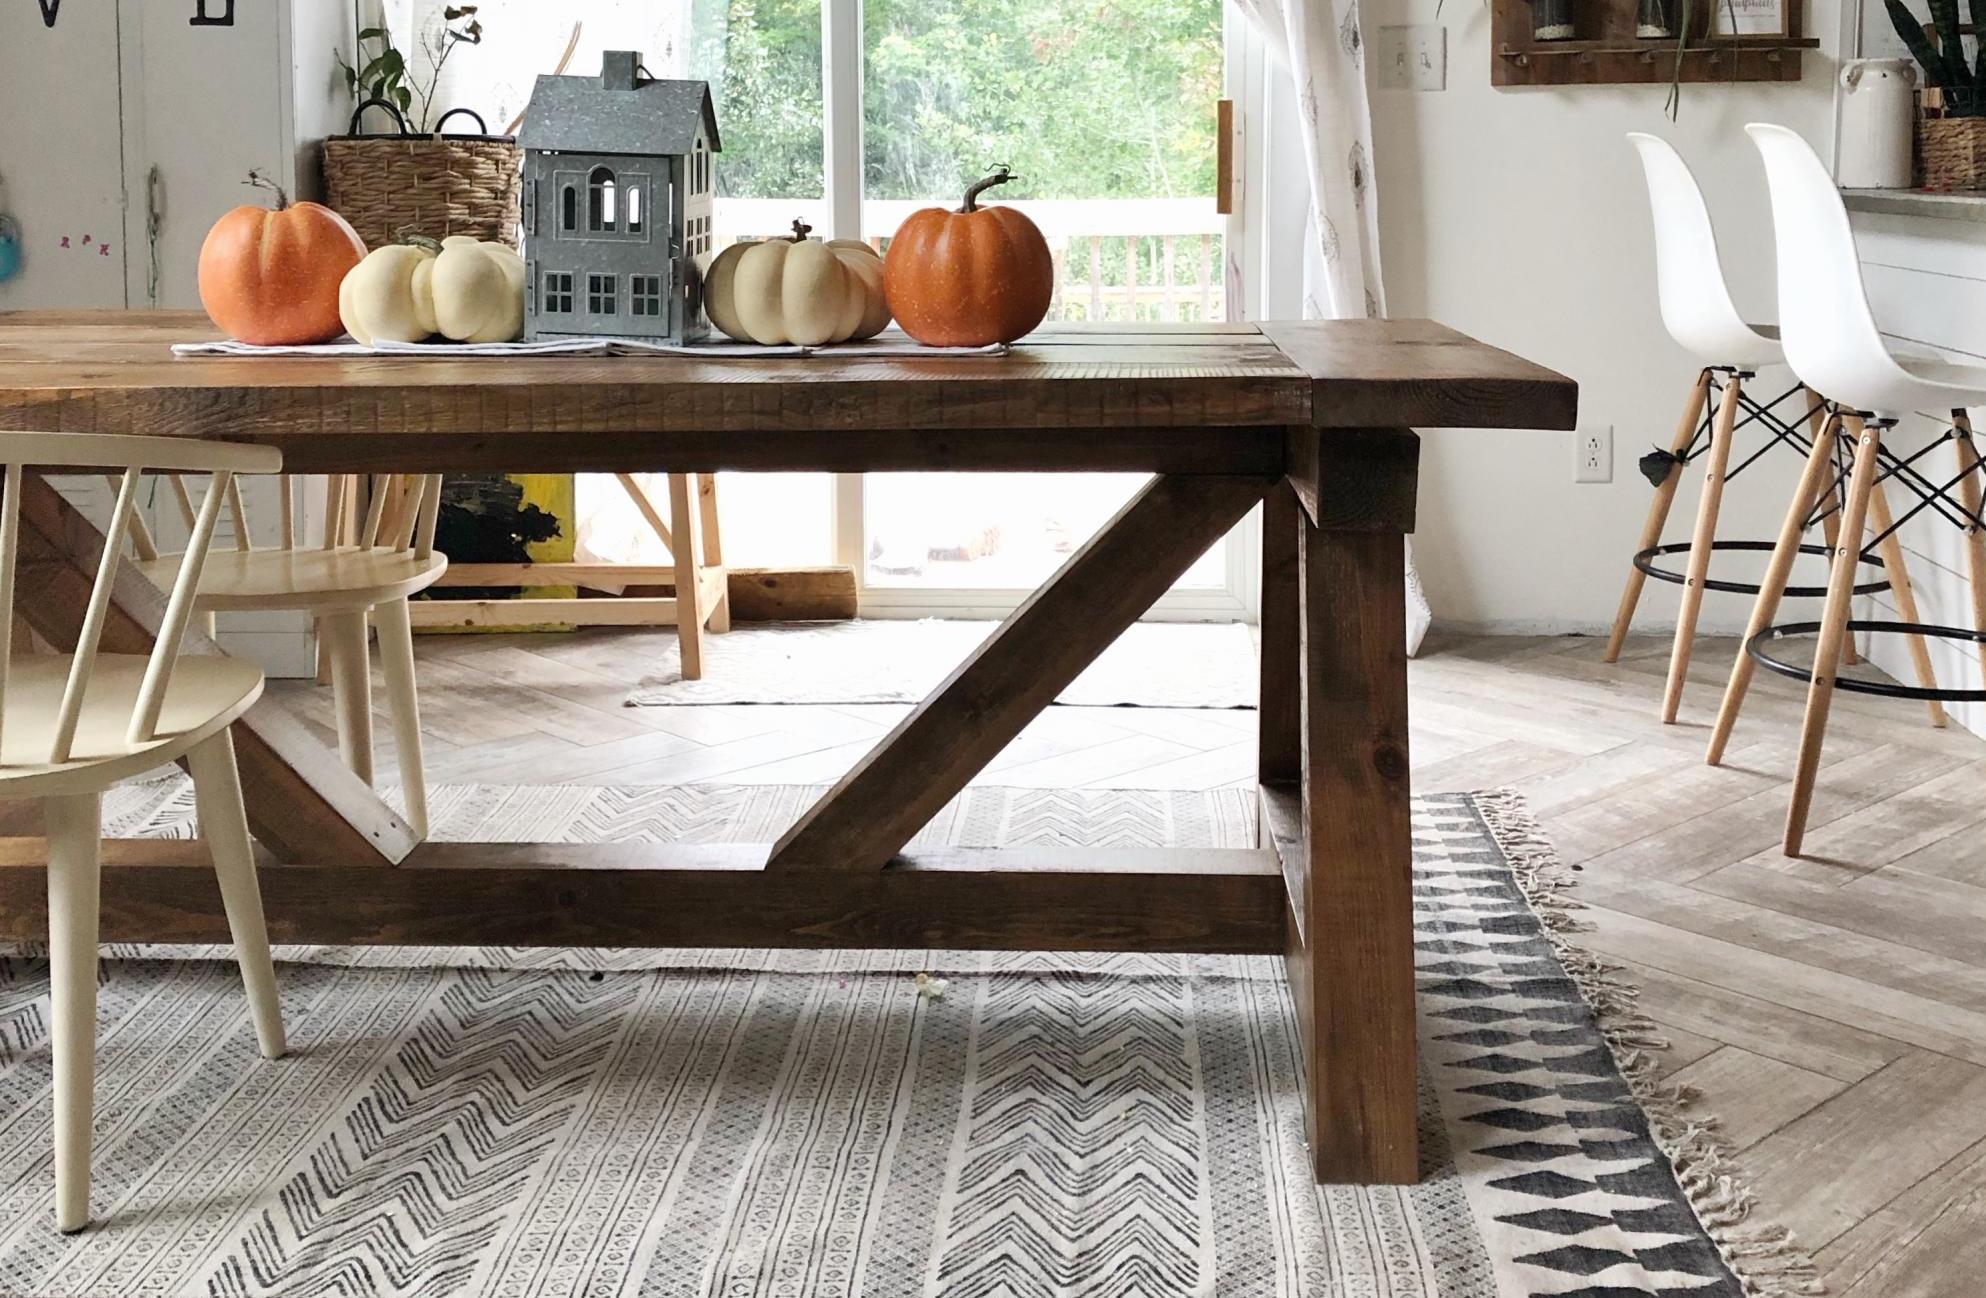
So this DIY Farmhouse Style Table has been on my “make it” list for a while now. And what better time to make it than now, since we just got a saw mill. Check out the blog link below to read all about it.
Built from Plan(s)
Estimated Time Investment
Weekend Project (10-20 Hours)
Finish Used
Minwax Early American Stain
Minwax Polycrylic Clear Sealer
Minwax Polycrylic Clear Sealer
Recommended Skill Level
Intermediate
Seasonal And Holiday
Mimi’s Entryway Storage Bench&NarrowHall Tree Hutch
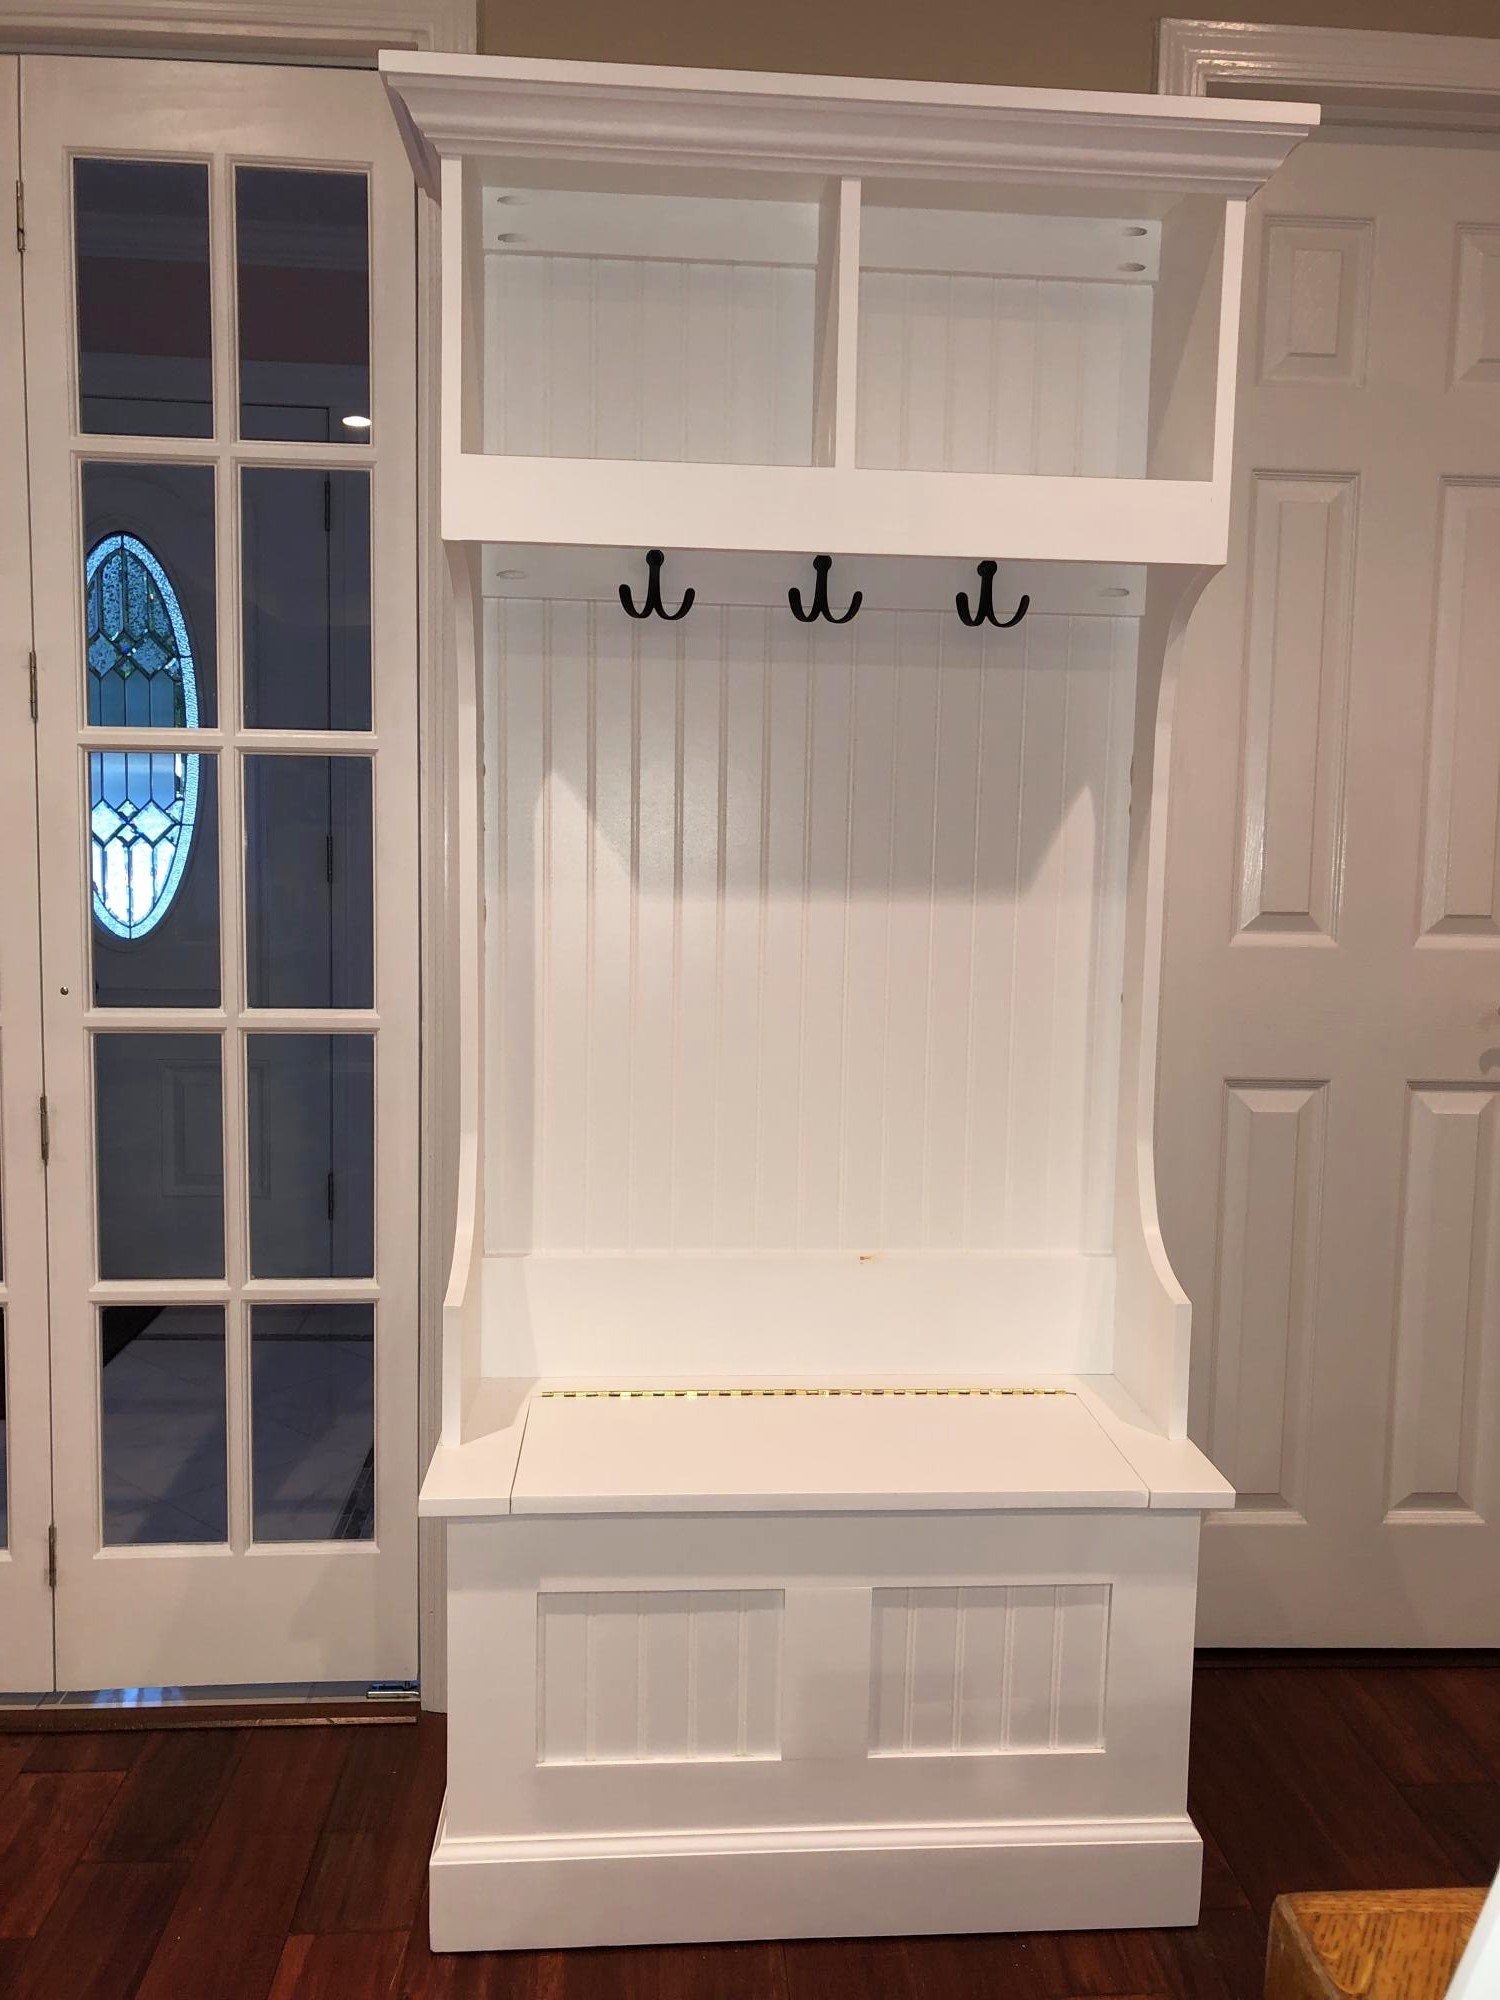
This was a two week project. The width was modified smaller than the plans. The panels on the bench were fitted into dado joints rather than inserting an entire panel on the inside. Also used pocket hole joints where some nails were suggested.
This was my first attempt at a project like this and turned out amazing. My wife loves it too.
Built from Plan(s)
Farmhouse bed king modified
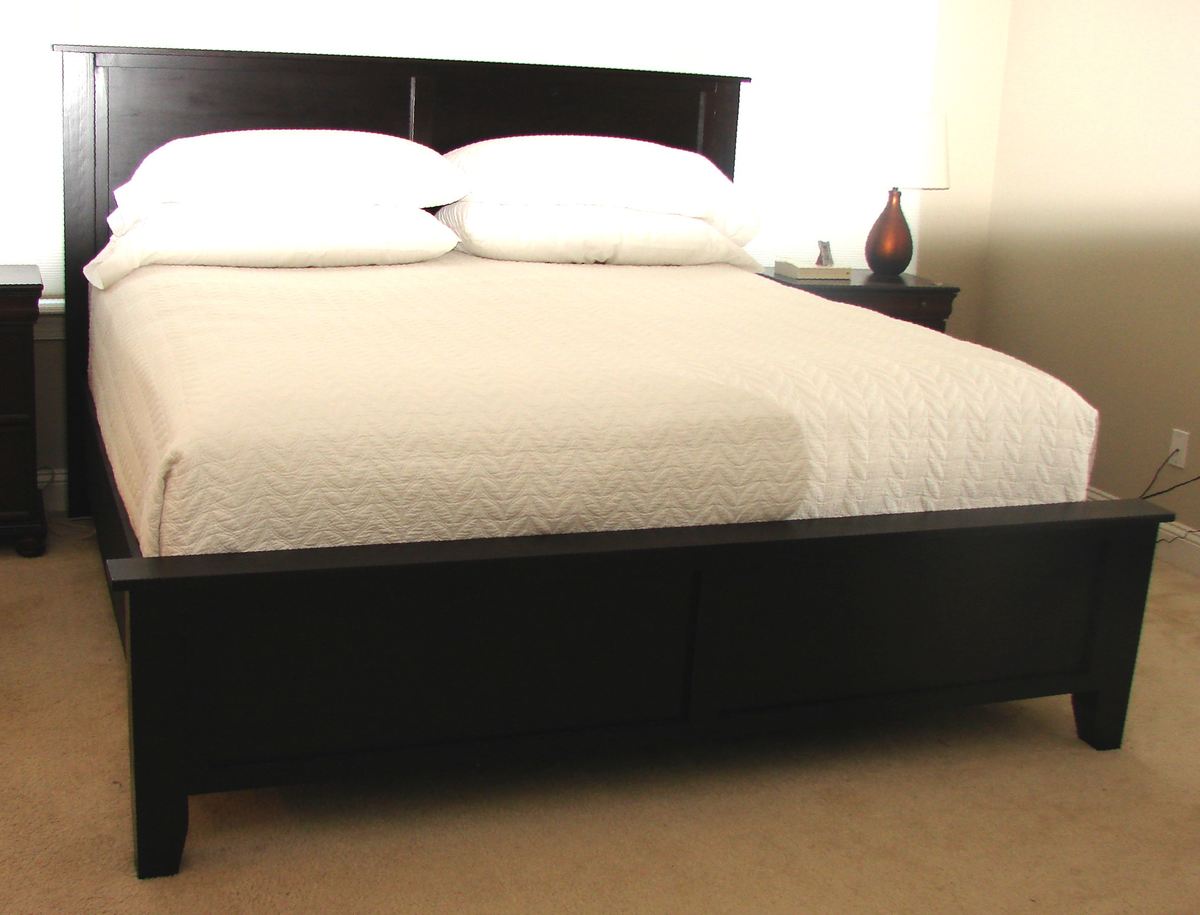
This is a modification of the Farmhouse bed with a panel headboard and footboard rather than individual boards. It currently fits around the mattress/boxspring/metal frame. When we buy a new mattress, we will then add the joists, etc.
The headboard and footboard are both 72" wide. We had the guys at blue do a rip cut at 72" which ensures that both pieces are exactly the same measurement (for square.) Then, they turned the plywood a quarter turn and cut at 15" for the footboard. This left a 33" high headboard. It is 3 inches larger than the original plan, but it doesn't require a second cut and you don't see it anyway. The trim is just a 1x3 with a 1" overhang. (I might make it just a 3/4" if doing it again.)
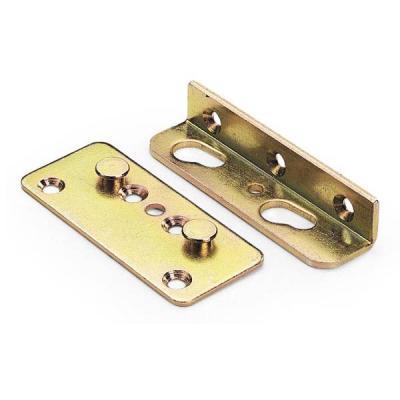
The side boards are 1x12 cut at 80 1/4", but you may want to add a little if your comforter is really thick or if your mattress is much longer than ours at 79 1/2". We used non-mortised (no cutting into the wood) bed rail hardware from Woodcraft, so we could easily take it apart. These were placed 1 1/8" in from the inside edge of the 4x4 post. They were placed on the very edge of the side rail so it would butt up against the post. The 1 1/8" gives us plenty of room to shove the bedding down inside the side rail.
We glued and nailed 1x2s from the back for the trim on each piece.
Built from Plan(s)
Estimated Cost
about $190, but you could save $17 by not spilling an entire can of dye/stain on yourself when you foolishly open your completely full pressurized sprayer
Estimated Time Investment
Weekend Project (10-20 Hours)
Finish Used
General Finishes dye stain in Dark Brown; polycrylic - 3 coats; prefinished all the wood before assembling.
Recommended Skill Level
Beginner
Comments

Wed, 02/22/2012 - 05:18
Looks beautiful! We are
Looks beautiful! We are currently making this bed with the exact samce change to use panels instead of boards and then one board down the middle, except we made our footboard and headboard higher.
Wed, 02/22/2012 - 07:32
Thank, Kate!
I would love to have the footboard higher, but my husband is 6'4" with large feet, and he asked that I make sure that he could sleep on his stomach with his feet dangling down without touching the footboard! We actually measured it. Make sure you post yours when it is done.
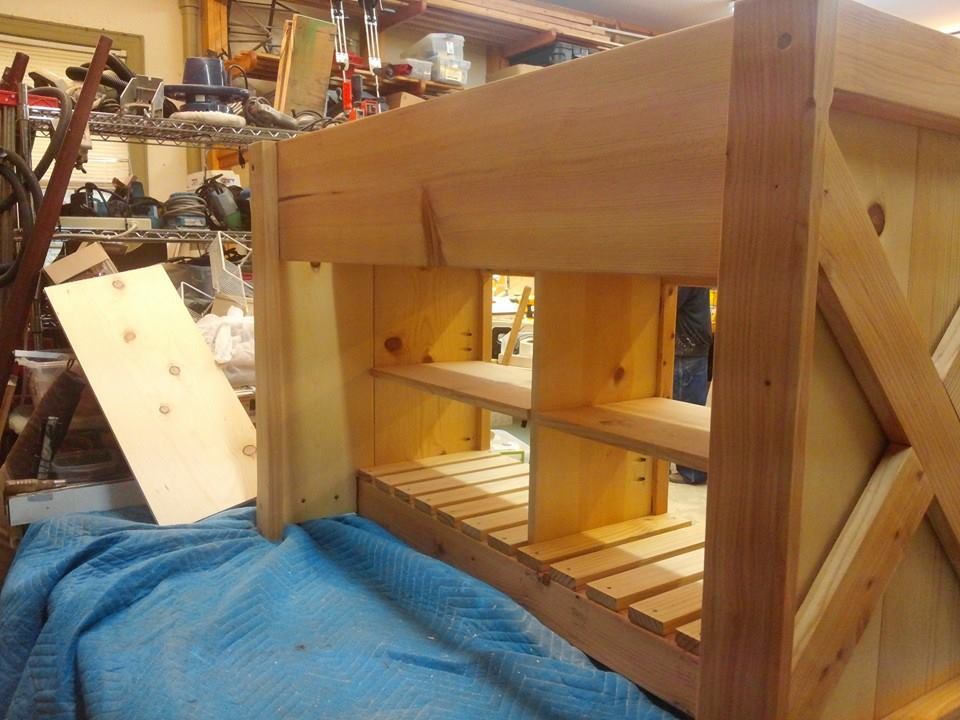
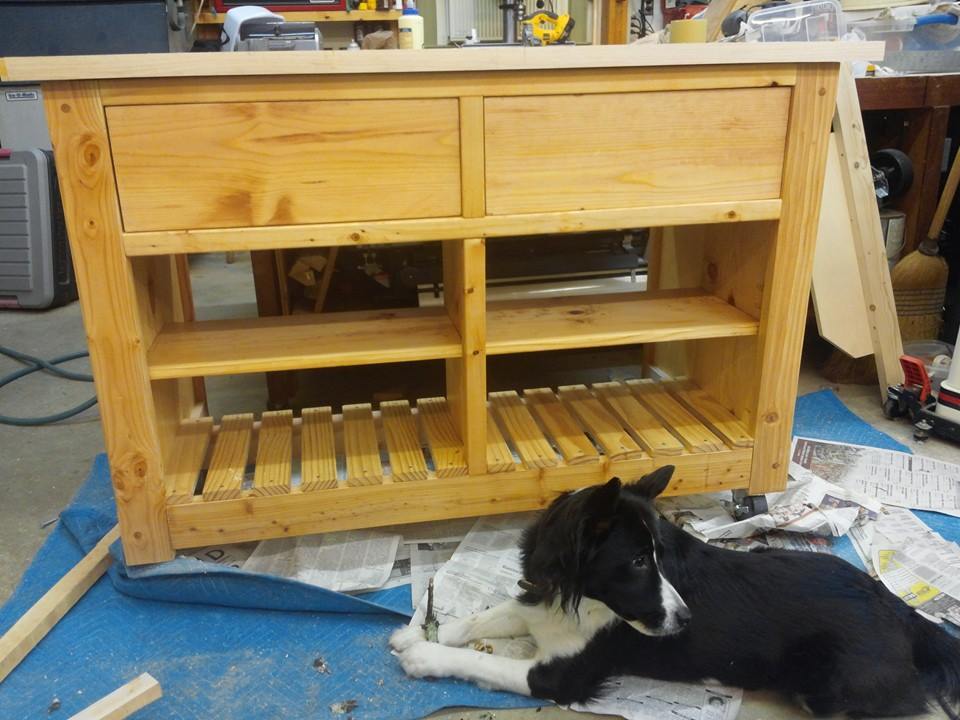
Rustic Kitchen Island with Maple Cutting Board Top!
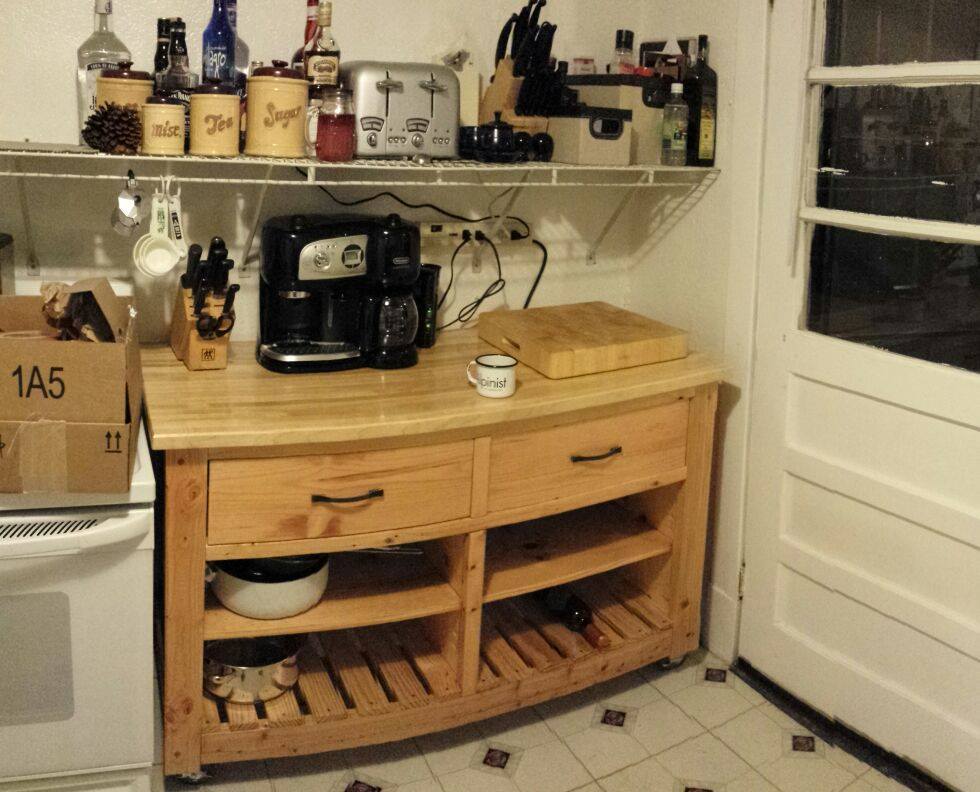
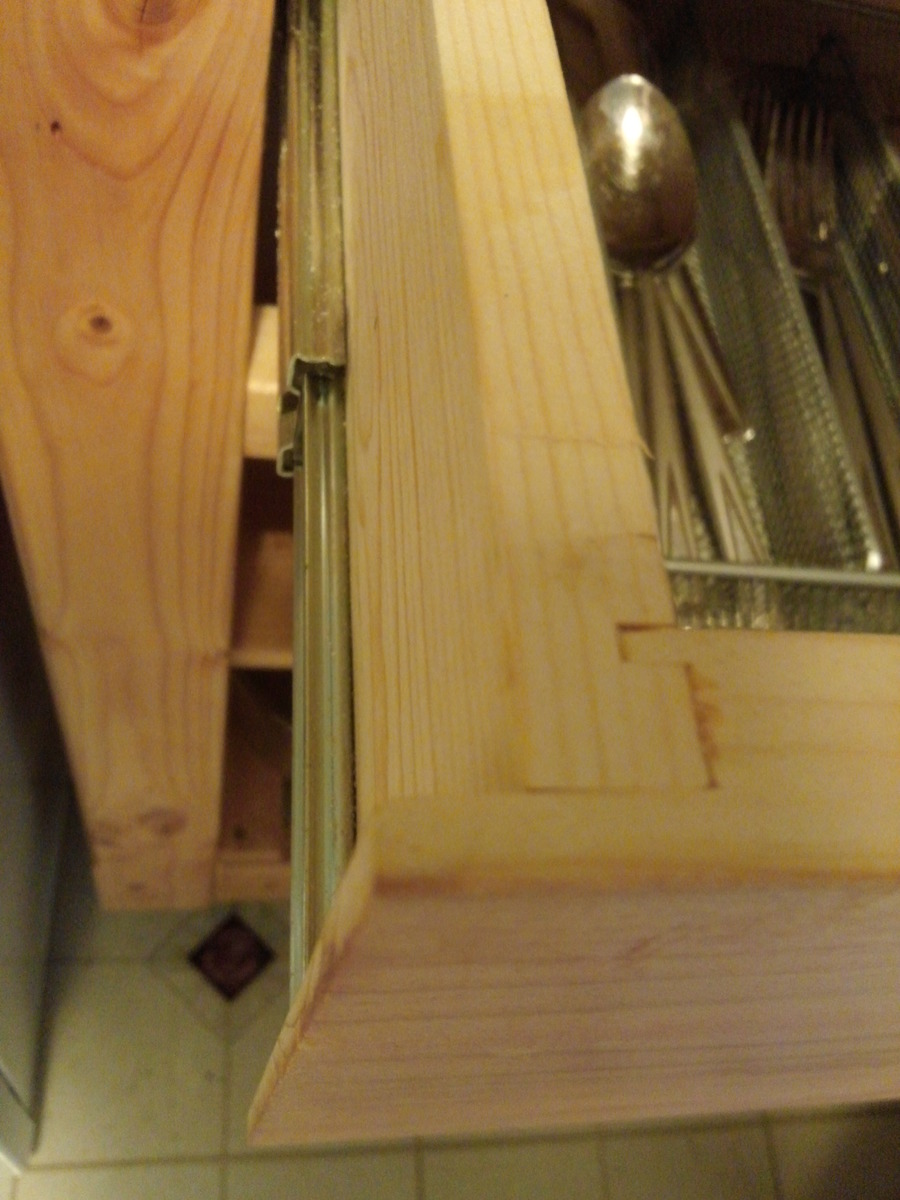
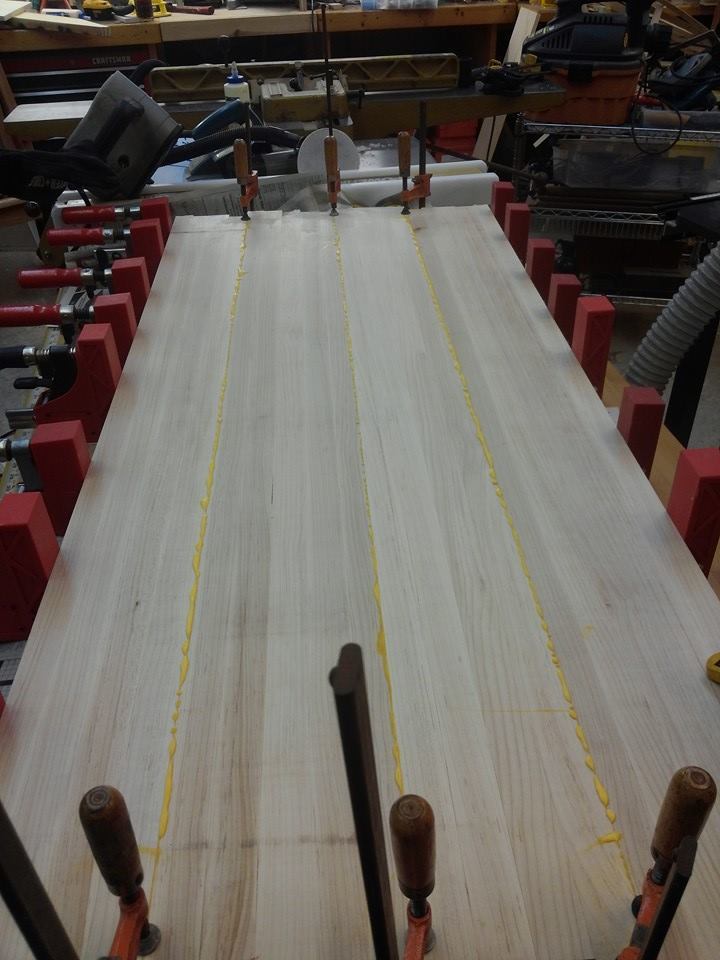
We constructed the Rustic Kitchen Island with a few modifications. My dad, president of the Norm Abrams fan club, built fantastic drawers using rabbet joints and fashioned a maple cutting board top. We also chamferred the edge of the top and the leg ends, very easy and adds a beautiful touch. We finished the cutting board top with "Salad Bowl Finish" which facilitates food prep.
This was a Christmas present for my boyfriend, he is in love with it! I watched him play with it like a little kid for hours after opening it. Thank you, Ana, for your great plans! (Also, Santa brought me your book for Christmas so I will be sharing many more completed projects!)
This was my very first project in the workshop. I was able to complete most of it on my own, which is why I rated it a "beginner" project. However, construction of the drawers using rabbet joints and prepping the maple for the top were considerably more difficult.

Estimated Time Investment
Week Long Project (20 Hours or More)
Finish Used
Bottom & Drawers: Golden Pecan, Minwax (2 coats on pine)
Top: Salad Bowl Finish, General Finishers (3 coats)
Top: Salad Bowl Finish, General Finishers (3 coats)
Recommended Skill Level
Beginner
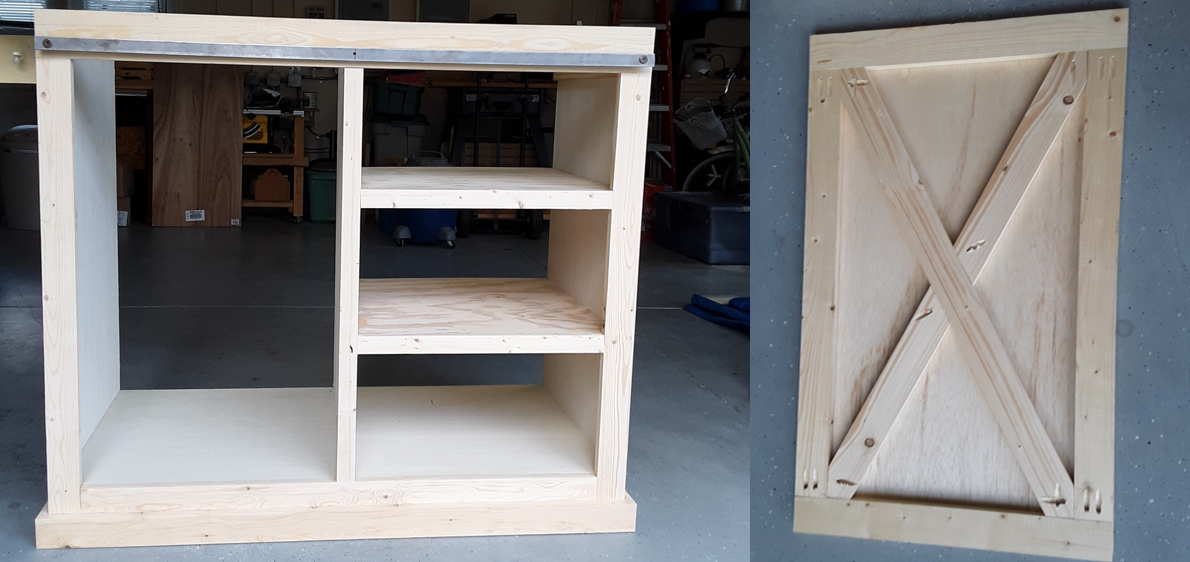
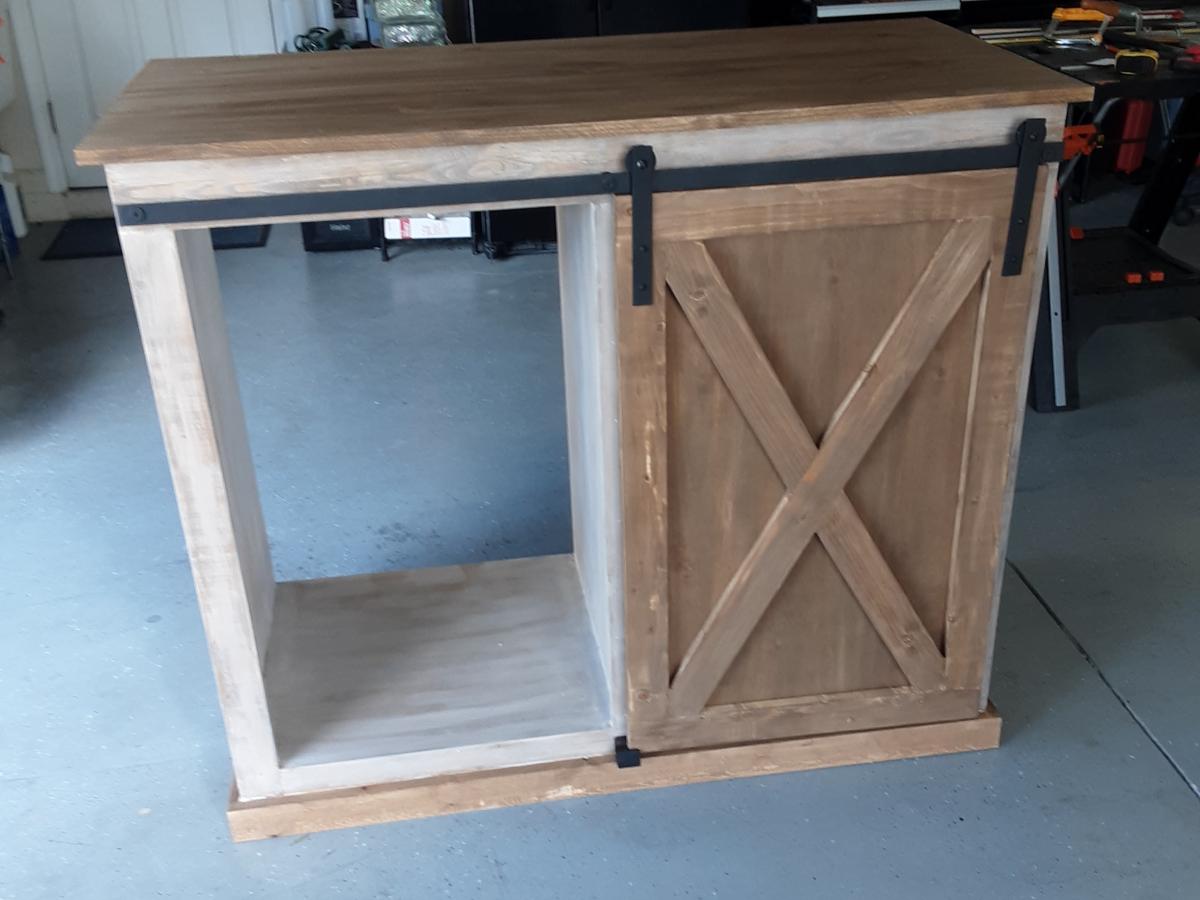
Refreshment center console with barn door
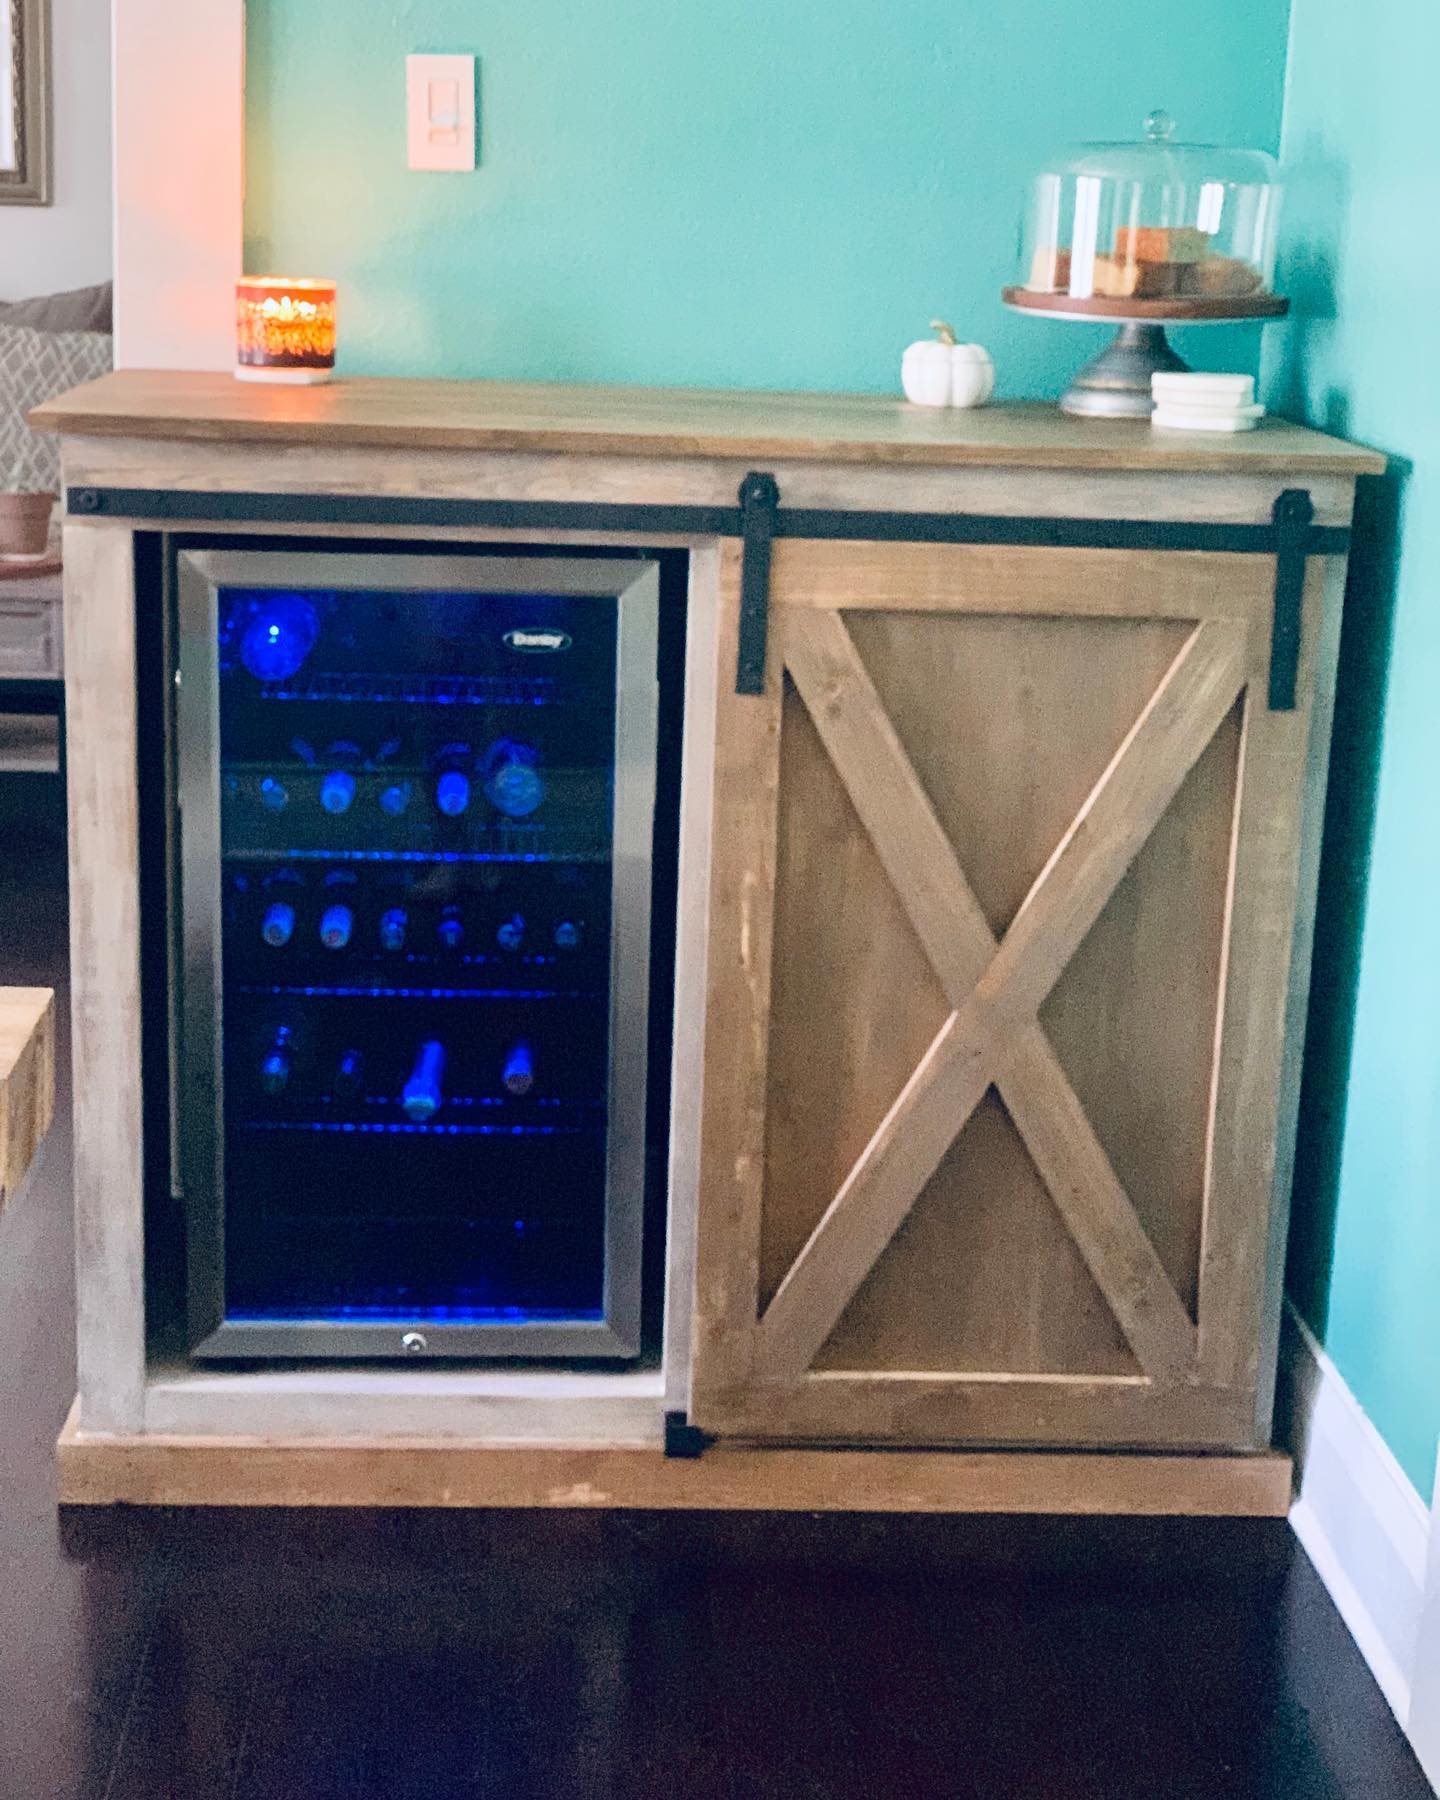
My wife and I built this Refreshment Console as a birthday present for our daughter. She had previously purchased a beverage refrigerator and wanted us to adapt it inspired by your barn door console project. Thus, we modified your plan to accommodate the height of the refrigerator. Also, she wanted three shelves with a closed back on the right side of the cabinet. Simply plan adjustments were all that was needed.
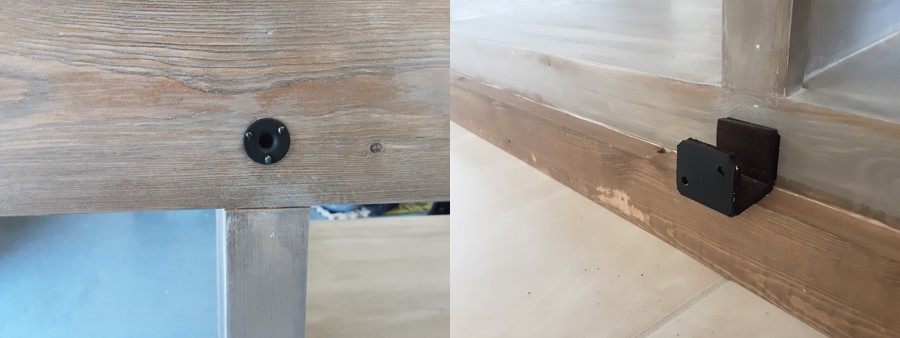
Using your plans, material list and excellent video we were able to construct the barn door rails and hangers using 1 ½ inch fender washers which sandwiched three 1-inch fender washers. The metal bar was sized to fit the top of the cabinet and connected to the top trim board using spacers, washers and bolts. As we decided to place a middle support for the bar, we added a t-nut into a center plywood partition so that we could use the same bolts, spacers and washers to support the rail.
As we were following a rustic theme, we decided to add the X Braces to the barn door and used a project panel board as the top. The barn door is guided at the bottom using a simple U shaped metal bracket that we lined with felt for a smooth glide.

Built from Plan(s)
Estimated Cost
$100
Estimated Time Investment
Weekend Project (10-20 Hours)
Finish Used
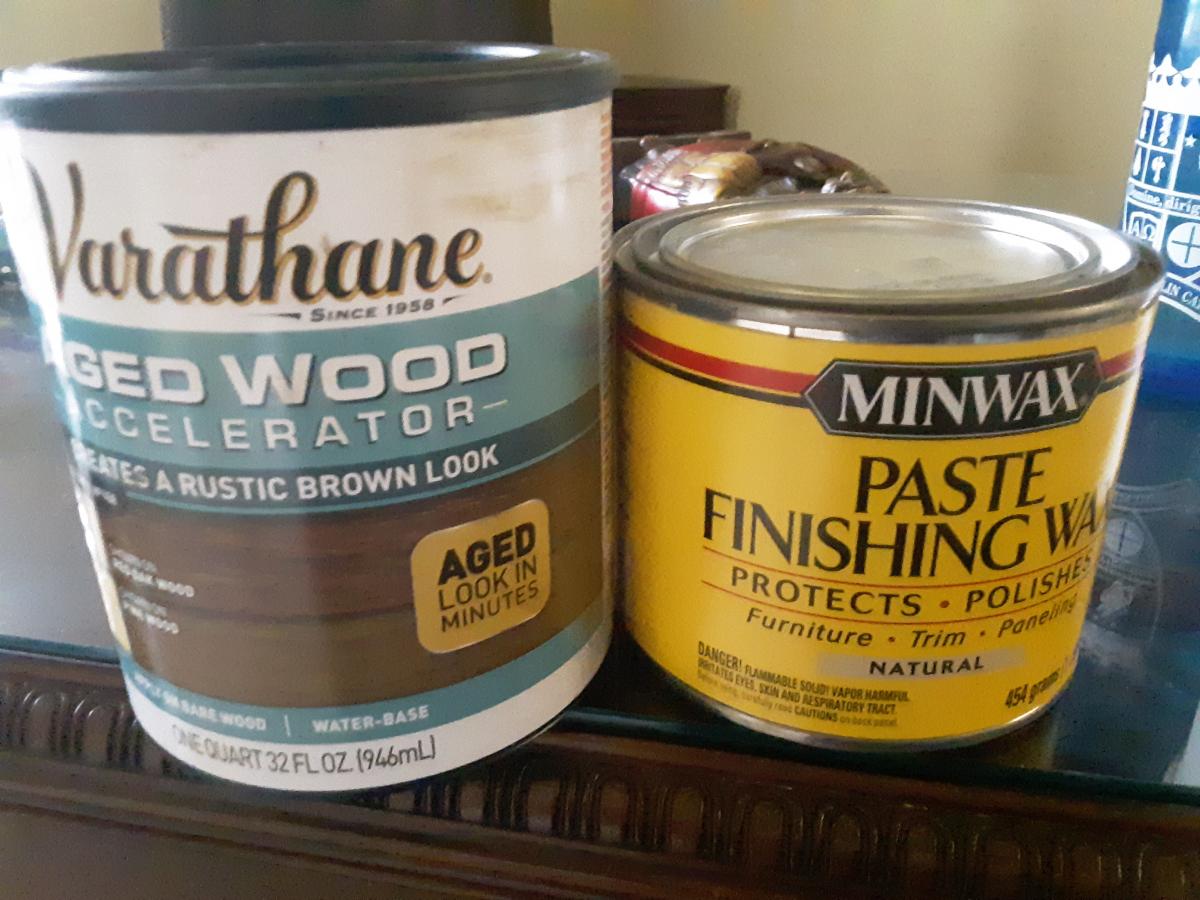
Top, barn Door and Bottom Trim treated with one coat of Varathane Aged Wood Accelerator using a rag to create a rustic brown look.
Cabinet carcass and surrounding trim painted with one coat of Behr Premium Plus Ultra Satin Finish Metropolis Grey.
Entire cabinet finished using MinWax Paste Finishing Wax Natural applied with a rag and buffed for a durable finish.
Cabinet carcass and surrounding trim painted with one coat of Behr Premium Plus Ultra Satin Finish Metropolis Grey.
Entire cabinet finished using MinWax Paste Finishing Wax Natural applied with a rag and buffed for a durable finish.
Recommended Skill Level
Intermediate
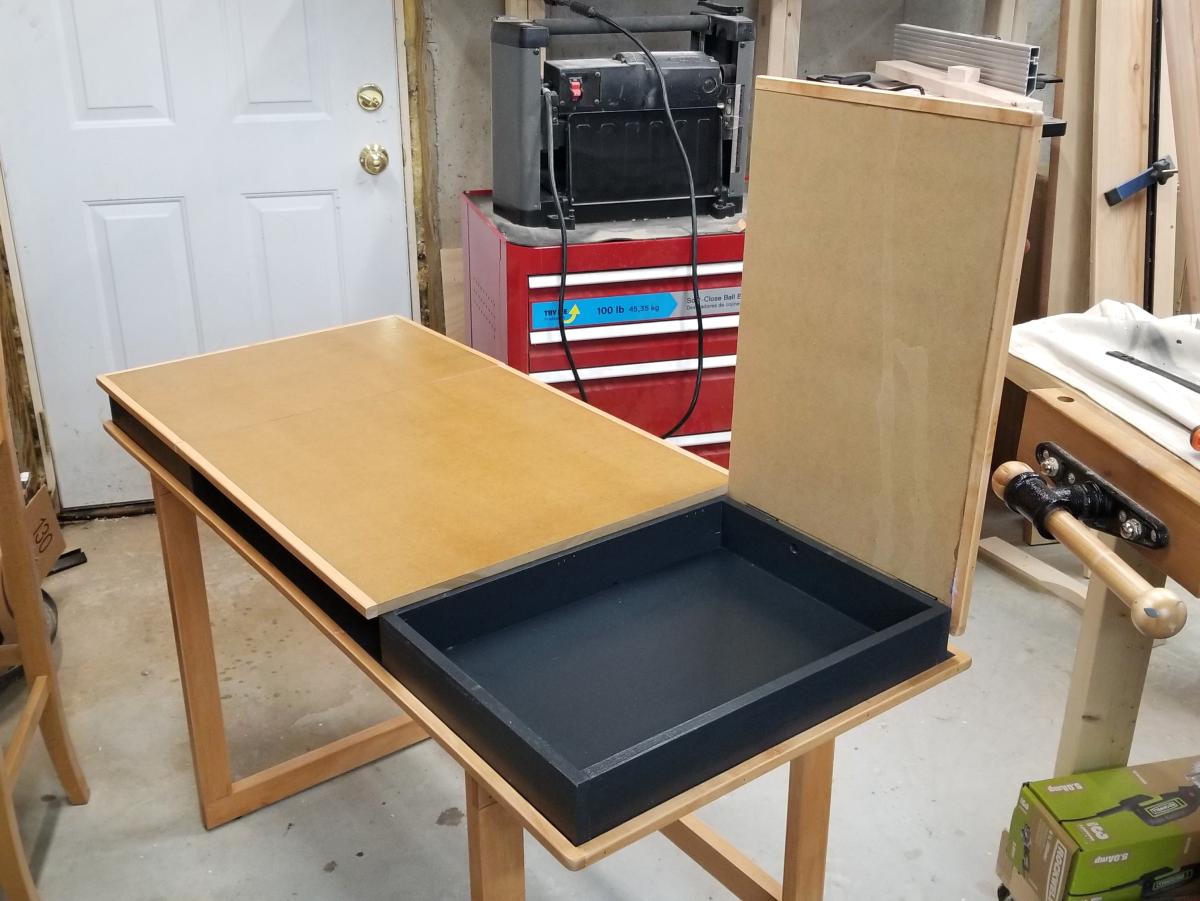
Modern Storage Desk
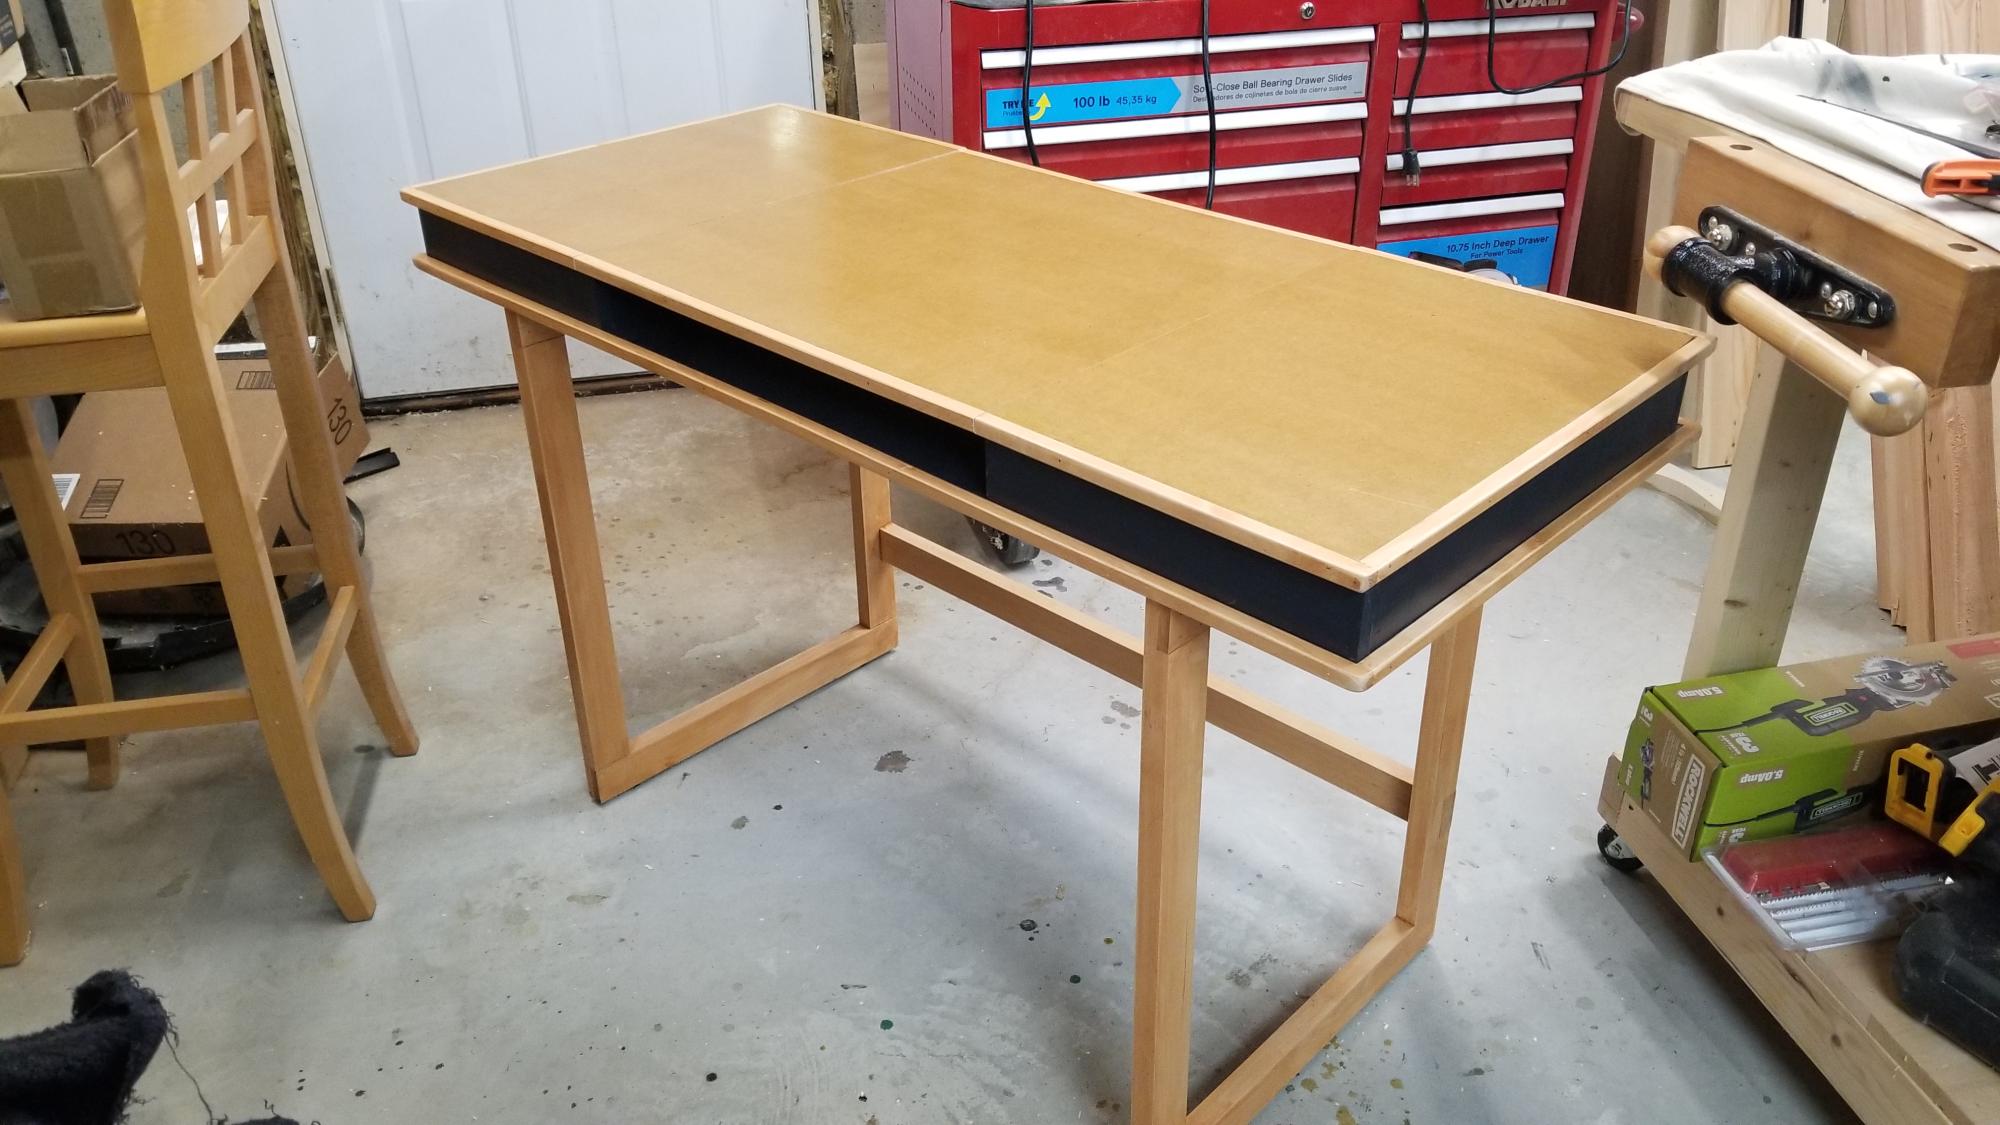
I used these plans as inspiration and made some changes per my son's request. I made the base out of maple and changed the board dimensions to 1x2" I also used half lap joints instead of pocket hole screws (personal preference). The top is MDF and I edged plywood and MDF in Maple. Fun Project
Zen
Built from Plan(s)
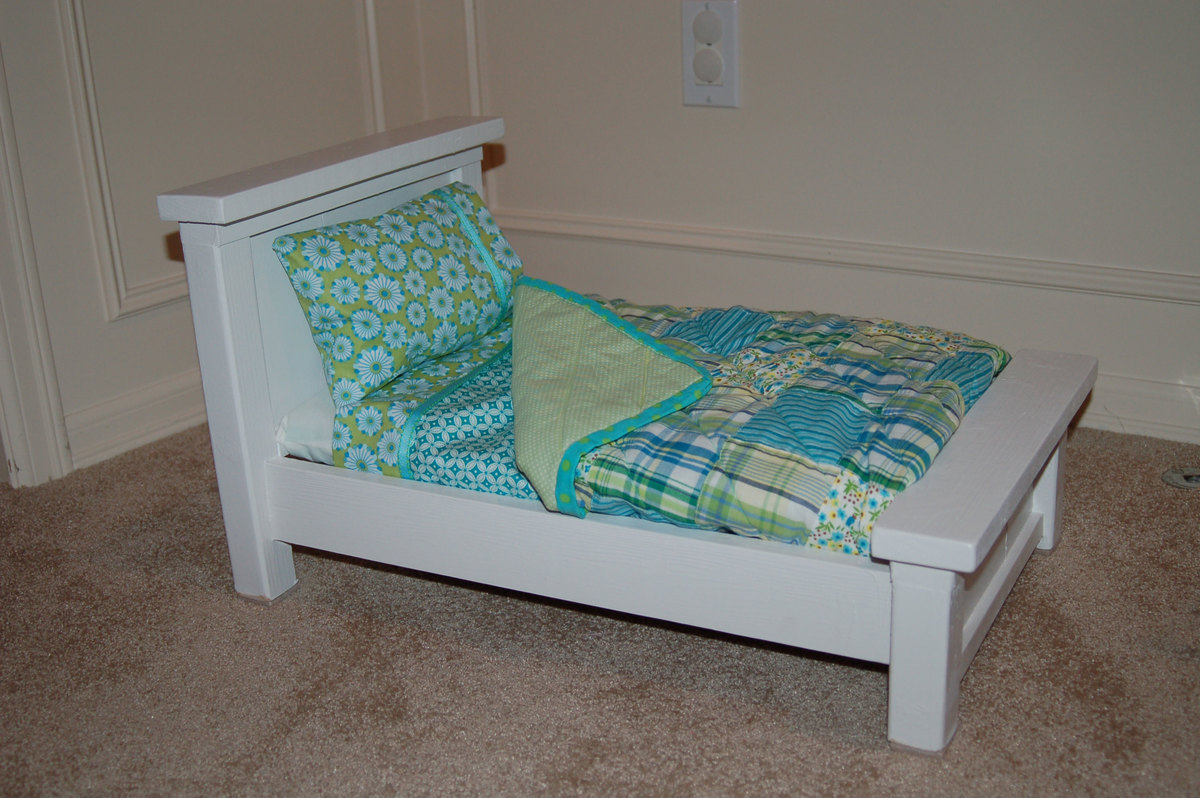
Farmhouse Doll Bed X 3
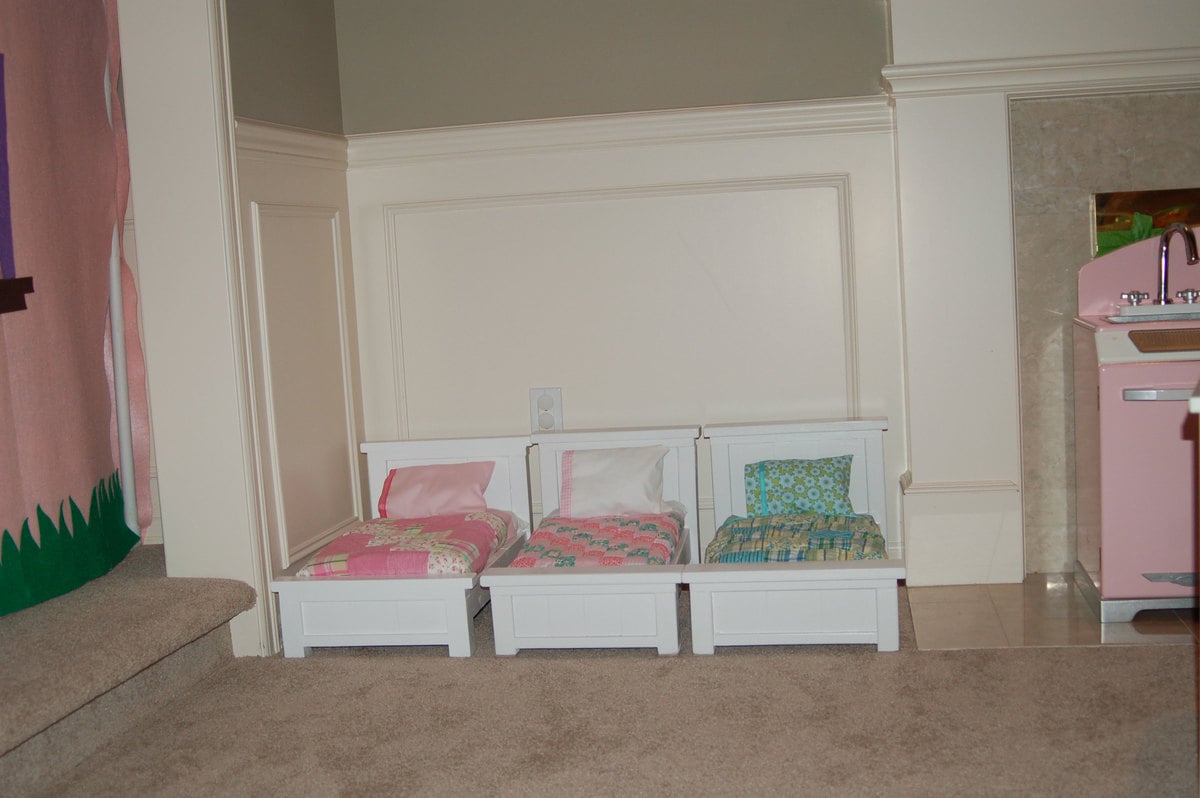
I made these three farmhouse doll beds for my daughters. Initially, I made two beds following the plan as written but started feeling like they would take up too much space. My girls are close in age (4 and 2 yo twins) so waiting for one to outgrow something and passing it on isn't an option.
I gave the first two regular sized beds away as gifts and made three narrow versions that I saw on another blog http://thatsmyletter.blogspot.com/2011/02/b-is-for-bed-5.html Her bedding is still the gold standard in my eyes. LOVE IT!
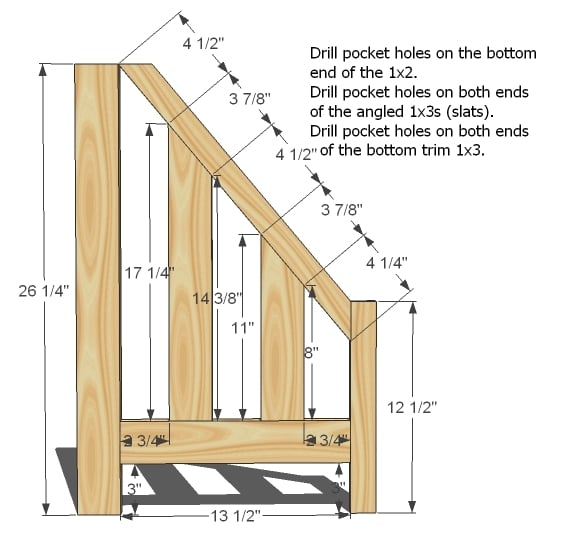
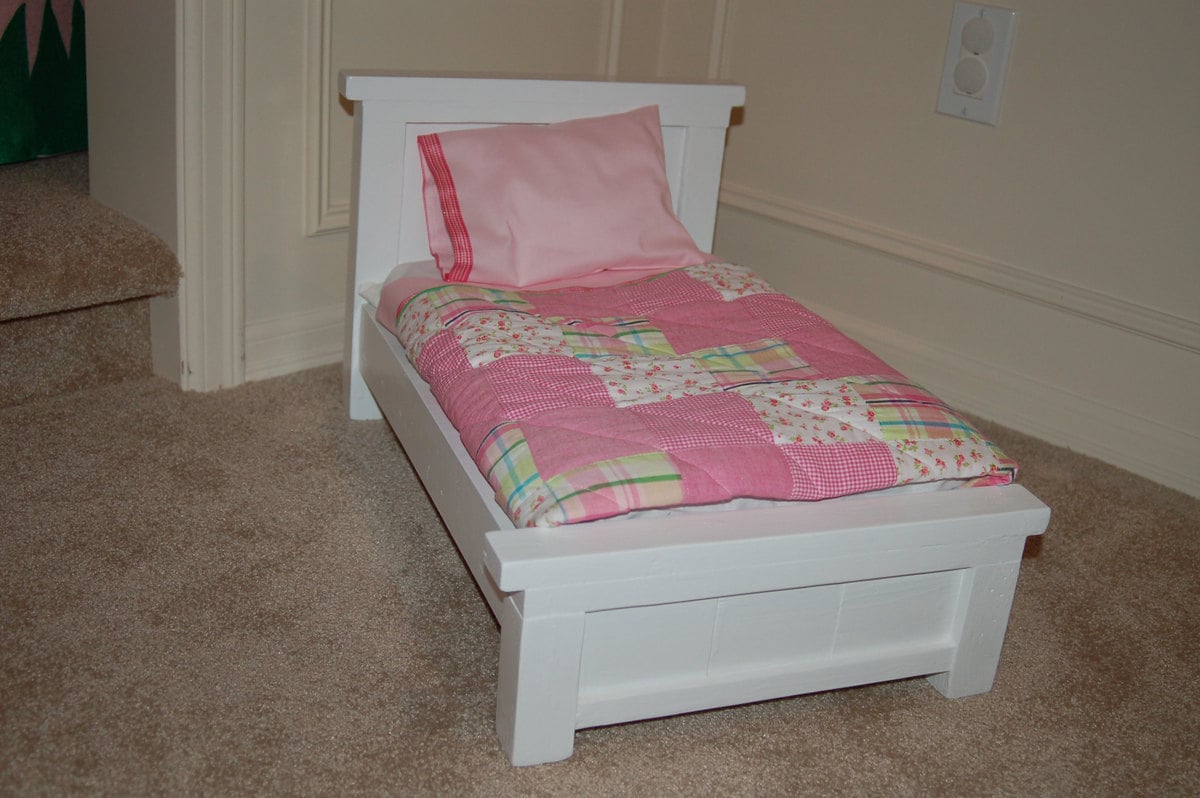
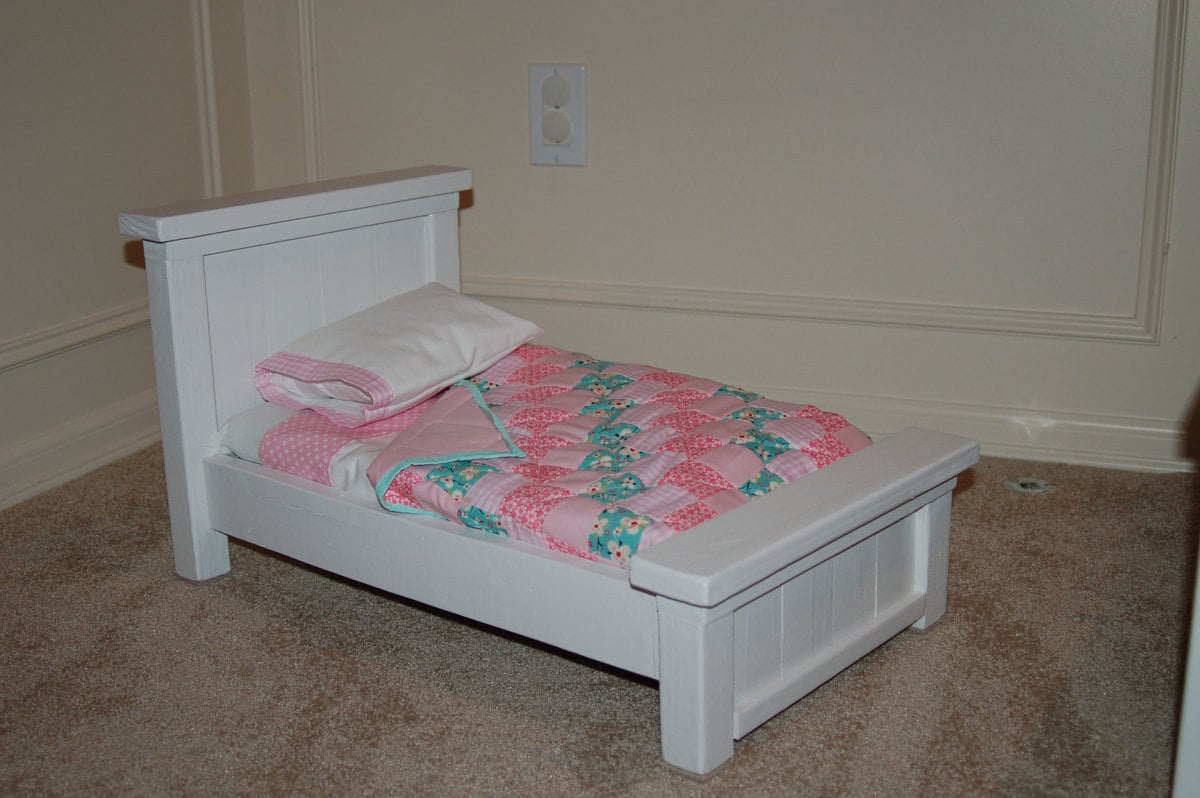
On two of my beds, I left off one 1x2 slat, and on the other I used 3-1x3's. The width of the 3 beds are slightly different. Heck, I think I am incapable of making two things exactly the same. lol The girls love them so that's all that matters. For the bed that used 3-1x3s, I didn't write down the width of the top boards. I measured and cut as I assembled.
I put an extra 1x2 mattress support in the middle because I knew they would sit on them and used masonite to hold the mattress. Seems strong enough so far.
Before painting, I used lots of wood filler and caulk to hide some flaws. By the way, I feel like painting the beds is the hardest part. So many little grooves, nooks, and crannies. I recently bought a Graco 3900 HVLP paint sprayer. Painted a half wall and 6 long pieces of trim in 30 minutes today---love it! If I make another bed (or anything for that matter), I'm totally going to spray it.
Oh and I have to confess that after the first two beds, I got too impatient to use just screws so I used the nailer, glue, and used a few screws at key points. It made things go so much quicker, and the beds still feel quite sturdy. If my kids manage to break them, I'll make them new ones. :-)
I used 1" foam and muslin for the mattress & cover and fabric that I obsessively buy and hoard for everything else. The middle quilt is an actual quilt. I cut the squares and all---first time for that too. The other two are made of pre-made patchwork fabric from Joann's.
Thank you to everyone for sharing your creations, and thank you, Ana, for the plans. I am so inspired!
Built from Plan(s)
Estimated Cost
$20 (best guess - for all three)
Estimated Time Investment
Afternoon Project (3-6 Hours)
Finish Used
Sherwin-Williams ProClassic Alkyd Interior Enamel in white and primed beforehand with the recommended primer. I had both on hand from another project.
Recommended Skill Level
Beginner
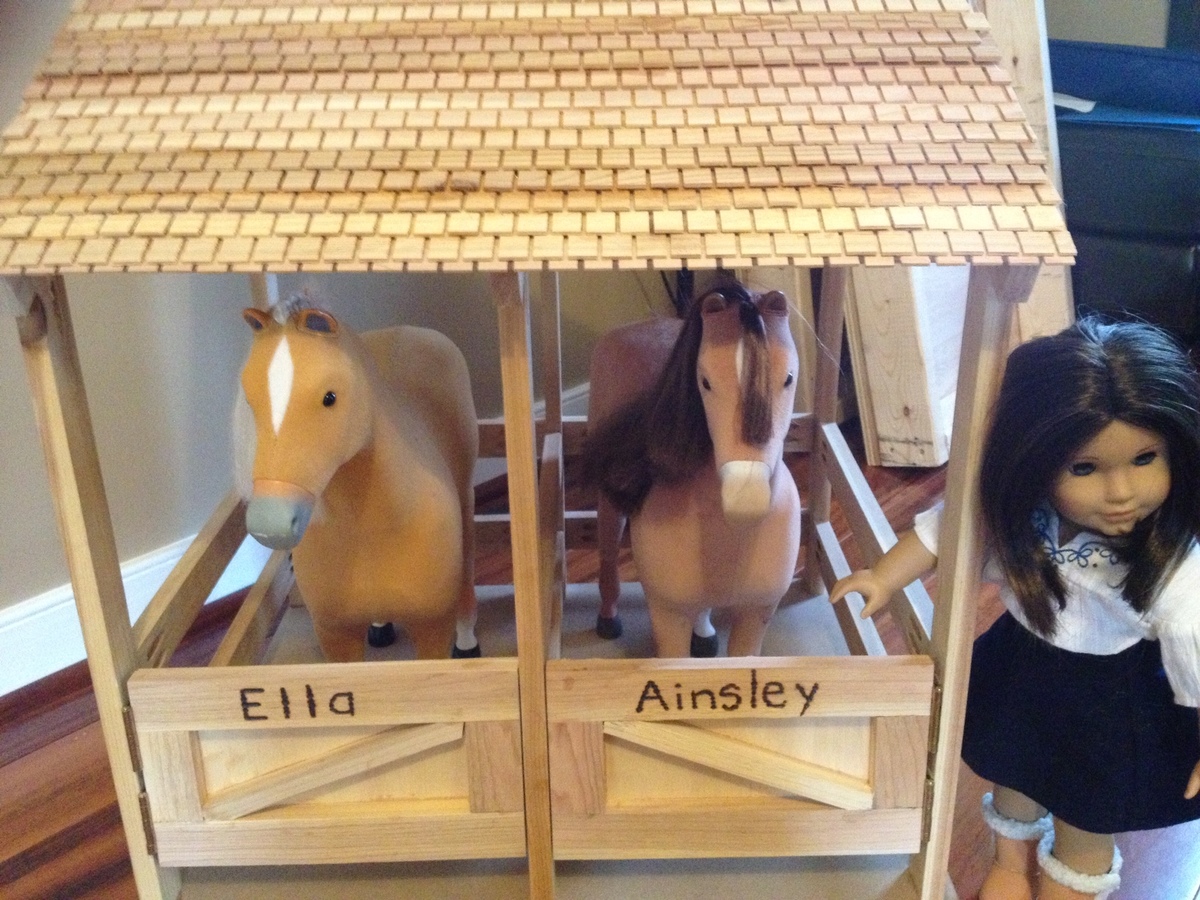
American Girl Doll Horse Stable
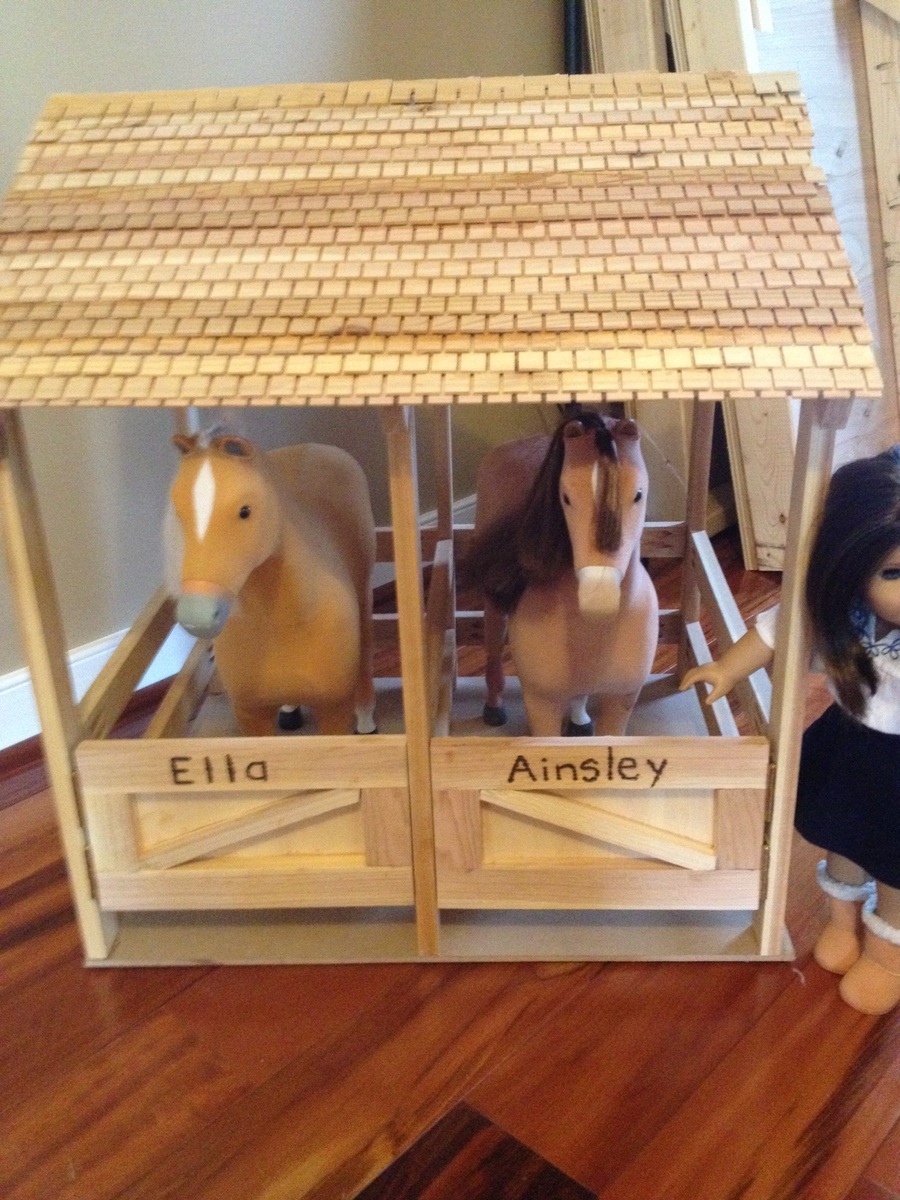
My two dauirlghters wanted a stable to protect their beloved American Girl Doll Horses.
Estimated Time Investment
Weekend Project (10-20 Hours)
Finish Used
None
Recommended Skill Level
Intermediate
Comments

Sun, 10/18/2015 - 19:55
AG stable
Hello Scott,
The links provided for the AG horse stable does not work or exist. I probablly cannot create one like you did because I don't have wood working tools but if you have the pics available somewhere I may be able to do a rough version for my daughter. It pains me to buy a horse she wants knowing she won't use it much but it's on her xmas list! :)
Christina
Mon, 10/19/2015 - 08:38
AG horse stables link
Here's Ana's plans
http://ana-white.com/2012/12/plans/horse-stables-american-girl-or-18quo…
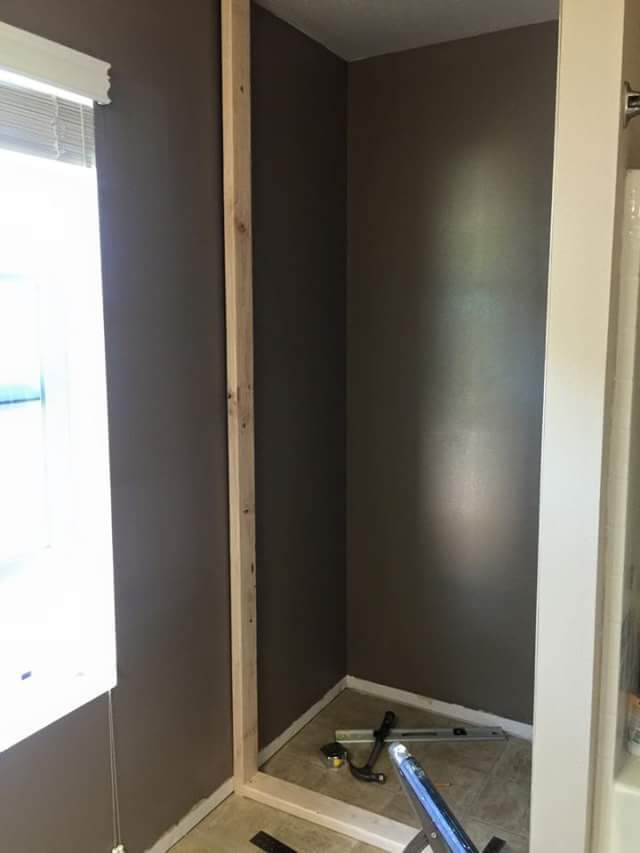
Bathroom Cabinet

My niece had an area in her master bathroom that she wanted to make into a closet. Since she is very interested in woodworking I was happy to assist her on her first project. It was a challenge as one wall was out of plum by 1.5 inches but we managed to successfully address the problem.
The project turned out very nice and now my niece has a large closet with lots of storage space. But we also created a monster as she has definitely caught the woodworking bug! Her birthday is coming up soon and all she wants are tools!
Built from Plan(s)
Estimated Cost
350.00
Estimated Time Investment
Week Long Project (20 Hours or More)
Finish Used
Interior white paint ... to be applied.
Recommended Skill Level
Intermediate
Comments
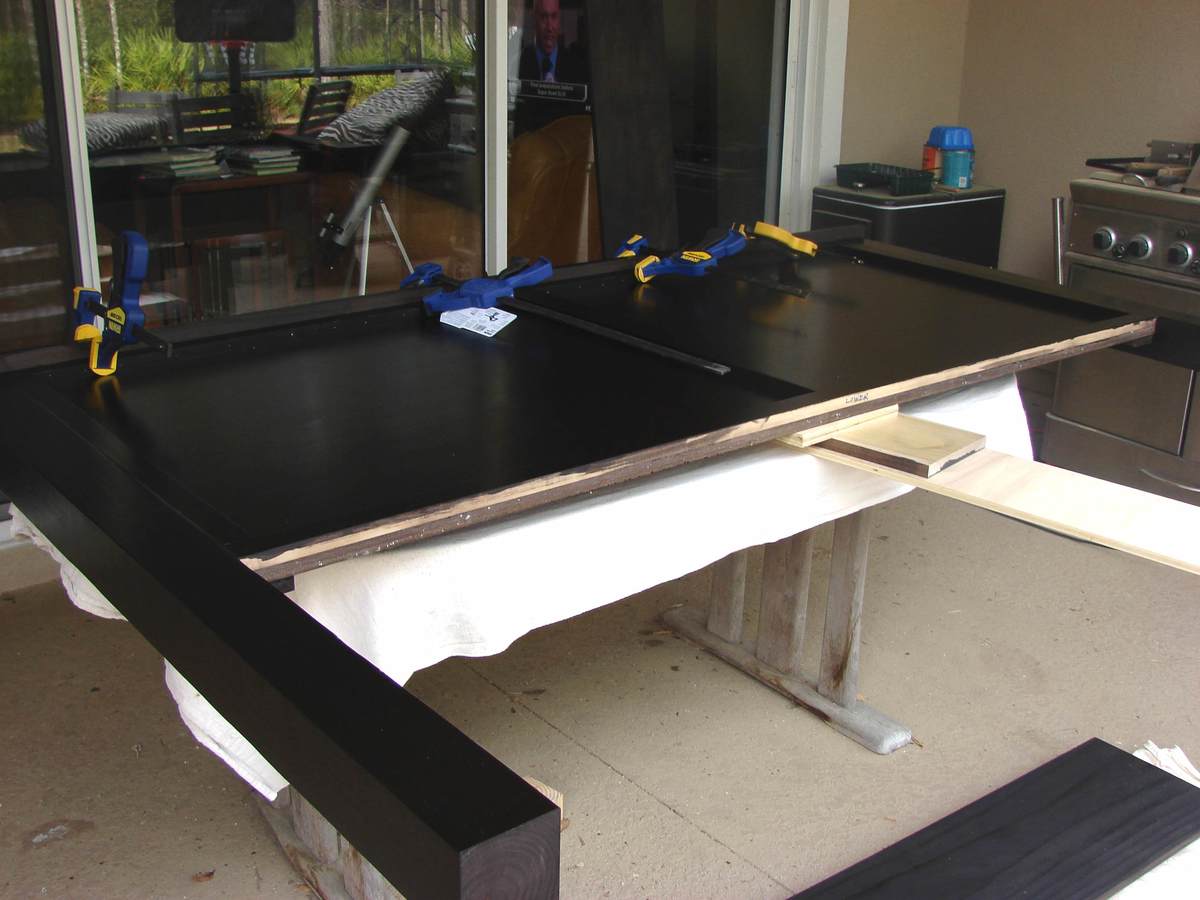
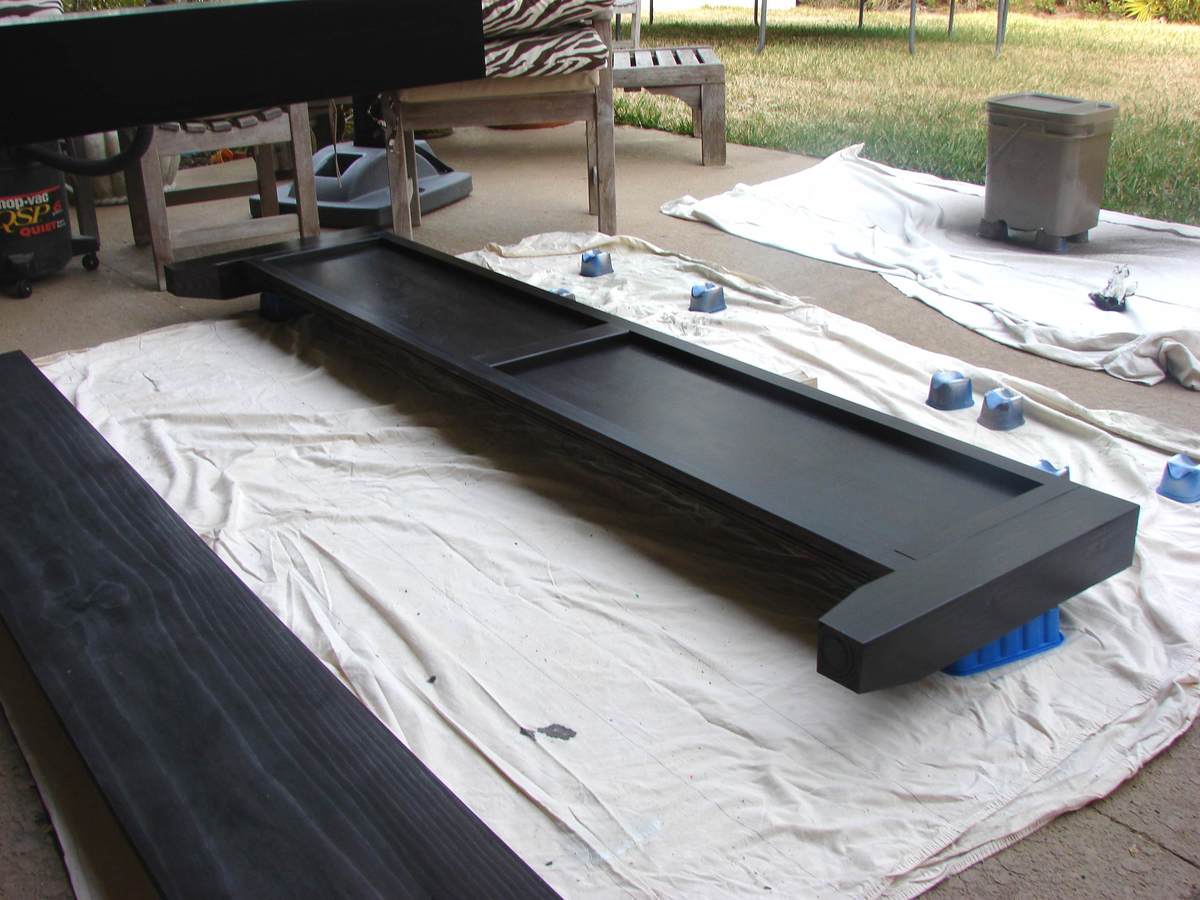
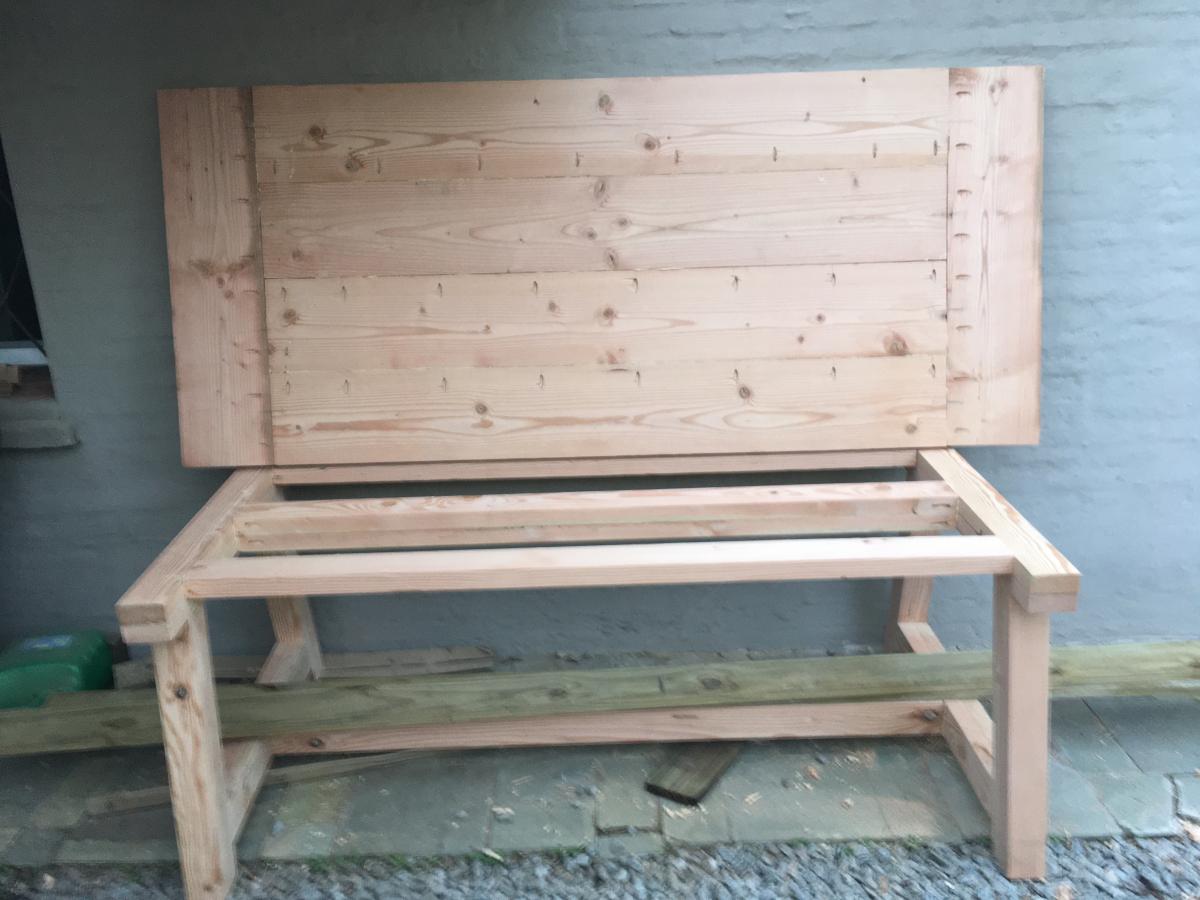
Farmhouse table

I just finished this table for our new house at the beach; I did a small modification at the moment of fixing the breadboards; besides the pocket holes I also used dowels for extra strength. If someone sits on the front of the table it could be a problem.
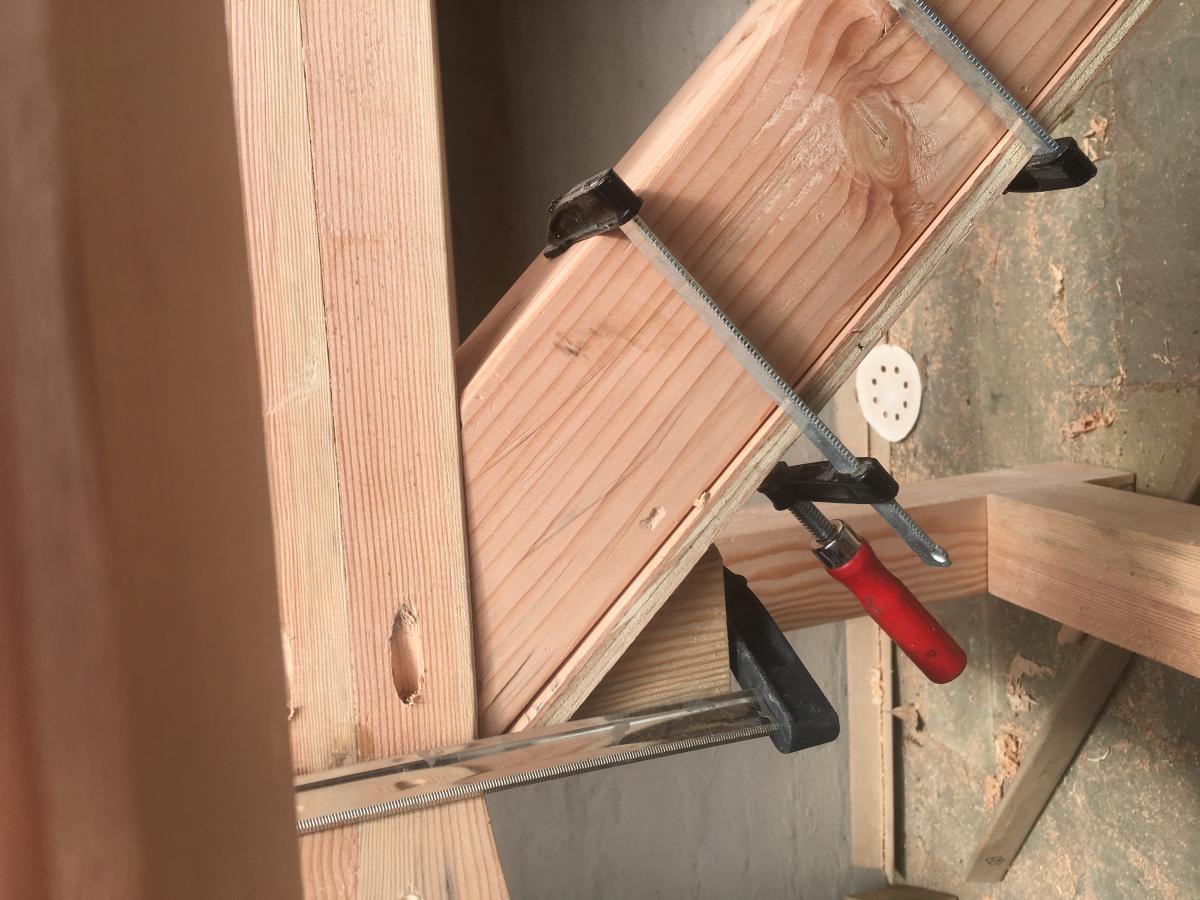
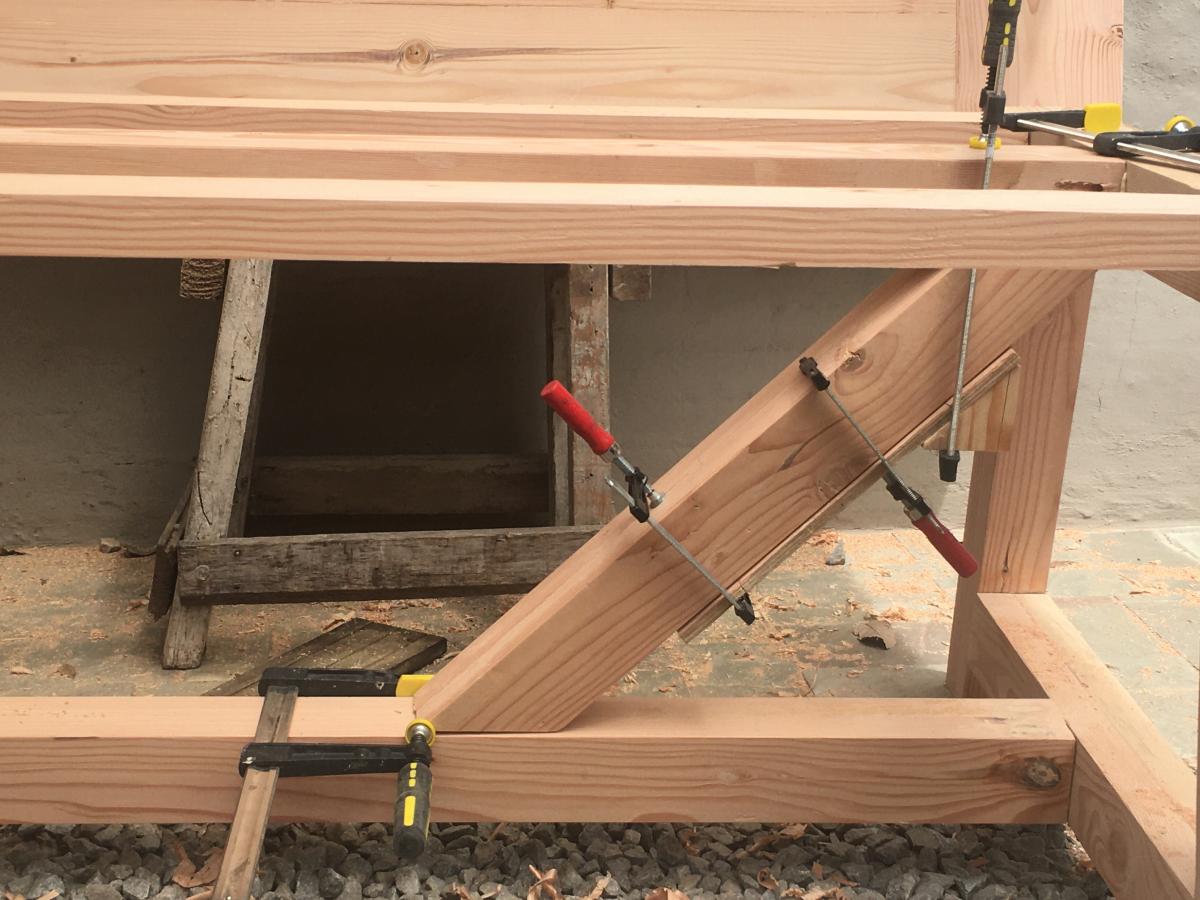
Another detail I included,is a simple way to clamp the diagonal pieces, much more firmly than with tape.
I am quite happy with the results, I will now finish the table with lacquer.
Estimated Time Investment
Week Long Project (20 Hours or More)
Finish Used
Lacquer
Dollhouse Bookcase

We built this dollhouse bookcase pretty much to plan. We did add "shingles" to the top.
View more on our blog: http://www.bearrabbitbear.com/2012/02/dollhouse-bookcase.html
Comments
Thu, 12/13/2012 - 06:21
My husband is about to start
My husband is about to start cutting the wood for this bookcase. He made the farmhouse doll bed last year! It turned out great! He is making the doll bed for a friend andthe doll bunkbeds for our daughter.
Yourbookcase is beautiful!:o)
Wed, 09/02/2015 - 06:27
Love this project
I made this for my daughter for her second birthday and she loved it too! 
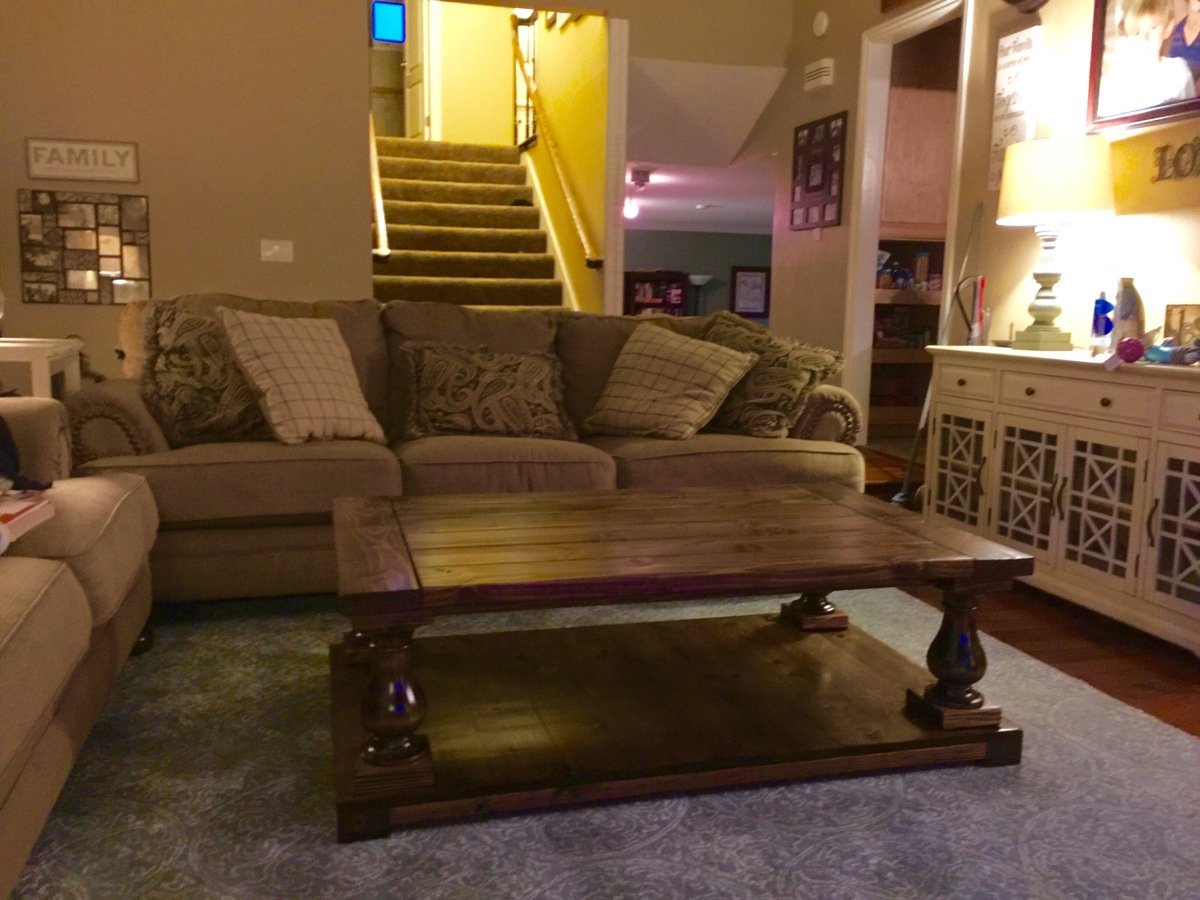
Corona Coffee Table
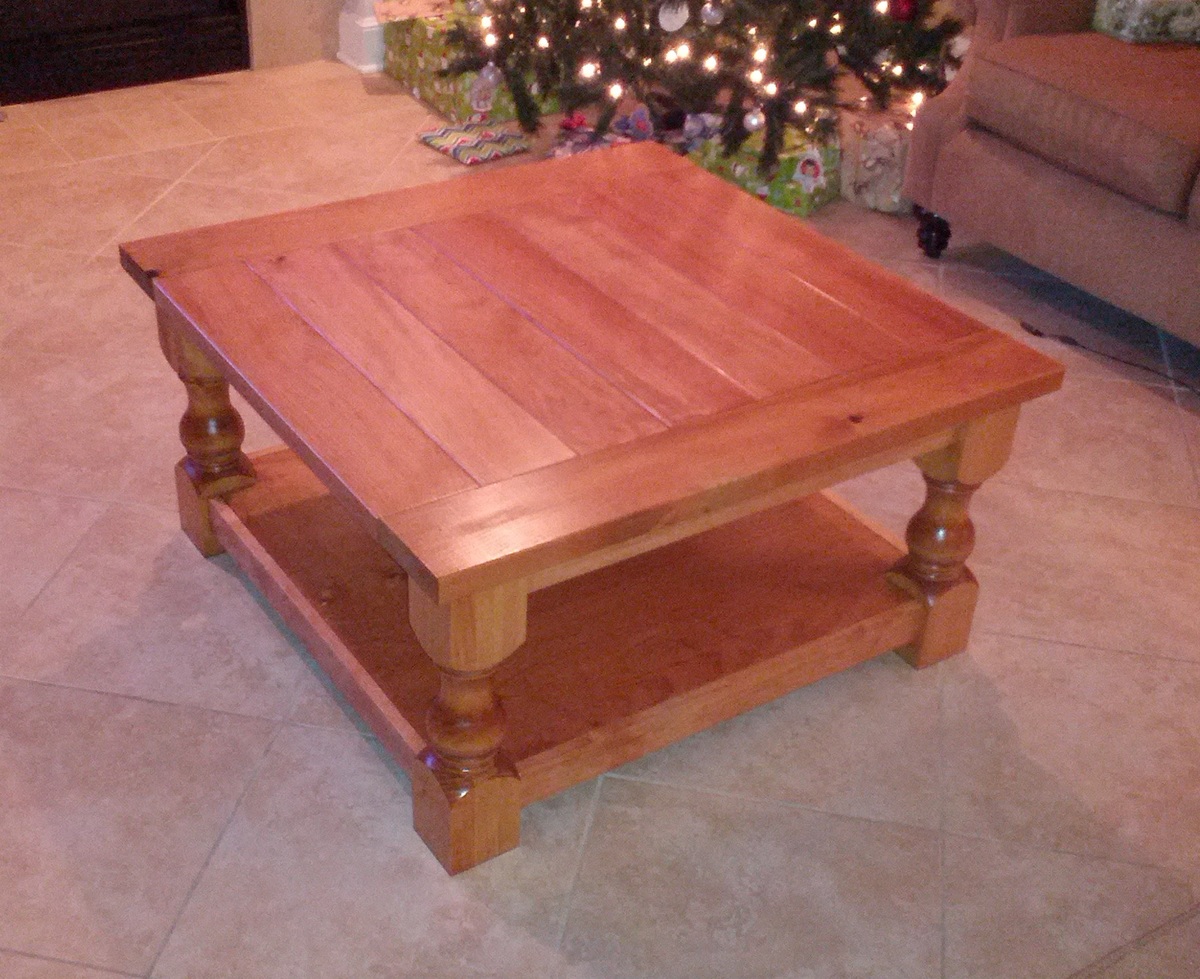
I first saw this table on the Shanty 2 Chic website and when I saw that it was based on a plan from Ana, I knew we had to build it. I asked my husband David to get started on it right away.
It turned out perfectly!!!
Built from Plan(s)
Estimated Cost
250
Estimated Time Investment
Weekend Project (10-20 Hours)
Finish Used
To finish the table, we started with Minwax Pre-Stain Conditioner, and followed it with Minwax Golden Pecan, Minwax in Golden Oak and finally Minwax Polyacrylic.
Recommended Skill Level
Intermediate
Rustic X-Entryway Table
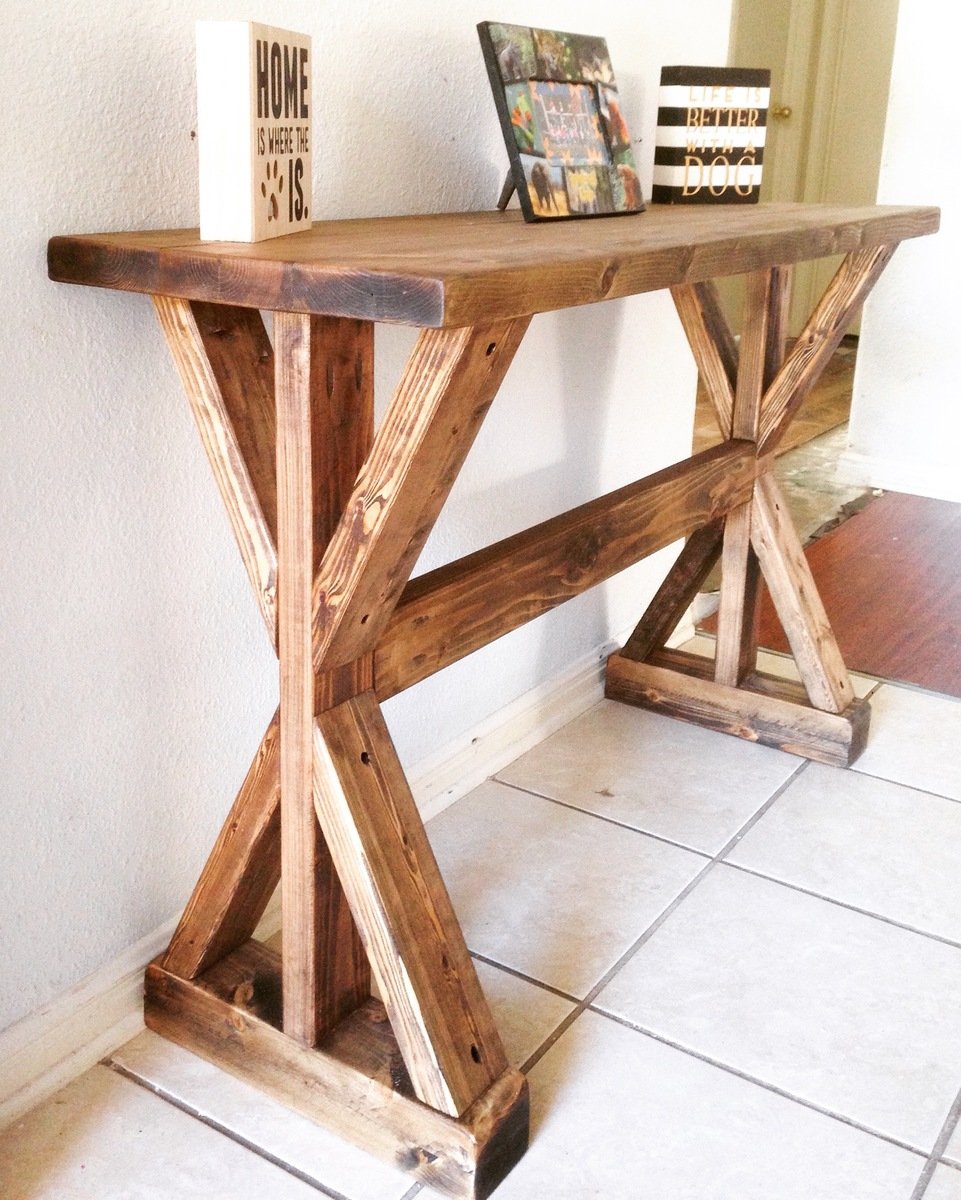
Handmade rustic entryway table. Stained with Varathane Stain and made from 2x4s & 2x6s Canadian white pine
Estimated Cost
$25
Estimated Time Investment
Day Project (6-9 Hours)
Finish Used
Varathane Ash Stain.
Varathane Polyurethane Satin
Varathane Polyurethane Satin
Recommended Skill Level
Intermediate
Comments
Mon, 04/11/2016 - 05:30
Dimensions
Hi,
I really love your entryway table. Do you have a plan that we can use with dimensions and cut list?
Thank you
Tue, 05/17/2016 - 20:33
Plans? What saw(s) did you use?
Hello can you provide us with plans for this? What saw(s) did you use?
Sun, 08/21/2016 - 08:18
Do you have plans for this
Do you have plans for this entry table?! I love it but can't seem to find the plans?
Thank you!
In reply to Are there plans for this ? by Jatin2286
Fri, 03/16/2018 - 10:49
I could draw you plans...
If you are OK with waiting a few days, I could draw you plans based off of the images.
In reply to Are there plans for this ? by Jatin2286
Sat, 03/17/2018 - 19:38
Here are plans for you.
I modified the design slightly, by adding feet and a 1x4 board accent (that makes it easier to build). I'm assuming the overall height is 29.5" and the length is 48". If you want these to be different, feel free to reach out to me and I can help you adjust.
You can find the plans here: http://famousartisan.com/diy-x-base-sofa-table-plans-or-entry-table/
In reply to Are there plans for this ? by Jatin2286
Sat, 03/17/2018 - 19:39
Here are plans for you.
I modified the design slightly, by adding feet and a 1x4 board accent (that makes it easier to build). I'm assuming the overall height is 29.5" and the length is 48". If you want these to be different, feel free to reach out to me and I can help you adjust.
You can find the plans here: http://famousartisan.com/diy-x-base-sofa-table-plans-or-entry-table/
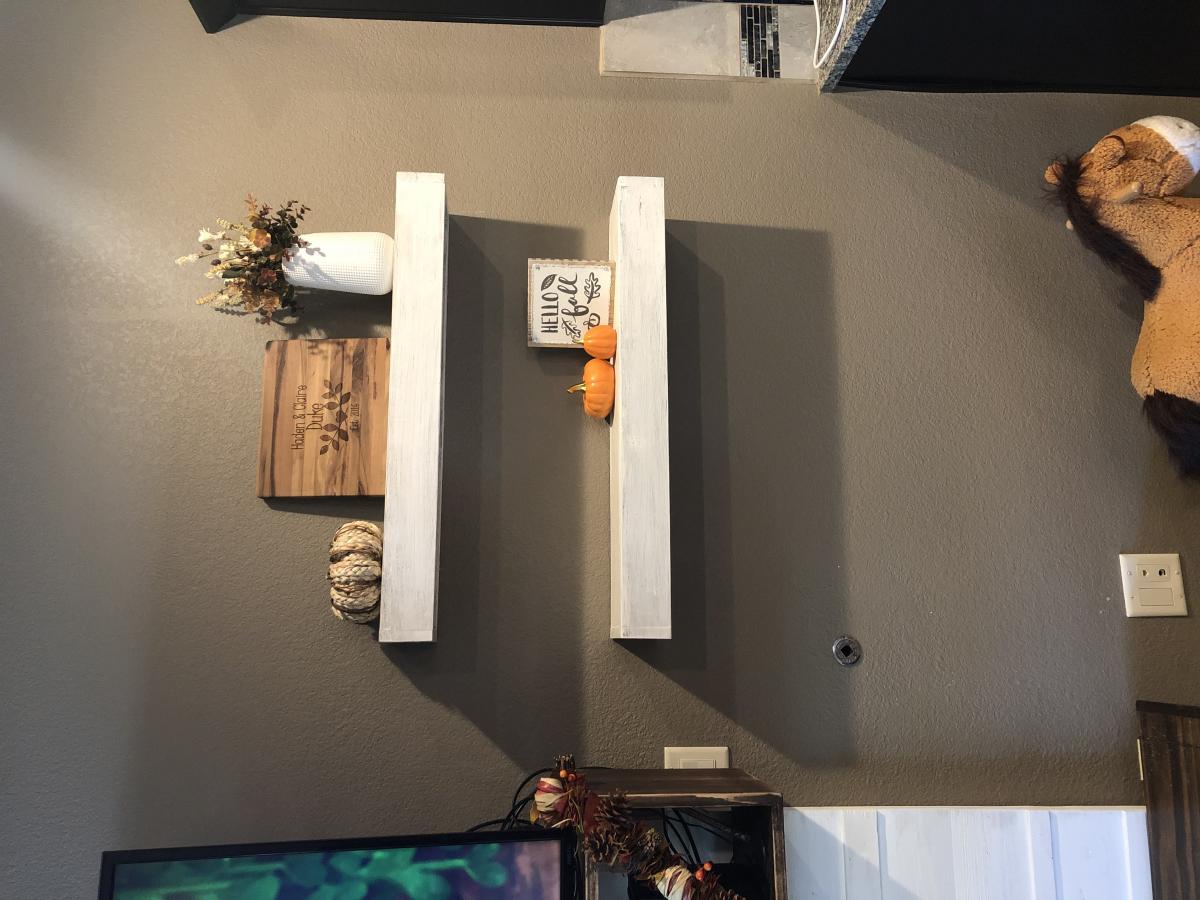
First Farmhouse Kitchen Table & Floating Shelves

Been loving our Ana White plans!! The table and shelves turned out exactly how we wanted them to & they were SO much cheaper than paying for lesser quality furniture store finds. We’ve received so many compliments!
Built from Plan(s)
Estimated Cost
$230
Estimated Time Investment
Week Long Project (20 Hours or More)
Finish Used
Stained the table top in Kona by Varathane. Painted the legs and shelves dark brown and white to create a weathered look.
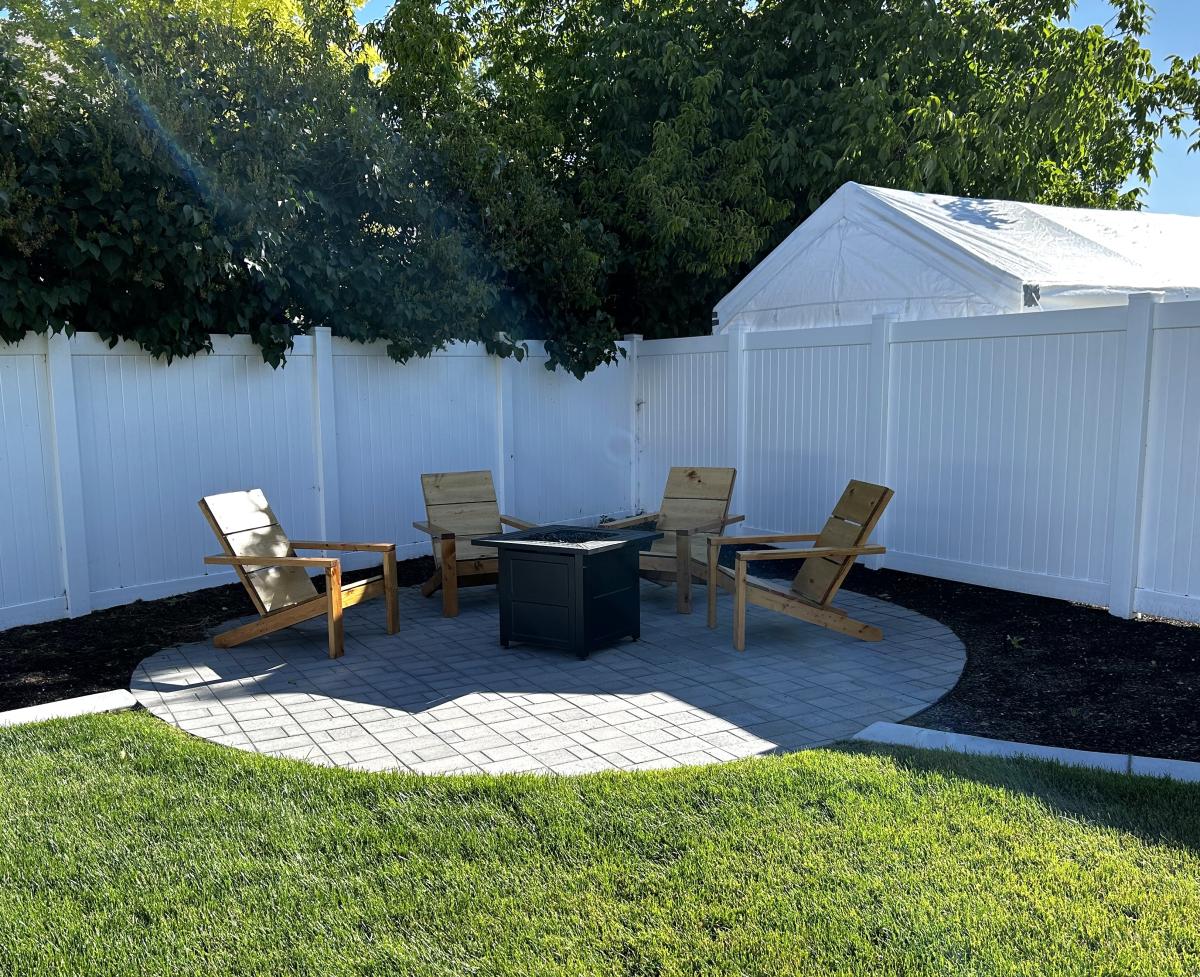
Adirondack Chairs for Fire Pit

Adirondack Chairs stained.
Rachel M
Built from Plan(s)
Changing Table/ Storage Shelf Combo
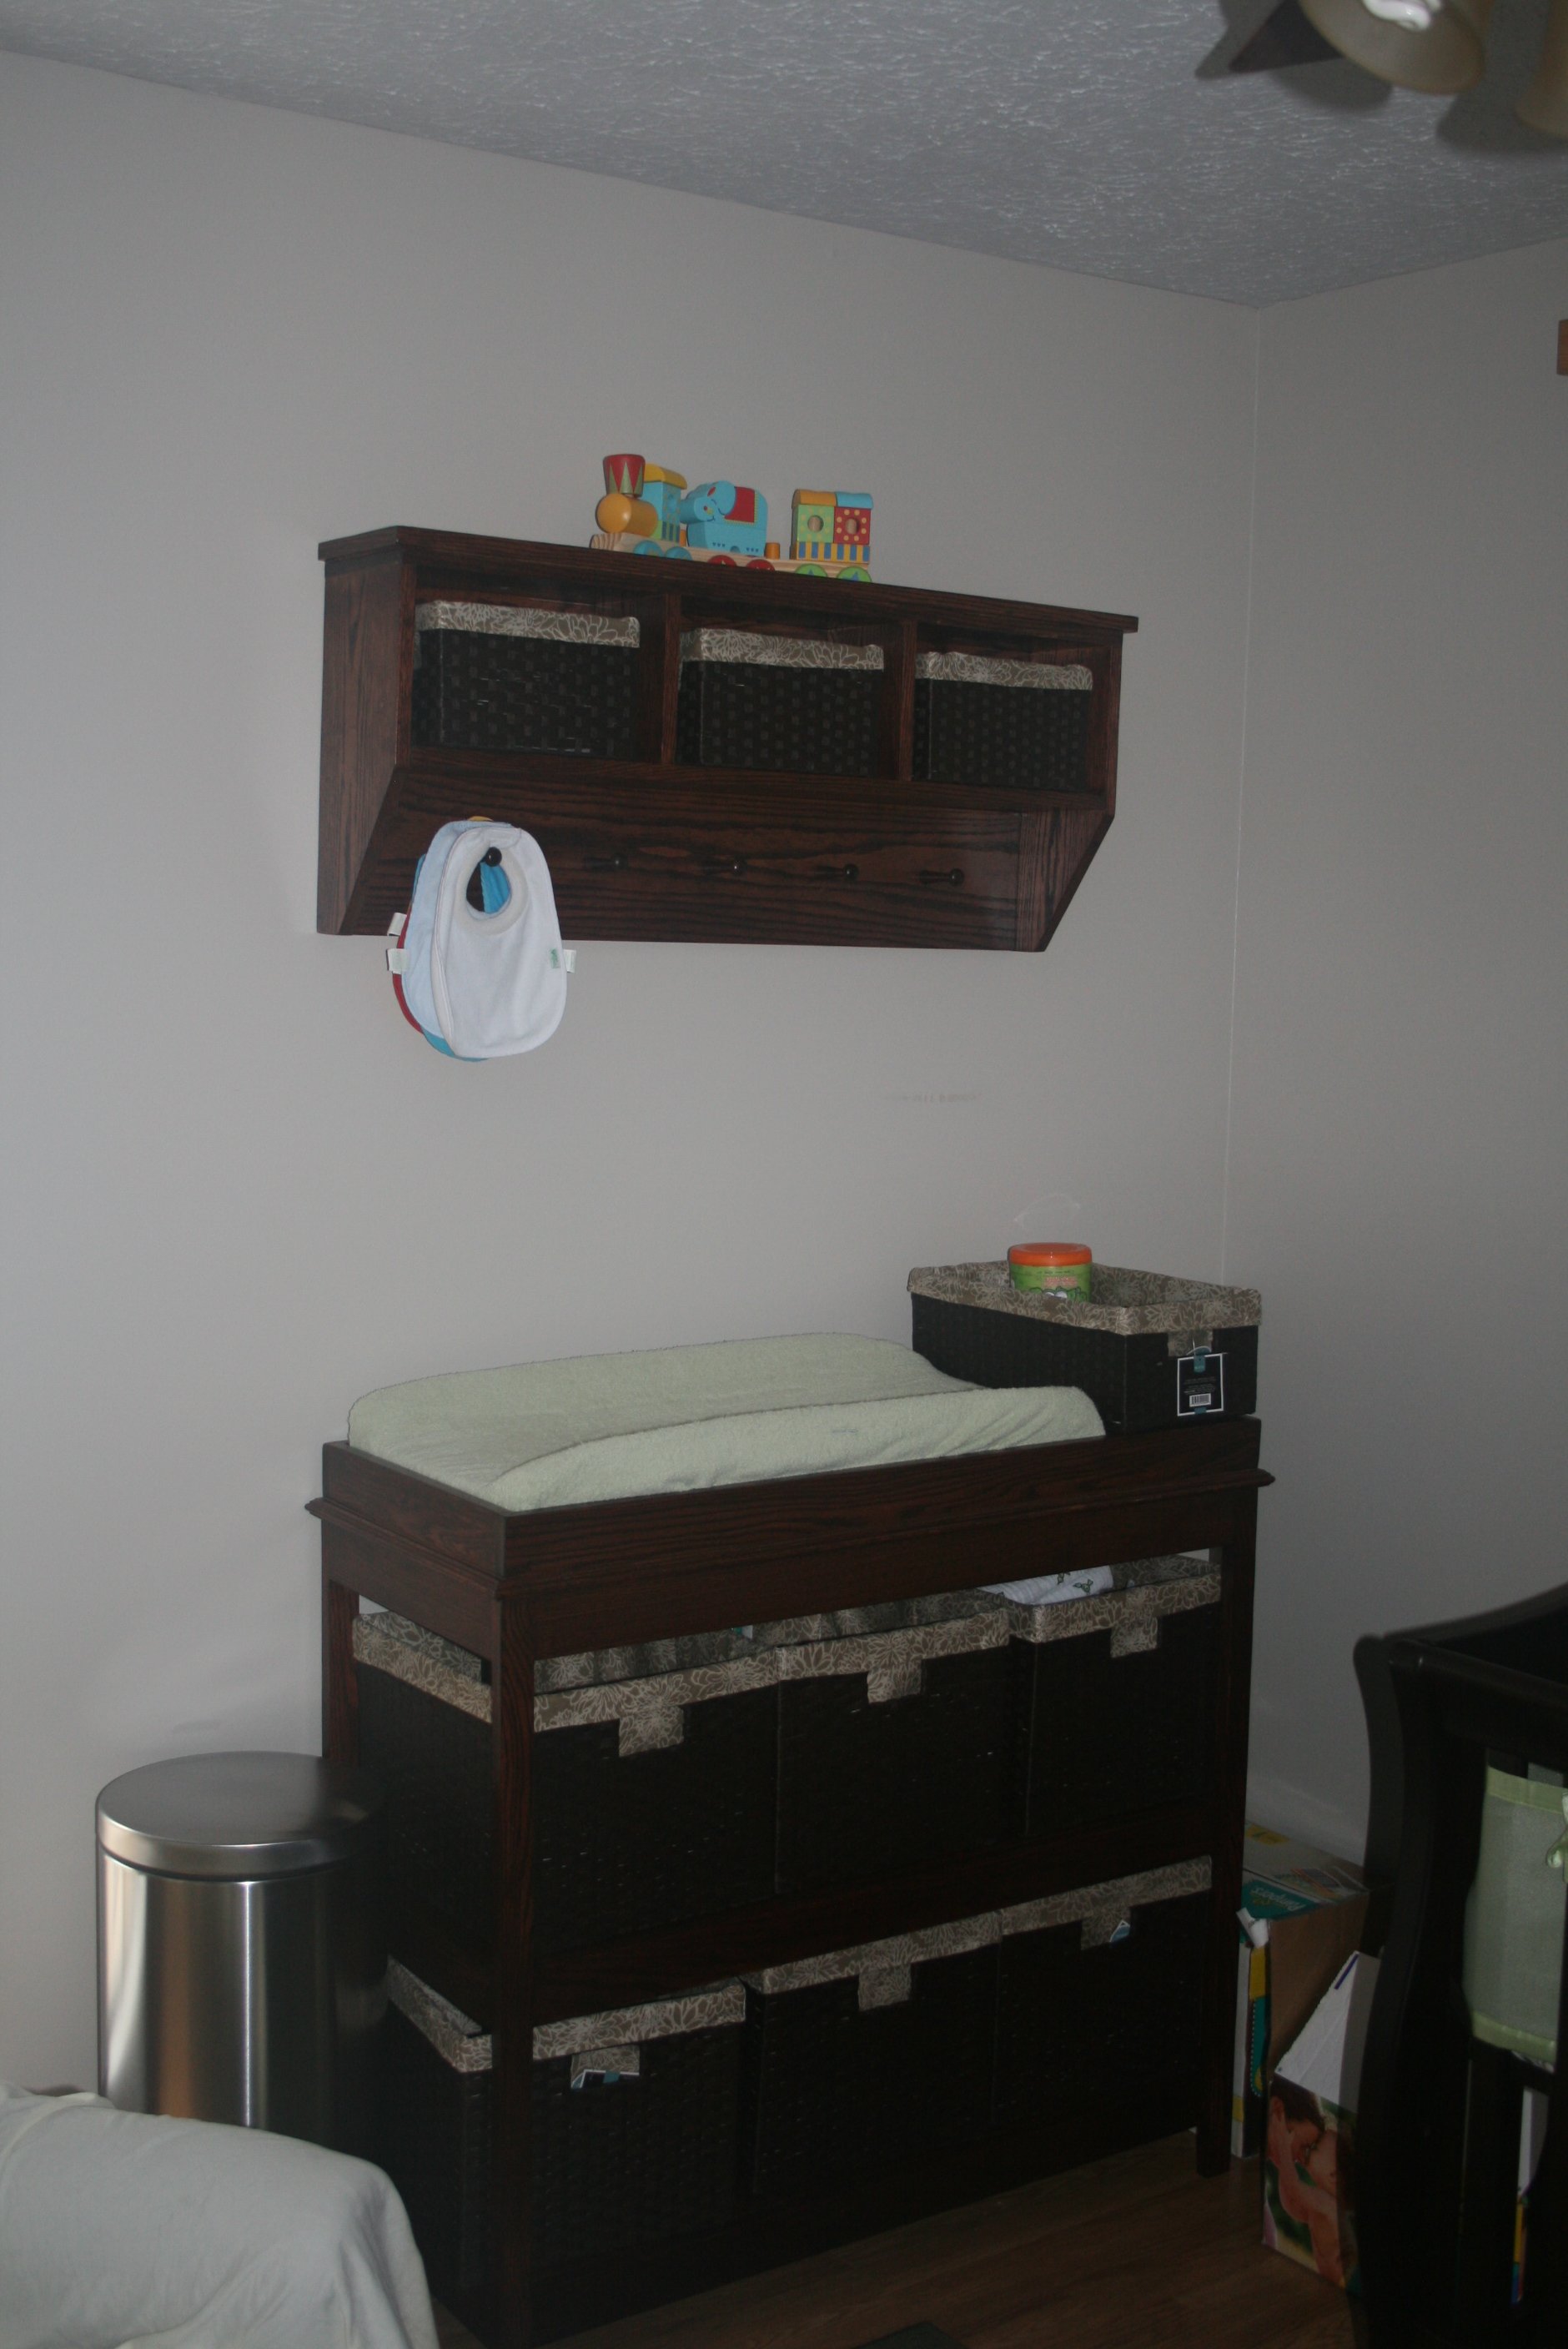
Combination of Entryway Bench and Storage Shelf with Hooks and simple changing table. I did make the table a little taller as my wife and i are pretty tall. I also had to add about an inch to the overall length of the table as well to fit the baskets. Mostly straight forward.
Built from Plan(s)
Estimated Cost
~$150
Estimated Time Investment
Weekend Project (10-20 Hours)
Finish Used
4 applications of Min-wax "Red Mahogany" stain, and 4 coats of satin polyurethane. Stain kind of hides the grain, but you do what your wife asks...
Recommended Skill Level
Intermediate
Comments
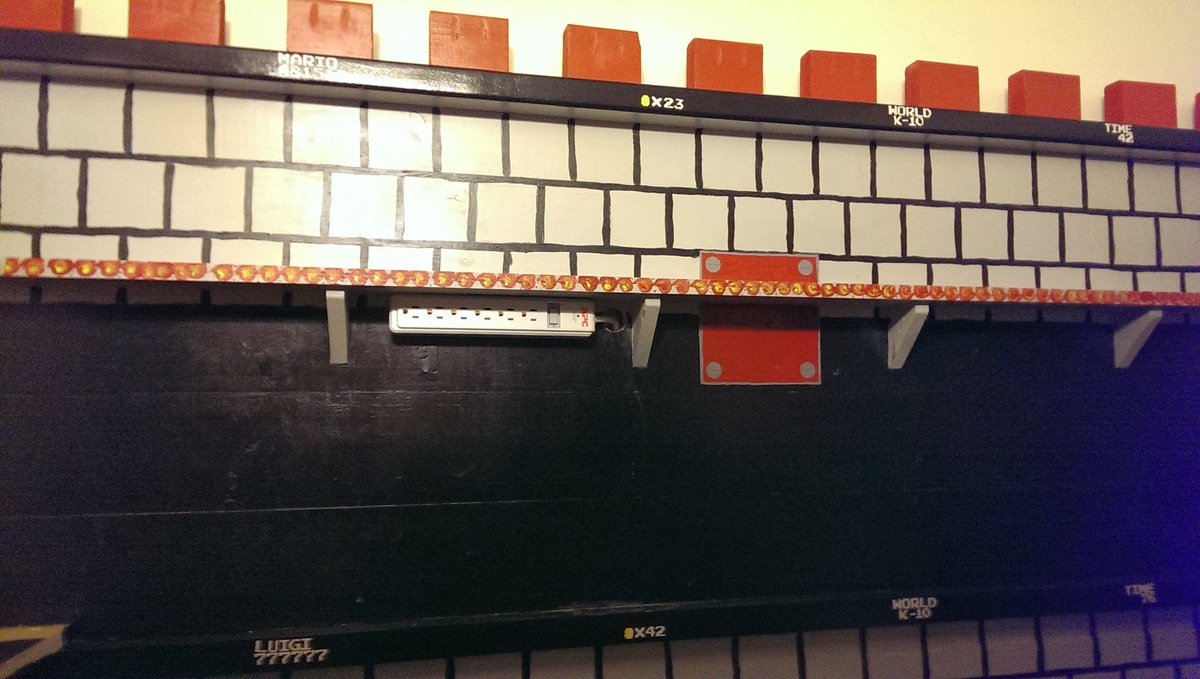
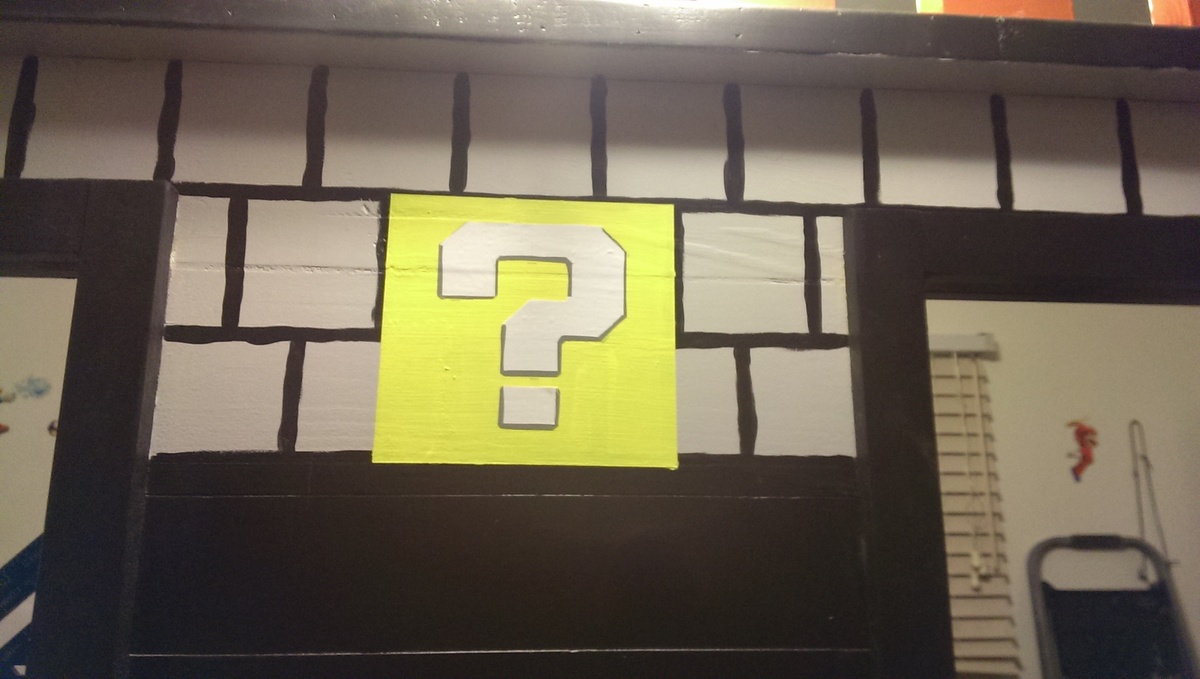
Mario Castle Bunk
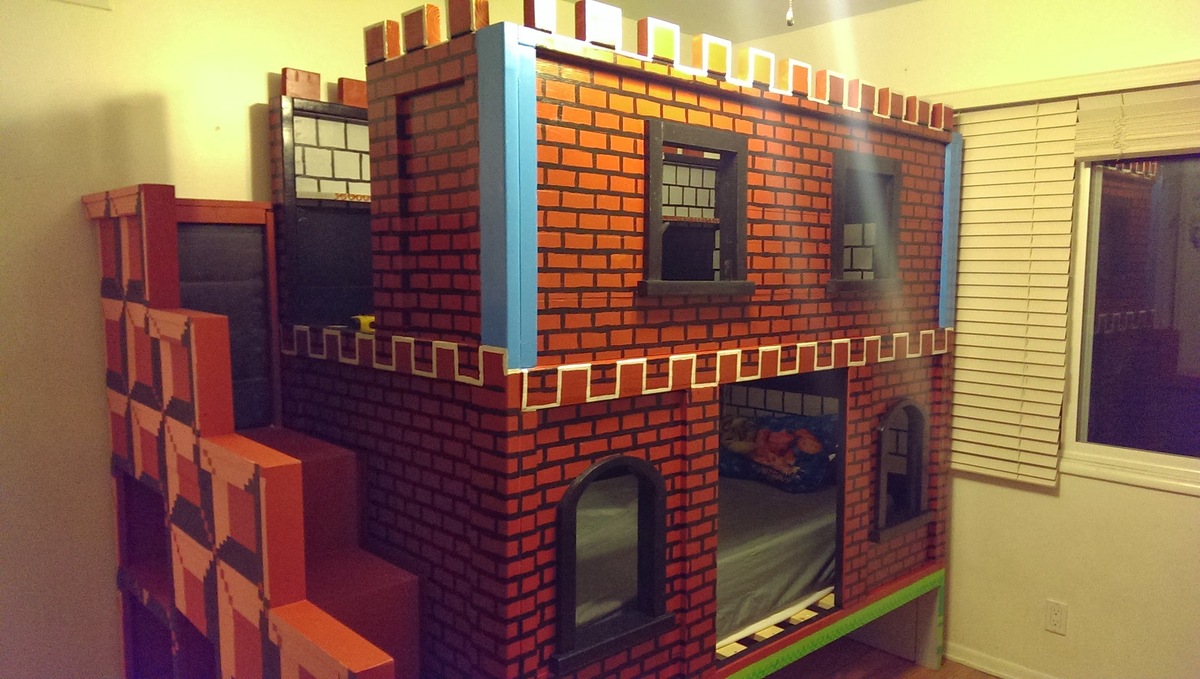
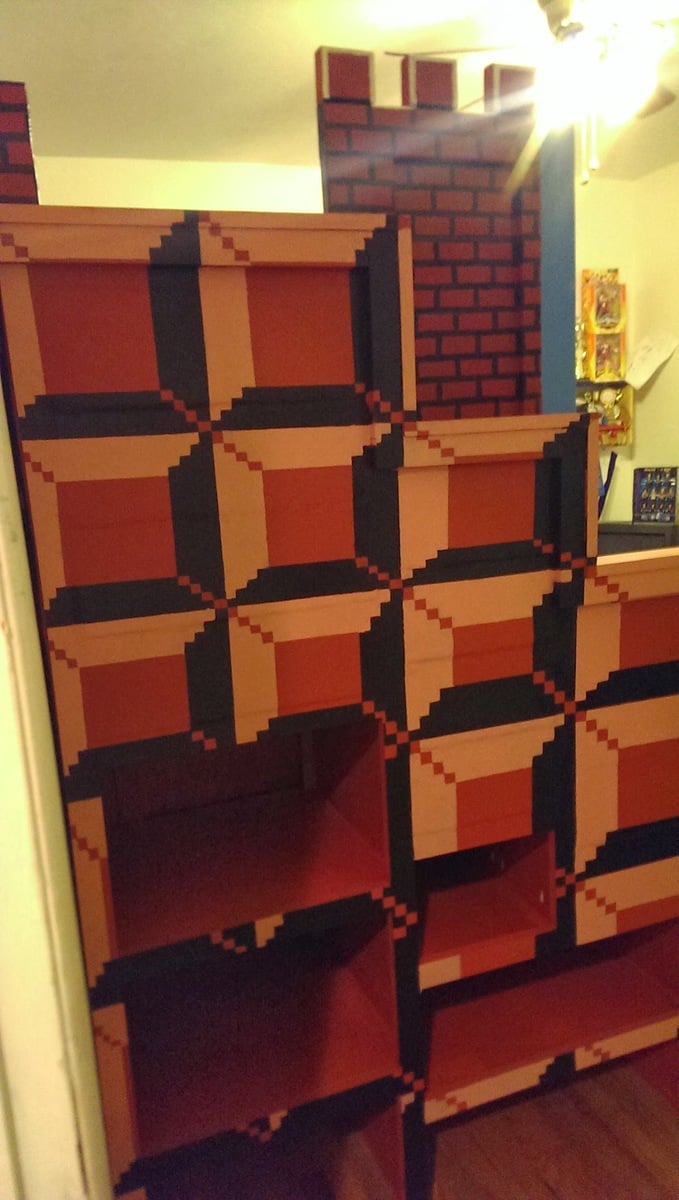
So my son needed a bunk bed and we came upon the sweet pea bed. It was too girly for him so we decided to go with a theme that would be timeless, something he wouldn't mind having when he is 18 (or older, he is 10 now). What is better than Mario! (We are a house full of gamers, my 17 year old is super jealous of this bed lol). The build was fairly easy and the plans were straight forward enough, the time consuming part was the painting (without all the painting we could have probably build this in a long weekend). We changed a few things, like not arching the top windows, adding the 4 inch 2x4 squares to the top to give the castle look and stairs are made to look like stairs from the side so we stepped out the banister instead of angling it.
Built from Plan(s)
Estimated Cost
500
Estimated Time Investment
Week Long Project (20 Hours or More)
Finish Used
Paint colors were all Behr paint+ primer (mostly eggshell or flat):
New Brick, Black, Polar Bear White, Green Crush, Green Acres, Lemon Zest, Windjammer, and French Silver. Some of the colors (like pinkish tone on the stairs) we created on our own mixing the New Brick and the Polar Bear.
Polyurethane. I mixed regular oil based polyurethane (gloss) with mineral spirits (50/50) and wiped it on. It was remarkably simple and gave it a nice seal/finish. Last coat I used Satin Polyurethane because I didn't want the gloss finish. I opted not to sand between coats because this is a kids bed and I wasn't looking for that "perfect" finish, just wanted some added protection.
Recommended Skill Level
Intermediate
Comments
Wed, 01/01/2014 - 06:11
This is the coolest bed I
This is the coolest bed I have ever seen! I wish I could make this for my youngest. I could probably build it, but I 'm pretty sure it would go downhill when I started painting it. You did an amazing job and your son is a very lucky boy!
Wed, 01/01/2014 - 16:10
Painting...
You can totally do it! I am a horrible painter (I'm too impatient) and you can't tell with this because of how forgiving the design ends up being. There is so much going on it's hard to pinpoint the mistakes. :)

Wed, 01/01/2014 - 06:31
Awesome bed!
Super creative. I can't think of a word to say just how cool this is! Wow!
Wed, 01/01/2014 - 06:58
Holy Mother of God
That is the most spectacular bed I've ever seen. I have a 5 year old son. :) You are a genius.
Wed, 01/01/2014 - 16:07
Thanks!
Thanks so much! This was the first thing we ever built (although my husband did a lot of building stuff in his youth we have never done anything together and I was a total beginner) so we are very happy with it. :D I appreciate all the kind words.

Wed, 01/01/2014 - 18:27
Wow! I'm super impressed,
Wow! I'm super impressed, your version is awesome! The stairs are very cool- well done!

Tue, 08/08/2017 - 05:14
This looks amazing! :o The
This looks amazing! :o The kid version of myself would adore this. (haha no the adult version would too)
Fri, 05/03/2019 - 22:00
Full size conversion
We are super excited to build this for our 9 year old son. To make this a Full size bed am I correct in thinking that I only need to alter the side panels by adding 15inches? I am paranoid about building it and the mattress not fitting. Thanks so much!
play table (24" x 36") with storage bins

I modified Ana's plans to make a smaller size play table (24" x 36") and built the frame using pocket hole joinery. I've included free plans for the smaller size in my blog post.


Built from Plan(s)
Estimated Cost
$100
Estimated Time Investment
Afternoon Project (3-6 Hours)
Finish Used
2 coats clear satin poly
Recommended Skill Level
Beginner
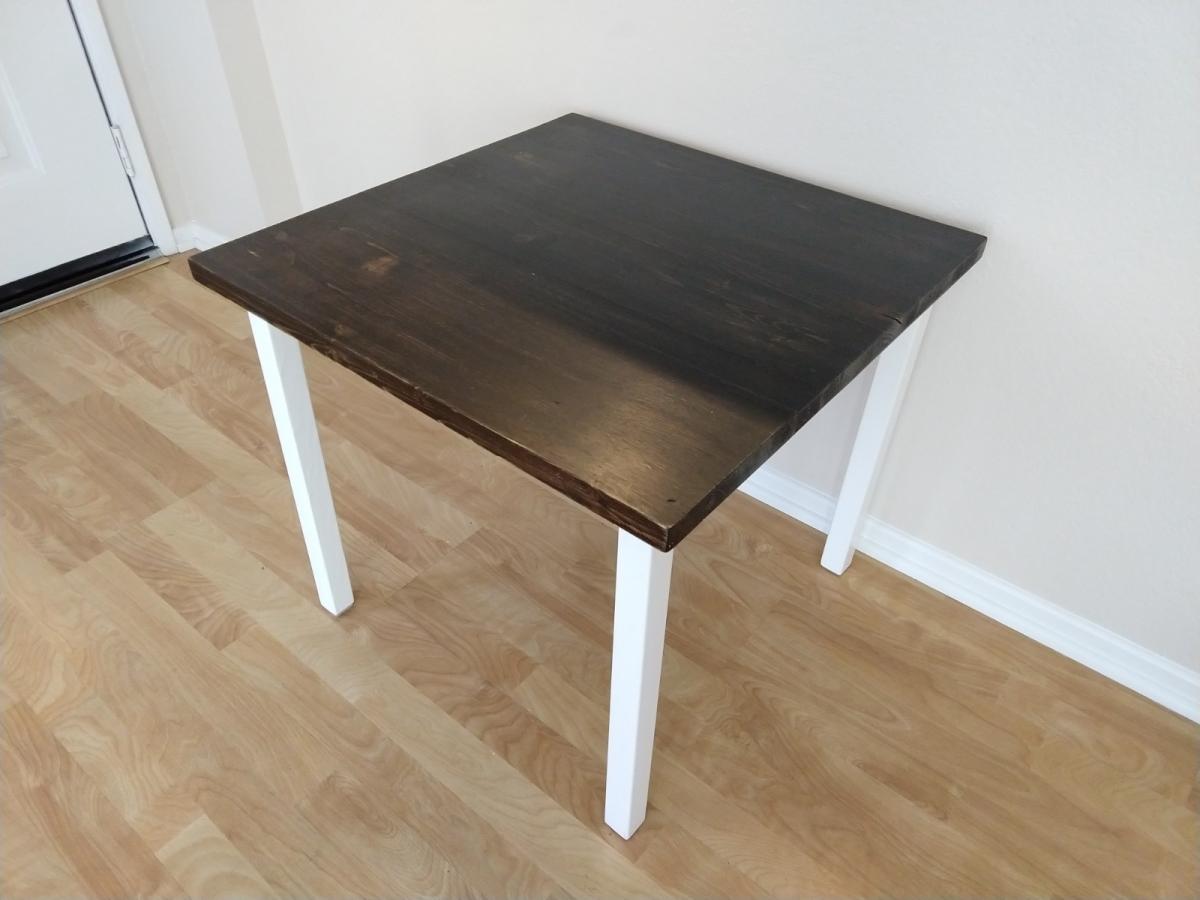
Clara inspired kid's table
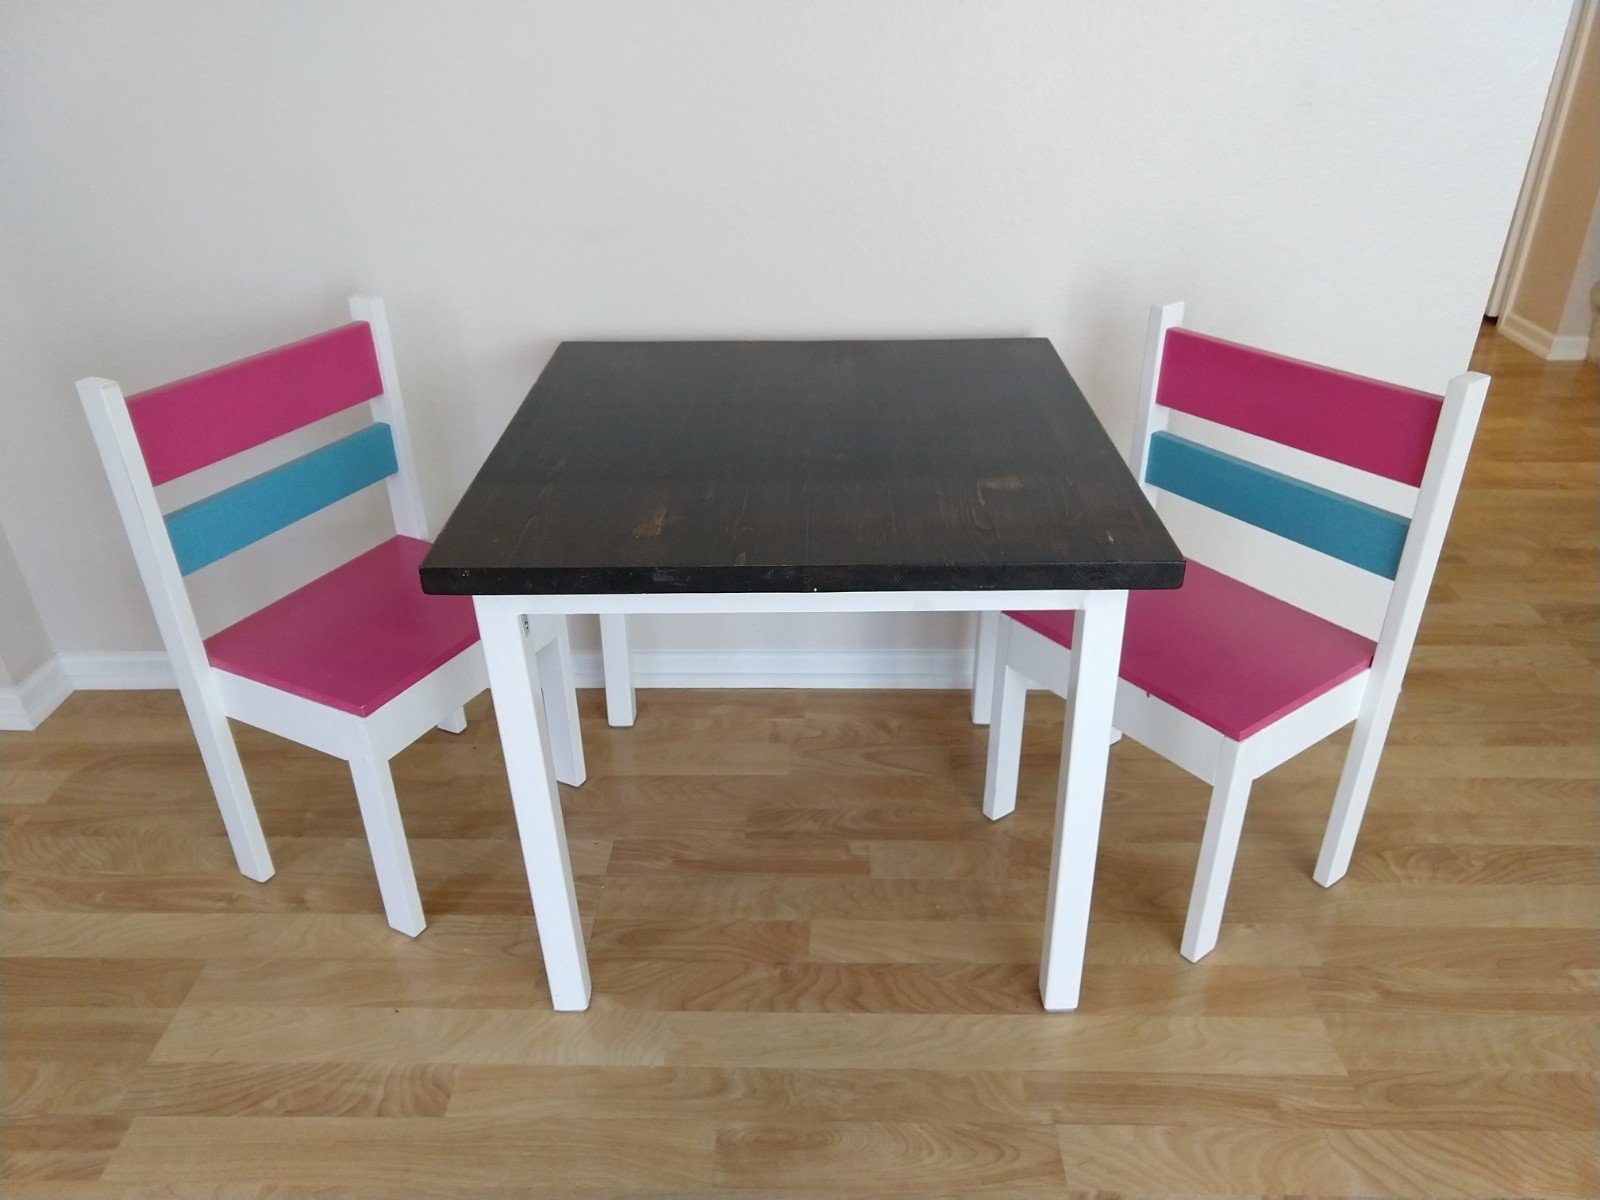
Child sized table. Used a 24" project-style top (all-in-one), 1x2s for the supports, and 2x2s for the legs.

Built from Plan(s)
Estimated Cost
$30
Estimated Time Investment
Day Project (6-9 Hours)
Finish Used
Minwax Penetrating Stain and Minwax Polyurethane for the top
White cabinet paint for the legs and supports
White cabinet paint for the legs and supports
Recommended Skill Level
Beginner