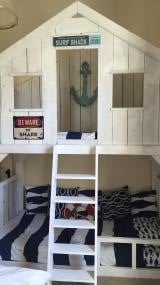
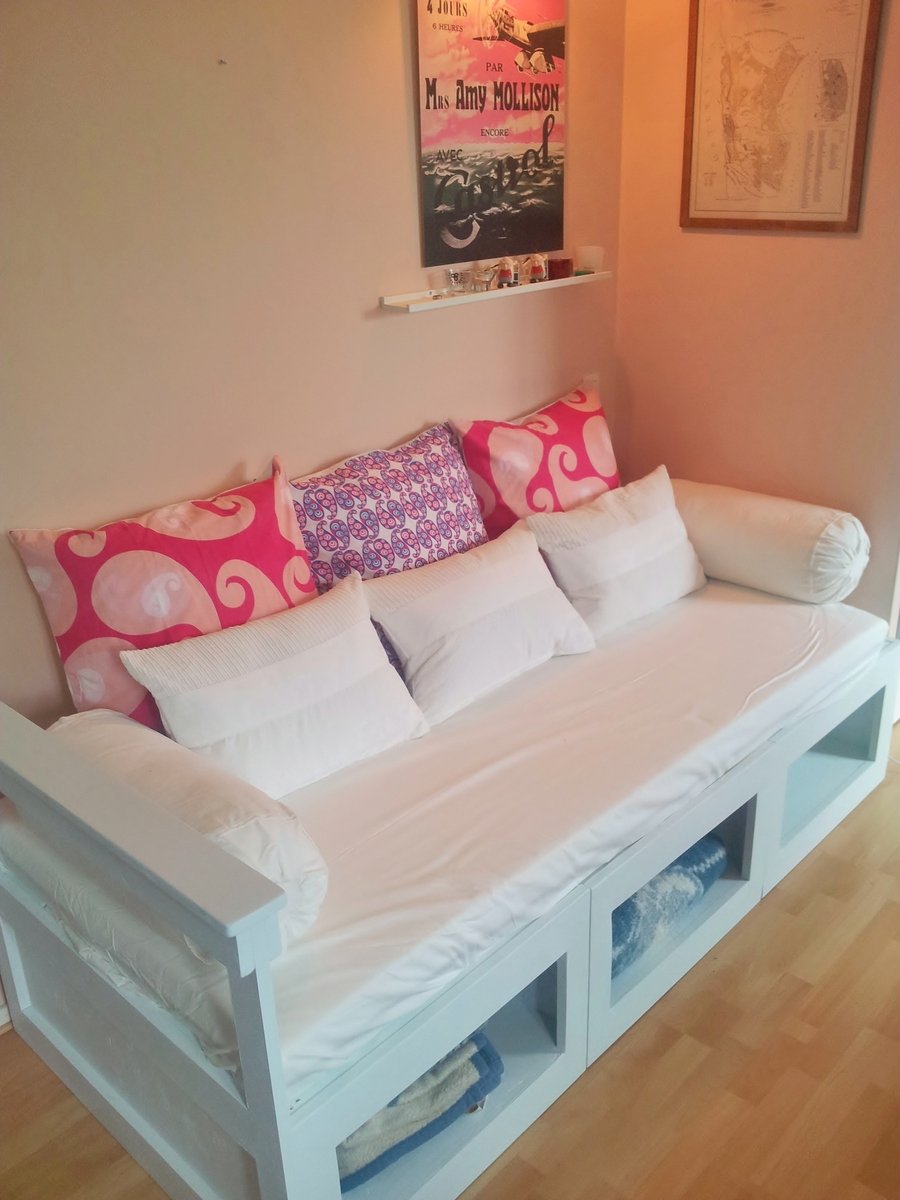
Community Brag Posts

Shared room

Submitted by kile529 on Fri, 08/26/2016 - 05:38

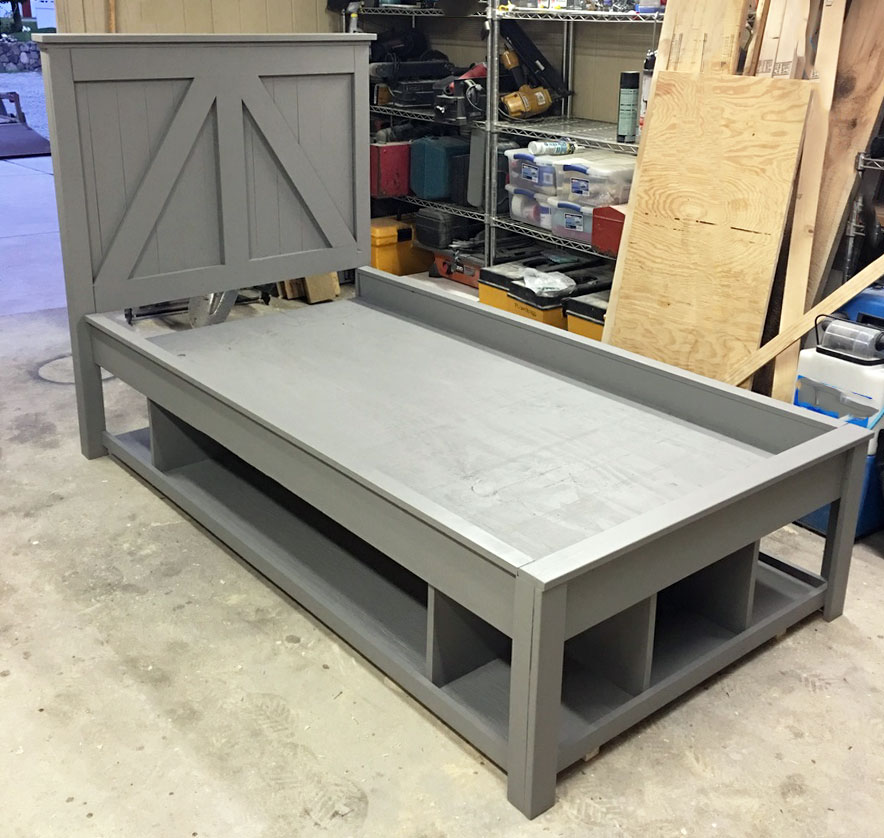
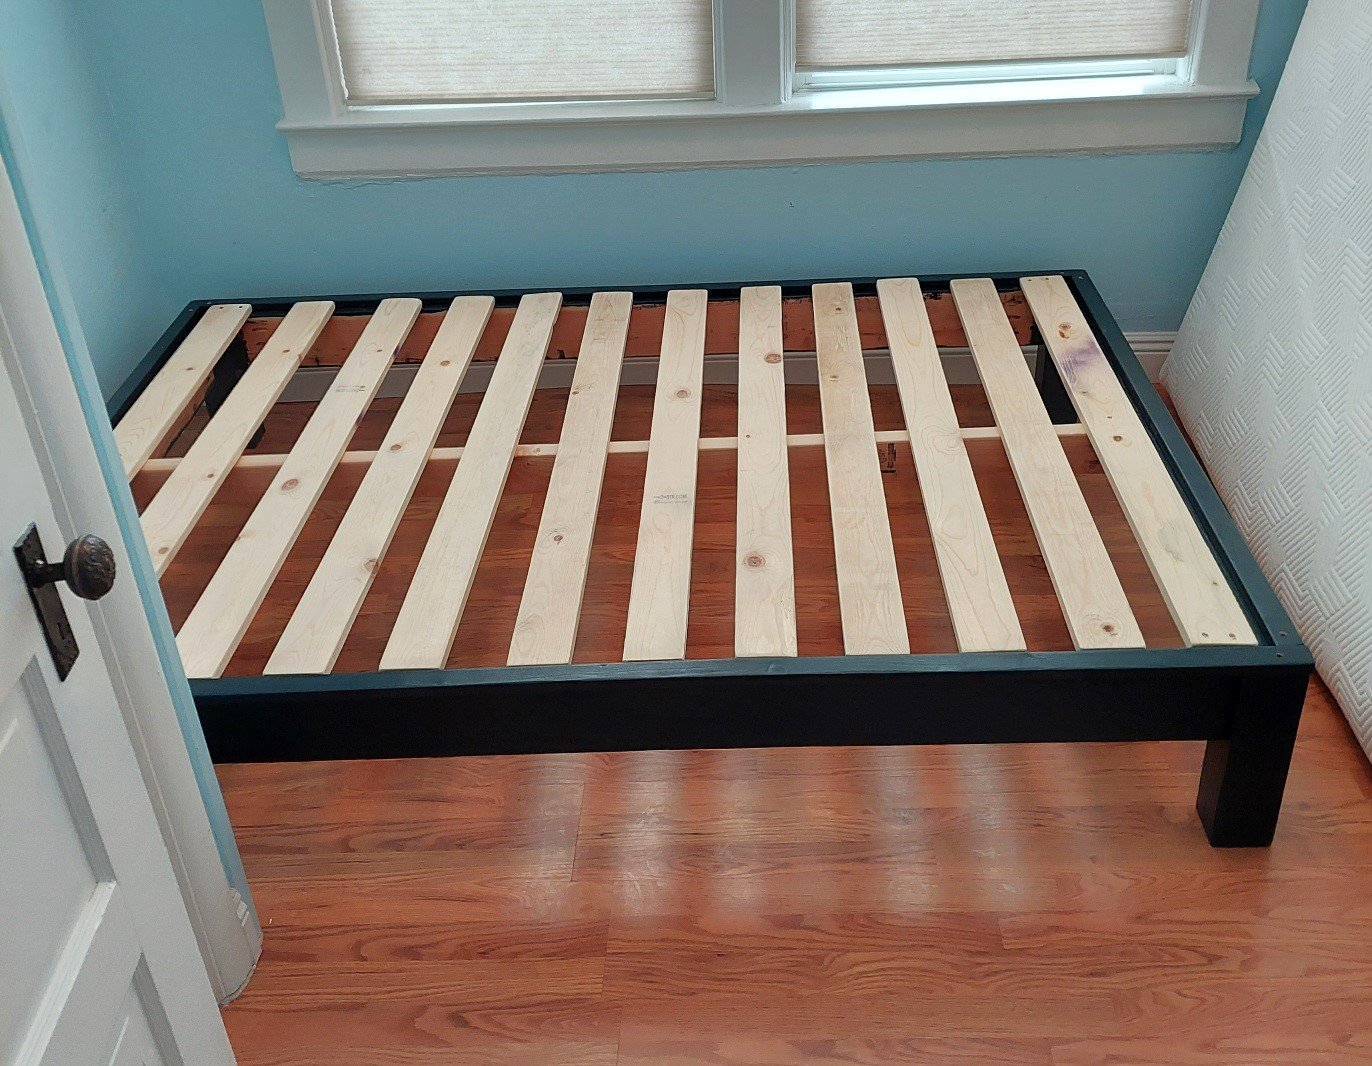
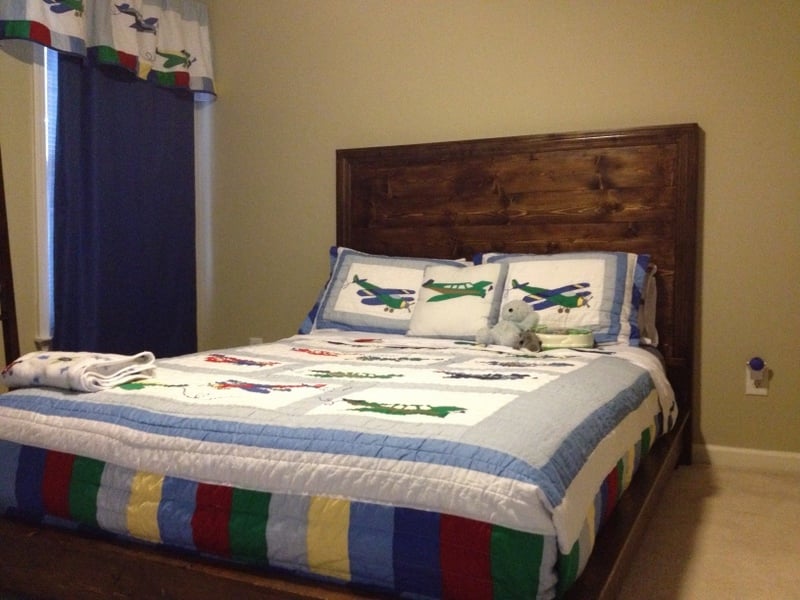
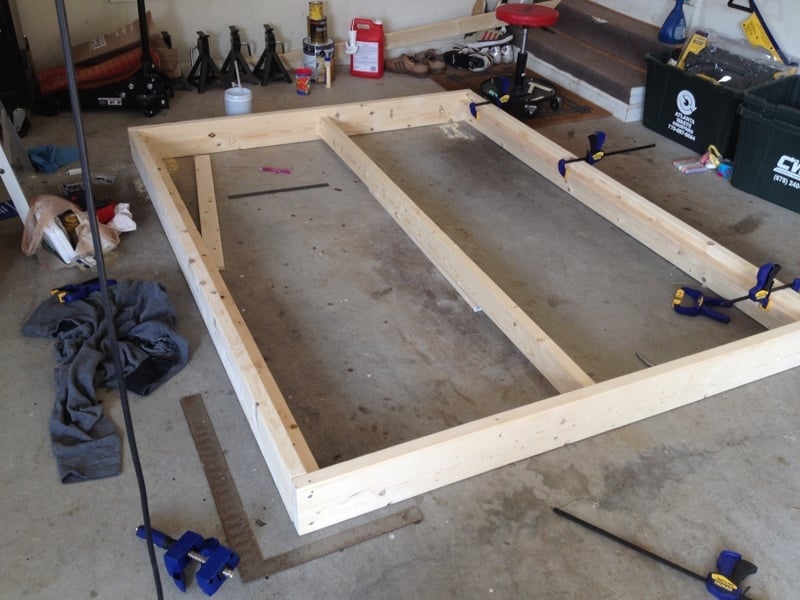
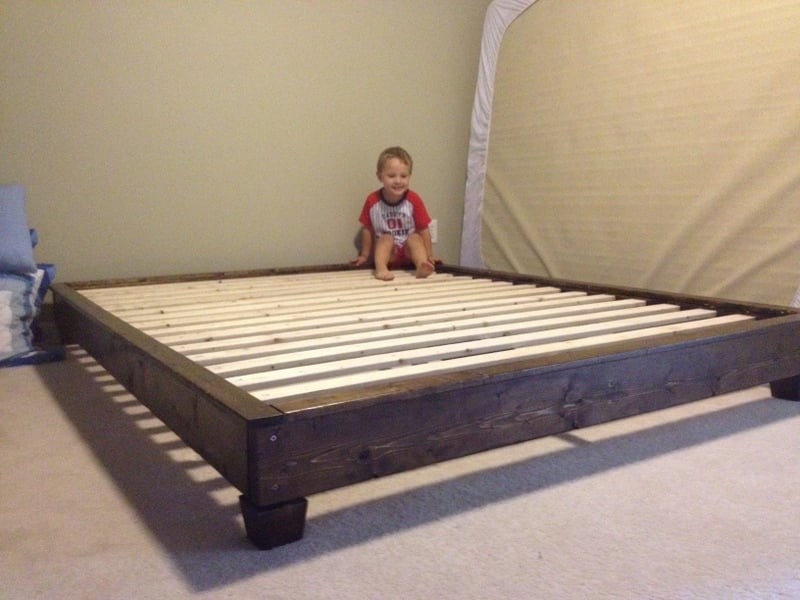
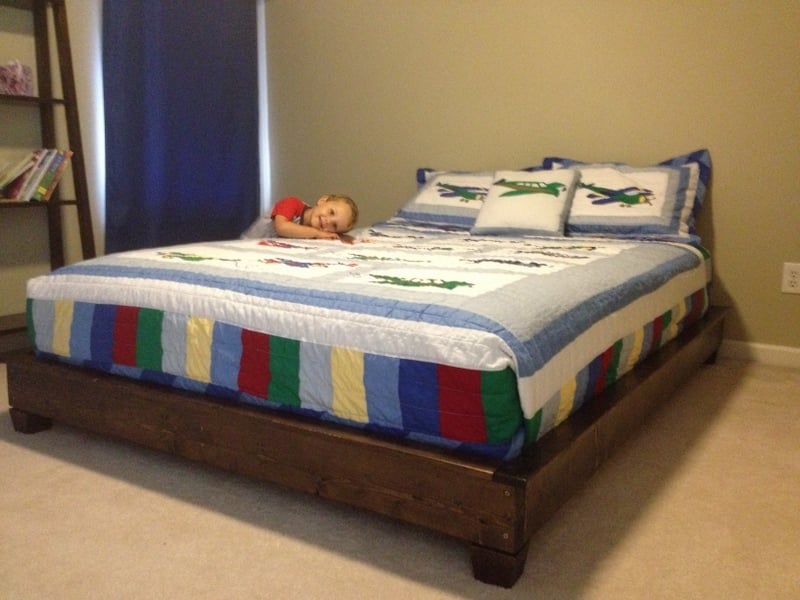
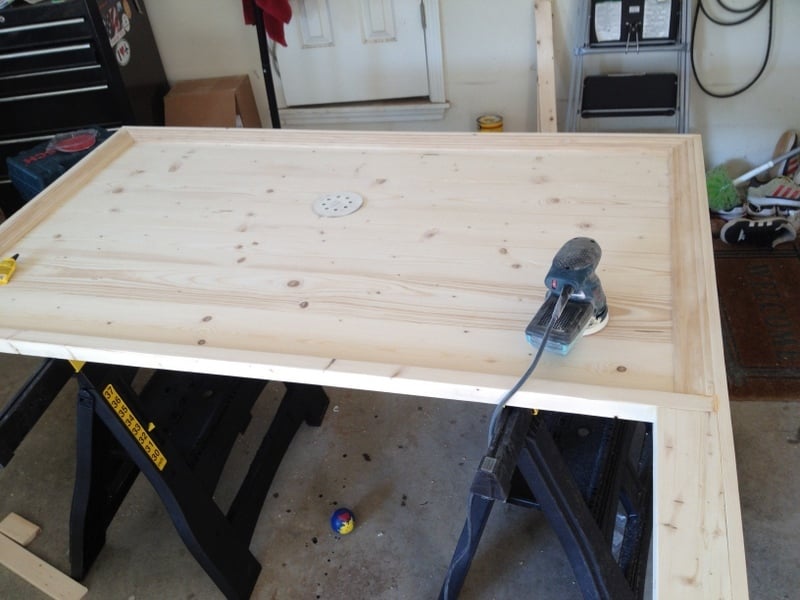
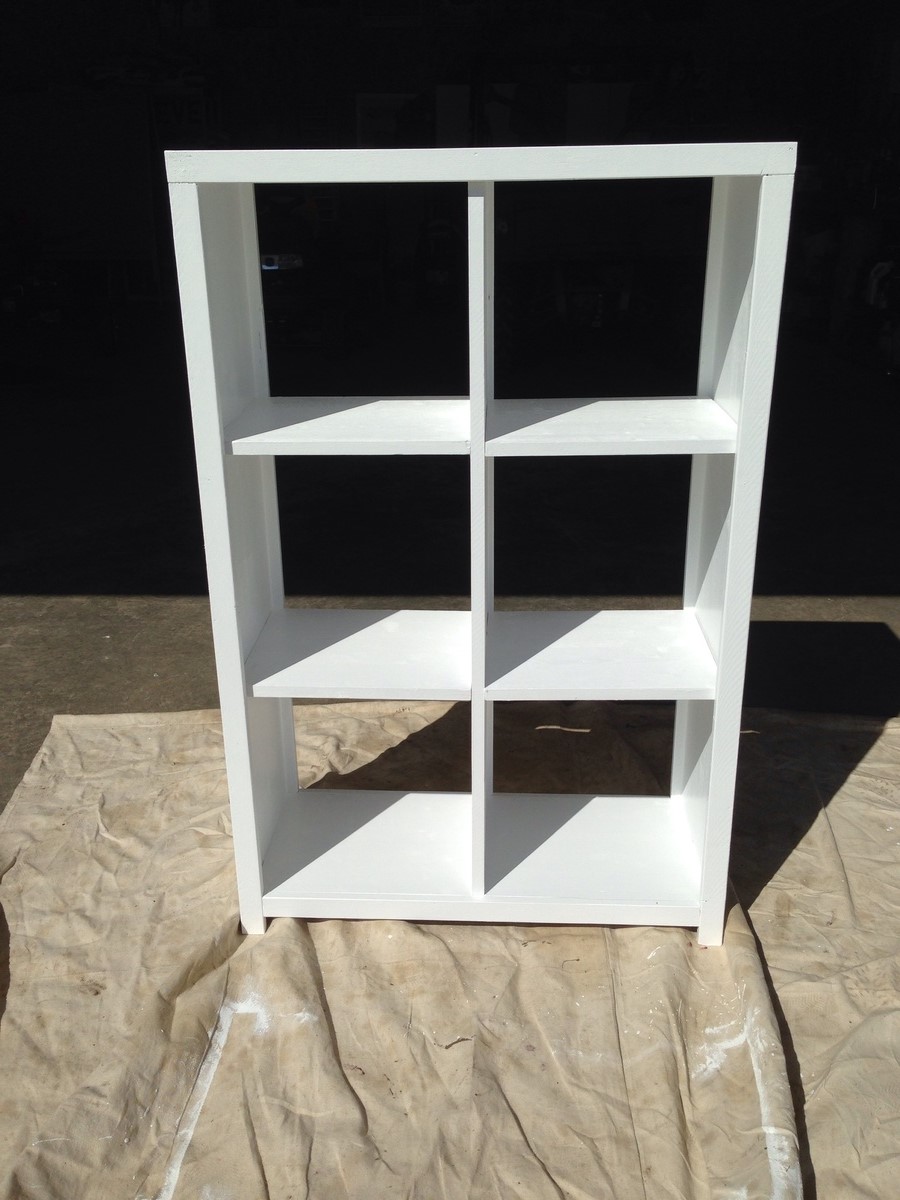
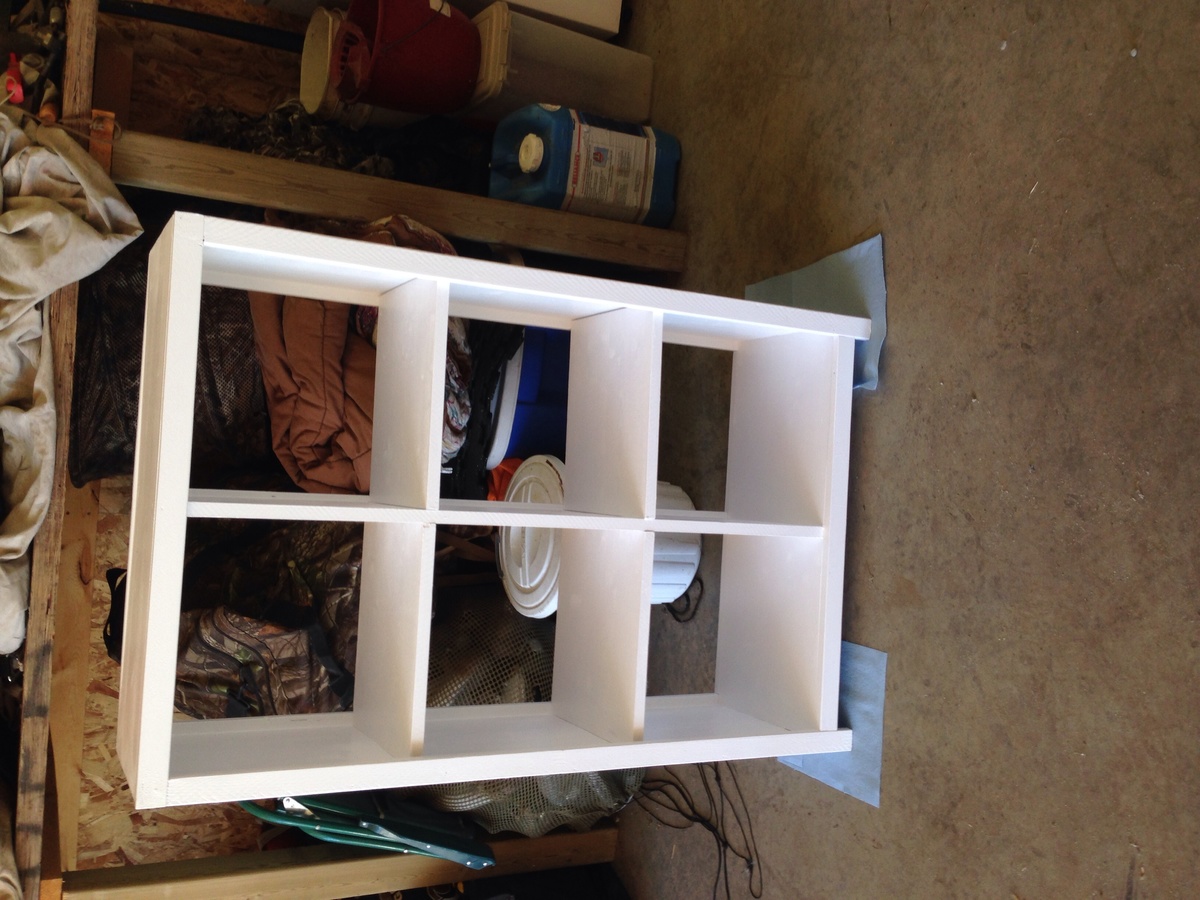
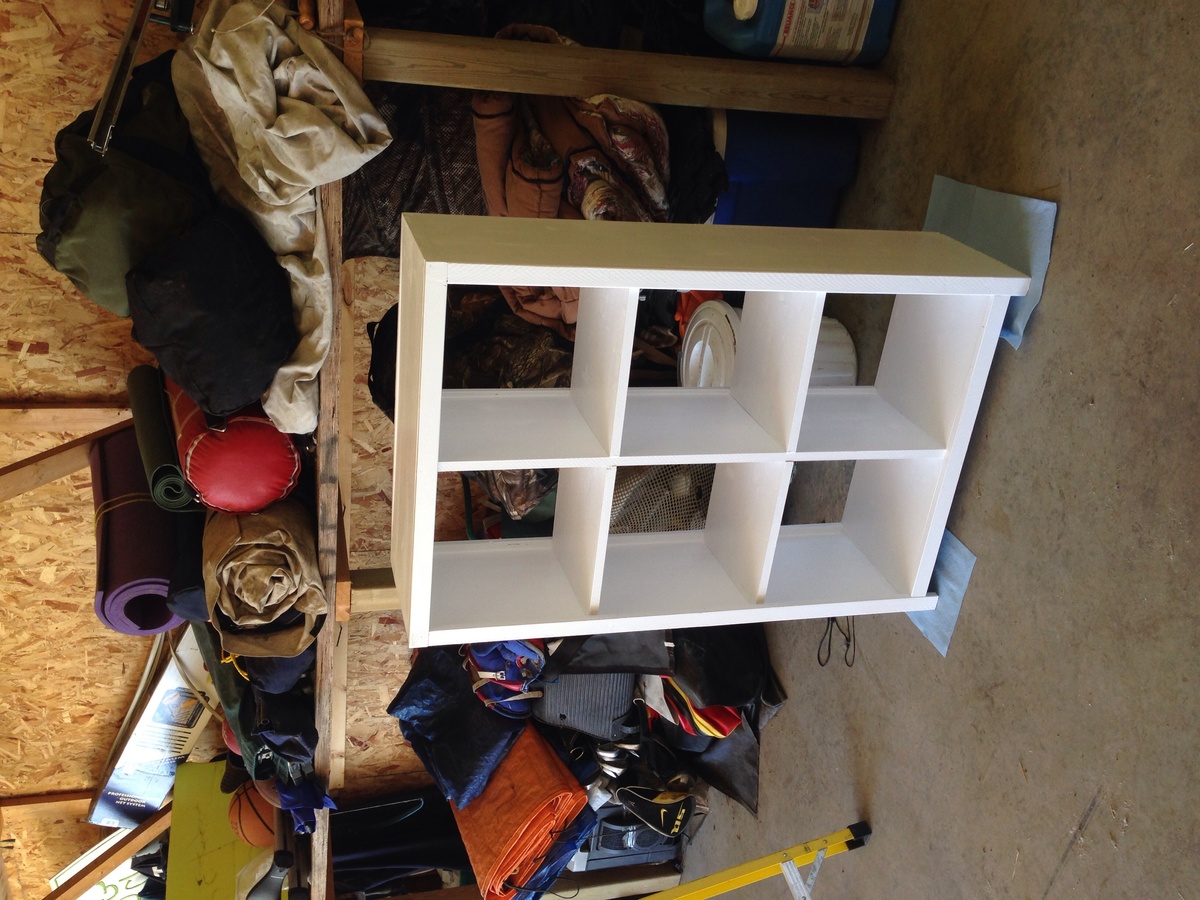
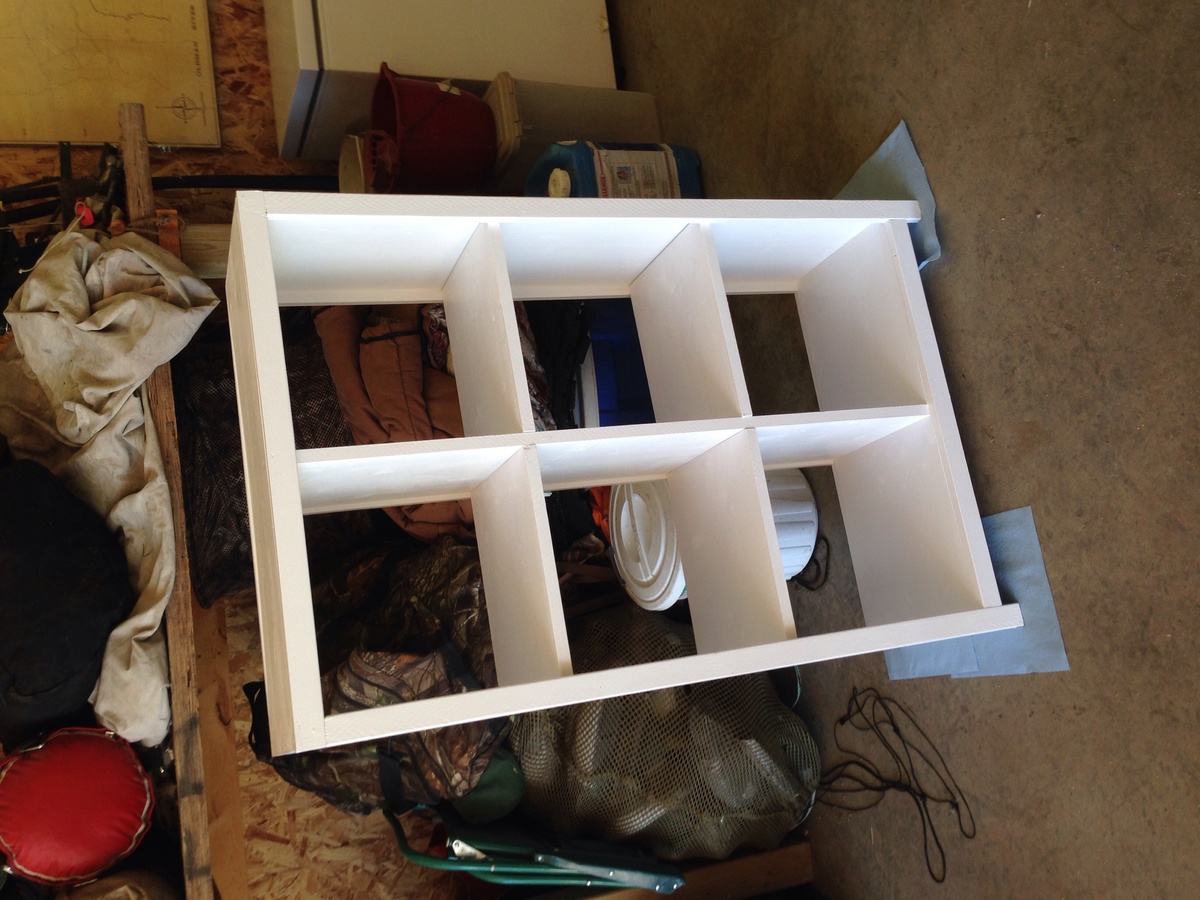
We have 3 (almost) teenage boys and needed the storage of the Brookstone bed for their sport gear, etc. I built 2 of them and my 15 year old built his. I can't get over how easy they were to build! This was the first building project I ever made and they turned out beautifully! The headboard took about 2 hours to build and the bed about 5 hours. I was pretty slow though, checking and double checking measurements, glueing and clamping like crazy, being careful not to rush. Still, 7 hours to make the bed and a couple hours to paint, not a bad days work! The lumber cost $144/each so we were happy with the cost of the beds. I would highly recommend furniture movers underneath them. I used 4 huge ones under the ends of the 2x2 supports and small squares under the legs/headboard. They move so easily with them! Thanks, Ana, for a great plan!! We are so thankful and love our new beds!!

Estimated Cost
$144 for lumber
Estimated Time Investment
Day Project (6-9 Hours)
Finish Used
Grey paint. Wanted a grayish stain but couldn't get the pine to take it the way I wanted it to.
Recommended Skill Level
Beginner

Comments

anita1977

Tue, 12/06/2016 - 07:56

I have 4 boys, but 3 are married and gone now and I bought my youngest a new bed last year, but I would have loved to have been able to make these for the older ones when they were growing up!  Great job to you and your son!

Toy Box

Submitted by Sgeisinger on Sun, 06/07/2020 - 08:16

This design turned out to be perfect! It was super simple and easy to build! Easy to follow plans! Great beginner project!

Estimated Cost
Around $40 in lumber
Estimated Time Investment
Day Project (6-9 Hours)
Finish Used
Varathane Premium Wood Stain in Red Mahogany
Recommended Skill Level
Beginner

Comments

Bed for Small Room

Submitted by Anonymous (not verified) on Wed, 03/06/2024 - 12:17

In my new house we have a small room that can fit a full but also have a tall family, so when I found out that there is a Full XL, I went on the hunt for bed frames and not many choices, so I turned to Ana's site and found/used the essential bed frame for all sizes plan and adjusted it for a FullXL. Our house theme is black and white so we painted it with Ink Black by Behr. Whole frame built for $50 as I already had the paint. My wife loves the frame.

New Bed for my 3 year old!

Submitted by red98dawg on Thu, 08/02/2012 - 13:49

I had been on a search for a while for new furniture for my son’s new big boy bed room but couldn’t justify the money for new furniture and couldn’t find anything remotely nice on craigslist. I ran across this plan on Ana’s site and just had to have it so it became my first large furniture project.
It was fun to build and very rewarding when my son told me he loved his new bed!

I did have some issues with using the kreg jig on the platform so I did use wood screws on the outside frame. I had better success with the kreg jig on the headboard, guess I just needed practice.

There were a few things I did to make it easier to move the bed if needed:
I did not attach the slats but I did lay them on a non skid grip (like you put under rugs on wood floors).
I attached the headboard to the platform using carriage bolts so it could be taken apart easily.

The plans were really easy to follow.

Estimated Cost
$170
Estimated Time Investment
Weekend Project (10-20 Hours)
Finish Used
Minwax - Jacobean, 1 coat
Minwax - Fast-Drying Polyurethane, 2 coats
Recommended Skill Level
Beginner

Neighbors

Submitted by Pebcat on Tue, 05/27/2014 - 20:22

I found Ana's website in my search for the desk plans, and in the process found many other wonderful plans I want to try. My goal is to make a sawhorse desk for my new home office. I need to learn all proper woodworking skills, however.

Therefore, I decided to start with this birdhouse project, which was a joy for me since I have a fascination with photographing birdhouses wherever I go. I also have fond memories of making birdhouses with my mother when I was a little girl. She did all the cutting and nailing, and I sanded and painted.

This project brought back happy memories, and my mom got a kick out of seeing photos of the finished results.

In addition, today I had the wonderful opportunity to photograph my own birdhouses!

Estimated Cost
$3 per house for the wood
Estimated Time Investment
Afternoon Project (3-6 Hours)
Finish Used
I used a combination of paint I had on-hand, all Valspar. Most of the paints were Valspar Ultra Paint & Primer.

Paint colors for the birdhouse on the left are called: Country Heather (blue), Bittersweet Stem (beige), brandywine (terracotta), and Pistachio Ice (green) for accents.

The colors of the house on the right also included Country Heather, Bittersweet Stem, and Pistachio Ice (again for accents). In addition, Buttered Hazelnut was used for the walls and roof.

I completed most of the painting prior to assembly, adding only accents such as hearts and windows post-assembly.
Recommended Skill Level
Starter Project

Surf Shack Bunk Bed (Using Club House Bed Plans)

Submitted by Anonymous (not verified) on Sun, 08/28/2016 - 21:39

We decided to follow the Club House bed plans, but we added another bunk below. We did this by adding a foot to the height and duplicating the slats and ends etc. My boys absolutely love this bed! We actually enjoyed building it. I can't wait to try more Ana White plans - they were so easy to follow and it's so satisfying having made something cool from scratch.

Built from Plan(s)
Estimated Cost
$200
Estimated Time Investment
Weekend Project (10-20 Hours)
Finish Used
One part water to two parts white paint
Recommended Skill Level
Intermediate

Willy Bookcase Library

Submitted by JLW on Mon, 08/06/2012 - 18:50

My wife wanted matching bookcases for our library rather than the hodgepodge collection we had assembled over the years. We looked at several different options but the trick was getting them to our house in a cost and time effective manner. We came across the Willy Bookcase plans here and, after pricing the wood vs. pre-built options, decided to strike out to build our own bookcases.

The library took 5 McMansions, 1 Highrise, and 1 3-Bed/2Bath bookcase. We liked Ikea's Billy corner bookcase set, so we purchased a corner bookcase bracket from them to create the effect and stabilize the Highrise between two McMansions.

We decided to do the entire length of the bookcase sides with shelf holes to allow for maximum flexibility in spacing of the shelves. We fixed the middle shelves across all units to match the top of the short 3-Bed/2Bath.

The simple design made the project simple overall - a single bookcase is an easy weekend project. Since we decided to use stain with wipe on poly, finishing took the vast majority of the time (four hours to cut, sand, and build, 44 hours to finish...) Purchasing a good shelf pin jig and making consistent measurements is a necessity for mass producing shelves with consistent spacing on the shelves.

Built from Plan(s)
Estimated Cost
$800
Estimated Time Investment
Weekend Project (10-20 Hours)
Finish Used
Two coats of Minwax Dark Walnut with two coats of Minwax satin wipe on poly.
Recommended Skill Level
Starter Project

Farmhouse Table

Submitted by normansm on Fri, 05/30/2014 - 07:17

This build was done with all pocket holes. I used some pre-made project boards for the top and joined them with pocket holes and glue. Also I used all pine for this project. The chairs are just old chairs from my previous table. Stained with special walnut and finished with semi-gloss poly and finishing wax. I rubbed and buffed the finish to get the nice shine. This project took a while because I decided to let the poly cure for about a week before finishing and placing in my dining area.

Estimated Time Investment
Weekend Project (10-20 Hours)
Finish Used
Minwax Special Walnut and Minwax Polyurethan (Both of them were Oil based)
Recommended Skill Level
Beginner

Storage Daybed

Submitted by hilt_m on Thu, 08/09/2012 - 08:06

This is the 3 box storage daybed, as you can see I added an armrest on one end as it sits in a corner.

Tips for building this project: Buy a decent circular saw, I used a cheap one and really regretted it. Square your timber, I ended up squaring my timber using a sander, which wasn't as easy as it sounds. Check you measurements, the bottom of one of my boxes was a little short because I didn't double check the measurements and I ended up having to fix it with an extra piece of timber. 2 or 3 saw horses are a real help and lots of clamps.

I used the cutout outline from the link below but had to convert it all to metric since I live in Sweden, also a standard single mattress here isn't as wide but longer then the one used in the linked project. I didn't take this into account and ended up having to buy an extra piece of plywood.
http://ana-white.com/2009/12/plan-stratton-daybed-as-request-by-you.html

I got the single mattress and the pillows from IKEA.

This was a lot of fun and I look forward to spending many hours relaxing on my new daybed.

Built from Plan(s)
Estimated Time Investment
Week Long Project (20 Hours or More)
Finish Used
white paint
Recommended Skill Level
Beginner

Comments

Rusty Cottage

Thu, 08/09/2012 - 10:48

Nice job on the daybed, I like that you got through all your "dilemmas".

Your saw's bevel function (hopefully it has it) might be nicer than mine but you can try to adjust it.

I have a $50 dollar skil saw and my only complaint is how difficult it is to set the base plate 90 degrees to the blade. I even take care to set the circular saw between two 2x4 when not in use so that setting it on the ground doesn't change the angle of the foot plate to blade. I can cut 90 degrees with a speed square as a guide, but I can't adjust the saw right.

I will be starting assembly of my first furniture project with the wood I cut two days ago. I will see how the pieces go together.

Best of luck on your next project!

hilt_m

Sat, 08/11/2012 - 06:27

Thanks, I'm pretty pleased with it. Yes that was one of my problems as well, trying to get the base plate set at 90, I found that if I leaned on it too much it flexed a bit which isn't good. Also by the end I had a pretty blunt blade or I was getting pinching or something thing because the plywood had some shocking edges with splintering. What I would really like is a proper saw table, but for now that's just a dream. Good luck on your project.

AmandaKay

Wed, 08/21/2013 - 10:50

Hi there! I was hoping that someone on here had added the armrest! Would you be willing to post a pic of the end of the bed so that I can see how you configured it? Im goint to be starting this project soon for my daughter, and need to strategize some armrest ideas for hers.

Thanks so much!!

6 cubby book case - nursery

This was my first project. It is for our nursery. Painted white to match the crib and dresser. So much fun. Plan was great and very easy to follow. Thanks to the other brag post which mentioned there was a missing cut for the box (bottom shelf). 28 3/4. I used countersink screws with a 1/2" countersink drill bit. I also used shelf pins to secure the shelf. With the paint I noticed the shelfs were very snug. I would probably take off 1/4" off the shelf size if I built it again. Can't wait for the next project! Thanks.

Built from Plan(s)
Estimated Cost
130
Estimated Time Investment
Day Project (6-9 Hours)
Finish Used
White paint. Eggshell finish.
Recommended Skill Level
Beginner

Spanish entry table

Submitted by Anonymous (not verified) on Sun, 09/04/2016 - 16:25

Built this entry table as a gift for my aunt. She has a beautiful Spanish style home, and I wanted to create a piece that looked as though it would have come from one of our California Spanish missions. I used the Honey Bear Lane staining technique. I used HD pine lumber and accented with metal straps from HD and clavos. This was a challenging but very fun project!

Estimated Time Investment
Week Long Project (20 Hours or More)
Finish Used
Honeybearlane.com technique- dark stain over white wash. Three coats of matte polyurethane varnish to seal.
Recommended Skill Level
Beginner

Potting Bench/Stand

Submitted by MikeO on Tue, 06/16/2020 - 09:58

Built this for my girlfriend's birthday present. Added a 1x4 backsplash and a 2x6 for the top shelf to give a little more shelf room instead of the 2x4 called for in the plan. Stained with Varathane "Vintage Aqua" color and then 3 coats of Helmsman Spar Urethane for outdoor durability. Set the whole thing on caster wheels (not pictured) so she can move around the deck as needed.

Built from Plan(s)
Estimated Time Investment
Afternoon Project (3-6 Hours)
Finish Used
Varathane Vintage Aqua
Helmsman Spar Urethane
Recommended Skill Level
Intermediate
Seasonal And Holiday

DIY Outdoor Wood Furniture

Submitted by Anonymous (not verified) on Thu, 03/21/2024 - 07:36

My daughter wanted patio furniture but did not want to spend a ton of money. The total project cost around $400. We used treated 2x4’s for the frame. We found $45 cushion sets, the rug and accessory pillows at Big Lots. I love we used different colors for the chair s and love seat.

Jennifer Poarch

Seasonal And Holiday

Solid Maple Desk

Submitted by ccbuilder on Sun, 08/12/2012 - 14:29

This is a solid maple desk with two drawers finished with shellac and paste wax. I altered the plan by giving the desk and overhang, as well as changing the way the legs were built.

Built from Plan(s)
Estimated Cost
$250
Estimated Time Investment
Week Long Project (20 Hours or More)
Finish Used
Shellac and paste wax. I sanded until the surface was incredibly smooth and then used a high quality brush to apply the shellac.
Recommended Skill Level
Intermediate

Floating Bedside Table

I’ve been in need of a bed side table in my room for quite some time now. I need storage for things like my keys, wallet, the remote, as well as other little items that seem to get kicked around and lost. I figured it would also be nice to have a place to keep my alarm clock, I’m guessing it will be a lot more convenient to hit the snooze button in the morning if the clock is closer to me.

Estimated Time Investment
Day Project (6-9 Hours)
Recommended Skill Level
Intermediate

Beverage Station

Submitted by davis7029 on Thu, 06/18/2020 - 06:29

After seeing this same cabinet on Etsy for $2000+ I decided to try building my own. This was built using Ana's plans for the Barn Door Cabinet with Mini Fridge and Microwave. On top of the cabinet is a custom chalkboard which I anchored to the back of the cabinet. Attached to the chalkboard is a shelf for liquor. The rail is made from 3/8" black iron pipe from Home Depot & Amazon. Unfortunately, my Home Depot did not have nipples larger than 6 inches so we had to source 12" from Amazon. The fittings and shorter nipples came from Home Depot. The supports for the shelf and coffee mug rack are made using 1/2" black iron pipe and fittings which were 100% sourced from Home Depot. The finish for the borders of the chalkboard and cabinet top were stained using Varathane Stain + Poly. The color is called "Mission Oak" and it is a satin finish. The hardware for the barn door was purchased from Amazon.

NOTE: If you decide to build a similar version of this I'd consider leaving at least 33.5" on the inside where the refrigerator sits so you can fit a 120-can refrigerator instead. Most are 33.5" tall. I prefer to drink beer from a bottle and the space in a 2.2 cu. ft goes quick when bottles are placed inside.

Estimated Cost
$1000
Estimated Time Investment
Week Long Project (20 Hours or More)
Finish Used
Varathane Stain + Poly (Mission Oak)
Recommended Skill Level
Intermediate