Community Brag Posts

Dollhouse

Submitted by boughtasaw on Thu, 12/15/2016 - 11:42

I am not sure what happened first time I posted this as it was posted as Guest (sorry). Anyway....

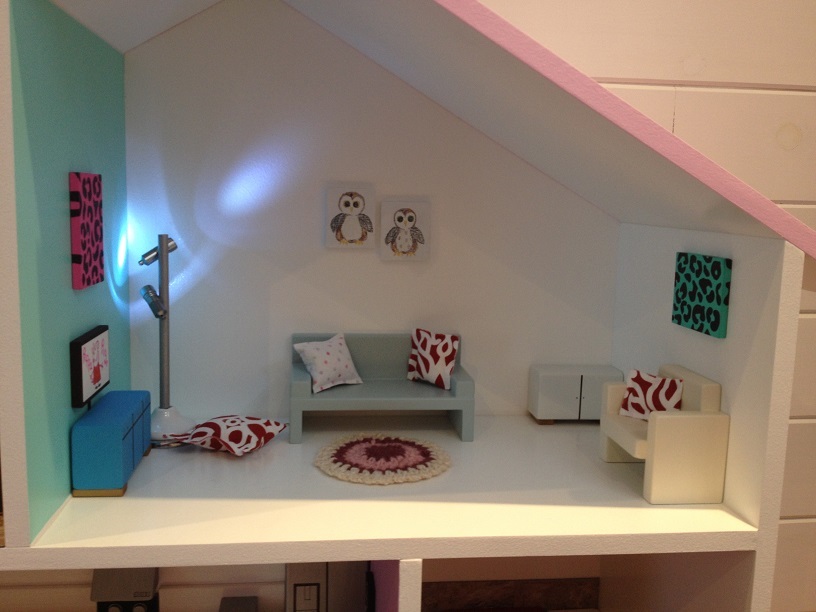
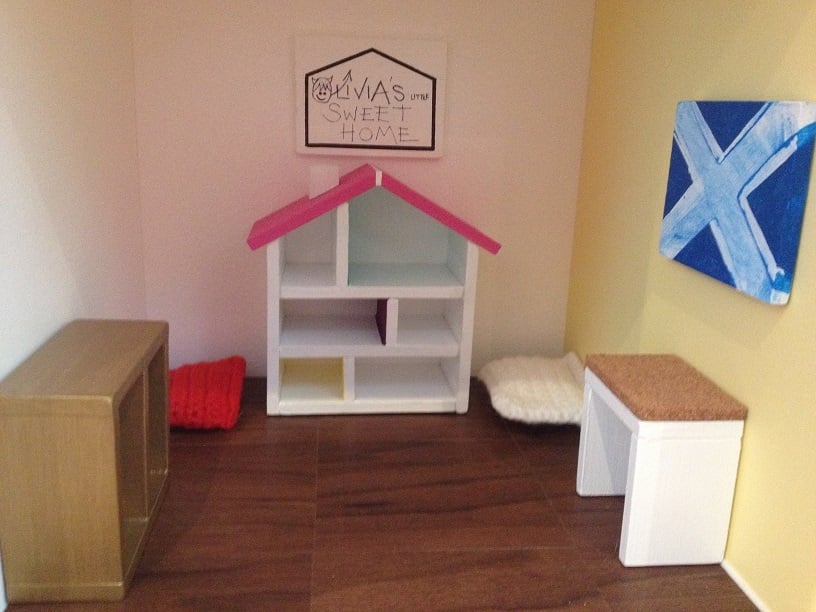
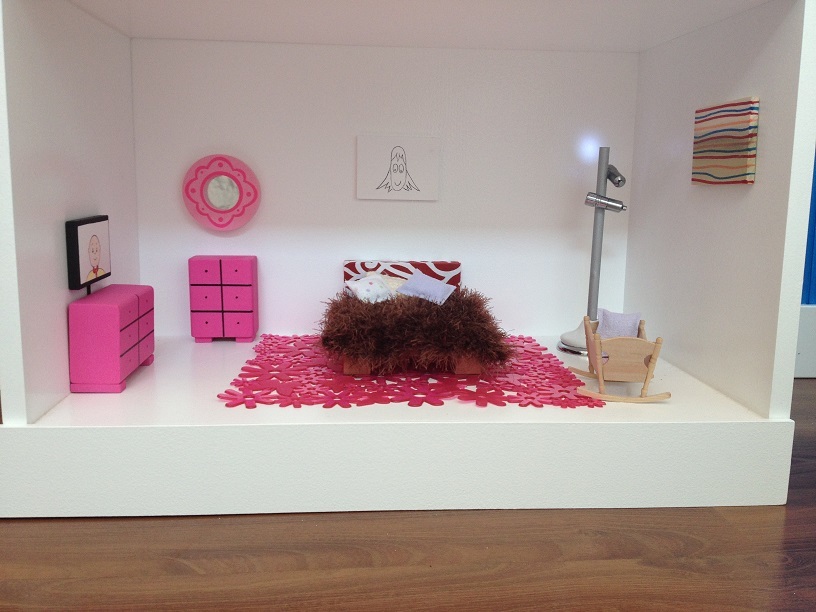
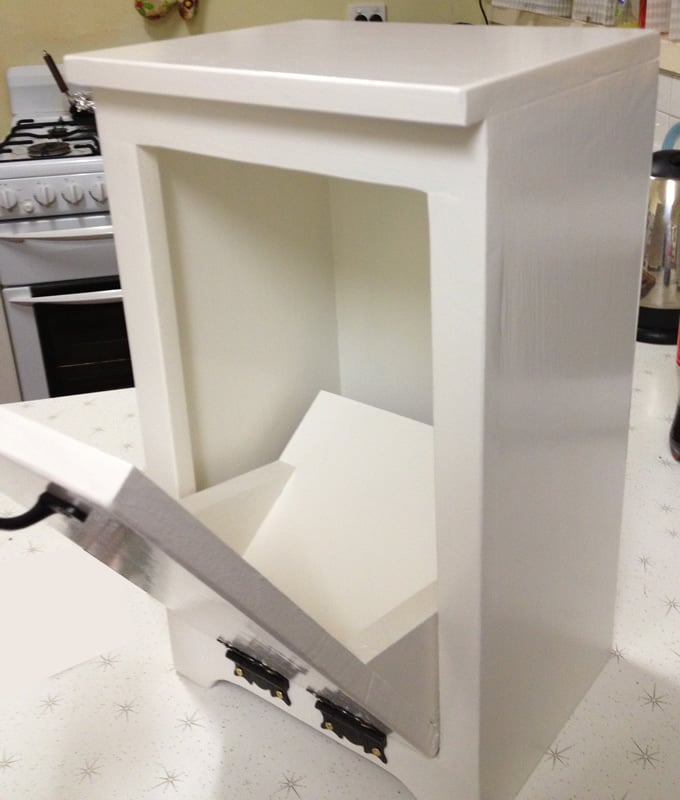
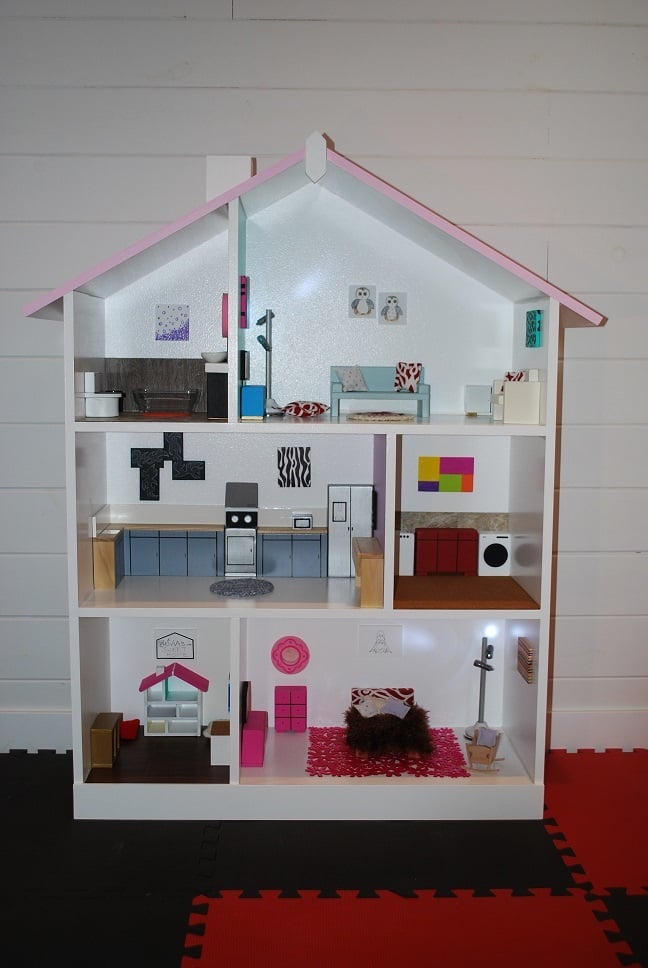
When my daughter was born I promised that I would make her a dollhouse. A few weeks ago I found these plans, and absolutely loved the visual layout of the rooms. I stuck with this layout and tweeked the dimensions according to what worked best for the space it would proudly sit in. It is 46 inches high and 31 inches wide at the walls, and is made from 12 inch wide MDF which I primed with a latex primer and then finished off with a semi-gloss white on the majority of the walls. I also mixed the colors for the roof and also the 3 accent walls to give it an extra wee shot of color. 
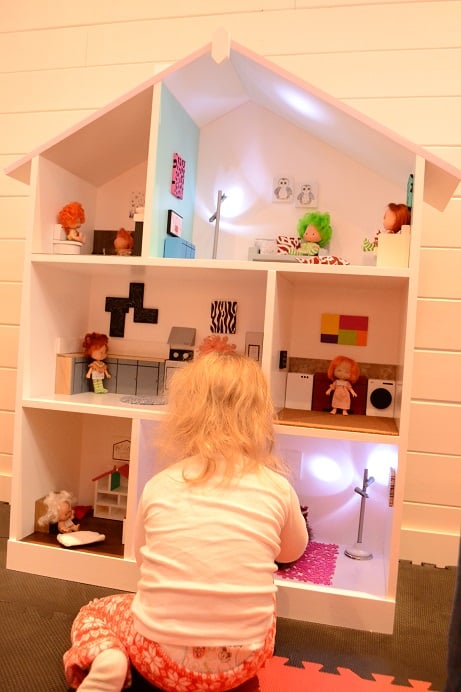
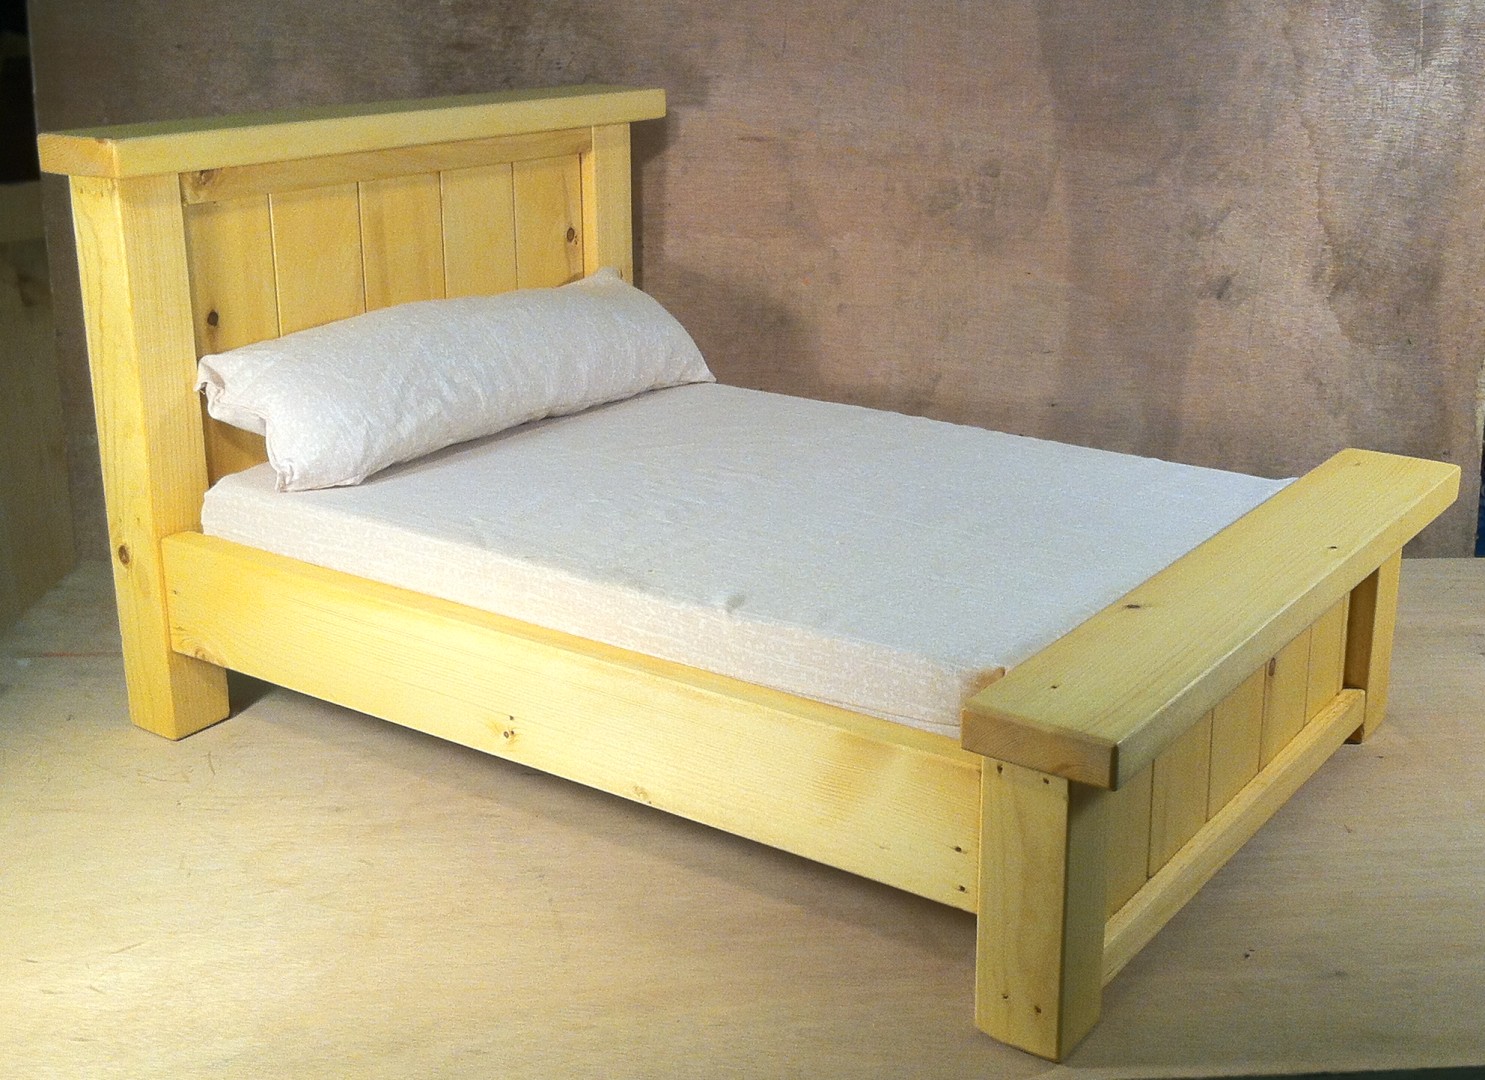
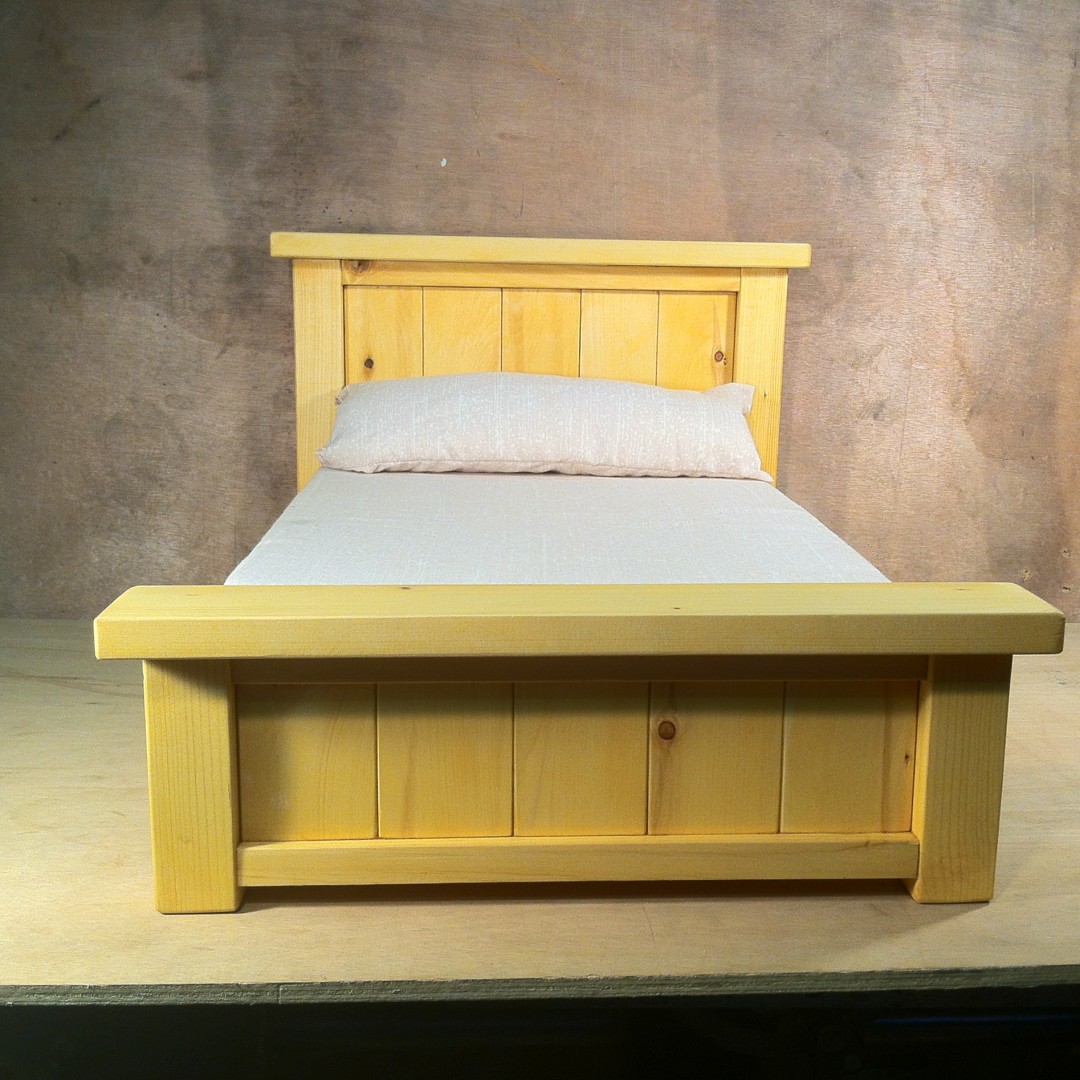
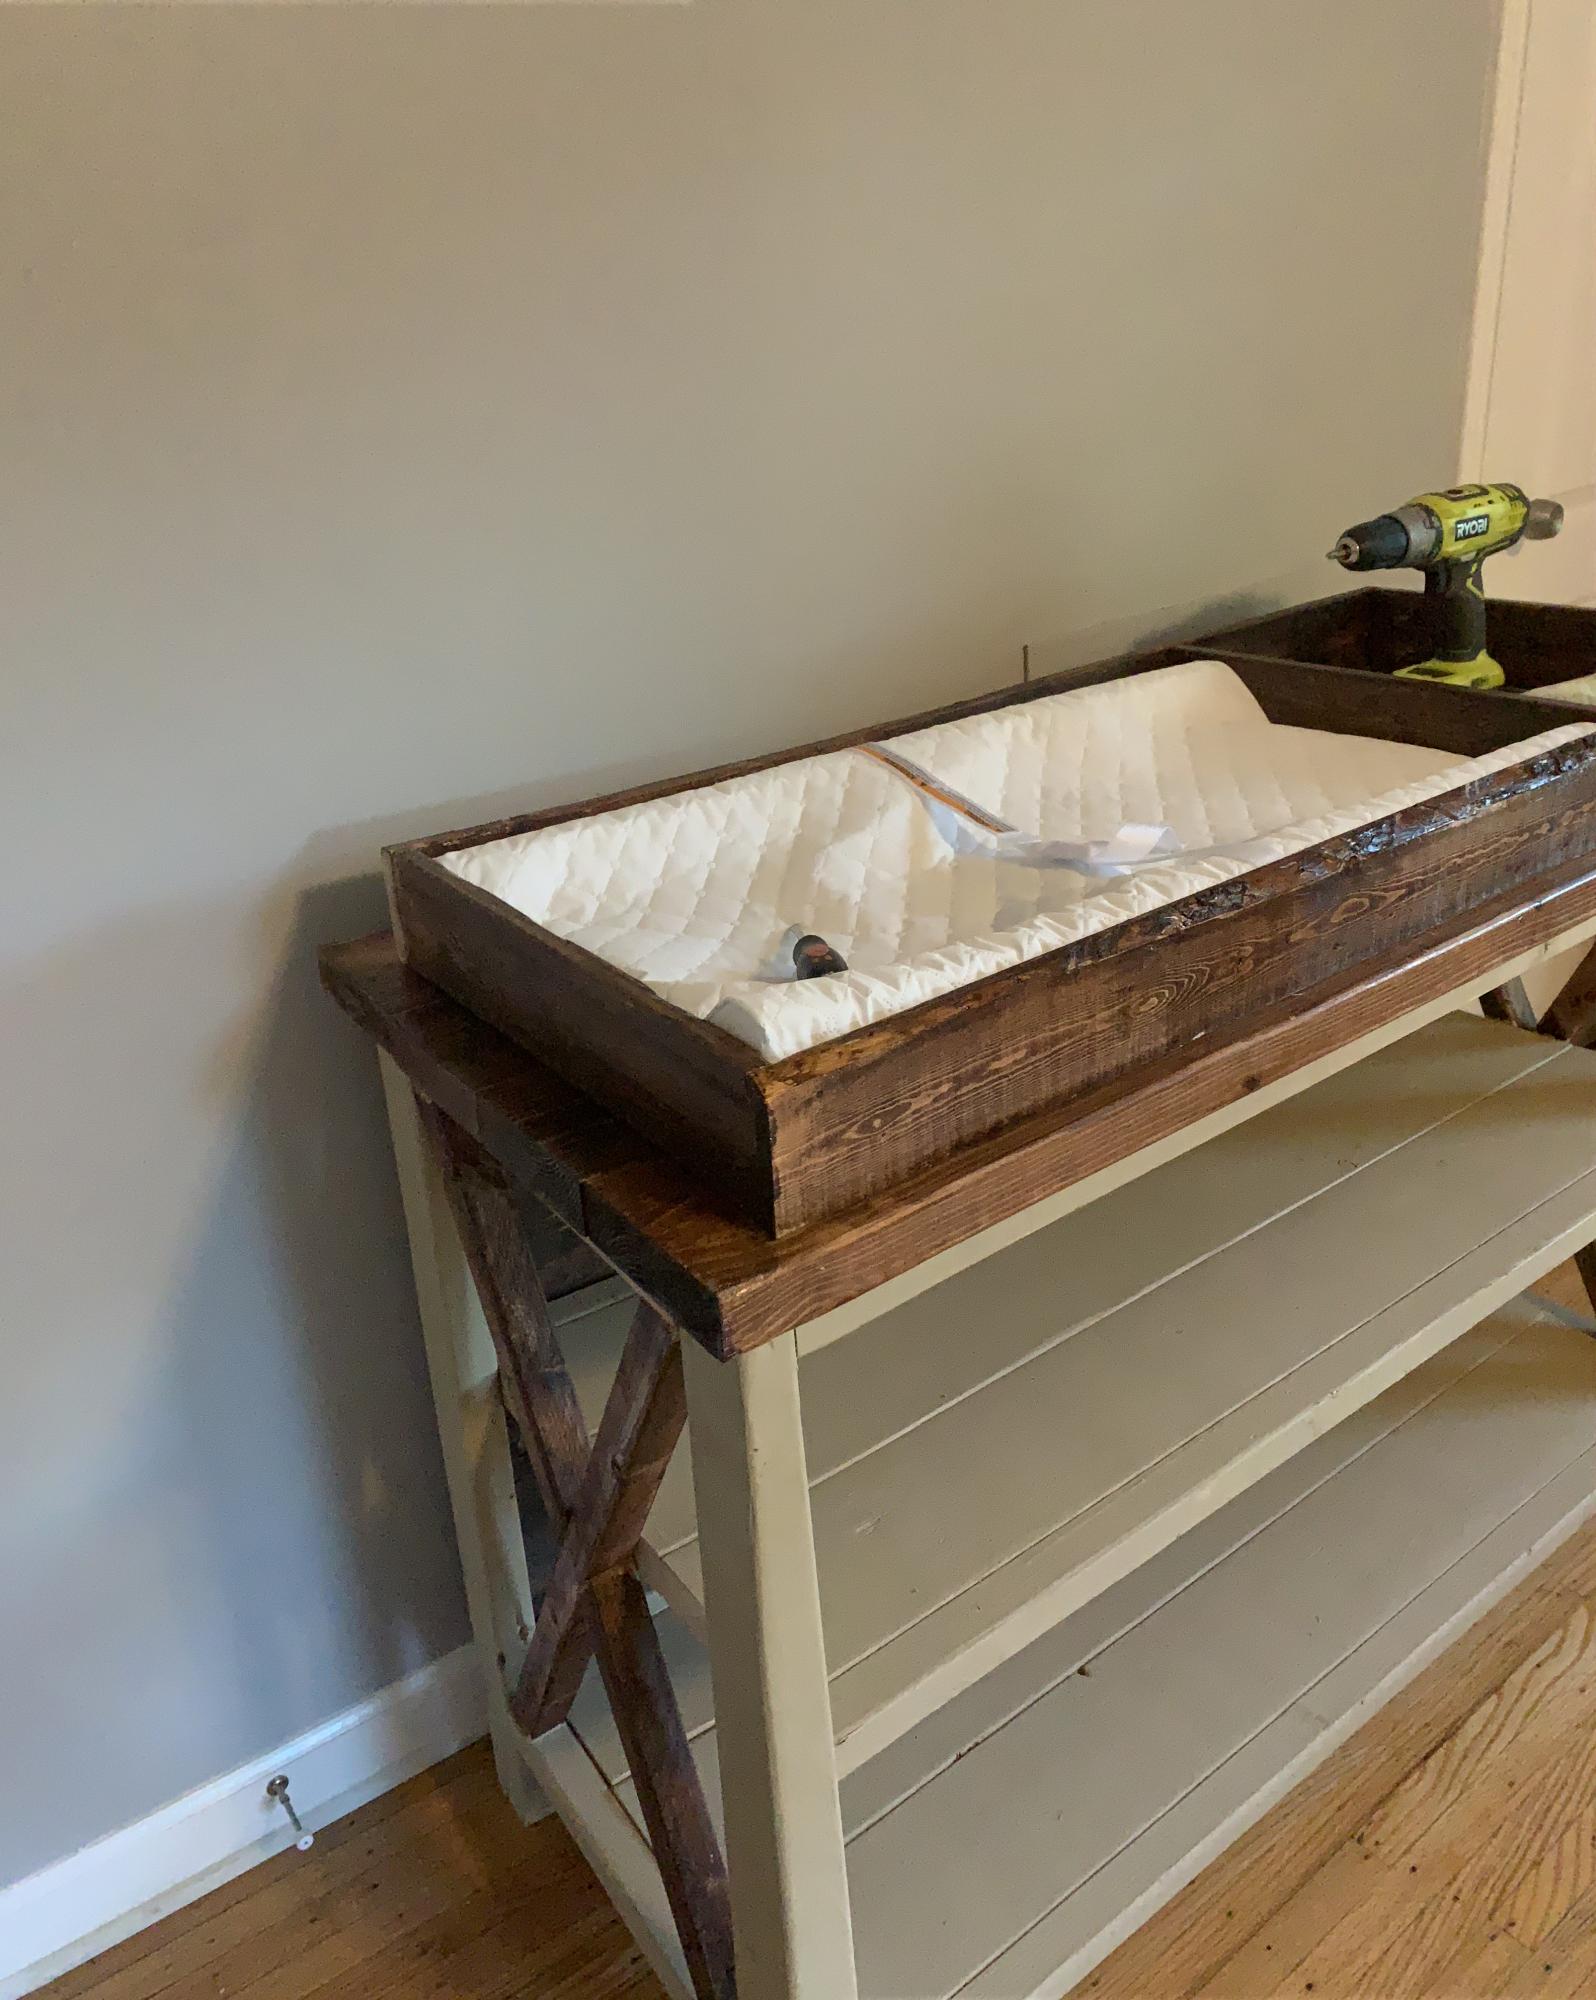
I was very, very happy with the end result, and having caught what I now know as the "dollhouse bug" I thought "what about if I added a chimney ?". So I added it. I then though what about adding a roof ridge and gable to the roof. The house looked even better. Progressing onto full-blown "dollhouse-flu",  I then decided to make a chair for what would later be the living room. That was it, fully addicted now I couldn't stop and found myself obsessively planning, designing, messing up, re-designing, cutting, building and painting until I reached the point where last night I attended my first "DA" meeting. 
I found Dollhouse Annonymous very helpful and although not cured, I realise that it is perfectly acceptable for a 44 year old Scotsman to build a dollhouse for the daughter (naughty 2 1/2 year old daughter) that is the love of his life. If she is happy when she unwraps it on Christmas morning, then all of the work shall be worth it. 
This site is top of my bookmark list and I love it. !

Built from Plan(s)
Estimated Cost
$90
Estimated Time Investment
Week Long Project (20 Hours or More)
Recommended Skill Level
Beginner

Wall Attached Storage Shelves

Submitted by Anonymous (not verified) on Sat, 08/29/2020 - 18:21

We just moved onto a new house with ample unused space I. The unfinished part of the basement so I decided to make a 12’ wall of storage shelves, altering Ana’s plans just a little bit. I did two 24” tall shelves on bottom and two 18” y’all shelves up top. It was a fun project and I got to use my Kreg HD Jig for the first time! These shelves are SOLID!

Estimated Cost
$150
Estimated Time Investment
Afternoon Project (3-6 Hours)
Recommended Skill Level
Beginner

Tilt out bin

Submitted by naomi on Sun, 08/31/2014 - 07:48

I love this bin so much I built a large one and a small one. The small one is for the bathroom. The large on is for the kitchen. This is actually a rather easy build. I used mdf. I grooved the front panel on the large bin to add character. This was built from Ana White's Wood Tilt Out Trash or Recycling Cabinet Plan.

Estimated Time Investment
Day Project (6-9 Hours)
Finish Used
White enamel paint
Recommended Skill Level
Beginner

Comments

Niewenhuis

Thu, 09/11/2014 - 10:17

Can you give me a few more details about your grooved front panel...

did you just run the panel thru a table saw?

naomi

Fri, 09/12/2014 - 01:44

I don't actually own a table saw.

I just used my router and set the depth so that only part of the bit touched the mdf.

It was just a matter of testing it until I found the right depth.

Hope this helps. :)

shelbyannec21

Tue, 01/24/2017 - 16:03

I know its been awhile, however the one you have both normal trash and a recycle bin in.. is that the same dimensions as the ana-white build for a single? 

I assume the trash cans are just flipped side ways to hold 2 instead of 1?

looks great, thank you!

Doll Farmhouse Bed

Submitted by rpd on Sun, 12/18/2016 - 23:57

Made for my grand daughter.  It was too cold in the shop to use carpenters glue, so I used medium thick, gap filling CA (cyanoacrylate)glue, and brad nails instead of screws.


Estimated Cost
$10.00
Estimated Time Investment
Afternoon Project (3-6 Hours)
Finish Used
Watco Golden Oak
Recommended Skill Level
Intermediate

modified X

Submitted by colsen on Sat, 11/17/2012 - 10:08

This is my very first project. Never used a saw before until a few weeks ago. I am really happy with the way it turned out.

I shortened the plan and modified the second shelf. I was planning on an "X" brace for both sides but got carried away and realized it wasn't going to work on the one side. I like the end result and don't mind that its missing.

I would have finished it sooner but was a bit intimidated by the angled cuts. My miter saw only cuts 45.

Built from Plan(s)
Estimated Cost
$75
Estimated Time Investment
Weekend Project (10-20 Hours)
Finish Used
Iron acetate, however I applied the stain backwards. I put the tea on last instead of first. Then 3 coats of polyurethane.
Recommended Skill Level
Beginner

Comments

JoanneS

Mon, 11/26/2012 - 18:17

Wow you did an awesome job on this! Congrats! Looks very professional. The modified second shelf is a great touch, I think it looks perfect without an X on that side. BTW love the shells and captain's wheel too. :)

Balin Console Table

Second Ana White build!

Built from Plan(s)
Estimated Cost
$150-$175
Estimated Time Investment
Weekend Project (10-20 Hours)
Finish Used
Console was painted Antique White and covered with Asphaltum glaze.
Recommended Skill Level
Beginner

Comments

kristyzed

Mon, 08/08/2016 - 16:16

You did a lovely job on this, I think it's my favourite of all of them.  Where did you find those knobs?  Is there a special technique you used for painting and glazing?  It looks like it might not be even everywhere but have a more random pattern to it.

Farmhouse Table and Benches

Submitted by Darrin Dee on Fri, 12/23/2016 - 11:09

I built this table for my wife for Christmas.

Estimated Cost
Less than $150
Estimated Time Investment
Weekend Project (10-20 Hours)
Finish Used
Rust-oleum Weathered Gray stain for the tops.
Rust-oleum Antique White for the rest.
Rust-oleum Triple Thick Polyurethane in clear satin
Recommended Skill Level
Intermediate

Corona Square Coffee Table

Submitted by KevinBrown on Sat, 09/06/2014 - 12:54

This was my first handmade diy furniture project ever.  It turned out much better than I anticipated.  The lumber store that I used did not offer knotty pine in 2x6 dimensions so I improvised with 2x4s.  This project was a little time consuming due to the fact that I am a complete novice and I had to gather all of the necessary tools and learn how to use them.  Everything considered I am very happy with the result and I really enjoyed this project.  

Built from Plan(s)
Estimated Time Investment
Weekend Project (10-20 Hours)
Finish Used
Dark Walnut Wood Stain
Polyurethane Matte Finish
Recommended Skill Level
Intermediate

Comments

Computer Desk

Submitted by mjgreene79 on Mon, 12/26/2016 - 10:29

I made this computer desk for my college age daughter out of a 150 year old door that we got from her grandfather's homestead.  I think it turned out fantastic.  I need to add a glass top to complete.

Estimated Cost
$50
Estimated Time Investment
Afternoon Project (3-6 Hours)
Finish Used
painted legs and base but left the door the original.
Recommended Skill Level
Beginner

Large Bench

This bench is freaking huge but I love how it turned out. A lot of pocket holes for the back so it took a lot of putty to cover those up but that’s to be expected. Proud of this one.

Estimated Cost
40
Estimated Time Investment
Weekend Project (10-20 Hours)
Recommended Skill Level
Beginner

Bon Appetit Rustic Kitchen Island

Submitted by Janettx on Sun, 11/25/2012 - 07:18

Here is the Easy Kitchen Island all finished. I learned to use my k-reg with this project. To attach the top I instead used corner blocks in each corner of the bottom unit and screwed the top in place. I found this made the piece more sturdy. for the 1x2's I used furring strips which are not very nice however I painstakingly picked through a large pile till I found ones that were straight and without knots. I then had to sand them like crazy. Saved a ton of money but worked very hard. This project actually took 19 - 1x2's rather than what the plan called for. When complete this piece was very heavy...I love it and have found the perfect home for it.
Thanks again Ana!
Janet

Estimated Cost
60.00
Estimated Time Investment
Weekend Project (10-20 Hours)
Finish Used
White gloss paint and Mahogany stain.
Recommended Skill Level
Beginner

DIY_Women Owens Nightstand

Submitted by diy_women on Mon, 09/08/2014 - 08:39

This piece came out beautifully! Took all of 6 hours to complete it. I used pine on this project.

Built from Plan(s)
Estimated Cost
Cost about 75 dollars.
Estimated Time Investment
Day Project (6-9 Hours)
Finish Used
Polyurethane.
Recommended Skill Level
Beginner

Modified Industrial Style Coffee Table w/ Bottom Shelf

Submitted by danandbeth on Wed, 12/28/2016 - 08:36

Our first project!


We used the "Industrial Style Coffee Table as seen on DIY Network" plans and simply added a bottom shelf. This required an extra 2x2 bracer (same cut as top bracer) and 8 more 1x4s, cut slightly smaller than the top 1x4s in order to have them sit flush with the bottom 2x2s. The table is all pine.


We spaced the bottom shelf boards roughly a half inch apart (give or take - it's "rustic"!) and screwed in from the bottom just like the top boards. 


On the top shelf, we used 3 coats of Minwax Natural stain, and followed up with 3 coats of Minwax Satin Poly. We sanded these after attaching to the frame in order to achieve a level surface. We started with 80 grit, then 120, then 150. We then used 220 in between coats of poly. The result is a smooth, but not store-bought smooth surface, which we think works well.


We didn't spend as much time on the bottom shelf since they'll be mostly storing items, giving them just a quick 150 sand prior to 2 coats of stain and 2 coats of poly. Finally, we nailed in some plastic feet to keep it about a half inch off the floor.


All in all, being our first project, and going beyond what the original plans called for, it took us a few weeks to complete, working on it mostly on weekends and here and there in the evenings after work. We love the finished project and it works really well in our living room!


-Dan and Beth

Built from Plan(s)
Estimated Time Investment
Week Long Project (20 Hours or More)
Finish Used
Natural Stain (Minwax)
Satin Poly (Minwax)
Recommended Skill Level
Beginner

2x4 Adirondack Chairs

Submitted by Sprochniak on Mon, 09/07/2020 - 11:16

I changed the back of this chair to use some lumber I already had. These are very comfortable. I see more in my future.

Estimated Cost
$60
Estimated Time Investment
Afternoon Project (3-6 Hours)
Finish Used
Sherwin Williams exterior semi-gloss
Recommended Skill Level
Starter Project

Traditional Toddler Bed with Rustic Headboard

Submitted by jenmac75 on Tue, 11/27/2012 - 17:42

After my daughter started escaping from her crib I knew it was time to build her a new bed. I didn't think she was quite ready for a full size yet so I thought a toddler size would work for at least the next year.

I started with the Traditional Toddler Bed plans and scaled down the size of the Rustic Headboard and incorporated that. The biggest thing I learned in the process was to measure your mattress first! I don't think I realized the size variation in crib mattresses and ended up having to recut my slats and rails to accommodate my larger mattress. Also, our mattress is 5 inches deep, which means that the safety rails only extend about an inch over the top of the bed. This seems to be fine for my daughter and she hasn't fallen out - yet - but I think if you have a very restless sleeper or just want to play it safe, you might want to add an extra inch or two to the height of the guardrails.

I also used a 2 x 6 for the foot rail as this allowed the legs to be inset further and gave it a more solid look on the bottom.

Estimated Cost
$60
Estimated Time Investment
Day Project (6-9 Hours)
Finish Used
Valspar Primer and 2 coats of Olympic Premium in Caruso
Recommended Skill Level
Beginner

Comments

square x coffee table

Submitted by Alongwell on Thu, 09/11/2014 - 06:41

I loved this table so much but needed it to be a lot larger. It's 9 2x6s wide X 54in.There are also 4 1x12s as the bottom shelf. I used the steel wool and vinegar as a finish and had to paint on some black tea also to get it to change color and then finished it with a few coats of poly. This table fits so great in my space I am super happy I found this site! 

Built from Plan(s)
Recommended Skill Level
Beginner

Kitchen island

Submitted by Anonymous (not verified) on Fri, 12/30/2016 - 11:27

Weekend project worked out well. Also made the tall bar stools also found on Ana White! Topped with a granite countertop. In the middle, I went with a double trash can sliding cabinet. 

Estimated Time Investment
Weekend Project (10-20 Hours)
Recommended Skill Level
Advanced

Comments

Small rustic x console

Submitted by nprice on Wed, 09/09/2020 - 12:05

First woodworking project. Made some mistakes but learned in the process. Satisfied with how it turned out considering it was my first project. Using it as a printer table for my home office.

Estimated Cost
I had to purchase some tools so estimating $40 for the lumber
Estimated Time Investment
Day Project (6-9 Hours)
Finish Used
Varathane stain in Expresso
Lacquer in Satin
Recommended Skill Level
Beginner

Clubhouse Bed - my first build

Submitted by dpeterson on Thu, 11/29/2012 - 19:32

So we wanted to build a simple twin size bed for our 5 year old son. That quickly expanded into my wife wanting me to build this PB replica (which happens to be her favorite kids bed). My response was "honey, you really don't understand my lack of ability." She insisted and after a couple of weeks the bed is done! Using Ana's plans made this not only doable but much easier than I thought (this was my first build).

We changed the design very slightly because the original was a few inches too tall (we have a ceiling fan that would have hit the top). We simply shortened the top half of the bed by 3 inches. At the suggestion of a friend (who's mitre and table saws we used for the cuts) we used dado instead of pocket holes for the stairs. We also used a lot of countersinking instead of pocket holes (for example to attach the vertical slats on the side walls).

We bought the cheapest wood we could get at Home Depot. All the wood and stain and materials cost about $250-300 (I still haven't checked the receipts exactly). However, I was told (quite sternly) that I severely overpaid for the wood by not going to a lumber yard. We used a Minwax oil-based stain (mission oak). We only did one coat.

Now that we're done with this we can't wait to get started on the next project (right after I get my dissertation going).

Built from Plan(s)
Estimated Time Investment
Week Long Project (20 Hours or More)
Finish Used
Minwax oil-based stain - Mission Oak, single coat applied using rags.
Recommended Skill Level
Intermediate

Comments

5 tator tots (not verified)

Fri, 12/07/2012 - 18:22

I've been wanting to build this for our youngest son. He will be three before we make it and the fact that it is enclosed makes me comfortable with having him in a lofted bed, but it also looks like changing the bedding would be really challenging. Seeing your picture smoothing the quilt begs the question, how hard is it?

Nice work on the bed-what a first project!