Community Brag Posts


Address Sign
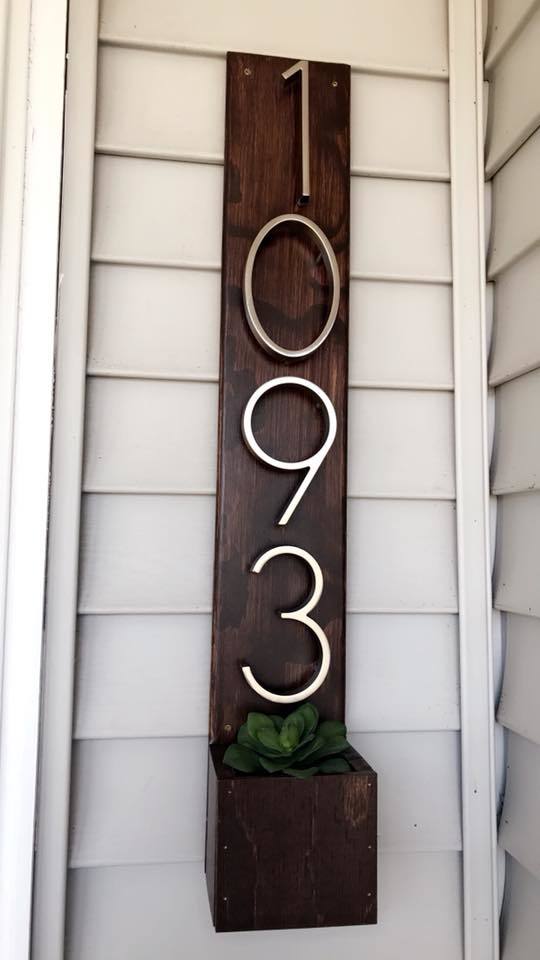
Address Sign
Built from Plan(s)
Estimated Time Investment
An Hour or Two (0-2 Hours)
Recommended Skill Level
Beginner
Planter Box
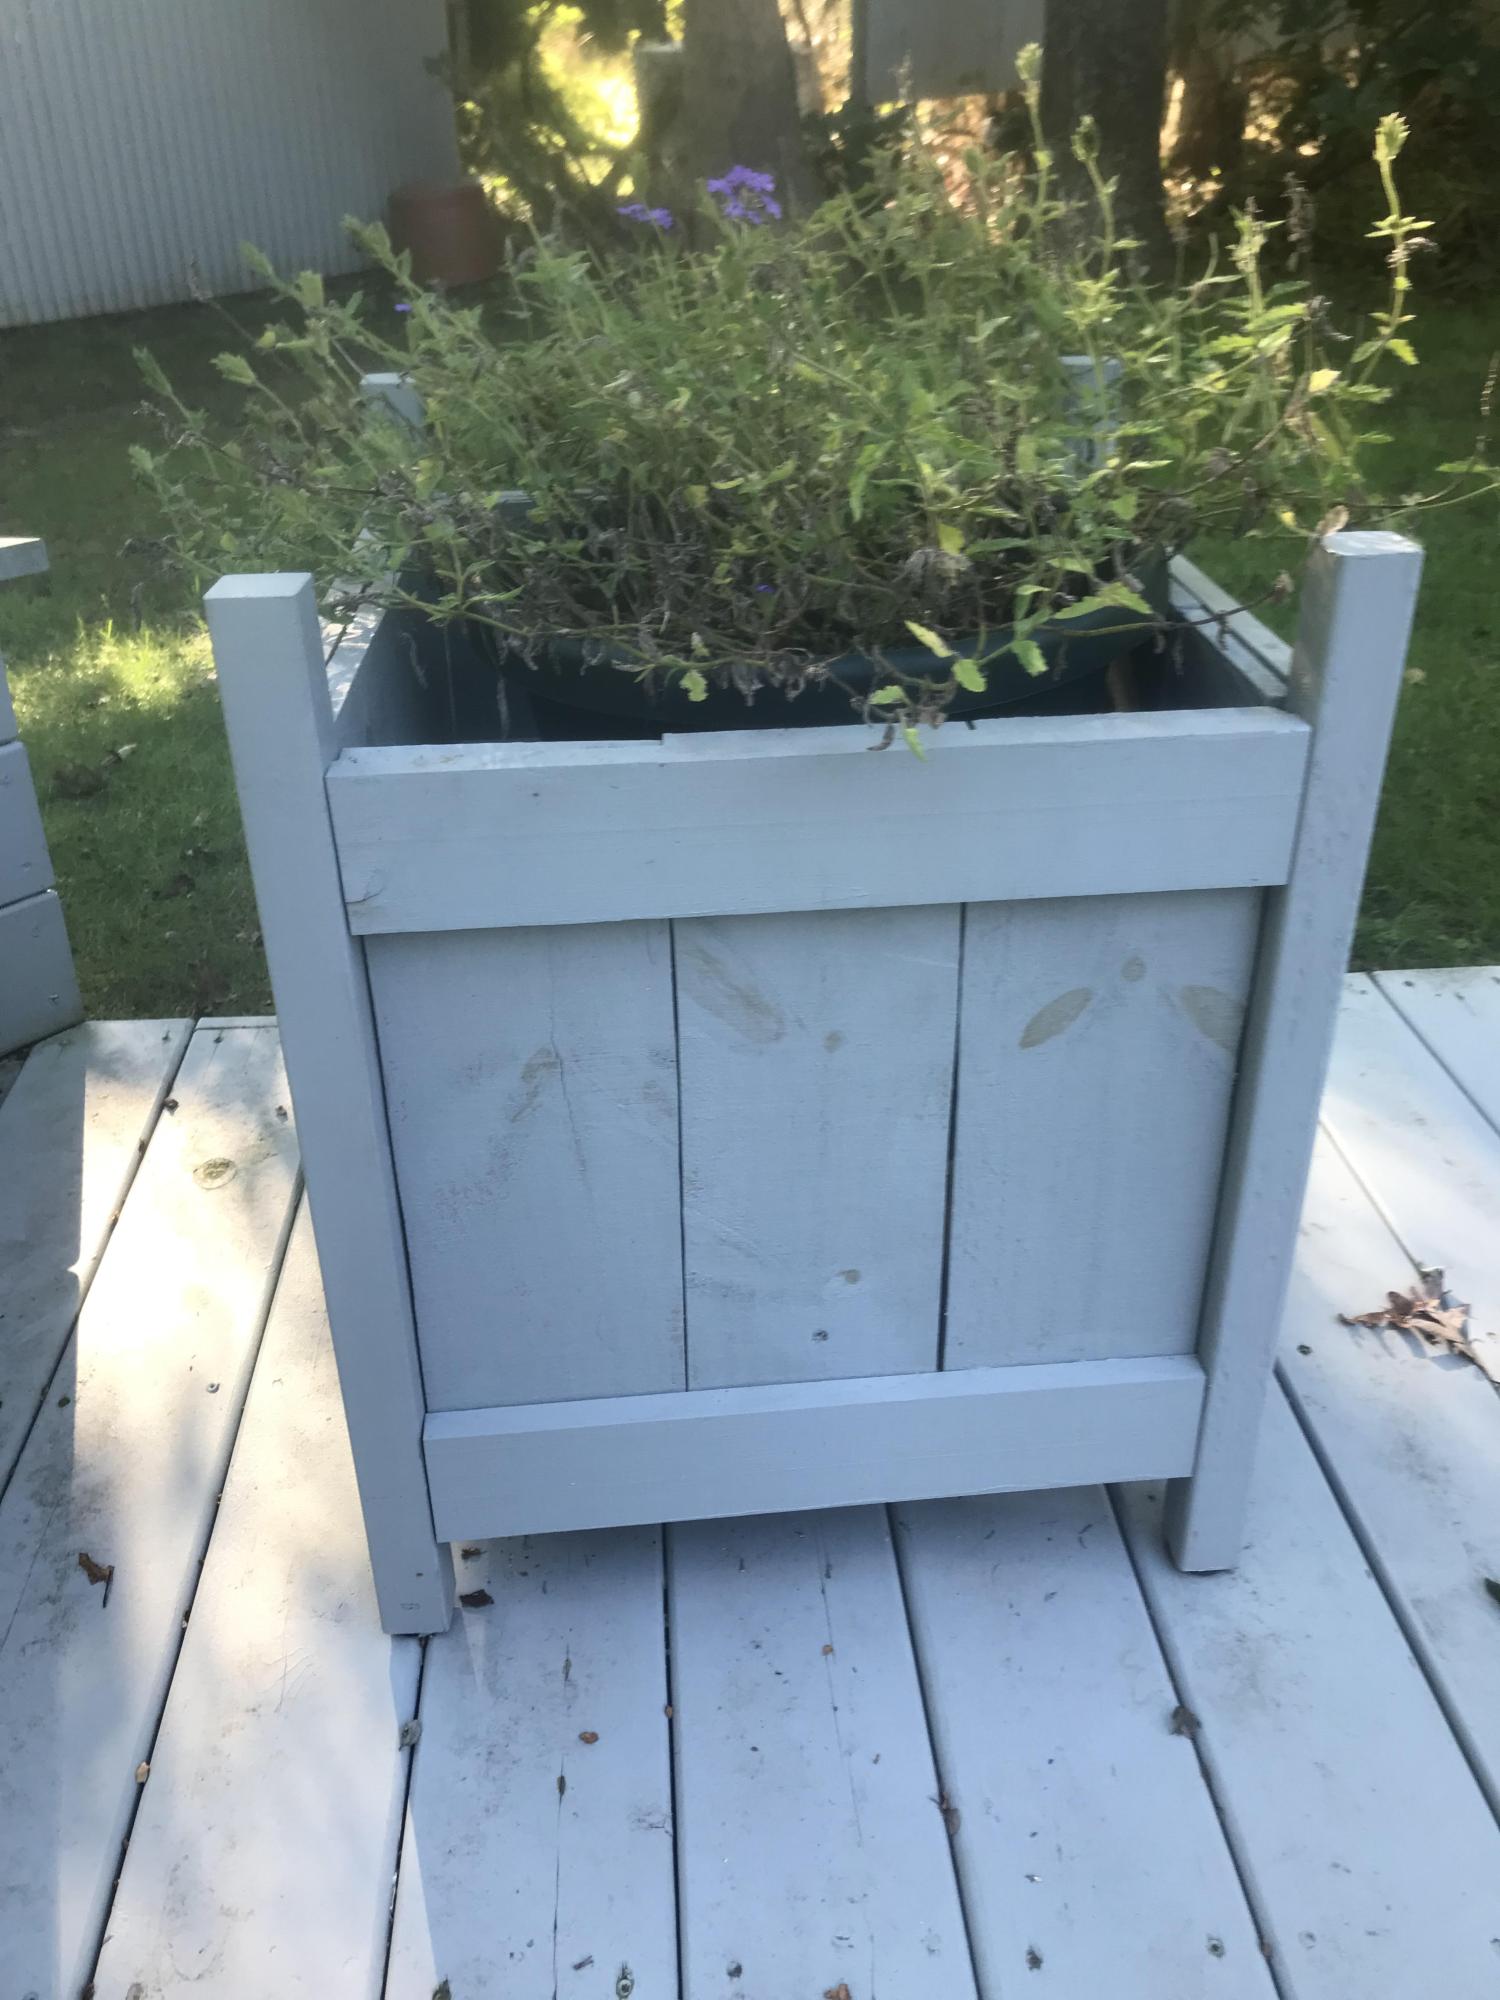
Planter box by Harvey!
Built from Plan(s)
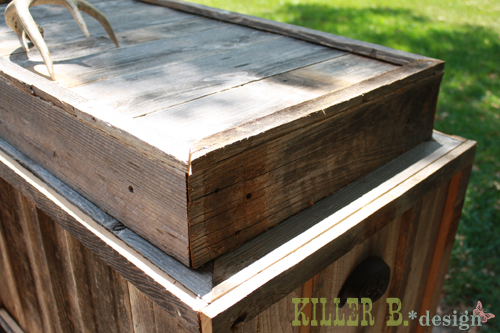
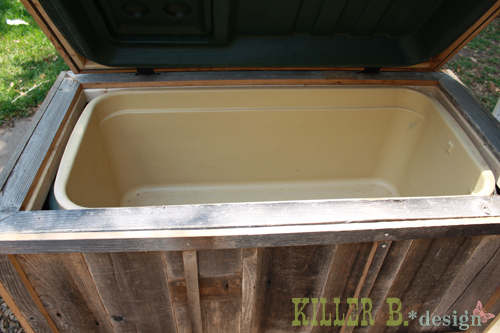
Rustic Cooler

My father gave us a whole mess of reclaimed barnwood that a neighbor had given to him, and I knew just what to do with it! My husband had an old cooler that would be the perfect size to create a rustic cooler case from. We built a frame out of 2x2's, faced it with the old wood (which looked like old cedar fence pickets) and popped the cooler inside. I've got a whole step-by-step on my blog. Love the way this turned out! We used an antler shed to make the lid handle, and bought some great rustic looking handles for the sides, as well as an old rustic bottle opener. Can't wait to see it in action!

Estimated Cost
$30
Estimated Time Investment
Afternoon Project (3-6 Hours)
Finish Used
None, keep it looking weathered!
Recommended Skill Level
Beginner
Comments

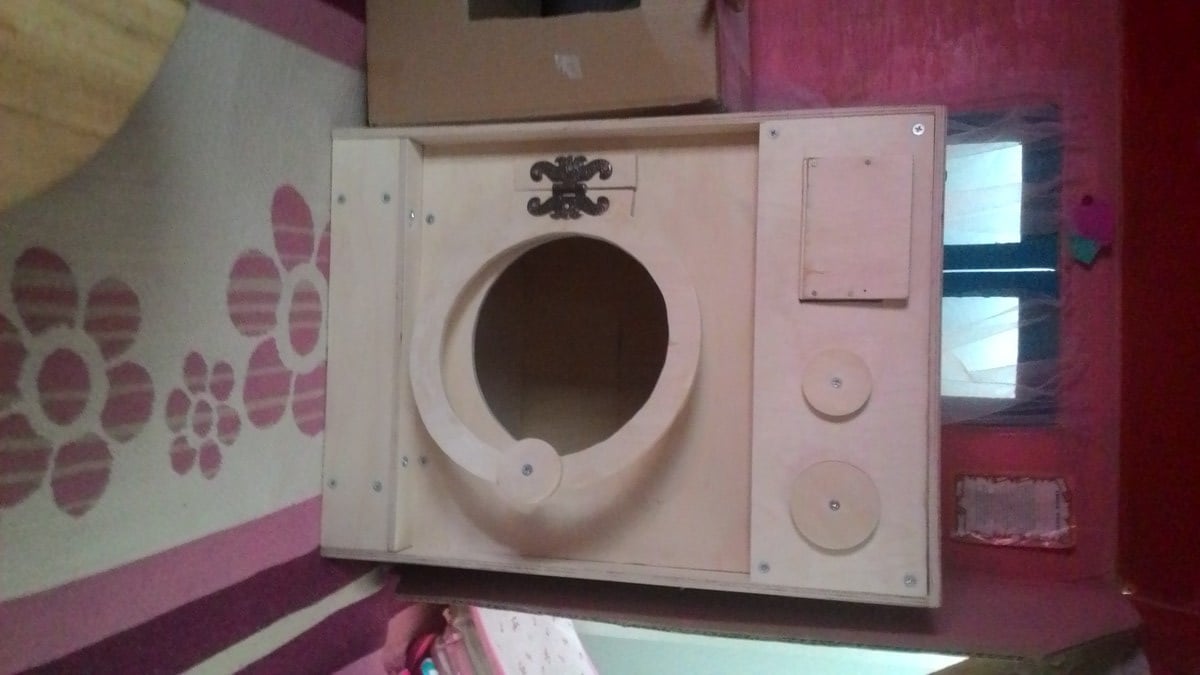
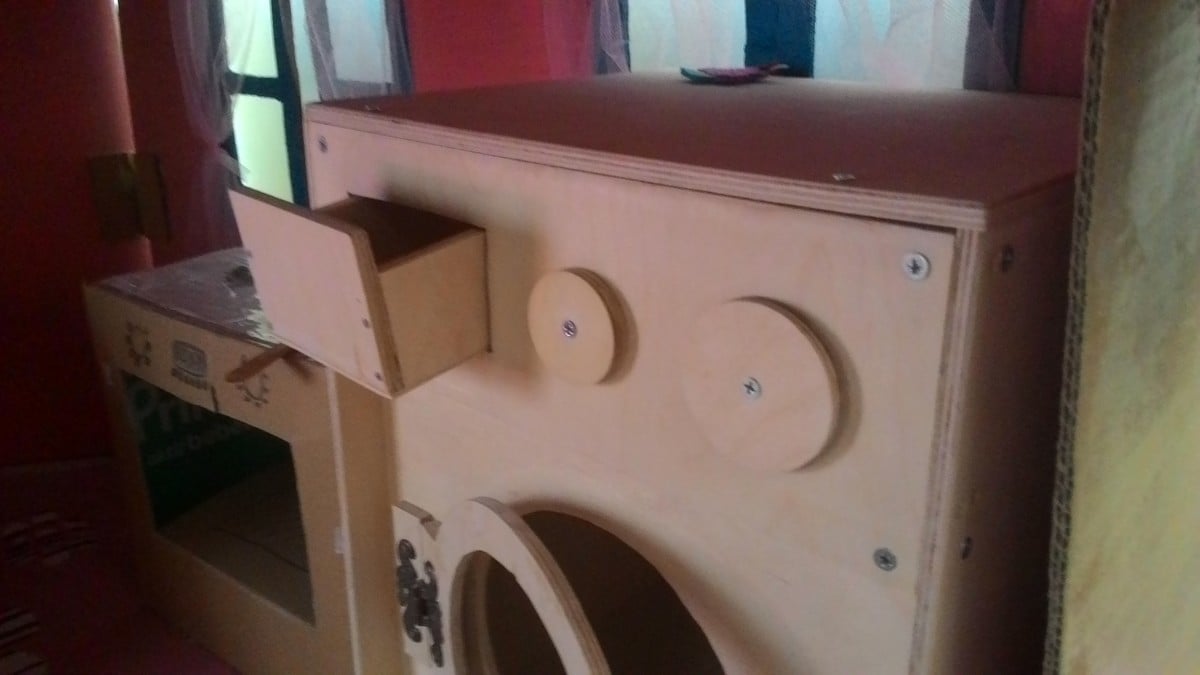
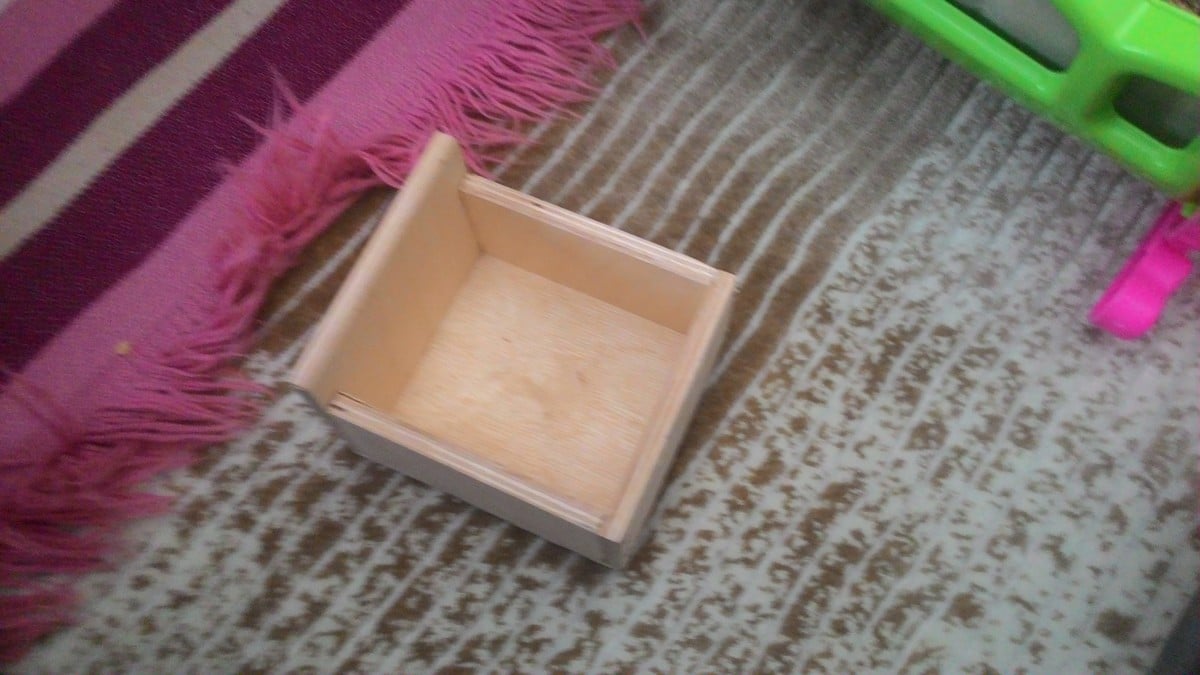
sweetpea bed
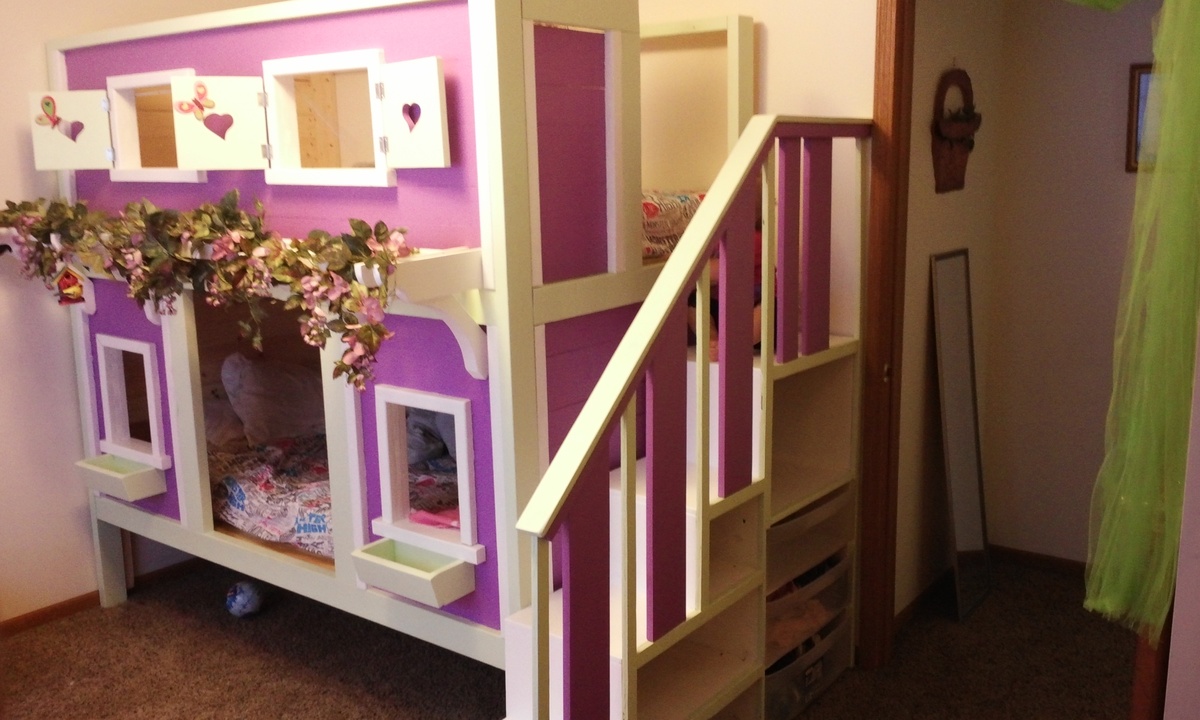
I made this for my 2 young daughters. They love it.
Built from Plan(s)
Estimated Cost
$800?
Estimated Time Investment
Week Long Project (20 Hours or More)
Finish Used
Paint from lowes. I suggest spraying as you cut. The longest part of the pro jest was painting after I built this.
Recommended Skill Level
Intermediate
Comments

Fri, 08/02/2013 - 10:38
staircase
HI! Great Job! i hope mine turns out just as nice! i have a question. how wide did you make the stairs on yours im looking to make my staircase narrower to fit in my spot but i wanna make sure i dont make them too narrow but yours looks perfect!
In reply to staircase by eliseaurban
Sun, 12/21/2014 - 09:31
I'm so sorry that I never
I'm so sorry that I never answered you. I built the steps 14 inches wide. I had to make them more narrow than I had wanted because of the doorway. They ended up perfect for the kids though.

Sat, 10/03/2015 - 08:11
Inspiración!
Hola Ana White, tu inspiras a hacer cosas increibles. Gracias por el tiempo que dedicas a inspirarnos!
X coffee table
X coffee table
Finish Used
Finish was a mixtures of Minwax weathered grey and a little of Minwax ebony
Recommended Skill Level
Beginner
Comments
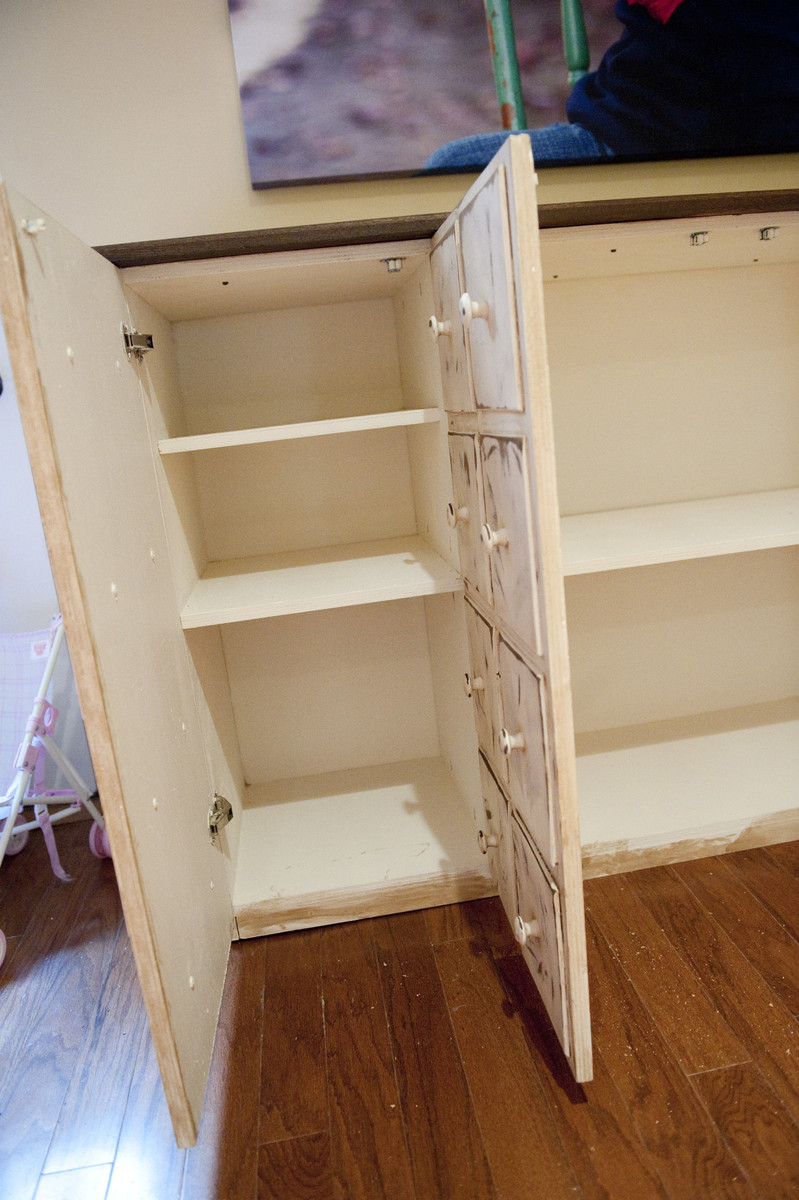
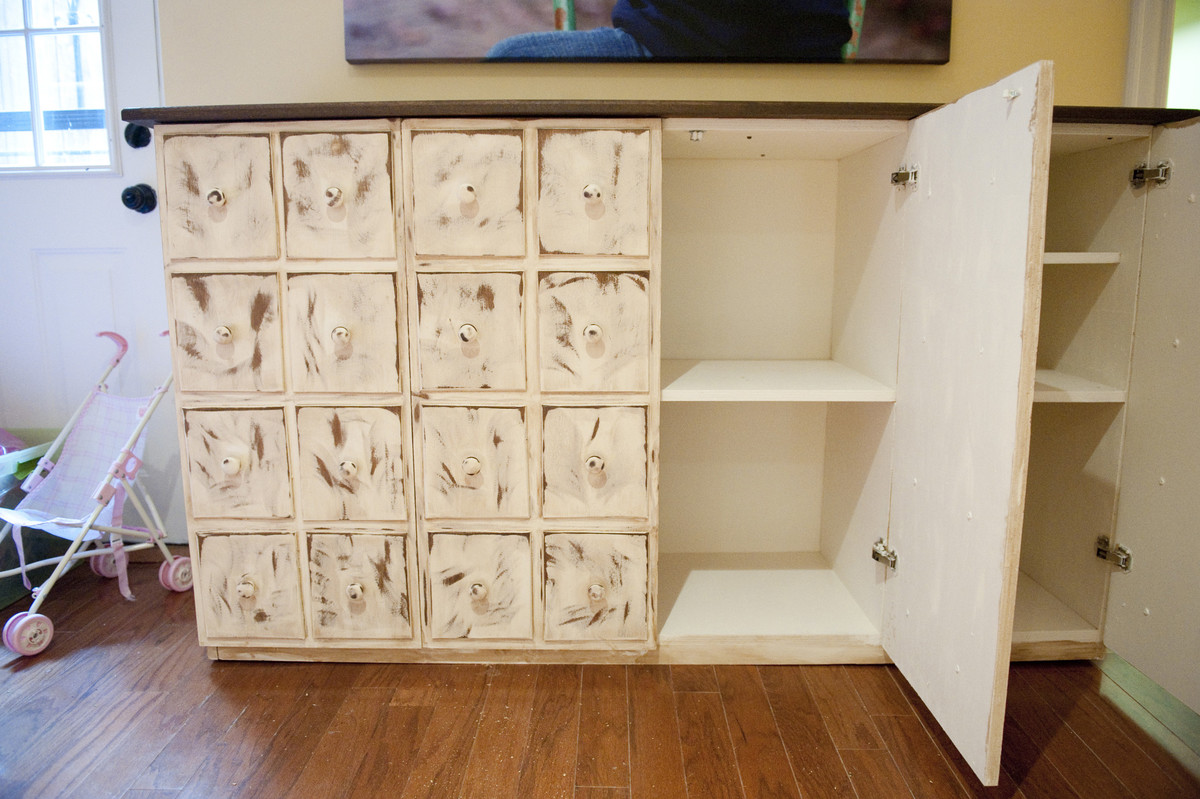
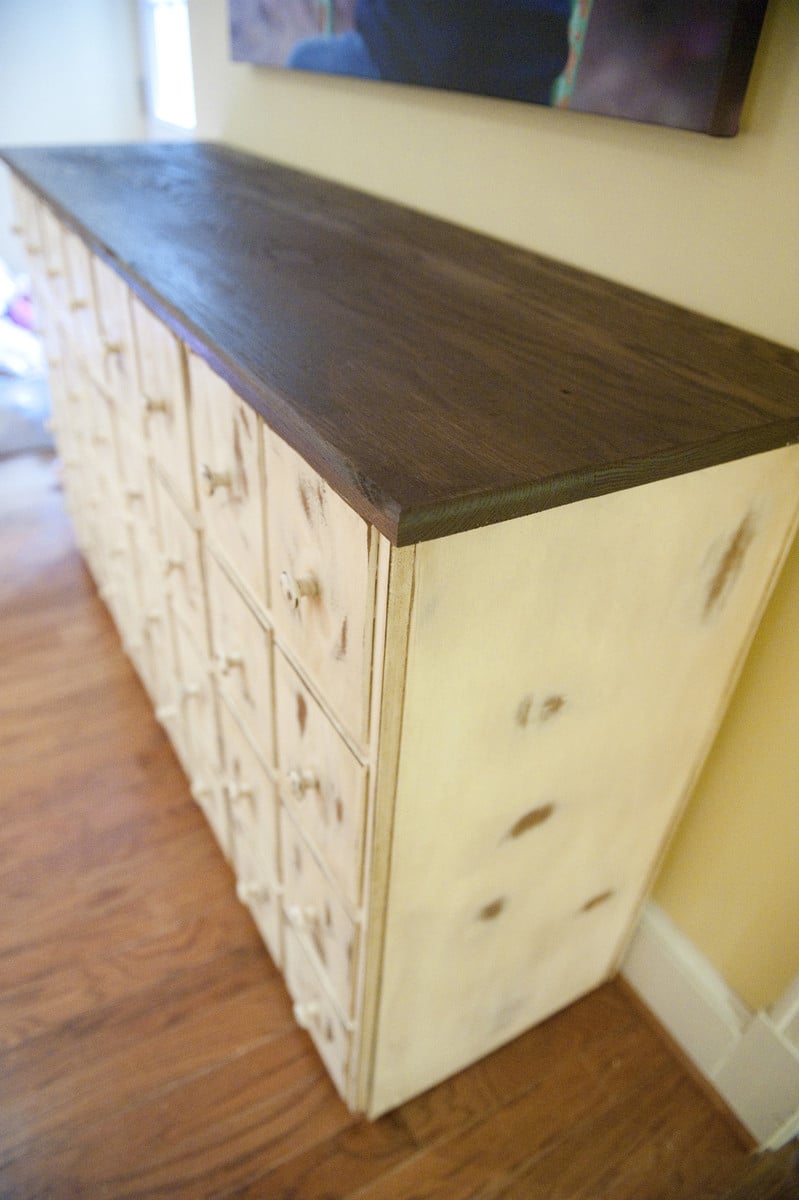
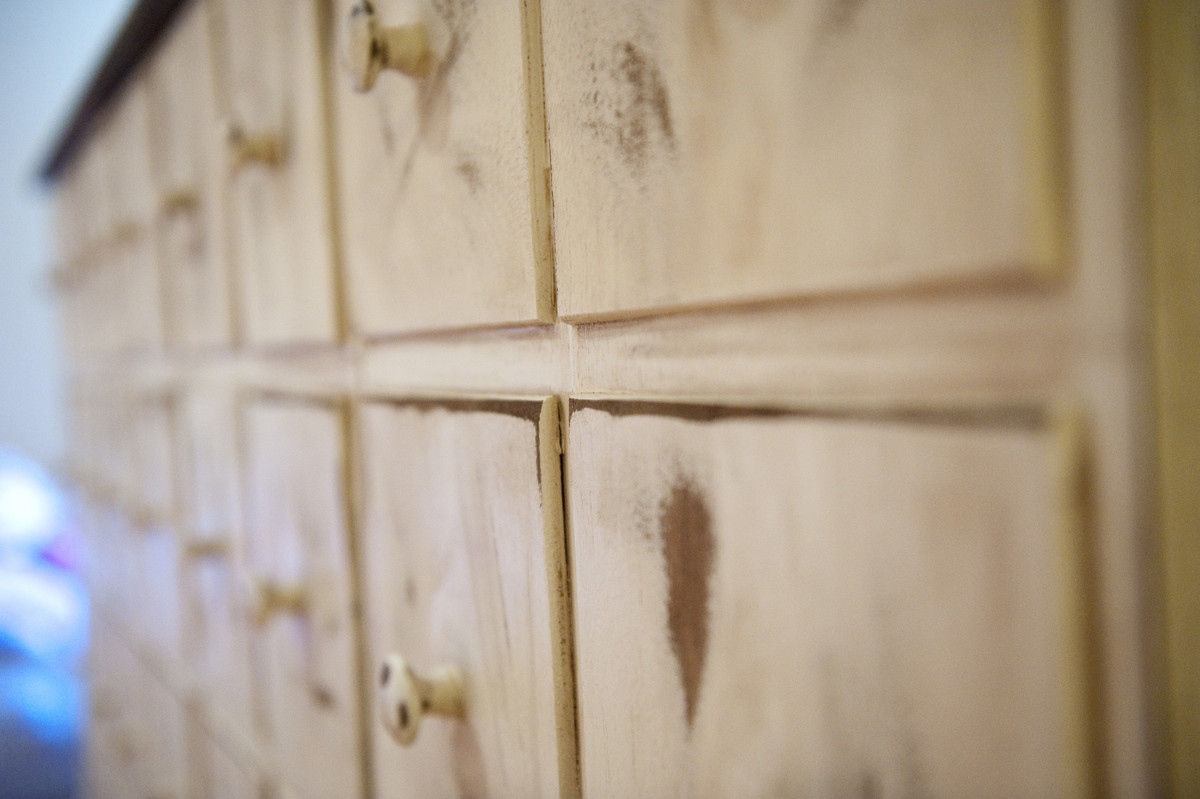
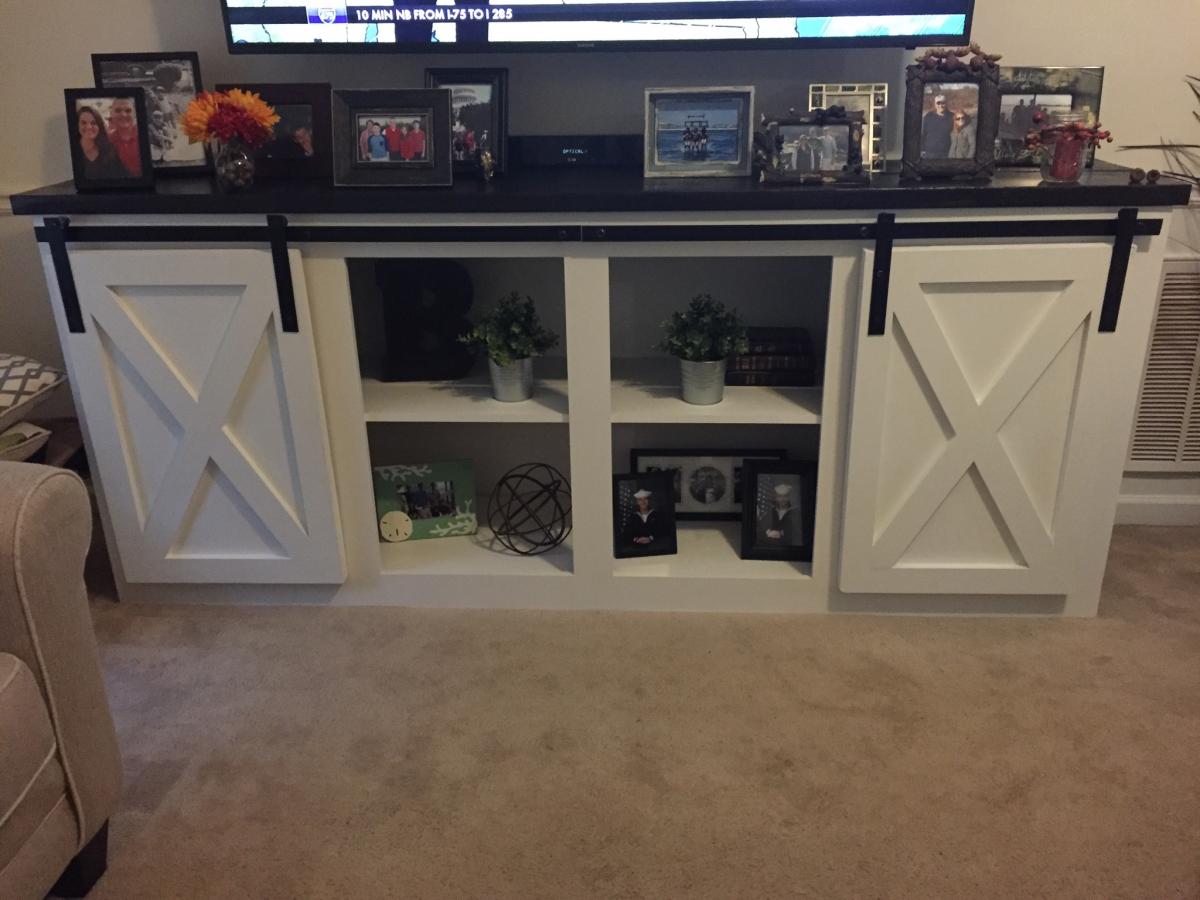
Apothecary Storage Console with full overlay doors
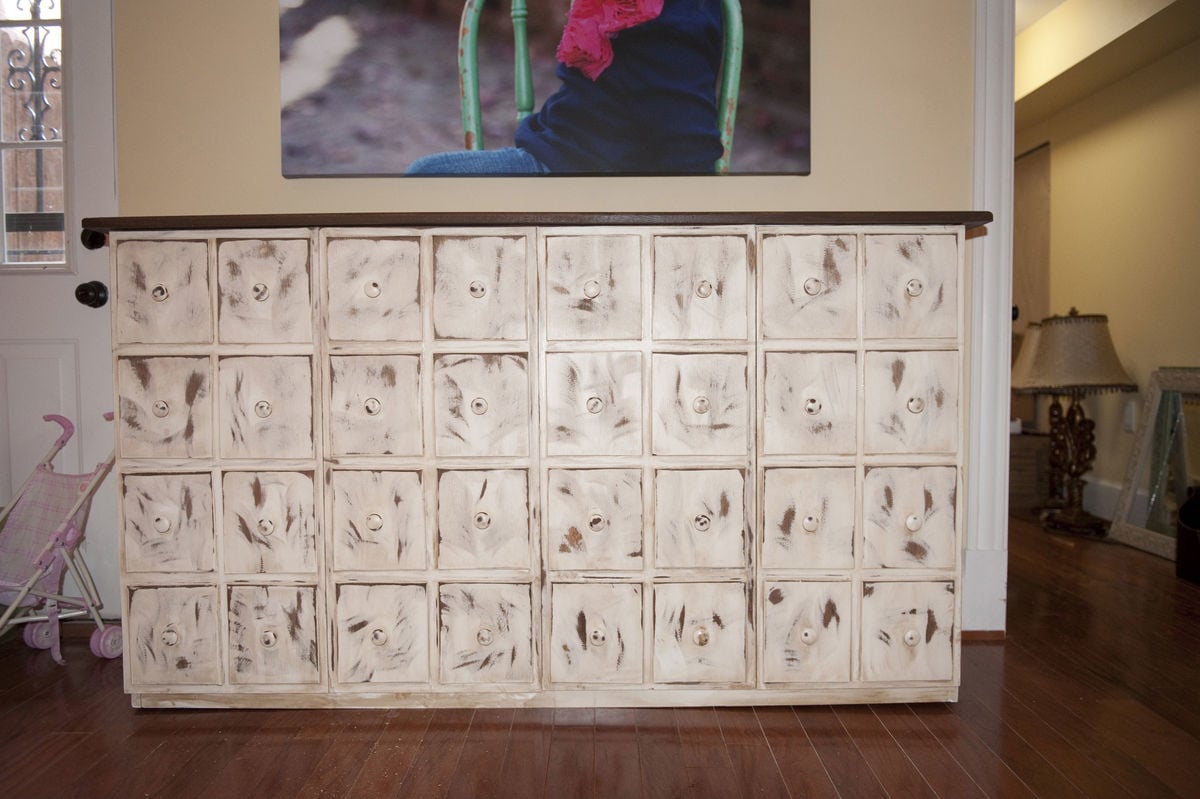
I liked the apothecary plans and loved the look. My wife really liked it and needed somewhere for our daughter to keep her toys. For our anniversary I told her I would redesign it and make it as she liked. This is what we came up with and I think it turned out great. We used full overlay door to prevent the visible lines on the original and are really happy with the results.

Built from Plan(s)
Estimated Cost
250-300
Estimated Time Investment
Week Long Project (20 Hours or More)
Finish Used
We used Aura in "Collector's Item", Two coats then sanded it quite a bit. Then glazed with Min-wax in English Chestnut. For the top we beat it with a hammer and some chains to distress it then stained with Pecan.
Recommended Skill Level
Intermediate
Comments
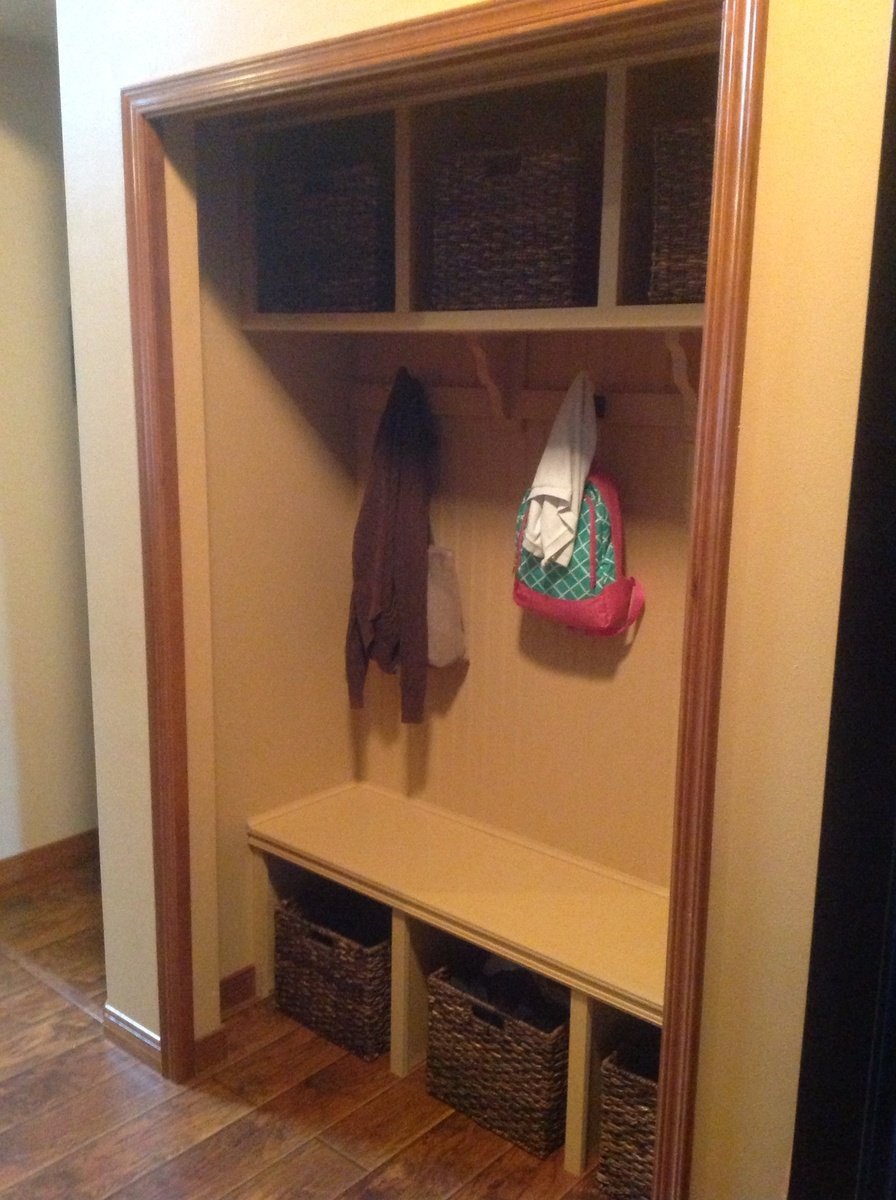
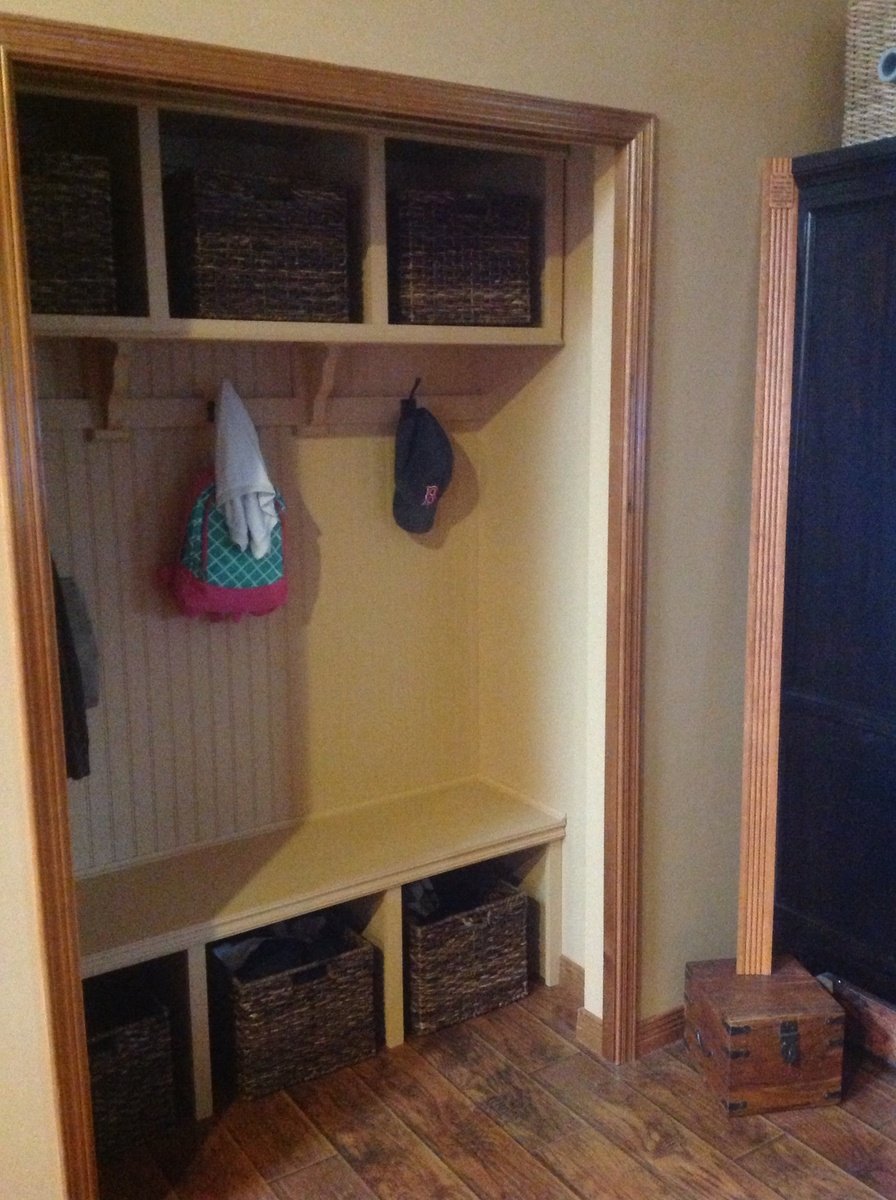
Closet mud room
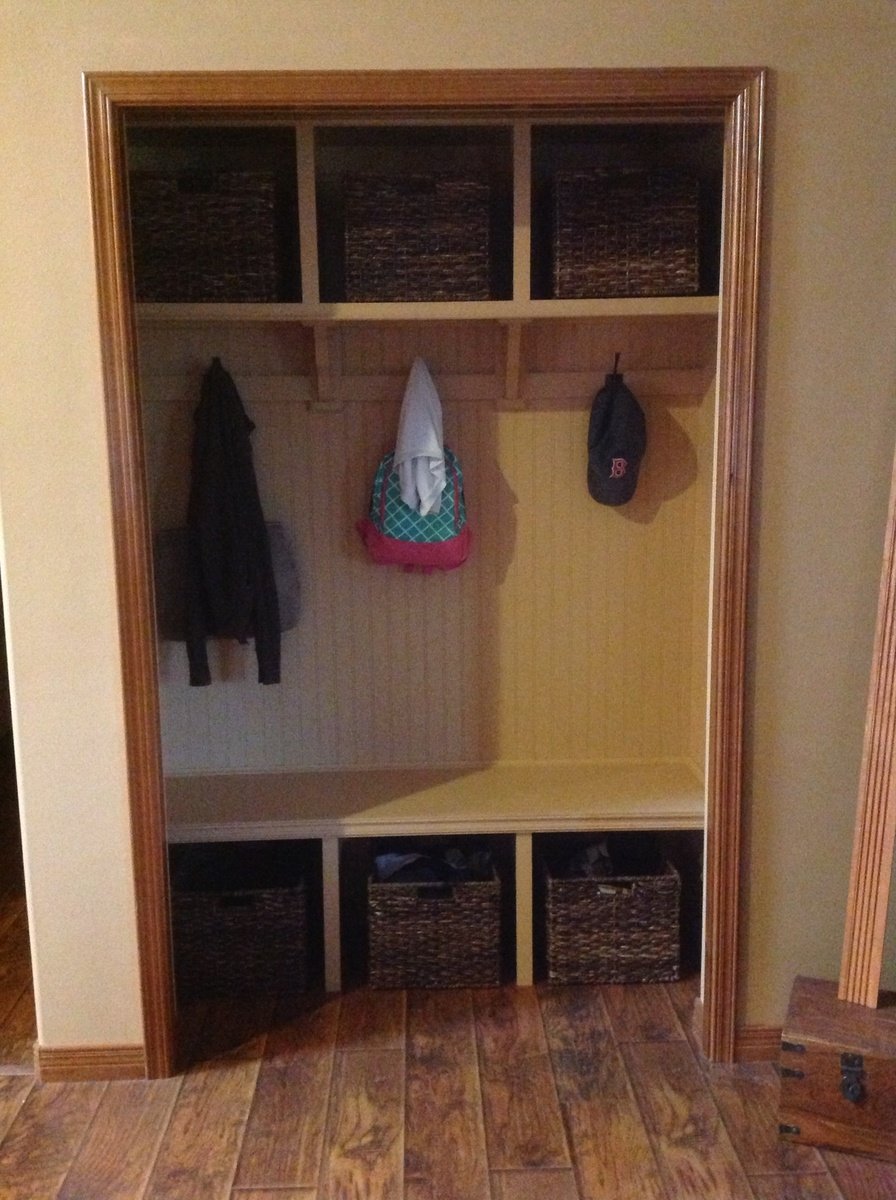
We were replacing the floors in our house so we decided to build a closet mud room. We used the plans for the smiling mudroom and altered them slightly. We didn't end up building the partitions because the left and right seats would have been too closed in. We installed bead board on the back wall and used moulding on the shelf and bench. The only hard part was that we had to actually assemble the shelves and bench in the closet because they wouldn't have fit in once built! The Kreg Jig was extremely helpful and well worth the purchase.
Built from Plan(s)
Estimated Cost
$150
Estimated Time Investment
Weekend Project (10-20 Hours)
Finish Used
Paint / Matte Polyurethane
Recommended Skill Level
Beginner
Comments
Thu, 01/02/2014 - 13:37
Converting closet to mudroom
I am going to do this in our laundry room which you walk into from the garage - what do you suggest doing when you remove the doors for the current closet? I do not want to install all new trim since that was just done recently, before the mudroom idea came! Thanks!
Secretary Cabinet
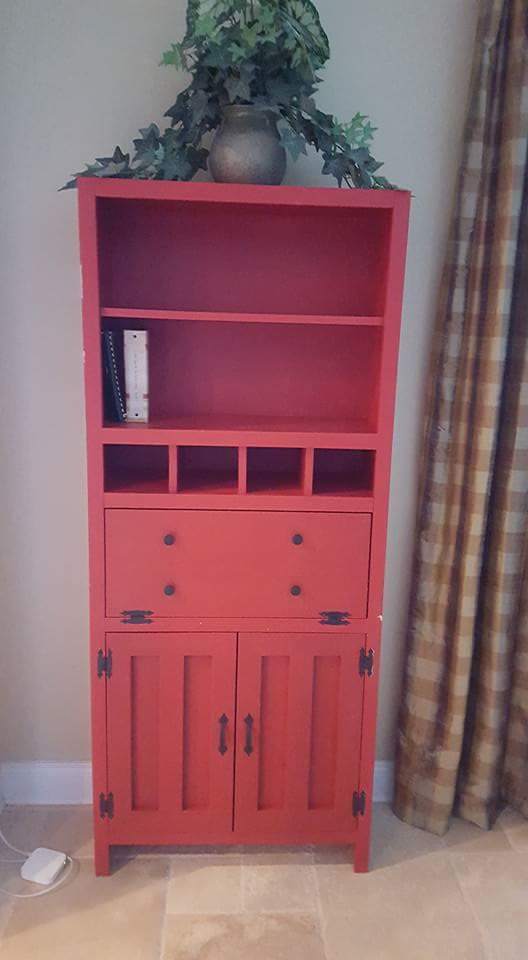
I built this cabinet as a Christmas present for my mom, but life got in the way and I just got around to finishing it this week. It didn't helo that I was just learning my way around a Kreg Jig when I started this project. I used 1x12 dimensional lumber from lowes, and went with the cheap stuff. Looking back I would have just splurged on purebond 3/4" plywood because the boarda would have been smoother but at the time I didn't have my rip cut saw attachment. Instead of the euro secretary hinges I used short pieces of chain attached with eye screws for the drop down door, and I like the look and ease of the rustic black hinges versus the euro style for the doors.
Built from Plan(s)
Estimated Cost
$100
Estimated Time Investment
Day Project (6-9 Hours)
Finish Used
Valspar fabulous red in satin
Recommended Skill Level
Beginner
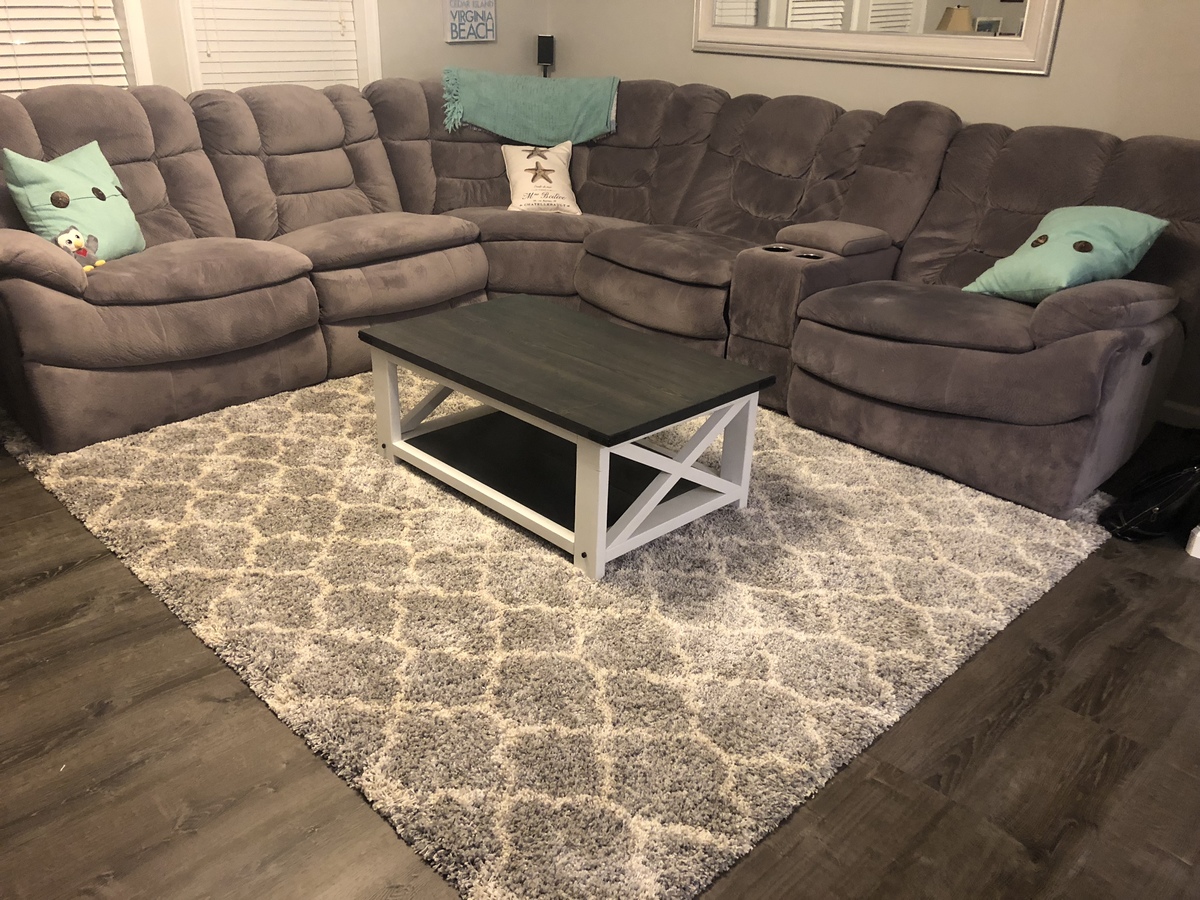
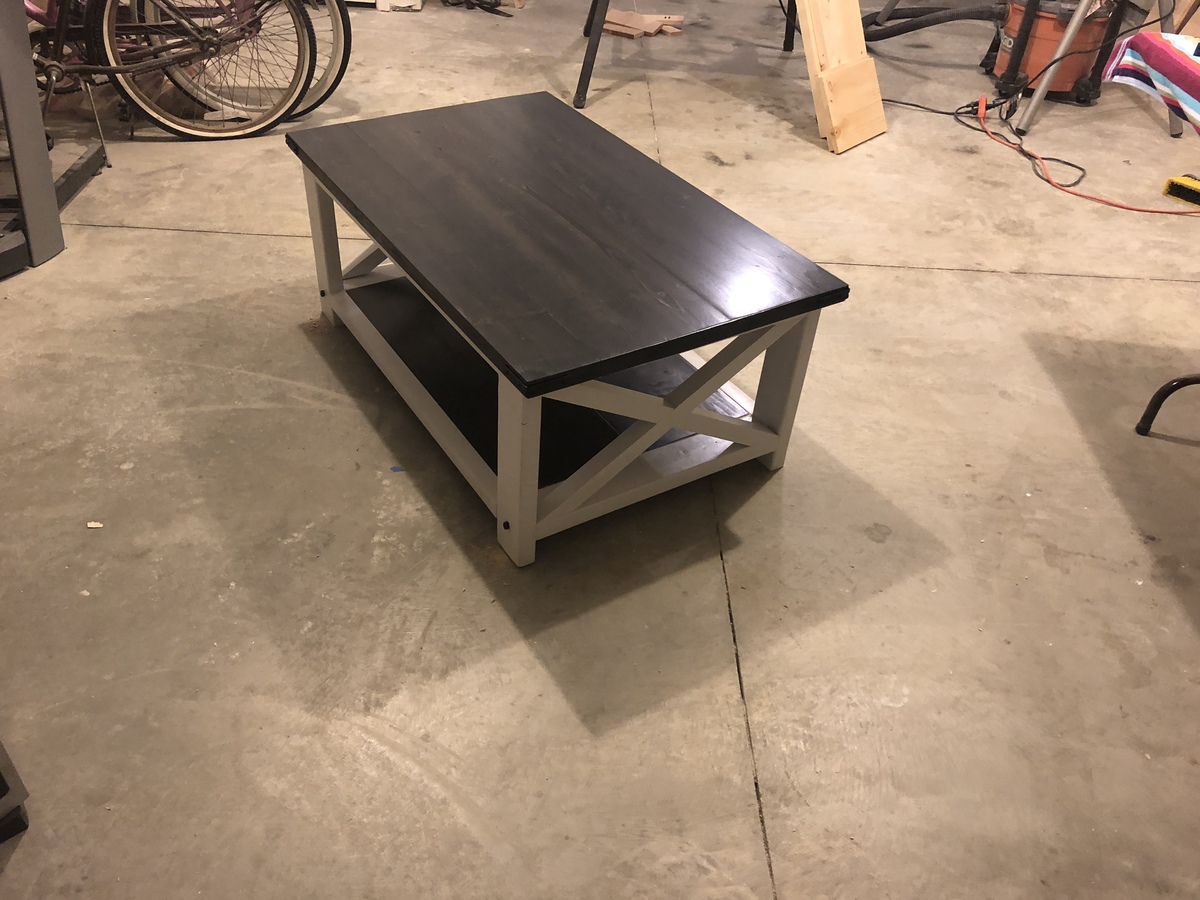
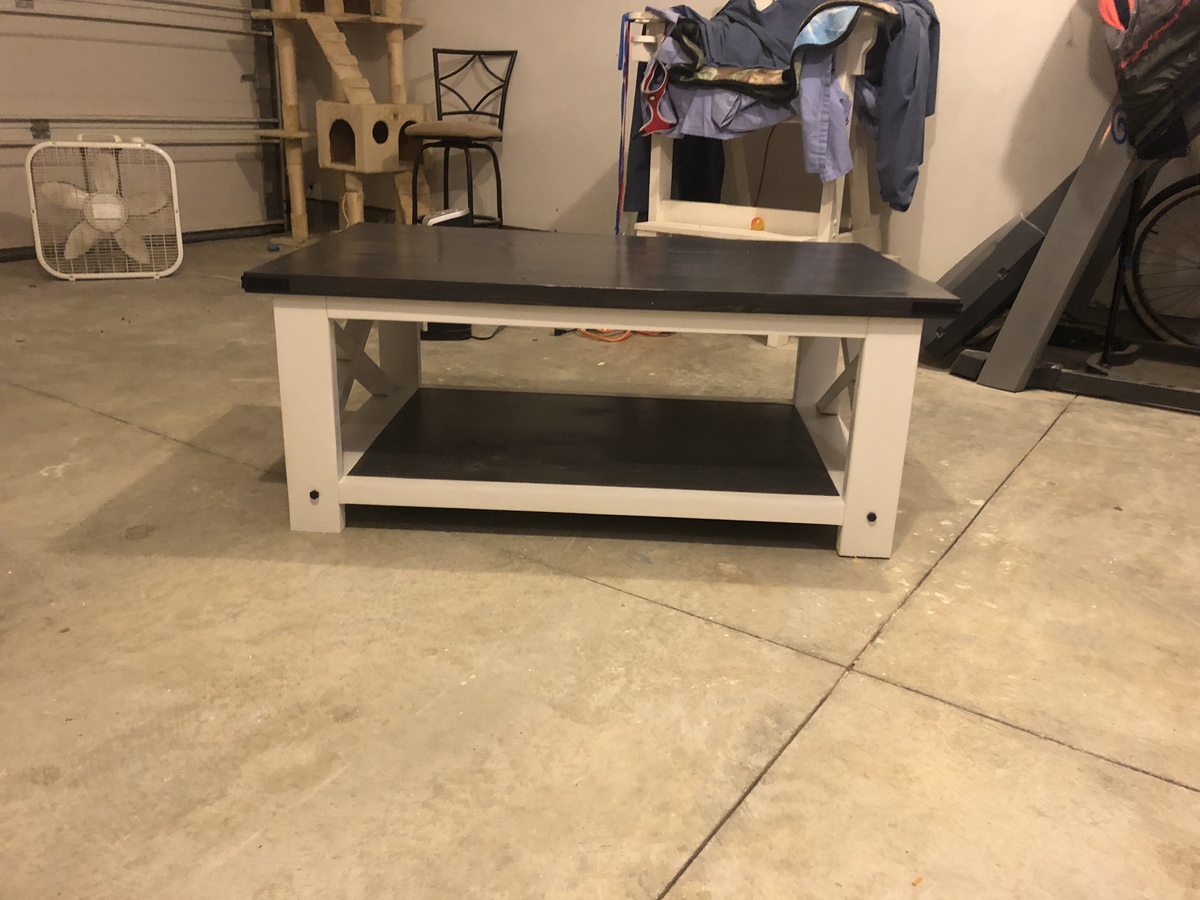
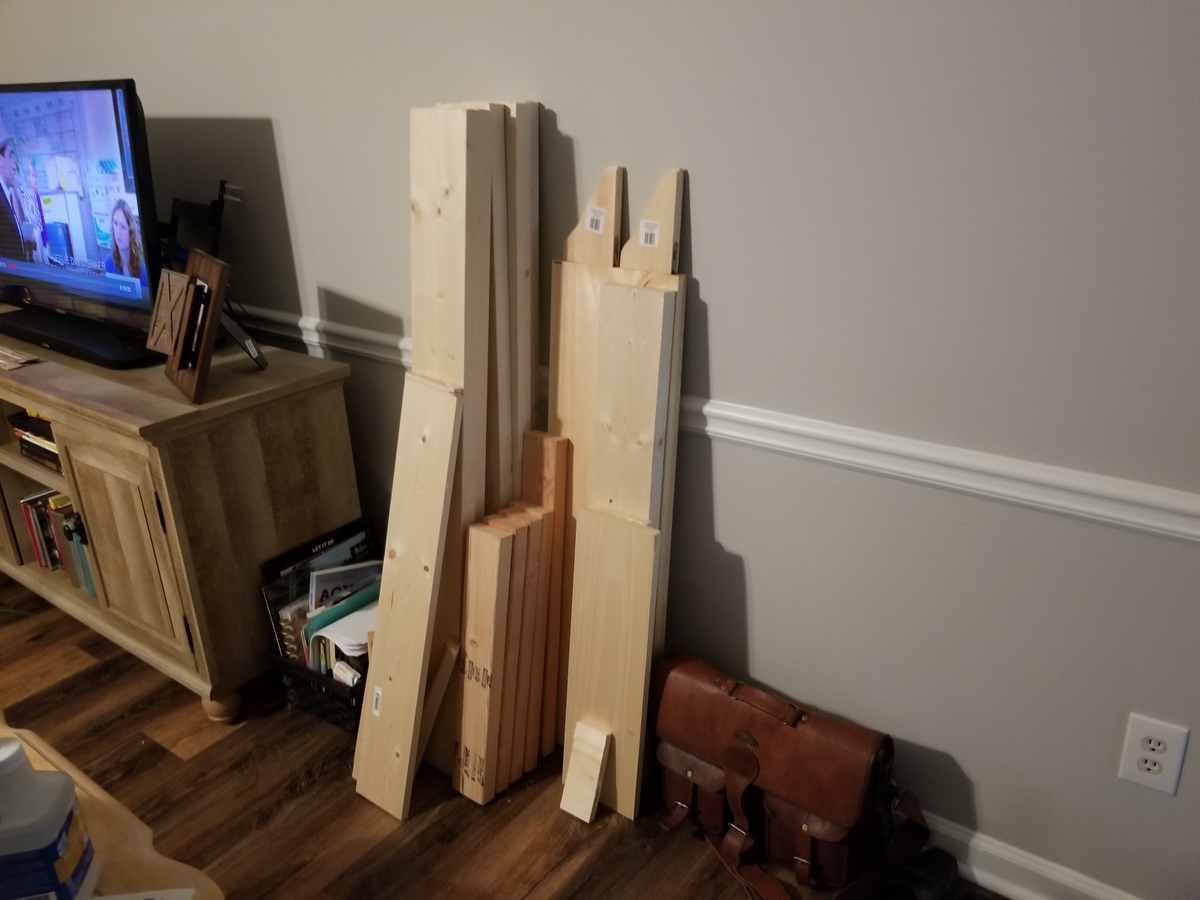
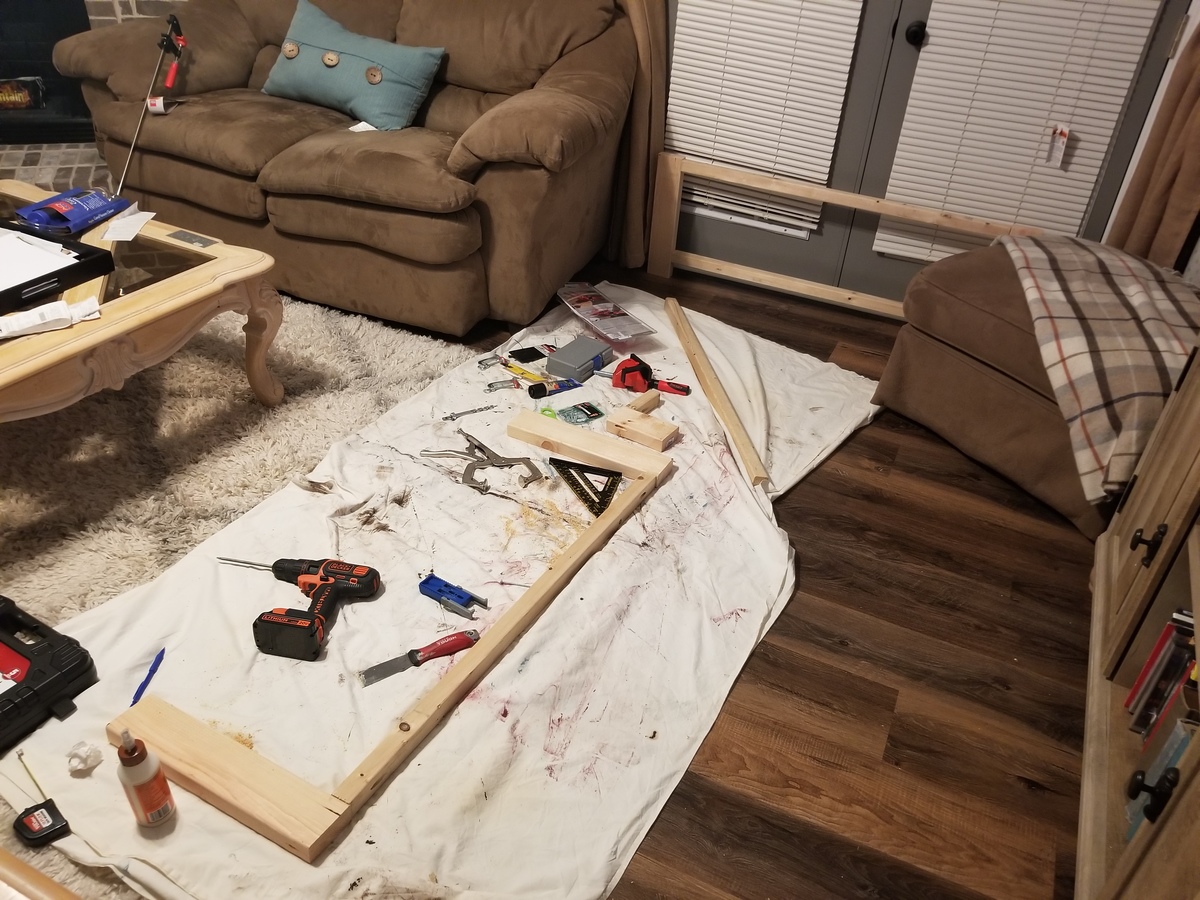
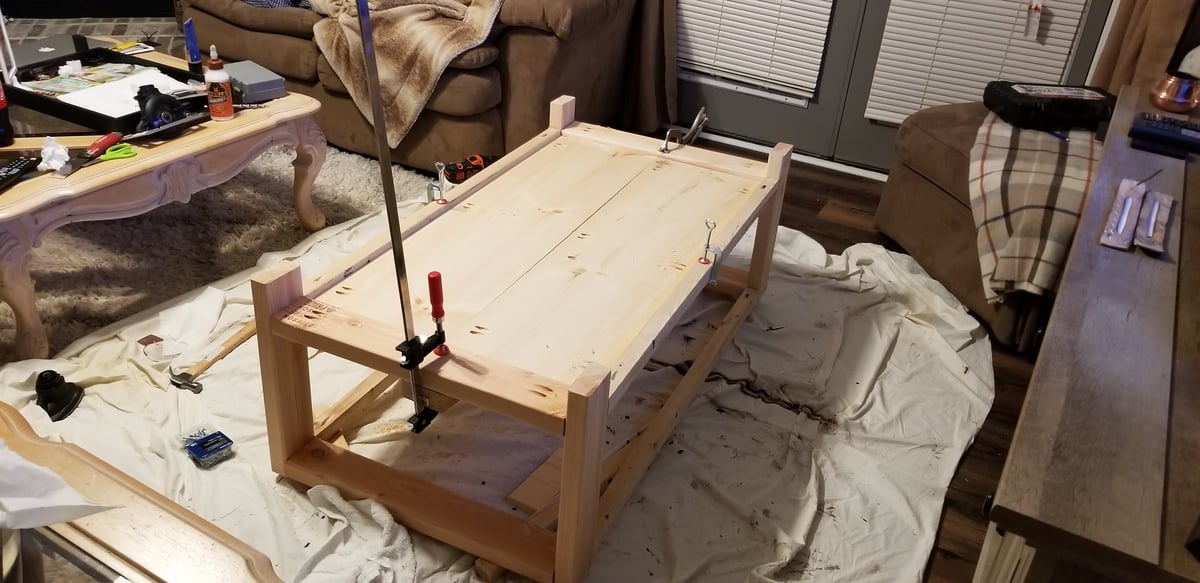
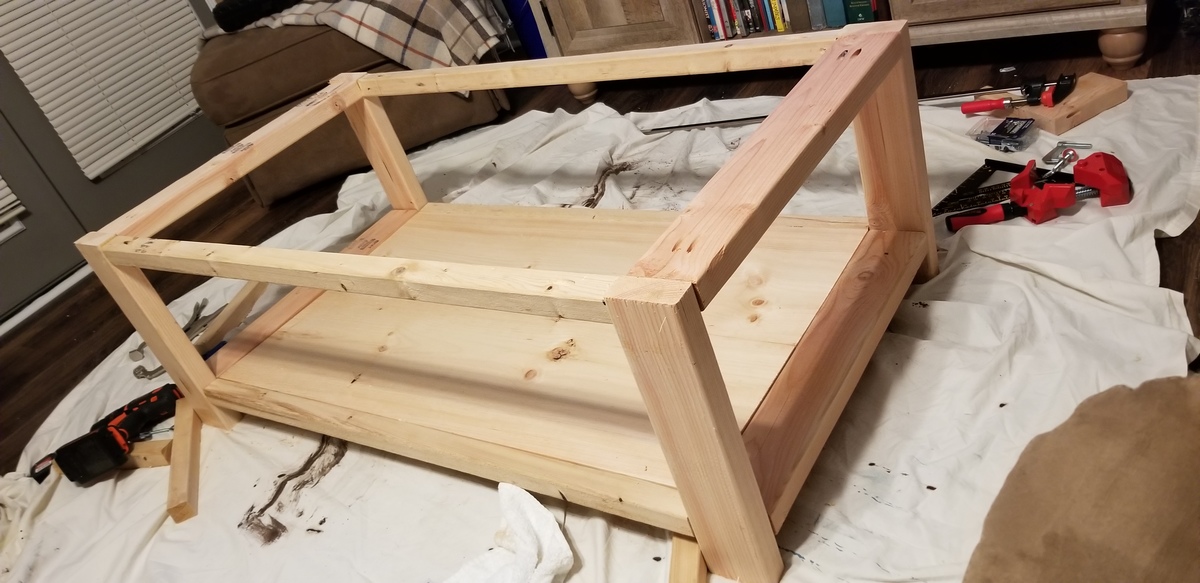
Rustic X Coffee Table
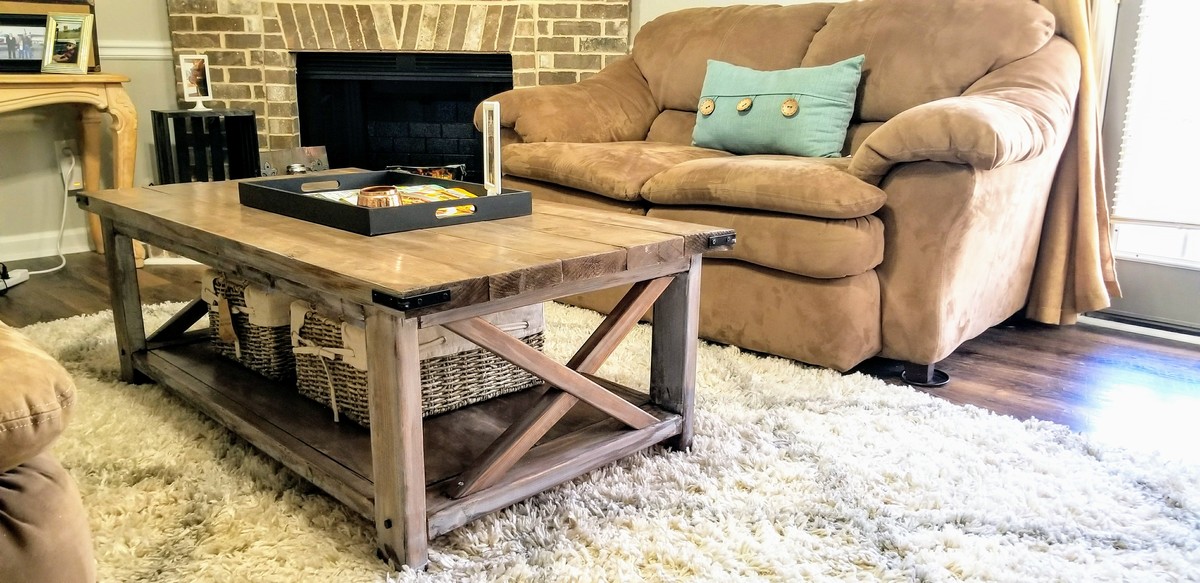
This was my first ever attempt at making something real out of wood. I've only made some really basic floating coat hangars and docorative rustic pieces to set around peoples houses and a spice rack. I really wanted more of a challenge and this was a perfect place to start. I had to purchase the Kreg Jig and a couple of large clamps but once I got the hang of drilling and filling pocket holes it was smooth sailing.
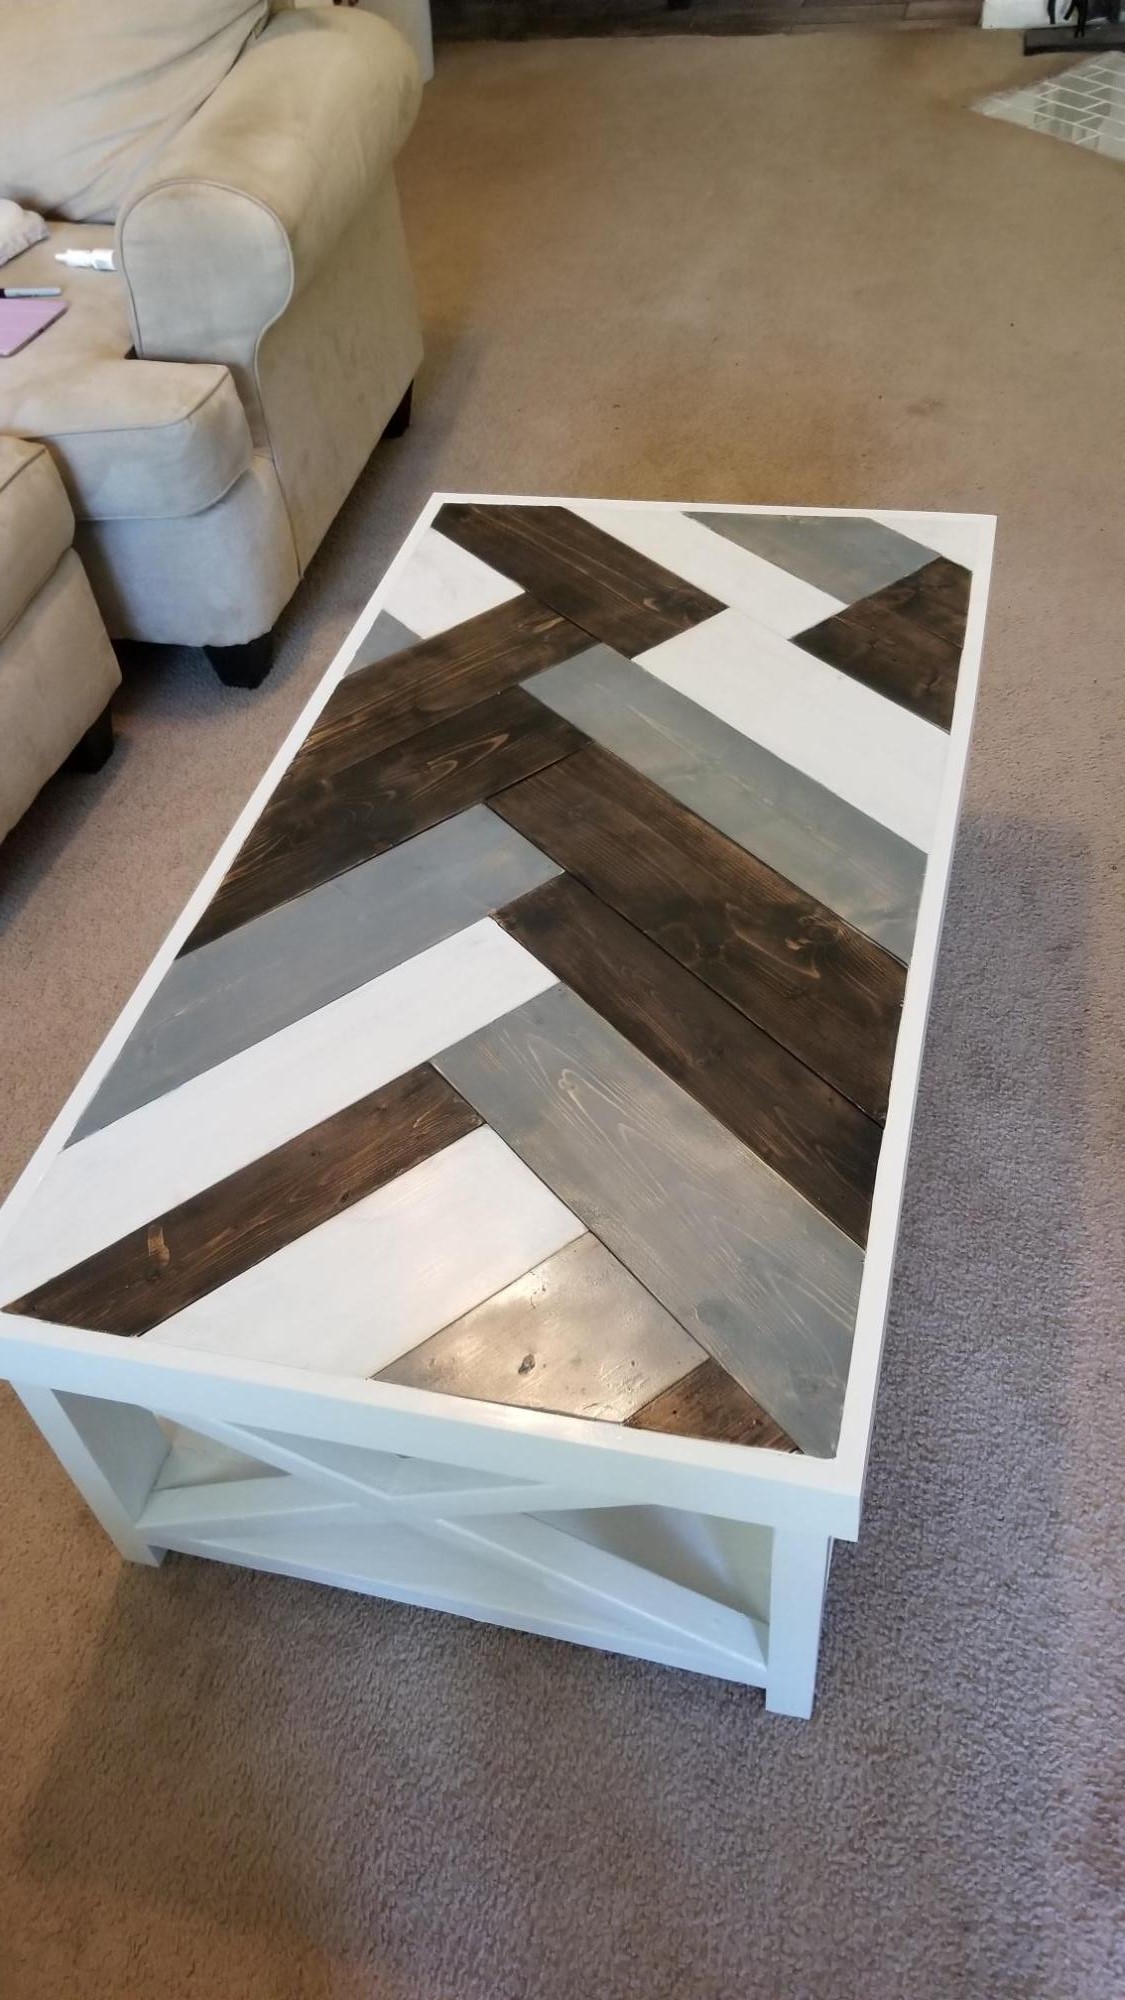
The Mrs then finished it off with some lovely rustic baskets and a serving tray with all the latest Southern Living magazines.

Built from Plan(s)
Estimated Cost
$39.97 - Kreg Pocket Hole Jig Model R3
~$60 - various cuts of wood, Home Depot made this easy and cut it all to size for me when purchased. (other than the angled cuts)
$7 - Speed square (for the angled cuts)
$10 -100 count pack of 2 1/2" pocket hole screws & 100 count 1 1/2" pocket hole screws
$7 - Foam brushes
__________________________________
Total: $123 w/some spare wood
Estimated Time Investment
Weekend Project (10-20 Hours)
Finish Used
5 layers of stain are applied in the following order:
1st - Miniwax Dark Walnut
2nd - Varathane White wash Pickling
3rd - Miniwax Classic Gray
4th - Miniwax Dark Walnut (Wiped off almost as fast as it was put on)
5th - 2 coats of clear gloss.
1st - Miniwax Dark Walnut
2nd - Varathane White wash Pickling
3rd - Miniwax Classic Gray
4th - Miniwax Dark Walnut (Wiped off almost as fast as it was put on)
5th - 2 coats of clear gloss.
Recommended Skill Level
Intermediate
Farmhouse Projects
Projects by Michael!
Built from Plan(s)
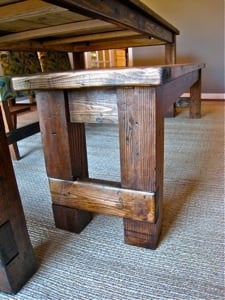
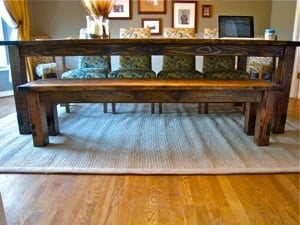
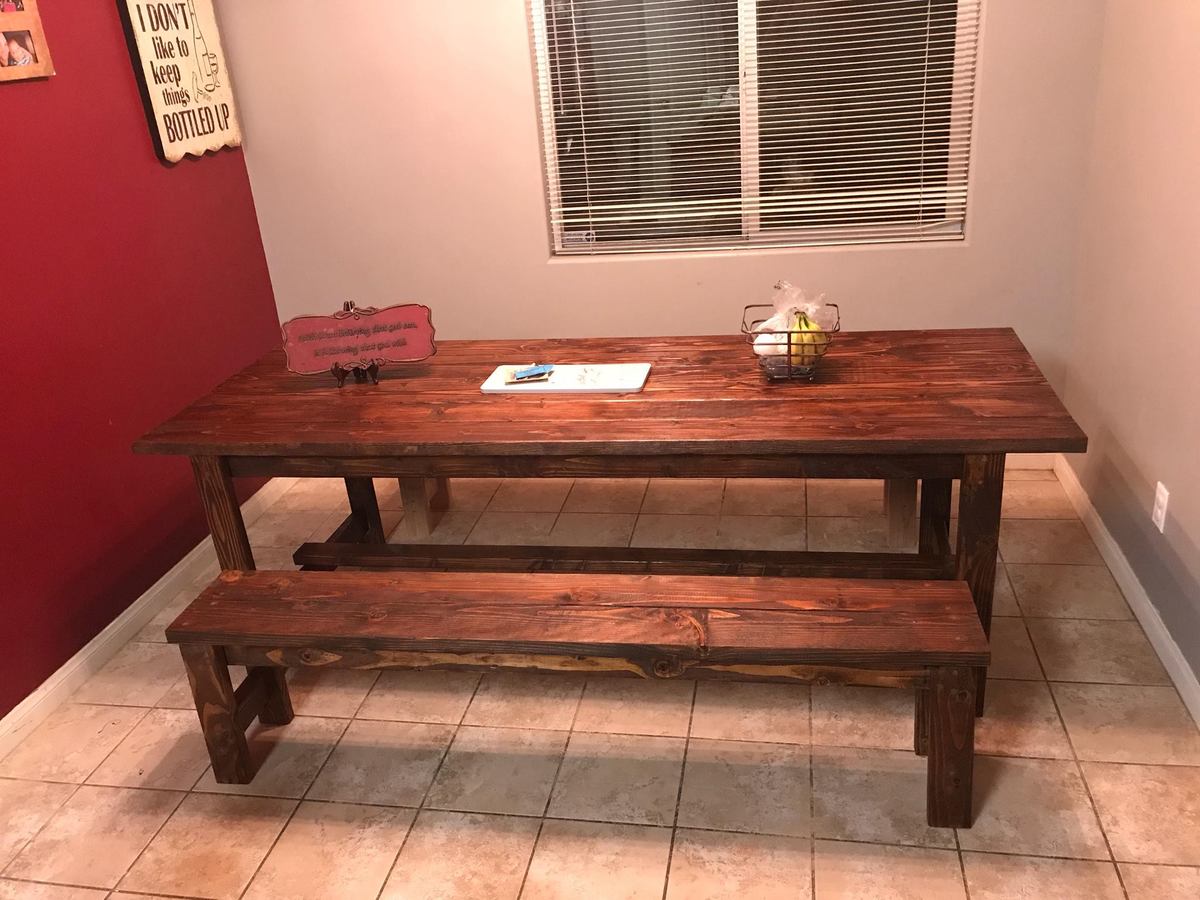
Farmhouse Bench
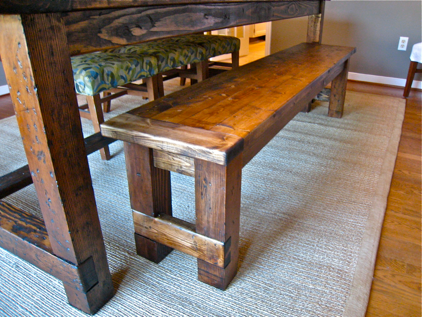
I built the farmhouse table and needed a farmhouse bench to match. The building plan helped make it so simple and I couldn't have done it without the inspiration of Ana White. I used leftover 4x4"s for the legs and then pretty much followed everything else that the building plan said.
I've tried to document better at: http://www.tommyandellie.com/Site/Home/Entries/2011/6/14_Farmhouse_Benc…
Estimated Cost
$15
Estimated Time Investment
Afternoon Project (3-6 Hours)
Finish Used
I distressed the wood a little bit and then used Dark Walnut stain and a couple coats of Poly.
Recommended Skill Level
Beginner
Comments

Thu, 06/30/2011 - 04:48
Great for Anywhere
After building it, I realized that this would make a great bench anywhere. I could easily see this as an outdoor bench, around the pool, around a picnic table, along a deck, anywhere.

Sun, 10/02/2011 - 21:05
It looks Awesome!
It looks so beautiful with your table, great job! I am looking to build a bench for my counter/bar. Do you think it would work to build it counter height? I am totally new to building and building a bench for my counter is my first priority.
Mon, 10/03/2011 - 05:46
Counter Height Bench
Thanks for the great comments! I think you could totally make this at as a counter height bench (approximately 24"). I would be a little worried that if it was too long it could topple over easily. So if you had about a 60" length to cover, I would probably build two 30" benches that can butt up to one another.
One other thought is to make some stools.....I posted some of those from an ana-white plan as well for you to check out; http://ana-white.com/2011/06/simplest-stool-saddle-back-style
Hope that helps....let me know if you have other questions.
Tommy
In reply to Counter Height Bench by tsibiga
Wed, 02/15/2012 - 18:14
Thanks!
Tommy, I appreciate your helpful comments. Like how I just got it today, some priority in getting the bench done! =) I am getting back it now however.... So, I love the stools you made! I am trying however to limit the amount of things (stools/chairs) that my little kids can push around the kitchen. I am considering the two smaller benches at counter height. If I could do one at 24" tall do you think 55" would be too long? I was thinking it would be good to put supports across the length (maybe 10" or 12" from the floor?) to help stability and to use for little ones climbing up. If that makes since? Anyway thanks for your help I really appreciate it!
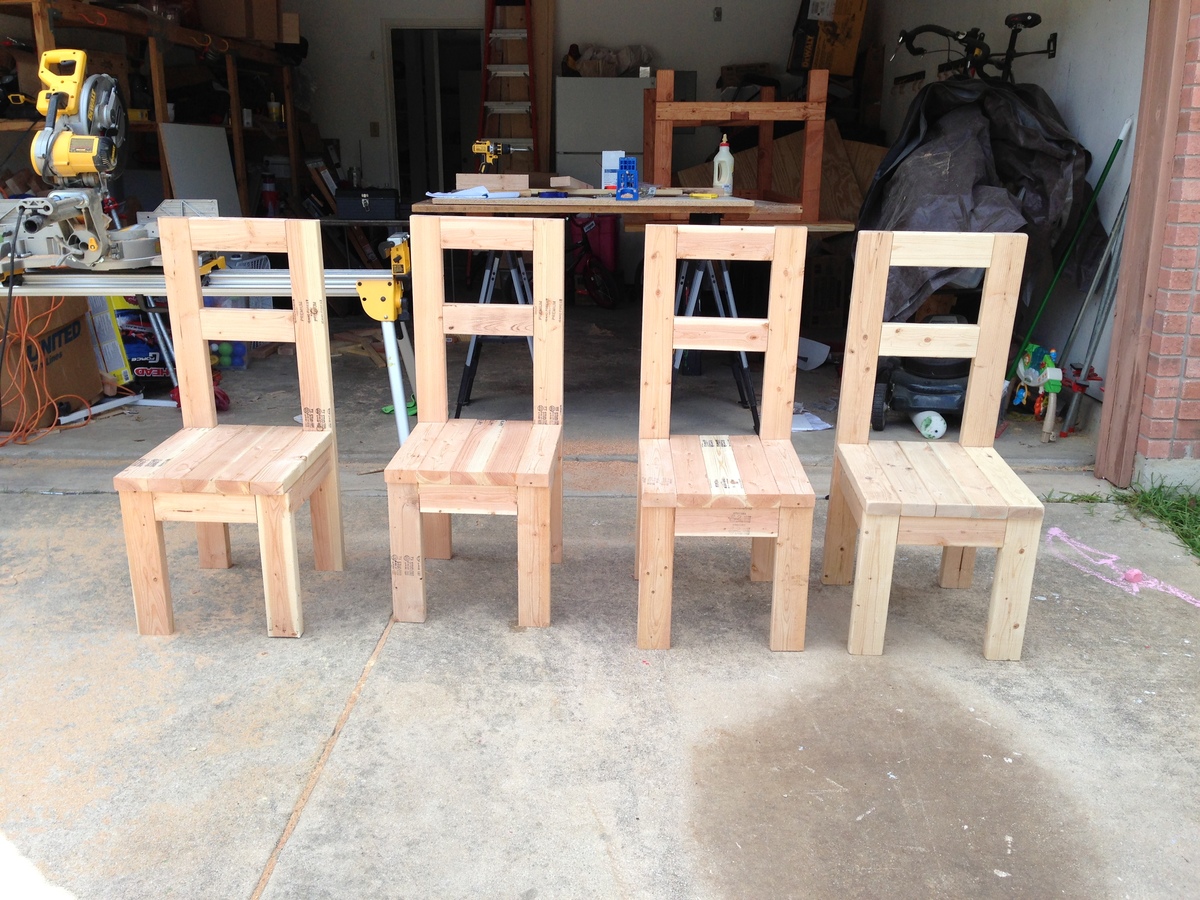
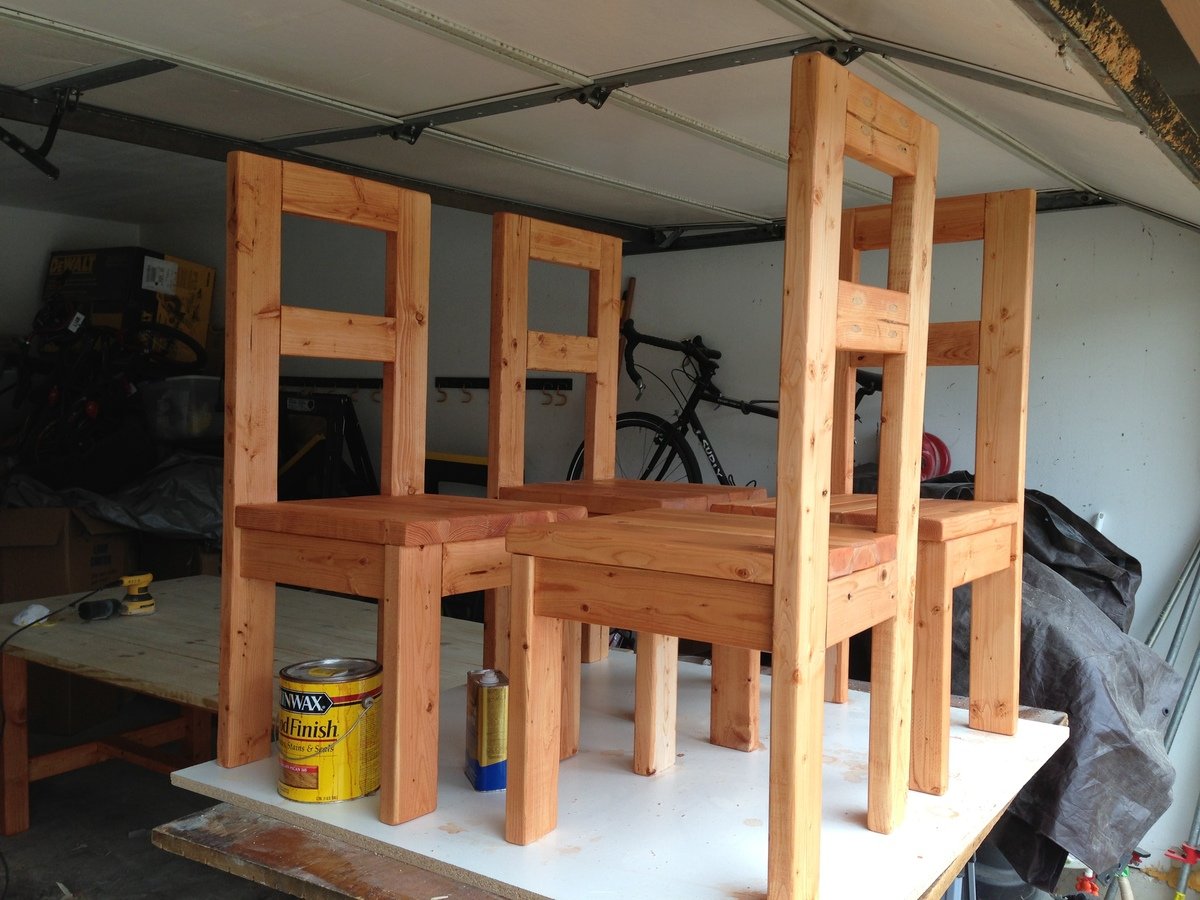
Modern Farmhouse Dining Room table with 2x4 chairs
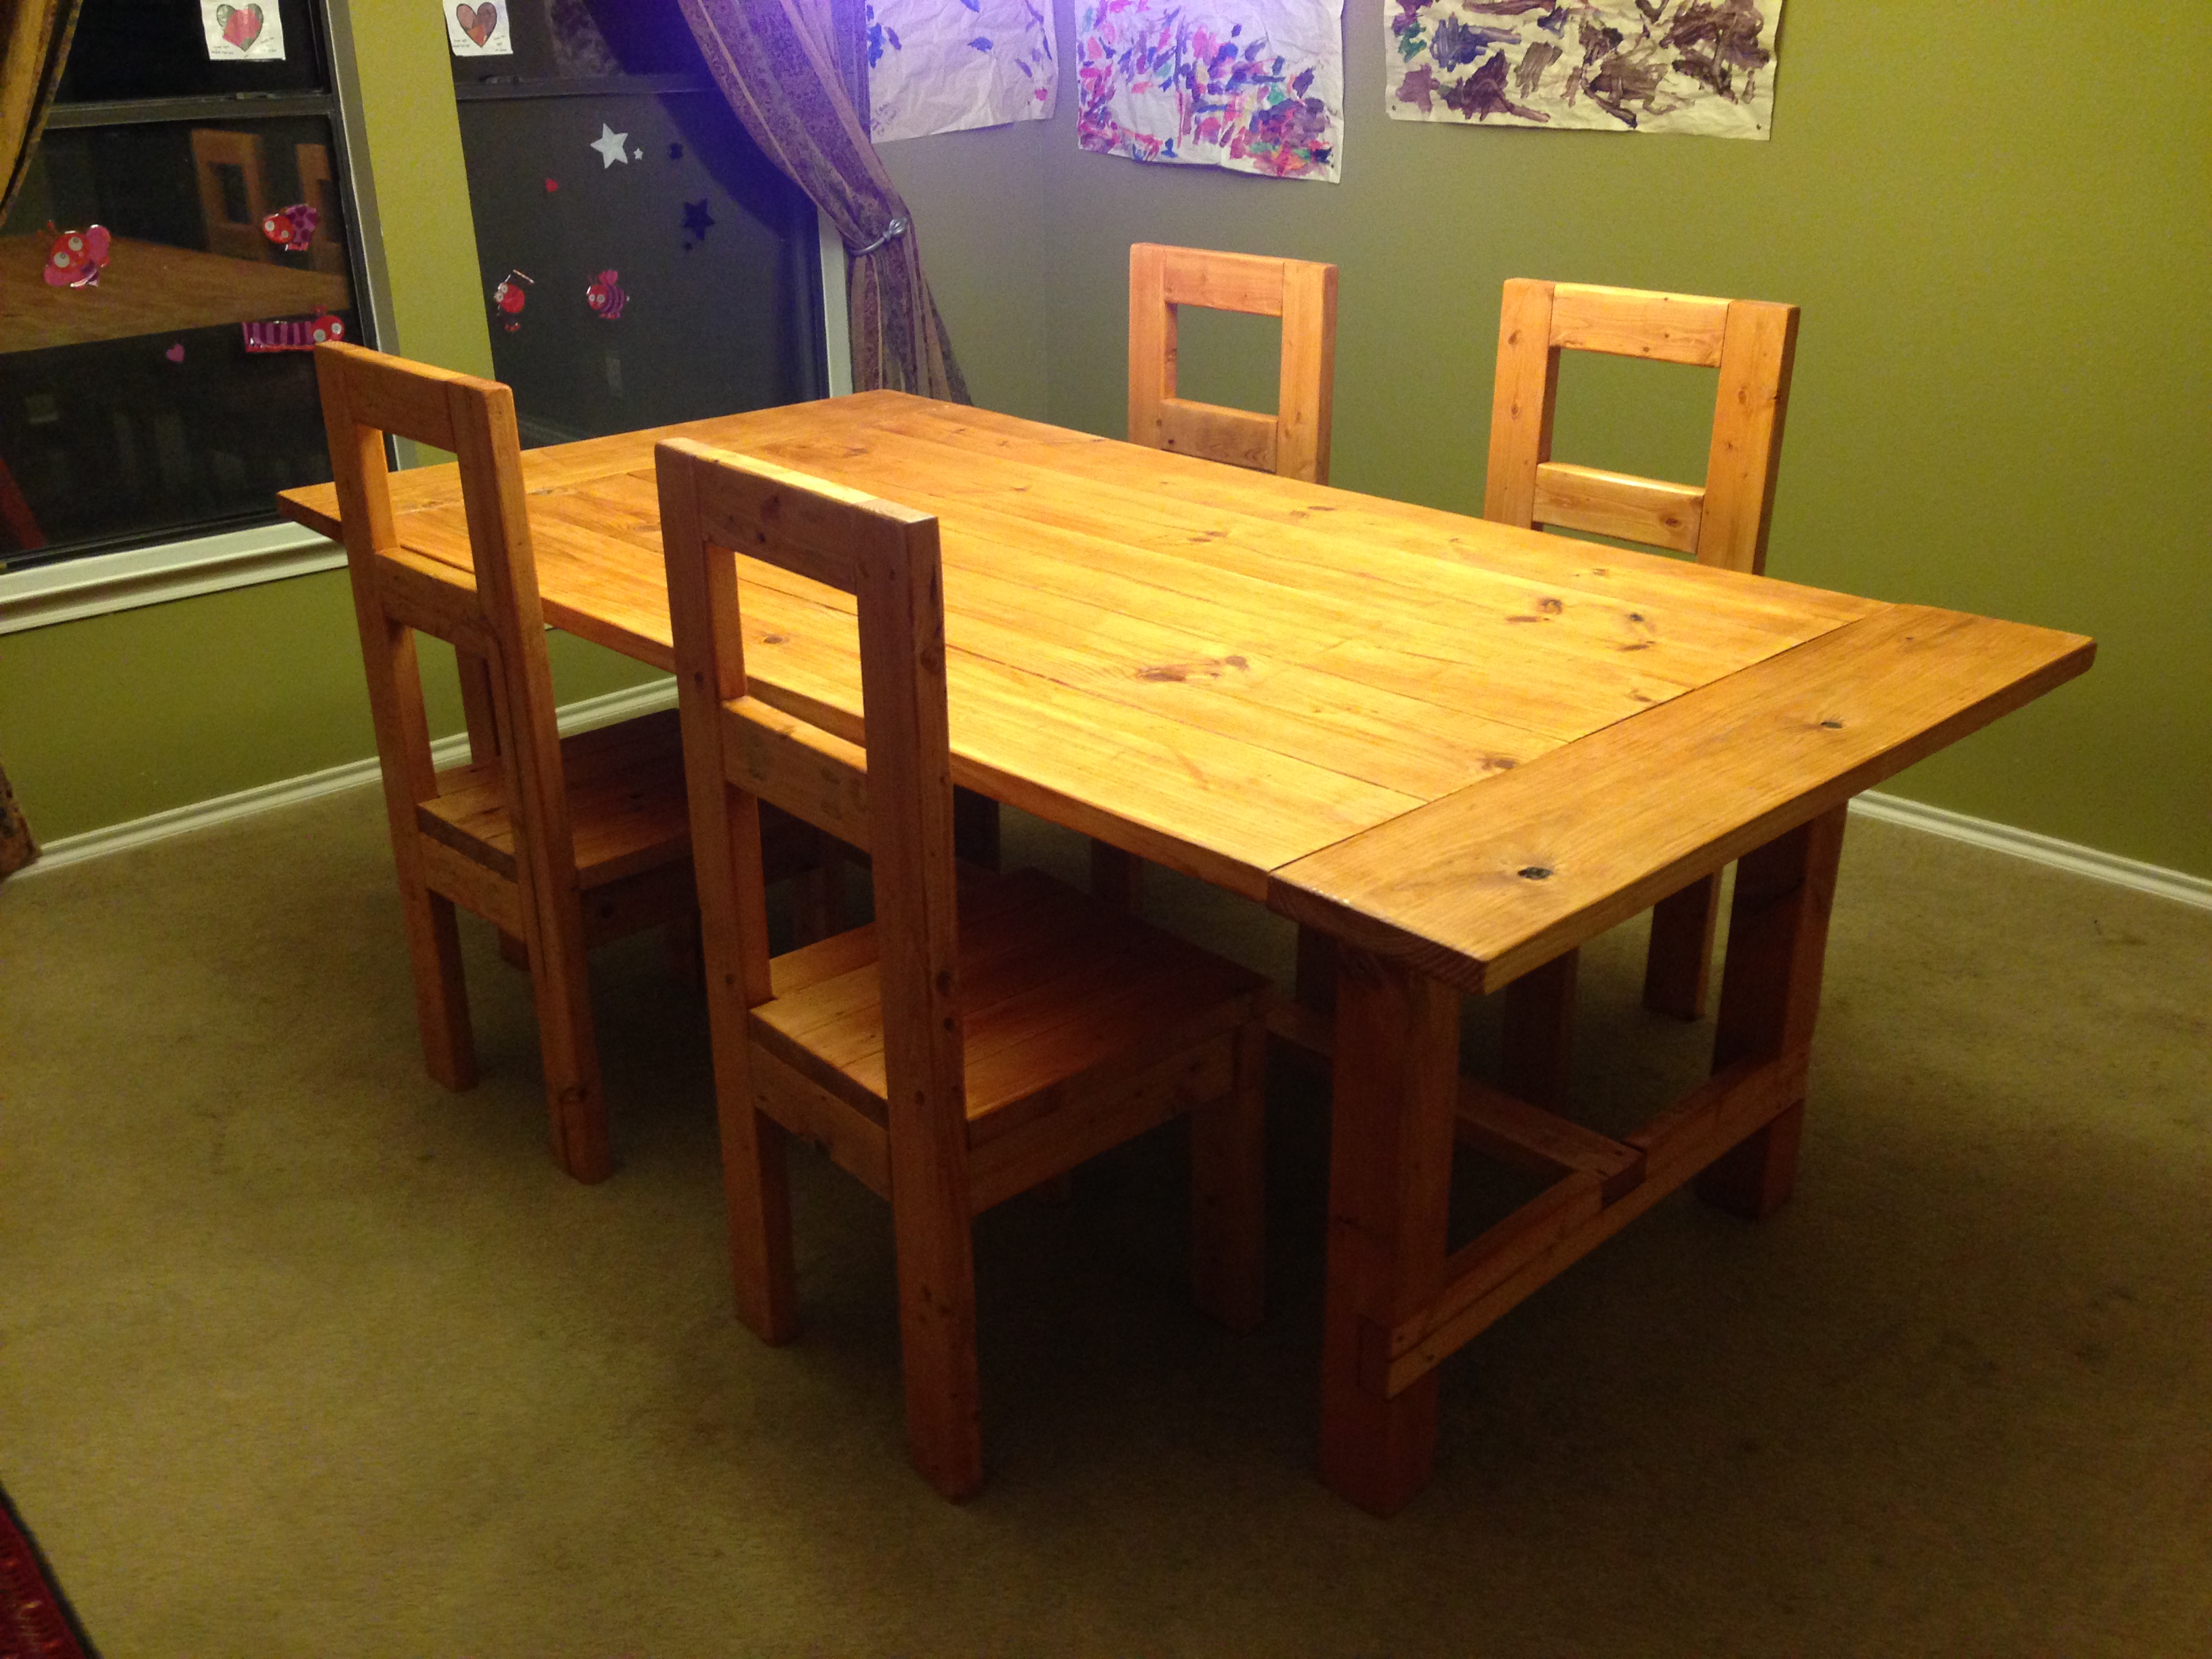
Modern Farmhouse Dining Room Table (with pocket hole) and 2x4 chairs with plans reposted from morelikehome.net.
Surfed the site for the right plans and dove right in. Thank you for the inspiration all!
Estimated Cost
$200
Estimated Time Investment
Week Long Project (20 Hours or More)
Finish Used
Minwax Golden Pecan and Poly coat.
Recommended Skill Level
Beginner
Comments
Mon, 09/10/2018 - 11:05
I don't see the plans to make it.
I have clicked on the link the plans are not there.
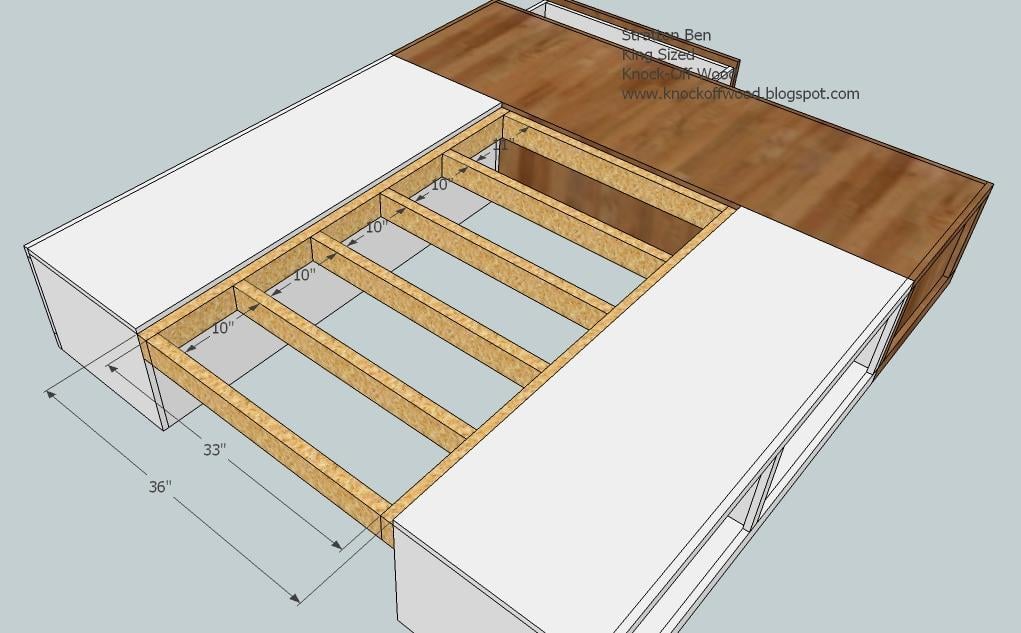
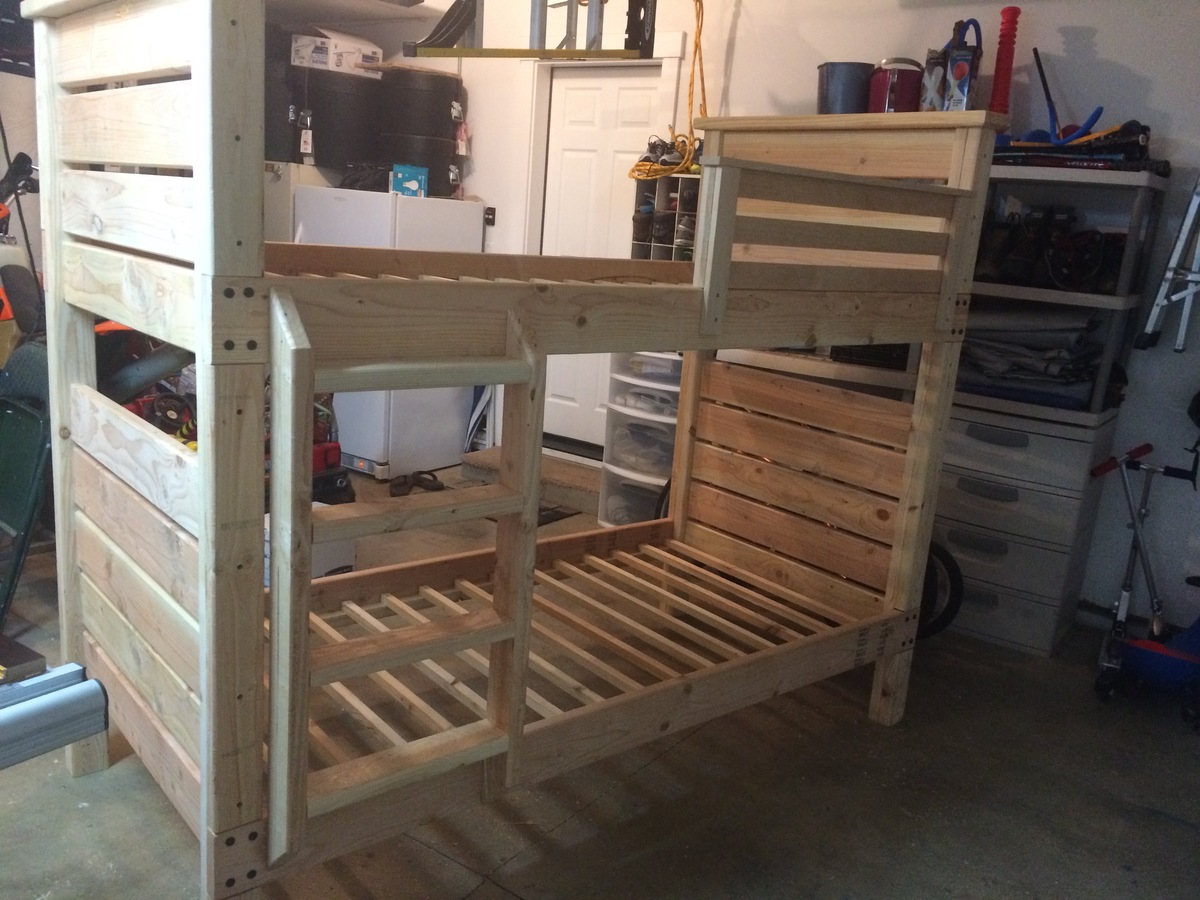
Bunk beds!

I worked with a local charity group in my area as well as Home Depot, who donated the wood to make a set of bunk beds for a family in need who all shared a room. It was great to help them out and the kiddos were super stoaked to have bunk beds and something special they could call their own!


Built from Plan(s)
Estimated Time Investment
Weekend Project (10-20 Hours)
Finish Used
Watco medium walnut stain
Recommended Skill Level
Beginner
Comments
Farmhouse Table
I love this table and bench set! Very easy to build and didn't take too much time. We made it a family build. My kids helped put together the benches and table. My wife and kids did all the staining.


Built from Plan(s)
Estimated Cost
$150 for lumber and supplies.
Estimated Time Investment
Weekend Project (10-20 Hours)
Finish Used
Minwax Early American used with a staining pad. We applied two coats for a darker finish.
Recommended Skill Level
Beginner
Barn Door Cabinet
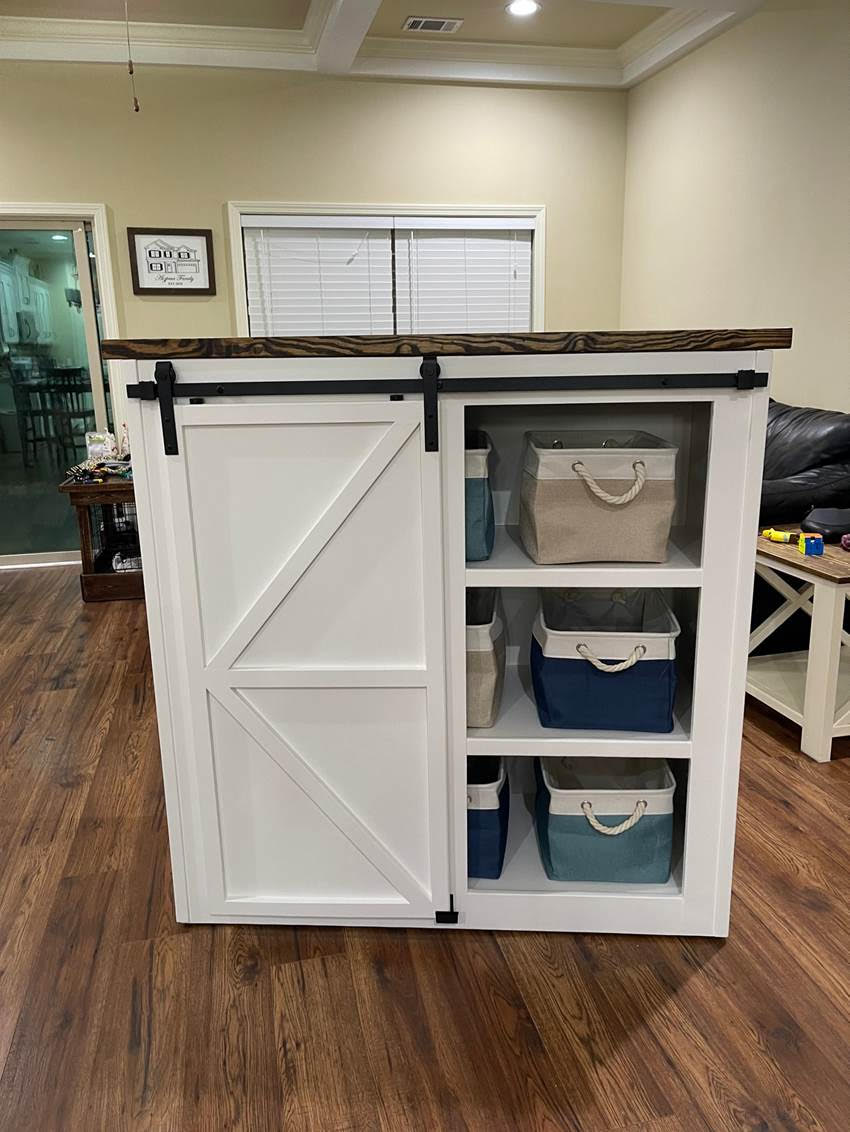
Barn door storage cabinet by Greg!
Built from Plan(s)
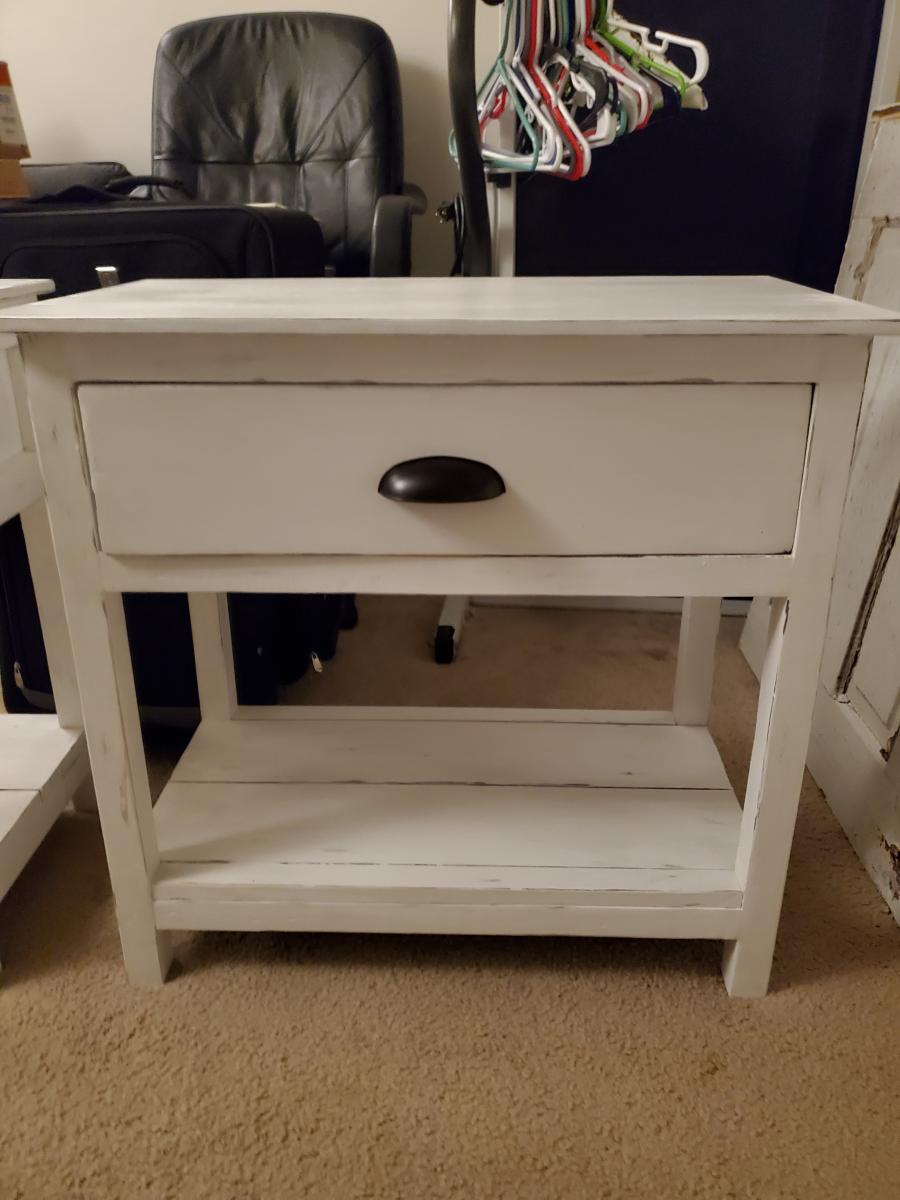
Ladder Table White
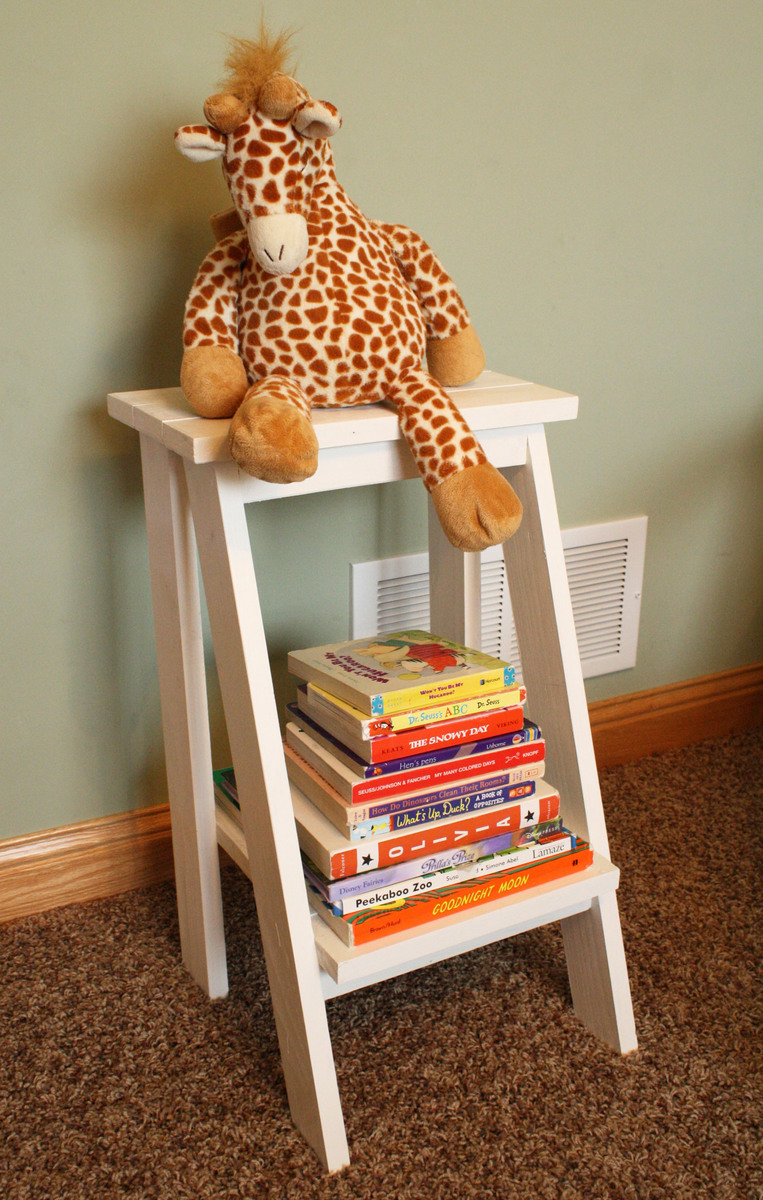
I made this ladder table, I just love it to hold books in my daughters room, I think I got the legs on backwards but you can't tell, and it sits flush. First project done!!
Built from Plan(s)
Estimated Time Investment
Afternoon Project (3-6 Hours)
Finish Used
White paint
Recommended Skill Level
Beginner
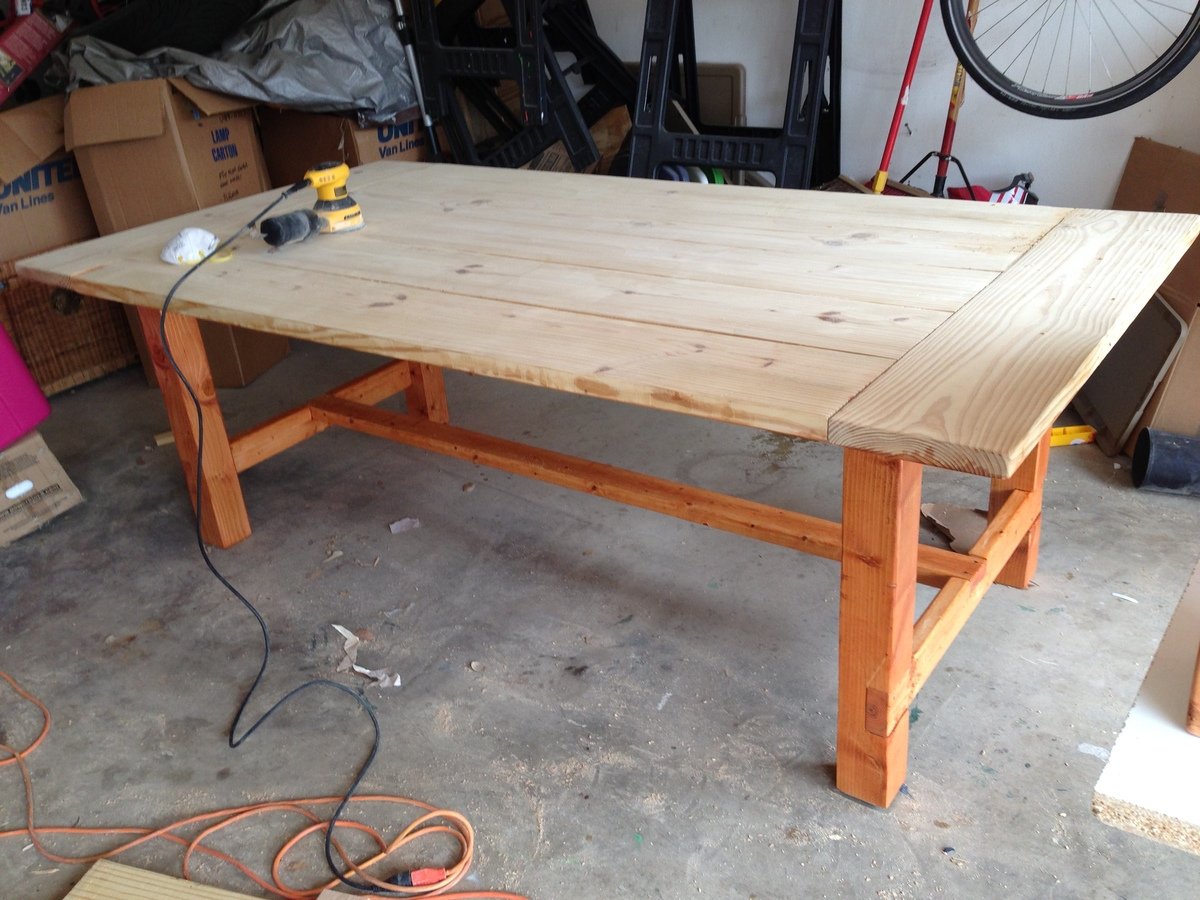
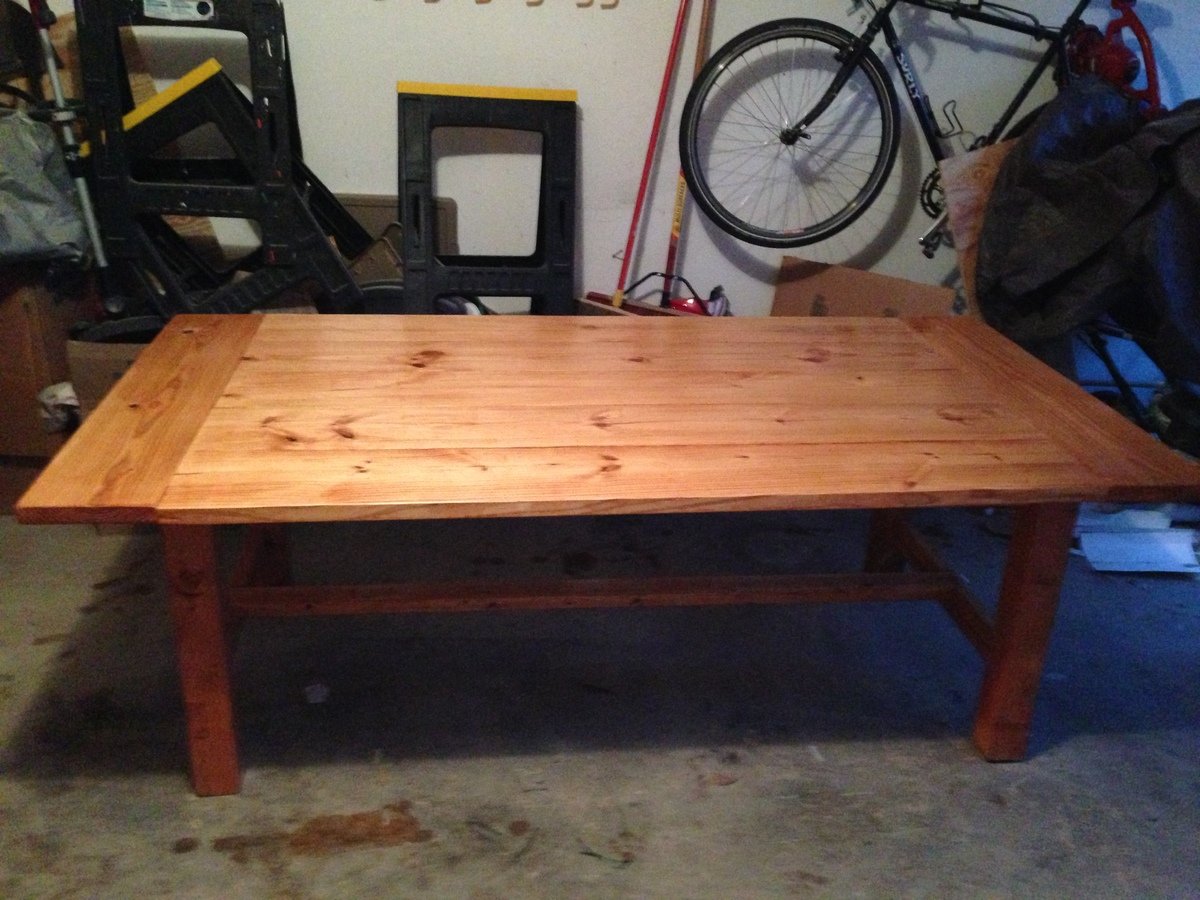
Farmhouse Table
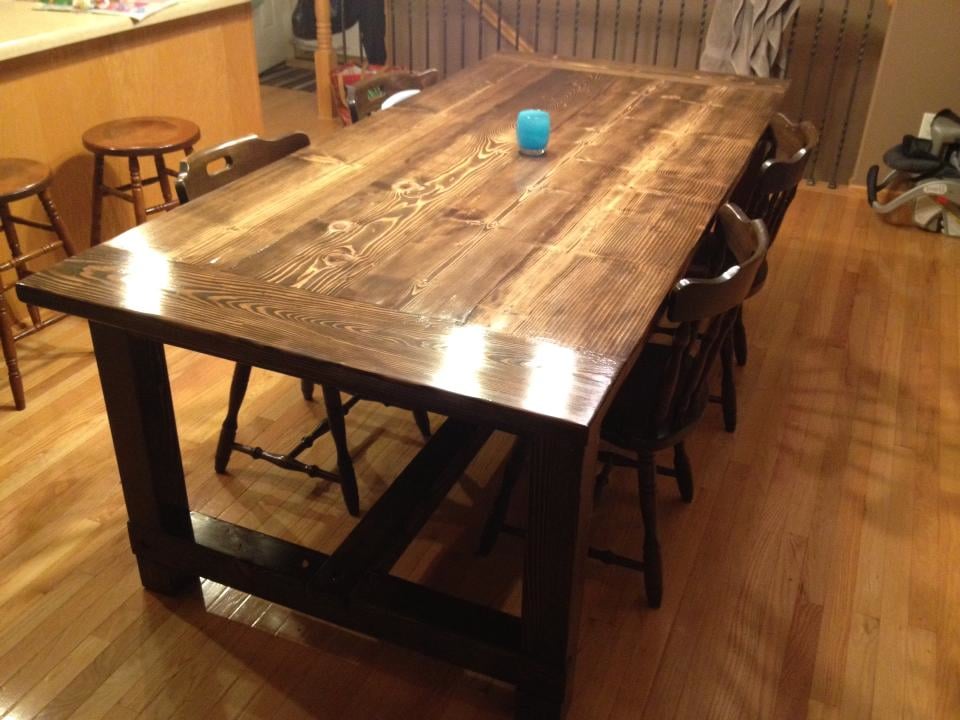
Inspiration for this project came from the original Restoration Hardware table's price, which was way out of our budget. We found the plans on this site, and then the brag post from http://tommyandellie.com/?p=2582, which convinced me to give it a try when we moved to our new house.
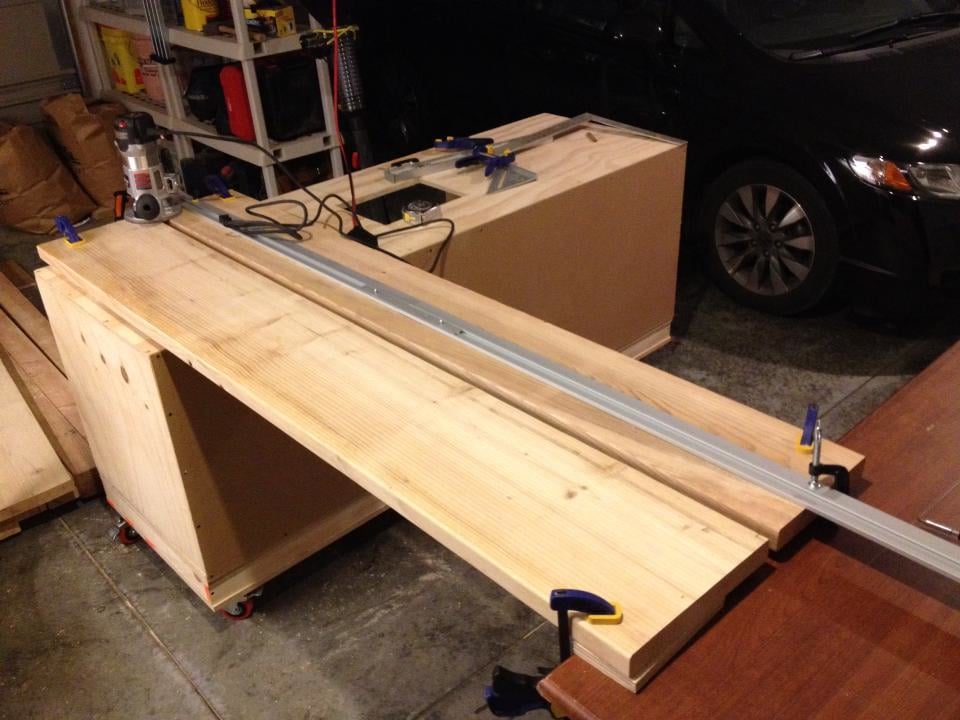
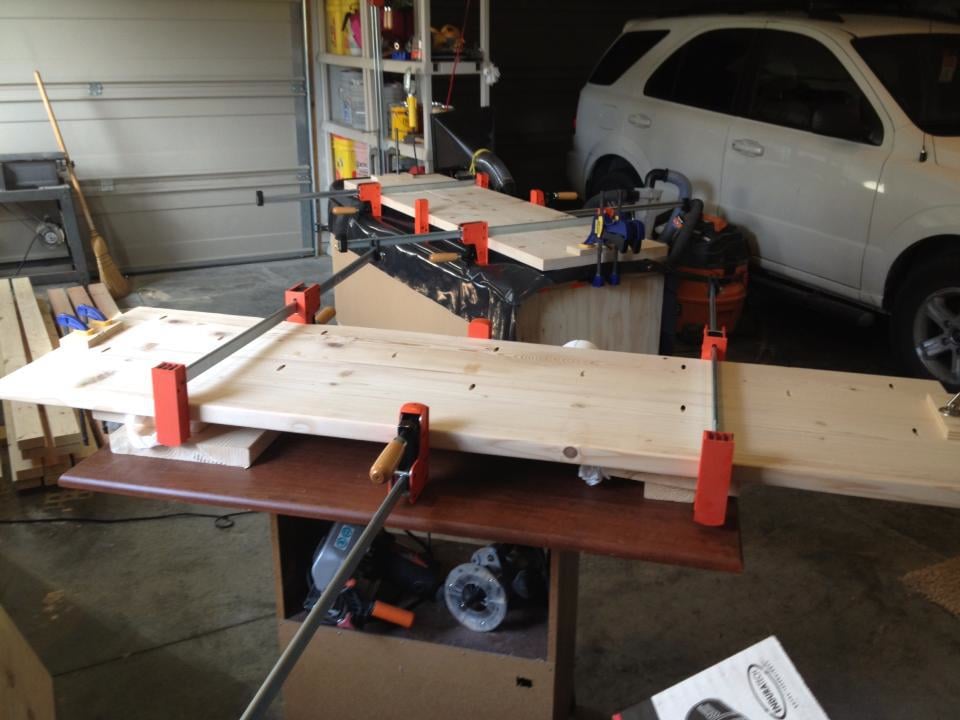
I pulled some ideas and techniques from a couple of different areas - one was the idea from American Woodworker to use a straight-edge and a router to joint the edges of adjacent boards so they match perfectly, or as close to perfect as possible (see one of the pictures). After a few false starts it worked out very well.
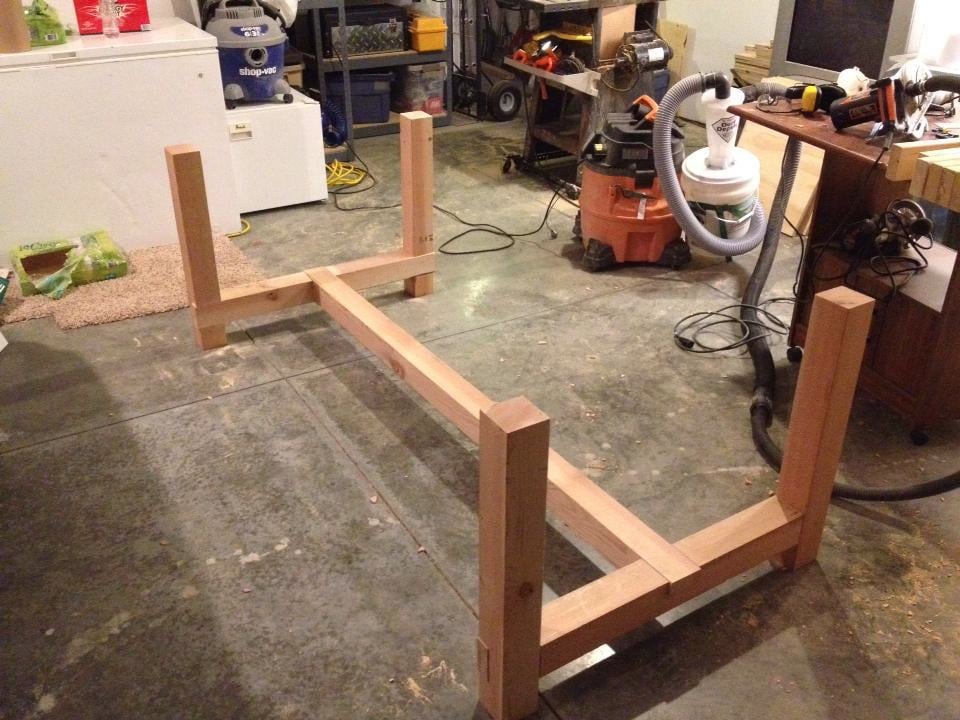
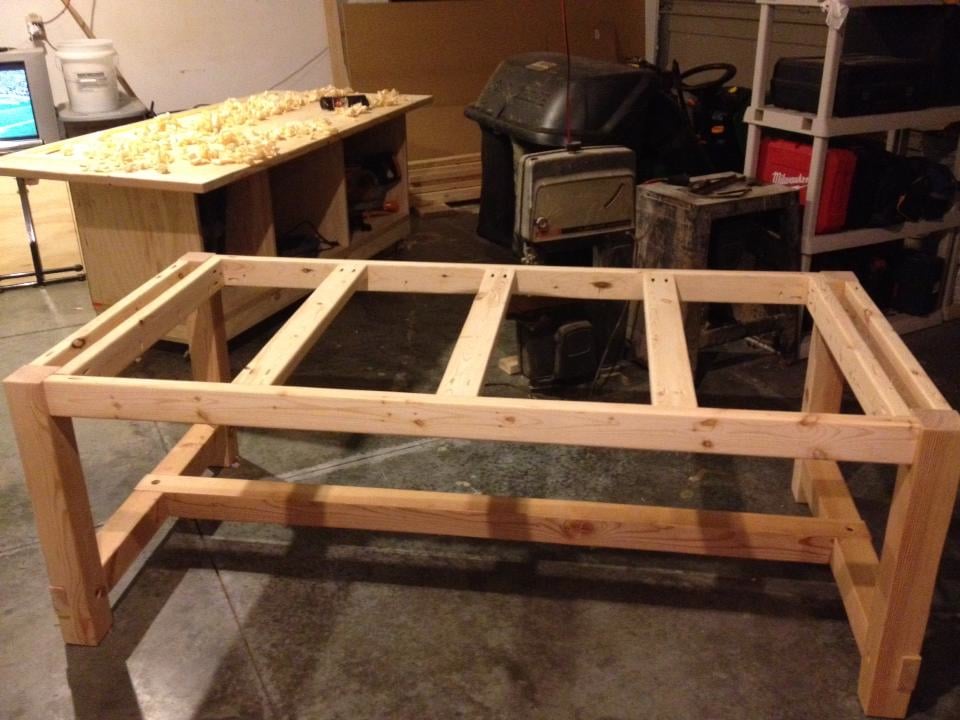
One other big change was to use 4x4 pieces for the legs and cross-braces - especially on the long cross-brace. With two kids (6 and 3) and a third on the way, I knew they would want to crawl under the table to play, and sit on the beams - and I was afraid a 2x4 wouldn't hold up to their weights. I've VERY happy with the result - that base is not moving or flexing at all.
Finally, I learned a TON about what NOT to do! Apparently after doing the dry fit and having everything fit well, you should not sand the parts of the boards that fit together or suddenly they will be loose! Also, wiping off the stain after the suggested amount of time IS a good idea, after all! Finally, we ended up using pine boards with fir 4x4's, and I wish we had used all fir as I think the grain pattern was nicer.
All in all, though, it was a great experience and I can't wait to tackle another project!

Built from Plan(s)
Estimated Cost
$200-$300
Estimated Time Investment
Week Long Project (20 Hours or More)
Finish Used
Minwax wood conditioner followed by 2 coats of Minwax Walnut stain, sanding lightly between coats at 240 grit. After stain dries, one coat of Varathane sanding sealer, sanding again at 240 grit. Then, Varathane water-based poly, 2 or three coats followed by light sanding at 400 grit (or between individual coats if it was past 12 hours from the last application) - followed by one final coat of poly. If I had known then what I know now, I would have used oil-based poly - I didn't realize there was a difference when I purchased the items. I also used foam brushes for each step.
Recommended Skill Level
Beginner
Comments

Mon, 08/05/2013 - 14:52
Thanks, & link to router technique
Thanks Rob, good luck! Below is the link to the original source for the technique I used (#8 in the list). Just be VERY sure you have the boards (and the straightedge) clamped tightly so there's no wiggling. The first time I did it I didn't have the straightedge tight enough and it wiggled loose at one end, so the router started biting into one board more than the other, making a curve. Once I got the layout figured out, however, it worked very well and I was very pleased with it - I even did it again with the ends of the long boards (after they were glued/screwed together) and the inside edge of the breadboards before attaching them.
http://americanwoodworker.com/blogs/techniques/archive/2009/08/26/10-tr…

Fri, 08/09/2013 - 07:11
Good call on using 4x4's.
Good call on using 4x4's. They look much better then a builders grade 2x4. Looks great!
Fri, 08/16/2013 - 08:05
If your using a hand planer
If your using a hand planer your going to get more of a worn uneven look, it's nearly impossible to get a perfect straight board after using a hand planer. IF you run it through a floor standing planer whatever bend in the board will still be there since it follows the contour of the board. If you want a straight board regardless of size you need to straighten it with a tablesaw. I am sure you can find a million how to's by just googling "how to straighten a board with a tablesaw". When your using building lumber you will always have an issue with things not being straight and looking "rough". It may be easier to just goto a actual lumber store and buy something that isn't Pine. Pine is a soft wood which is likely to dent easily after being used. But regardless, if you want a straight board use a tablesaw. I bought a bosch table saw at lowes and its awesome. folds up against my wall and is probably the best tool i have bought. Decent ones run about 400 bucks but its well worth it with what it allows you to do.
Fri, 08/16/2013 - 07:53
Re: Planer
Not beforehand... (just to be clear, my 2x's were all white pine, only the 4x4's were Fir - unfortunately, the local Menards only had pine 2x's and fir 4x's) - I spent a lot of time at the store picking out the straightest, least cupped/curved boards I could find, and then spent more time at home arranging them to make sure the boards with the longest straightness (is that a term?) were used for the long pieces. Once the top was put together, I used a straightedge to find the humps and valleys in the top and used a hand plane to level them out a bit (see the background of the picture with the completed base, you can see the shavings on the top). I would suggest, if you do the hand plane route and aren't familiar with the tool or don't own one, to either borrow a well-tuned one from someone who would show you how to use it, or prepare to spend money to get a good one. You probably don't want to do what I did, which was buy a cheapo Stanley from Menards and then spend probably 8-10 hours over the course of a week or so trying to get it setup properly. I finally got it useable, but it was a very frustrating process and it didn't take long before the newly-sharpened edge was dull again. I did finally get it smooth enough so that it was easy to slide a plate or dish from one side of the table to the other without it rocking or hitting an edge/bump, but if I had it to do over again I would have saved the time and spent the money on a good older Stanley or a newer Lie-Nielsen or Lee Valley, etc., and then spent a lot less time getting the plane ready to go.
One thing that helped my mind-set as I went through the process was to remember that the beauty of this style is that it is not supposed to be perfect - a farmhouse table is supposed to look a little rough and worn, and the little defects are part of it's charm. It's an important point to remember especially if you are a bit of a perfectionist as I am!
Outdoor Sofa with 2x4s

Cushions are from Pier 1; Seat 25" by 25" by 4"; Back cushions 25" by 18". You can't make your own for less than end-of-season sale prices. Trust me, I tried. Foam is expensive.
About the plans: I did add a second back support because I turned the slat flat for a more comfortable back seat.
Estimated Cost
Wood - free, leftover from other projects. Tools, screws, paint ~ $150
Estimated Time Investment
Weekend Project (10-20 Hours)
Finish Used
Color is "Darling Clementine" by Valspar, but the paint is Ben Moore exterior flat finish.
Recommended Skill Level
Beginner
Comments
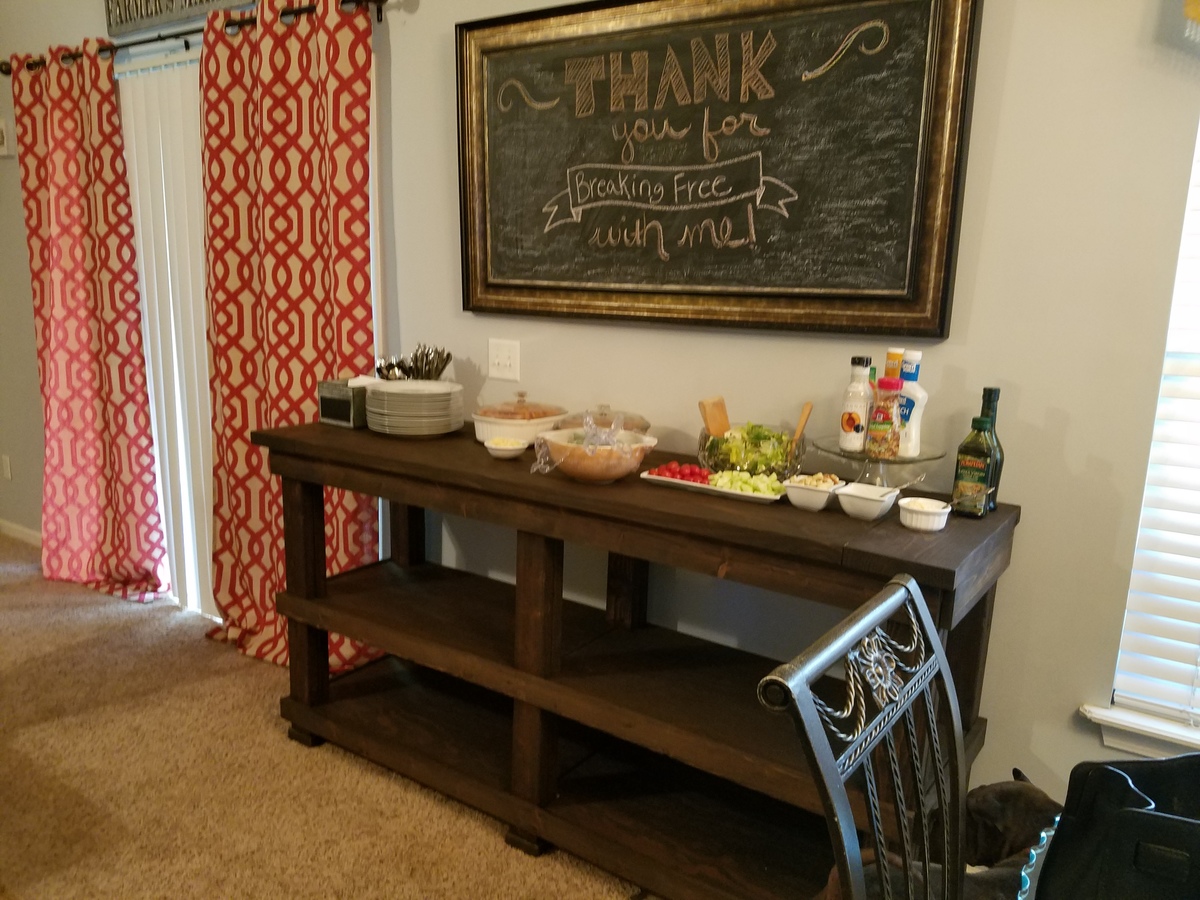
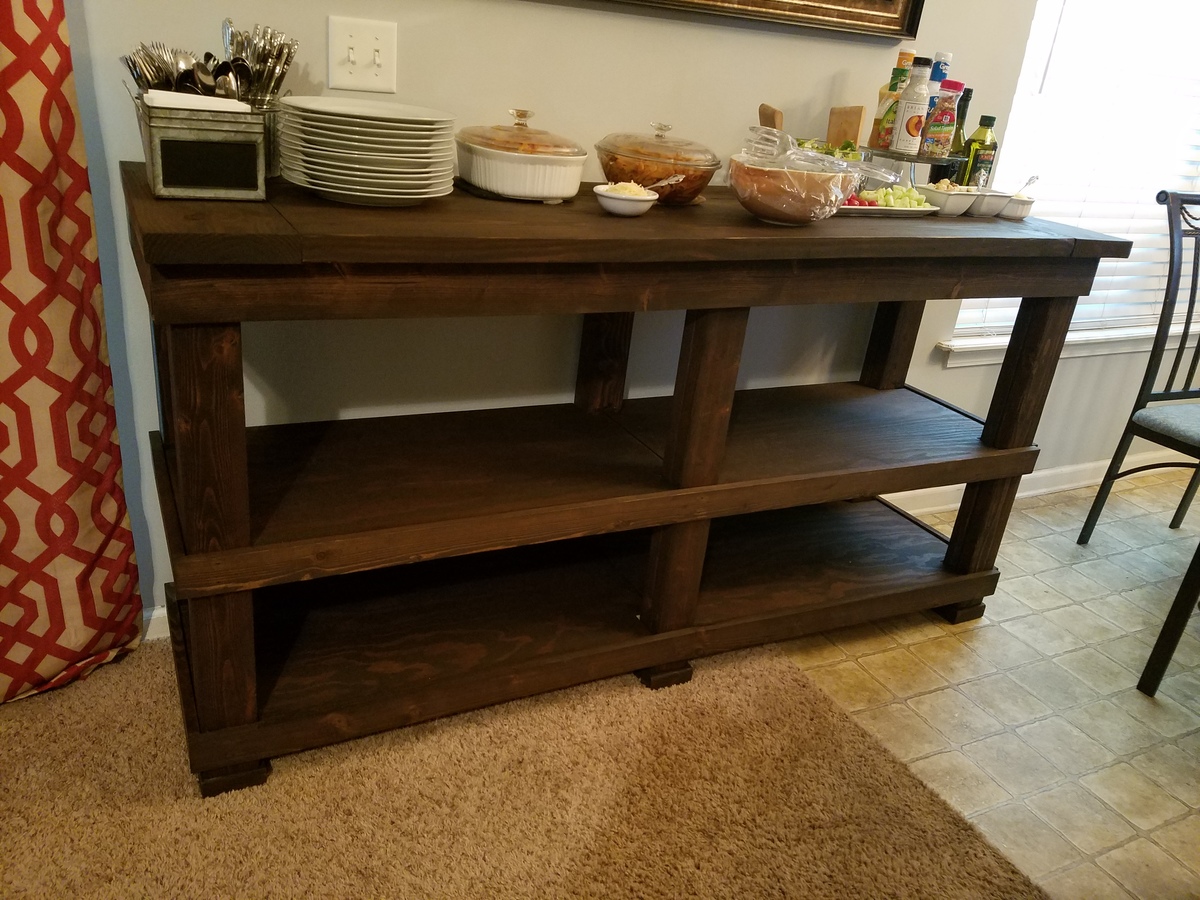
Buffet, serving table
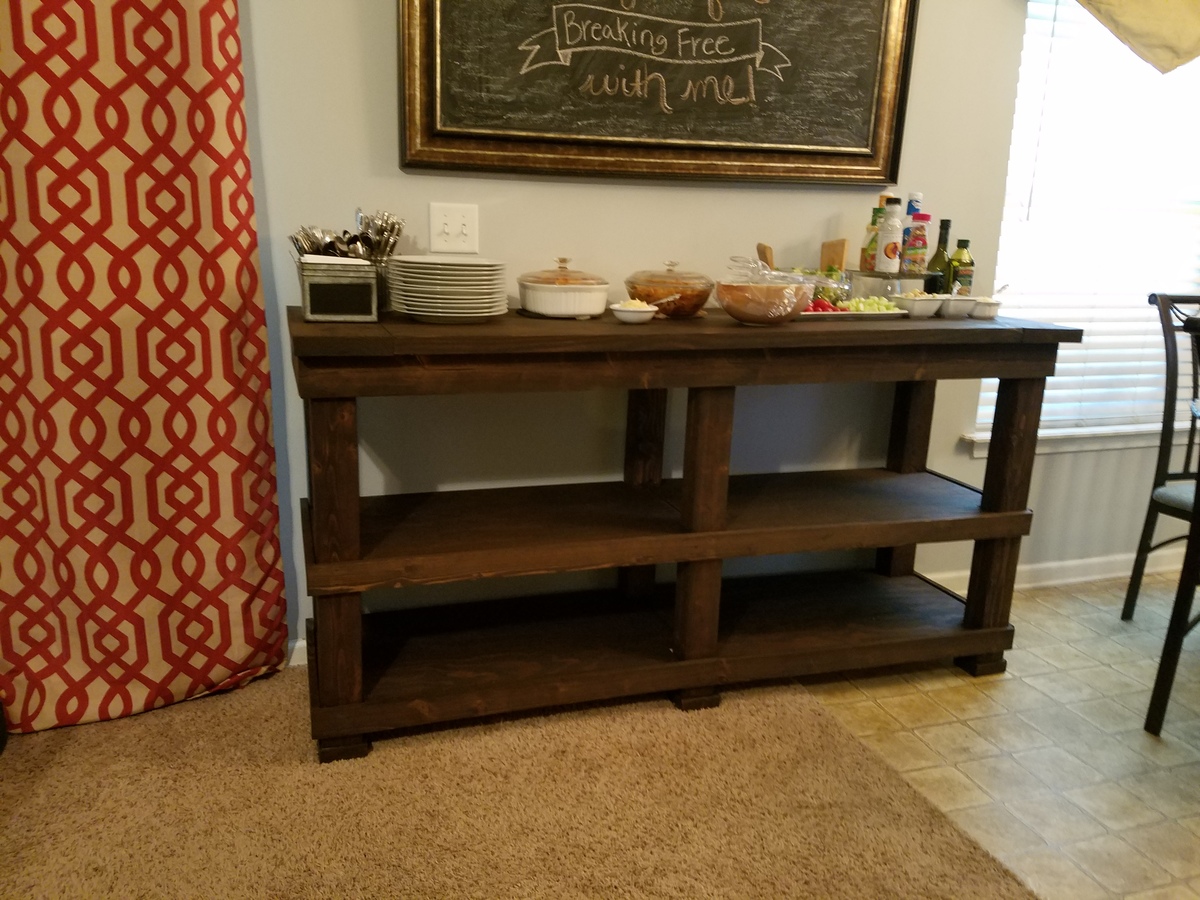
I made this buffet, serving table to go with a large gathering farmhouse table I made. I loosely used the farmhouse table plans but did some designing of my own based on a picture my friends had of what she wanted.
Built from Plan(s)
Estimated Time Investment
Weekend Project (10-20 Hours)
Finish Used
Varathane - Kona stain
Recommended Skill Level
Intermediate