Community Brag Posts

My First Ana Project (Simple Outdoor Bench)

Submitted by Marcie89 on Mon, 04/29/2013 - 19:38

This bench is the first project I have built from Ana White's plans, and I love how it turned out! The cutting list and instructions were very easy to follow. The most difficult thing about this project was the staining and painting, which I admit I have never been great at. I built this bench because my fiance and I needed additional outside seating on our patio for a party we threw, and I literally built it the day before! A week after the party I gave it to my fiance's daughter who wanted it as an indoor hall bench for her house. At first I was sad to give it up, but I figure I can easily make another! Thank you so much, Ana, for the fabulous plans you provide!!

Estimated Cost
$100.
Estimated Time Investment
Day Project (6-9 Hours)
Finish Used
Olympic wood sealer/toner in Canyon Brown
Helmsman Clear Wood Sealer
Black Latex Paint
Recommended Skill Level
Beginner

jardinière

Submitted by Anonymous (not verified) on Tue, 06/20/2017 - 18:07

jardiniere  16x36x32h 

built whit cedar 

Estimated Time Investment
An Hour or Two (0-2 Hours)
Recommended Skill Level
Beginner

Kitchen Bar with Drawers

Submitted by Anonymous (not verified) on Sun, 09/12/2021 - 16:30

I decided to demo our old pantry and build a counter height bar in its place. I used Ana’s mudroom bench plans and added an additional drawer to the length and 2 more drawers to the height, making a total of 12 drawers. I also used Ana’s video on sizing drawer faces https://youtu.be/AlvlrPxXGUw
—at least for the bottom 4 drawers. I didn’t find that video until I’d completed the first 2 rows of drawers and they definitely require some tweaking still.
I added some moulding to the back and sides with 1/2” plywood ripped into 2.5” strips to complete the shaker look. Then I had a quartz top fabricated and installed.

Built from Plan(s)

Comments

Fancy Farmhouse Double Pedestal Table

Submitted by carrmatt02 on Wed, 05/01/2013 - 20:02

This is a combination and a scaled down version of a couple different farmhouse table plans. It is 60"x43" to fit our dining room. I integrated an inlay looking piece into the top with a 1x2 and mitered the corners of the outer two layers. The thickness at the edge of the table was accomplished with 1x4's with the middle layer inset by 1/2"... chairs to match are in the process of being built.

Estimated Cost
$175
Estimated Time Investment
Week Long Project (20 Hours or More)
Finish Used
Minwax Dark Walnut and Ebony for the inlay with six coats of Minwax Wipe-on Poly.
Recommended Skill Level
Intermediate

Comments

A star for the bar!

Submitted by Ashley_C on Sun, 03/22/2015 - 12:06

This plan worked great to add a finishing touch to the front of our rustic barn themed bar project. Love it!

Built from Plan(s)
Estimated Cost
$5
Estimated Time Investment
An Hour or Two (0-2 Hours)
Finish Used
MinWax stain in Provincial
Recommended Skill Level
Beginner

Comments

Kitchen Island Trolley

Submitted by naomi on Fri, 06/23/2017 - 08:26

Kitchen Island Trolley.

Base was made from recycled timber and the top was made with new pine.

The rails were made from curtain rails. 

One end has wheels for easy moving.

Estimated Cost
$20
Estimated Time Investment
Day Project (6-9 Hours)
Finish Used
Chalk Paint and Wipe on Poly
Recommended Skill Level
Intermediate

Comments

Narrow Farmhouse table - Triples!

Submitted by Bigherd on Tue, 09/28/2021 - 04:15

I built a couple of farmhouse tables per the plans. However, I had person who wanted three narrow, 15", display table for her craft store. I followed the plans but just changed the width to 15".

These are my triples!

Comments

Child's Adirondack Chair

Child's adirondack chair. I made it mostly with wood scraps purchased at my local Habitat for Humanity Store

Estimated Time Investment
Day Project (6-9 Hours)
Finish Used
primed and painted with exterior satin
Recommended Skill Level
Beginner

Changing Table

My Grandson will be born any day now so I want to create a cozy environment for him. We still haven't put the bed up or added any of the decorations, but at least the changing table is finished smiley.  Painted walls, added new flooring, still have to customize the closet, but with Ana's help that will be a snap.  I would have never gotten the courage to do some of the builds I've done without Ana's site.  Thank You Ana!!!

Estimated Cost
Cost about $100
Estimated Time Investment
Weekend Project (10-20 Hours)
Finish Used
I used Minwax Sedona Red with a little Minwax Ebony in the mix to darken a little. Finish is Minwax Satin Poly.
Recommended Skill Level
Intermediate

Studio82 Build: Farmhouse table with quartersawn white oak and walnut

Submitted by Anonymous (not verified) on Sun, 06/25/2017 - 20:25

I love this design and I constantly get people requesting tour of the house just to see this table. Simple and beautiful. 

Estimated Cost
~$3000 of material (for benches and table)
Estimated Time Investment
Week Long Project (20 Hours or More)
Finish Used
⅜ inch epoxy coat on top. Boiled linseed oil for base
Recommended Skill Level
Intermediate

Counter Height Table and Chairs

Submitted by Anonymous (not verified) on Mon, 10/04/2021 - 12:31

My husband and I made the table and chairs for our screened porch. We really like how the project turned out. Many more Ana White projects on the our list!

Comments

Modified Fancy X Desk

Submitted by snarl on Tue, 05/07/2013 - 10:48

I made this based on the $55 fancy x desk plan for my daughters room. It is 18" shorter (54") so I eliminated the diagonal braces at the back of the plan. It still is very sturdy. I made the top from rough sawn oak board that I had in the yard by handplanning the top and edges. You could just buy 1x12 oak if you wanted to, although it would be pricey. If you are in Connecticut let me know I have a few thousand feet of it! My daughter loves the desk!

Built from Plan(s)
Estimated Cost
$30
Estimated Time Investment
Day Project (6-9 Hours)
Finish Used
Minwax Ebony for the base. I just followed the instructions on the can. For the top I brushed on Ben Moore Arborcoat semi solid in Chelsea Gray let it dry for about 15 minutes and then poured vinegar that had steel wool in it. I left that one for about 15 minutes and hosed it off.This gave it the dark streaks. I then let it dry completely and sprayed on Spar Urethene
Recommended Skill Level
Beginner

Farmhouse Bed

Submitted by rosiejane on Sat, 03/28/2015 - 06:11

Finally our 3 year old is out of her cot. Her long awaited bed finally got made! It took about 3 days to build (working around naptimes and school runs) and another week to paint it. I modified the plans slightly, using 70mm posts (instead of 90mm). I used 19x140mm for the rails so that more of the mattress was exposed (so we don't hit the rails when we sit on the edge of the bed) and also took quite a bit off the height of the headboard. I used bed brackets which made joining the rails very easy. Very impressed with how it turned out. The plans were really easy to follow and easily modified to suit our needs. A matching doll bed is in the works and her older siblings are also putting their orders in...

Built from Plan(s)
Estimated Cost
AUD$250 (timber and bed brackets) I already had the paint.
Estimated Time Investment
Week Long Project (20 Hours or More)
Finish Used
I rounded off all sharp edges. This gave a nice definition to the head and footboard panels. I used gap filler in all the cracks and this made everything nice and smooth for painting. 1 coat primer and 4 coats acrylic semi-gloss - vivid white. I used a 100mm foam roller.
Recommended Skill Level
Intermediate

Comments

britt.barth

Mon, 08/03/2015 - 17:16

we made a toddler size bed a few years ago recreating this farmhouse plan,  and are wanting to make the regular twin size now. I LOVE your changes. Any chance you could post a picture 1) a close up of the bracket (I'm wanting to do the same), and 2) how it looked from the inside, but pointing to the footboard? I want to copy YOUR bed! :D

Cheers!

Sideboard by KC

Submitted by Anonymous (not verified) on Wed, 06/28/2017 - 14:20

This took me about a month to build.  Ana's plans were great.  Installing drawers was the toughest part. 

Built from Plan(s)
Estimated Cost
$300
Estimated Time Investment
Week Long Project (20 Hours or More)
Recommended Skill Level
Intermediate

Modern Deck Chairs and Loveseat

Submitted by Anonymous (not verified) on Mon, 10/04/2021 - 12:54

Love, love, love your projects. I have made 3 of the modern 2 x 4 chairs, with a modification. I had purchased both seat and back cushions for my chairs and the back cushion had nothing to lean back on, so I added some height and personality to the chair.

Your plans are easy to follow and make very nice, heavy furniture that I know will not blow away and end up in the field next to my house. Keep those plans coming!

Height Chart

Submitted by MMTruncale on Thu, 05/09/2013 - 08:36

We bought the house my husband actually grew up in. In the garage, on the wall, is theire family's height chart. When they moved taking it with them wasn't really do able. So, for Mother's day we wanted to give his mom a NEW (relocatable) height chart for her grandbabies.

One long board, another small board to insert at each foot mark, some house address numbers, and two different colors of stain, and we had what we wanted.

My husband made this in no time.

Estimated Cost
$15ish
Estimated Time Investment
An Hour or Two (0-2 Hours)
Finish Used
Spray Stain. (It's the best and easiest stain EVER)
Recommended Skill Level
Starter Project

Coffee table

Submitted by gonzoo07 on Mon, 03/30/2015 - 12:05

Thanks for the plans. Love the table

Estimated Cost
$60.00
Estimated Time Investment
Weekend Project (10-20 Hours)
Finish Used
Min Wax
Recommended Skill Level
Beginner

Comments

Truss beam table

Submitted by Anonymous (not verified) on Fri, 06/30/2017 - 07:59

I wanted to try attempt the beam table and my son's wedding rehearsal dinner was the perfect reason. My wife liked the table so much, she asked me to make three more. Because they will be used in our new wedding venue business, I wanted them to to withstand the weather. The materials were quite a bit more expensive as I used 10 ft x 3 ft  x 2 3/8" thick redwood butcher block planks for the tops and cedar 4 x 4's for the bases. Stained and sealed with Cabot sealant. What do you think?

Built from Plan(s)
Estimated Cost
$700 per table
Estimated Time Investment
Week Long Project (20 Hours or More)
Finish Used
Cabot outdoor sealant
Recommended Skill Level
Beginner

Children’s Stool

Submitted by Anonymous (not verified) on Mon, 10/04/2021 - 13:19

This was a gift for my goddaughter along with a keyboard for her third birthday! I love the way it turned out, and it fits perfectly in with the animal theme in their playroom!

Built from Plan(s)

Comments

Full Kitchen Set

don’t know when I first stumbled across Ana’s site. But – when I started printing the plans that I wanted, and I printed a whole 2 inch binder – I knew I was addicted.

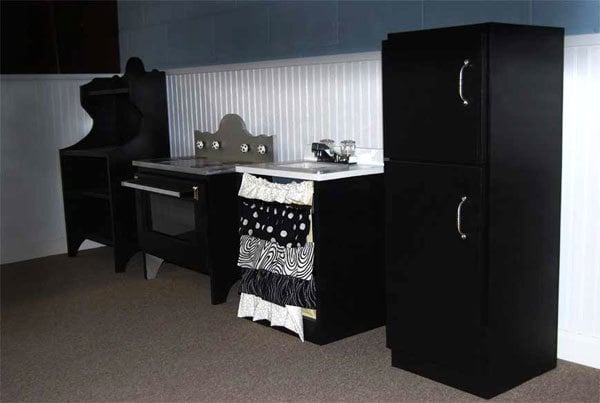
It was November and I wanted to build the whole kitchen, the hutch, fridge, sink and stove. (I get obsessive about things) That was a lot of building! Being the numbers dork I am, I ran to my excel sheet – planned out all the cuts to use as little MDF as possible. I used three sheets of MDF – which totaled about $90, the accessories and flat black paint ran a little under $30, so in total the four pieces were $120, for all 4 pieces! My full story of my husbands blizzard drive to the depot, and 120 cut’s later are in my blog: http://mycreativeescapes.blogspot.com/

I work full time and I have three kids 4 and under, so I had NO idea when I was going to do it, but – I knew I was going to do it – and as a christmas present!

My dad helped me with the first two pieces, and I finished it up. It secured my love for building!

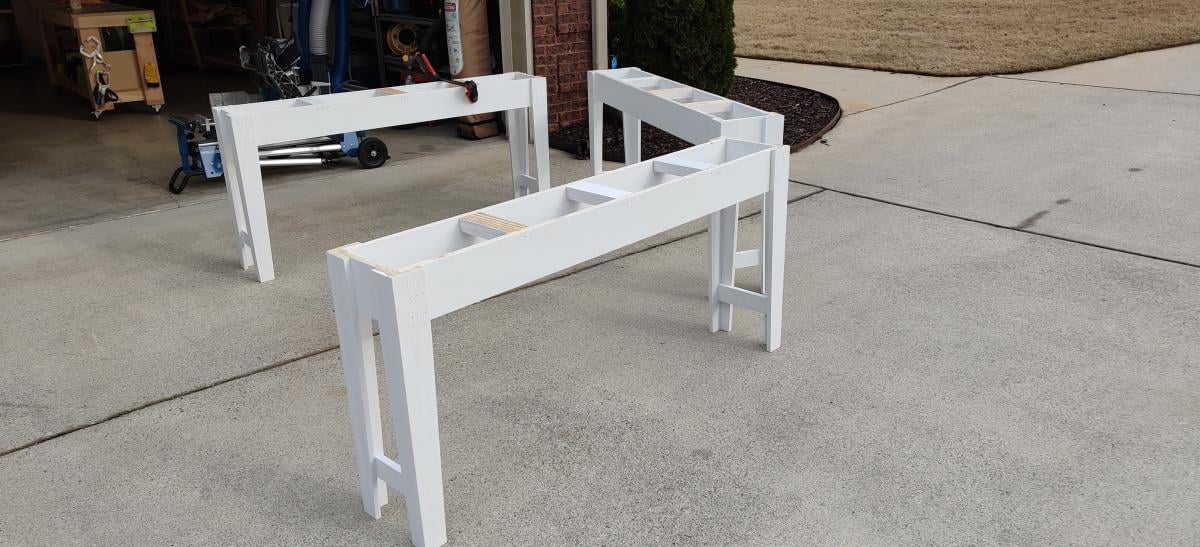
Overall the building was super easy – after a few popped nails, I got the hang of the nail gun. After the first piece, I figured out the tricks to be able to build it myself. Clamps are my new best friend!

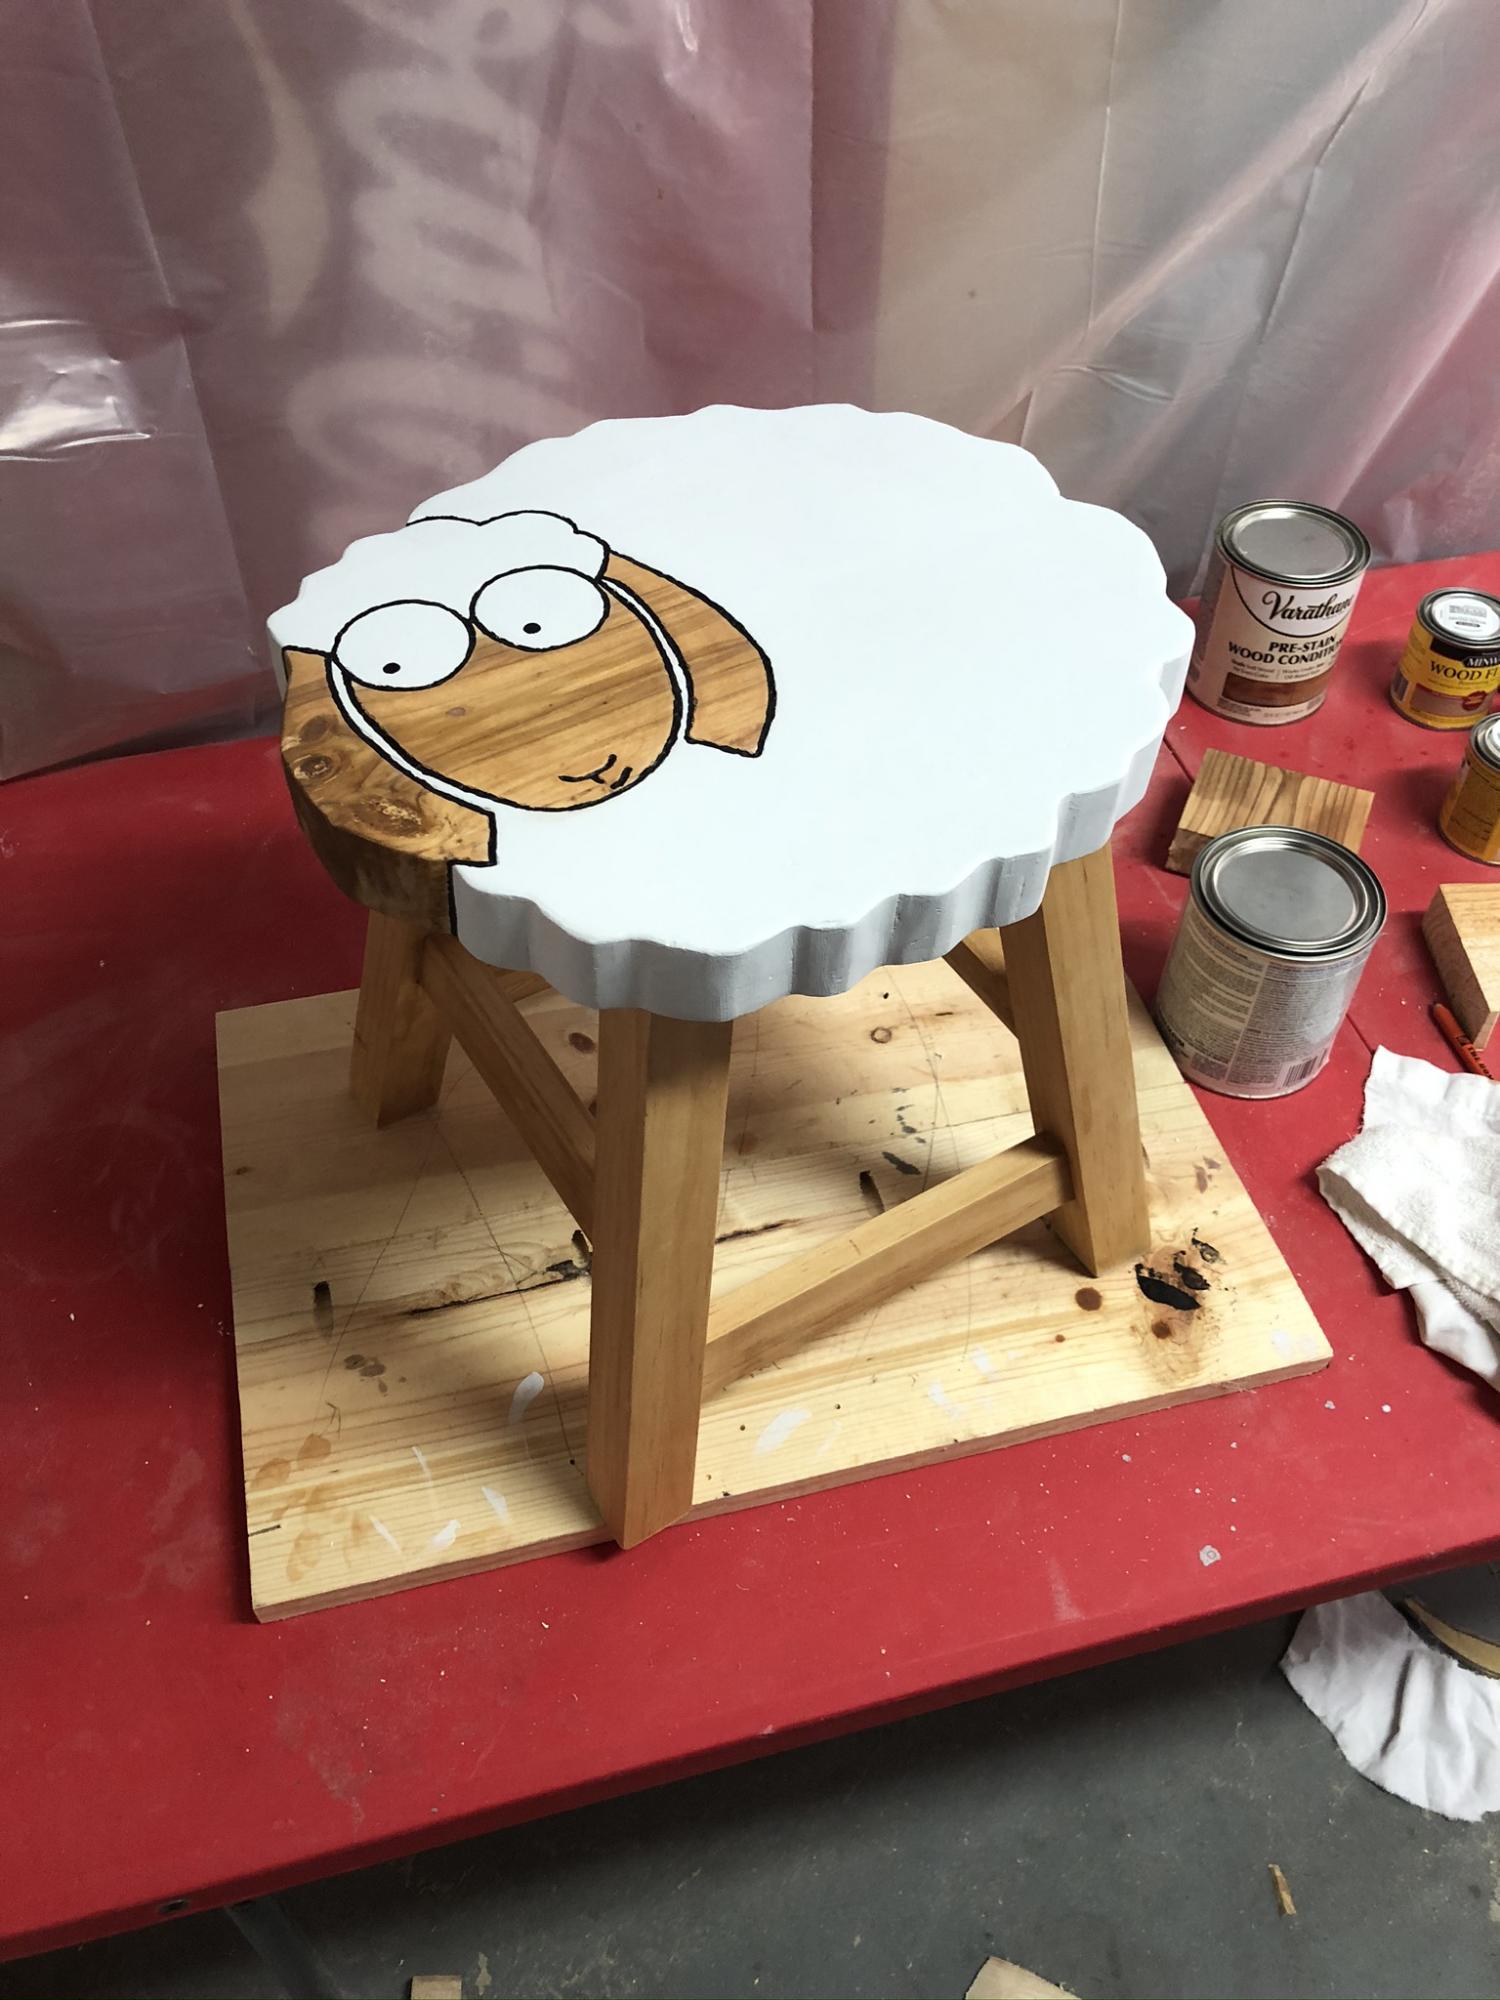
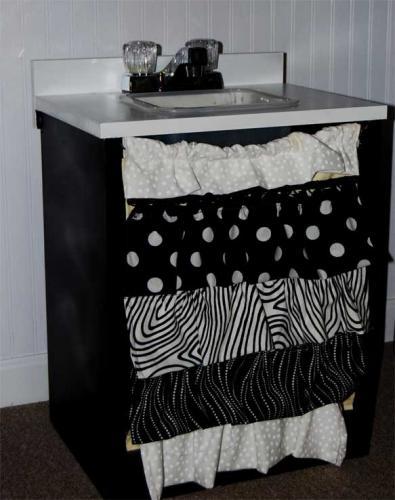
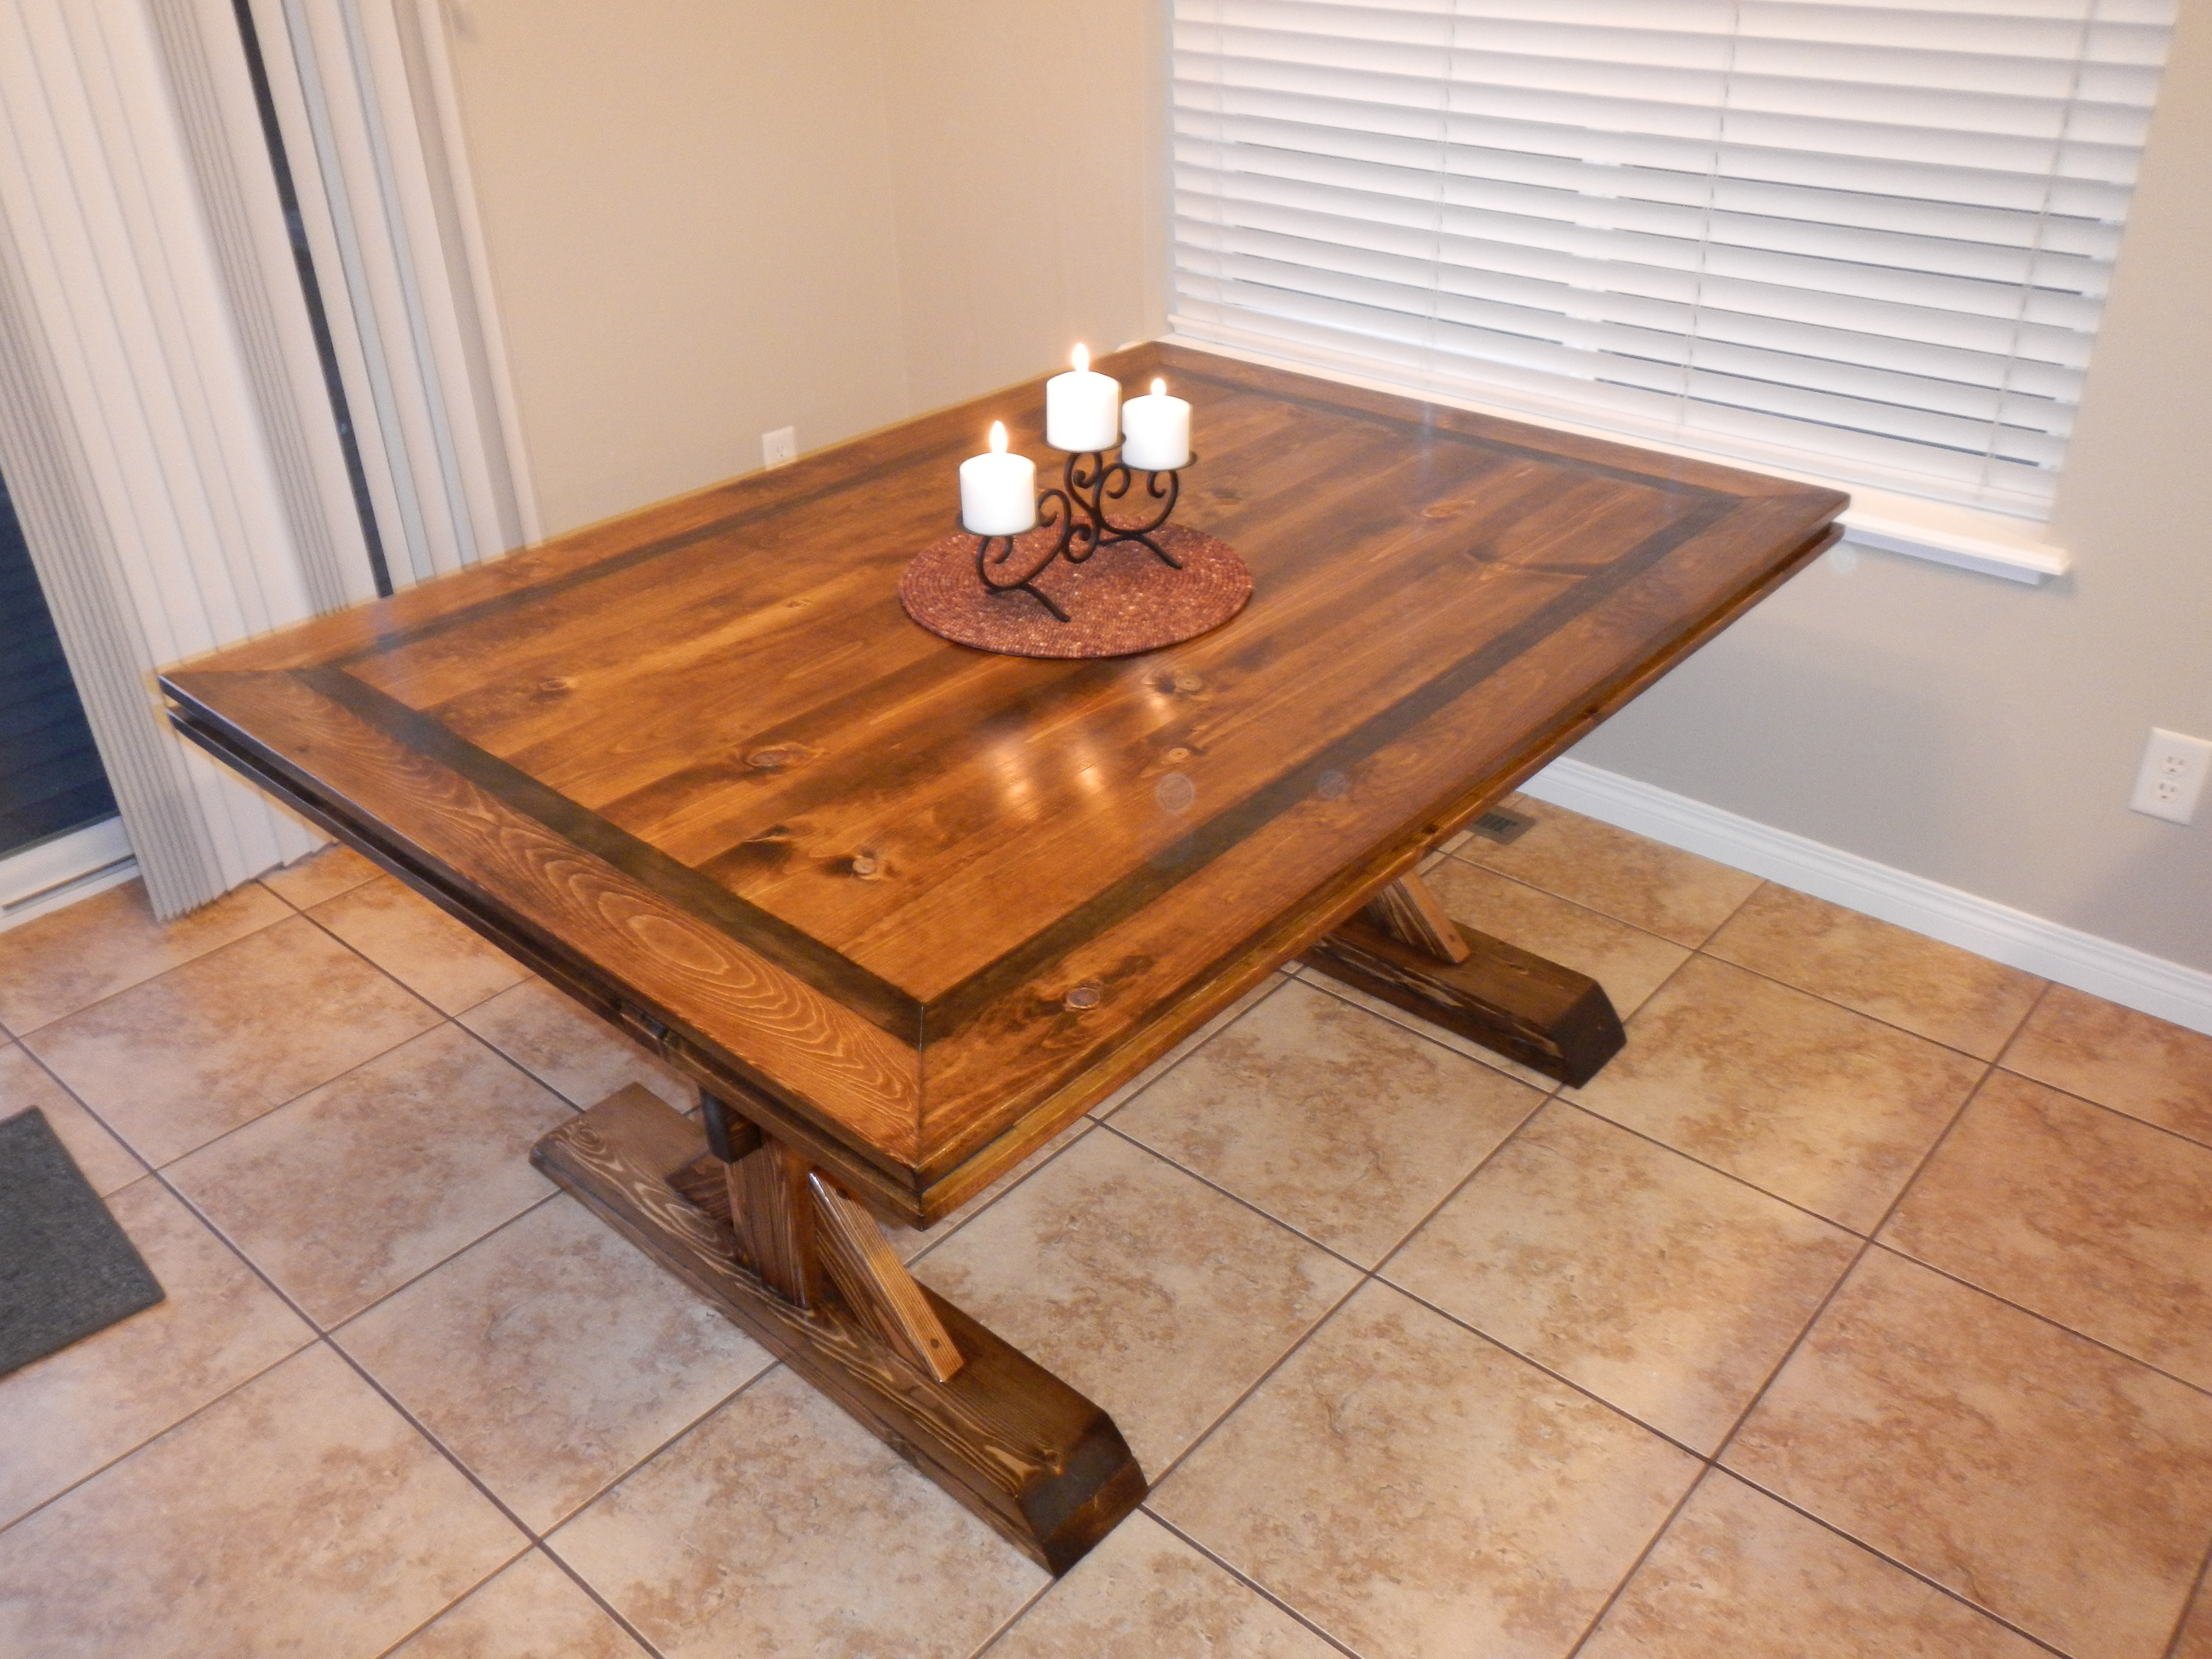
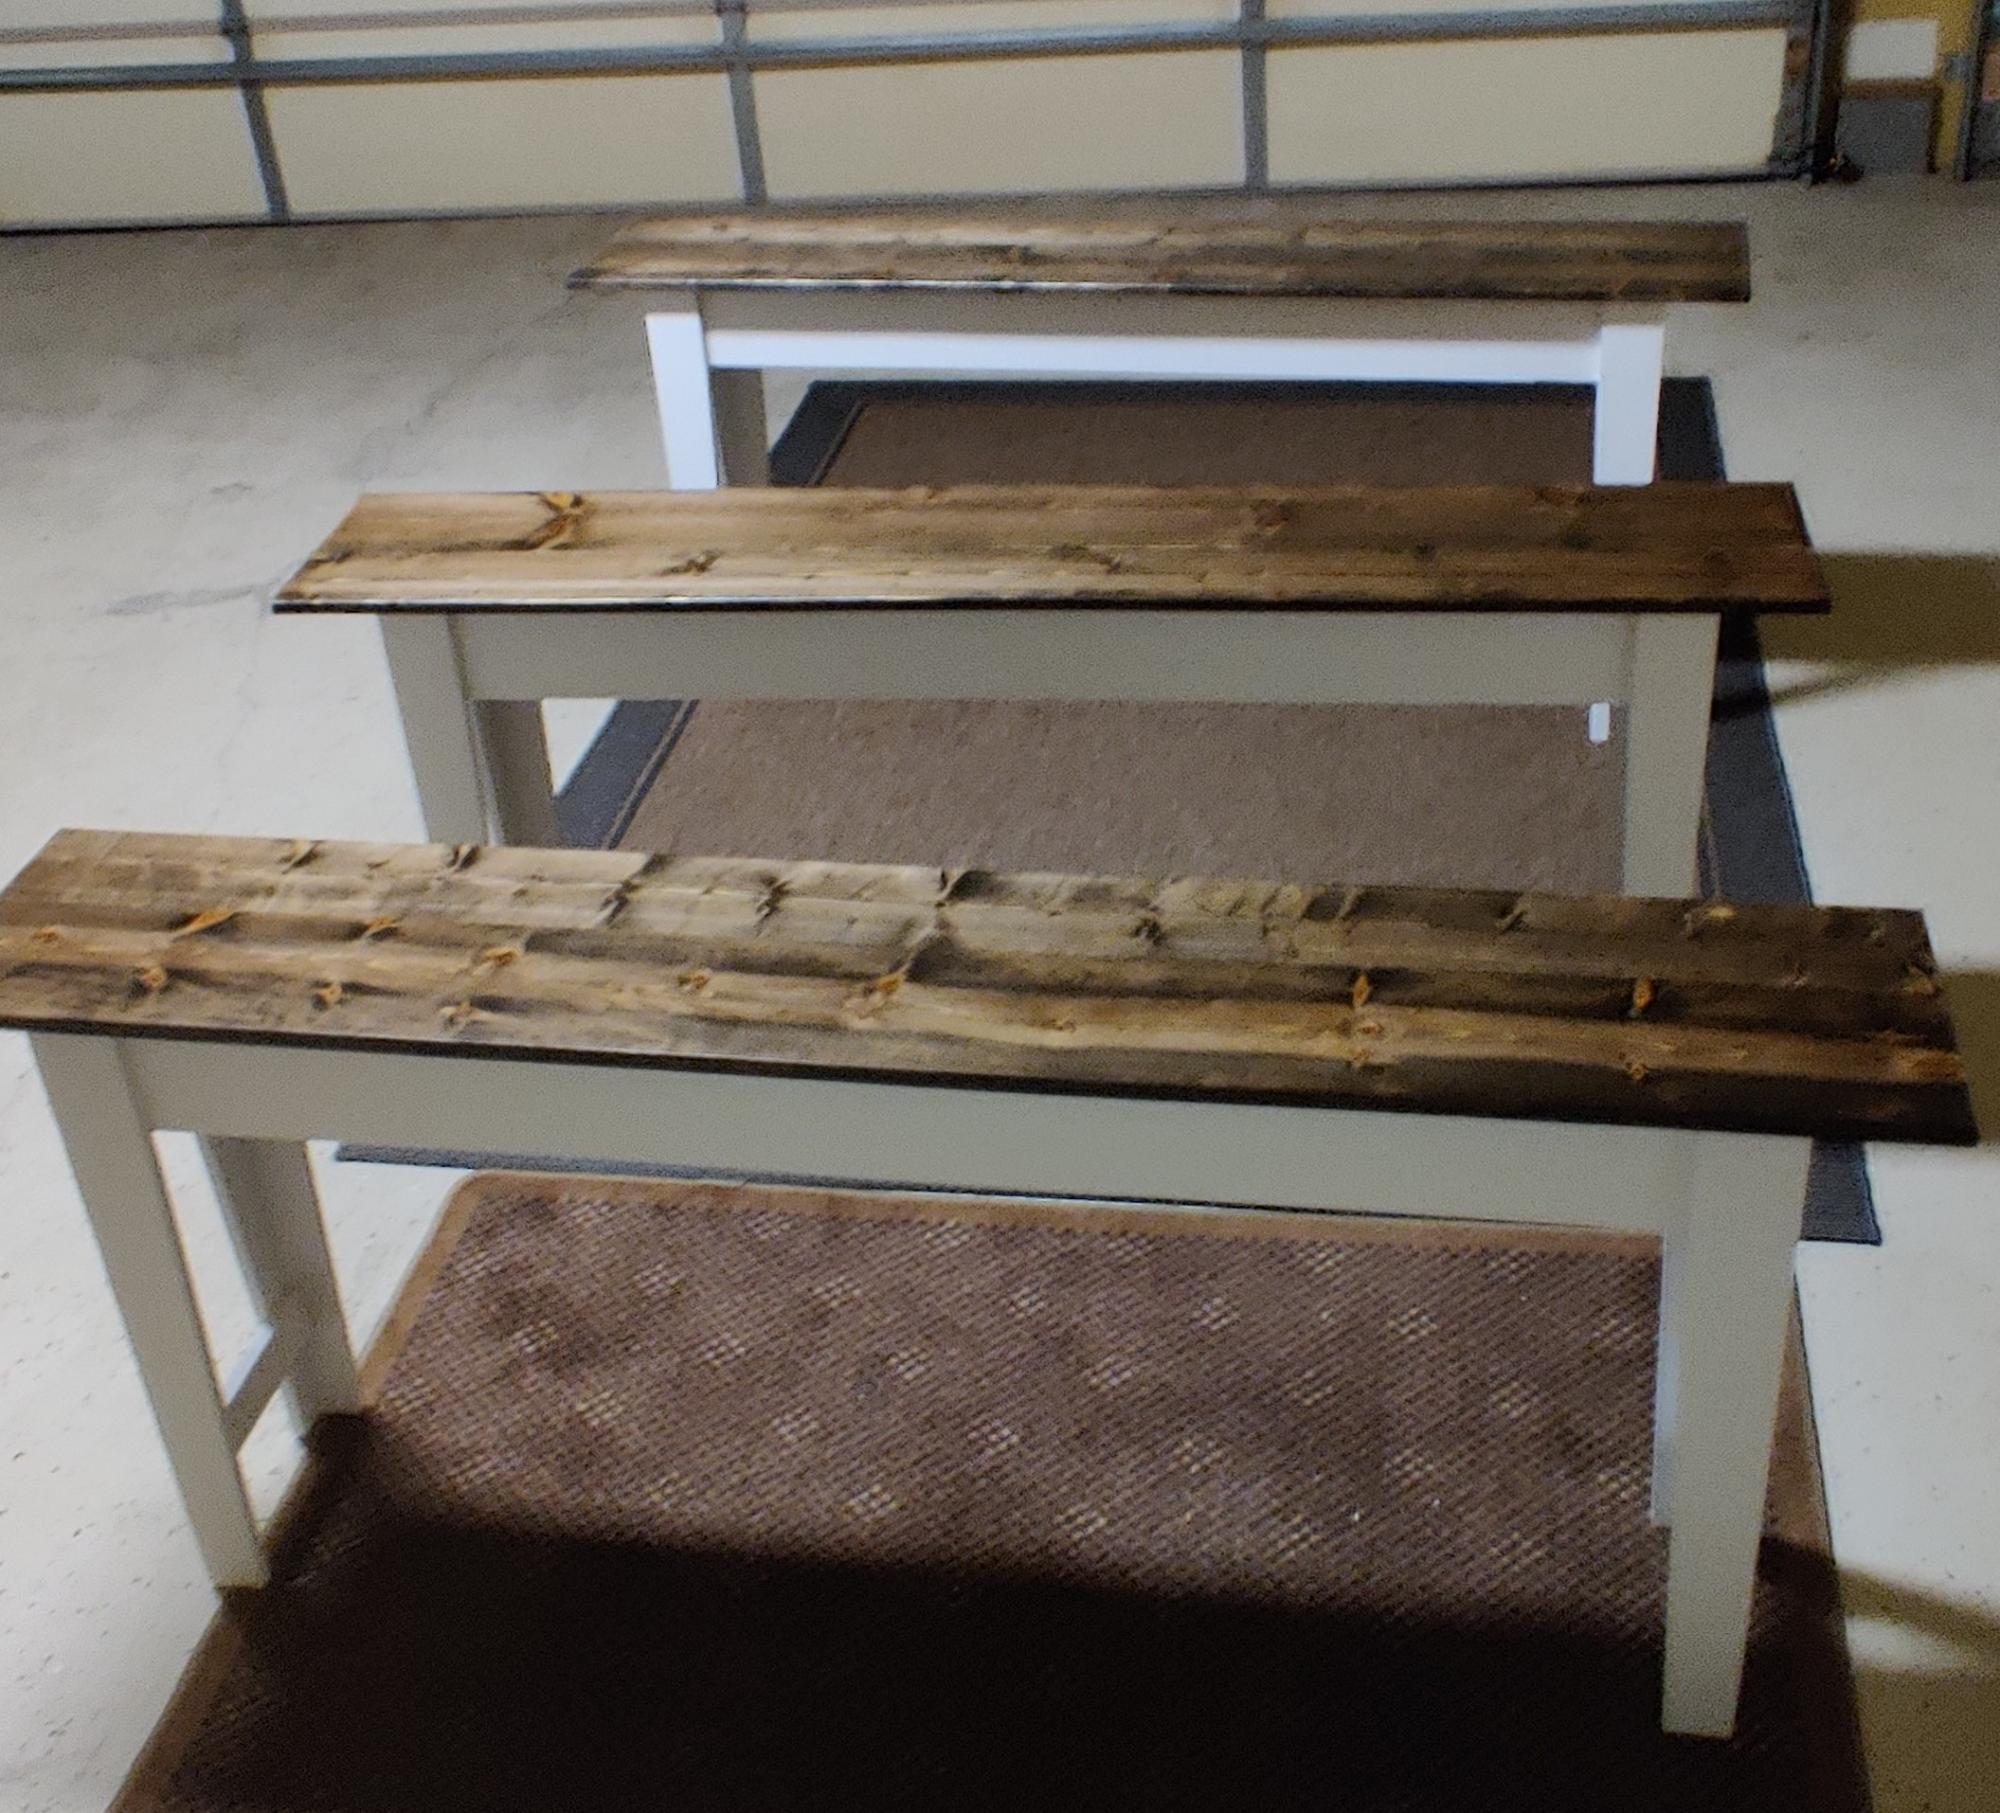
The finishing – ahh good times, nothing like the wife wanting to use the power tools, and the husband wanting to do the paining. He insisted! We had flat black paint, so we did most of it in flat black. We wanted to do “Stainless” but the chrome didn’t look very good because we painted on the primer with a brush – we didn’t spray it, so when we sprayed on the Chrome spray paint – you could see the brush strokes. So we ended up painting most of it black as you can see in the picture.

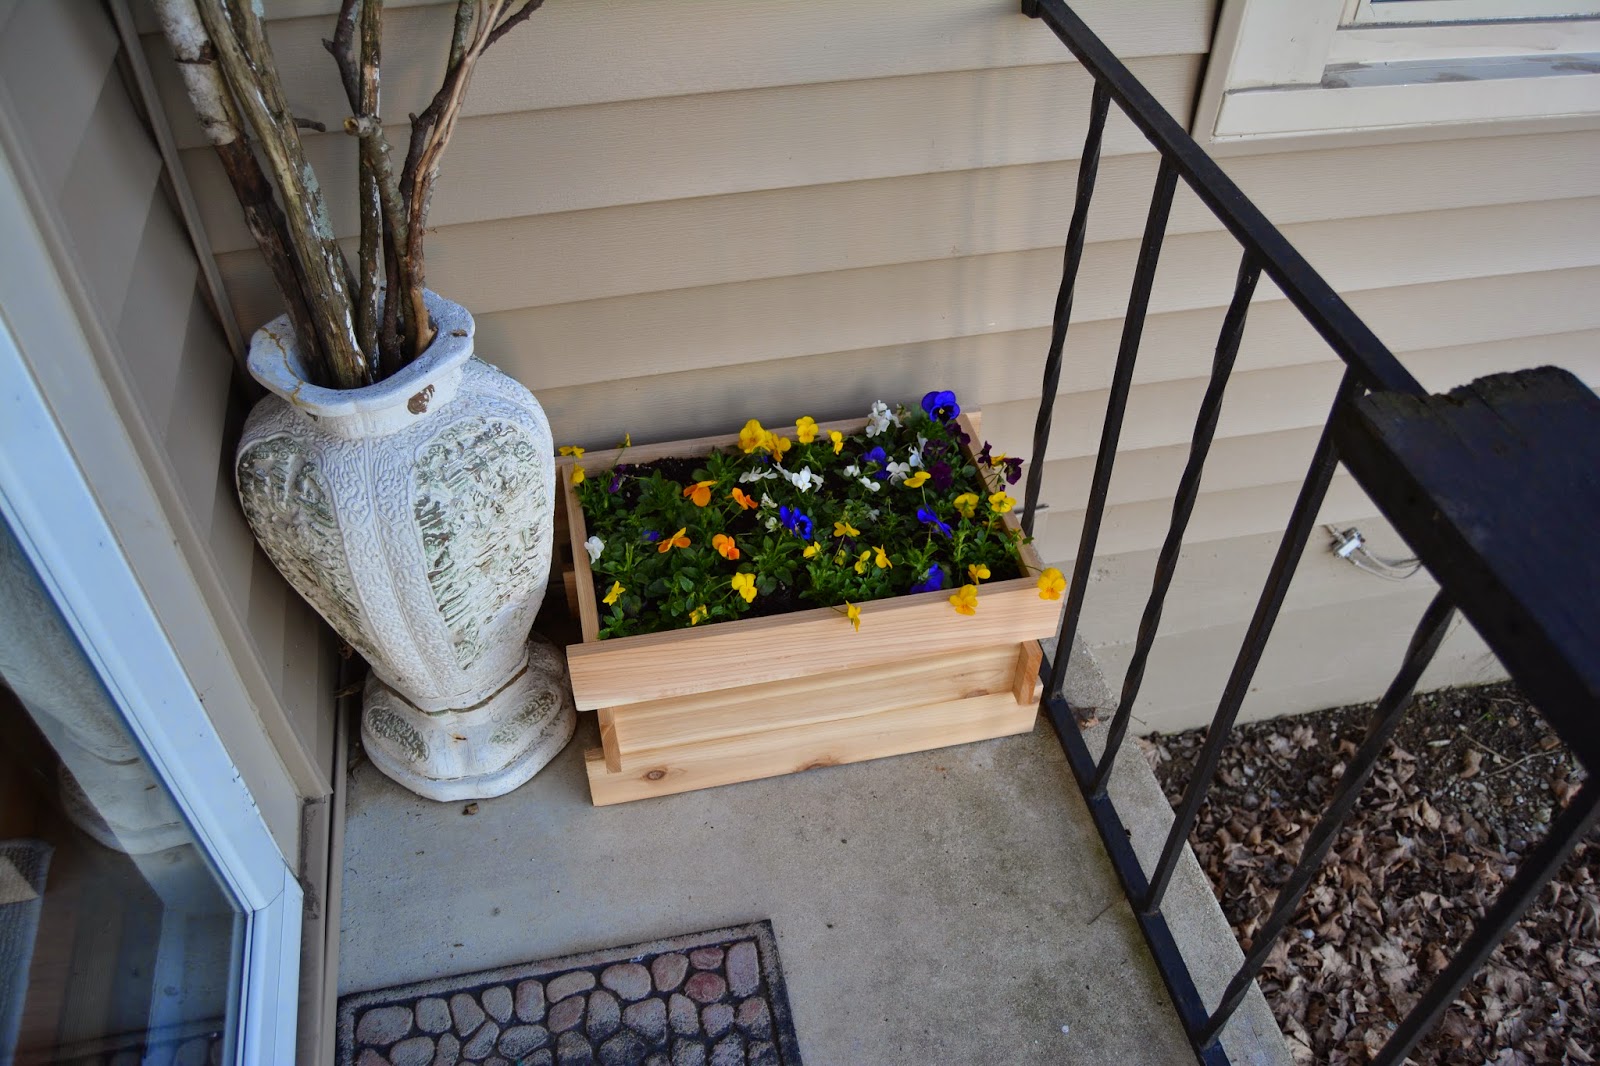
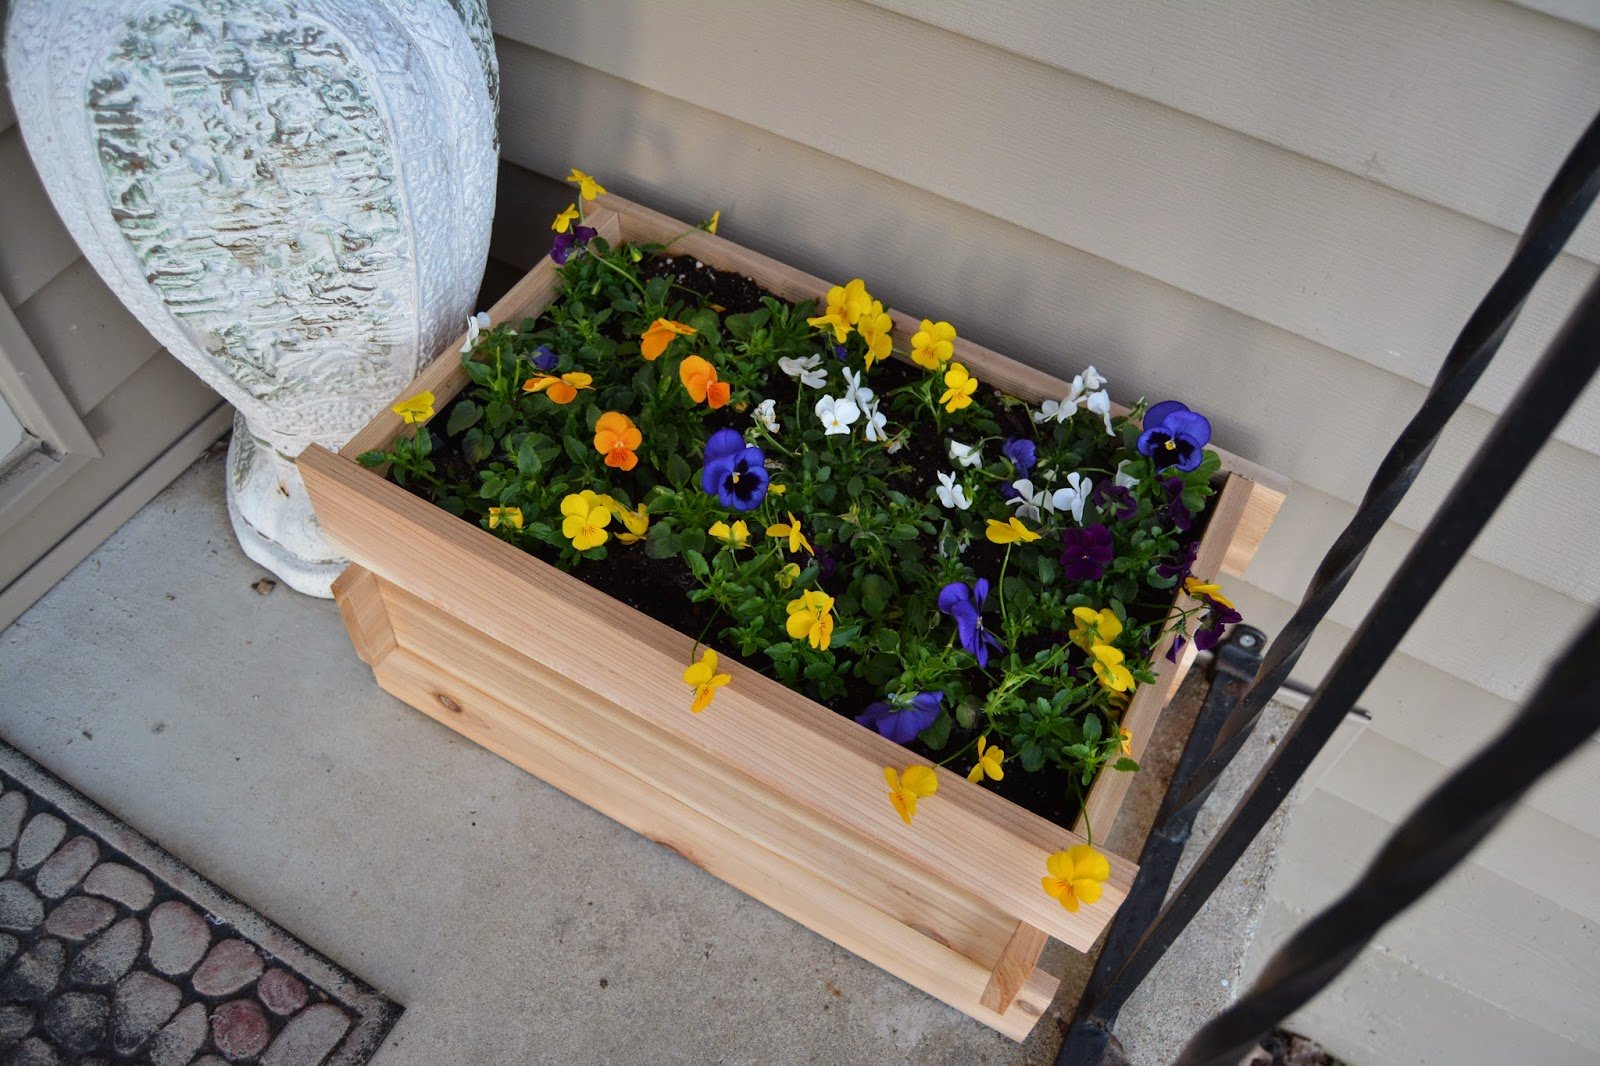
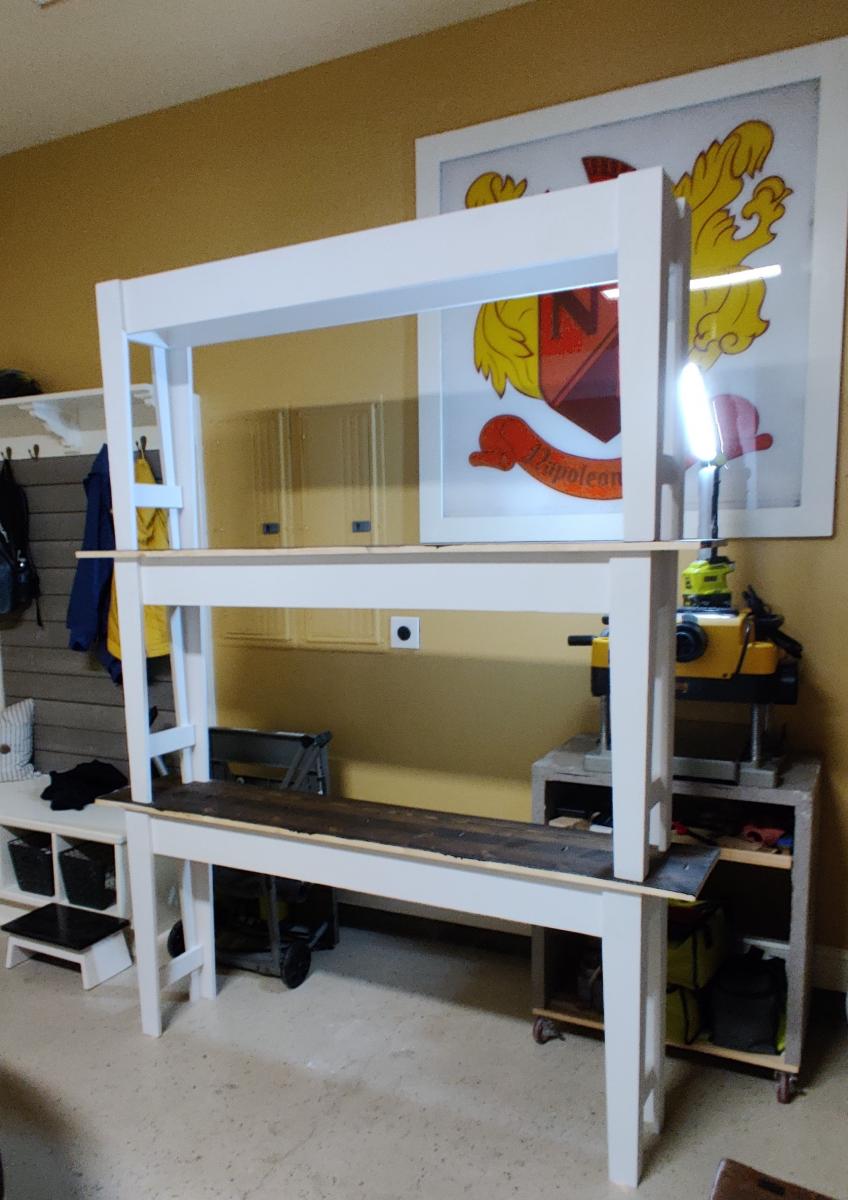
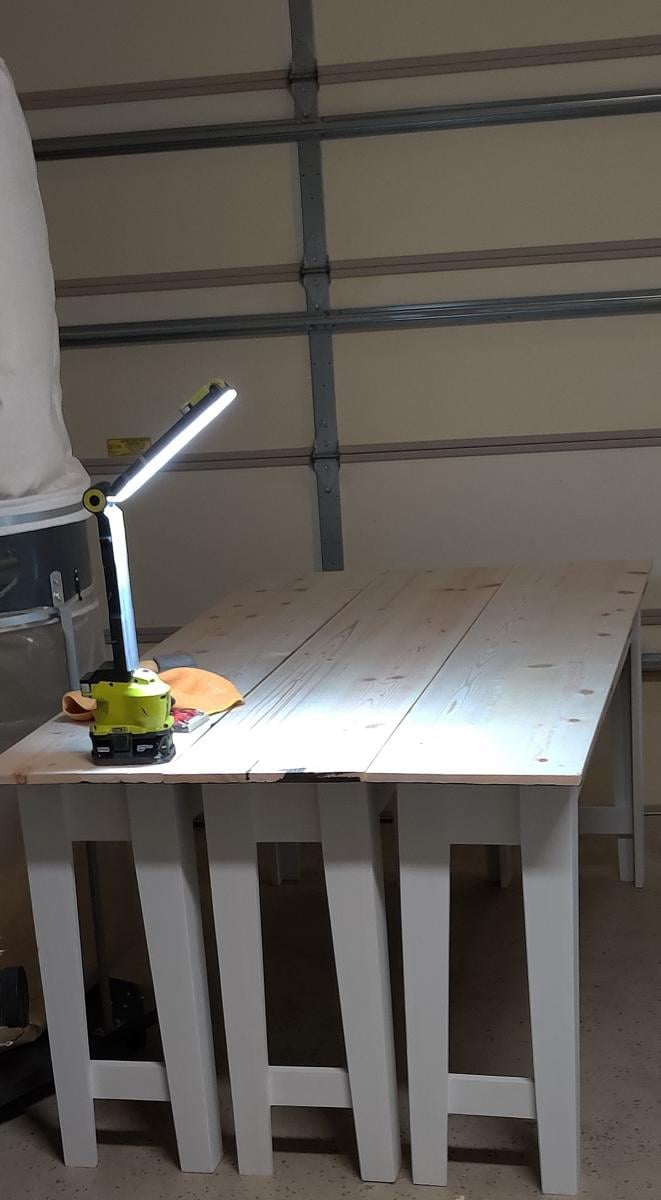
This is what the project looked like pretty much done, just drying. My plans are resting on each piece, the clamps are holding the oven door together. And the plastic bin is my sink!

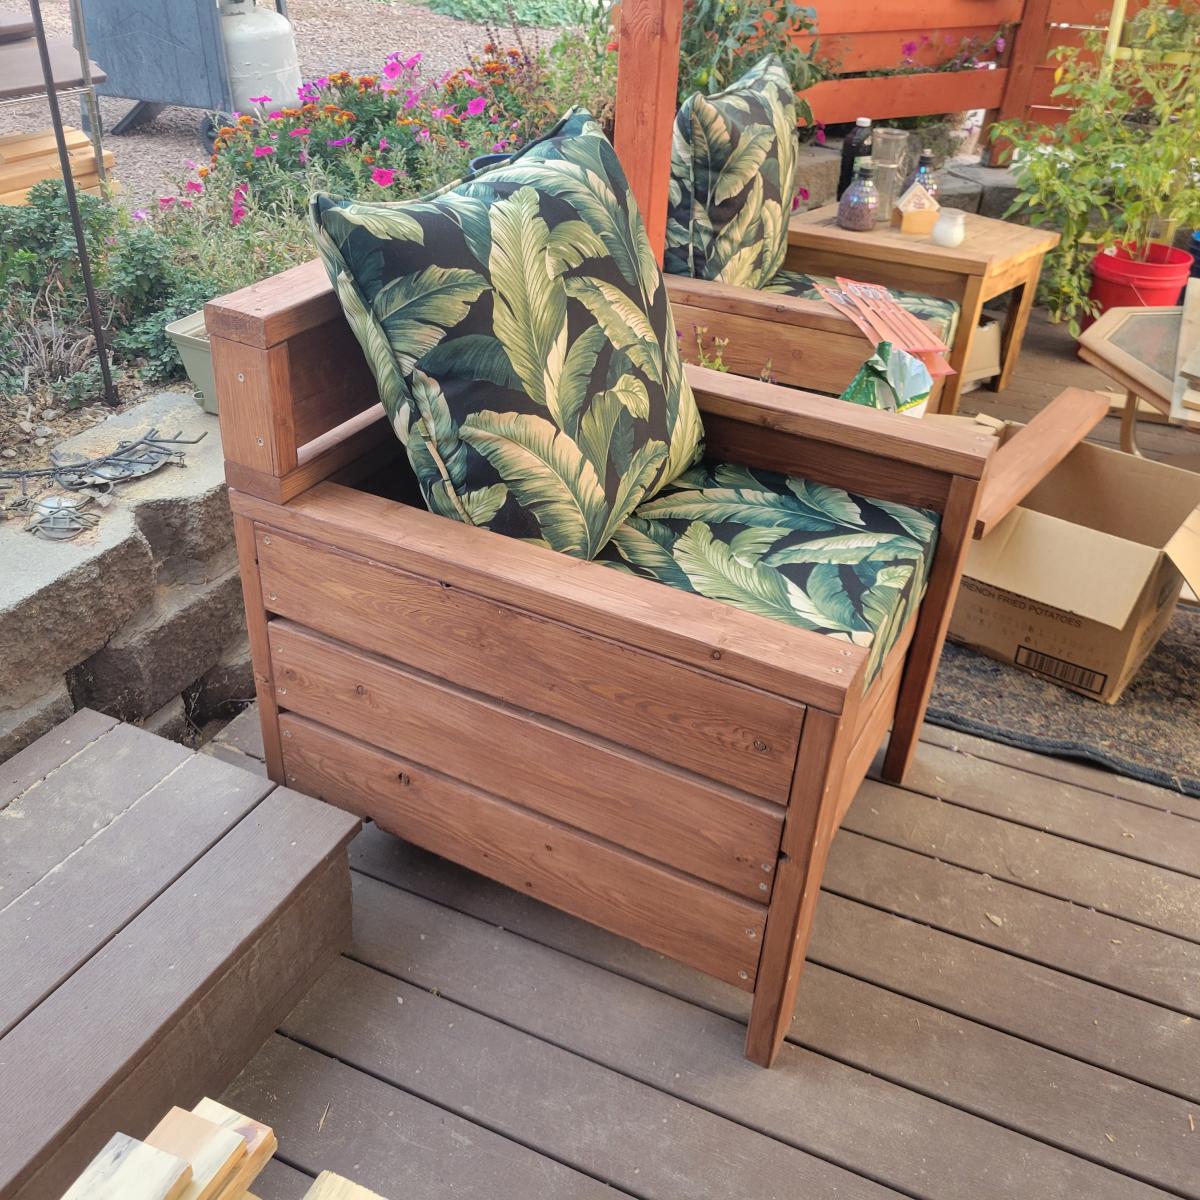
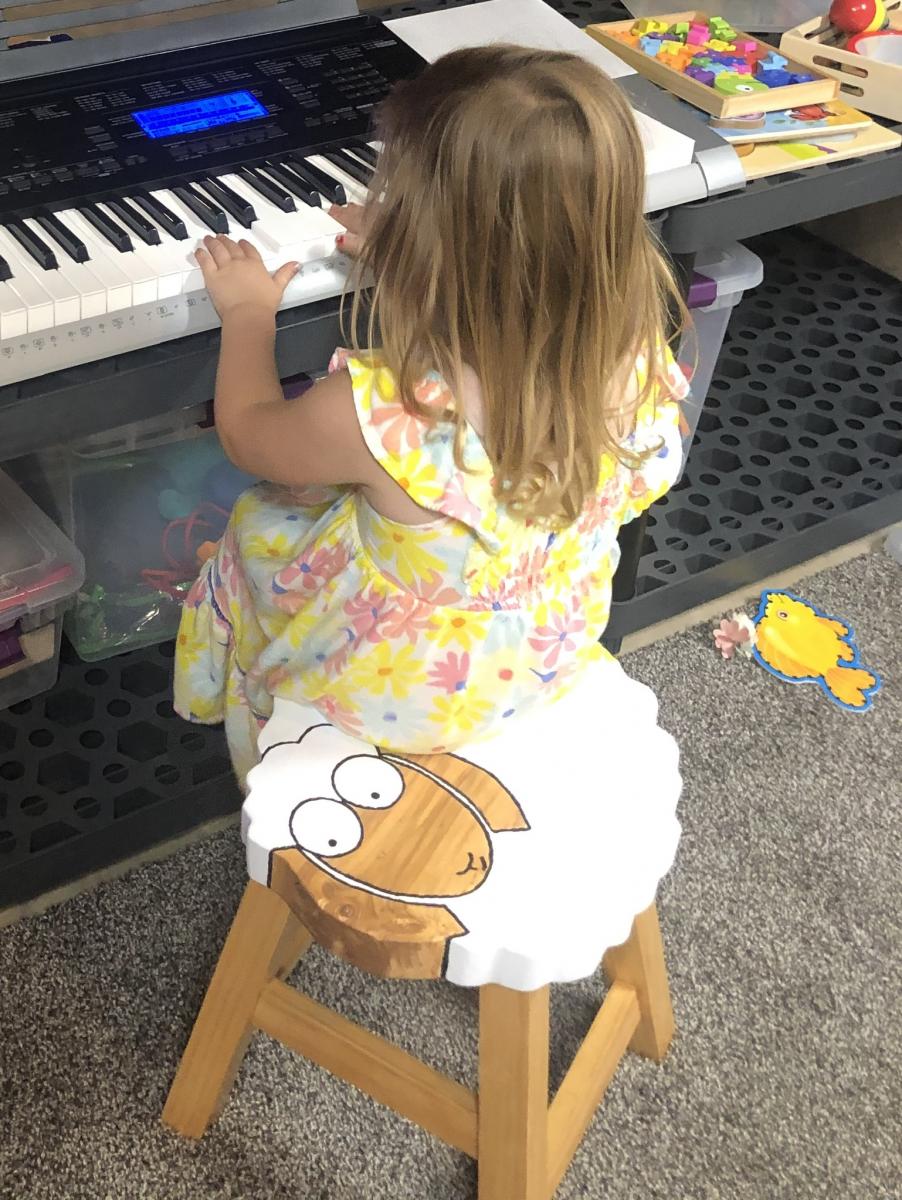
Ana – you truly are an inspiration! Your plans are awesome, and your generosity is amazing! I seriously have a binder full of your plans, and I am going to guess about every other blog post will be featuring your work. My first project was a simple bookcase, then the entire kitchen set, then the bench with the butterfly hinges that revealed storage for my mom (for christmas, it made her cry!). I can’t wait till the weather is warmer so I can build more! Thank you from the bottom of my heart! Next – I will post some pictures of my three little nut bags playing with there new kitchen from Santa, and my two girls and my niece sitting on the bench I built my mom.
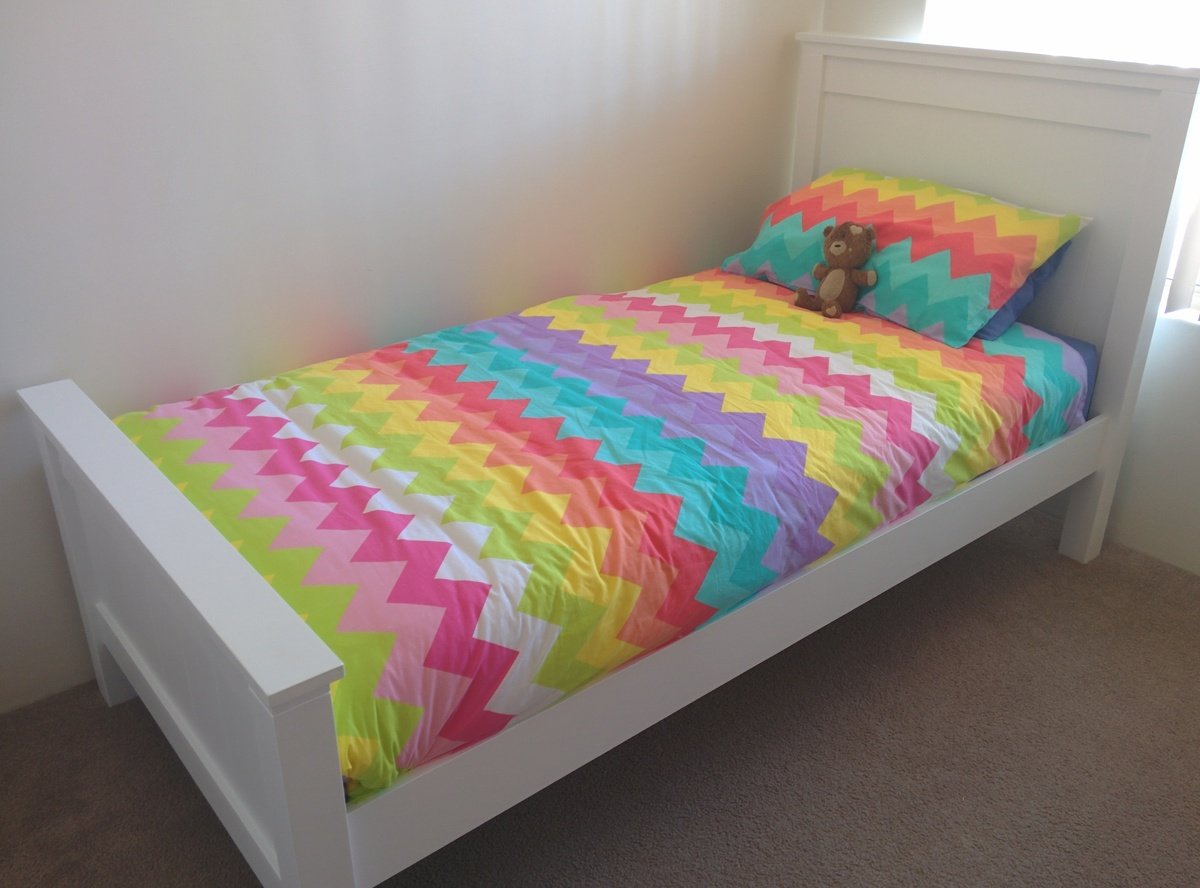
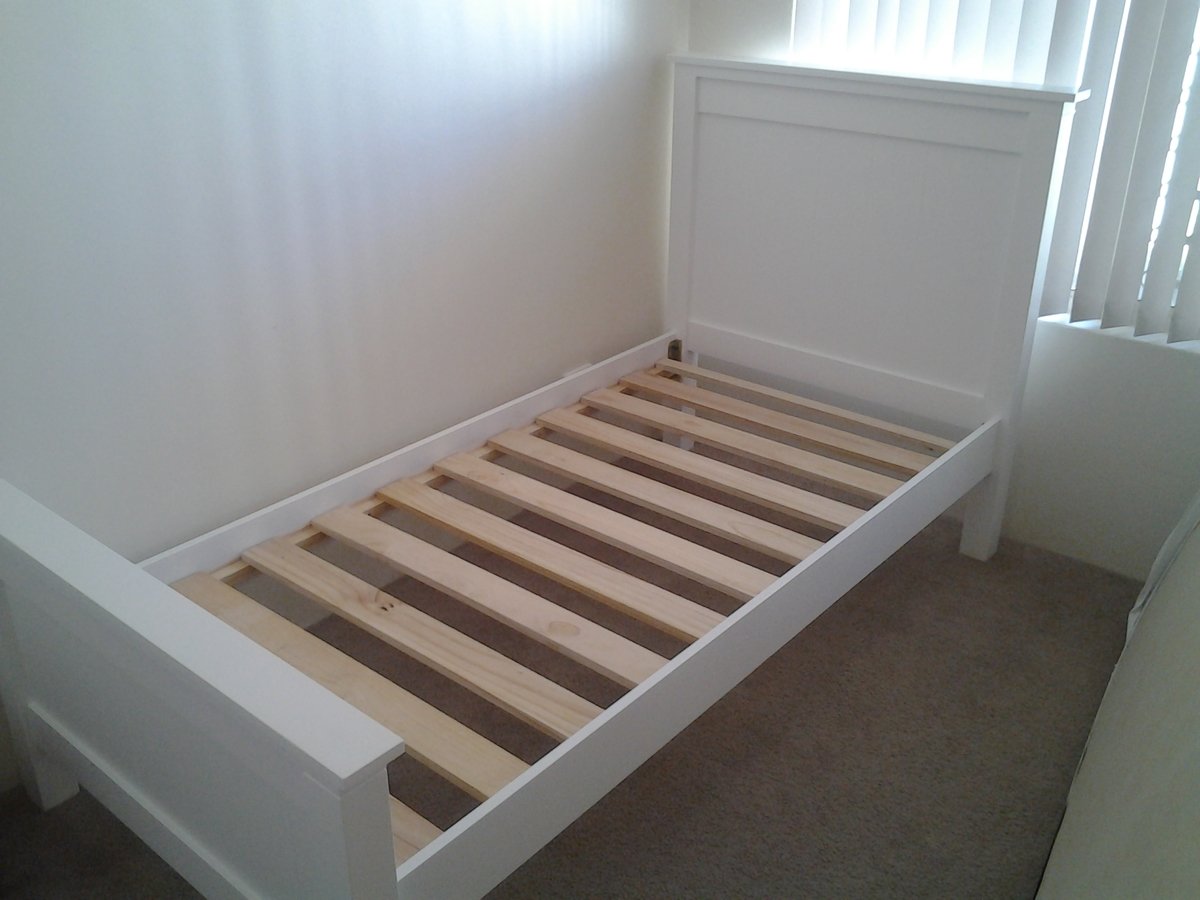
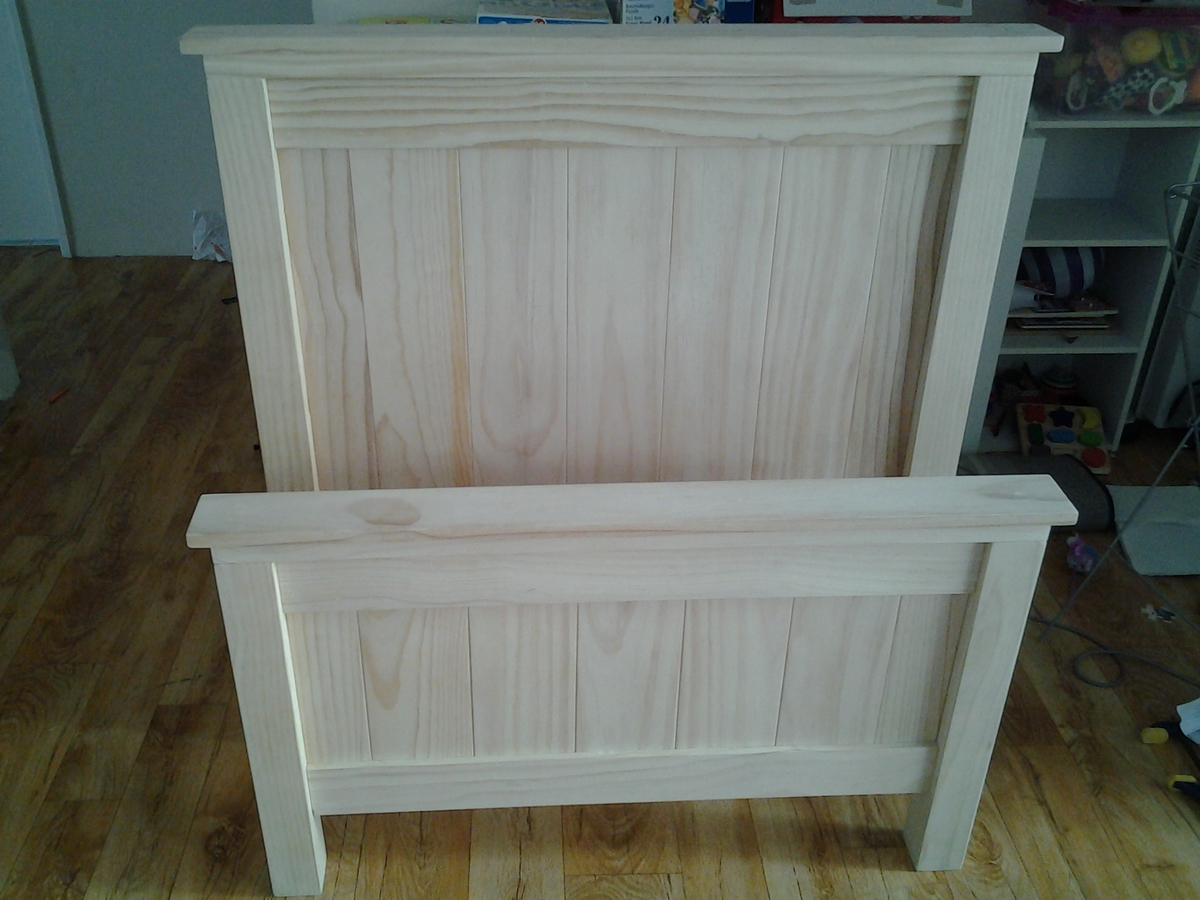
Estimated Cost
$90-$120
Estimated Time Investment
Weekend Project (10-20 Hours)
Finish Used
Sanding, priming and painting with flat paint, tried "chrome" spraypaint - didn't work so well.
Recommended Skill Level
Intermediate