Community Brag Posts

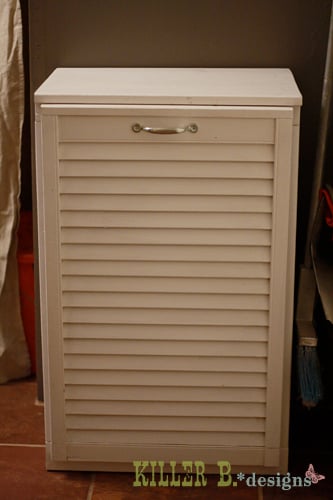
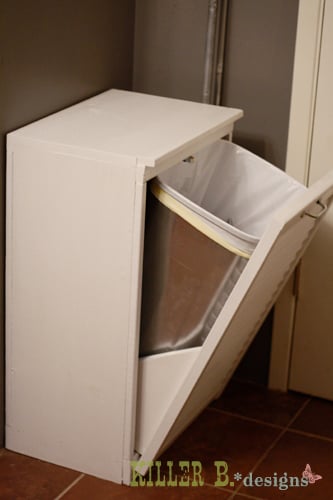
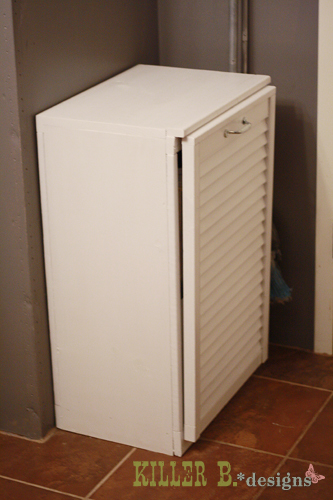
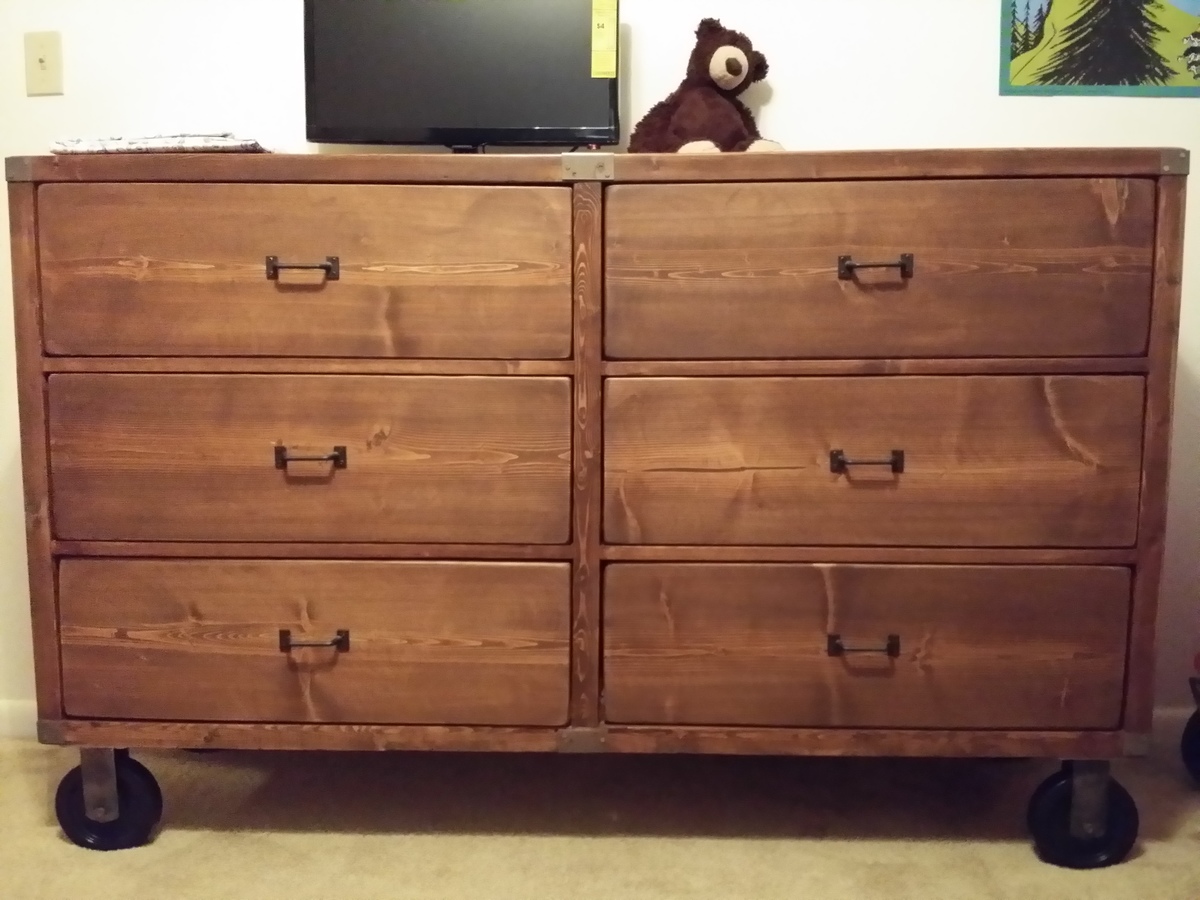
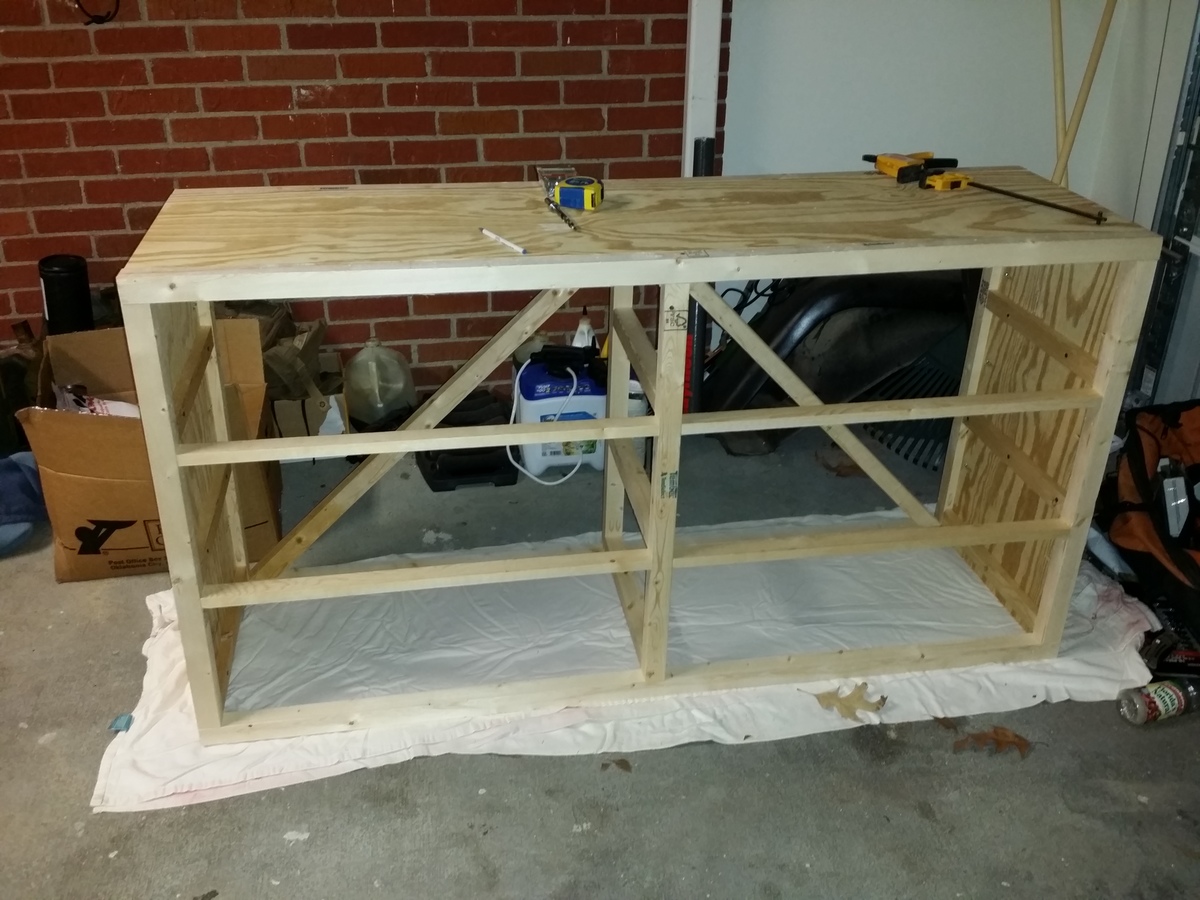
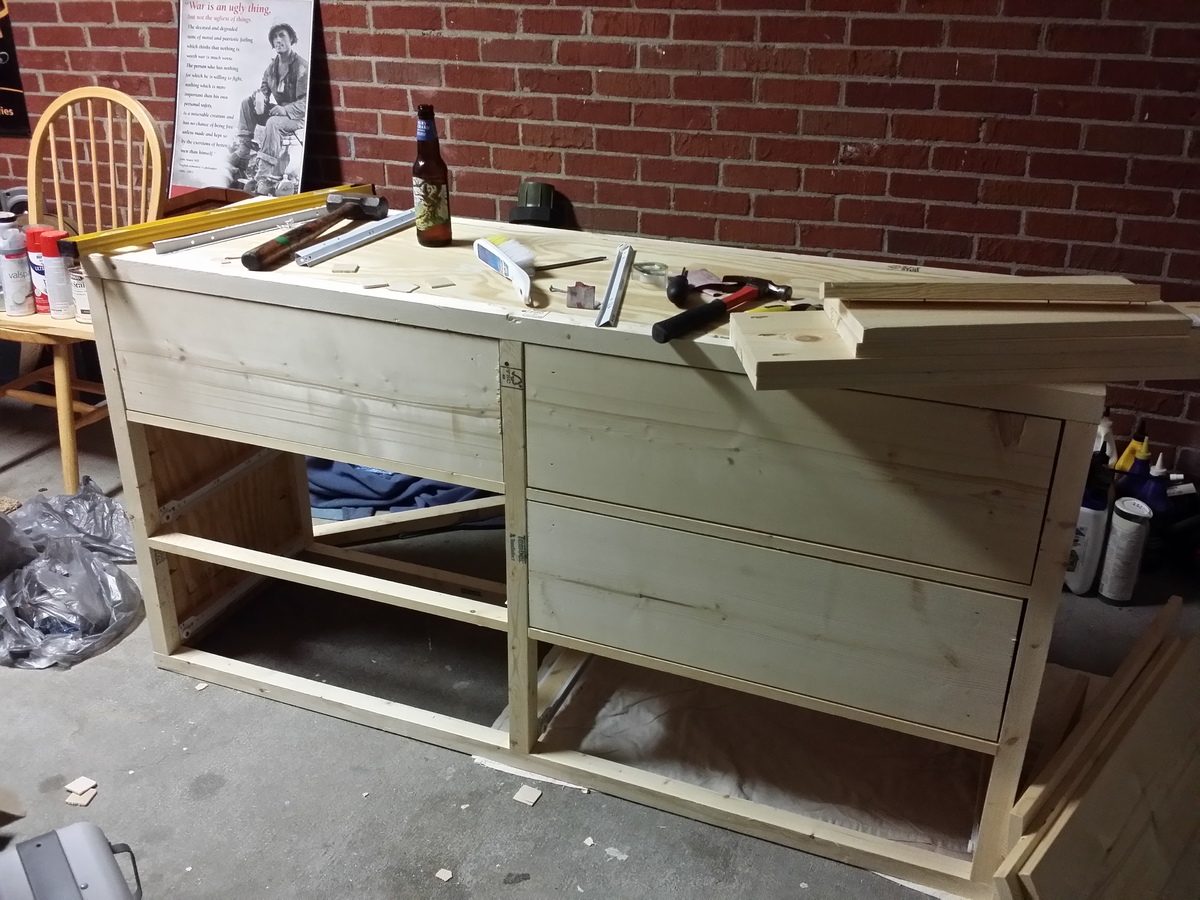
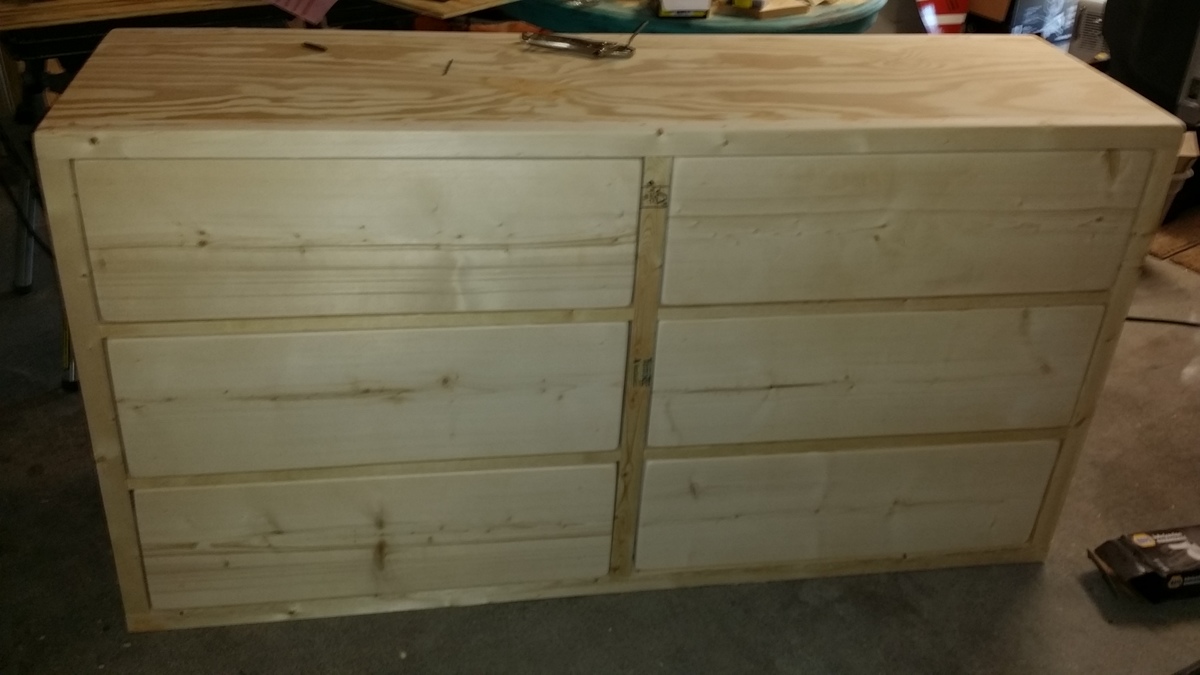
Tilt Out Trash Cabinet with Shutter Door

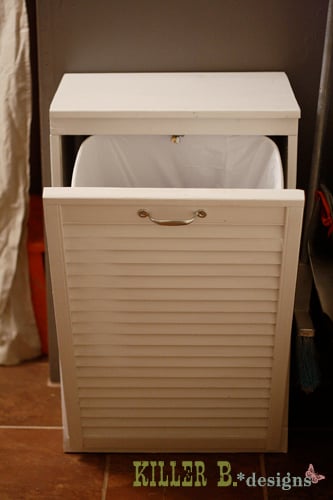
My trash situation was pretty dire once my dogs figured out how to pop off the lid and dig into everything. Trash was everywhere! So to keep out prying paws, I built Ana's tilt-out trash cabinet to keep the can safe. But I didn't read the plan through before going shopping, and didn't get any plywood to make the door! So I used part of an old bifold door that looks like a shutter and cut it to fit. I also added a cabinet clasp inside the top so it can securely shut. Now we don't have any trouble with my dogs dragging trash through the house!

Estimated Cost
15
Estimated Time Investment
Afternoon Project (3-6 Hours)
Finish Used
Three coats of semi-gloss white
Recommended Skill Level
Beginner

Comments

Shaker style cabinet doors and drawers!

Submitted by ksmith311 on Sun, 02/16/2014 - 16:49

After some inspiration from Ana, my husband and I tackled refacing and rehabbing our original cabinets circa 1939. The drawers and shelves were in rough shape so we built our own using the kreg jig. We're extremely happy with how everything turned out. When the weather gets better we will be building new cabinets on the opposite side of the kitchen where unfortunately we don't have ANY storage.

Thanks for looking!

Estimated Time Investment
Weekend Project (10-20 Hours)
Finish Used
Farrow and Ball "Lime White" uppers and Benjamin Moore "Kendall Charcoal" lowers
Recommended Skill Level
Intermediate

Childs Bench with Arbor

Submitted by Fitz3636 on Tue, 02/18/2020 - 08:28

This was one of my first Ana-White projects. I am a hack builder and found this to be fairly easy with the back of the seat to be intermediate (However, I slanted the back and found that to be challenging for me.) Loved this little arbor bench and how it turned out. A couple coats of polyurethrane has helped it last outdoors all year through the sun and rain in Florida. Kept costs down using extra wood in the garage. Kids love to sit on it but mostly climb...!

Estimated Cost
45
Estimated Time Investment
Weekend Project (10-20 Hours)
Finish Used
Paint and polyurethrane
Recommended Skill Level
Intermediate

Sandbox with Benches

For the last year we have been kicking around making a sandbox. We really needed a cover and really wanted seats. So this worked out perfect. We did modify the plan a little to make it just a little bigger. It is 4' x 5' instead of the 4'x4' called for in the plans. Very easy to build...we have very little building experience and pulled it off. We did dig out the grass where the box was going to sit and stapled 2 layers of landscaping fabric to the bottom of the box frame. We also sealed the main box frame with a little silicone to minimize sand leakage.

Built from Plan(s)
Estimated Time Investment
Day Project (6-9 Hours)
Finish Used
Miniwax Polystain (Stain and Urethane in one) in Pecan color
Recommended Skill Level
Beginner

Comments

Lady Goats

Sun, 05/06/2012 - 21:06

Widening that had a HUGE impact! Did that mean you had to double the 1x4s you bought? Very nice!

queenmooshie

Mon, 05/07/2012 - 05:32

Thanks. There are the same number of 1x4s on the top they are just longer. I was worried about the benches sagging because of the increased length and was prepared with scrap 2x4s to add support under the first two boards if needed but it doesn't seem to be a problem. We only widened it to 5' though...I think at some point that extra support would be needed.

4x4 Truss Beam Table with upholstered bench

Submitted by hubn8147 on Tue, 02/18/2014 - 14:35

I shortened the length of the table but kept the width. I have to re-figure the angles of the cross beams underneath. I also added decorative hardware to the raw post edges on the sides, on the edge of the breadboards, and underneath. I used Rustoleum Dark Walnut stain, and Rustoleum Satin Poly for the finish. I bought the 4 chairs before I stained it so I could match the table to the chairs. I then made the matching bench and upholstered it myself to match the chairs. All in all, it looks like a complete set and I'm so happy with it!
It is very heavy...

Estimated Time Investment
Week Long Project (20 Hours or More)
Recommended Skill Level
Intermediate

Comments

Joni

Wed, 02/19/2014 - 08:24

This looks fantastic. I LOVE the hardware on the edges. I know how hard it is to match stains and you did a great job. The upholstered bench looks professionally done.

Modern Craft Talbe

Submitted by Anonymous (not verified) on Wed, 05/18/2016 - 13:26

The desk top measures 39" X 69". It extends 15" on one side, creating a counter overhang for a second crafter. The top is supported by a 1X3 frame fashioned after the desk design shared on Ana's brag post (pg. 7 as of this writing). The room has a tile floor, so adhesive-backed felt strips were placed on the bottom of the bookcase units, making it easier to pull the desk into the middle of the room should I need to access my work from both sides.


A lumber yard cut all the pieces. Next time I would use 1X12s for the two side pieces.

Built from Plan(s)
Estimated Cost
$220
Estimated Time Investment
Week Long Project (20 Hours or More)
Finish Used
MDF for table top. White wood for bookcases.
Recommended Skill Level
Beginner

Double Teeter Totter

Submitted by Anonymous (not verified) on Mon, 10/16/2023 - 08:49

Here are a couple my Grandson and I built with pressure treated lumber with PVC handles and Azek seats. Grand kids love them!

Rocco Q.

Comments

Large rustic bench

Submitted by qfiffle on Wed, 05/09/2012 - 06:28

This is the first woodworking project I have done since high school (16 years ago!) and it's more ambitious than anything I attempted then!

It was easier than I thought on the whole, although I got a bit baffled by Australian standard timber sizes being totally different from USA ones. (The guy at the timber yard was all "One WHAT by two WHAT?") And because I couldn't find a 1x12 longer than 47 inches, I had to make the bench slightly shorter. I didn't anticipate how incredibly hard that would make it to calculate the cross support angles. (It's not just trigonometry, because there are multiple possible solutions).

It was the first time I've tried to upholster anything, too, so it's a bit wrinkly at the corners, but I'm happy with it.

I think the painting took the longest. I built the bench in one afternoon, but I had to do four coats of paint (and one of primer), each of which took nearly 24 hours to dry, so it took forever to finish.

Estimated Cost
$70 ($30 for the wood; $25 for fabric and batting; $10 for paint; $5 for screws and sandpaper)
Estimated Time Investment
Weekend Project (10-20 Hours)
Finish Used
Black acrylic "enamel" paint. Four coats over one coat of water-based primer. Upholstered top with upholstery fabric and batting, using a stapler gun.
Recommended Skill Level
Starter Project

Rustic Dresser and Bedroom Set

My son was too big for his toddler bed and had been spending his nights in the guest bed, instead. For his Christmas gift this year, his grandparents were going to get him bedroom furniture, but I insisted on building it instead! I love the rustic theme, saw the rustic dresser on wheels and thought it was perfect for him and perfect for us since we move so much with the military. Hello, a dresser on wheels? Like, no man labor trying to carry the thing out of the house? Just roll it? SOLD! I HATE the wheels that I put on it, but I really did not want to dish out $100 for the spoked wheels. I think I may change them one day and put the wheels on that will make it look ten times better, but for now, these will do. The wood for the dresser was pricey, but it was my first time buying plywood and I didn't realize that I could buy nicer plywood in smaller amounts that would have been a little cheaper since I didn't need to buy entire boards! Otherwise, it wouldn't have cost as much I am sure. I built a bed and a night table to match the dresser (as seen in the pictures), and frankly, I am very pleased with this set that I built! (CHECK OUT MY BED! http://ana-white.com/2014/02/rustic-twin-bed-upholstered-headboard-matc…) It was quite a difficult project for me, being the first time I had built drawers and because I didn't have more than a few hours in a week to get outside to work on it, but I finally finished :-) I also had a very small space to work in, since my husband consumes the garage with his man "stuff" and it was cold, so I needed the door closed with the space heater ;-). This project could definitely use some good amount of workspace!

Built from Plan(s)
Estimated Cost
$100-$200??
Estimated Time Investment
Week Long Project (20 Hours or More)
Finish Used
Minwax Early American , used a natural bristle brush, foam brush and cloth, set for a minute or two, wiped off.
Minwax Furniture Wax, rubbed on with cloth and let dry for a bit.
Recommended Skill Level
Intermediate

Sideboard Build

Submitted by craw4dz on Thu, 02/27/2020 - 10:24

Before moving, I sold my older, MDF-containing, sagging china hutch that was given to me by a friend.  I had dreams of building my own and had printed out these plans... built it in my head, rebuilt it, scratched out notes, wrote new notes, and so on until my husband finally said "just build it already" haha.  It took me 2 months to finish it and fill it with all of my china and I'm into it for about $330.  I love her and affectionately refer to her as Gert... she's a big girl.  I added adjustable shelving inside and horseshoes to the front to match everything else in my house and I think it turned out great.  It's sturdy enough I think we could have dances on top of it!

Thank you for the simple and easy-to-follow plans!

Built from Plan(s)
Estimated Cost
$330
Estimated Time Investment
Week Long Project (20 Hours or More)
Finish Used
Varathane Kona with a satin poly
Recommended Skill Level
Intermediate

Farmhouse Table

Farmhouse table from plans. Shortened length to 6.5 feet to fit our area. Good plans.

Estimated Cost
$90
Estimated Time Investment
Day Project (6-9 Hours)
Finish Used
Minwax oil-based Dark Walnut with two coats of brush-on poly all around. One additional coat of brush-on poly on the top followed by one coat of wipe-on poly.
Recommended Skill Level
Beginner

Comments

lipstickandsawdust

Mon, 05/14/2012 - 07:39

Very nice, nice stain work as well. I also really love the "filled" screw holes. I think it gives it so much character. I too have made this table and wanted the markings to show through. Thumbs up!

Debi_G (not verified)

Sun, 06/10/2012 - 16:30

Love it. Planning to make one for our new house once we get settled.

Joyous_Jems

Fri, 02/15/2013 - 10:40

Just go to the blue bar above Ana's picture at the top of the page where it says "plans" and type in the kind of table you're interested in. Prepare to drool over all the gorgeous furniture and projects!

Farmhouse End Tables

Submitted by pde00311 on Mon, 02/24/2014 - 22:49

Of course, with our new king farmhouse bed, we needed matching his and her bedside tables. It was a pretty straightforward build. However, if I were to build it again, I would install slide hardware for the drawers. For whatever reason, our drawers, which use the wood on wood slides in the plans, are difficult to open/close. When I get a chance, I am going to sand everything down to try to prevent the drawers from sticking so much.

Built from Plan(s)
Estimated Cost
50
Estimated Time Investment
Day Project (6-9 Hours)
Finish Used
Behr off white #1873 paint distressed with Minwax special walnut stain
Recommended Skill Level
Beginner

Comments

ehays216

Wed, 02/26/2014 - 05:44

I love the stain you used on the tables and bed, thanks for giving the details! They all look great!

Double farmhouse bed

Submitted by Anonymous (not verified) on Wed, 05/25/2016 - 20:05

My husband built the full size farmhouse bed for our 2 year old son. It turned out beautiful but very high off the ground. In hindsight he would've cut off about 4" from the end posts so it would be lower to the ground. Overall we are very happy with it!

Built from Plan(s)
Recommended Skill Level
Beginner

Breakfast nook with storage

Submitted by nahoy08 on Mon, 03/09/2020 - 08:12

Modified the benches a little to be opened without removing a cushion. Cushions to come. We made our own paneling for the back and reused the original trim. Table to come. 
Idea and plans from another brag Breakfast nook. 

Estimated Cost
275
Estimated Time Investment
Weekend Project (10-20 Hours)
Finish Used
Variety of stains all with a light clear coat on top.
Recommended Skill Level
Intermediate

Modified Kitchen Island from the Handbuilt Home Island Plans

Today I’m sharing this unexpected addition to our kitchen! Everything about the construction of this furniture-style kitchen island seemed to be charmed. There is usually a lot of trial and error that goes on behind the scenes during our projects- but everything seemed to just kind of fall in to place. We enjoyed it while it lasted, since we know it won’t be that easy again! ;) Without a real plan for the island, we found the beautiful marble slab on Craigslist for a steal. While the slab was having it’s edges finished, I began comparing island legs. The ones I decided on came from Osbourne Wood, they are called The Grand Harvest Island Posts. I liked the chunky style in order to support the heavy marble. We are so so happy with the quality of the legs that we plan on using this company for all future furniture building projects. For the specifics on how to build the island, we were a bit stumped. We were just kind of going to wing it. Then, when I was daydreaming about a completely unrelated project, I stumbled across the kitchen island plans in Ana‘s book The Handbuilt Home. The dimensions were almost perfect for the slab! We modified the plans slightly- we didn’t need casters, and our island needed to be a bit narrower than the plan in the book, and we swapped out the 2×4′s for 2×6′s in some places- but the length was perfect, so we were still able to use most of the materials list (a huge time & money saver!) to maximize yields. We ordered a Kreg Jig, like Ana recommended, and I have to say- I love it! This island was so much fun to build and finish- and it makes a huge statement in our DIY renovated kitchen!

Built from Plan(s)
Estimated Time Investment
Day Project (6-9 Hours)
Finish Used
Aged Driftwood Finish: I started out by giving the island a coat of Minwax pre-stain conditioner, since I was planning to use a water-based stain. Next, I did a coat of Minwax Waterbased Wood Stain White Base tinted Slate at the paint counter at Lowes. My next step was the whitewashing. I very lightly dry brushed the entire island with white satin paint. After it dried, we sanded it all smooth, removing some of the white paint. Some stayed behind in the detail. Then, we stood back and looked at our results… and we decided that it was too white with the rest of the kitchen, so we went over the paint with Rustoleum Driftwood. Weird, I know- but it worked perfectly! It changed some of the white paint into a more natural looking gray color, and toned down some of the blonde wood peeking through. The overall effect made it appear aged, and we were so happy with it!
Recommended Skill Level
Intermediate

Comments

suschen

Fri, 02/28/2014 - 05:22

This looks amazing! I was wondering how you attached the marble slab to the posts?

gkubrynski

Mon, 03/03/2014 - 17:24

Unbelievable! Great accent to the kitchen. You mentioned you used both pine and maple... can you specify which parts were pine v. maple? Beginner here... Thanks

Back