Community Brag Posts

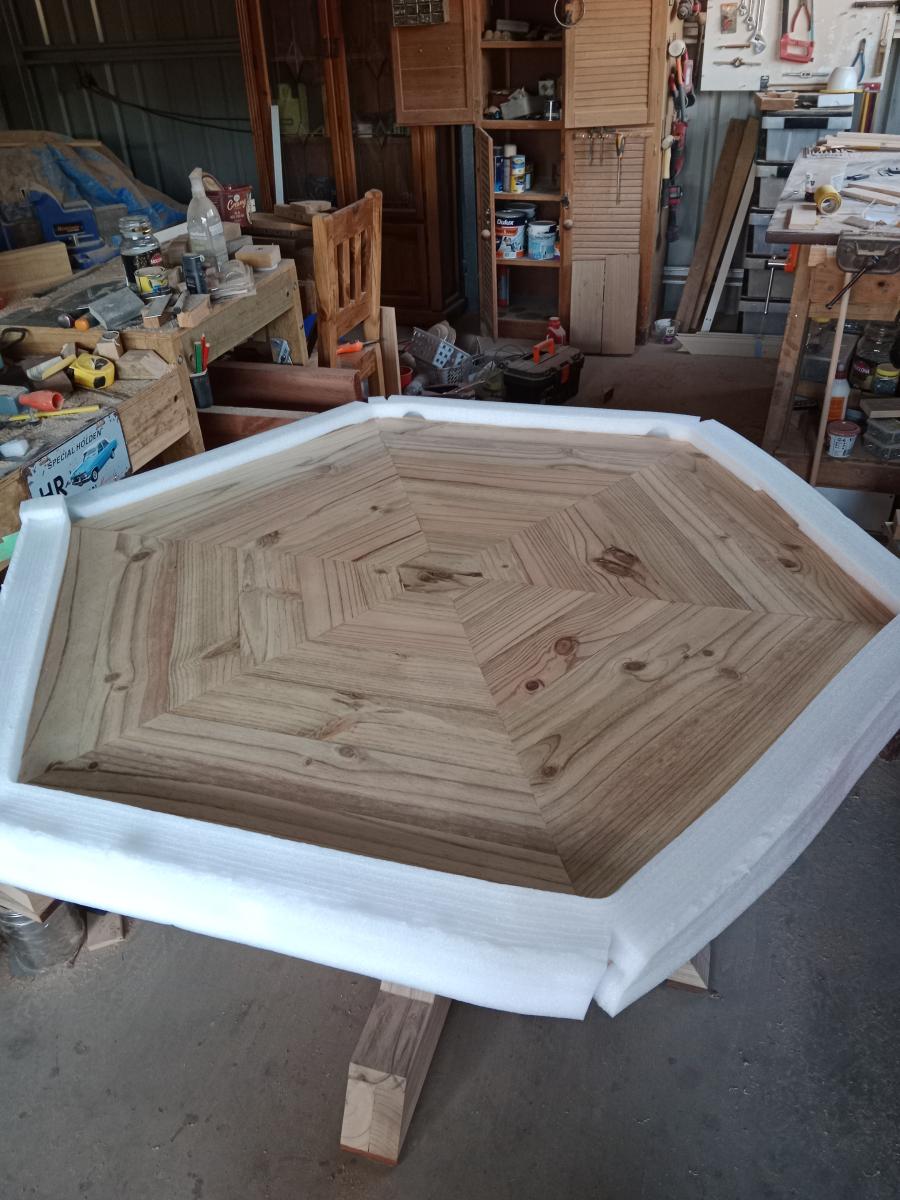
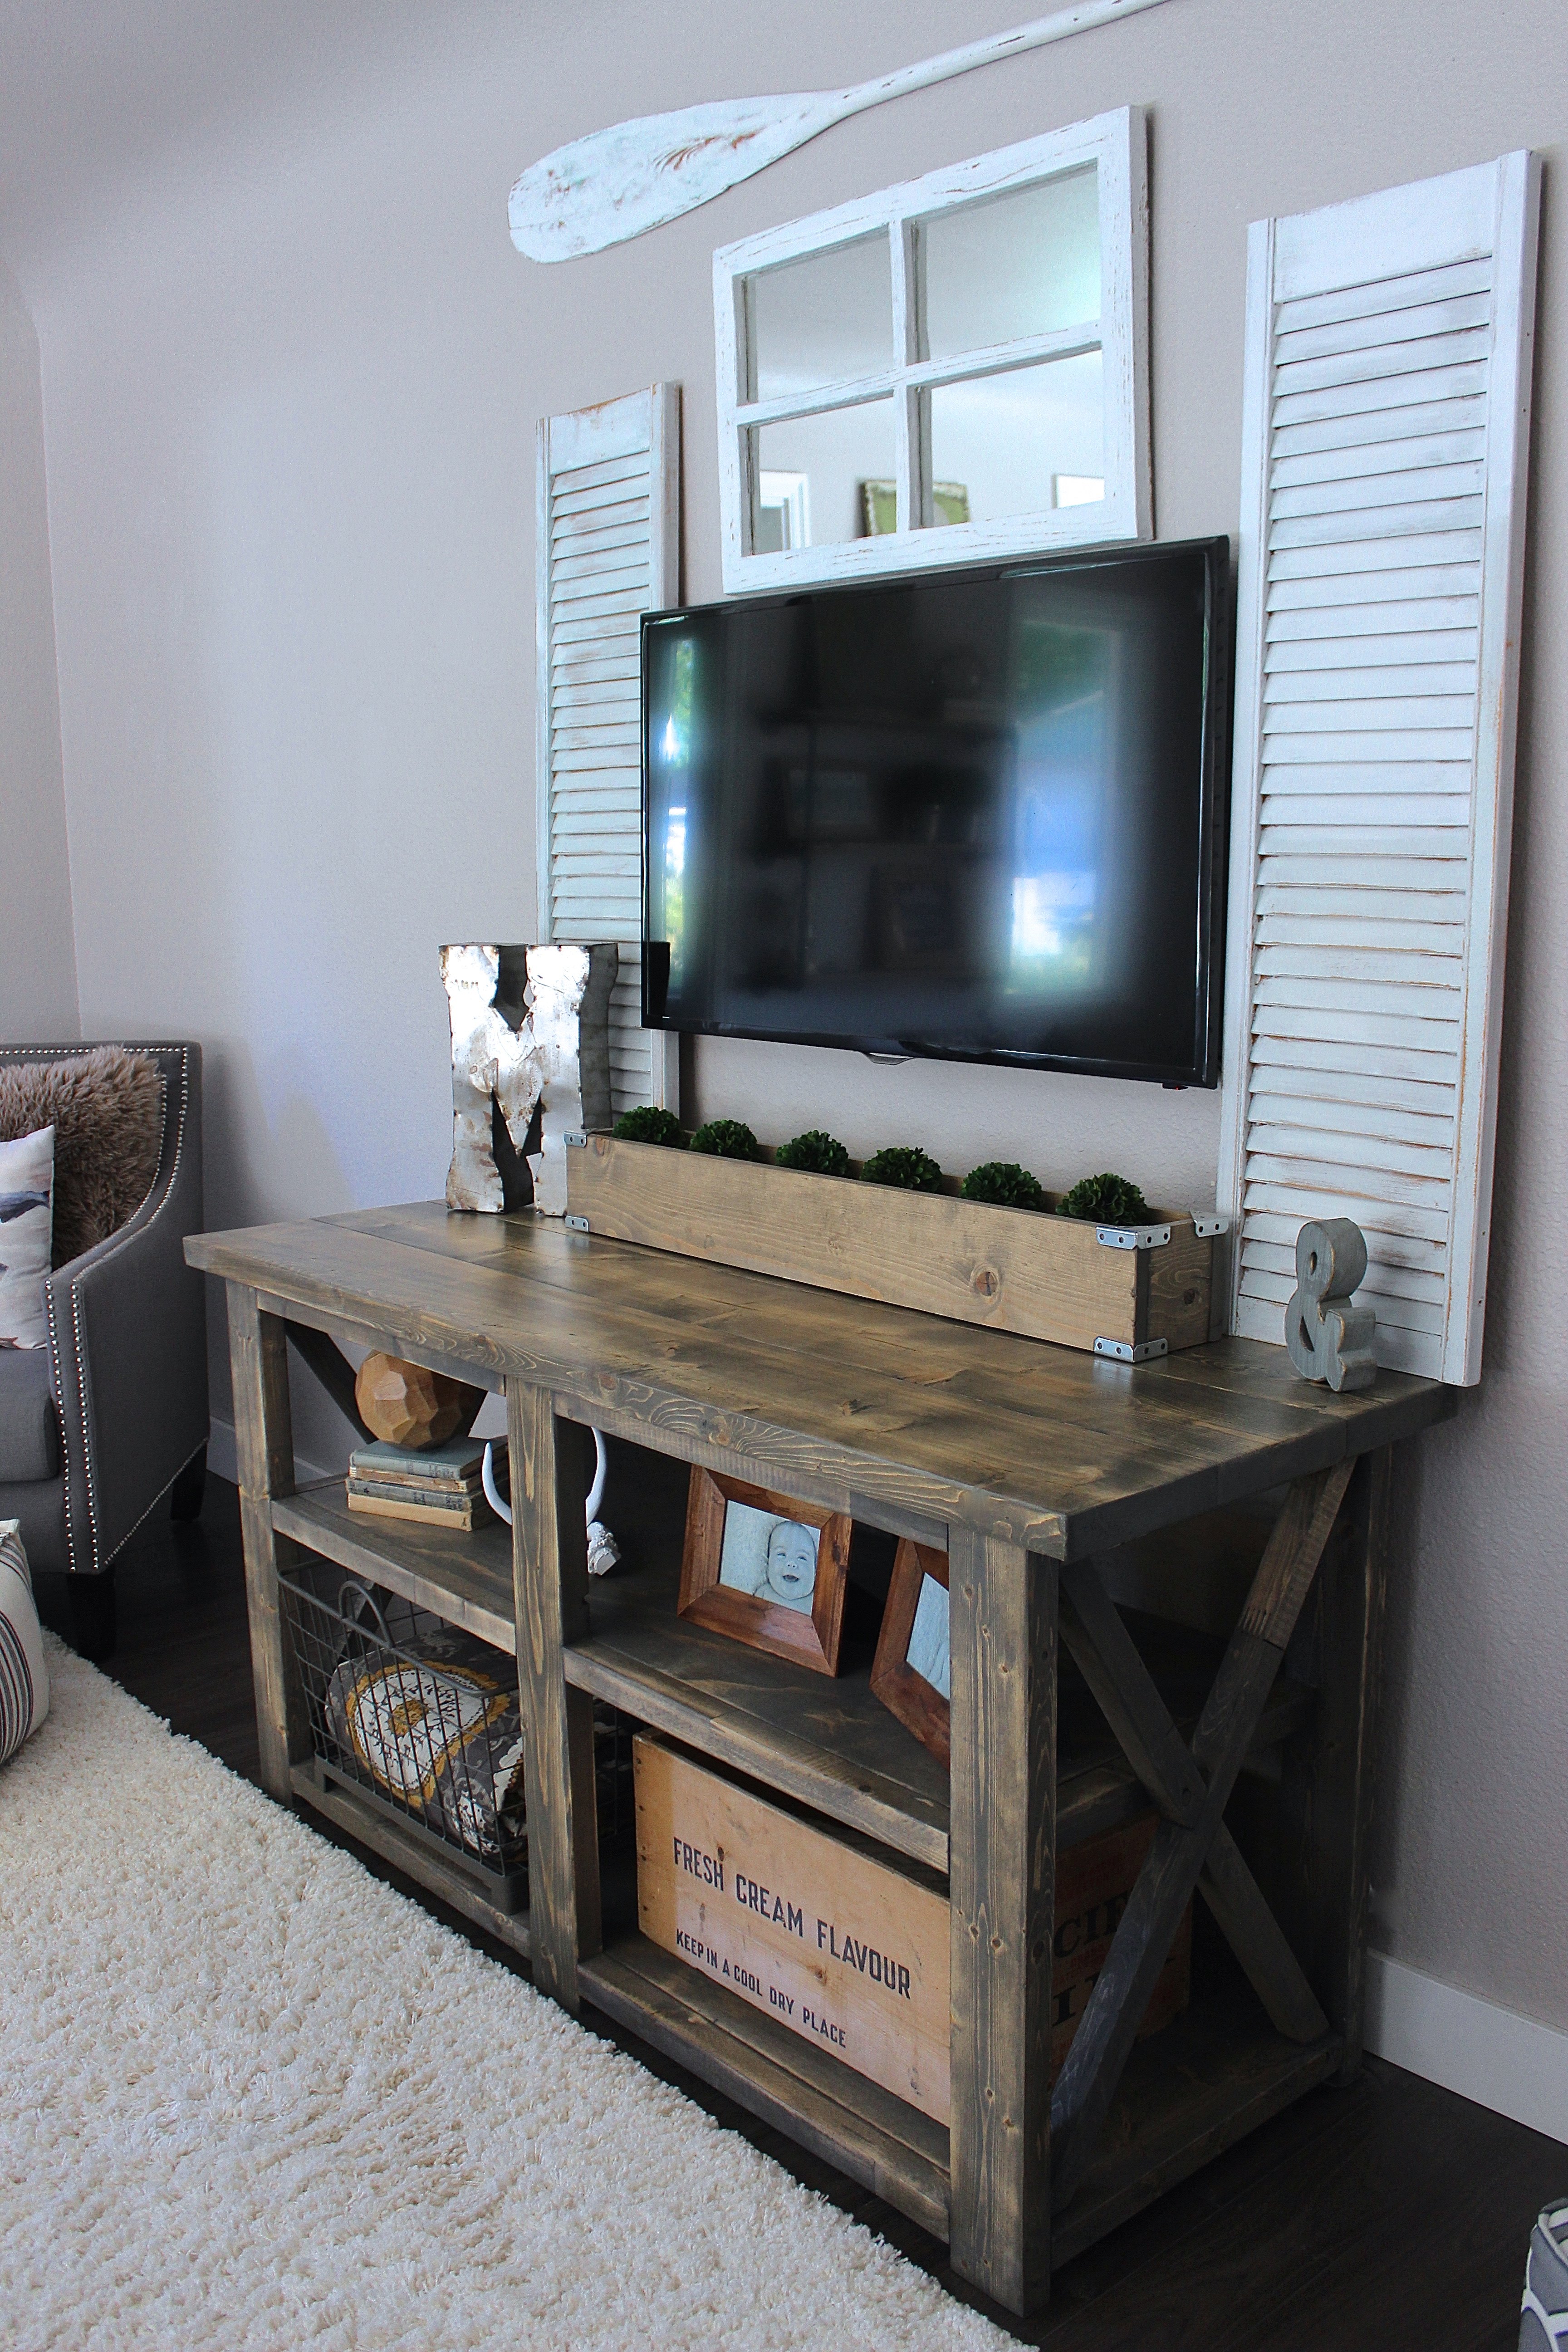
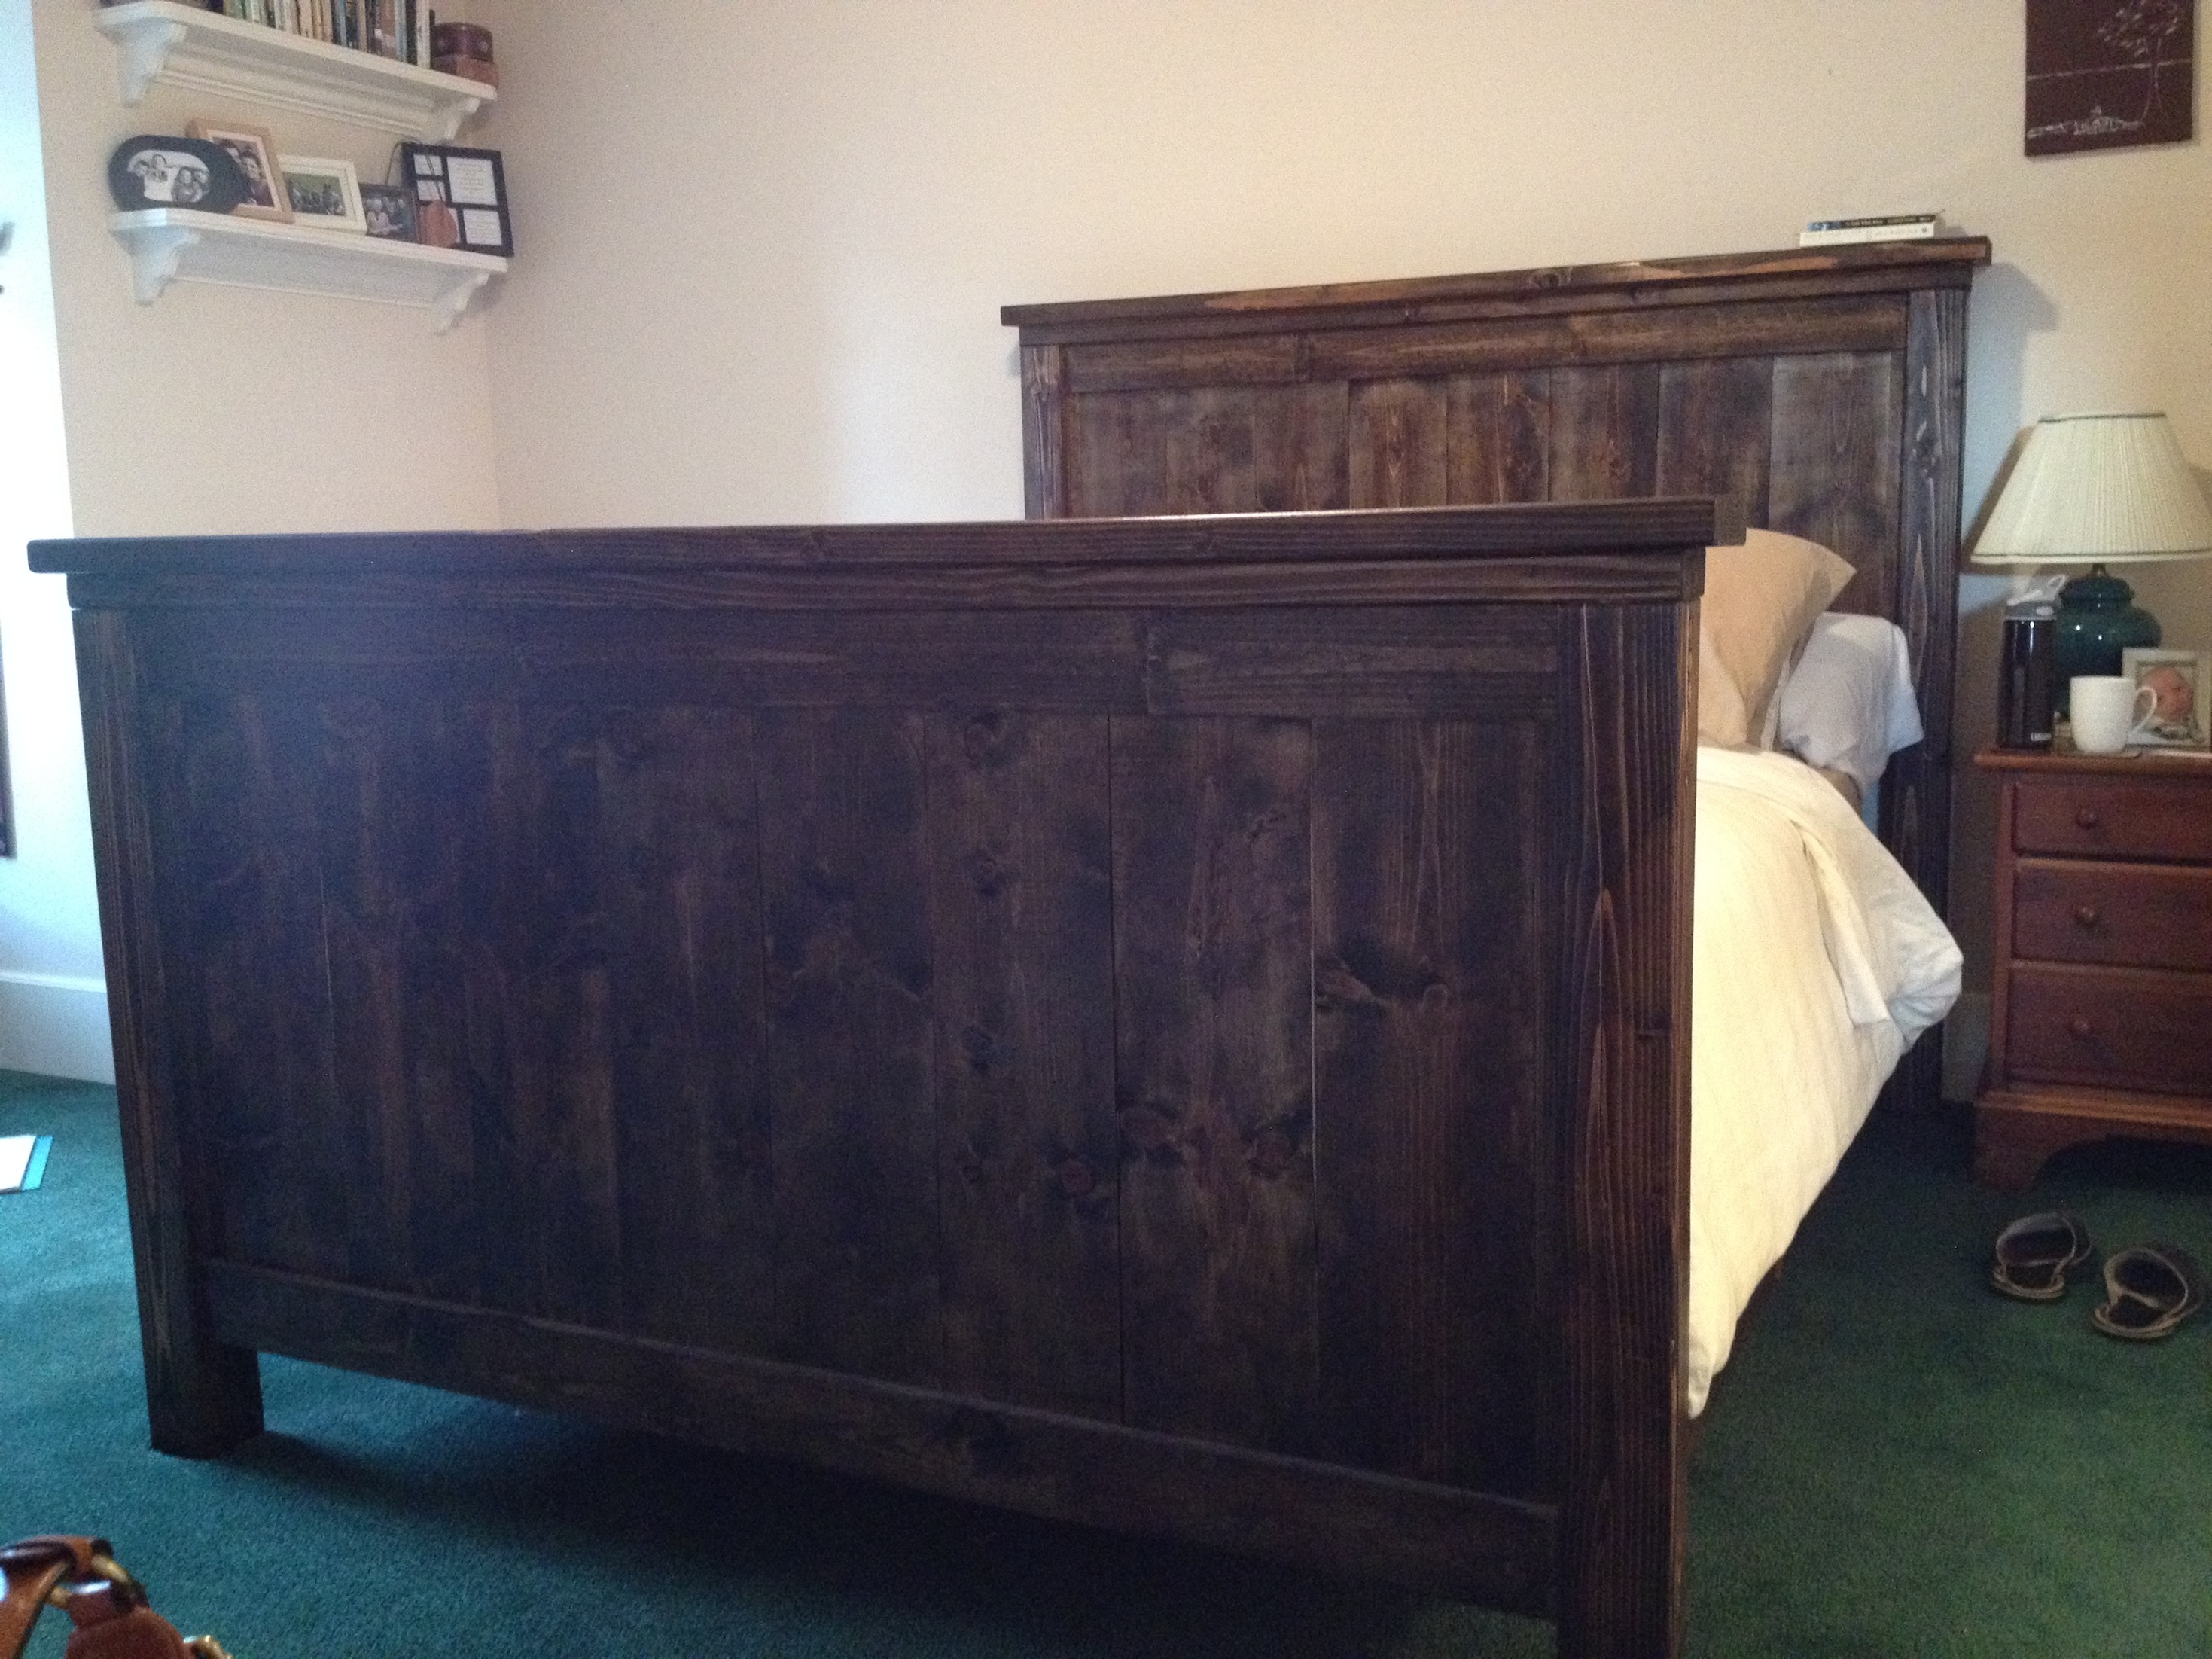
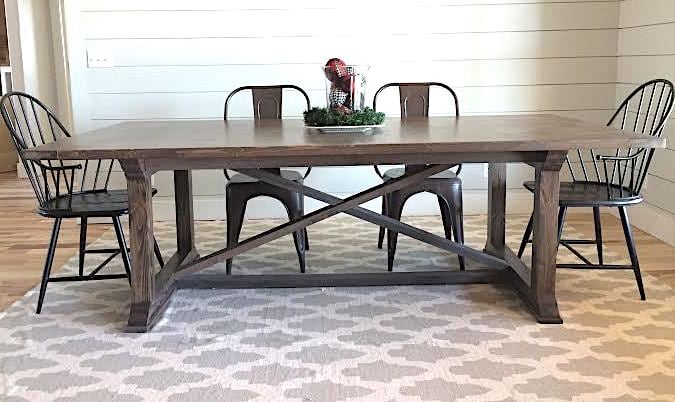
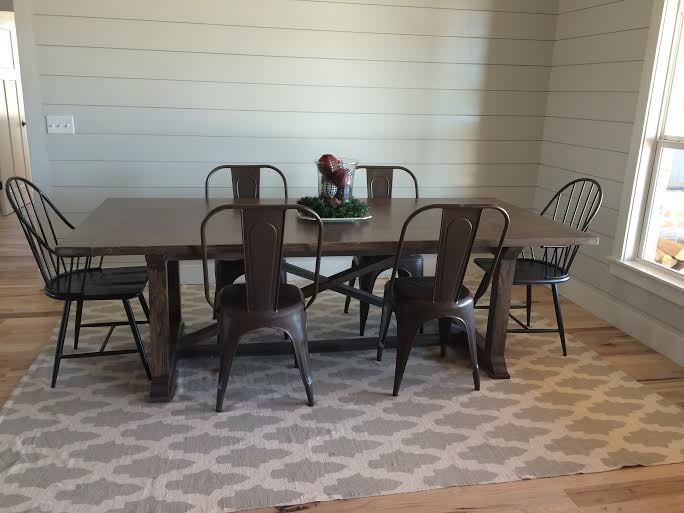
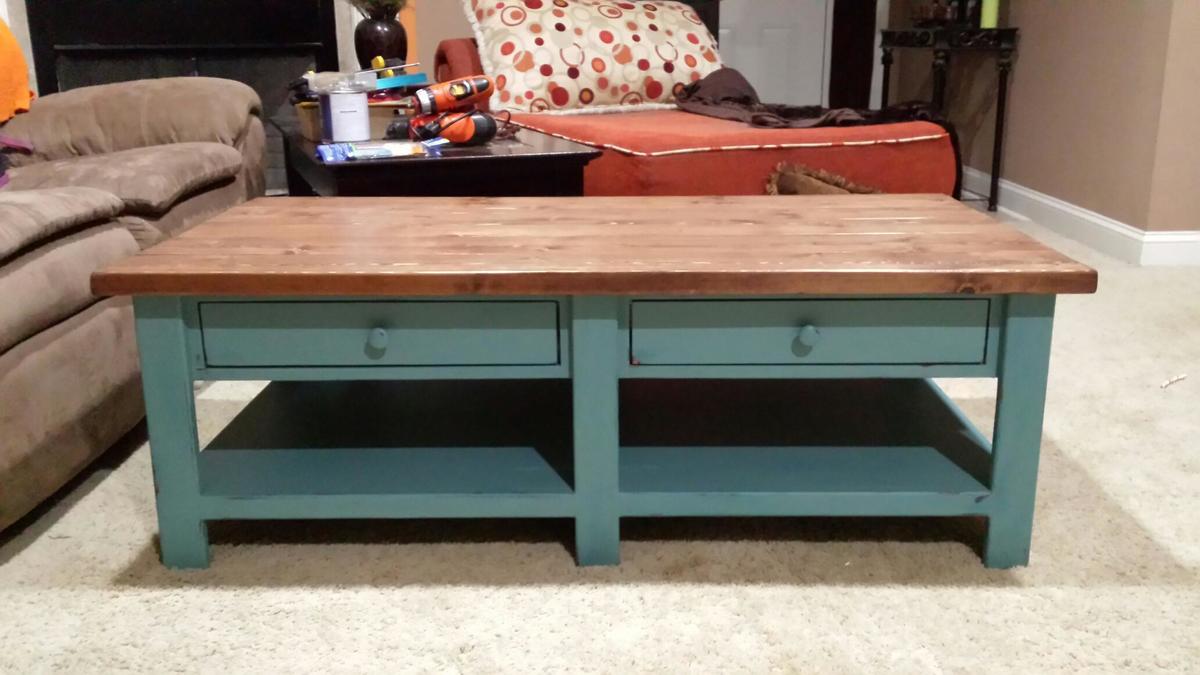
Hexagonal X based pedestal table

Submitted by Anonymous (not verified) on Tue, 05/30/2023 - 10:53

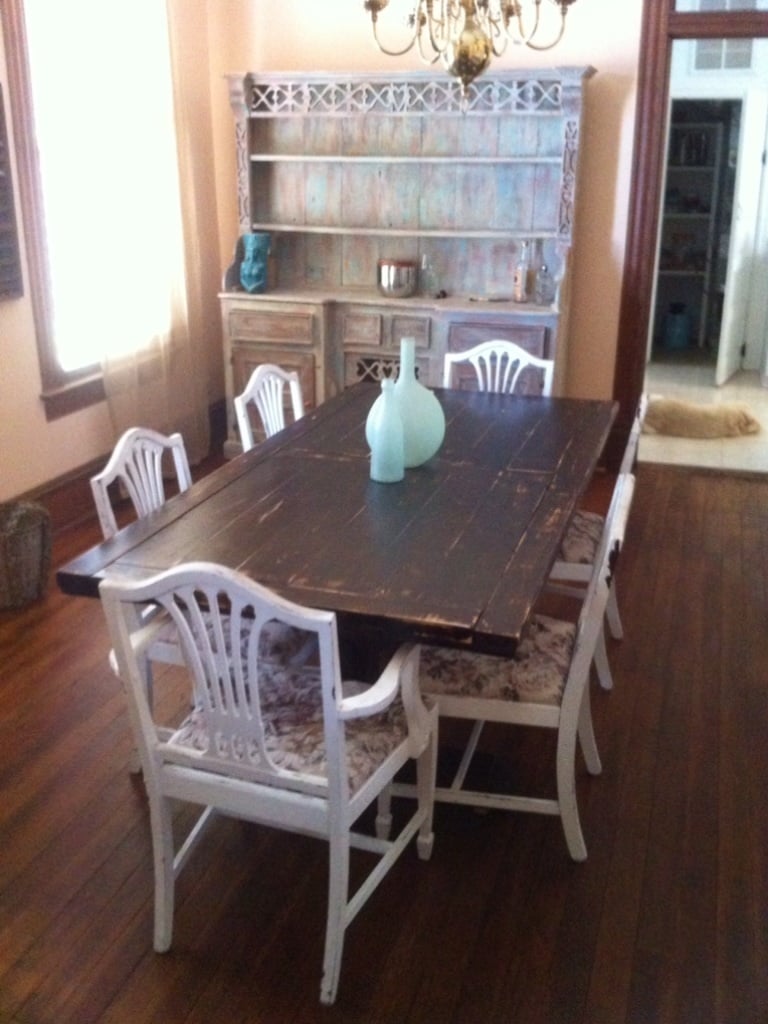
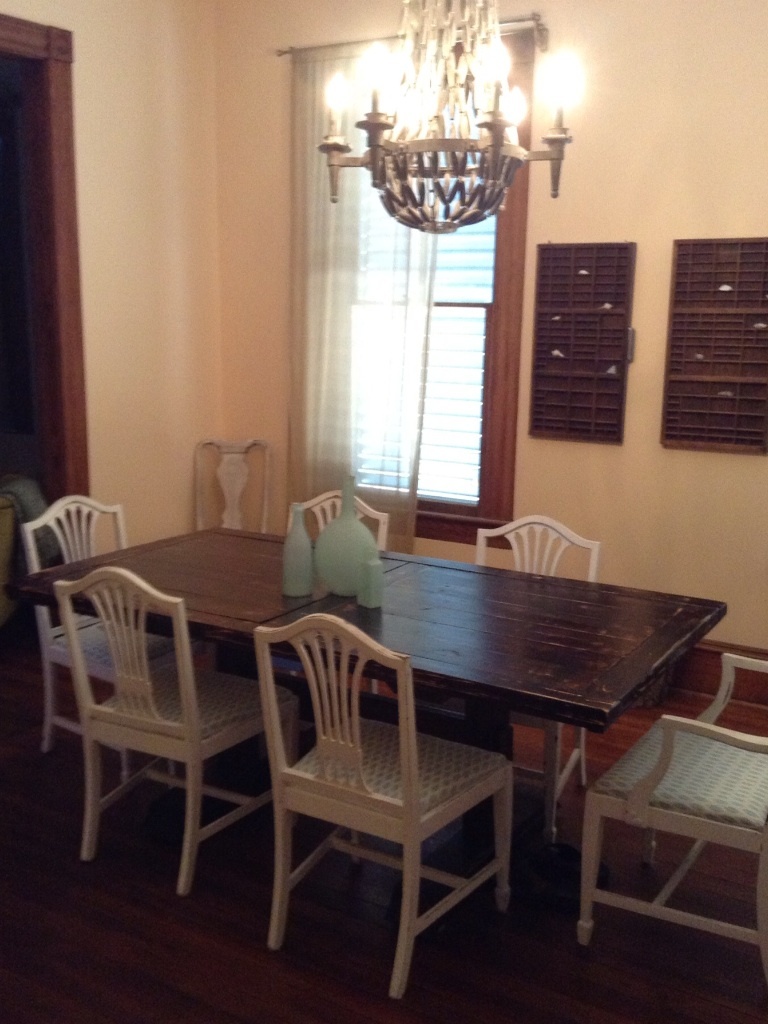
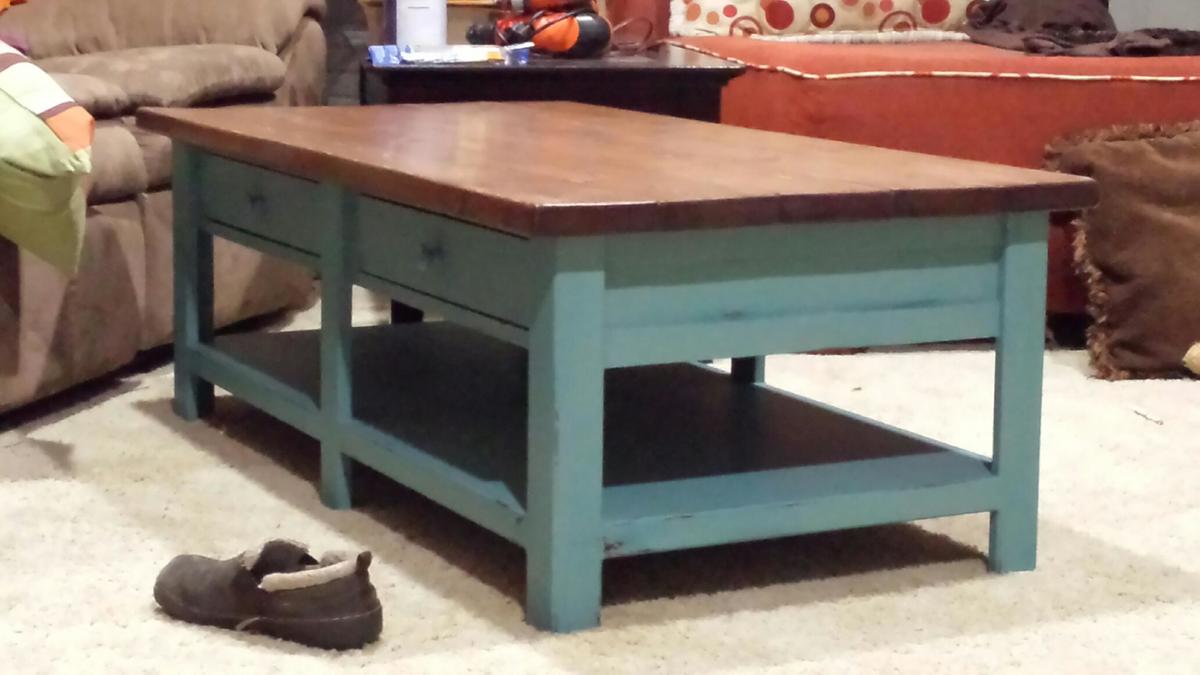
After completing all the pieces for myself based on 4x4 pedestal dining table with planked wood top, I thought I would build a table for my daughter.
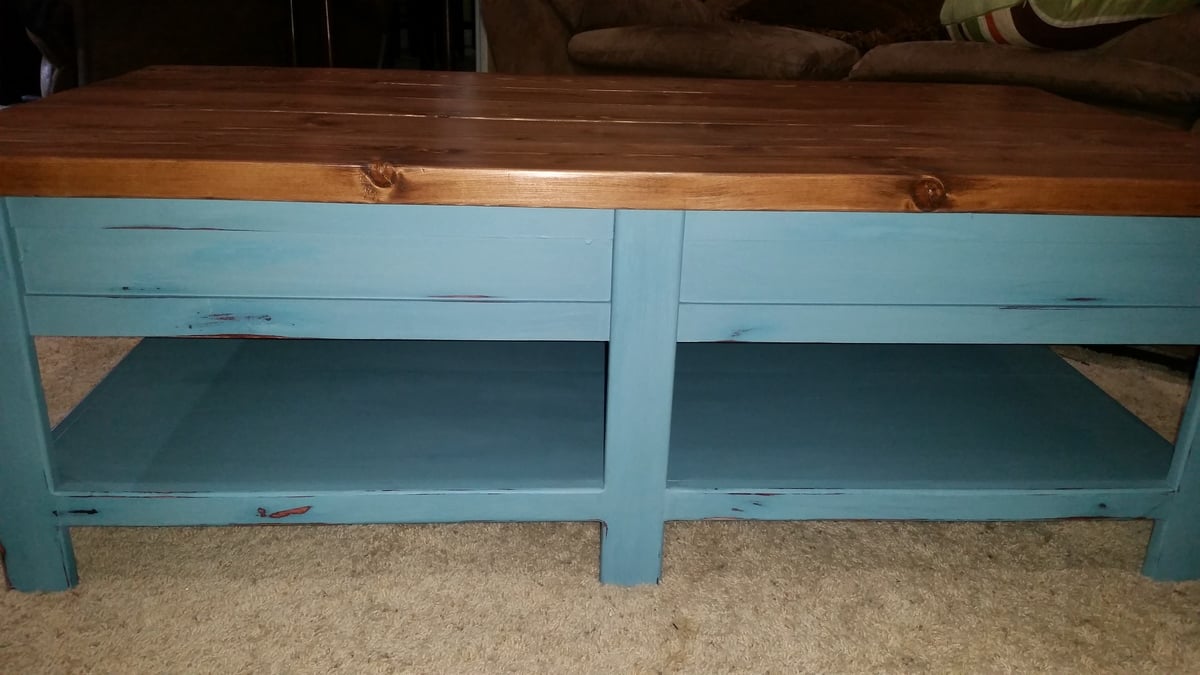
The pedestal base is the same as the plan.
Now all i have to do is get it transported 400km down the road

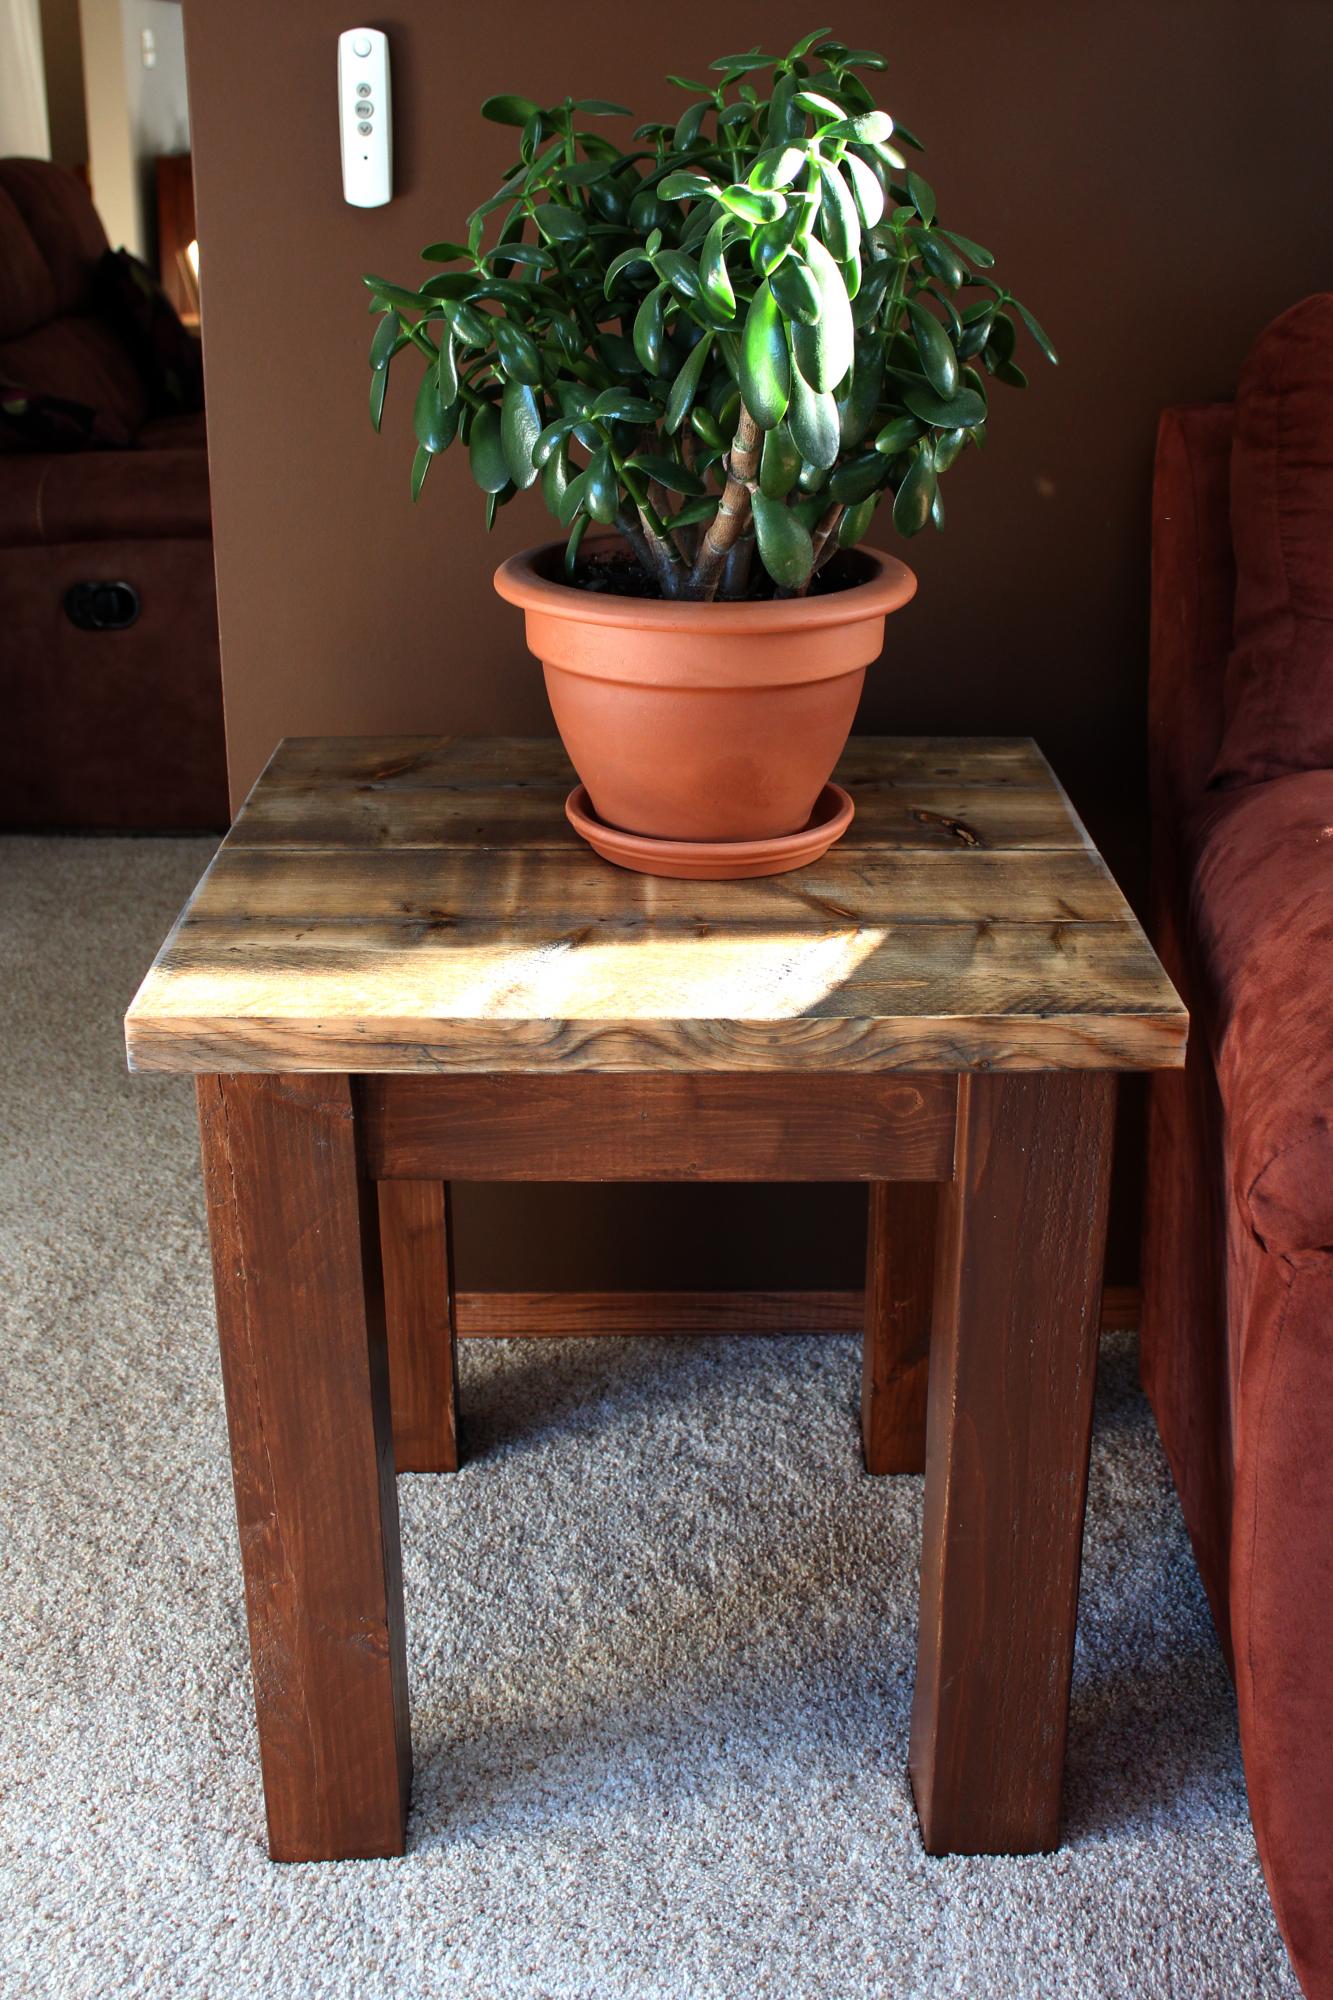
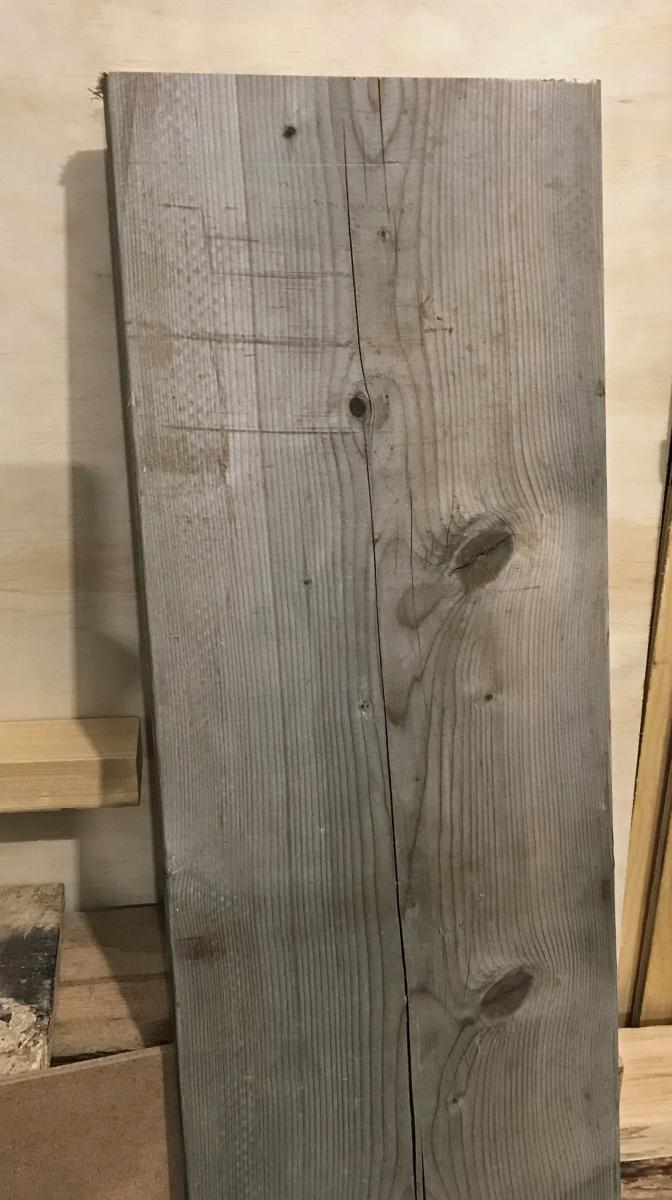
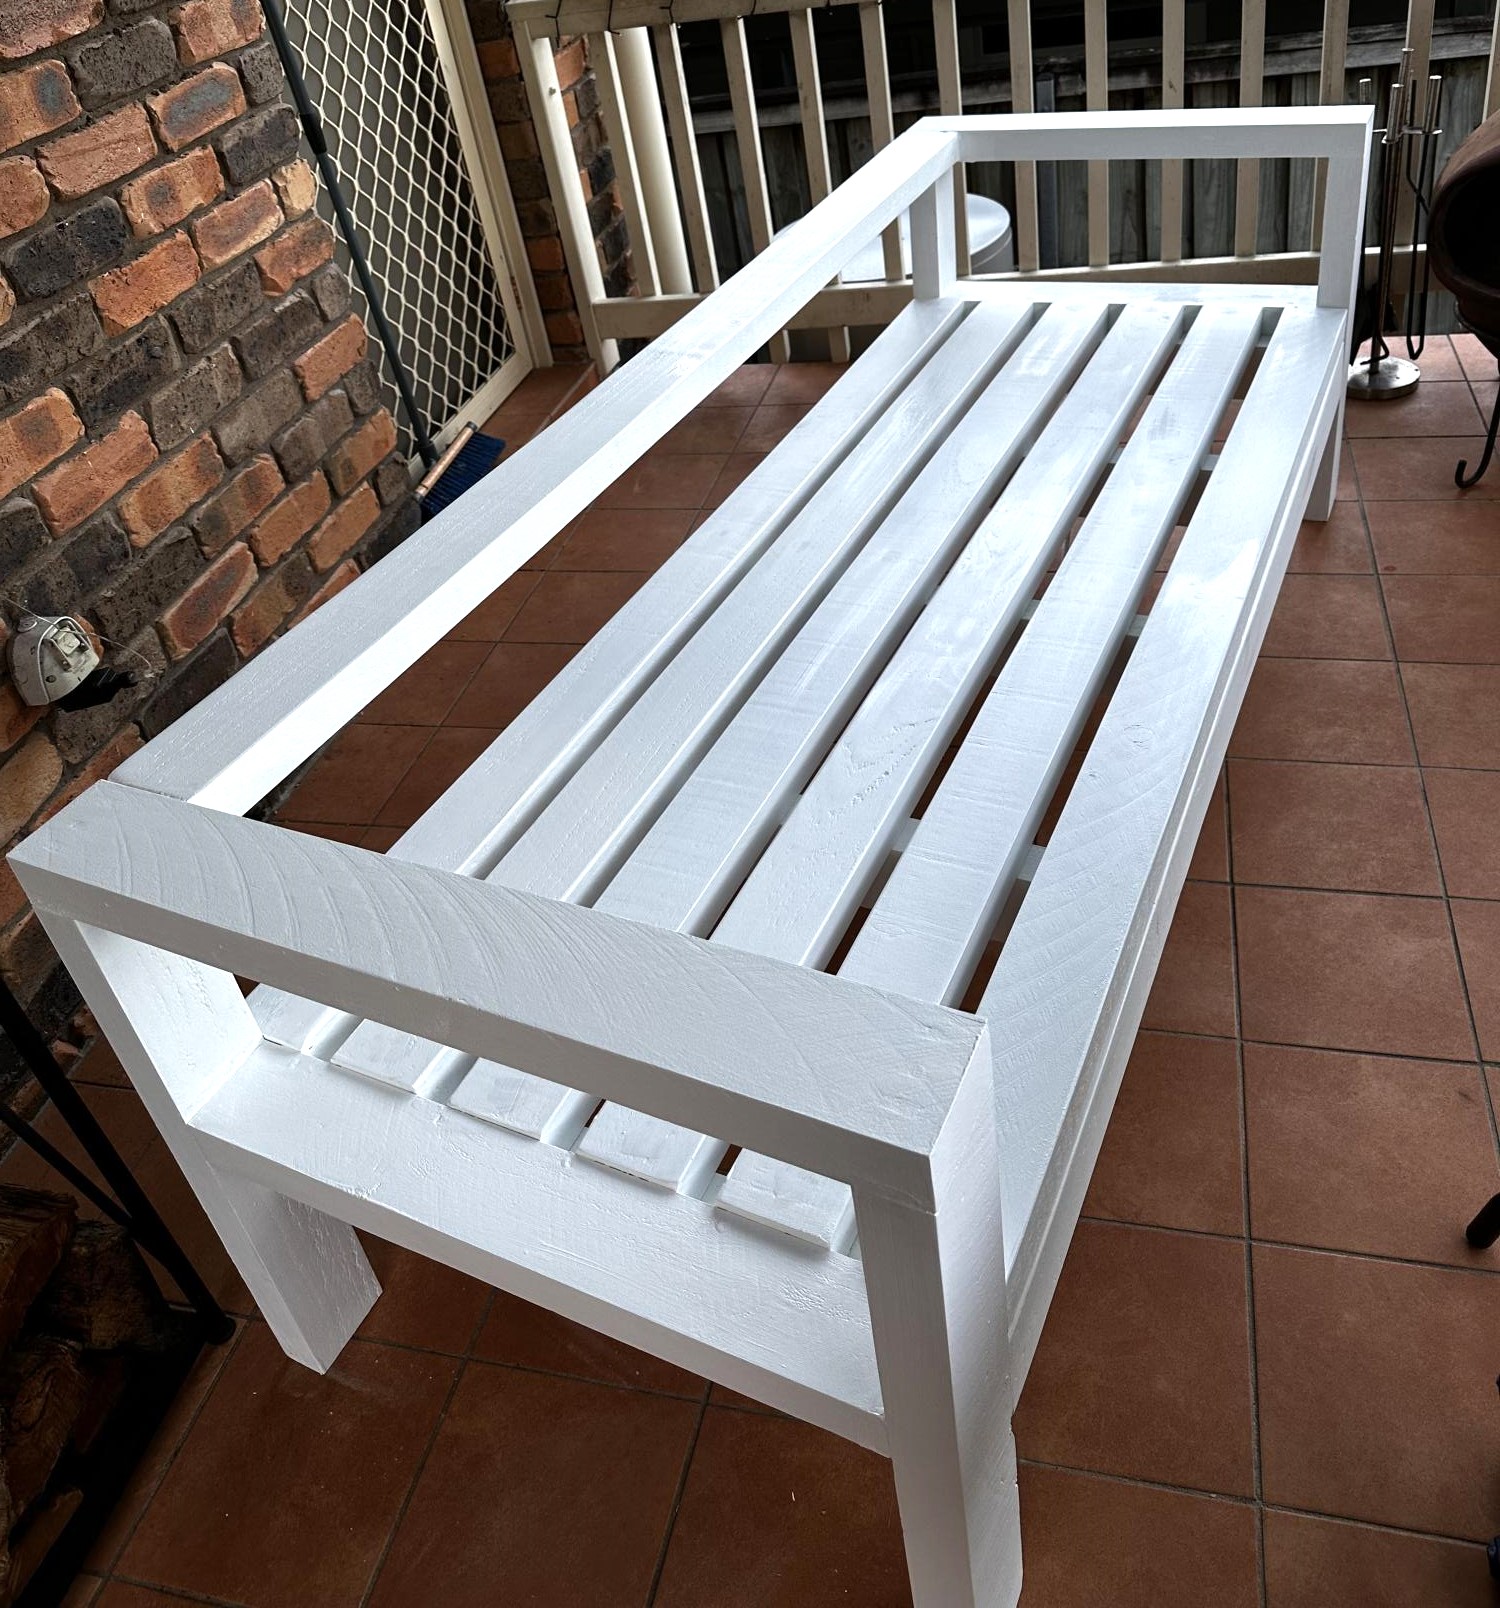
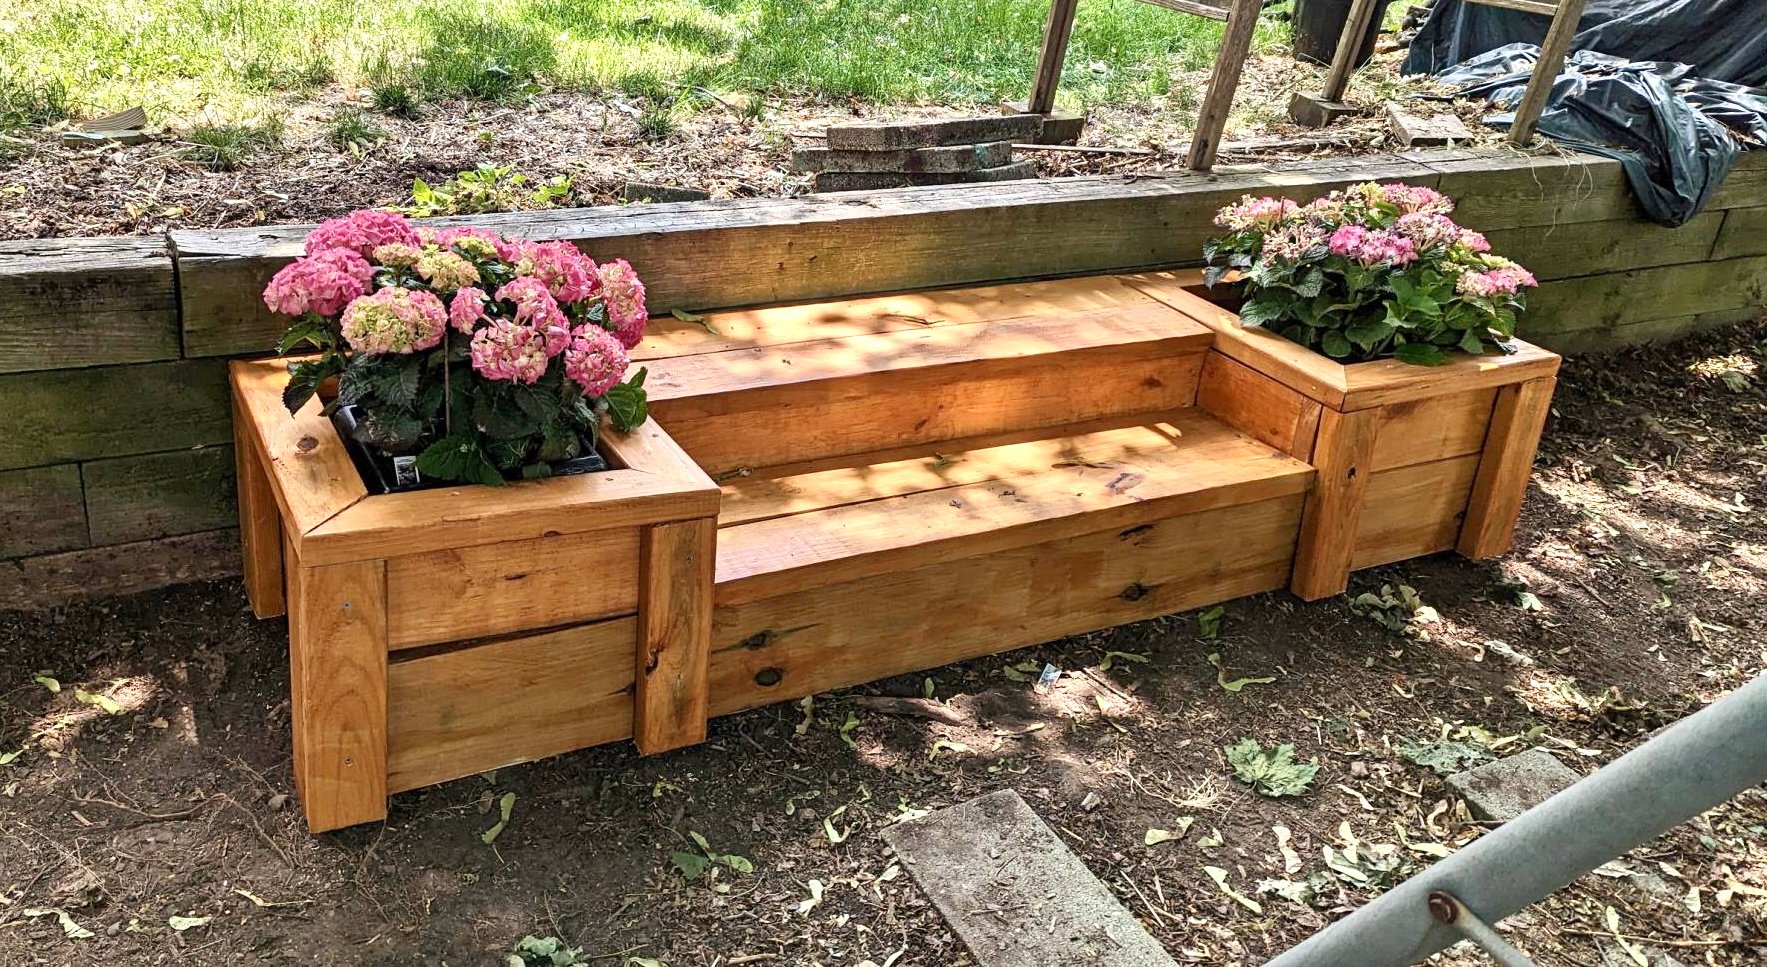
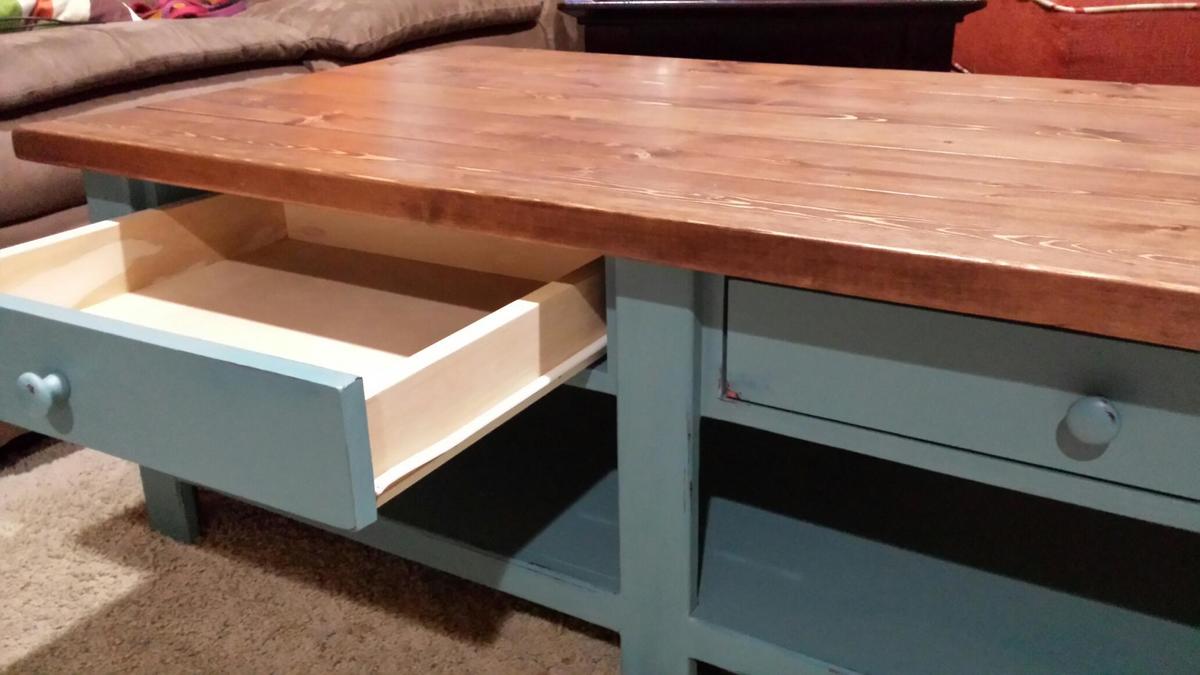
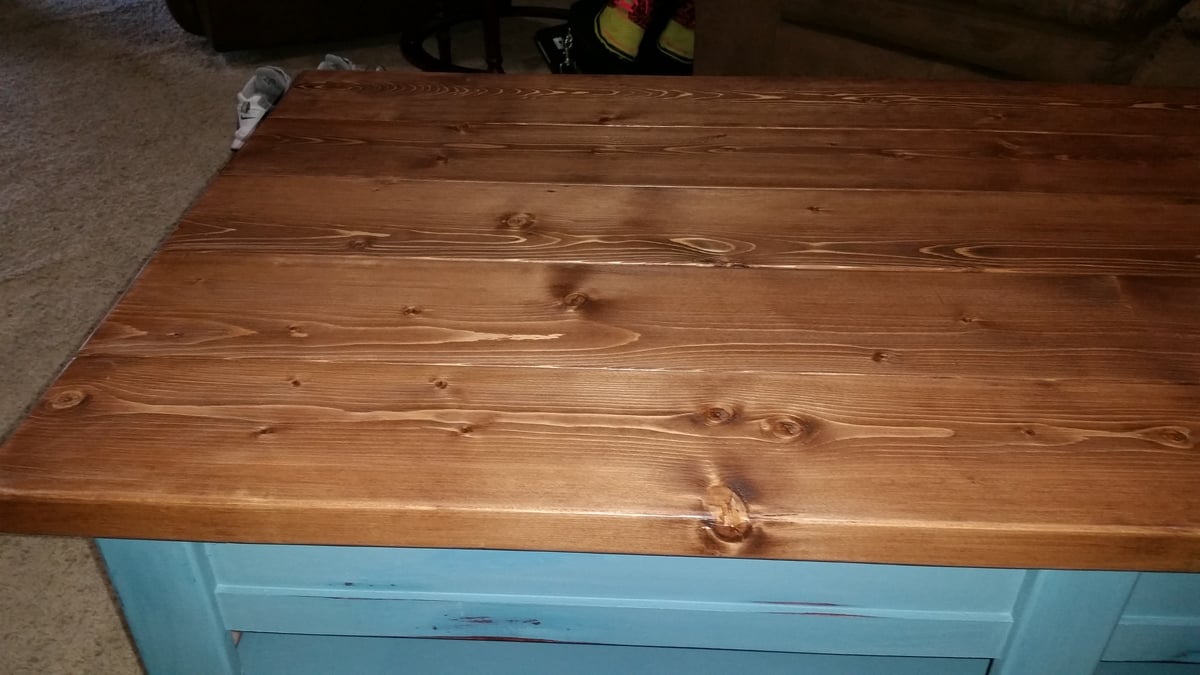
The table was made from 200mm x 50mm pine sleepers
The top was finished with 2 coats of British paints 1 coat finish

Comments

Cute and easy tent

Submitted by lovinglife on Tue, 01/17/2012 - 19:53

I mostly followed the directions as provided. My only changes were using hickory instead of pine, it is a nicer wood and it only added $6 to the project. I also put non slip pads on the bottom of the bottoms and used 14 feet of fabric in place of curtains. It is a very quick and inexpensive project that my kids have been getting a lot of enjoyment out of.

Built from Plan(s)
Estimated Cost
28.00
Estimated Time Investment
An Hour or Two (0-2 Hours)
Recommended Skill Level
Starter Project

Comments

Guest (not verified)

Mon, 02/06/2012 - 18:01

where or how did you make that cool mini/toy "tree house" in the background!!?!

Pedestal farmhouse table

Submitted by Towboatjs on Wed, 12/04/2013 - 01:33

My wife wanted a farmhouse dining room table for our new house, I wanted to get into woodworking so these plans were a perfect fit. Bonus was adding a few tools to my collection! Revised plans to two pedestals and shortened about 2 feet. If I were to do over I would have stained and poly'd separately, but I tried to save steps because I was finishing inside the house and didn't have time for separate steps before leaving town. Ran into a few hiccups along the way but both my wife and I are happy with the end results.

Built from Plan(s)
Estimated Cost
150
Estimated Time Investment
Weekend Project (10-20 Hours)
Finish Used
Poly shades stain and poly in one, sanded Down to "distress" and then a few coats of wipe on satin polyurethane on table top to resist stains and for easier cleanup
Recommended Skill Level
Intermediate

Comments

Media Stand

We built this media stand for our home and we had many that followed. We put a backing on ours to hide the cords and such. It makes it feel a lot classier & takes under 5 minutes to add! We used 1/8" particle board and we used our neumatic nail gun. 

All in all, this is a super easy beginner project that adds a big bang to the space!

Built from Plan(s)
Estimated Cost
80.00
Estimated Time Investment
Afternoon Project (3-6 Hours)
Finish Used
This is our custom beachwood stain. A few stains from Minwax mixed together.
We then Distressed it & applied 3 coats of semi-gloss polyurethane
Recommended Skill Level
Beginner

Tryde End Table

Submitted by frmoody on Wed, 10/02/2019 - 08:49

I had a very old, weathered 2 x 10 and wanted to build a couple of end tables for beside our new couch. All I did with the top was to lightly sand to take away a bit of the weathered wood. I had to purchase two 4 x 4 x 8' fir posts for the legs. I decided against adding the bottom shelves.

Estimated Cost
$50
Estimated Time Investment
Weekend Project (10-20 Hours)
Finish Used
For the top all I applied was two coats of Tung Oil. The legs were given two coats of Minwax Water Based Colonial Pine stain followed by two coats of Varathane semi gloss interior water based finish
Recommended Skill Level
Beginner

Comments

Leaning Herb Garden by Love & Renovations

"For this project, I decided to lean on the expertise and creativity of someone else, and I followed a tutorial from Ana White It was incredibly easy to follow, really well written, and a super simple build. It took me just a few hours to build the leaning planter, and cost about $45 in wood." - Amanda


Seasonal And Holiday

Farmhouse Bed Edited

Submitted by mrsmay on Mon, 01/23/2012 - 14:26

I saw Ana's plans for the farmhouse bed a couple years ago I think and have wanted to build one ever since! My husband and I were moving over to Oregon from Scotland though so our timing wasn't quite right... in the end though, I waited until I was 8 months pregnant to do it! We raised the footboard to be about bar height (hung our stockings from it at Christmas) and used carriage bolts and routed out the 4x4 posts to make the bed modular. We also used a forstner bit to drop the screws and plug cutters to make a nice cover up for them... If I could do it over I would have used wood conditioner first before staining to achieve a smoother stain job, but we like how it took to the wood a bit crazy-like in the end. Obviously, night stands are next. :) We LOVE this bed! Thanks Ana!

Built from Plan(s)
Estimated Cost
$300
Estimated Time Investment
Week Long Project (20 Hours or More)
Finish Used
Dark Walnut stain from Home Depot. (next time I'll do a wood conditioner as the soft woods take the stain in differently)
Recommended Skill Level
Beginner

Faux Fireplace for Holiday Markets

For the holiday markets this year, some other dog related businesses, along with myself, colaborated on dog stockings! I really wanted to feature the stockings and not just decorate my booth with generic ornaments etc. My boyfriend was kind enough to help me with this project and it has been a hit! I think I am going to change out the decal with chalkboard though. The decal just looks to cheesey and I think the chalkboard will give it a more rustic and crafty fell. Thanks for the idea!!

Finish Used
Stain for the molding and then stain with color added for the interior green portion
Recommended Skill Level
Beginner

Ana White Barn Door Entertainment Center / Closet

Submitted by Anonymous (not verified) on Wed, 10/02/2019 - 17:07

After many months of trying to find the perfect piece of furniture for our bedroom, I stumbled upon Ana White’s barn door entertainment center. I loved it so much that instead, we turned it into an armoire for our bedroom. Behind the barn doors are shelves that holds our clothes, and in the center we added simple pull out drawers. The center space was perfect for our tv. We had to rework the size of the piece and it is 7 feet instead of the 8 feet that the plan called for. This is my favorite build (we have done a lot of them)!

Built from Plan(s)
Estimated Cost
$600-$650
Estimated Time Investment
Week Long Project (20 Hours or More)
Finish Used
Behr Graphite grey
Recommended Skill Level
Intermediate

Comments

Outdoor Sofa

Submitted by Anonymous (not verified) on Fri, 06/09/2023 - 15:46

Choose the equivalent of 4 x2 here in Australia but as you can see the Depths were different. Painted in Dulux outdoor paint in Vivid White

Built from Plan(s)

Comments

My first (half) project- built-in cabinets!

Submitted by LE1066 on Tue, 12/10/2013 - 21:11

Using the base cabinets 101 post and other members' ideas and tips, I built these nine cabinets. It's my first project, and I'm very pleased. I live in a 1960's split level with nearly zero storage space... Until now. Next step is to top them with bookshelves, and add some decorative molding. Will start cutting wood once the temperature allows me to set up my sawhorses in my driveway again. Can't wait. Might make something really quick for my husband between now and Christmas. Thanks Ana and everyone else- I'm inspired.

Estimated Time Investment
Week Long Project (20 Hours or More)
Finish Used
Flat white paint inside, then sherwin Williams proClassic enamel for doors and outer surfaces. Sanding between coats seems to be important.
Recommended Skill Level
Beginner

Comments

mezzopiana

Wed, 12/11/2013 - 05:59

You may just be my inspiration for building something very similar for my kids' playroom. Very, very good-looking storage you built there! Well done - especially for a first build :)

Reese

Thu, 12/12/2013 - 07:16

Wow! They look So Good! I'm so impressed that this was your first build. Is the top just plywwod also? It looks so smooth and glossy i can't tell. How much did it end up costing?

Our Farmhouse Sunflower Bedroom

Submitted by cjschulz on Mon, 02/22/2016 - 21:58

We combined two plans to accommodate for a boxspring with a mattress. We also liked the plan with the 4x4 posts so we tweaked the two plans and made it work.

Estimated Time Investment
Weekend Project (10-20 Hours)
Finish Used
To achieve a rustic look I "sloppy painted" with 2 shades of grey, white and some black. Once the paint was thoroughly dry, I used a course grit sandpaper to lightly take off paint in some areas, leaving it thicker in spots. I then applied barn wood grey stain and immediately wiped it. I finished with a satin poly.
Recommended Skill Level
Intermediate

Comments

Dvega

Fri, 03/25/2016 - 09:44

Hi! What grey do you use , latex or it was stain?


cjschulz

Tue, 09/17/2019 - 23:07

I used two shades of grey, white and black enamel paint to "sloppy paint" in various areas.  Then I sanded off the paint, leaving some areas thicker than others.  When I liked the look recreating "rustic barn wood" I then stained over the entire surface with barn wood grey stain.

New farmhouse bed

Submitted by Anonymous (not verified) on Thu, 10/03/2019 - 11:51

I needed to replace my bed quickly. I could not sleep in my old one anymore. Unfortunately I did not have the money to buy a new one so I turned to Ana white and a short time later I had a new bed and a fresh start. My kids and I love this bed. It’s hard to get them to sleep in their own beds now!

Built from Plan(s)
Estimated Cost
$200
Estimated Time Investment
Weekend Project (10-20 Hours)
Recommended Skill Level
Intermediate

Comments

A beautiful spot in a less than perfect yard

Submitted by Anonymous (not verified) on Fri, 06/16/2023 - 13:43

When my husband left he left behind an entire tier of our yard that he'd used to throw sticks, branches, clippings, dead plants, you name it for years. I cleared the mess last spring and am excited to make it beautiful this season!

Comments

Doll Farmhouse Bed

Submitted by Karajoy on Sat, 02/04/2012 - 16:59

My 6 year old son and I made this doll bed for my daughter. It's the cutest little bed. Right now she puts her "Bitty Baby" doll in it but it will be great for when she's older and has an American Girl doll, too. And, it gave me a chance to make a little quilt. That was fun.
It was a quick and easy project! Thanks, Ana!!

Estimated Cost
Used Scrap wood. Cost was paint.
Estimated Time Investment
Afternoon Project (3-6 Hours)
Finish Used
White paint.
Recommended Skill Level
Beginner

Simple Work Bench

Submitted by Medickep on Sat, 12/14/2013 - 21:50

This is my spin on the sturdy work bench. I needed some more work space for building projects and for a few tools I acquired. My main work bench always seems to be covered in stuff so the extra space is great!

The first one I made I matched the height of the rollers for my chop saw, so I would have room for longer pieces of wood. I also put it on casters, so I can roll it onto the driveway when do things that should be done outside! The second one is fixed at the same height!

I used 2x4's with MDF on the shelves. I covered the bottom shelf and top with masonite, so it could easily be replaced when it gets nasty!

Built from Plan(s)
Estimated Cost
40-50??? (extra for casters)
Estimated Time Investment
Afternoon Project (3-6 Hours)
Finish Used
None
Recommended Skill Level
Starter Project

Benchright Coffee Table

Submitted by brass2005 on Thu, 02/25/2016 - 19:27

This was my first build other than some outdoor chairs. I learned tons while building and I got to spend time with my sister doing it. Also learned about chalk paint and other finishes from big sis. 

Estimated Cost
$75 I used 1 4' x 8' sheet of pine cabinet plywood for everything but the top to bring the cost down from $150.
Estimated Time Investment
Weekend Project (10-20 Hours)
Finish Used
General finishes Georgian cherry gel stain. Blue coral chalk paint. minwax early American stain with general finishes gel topcoat for top.
Recommended Skill Level
Beginner

Comments

Grandy Barn Door Console Headboard with Farmhouse Storage Bed

This is a really cool build with a few of Ana's most popular builds combined!  I used the Grandy Barn Door Console plans and added the farmhouse storage bed plans for a stunning bed with plenty of storage!

Estimated Cost
$600
Estimated Time Investment
Week Long Project (20 Hours or More)
Finish Used
This is a custom stain I create. I start with a layer of Minwax Dark Walnut. Allow 48 hours to dry. Apply Minwax Whitewash Pickling with a rag. It will streak but that's ok! After allowing 24 hours to dry sand down to desired distressing.
Recommended Skill Level
Intermediate

Comments

Ladder blanket rack

Submitted by Anonymous (not verified) on Fri, 06/23/2023 - 13:25

Made this ladder blanket rack and stained it. Only my second project that I have stained. I’m not around the learning curve yet. Works very well and hides our robo vac well. I did have a mishap - lesson learned don’t put kreg screws in for a test fit and then remove them. All of the holes stripped out while doing final assembly after finishing and I had to plug the holes to be able to finish it.

Comments