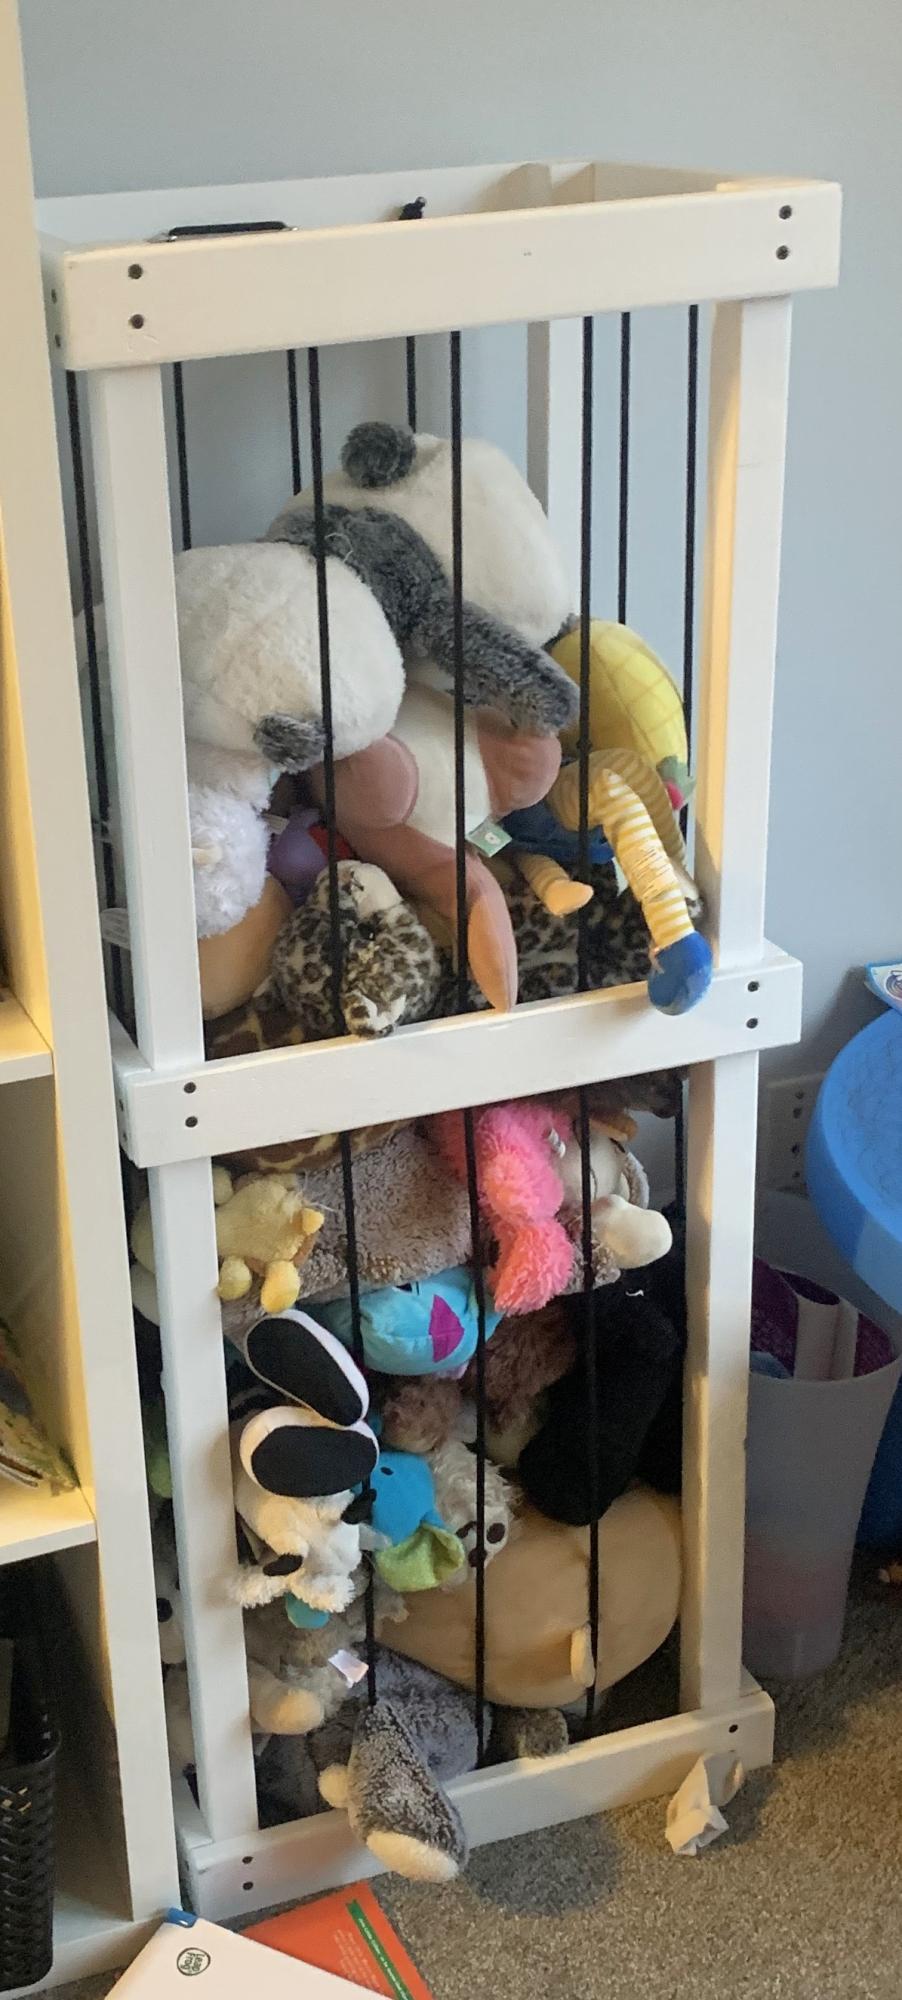
Stuffed Animal Containment
I made mine with 1/4” shock/bungee cord instead which I preferred for this project but turned out great. Easy to follow and the easiest project I’ve ever made. Go for it!
Kate
Built from Plan(s)
I made mine with 1/4” shock/bungee cord instead which I preferred for this project but turned out great. Easy to follow and the easiest project I’ve ever made. Go for it!
Kate
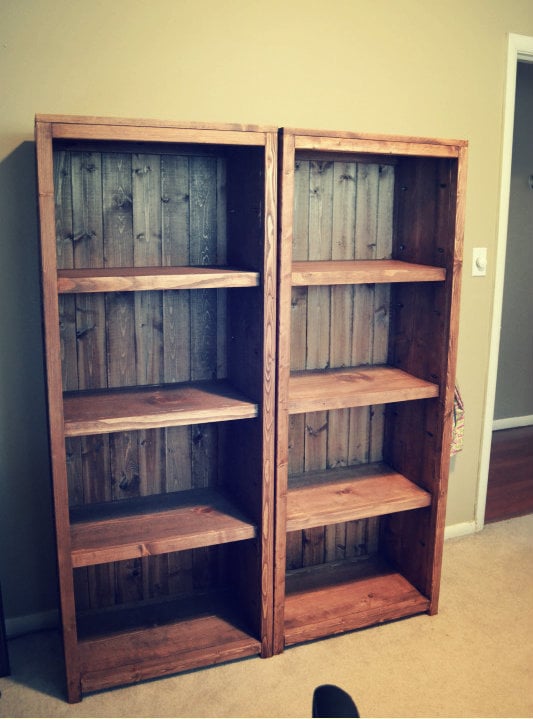
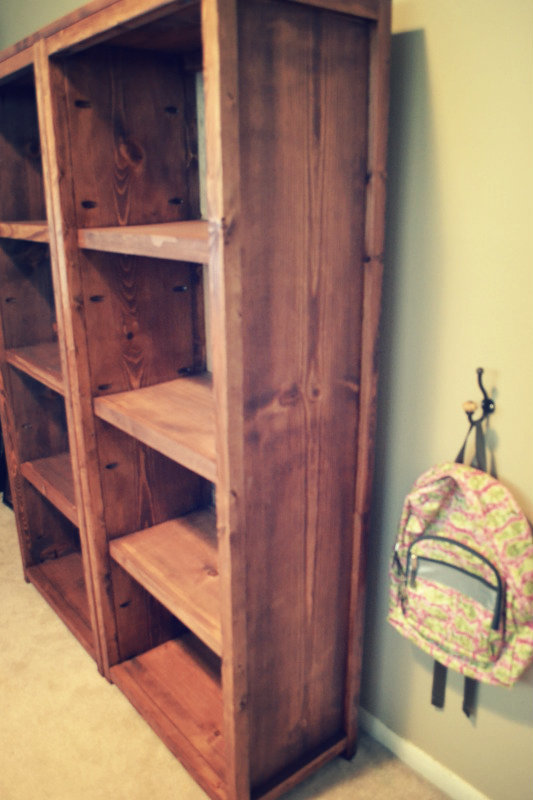
When I started my blog This Girls Life ( t-g-life.blogspot.com ) I knew I wanted to makeover my office to give me more room and storage. These bookcases were perfect for that.
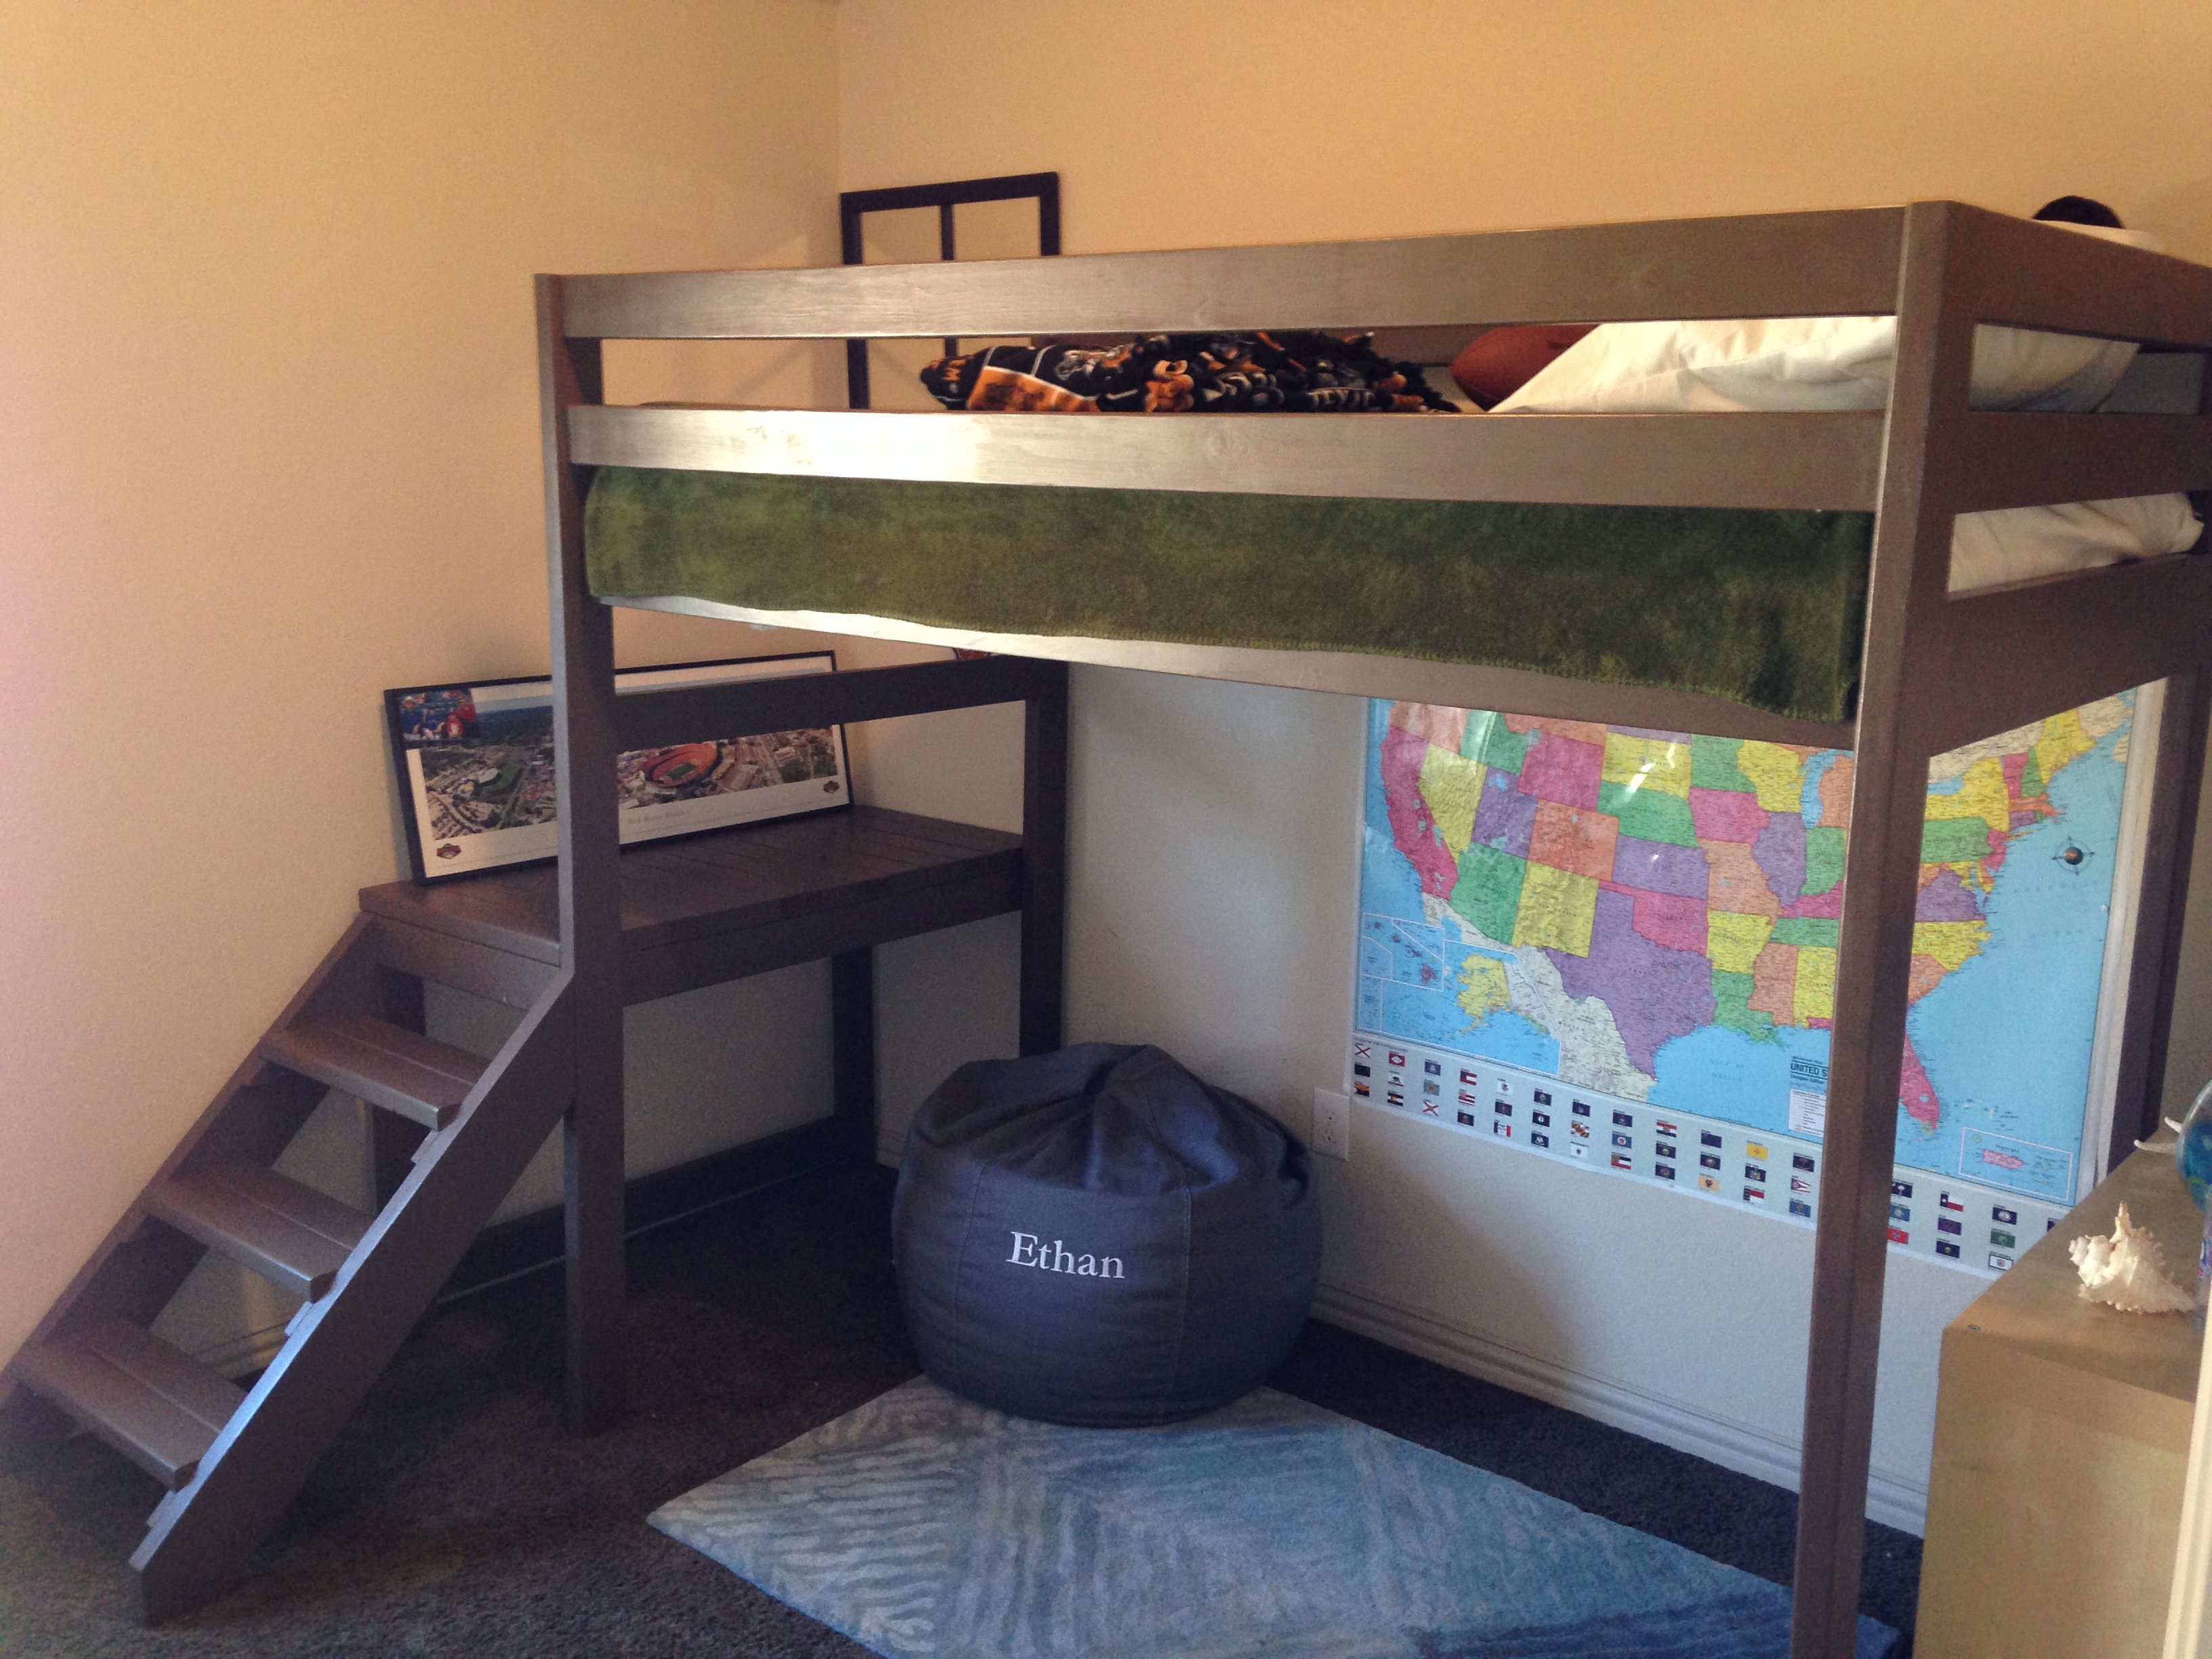
To build this bed I combined the Camp Loft Bed with Stairs (Jr. height) plan with the height measurements of the Loft Bed. My son absolutely loves this bed!

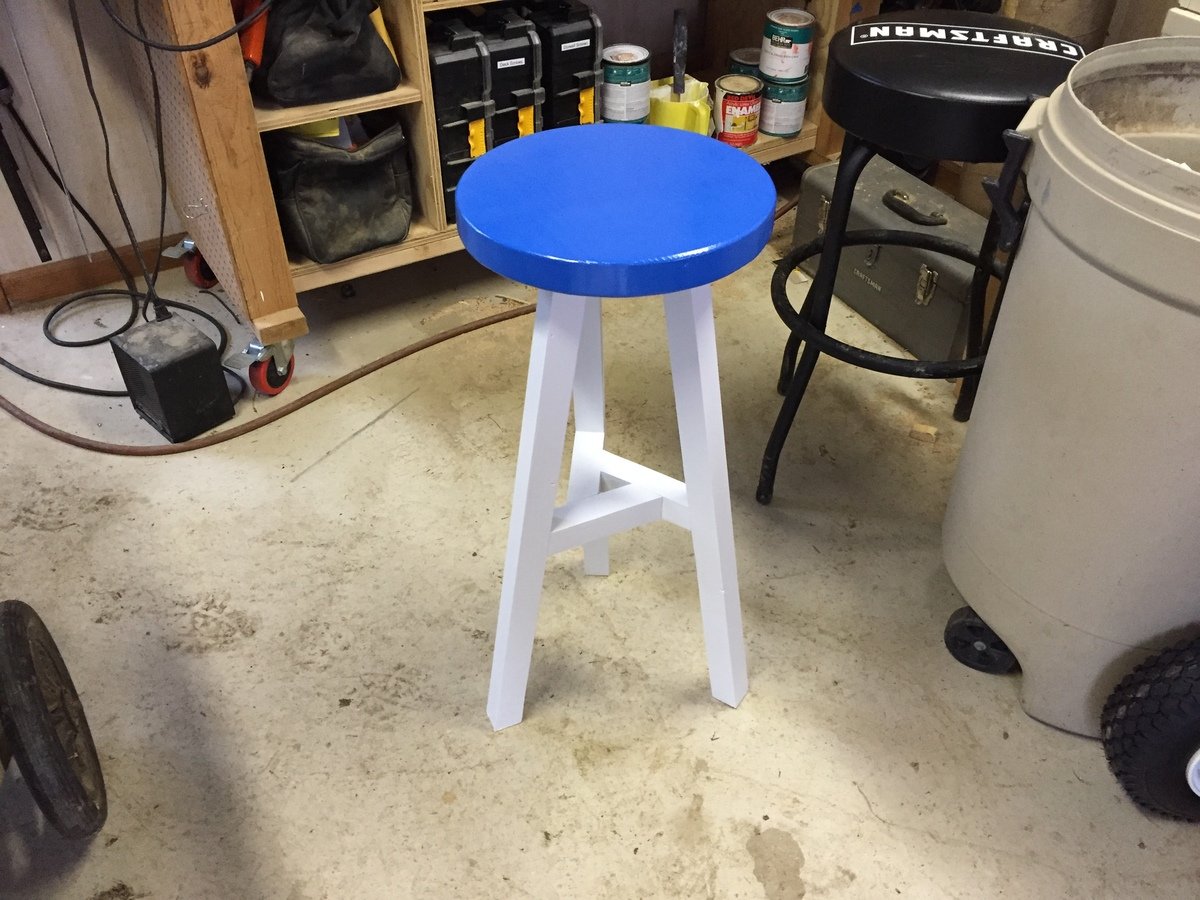
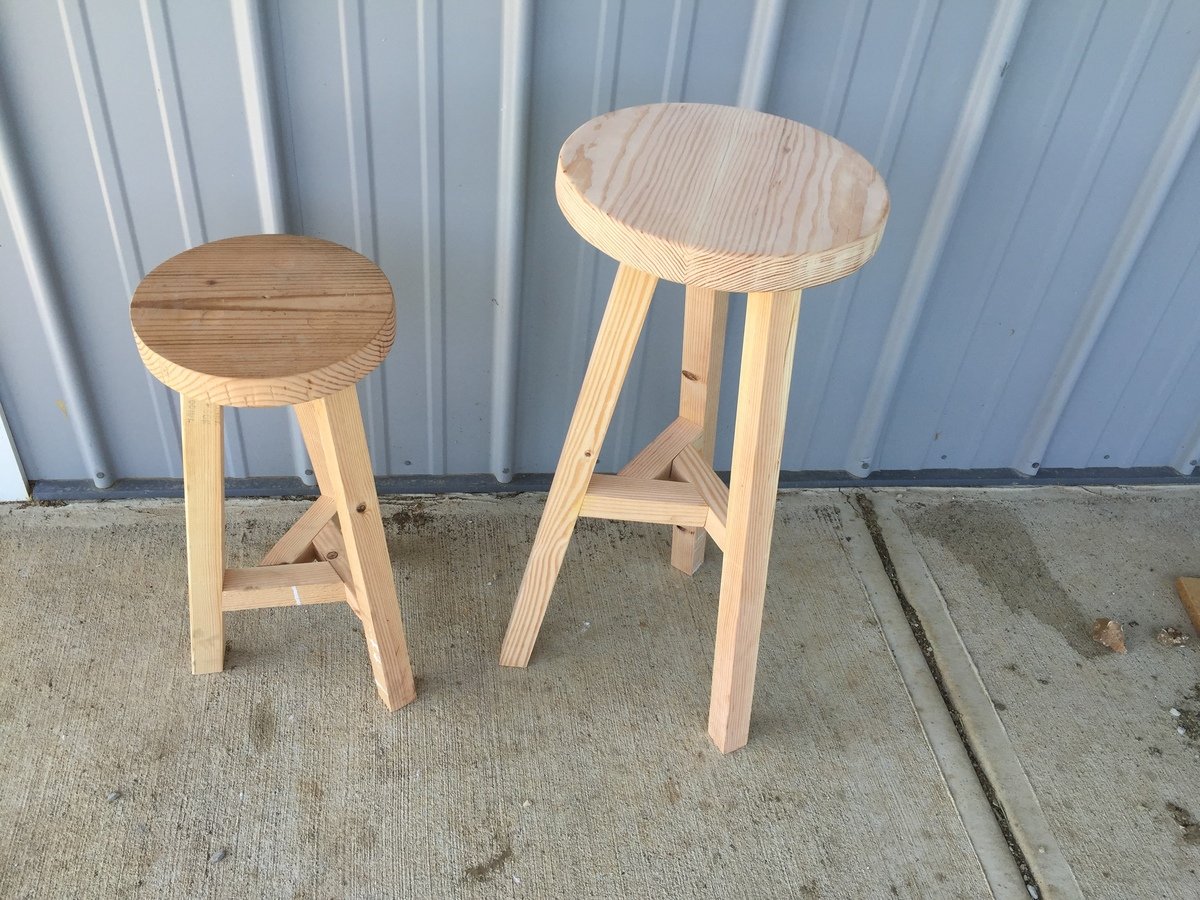
My 13-year-old daughter asked me about making a stool, with the main requirement being it had to have a round seat. So I turned to this ana-white.com to see if I could find something that we could do and found the plans for the three-legged stool. The first one we made with the dimensions specified in the plans but she thought it was too short. So we made another one with longer legs and a larger diameter seat.
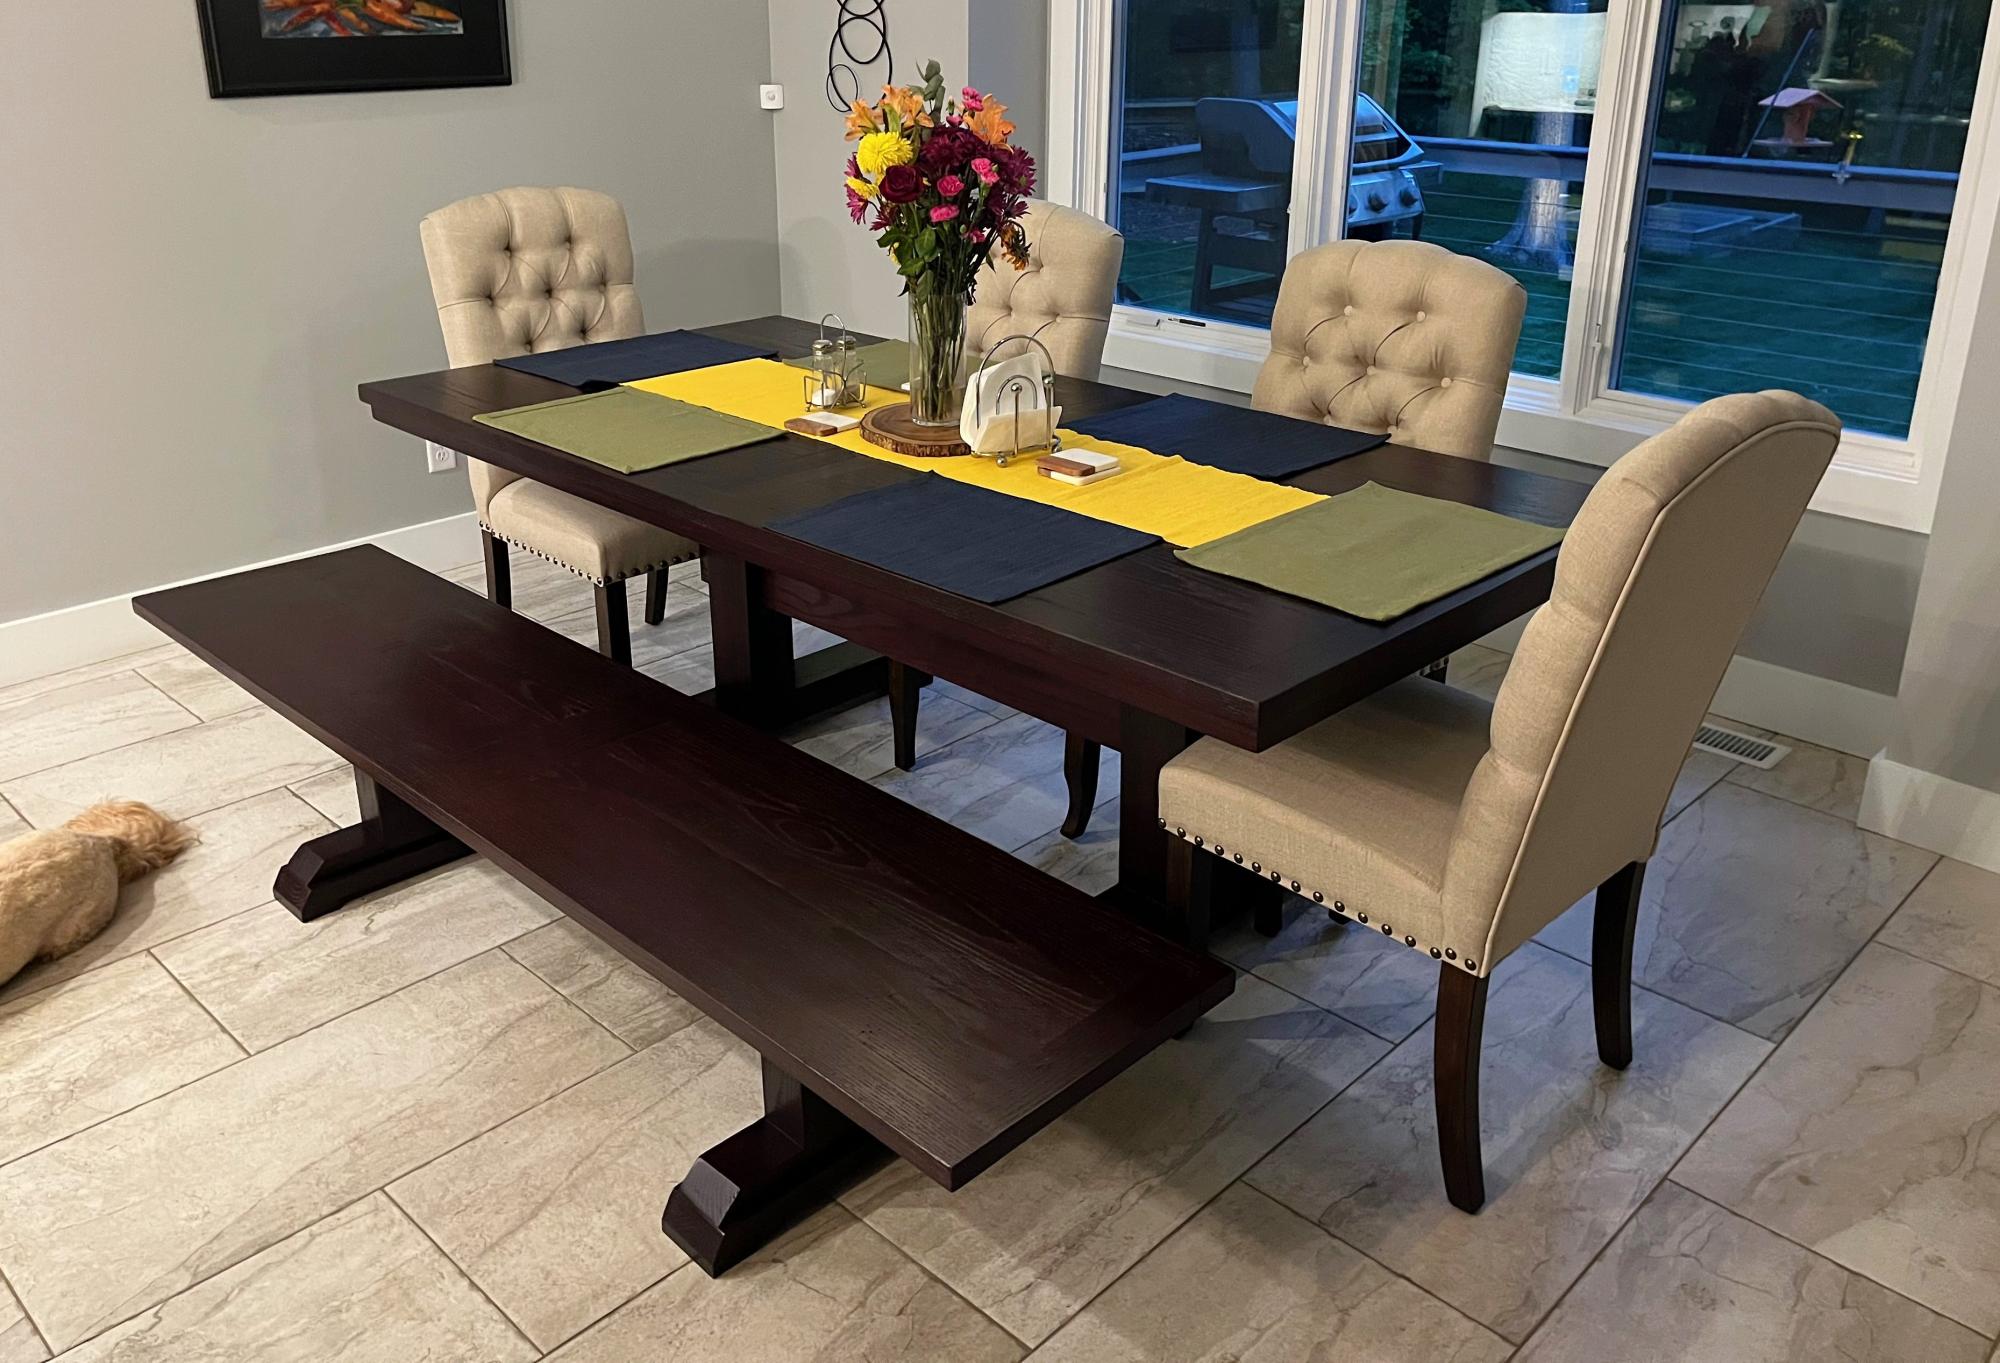
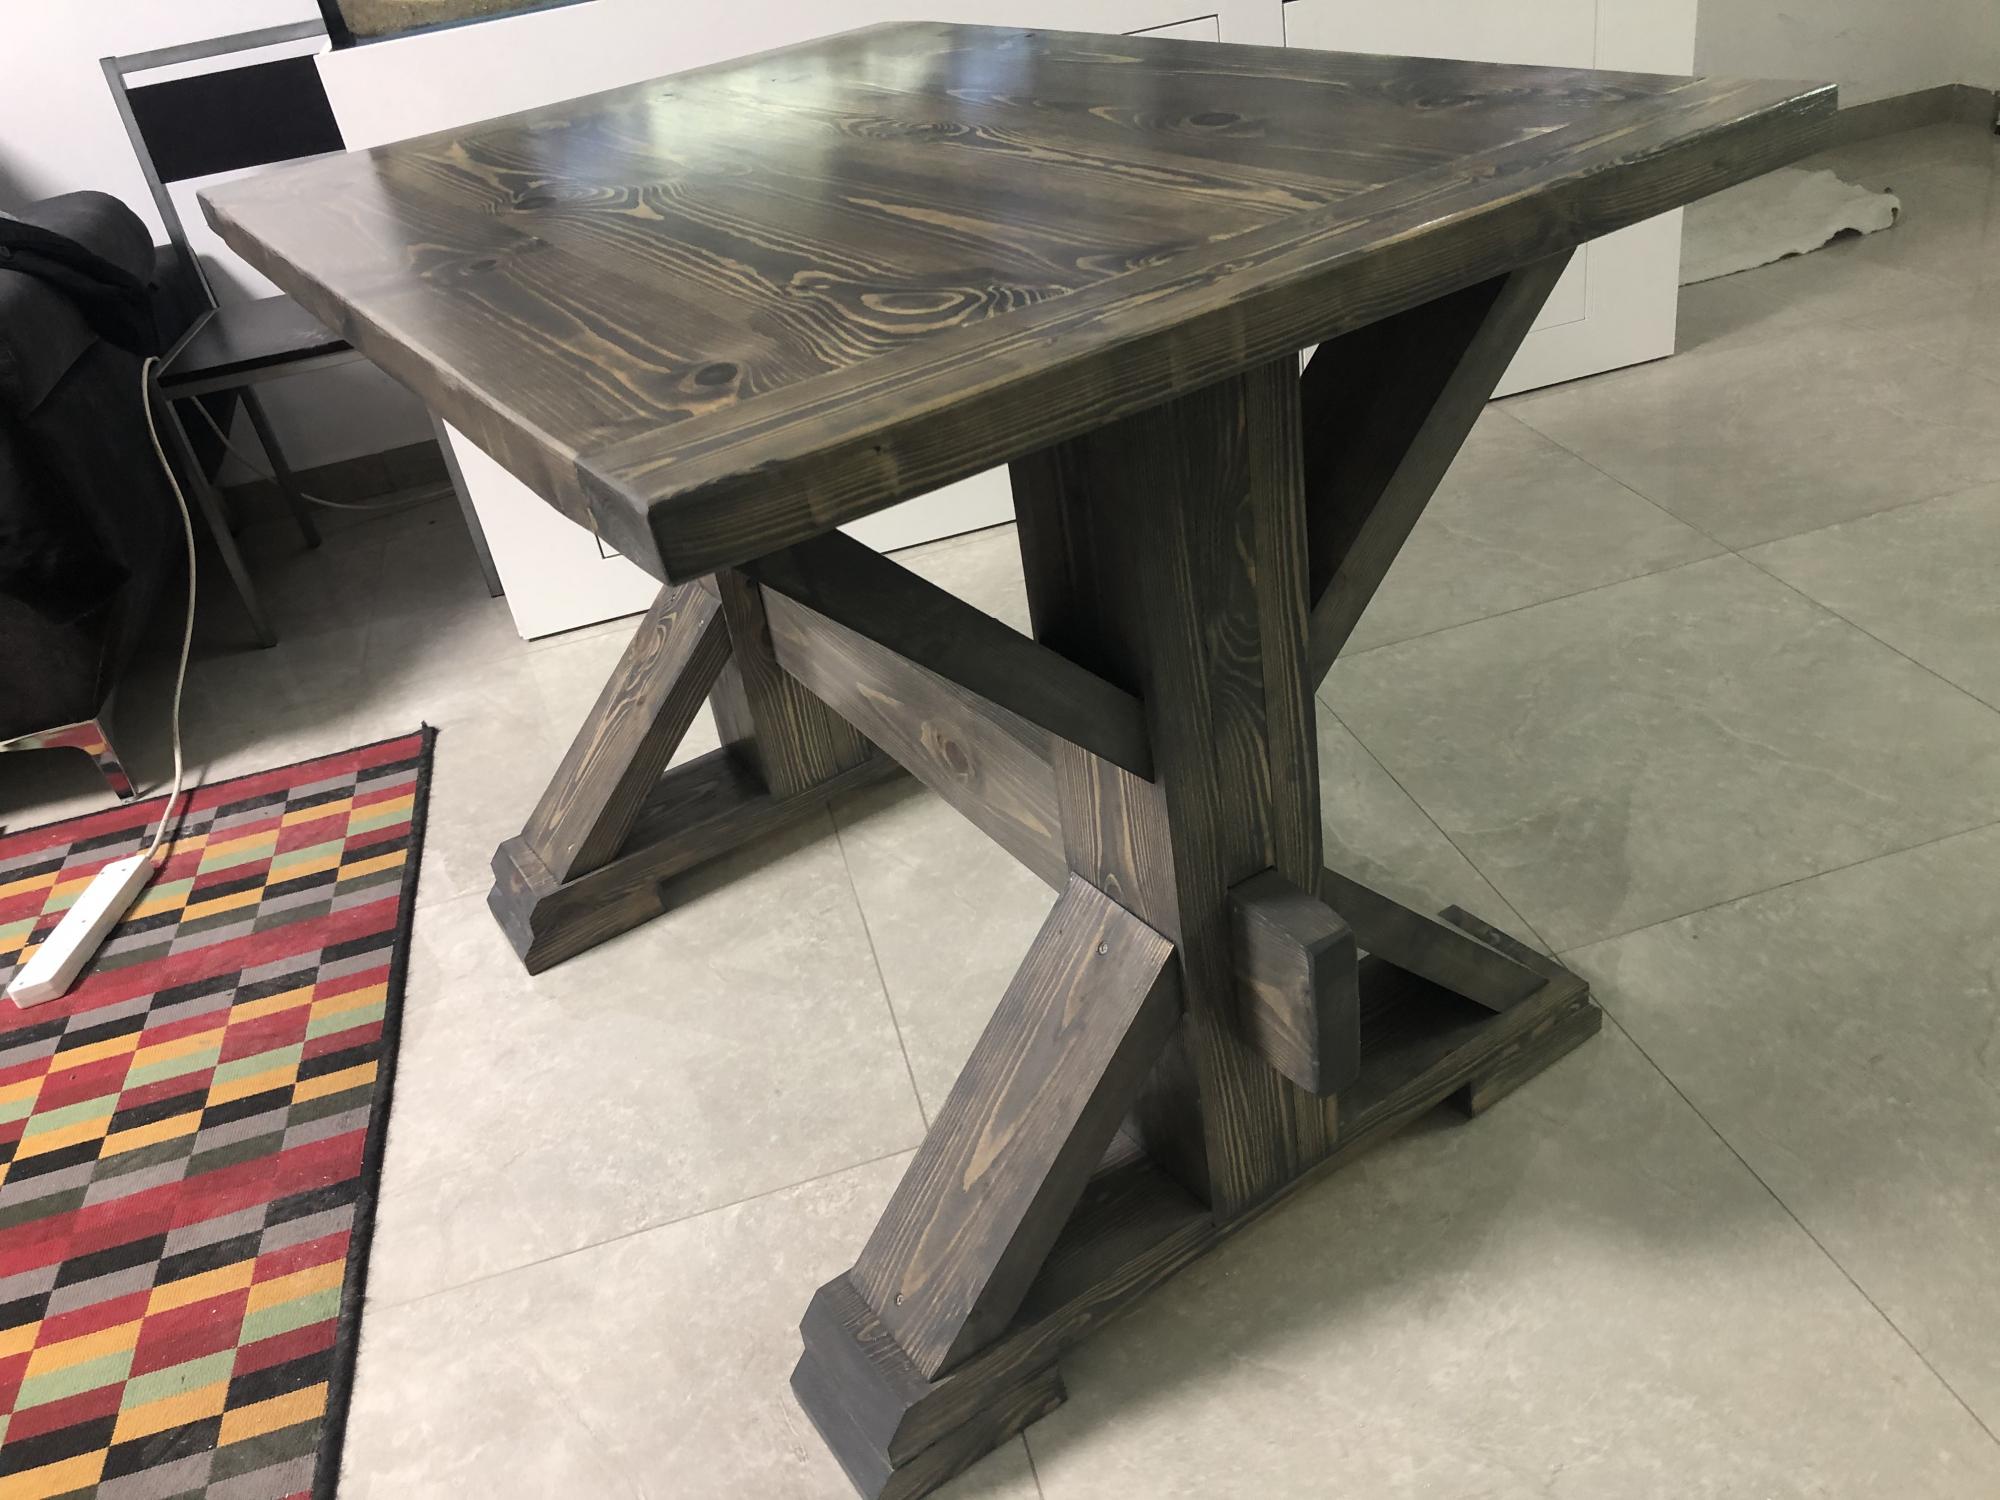
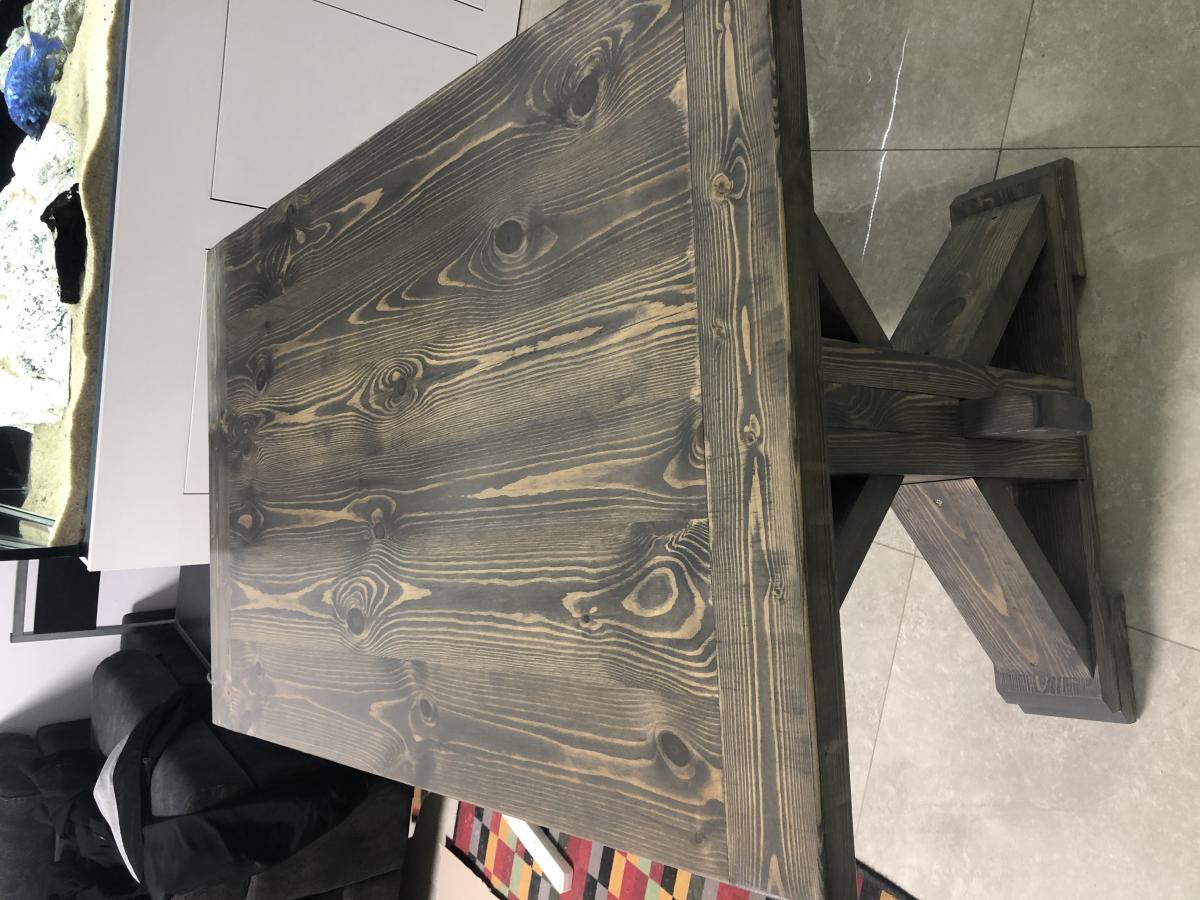
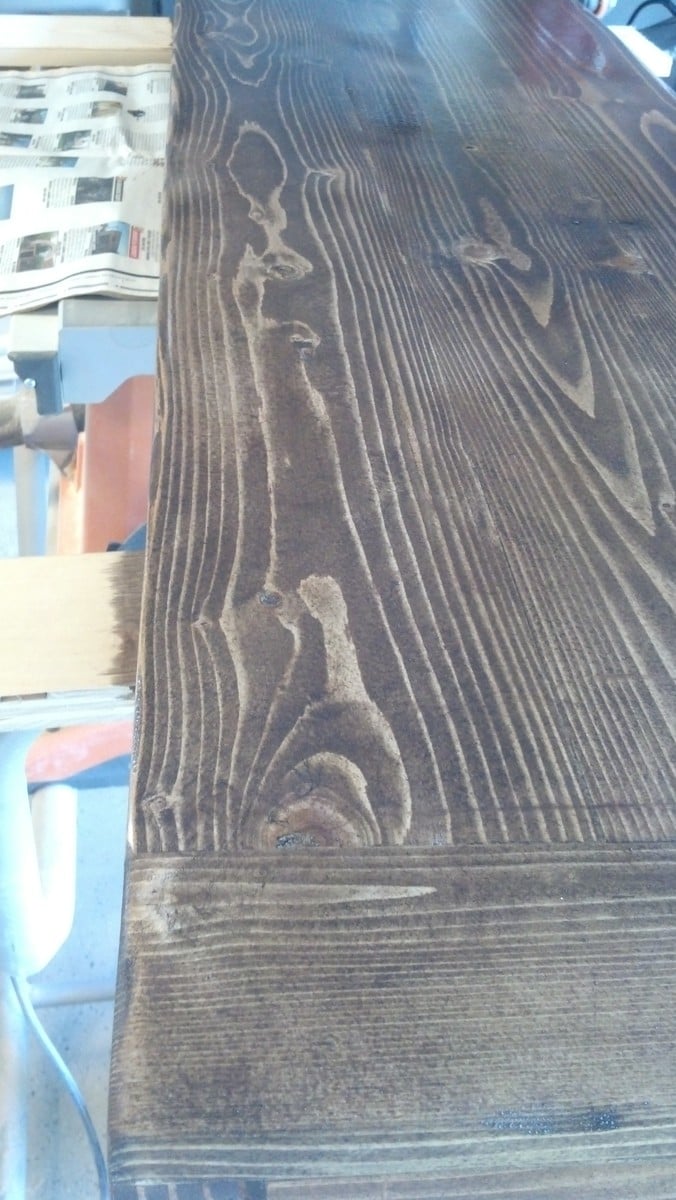
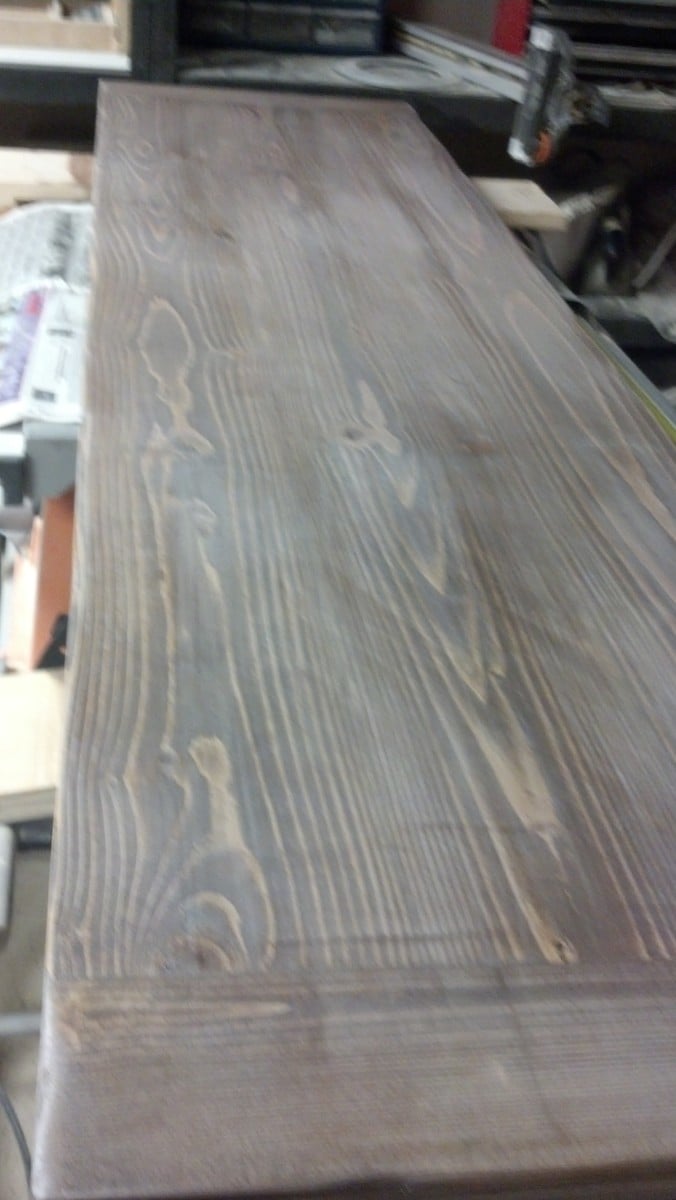
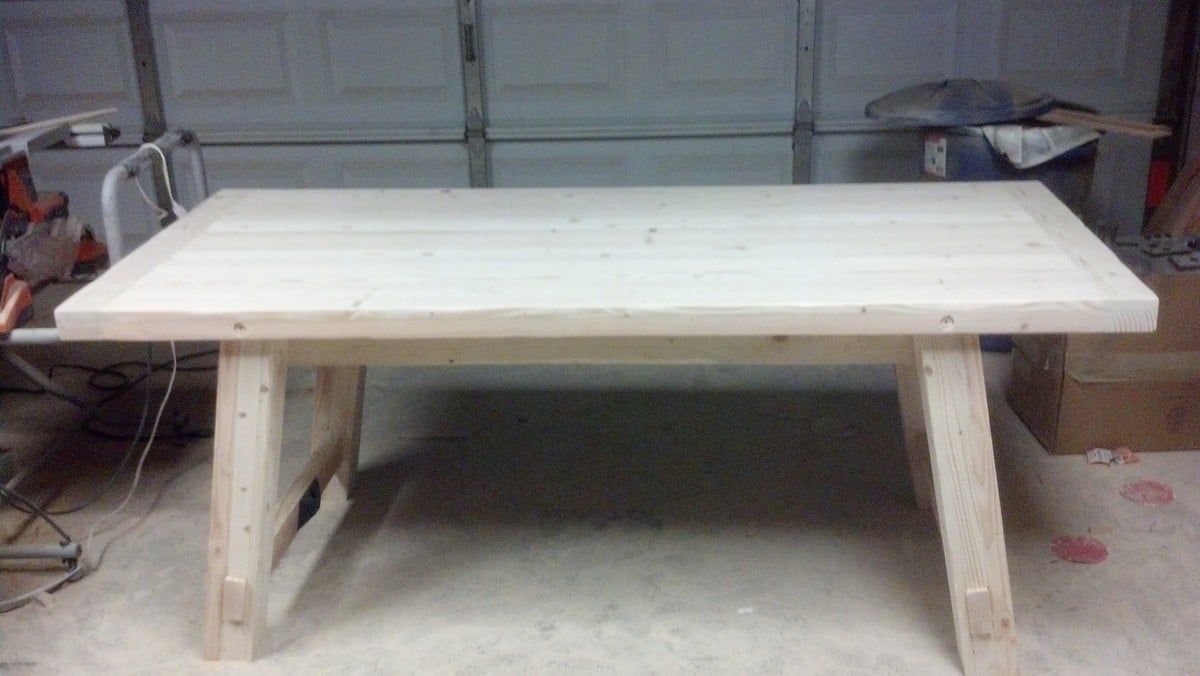
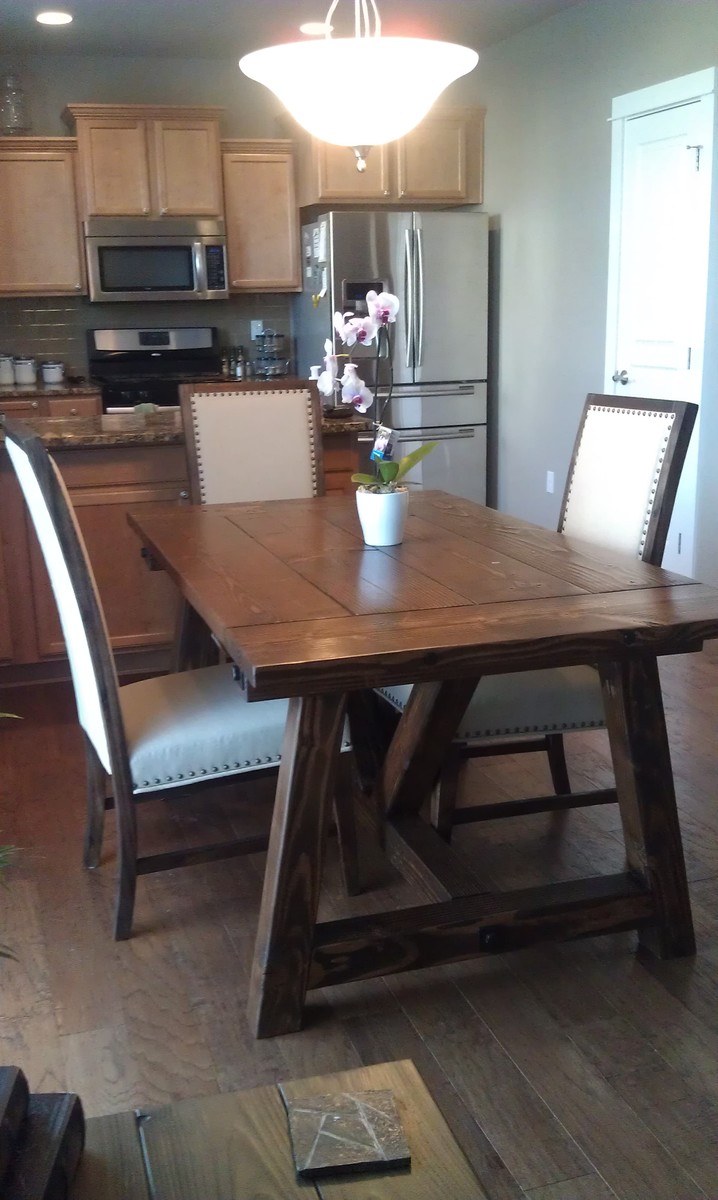
This was made from Red Oak trees that were cut down to clear a lot to build our home. We saved the trees with plans of making a dining room table. I used the Triple Pedestal Farm House Table plan and modified it for the size that we wanted to fit our space. The end result was just want we wanted!
I used paint stir sticks as the front of my bins!
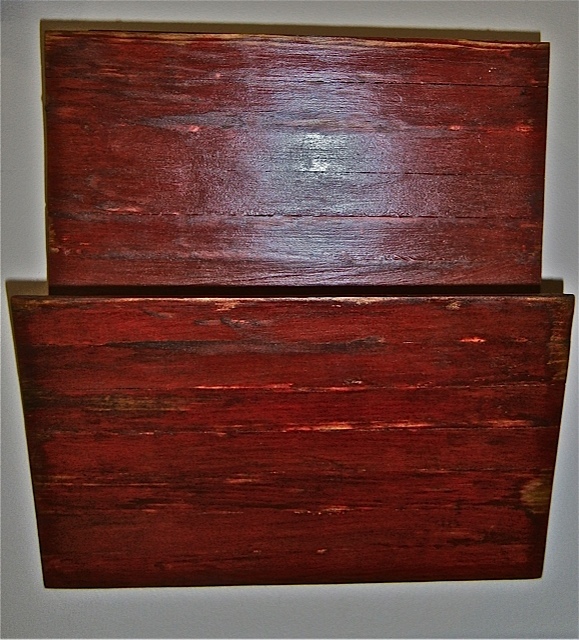
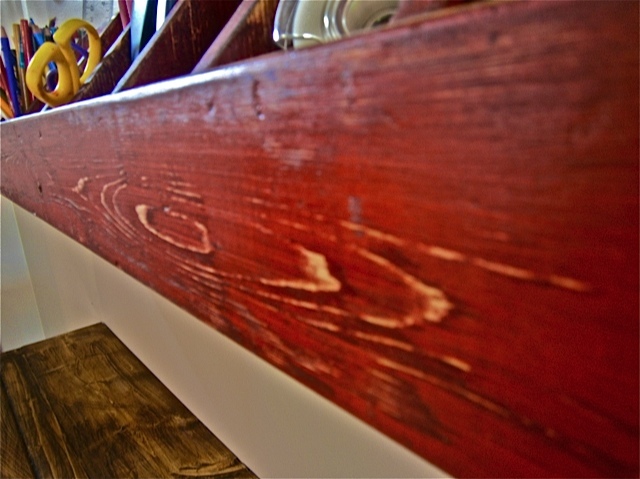
I wanted the "bead board" look but to still have a natural wood grain that I could stain for the rustic look. I also really like being "frugal"

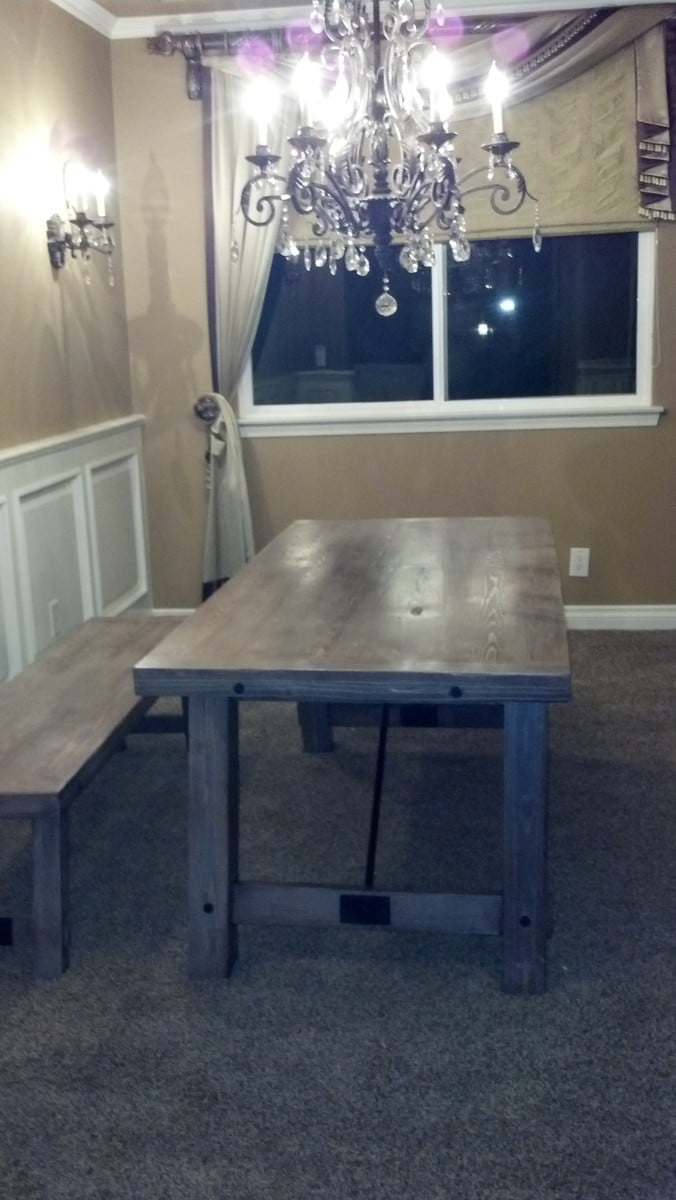
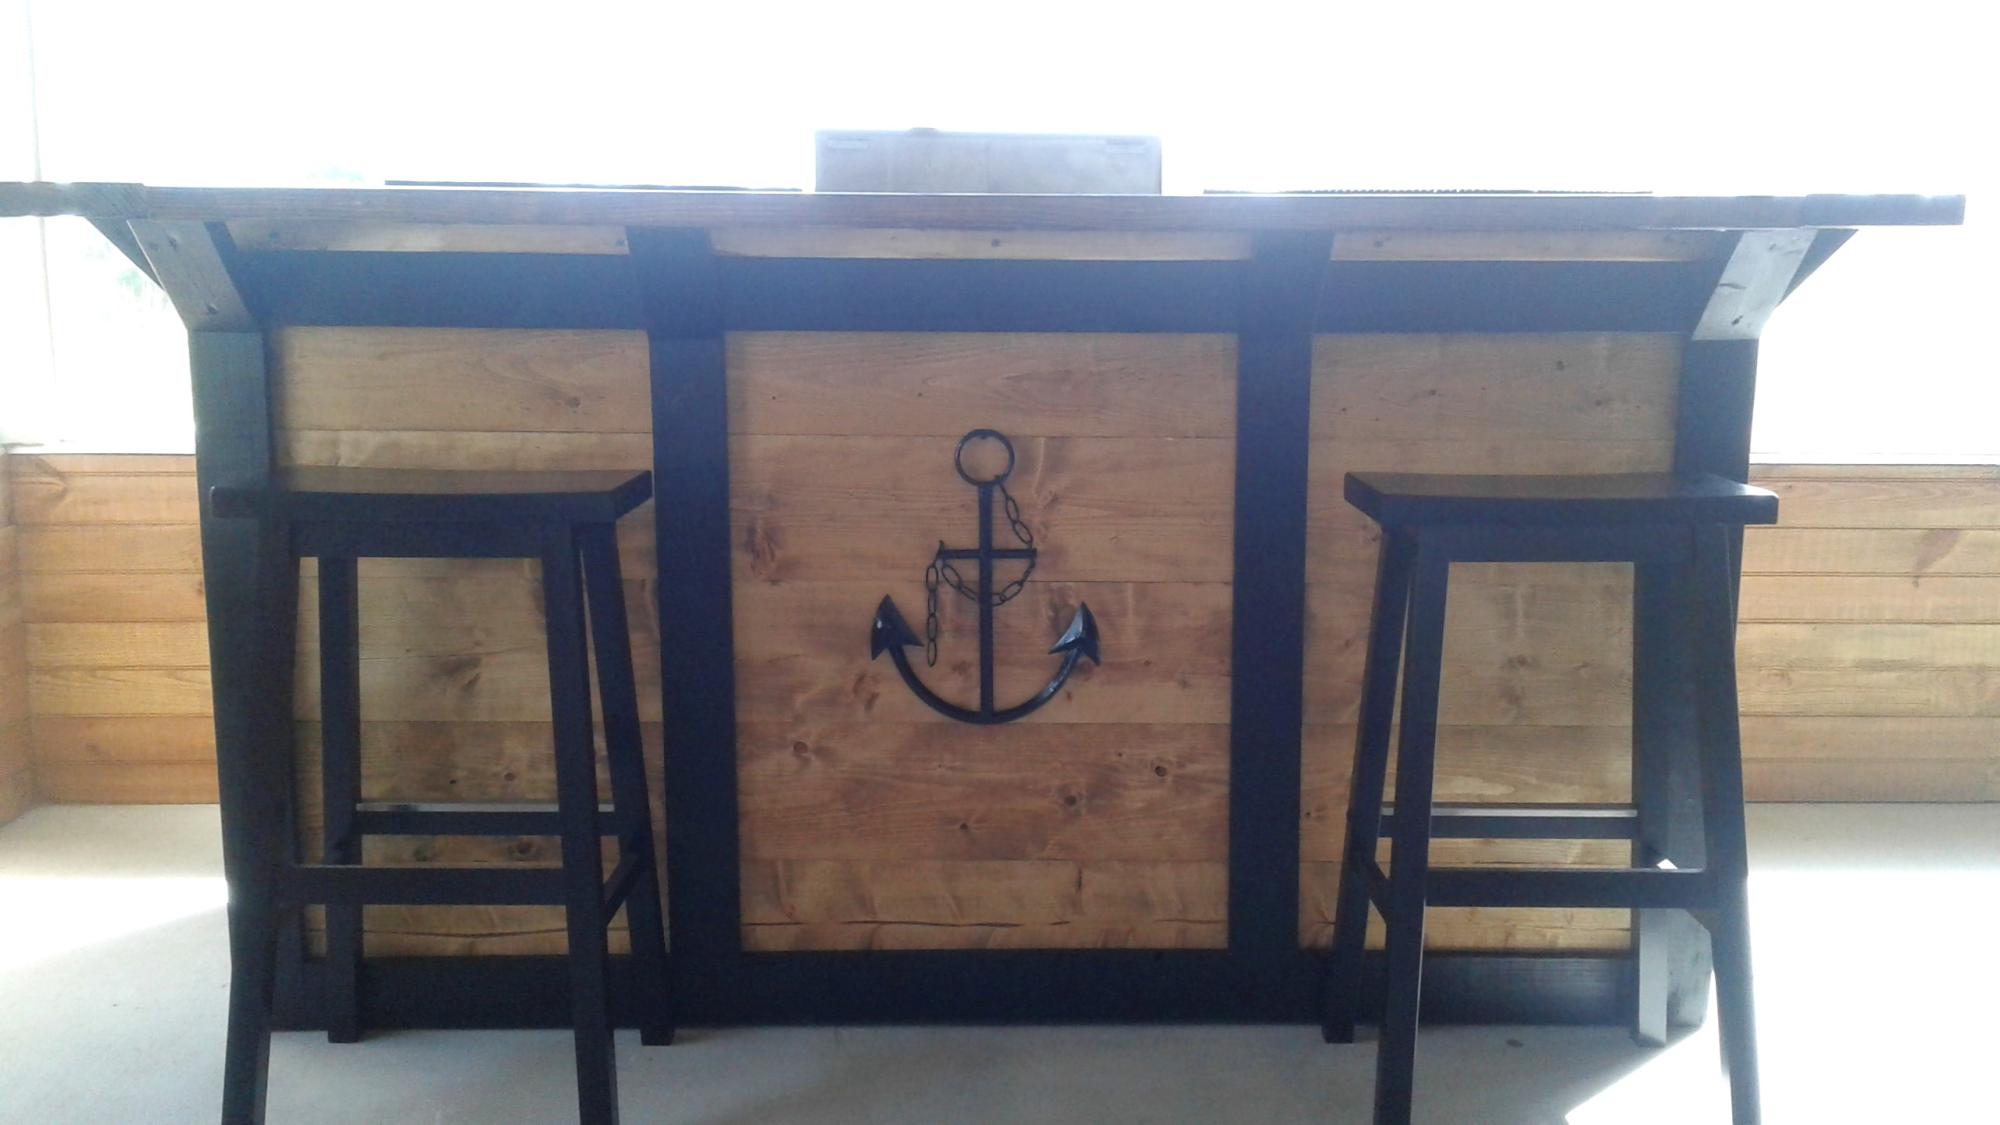
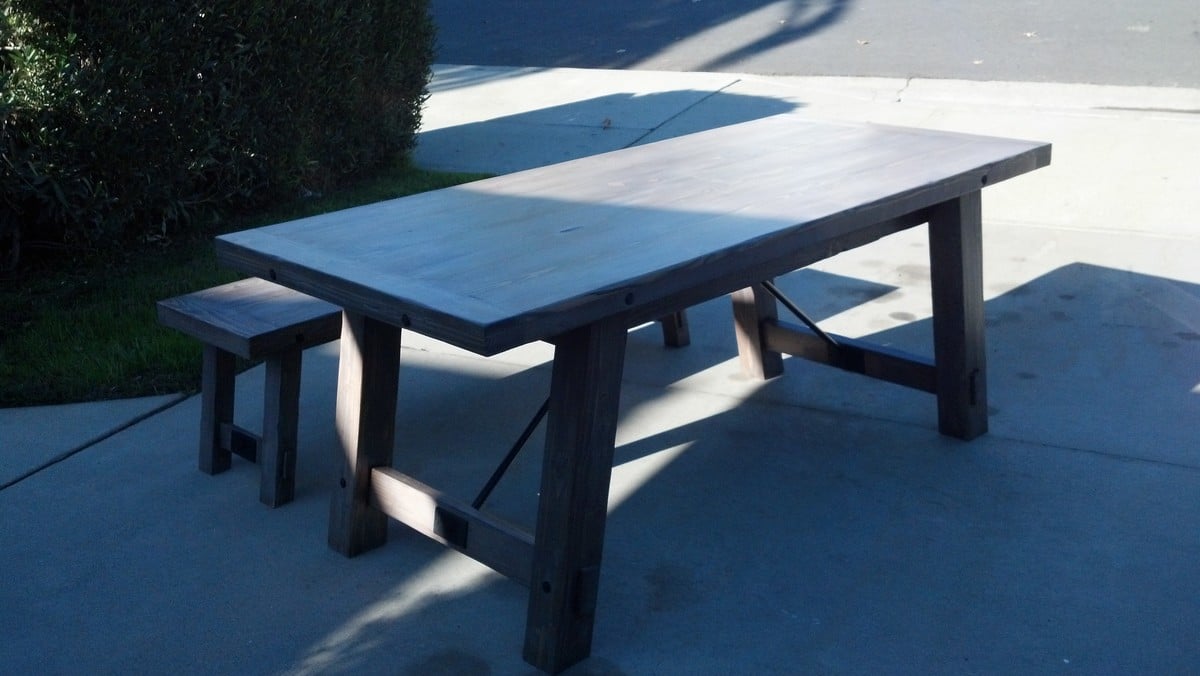
So my son and daughter-in-law have a new home, and lots of empty space. I told them to find a table they liked and I'd try to make it for them. They liked the PB benchwright table (http://www.potterybarn.com/products/benchwright-dining-table/http://www…) with the iron support pieces. I had to get creative for those using electrical conduit and some plumbing pieces that I spray painted black. I finished it exactly like Jen of House of Wood (http://jenwoodhouse.com/blog/2013/06/07/diy-dining-table/) and it turned out beautifully!
It was a fun project and they love it.

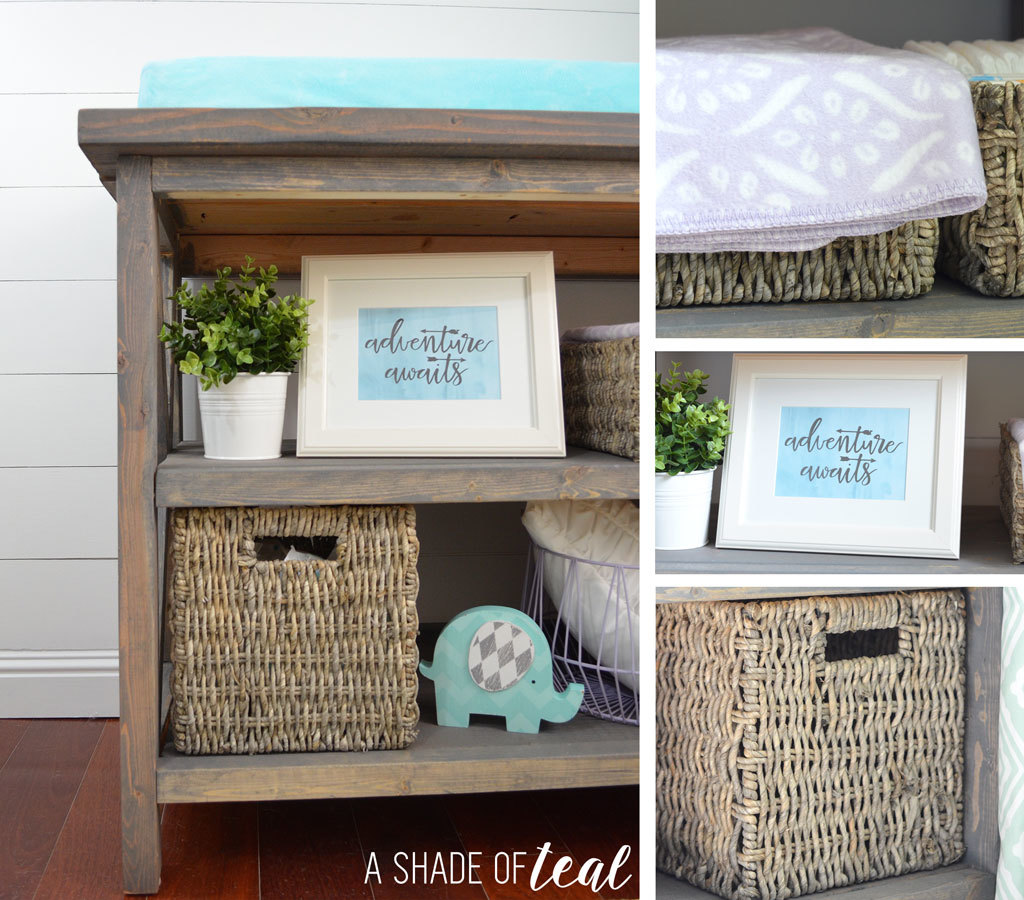
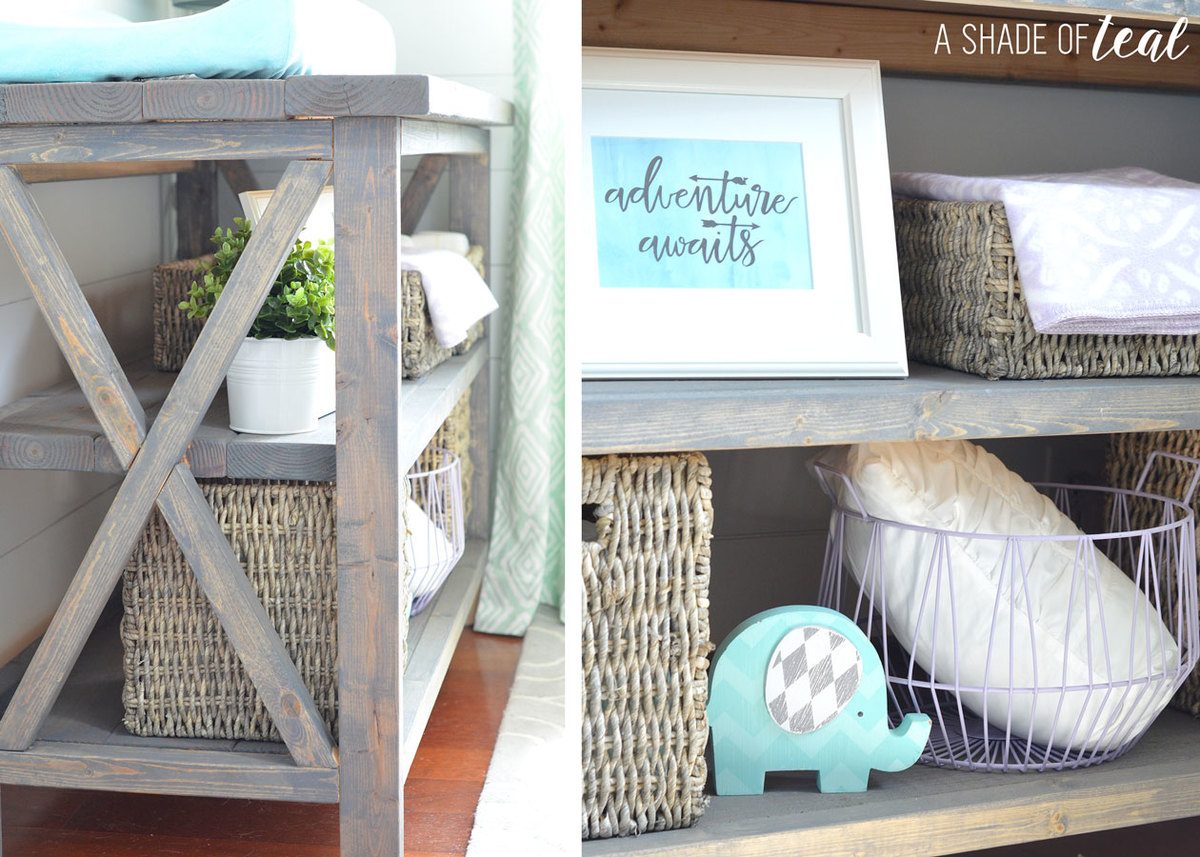
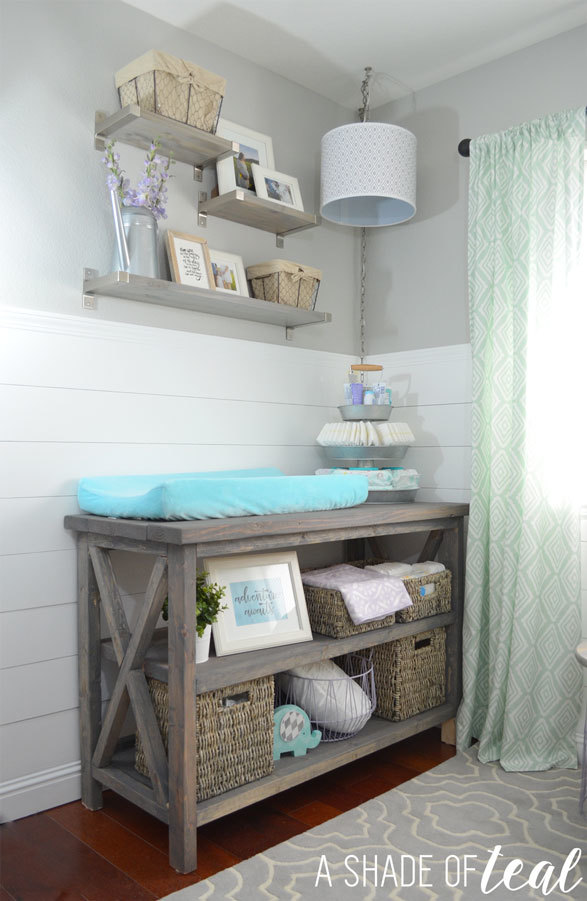
Rustic farmhouse changing table without the framed top box. I built this for my daughters nursery.
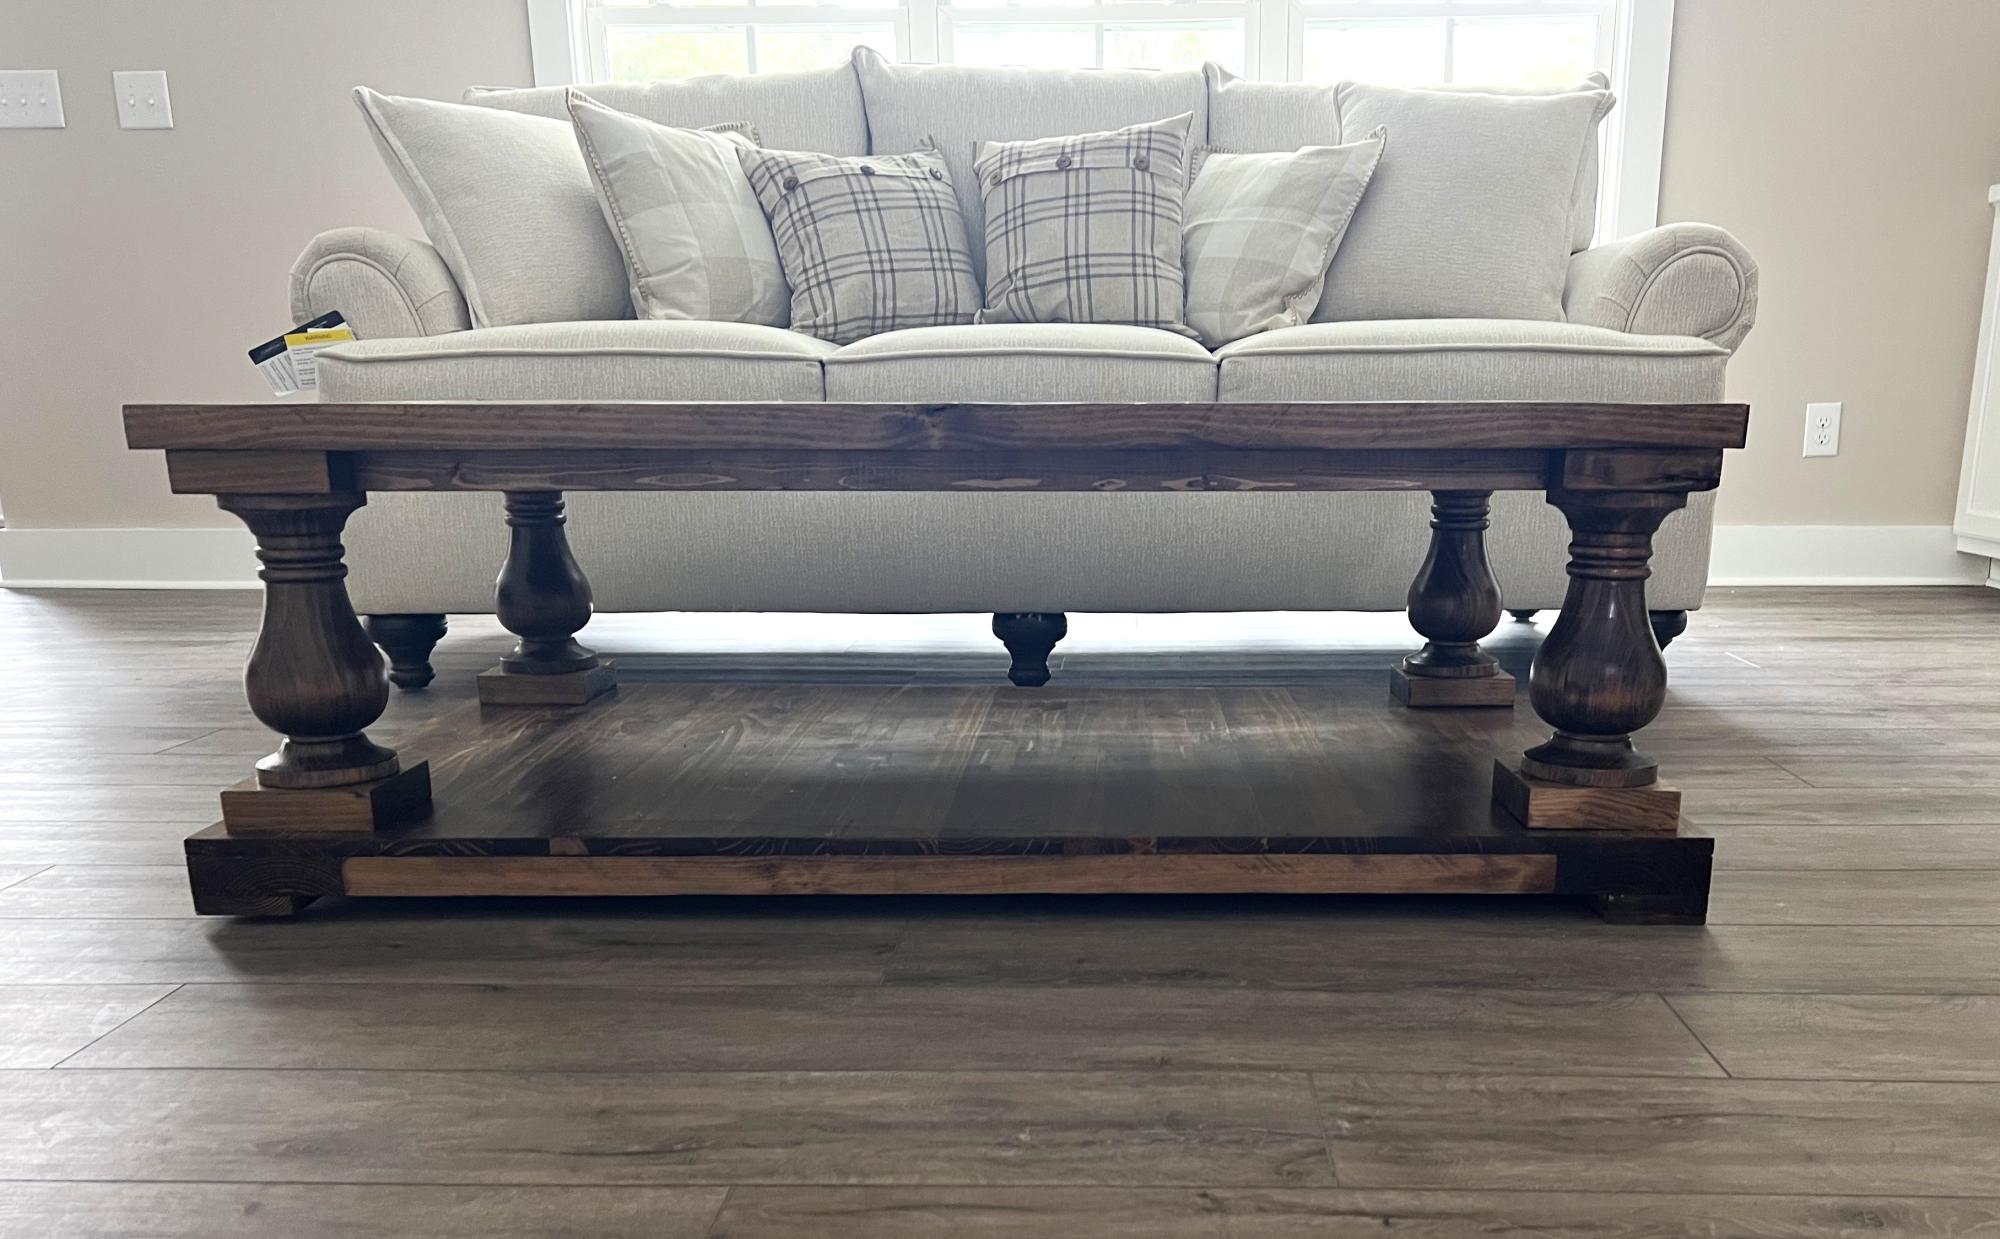
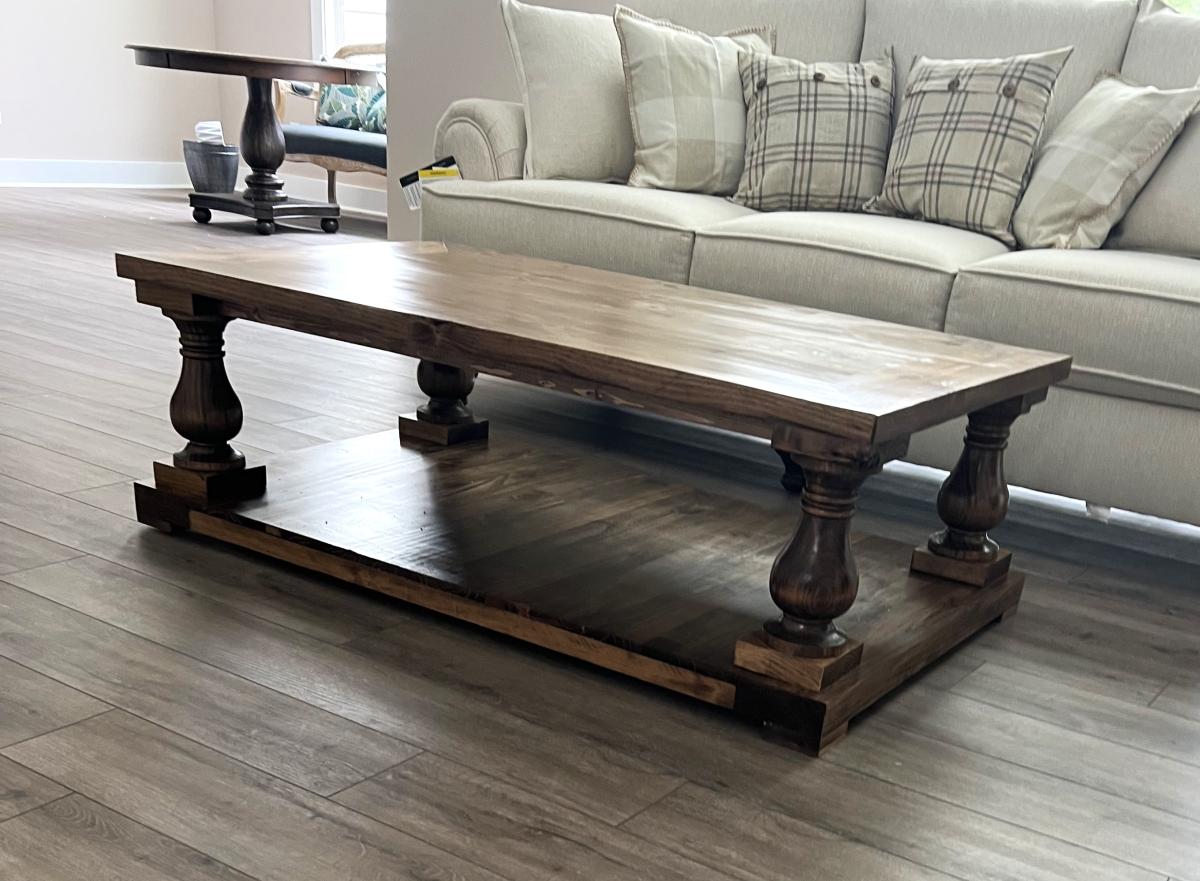
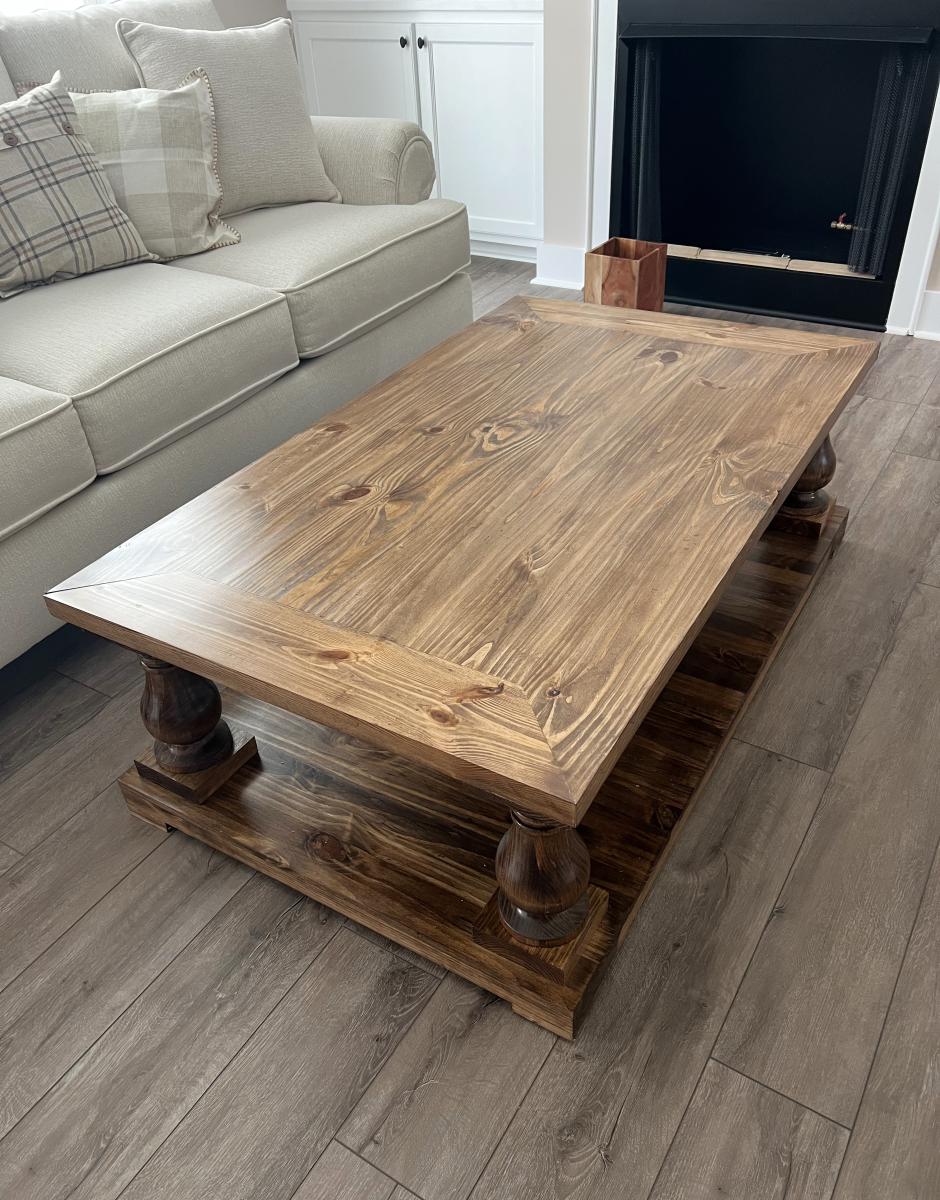
My rendition of the baluster coffee table.
Wayne A.
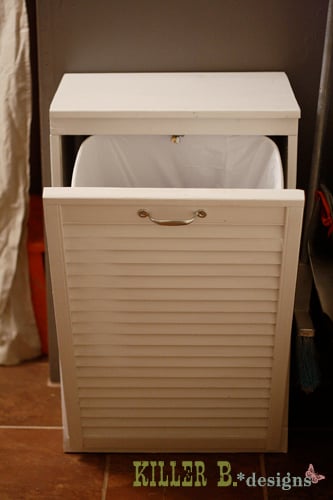
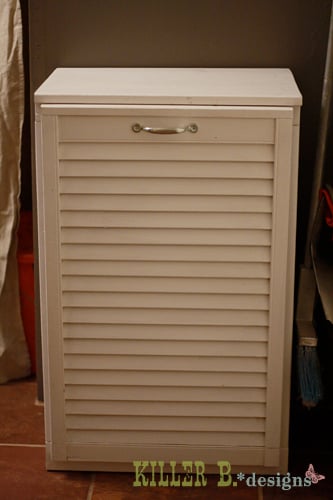
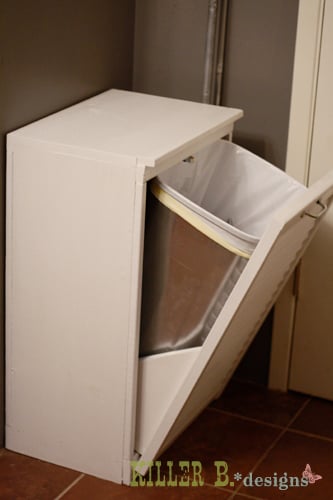
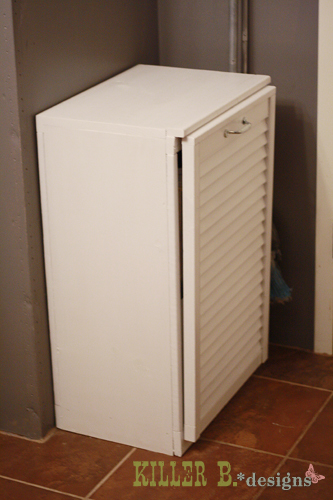
My trash situation was pretty dire once my dogs figured out how to pop off the lid and dig into everything. Trash was everywhere! So to keep out prying paws, I built Ana's tilt-out trash cabinet to keep the can safe. But I didn't read the plan through before going shopping, and didn't get any plywood to make the door! So I used part of an old bifold door that looks like a shutter and cut it to fit. I also added a cabinet clasp inside the top so it can securely shut. Now we don't have any trouble with my dogs dragging trash through the house!

Wed, 05/02/2012 - 11:26
I love the shutter style door! I'd say you improved the plan out of necessity. Good Job!
Fri, 09/28/2012 - 07:14
I too think you have given us another idea with this plan, it's wonderful!
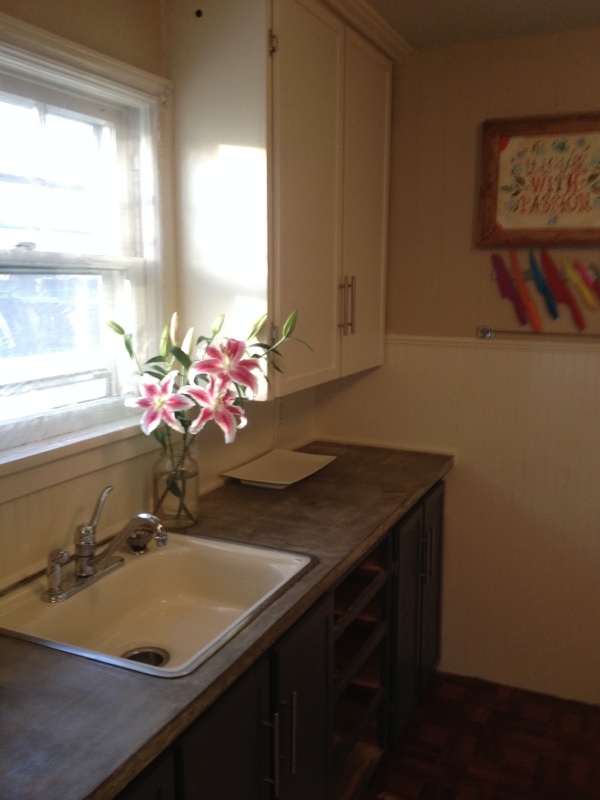
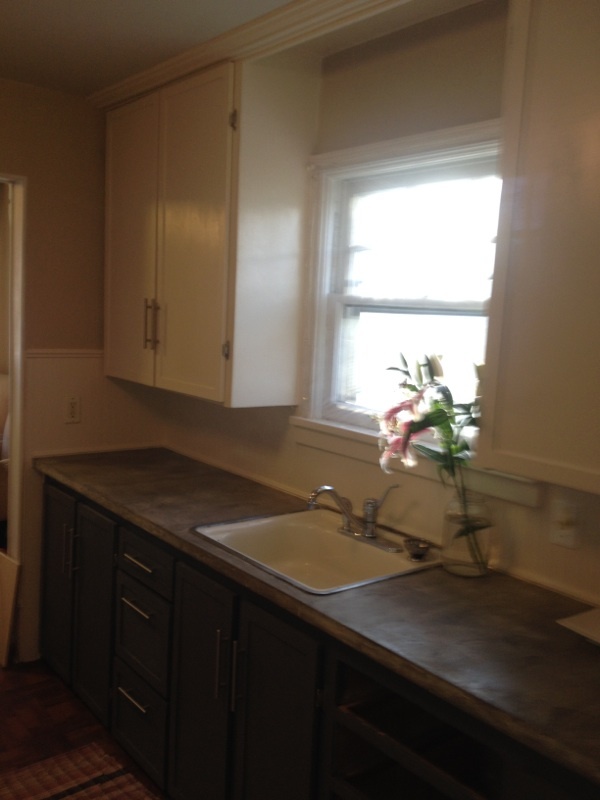
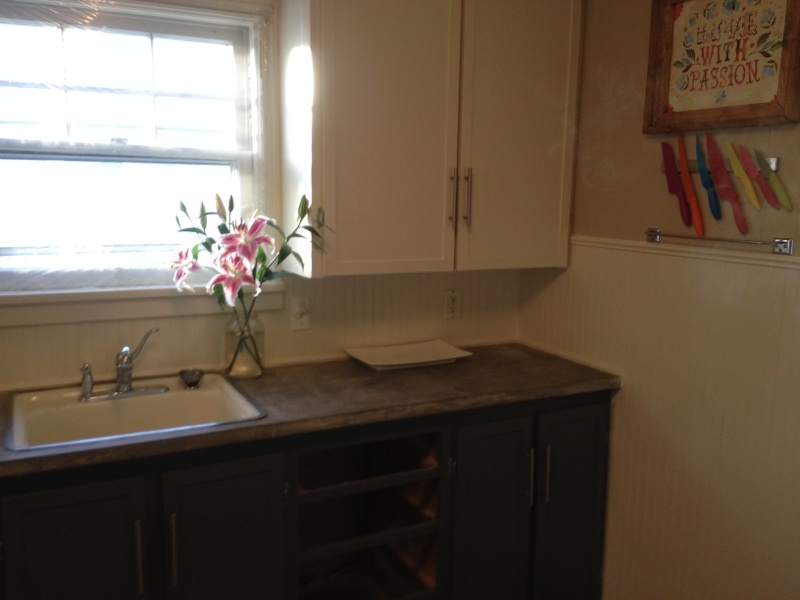
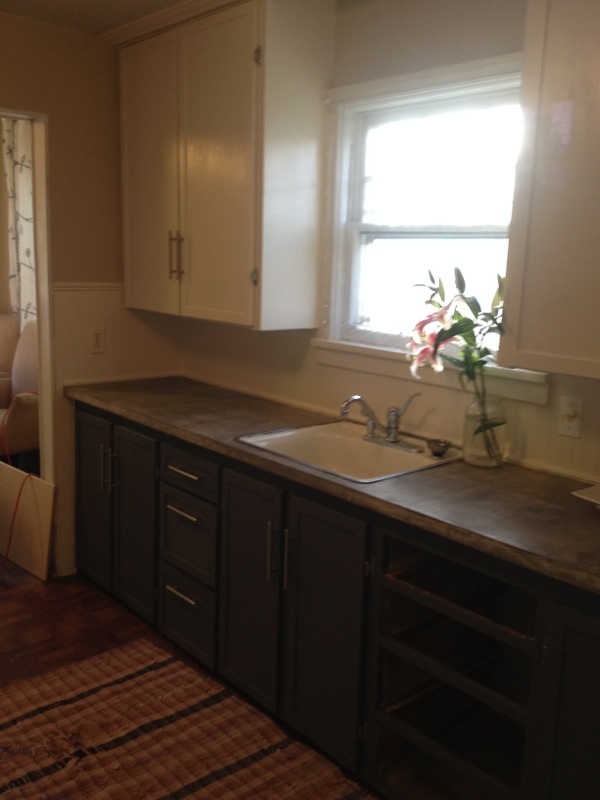
After some inspiration from Ana, my husband and I tackled refacing and rehabbing our original cabinets circa 1939. The drawers and shelves were in rough shape so we built our own using the kreg jig. We're extremely happy with how everything turned out. When the weather gets better we will be building new cabinets on the opposite side of the kitchen where unfortunately we don't have ANY storage.
Thanks for looking!


Inspired by the Madeline plans, I built this changing table for our impending arrival.
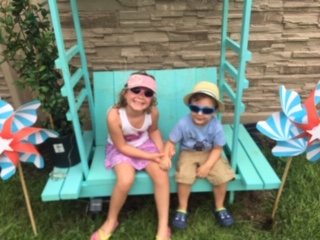
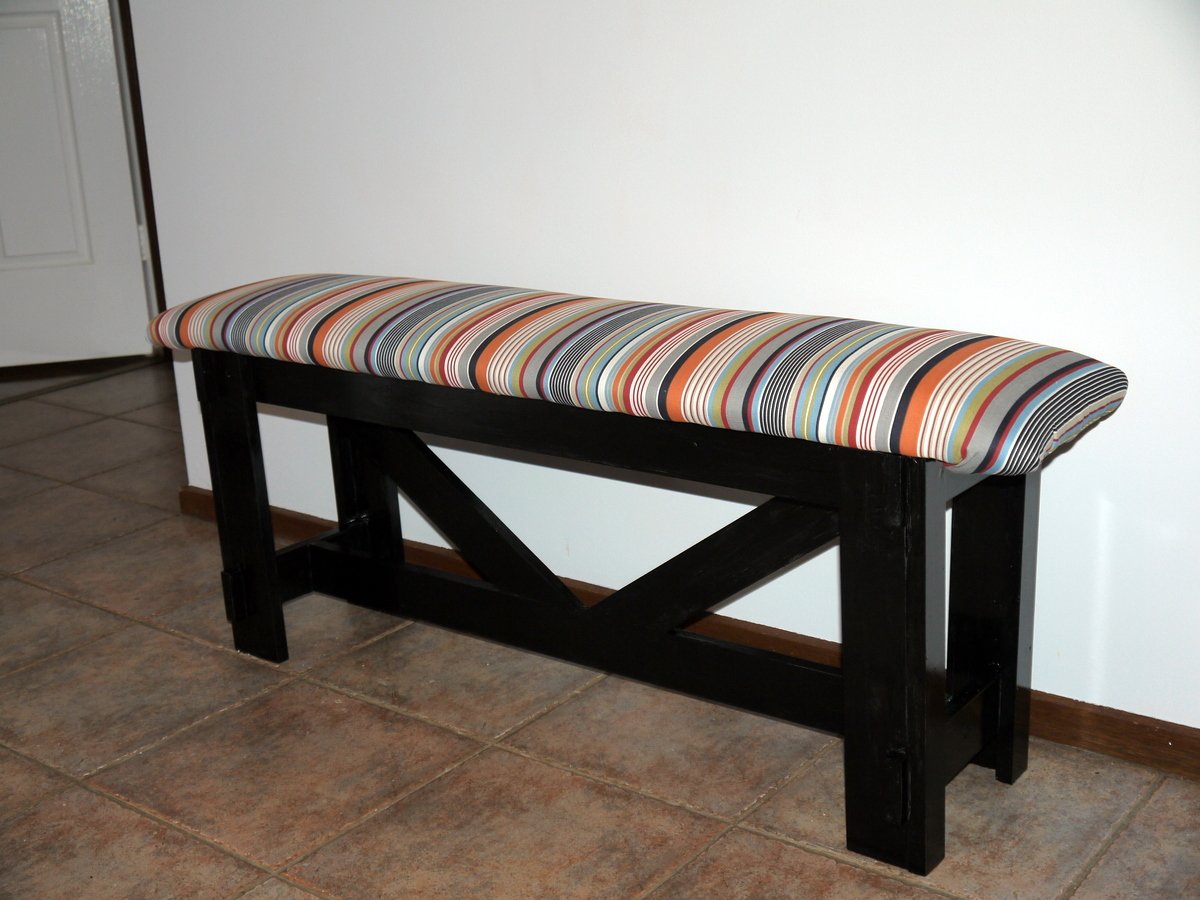
This was one of my first Ana-White projects. I am a hack builder and found this to be fairly easy with the back of the seat to be intermediate (However, I slanted the back and found that to be challenging for me.) Loved this little arbor bench and how it turned out. A couple coats of polyurethrane has helped it last outdoors all year through the sun and rain in Florida. Kept costs down using extra wood in the garage. Kids love to sit on it but mostly climb...!

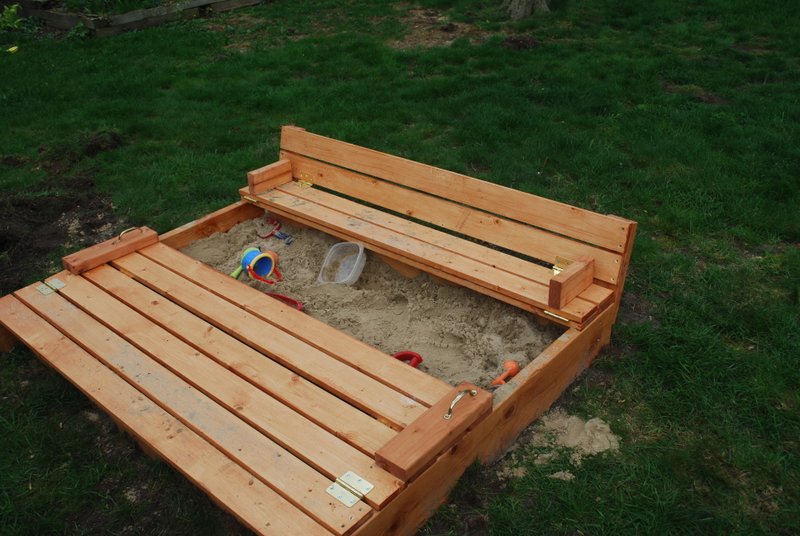
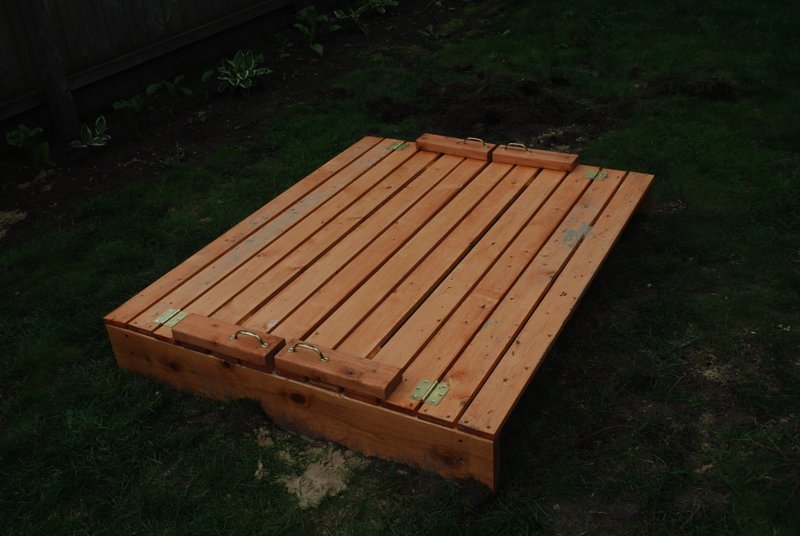
For the last year we have been kicking around making a sandbox. We really needed a cover and really wanted seats. So this worked out perfect. We did modify the plan a little to make it just a little bigger. It is 4' x 5' instead of the 4'x4' called for in the plans. Very easy to build...we have very little building experience and pulled it off. We did dig out the grass where the box was going to sit and stapled 2 layers of landscaping fabric to the bottom of the box frame. We also sealed the main box frame with a little silicone to minimize sand leakage.

Mon, 05/07/2012 - 05:32
Thanks. There are the same number of 1x4s on the top they are just longer. I was worried about the benches sagging because of the increased length and was prepared with scrap 2x4s to add support under the first two boards if needed but it doesn't seem to be a problem. We only widened it to 5' though...I think at some point that extra support would be needed.

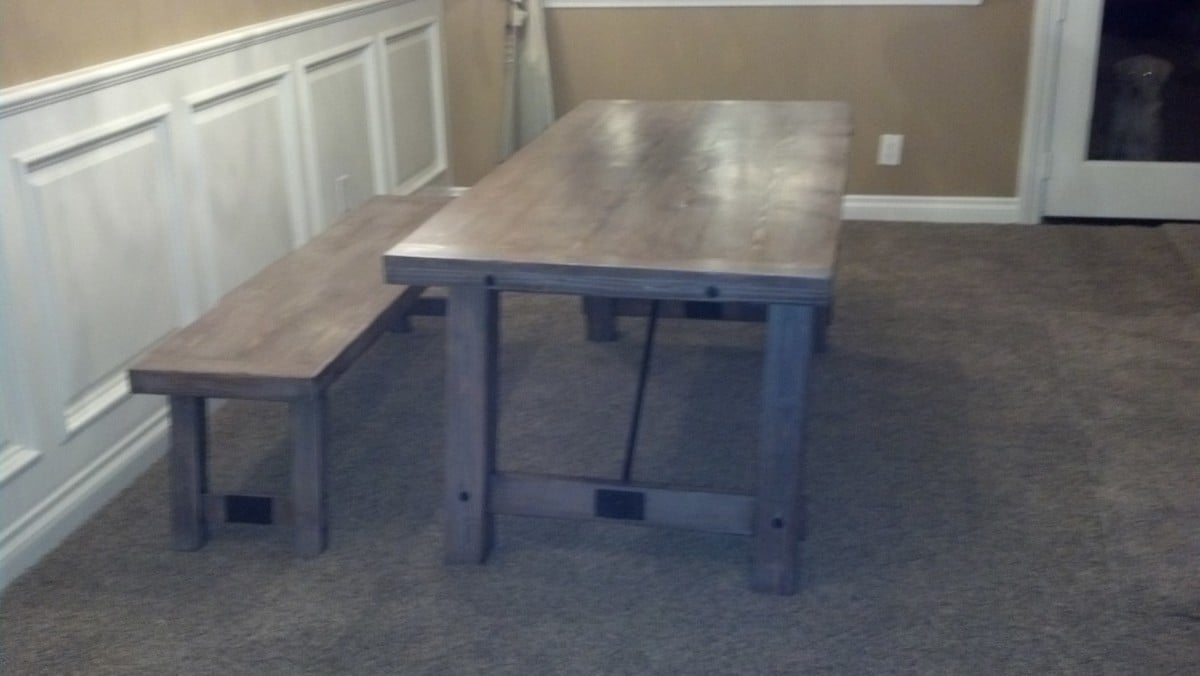
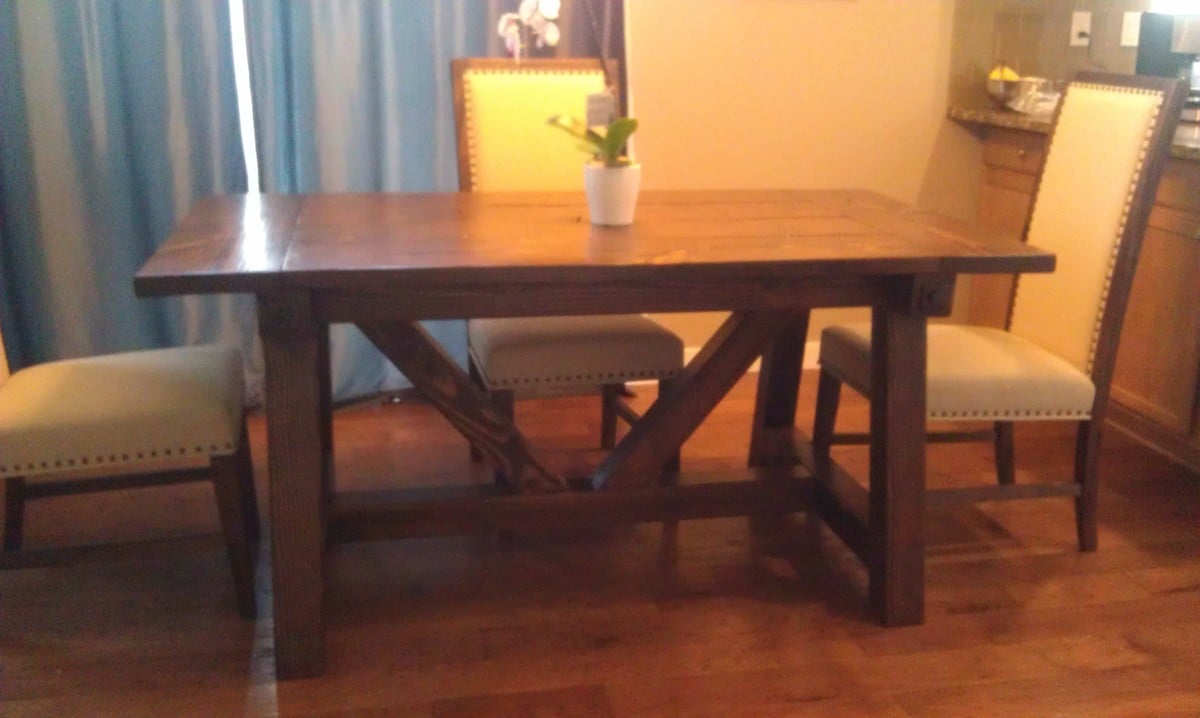
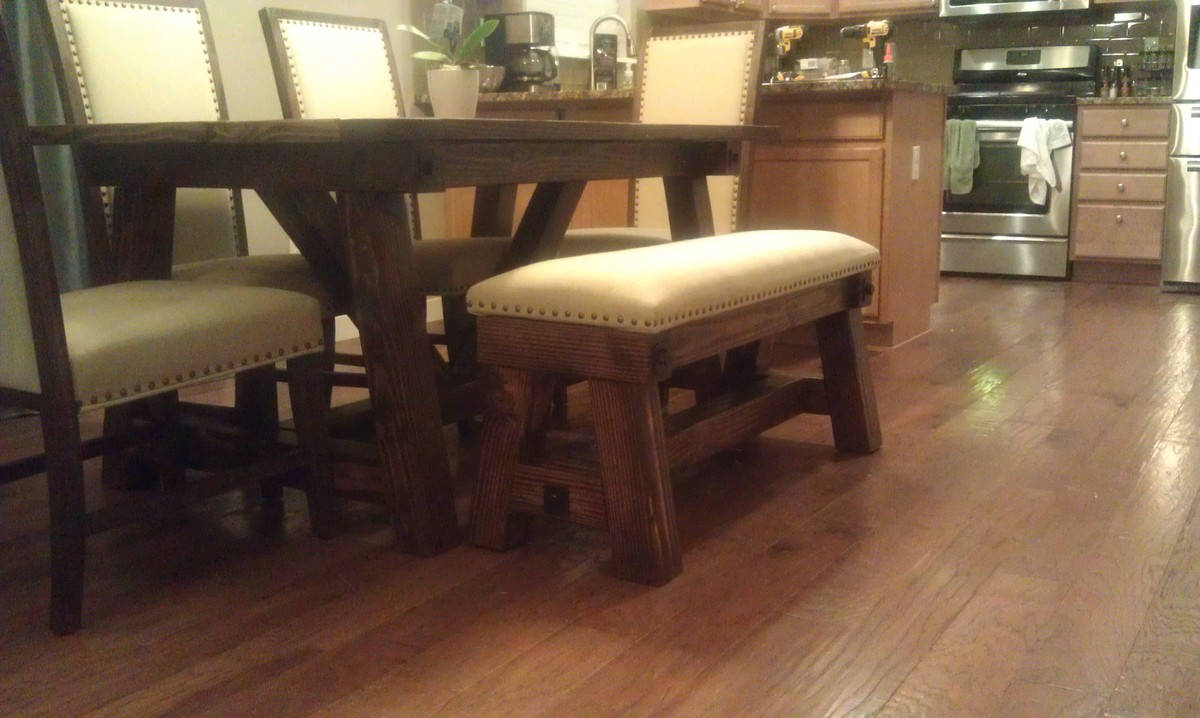
I shortened the length of the table but kept the width. I have to re-figure the angles of the cross beams underneath. I also added decorative hardware to the raw post edges on the sides, on the edge of the breadboards, and underneath. I used Rustoleum Dark Walnut stain, and Rustoleum Satin Poly for the finish. I bought the 4 chairs before I stained it so I could match the table to the chairs. I then made the matching bench and upholstered it myself to match the chairs. All in all, it looks like a complete set and I'm so happy with it!
It is very heavy...

Wed, 02/19/2014 - 08:24
This looks fantastic. I LOVE the hardware on the edges. I know how hard it is to match stains and you did a great job. The upholstered bench looks professionally done.
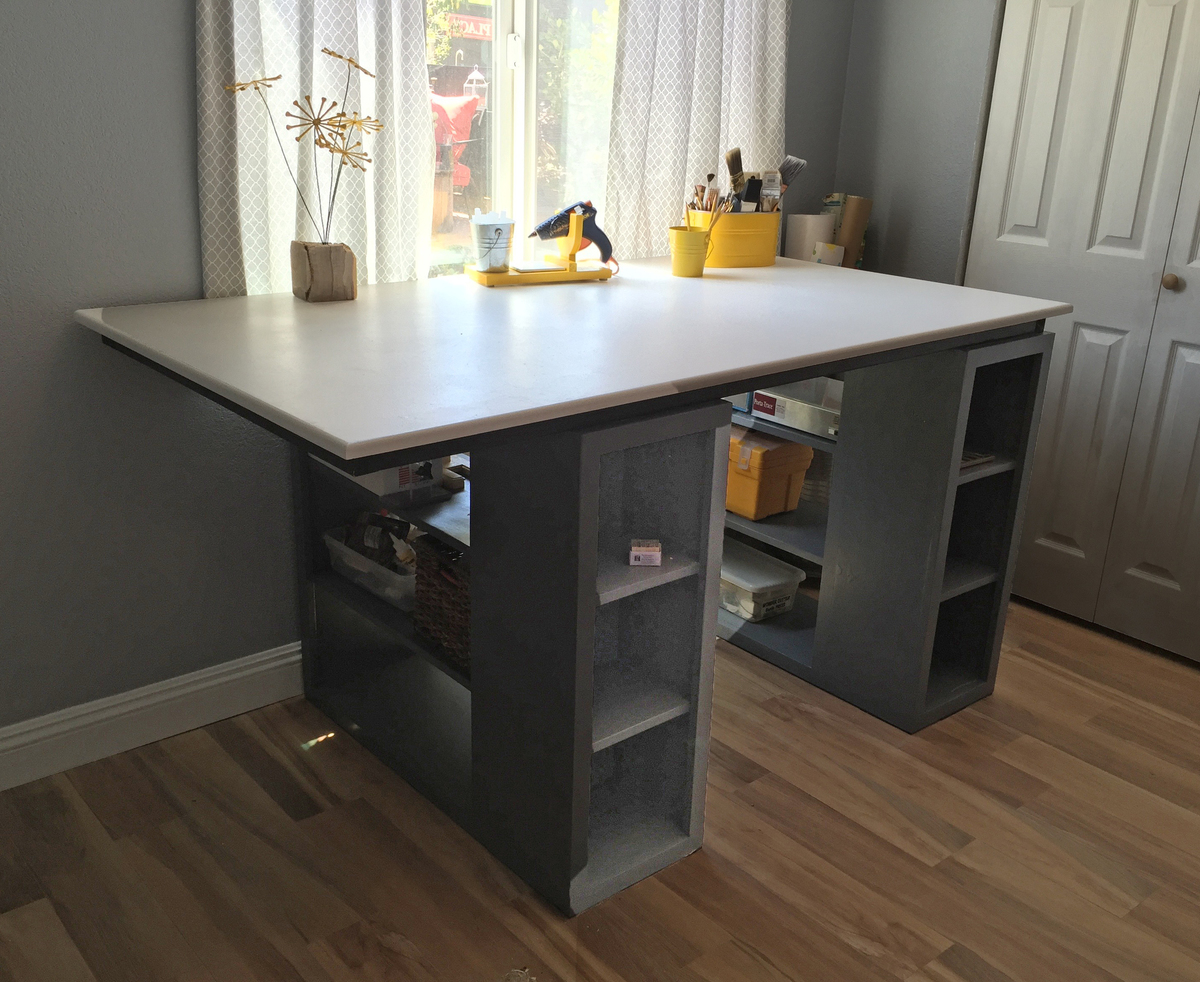
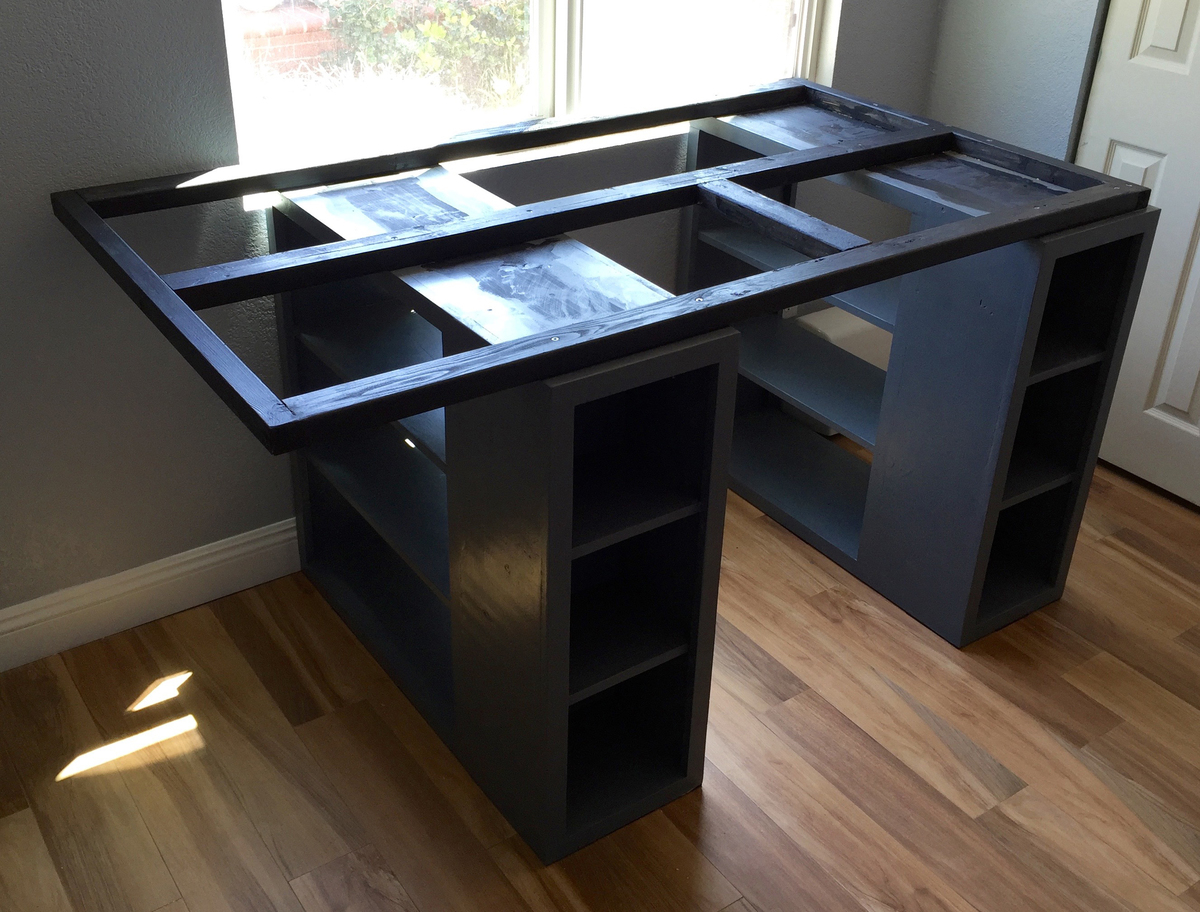
The desk top measures 39" X 69". It extends 15" on one side, creating a counter overhang for a second crafter. The top is supported by a 1X3 frame fashioned after the desk design shared on Ana's brag post (pg. 7 as of this writing). The room has a tile floor, so adhesive-backed felt strips were placed on the bottom of the bookcase units, making it easier to pull the desk into the middle of the room should I need to access my work from both sides.
A lumber yard cut all the pieces. Next time I would use 1X12s for the two side pieces.
This is the first woodworking project I have done since high school (16 years ago!) and it's more ambitious than anything I attempted then!
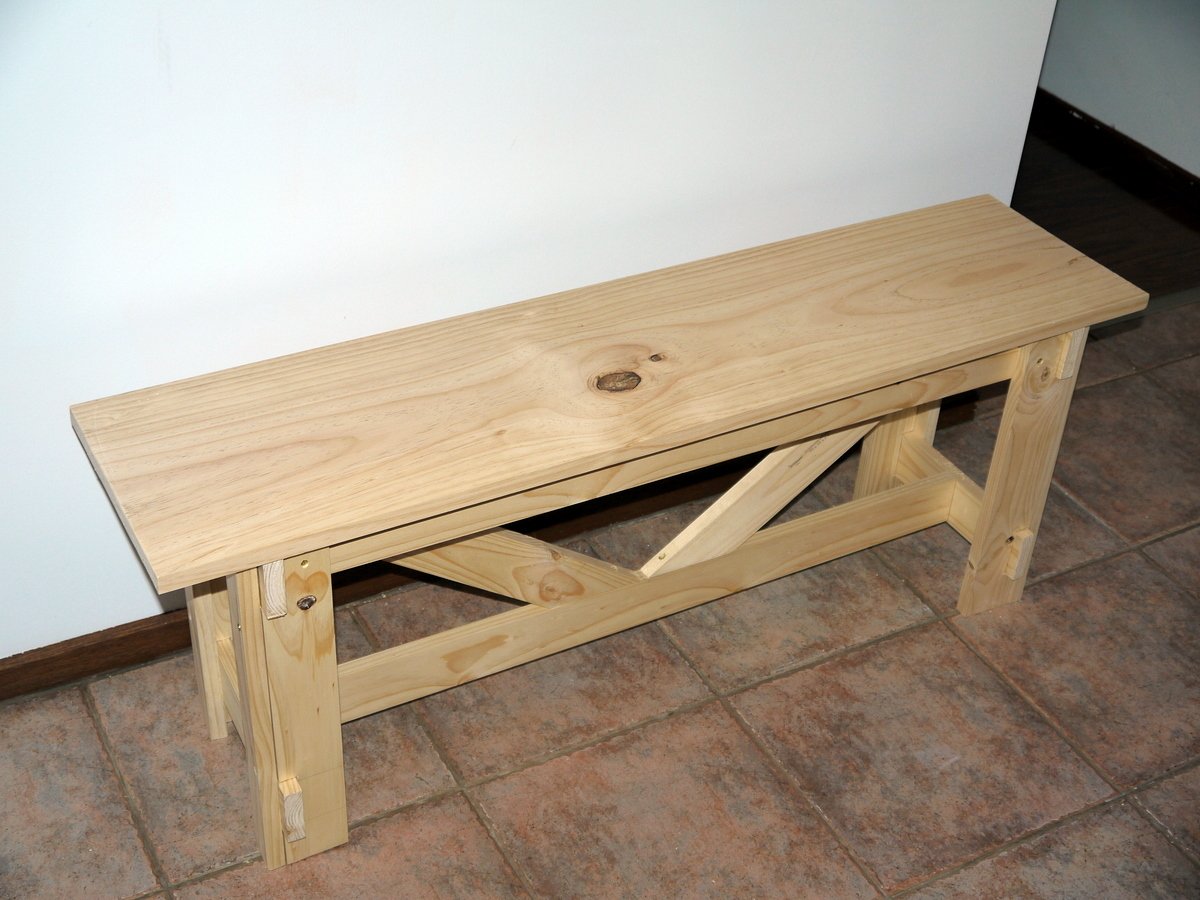
It was easier than I thought on the whole, although I got a bit baffled by Australian standard timber sizes being totally different from USA ones. (The guy at the timber yard was all "One WHAT by two WHAT?") And because I couldn't find a 1x12 longer than 47 inches, I had to make the bench slightly shorter. I didn't anticipate how incredibly hard that would make it to calculate the cross support angles. (It's not just trigonometry, because there are multiple possible solutions).
It was the first time I've tried to upholster anything, too, so it's a bit wrinkly at the corners, but I'm happy with it.
I think the painting took the longest. I built the bench in one afternoon, but I had to do four coats of paint (and one of primer), each of which took nearly 24 hours to dry, so it took forever to finish.
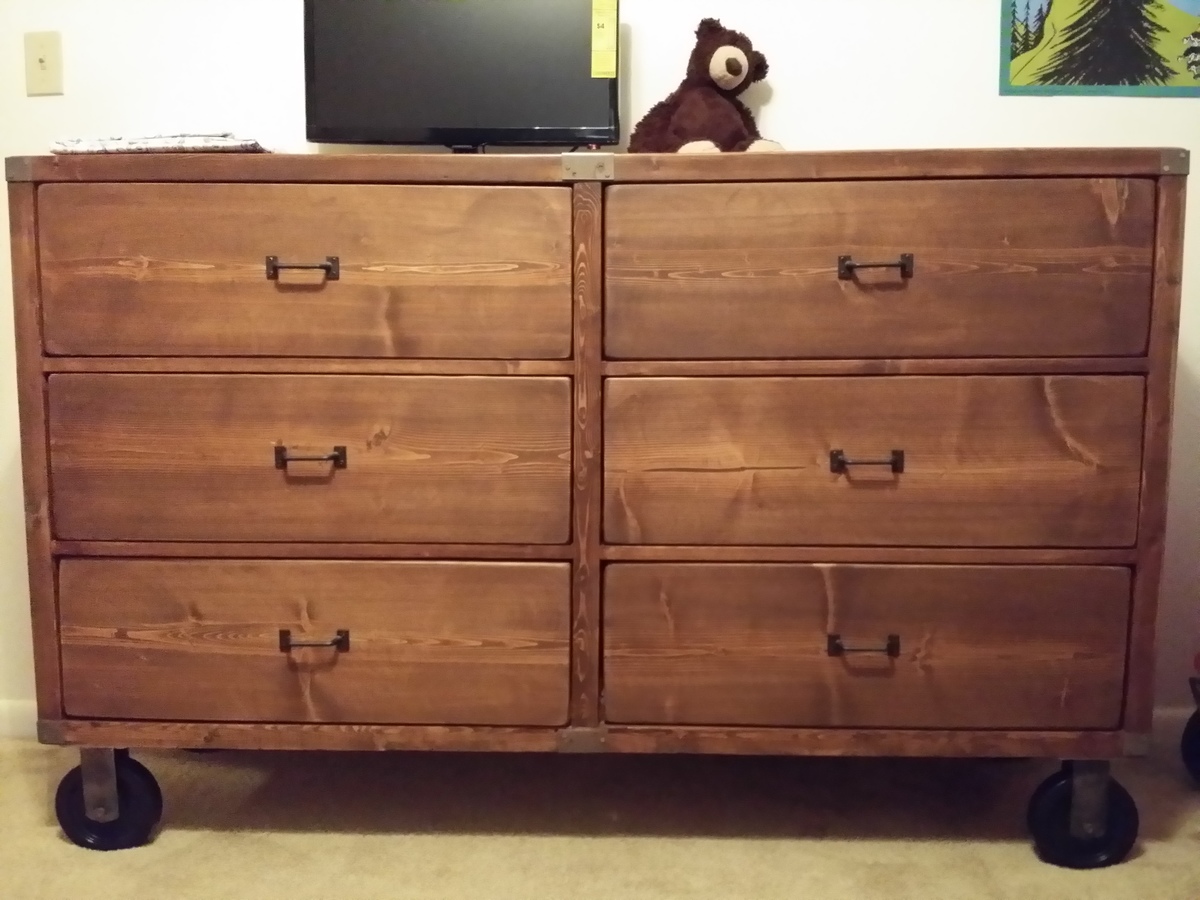
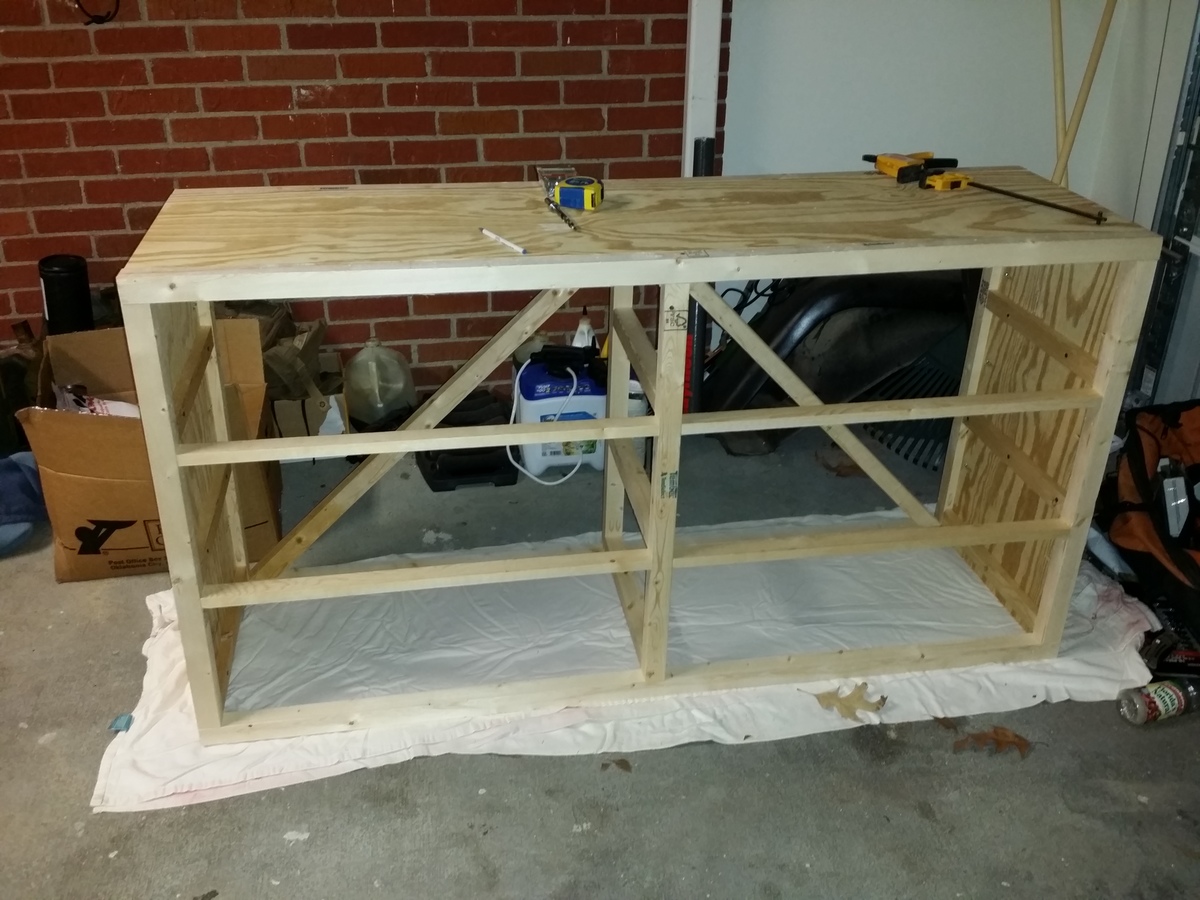
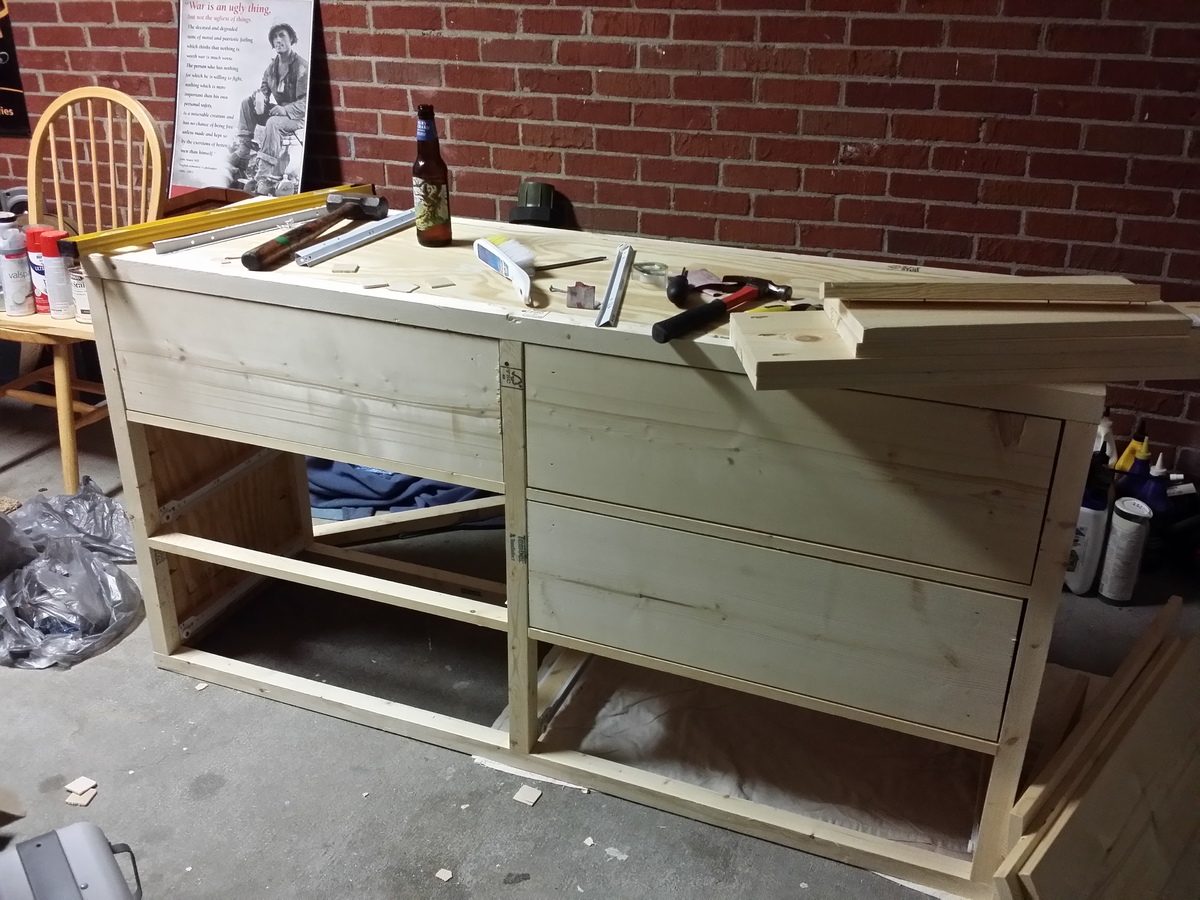
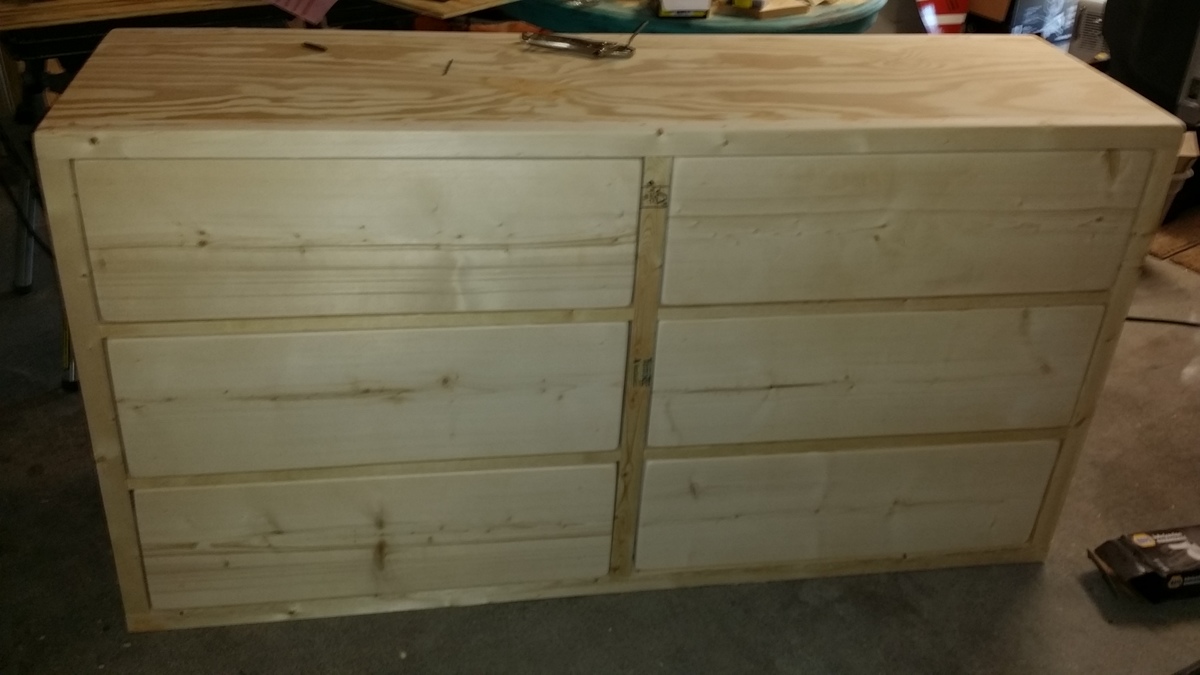
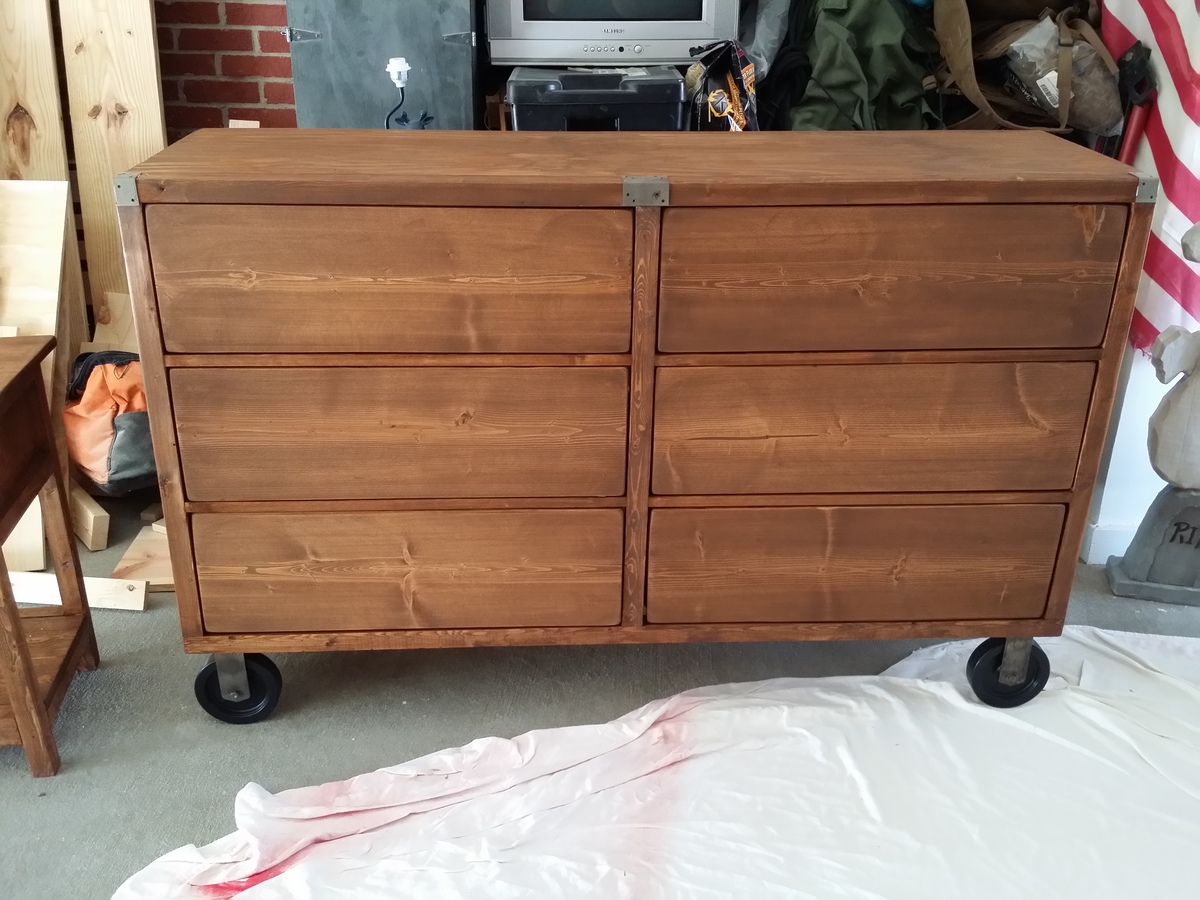
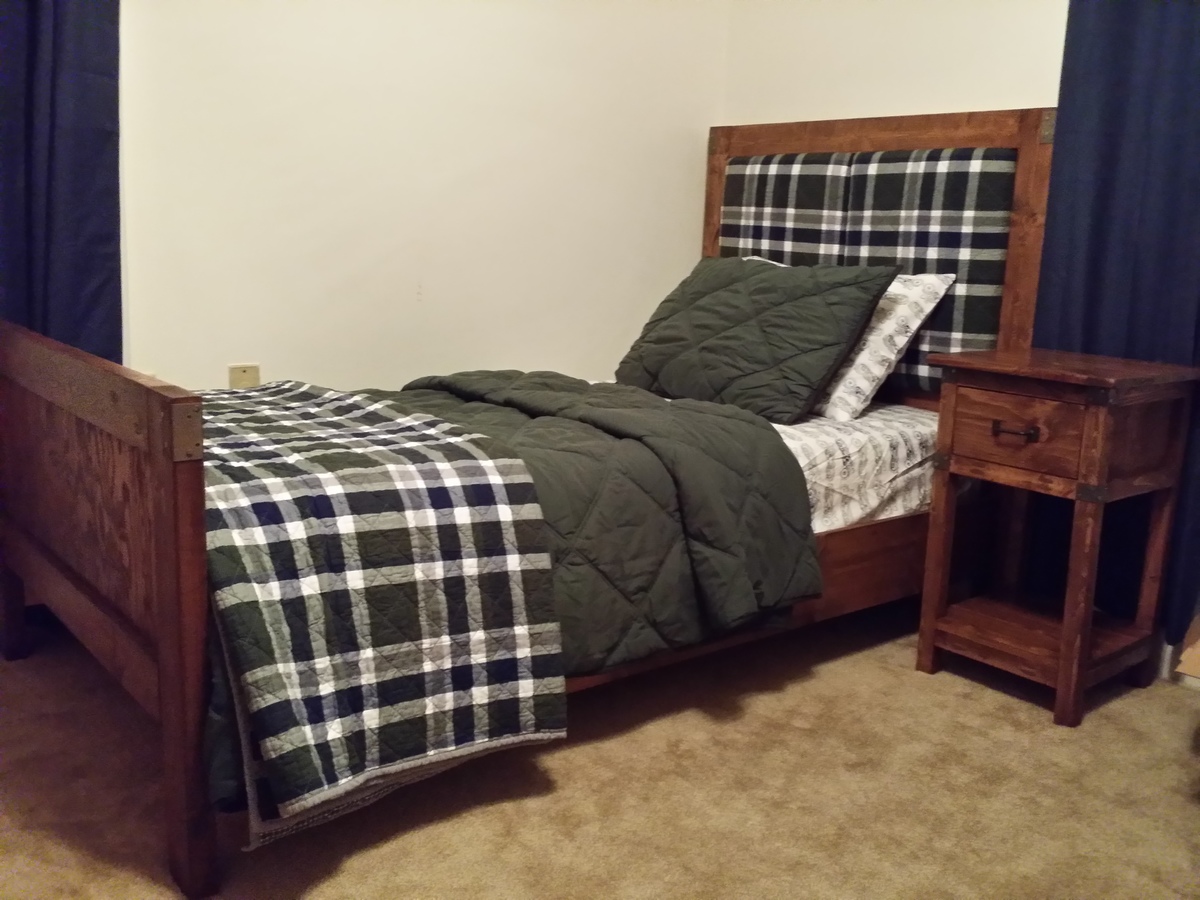
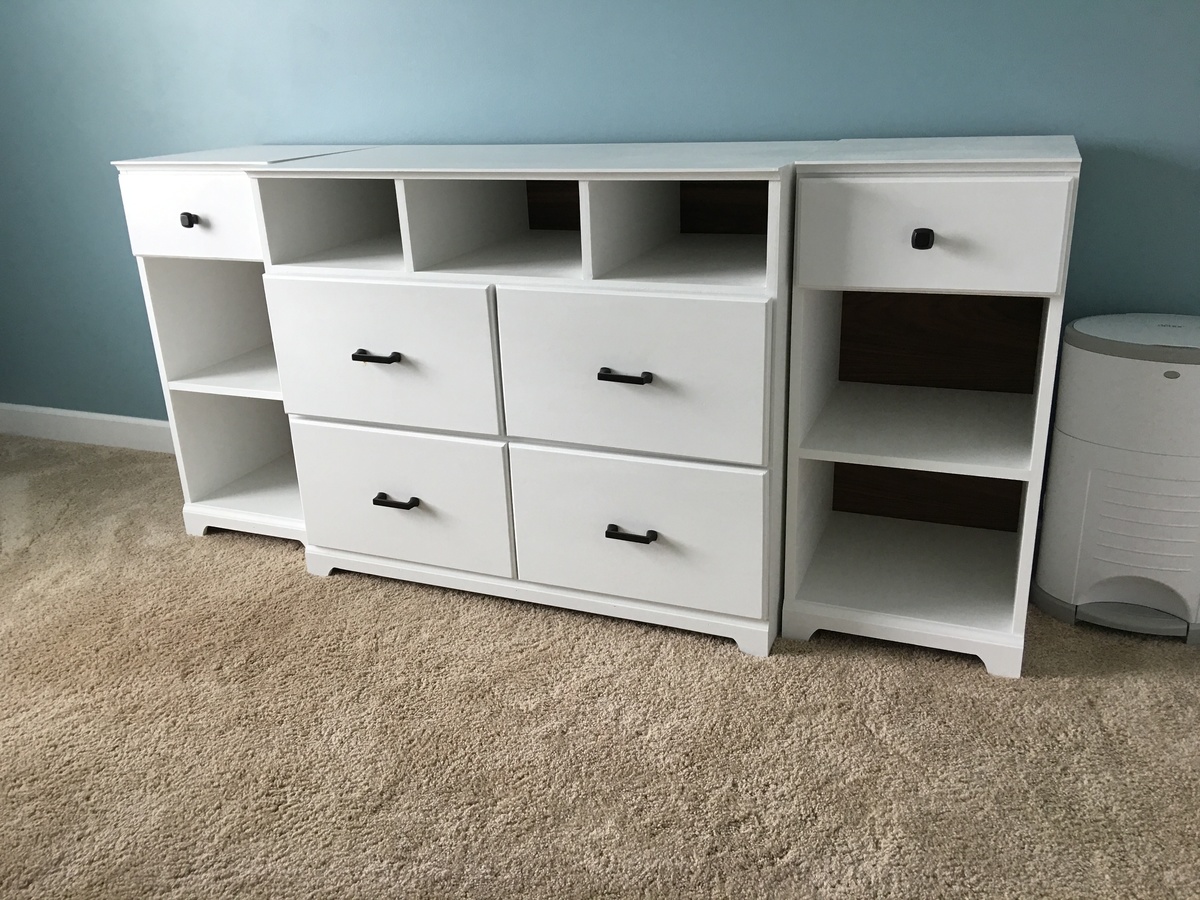
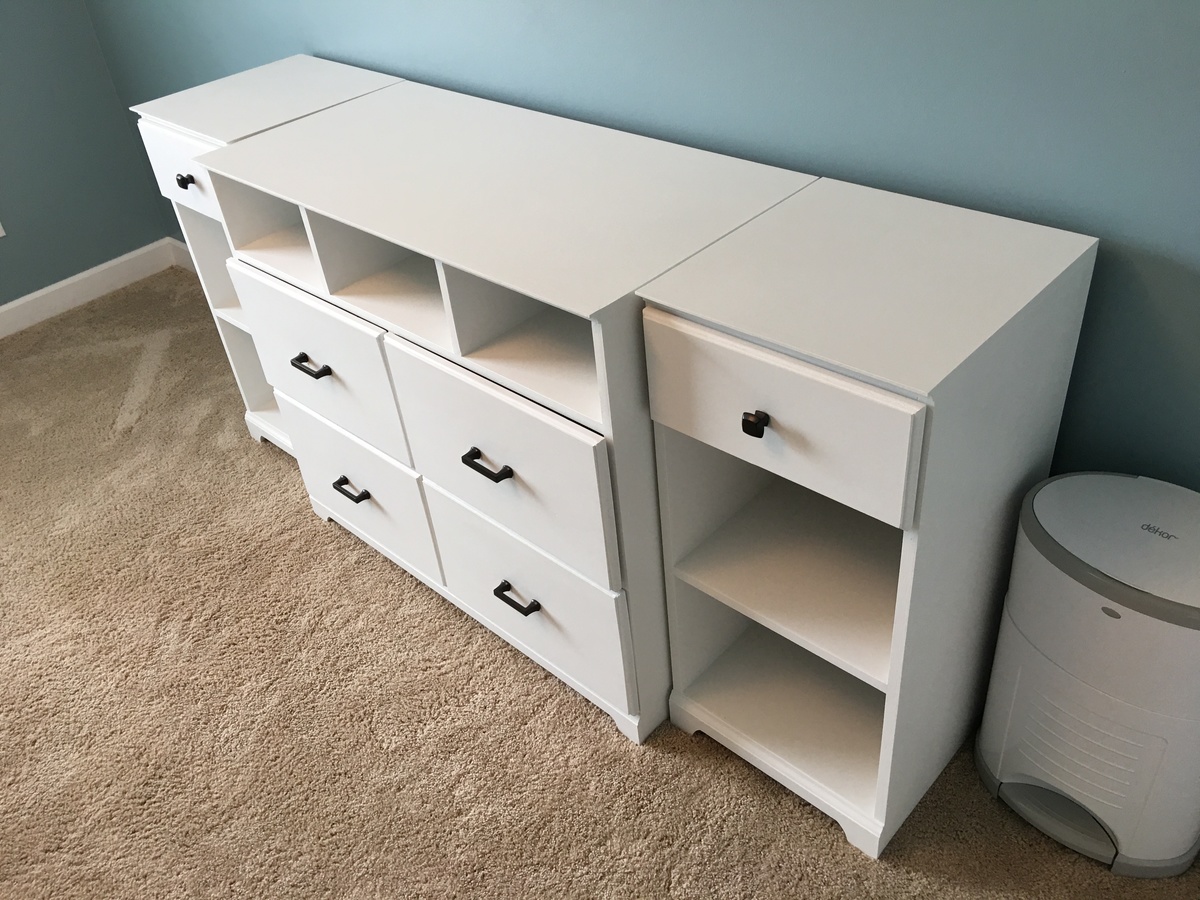
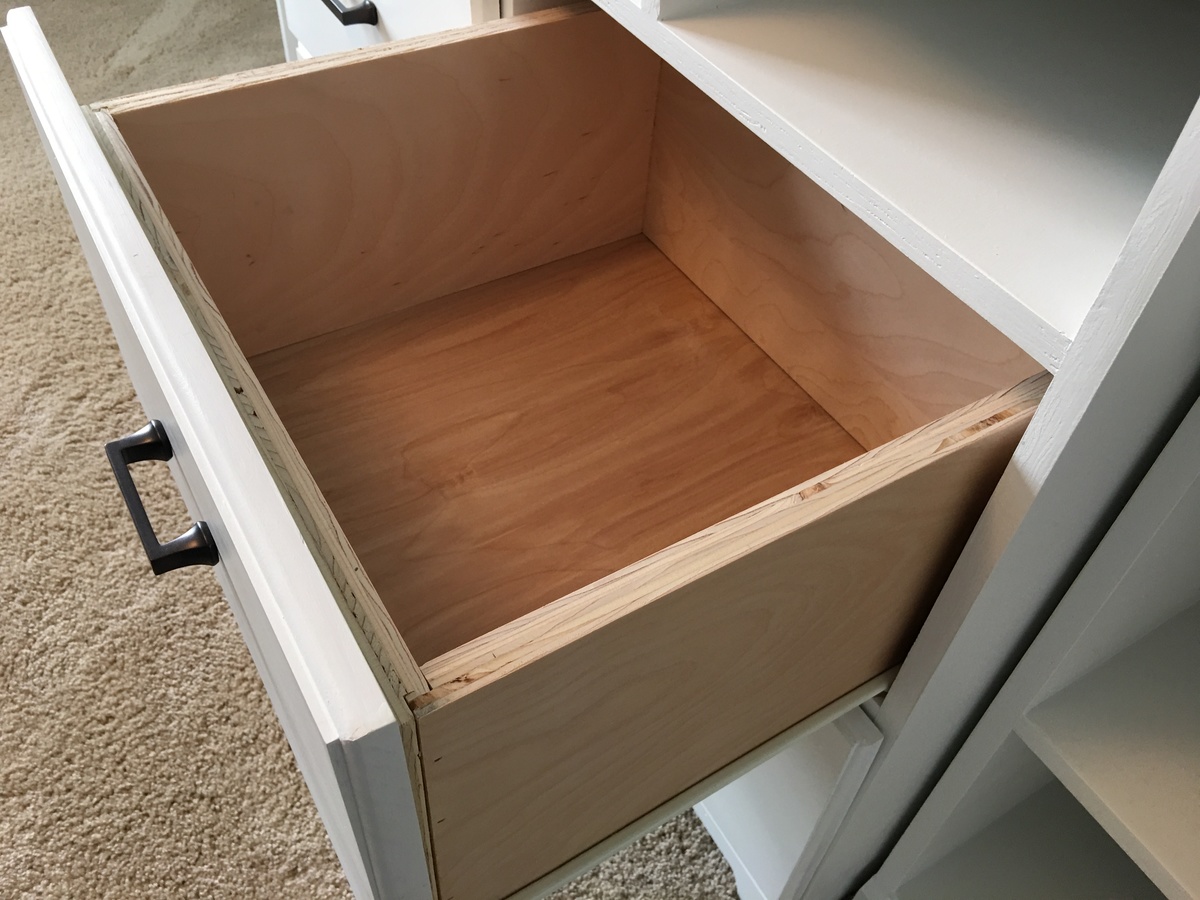
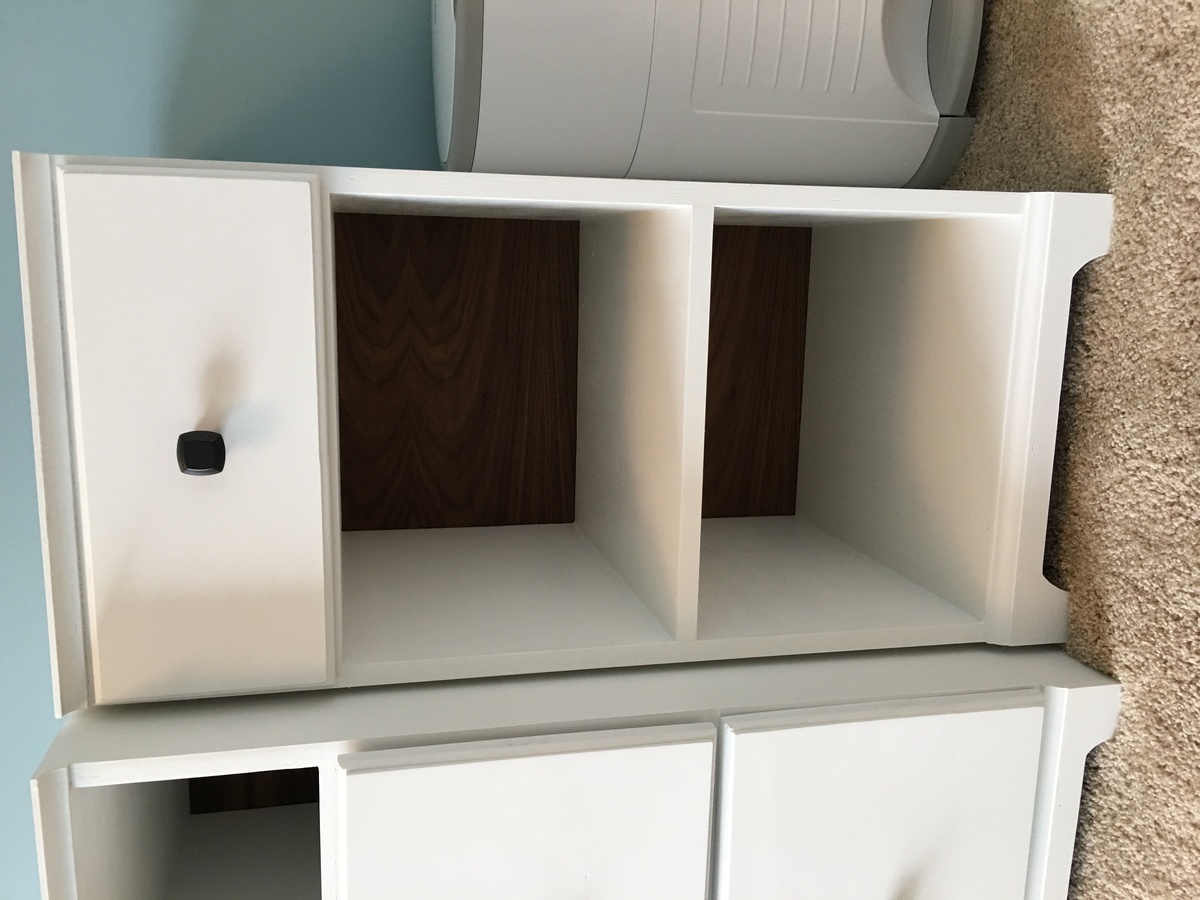
My son was too big for his toddler bed and had been spending his nights in the guest bed, instead. For his Christmas gift this year, his grandparents were going to get him bedroom furniture, but I insisted on building it instead! I love the rustic theme, saw the rustic dresser on wheels and thought it was perfect for him and perfect for us since we move so much with the military. Hello, a dresser on wheels? Like, no man labor trying to carry the thing out of the house? Just roll it? SOLD! I HATE the wheels that I put on it, but I really did not want to dish out $100 for the spoked wheels. I think I may change them one day and put the wheels on that will make it look ten times better, but for now, these will do. The wood for the dresser was pricey, but it was my first time buying plywood and I didn't realize that I could buy nicer plywood in smaller amounts that would have been a little cheaper since I didn't need to buy entire boards! Otherwise, it wouldn't have cost as much I am sure. I built a bed and a night table to match the dresser (as seen in the pictures), and frankly, I am very pleased with this set that I built! (CHECK OUT MY BED! http://ana-white.com/2014/02/rustic-twin-bed-upholstered-headboard-matc…) It was quite a difficult project for me, being the first time I had built drawers and because I didn't have more than a few hours in a week to get outside to work on it, but I finally finished :-) I also had a very small space to work in, since my husband consumes the garage with his man "stuff" and it was cold, so I needed the door closed with the space heater ;-). This project could definitely use some good amount of workspace!