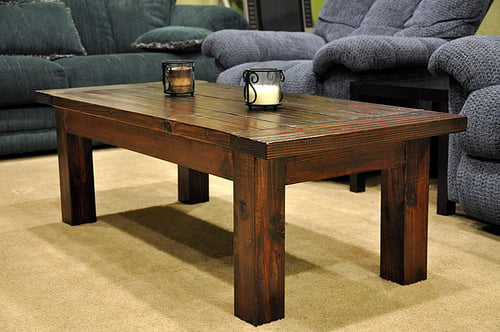


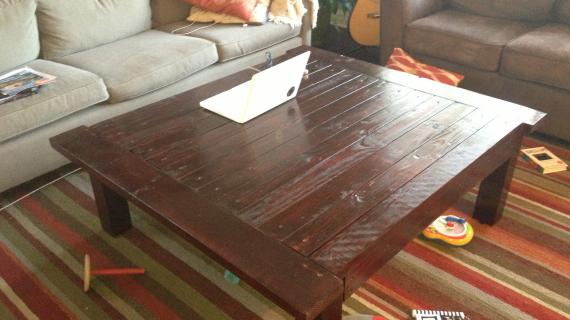
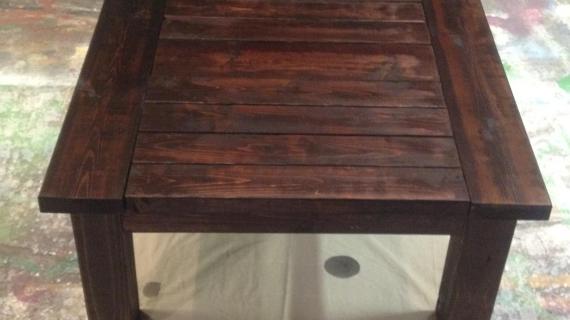
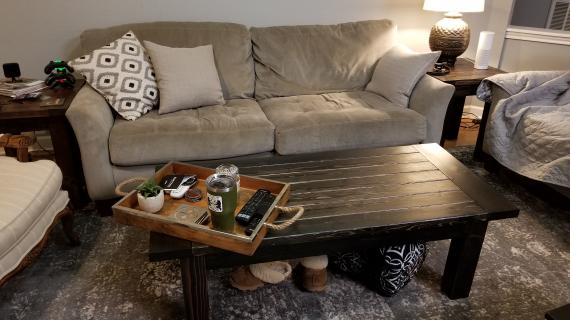
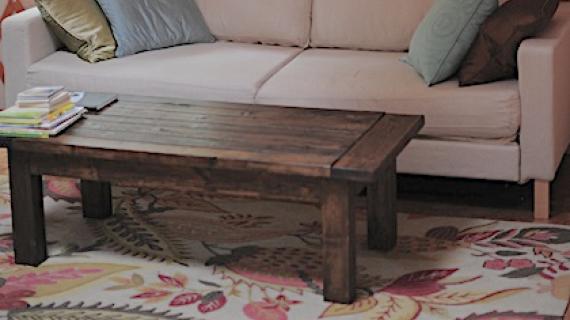
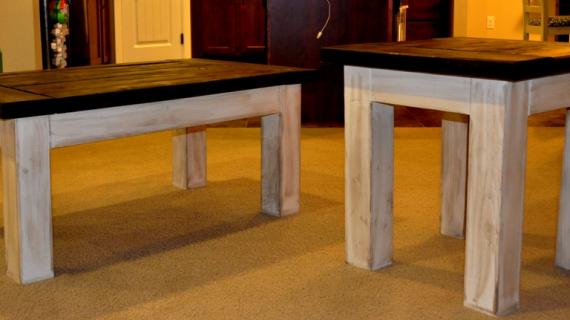
Build your own coffee table - this free plan uses basic tools and simple techniques and framing lumber to create a gorgeous coffee table! With lots of reader submitted photos, cut lists and shopping lists, make this your next project! Free step by step plans from Ana-White.com
Preparation
- 2 - 2x6 @ 8 feet long
- 1 - 4x4 @ 6 feet long
- 2 - 2x4 @ 8 feet long
- About 75 2-1/2" long self tapping star bit screws
- wood glue
- 4 - 2x6 @ 41" - tabletop Atta
- 2 - 2x4 @ About 22" - breadboard ends, cut to fit
- 2 - 2x4 @ 14" - end aprons
- 4 - 4x4 @ 16" - legs
- 2 - 2x4 @ 38" - side aprons


For long term durability and more professional results, I recommend using a pocket hole joinery system for wood joints. Here is a video with tips for using a pocket hole jig:
Instructions
Step 1
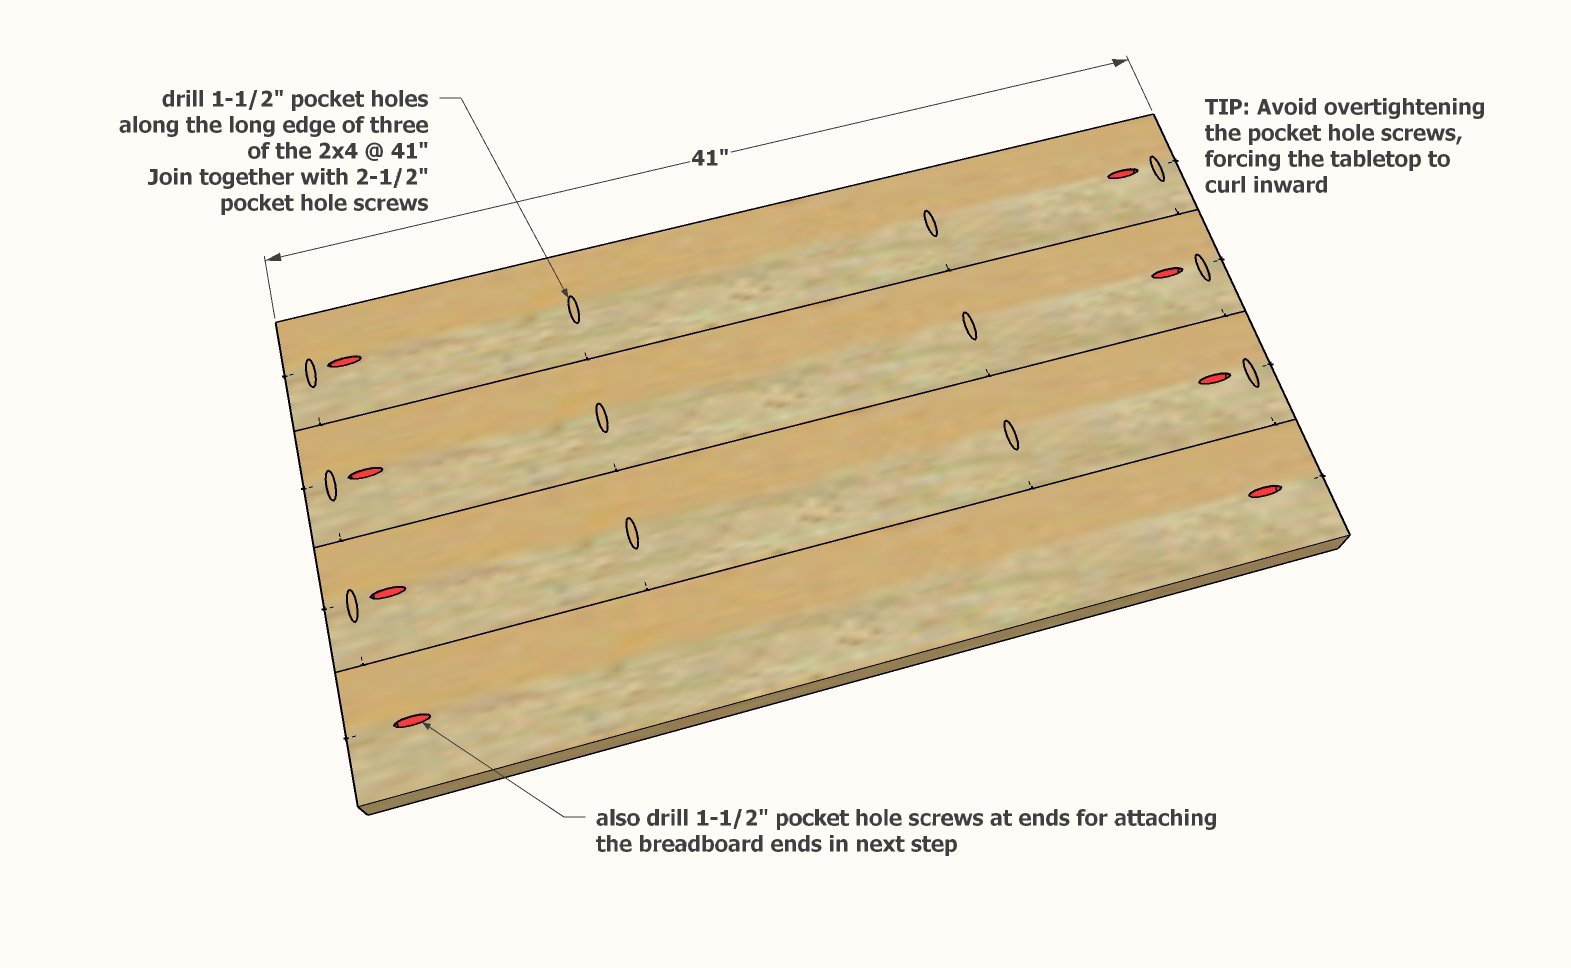
Cut the 2x6 boards to exactly match in length.
Drill pocket holes on the ends of all the 2x6 boards.
On three of the 2x6 boards, drill pocket holes to attach together edge to edge.
Attach with 2-1/2" pocket hole screws and glue.
Avoid overtightening the pocket hole screws as this can make the tabletop curve inward.
Step 2
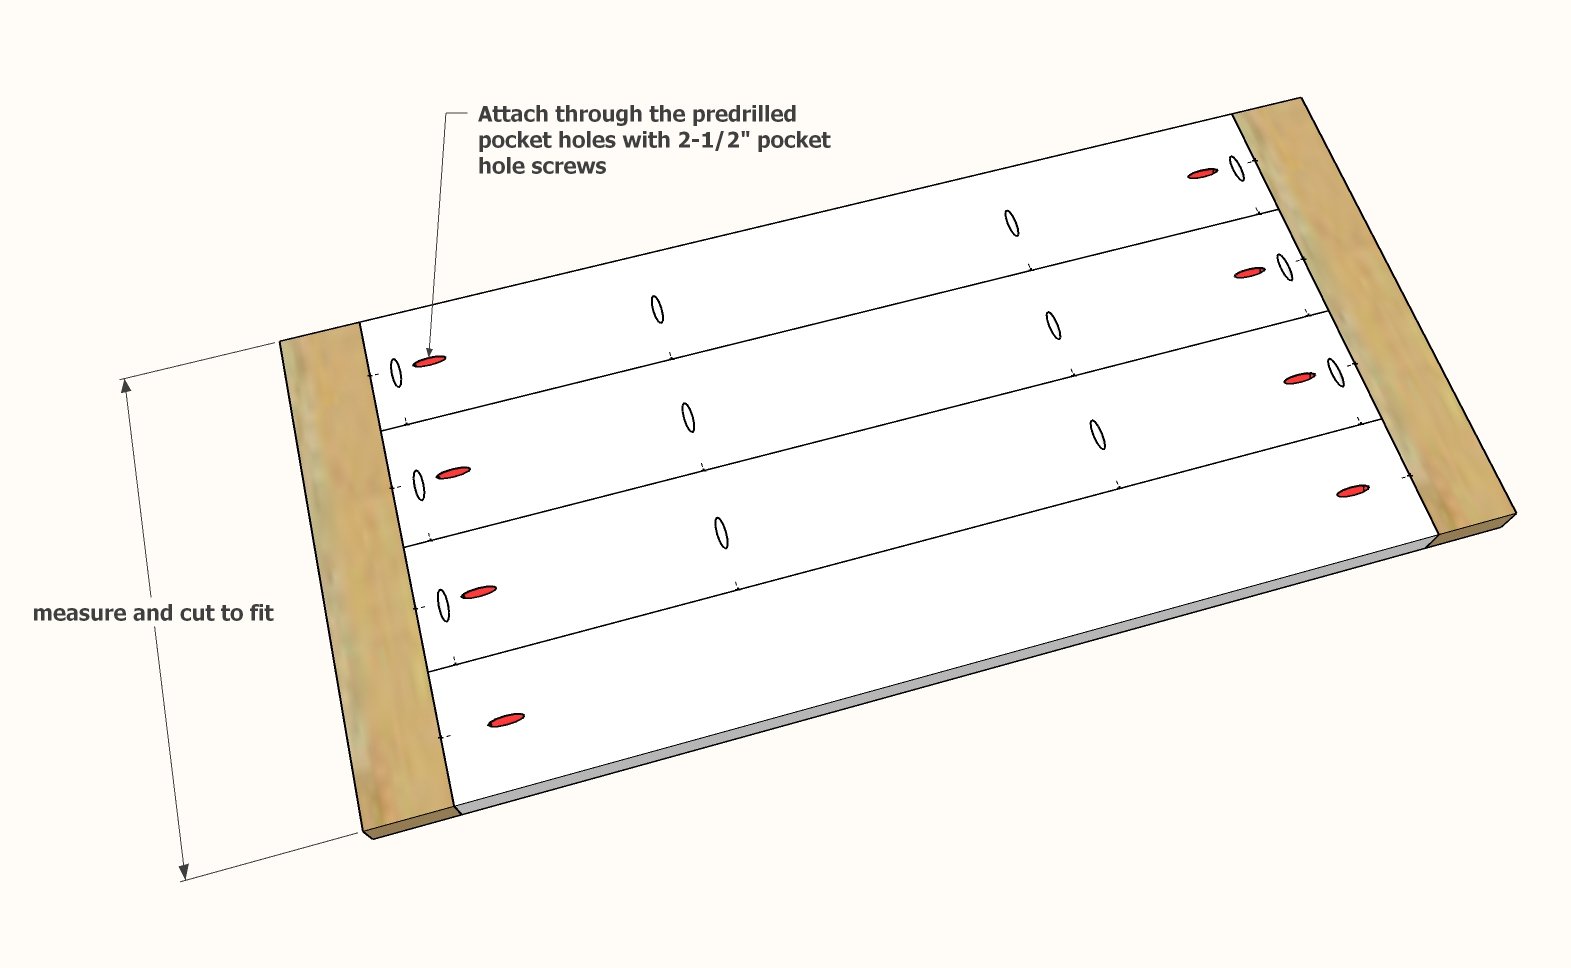
Measure the width of the four 2x6 boards and cut 2x4 breadboard ends to match.
Attach through the predrilled pocket holes with 2-1/2" pocket hole screws.
Step 3
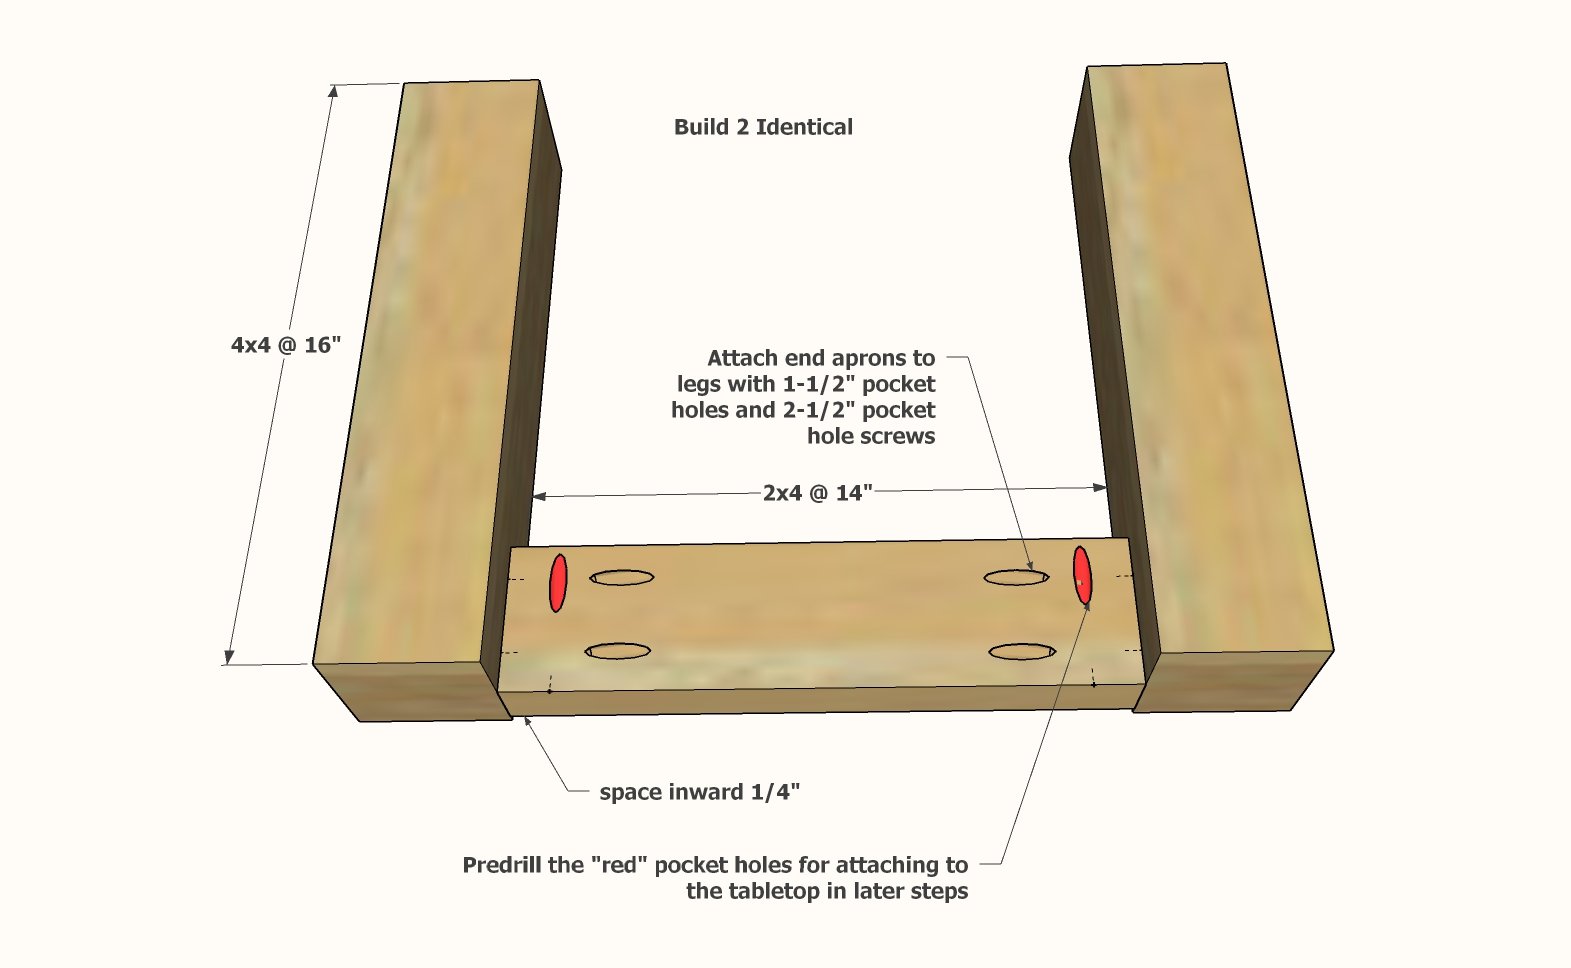
Prepare the 2x4 aprons by drilling 1-1/2" pocket holes as shown in diagrams. Note the pocket holes facing upward for attaching the tabletop in later steps (highlighted in red)
Attach to the two legs.
Build two identical.
Step 4
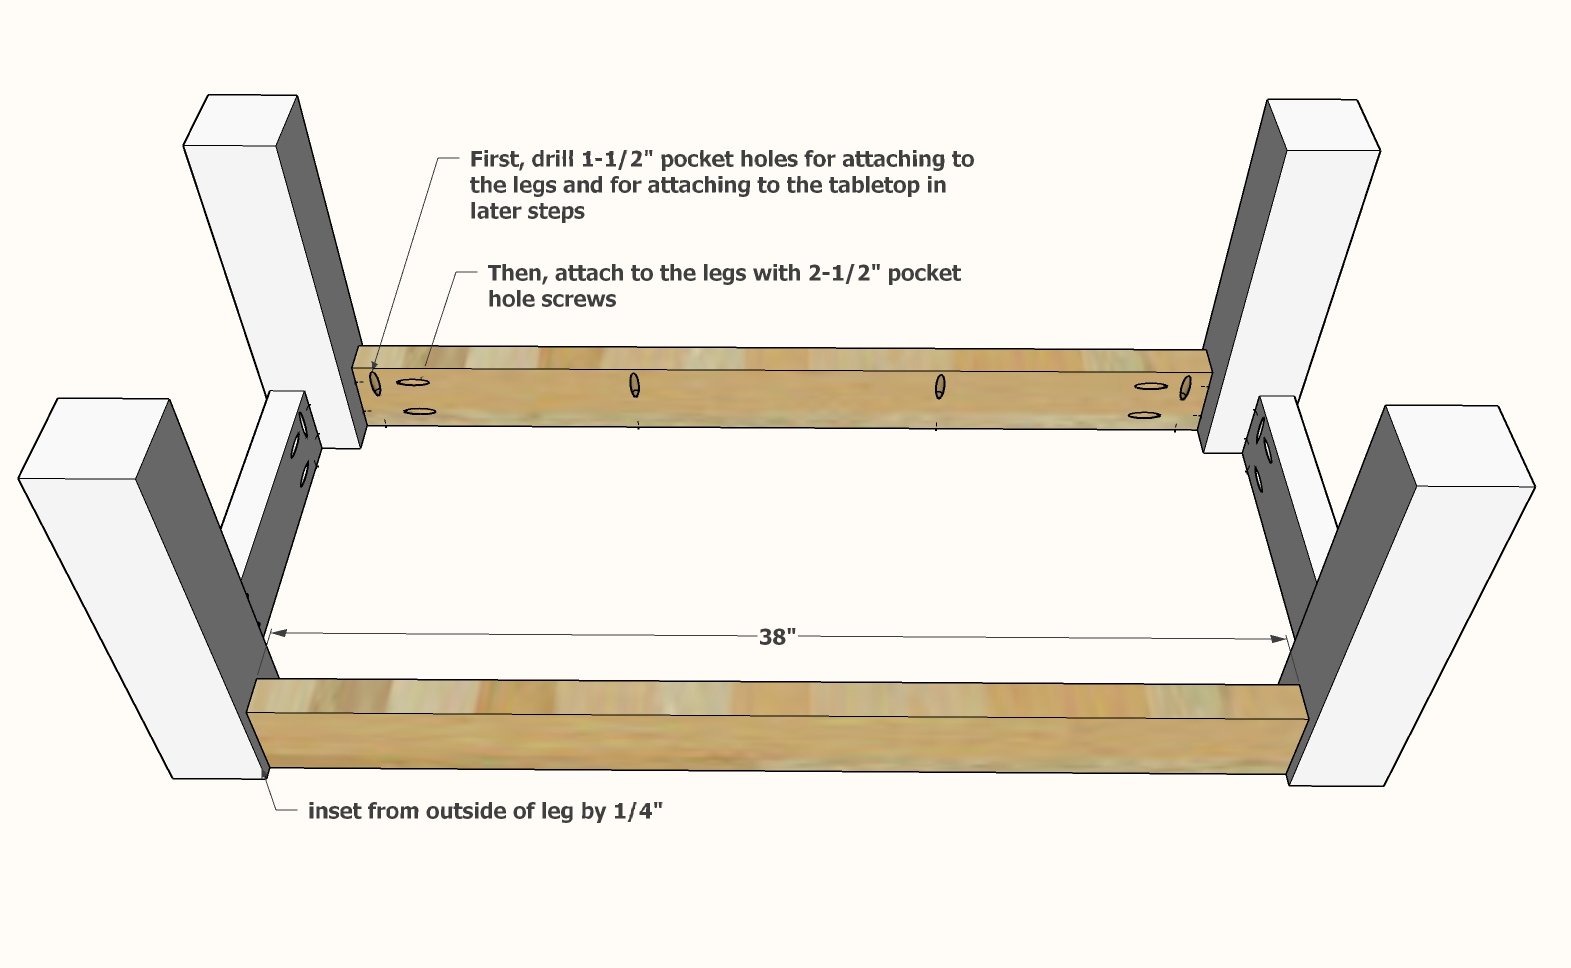
Repeat for the longer side aprons.
Step 5

Center the base on the underside of the tabletop.
Attach base to tabletop through predrilled pocket holes with 2-1/2" pocket hole screws.
Remove sanding residue.
Apply clear poly topcoat to seal.

Comments
beth (not verified)
Mon, 12/07/2009 - 04:34
I found your through The
I found your through The Shabby Nest, and I am so glad that she introduced me to you, cause I've been wanting one of those Hyde tables!! When I showed it to my husband, he told me that he thought that he could build it, and now I know that he can!! :) I'm going to show him the plans tonight! Maybe I'll have myself a "Hyde" table this week!! :)
Thanks so much and Merry Christmas! Beth.
Sharon (not verified)
Mon, 12/07/2009 - 04:43
I found you through the
I found you through the Shabby Nest and I'm really Thrilled to find you!!! You're on my Favorites List now! We're headed from Michigan to Florida for a wedding just before Christmas...but I can't wait to get started on one of your plans!! You'll be hearing from me again soon! Merry Christmas!
Maria in TN (not verified)
Fri, 12/11/2009 - 18:12
Ana, is it possible for you
Ana, is it possible for you to post about how to modify this plan for the console Hyde table? It's PB's skinnier, taller version with a shelf underneath. I would love one of these for behind our sofa...would appreciate any tips or plans you could share. ~Maria
Ana White (not verified)
Sun, 12/13/2009 - 22:41
Hi Maria, Thank you so much
Hi Maria,
Thank you so much for reading my blog and leaving comments!
There actually is a plan online that is very similar to the Hyde Console Table, but super easy to build - I actually labeled it Simple Cheap and Easy Console Table. It is located here: http://knockoffwood.blogspot.com/2009/11/plan-simple-cheap-and-easy-con…
I will also be posting plans for the Hyde Console table so check back soon.
Thanks again for stopping by! Ana
Funky Junk Interiors (not verified)
Sat, 01/02/2010 - 12:11
Welcome to the party Ana! I'm
Welcome to the party Ana! I'm so glad to have you show the party goers all that you can do. You've amazed me for weeks now and your stuff needs to simply be seen. :)
Ponder... I think you need a feature in your future. :D
Thanks for linking up one of your wonderful creations to SNS! Folks, this girl is baaaad, is she not?!?
Funky Junk Donna
FleaMarketTrixie (not verified)
Sat, 01/02/2010 - 15:54
Wow that's amazing, love it!
Wow that's amazing, love it!
sleepyhead des… (not verified)
Sat, 01/02/2010 - 16:58
Your furniture knock offs are
Your furniture knock offs are amazing! I came over from FJ and have enjoyed looking around your blog. Love your Restoration Hardware dining table too.
Lisa @ Fern Cr… (not verified)
Sat, 01/02/2010 - 19:35
Your blog and your projects
Your blog and your projects are so amazing! YOU are so amazing! I love this coffee table, it's gorgeous!!
Shelly (not verified)
Sun, 01/03/2010 - 07:08
I am so excited about finding
I am so excited about finding your blog! I have expensive taste without the budget! My husband is a carpenter and has already made me two items that I wanted from the Pottery Barn...
My "honey do" list is endless...and now I can just pull this site up and show him exactly what I want. Thank you thank you!
Proper Prim (not verified)
Sun, 01/03/2010 - 13:54
I just found you through
I just found you through Funky Junk and I so happy I did. Thank you so much for sharing this. Your directions are so easy I could make this myself.
Deb
design_aholic (not verified)
Sun, 01/03/2010 - 14:52
This is amazing!!! I love
This is amazing!!! I love it, and love the directions.
Cha Cha (not verified)
Sun, 01/03/2010 - 15:03
You have made it so
You have made it so approachable. Thanks for sharing.
Veronica King:… (not verified)
Tue, 01/05/2010 - 17:07
Where has this blog been all
Where has this blog been all my life?!? I can't believe I haven't stumbled across it sooner. I'm in love! I can't wait to do one of these amazing projects! =]
Jori Hodgson (not verified)
Thu, 01/21/2010 - 22:01
When you go to the lumber
When you go to the lumber store it seems like they have several different types of wood in 1x4's and 2x2's, etc. What type of board to you get? Better yet, what type of wood did Beth use on hers?
Thanks so much!
Jill (not verified)
Fri, 01/22/2010 - 03:05
Wow! I love this! I'm
Wow! I love this! I'm wondering how difficult it would be to convert this project to a dining table? I think it would look great and survive my four kids! =D
Ana White (not verified)
Fri, 01/22/2010 - 04:42
Beth used regular old pine
Beth used regular old pine boards. These are the cheapest. You can use even stud grade lumber. I know she said she choose boards that were rough looking to get the reclaimed look, but just make sure you buy straight boards.
Ana White (not verified)
Fri, 01/22/2010 - 04:45
I don't see why this would
I don't see why this would not work as a dining table. Just remember that a dining table is 30" high overall, so your legs would need to be 28 1/2". I would suggest looking at my farmhouse table to see how I built the top. You can find that post here:
http://knockoffwood.blogspot.com/2009/12/plans-farmhouse-table-knock-of…
Peggy (not verified)
Fri, 01/29/2010 - 12:48
Wow! What a great coffee
Wow! What a great coffee table! I totally intend to make this my first project of your site, which I am telling everyone about. I have a question though, my coffee table area is VERY small. Finding one this small is impossible, so being able to build one is great! The current badly painted Freecycle coffee table is 32.5"L x 16"W x 17"H. What modifications would I need to make to make it roughly this same size? Thanks!
SaraReno (not verified)
Sun, 02/21/2010 - 07:40
I just finished building this
I just finished building this last night (still need to do the stain, etc. before I send pics) and the plans were great! The only suggestion is that it looks like there isn't a mention of attaching part E. I suppose it's fairly obvious that I needed to but it might not hurt to add that in.
Anonymous (not verified)
Thu, 02/25/2010 - 18:34
I built this project and it
I built this project and it came out perfect. You did leave out a picture for one of the pieces but it was easy enough to figure out. What an easy first project. Thanks.
Pacific NW Blogfan (not verified)
Thu, 03/04/2010 - 02:41
I just came across this
I just came across this website and it is awesome. Hopefully you continue to provide all of us with great plans and instructional videos. Thanks!
Wendy (not verified)
Thu, 04/22/2010 - 21:10
The coolest part about this
The coolest part about this post was that you stayed up until 2:30am writing it! What dedication! This is my next project and I have become obsessed with building! Thanks for your hard work ANA!
Virginie (not verified)
Fri, 04/23/2010 - 07:09
Hi Ana! I know you have
Hi Ana!
I know you have written it elsewhere, I haven't been able to find it, but what adjustments need to be made for the elusive 4x4? Are the measurements relatively the same if we use two 2x4?
Ana White (not verified)
Fri, 04/23/2010 - 07:15
Hi, when you use 2 - 2x4s
Hi, when you use 2 - 2x4s remember that the overall dimensions will be 3" x 3 1/2" instead of the dimensions of of a 4x4 3 1/2" x 3 1/2". Good luck with your table. :)
ehendric (not verified)
Sat, 05/01/2010 - 19:13
Do you know where you can get
Do you know where you can get the 2 3/4 inch screws? I can find 2.5 inch and 3 inch but no 2.75 inch. Can I just use 2.5 inch instead? Love your new site.
Thanks
Ana White (not verified)
Sun, 05/02/2010 - 08:18
2 1/2" screws should do the
2 1/2" screws should do the trick!
liz (not verified)
Sun, 05/09/2010 - 18:15
Thank you so much for posting
Thank you so much for posting these plans. It quickly became my weekend project.
Oh for those asked I used 2.5 inch screws and they worked perfect. I personally don't think I would have liked using anything longer. Anyways here is a link to my master piece http://tinyurl.com/2625wej
igotsonshine (not verified)
Mon, 07/12/2010 - 15:29
Hi Ana! I happened upon your
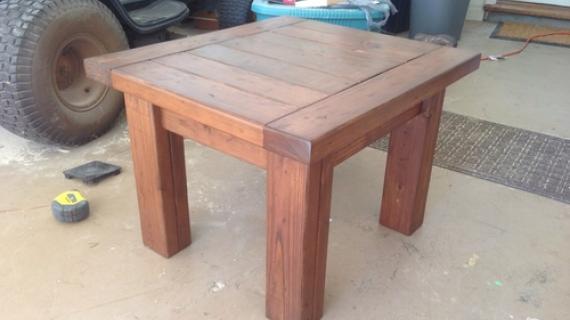
Hi Ana! I happened upon your website the other night and I am so psyched! My hubby and I will be moving shortly to a new home and I was wondering how I was going to be able to finance all the things I wanted. Now I know I can build them, thanks to you. My hubby even said he'd help, however, once he sees my list, he might change his mind, lol! Anyway, I believe this coffee table will be my very first project. However, what I really want is to modify it, kind of like that reader whose picture appears; "supersized" you called it. I would like a larger size than the rectangular plans you offer. I would like a square coffee table, the type that are popular now and used with sectionals. Since I haven't built furniture before, I definitely don't feel comfortable just winging it. Anyway, would you consider offering measurements for a square tryde coffee table? Pretty please? Thank you for all that you do. You are awesome; a true inspiration! God bless you!
Denise (not verified)
Mon, 07/19/2010 - 05:17
Hi Ana! I am super excited
Hi Ana! I am super excited that a friend of mine shared your blog via Facebook. I love me a good power tool, but usually don't have the know it all to get the plans in my head all figured out & built. SUPER excited to have found you! Thanks for posting all your knowledge!
XoX
Denise
Meg (not verified)
Mon, 08/30/2010 - 09:30
Could a variation of this be
Could a variation of this be made so that there is storage for blankets and quilts underneath. I would love it to be the dimensions of the one that you have pictured above that reader Sarah made. Something where the top opens up and there would be hidden storage. Maybe the hinges could be braced down a center stationary brace and then it opened on two sides so the whole top wasn't to heavy for little hands to open....
mae (not verified)
Thu, 09/02/2010 - 12:12
hello ana! i love this
hello ana!
i love this coffee table! i was wondering if i could follow the same procedure to turn it into a farmhouse table? I know you have another plan for that, but i just love the chunky legs of this table. what do you think?
thanks a bunch!
your biggest fan!
Ana White (not verified)
Thu, 09/02/2010 - 12:33
Hi Mae, yes, this would make
Hi Mae, yes, this would make a perfect dining table! Just make the legs 28 1/2" long to get a standard table height of 30". And then adjust for size. Check out perhaps the Farmhouse Table with stretcher for tabletop sizes. http://ana-white.com/2009/12/plans-farmhouse-table-knock-off-of.html Thanks for being a part of this!
heatherlowman (not verified)
Thu, 09/09/2010 - 14:51
My daughter's pre-k teachers
My daughter's pre-k teachers told me about this website just this afternoon. I just have to tell you how much I LOVE THIS SITE!!!!!!!!!!!!!!!!!!!!!!!!!!!!!!!!!!!!!!!!!!!!!!!!!!!!!!!!!!!!!!!!!!!!!!!!!!!!!!!!!!!!!! my husband is a general contractor ,but has no idea about building furniture. But now that I see how easy you make it and TRULY easy to understand directions I can't wait to build this coffee table!!! I do love me some pottery barn butwho can afford it now adays! Once again Thank You SOOOOO much for this totaly awesome wedsite. If I could see you I'd hug you I'm so Happy!!! lol
Todd @ Dreamin… (not verified)
Thu, 10/28/2010 - 03:49
Awesome coffee table! It
Awesome coffee table! It looks like a really good project with great results.
Seth (not verified)
Sat, 12/04/2010 - 04:56
Ana - Thank you for the great
Ana - Thank you for the great plans, and the great site. This was my first piece of homemade furniture. Here are some pictures: http://picasaweb.google.com/sethart/CoffeeTable?authkey=Gv1sRgCNLrkoGU-…
My next project: The farmhouse dining room table!
Laura R. (not verified)
Wed, 12/22/2010 - 17:54
My 23 yr old and I are going
My 23 yr old and I are going to make this and the Cara bookshelf this weekend. Is there an easy way to add a lower shelf to the coffee table? I would love to have some square basket 'catch-alls' underneath!
K (not verified)
Wed, 01/05/2011 - 11:56
Love this table! Can you tell
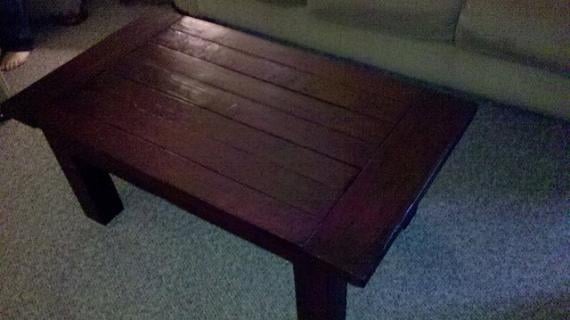
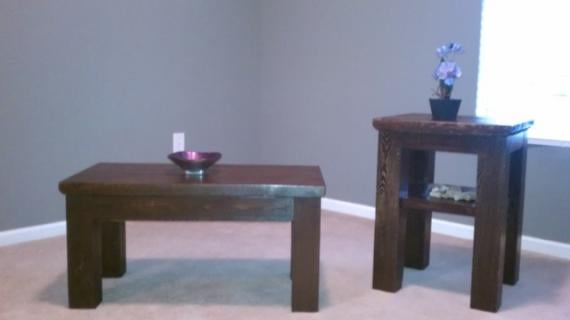
Love this table! Can you tell me what stain was used on the table that is shown with the 4 votive candles ?
Aunt LoLo (not verified)
Wed, 01/05/2011 - 16:29
This is exactly what I've
This is exactly what I've been looking for! And hubbie's working late all month. Maybe I can get it built before he can say "you probably can't." LOL (my first project, the cube bench, is still in the garage waiting for its final coat of top coat. I'm slow!! haha The bench has been there for a month. ;-))
I Love a New T… (not verified)
Wed, 01/19/2011 - 05:16
[...] I can sneak in some
[...] I can sneak in some more playtime this coffee table is next on my “to-build” [...]
First Bulid!!!… (not verified)
Sat, 01/22/2011 - 18:32
[...] in Brag Blog Put on
[...] in Brag Blog Put on my TO-DO List Save as PDF Print this PostShare/Bookmark Builder: Valerie Experience Level: Absolute Beginner Estimated Cost: 70$ Estimated Time Investment: 1 week of free time From Plan: http://ana-white.com/2009/12/plans-little-farmhouse-table-for.html [...]
Jeremy (not verified)
Tue, 02/01/2011 - 06:21
Hey Ana, do you recommend
Hey Ana, do you recommend using pine for the top or something a little harder like oak?? Also I haven't been able to find 4x4's that are untreated...they all have that ugly green tint to them in the store (Lowes or HD are about the only places around here) does that really matter or will the stain take care of it? thanks so much it looks great and I can't wait to build it!
ddietz12
Sun, 04/24/2011 - 08:55
do you think cedar is a good wood choice for this project?
ptay
Sun, 07/03/2011 - 20:10
Awesome!
I adore this coffee table! I showed it to my husband and he loved it too! Just as soon as I finish my clients furniture I will be building this one for my home. Thanks for the awesome plans!
Greg (not verified)
Mon, 08/22/2011 - 14:13
4x4 staining
Ana, let me start by saying I'm thrilled that I found your site. I've been working on building a coffee table, but decided to scrap it and start over. I originally wanted to build it with dowels but it's a pain to make sure everything lines up perfectly. Your design definitely seems more simple (and fun) to put together.
Anyway, the only places for me to get wood in my area are Lowe's and Home Depot. The only problem is that neither sell untreated 4x4s. Is it best to use a different stain for these? I know it has to be dry first, but do you know if it will take the stain the same as untreated wood?
Alex (not verified)
Wed, 08/31/2011 - 19:38
Weight
Dose anyone know how much this table will hold? I wanna put an aquarium on it and this could weigh upto 550lbs. Do you think this is a stable enough table? And sugestions on making it more stable?
Guest (not verified)
Tue, 09/27/2011 - 04:19
I'm so Impressed!!!
Hi, I just made this Tryde Coffee Table and I'm so pleased with it! I discovered your site while using google images to find a rustic coffee table that I liked. Imagine my surprise when I realized my favorite was a DIY project...Yay! It is probably the sturdiest piece of furniture in my whole house! My husband manages a lumber yard/warehouse at a home hardware store and with his discount I was able to get everything I needed for $20! I can't wait to tackle my next project...Reclaimed Wood Headboard! Thanks so much for sharing your wonderful plans with all of us!
gregmasciola
Tue, 10/18/2011 - 22:43
I just finished building this
I just finished building this coffee table and am very happy with it. I didn't stick completely to the plans though. I had a bit of 2x4 scrap wood laying around, so I just used that for the side & end aprons, attaching them flush with the legs. I also used 2x4 for the legs, because my Lowes and Home Depot don't sell untreated 4x4s. I don't know what's more satisfying, having my new table in the living room or using my old falling apart one as firewood.
jimboski93
Thu, 10/27/2011 - 07:41
What stain was used?
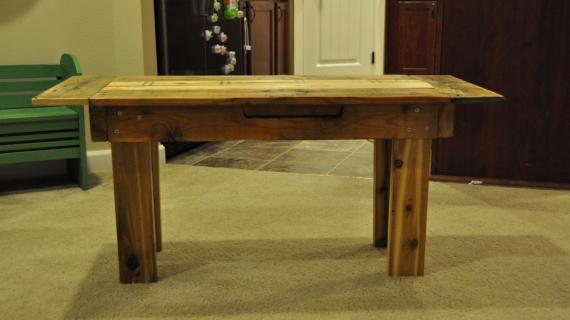
I really like the look in the first picture at the beginning of the post, or even the first picture in the "additional photos" section.
What stains were used to achieve this look?
Thanks
Naya (not verified)
Thu, 11/03/2011 - 17:51
tryde coffee table
This was an amazing plan to build from...thank you Ana! I did have one suggestion as my cutting skill are still improving:) I put on one side piece and then added the long middle pieces. After dry fitting everything, I then cut and added the second end piece. That was easier than trying to get my 2x4s to cut exactly to fit inside the 2 set side pieces. I also brought my side pieces in just a bit to give them more support. Instead of just filling my screw holes, I strategically spaced them on the boards. I then went and added some rustic brads over the hole. It gave it a very unique look. This was a great starter plan. Don't doubt yourself...just try it!
Happy Cutting!
Steve P (not verified)
Thu, 11/10/2011 - 05:16
Screws
Can anyone please provide a close up photo of how they screwed everything together? (Especially step 2, as these will be seen in the final product). I was thinking about countersinking them deep and filling them in with dowels or hole caps.
BTW, I stumbled upon this website yesterday by ways of artofmanliness.com and I'm already planning what I want to make. This coffee table will be my first project and will be my Christmas present to my fiance. Thank you Ana and the whole community. This is a invaluable resource!