


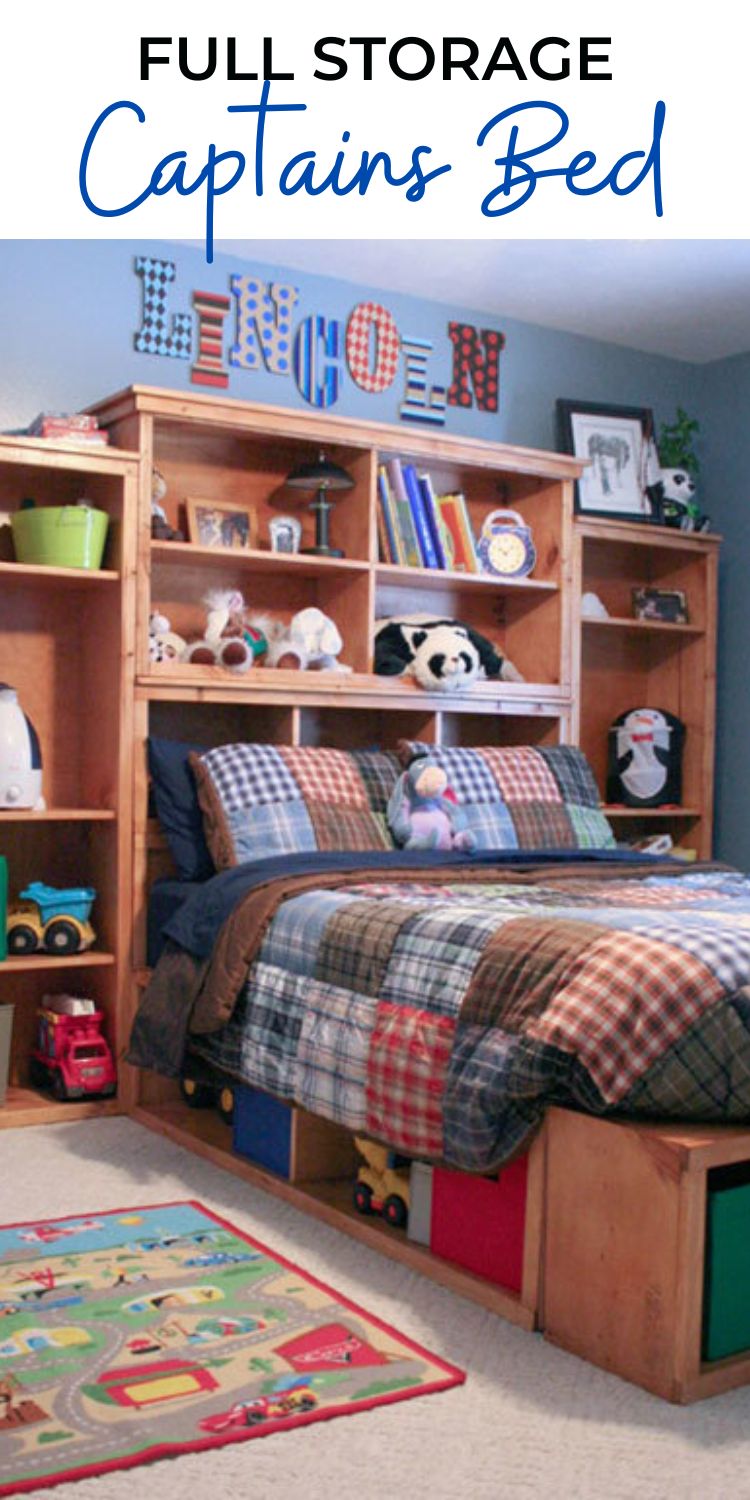
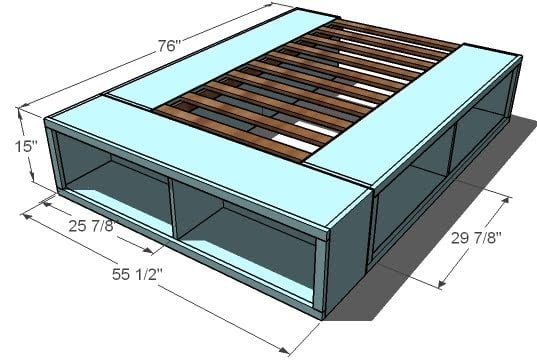
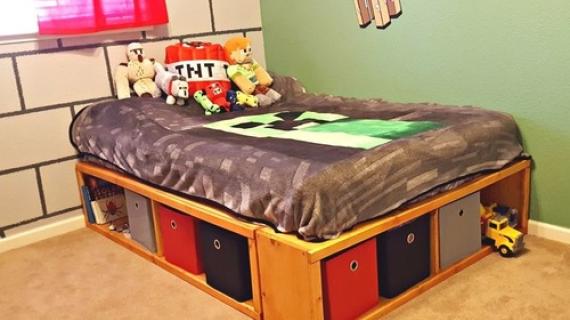
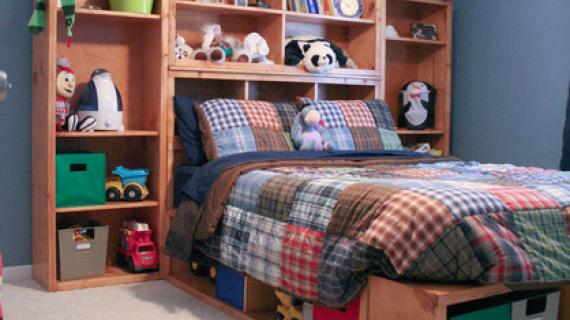
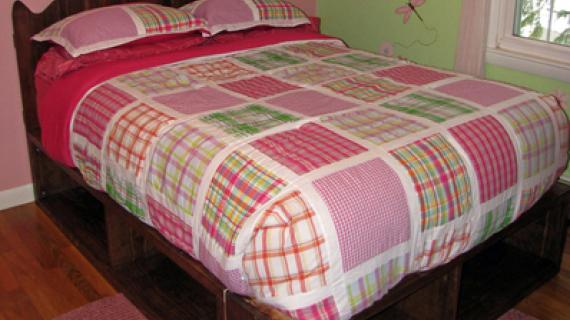
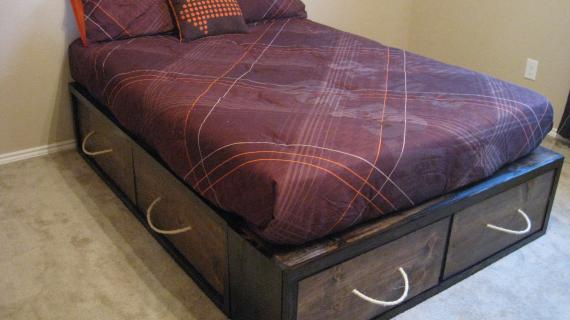
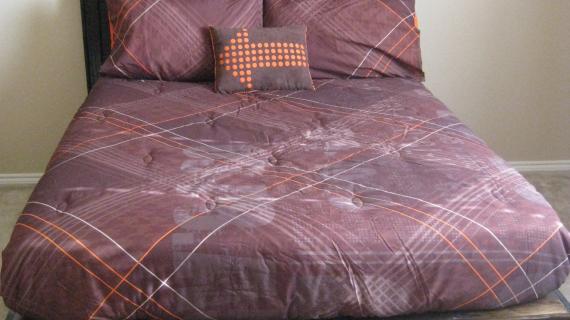
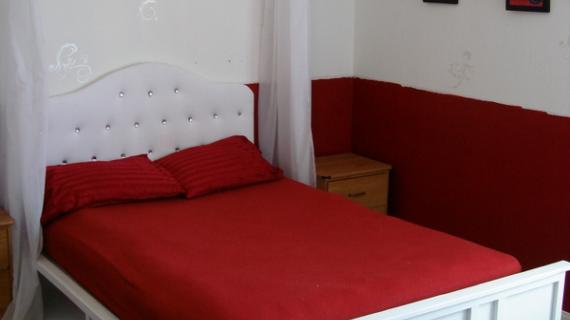
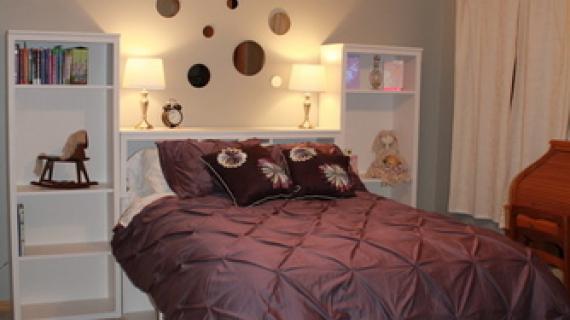
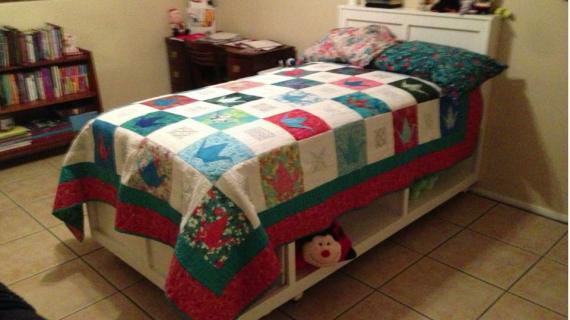
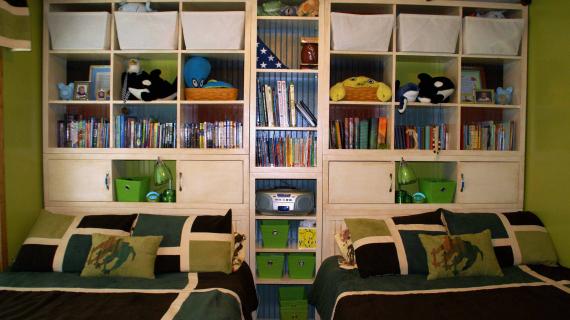
You can build a simple storage bed to elevate a mattress and provide extra storage with these simple plans. Featuring six large, wide cubbies, perfect for fabric bins, toys, or even books and games. This bed has a cubby depth of 12".
This plan is also the base plan for the twin sized modification. You can see all the project plans in this collection here. Special thanks to Amy and Steve for sharing their amazing photos with us.
Pin For Later!
Preparation
- 6 – 1×12 Boards, 8′ Long (Most economical for stain grade is pine (like the PBTEEN stained bed, and also would work great for painting. You could also use sheets of MDF cut into 1x12s, but you would need to purchase two whole sheets of plywood and only use up 1 1/2 sheets)
- 1 – Sheet of 1/4″ Plywood cut into 15″ wide strips, 8′ long
- 6 – 1×2 Boards, 8′ Long (For paint grade, 1×2 Pine Furring Strips would work for about $1.00 each)
- 5 – 1×3 Boards, 8′ Long (1×3 Pine Furring Strips are about $1.50 Each and would work perfect)
- 2″ Screws
- 1 1/4″ Screws
- 1 1/4″ Nails (optional if you have a nailer handy)
- 2″ Nails (optional if you have a nailer handy)
- Wood Glue
- Wood Filler
CUT LIST FOR THE BOXES
- 6 – 1×12 @ 15″ (Cubby Sides)
- 3 – 1×12 @ 12 3/4″ (Cubby Dividers)
- 2 – 1×12 @ 54″ (End Cubby Top and Bottoms)
- 4 – 1×12 @ 62″ (Side Cubby Top and Bottoms)
CUT LISTS FOR THE TRIM
- 6 – 1×2 @ 12″ (Vertical Trim)
- 2 – 1×2 @ 55 1/2″ (End Top and Bottom Trim)
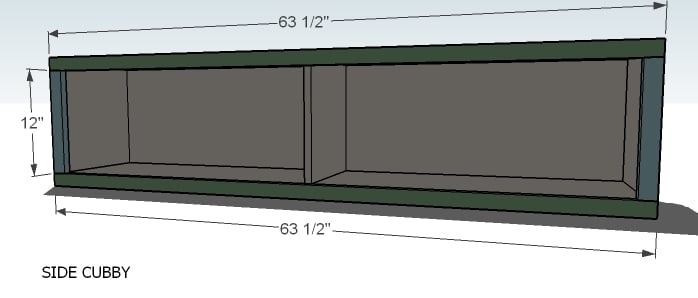
- 4 – 1×2 @ 63 1/2″ (Side Top and Bottom Trim)
CUT LIST FOR THE CENTER SUPPORT
- 2 – 1×3 @ 63 1/2″ (Cleats)
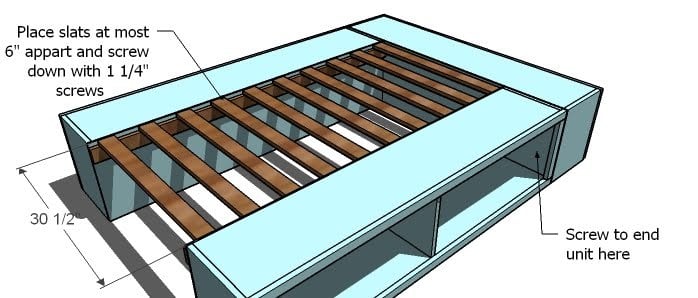
- 11 – 1×3 @ 30 1/2″ (Slats)


So if you read my blog long enough, you already know that to get a square project, you gotta work on a square surface with square boards. And you also need to check for square after each step. Predrill and countersink your screws. If you are working with MDF, use drywall screws and make sure you drill a pilot hole the entire length of your screw hole to keep your MDF from blowing apart. Be safe, have fun!
Instructions
Step 1

You will need to build one end cubby.
Step 2
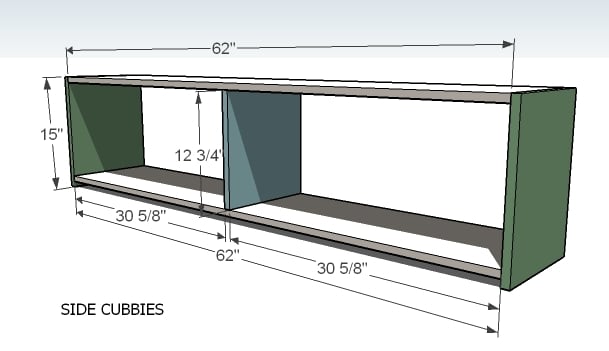
And two side cubbies.
Step 3

Put the back on the end cubby with nails and glue. Don't forget to nail into the center partition as well.
For both backs: You can have the lumber store “rip” your 1/4″ plywood into 15″ wide strips so they are easier to manage, can be hauled in a car, and all you have to do is make a single chop. Have the plywood ripped into 3 – 15″ wide x 8′ long strips. Then cut your plywood for the backs of the end and two for the side cubbies. Use 1 1/4″ nails and glue to fasten in place.
Step 4

Do the same for the side cubbies.
Step 5

Step 6
Trim for the side cubbies.
Step 7
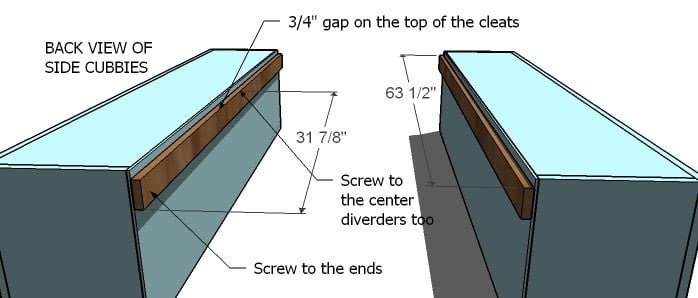
CLEATS
Use the 2″ screws and glue to fasten cleats to the backs of the side cubbies only.
Step 8
SLATS
Lay the slats on top of the cleats, as shown above. Screw in place. Don’t use glue so dissemblance will be a cinch. Also screw the end cubby to the side cubbies ( a couple of blots with washers and nuts would be your best option to keep everything together over time (and make dissemblance a cinch)


Comments
Free Pretty Th… (not verified)
Thu, 05/20/2010 - 00:26
LOVE storage BEDS!! so
LOVE storage BEDS!! so awesome!
Sarah {The Stu… (not verified)
Thu, 05/20/2010 - 01:07
Wow, you are a MACHINE right
Wow, you are a MACHINE right now!! Pumping out those plans! :D
Meghan (not verified)
Thu, 05/20/2010 - 02:25
I sooo want to build this for
I sooo want to build this for our new guest room but wedding planning is ruling my life right now! :P One of these days, I'll actually have the space and time to build one of your awesome projects! ;)
Deanne (not verified)
Thu, 05/20/2010 - 04:08
I love these beds. The one I
I love these beds. The one I really need is for a twin xl - it is for my college age son. He wants us to build it and he wants the drawers, how should I convert the twin plans to twin xl?
Thanks!
CJ (not verified)
Thu, 05/20/2010 - 04:34
Oh Ana, I would hug you if
Oh Ana, I would hug you if you weren't like, 5,000 miles away! I've been reading your amazing blog for a couple of months, hoping you would post a full-sized version of this bed. I have a list of your projects to build for when the BF and I move in together - THANKYOUTHANKYOU for all the plans!
Alicia (not verified)
Thu, 05/20/2010 - 04:37
Thank you, thank you, thank
Thank you, thank you, thank you!! I've been waiting for this. =)
Nancy (not verified)
Thu, 05/20/2010 - 04:49
Love the design. I can't wait
Love the design. I can't wait to post some pictures of it.
If you're looking for other bins that are about 12 x 12 (and not as bright as Target's version), I found that www.organize.com has a few alternatives.
http://www.organize.com/canvas-sweater-drawer.html
http://www.organize.com/silmesstorba.html
Ashleigh (not verified)
Thu, 05/20/2010 - 05:04
A full size! Just what I
A full size! Just what I needed! You are the best... I just sit here and wish for it, and you come through! Thank-you so much for your hard work and efforts. I am just one of the many who are really benefitting from it.
Ms. X (not verified)
Thu, 05/20/2010 - 06:57
Would someone PLEASE post a
Would someone PLEASE post a link to the King size storage bed plans? I can't seem to find them :(
Liana Brooks (not verified)
Thu, 05/20/2010 - 07:15
Ana, you are the best! I was
Ana, you are the best! I was actually on this morning to print the cut lists for the storage bed. I was going to build the twin size stratton and steal the mattress off my daughter's bunk bed, but I think I like this better.
Or this in a twin size.
Thank you!
Nancy (not verified)
Thu, 05/20/2010 - 07:15
Here is the king version. I
Here is the king version. I have it bookmarked ;)
http://www.knock-offwood.com/2010/01/plan-how-to-modify-queen-sized-str…
Anna, could you post this link on your plan catalog or this post that links to the other versions? It seems to be a lost link that's hard to find.
Crystal (not verified)
Thu, 05/20/2010 - 07:16
Ana- is it possible to use
Ana- is it possible to use the slats instead of plywood boards on the Queen size as well?
Ana White (not verified)
Thu, 05/20/2010 - 07:23
Thank you all, I'm really
Thank you all, I'm really liking this simple more economical design, for those of you okay with no drawer possibilities and not so deep cubbies.
Yes, you could definitely do the slats for the king and queen beds.
BeeHive (not verified)
Thu, 05/20/2010 - 07:58
I just asked my husband to
I just asked my husband to make me the queen sized version for my birthday :)
Yolanda (not verified)
Thu, 05/20/2010 - 08:07
I love this simplified design
I love this simplified design and the corner piece you have planned looks great. Awesome work, Ana.
Michelle (not verified)
Thu, 05/20/2010 - 12:38
YAY! This is so awesome! My
YAY! This is so awesome! My husband and I are always looking for better ways to add storage to our space. This would be perfect. We LOVE LOVE LOVE your site. Thanks for all you do!
Miranda (not verified)
Thu, 05/20/2010 - 15:00
This is awesome and just what
This is awesome and just what I've been looking for along with the corner unit. Can you give tips on how to make this with drawers? I'm putting my 3 boys in a bonus space that has sloped ceilings and not enough space for dressers too. I'm planning to make a U shape with them, but need drawers. Thanks!
Katie Seamons (not verified)
Thu, 05/20/2010 - 17:16
What kind of putty is
What kind of putty is everybody using? We tried elmers and it seemed to dry super fast. Is there a better brand?
Ömer Feyzoğlu (not verified)
Thu, 05/20/2010 - 19:44
excellent plans thank
excellent plans thank you
http://www.groupenerji.com/plywood_fiyatlari.html
marcie (not verified)
Thu, 05/20/2010 - 21:46
I made the Queen stratton for
I made the Queen stratton for my 4yr old/guest bed as needed, it turned out great. its very humid here and I have a memory foam mattress so to get airflow to the mattress I drilled some holes in the tops of the cubbies.to answer the question of using slats on the queen size I followed the plans but used 2x2's spaced closer together and just left off the plywood topper. it seemed strong. for adults I would maybe use
2x4s for added strength
Ms. X (not verified)
Fri, 05/21/2010 - 08:55
@Nancy (and Ana) - Thank you
@Nancy (and Ana) - Thank you so much!
Mommy Words (not verified)
Sun, 05/23/2010 - 06:29
Ana I built a version of the
Ana I built a version of the storage bed last year and I actually allowed the two sides to go all the way back and they fit full size bins for toy or other storage. They even fit my daughters huge Melissa and Doug Castle and her baby crib. They can also then be used as storage benches if the bed is taken apart. It was really simple. So anyway that is an aoption to just eliminate the empty space and get tons of storage! The bed is at http://www.mommywords.com/2009/10/diy-pretty-practical-platform-bed/
There are pics of it with ant without linens. Everyone who sees it loves it!
Dawn (not verified)
Thu, 05/27/2010 - 05:42
This is wonderful -- I've
This is wonderful -- I've been looking for a plan with smaller benches for the sides and also with slats. However, I have a question -- is there any reason not to leave off the bench at the foot and just extend the sides to make up the difference? The reason I ask is that I don't want to completely block off the space under the bed (we store some items there plus the cats like to hide). So basically is there any reason not to build the two side benches (but longer because I actually have a king), add the slats and be done with it? Is there additional structural support provided by the third bench?
I love your website by the way even if I haven't gotten around to building anything yet (though perhaps a huge bed is not the place to start :)
Ana White (not verified)
Thu, 05/27/2010 - 12:56
As far as removing the bottom
As far as removing the bottom bench goes, you definitely could. This design was done to keep the cost down and make the build process more manageable. If you wanted to do just two extra deep benches and no middle platform, you would need at least six sheet fo 3/4" plywood, because the width of the bed is at 54". You basically would need to rip your plywood into 27" wide strips, and build the side benches using the 27" wide strips instead of the 12" wide strips. Can be done, but it is going to be pricy.
Megan (not verified)
Thu, 07/22/2010 - 01:33
These plans are beautiful! I
These plans are beautiful! I would really love to try making them, but my dad is a little skeptical. How many manhours do you think this would take?
Kelli (not verified)
Thu, 07/22/2010 - 19:47
I've never built before, but
I've never built before, but you are giving me the confidence to give it a try! I LOVE your blog and I'm so excited to try my hand at these beds and corner hutch. It's just what I need for my twins in their tiny room.
WWolfe (not verified)
Sat, 09/11/2010 - 06:31
Sadly a lot of good plans
Sadly a lot of good plans from Ana's previous webs sites can't be found on this site now using search.
Here is the one you are looking for:
King Size Bed conversion: http://ana-white.com/2010/01/plan-how-to-modify-queen-sized-stratton.ht…
You will also need this one, which is equally hard to find: http://ana-white.com/2009/11/plan-knock-off-of-pottery-barn-stratton.ht…
We love you Ana and are amazed at all you do so quickly. Sorry to see so much good work being lost on the new site!
Ana White (not verified)
Tue, 09/28/2010 - 08:43
Anne's full storage bed!
Anne's full storage bed!
Ana White (not verified)
Tue, 09/28/2010 - 08:49
Ana White (not verified)
Tue, 09/28/2010 - 13:56
Check out Anne's photo of
Check out Anne's photo of this very bed!
Ana White (not verified)
Wed, 09/29/2010 - 09:50
Check out Anne's photo of
Check out Anne's photo of this very bed!
Jessica (not verified)
Wed, 10/27/2010 - 07:13
I love this bed frame, but
I love this bed frame, but I'm also looking for a headboard with small shelves or somewhere to set things. My boyfriend and I are avid readers and it would be the ideal place to put a book when you are just too tired to continue reading.
Voncelieet (not verified)
Mon, 11/22/2010 - 22:38
Hi! This would be my first
Hi! This would be my first project ever, but in twin size. And I was just wondering, how many screws and nails I'm gonna need? I'm totally lost with that!! Can someone help me with this?
young (not verified)
Wed, 12/22/2010 - 08:56
Nice work. What paint you
Nice work. What paint you use? Semi-gloss or gloss? Thanks.
Cheryl Prevost (not verified)
Sun, 01/02/2011 - 08:19
We bought this bed years ago
We bought this bed years ago from Ikea for our sons - If I knew then what I know now I would have built it myself.
The boys still sleep in the bed, finally in their own room but I now thinking of adding your Twin Storage bed idea to put underneath it. That way we'd have extra storage space and the bed would be a bit higher for my growing boys.
young (not verified)
Sun, 01/02/2011 - 09:27
it took me around 24 hours
it took me around 24 hours
young (not verified)
Sun, 01/02/2011 - 09:30
i bought 1lb 2" nail and 1lb
i bought 1lb 2" nail and 1lb 1-1/4 screw, but used less than half
ohmyzephyr (not verified)
Tue, 02/01/2011 - 11:17
I am in l.o.v.e. with this
I am in l.o.v.e. with this bed! I have been lurking for about a year and am finally ready to make it. The only problem is that i cant find the plans for the queen! i know there have been changes going on for the past few months, and i feel like l'v looked in every little nook and cranny on the site, but i just cant find it. Is there someone out there who has saved the plan for the queen storage bed...
Robbie Robbins (not verified)
Tue, 02/15/2011 - 12:37
Please help direct me to the
Please help direct me to the Queen size storage bed plans. I have searched and searched ans have been unable to locate them. My daughter has just moved into her first apartment with a room mate from college and has discovered there is not enough room for her bed and the dresser in her bedroom. She is coming home for spring break so we can work on our first furnature project together, a storage bed. Please help me in locating the Queen plans so I can start preparing the lumber and cut list.
Thanks!
Jennifer (not verified)
Sun, 02/20/2011 - 05:03
I can't find the queen size!
I can't find the queen size! Does anyone know where they are?
Jennifer (not verified)
Sun, 02/20/2011 - 05:08
The Queen size plans are
The Queen size plans are here, just not very obviously labeled as such: http://ana-white.com/2009/11/plan-knock-off-of-pottery-barn-stratton.ht…
eileen dickey (not verified)
Mon, 02/21/2011 - 09:41
Hi, I can't seem to find the
Hi, I can't seem to find the queen plans for the storage bed... can someone help me out? Thanks!
leesa (not verified)
Tue, 02/22/2011 - 20:25
I have a Cal King. What would
I have a Cal King. What would be the changes?
Guest (not verified)
Sat, 05/14/2011 - 23:50
Tutorial
good tutorilas averall thank you and very pretty lady..
Ruthie (not verified)
Sat, 05/21/2011 - 17:08
question
is this what I do to make the twin beds w/ corner unit??? Trying to find those plans. Please help me!
JES
Sat, 05/21/2011 - 20:41
Twin Bed Plan Links
For a twin I think you'll need to use 2 for plans: full size Plan link (above) for the sides for the storage bed (full and twin sides are the same):
http://ana-white.com/2010/05/furniture-plans-full-size-storage-bed.html
Also, you'll need the Modification of plan for twin size end (makes it a twin storage bed):
http://ana-white.com/2010/05/twin-storage-captains-bed
This is also in a a link you can click at the top of the full plan, which will take you to the plan for the modification to twin.
The full size plan has the shopping list and shows cutting list for the sides. The twin modification plan shows you the measurements and cuts for the twin size end. hope this helps?
Shear Studs (not verified)
Wed, 12/28/2011 - 12:13
Plans
Thank you for putting such lovely photos and plans ,wich shows that you really care and love your job .
Happy new Year 2012
Guest (not verified)
Sat, 02/18/2012 - 17:27
Using what I have
Thanks for the inspiration! I'm going to use these as a starting place to making shorter cubbies to fit snugly under my present bed. All I really need is some shoe/small item storage, so this should work wonderfully!
I've also needed a small storage bench in my office, so I will modify this to work for that as well/
jaymeej
Mon, 02/20/2012 - 09:39
Storage headboard
Where can I find the plans for this? I've found the hutches, but can't find what they set on.
daphne (not verified)
Wed, 02/22/2012 - 09:44
Great minds
Ok everyone thinks I am nuts but now I dont feel so bad, I picked out the exact same wall color. LOL I call it inspiring instead of bright.