Community Brag Posts

Simple Outhouse

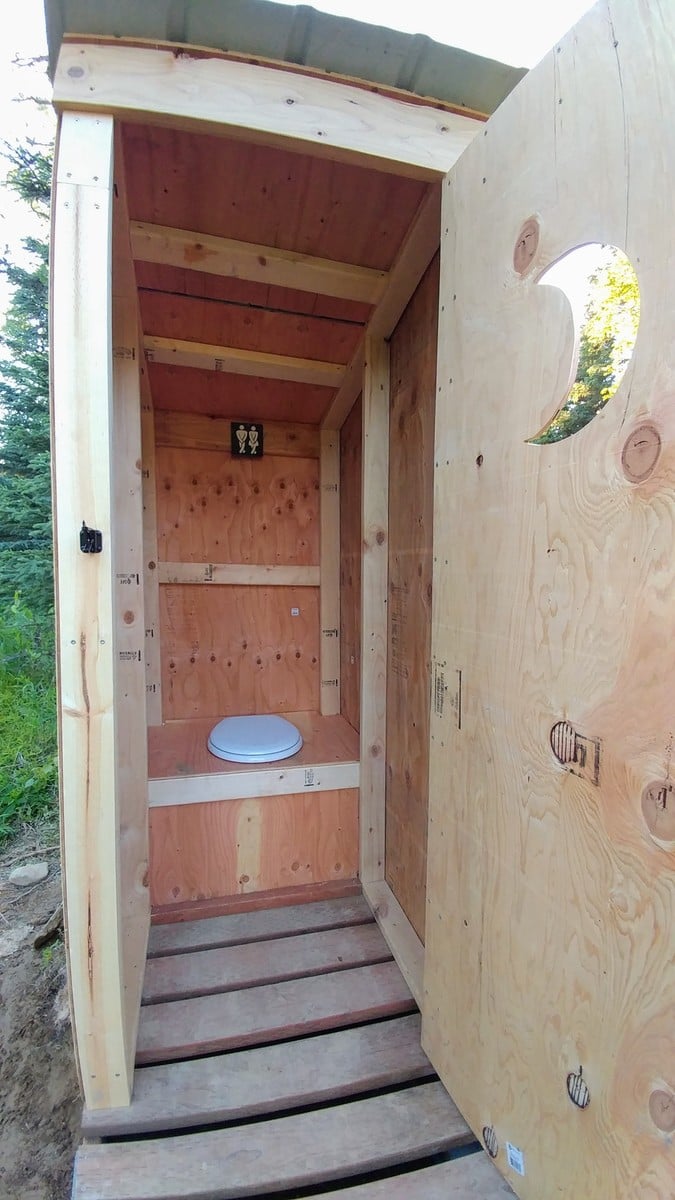
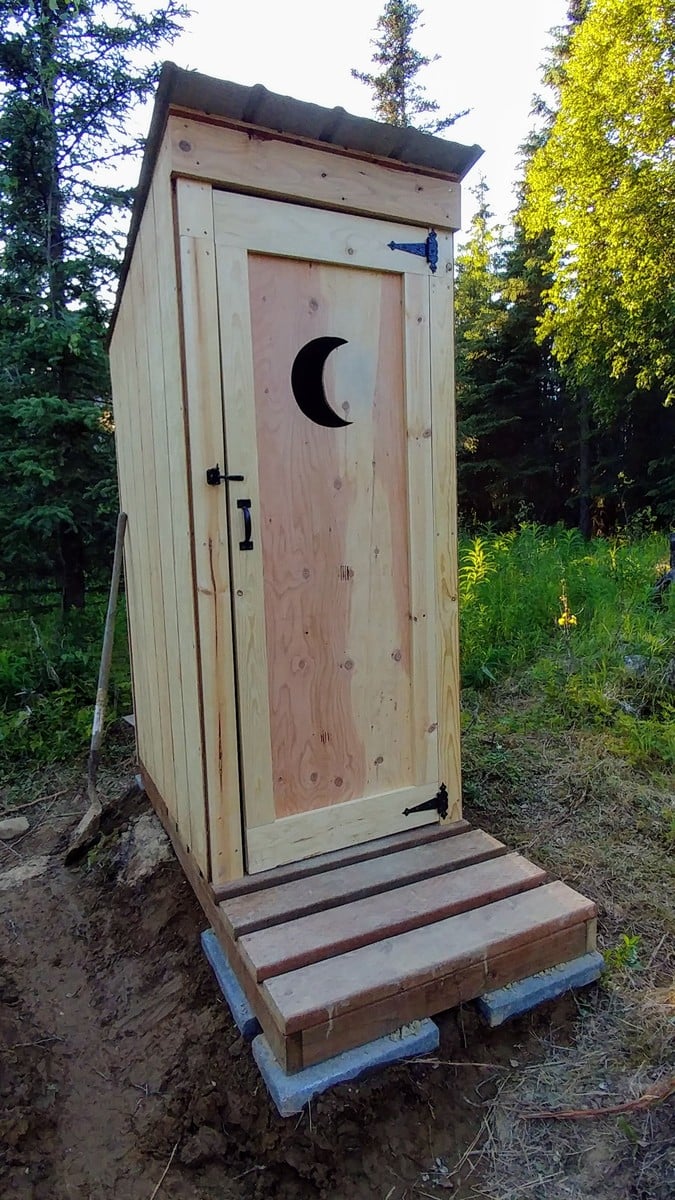
I built this outhouse to go with a dry cabin I'm working on, and also as an emergency backup for my house. I used treated lumber on the base/deck and splurged on T-111 for the siding. I wanted to use greenhouse polycarbonate for the roof, but found a piece of metal roofing in my shed that was exactly the right size so I used that instead. I thought about doing a fancy cutout on the door but ended up going with a half moon because it was easy. I'm thinking about cutting out stars of different sizes all over the rest of the door to let in more light. I'll trim and stain it next summer.

Built from Plan(s)
Estimated Cost
$450 - I used T-111 which is $40/sheet here in Alaska. I also used treated lumber where recommended and stainless steel screws.
Estimated Time Investment
Weekend Project (10-20 Hours)
Recommended Skill Level
Beginner

Comments

CH

Mon, 01/13/2020 - 15:25

WHAT HAPPENS TO THE 'STUFF' THAT YOU DEPOSIT IN THE TOILET?  I DIDN'T READ ANYTHING ABOUT DIGGING A PIT/TREATMENTS, ETC.  PLEASE LET ME KNOW.  THANK YOU!  CH.

sandbox with benches

Submitted by nananana on Fri, 07/10/2015 - 13:18

This sandbox has been around for some time BUT it is still a great project to build The plans were simple to follow and would be an excellent project for beginners. We built this for our grandson and future grandbaby. Was easy to complete in one day, including painting

Built from Plan(s)
Estimated Cost
Estimated cost was $75.00 including the wood, hinges and paint.
Estimated Time Investment
Day Project (6-9 Hours)
Finish Used
We used a flat exterior paint. paint color was Cool Bamboo. We put on two coats to preserve the wood.
Recommended Skill Level
Beginner

Comments

Seasonal And Holiday

Rustic X beach beverage center

Submitted by one wolf on Tue, 09/08/2015 - 06:52

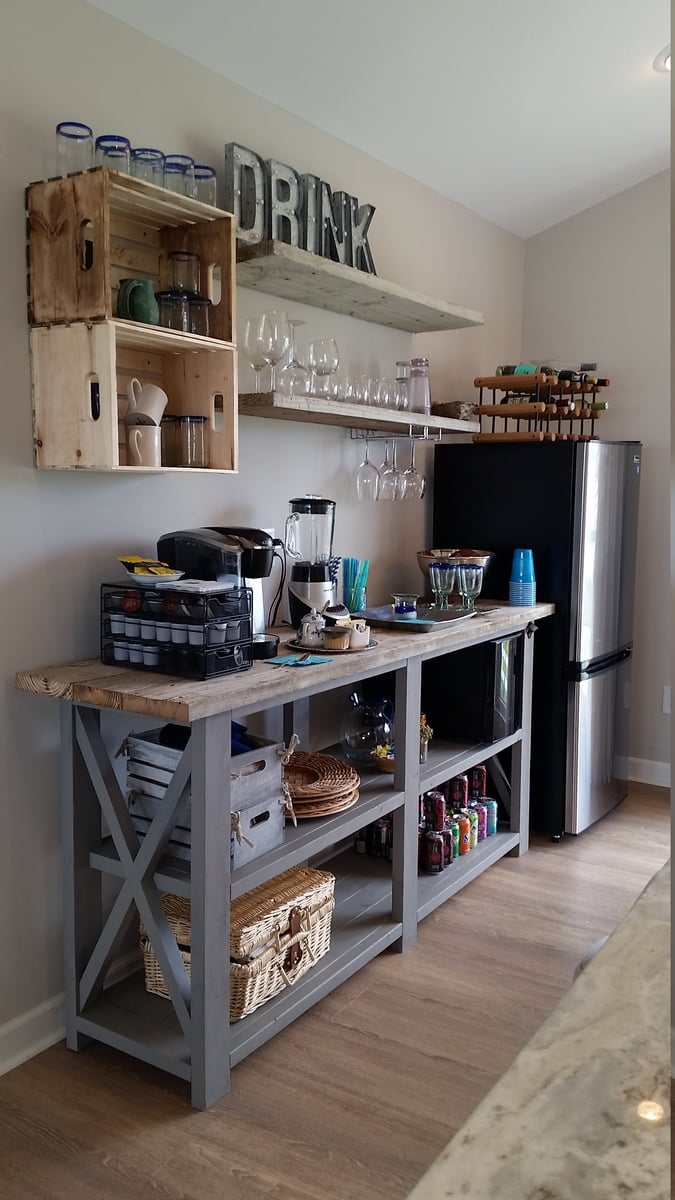
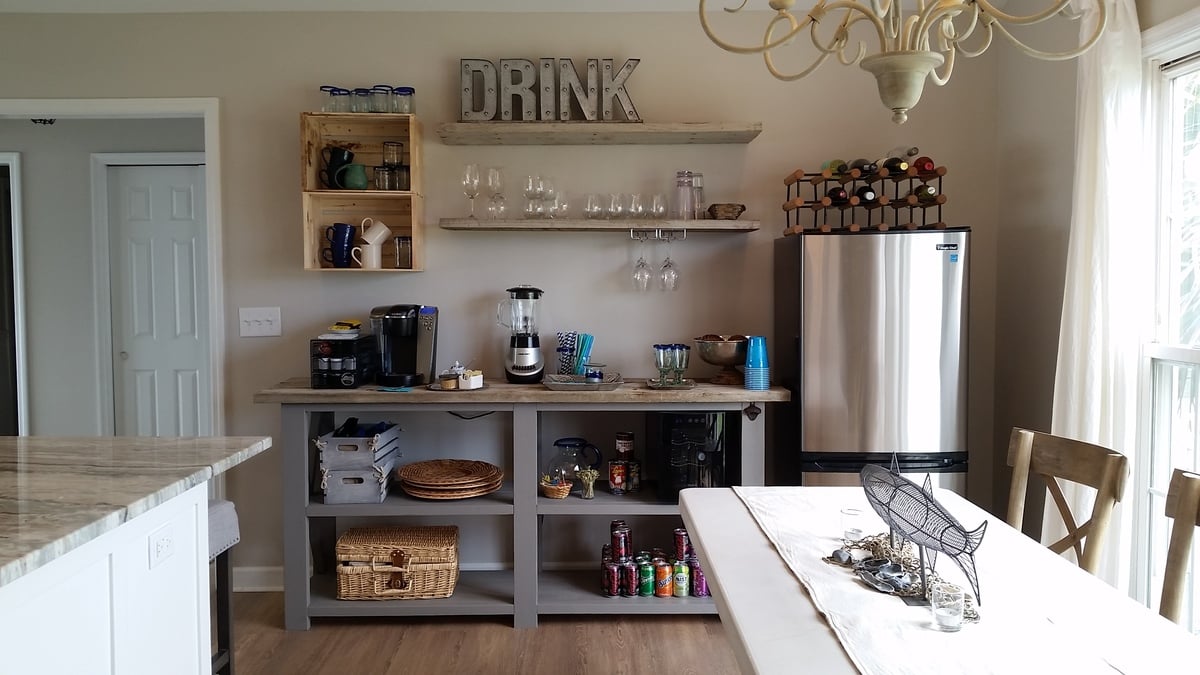
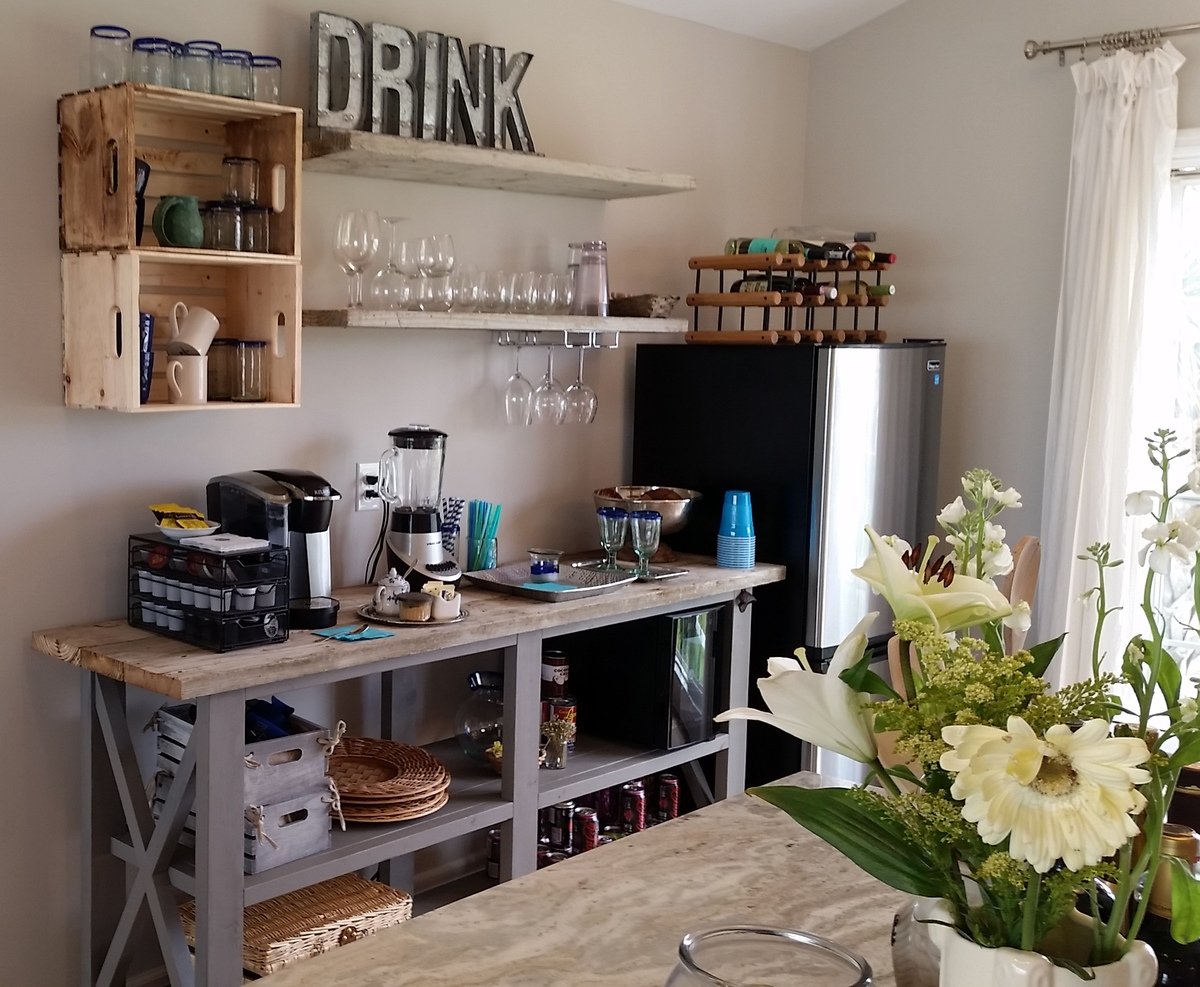
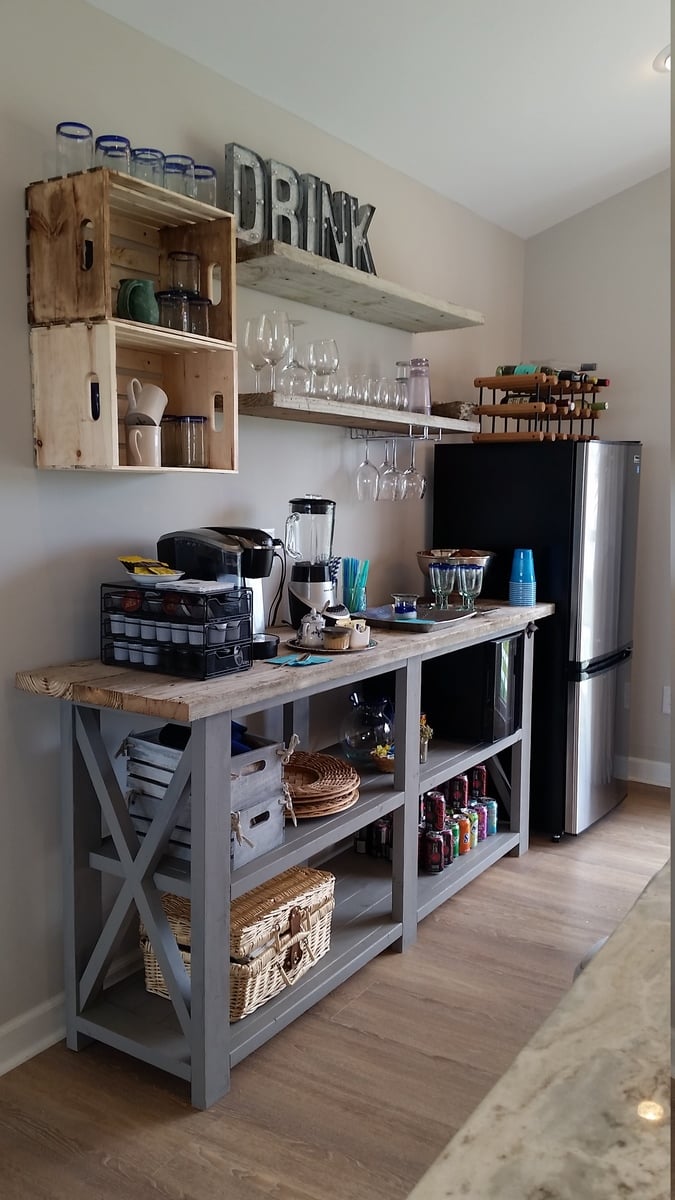
We used old dock wood for the surface of our X table for a nice beach house beverage center (sand bar!).  We adjusted the size to fit our space (a little longer and wider) and used additional studs for the shelves instead of 1" shelving, glued and PH/PS together.  To cut the X pieces I just held the 1x1 on the end of the table where it goes and marked the lines. Then I clamped a guide board at the correct angle on the table saw to make all the cuts, starting a bit long and shaving off until it just fit.  


With all the pocket holes and screws I wouldn't consider this a beginner project. Some additional steps and pictures in your description would help also.  End result is really nice.


Built from Plan(s)
Estimated Cost
$50
Estimated Time Investment
Weekend Project (10-20 Hours)
Finish Used
Patina wood from an old dock for the surface and the base is painted flat gray.
Recommended Skill Level
Intermediate

Comments

X - Farm House Table

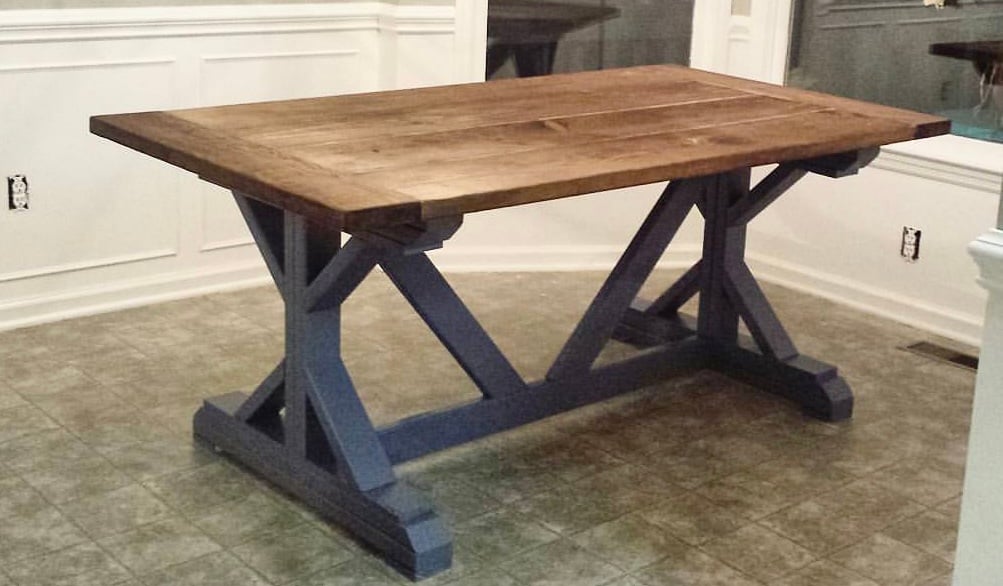
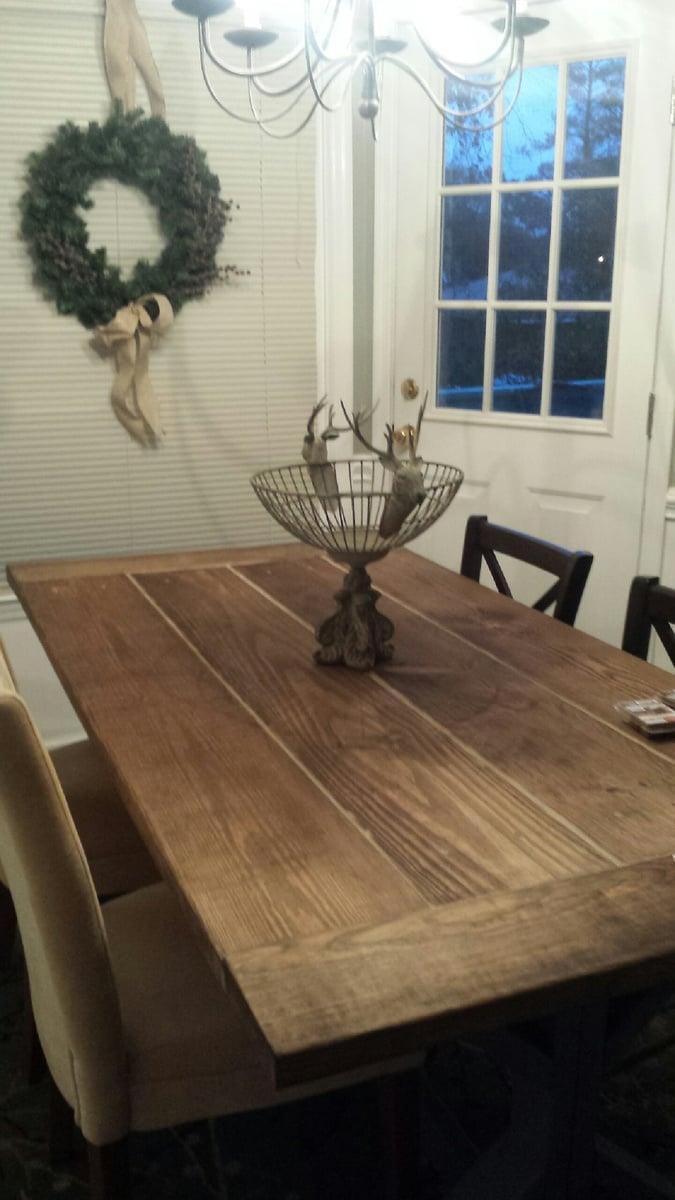
I modified this plan just a little on the ends, and I can not tell you how pleased I am with it! I did run into some issues with lining the boards up properly due to imperfections (and not laying the boards out ahead of time in the store because I was rushing at closing time), but in the end, I decided to add a wood filler in between the boards and everyone just raves over it. I could not imagine it having come out better. I would not do it any other way. 

Thank you Ana!! 

PS... I have a wonderful idea for a loft bed, but the plans are not provided. I know you would do it justice.. how do I submit the photo????

Built from Plan(s)
Estimated Time Investment
Day Project (6-9 Hours)
Finish Used
Satin, Custom mixed stain, stainable wood filler, sander.

Recommended Skill Level
Intermediate

Comments

jeffross

Sun, 01/07/2018 - 07:22

My appologies if I'm missing it but are there build plans for this table.  I would really like to build this for a friend but I'm not sure my skills will enable me to free style this. Thanks in Advance.  Jeff

cjtrunk21

Fri, 05/29/2020 - 11:50

Did plans over get posted for this table? Love the design. Thanks.

Sandbox w/ Built In Seats

Submitted by Anonymous (not verified) on Wed, 06/14/2017 - 07:30

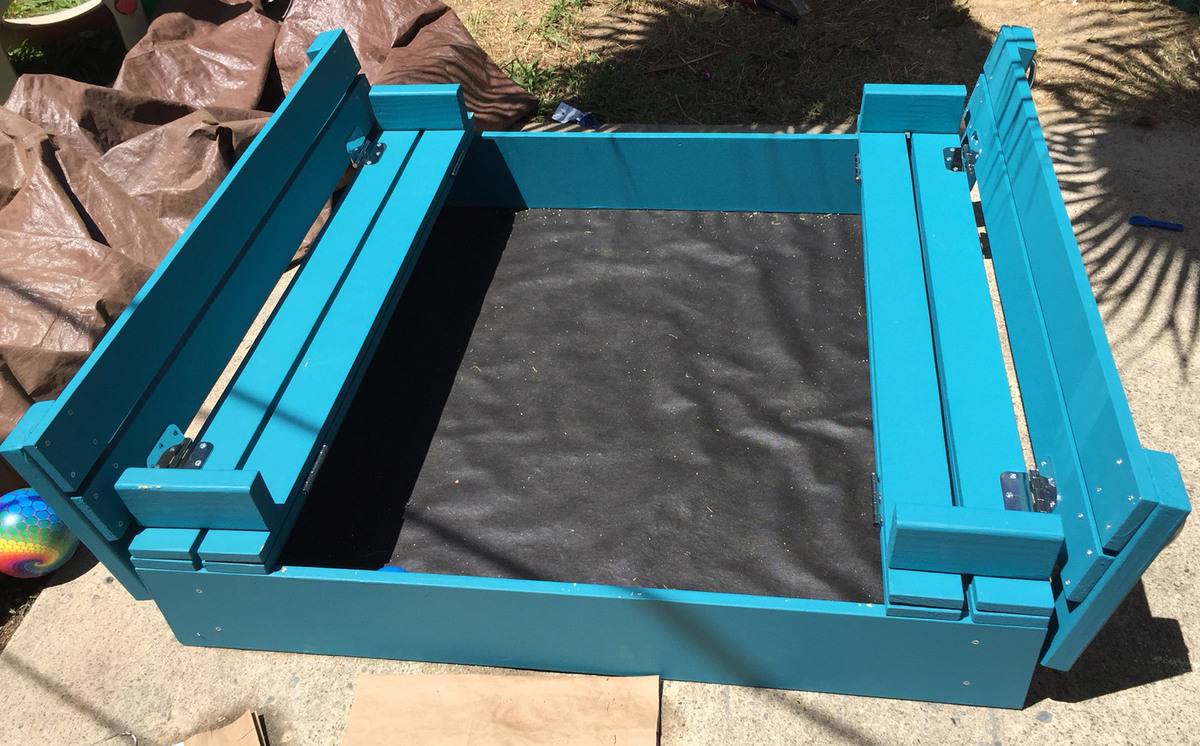
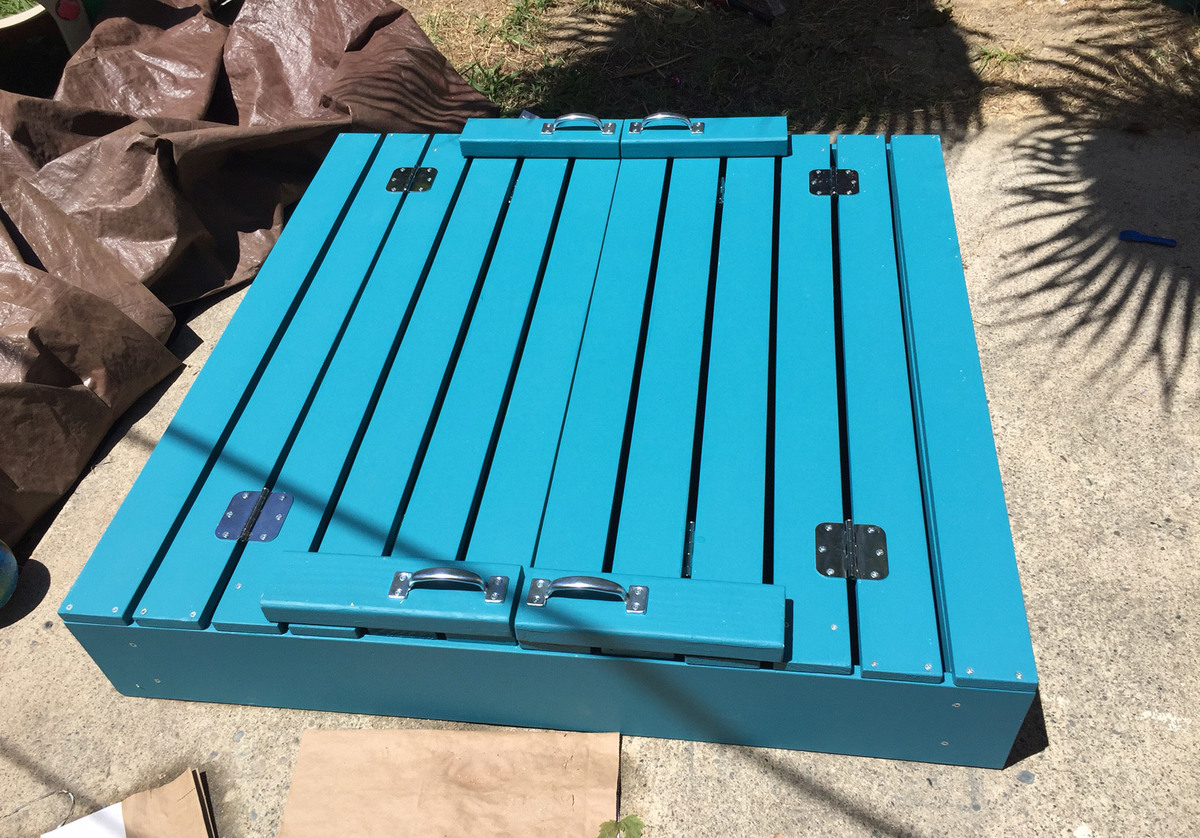
I have built some other stuff before, but not with paint and sanding and such. It was definitely a great learning project. There are imperfections, but it's a toy, so kids will be having fun and that is all that matters.

Built from Plan(s)
Estimated Cost
$100... but, the paint will be used on other projects, and I paid for better boards for on top.
Estimated Time Investment
Weekend Project (10-20 Hours)
Recommended Skill Level
Beginner

Comments

Dog Houses

Our local Habitat for Humanity puts on an annual event where they get folks to restore discarded or worn down furniture and sell them at auction. My wife and I participated last year and this year I was asked to build 4 dog houses and then they were going to let local designers/decorators finish them out.

I figured it would be easy to find a good dog house plan, but I was wrong so I had to come up with my own designs. I did not want to use plywood becauase I wanted them to look good. So I used 1x4's and 1x6's. I built them all just a little bit different, but the same basic design on all 3. Since I am not very good with circular cuts, did not do any fancy 1/2 circle doorways!

There are "after" pictures on the Blog. Thanks for looking!

Estimated Cost
$100 each
Estimated Time Investment
Afternoon Project (3-6 Hours)
Finish Used
I didn't finish them out, but did use screws to attach everything, so filled those in with wood putty and sanded down of course.
Recommended Skill Level
Beginner

Comments

Cindy from Indiana (not verified)

Sun, 11/06/2011 - 16:10

Great job for a great cause!

My First Project: Spinning DVD Rack

Submitted by Dan Y. on Sat, 07/13/2013 - 20:19

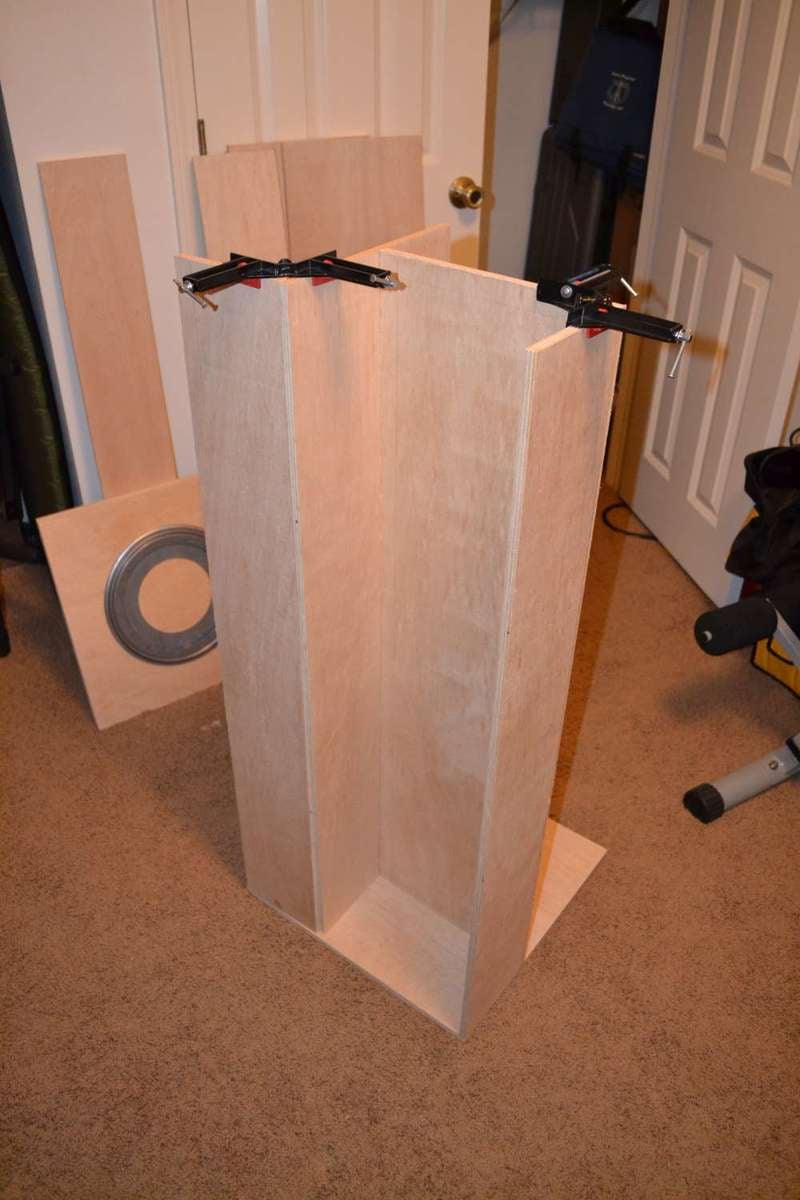
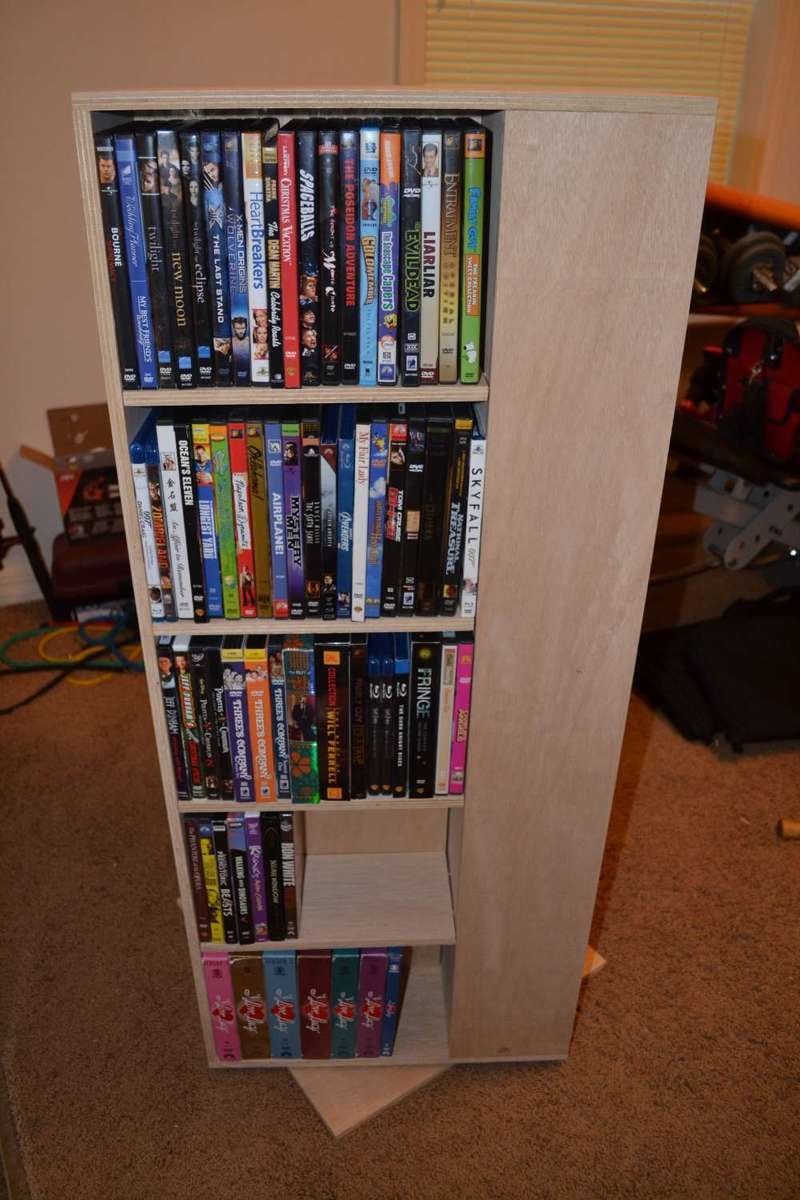
I was looking online for a spinning DVD rack to buy when I stumbled across a picture of a custom built rack. I decided to give it a try and this is the result. This is the first project I've done outside of basic shelves and it was a great learning experience. The overall fit and finish isn't quite where I'd like it to be but overall I think it turned out pretty well. I was able to find a 12" lazy Susan at a hardware store that supports over 300lbs and worked perfectly for this project.

I used pocket holes for the shelves, finishing nails for the top and screws for the bottom and lazy Susan. I also used pocket holes to attach the shelf backs and hid them behind the shelves. One thing I definitely won't use next time is spray paint/enamel. The finish isn't nearly as nice as I wanted and it cost far more than I was expecting.

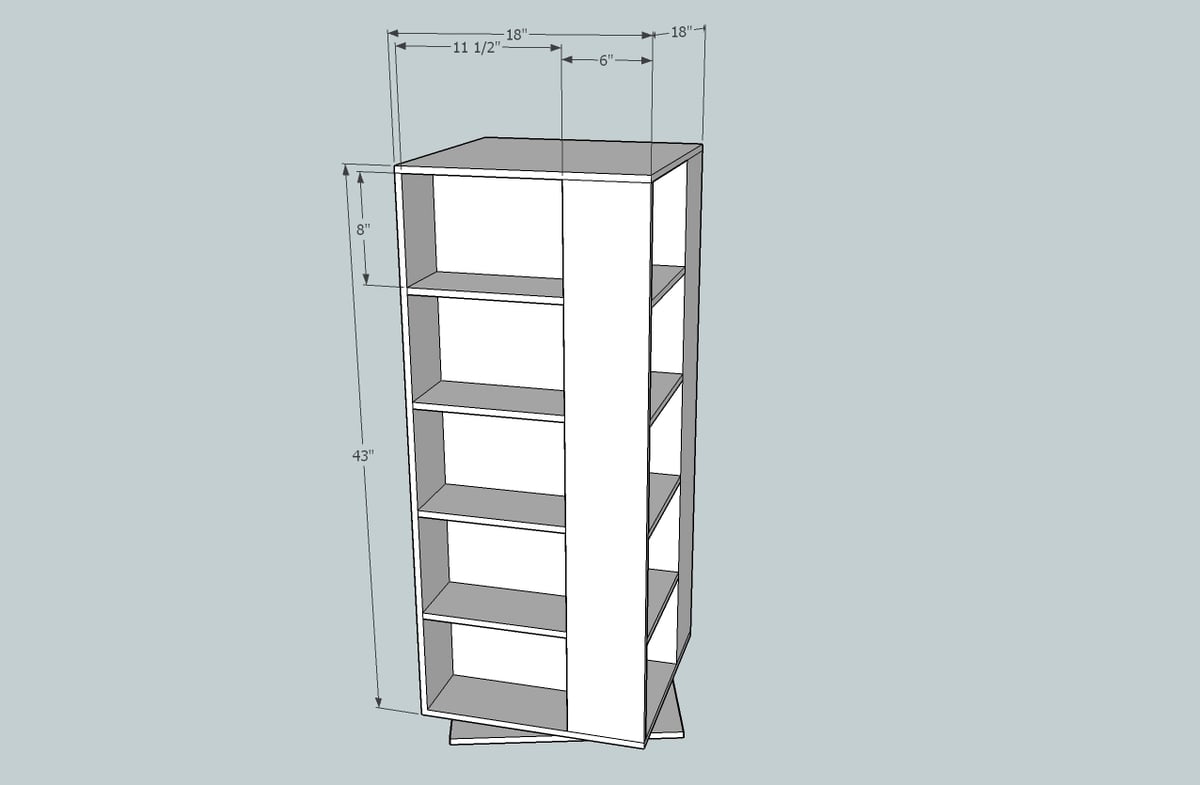
This is also my first time using SketchUp and I'm really impressed with it. I've uploaded a copy of the plans.

Criticism and suggestions are appreciated.

-Dan

Estimated Cost
$170
Estimated Time Investment
Weekend Project (10-20 Hours)
Finish Used
Rust-Oleum Universal Satin Spray Paint - Espresso Brown
Rust-Oleum Crystal Clear Enamel
Recommended Skill Level
Starter Project

Comments

Val Manchuk

Sun, 07/14/2013 - 11:35

I like this spinning DVD unit! Coincidentally, I just finished using spray enamel to redo some cupboard door handles. It's horrible stuff! I ended up sanding it off, and doing it over in flat black. I roughed up the edges with 180 grit to antique them a bit. Looks much better!

Rustic X Farmhouse Coffee Table with Storage

Submitted by Anonymous (not verified) on Sun, 02/05/2023 - 08:54

This project was made from reclaimed wood from my office where they had built a temporary safety railing out of 2x4s and 2x6s. I added a compartment for storage. The top is stained in a classic grey. I painted the body in black followed by white. I then sanded the body to allow the black to bleed through for a distressed look.

Comments

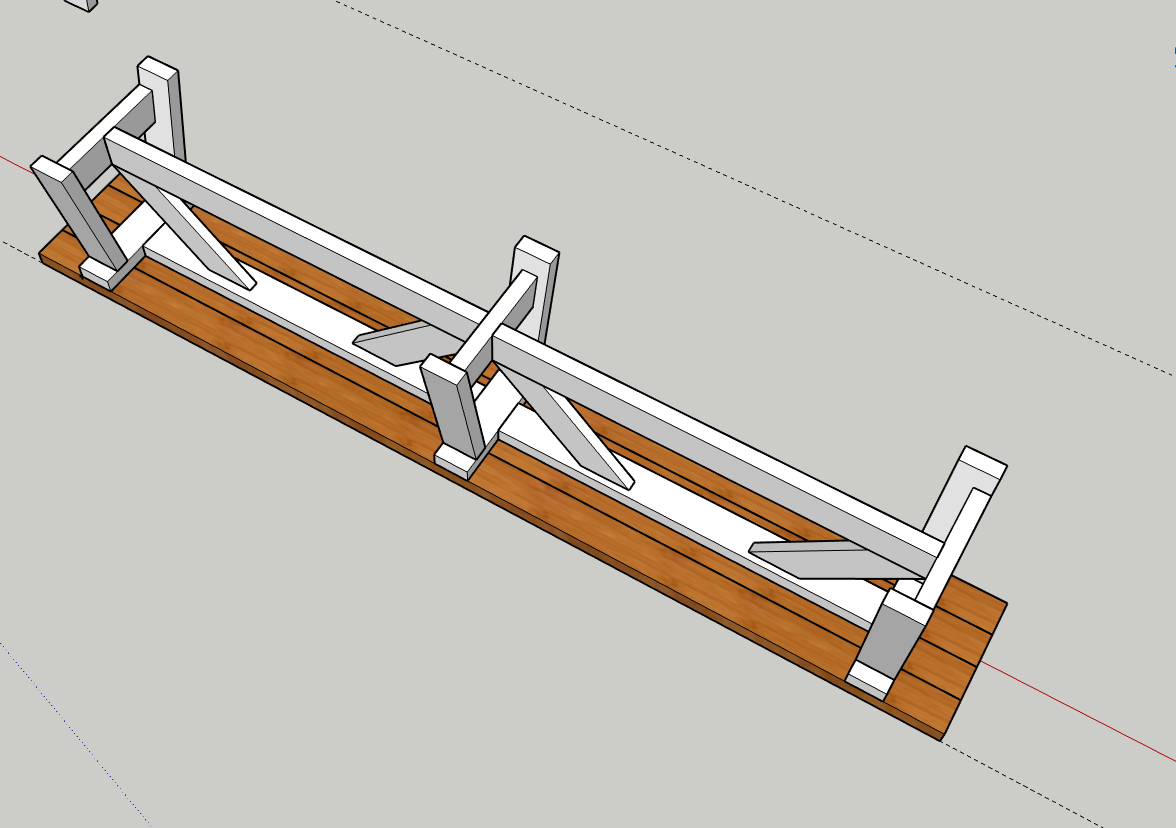
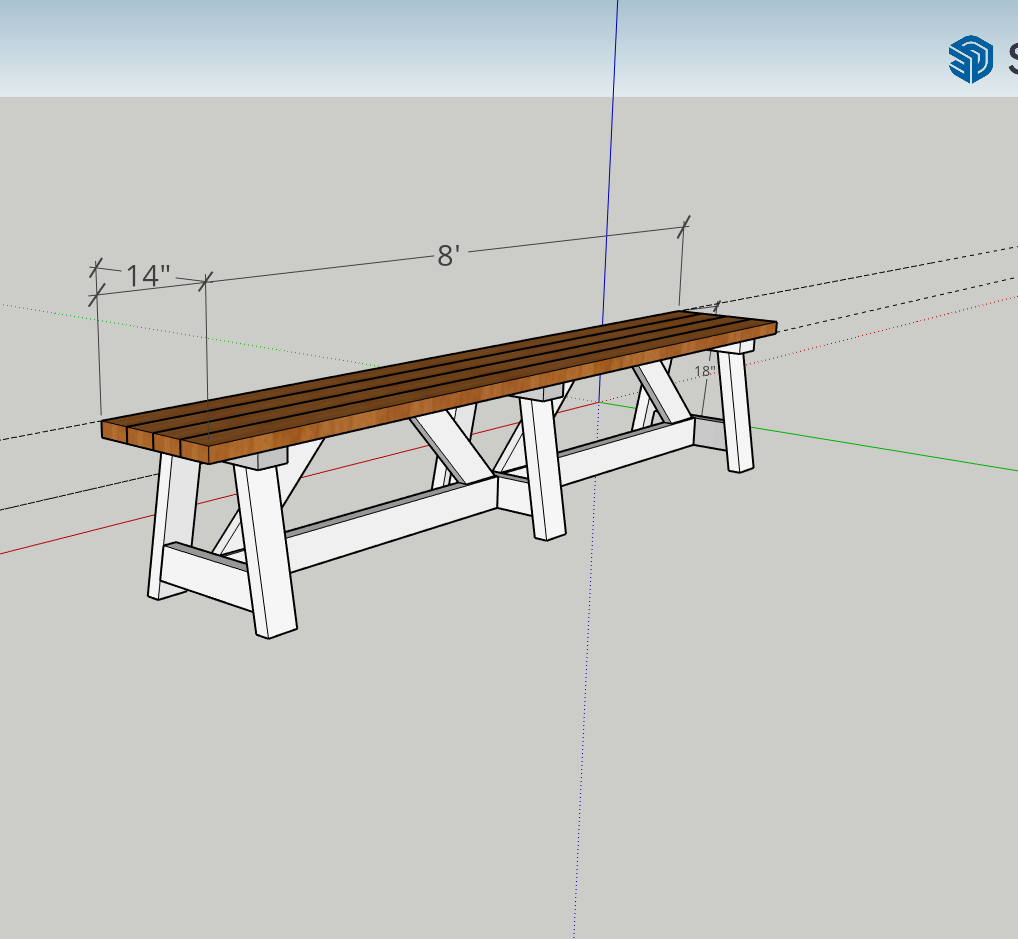
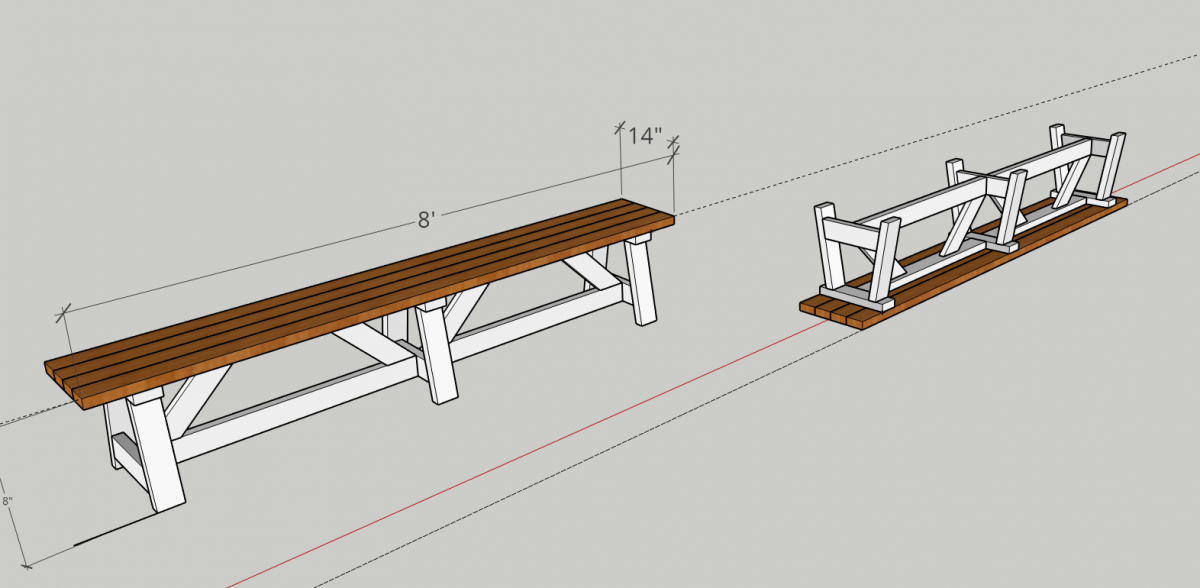
8 foot long truss style farm bench

Submitted by Bigherd on Wed, 04/21/2021 - 05:01

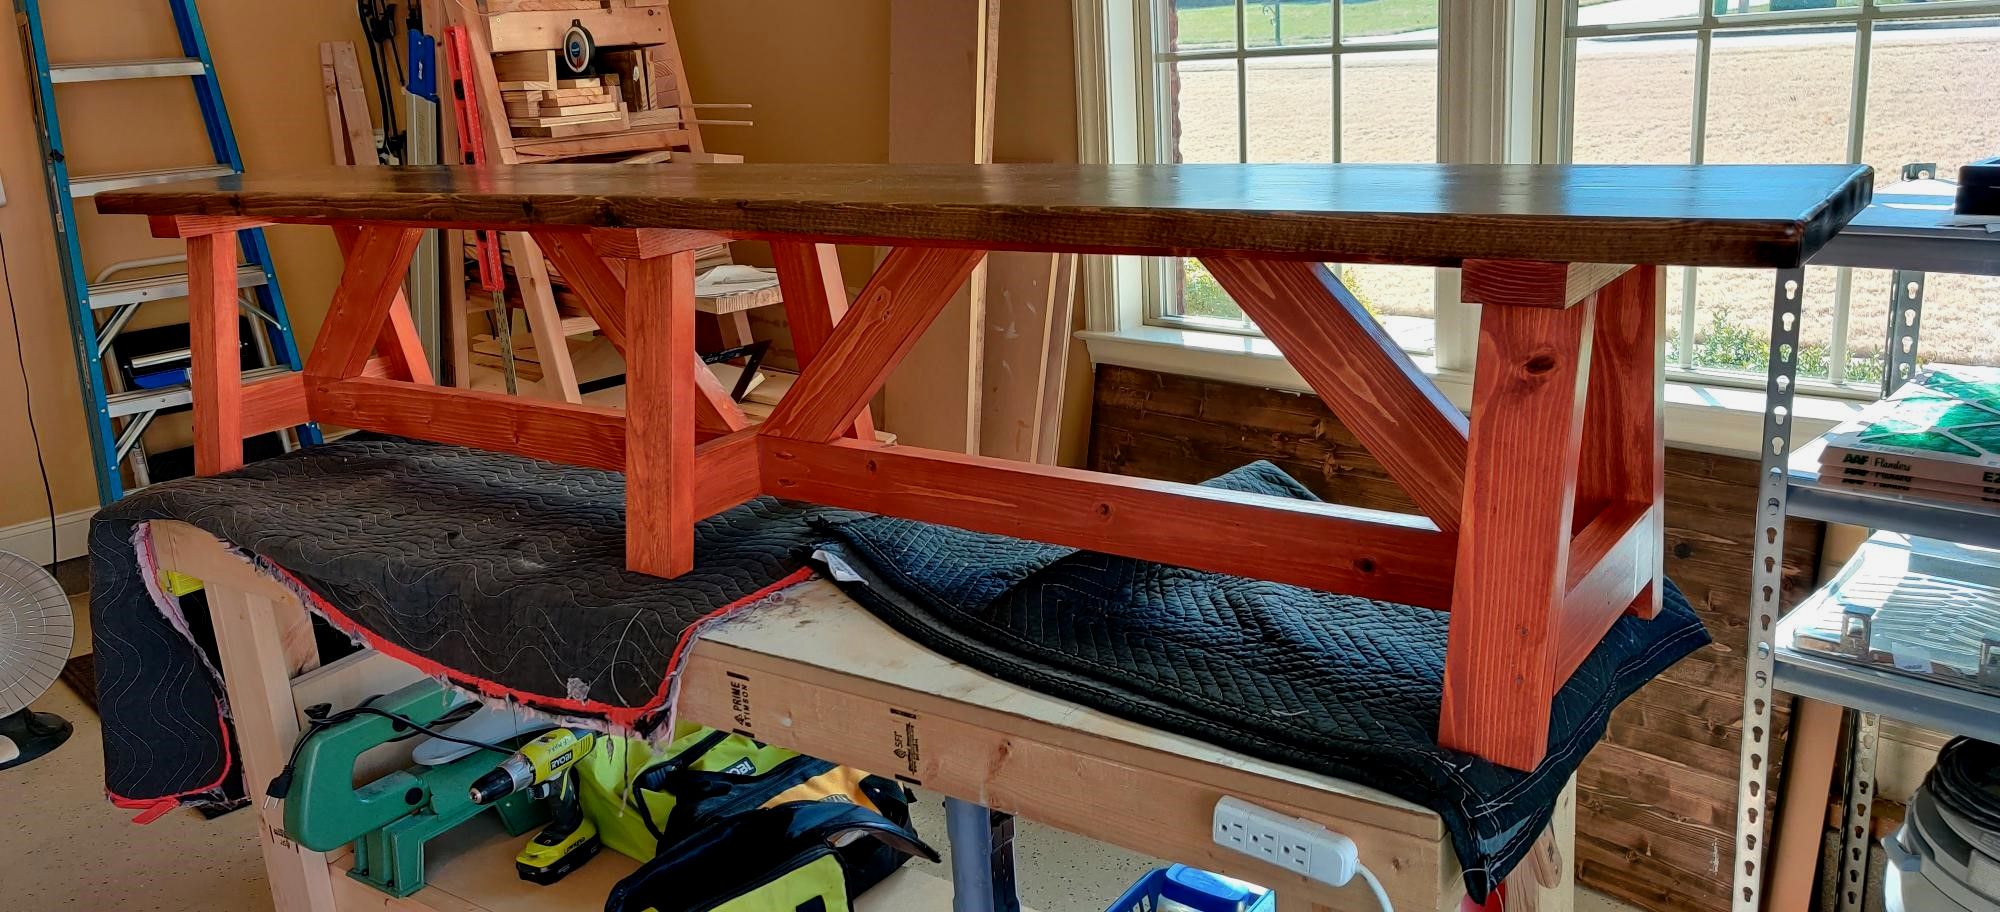
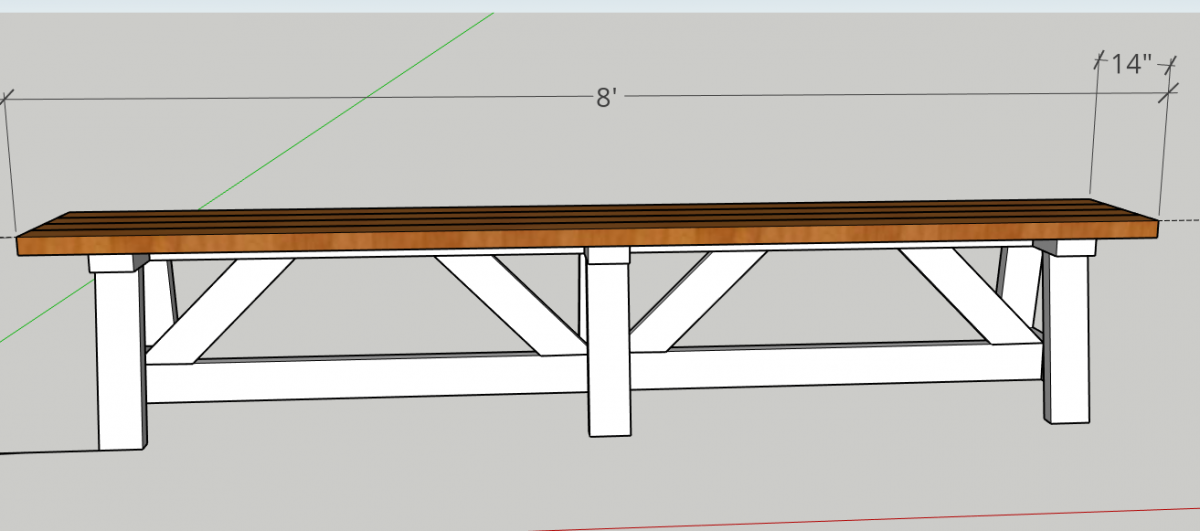
I had a friend that loved the 48" long truss style farm bench. However, she wanted one 8' long. I modified the "2X4 Truss Style Farm Bench" and came up with this design. As you can see, she want a very specific stain color combination.

Built from Plan(s)
Estimated Cost
$80
Estimated Time Investment
Week Long Project (20 Hours or More)
Finish Used
stains and Minwax Polycrylic
Recommended Skill Level
Beginner

Comments

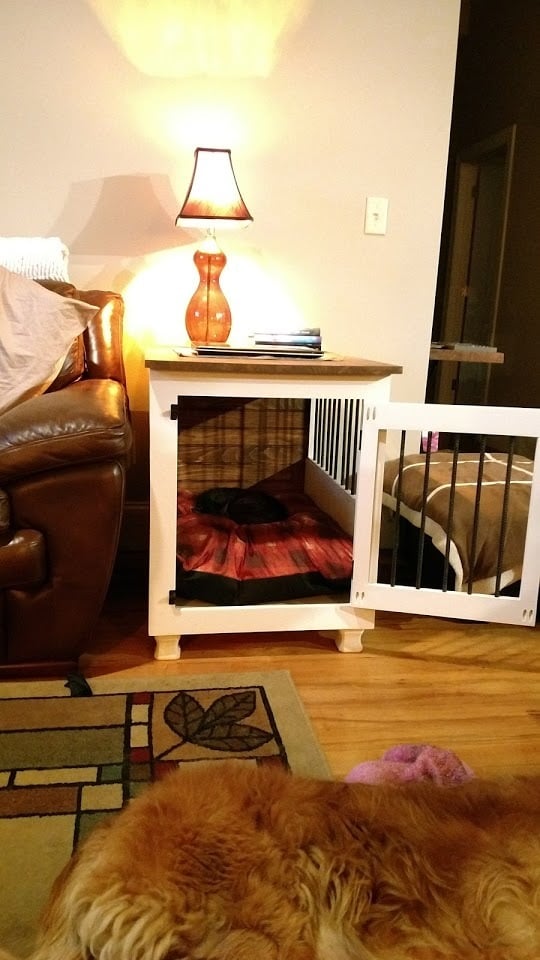
Dog Crate with a twist...

Submitted by AlexO on Mon, 05/08/2017 - 19:08

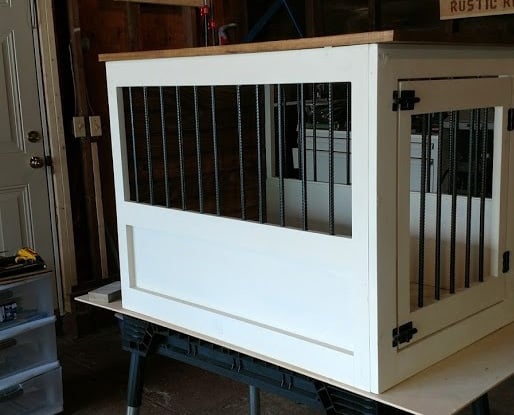
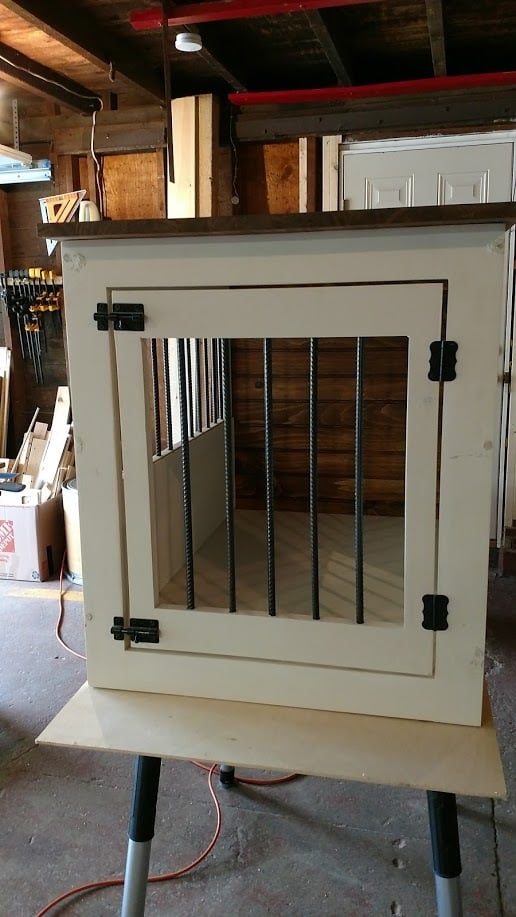
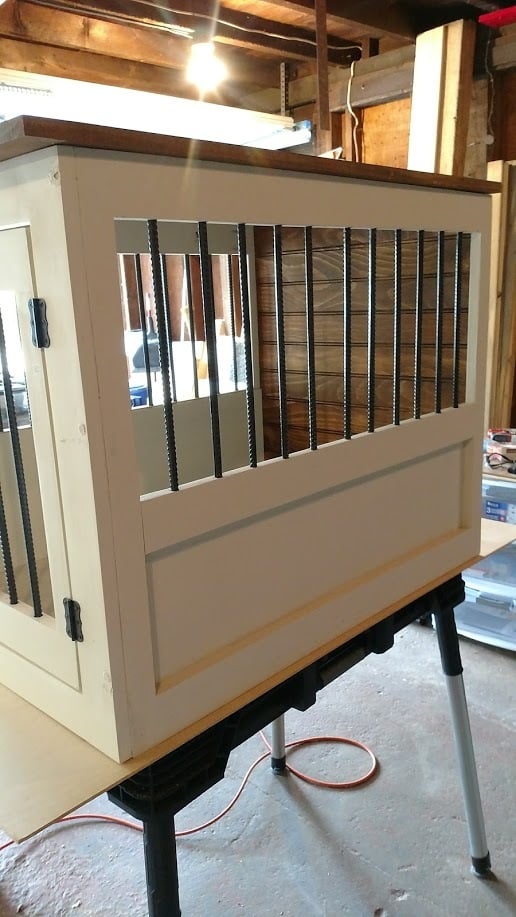
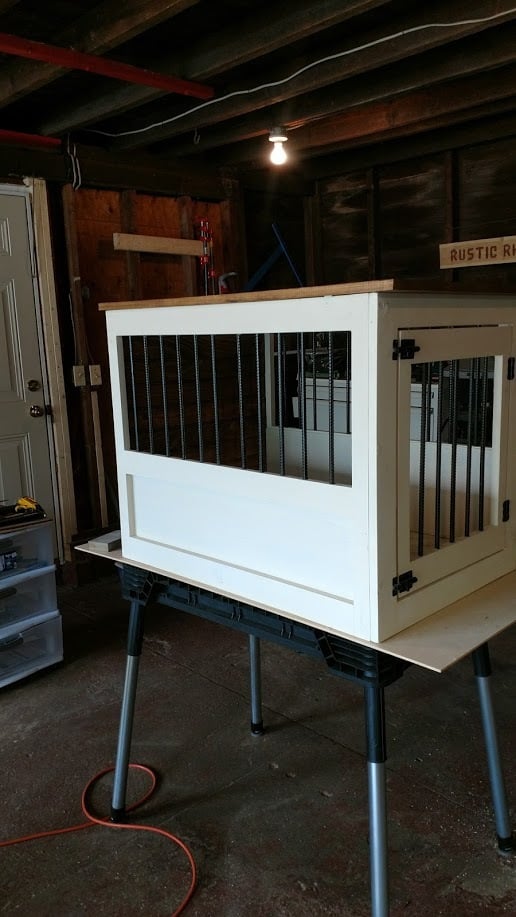
I really liked the Large Wooden Dog crate but wanted the sides to be lower and wanted to make sure there was no easy chew escape.  Not sure if you can see from the photo but the cats have taken over... Will need to make a larger one for the dog!

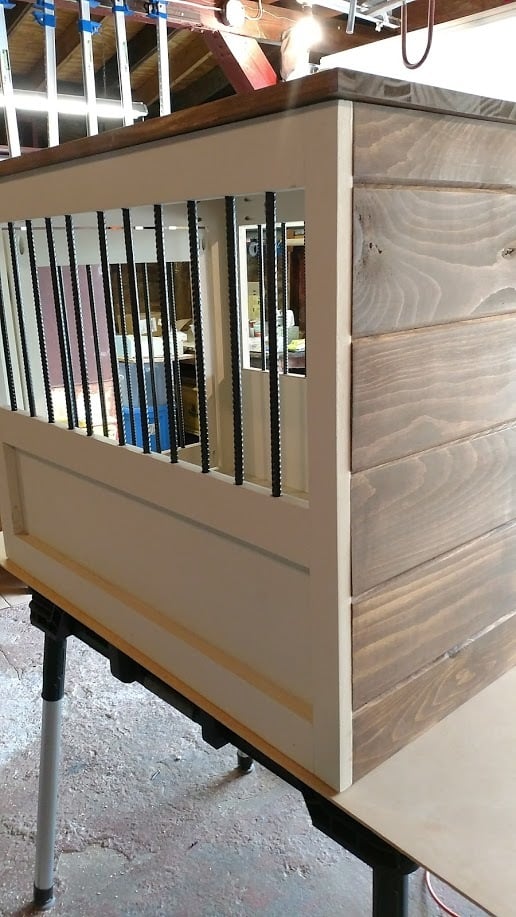
I followed the plan pretty much other than lowering the panel on the side and replacing the wooden bars with rebar.  The rebar was a bit of a learning curve getting the holes lined up perfectly but I figured it out and I think it came out pretty good!

Used all pine 1x3 and 1x2s.  Picked up a pine panel for the top and the bottom is a 3/4 plywood. Made our own chalk paint for the finish and sealed it with wax.

Oh, forgot, added tongue and groove pine for the back and finished it and the top with Antiguing wax.

Lots of fun and I think I will make a double one next!

Built from Plan(s)
Estimated Cost
Around $100 if you don't count all the practice pieces for the rebar!
Estimated Time Investment
Week Long Project (20 Hours or More)
Finish Used
Chalk paint and antiquing wax
Recommended Skill Level
Intermediate

Miter Saw Cart

Submitted by Nermell on Wed, 07/31/2013 - 16:51

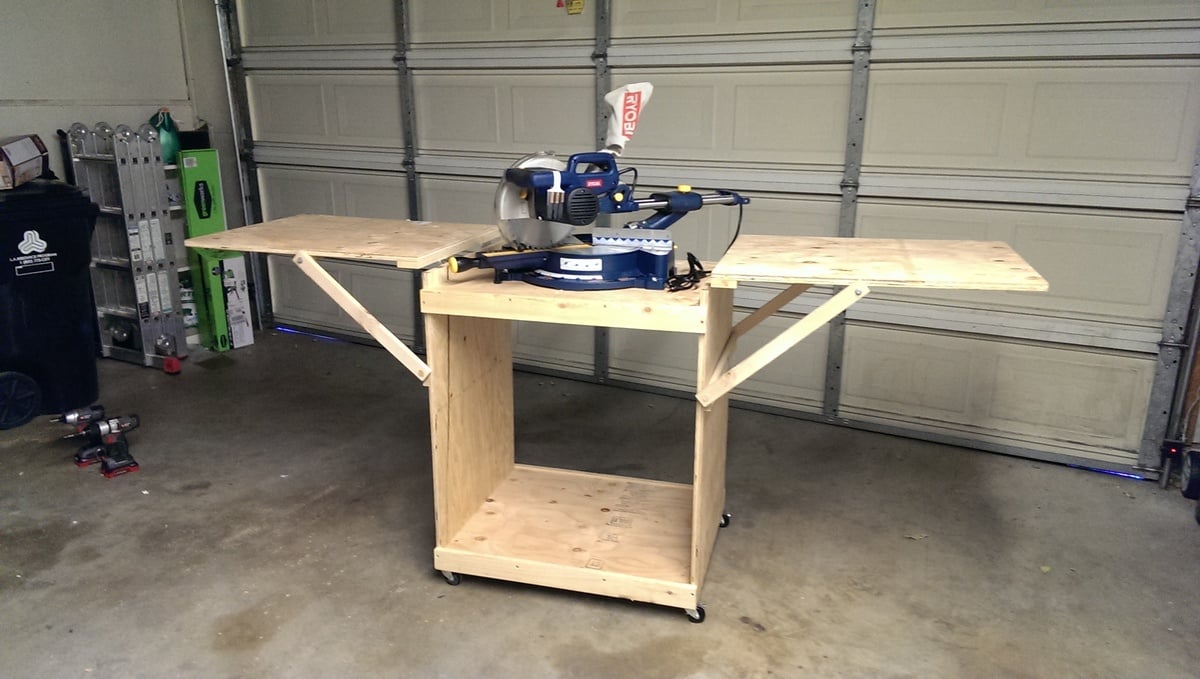
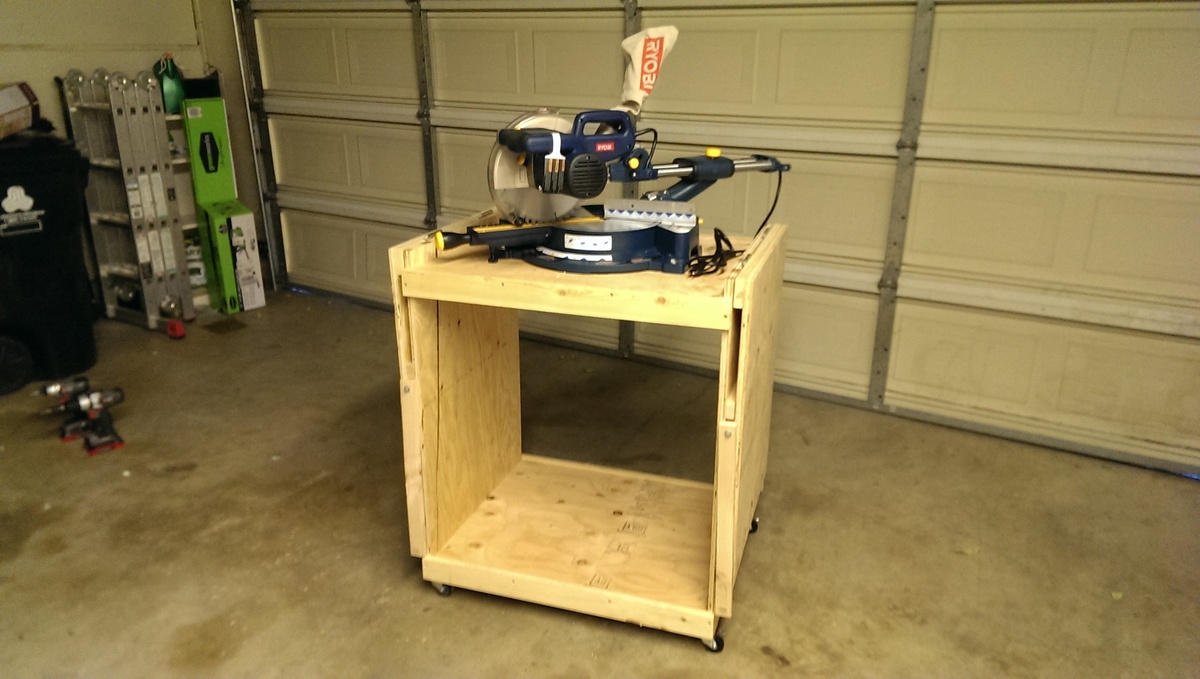
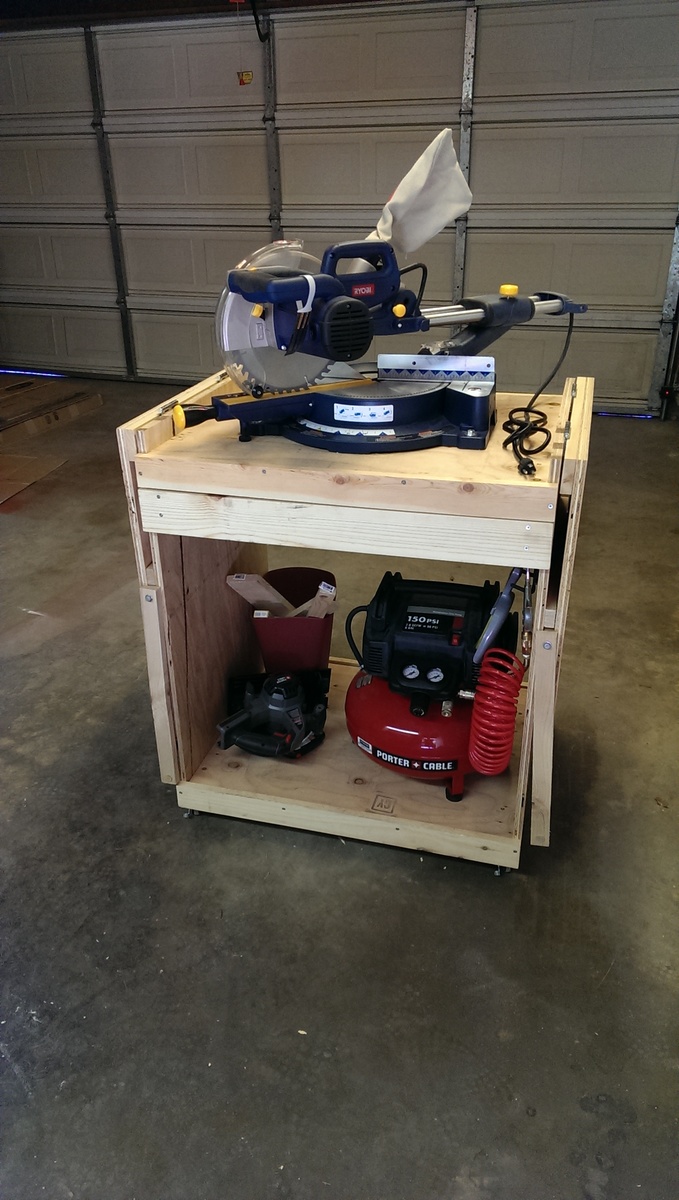
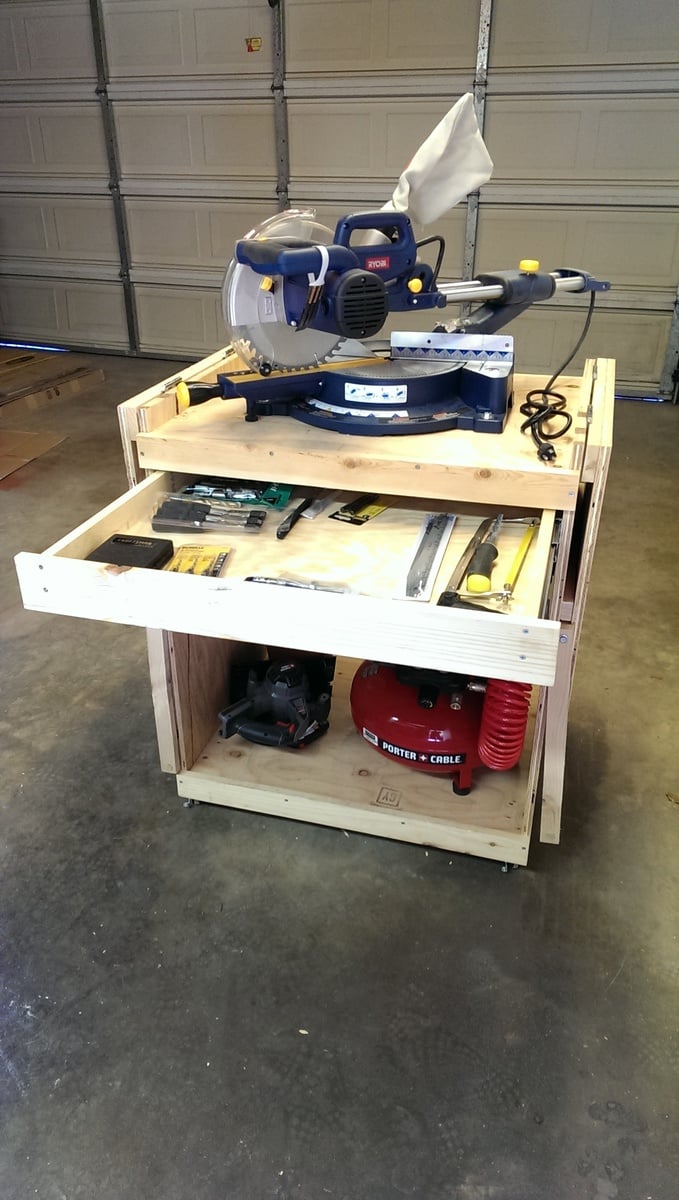
As a complete beginner in wood working (unless you count a year of woodshop over a decade ago), I decided that building a cart for the miter saw I just bought would be a great first project. So what did I do with that brand new miter saw? I left it in the box and made all of the cuts with a circular saw. Not sure what I was thinking there...

I mostly followed the excellent plan provided here but used wooden arms to prop up the wings in order to save on cost. I got the idea from the folding sling chair plan. It took quite a few screw ups and adjustments of the lower support bar before getting one of the wings level but I got it eventually.

Update 8/20/13: The miter saw has been a joy to use with the cart and the big flip up wings provide a ton of really convenient work space in addition to stabilizing 8 ft boards for cutting. I added a sliding drawer and some utility hooks for additional storage.

Built from Plan(s)
Estimated Cost
$70-80
Estimated Time Investment
Weekend Project (10-20 Hours)
Finish Used
none
Recommended Skill Level
Starter Project

Comments

davidmauer15

Thu, 08/01/2013 - 08:10

I originally just had a 2x2 and two blocks to hold up the wings on the cart. They kept falling out, so I replaced them with hinged arms, which were a pain to fit and install, but they work well. Your approach has the same advantage of hinging the support arms: the wood can't fall out and it looks way simpler to install than my system.

One hint if you try Nermell's approach: Flip the cart upside down when you fit and install the support arms. I did all kinds of complex sketches and measurements, then realized it was just faster to lean the support bracket at roughly 45 degrees, then I installed the two block (one on the side, one on the wing) to hold the bracket in place. Flip the cart over, and your wing will sit at a perfect 90 degrees to the sides of the miter saw cart.

Petite Planters for the Potager

Submitted by JoA on Mon, 08/19/2013 - 06:23

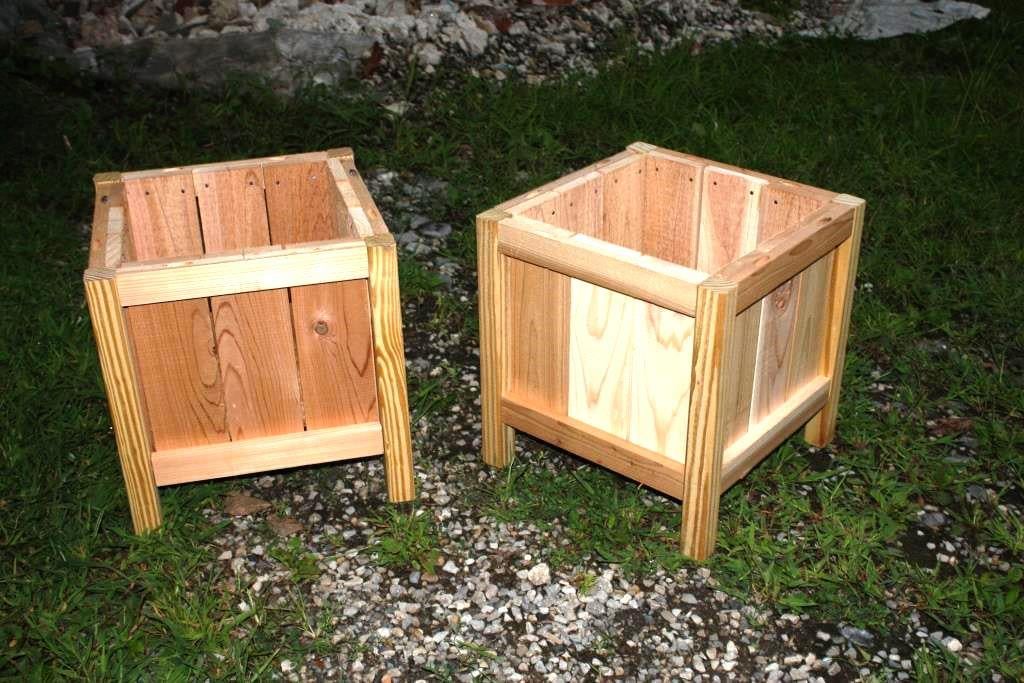
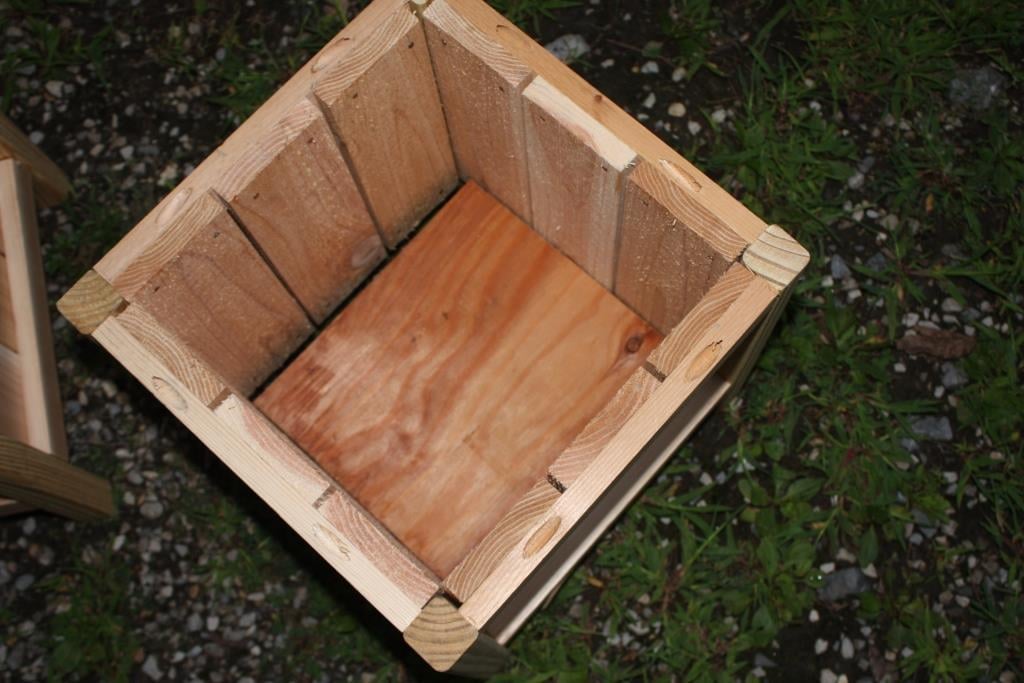
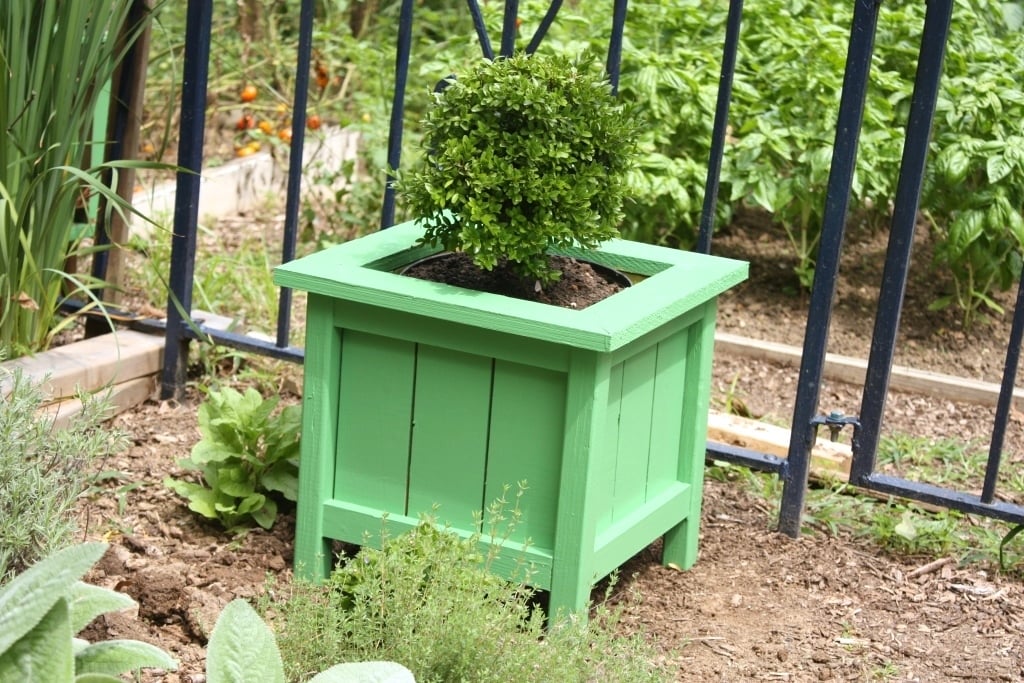
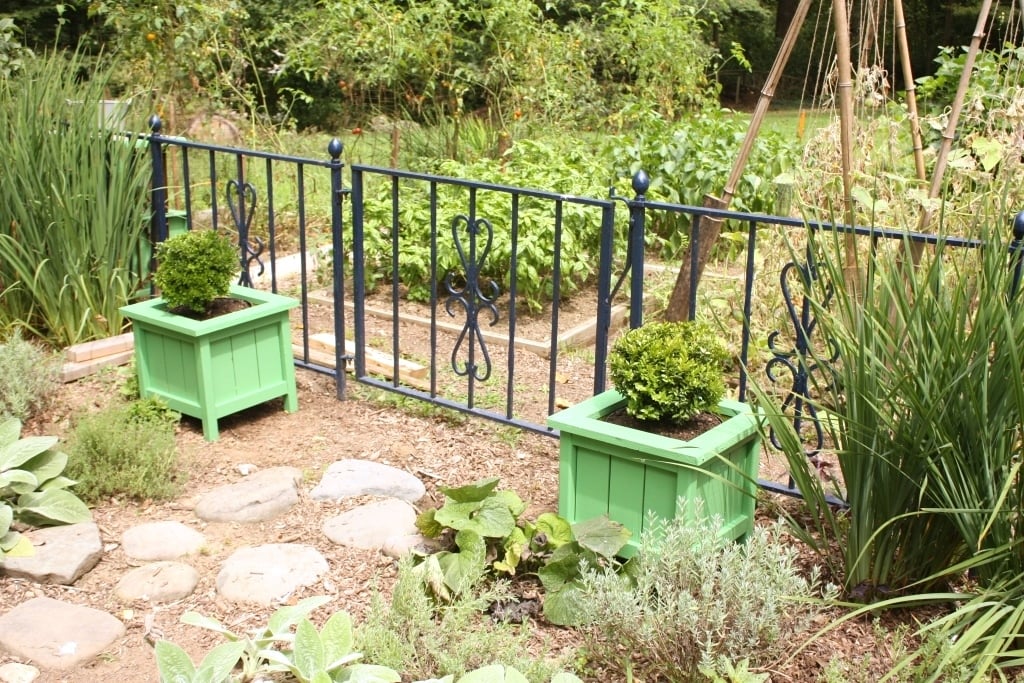
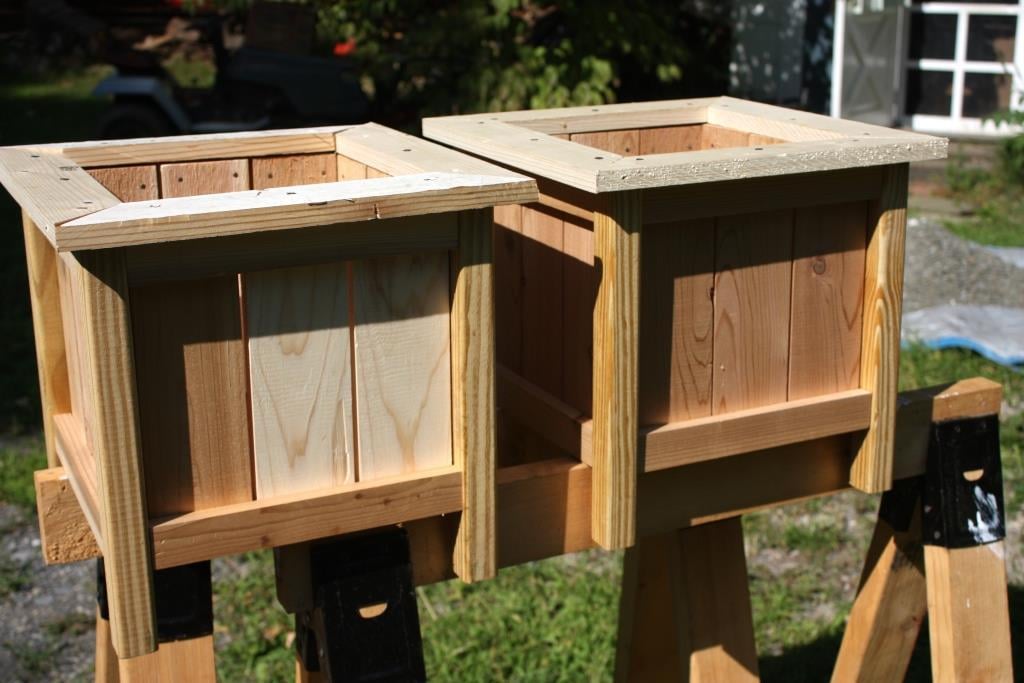
After building a large planter from Ana's plans and my salvaged fence wood I thought 2 smaller planters for the entrance to our kitchen garden would be nice. The complete instructions are on my blog, Let's Face the Music. Jo

Built from Plan(s)
Estimated Cost
$12 each
Estimated Time Investment
Day Project (6-9 Hours)
Finish Used
Benjamin Moore Exterior Semi-gloss in Bunker Hill Green over exterior primer.
Recommended Skill Level
Beginner
Seasonal And Holiday

Laundry Sorter

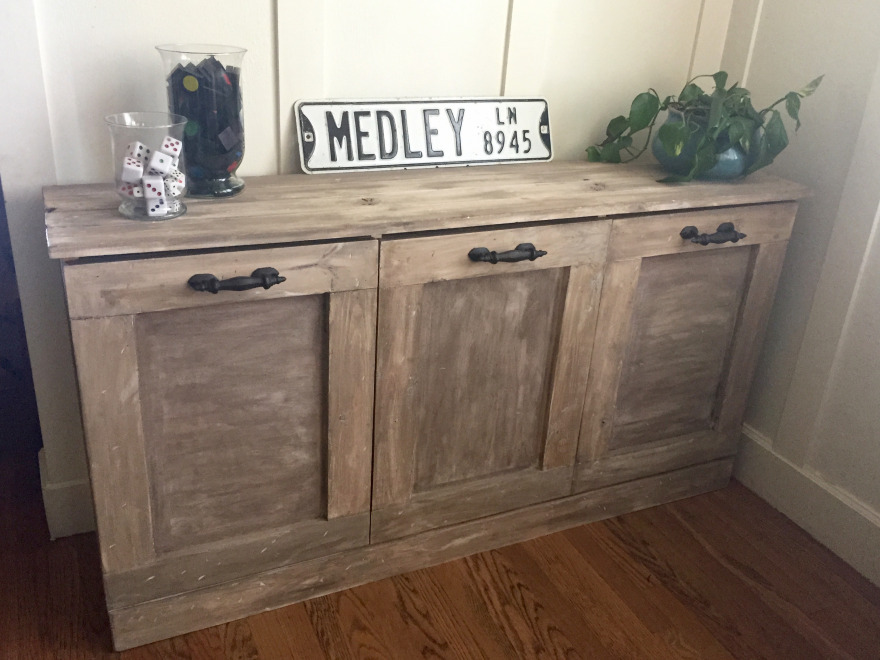
My laudry never looked so good!  I love these plans from shanty2chic and anawhite.  I spent a few days in the garage building, and now, my laundry can be hidden away in any room of my house.  


Thanks shanty2chic and anawhite for your excellent plans. 

http://www.shanty-2-chic.com/2014/08/diy-laundry-basket-dresser.html

http://www.ana-white.com/2011/04/wood-tilt-out-trash-or-recycling-cabin…

Estimated Cost
$200
Estimated Time Investment
Weekend Project (10-20 Hours)
Finish Used
Mix of paint and stain to create whitewashed look.
Recommended Skill Level
Intermediate

Mostly Cedar Vanity for the New House

Submitted by Anonymous (not verified) on Thu, 05/04/2023 - 09:49

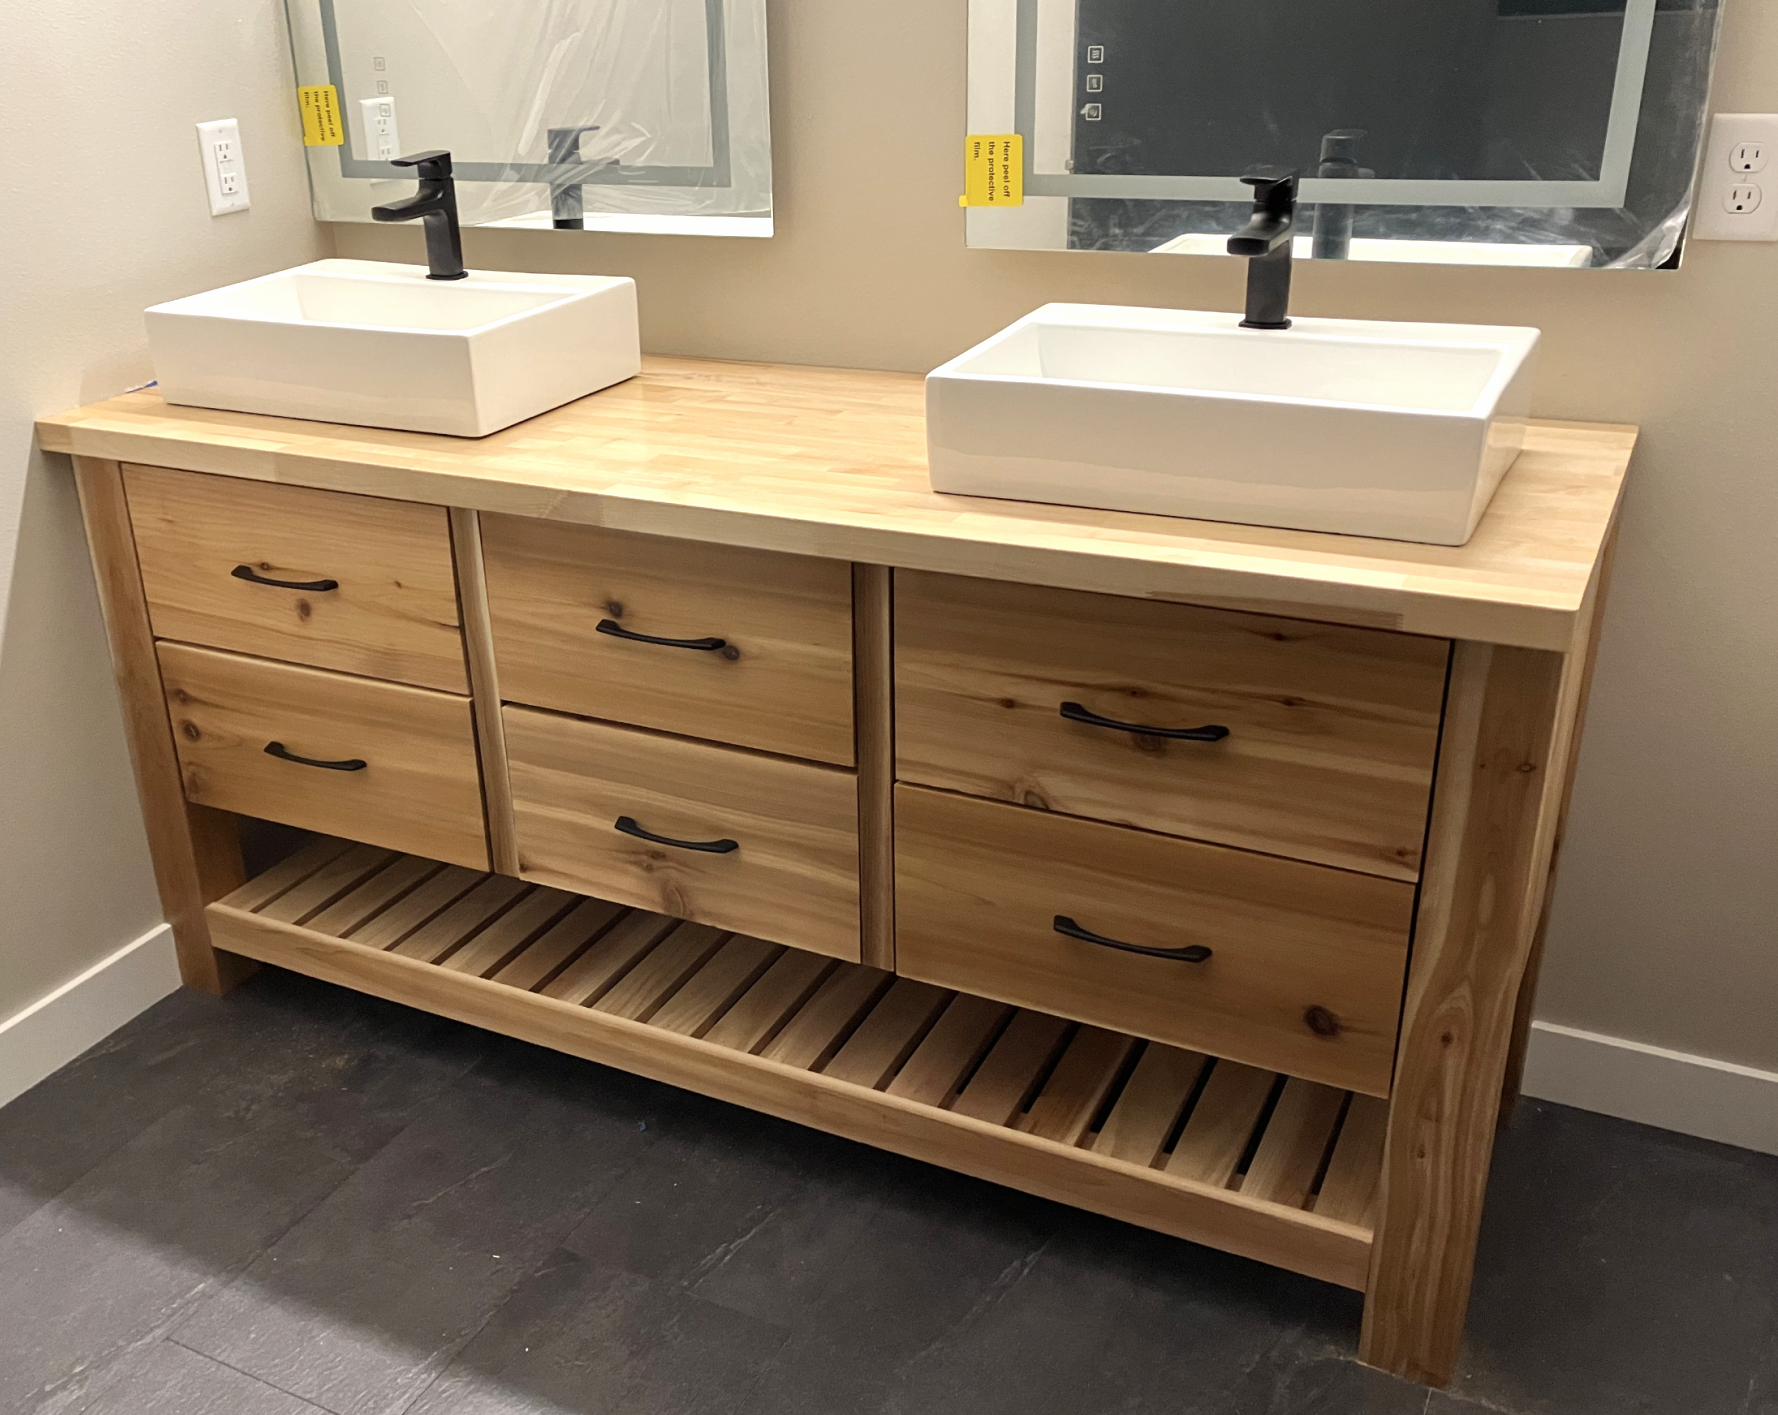
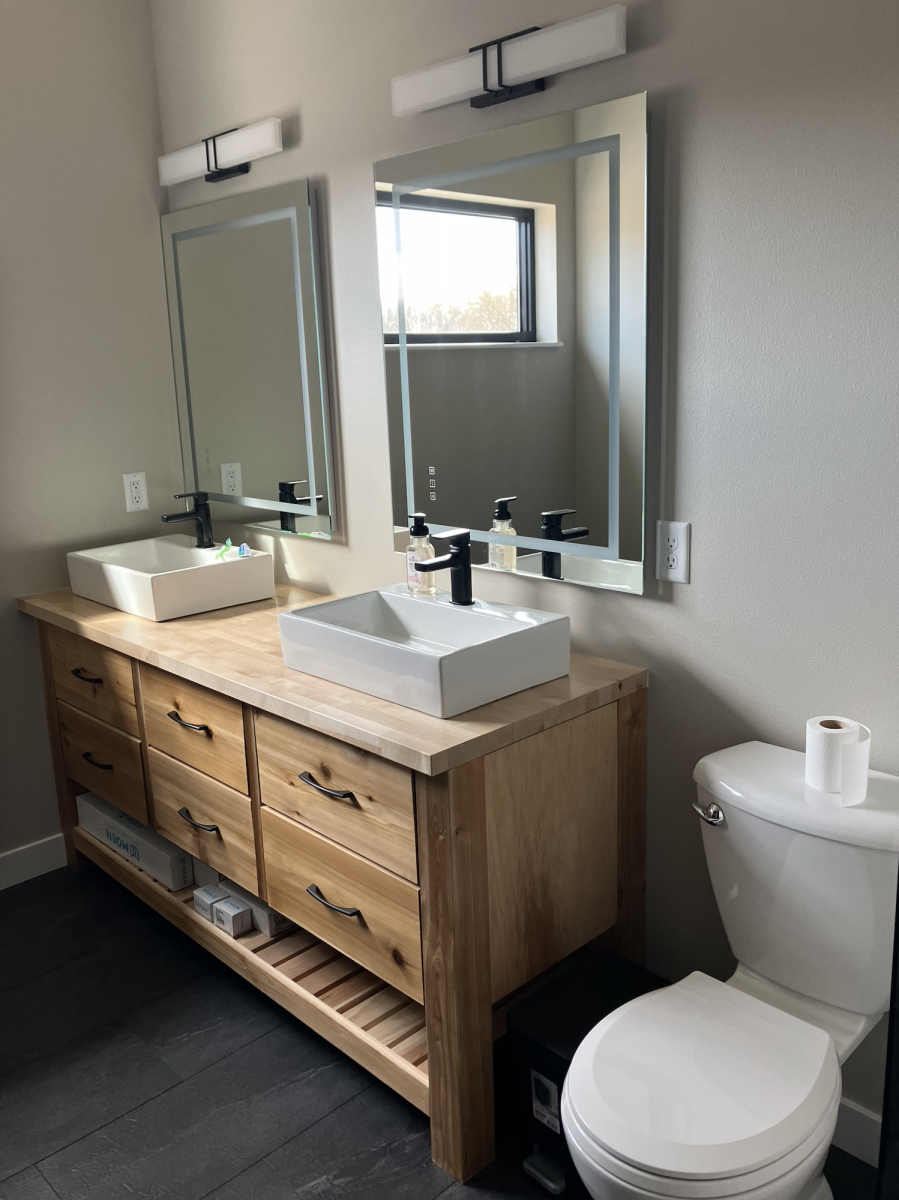
After looking at some terribly overpriced particle board vanities, I found the lovely Rustic Farmhouse Double Bath Vanity plans and decided to go for it. I think this vanity turned out much better than anything I could have bought with the same amount of money, and it will last much longer too!! Thanks Ana!!

Comments

Full size loft

Submitted by Anonymous (not verified) on Tue, 10/01/2019 - 18:46

Built a full size loft bed for my kids but wanted something safer than having them climb up and down a ladder so used the Camp Loft Bed plans to add the platform and stairs. It is much easier for the kids. Going to finish by covering the platform and stairs with carpet.

Estimated Cost
180
Estimated Time Investment
Day Project (6-9 Hours)

Comments

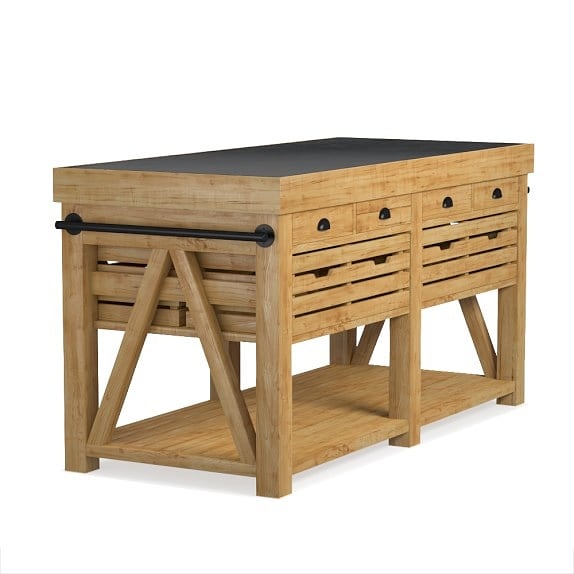
Homemade DIY Kitchen Island inspired by Williams-Sonoma "Cooper Double Kitchen Island"

Submitted by LN2014 on Mon, 04/29/2019 - 22:26

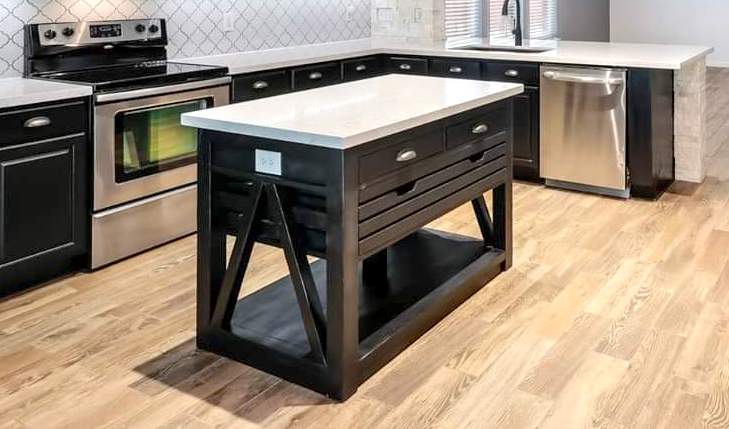
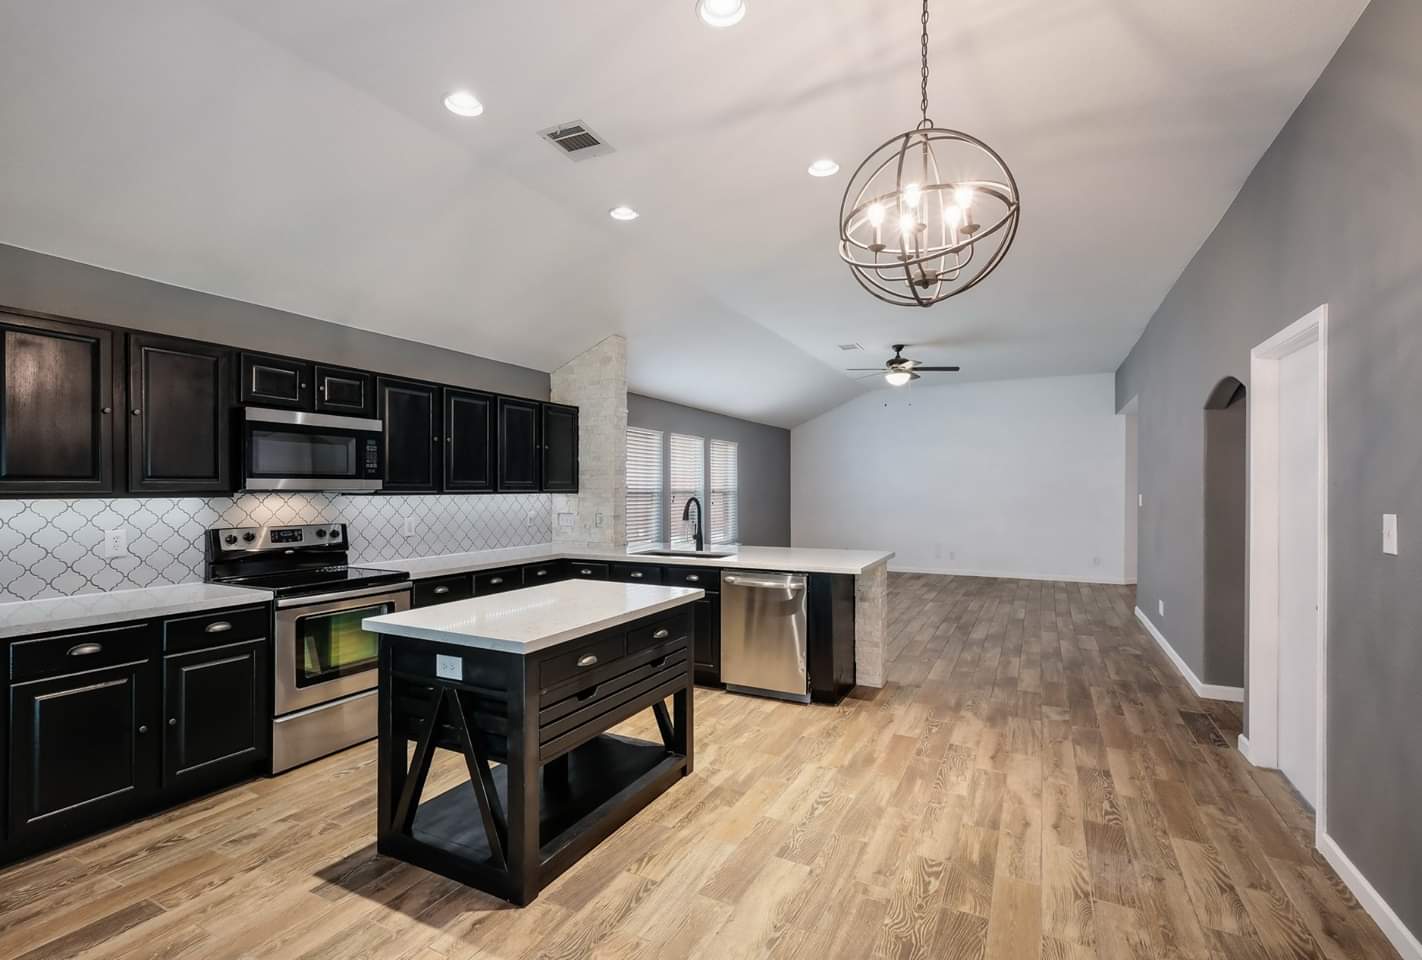
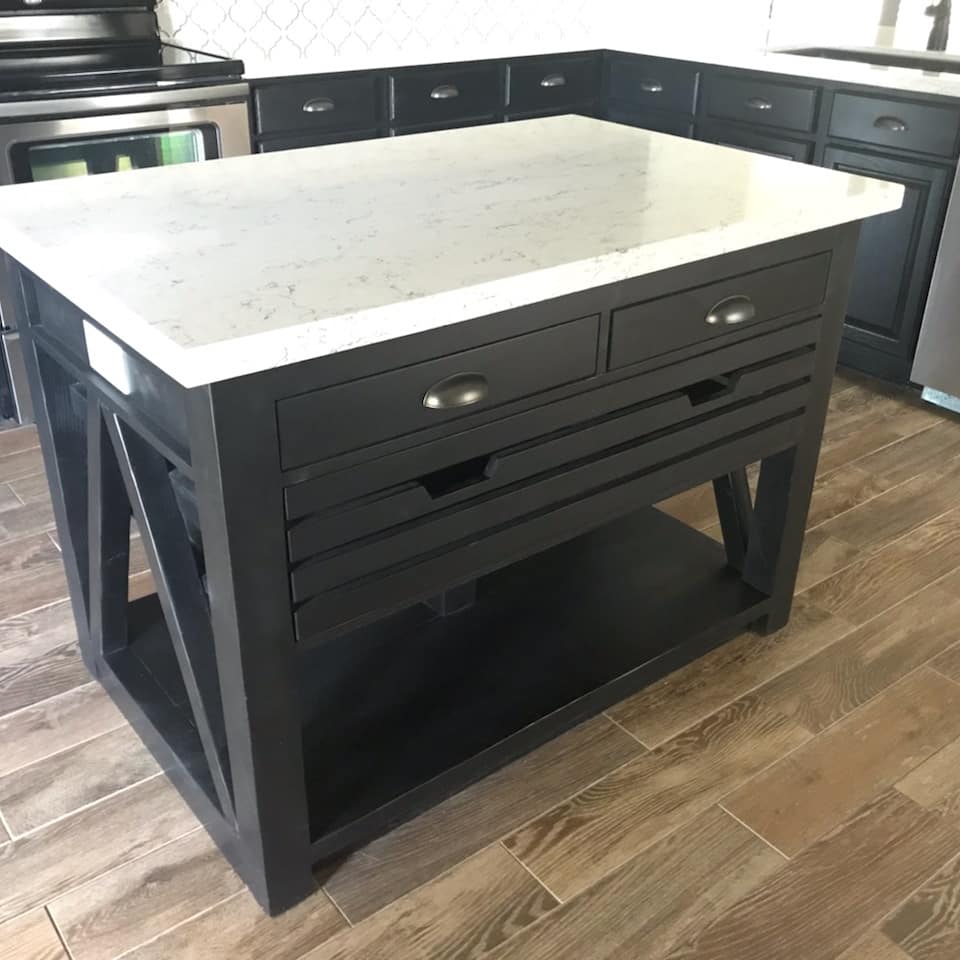
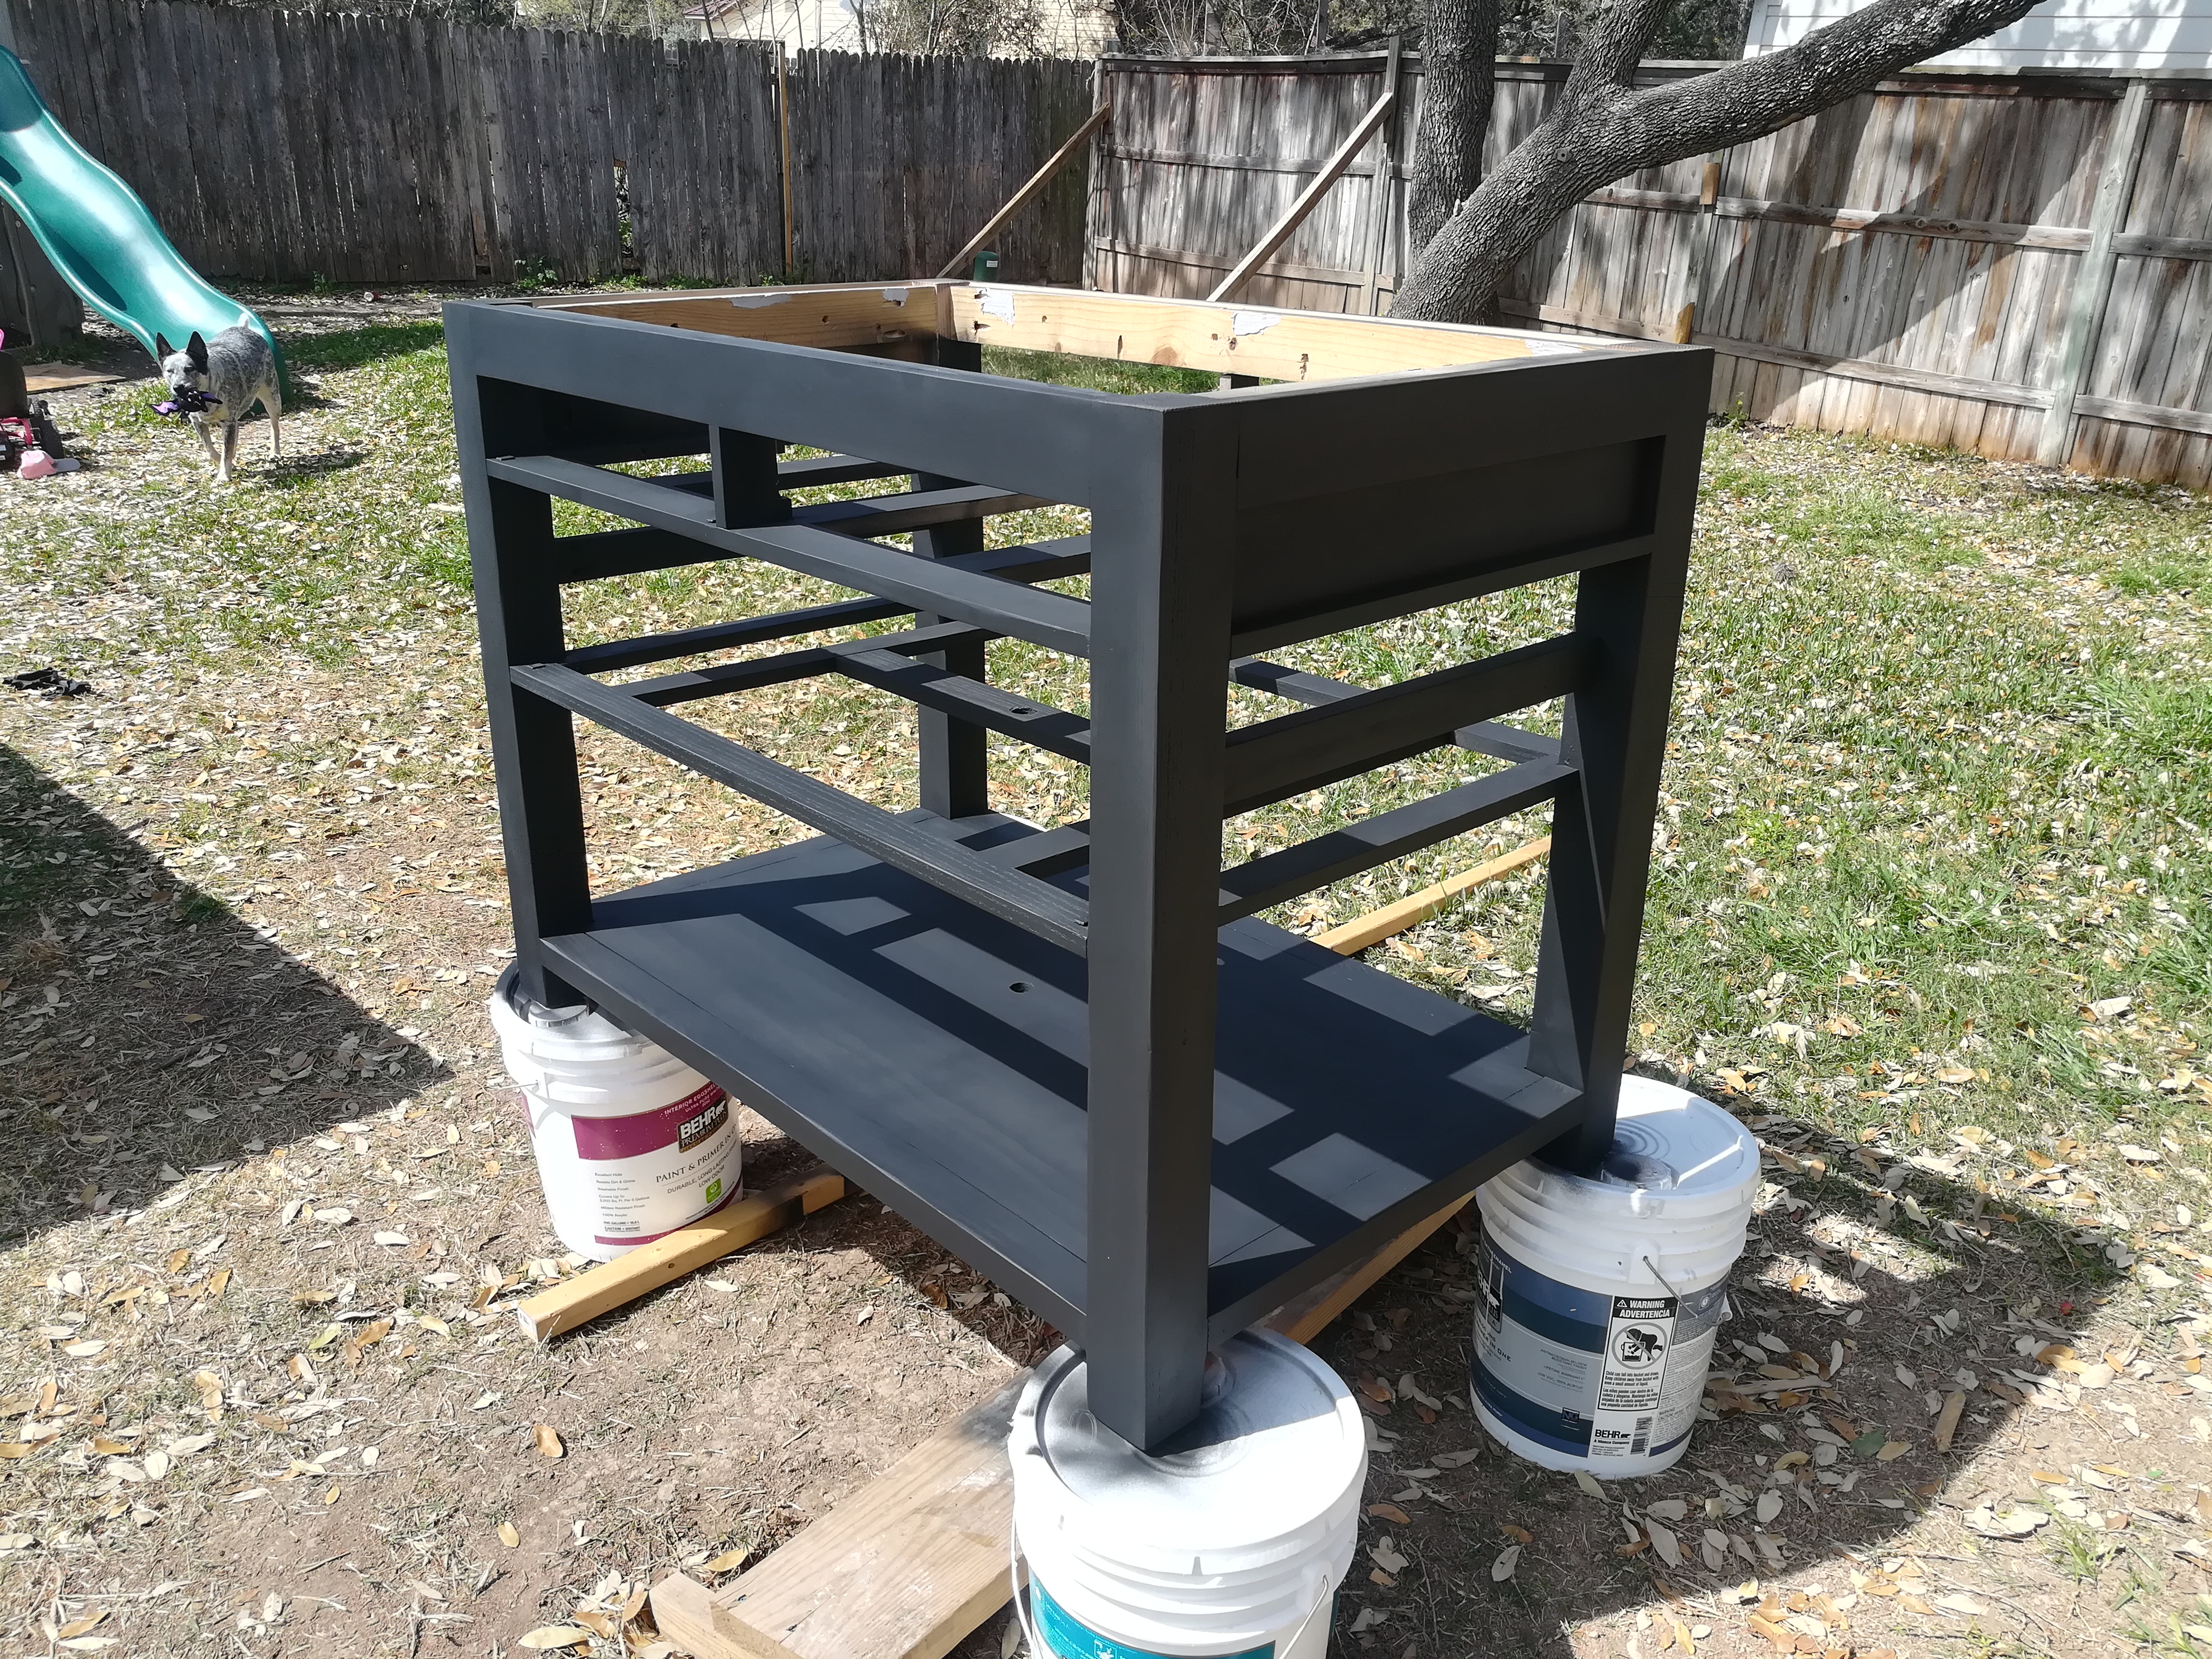
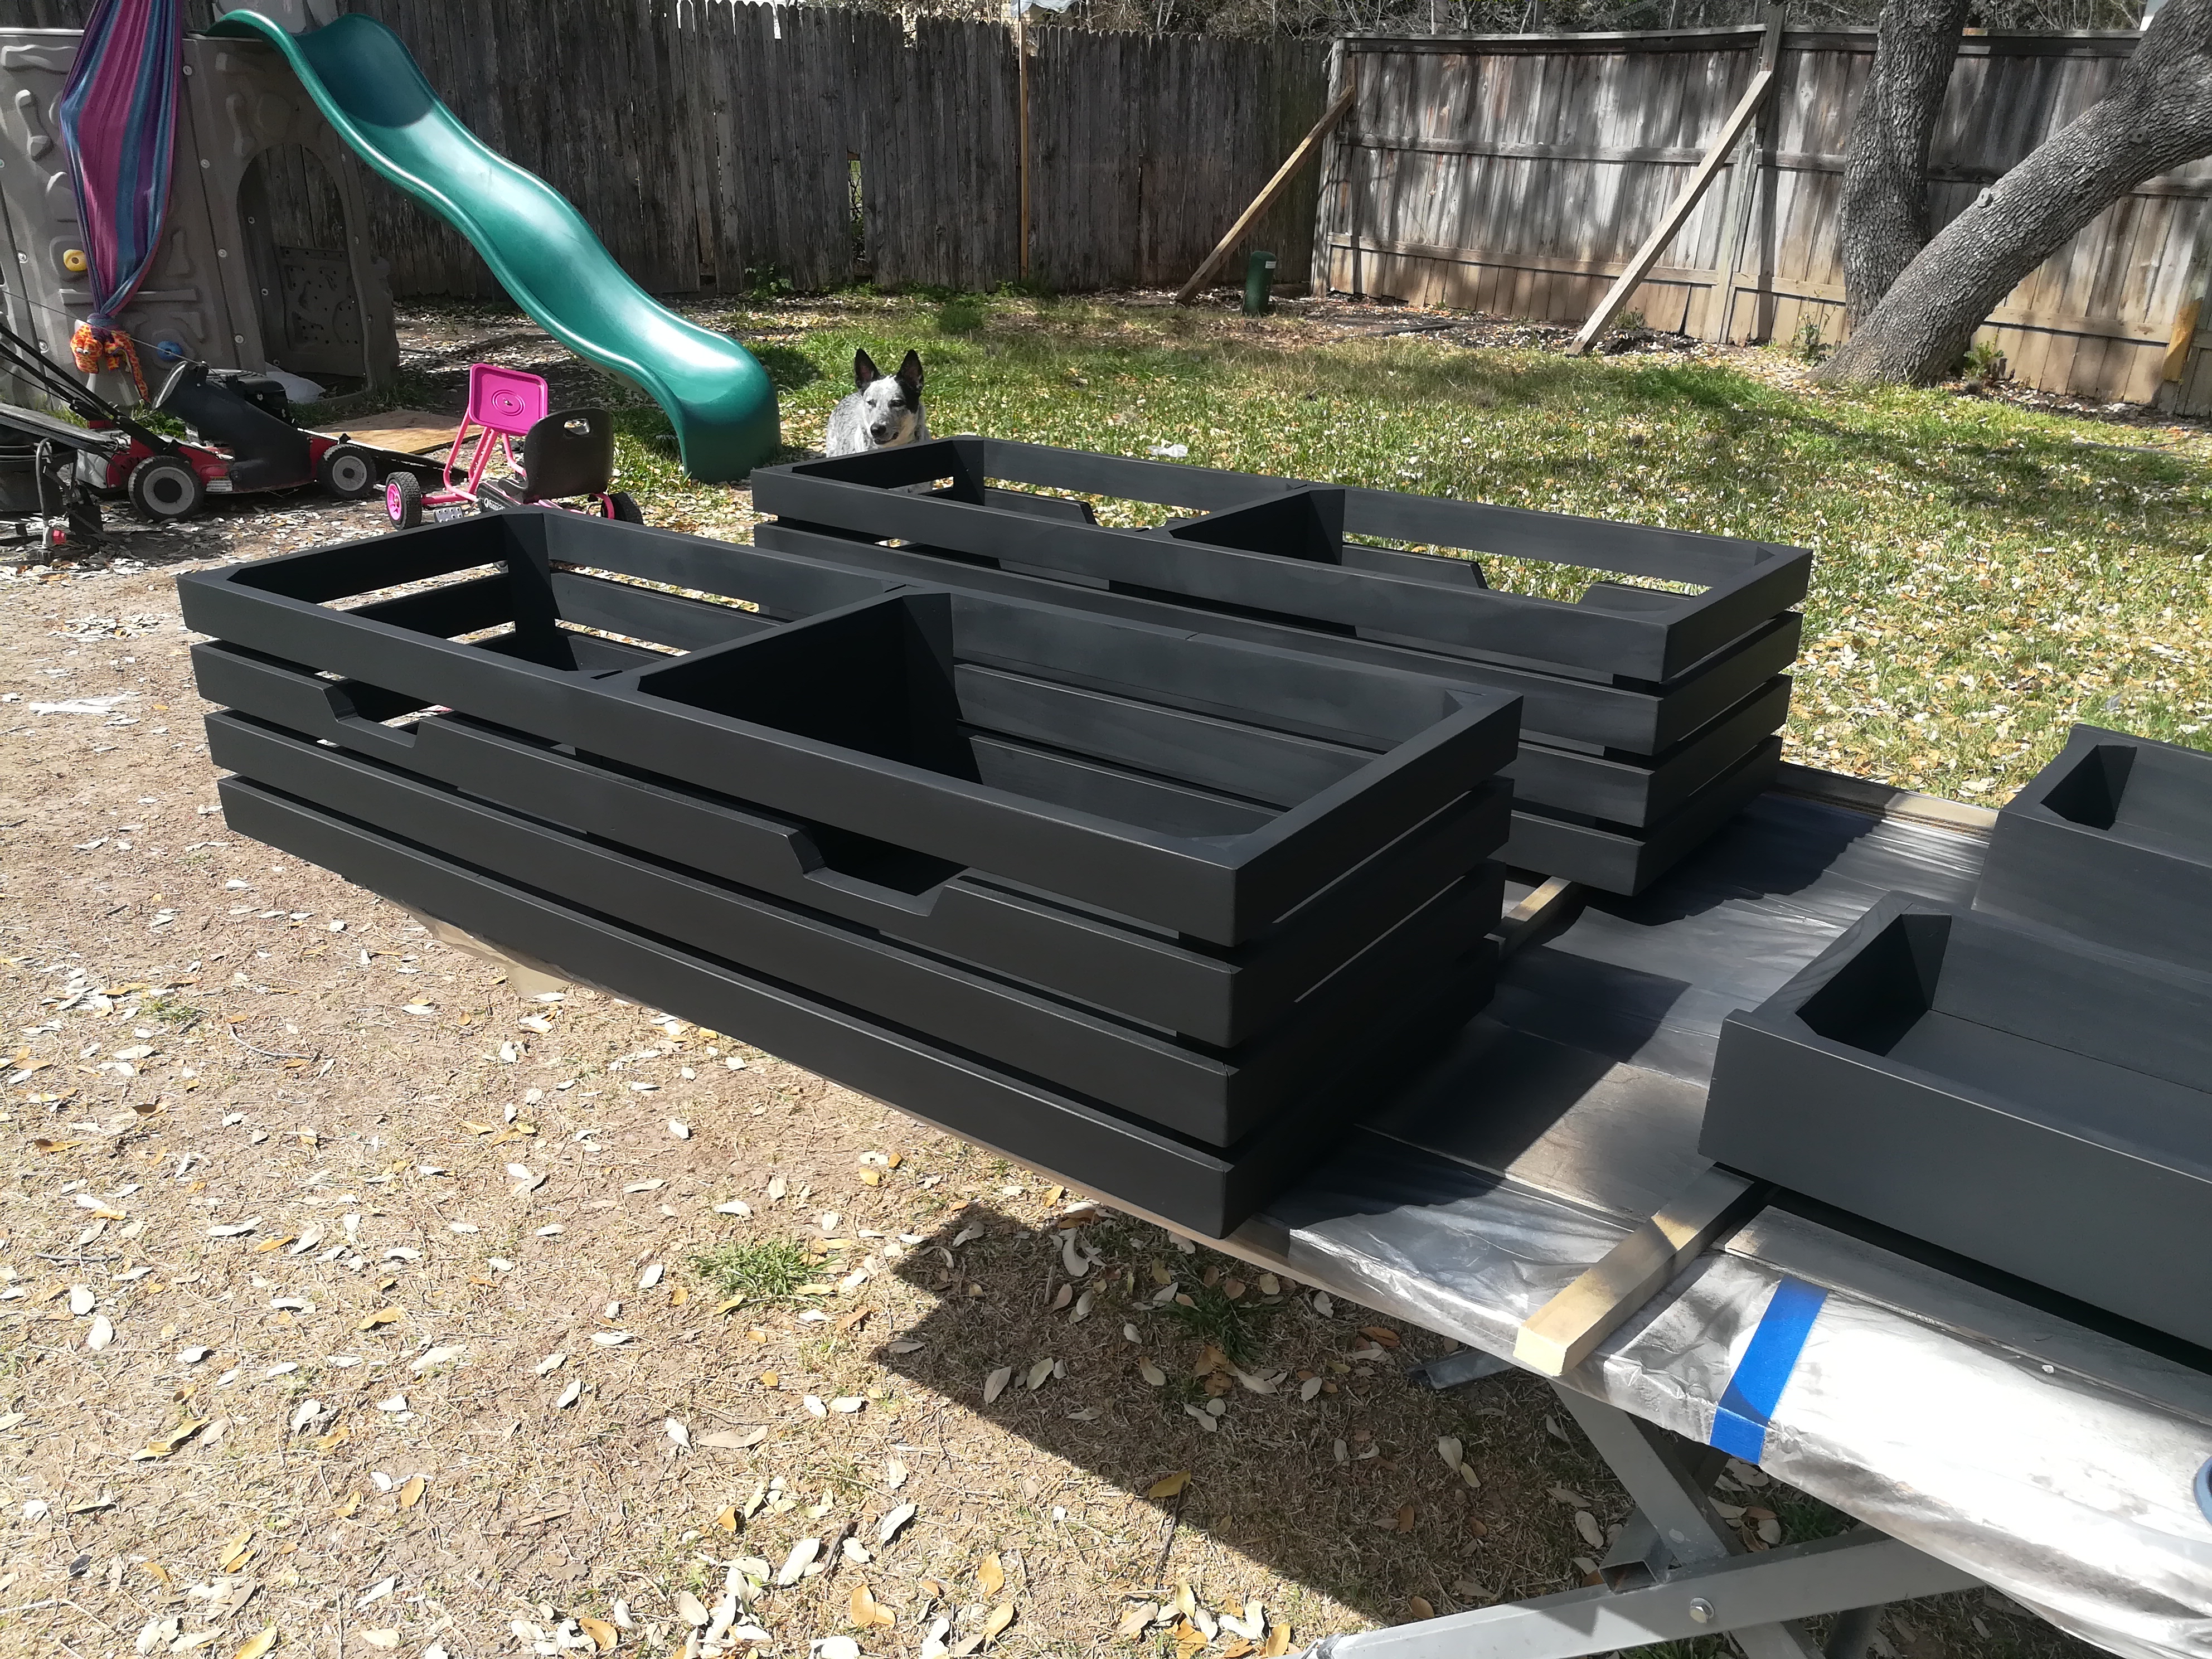
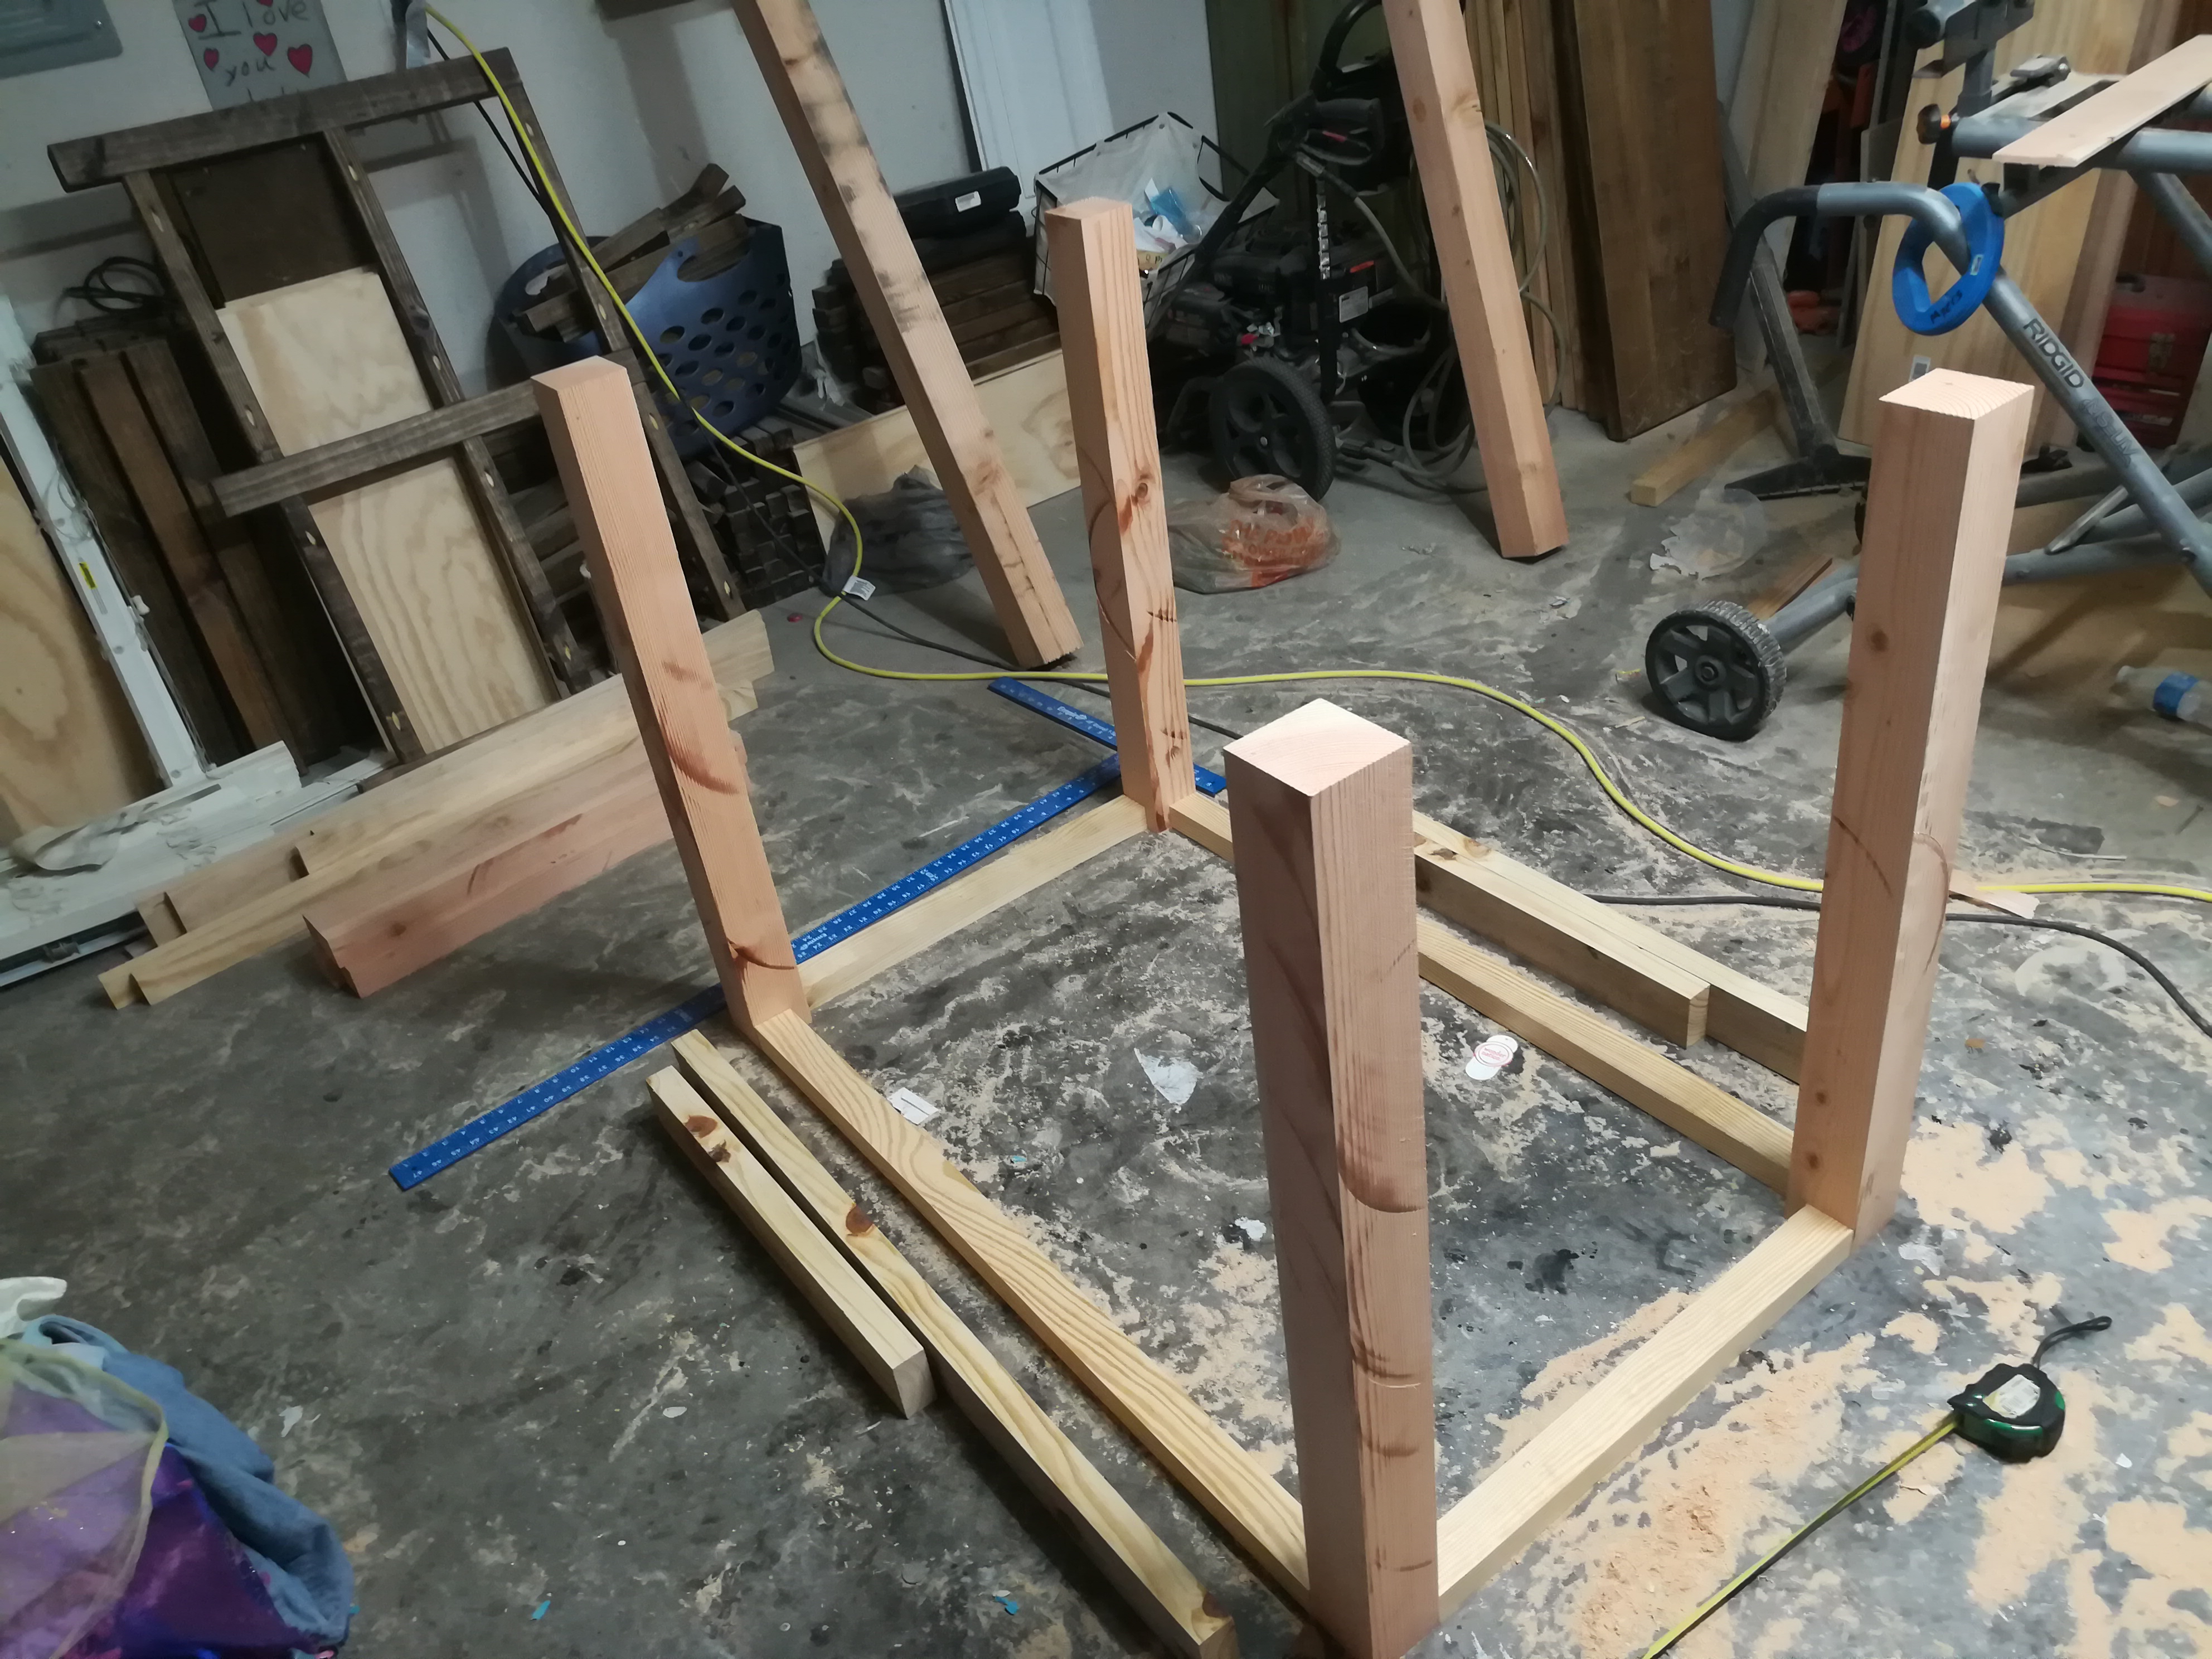
My latest furniture build, custom kitchen island inspired by Williams-Sonoma "Cooper Double Kitchen Island. The workers there weren't too happy when I was at their store taking measurements and me telling them, I'm going to build one myself. The most expensive part was the matching quartz top on it. Here is my start to finish pictures. It's a great addition to my complete home renovation project, which is now on the market for sale. If anyone wants specs and build info, to build it yourself let me know! Thank you Ana-White for inspiring in 2013 to start wood working and building, I have learned so much from your DIYs from the first x console table to now building anything my mind can imagine. https://www.zillow.com/homedetails/8707-Braun-Path-San-Antonio-TX-78254…

diy kitchen island

Built from Plan(s)
Estimated Cost
$600
Estimated Time Investment
Week Long Project (20 Hours or More)
Finish Used
Rust-Oleum Cabinet Transformations black
Recommended Skill Level
Advanced

Comments

Farmhouse Table with Extensions

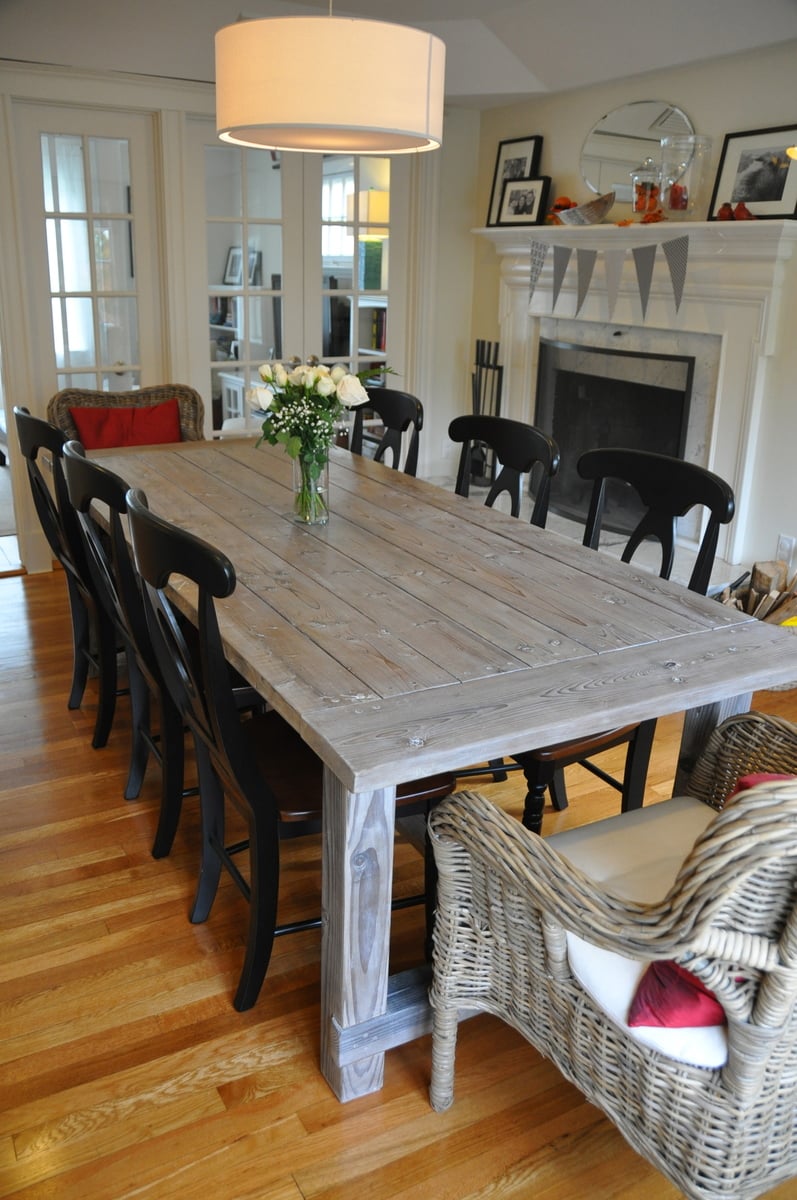
This was my first build and I learned A LOT and watched A LOT of youtube diy videos. The main take-away from this project is not to build in the freezing cold if the finished project is for inside. I finished this project in below freezing temperatures and I noticed that the wood expanded (increasing slightly the gap between the finished boards on the top) when it was brought inside.

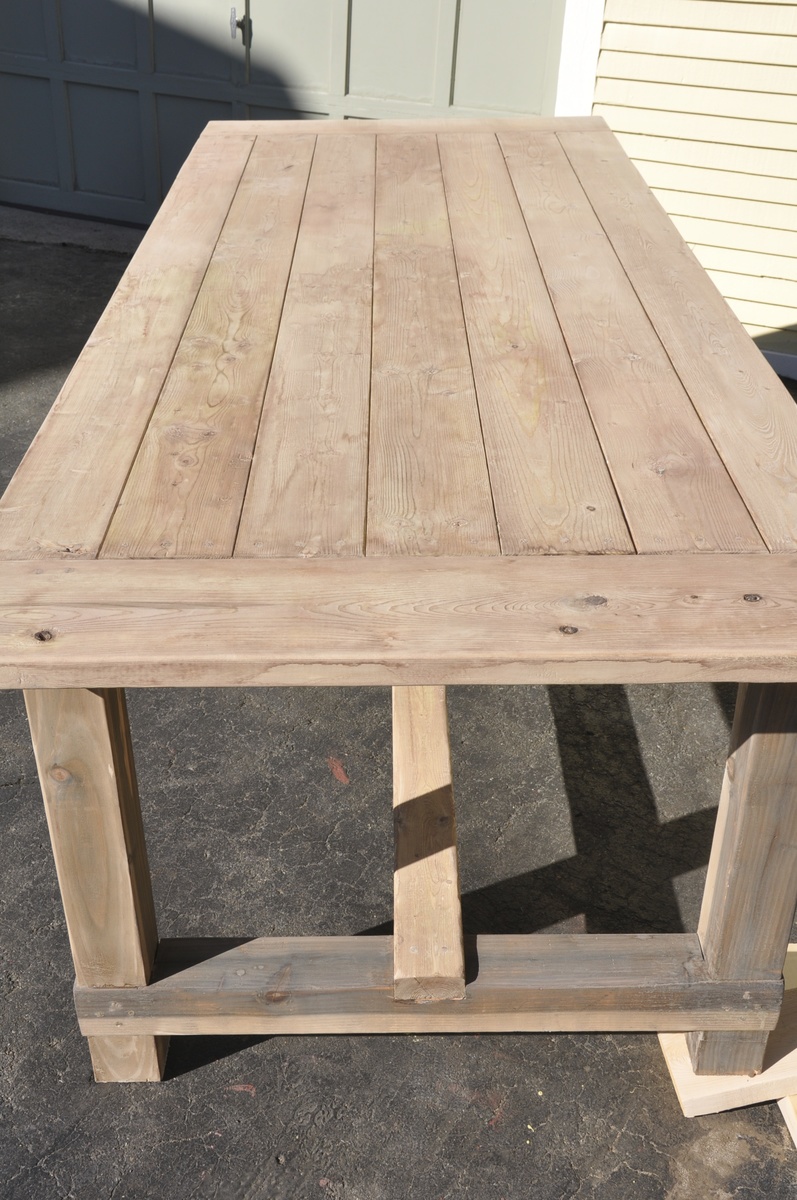
I built this from the original farmhouse table plans with no kreg jig although I did buy and use a pocket kreg jig to make the extensions. The main modifications were using 4x4s such as were used in the Country Living magazine spread that inspired this build and also making modifications to allow the addition of 15" extensions at each end of the table's bread boards.

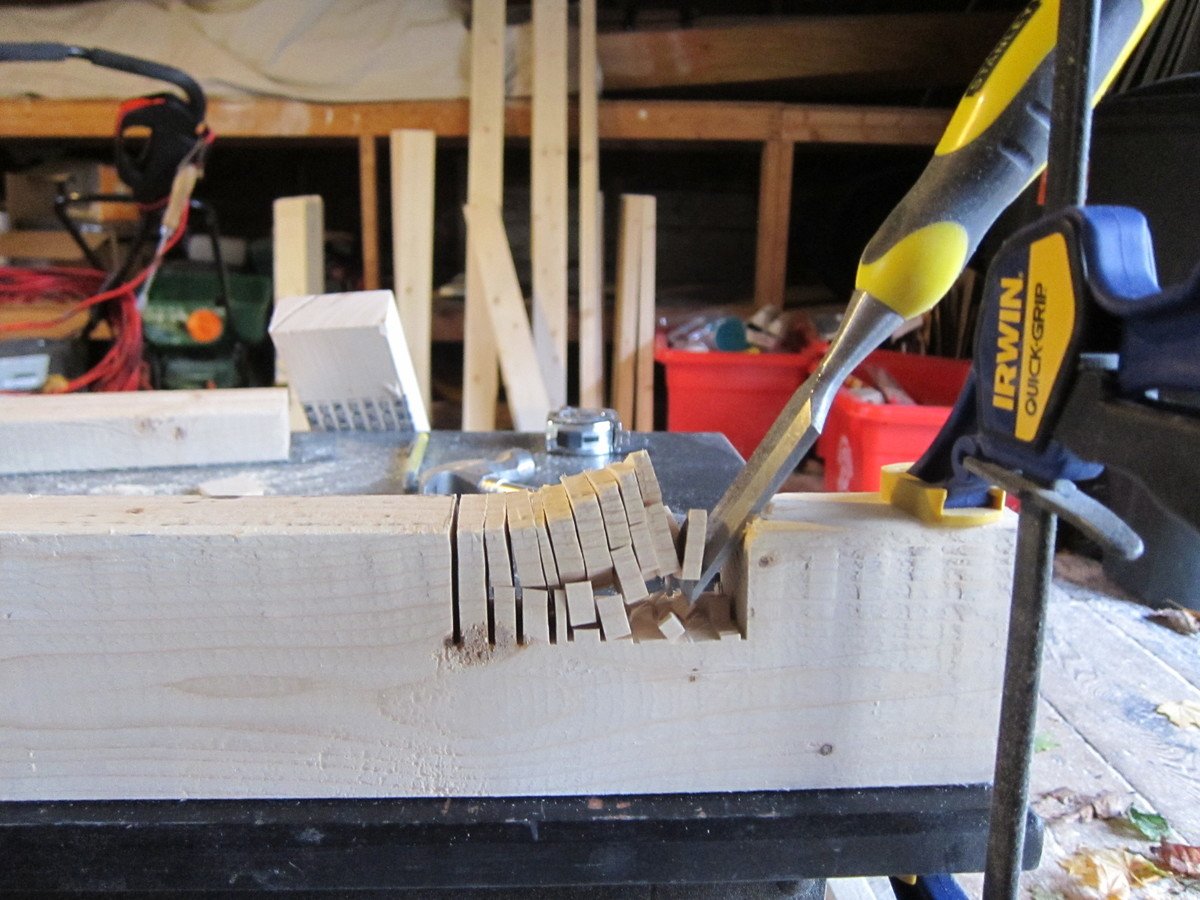
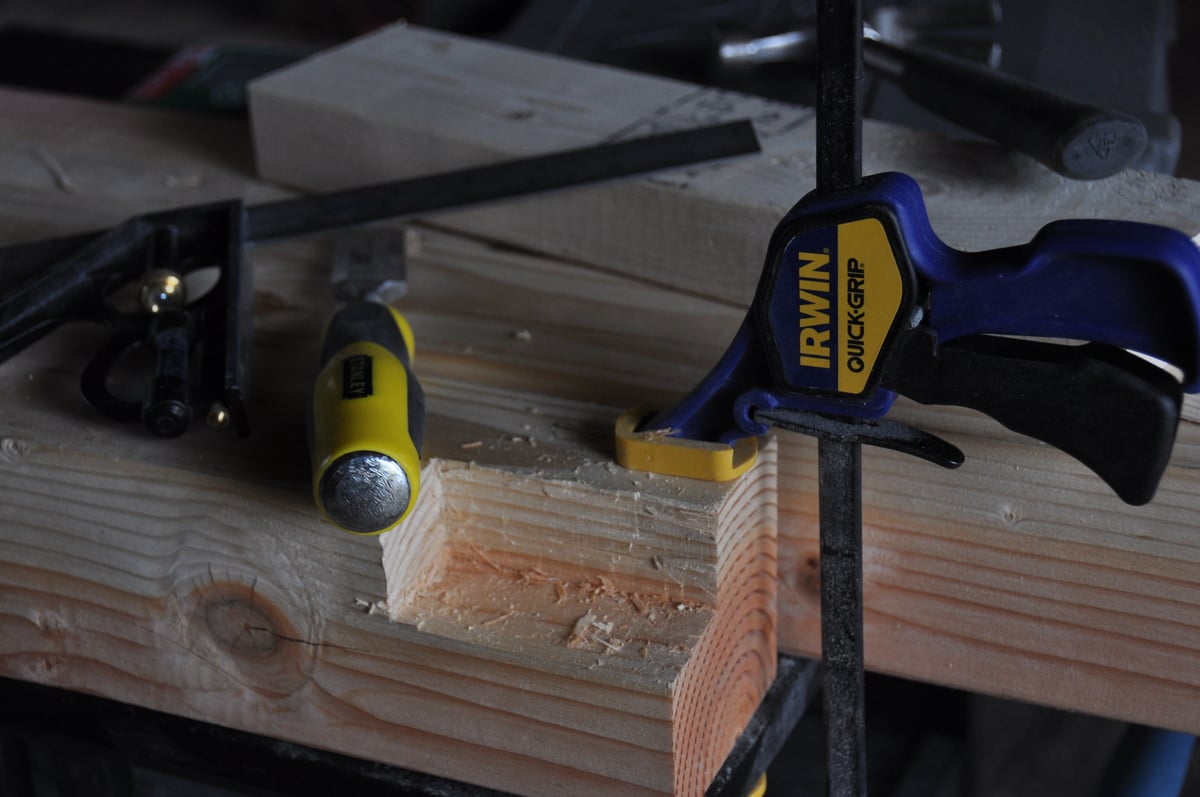
My first challenge was figuring out how to build with the 4x4 legs instead of the 2 2x4s screwed together. In order to accomplish this i had to use a chisel to create the corner lip that the table top frame would sit on. I added photos of this so I hope it will help someone. Chiseling these 4 corners (one on each post) only took an hour or two and was so worth it for the look of the 4x4s. Just measure carefully and work carefully with a sharp chisel. I actually removed half the wood by sawing off the corner at a 45 degree angle. Remember when cutting your boards for the table ends that a 4x4 has different dimensions than 2 2x4s screwed together. Compensate for this in your cuts.

Another challenge was hiding the screws on the table legs and table top. I was leaving the finish natural so didn't want to use wood fill. I accomplished this by getting a countersink bit and then buying wooden dowels the same diameter. For these screw holes, after finishing screwing, I put a dab of wood glue in the countersink hole, inserted the dowel as far as it would go, used a fine hand saw to cut off the dowel flush with the table and then used a hammer to make sure the dowel was in tight and flush.

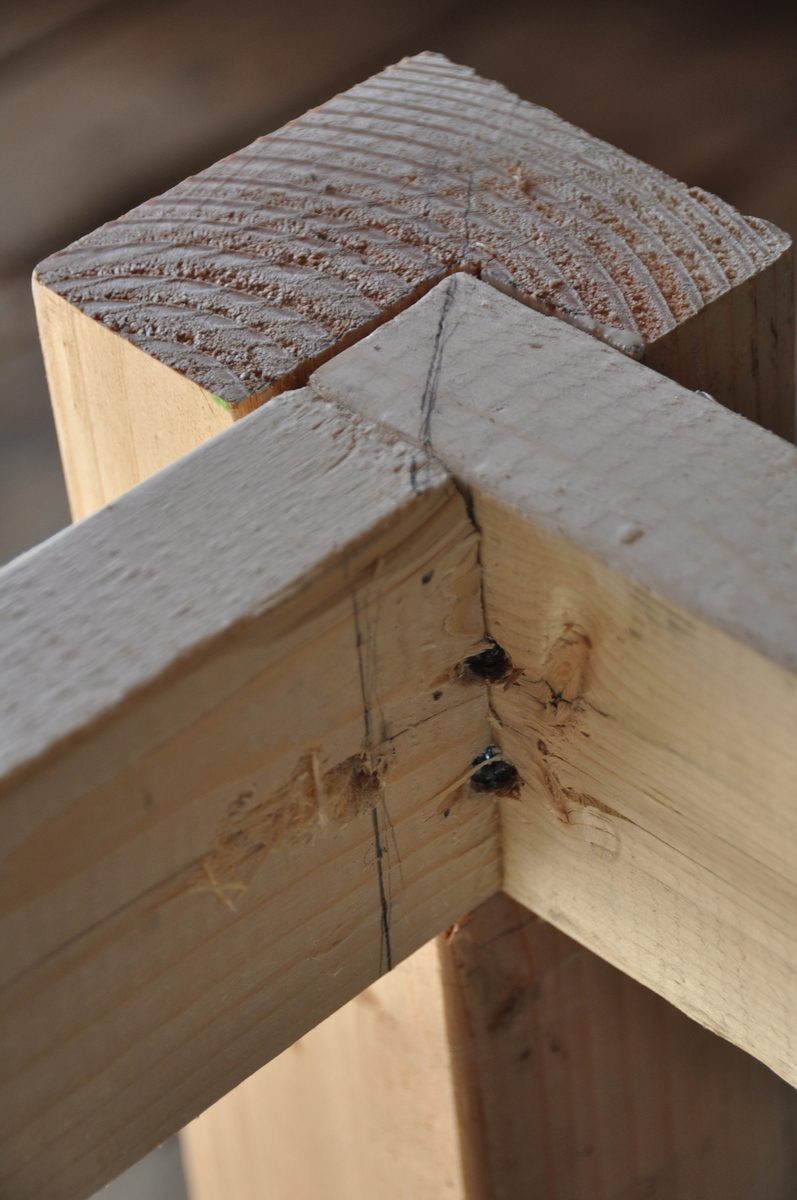
I had trouble figuring out how to attach the table top frame to the table legs with the long screws from the plans so I included a picture of this step. Its really easy but I was not able to use three screws as the plan calls for. I used two instead and it has been very solid. I used the long screws as proscribed.

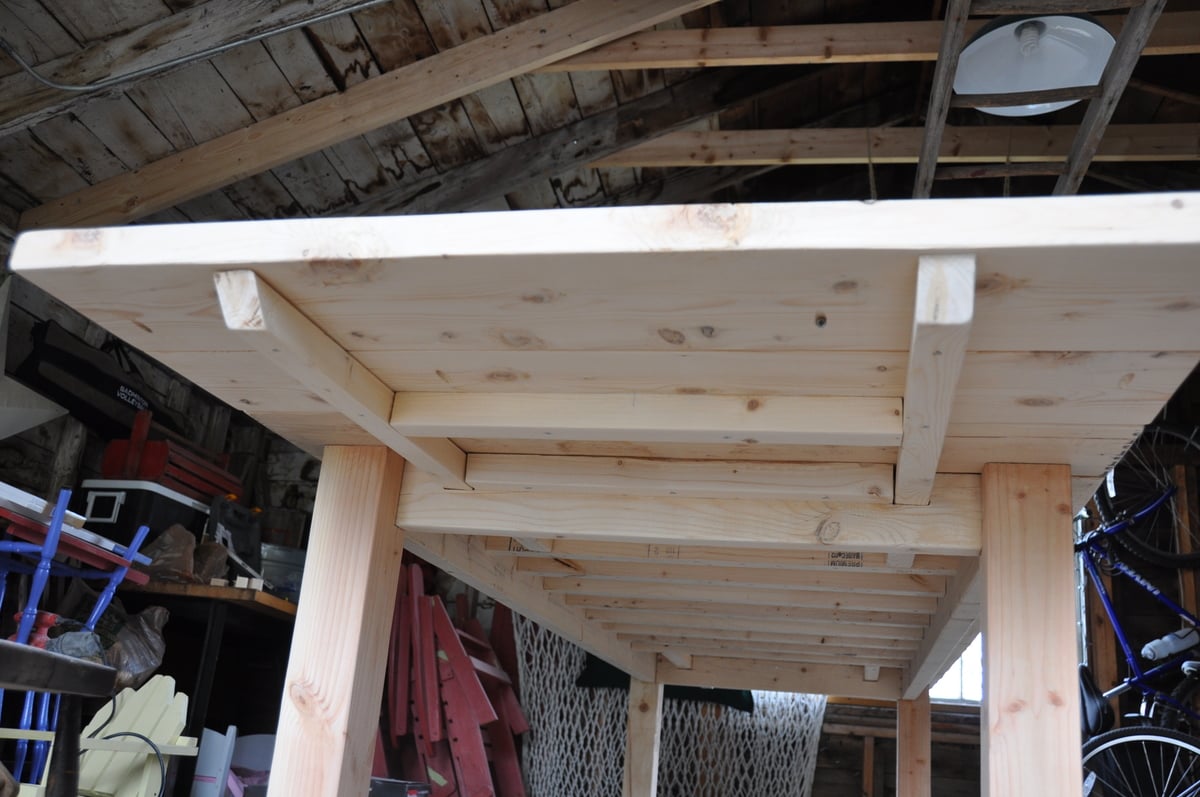
Finally, I wanted to build extensions (2 2x8 boards kreg jigged together) so I could increase seating up to a max. of 12 persons, so I needed to cut out 2x2 gaps on the table ends. I also included a picture of these in place. To make room for the 2 2x2s that extend under the bread boards and table top to brace the extensions, I left out one of the 2x2 cross beams at each end of the underside of the table (the boards that the table top boards screw into).

I hope this is helpful to you!
Estimated Cost
$250
Estimated Time Investment
Week Long Project (20 Hours or More)
Finish Used
Vinegar and Steel Wool Solution (soak steel wool for 24 hours in vinegar and be sure to test on a sample) to "age" the wood. Tung oil over this sealed the stain/wood. over this I applied a wax finish. First I used Briwax Liming Wax to enhance the gray finish and leave a slight white wash patina. This finish was enhanced because I had steel brushed with the grain to remove some soft wood so the liming wax would enhance the grain. I finished the project with clear briwax. We have been using this as our everyday table since February and there are no stains or problems with this finish.
Recommended Skill Level
Starter Project

Comments

dyemond47

Mon, 02/10/2014 - 11:55

Great job on the table! I love...I had visions of this table before I saw it. I wanted to use the 4x4's for the legs as well, the same finish. I am concerned now about the 4x4's because I am an amateur and I think that may throw too many wrenches into my plan. I started with the bench, finished in 3 hours I have patted myself on the back. Plotting on a Kreg jig right now.
epweigel92

Sun, 07/24/2016 - 09:57

Love the look of this table! Just to make sure I'm following correctly, the extensions are ones you can add and remove, not fixed? Do you have a pic of how they slide in or out?

Laundry Basket Shelf

Submitted by Anonymous (not verified) on Wed, 09/13/2023 - 09:35

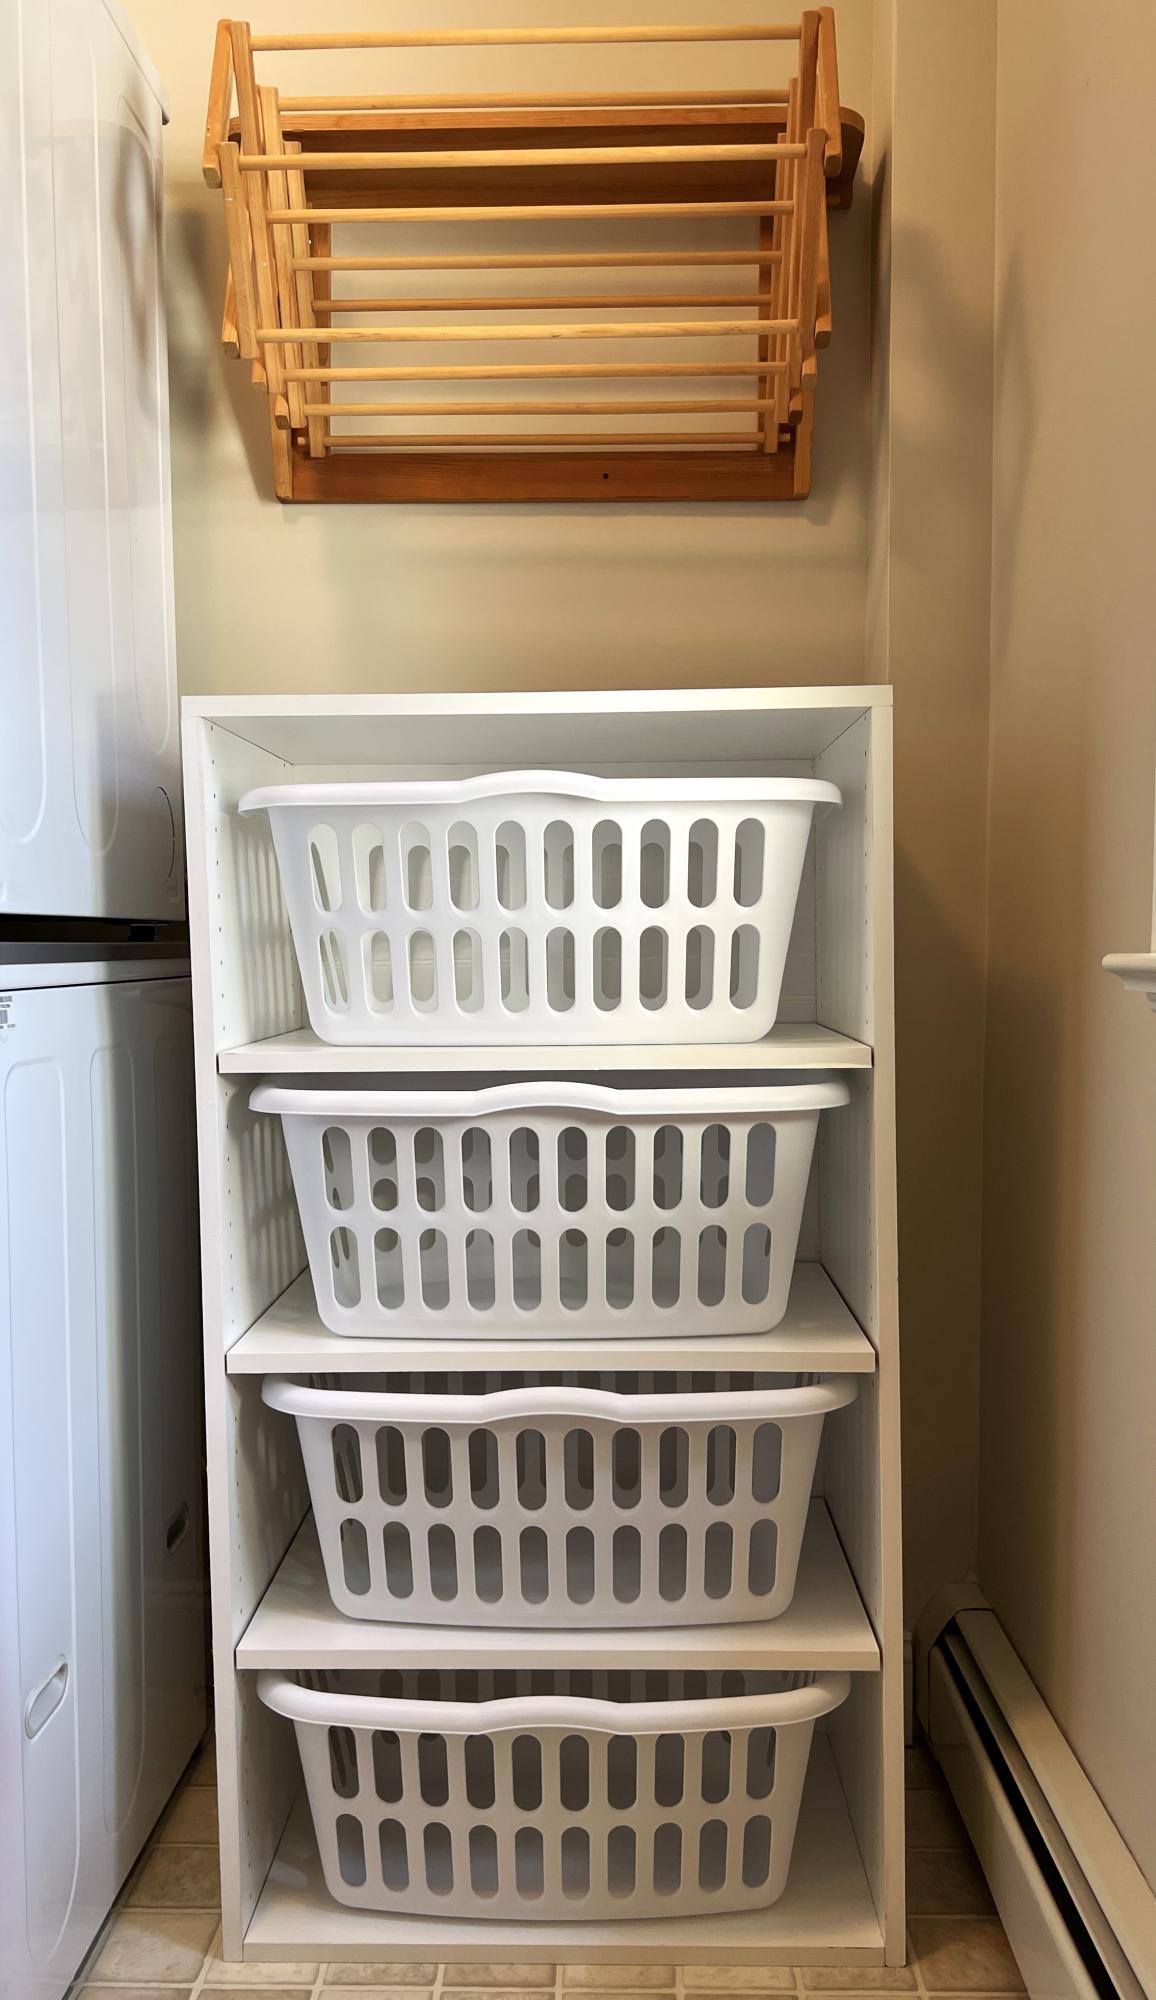
I didn’t want to have to paint or cut the metal angles - plus I wanted 4 basket tall so I used pre-drilled melamine for the sides making the unit 48” tall. Then cut top and bottom same as plans and bought 5mm L shelf pegs and had shelves cut 24 1/4”. Used white wainscot panel for back. Very easy - especially since I had big box store make all my cuts! Just have to make sure you have peg holes lined up at bottom or you won’t be level.

Deb D.

Built from Plan(s)

Comments

Rustic X Table and Chairs

Submitted by becca9872 on Sun, 08/19/2012 - 19:26

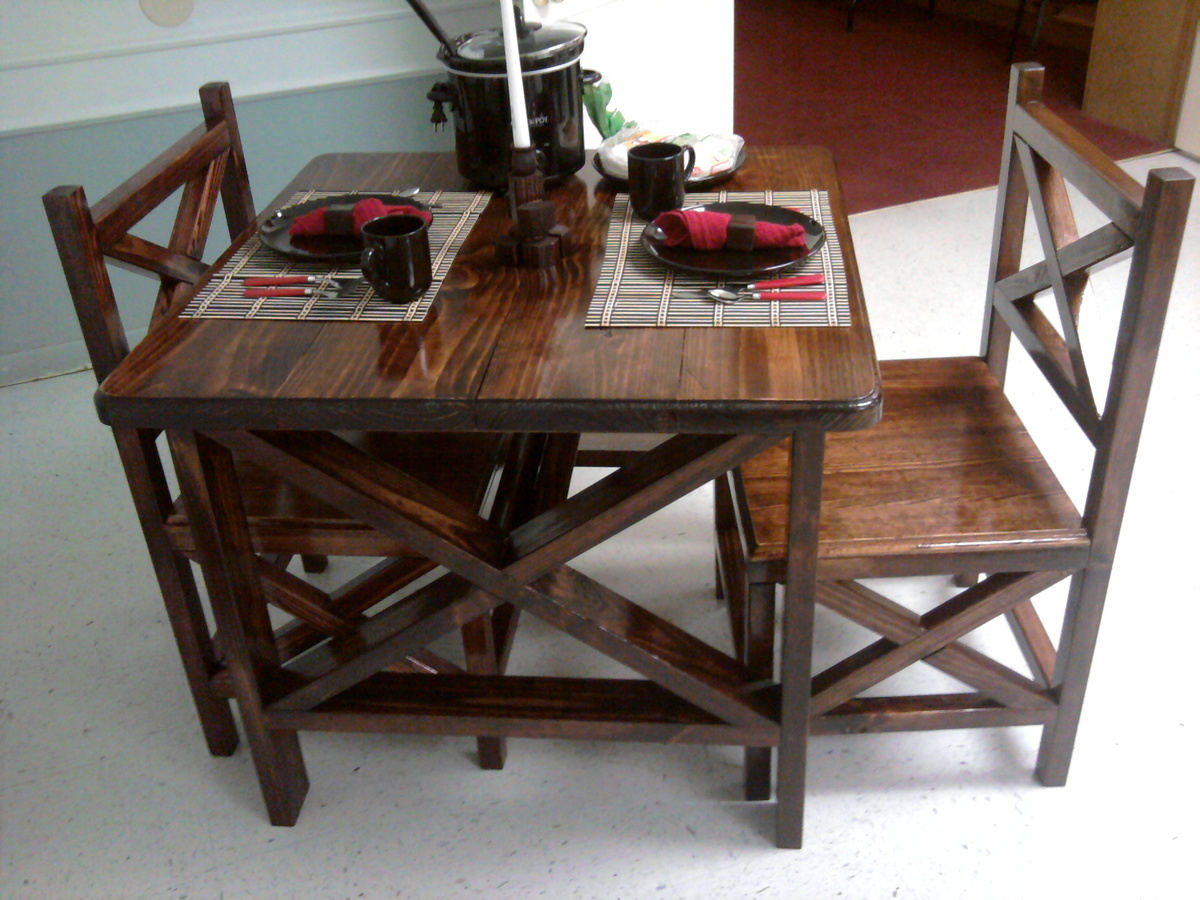
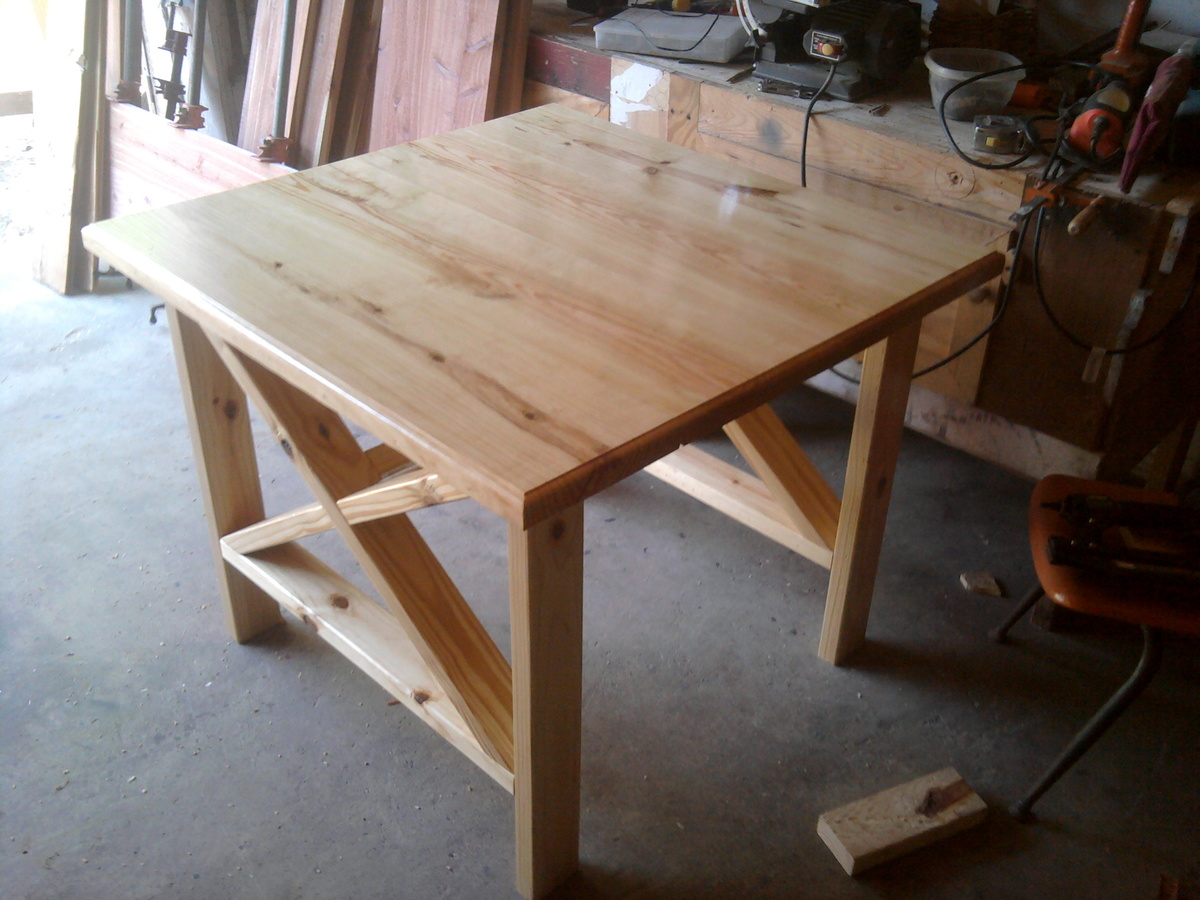
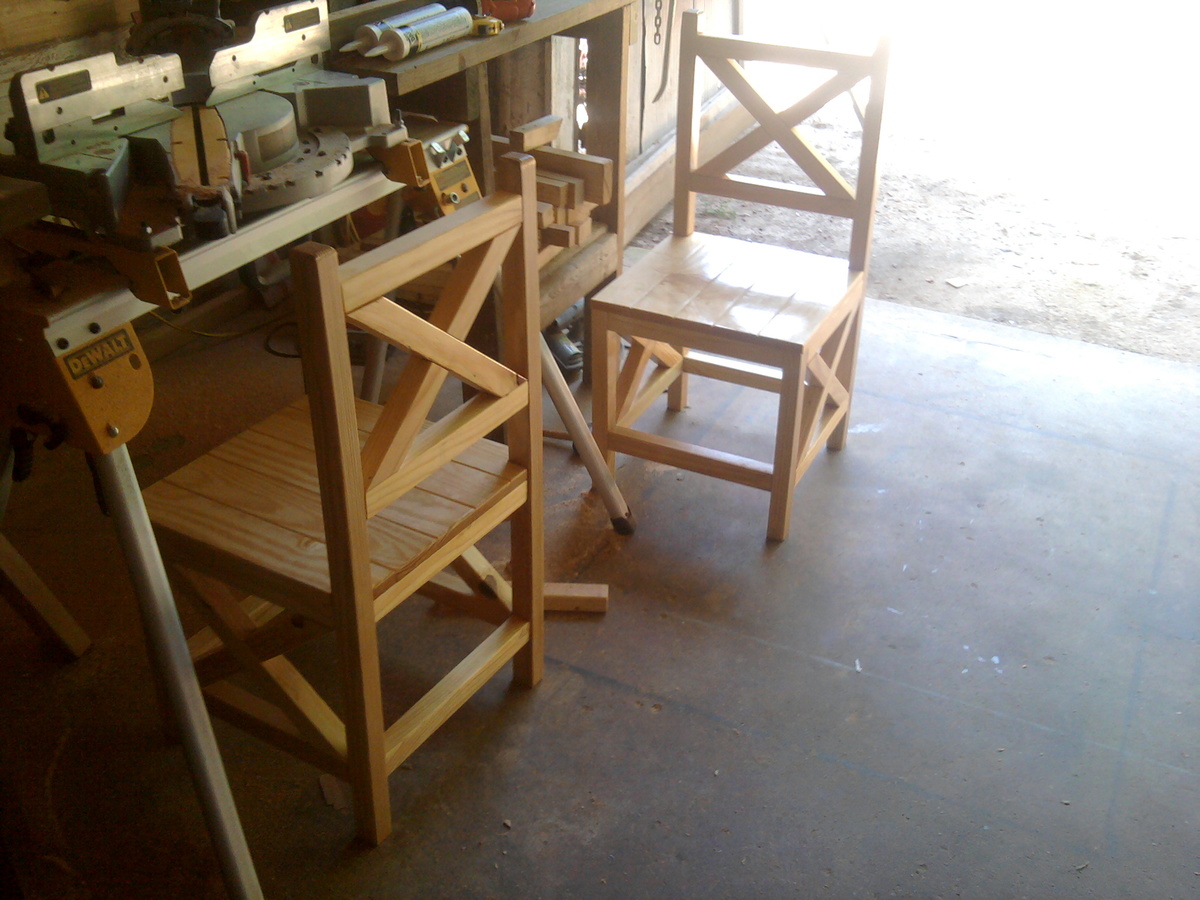
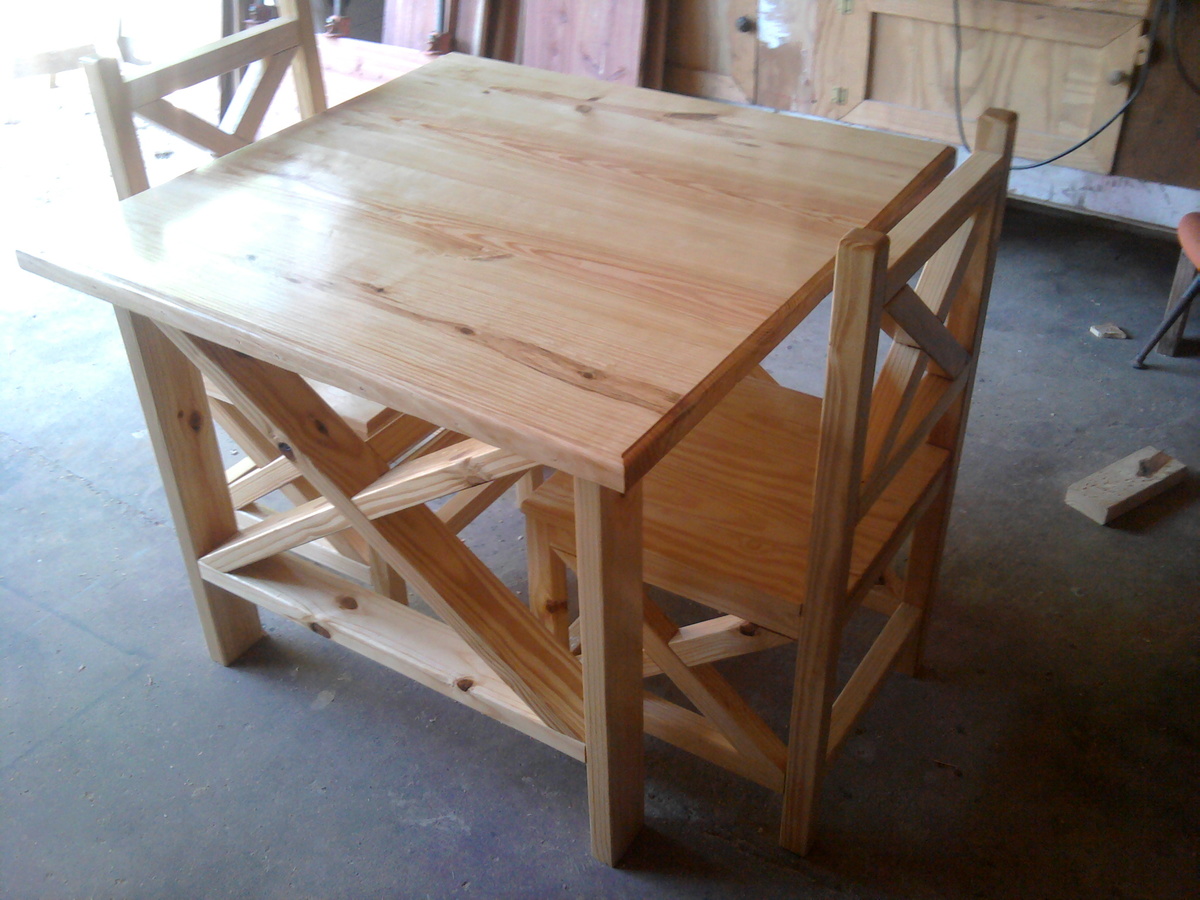
I wanted to build a table and chairs for my daughters wedding shower gift so i printed the coffee table plans and modified it to make the dining table. We just measured my sisters chairs and built the chairs.All of the lumber is white pine.We used 2x4s for the legs and frame, 2x10's for the top and 2x2's for a crossbrace under the table. The chairs are 2x4's ripped on the table saw to 2x2's with 1x4's for the seat. we routed the edge of the table and all pieces on the chairs.I spent $50 on the lumber on Monday and had it finished by Saturday for her shower. It is minwax red mahogany brushed on and wiped off and 2 coats of gloss polyuretane. It needs a couple more coats on the table top and the seats for a smoother finish. Lydia and Adam were thrilled, as was their friend who had us build her one just like it. She wanted hers in white pine with no stain and it has 4 coats of polyurethane for a very smooth finish. I love that we built a gift that will last them a lifetime!

Estimated Time Investment
Week Long Project (20 Hours or More)
Finish Used
Minwax Red Mahogany and Minwax Gloss Polyurethane Ace Brand Gloss polyurethane on the white pine table and chairs
Recommended Skill Level
Beginner

Comments

Cindy from Indiana (not verified)

Mon, 08/20/2012 - 03:24

Absolutely gorgeous! Great job and I love the price, too!

I am so excited - I'm going to finally get a kreg jig in the next few weeks and now I will have to add this beautiful project to my growing list of things to build!

spiceylg

Mon, 08/20/2012 - 05:25

This is incredible. Your daughter is certainly very blessed for all of your efforts you have provided for her new married life.

Tera

Sat, 02/07/2015 - 16:04

Yes I would also like to know if there are plans for these chairs! Love them.

rld

Tue, 01/12/2016 - 18:20

Do you have the plans for this, would love to make them to go with rustic x farm table

rld

Tue, 01/12/2016 - 18:21

Would love to get the plans for this if you have them

DocRob58

Fri, 01/20/2017 - 10:10

Plans for those chairs would be great. are they available?