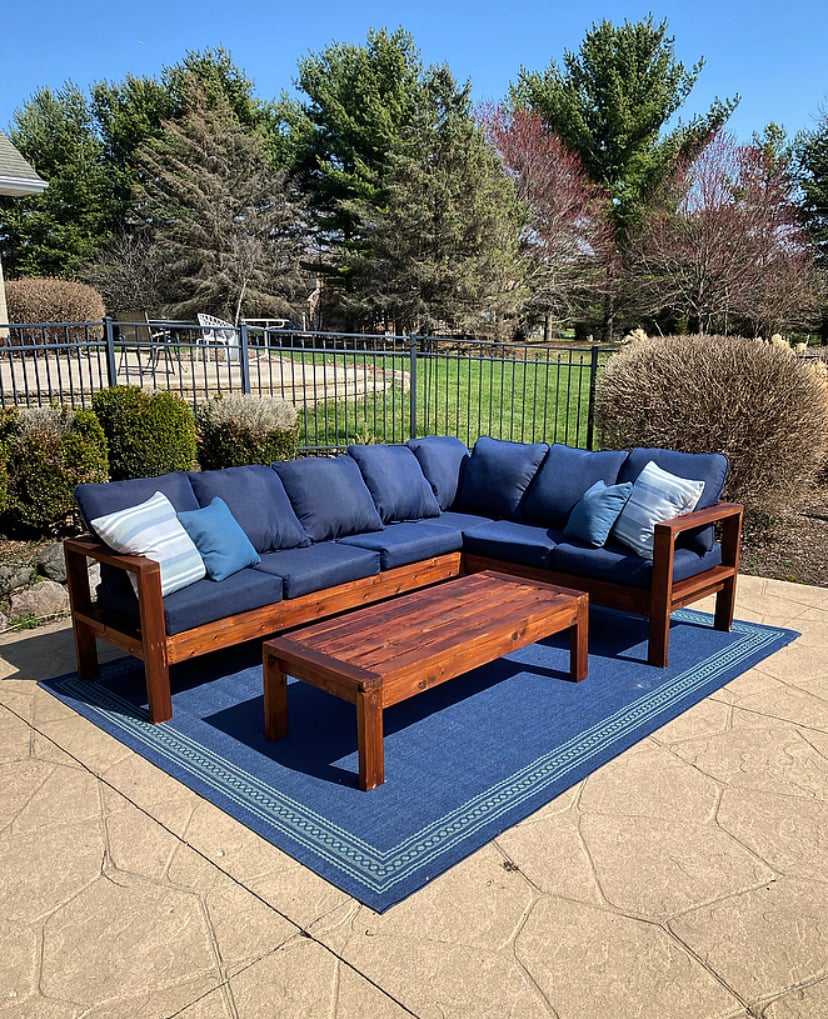
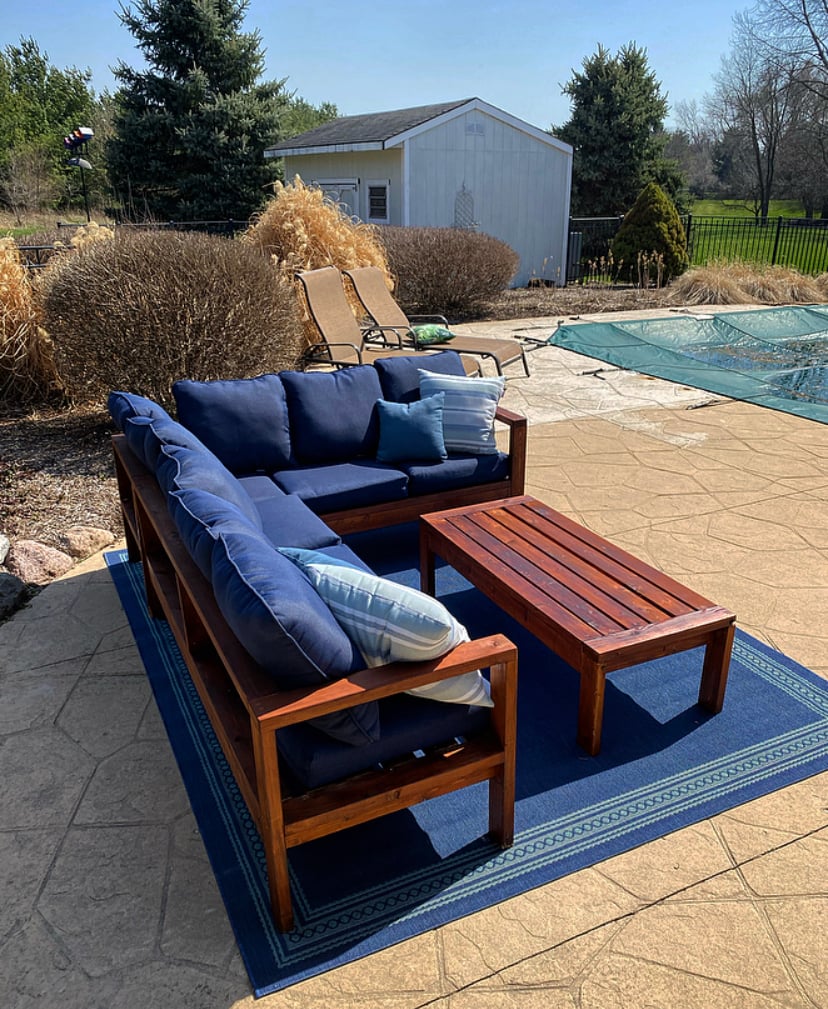
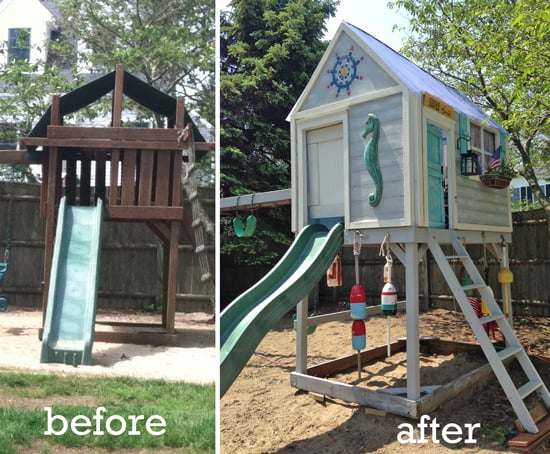
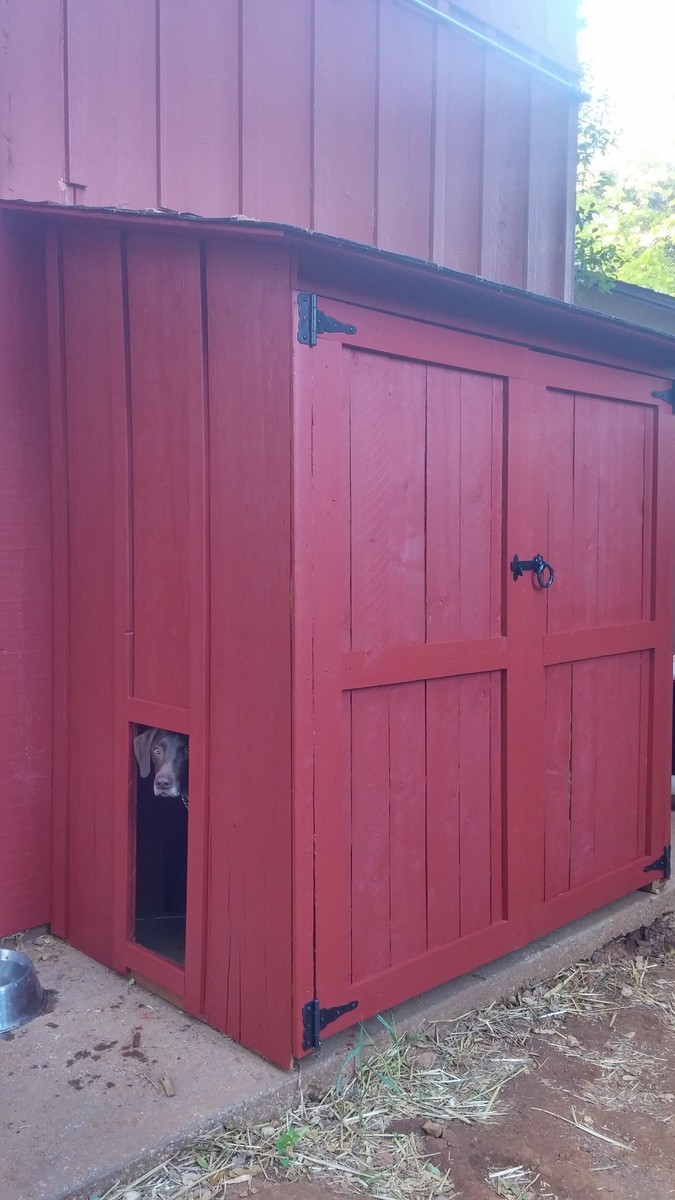
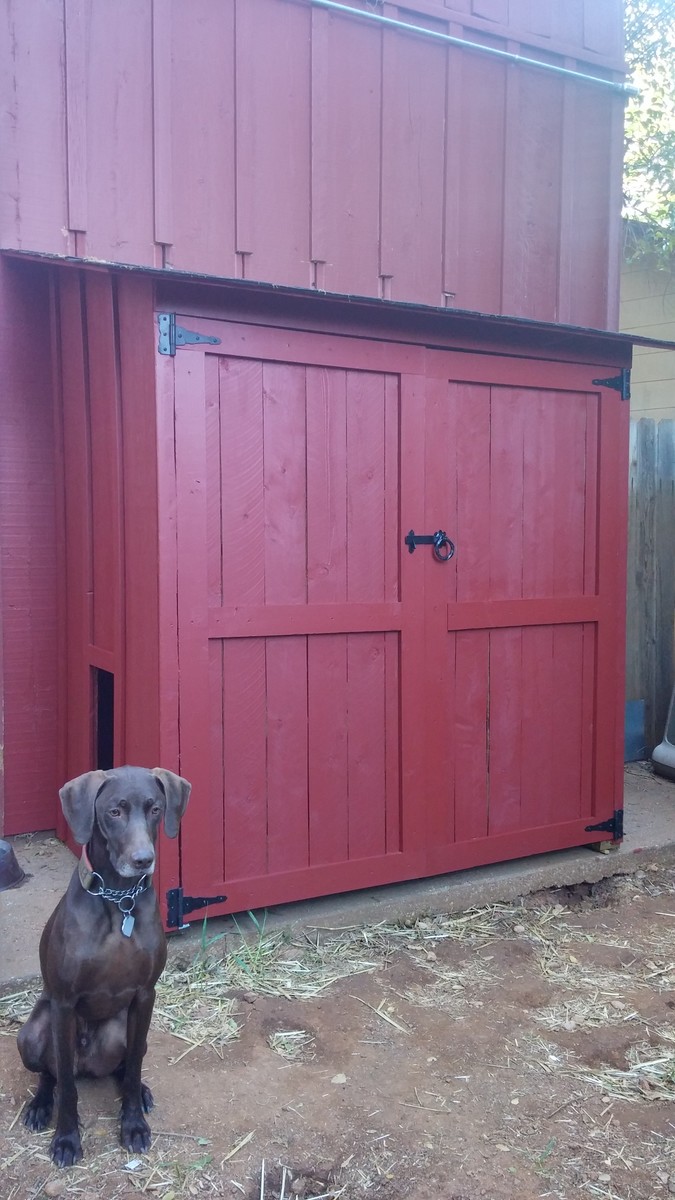
I needed a garden shed (for potting supplies) and a dog house, but I wanted it to look good. I started with Ana's plans, but screwed up a cut and was too lazy to go to the store, so I modified the plan a bit - also we didn't want a lot of venting off the roof.
OUR MODIFICATIONS:
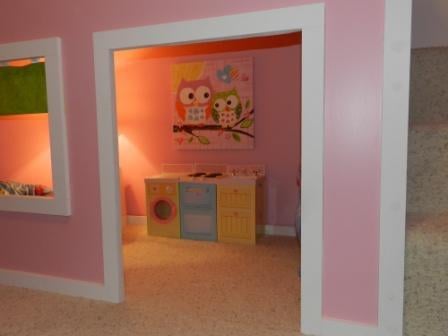
NO BACK WALL - I did not build a back wall, as we pushed it all the way up to the house. (You need to check your codes for this if it's allowed. The way I'm integrating mine w/o breaking the exterior waterproofing of the house and it's unconditioned made mine OK)
DOG HOUSE- I cut away a hole for our dog between the battens. And as you can see - he loves it. He's got his Coolaroo dog bed inside. We also added a 'ceiling' to the lower dog house half, that divides the gardening storage from dog house. The large shelf inside that acts as a dog house ceiling, and above are my un-used pots, hand tools etc. (no worries no chemicals with the puppy)
PAINTED EXTERIOR- I painted it red to match the house, and will also be putting garden pavers in front of the doors.
ROOF- We did put an underlayment down on the roof before the asphalt shingles.
LESSON LEARNED- If your dog is a Mama's boy like mine, he may try to climb a ladder to remove you from a roof which he has determined is not OK for you to be up there.
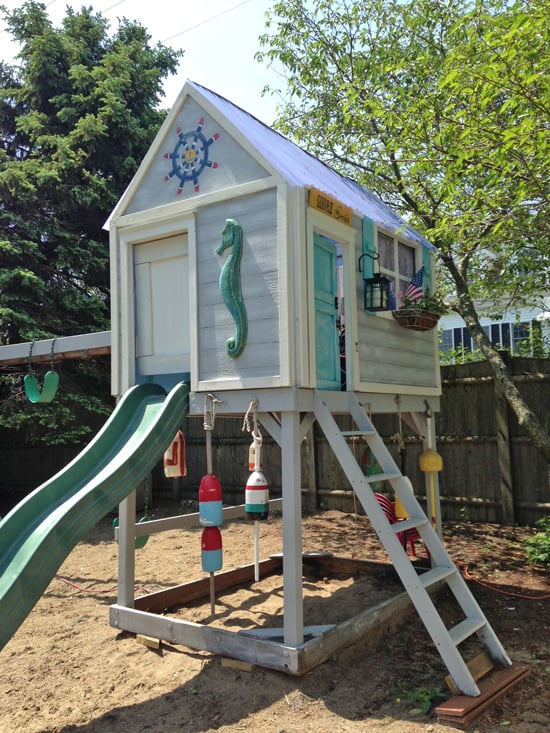
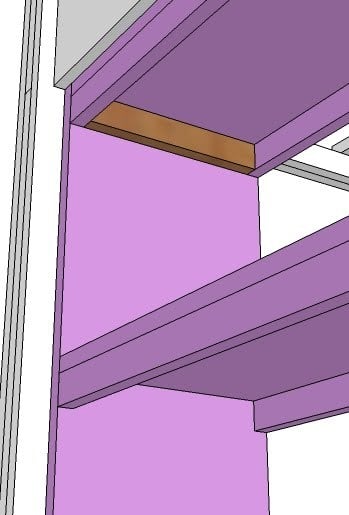
*One concern is - most sidewalks slope away from the house, so we had to shim the sill plate so front of the shed doesn't lean outward causing the doors to pull open constantly. As you can see from the photo I still need to flash at the roof where we cut back our houses' battens.
COST- We live in CA - and this project was more expensive than anticipated, our lumber/roof shingle costs were around $270 alone, and keep in mind we didn't build a back panel. I have very little scrap left over too. When I was nearly done the hinges were an additional $15 a piece, $10 for the latch. And we had the primer and paint in the garage. Underlayment for roof, I already had in the garage too.
TIM-: I started this project on a weekend, but it ended up taking longer; probably because I didn't block out the weekend just for this project. I spread it over the course of a month, so hours wise it probably wasn't as bad as it felt... You do need two people though, and that's where I ran into some trouble, I kept trying to work on it when my husband wasn't home. Probably 24hrs, 3 easy going days. Could probably be done in a weekend if you were dedicated and didn't get distracted (or screw up a cut like I did, which sent me to the drawing board to fix my mistake)


Comments
DawnL
Sat, 06/22/2013 - 02:57
Aloha Tina! You did a great
Aloha Tina!
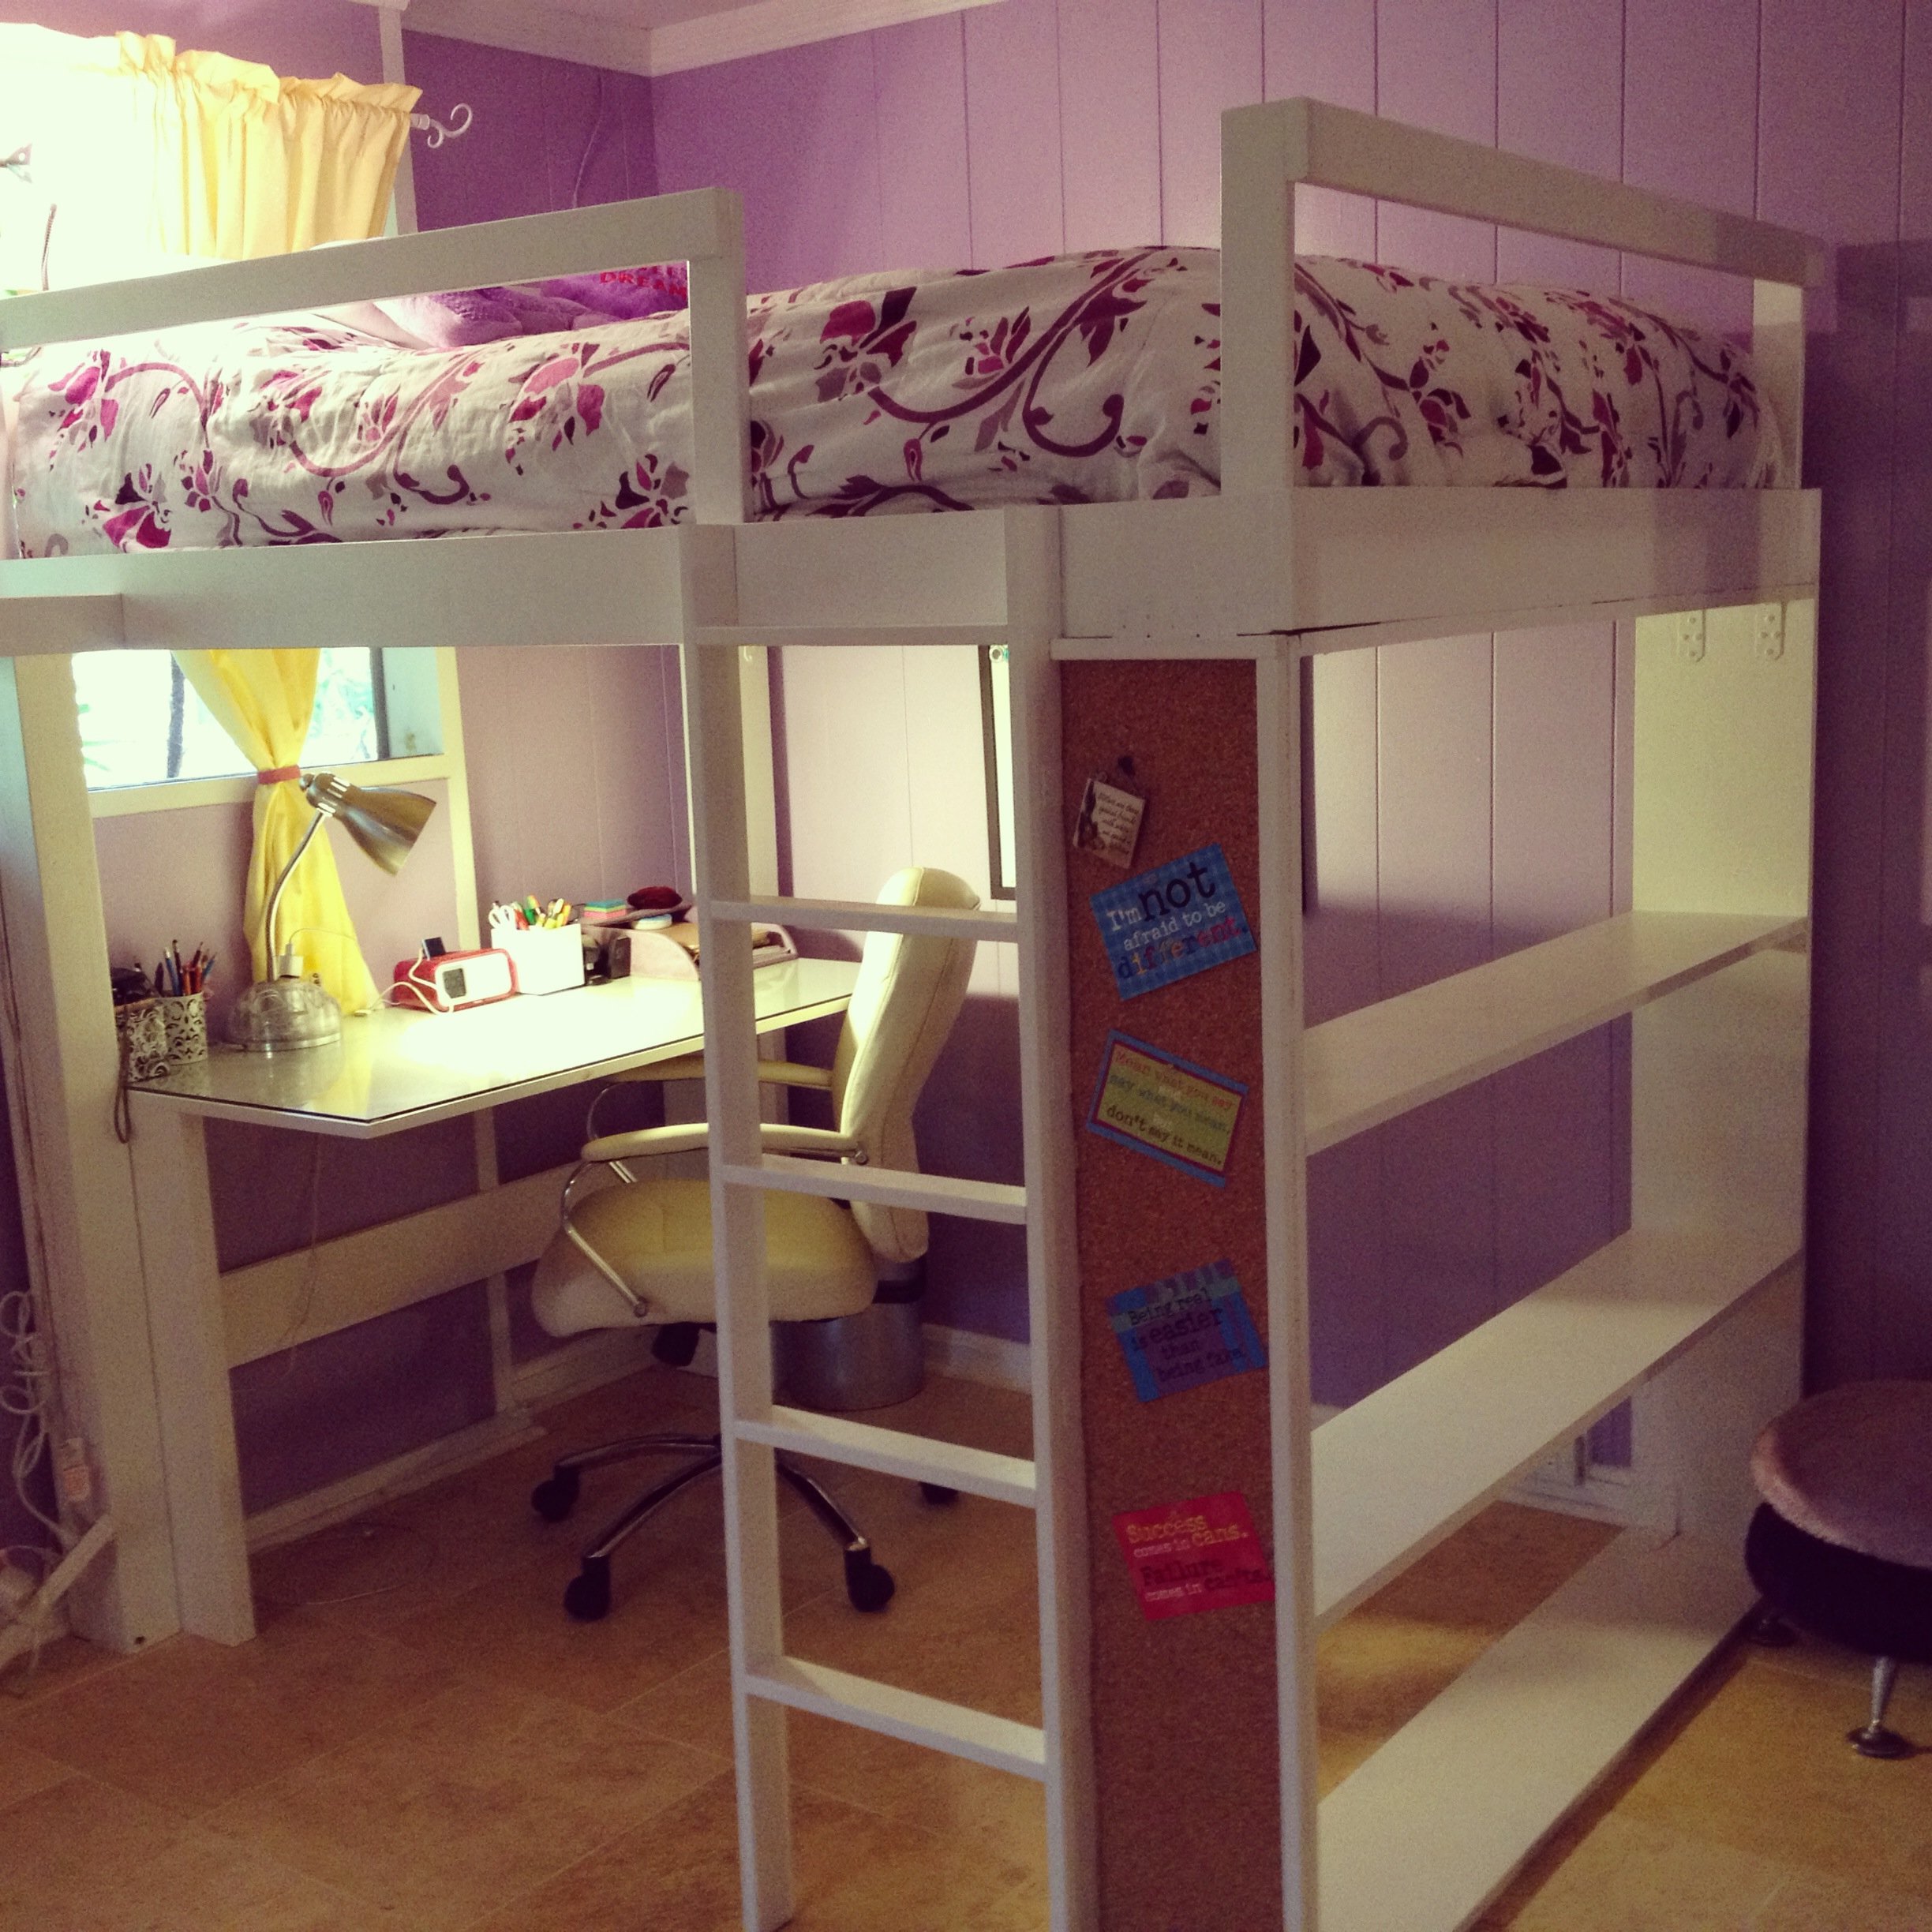
You did a great job! I was wondering, how high is the bed, room and clearance? We also live in Hawaii and my daughter's room is small. Any feedback on what modifications you made would be greatly appreciated! Mahalo!
KailuaGirl
Tue, 06/25/2013 - 13:35
reply
Hi Dawn,
Yes, my daughter's room has low clearance, so I tweaked the loft bed height.
I determined what top clearance I could maximize that would allow my daughter to sit up in bed comfortably, but it will be tight as she grows. She's 5 feet now...
Then I tweaked the desk area height as well to maximize without too much of a struggle to get into the area.. I hope this reply is helpful..
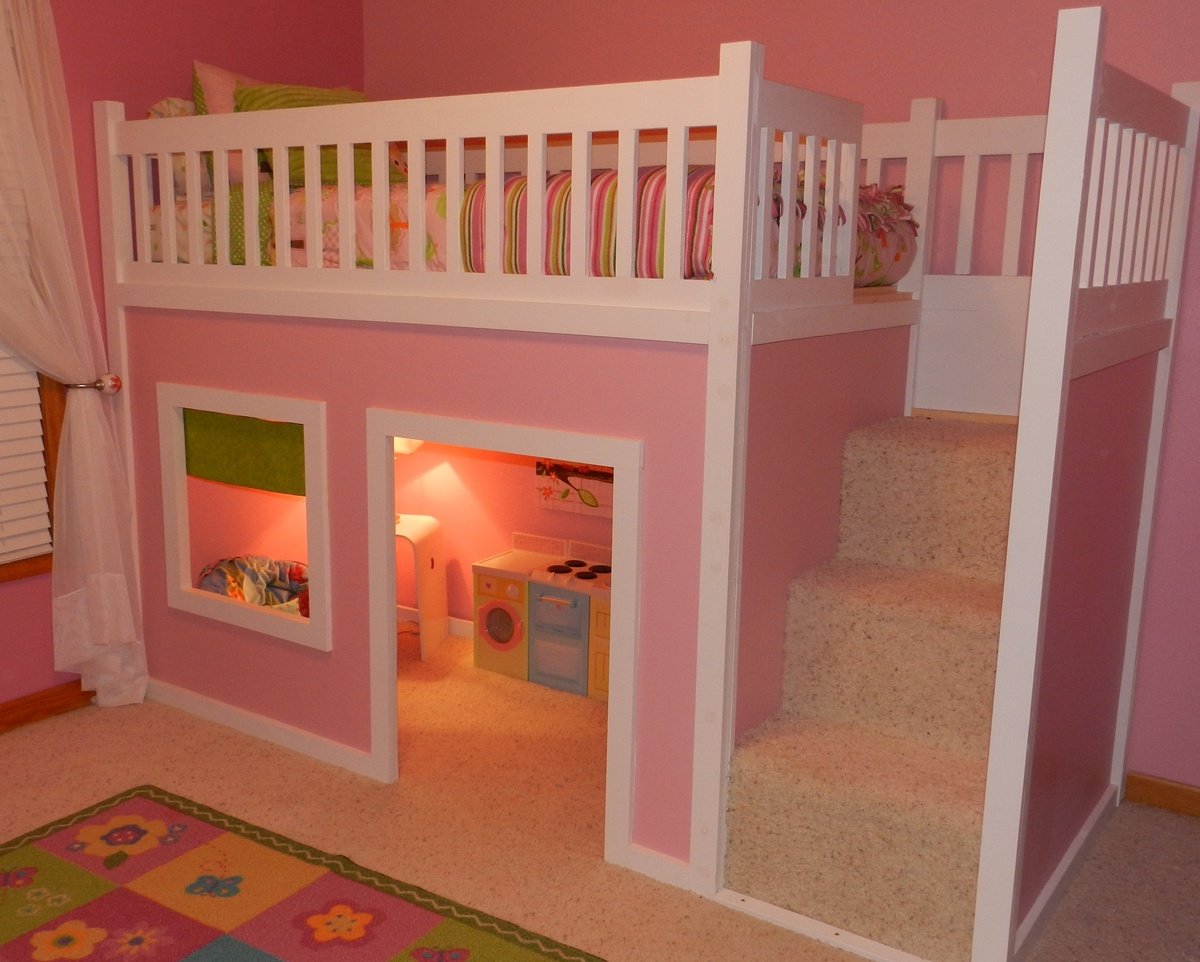
Floor to ceiling height is 96 inches. desk area has clearance of 56 inches and from the top of the mattress to ceiling has a clearance of 28 inches.
Aloha, Tina
hansje01
Tue, 12/17/2013 - 16:06
Teen Loft bed
Im having a problem finding the plans for the teen loft bed shown above. any direction would be appreciated! Thanks!
KailuaGirl
Tue, 12/17/2013 - 16:59
RESPONSE TO HANSJE01
HI! There are no plans for this loft bed.. I used the plans on this site and just literally DIY'ed to fit my needs.. Sorry I know this doesn't help you much…
If you have a specific question, maybe I could help…
Aloha, Tina