Community Brag Posts

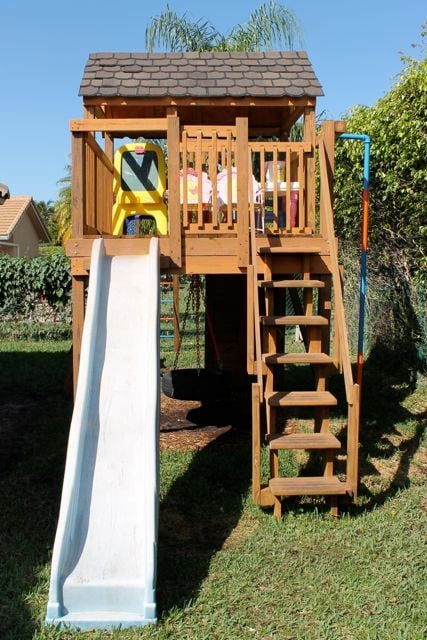
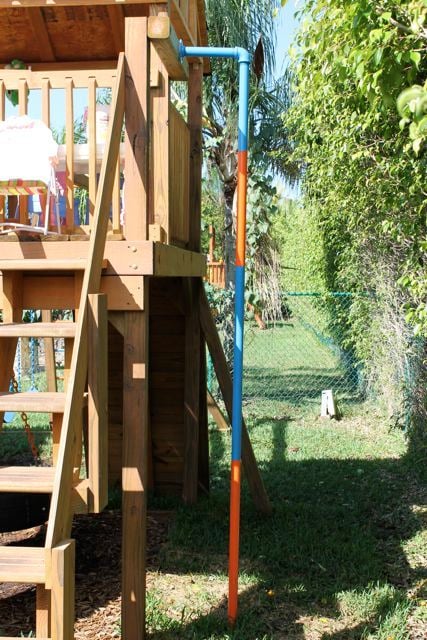
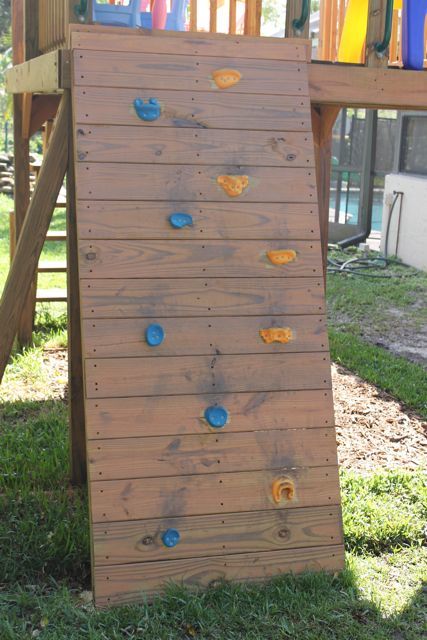
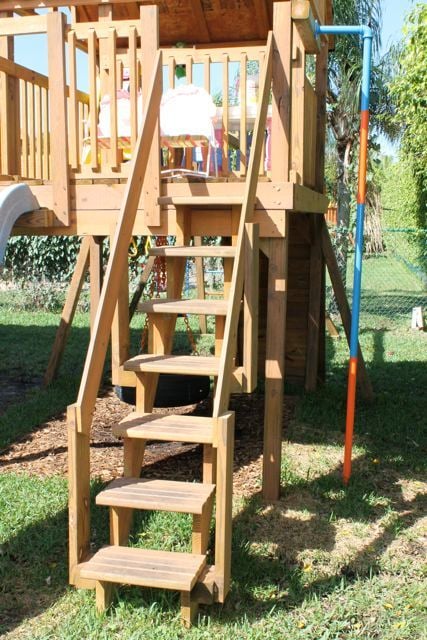
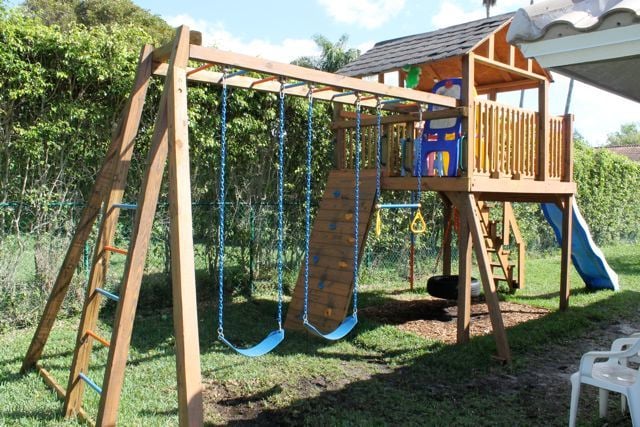
Florida Gator Themed Playhouse

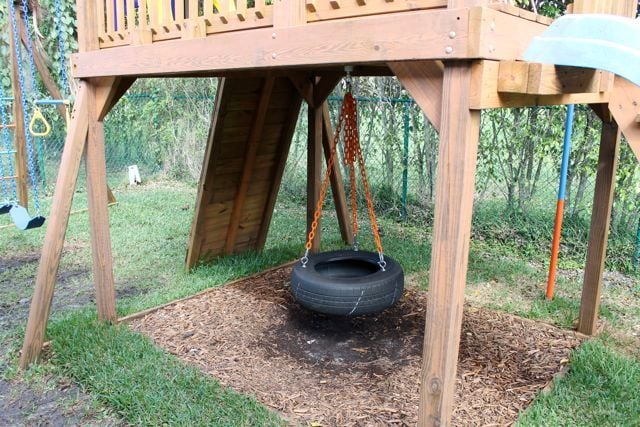
My husband Jon recently built this playhouse with/for a friend of his from work. It took them two months to complete and it's awesome! Jon's friend is also a die hard Gators fan so they made sure to add blue and orange as much as they could. Thanks Ana for giving them the courage to take on such a feat!

Estimated Cost
$2000
Estimated Time Investment
Week Long Project (20 Hours or More)
Finish Used
None
Recommended Skill Level
Advanced

Comments

birdsandsoap

Wed, 03/21/2012 - 01:51

Great Job! All this says is "GO BRONCOS!" I'm an Idaho girl and I love the BOise State colors, lol! "Playhouse" is an understatement. This is a jungle. This is a huge play structure! and it is awesome.

Corner TV stand

Submitted by TBarn on Tue, 01/21/2014 - 12:41

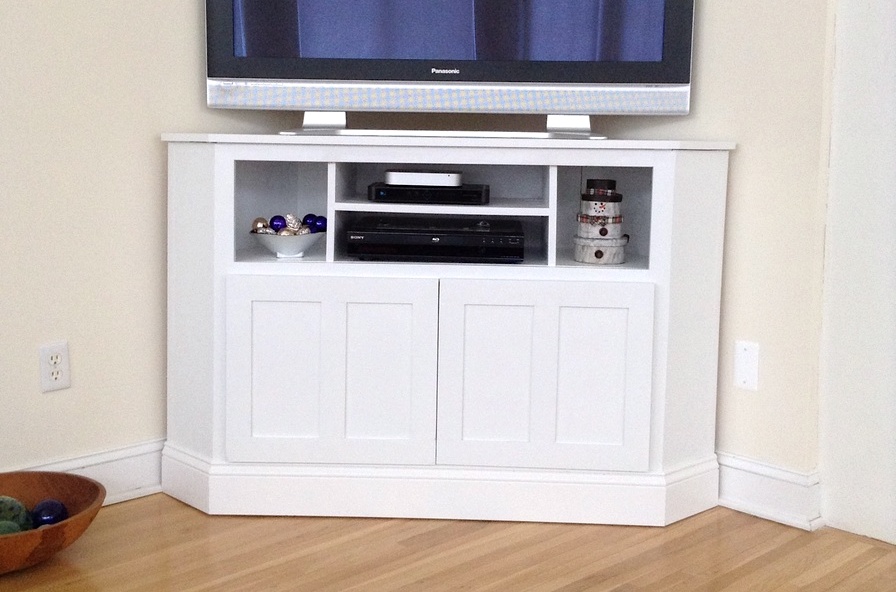
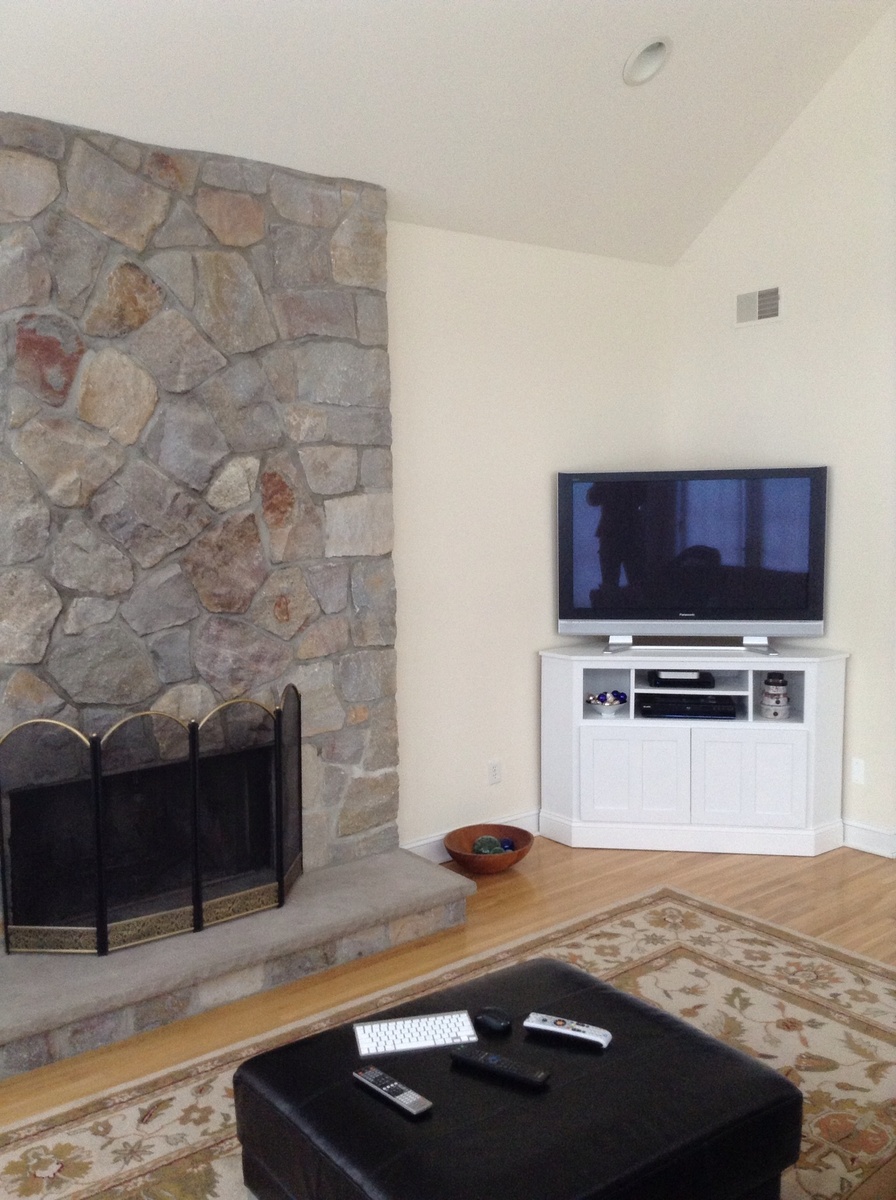
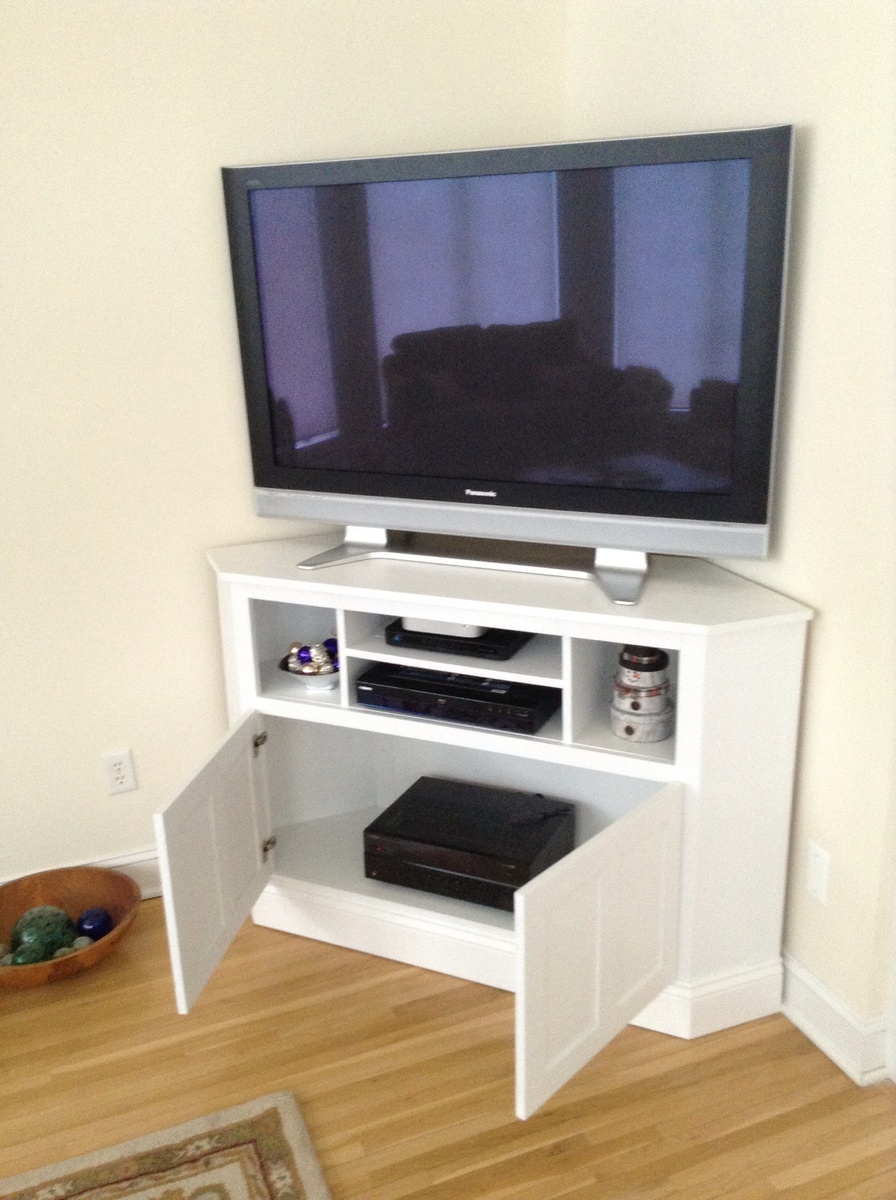
After a promise to get a new carpet and TV stand as an anniversary gift, I began a search for a corner stand that would fit a 50" flat screen and hid all of those ugly wires. Craig's List had nothing and the retail options were either cheaply made, ugly or crazy expensive. I stumbled upon Ann's page, and since my son has a wood shop in the basement, I figured why not try to build something. I used the original plan, but borrowed ideas from other brag posts to create a 36" tall model with overlay doors that we think looks great. Next project: bar stools for the kitchen island.

Built from Plan(s)
Estimated Cost
$200
Estimated Time Investment
Weekend Project (10-20 Hours)
Finish Used
Zinder Primer and Gidden (America's Finest) Semi Gloss
Recommended Skill Level
Intermediate

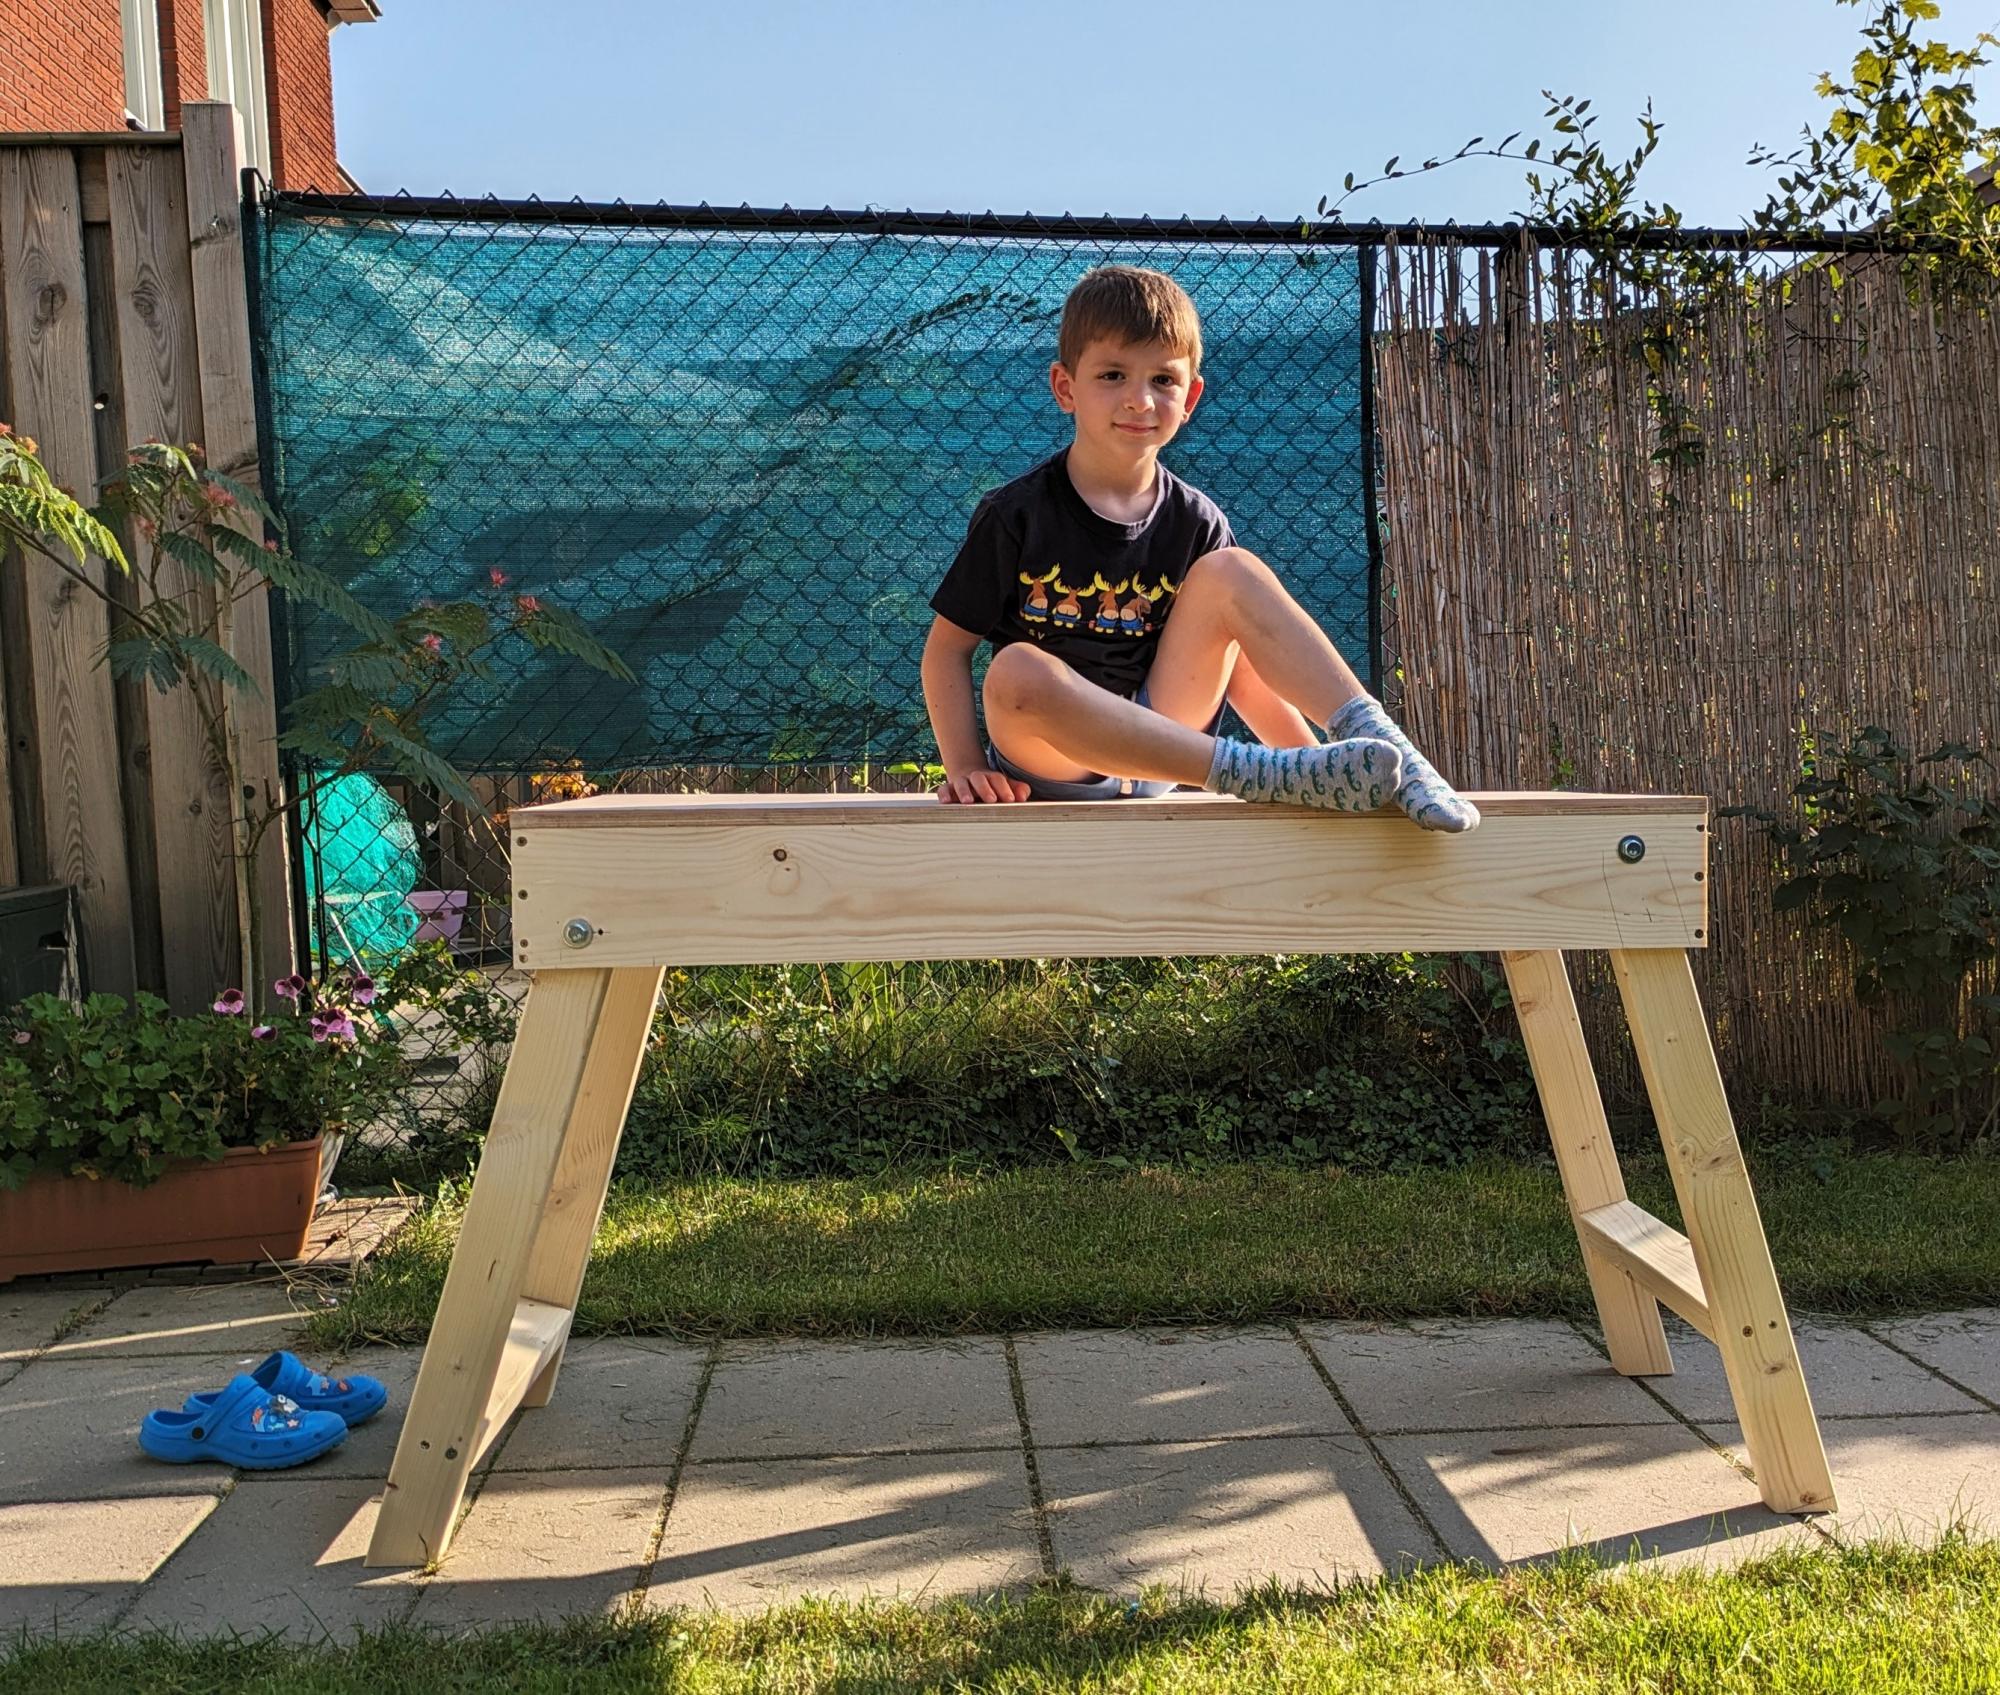
Folding Work Table First Project!

Submitted by Anonymous (not verified) on Tue, 09/12/2023 - 09:52

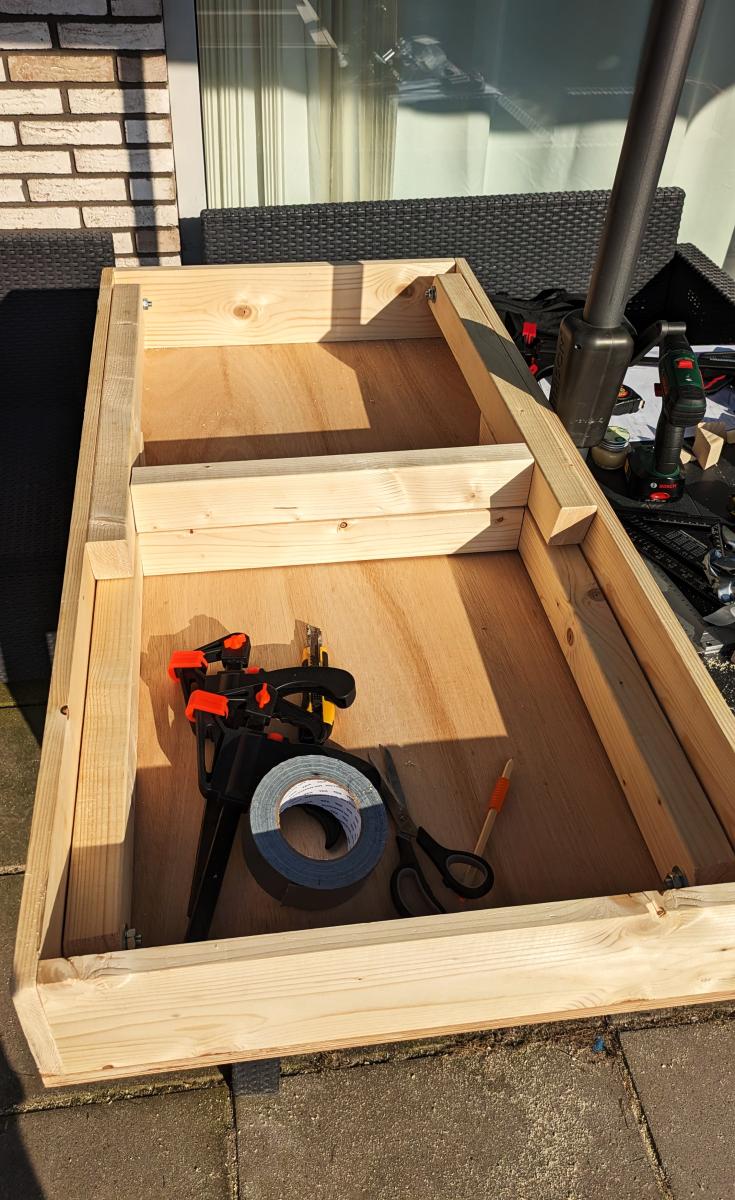
This is my very first project. I have no other tools yet besides the drill, so I had to make all the cuts with the hand saw, but it worked out well :) As I am in Europe, the imperial metrics mean nothing to me. The wood they sell here is of different sizes. That is overall not an issue, although I had a tough time calculating the holes for the legs. Luckily, only one error hole, and all came out level on the first try. No waste of wood! I also had a good helper.
Thank you, Ana

Ventsi

Sweet Pea Bunk Bed Plans turned into a dream for our Little Girl

Submitted by ShushiGirl on Thu, 01/30/2014 - 09:01

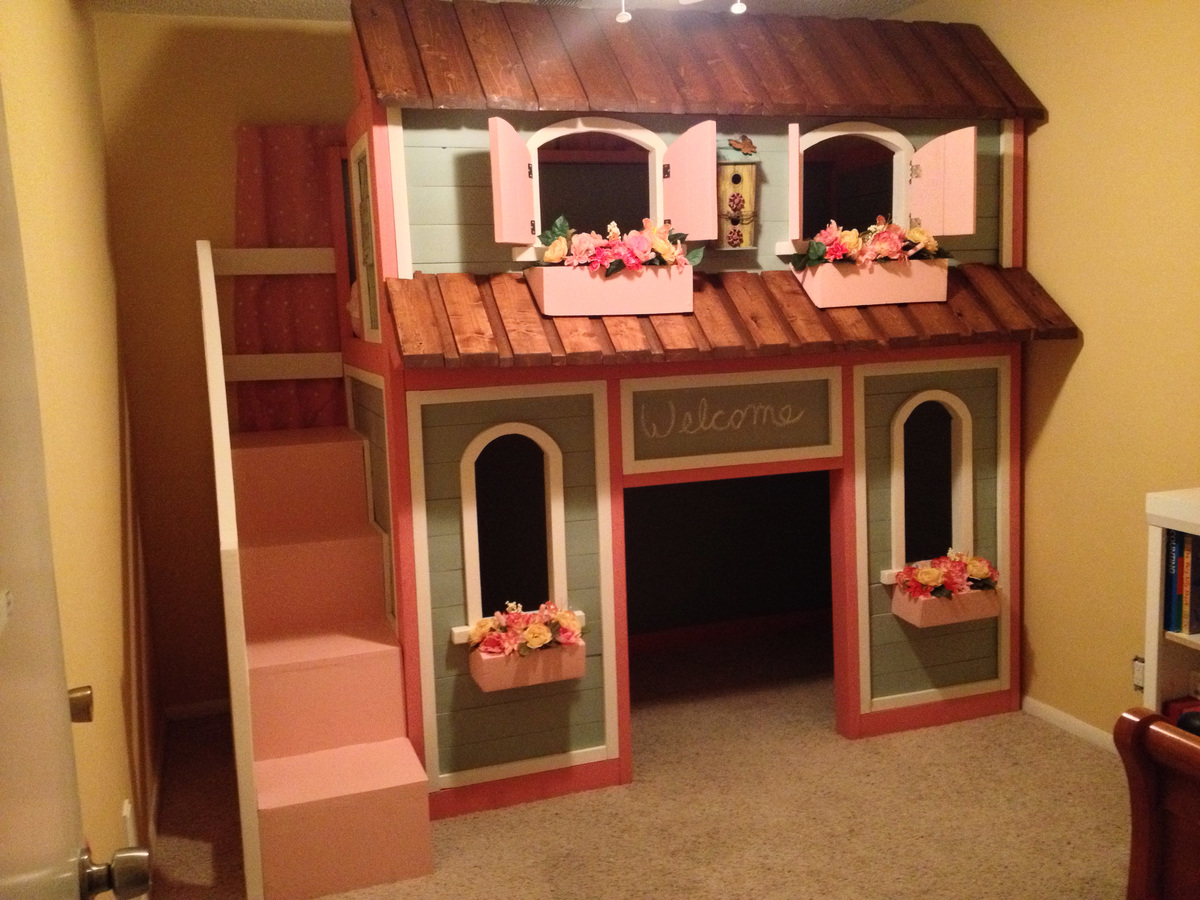
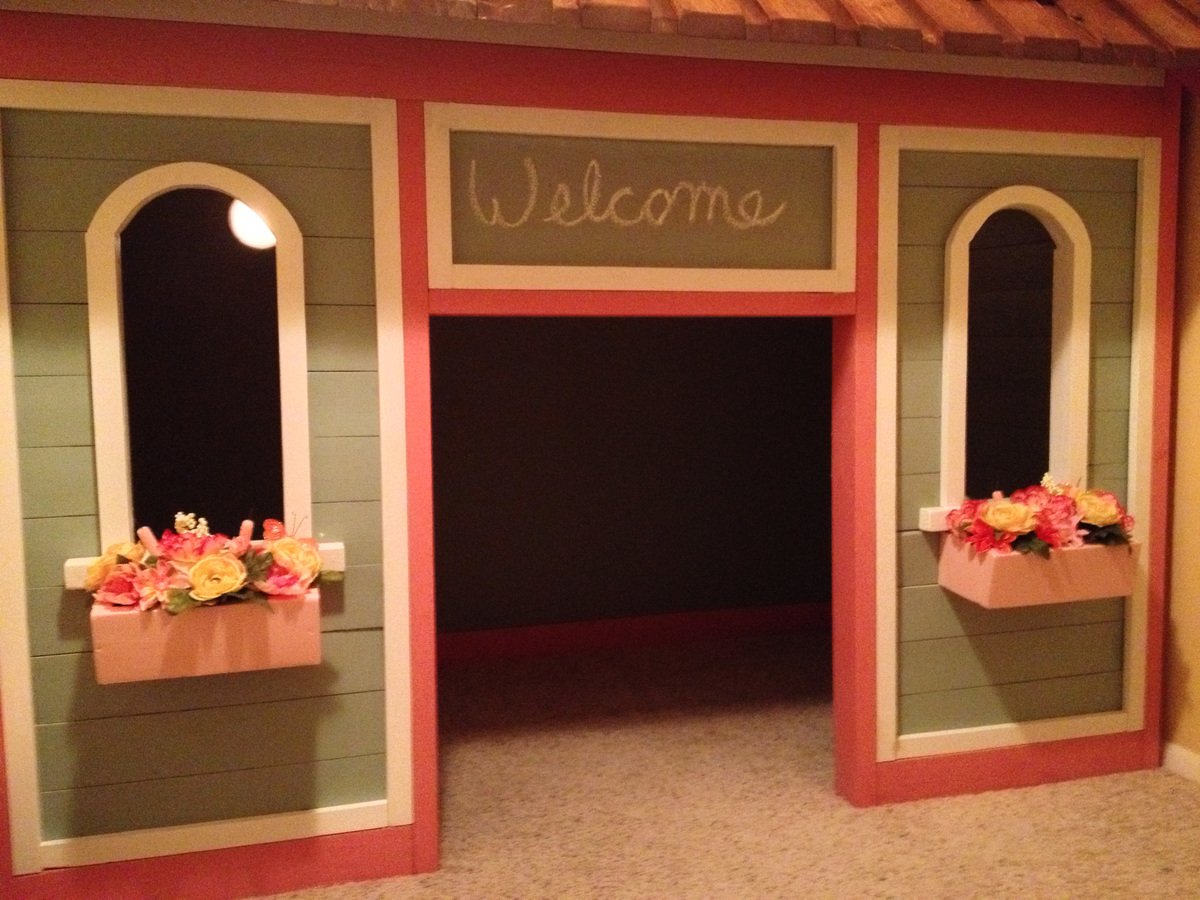
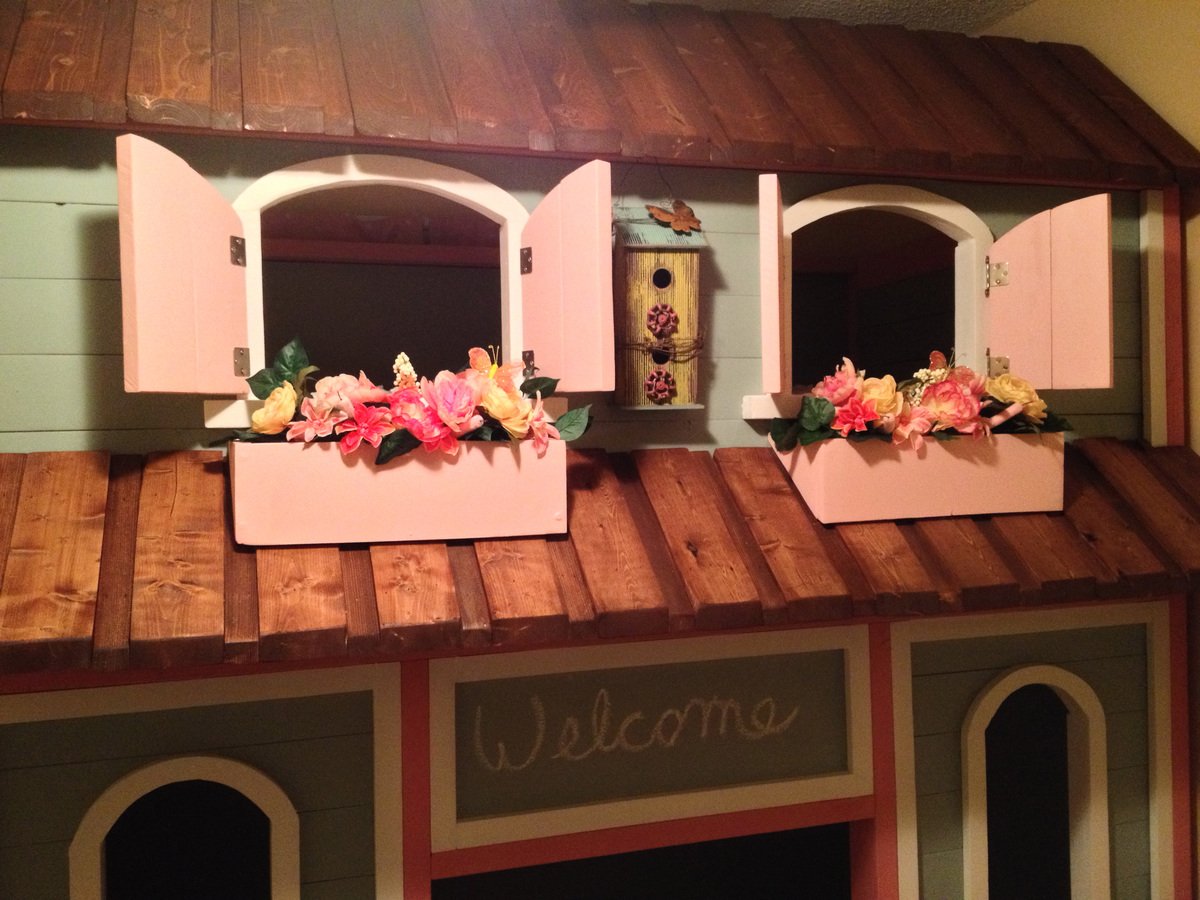
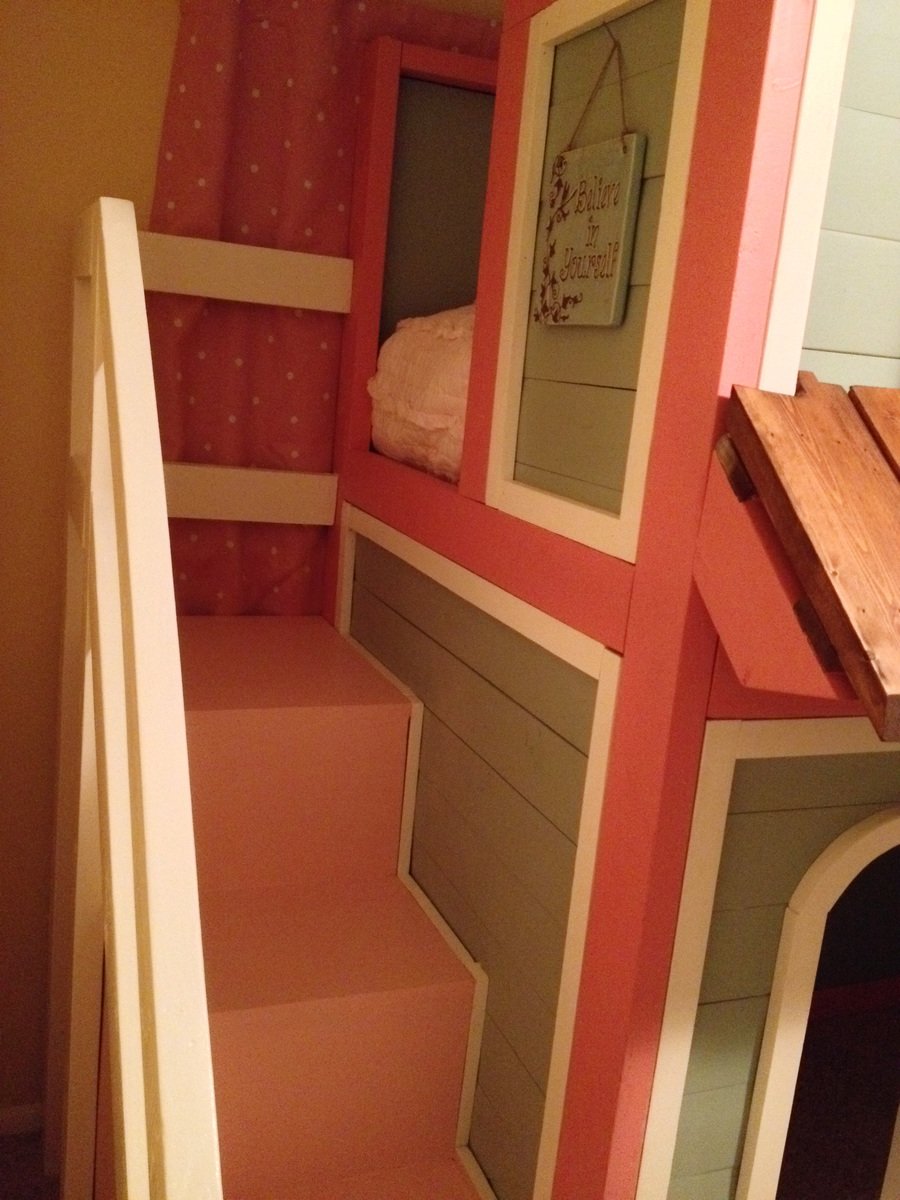
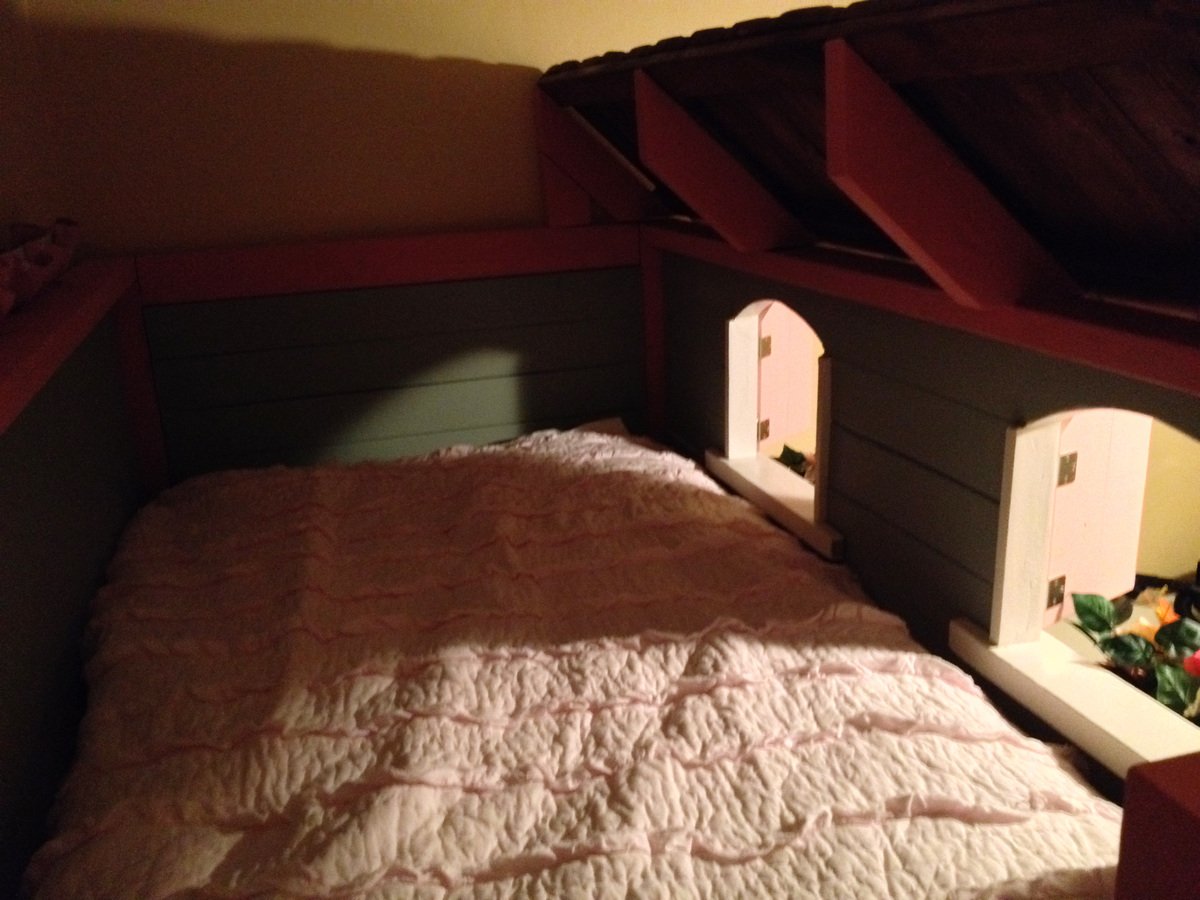
We loved the Sweet Pea plans so much but we didn't need bunk beds. We turned it into a loft bed with a playhouse underneath. We also inverted the shelves on the stairs to be inside the playhouse due to her room size. Added a second roof and window boxes. This project was fun and took us 10 days to complete. Thank You so very much for sharing these AWESOME plans!!

Estimated Cost
$1100.00
Estimated Time Investment
Week Long Project (20 Hours or More)
Finish Used
We used Baer Premium Paint sold at Home Depot
Recommended Skill Level
Intermediate

Comments

junior2725

Sun, 02/02/2014 - 22:11

I am looking at making this for my daughter and I also want to do a playhouse on the bottom as she is a single child. Did you just extend the opening to the bottom bunk to the floor and then extend the bottom windows down some to let in more light? Also, I love the idea of switching the storage from the stairs to inside the playhouse. If possible could you elaborate on how you did this. Thank you.

ShushiGirl

Tue, 02/04/2014 - 15:46

We omitted the bottom bunk and took it straight to the floor. We left the side panel clear but the frame until we built the stairs then added trim & side boards around the cubbies.

nadia37

Sat, 05/24/2014 - 07:51

First of all, what an amazing job on your build! I was looking for ideas for a playhouse and I will be modifying the plans for Sweet Pea Bunk beds and your build let's me know how get it can be. But what colors did you use? The look great together!

E81firegirl

Sun, 07/17/2016 - 14:49

I love the changes on this!  I had a question.  What did you use for the roof and is the lower roof section built to the same specifications as the upper roof?

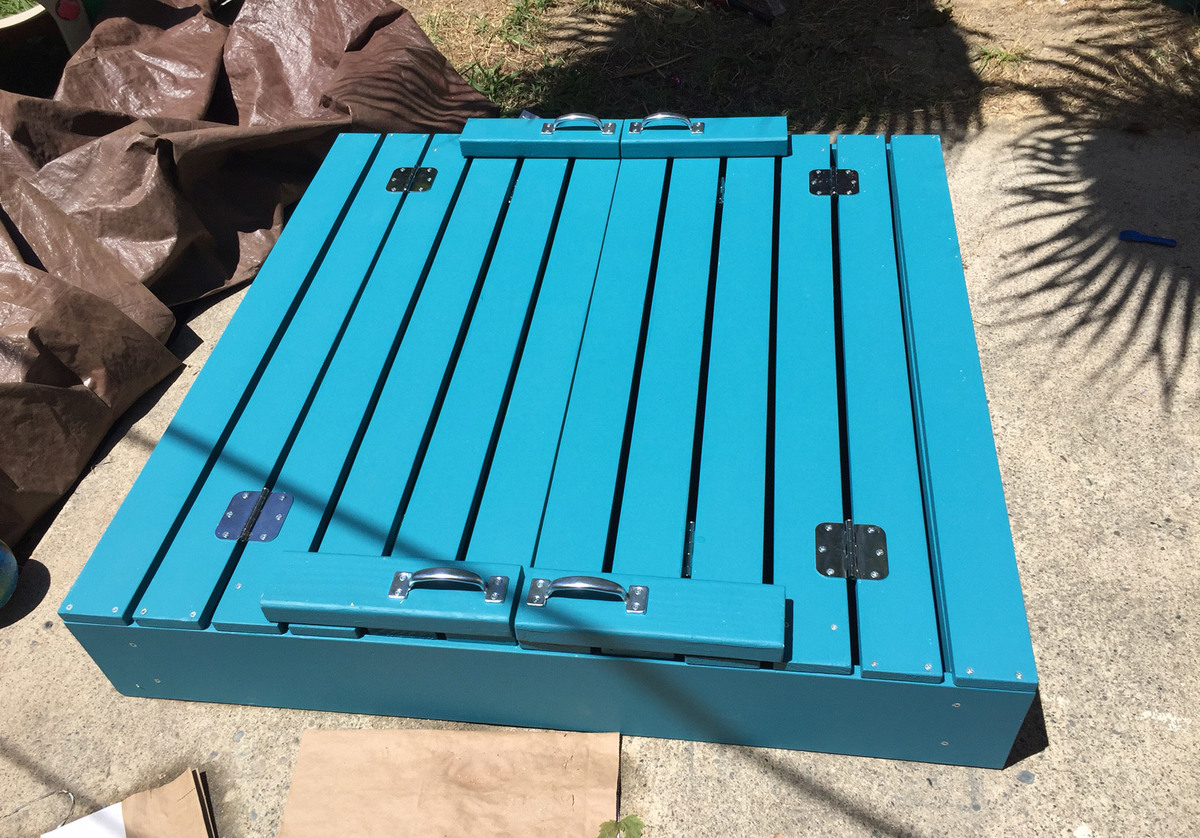
Modified Sandbox with built in seat

Submitted by niki on Tue, 05/22/2012 - 17:57

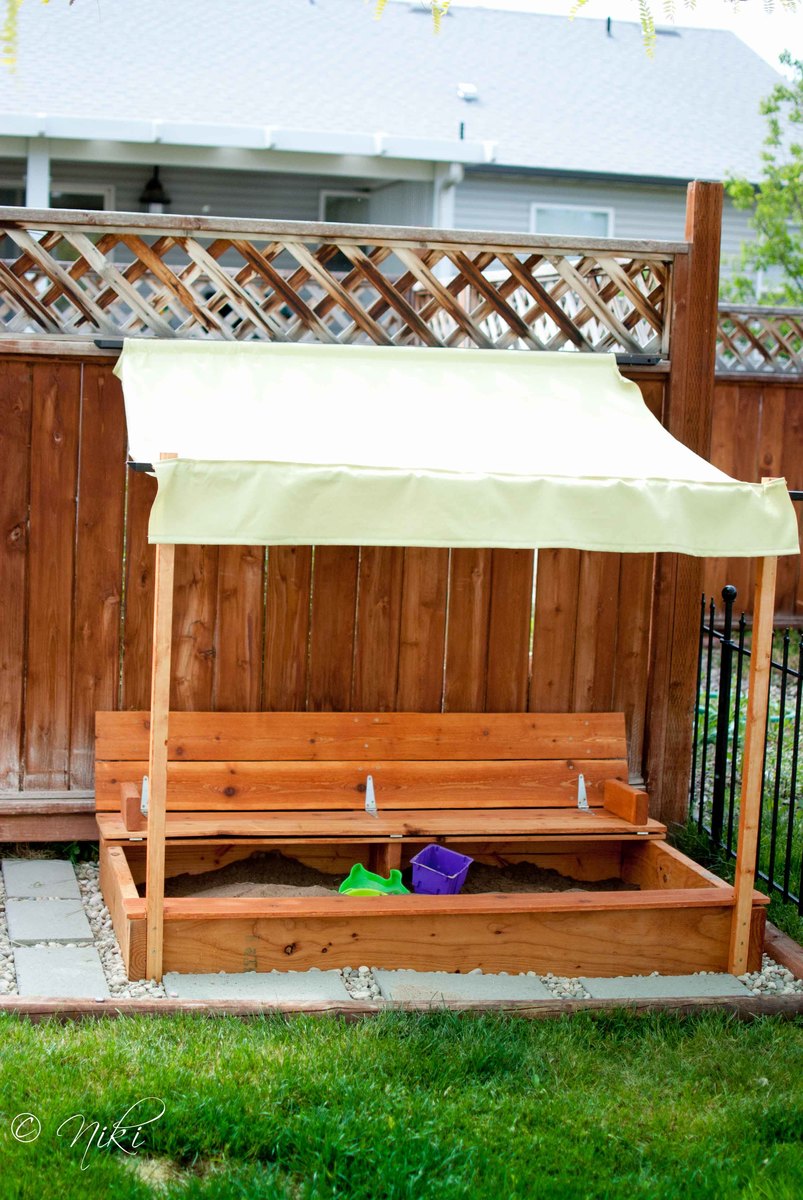
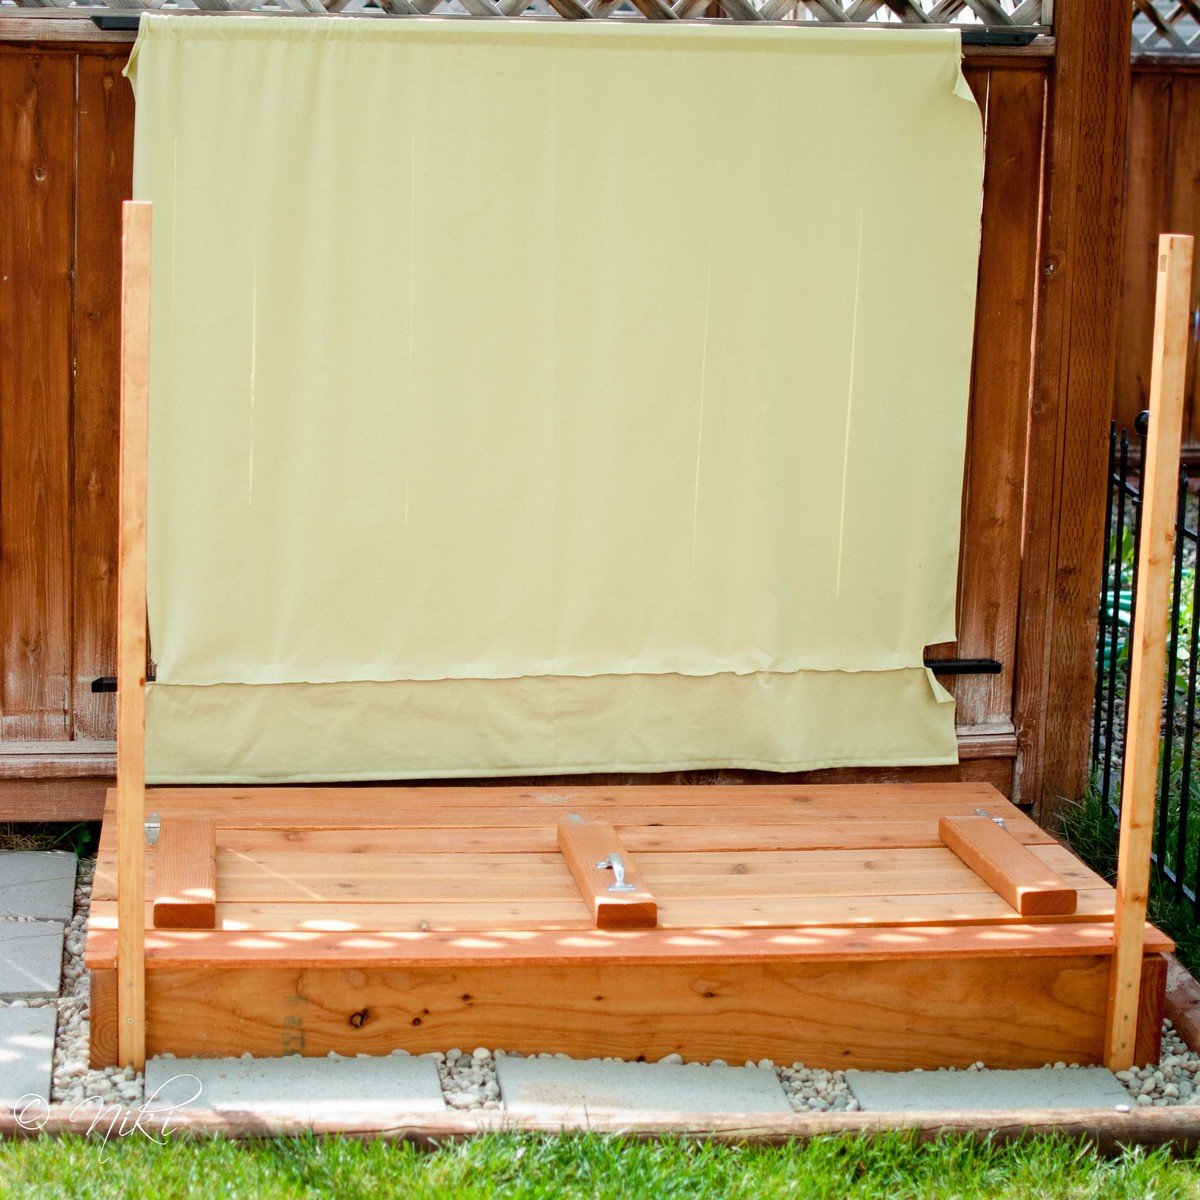
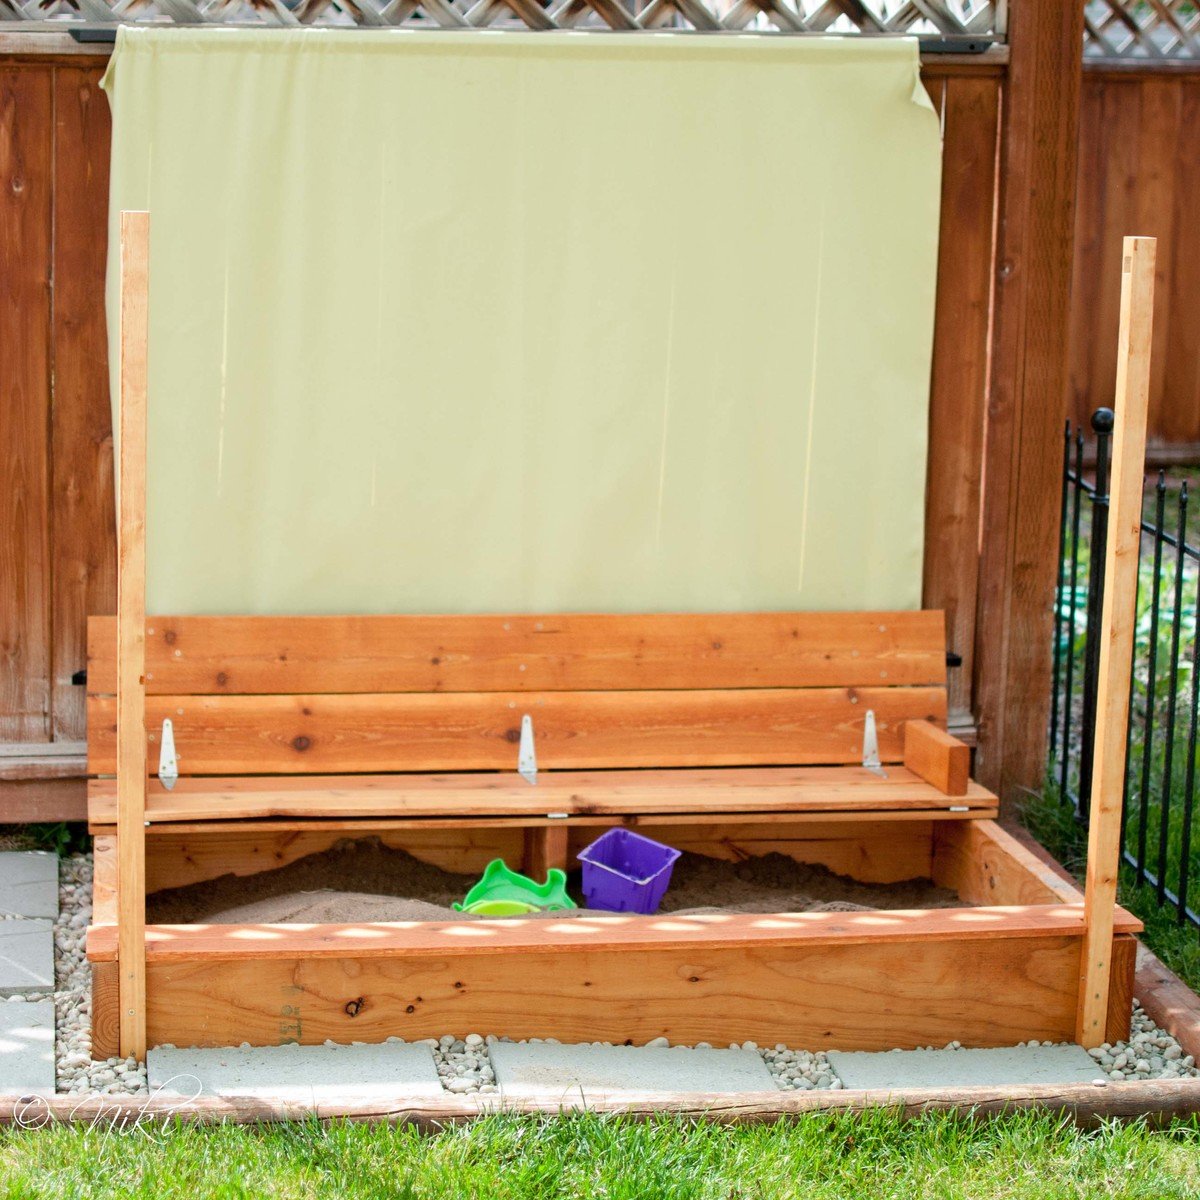
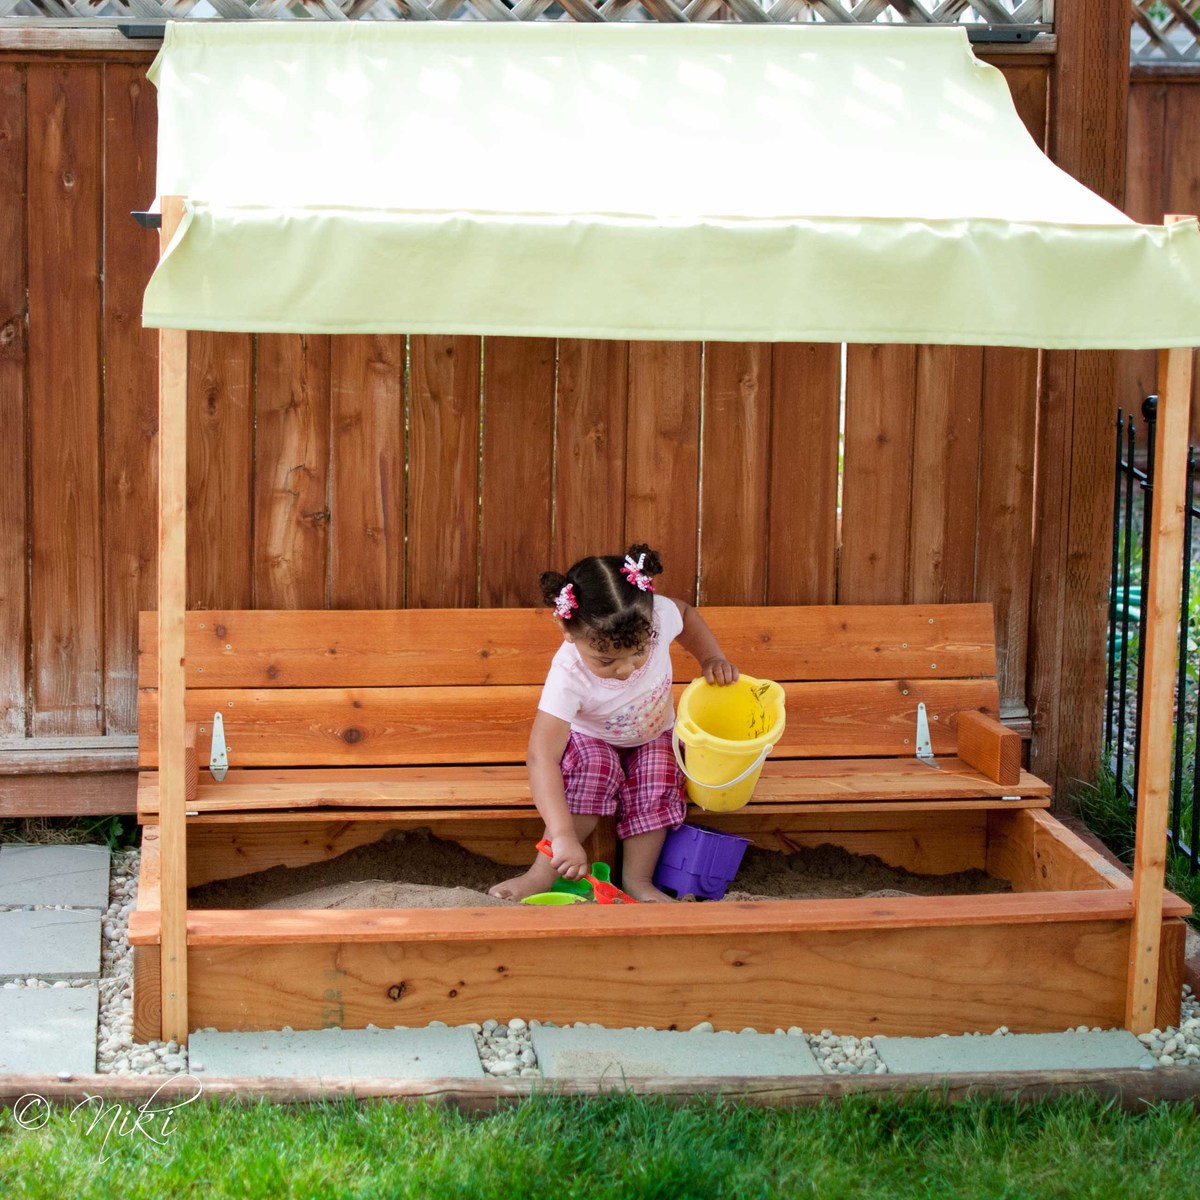
"Cellar? What cellar? We don't have a cellar... Oh, you mean the new sand box! Here, let me get some shade too."

I'm not sure why, but I can never seem to follow plans exactly. I guess that's not entirely true. I CAN follow plans exactly, but I almost never do. Maybe it's some sort of passive rebellion or something, but I usually have to put my own spin on the things that I build. Sometimes it works out in my favor. Sometimes not. This build was a little of both.

I decided to only build one bench in our sand box. This cut down on a lot of supplies. By making it longer a single bench and making it longer, it covers about the same amount of square feet, just in a rectangle instead of a square. When pricing lumber, I noticed that 2x8's were cheaper than 1x8's. So I went with those instead. It can't hurt to beef up the sides a little, right? This required some easy calculations on the cut list. I also decided to use 1x6 fence planks instead of 1x4 whitewood or pine. The fence planks were cheap, and I figured they would look nice in the back yard. They are also naturally pest and rot resistant. They required extra sanding to take the rough off. However, this is one place that I'm thinking the modification didn't work in my favor. The fence planks are not as thick as the whitewood. This combined with the increased length makes the the top pieces feel pretty weak. I put a little support piece under the bench. I'm quite sure the bench would not have held up well without the support.

Because this is an outdoor piece, I dry fit everything, and then stained everything before assembling it, to make sure all of the edges were well protected.

Cost breakdown (not including canopy)
Fence planks $14
2x8x8 $11
hinges $9
handle $2
stain $10

Built from Plan(s)
Estimated Cost
About $50
Estimated Time Investment
Day Project (6-9 Hours)
Finish Used
Preserva-wood in Pacific Redwood color (aka the cheapest outdoor stain I could find)
Recommended Skill Level
Beginner

Comments

tnavis

Thu, 03/07/2013 - 08:49

I just love the changes you made to this sandbox! Can you tell me what you used for the construction of the canopy? Thanks!

Diy Upholstered Settee

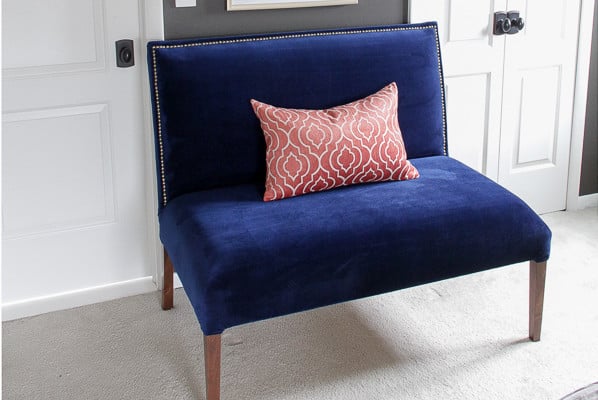
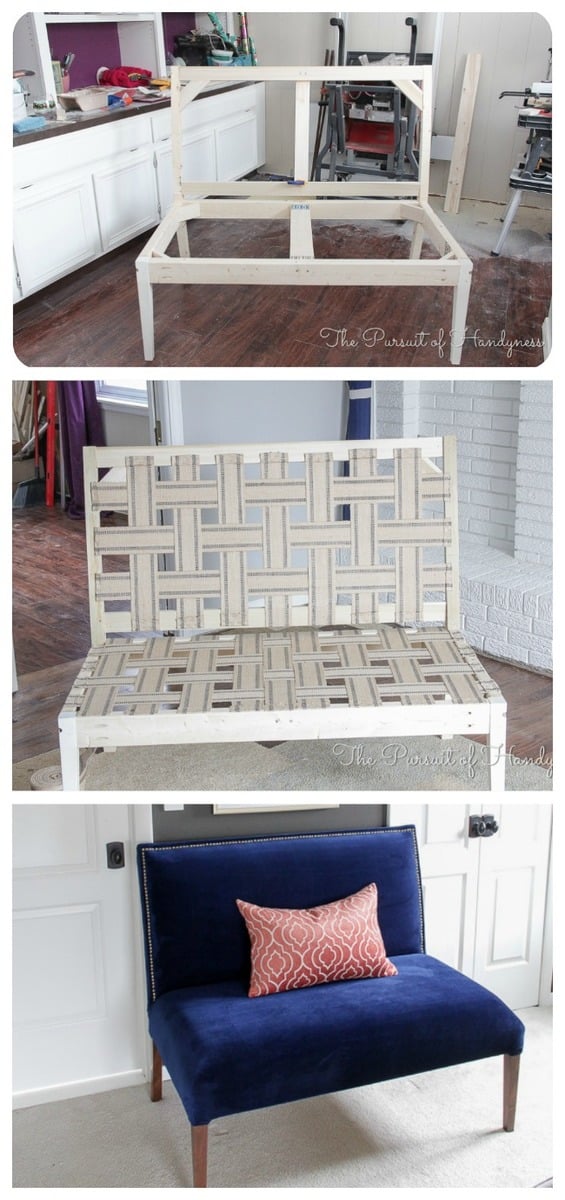
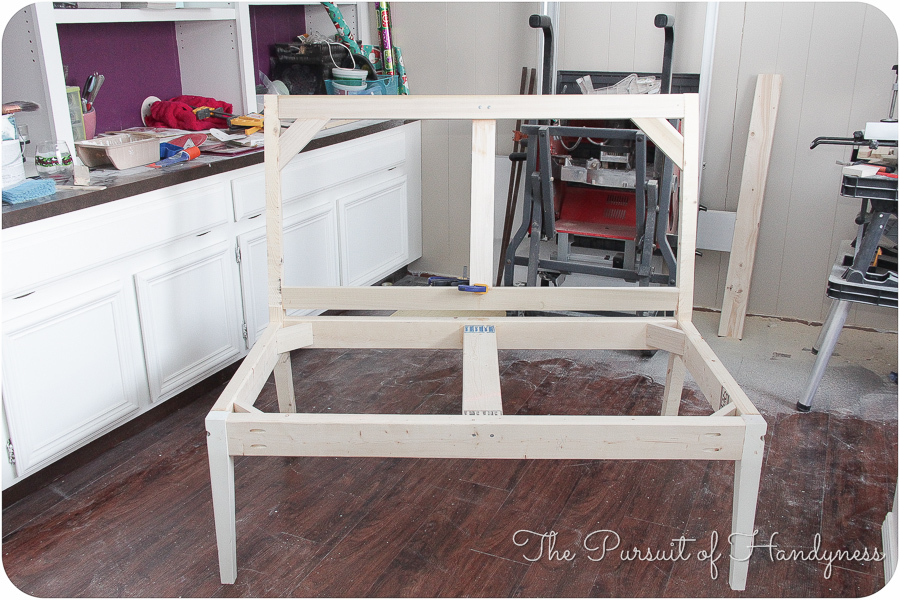
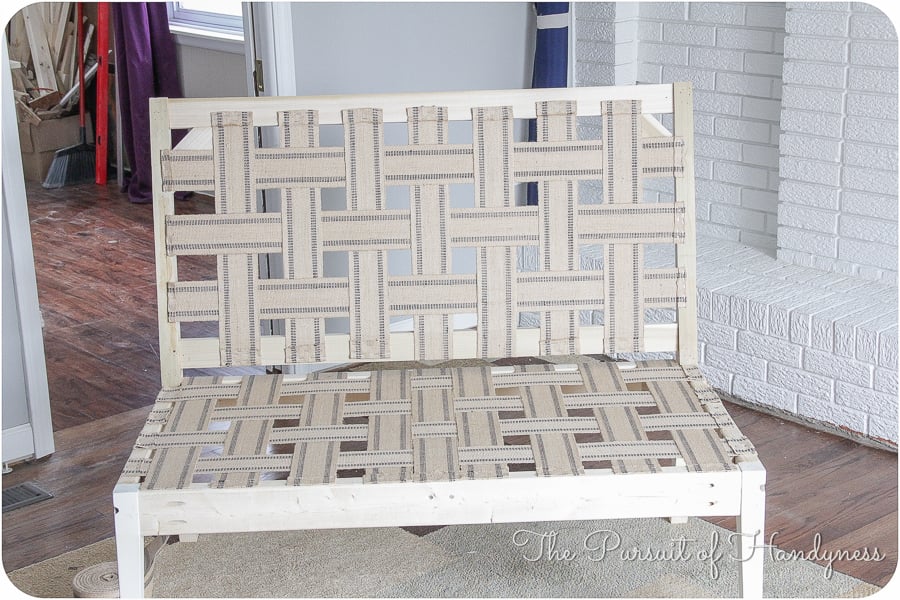
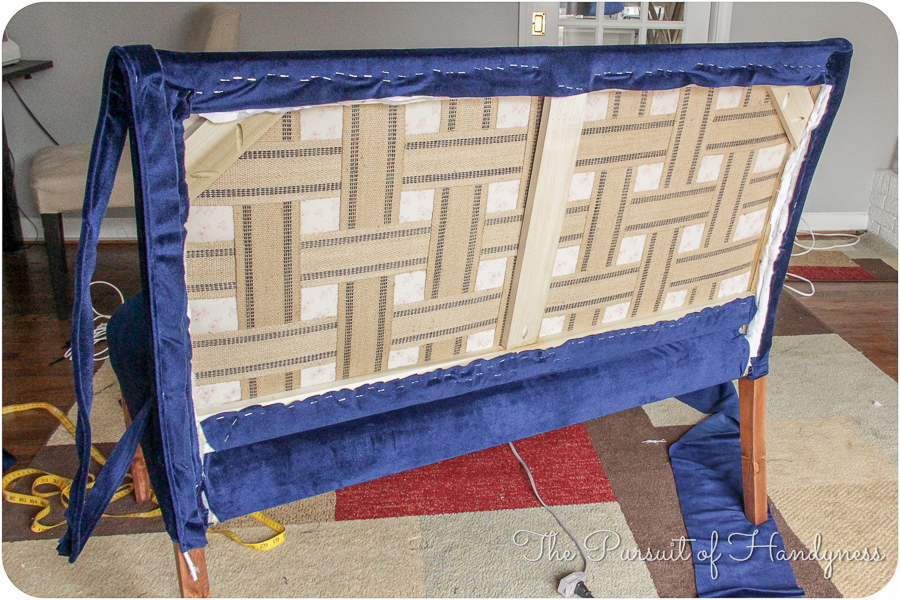
I started off with Ana's plans and kinda went rogue from there. The idea of creating those curved back legs scared me so I thought I'd sacrifice an Ikea dining chair and use it as the legs. When I ruined one of the legs I decided that I'd come too far to back out and that I must continue. I adapted many conventional methods to make the settee but I'm super pleased with the outcome. For the full step by step on how I completed the settee, please check it out here Part 1 Part 2 Part 3


Built from Plan(s)
Estimated Cost
150
Estimated Time Investment
Weekend Project (10-20 Hours)
Finish Used
Rustoleum Ultimate in American Walnut, Rustoleum Ultimate Polyurethane in Satin.
Navy Blue Upholstery Velvet, French Natural Nailhead Trim.
Recommended Skill Level
Intermediate

Comments

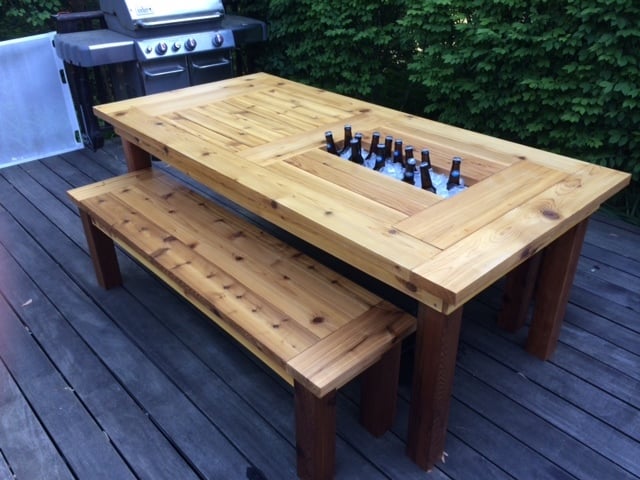
Cedar Patio Table w Hidden Coolers

Submitted by Goldy272 on Tue, 04/22/2014 - 08:04

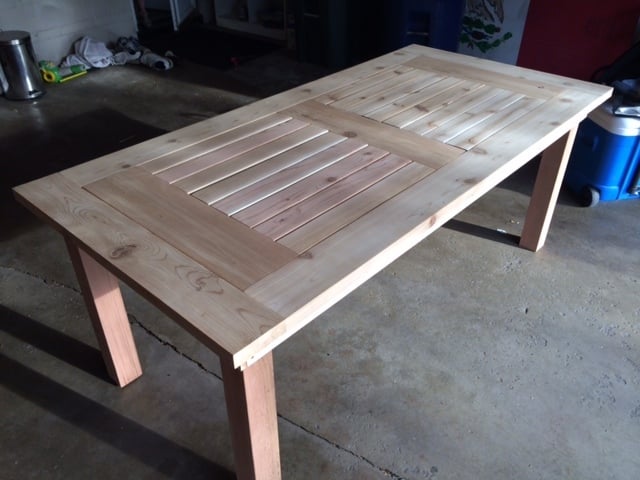
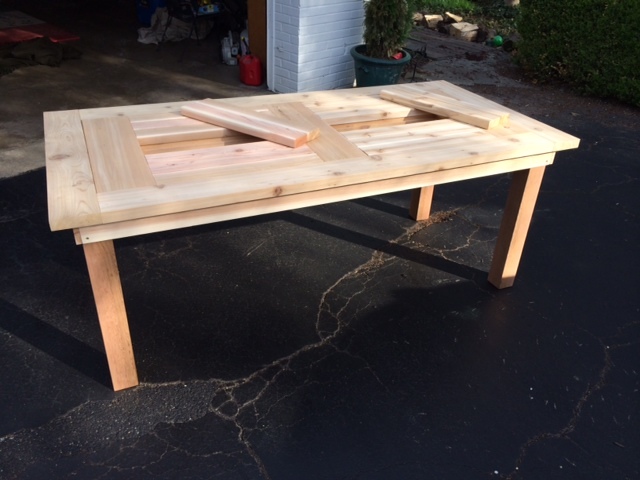
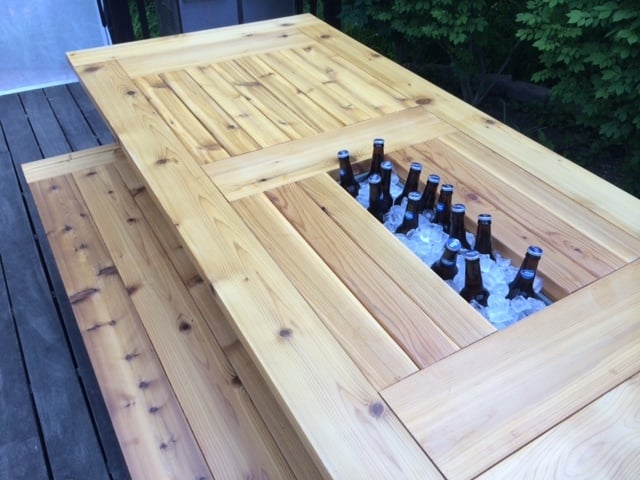
We needed a new patio table for our deck and I loved this design. I made it out of cedar which worked beautifully and made a few small tweaks:

- Needed it longer and wider so added two more 2x4's to the middle and added 2x6 end caps (as another poster had done).
- I did not add the holes to the cooler covers for uniformity, they slide in and out very easily.
- I used 4x4's as the legs and constructed the table skirting around it. This is a very sturdy design.

Built some benches for seating and they worked out great.

Overall I loved this build and it was fairly simple. Stained with Penofin deck stain (red label) and a spar varnish for protection.

Hope you like it!

Estimated Cost
$320
Estimated Time Investment
Weekend Project (10-20 Hours)
Finish Used
Stained with Penofin deck stain (red label) and a spar varnish for protection.
Recommended Skill Level
Beginner

Comments

Goldy272

Thu, 04/24/2014 - 07:43

Thank you! Local lumber yard that had great stuff. I will say though that I had to get some additional pieces from Home Depot and their cedar is fairly nice too. Beware though, they don't have true 1x cedar (at least here in St. Louis) it's more like 1/2 inch think.

coleyld10

Tue, 07/08/2014 - 20:00

Really well done with the two-tone stain. What particular colors of Penofin did you use? I'm working on a similar build and would like to use your color combination.

jmilkeris

Mon, 05/04/2015 - 10:06

Do you happen to have your lumber list? I'm not the greatest with add ons, LOL! If you happen to have a step by step that's even better.
Thanks,
Jennifer

Storage cabinet

Submitted by coryjon on Fri, 06/20/2014 - 04:34

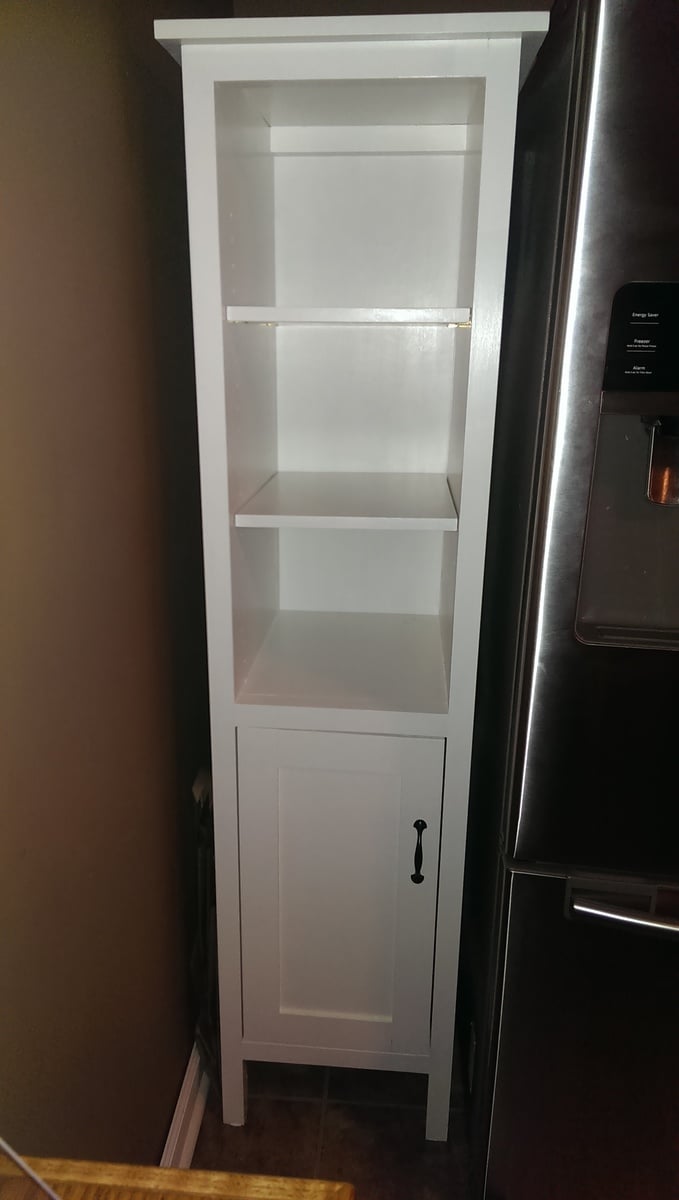
We needed some extra kitchen storage with a baby on the way and this project did the trick! We needed something skinny since space is a premium in our kitchen. I am happy with how this turned out. I made the shelves adjustable using the Kreg shelf pin jig, which worked amazingly.

Finish Used
Valspar Swiss Coffee in semi gloss
Recommended Skill Level
Beginner

Sliding "barn" door from reclaimed pallet wood

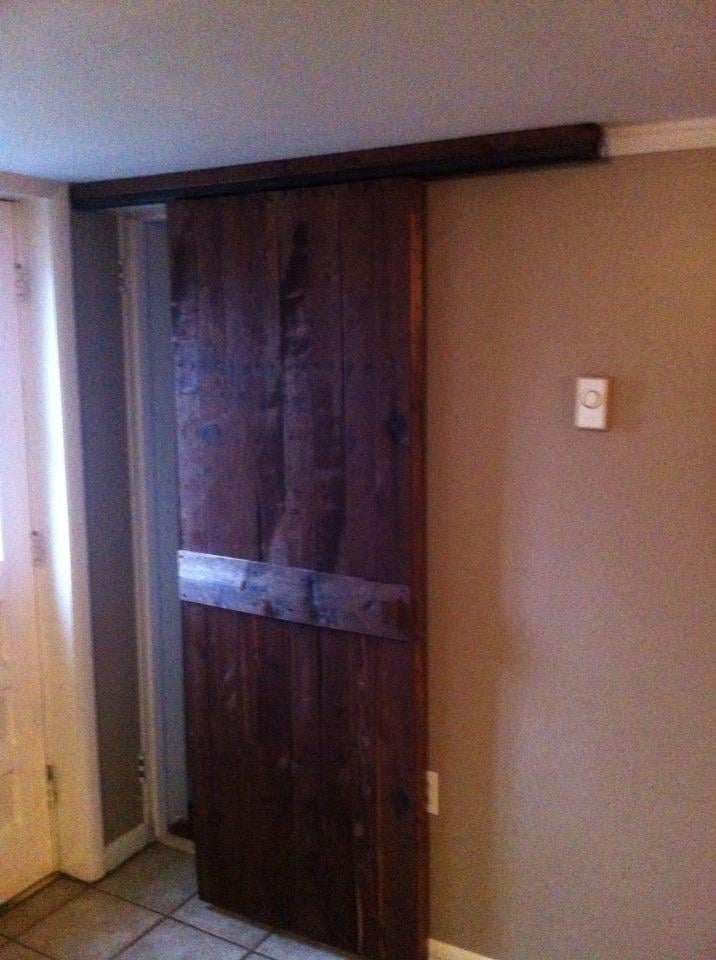
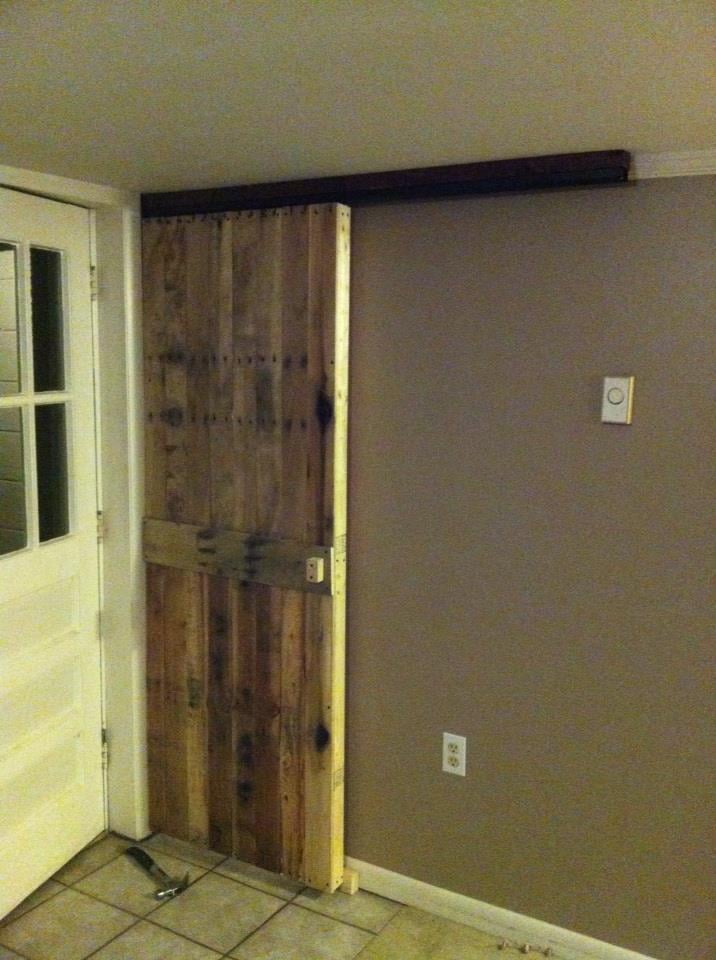
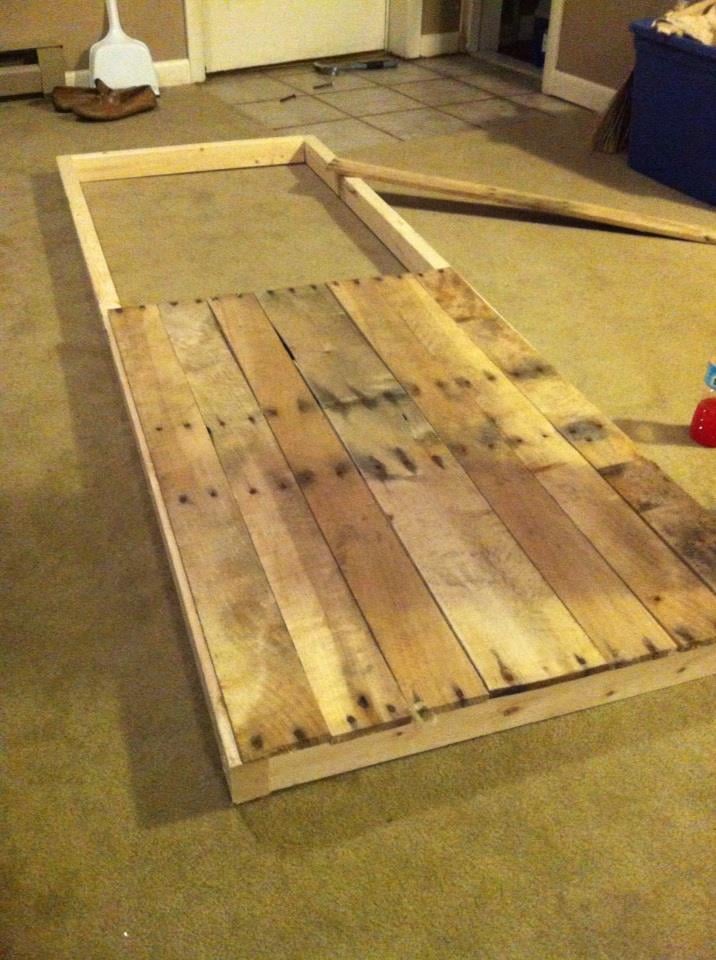
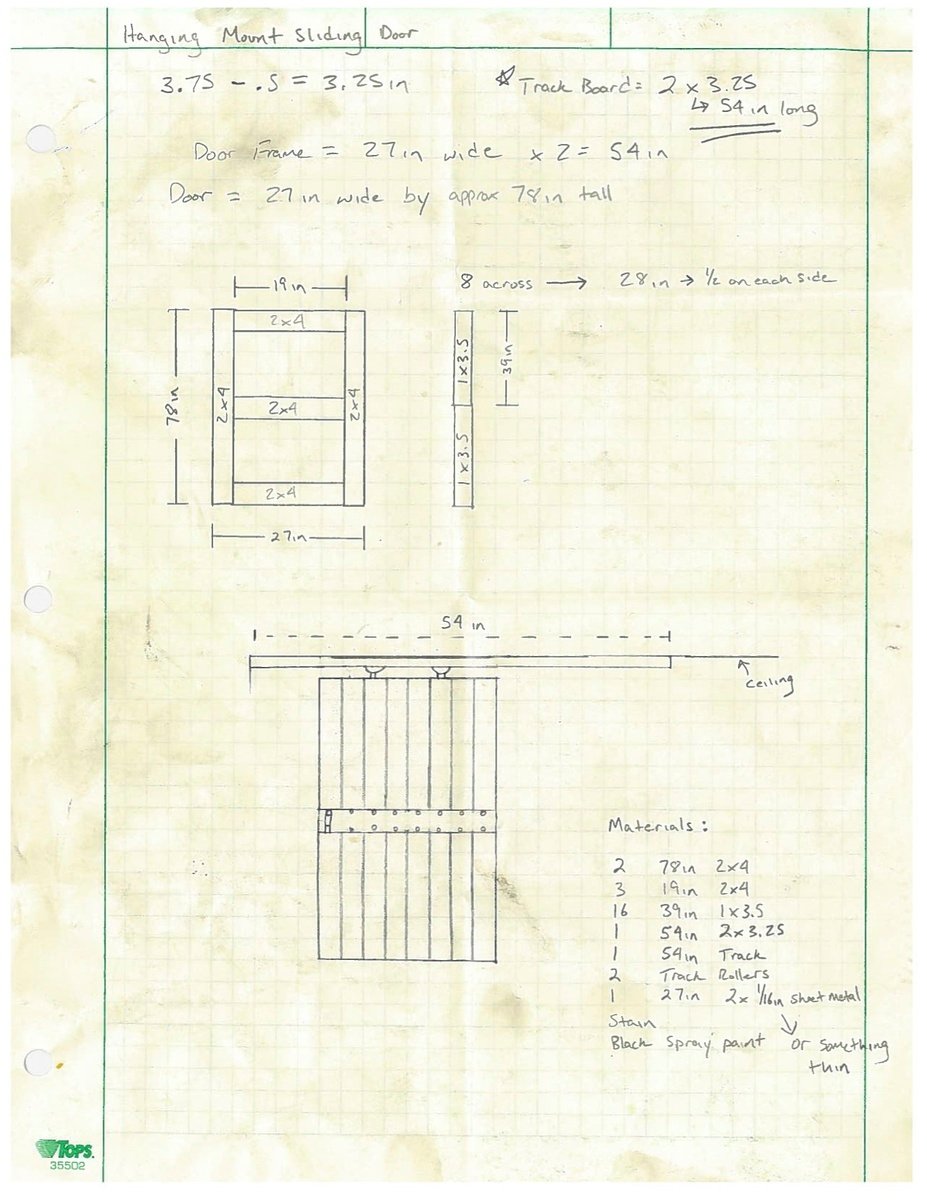
I saw many different sliding door projects online, so I did my own spin on one. I was able to get several old pallets for free (pine and oak). I went to Lowes and bought a few 2x3s which I used as the frame, and the track hardware which was only $13! Most doors I see are mounted from the wall, but since I have 7' ceilings downstairs I mounted mine from the ceiling. This project only took about 4 hours total and cost about $40 when you figure in costs for screws, stain, etc. The most difficult part was taking apart the pallets. Using a reciprocating saw with a 12'' demolition blade is the best way to take them apart. Thanks for the idea Ana.

Estimated Cost
$40
Estimated Time Investment
Afternoon Project (3-6 Hours)
Finish Used
Minwax Dark Walnut
Recommended Skill Level
Beginner

Comments

BREATHESMILEBE

Mon, 05/13/2013 - 20:00

Hi!!
This looks so awesome! I came across this and was hoping to repeat it. You mention that you found the door hanging hardware at Lowes for $13. I can't seem to find it. Do you happen to remember the name of it? I'm entering "hanging door hardware" into Lowes and Home Depot and can't seem to find any hanging door hardware at all. I'd appreciate the help. Thanks!
Tina

Farmhouse table

Submitted by jleach on Sat, 12/29/2012 - 06:53

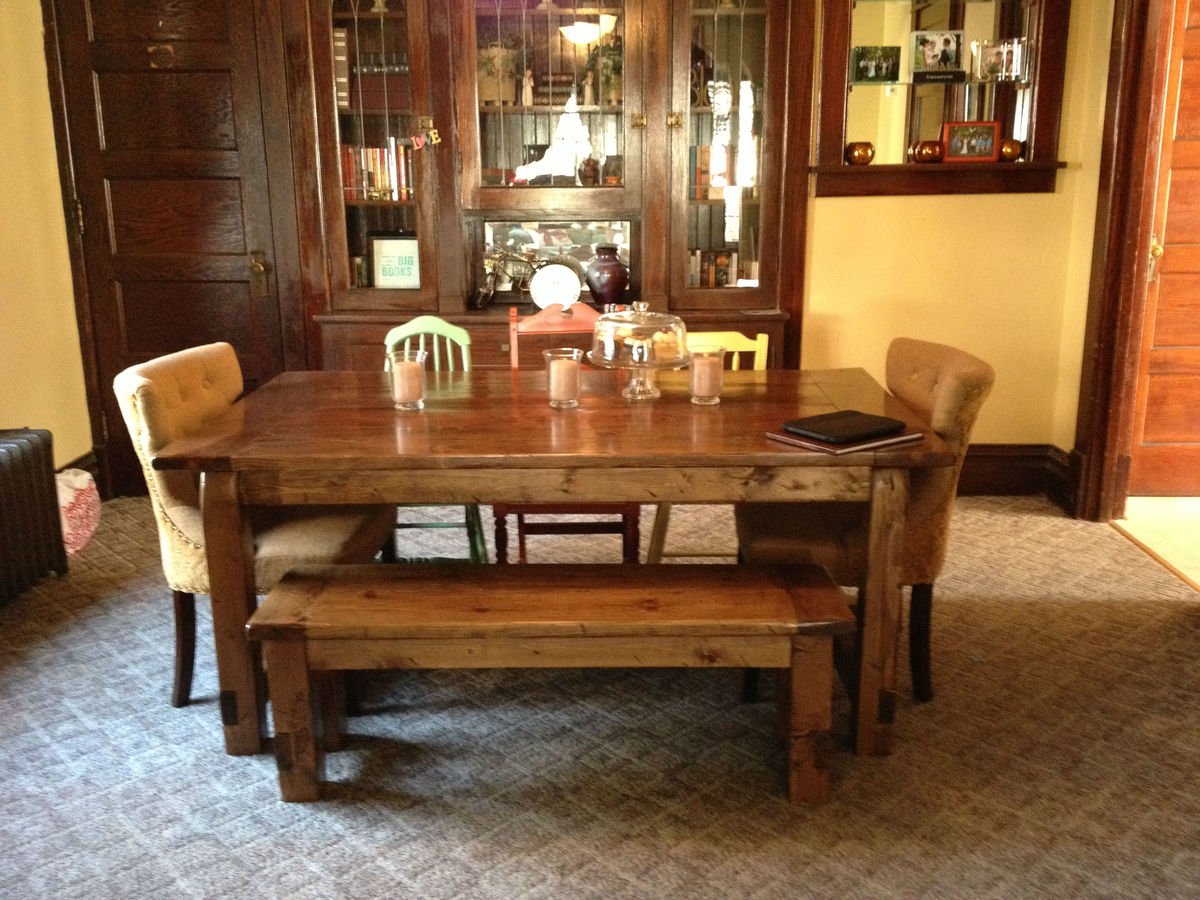
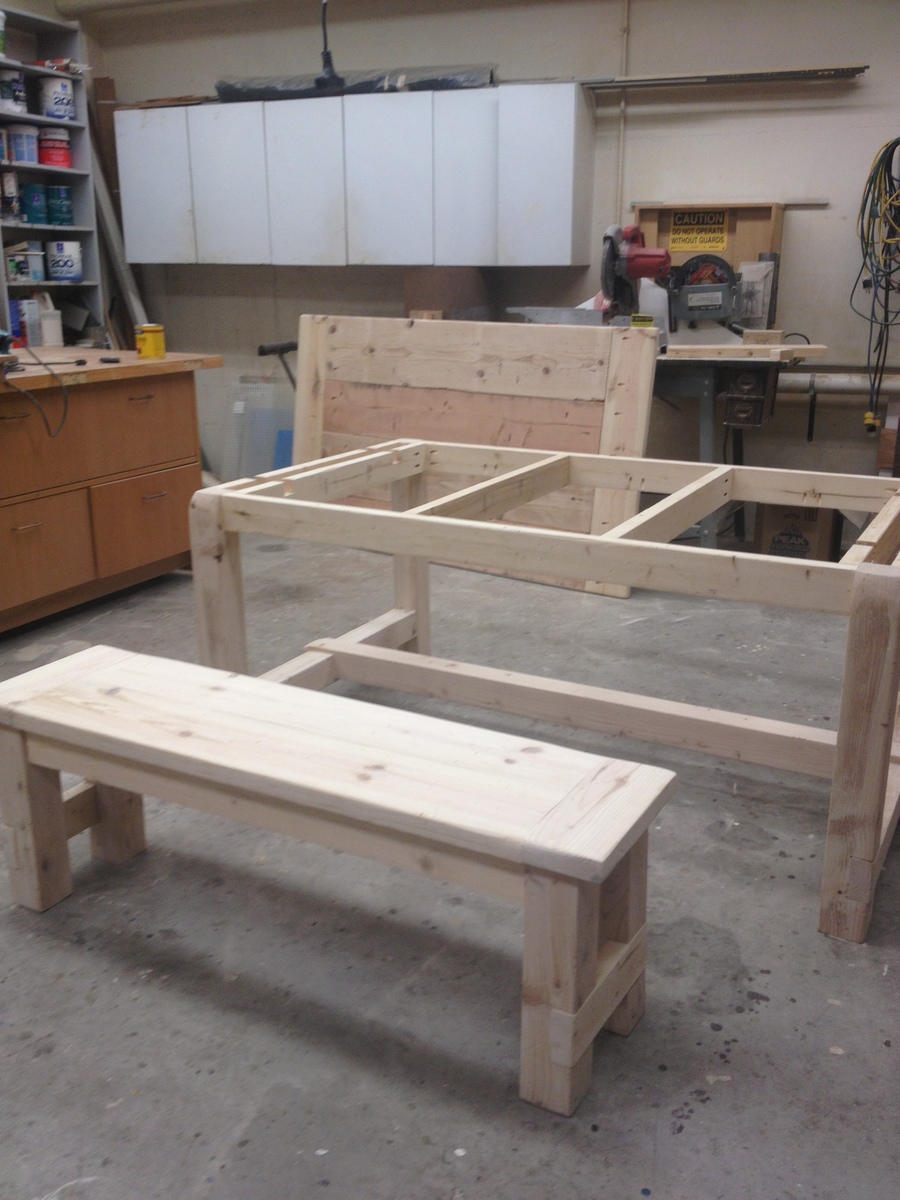
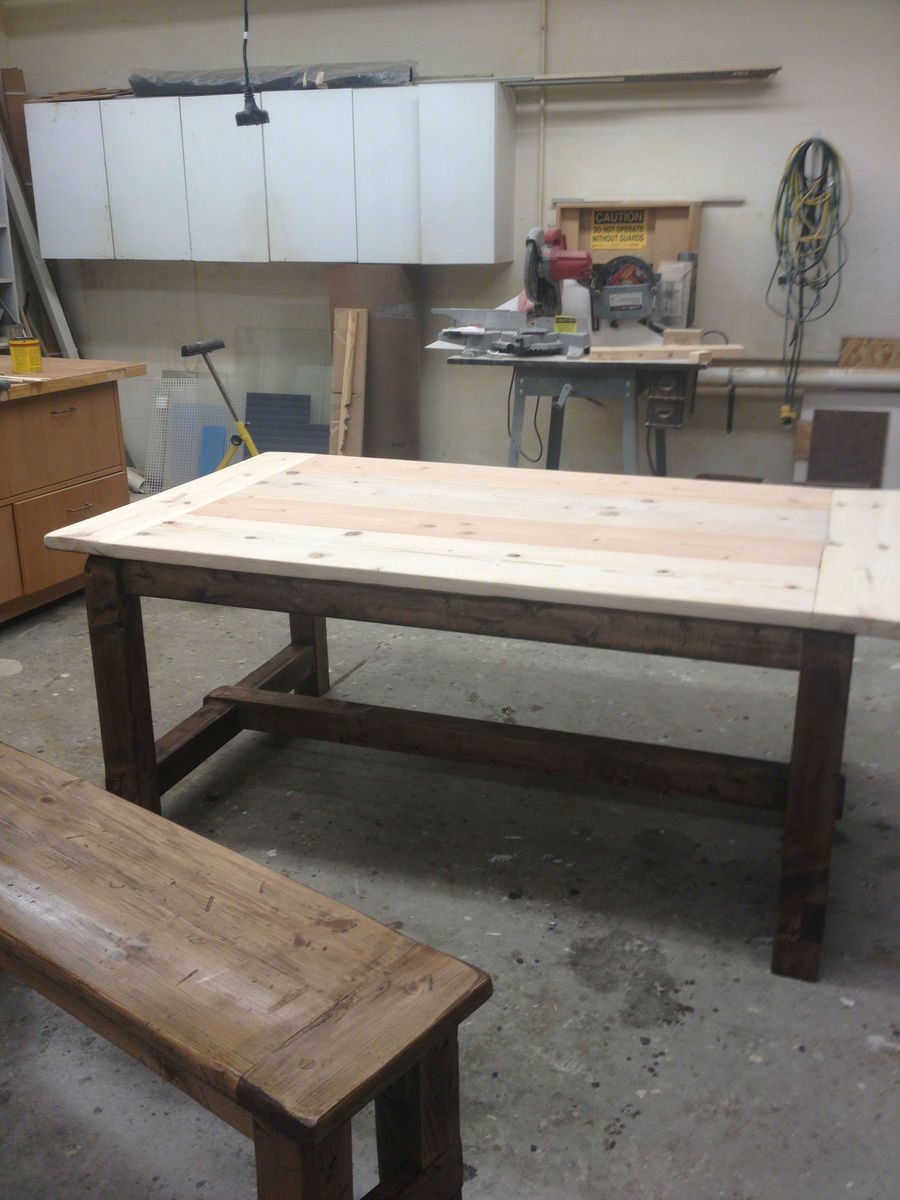
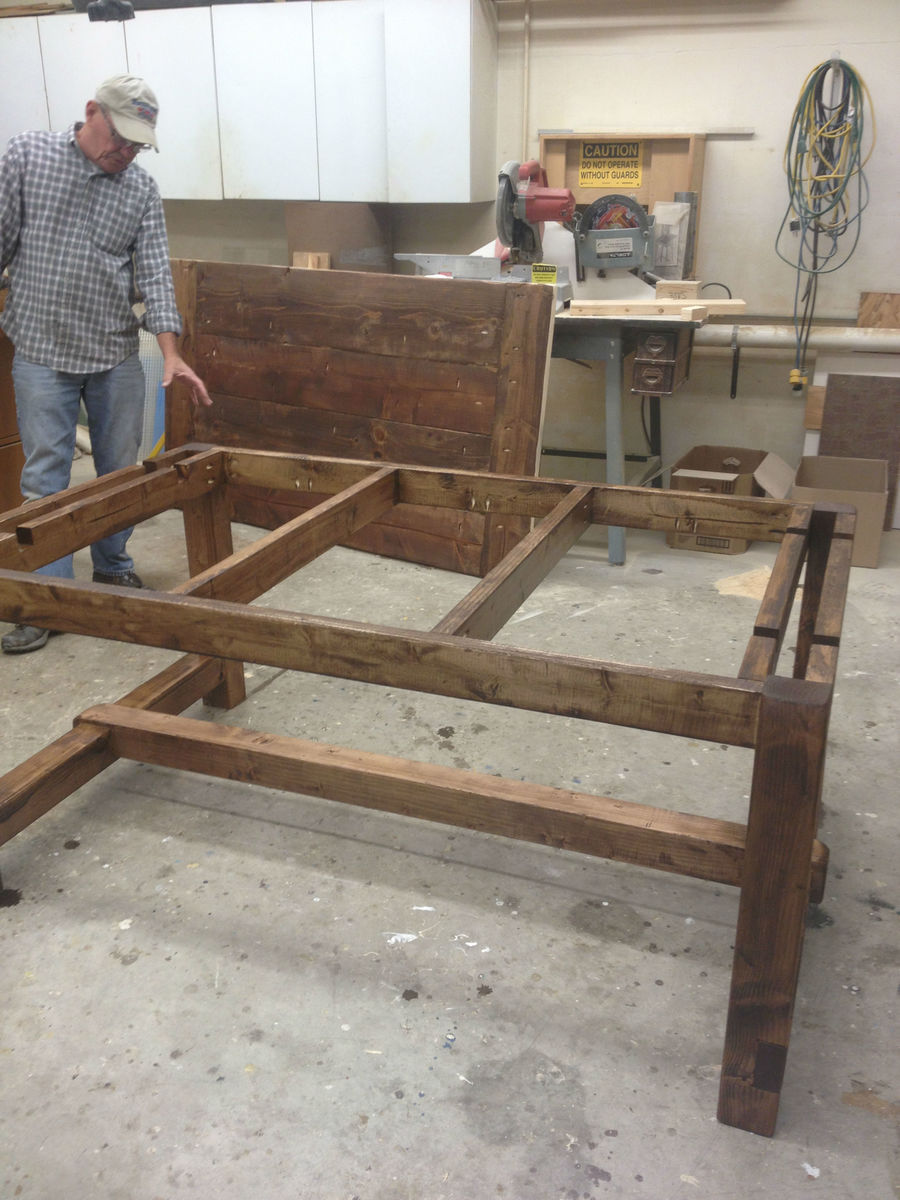
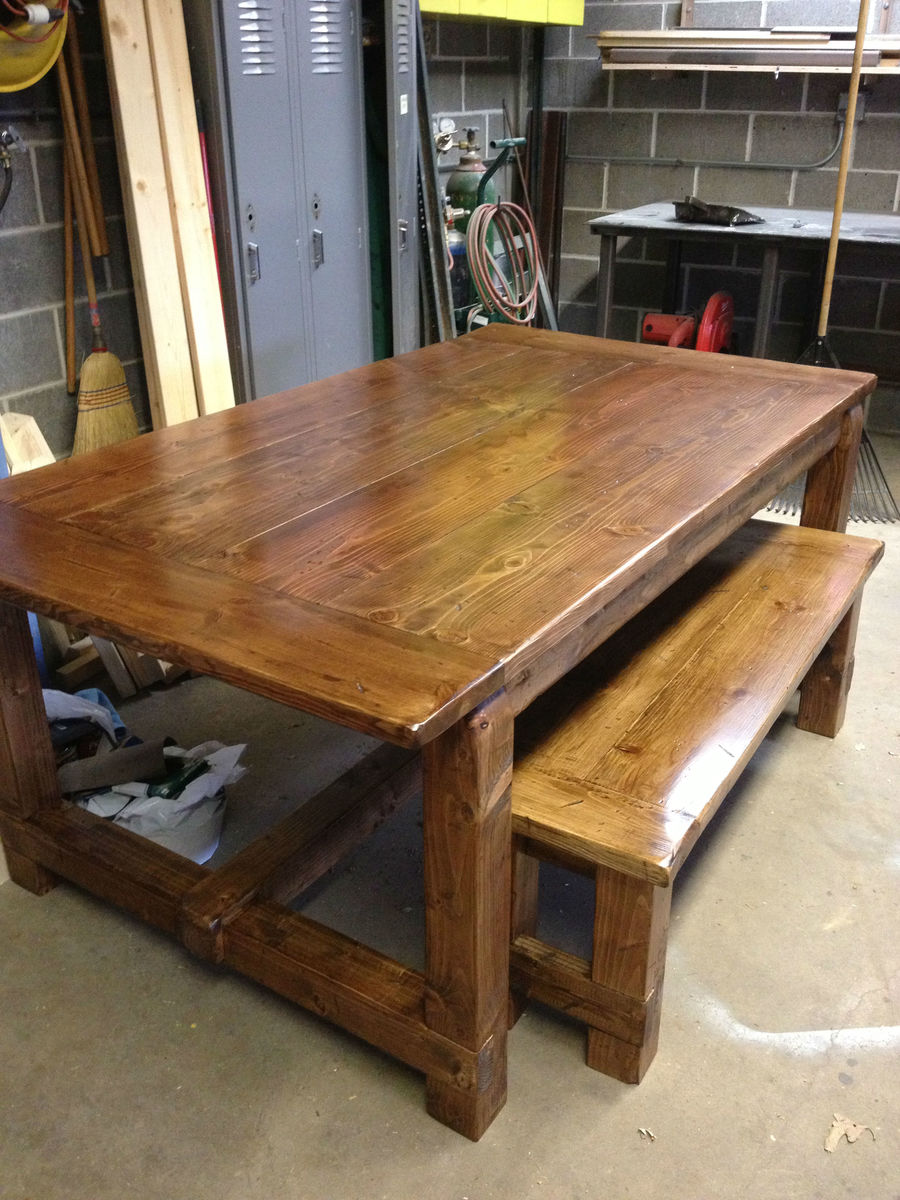
This was my first project. This was a birthday gift for my wife. She wanted one of these farmhouse tables but the cost was a little much for what we needed. I ran across a blog that followed the plans here and it walked me through step by step. It really wasn't that difficult of a build, and I almost want to sell this one(to the many people that have asked about buying one) and building another to fix the minor mistakes I learned while building it.(maybe triming the top so I would have nice tight seams, glue visible between boards, etc..) I started with the bench being this was my first project and first time using the kreg jig. The wife loved it. So much in fact that I took the scrap wood and made a coffee table and end tables for living room that matched. I did change the runner under the table and used another 4x4 instead of the 2x4. I like the beefier look with all the other 4x4 used for the legs. I also used the smaller table plans for the 72x41 plans as we didn't have room before building the larger one. With the extensions, we have comfortable seated 12.

Estimated Cost
200
Estimated Time Investment
Week Long Project (20 Hours or More)
Finish Used
Minwax special walnut and Minwax semi-gloss poly
Recommended Skill Level
Beginner

Comments

lphair

Mon, 12/31/2012 - 19:48

GREAT job! I just built this same table last weekend using what looks like the same plans (Tommy & Ellie?) and I had the same thought run through my mind about selling mine--even though it turned out great, I still wanted to improve on the minor things, like the tighter seams by ripping down the sides of the boards. I posted mine on CL to see what would happen and had it sold within 2 days at a $500 profit.

Yours turned out fantastic, I like the 4x4 lengthwise stretcher, that was a good call.

perry10706

Sun, 07/12/2015 - 22:36

I love the table you made! I checked out the blog post and have been studying your plans for an hour now. I'm really wanting to make this table with my husband! We will be first timers so we don't have all the fancy clamps and stuff. Can this be done without the use of clamps? The original plans don't call for them, but it seems like every other post of people making the table uses clamps. Thanks so much! 

hulkster51

Thu, 09/15/2016 - 16:53

very nice job , im going to tackle it this weekenddid you use 2x4 or 2x6? plans call for 2x4 but neveryone seems to use different sizes


paul

sandy.p56

Mon, 11/06/2017 - 11:26

On your Farmhouse Table and Bench build from 2015, you substituted 4x4s for the leg supports under the table. In the original plans, the 2x4s are notched out to provide support for the other 2x4s. You can't do that if everything is 4x4s, so I was wondering how you connected the pieces...or did you notch out both pieces so they would rest in each other (kind of interlocking)? It's hard to tell from the pictures. Thank you. Sandy

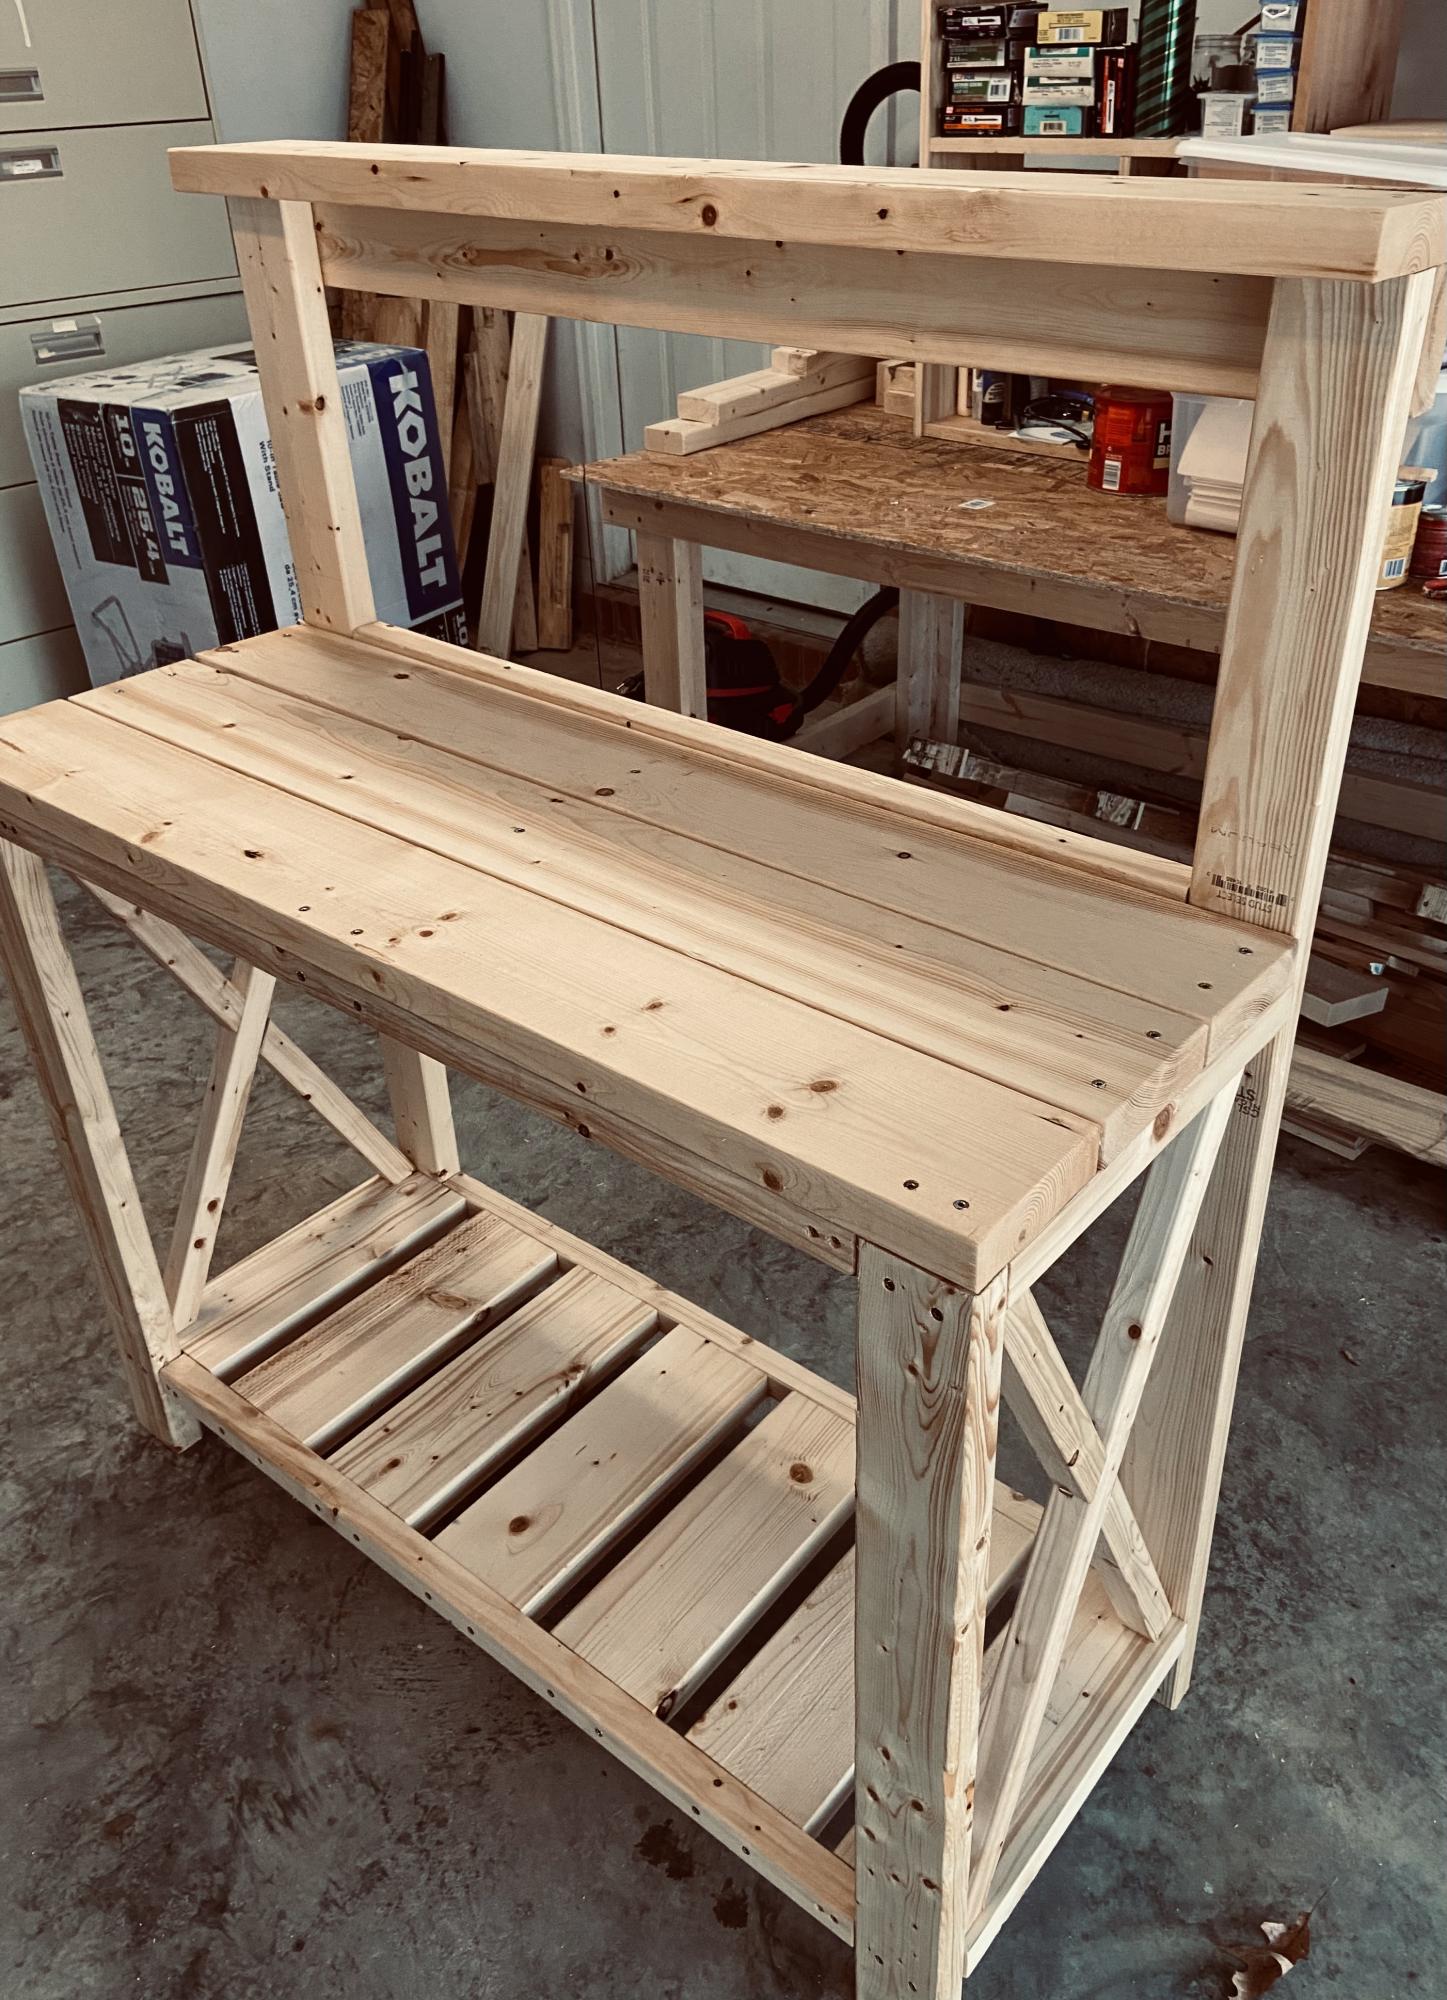
Potting Bench

I am a complete newbie to anything woodworking. I just turned 60 and used a drill for the first time about 9 months ago. Thanks to Anna and her plans and videos, I have developed some some self confidence in this art and absolutely loving it.

Farmhouse coffee table and king size bed is next.

Thank YOU Anna!!! You totally rock!!!!!!!!

Estimated Time Investment
Day Project (6-9 Hours)
Recommended Skill Level
Beginner

Comments

Simple Outhouse

Submitted by Anonymous (not verified) on Thu, 04/20/2017 - 12:26

I had my nephew build this outhouse for our new 70 acre lot - no neighbours in sight so I had him put in an acrylic window (with a view).  I left off the deck and had him put the boards tight together so 'critters' didn't get in as easily. I made a sign for above the door - 'Waste Management' for a touch of humour.  The plans were easy to follow and I love it.  Thanks, Ana.

Built from Plan(s)
Estimated Cost
Approx. $300 for material and $250 for my nephew's labour.
Estimated Time Investment
Weekend Project (10-20 Hours)
Finish Used
sealer
Recommended Skill Level
Beginner

Comments

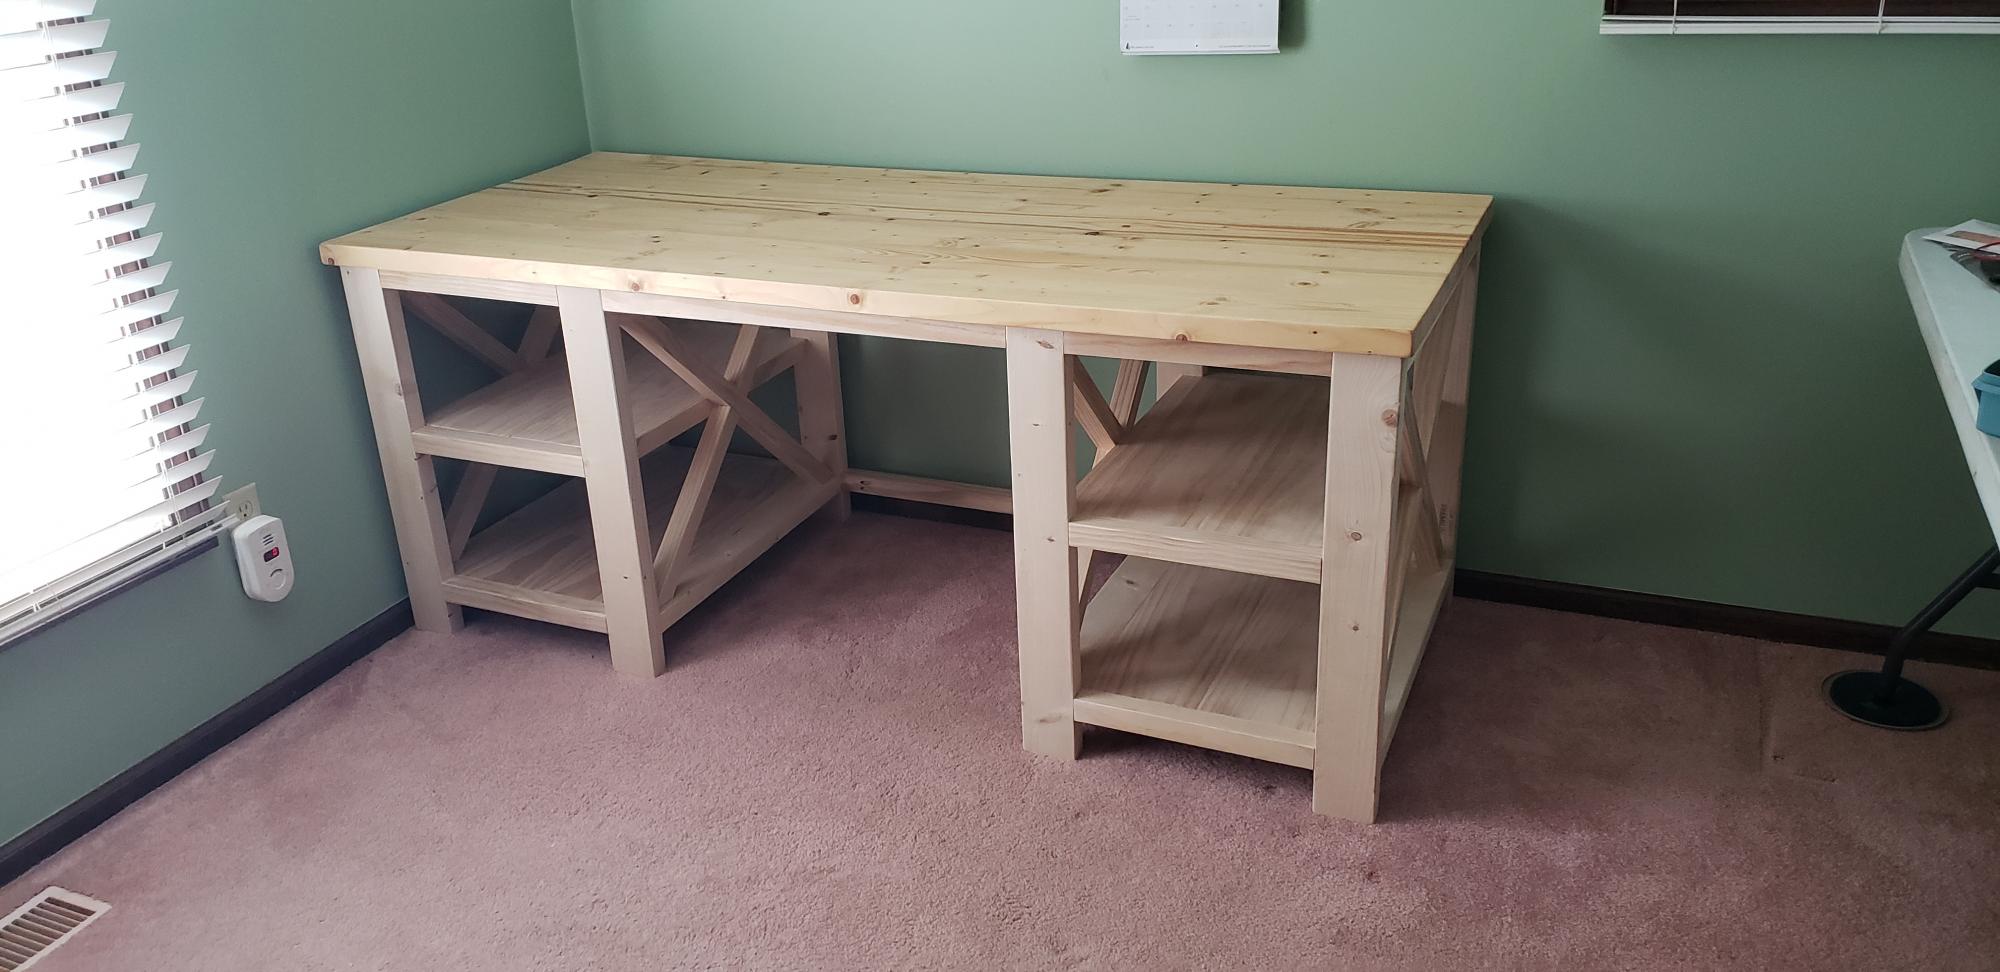
Electronics workstation desk from RusticX plans

Submitted by Anonymous (not verified) on Sat, 06/19/2021 - 20:37

Base desk for workstation. Will probably add a "hutch" at some point.

Comments

White and ceder nest boxes

Submitted by Anonymous (not verified) on Thu, 06/01/2017 - 21:35

I mostly followed Ana's plans but used 1 5/8 screws and had a problem with wood splitting so for the ceder I used a finish nailer instread which worked great. I also painted before nailing the ceder pieces so they would really stand out and I also cut a few inches off the front ceder piece as I think 5.5in is too high and covers too much of the entrance. 

Built from Plan(s)
Estimated Cost
30 dollars
Estimated Time Investment
Afternoon Project (3-6 Hours)
Finish Used
Just an exterior white paint on the pine.
Recommended Skill Level
Starter Project

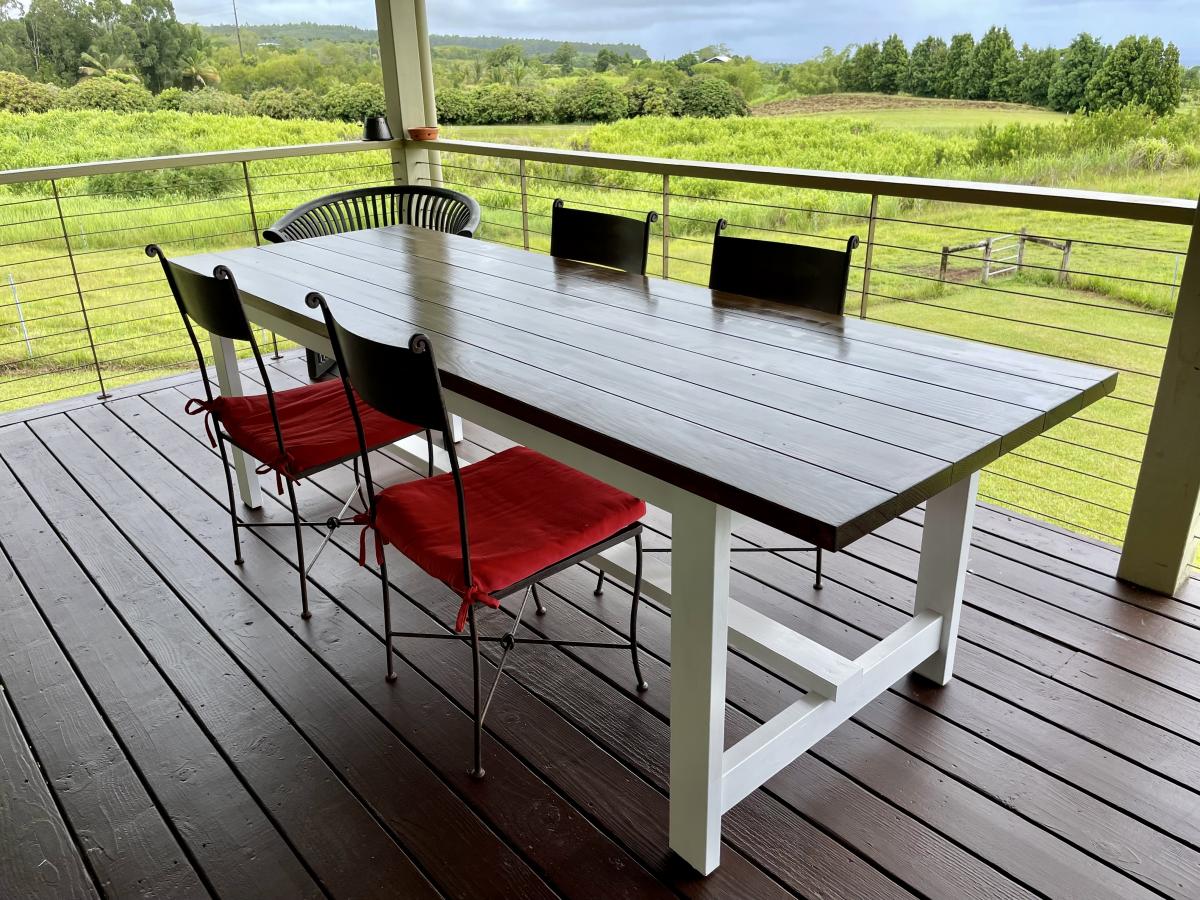
Exterior farmhouse table for the farm

we needed an exterior table big enough for 8 on short notice. It's hard to find nice exterior furniture on the Big Island of Hawaii so we decided to build ourselves using borrowed tools. only wish i had my kreg jig nearby :).

*this is July 2021 (pandemic) so wood prices have shot up. that's the reason the cost of the project is higher than normal.

Estimated Cost
350
Estimated Time Investment
Weekend Project (10-20 Hours)
Finish Used
1. Primer: Zinsser Bulls Eye 1-2-3 Primer
2. Wood conditioner: Varathane pre-stain wood conditioner
3. Paint – Legs: Benjamin moore soft gloss finish premium exterior paint in white
4. Stain – Top: Varathane premium poly+stain in Satin Jacobean
5. Varnish: Minwax Helmsman Spar Urethane
6. #9 x 2-1/2 in. Star Flat-Head Wood Deck Screws by Deckmate
Recommended Skill Level
Beginner

Comments

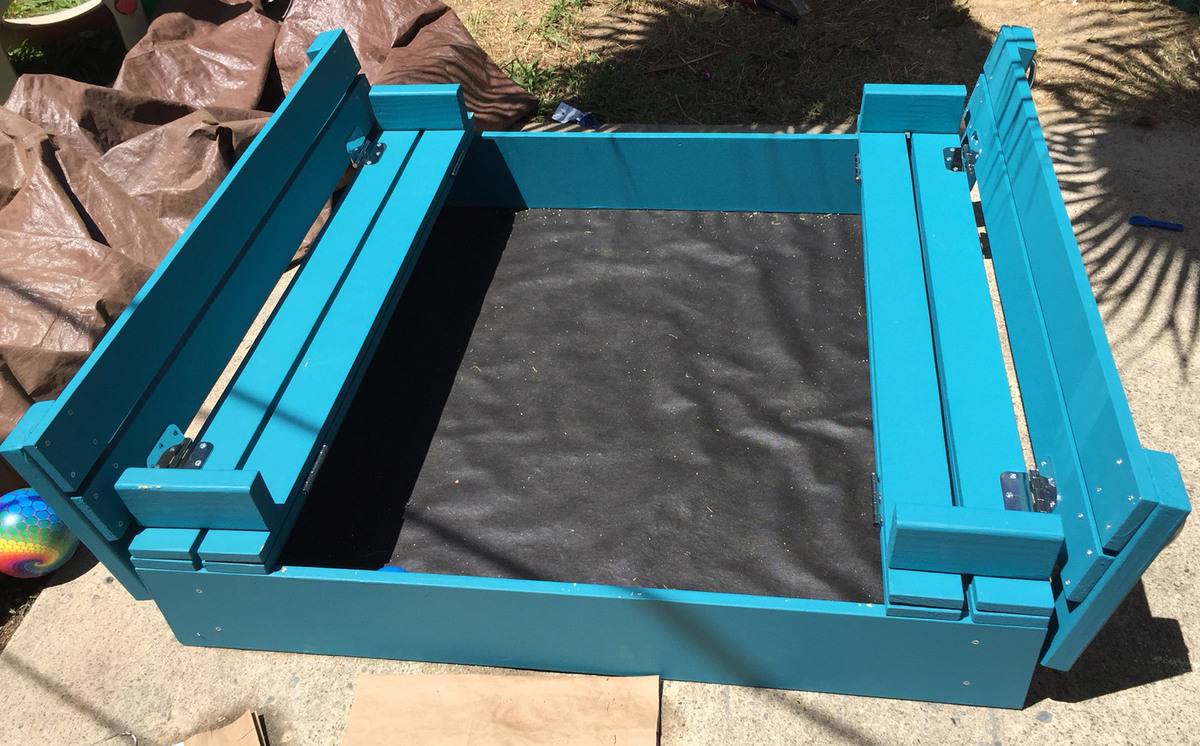
Sandbox w/ Built In Seats

Submitted by Anonymous (not verified) on Wed, 06/14/2017 - 07:30

I have built some other stuff before, but not with paint and sanding and such. It was definitely a great learning project. There are imperfections, but it's a toy, so kids will be having fun and that is all that matters.

Built from Plan(s)
Estimated Cost
$100... but, the paint will be used on other projects, and I paid for better boards for on top.
Estimated Time Investment
Weekend Project (10-20 Hours)
Recommended Skill Level
Beginner

Comments

Junior loft bed

Submitted by Anonymous (not verified) on Thu, 06/29/2017 - 09:55

My very first furniture build! Took me about 5 days, but as a beginner I found it very easy to follow the plans. I did buy a Kreg jog for this project, highly recommend it! Other tools used were a miter saw, circular saw, and drill.

Estimated Cost
$80
Estimated Time Investment
Week Long Project (20 Hours or More)
Finish Used
Ebony stain
Recommended Skill Level
Beginner

Washer/Dryer Platform Pedestal

Submitted by Dimarc67 on Fri, 04/17/2015 - 10:45


THE MOTIVATION
After a recent washer outage (that I was ultimately able to repair myself), my wife and I talked about eventually replacing our front-loading washer/dryer set.  One of the bullets I hate biting is paying the exhorbitant prices for the matching pedestals for new washer/dryer sets.

Having just bought a good set of cordless powertools, and having watched my father when I was a kid build countless household fixtures, window dressings, furniture pieces, etc., I decided to try my hand and construct a permanent platform for our current washer/dryer set, thereby eliminating the need to ever buy manufacturer pedestals again.

The existing pedestals were a standard 15" high, with a storage drawer, which we felt was still not high enough for comfort.  And, the washer pedestal drawer was entirely inaccessibl due to the 2" walls on the washer drain pan, so its drawer was totally useless, wasted space.

And, lastly, we really wanted more space for clothes baskets full of laundry, which we generally stacked (full and haphazardly) on top of the machines.


THE CHALLENGES
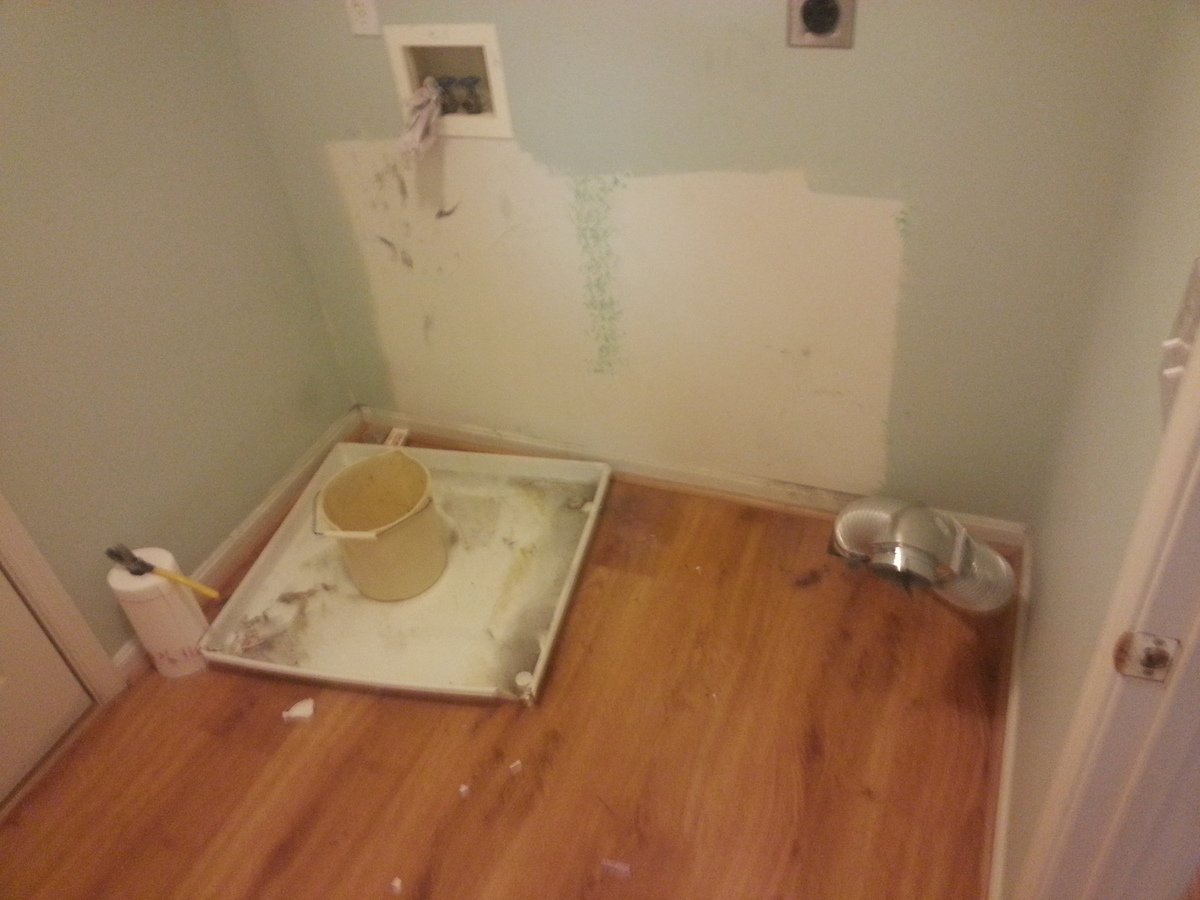
The largest challenges were mainly logistics, and gravity.  The washer/dryer would have to be unavailable for at least 2-3 days while they sat disconnected in the next room waiting for their new home.  So I coordinated with the family so they'd know when they needed to have their laundry done, or tough it out until I was done.

There was no way to know for sure what the drain connection for the washer pan looked like until I got the washer out.  So it was a small gamble that I'd be able to get the parts needed to extend the drain pipe up to the new platform right when I was ready for them.  Fortunately, this was no issue at all.

The biggest challenge turned out to be toward the end when it came time to lift our 230-lb. washer onto the new platform.  I seriously considered disassembling the washer to the point that I could remove its molded concrete counter-weights, but instead (and arguably stupidly) elected to use a large hydraulic car jack to raise the washer.  This ultimately worked, but I have to STRONGLY ADVISE AGAINST trying this.


THE SPACE
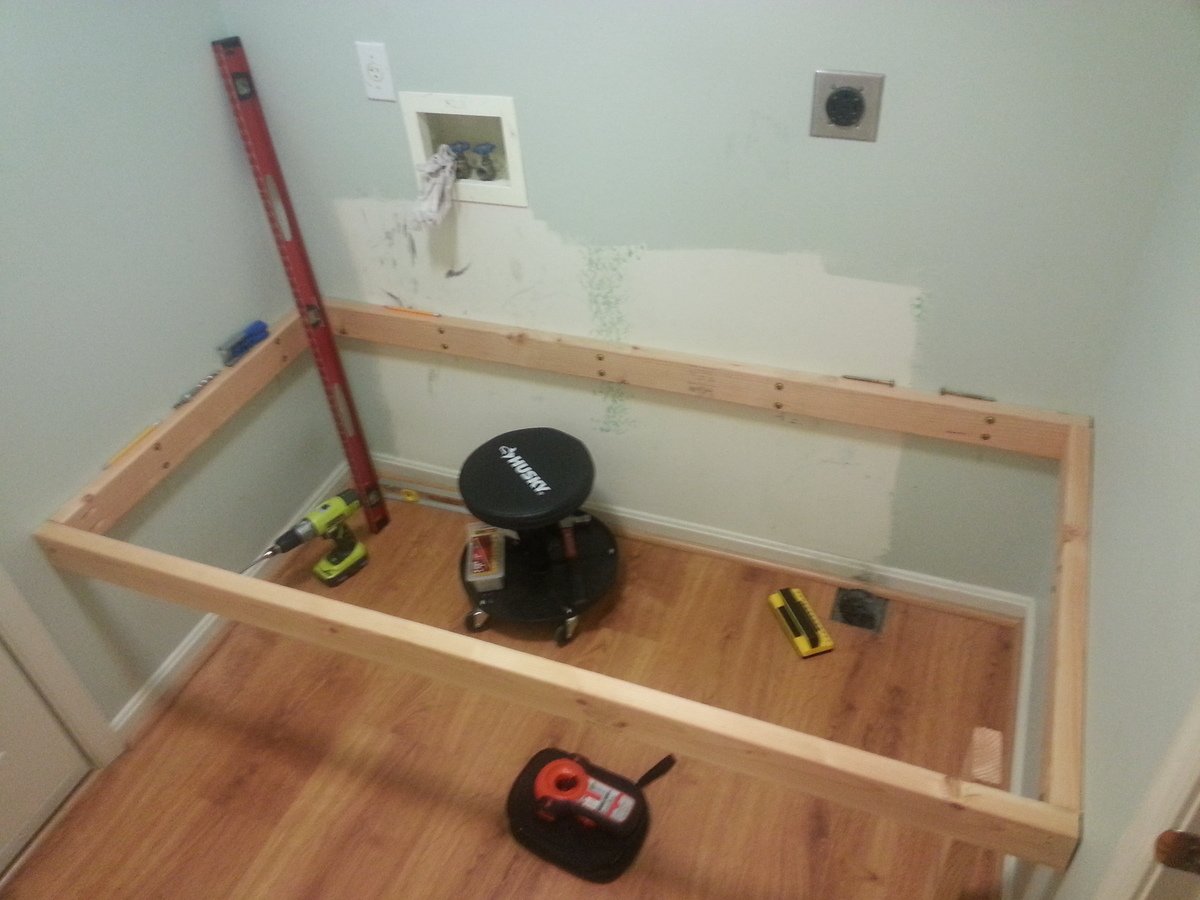
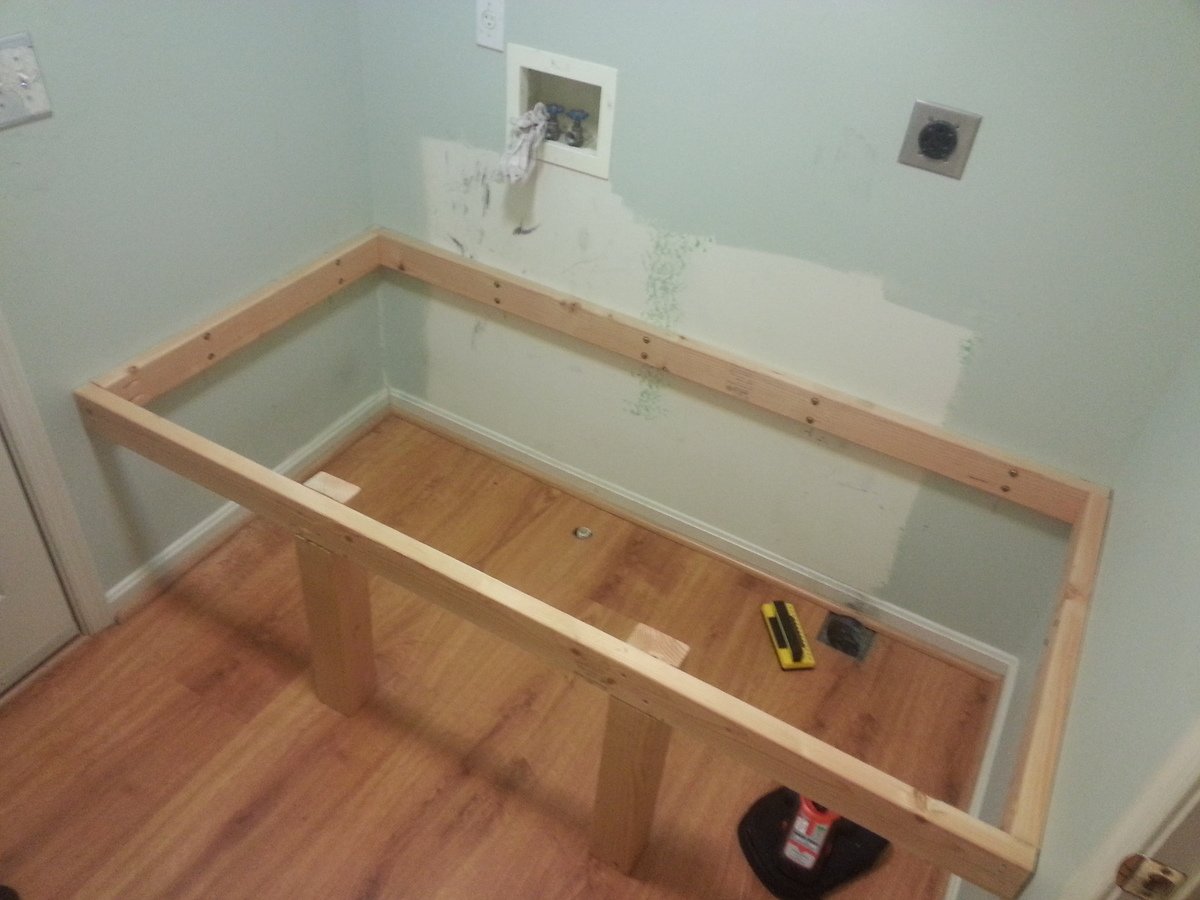
Our laundry room is also the "mud room" between our kitchen and the garage.  It is only large enough for the two machines, and the walk way between the two doors--in total, about 70.5" square.  Building the platform from wall-to-wall made the most sense, and minimized framing by fastening edge framing directly to the wall studs. 


THE PLAN
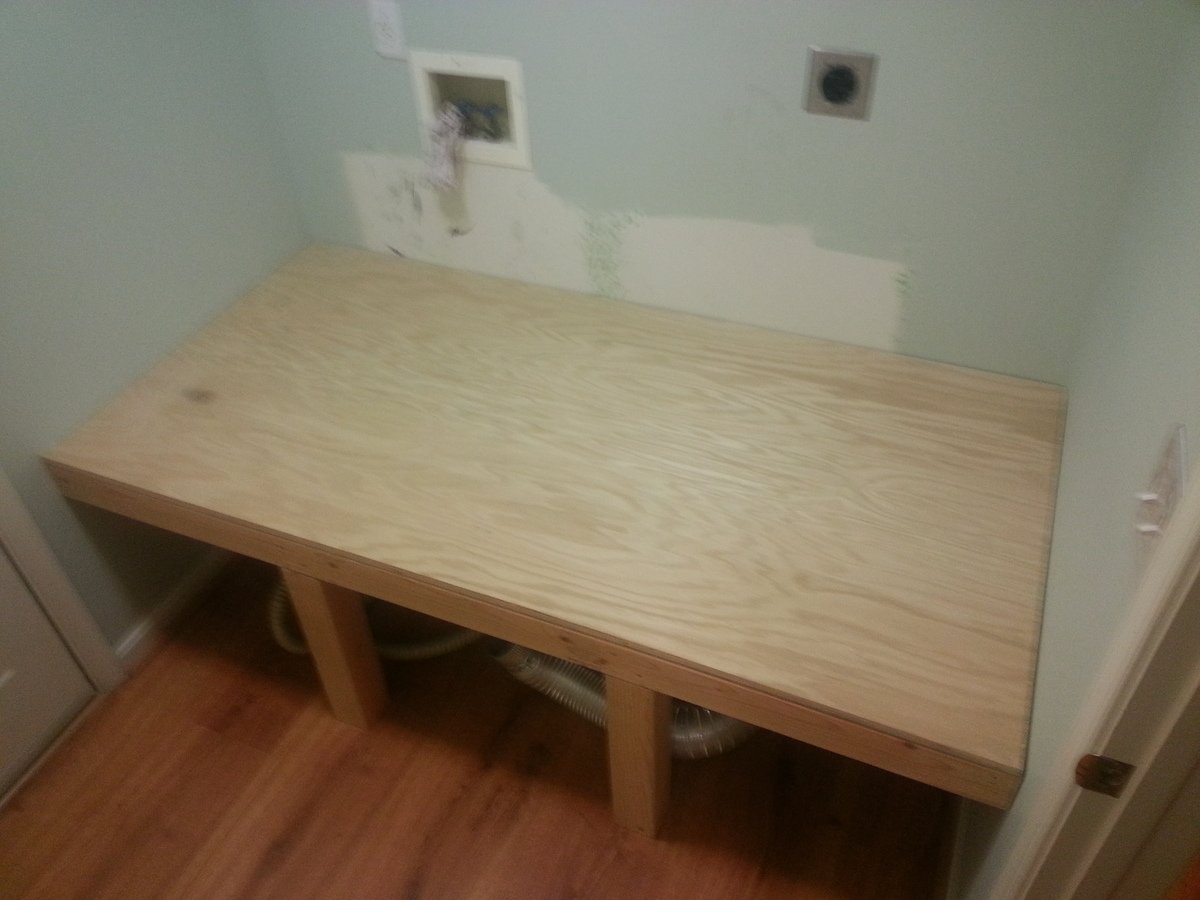
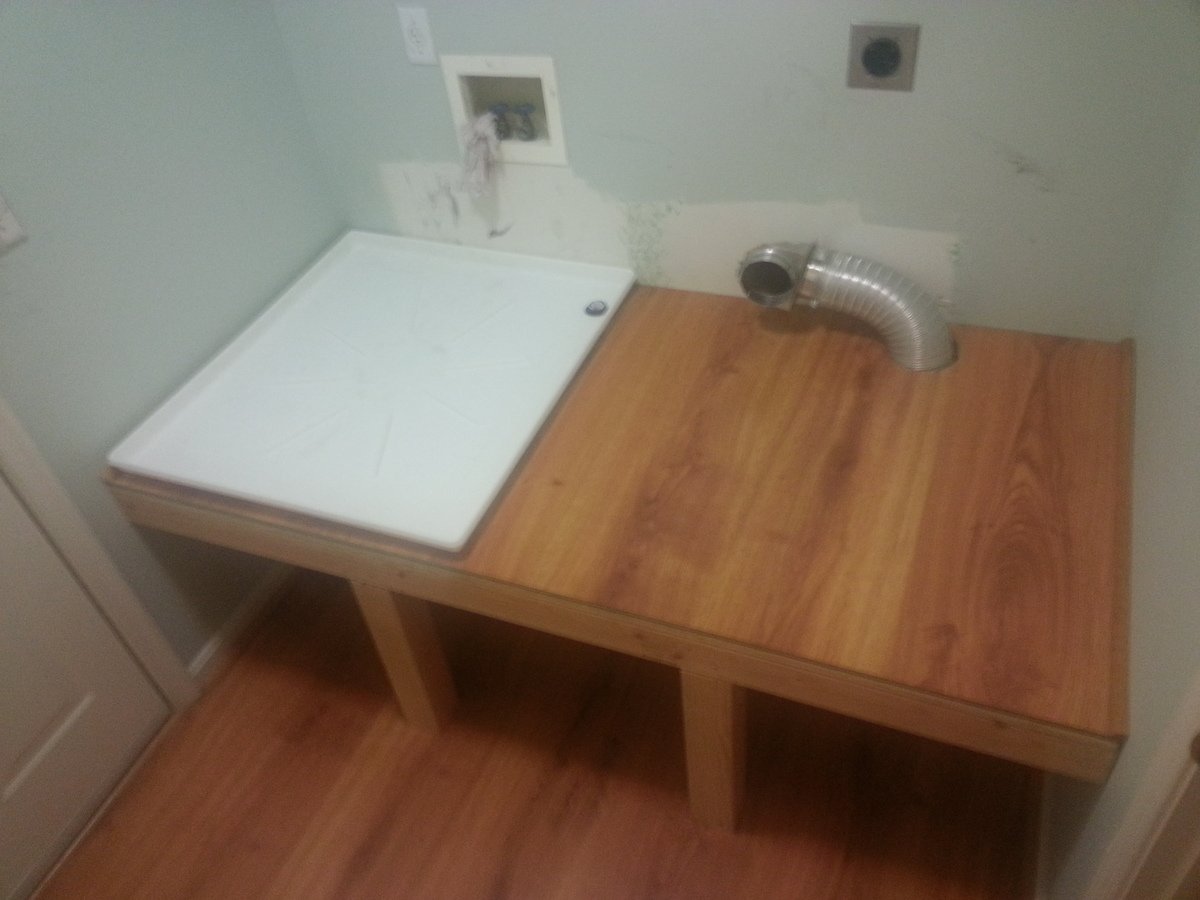
Pretty basic:  2x4's all around for the edge framing--back and sides fastened directly to the wall studs, and front 2x4 supported by two, notched 4x4 legs.  3/4" plywood for the subsurface, and 1/4" laminate faux-wood flooring on top (left over from reflooring, so it matches the floor below).  Bore holes for the washer pan drain and the dryer vent.  1" quarter-round molding on the sides, and 5.5" face piece flush with the top of the molding across the front (spare lauan I had looks perfect).  I also made a point of putting the machines on the platform before the face piece since it might have been in the way or damaged.

Anyone will tell you that it's best to at least sketch out what you want to do so you can minimize surprises, forgotten parts, etc.  I, of course, did virtually none of that, and made several course changes and corrections along the way.  For this project, I was lucky that I didn't need to backtrack at any point, and probably won't learn this lesson any time soon anyway.  However, you SHOULD.


TAKE-AWAYS
The main mistake I made was while gathering the platform dimensions for cutting the plywood.  It was only blind luck that kept me from having to do it more than once (and having to buy more than one 4x8 sheet).  I know that it's actually very unlikely that two adjacent walls are perfectly square, so I made a point to measure the width between the walls at the back and at the front--and, sure enough, found a 1/8" difference--wider at the front.  But when I measured and marked the plywood for cutting, I measured both distances from the precut edge, and then cut.  By doing this, I inadvertently assumed that one of the back corners was perfectly square. 

What I should have done was used a carpenter's square in each back corner to extend a square line from the back edge to the front, and then measured from the square lines to their respective side wall.  This would have accounted for neither back corner being square.

Fortunately, my mistake wasn't big enough to keep the plywood from fitting, but it was very, VERY close.


GIDDY
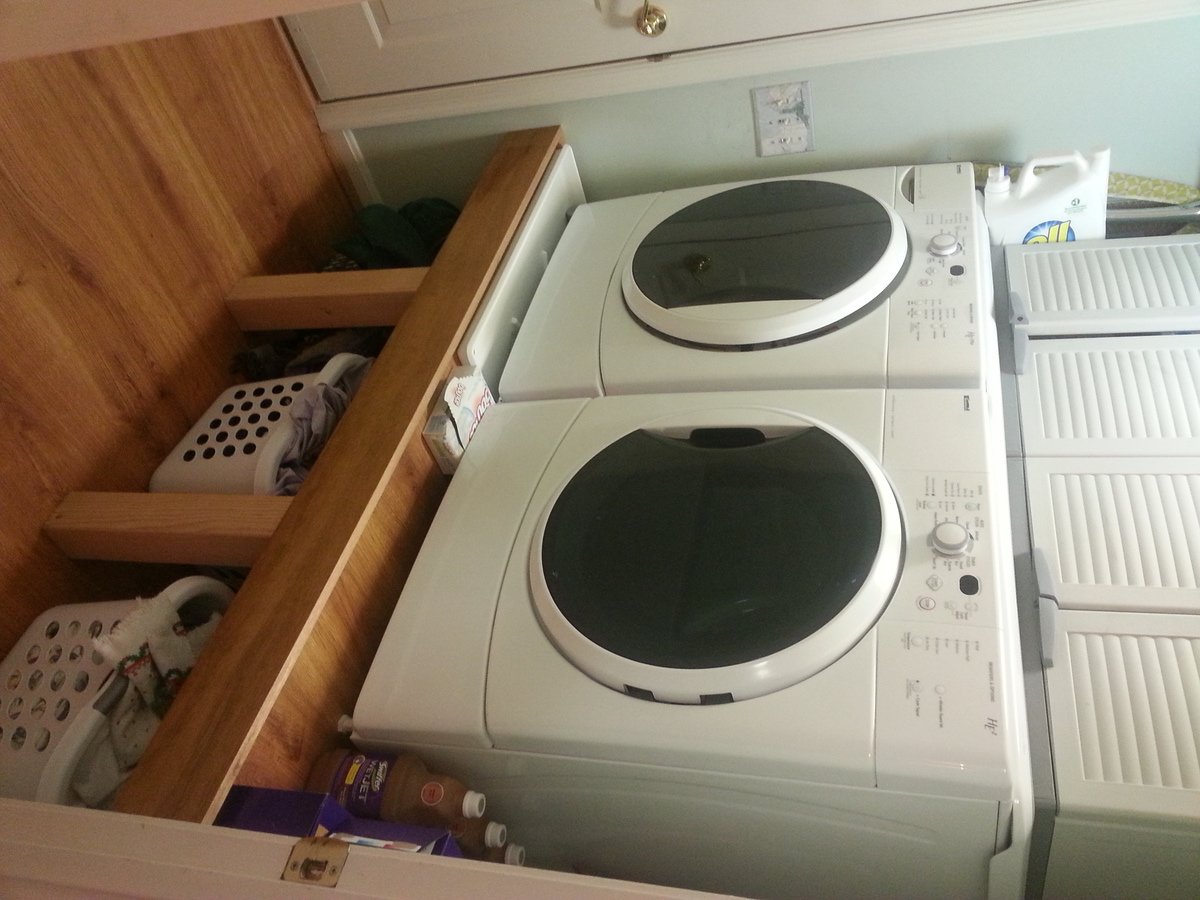
I honestly couldn't be happier with the finished project (or more smug).  We've raised the washer/dryer 9" higher than they were (24" off the floor), and we now have basket storage underneath all the way across.  I placed two 24" plastic cabinets on top, which still leaves room for the detergent right over the soap inlet on the washer.

And, most importantly, I got to use every powertool I own.  Kinda beats "the quick brown fox jumped over the lazy dog" thing, huh?
 

Estimated Cost
Most of my project made use of spare lumber and materials I've had on hand forever. The 4x8 sheet of plywood was about $30 at Home Depot.
Estimated Time Investment
Weekend Project (10-20 Hours)
Finish Used
Natural. No finishing, staining, or painting. Lauan has a natural stained oak coloring, so it was perfect for the facing. (A soft wood, Lauan--"lao-AHN", also sometimes called "Philippine Mahogany" simply for the darker color--used to be as readily available as pine, but I haven't seen it in stores for many years.)
Recommended Skill Level
Intermediate

Comments

Corner Cupboard

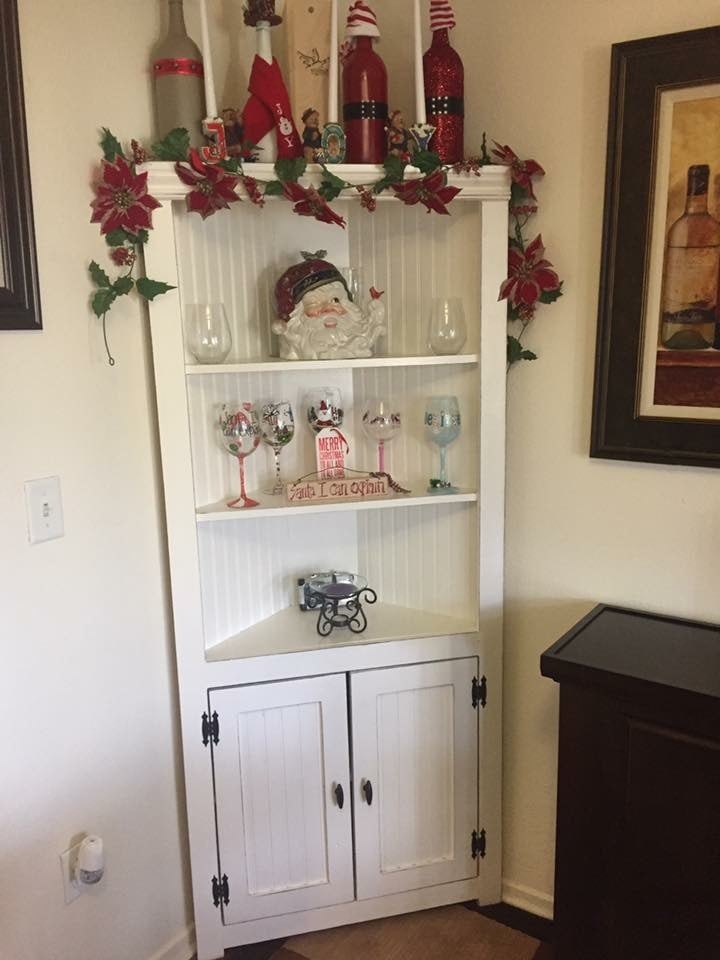
My husband built this for me. The doors were a bit frustrating for us as beginners. I really thought he was going to end my life over those doors really. I am very happy with the end result but it did sit inside of the house for over a month without doors. LOL I love this cabinet so much though. It's my favorite piece so far.

Built from Plan(s)
Estimated Time Investment
Week Long Project (20 Hours or More)
Finish Used
General Finish Java Gel Stain
Dove White Valspar Paint
Recommended Skill Level
Intermediate

Outdoor storage box

Submitted by mdsandell on Mon, 09/18/2017 - 10:46

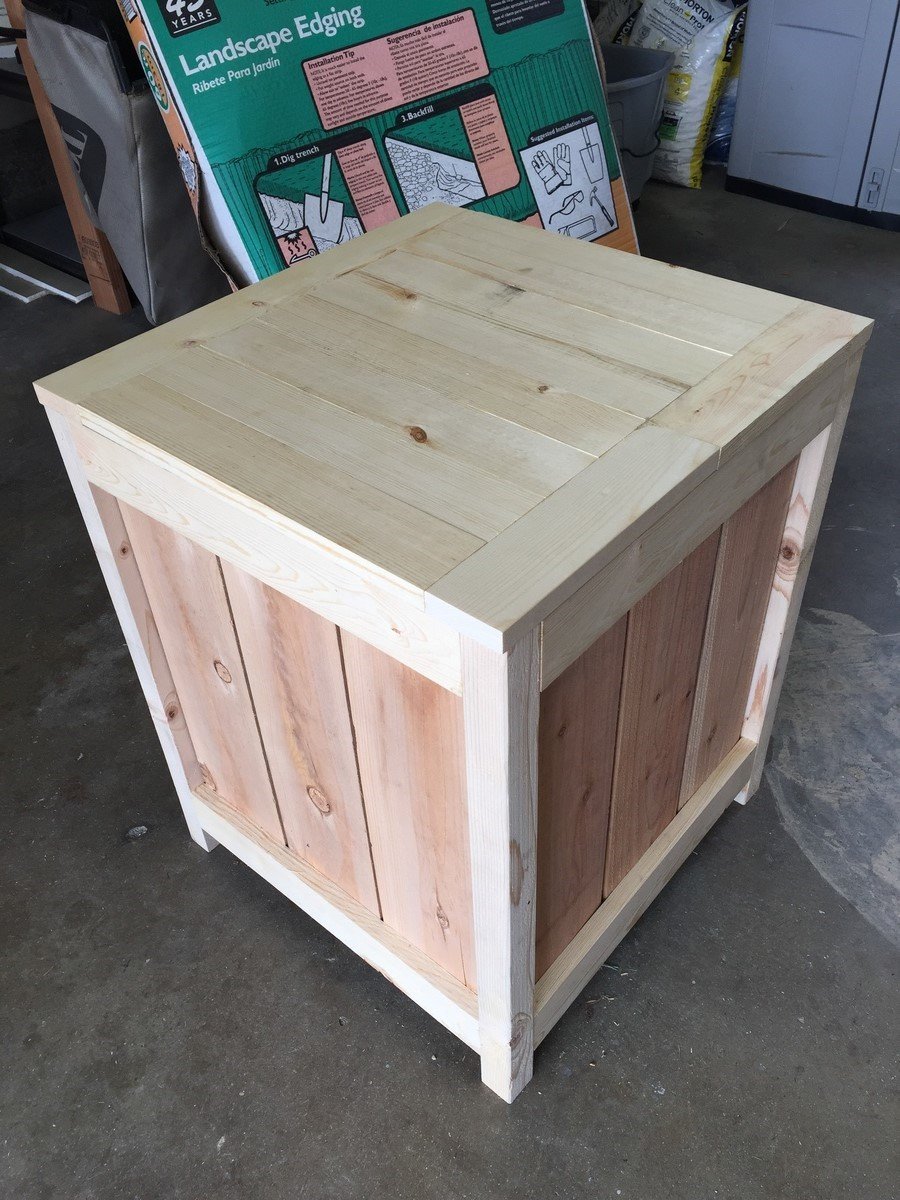
I modified the plans slightly to go taller so it could fit a standard propane tank. I also added a hinged lid based on an image I found on Pinterest that did something very similar. I still need to sand and stain it next weekend.

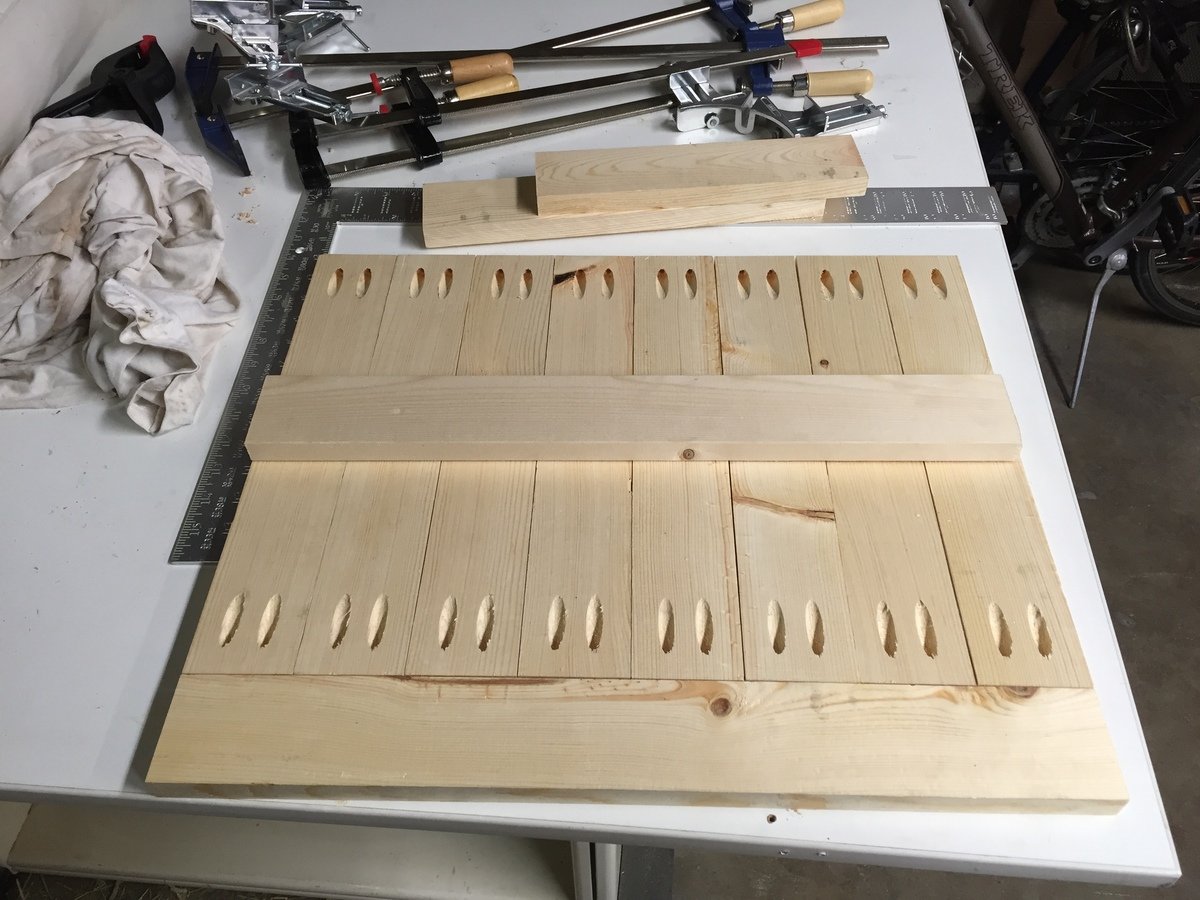
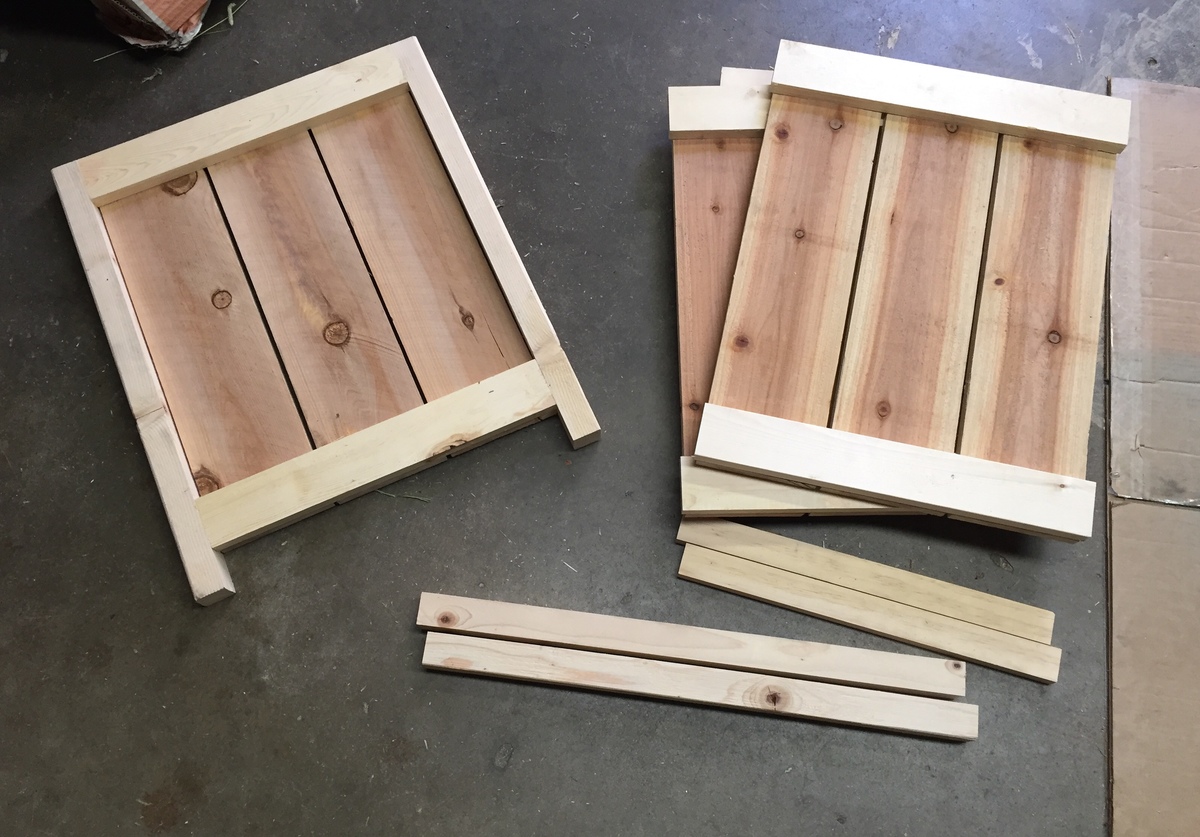
Like others, I had a little trouble keeping the fence planks from splitting when screwing them to the 2x2 legs, since there was about an 1/8” gap between. I tried to find some scrap to fill in the gap and didn’t overtighten the screws. The lid was made entirely of 1x3”.

Built from Plan(s)
Estimated Cost
$35
Estimated Time Investment
Weekend Project (10-20 Hours)
Recommended Skill Level
Intermediate