Community Brag Posts

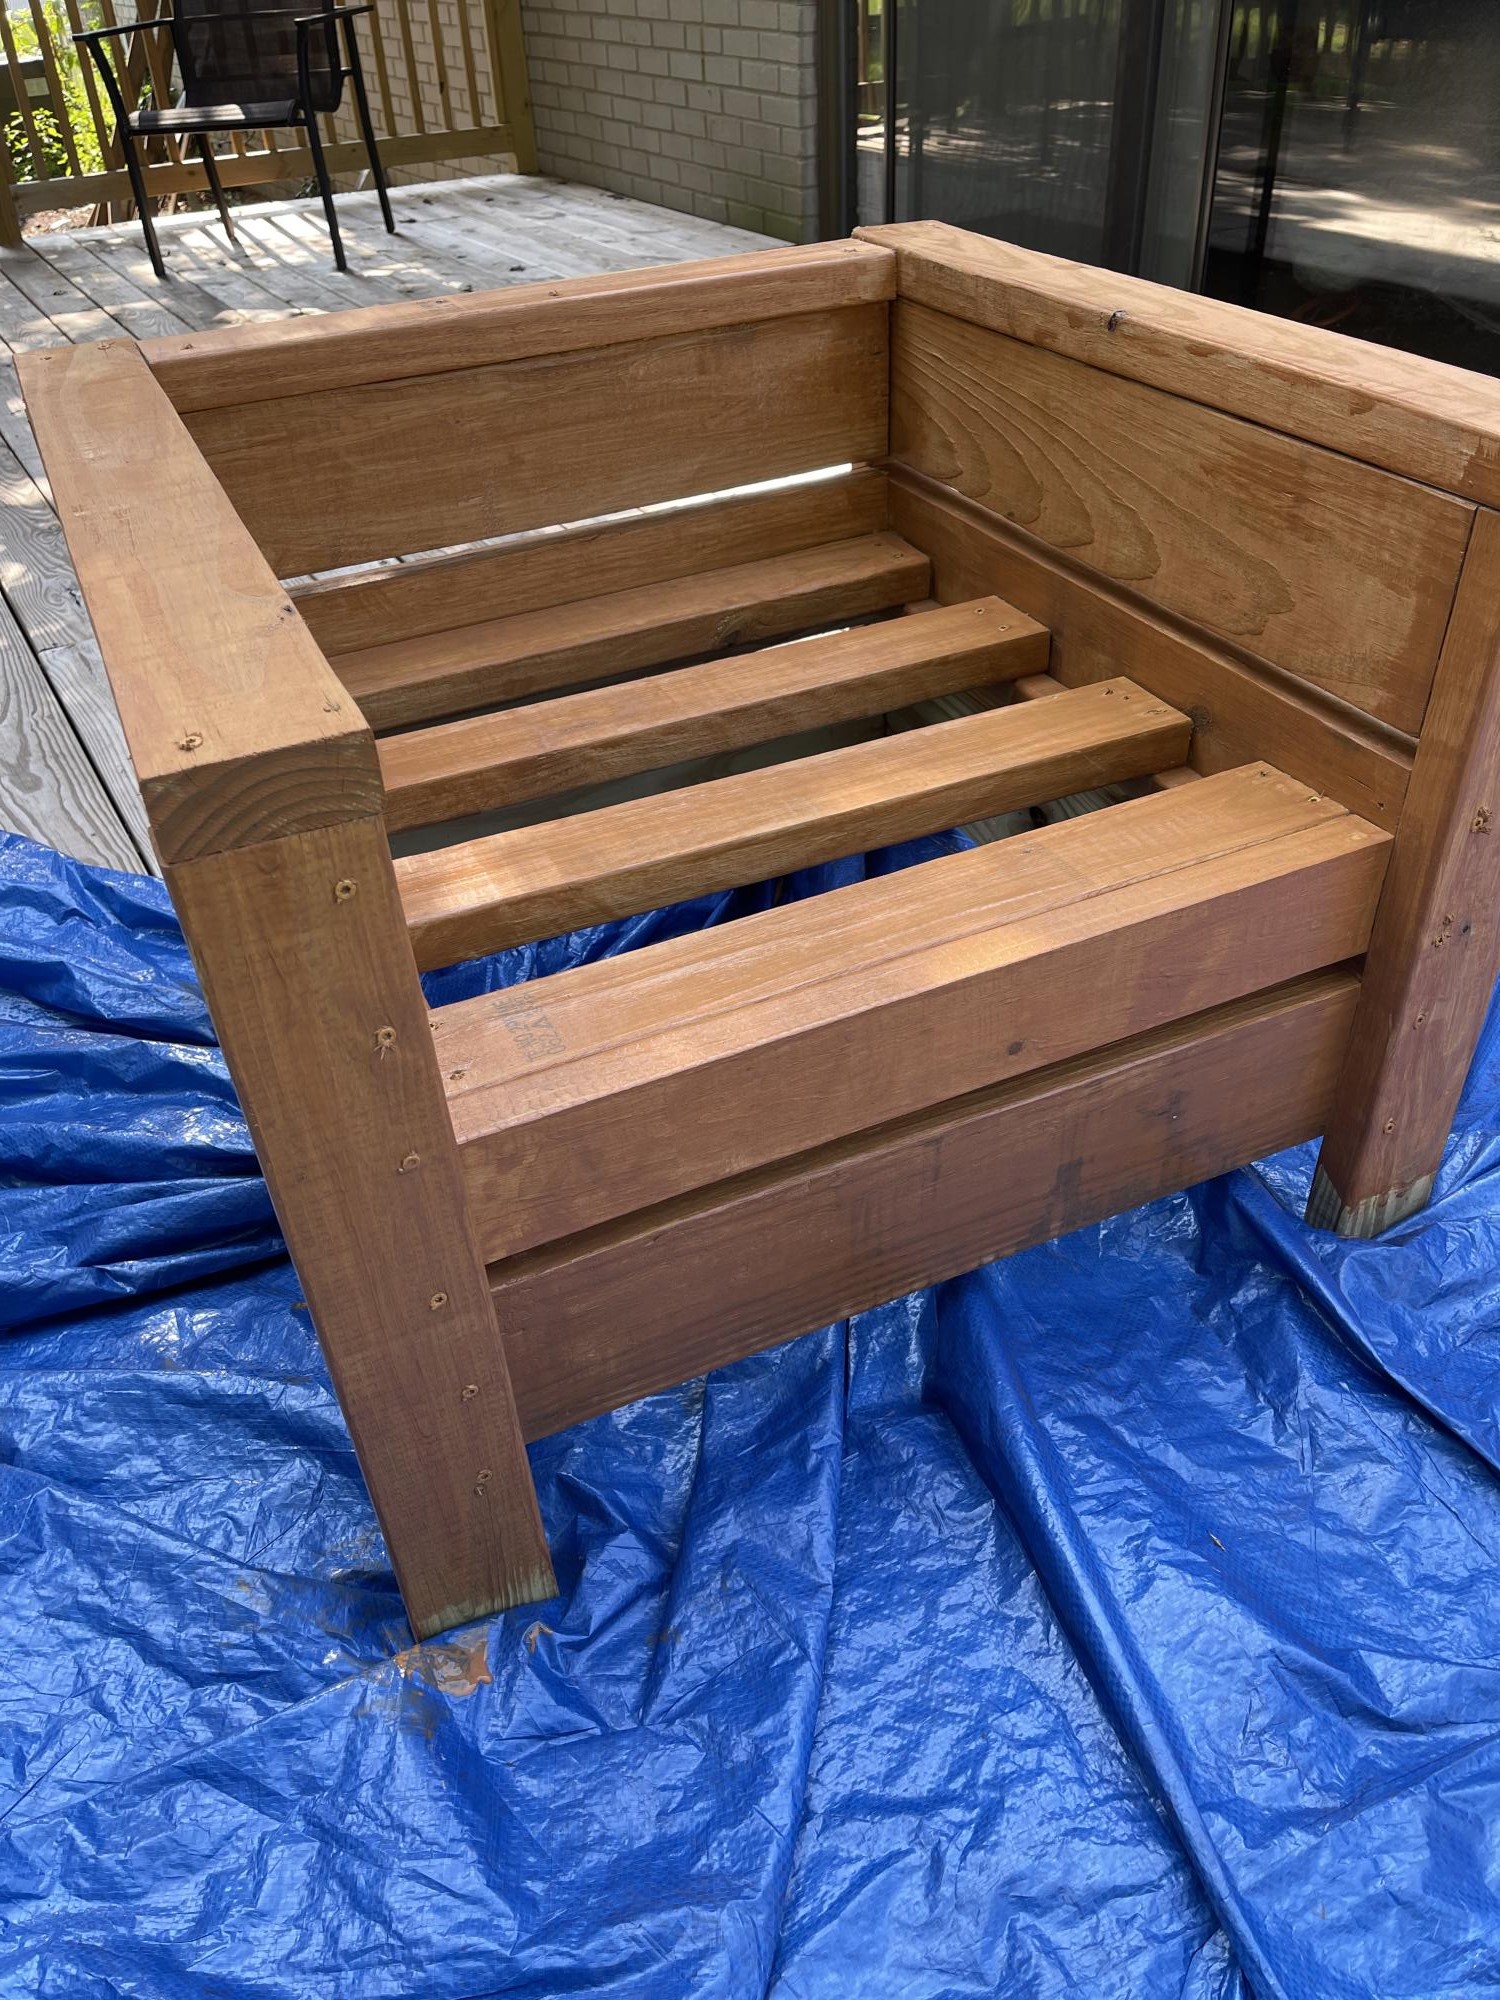
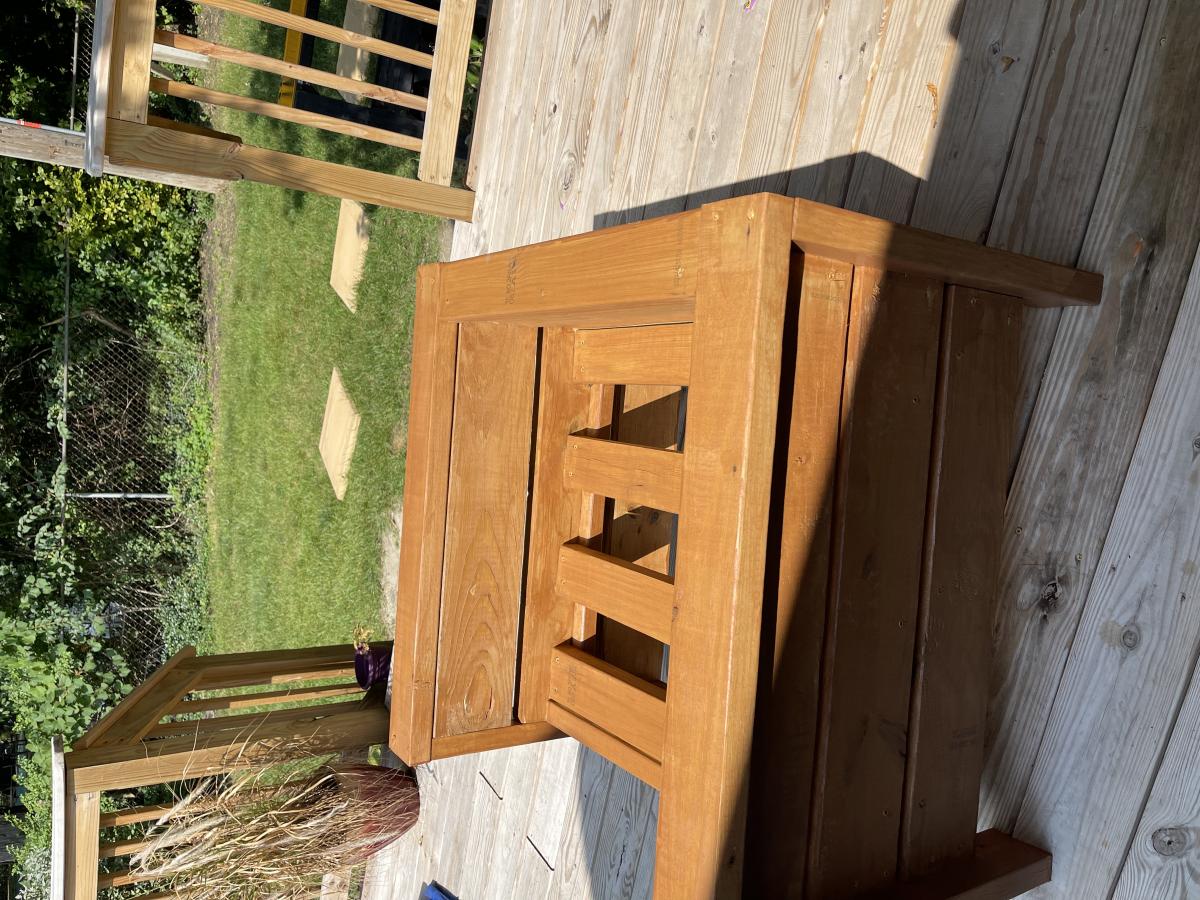
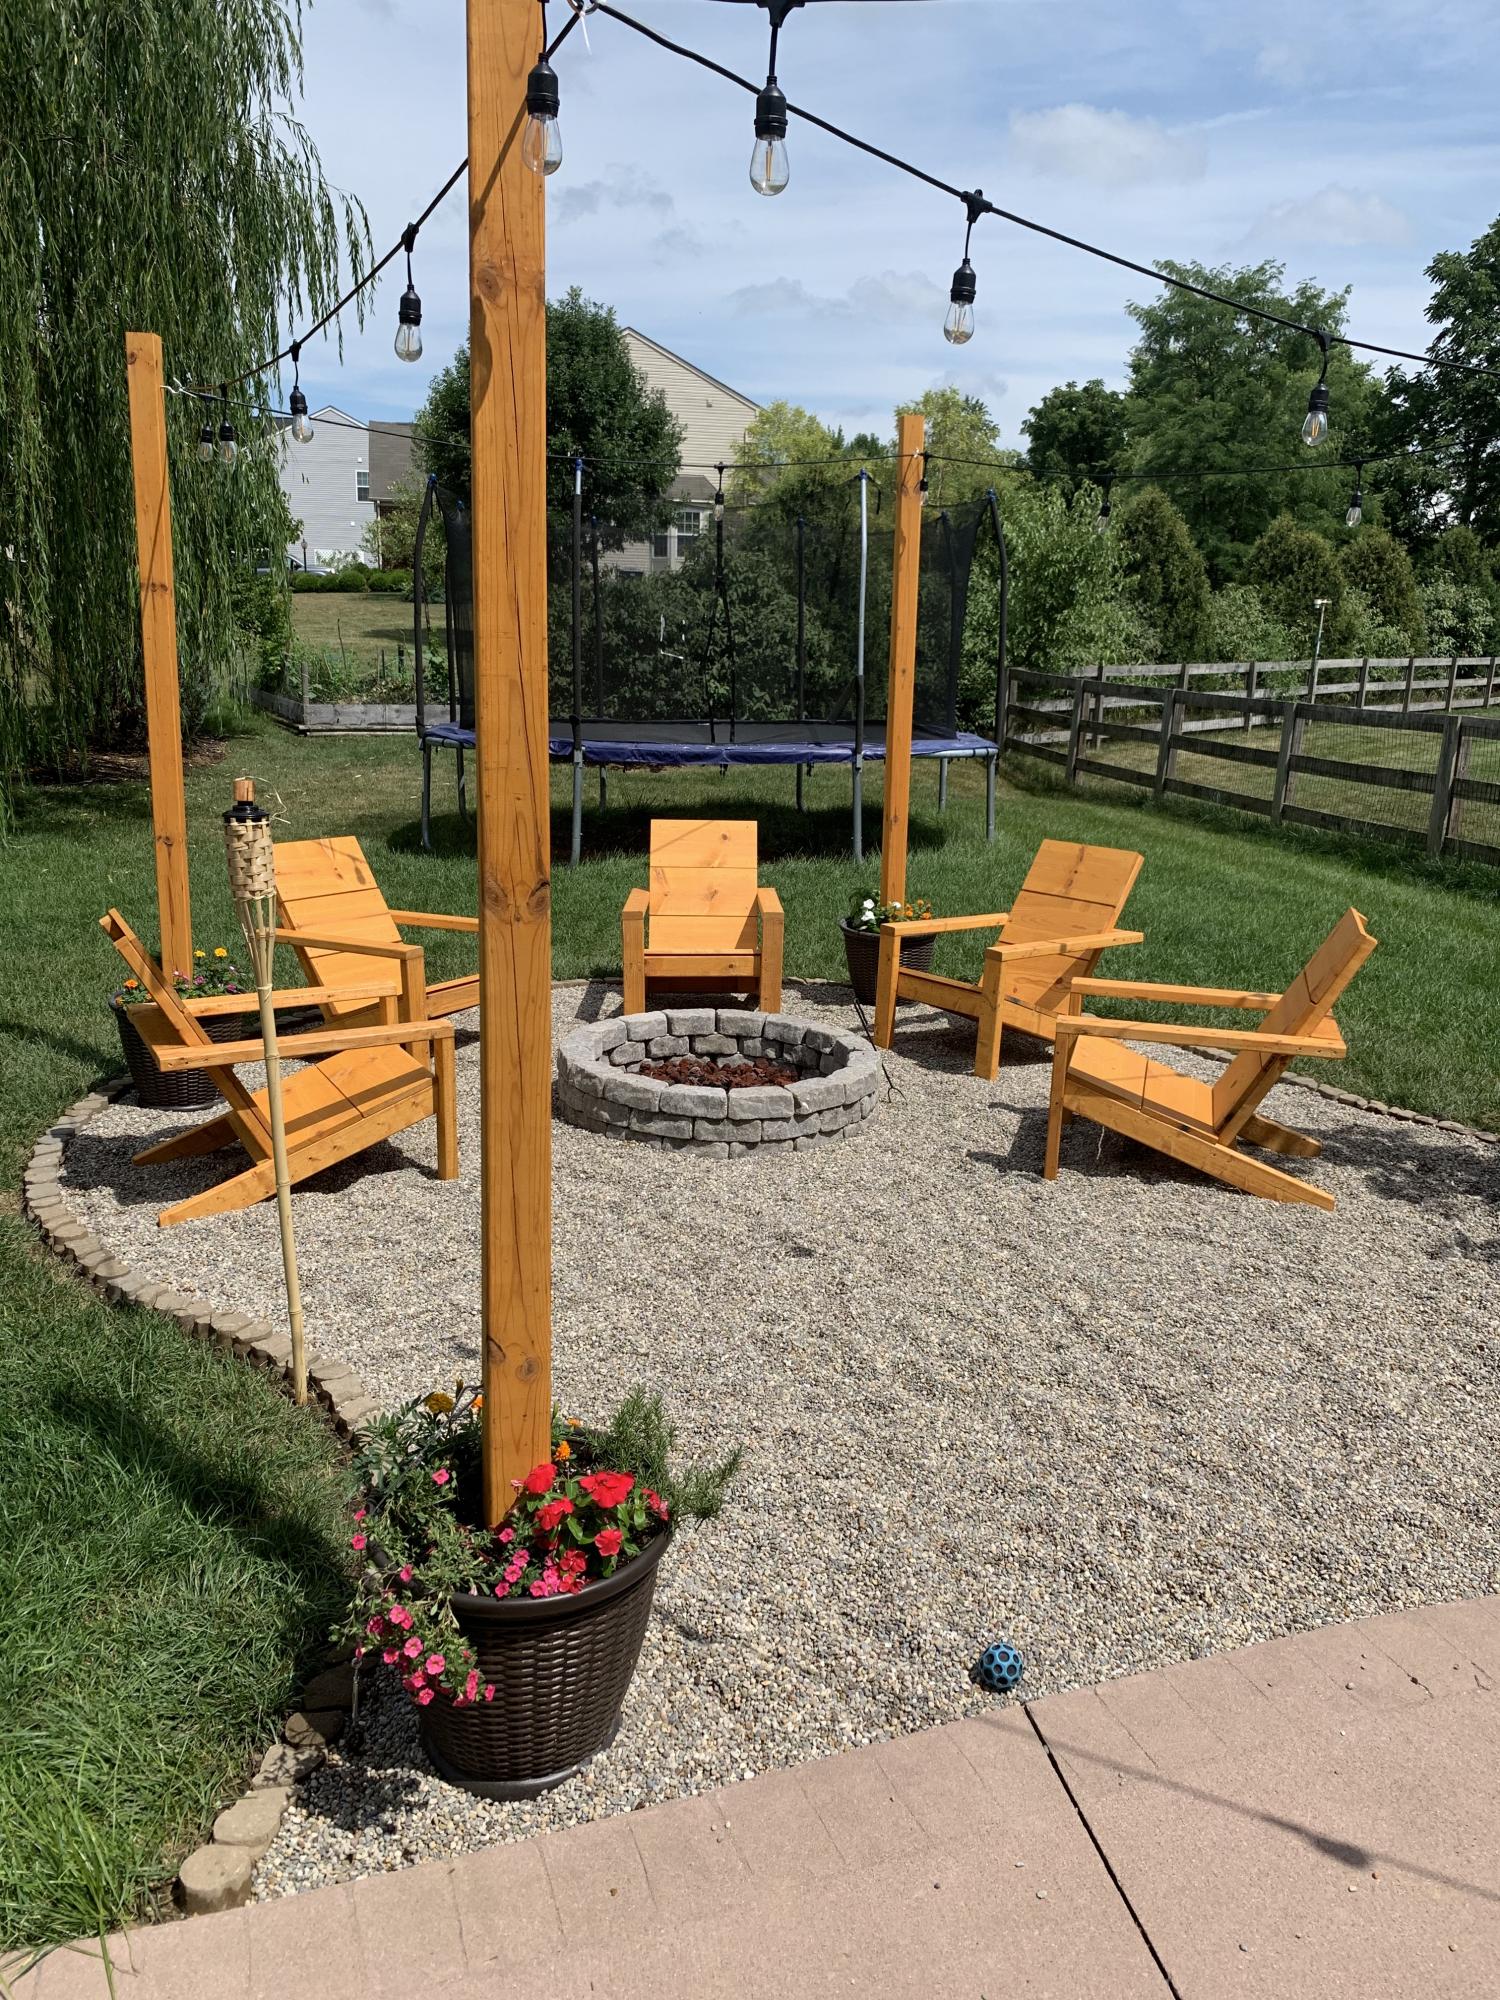
Adirondack Chairs for new Fire Pit area

Submitted by TonyLiddic on Thu, 08/06/2020 - 09:58

We've been talking about adding a fire pit and seating area for awhile. Our oldest daughter's graduation party combined with extra available time due to Corona presented a perfect opportunity to try something new. I've never built anything like this and have very limited experience with woodworking but I came across these chair plans when searching for chairs to buy. Not too bad for a first project! Started digging up sod about a month before the Grad Party. Worked on it a couple hours a day and maybe 3 full weekend days. Came out great and is a wonderful addition to our backyard.

Estimated Cost
$900
Estimated Time Investment
Week Long Project (20 Hours or More)
Finish Used
1 thin coat of Thompson Timber Oil (Cedar Semi-Transparent) applied before assembling each chair. Used about 2/3 gallon for all 5 chairs and light posts.

Storage Bed Modified

Submitted by sarmay on Mon, 12/24/2012 - 21:46

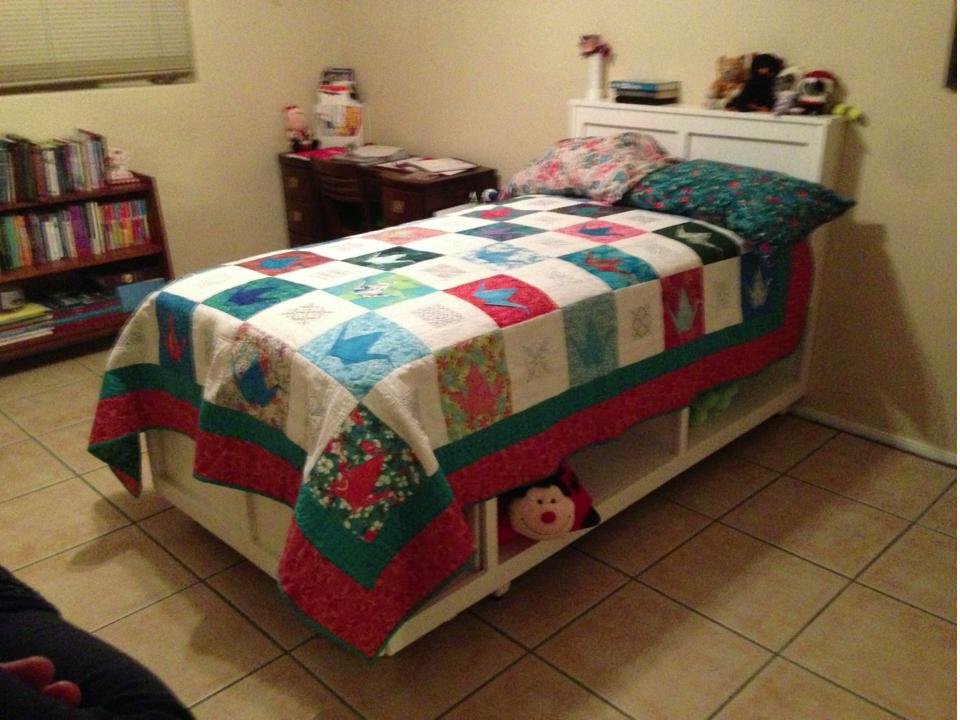
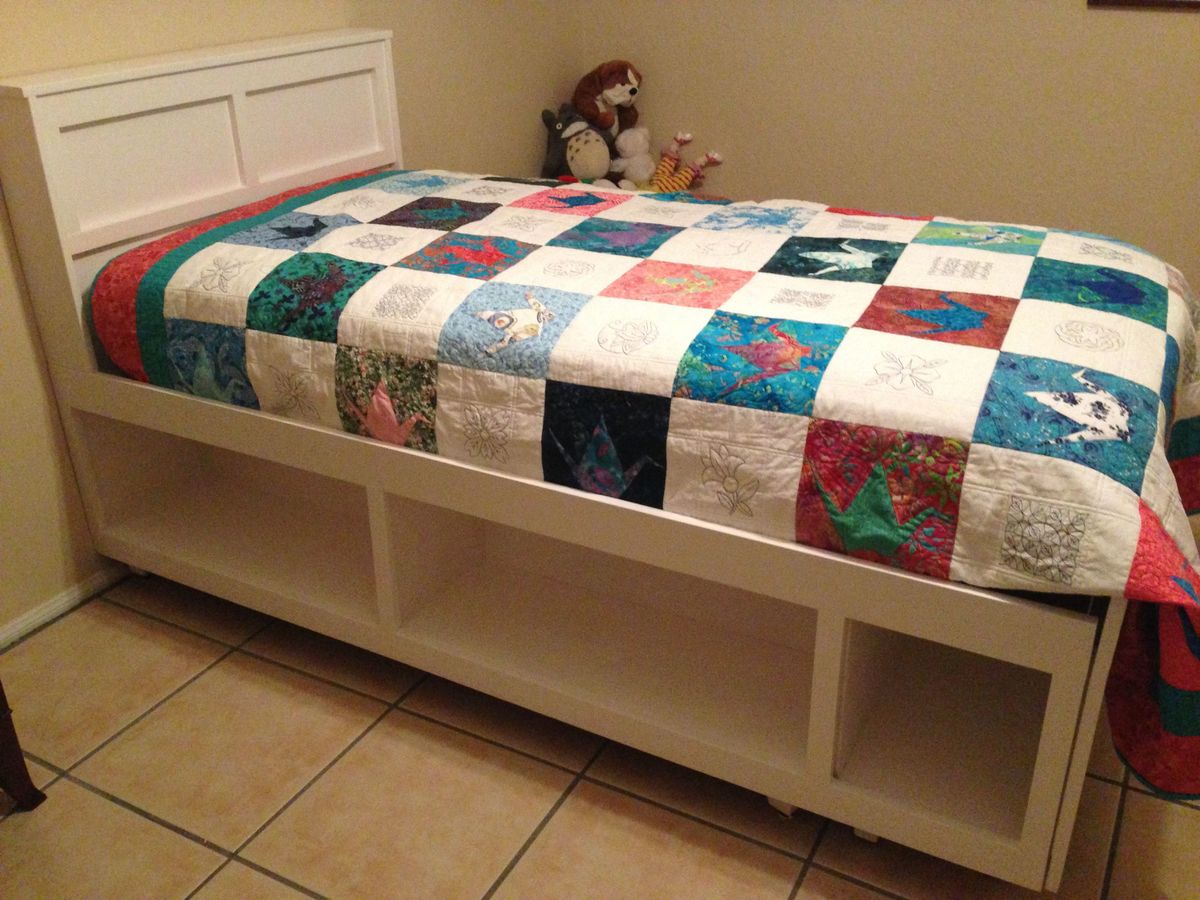
Our daughter was in desperate need of storage in her room, so we decided to build her a storage bed. This was our first build, and we had many issues that we've chalked up to "learning curve," but we're pleased with the end result anyway.

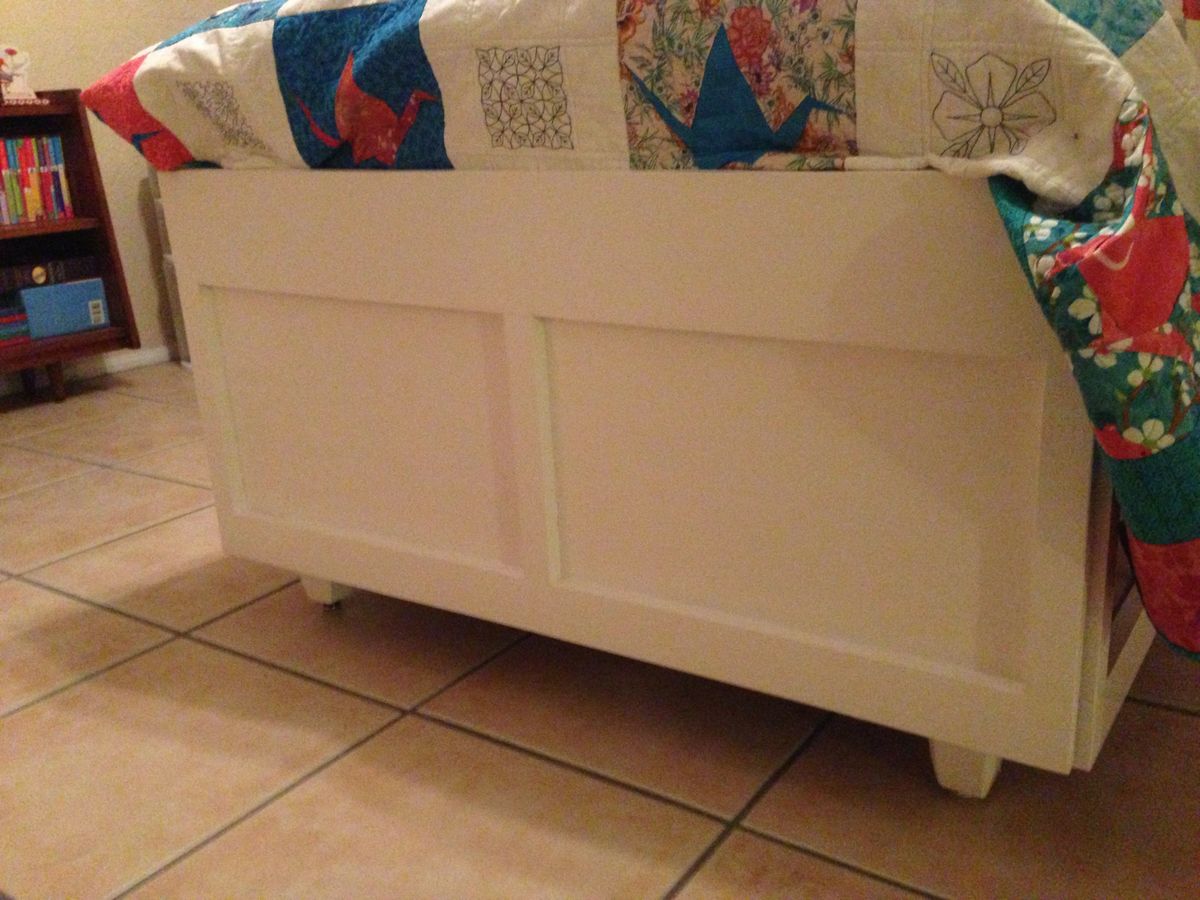
We used the Twin Storage Bed plans to start, but we modified the end box so that the sides would have all open storage, and we could build a low footboard. We liked the low footboard on the Farmhouse Bed, but our daughter did not want the crown on the footboard, so we worked up a simpler design. We kept the 3-box design of the Twin Storage Bed instead of just making the two side boxes longer so that the end box has deep storage (we kept the center divider for support, but the storage is 19" deep). The footboard is low enough that it doesn't extend over the mattress (our daughter's request), but it still gives the bed a finished look and keeps the mattress from sliding off.

When we built the two side boxes and the end box, we made the mistake of cutting all of the pieces at once, before assembly. When we went to assemble, we discovered that many of the boards had issues (warps, the boards were not the same width all the way through, our cuts weren't straight -- we had trouble figuring out how to get straight cuts with the circular saw at first). We didn't have money to buy all new wood and start over, so we went ahead and assembled the boxes, and I spent two weekends fixing as best I could (lots of filler and sanding). The boxes ended up being somewhat different heights, so even though each box was level on its own, we were going to have a problem getting them all the same height together. So, we decided to add feet with leveling footers. We also ordered a set of bowed slats from Ikea to help make sure the bed would be level and comfortable.

The storage cubbies all turned out the right size on the inside despite our assembly troubles, so we can fit 12 fabric storage cubes in the cubbies.

We added trim to the side boxes to give it a finished look and to help keep the mattress from sliding off the bed. To make it possible to move the bed later, we decided to build the trim on the side boxes and slide the end box into place. We attached the boxes together using L brackets.

The footboard is made out of plywood, trimmed with 1X6 at the top, 1X3 on the bottom trim, and and 1X2 vertical trim.

The side trim is made out of 1X4 for the top trim centered (2" overhang below and 2" raised above the side of the box), 1X3 horizontal trim for the bottom of the box (top edge of the bottom trim is flush with the bottom of the cubbies), and 1X2 trim for the vertical pieces.

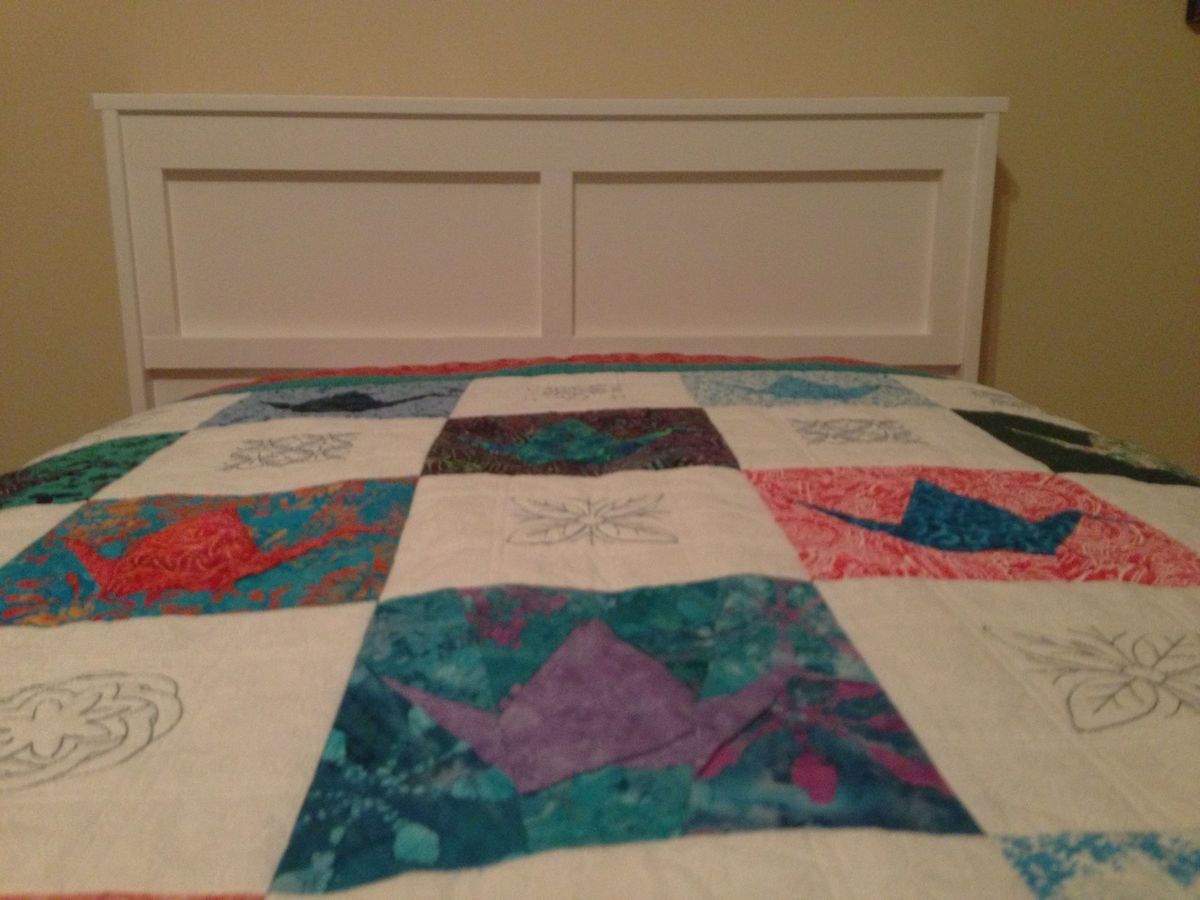
The headboard was our own creation. Our daughter did not want a large headboard, so we wanted to make something that was just enough to keep her pillows from sliding off the bed and to provide a ledge to put her glasses and book. When we first tried the mattress on the bed, there was a 5" gap between the head of the mattress and the wall, so we built a headboard "box" that sits on and is attached to the two side boxes. The mattress now fits without gaps so that the pillows won't slip off the head of the bed.
Estimated Cost
$600
Estimated Time Investment
Week Long Project (20 Hours or More)
Finish Used
Once coat of 1-2-3 primer and two coats of satin finish Benjamin Moore Aura paint in Gardenia (AF-10).
Recommended Skill Level
Beginner

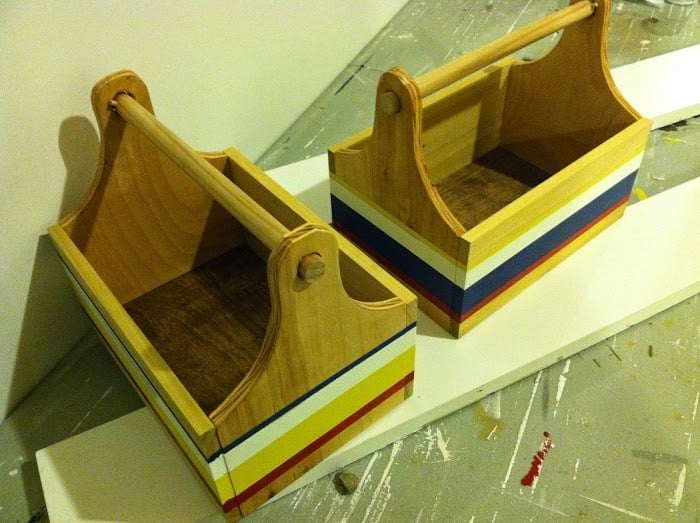
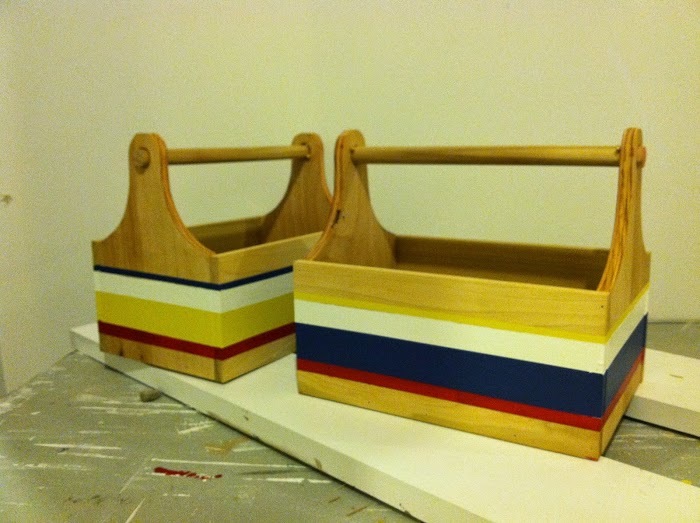
Boys Chrismukkah Tool Trugs

Submitted by brickton on Fri, 10/17/2014 - 05:32

I did a near direct copy of the tool trugs from Jamie and Ana using some 1/2" birch plywood and 1/2" craft wood from Home Depot. I was really happy with the ipswich pine stain that darkened the wood and gave it less of an unfinished look. 

Built from Plan(s)
Estimated Cost
Maybe $20 total for both trugs. I bought some little stain and sample paints when I could have just used what I had laying around, and some of the wood was scrap from other projects so it's hard to say.
Estimated Time Investment
Afternoon Project (3-6 Hours)
Finish Used
Minwax Ipswich Pine stain on the main body, Minwax Provincial on the bottoms. The paint colors are mostly Martha Stewart Living from Home Depot samples, the only two names I remember are Cornbread and Barn Red.
Recommended Skill Level
Beginner

Modified Camp Loft Bed

Submitted by akwebb3 on Tue, 08/03/2021 - 14:07

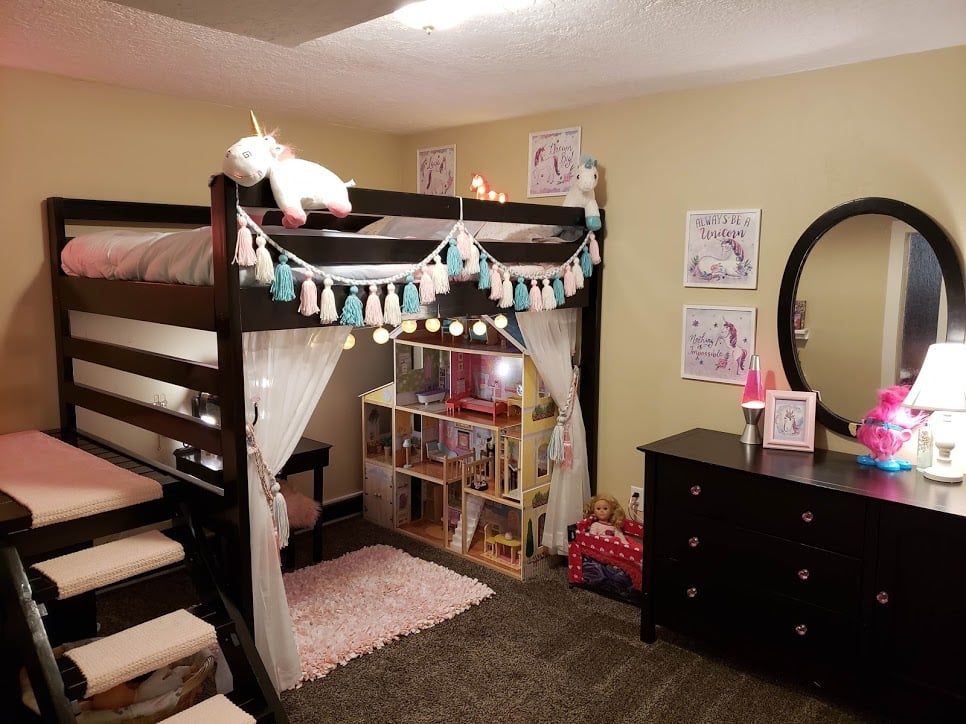
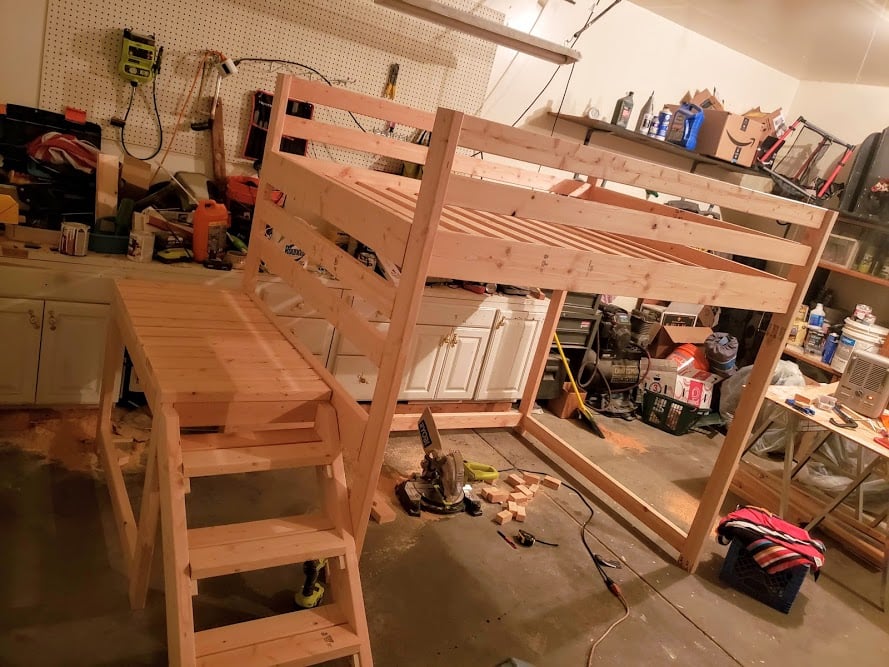
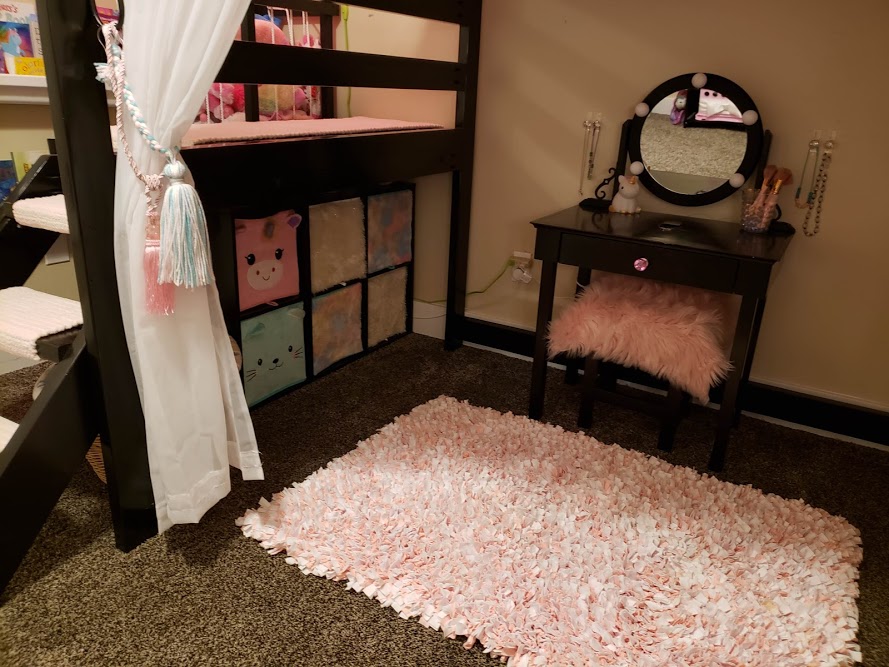
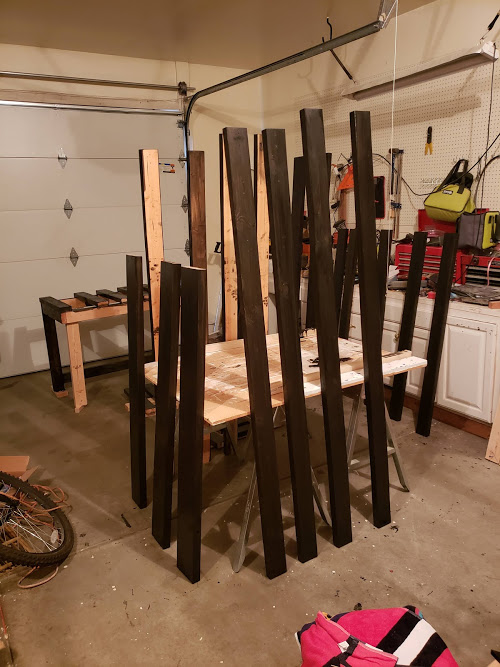
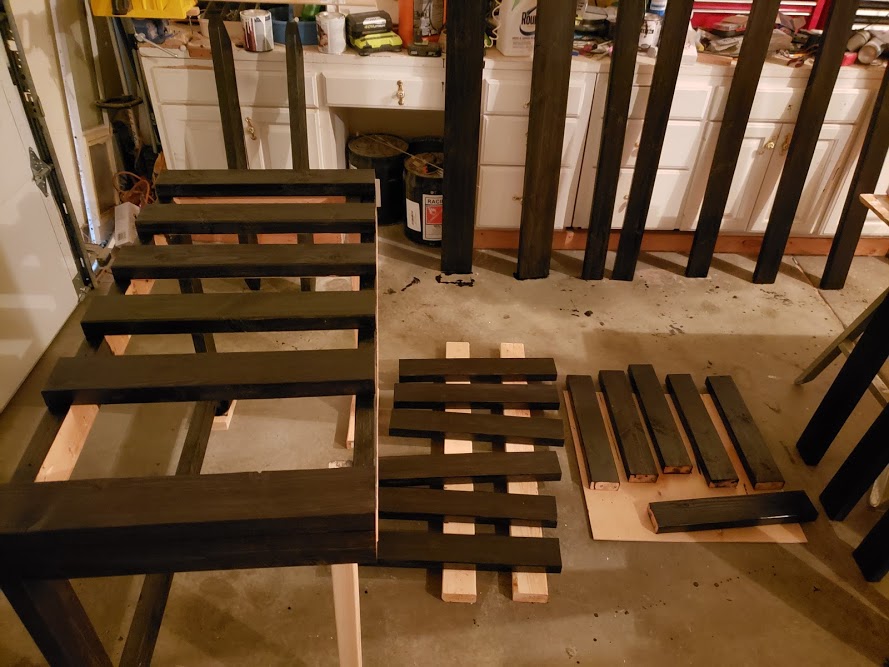
I may have spoiled my Grand-daughter a bit too much and her room was really full of stuff. I decided that I should just go ahead and spoil her a little more by building her a new bed for her birthday. I used the Camp Loft Bed plan but did modify it to fit her full size mattress and raised the height just a bit to make sure that her doll house would fit underneath. I am so happy with how it turned out! I love that I can fit her toy bins underneath the stairs where they are out of the way and how much more room she has to actually play. I used some really fat yarn and crocheted the little stair runners so it is nice and soft on her feet going up and down the stairs. This project did take longer then some of the others that I have done but I do also work a full time job. I had the bed actually built and put together in a weekend but then took it all apart for staining and finishing which took a long time. There were a lot of pieces to stain with multiple sides and coats to get the coverage I wanted so it would match her other furniture. I also did 3 coats of topcoat on each piece. Looking back if I had to do this over again I would have used 4x4's for the legs/bed posts. She is only 6 right now but as she gets older I will probably switch those so that it is a little more sturdy as she gets bigger.

Estimated Time Investment
Week Long Project (20 Hours or More)
Recommended Skill Level
Beginner

Comments

Basement Storage Shelves

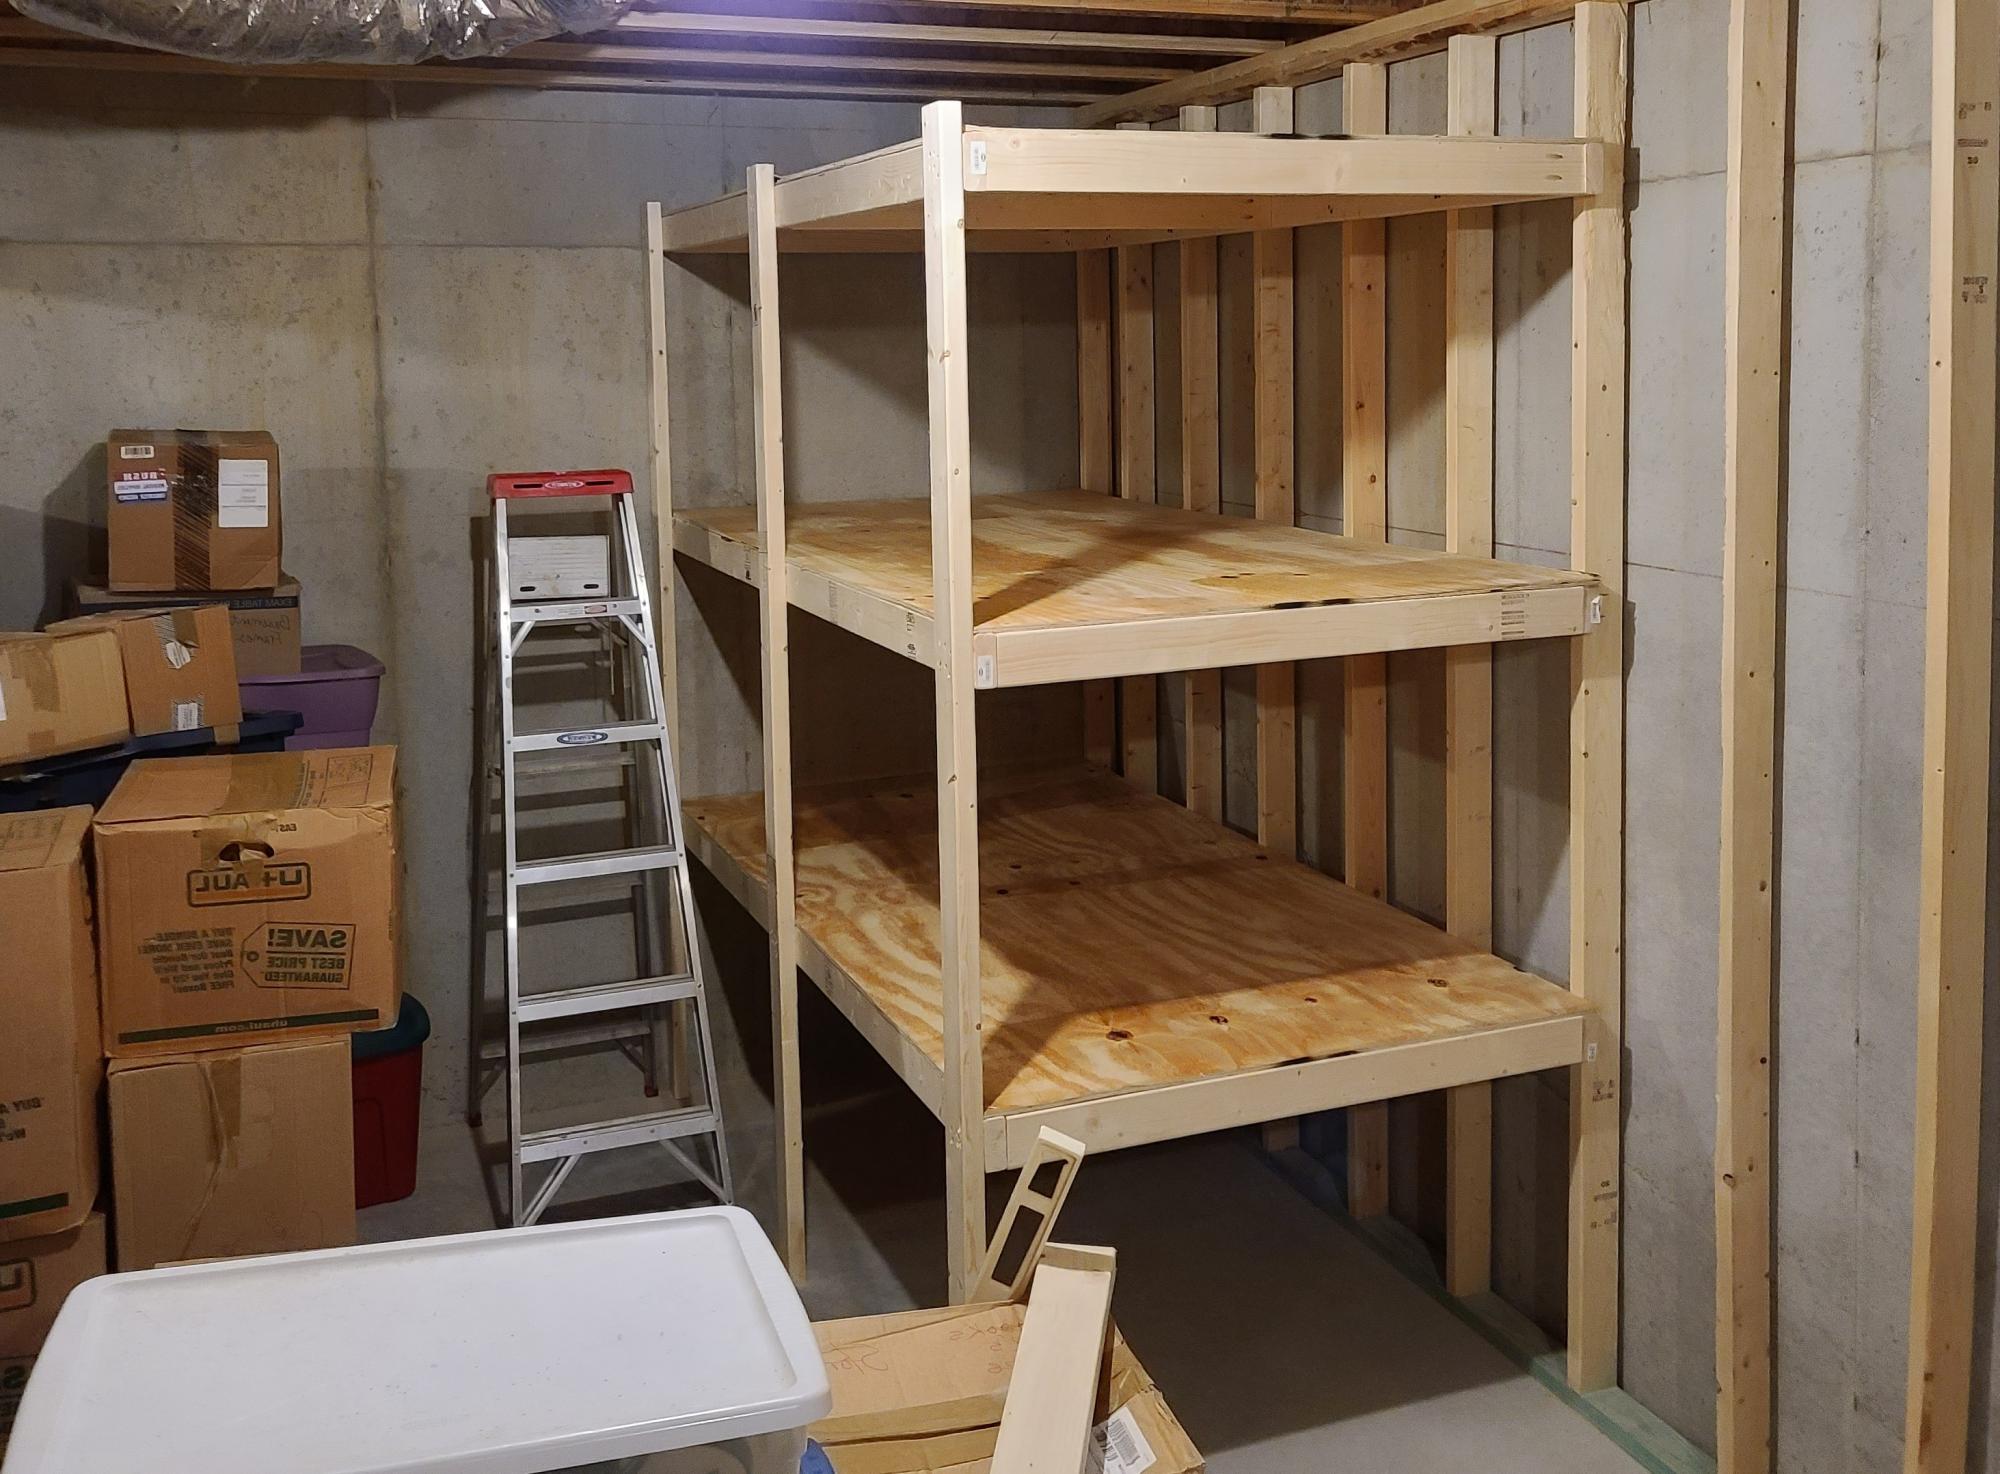
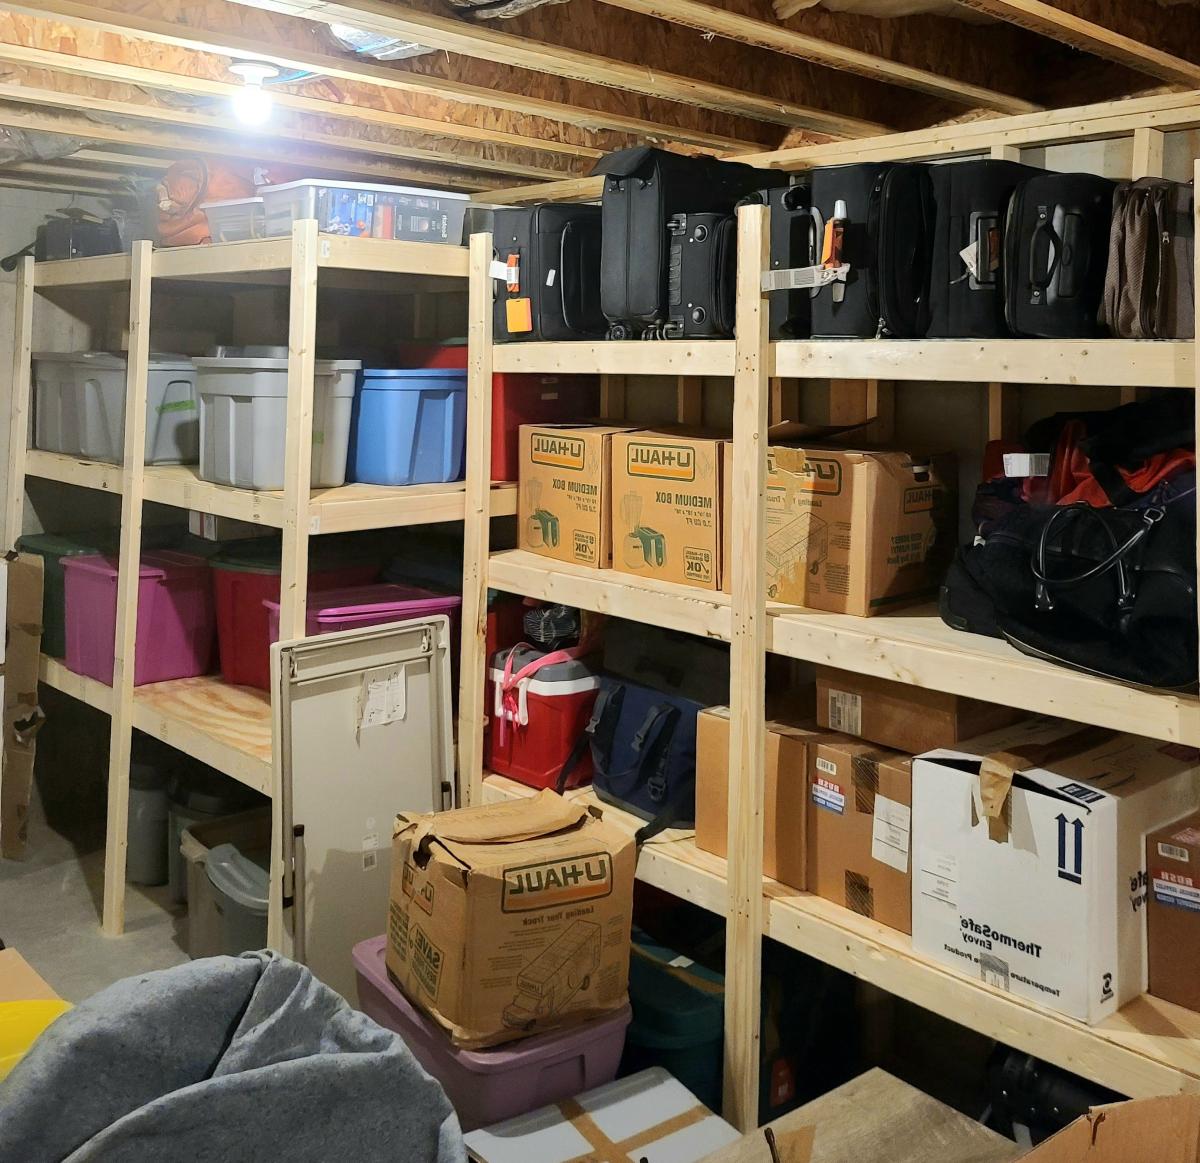
New house equals room for all the junk. Built this off the Garage Storage Shelves plan for our basement storage area. Leveraging the existing exposed studs made it a bit easier. Made these 48" deep to accommodate the big bins with all the holiday decorations. I added another along side, but made it 24" depth...one more yet to go. The wife can't throw anything away!

Comments

9 cubby Shelf

Submitted by sean1023 on Tue, 07/09/2013 - 19:57

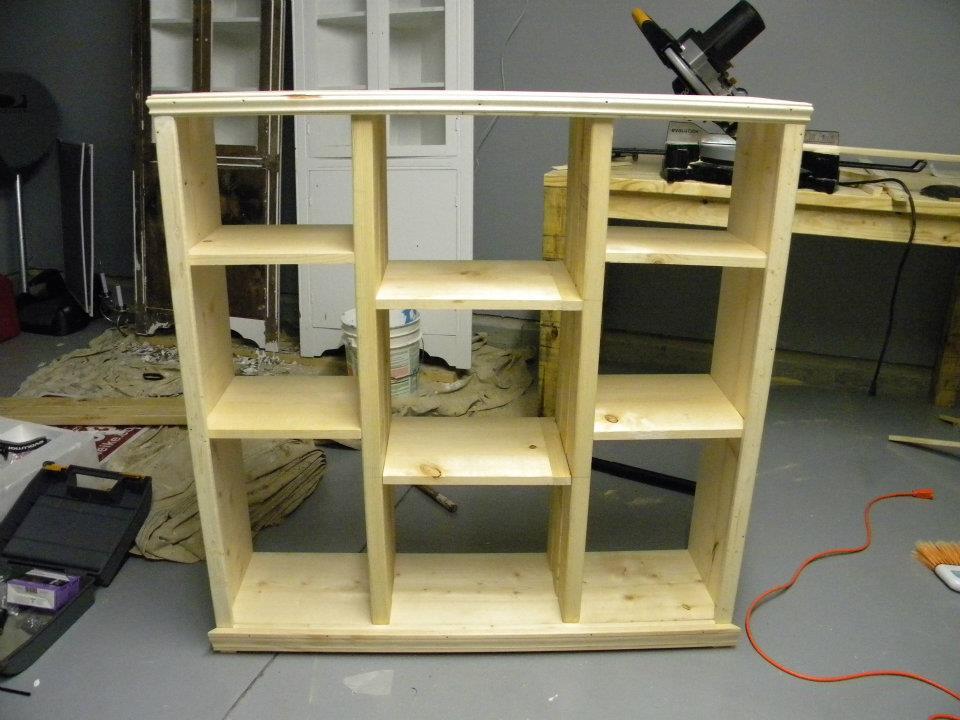
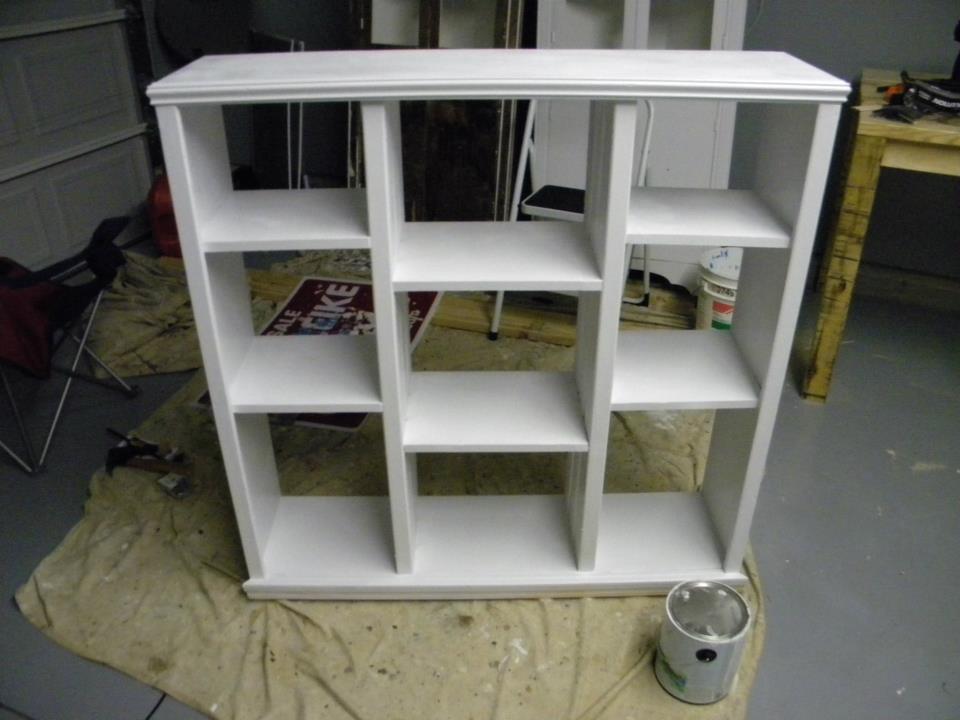
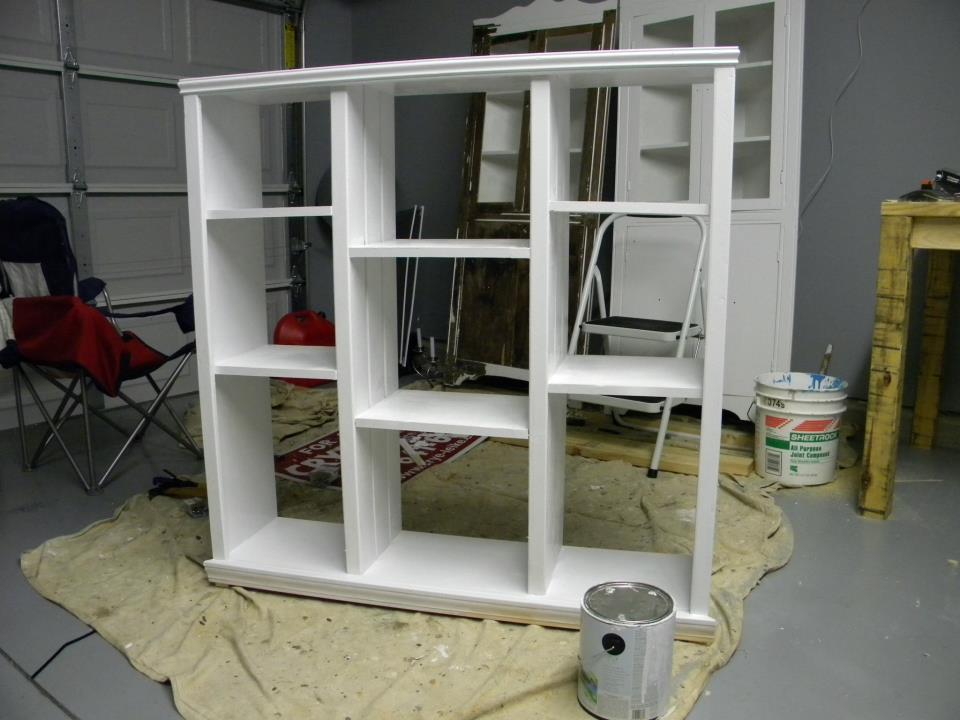
I off set the shelves because my wife wanted to be able to fit some of my sons bigger toys. I also add trim pieces to make it more decorative and painted it white. Enjoy...

Built from Plan(s)
Estimated Cost
50
Estimated Time Investment
Afternoon Project (3-6 Hours)
Finish Used
Paint
Recommended Skill Level
Beginner

Comments

Outdoor Patio Deck Chairs

Submitted by nlindauer on Tue, 05/24/2011 - 06:42

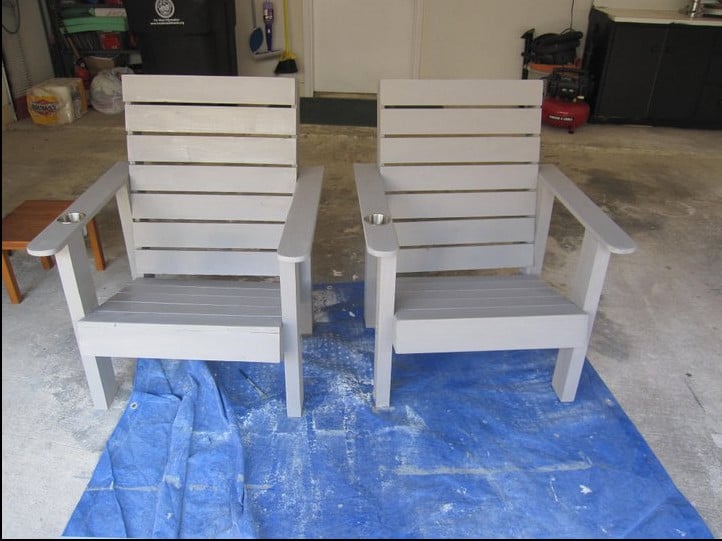
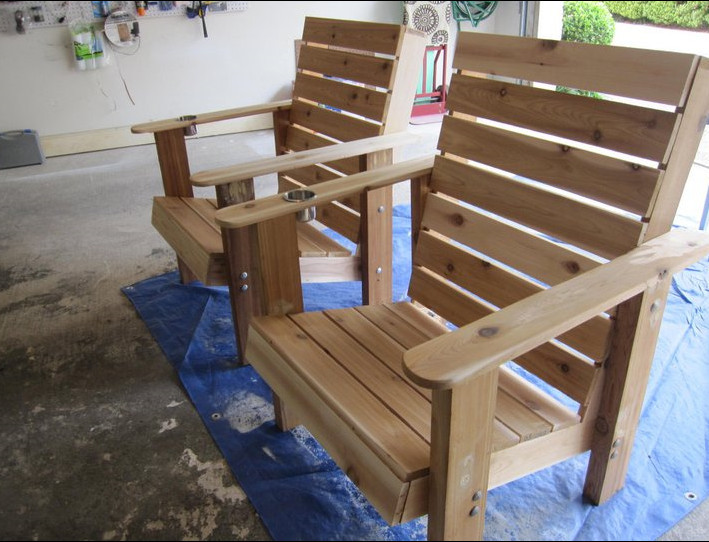
Made these chairs from plans found on the Kerig Jig website. I added the cup holders for convenience and lowered the seats by 2 inches to account for our short legs. Chairs were stained with an outdoor fence treatment that was tinted with a light grey color.

Estimated Time Investment
Day Project (6-9 Hours)
Finish Used
Olympic Maximum Solid - Grey Base
Recommended Skill Level
Beginner

Modified Beginner Farm Table and Bench

Submitted by Anonymous (not verified) on Tue, 06/28/2022 - 12:09

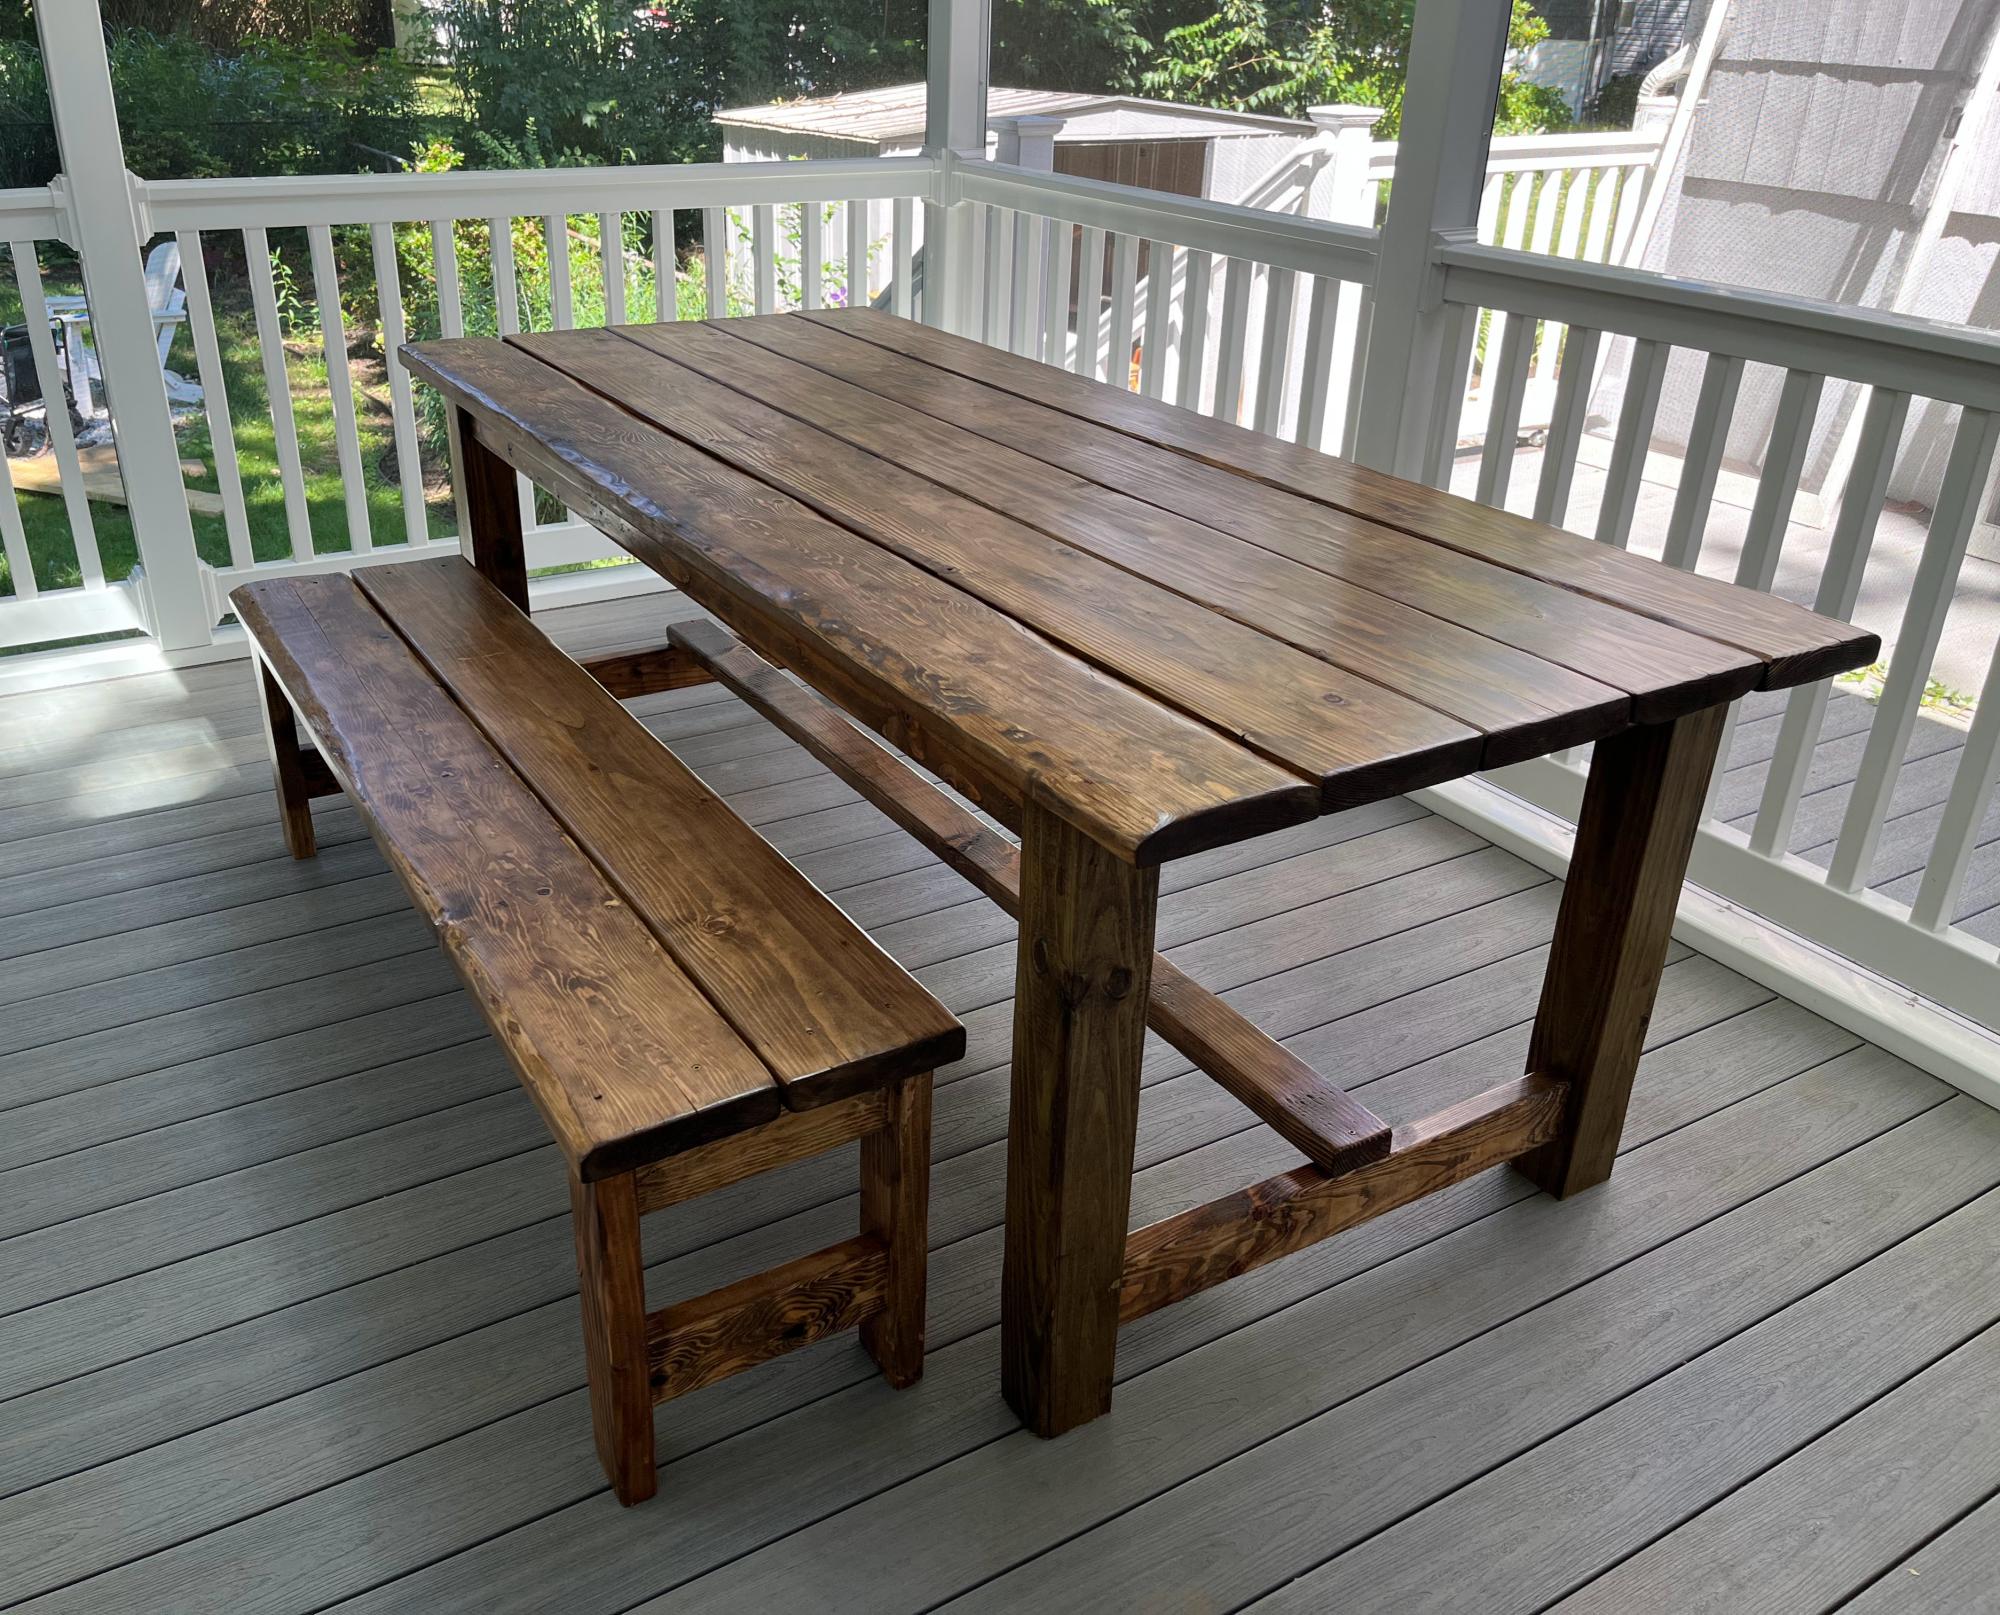
Altered the Beginner Farm Table plans to use 2x8s for the top and 4x4s for the legs. I used pocket holes for the table. I followed the bench plans almost exactly, adjusting slightly for the 2x8 tops. I am a beginner and I did it myself! The table and bench are beautiful and sturdy! Thanks Ana!

Comments

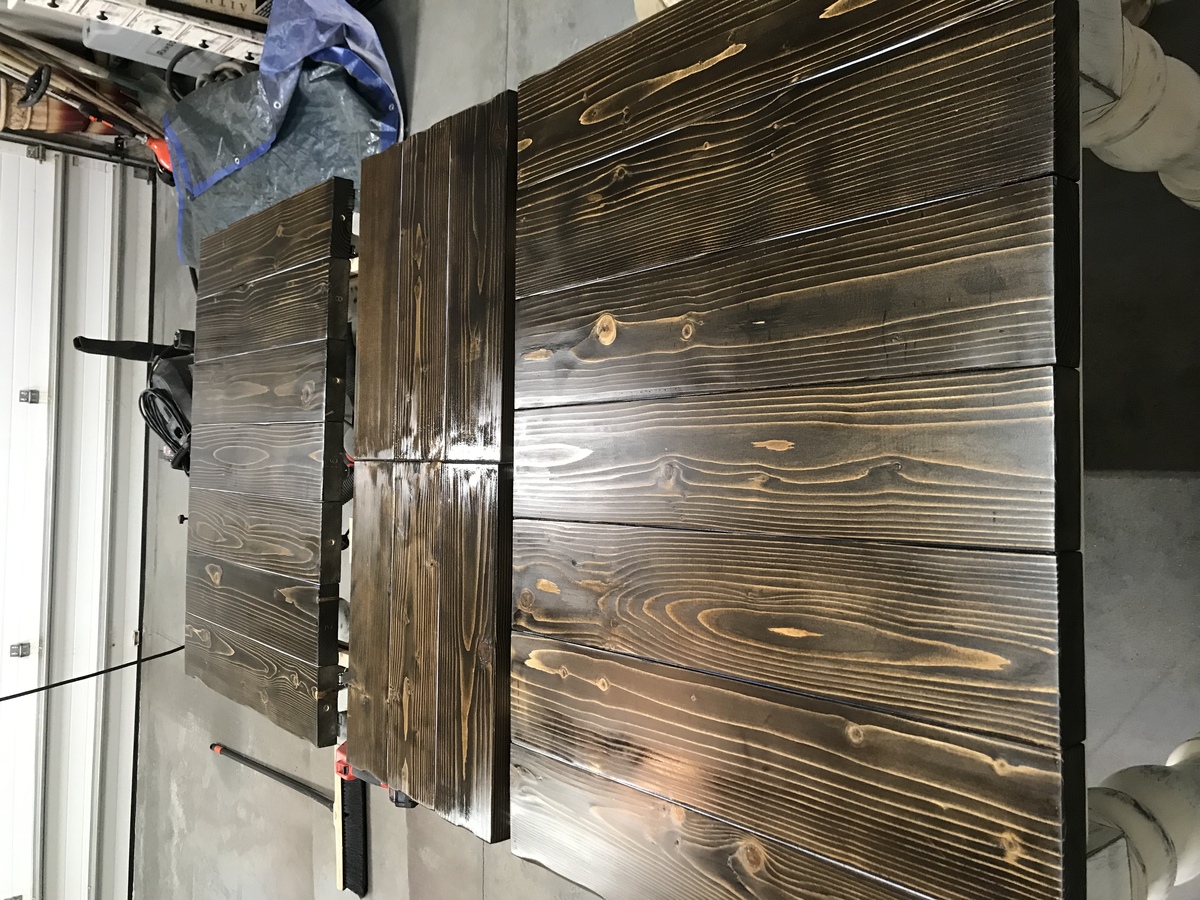
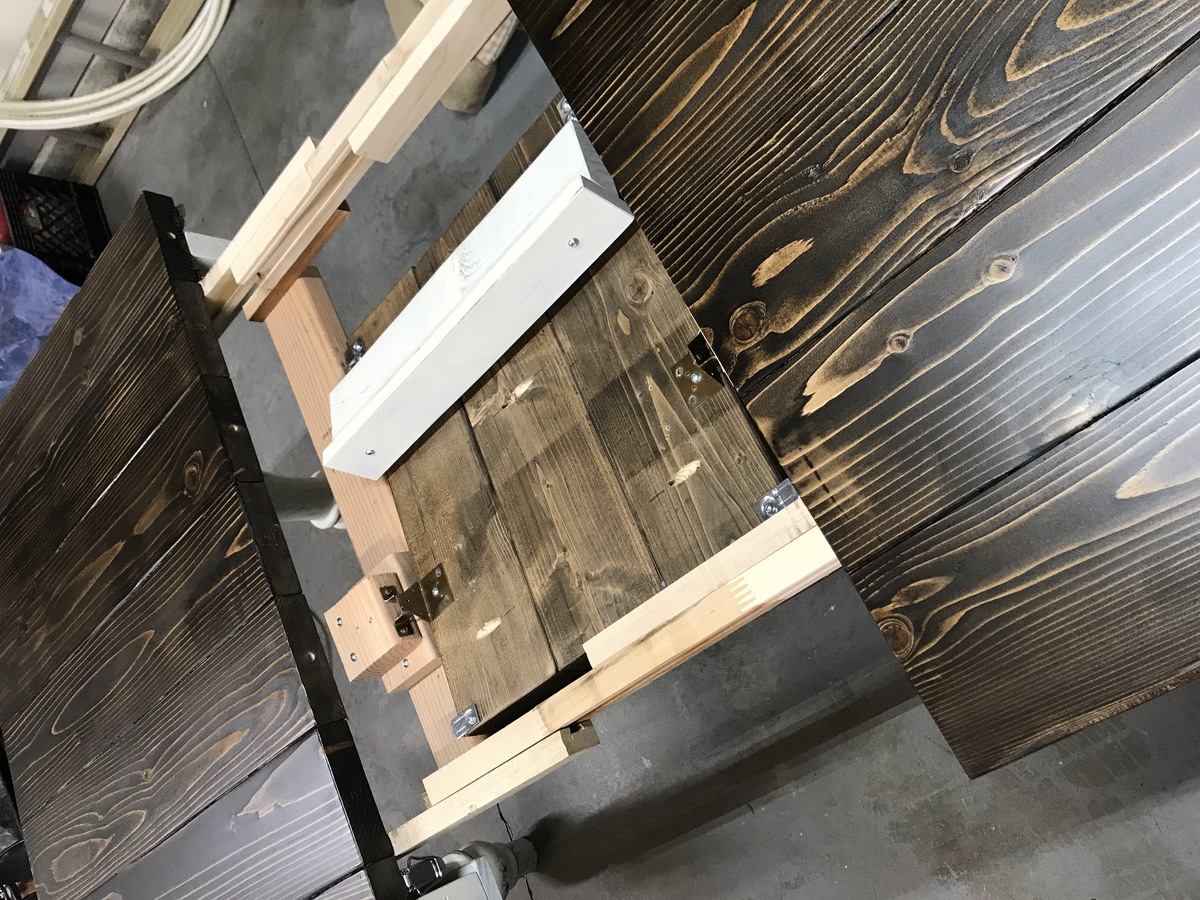
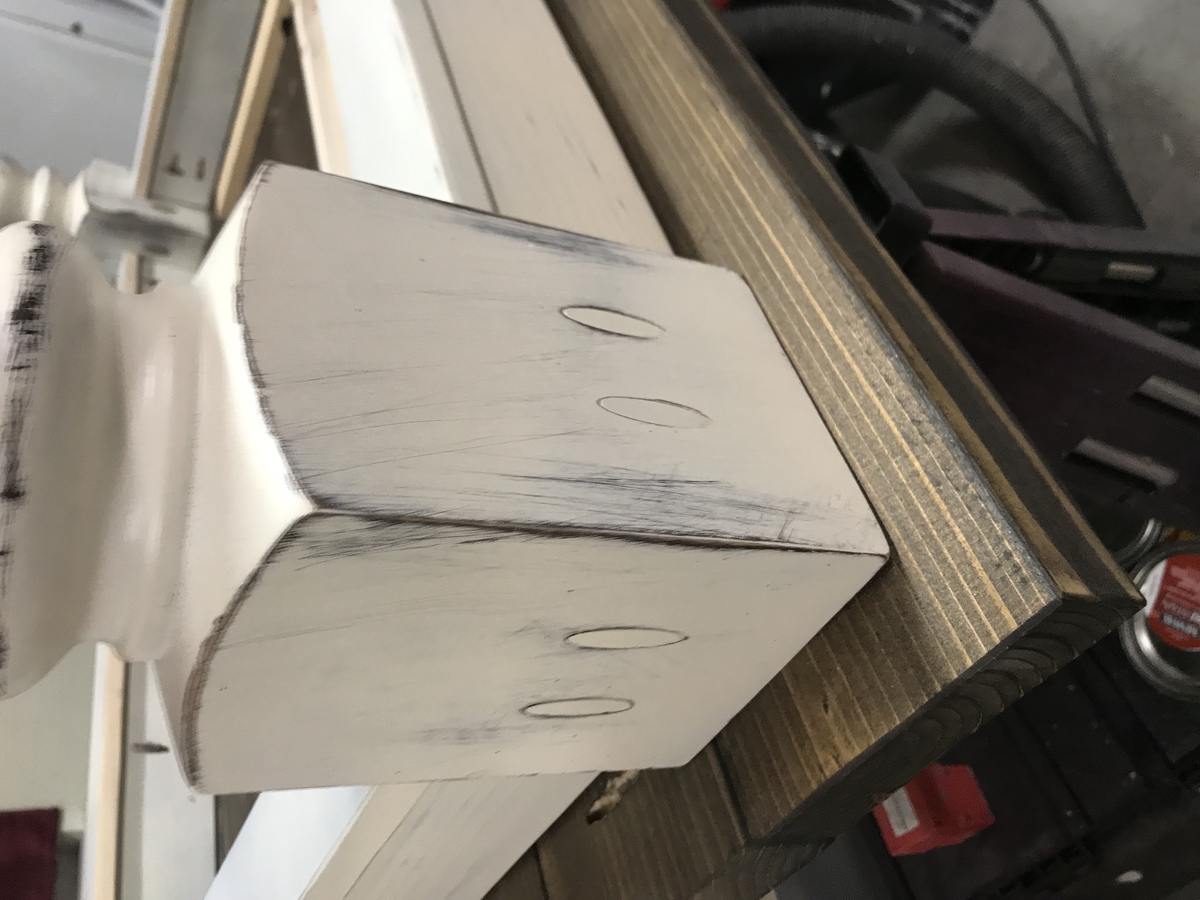
Husky farmhouse table w/ butterfly leaf

Submitted by Anonymous (not verified) on Wed, 02/06/2019 - 17:43
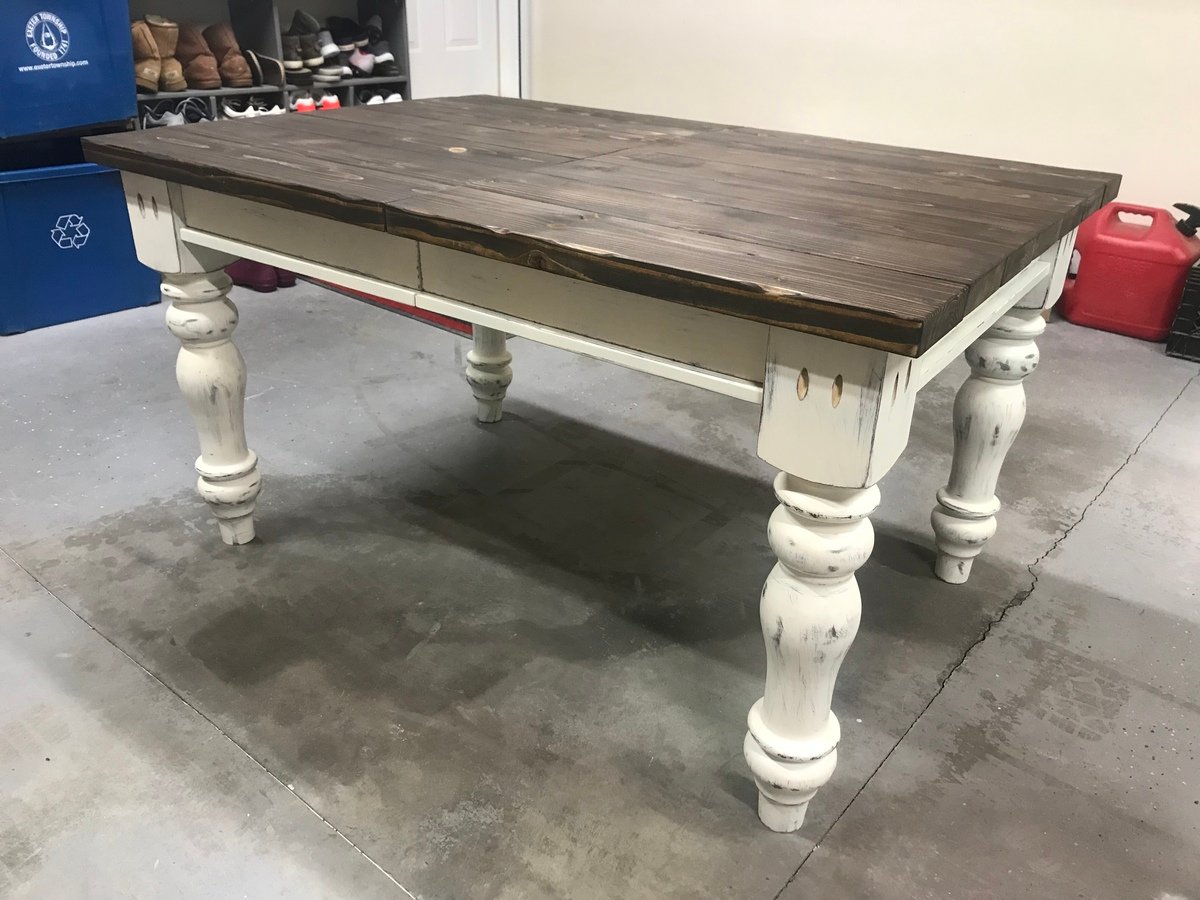
  • Hand built Husky Farmhouse Table, plans from Ana White adding a hideaway butterfly leaf
Estimated Cost
$350
Estimated Time Investment
Week Long Project (20 Hours or More)
Finish Used
4 coats of Polycrylic Clear Matte
Recommended Skill Level
Intermediate

Comments

Pottery Barn Benchright Inspired Side Table

Submitted by robinadams on Mon, 12/28/2015 - 11:12

A great project!!  I love how it turned out!  I used Poplar wood because I wanted a larger top than 1 inch but smaller than 2 inch.  Poplar had an in between size.  I love how it turned out!  Need to make another one now for my living room so that I have a matching set!  Thanks Ana!!

Built from Plan(s)
Estimated Cost
$60 because poplar wood is expensive. I already had the stain and hardware.
Estimated Time Investment
Afternoon Project (3-6 Hours)
Finish Used
Dark Walnut followed by 3 coats of Satin Polyurathane. Sanded with 1000 grit sandpaper in between poly coats.
Recommended Skill Level
Intermediate

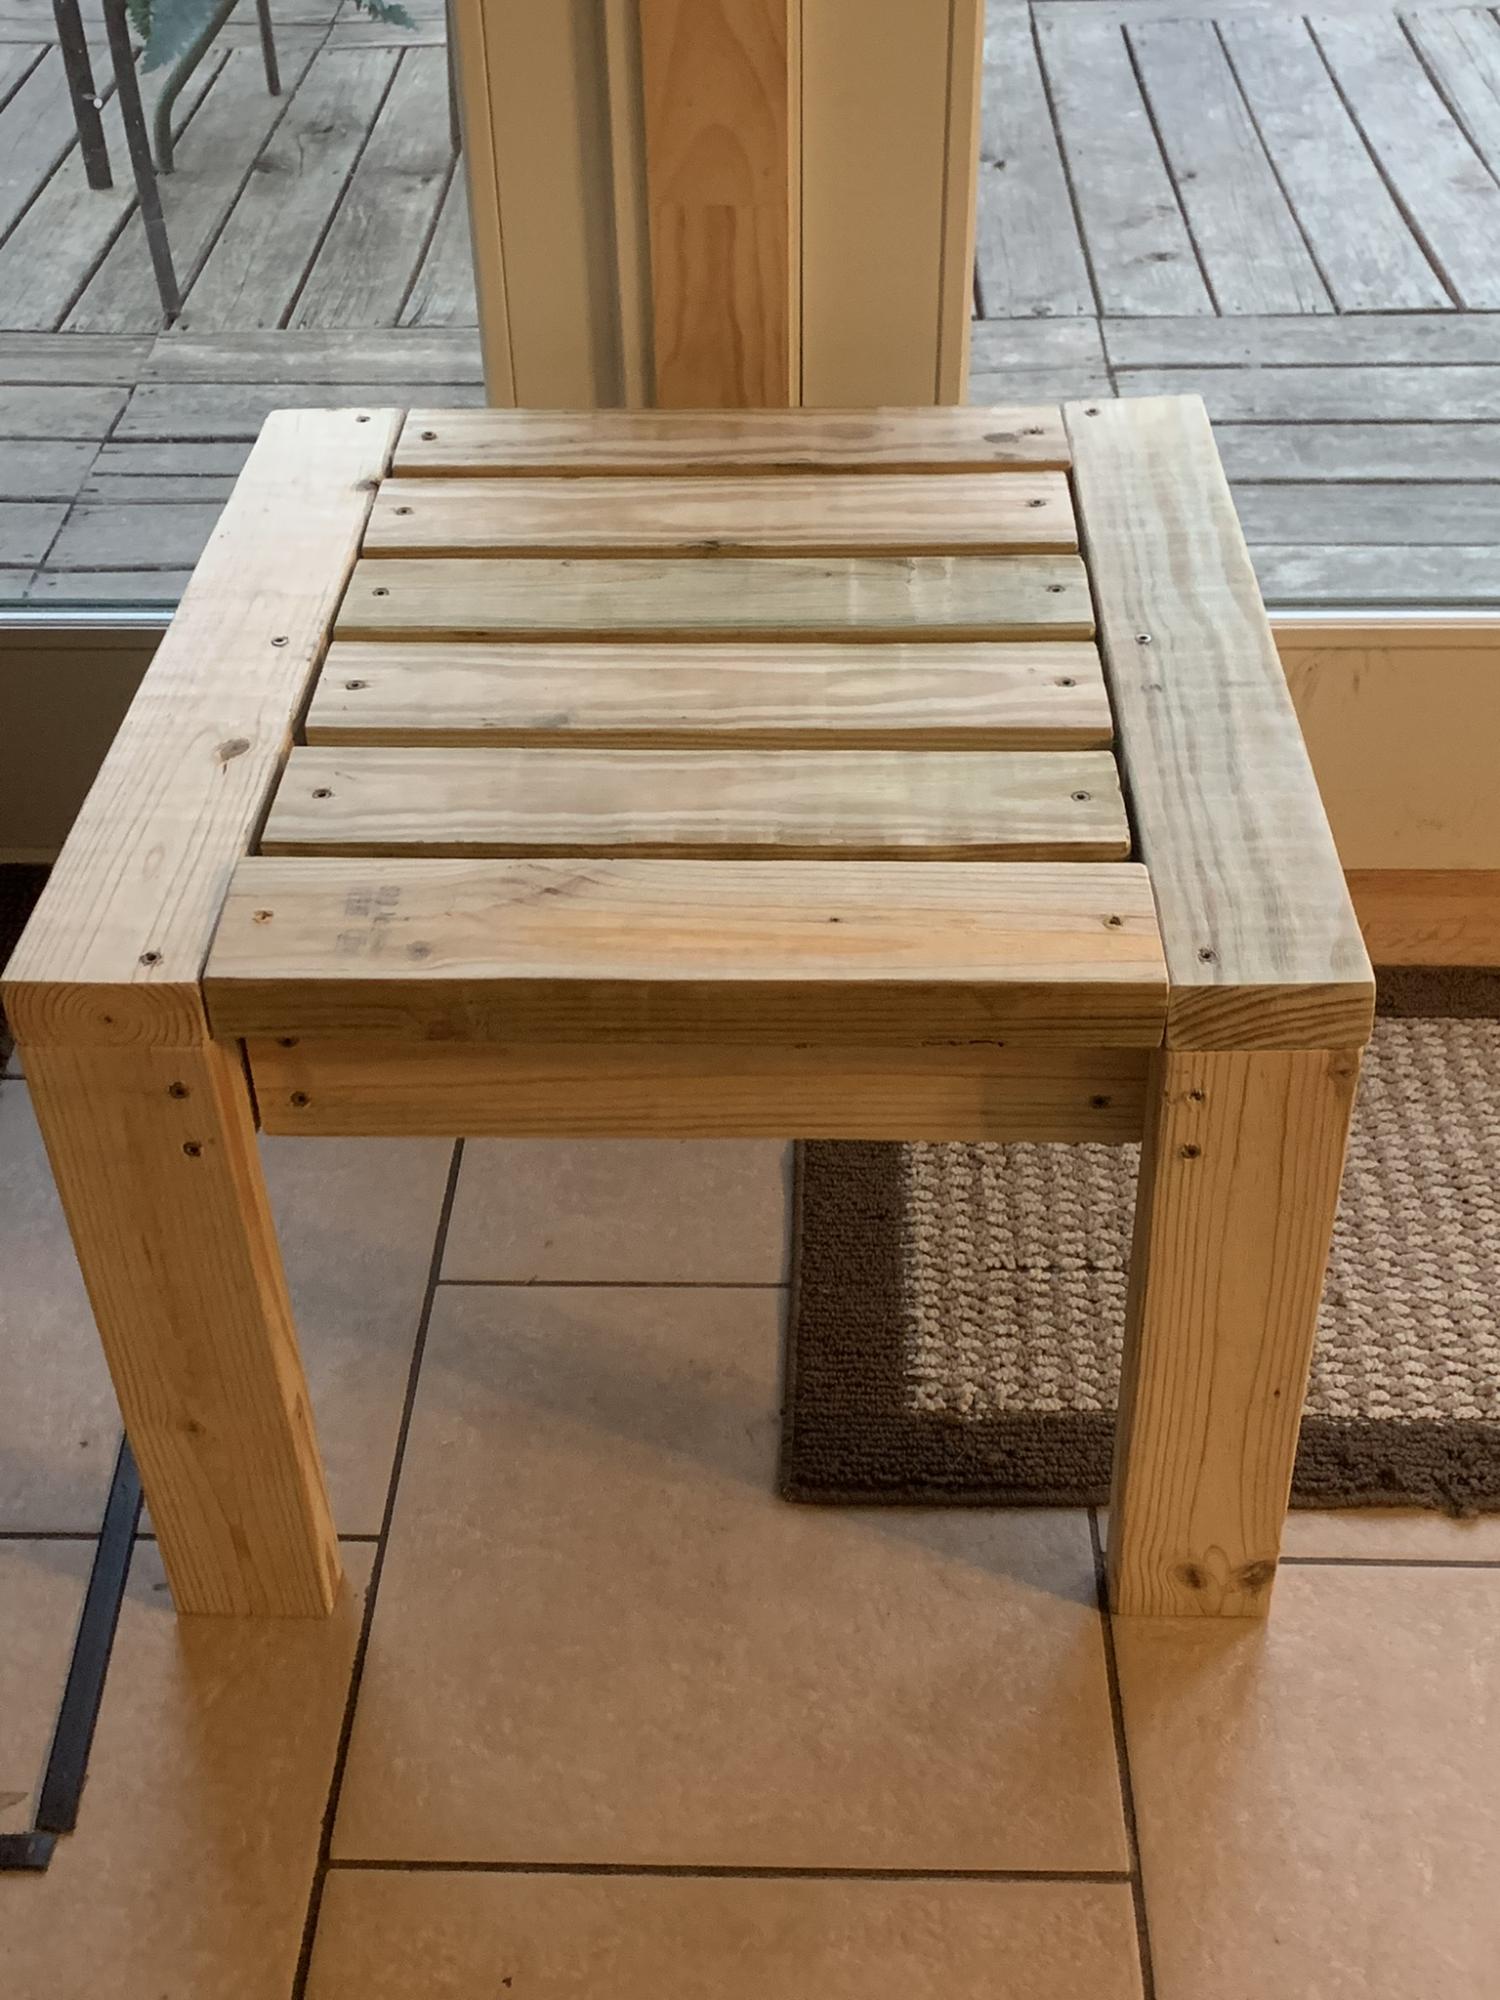
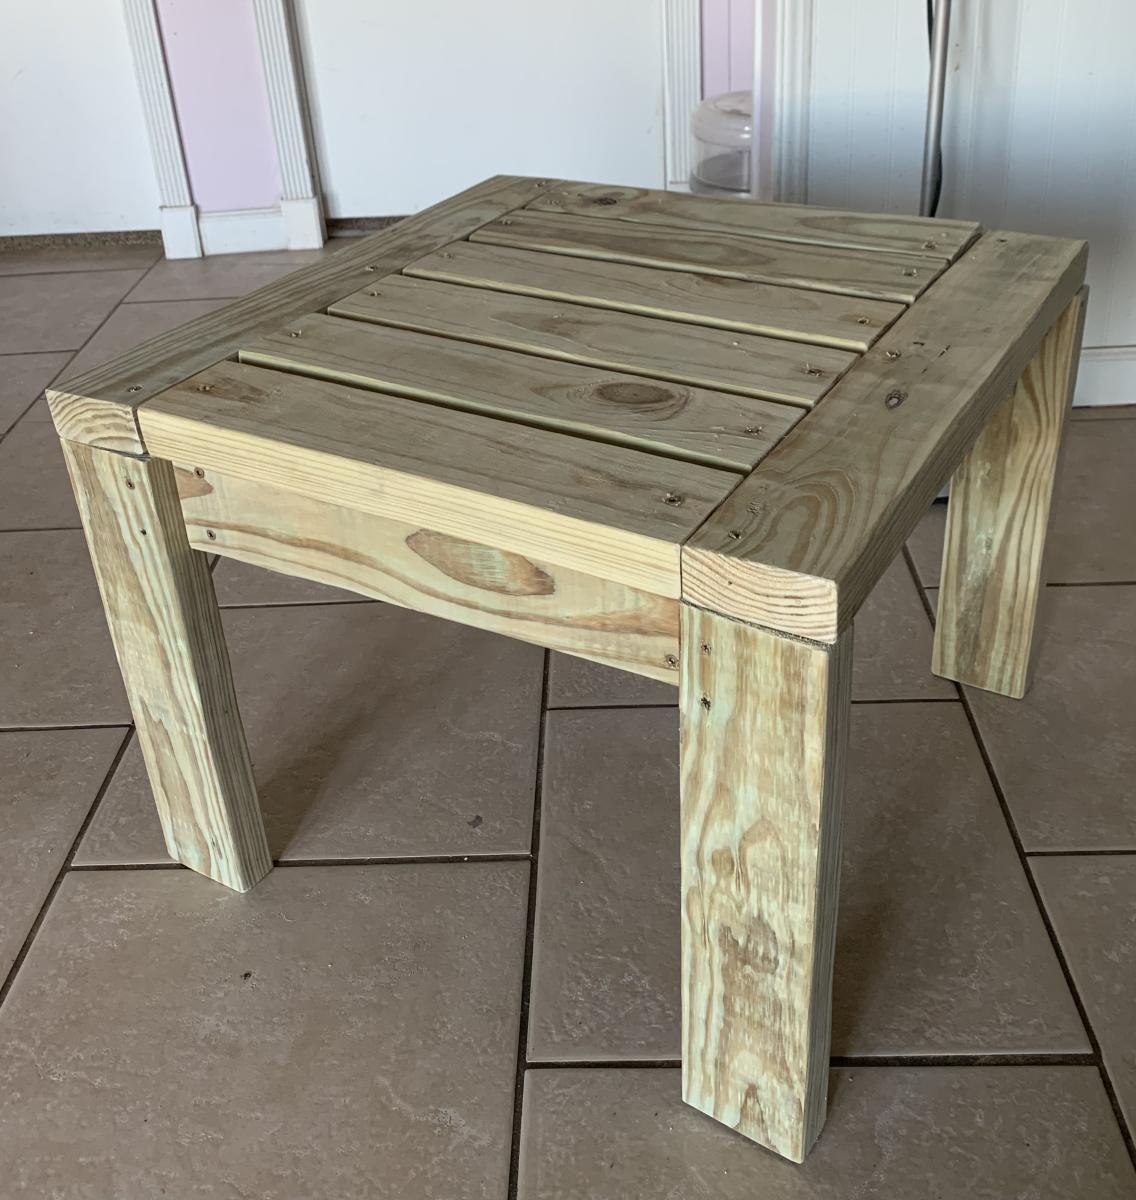
Outdoor end tables

I made these two Ana White outdoor end tables for my patio. Next up will be the matching coffee table

Built from Plan(s)

Comments

Simple Modern Bed

Submitted by sarah0406 on Mon, 05/13/2019 - 11:04

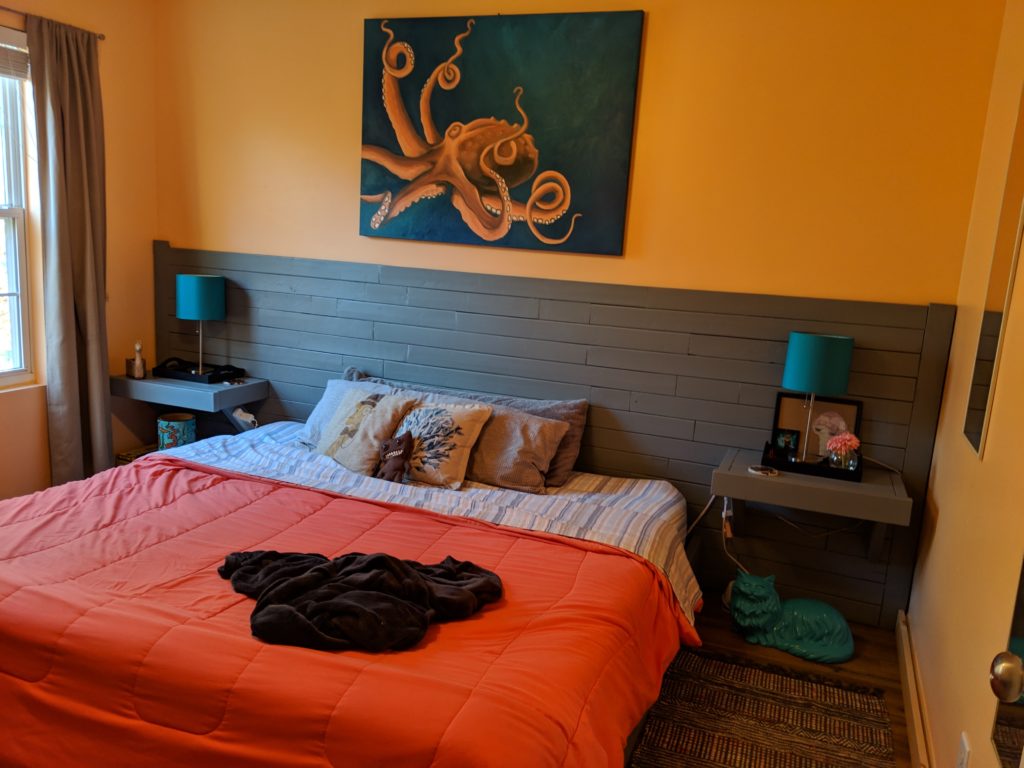
We used repurposed wood from a previous home reno project along with new lumber to build a king-sized bed frame and wall-length headboard - based off of the "2x4 Simple Modern Bed" plans from More Like Home. We are VERY much beginners so this was an incredible learning experience, but the end result looks pretty good, in my opinion!

Built from Plan(s)
Estimated Time Investment
Day Project (6-9 Hours)
Recommended Skill Level
Beginner

Kamado table

Submitted by lmarco191 on Sun, 05/16/2021 - 14:47

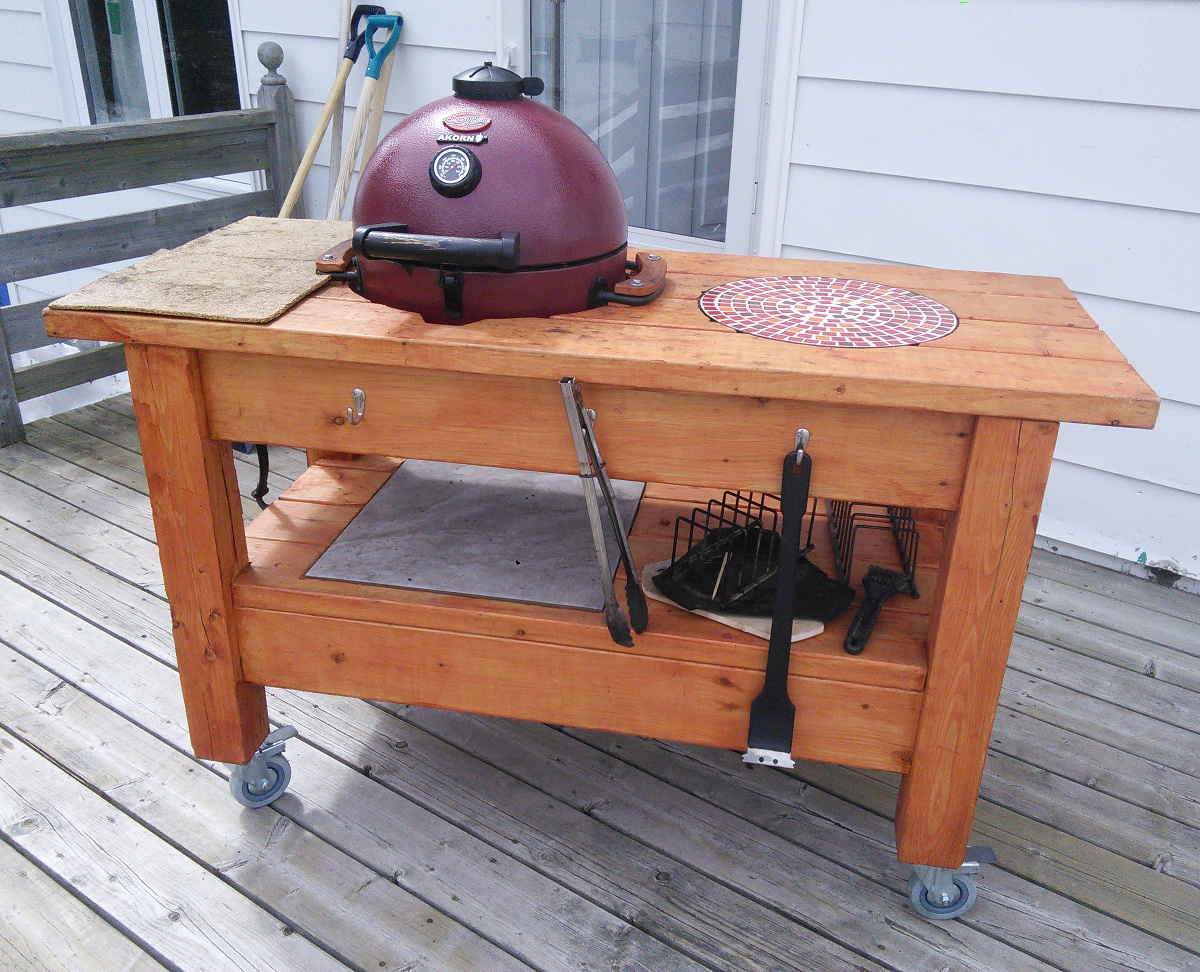
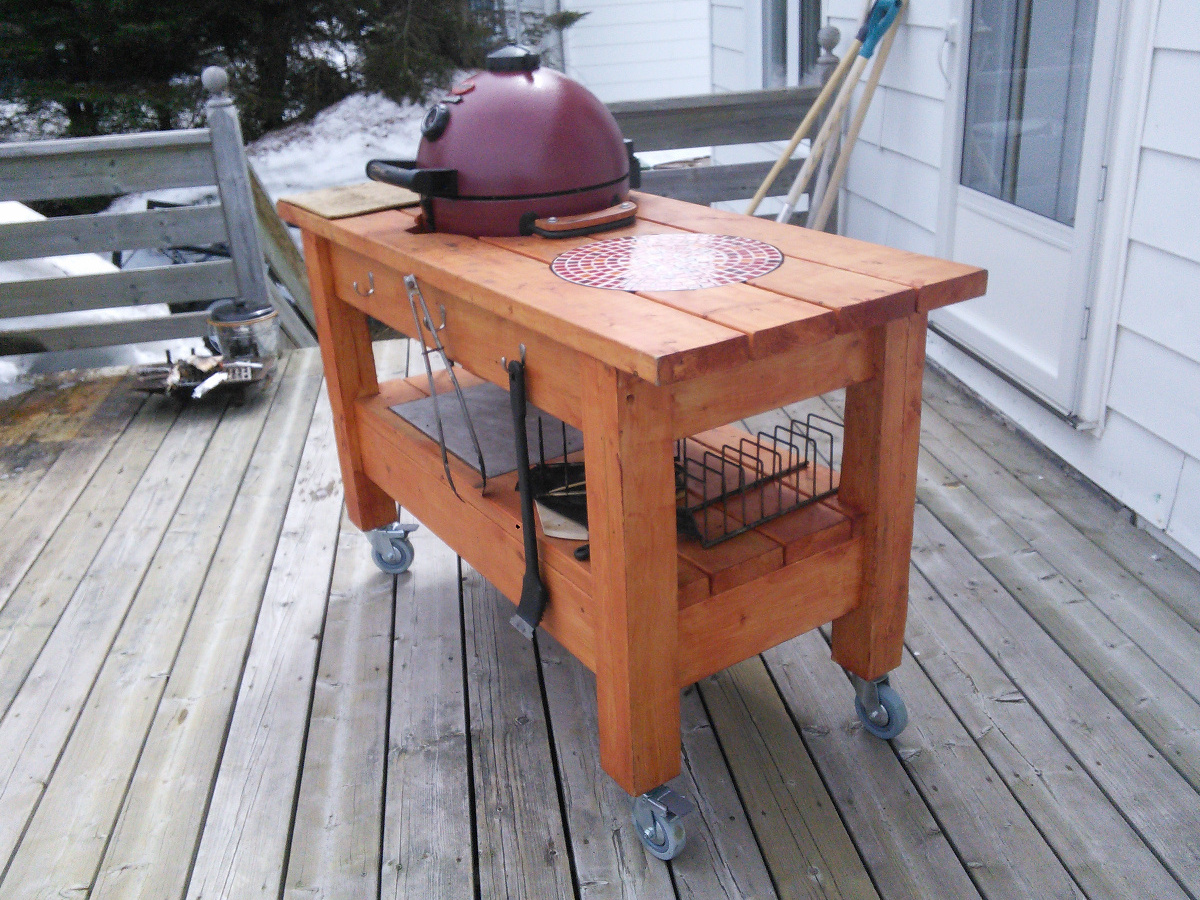
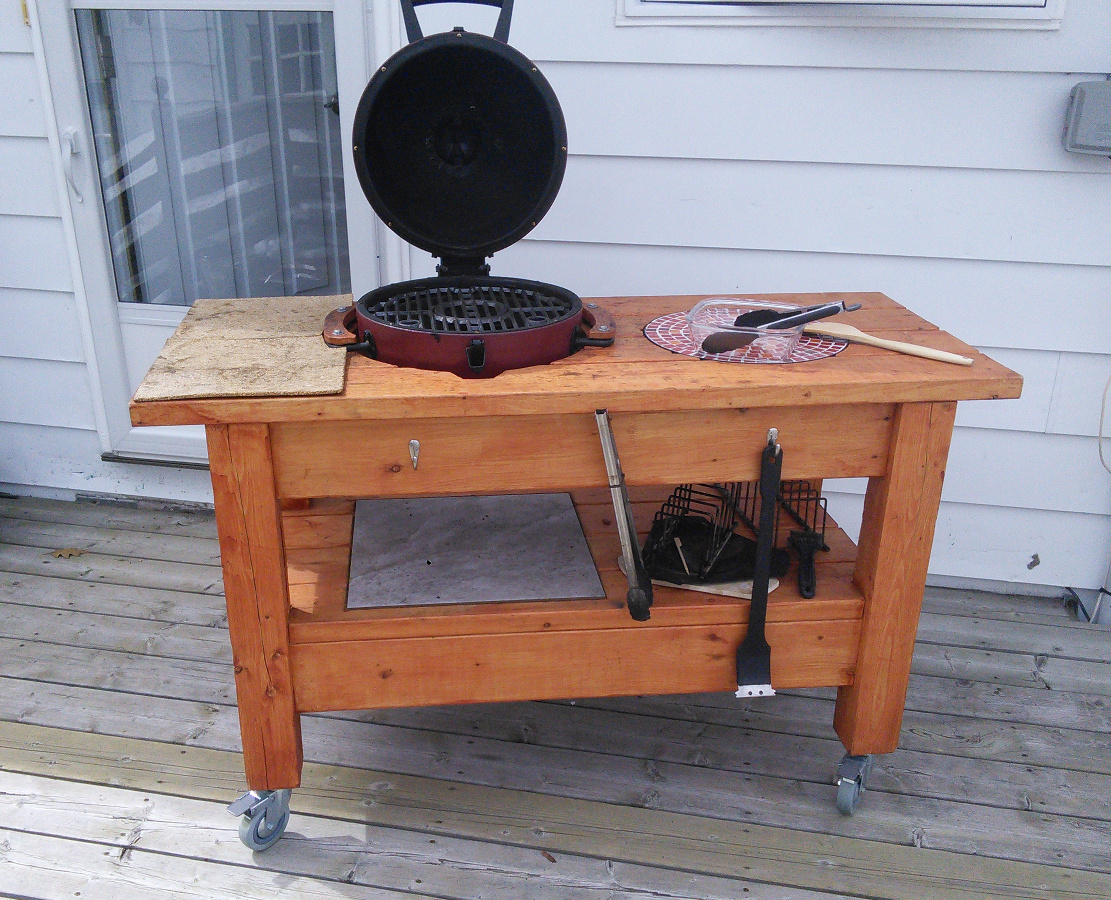
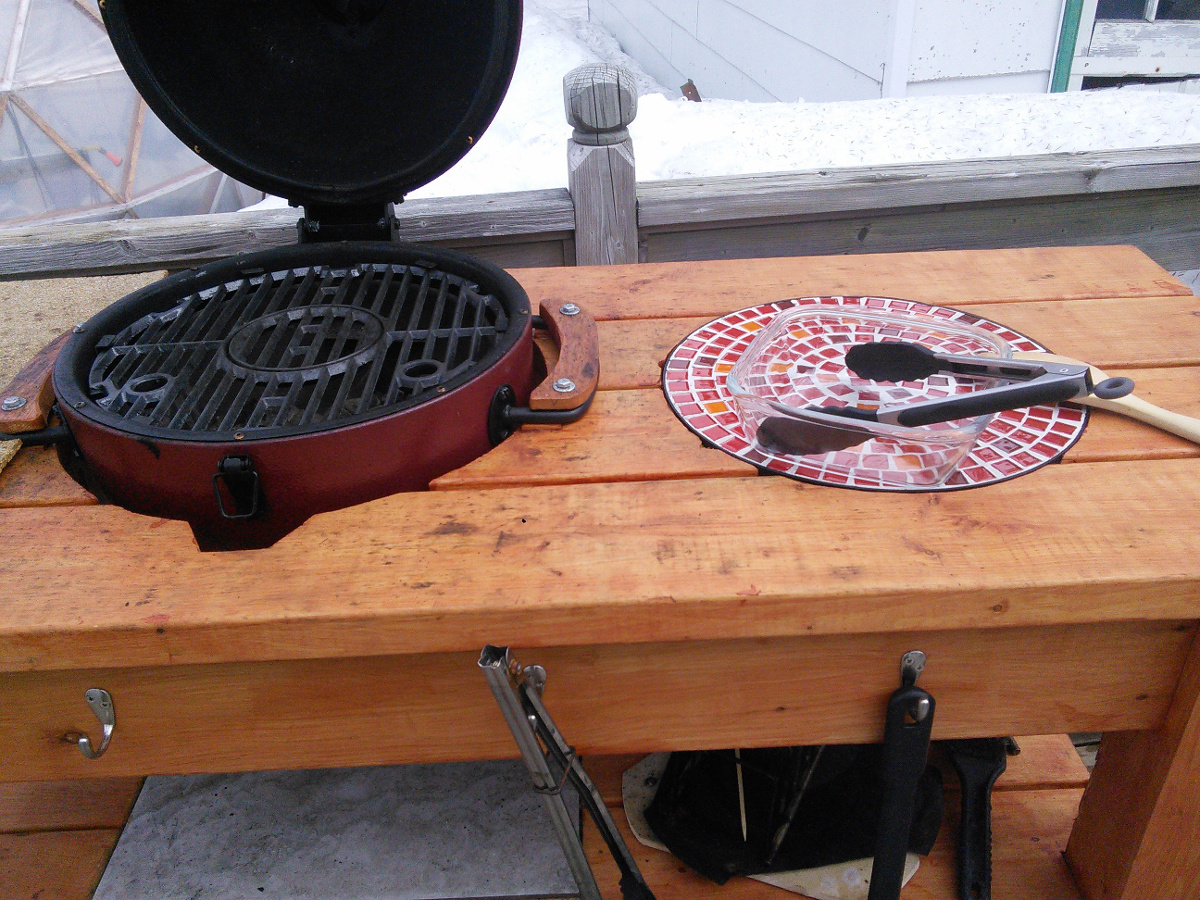
The table assembly was Inspired by farm table and workbench plans. It was built from construction grade untreated 4x4 and 2x6 and assembled using Kreg pocket screws and glue. Finish is semi-transparent wood stain. Rather heavy, the table have locking wheels to help move it. The lower shelf is used to store accessories.

The small kamado is just the right size for two people. I added a large ceramic tile under the firebox plus a small inlay next to the grill. That was the top of a small patio table. A few hooks were added as a final touch.

We built it last year; it gets a lot of use as a grill, smoker, bread and pizza oven.

We are very satisfied with the outcome. Many thanks for the plans and inspiration.

Built from Plan(s)
Estimated Time Investment
Week Long Project (20 Hours or More)
Finish Used
Semi transparent wood stain
Recommended Skill Level
Intermediate

Comments

Jacob1234

Mon, 08/02/2021 - 23:34

Your grill is very beautiful, but I prefer cooking in the kitchen, I will explain why, I recently read a lot of Kitchenotic.com here, what connects me and the kitchen most of all is the answers to my any questions, no matter how stupid they are and the answers were always correct

Kids' Playhouse (under stairs)

Submitted by kdins31 on Sun, 12/18/2011 - 09:22

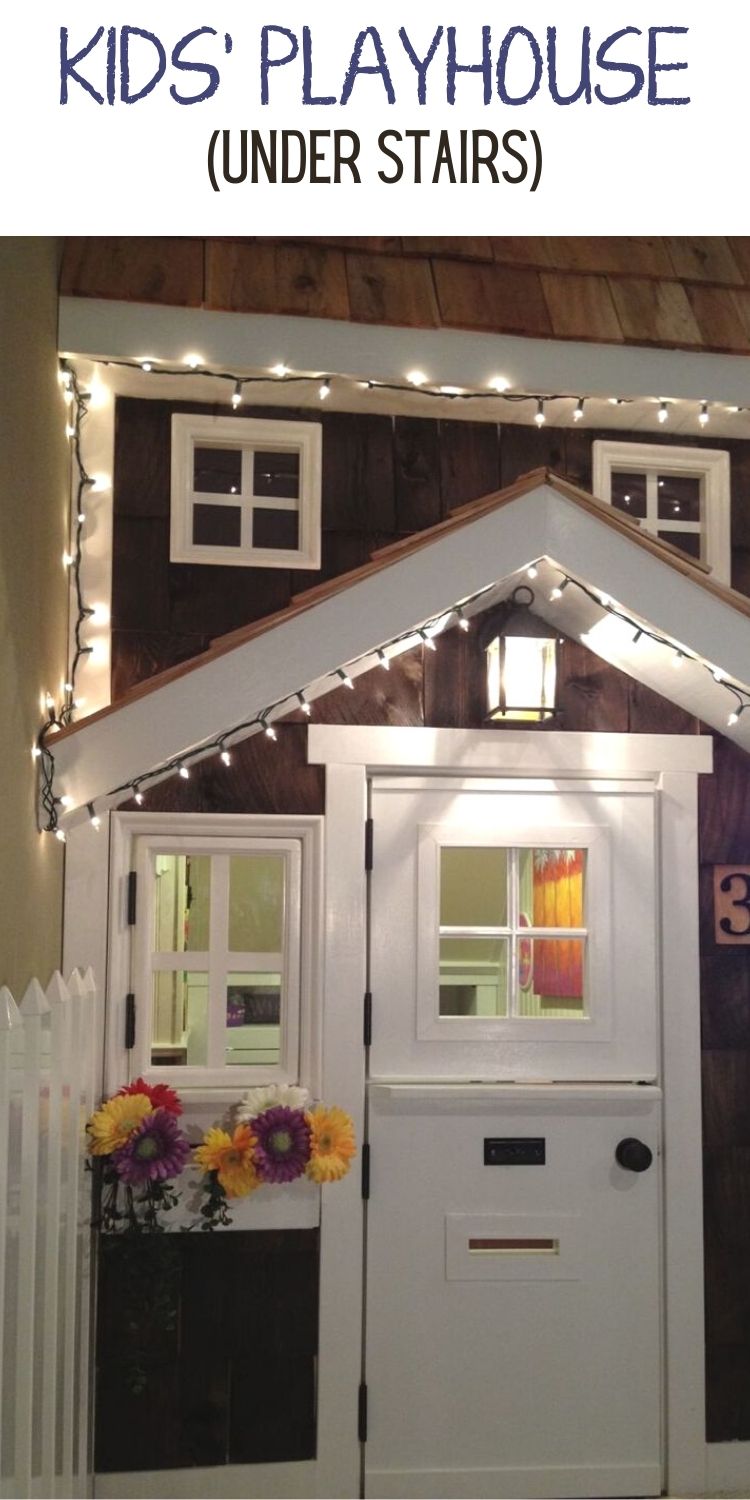
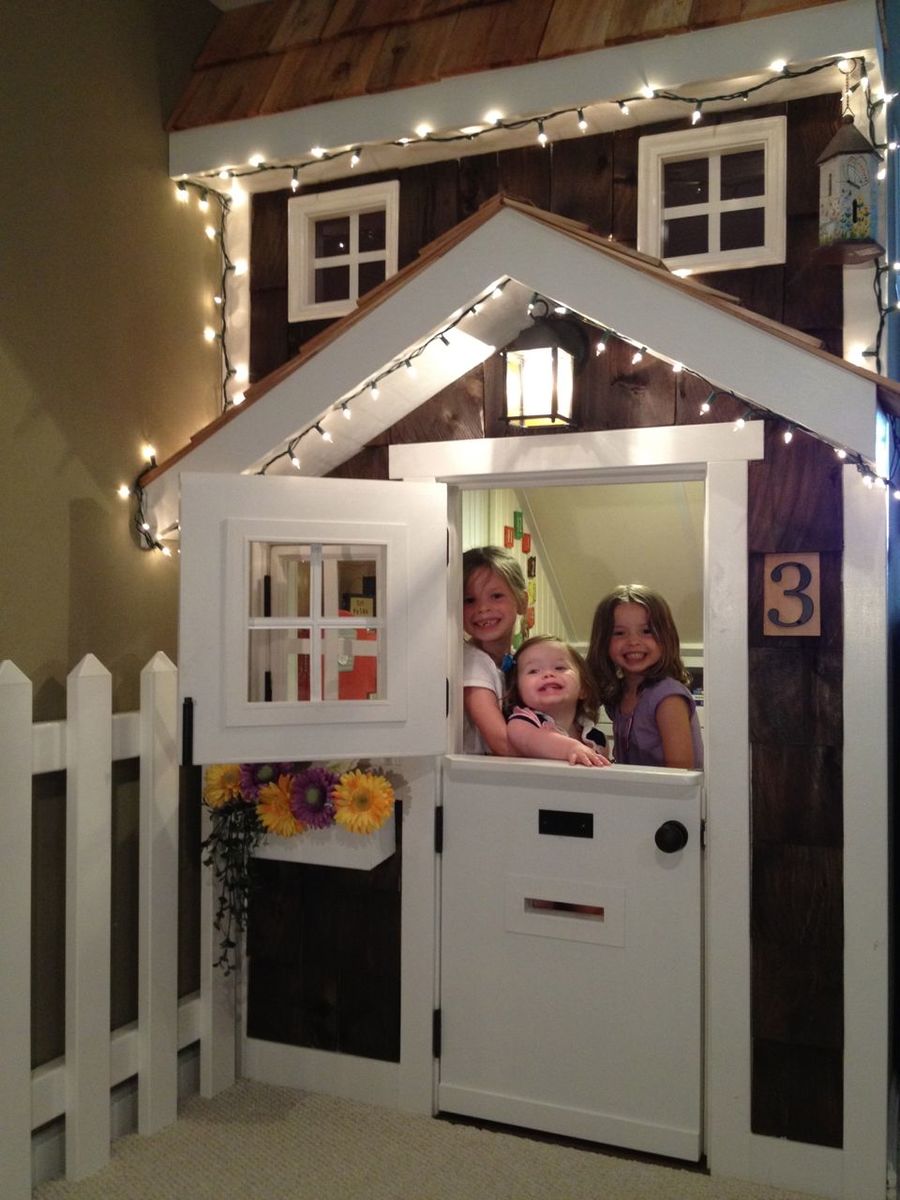
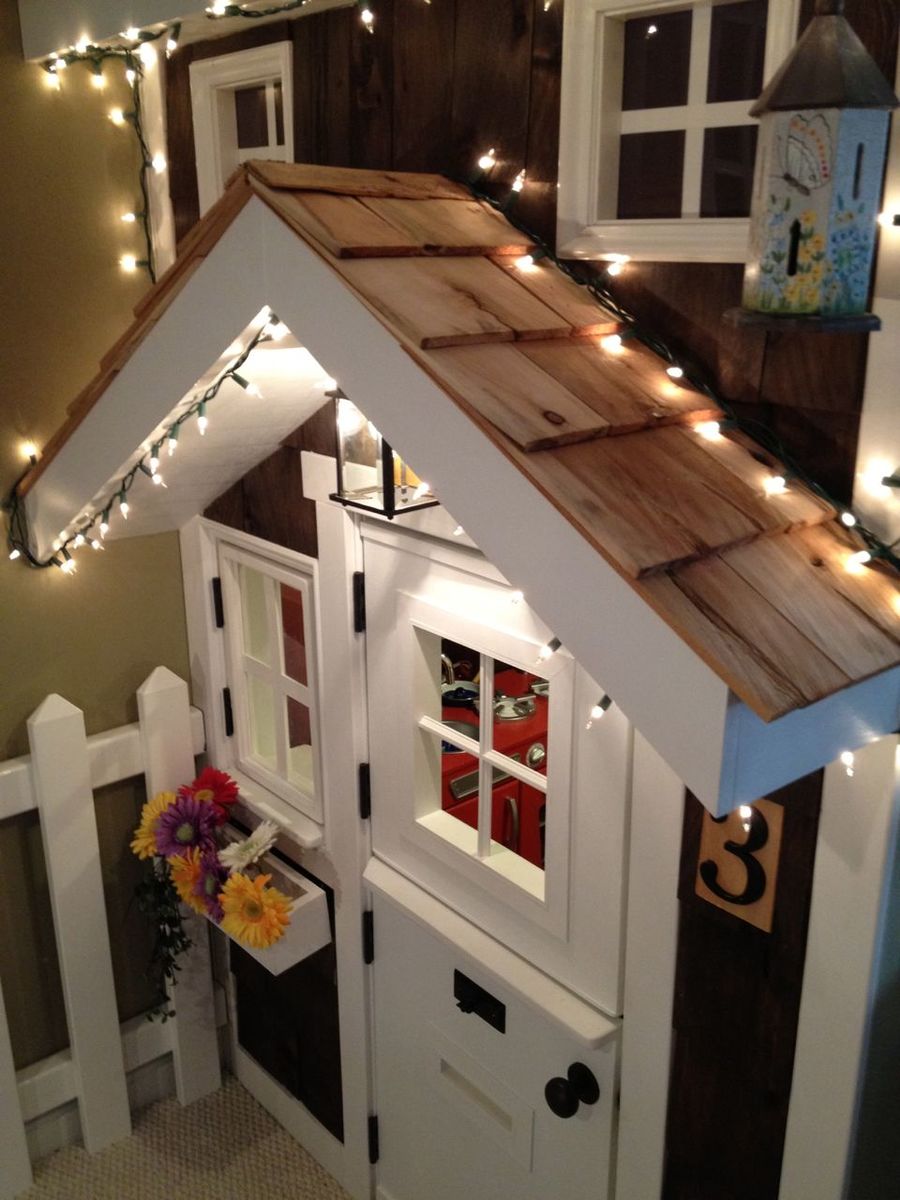
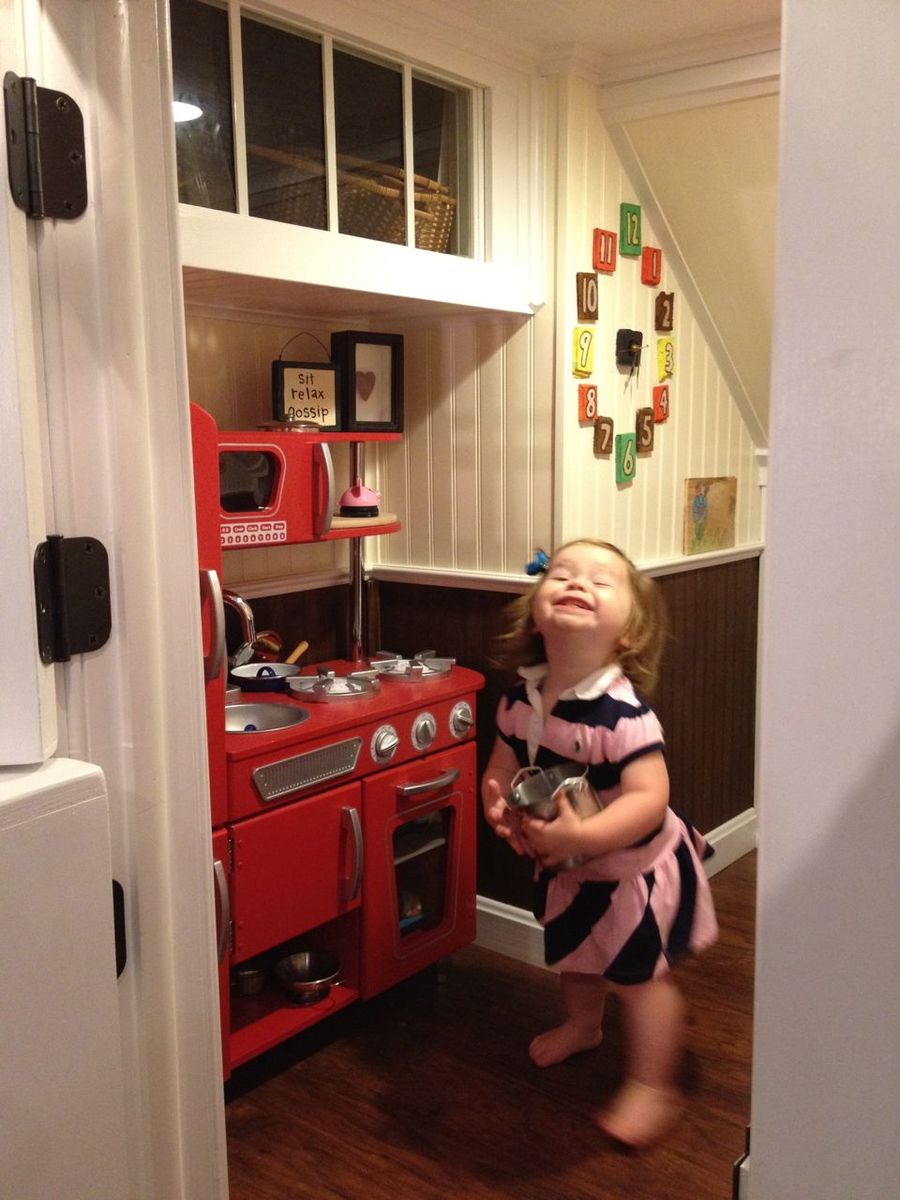
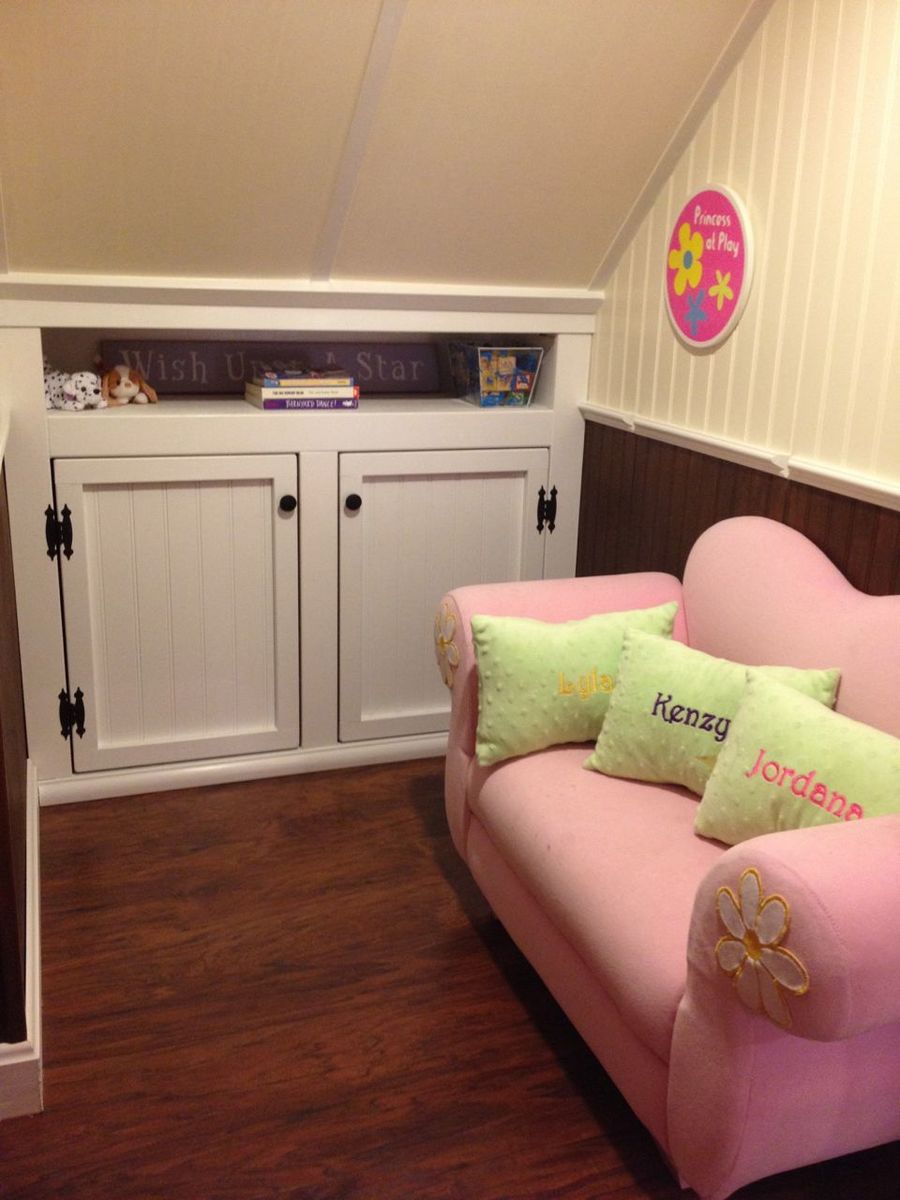
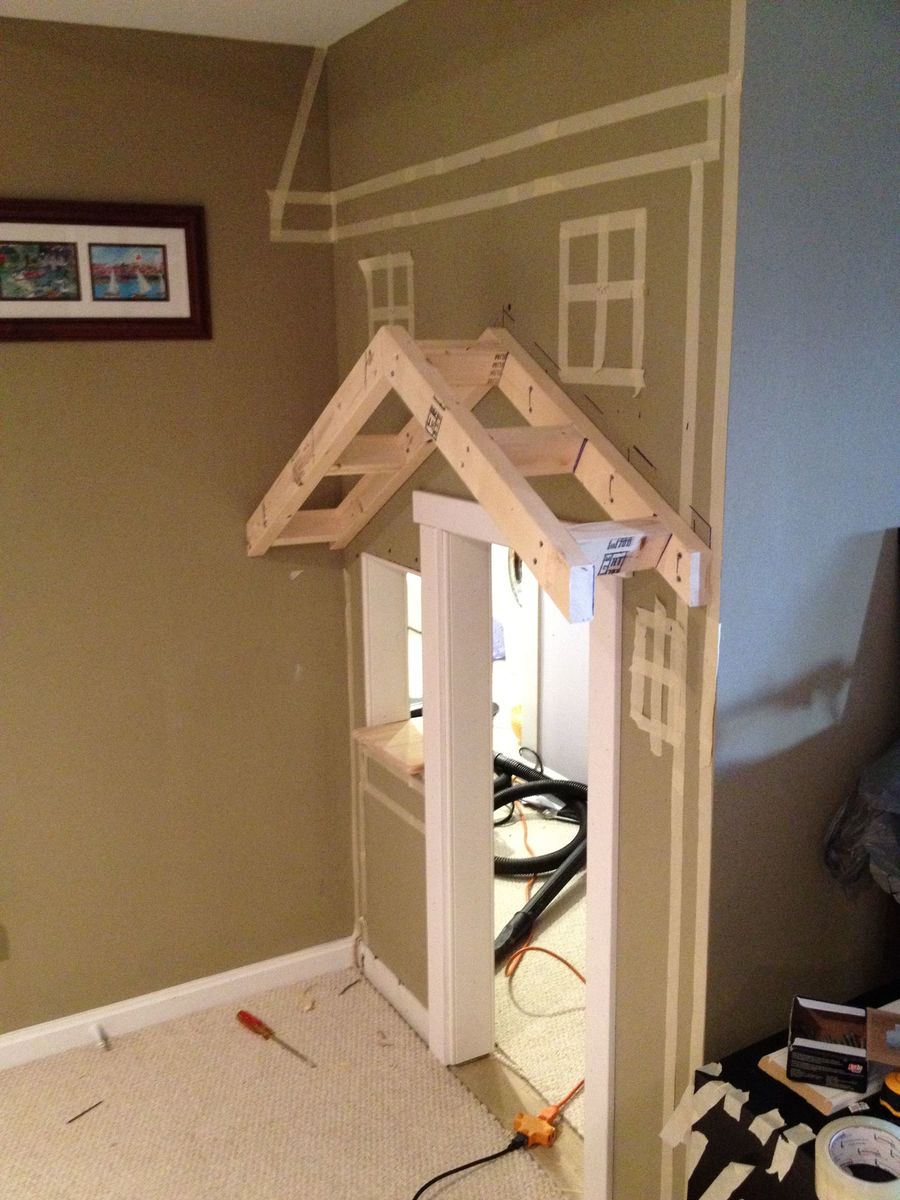
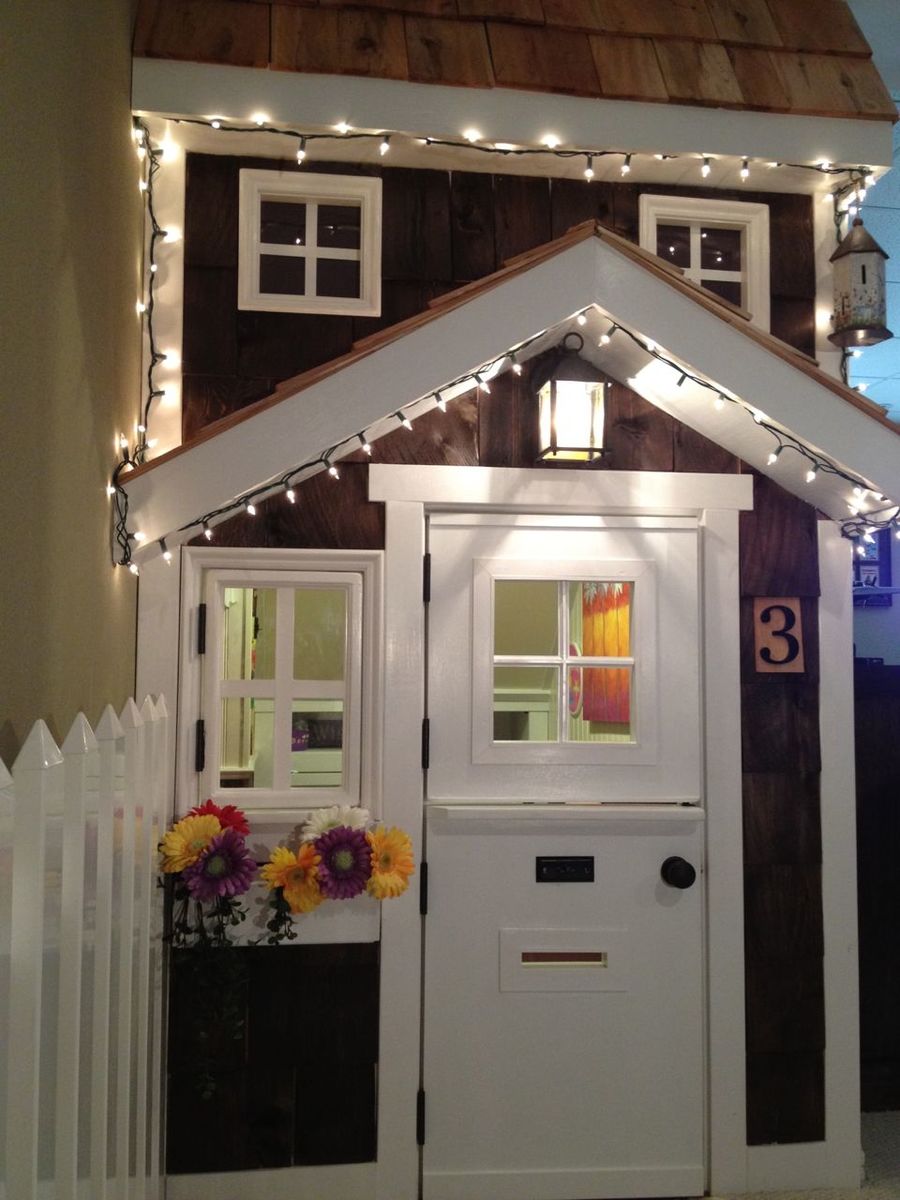
Had the perfect space for a little playhouse under the stairs in the basement and it's been our plan for 4 years to do something. Finally, we did something. Wanted depth so I added the roof and portico. Also added cedar shingles that I picked up for $7 at HD. Inside I had extra laminate flooring so I put that down and added beadboard, chair rail and crown molding. There's also a small transom window above the small kitchen area. The kids love the barnhouse doors with old fashioned doorbell, mailslot and window. The bookshelf under the stairs was the final touch. I didn't use any plans from this awesome site but did, as always, get a bunch of tips and inspiration!

Pin for Later!

Kids' Playhouse (under stairs)

Estimated Time Investment
Week Long Project (20 Hours or More)
Finish Used
Dark walnut stain on cedar shingles.
Recommended Skill Level
Intermediate

Comments

Cindy from Indiana (not verified)

Sun, 12/18/2011 - 19:00

Wow! That is awesome!

You really did a great job on that! So imaginative, too. WTG!

Guest (not verified)

Sun, 12/18/2011 - 19:58

That is so stinkin' adorable! Fantastic job. I love everything about it. Your kids (and grandkids) will remember the playhouse under that stairs forever!

spiceylg

Mon, 12/19/2011 - 06:54

Wow, this is too cool! They are going to love love love this! Can't wait to see the kitchen reveal!

bhoppy

Mon, 12/19/2011 - 08:43

LOVE LOVE LOVE this!!!! It looks amazing! Makes me want to buy a new house with stairs. LOL

birdsandsoap

Sat, 12/31/2011 - 18:26

You did an amazing job on this. I'm planning a bunkbed with a similar facade. I love how cozy it looks without having to make an actual pitched roof. The shingles are such a nice touch that I may have to copy you! And it's wired for lights; you've really outdone yourself.

Guest (not verified)

Mon, 02/27/2012 - 21:14

I love this playroom you created. We are currently in the process of building a playroom under the stairs for our girls. Where did you find the door...it is exactly what I am looking for! What a wonderful job you did!!!
kdins31

Mon, 03/19/2012 - 14:26

Thanks to all of you for the nice comments! Re: the door, I just cut a plain 18x80 door slab ($21 from orange) and trimmed it out. I still need to put the window grille over the open space, and was hoping to find a cool 'speak easy' grille that fits the space.

Thanks again!

megan_m

Fri, 04/27/2012 - 09:07

this is such an amazing little space! great work!

MicheleInAlabama (not verified)

Thu, 05/03/2012 - 23:38

This has to be one of the most adorable things I've ever seen! What an awesome idea......how cool is that for the kids??! Love the lighting and the laminate (or is it hardwood) flooring inside. Even the stove is gorgeous! Such fond memories will be made there and remembered forever. Kudos!!

Amanda Rhoads (not verified)

Wed, 12/05/2012 - 15:34

Oh my goodness this is such an inspiration! However, as a beginning tool user, I don't think I could get my finishes so nice. How much experience had you had at this kind of stuff before? Was the area closed in before this project or did you do that too? I've got an open stairway into our basement and would be starting from scratch with ceiling, walls, etc. and have no experience hanging drywall or anything. I think it would take me a year. Great job, and thanks for sharing!

maggieasselin

Sat, 06/21/2014 - 12:51

Hi there!

I was just wondering how you made the door for your play house? We're basically stuck at this level in ours right now... ;) Thanks for any tips!!!

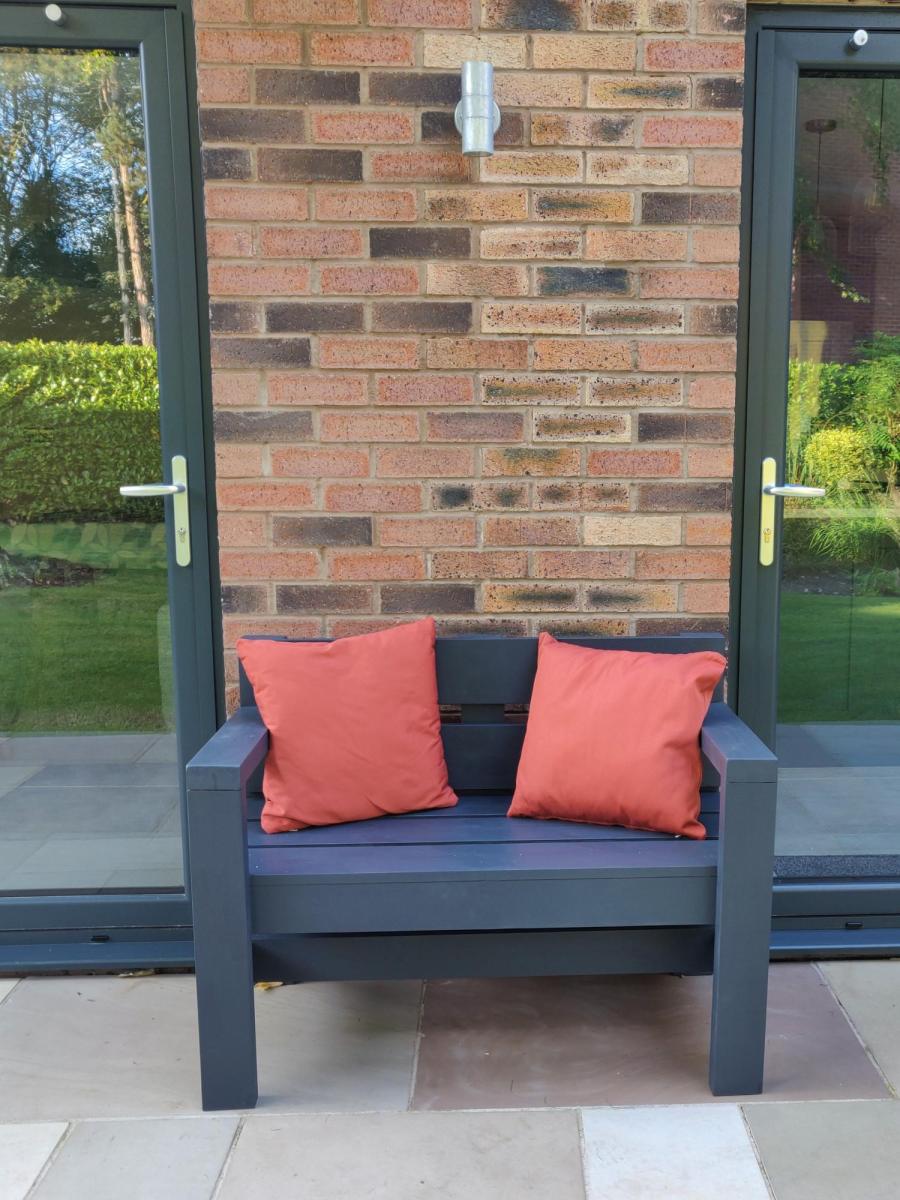
(Mini) Modern Park Bench

Submitted by philuk on Mon, 07/15/2019 - 15:16

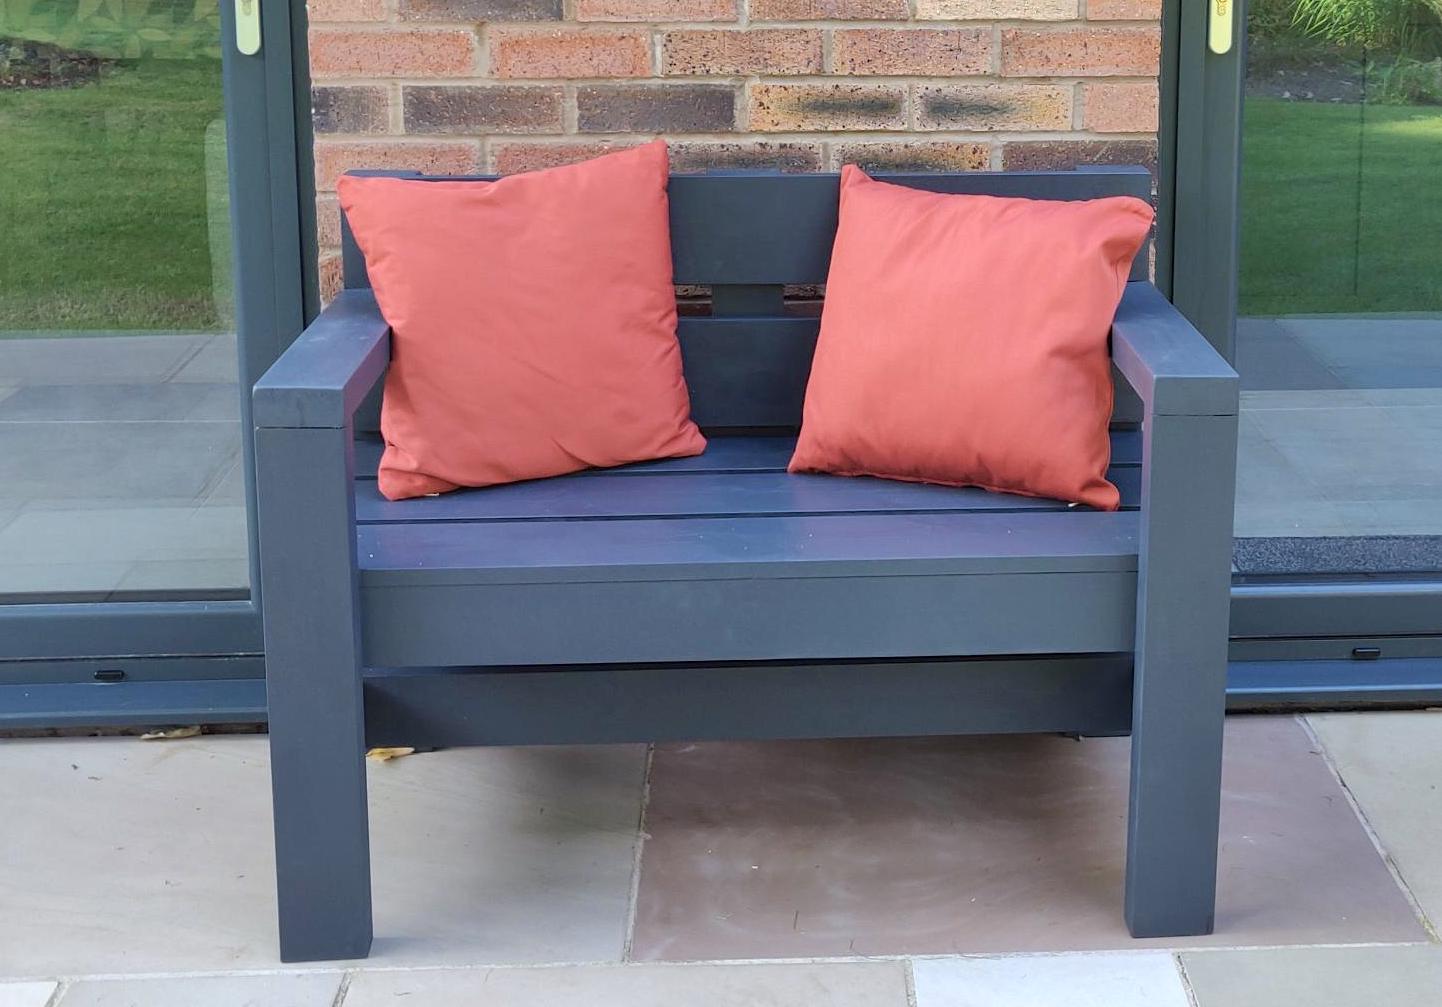
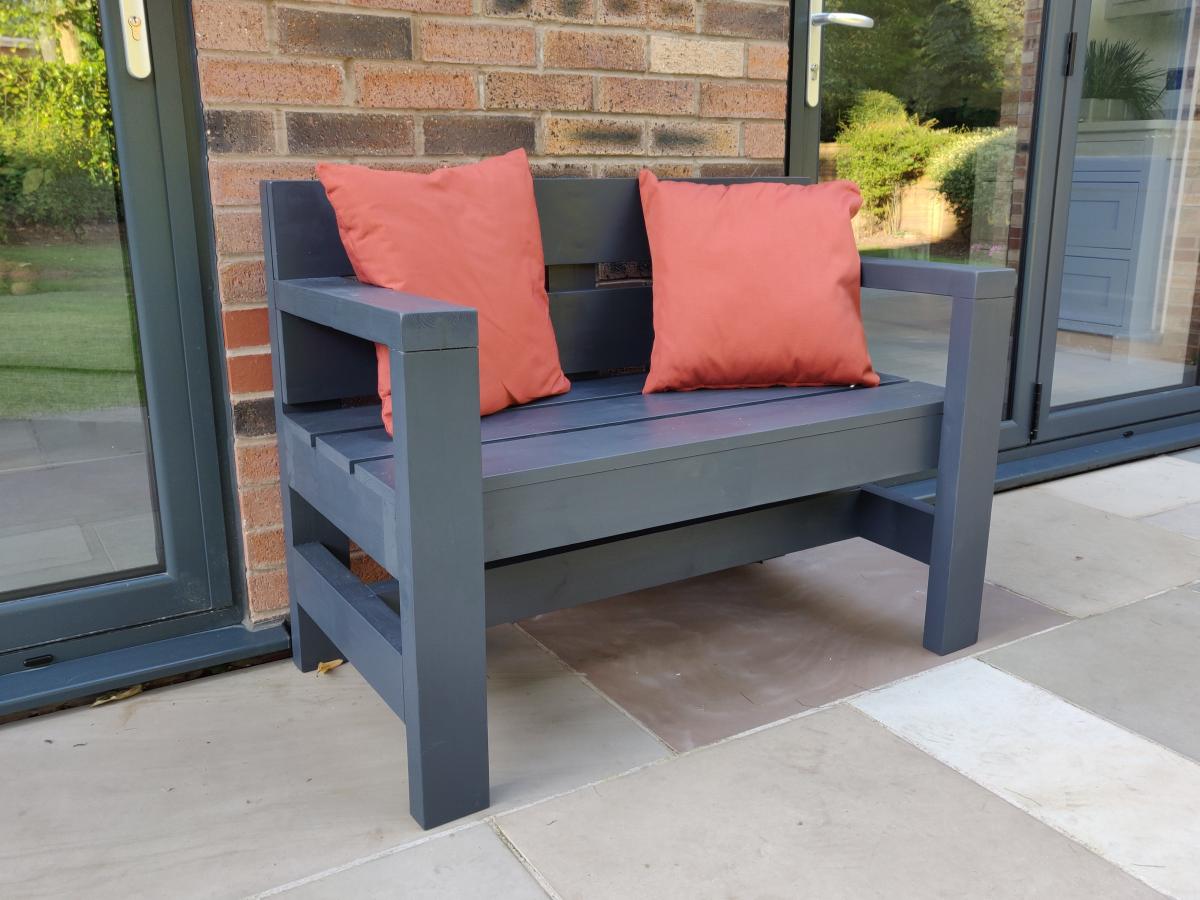
I needed a replacement outdoor bench to fit a small space between two door openings. Reduced the length of the Modern Park Bench to about 44". Also reduced the depth by removing one of the seat planks to retain a sense of proportion.

Had some issues with some of my 2x4s being a bit twisted which impacted the overall build quality but I'm happy with the end result considering the price/time invested.

Tip: spend some time in the lumber yard picking out your own wood - I wish I had.

Built from Plan(s)
Estimated Cost
£35 in timber.
Less than £5 for the finish.
Estimated Time Investment
Afternoon Project (3-6 Hours)
Finish Used
Two coats Cuprinol Garden Shades in 'Urban Slate'
Recommended Skill Level
Beginner

Comments

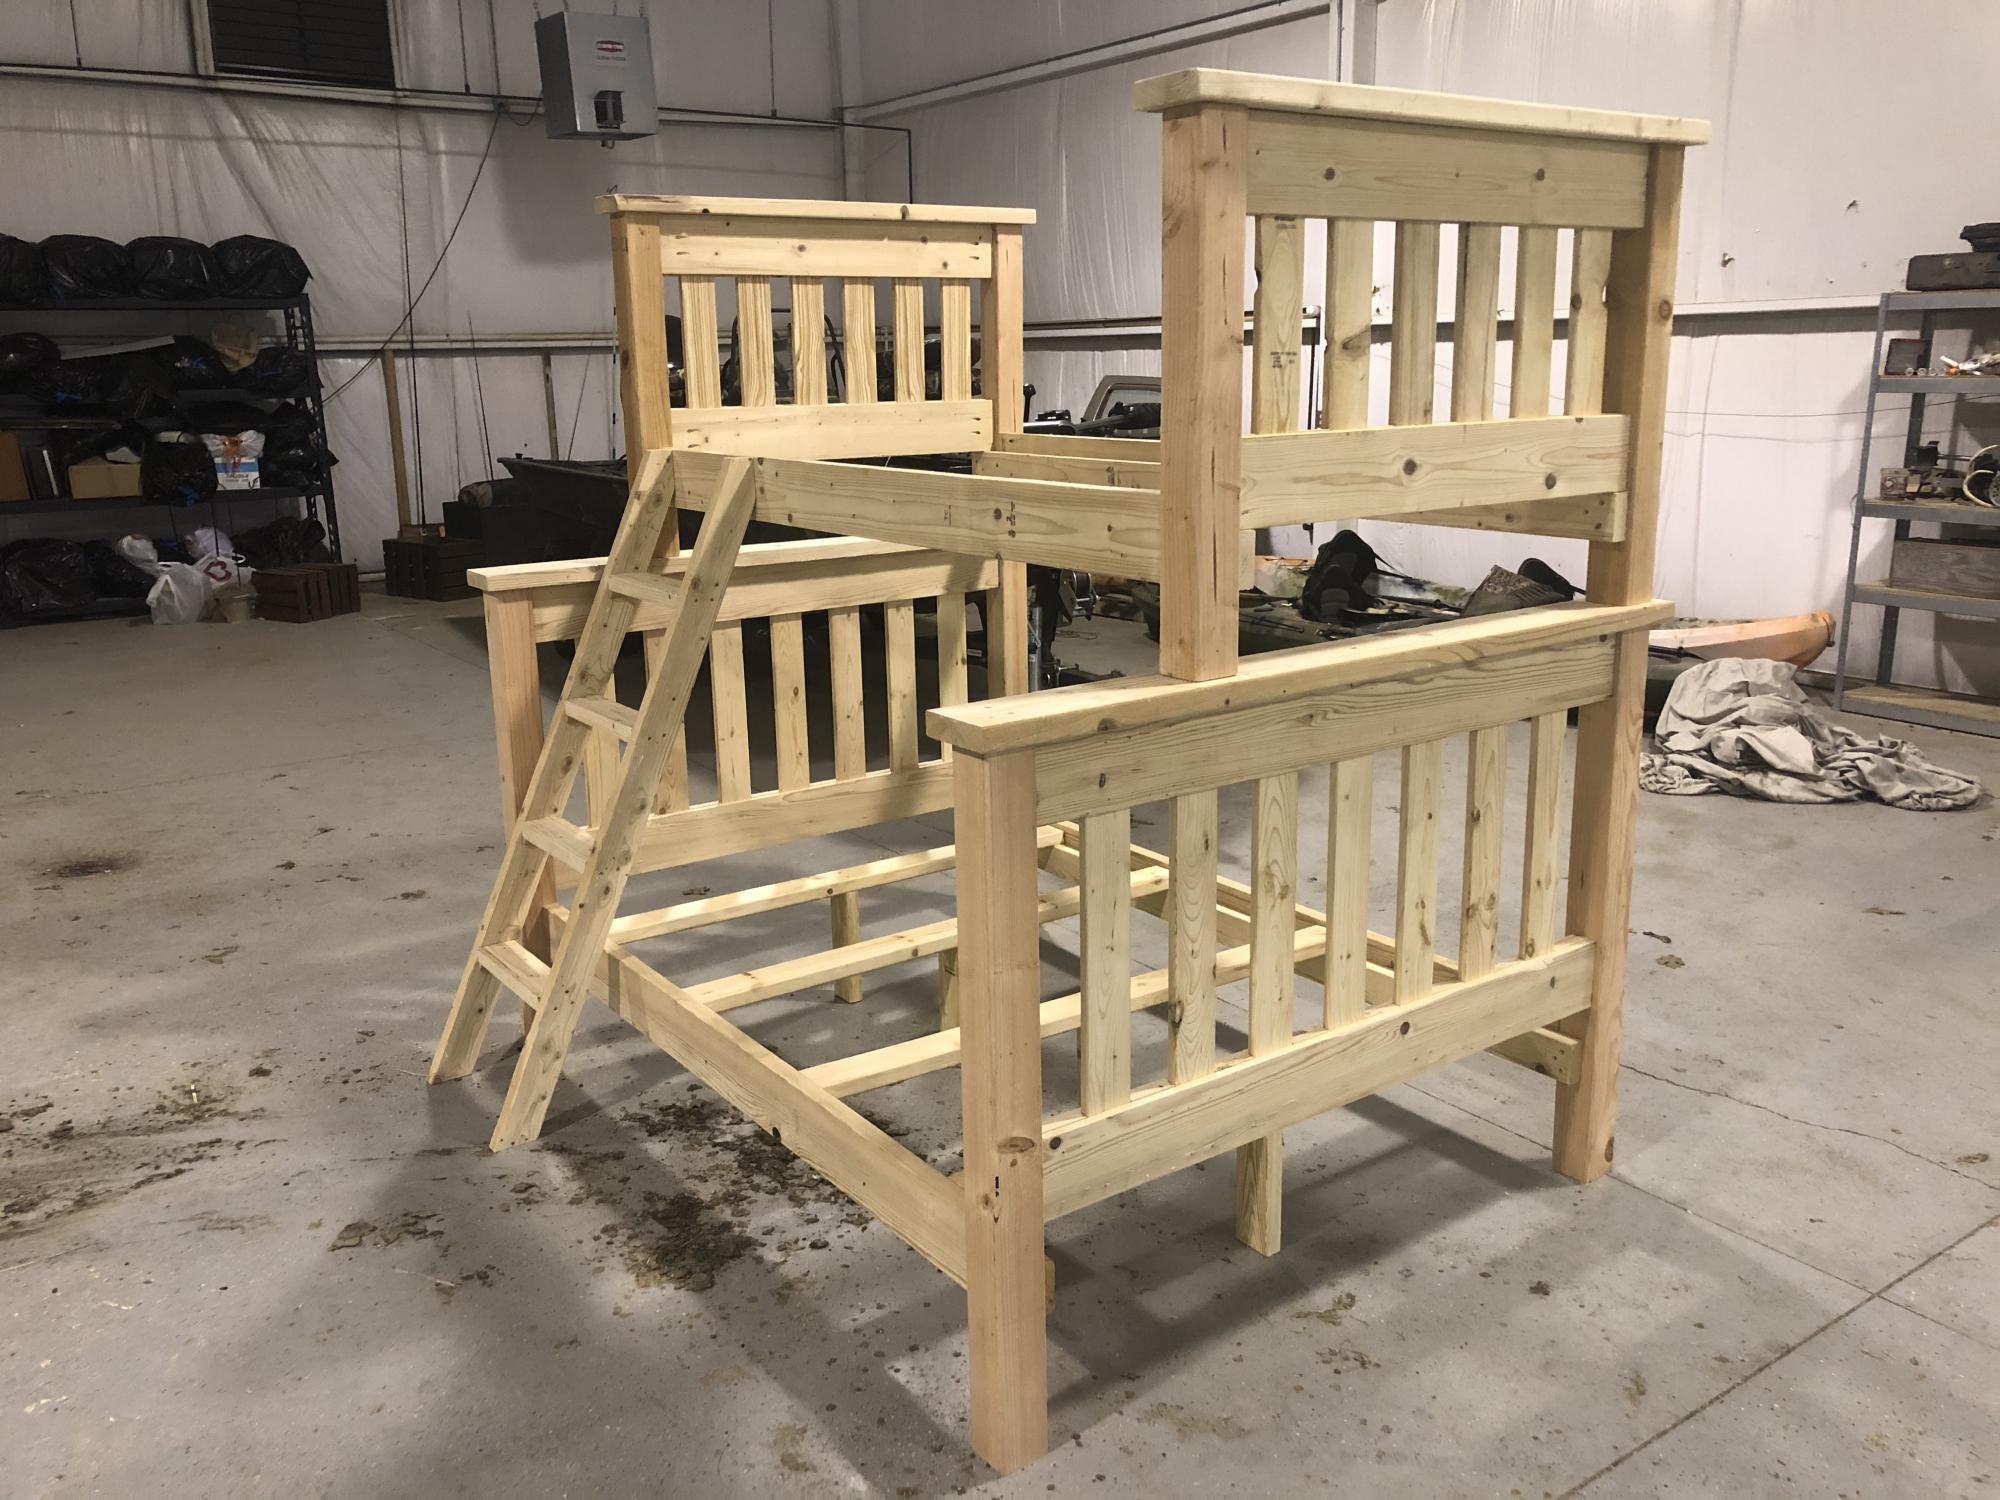
Bunk Beds

Submitted by Anonymous (not verified) on Thu, 10/10/2019 - 17:26

A lot of fun to build and not that hard at all. Thank you for the great plans.

Estimated Time Investment
Weekend Project (10-20 Hours)
Finish Used
Minwax Polycrylic Semi gloss
Recommended Skill Level
Beginner
Back