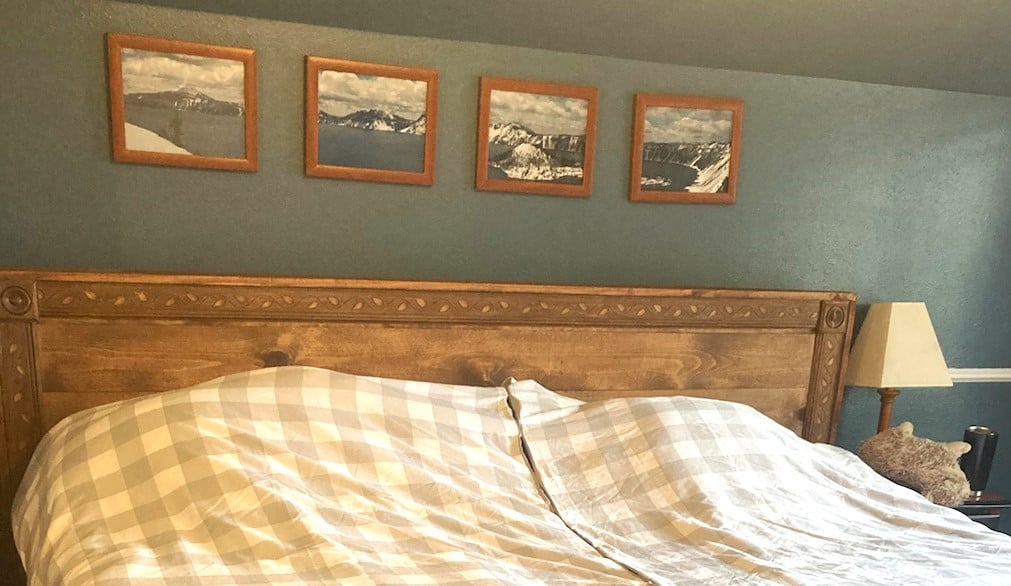
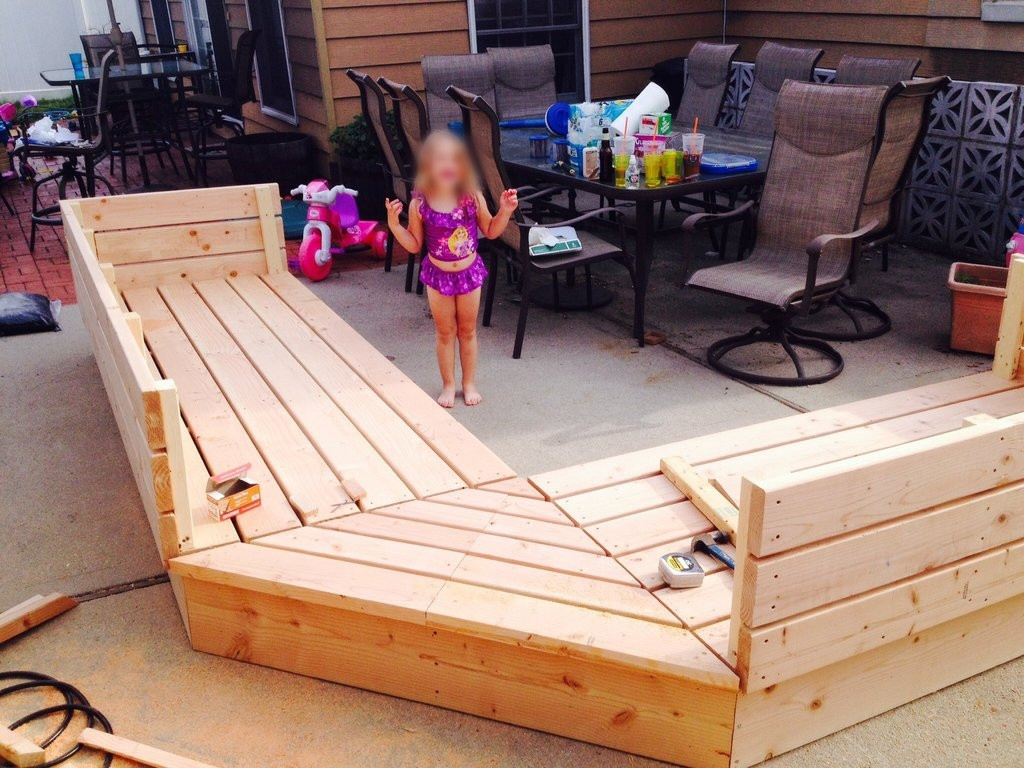
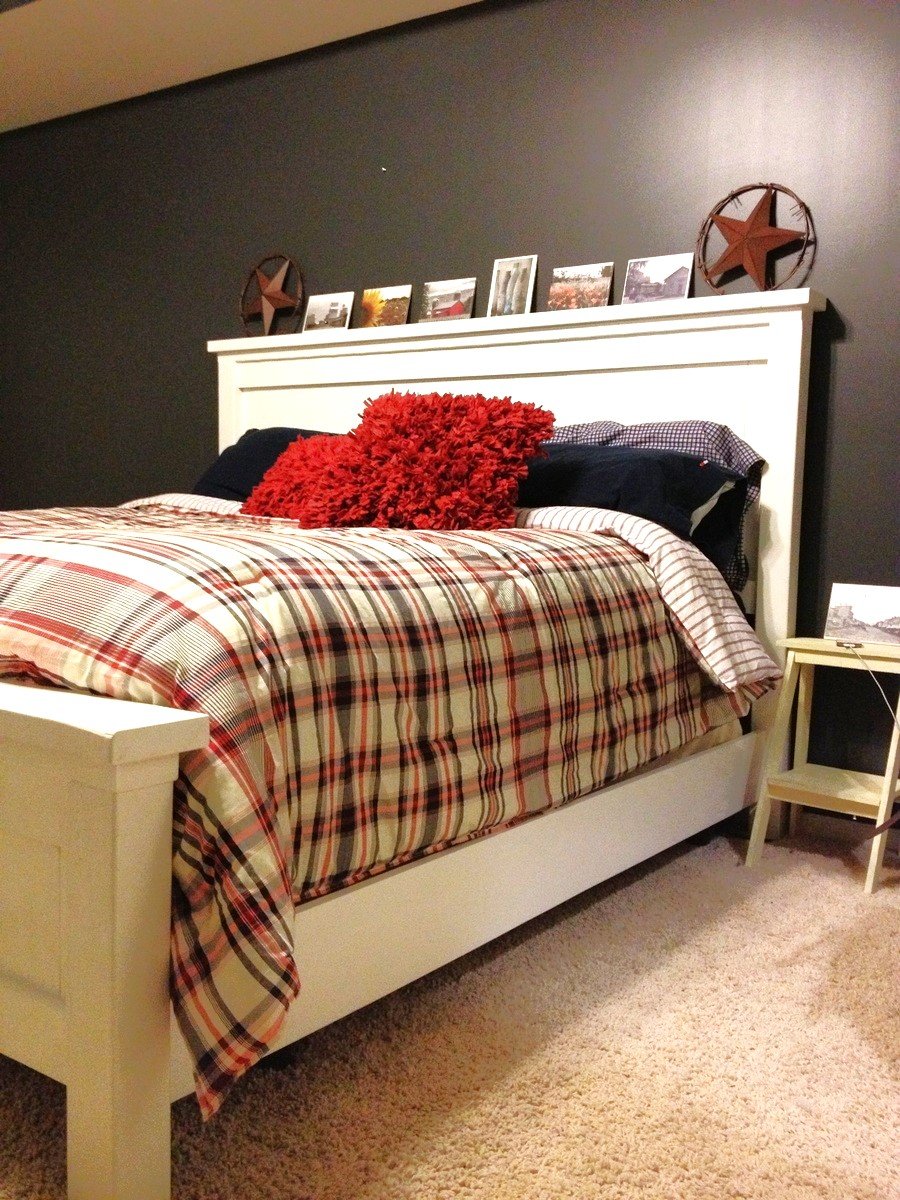
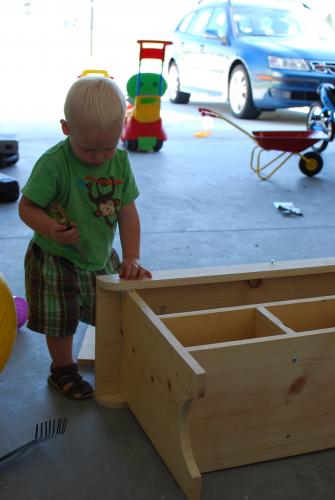
Big Boy Bed
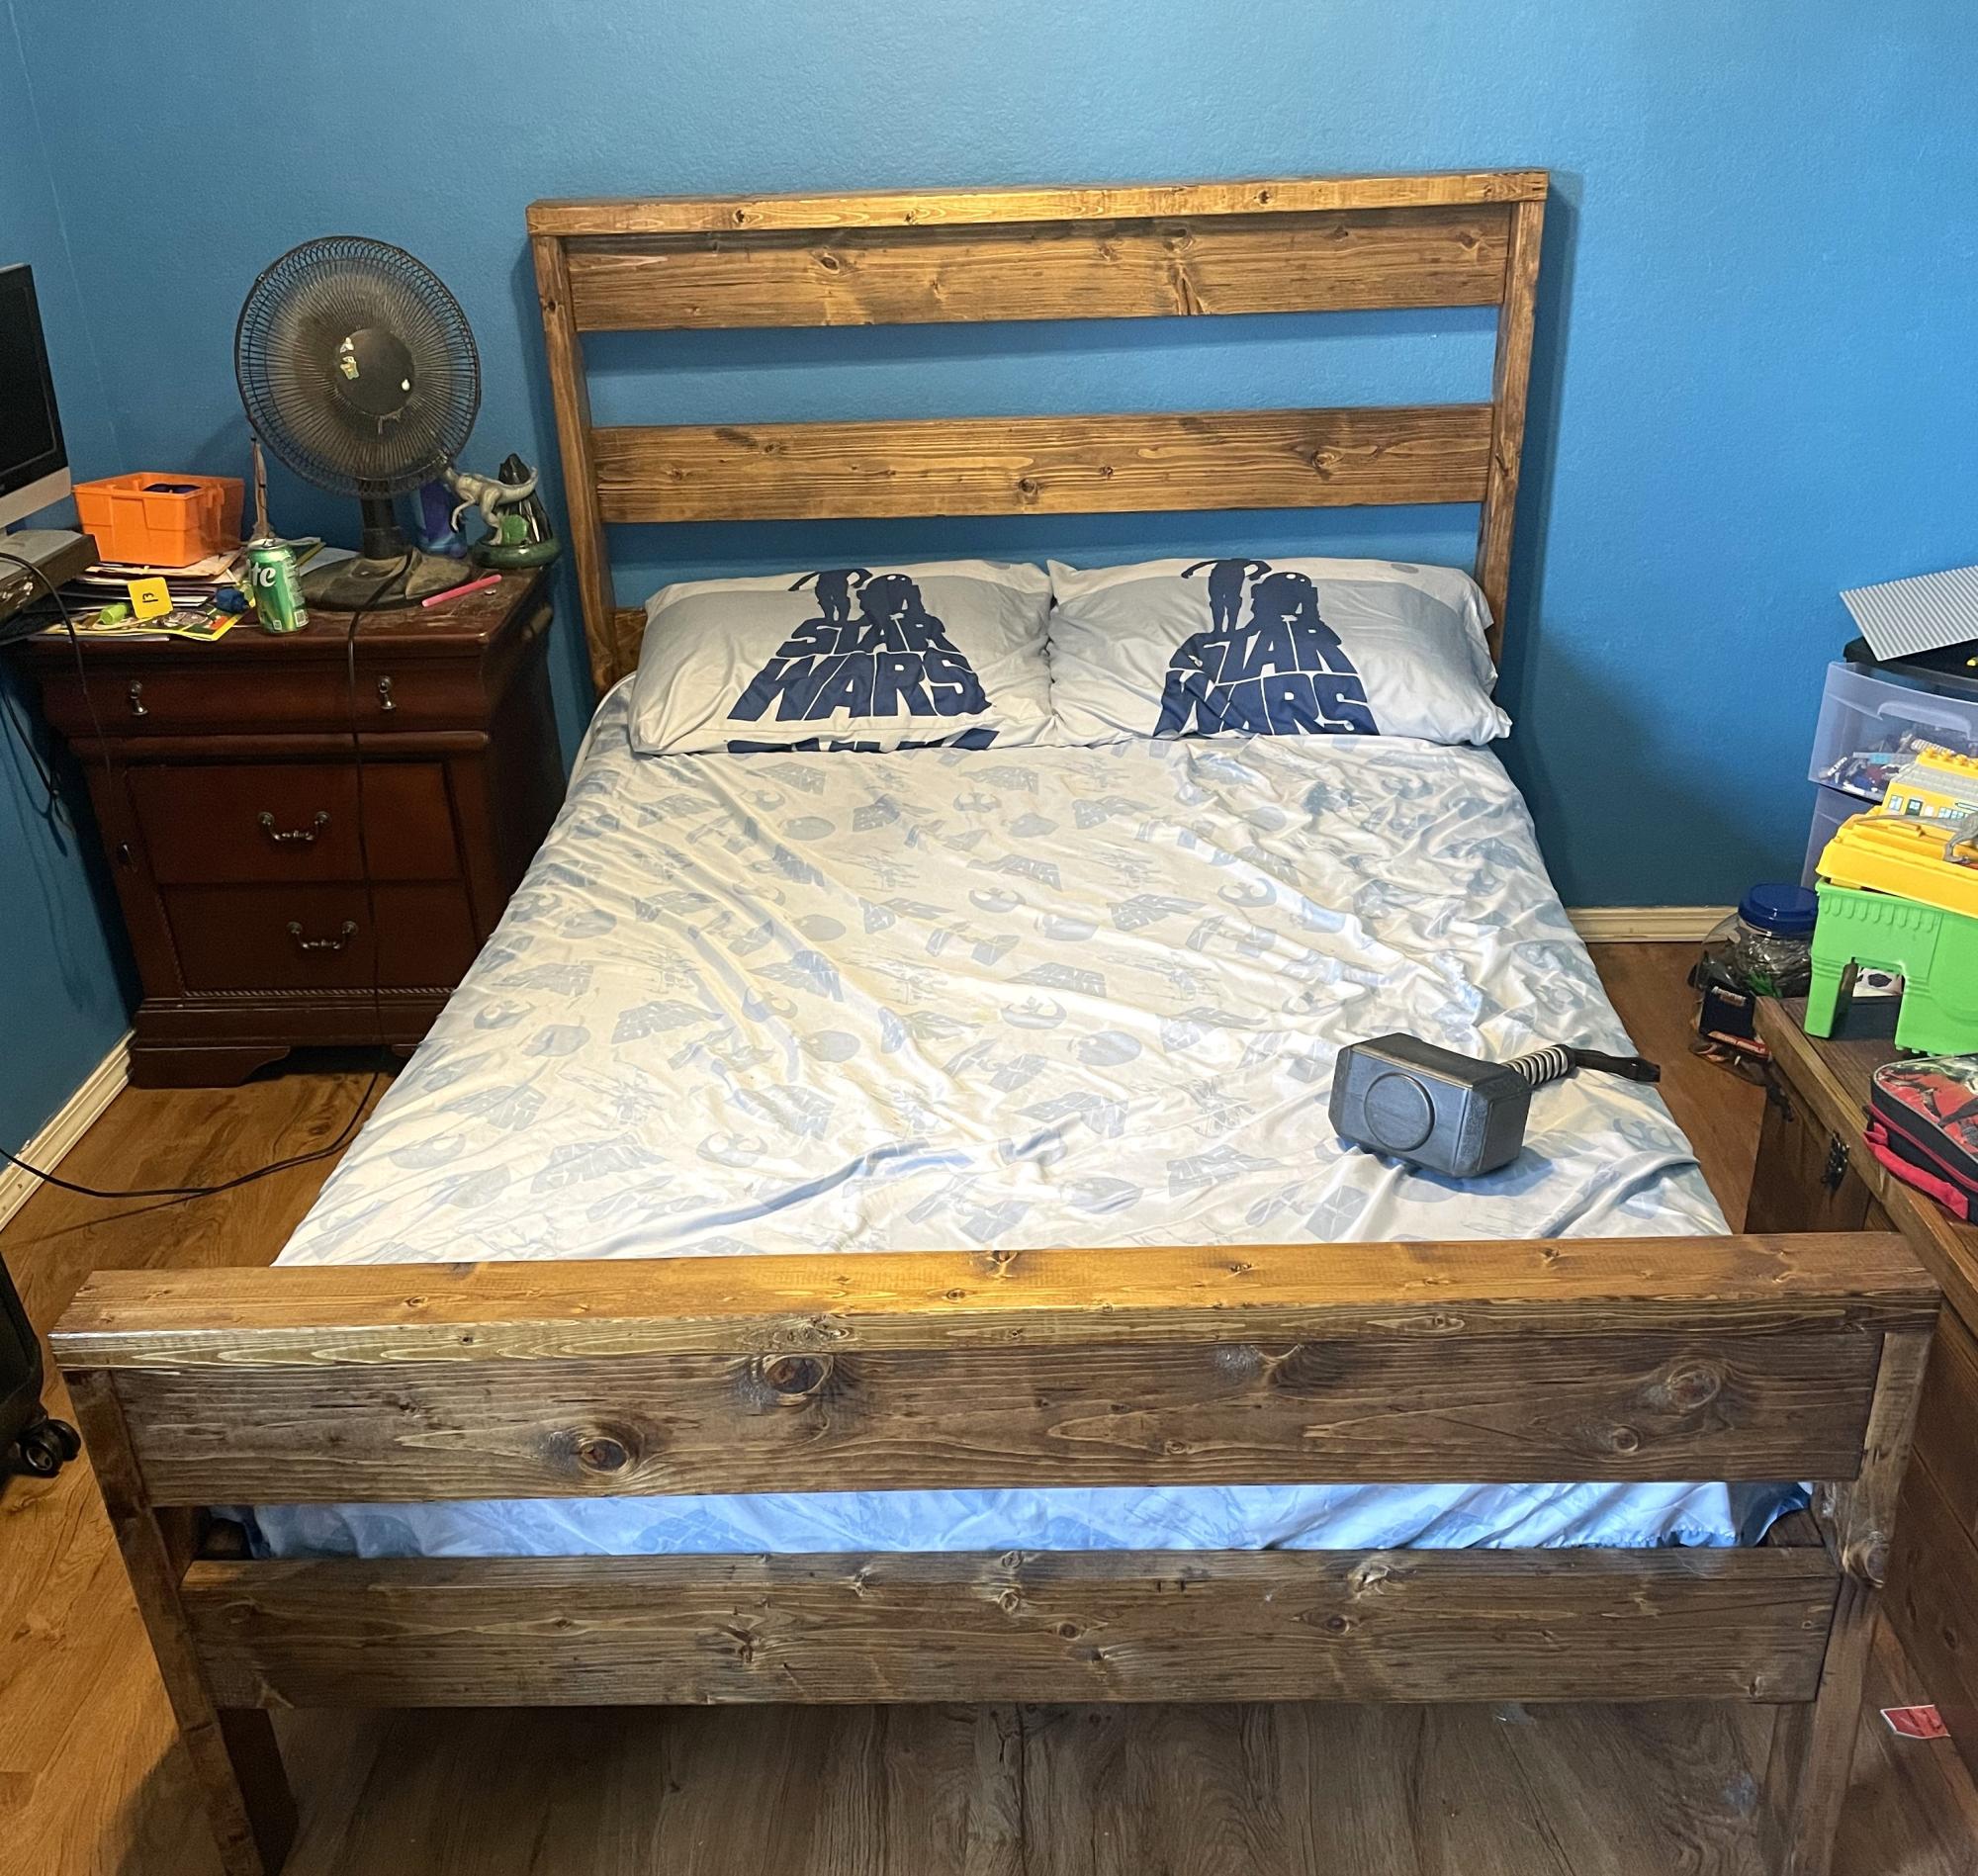
New bed for my boy. Great plan and not expensive.
Sean Hight on Facebook
Built from Plan(s)
New bed for my boy. Great plan and not expensive.
Sean Hight on Facebook
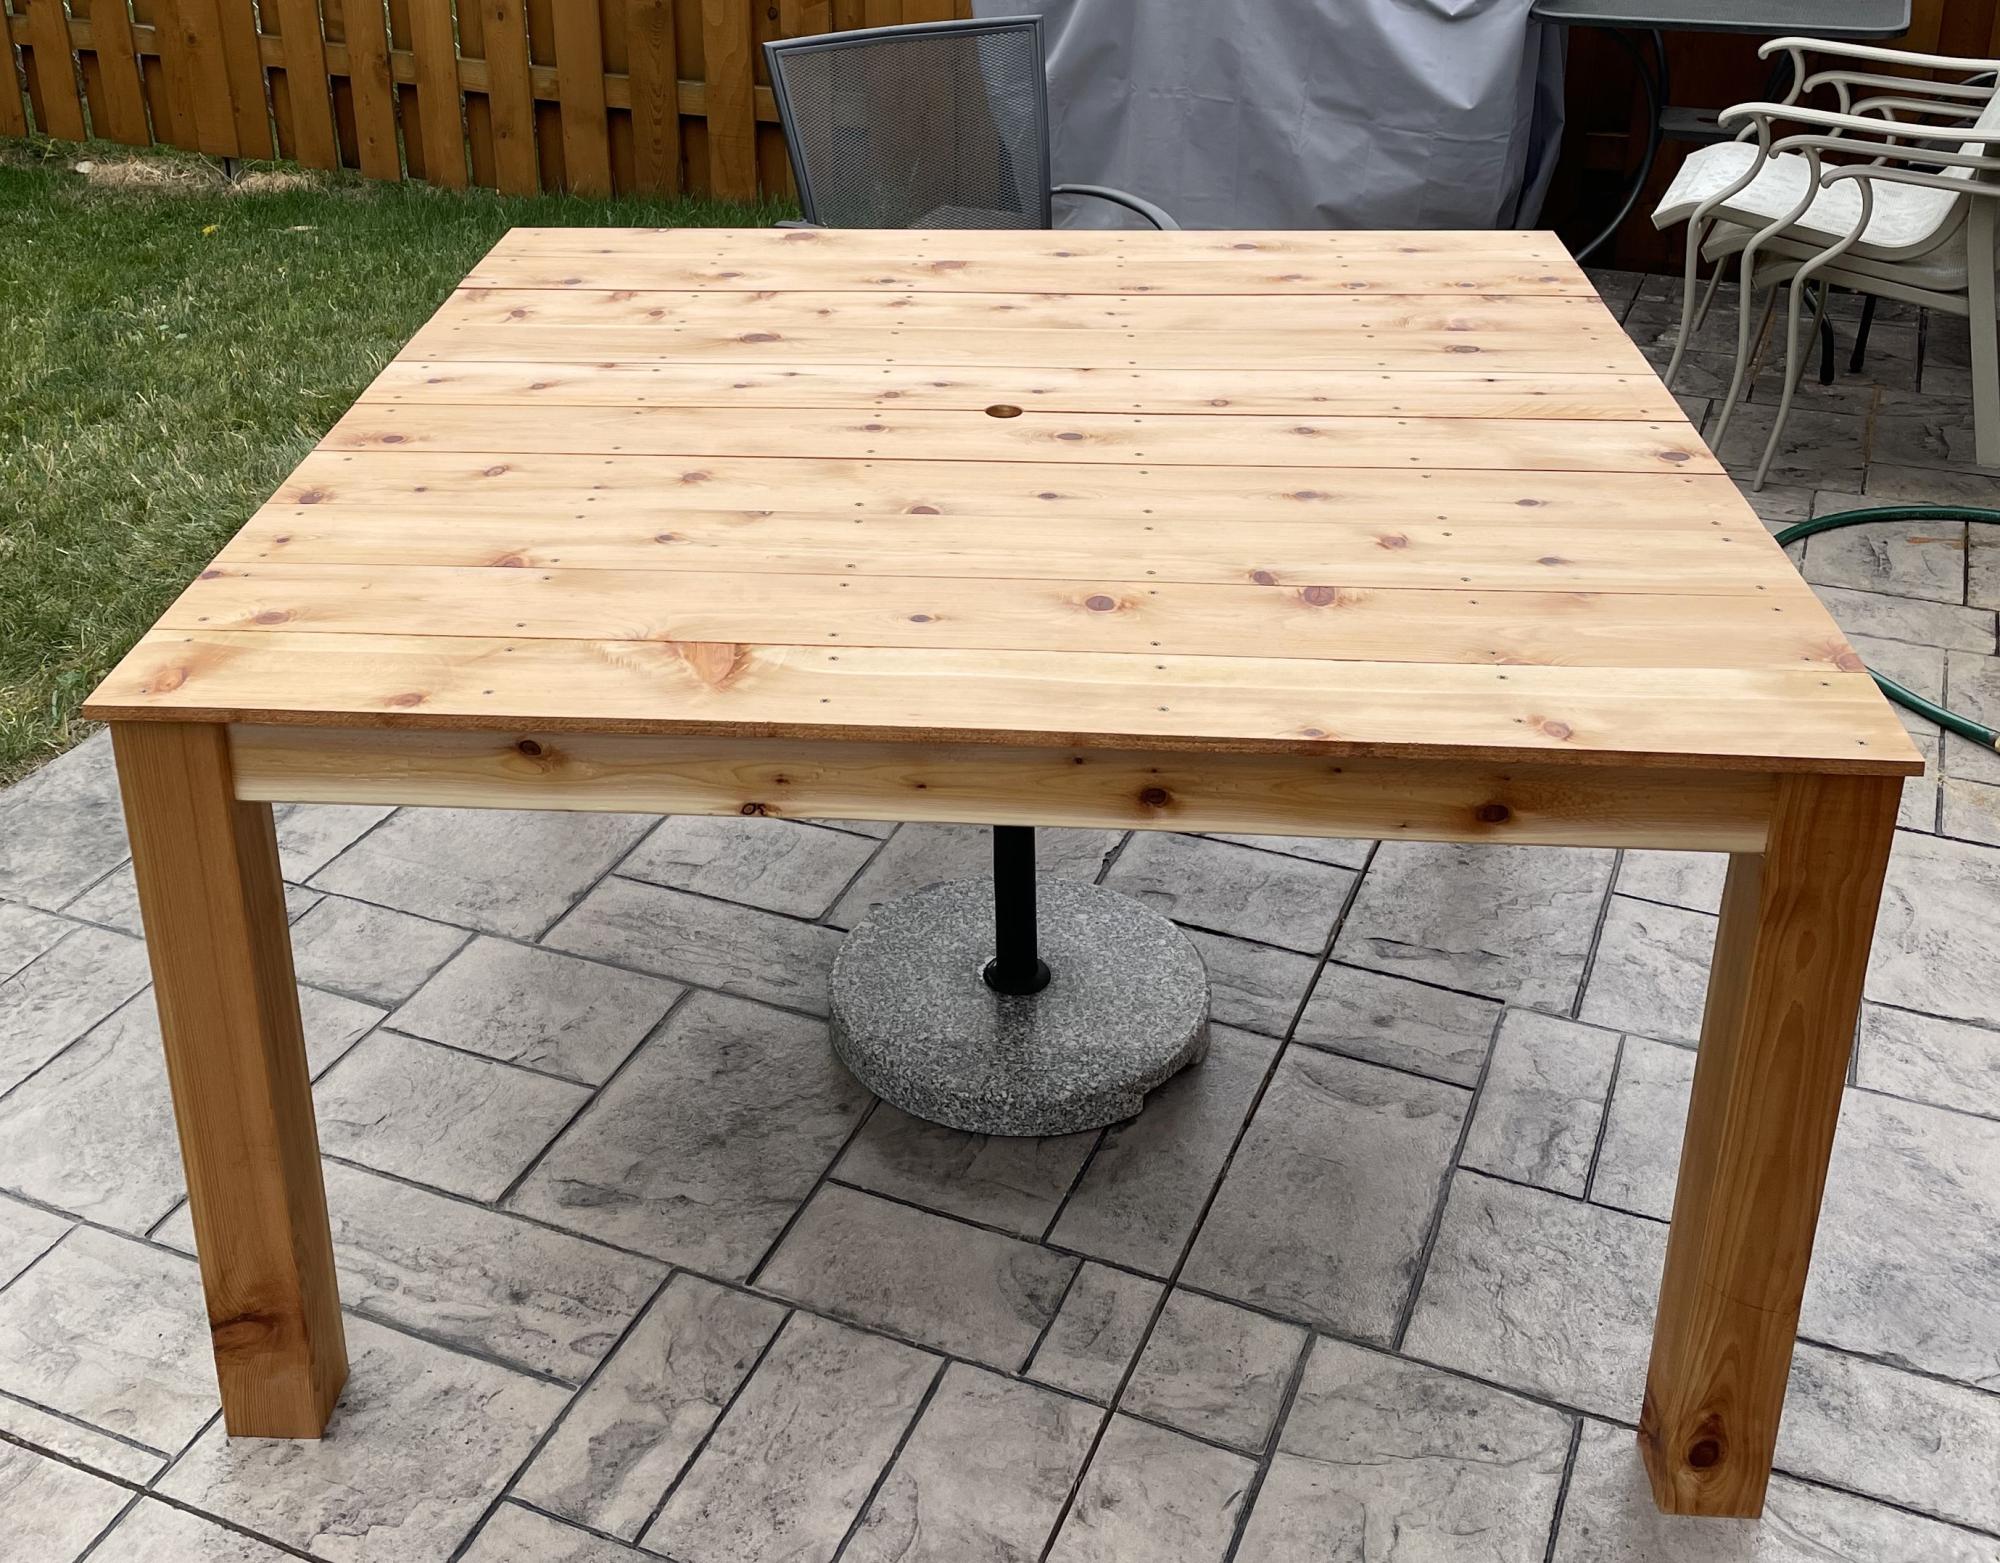
Square Outdoor Table
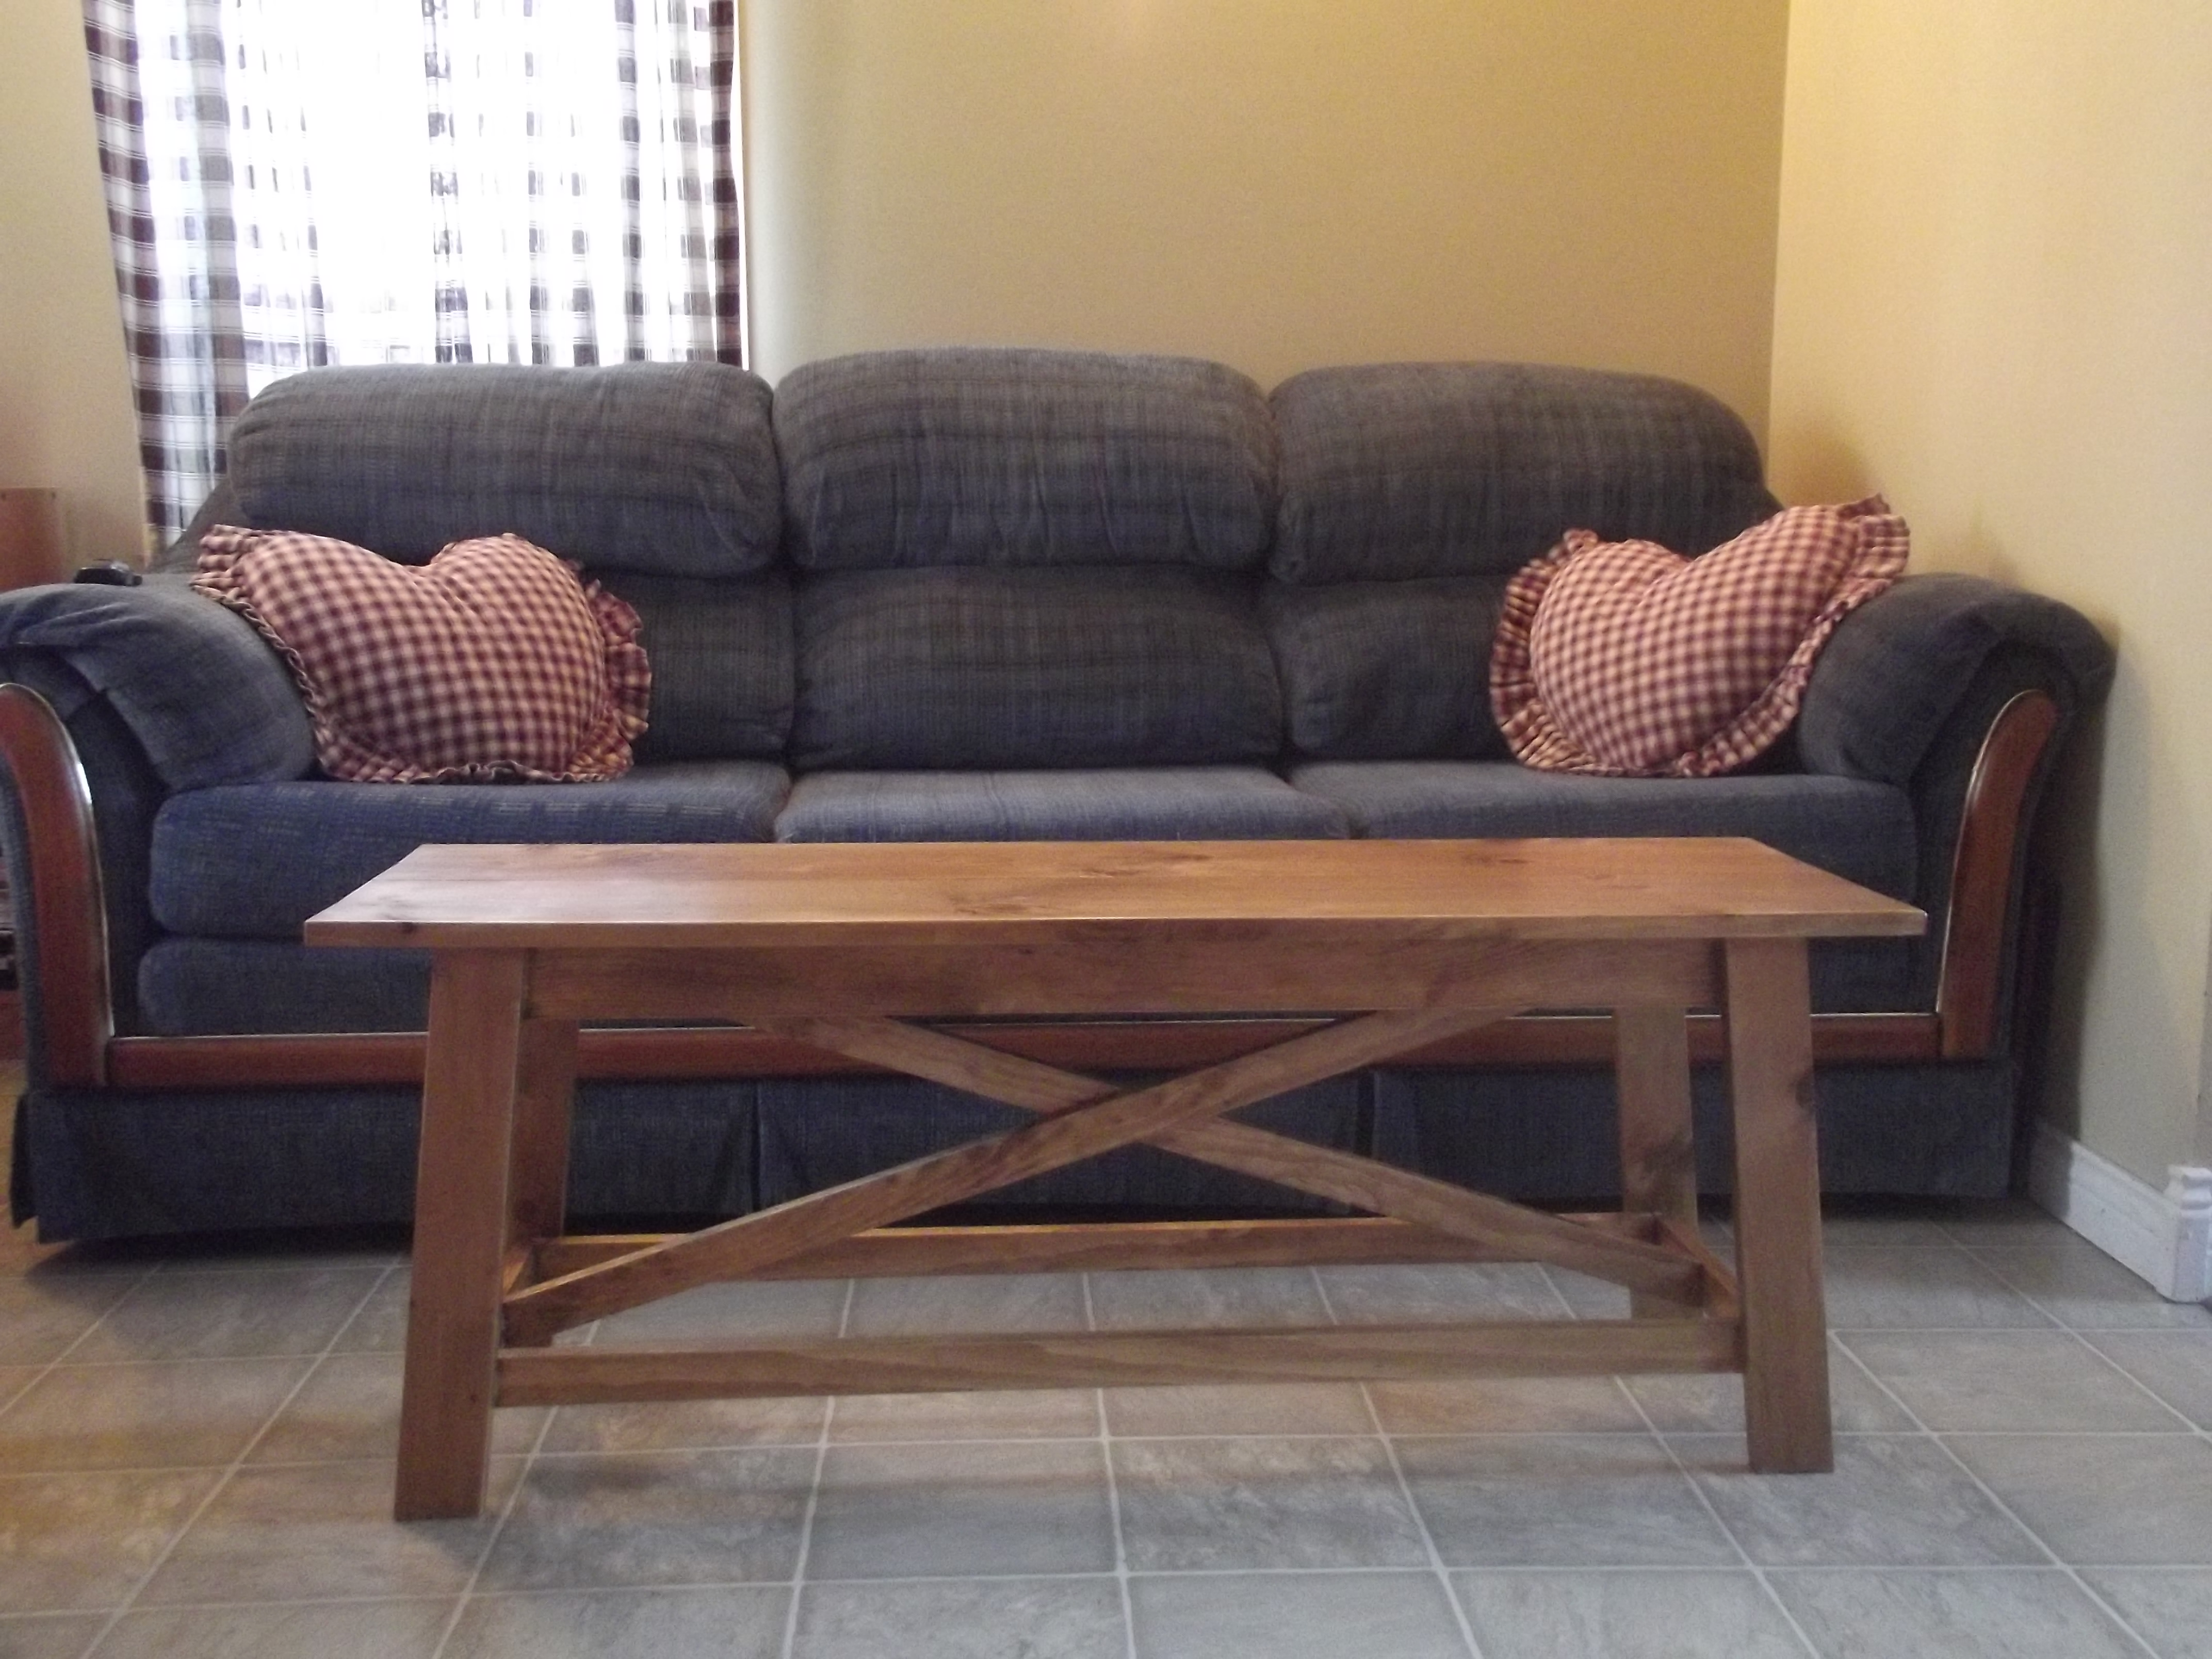
I made this coffee table from Ana's Rustic Bench plans in The Handbuilt Home. I needed something fairly small for my living room and this worked perfectly. I used pine and stained it with Minwax Early American. I finished it with 3 coats of Minwax Polyurethane.

Mon, 04/07/2014 - 18:34
This is lovely!!! Thanks for getting the book and doing a project from it, love how this bench turned out!
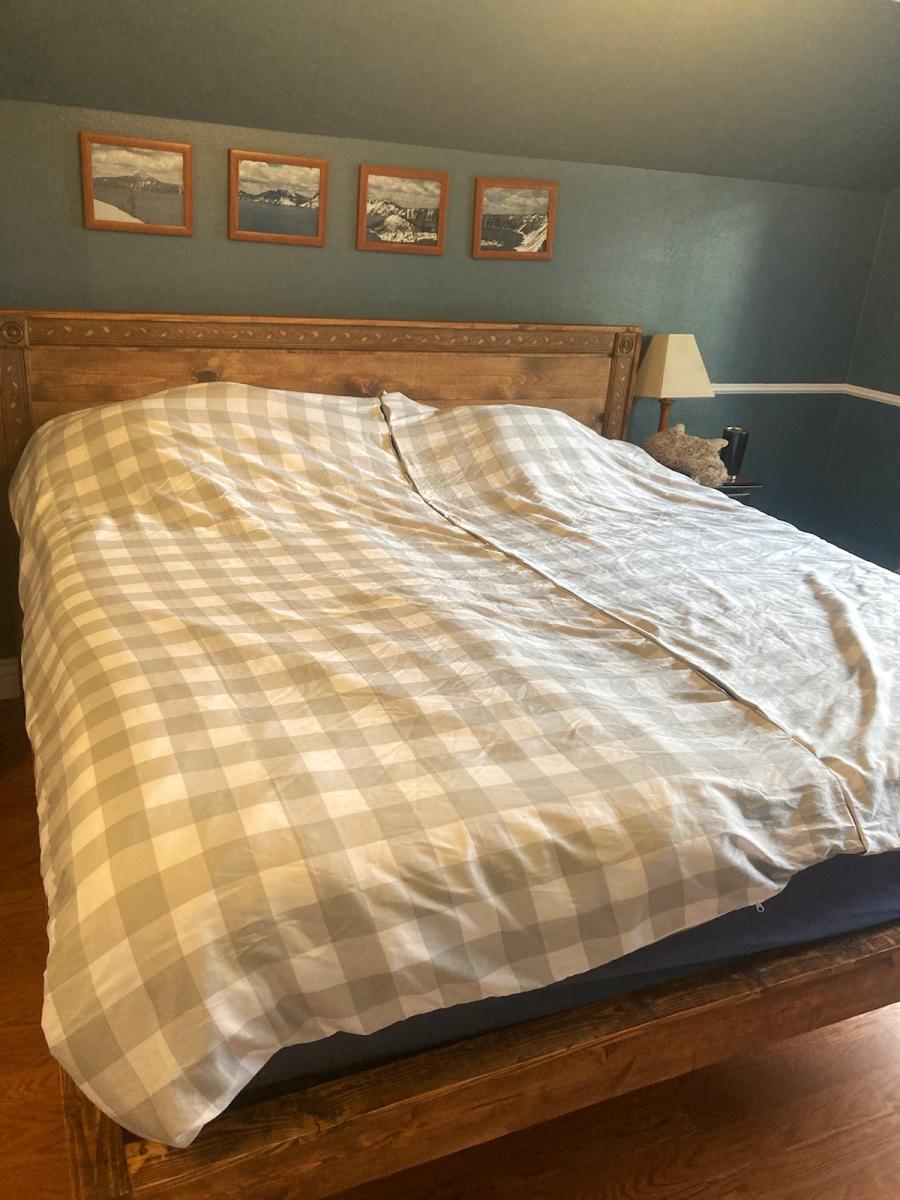
followed your instructions for the "Essential Platform Bed Frame" -- made this as a king. 2x6's for all legs/center supports with mitered corners for a simple added style. only suggestion/modification is the the #of slats you suggested (10) is way too few, I ended up using 15 or more
Also, used the circle-corners instead of mitering because all our doorframes in the house have that type of corner, and then I wouldn't have to "match" the leaf design where the mitered corners meet
Thanks for your guide!
Jake in Spokane
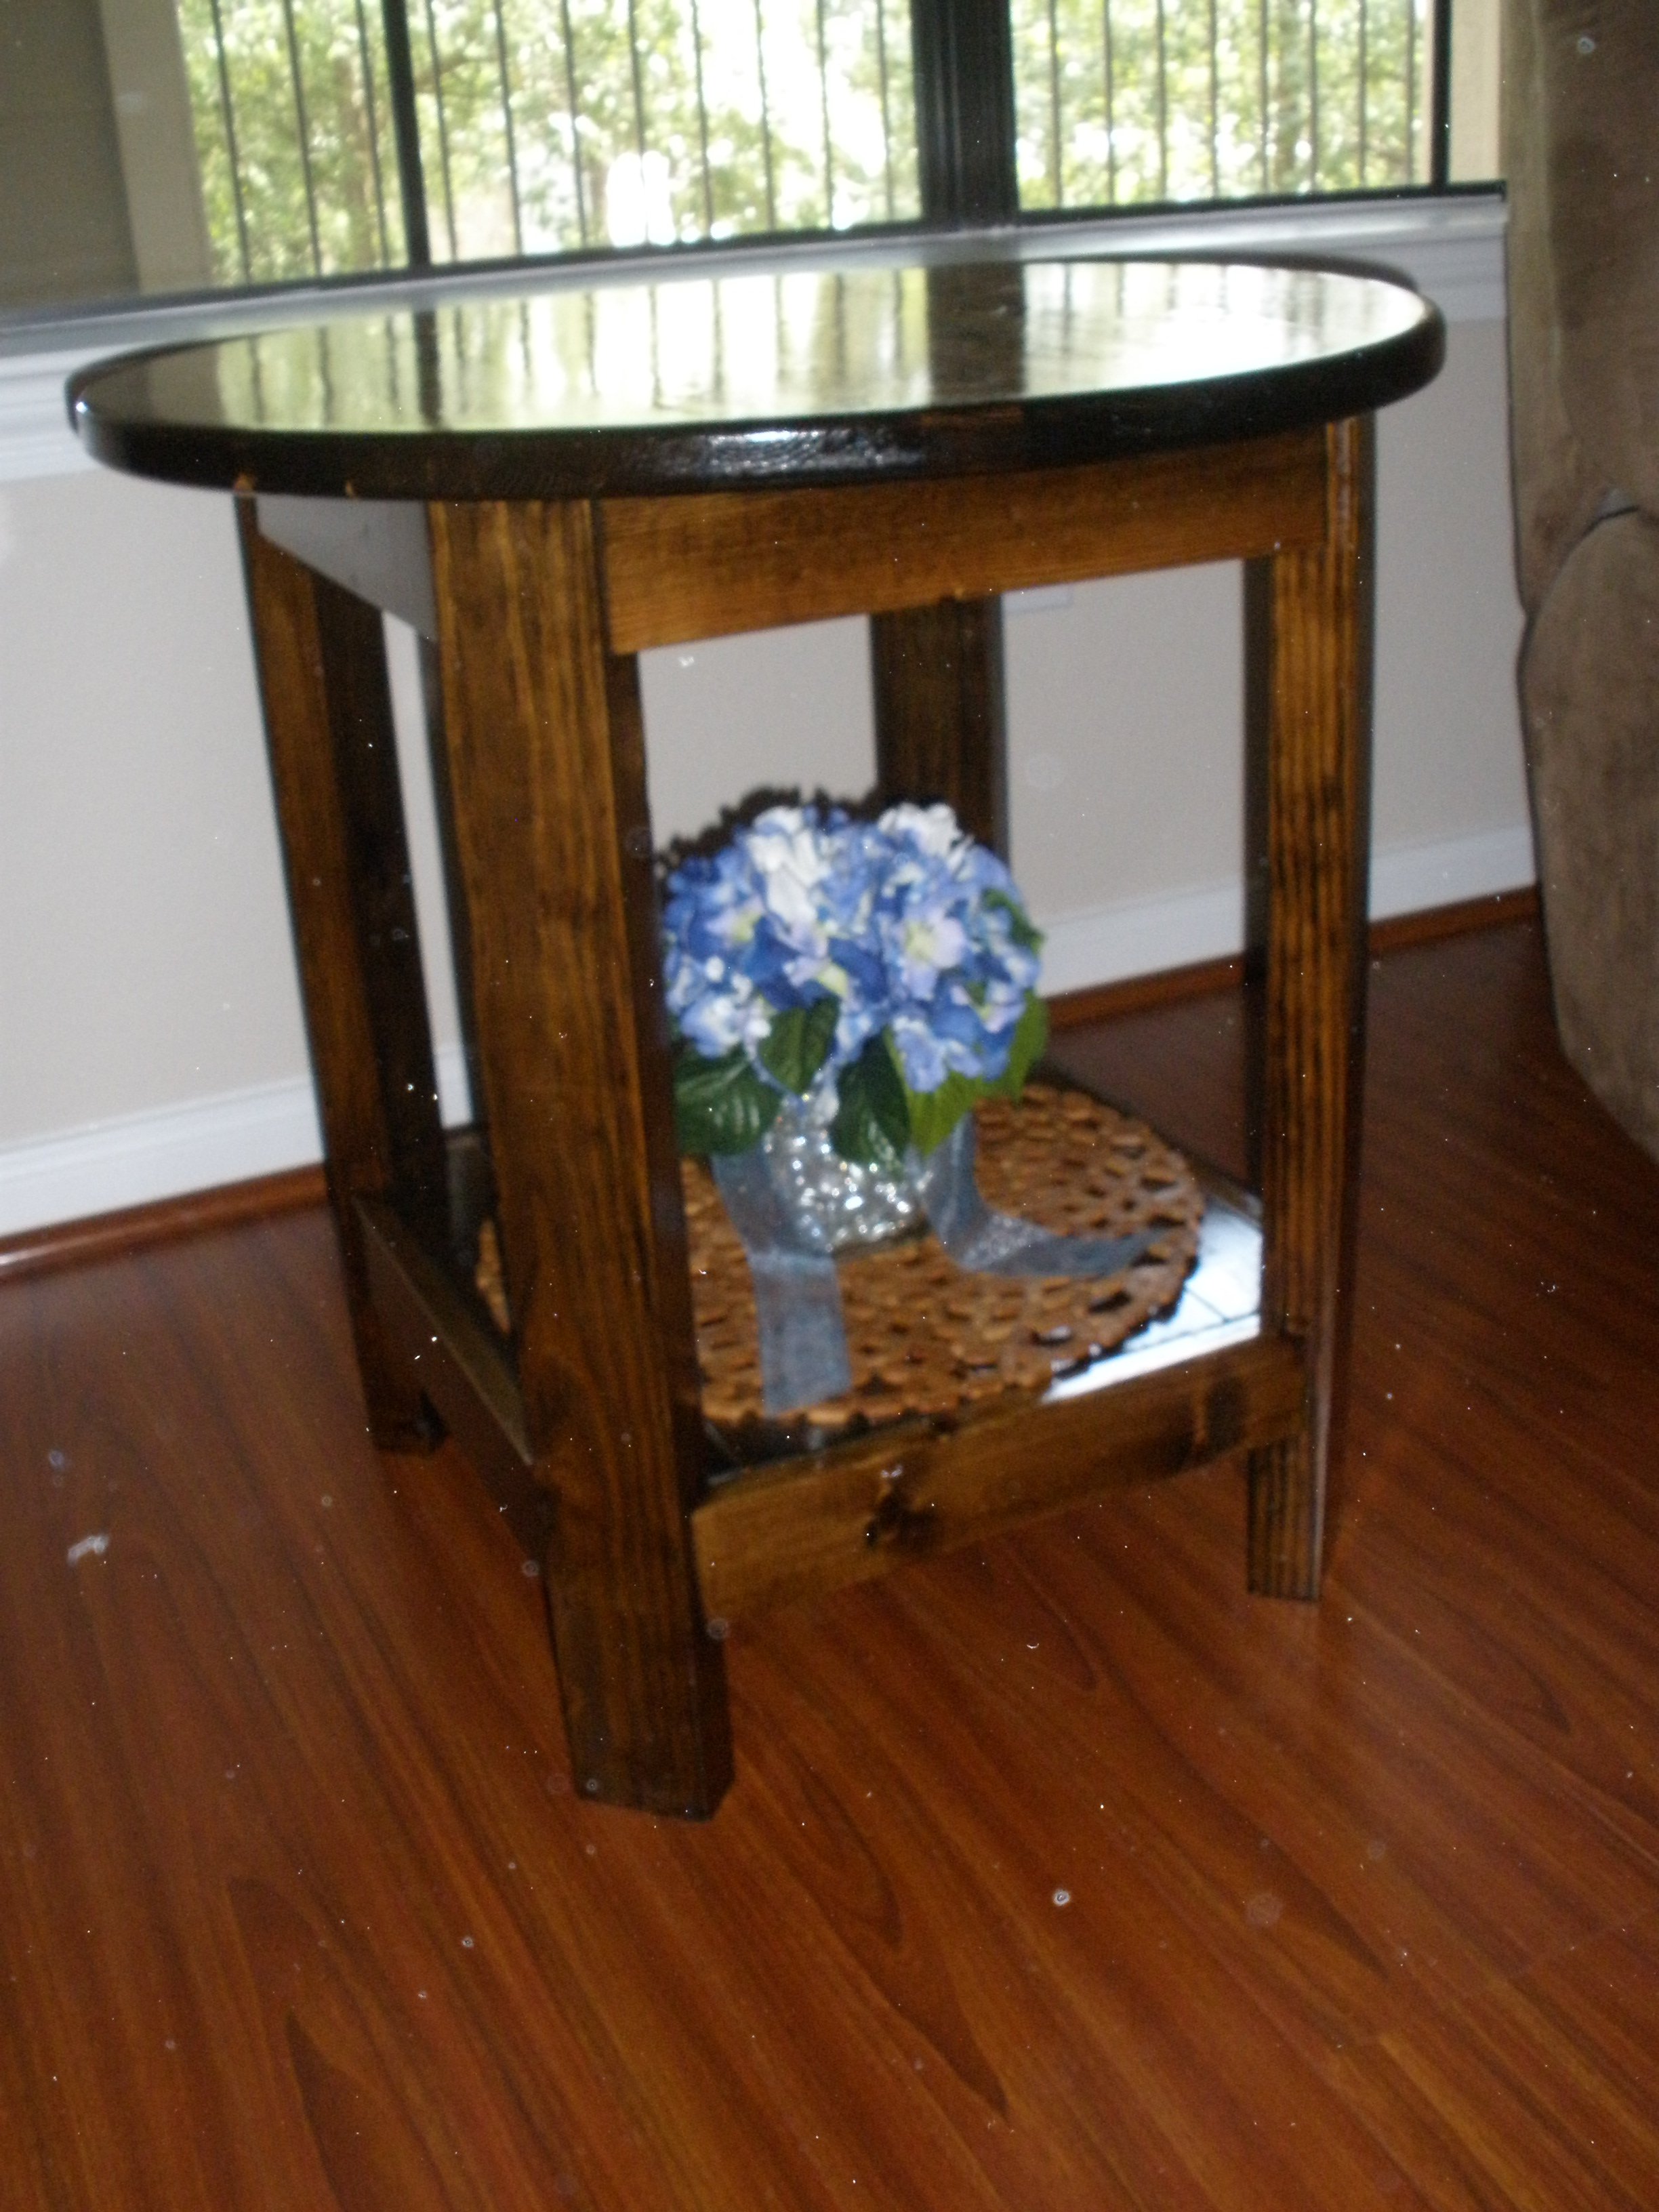
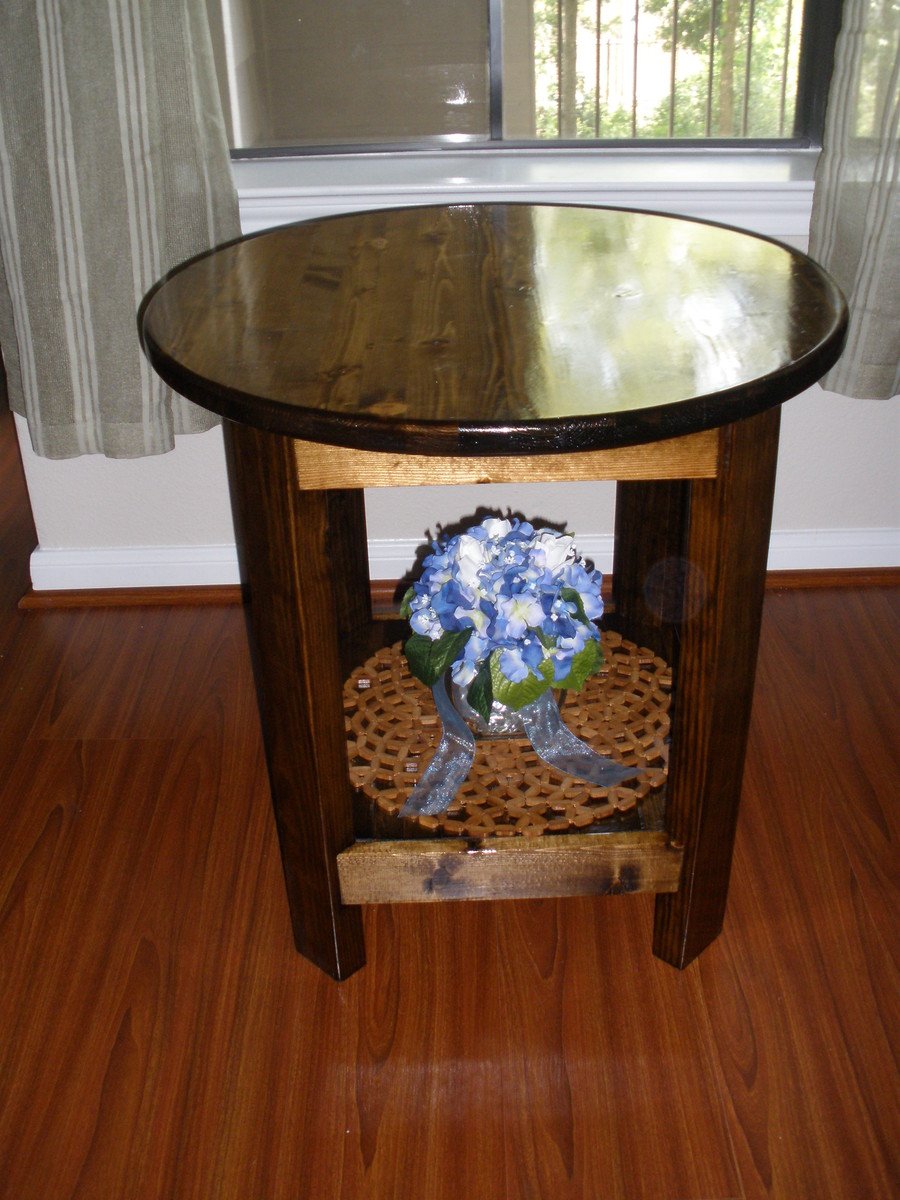
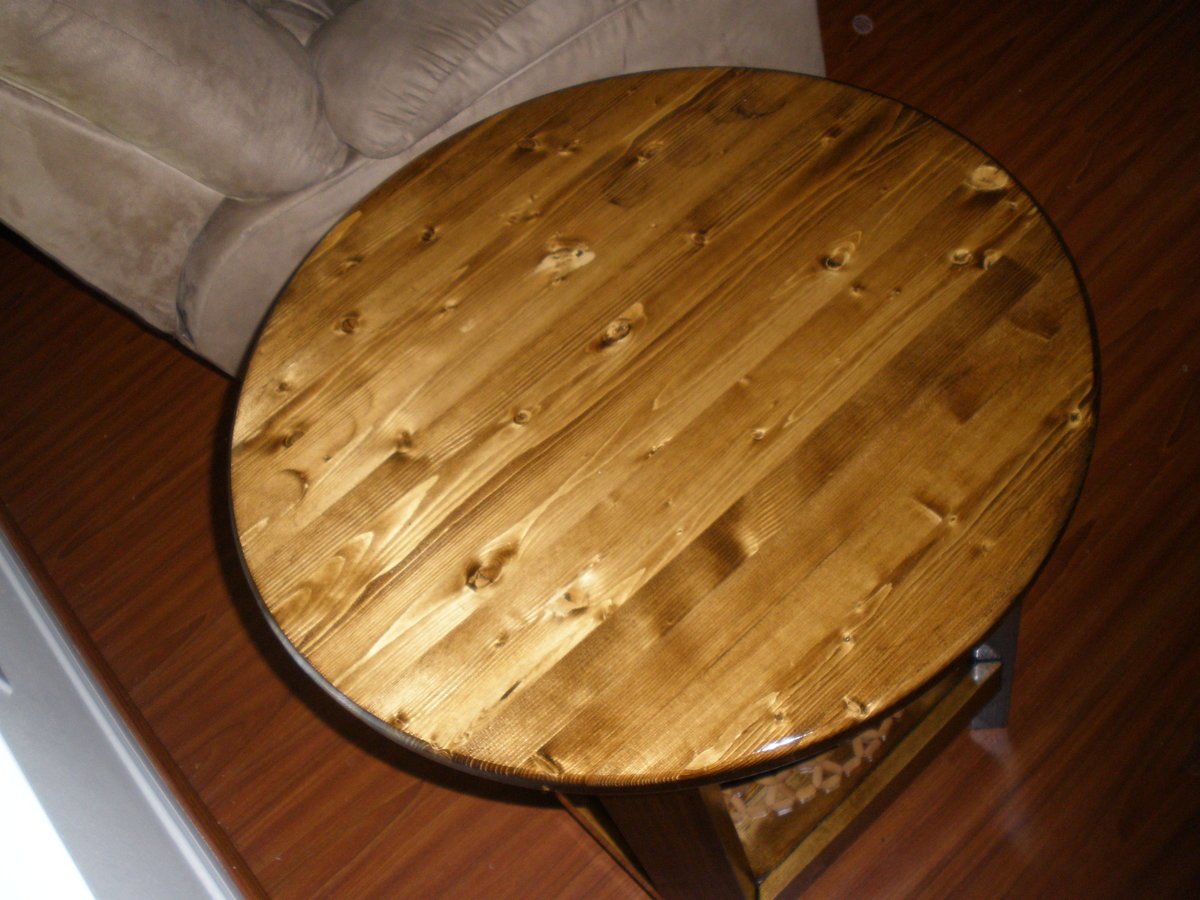
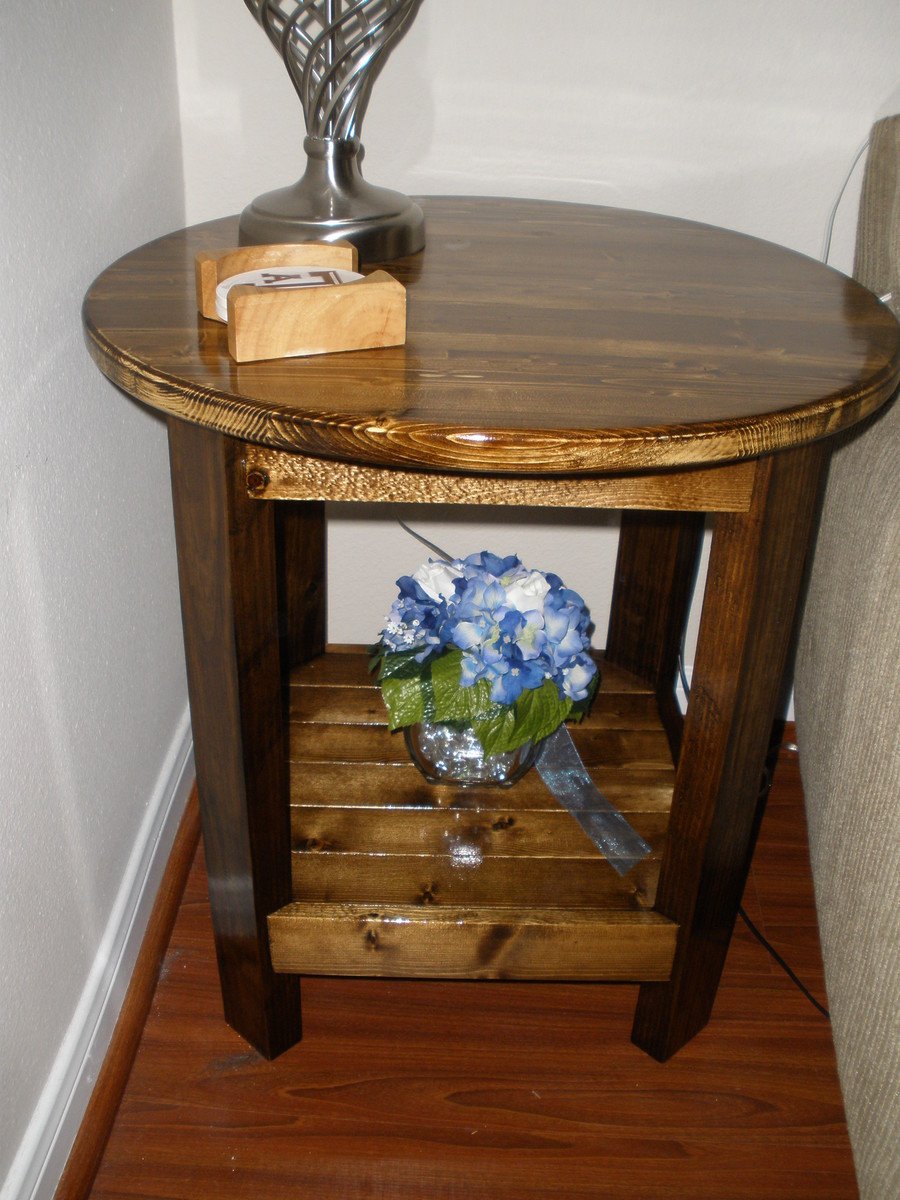
These tables are part of the Benchright collection. They are not terribly hard to make, especially if you buy the 24" diameter round table top from Lowes.
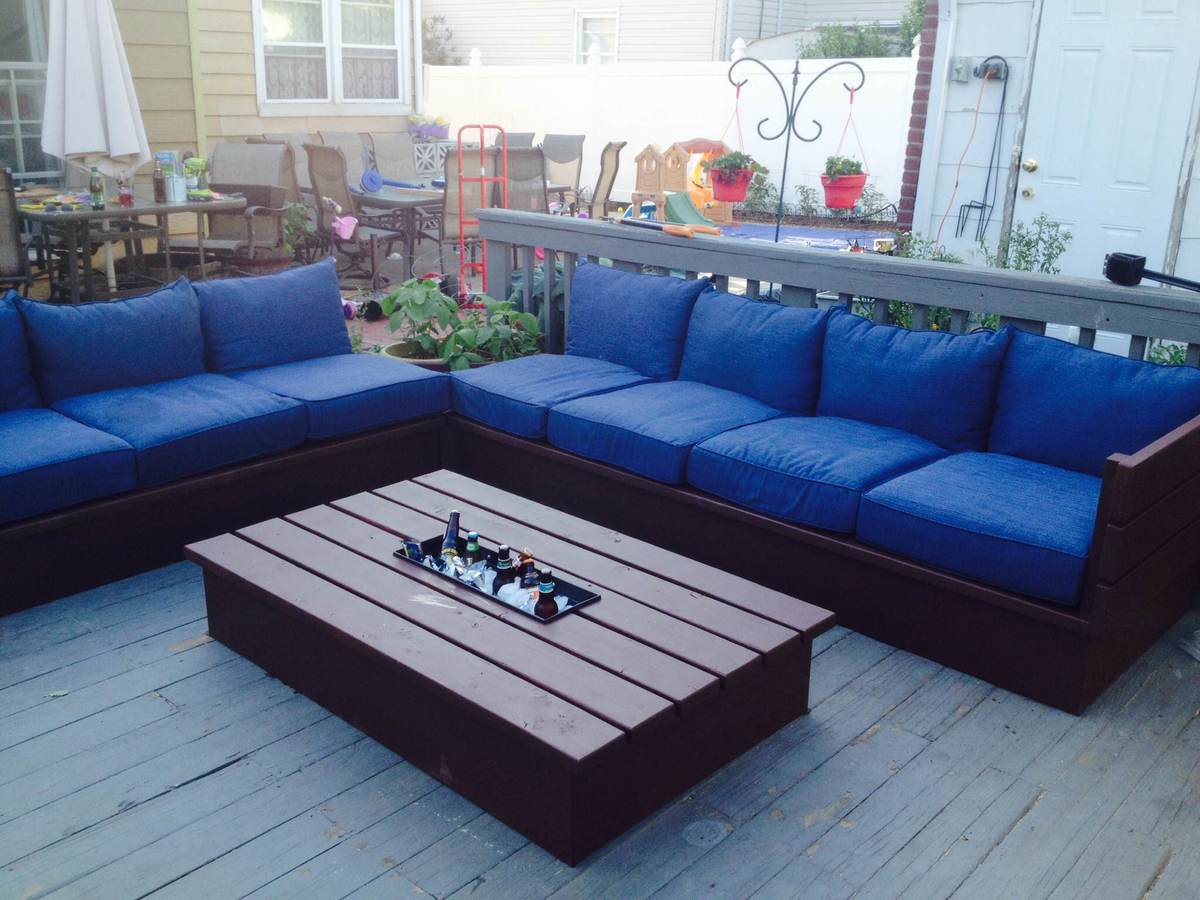
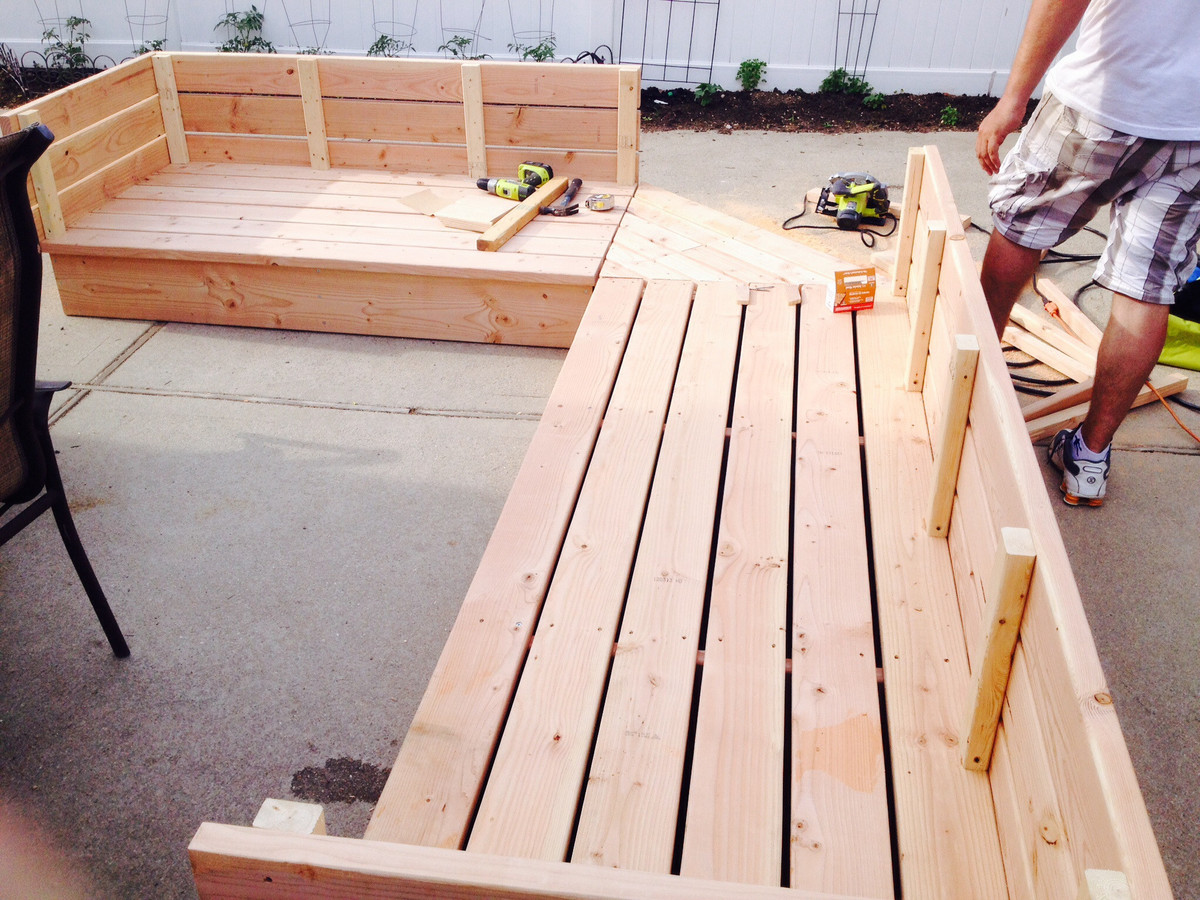
Saw the Outdoor sectional on your website and I just had to build it! Made some variations to the original plans, one being making it higher off the ground and the other was a necessity because Home Depot didn't have the right size wood and I wasn't about to go running around from store to store, so I used scraps to make a corner piece that fits perfectly. The most timely aspect was the sanding and removing all the rough edges. Also used Bondo to fill in all the holes that were on the outside to give it an all around smooth finish. The end result is just about the same though and the family and friends are in love with it! Thank you so much for the plans! Really could not even come close to justifying what it would cost to buy a sectional like this. Cushions were a huge concern and rightfully so. After building, I started searching and was mostly getting prices in the plus $800 range. It was breaking my heart knowing I was going to have to pay more than double what the entire sectional cost me. In the end though, was able to land some 25 x 25 x 6 cushions at Lowes for 50% off ($50 a piece).
Tue, 06/17/2014 - 14:11
You sure have outdone yourself, love the space! Thanks for sharing!

Mon, 03/16/2015 - 09:06
I love this modification. Did you use 2x8s or 2x10s for your base? It looks like you angles the back. How did you go about doing that? Thank you for posting this?! Great work!
Mon, 06/29/2015 - 18:00
nice build, when you get some time can you put up your modifications please:) would love to build this! Love the colours you used and how it looks!Me too..you cook like me, i make it my style...thats how i do my salsa ..my way i like it...
Mon, 06/29/2015 - 18:00
nice build, when you get some time can you put up your modifications please:) would love to build this! Love the colours you used and how it looks!Me too..you cook like me, i make it my style...thats how i do my salsa ..my way i like it...
Mon, 06/29/2015 - 21:50
sorry about the end of my comment, must of pasted a message in their somehow? My bad.

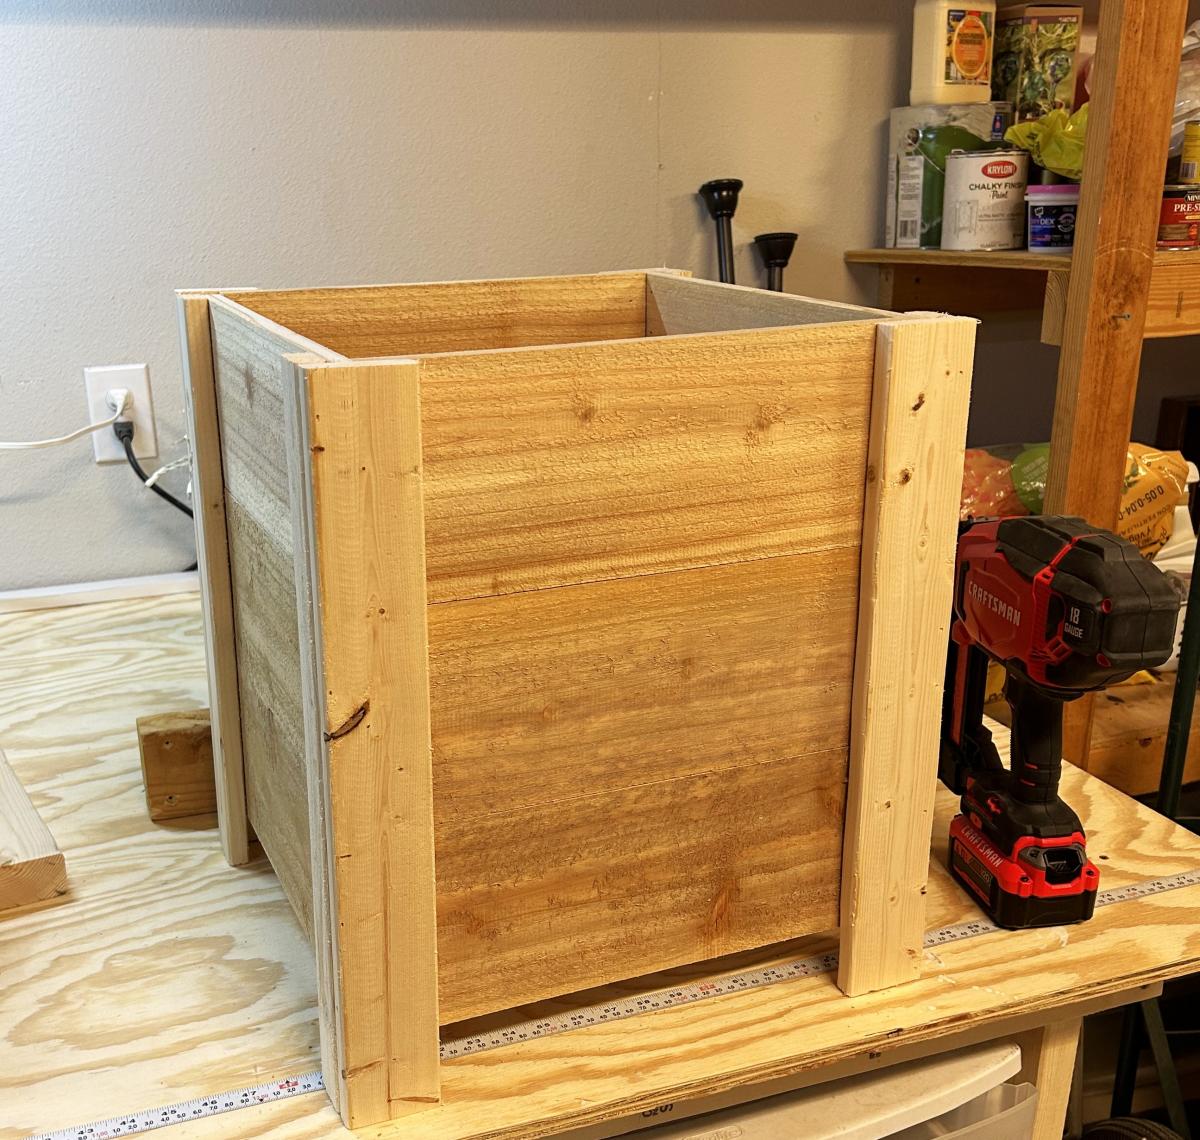
Easy Build DIY Planter Box with Cedar Fence Pickets
Followed these plans and made these planter boxes for the front porch! I couldn’t believe I was able to complete a project like this so quickly! Instead of paint, I opted to use some grey stain I had leftover from another project. Thanks! I love them!
Beth
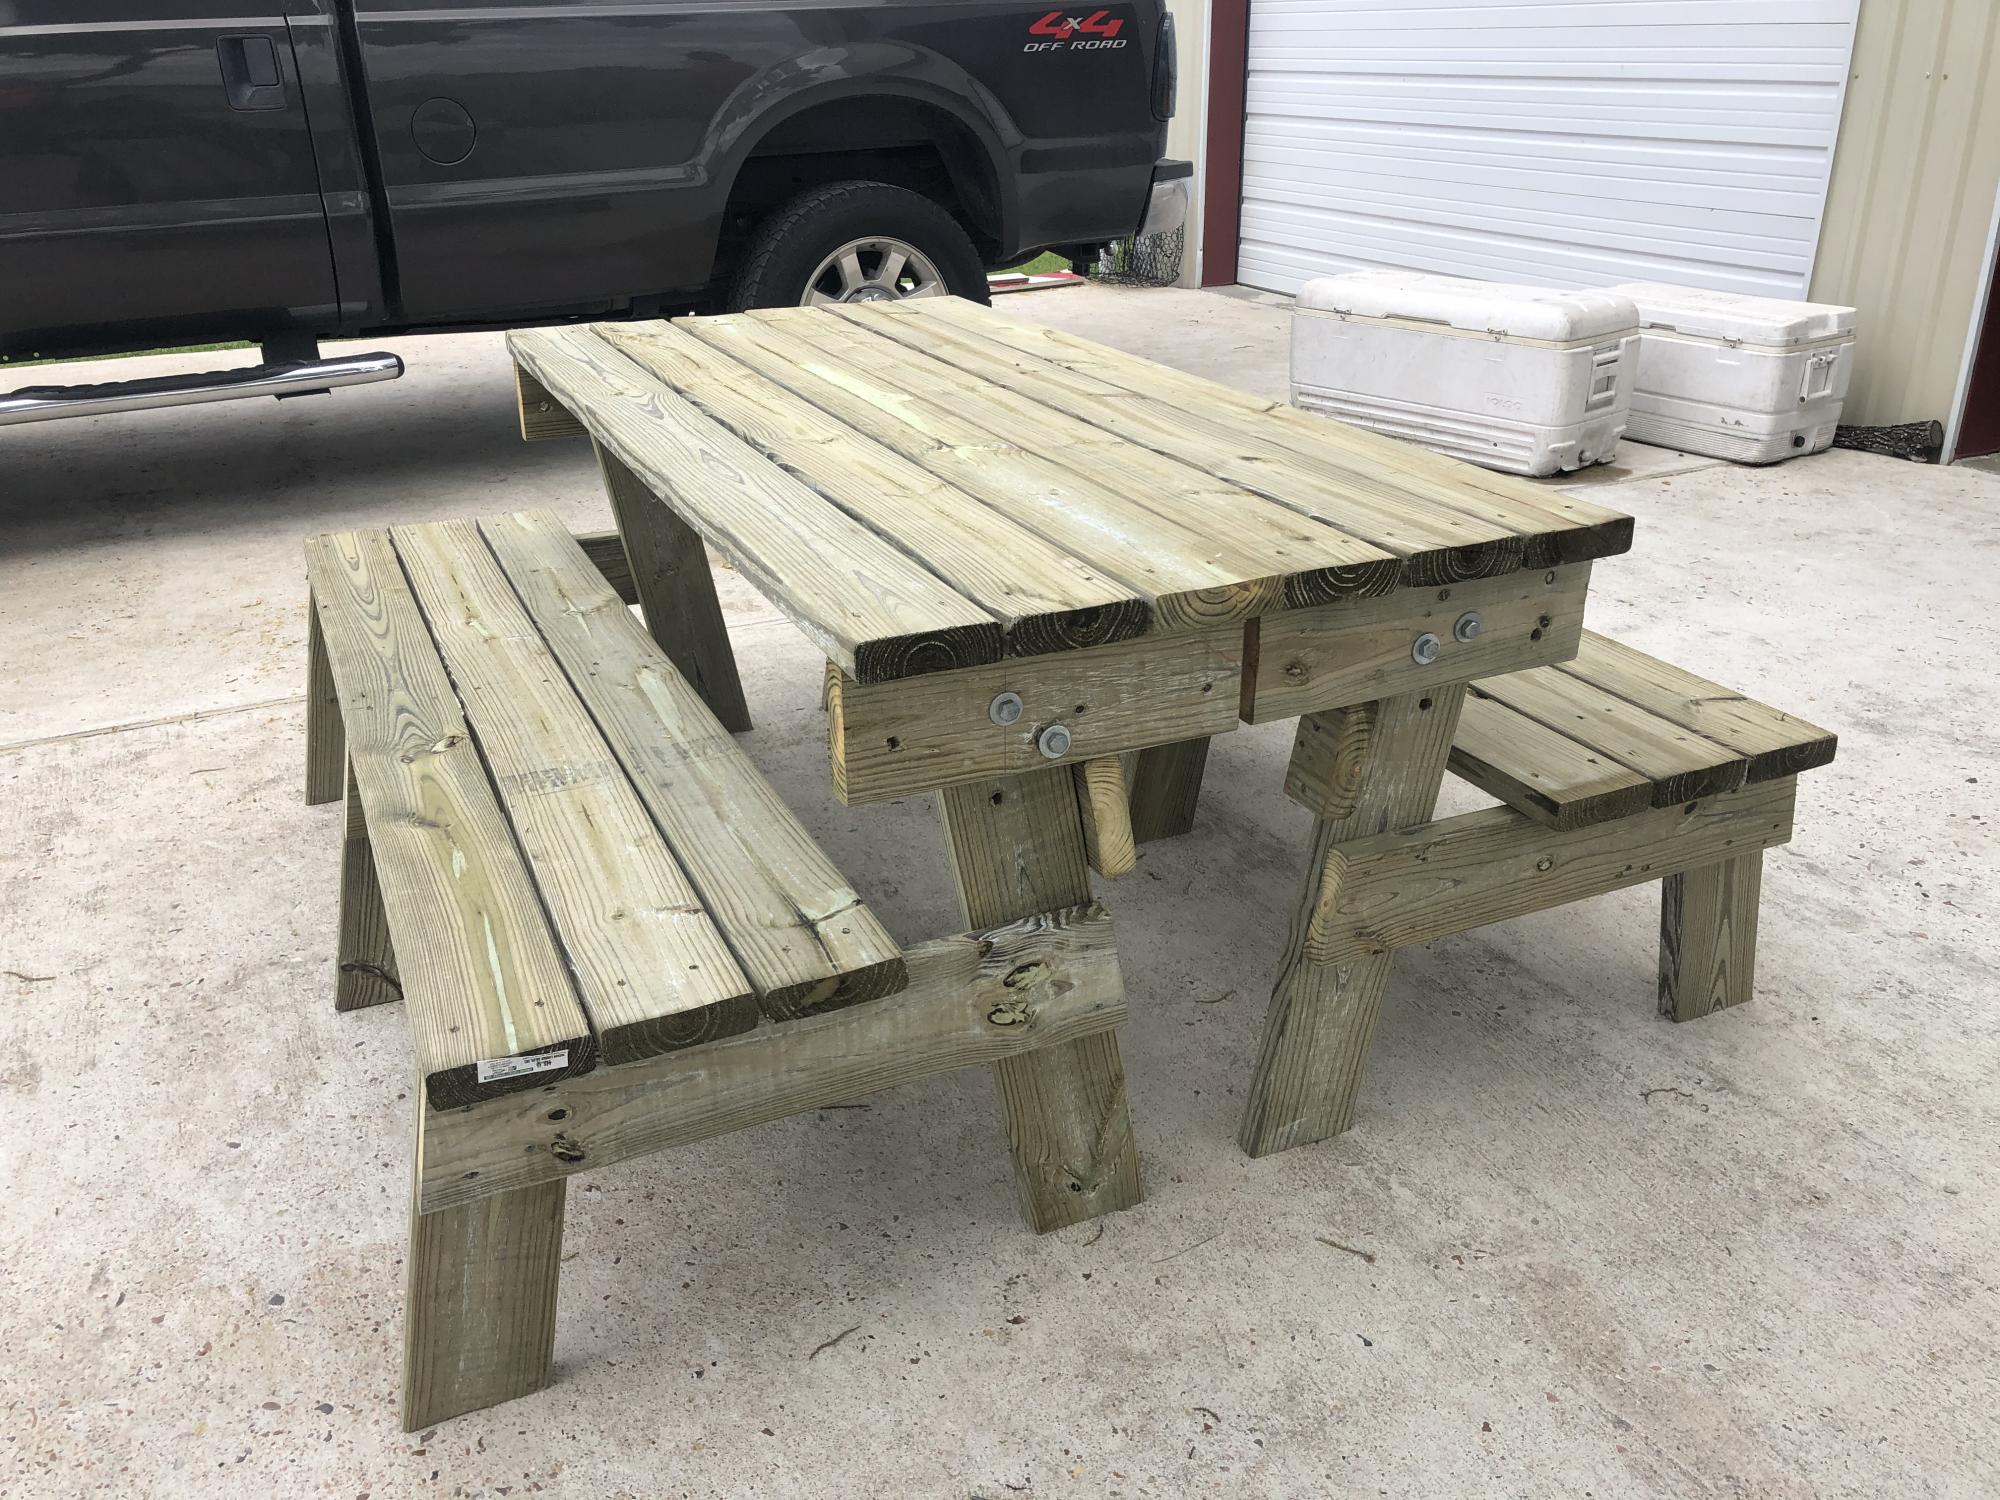
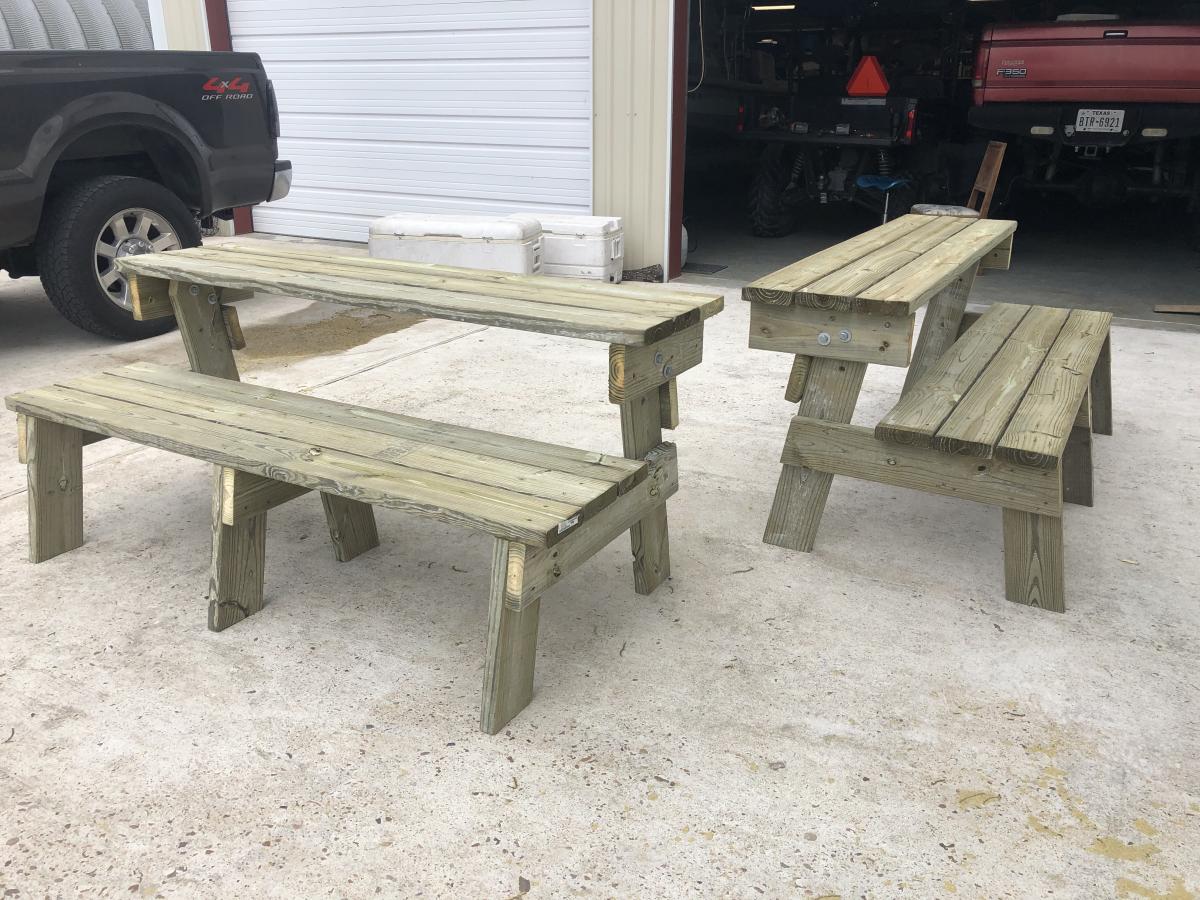
My husband and I modified the plans just a bit for this Picnic Bench Table we found on your site. We love it!
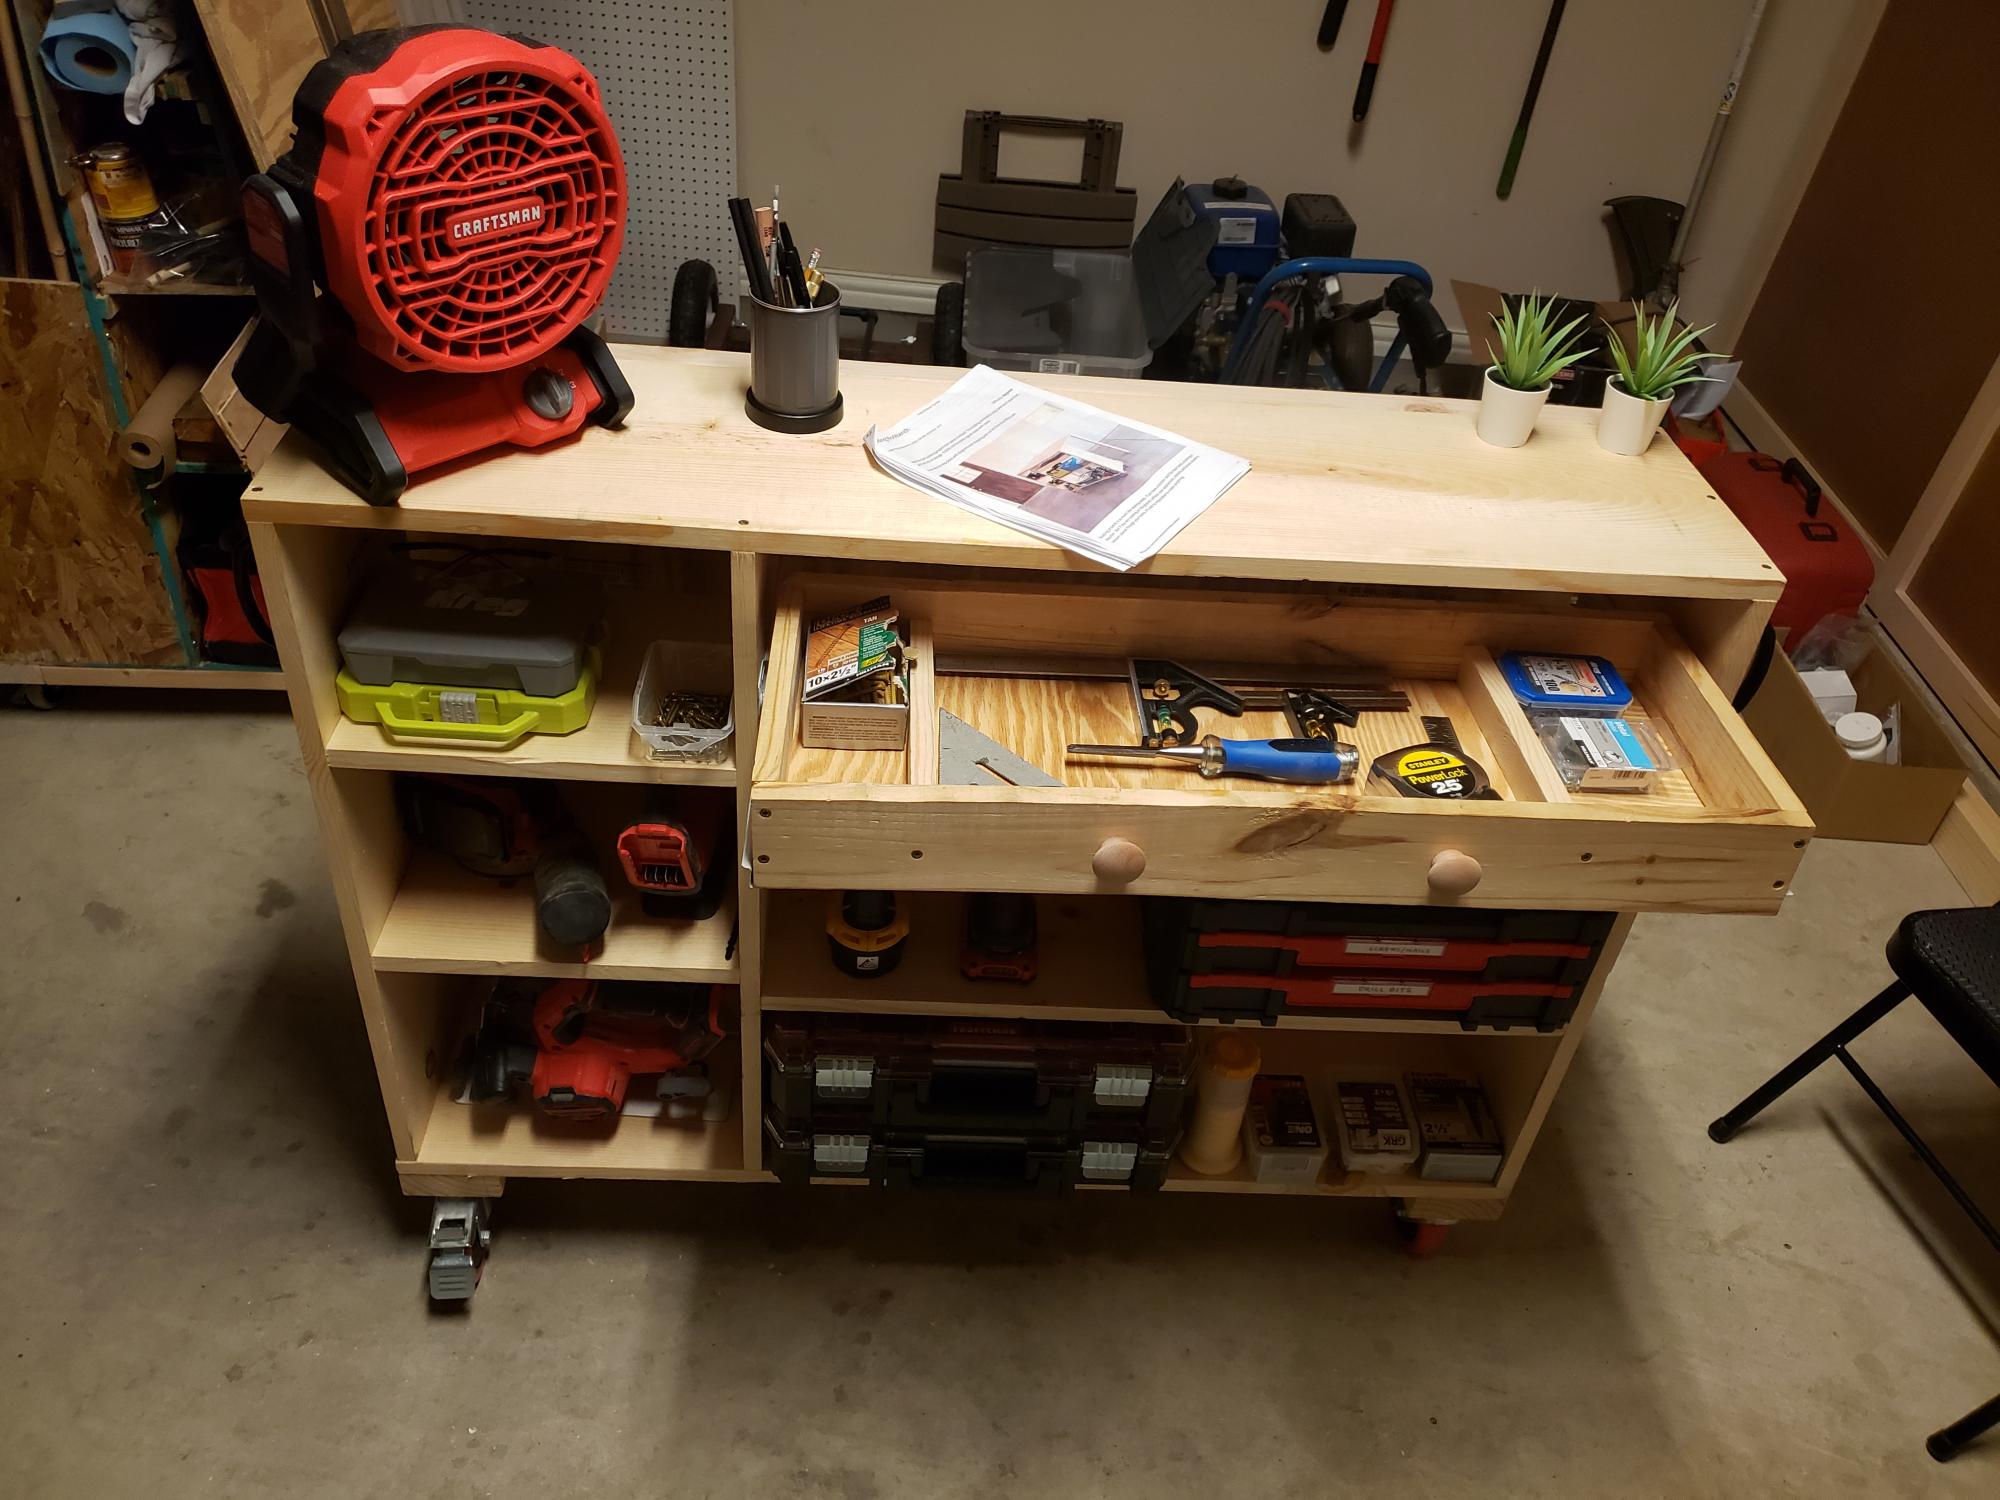
Made a folding Workbench for my small workshop.
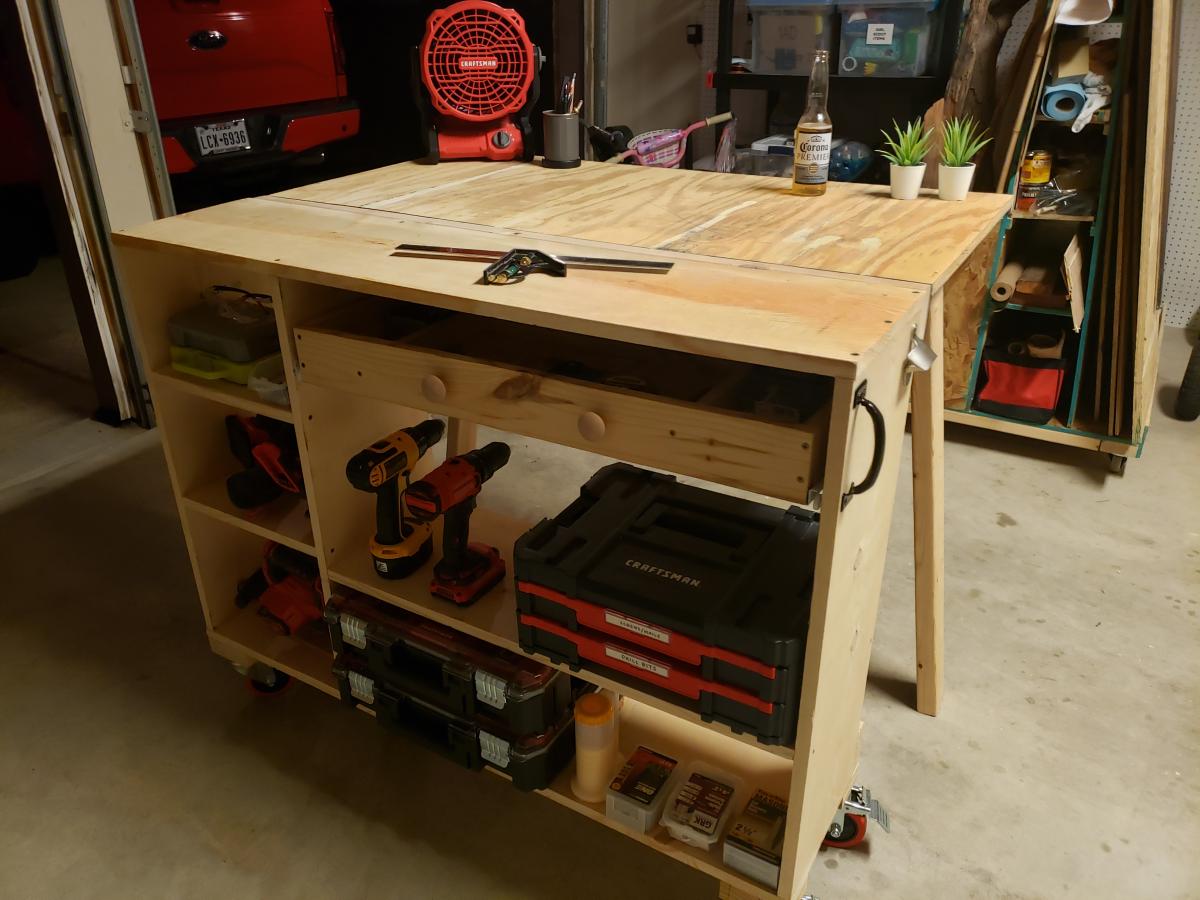
Unbelievable that just a few months ago I couldn't even get the corners to match up on a frame! Now I'm completely addicted to creating my own things. And saving soooo much money. Thank you Ana!

Thu, 01/02/2020 - 04:36
Very nice. I am a big money saver, and I used a coupon as well, so I am curious how you met the cost of $150? I think my cost ended up being about $220 after our trip to lowes. Are there better times of the year to buy lumber, Did you already have the screws and brads available? My last question is if you tried staining and went with paint in the end, or if you knew you wanted to paint from the beginning? I got all my dimensions cut yesterday, so going into the weekend will let me know if staining will be a success or not. Pine isn't the friendliest to take stain.
I cant believe how big this thing is. I have had queen all my life :)
Looks Great!
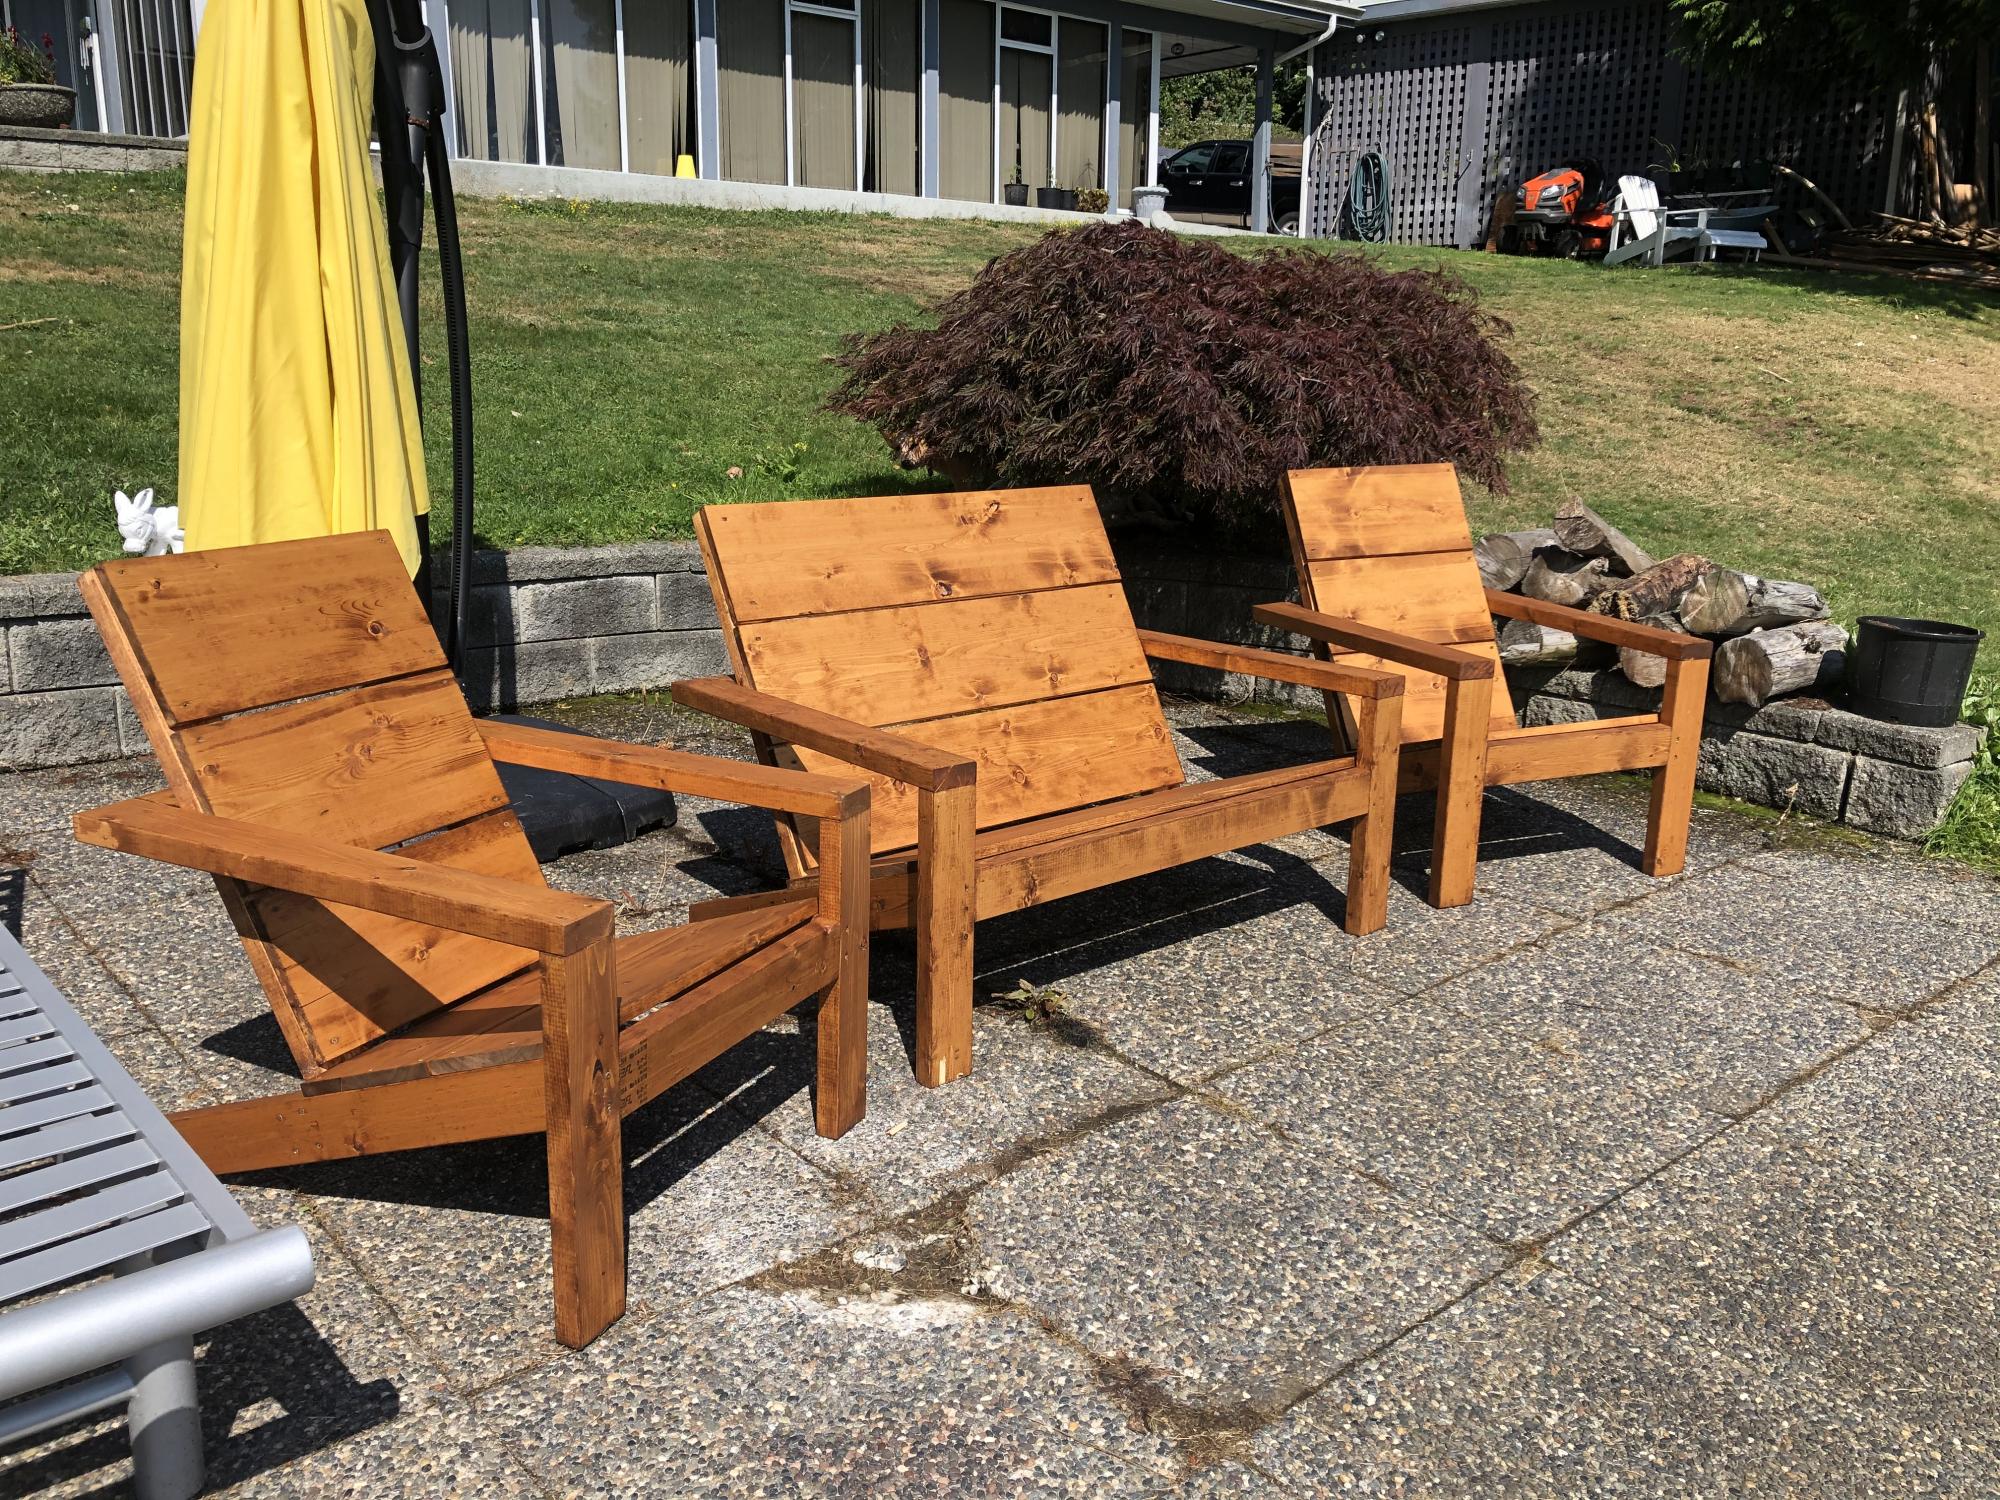
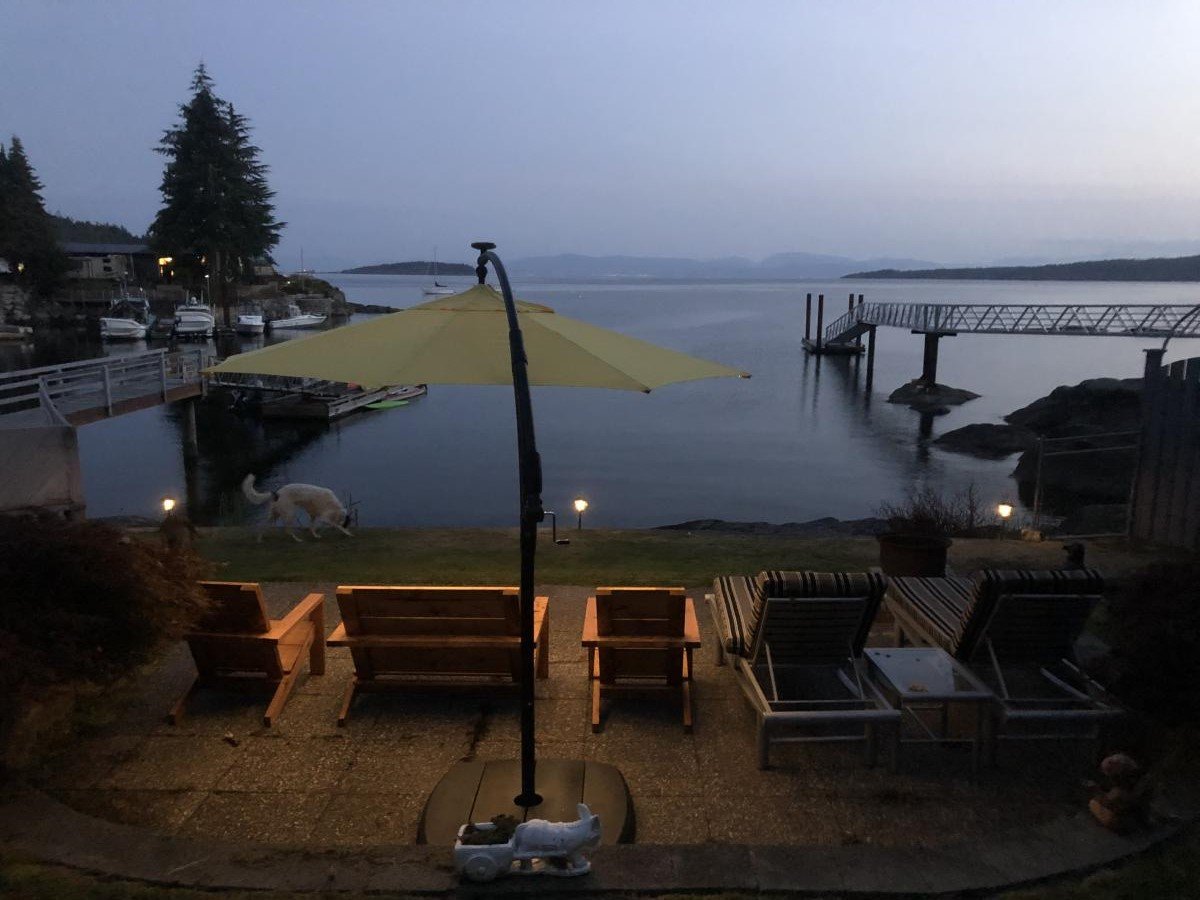
We loved the Modern Adirondack Chair pattern so much that we adapted it to have a matching love seat. It turned out beautifully!
Tue, 07/06/2021 - 17:08
Did you have to add any additional supports or just make the horizontal supports and seats/ backs longer?? Love this so much!
Tue, 08/31/2021 - 14:04
Yes, I added additional supports underneath. Two 2x4s going running along the 1x10s.
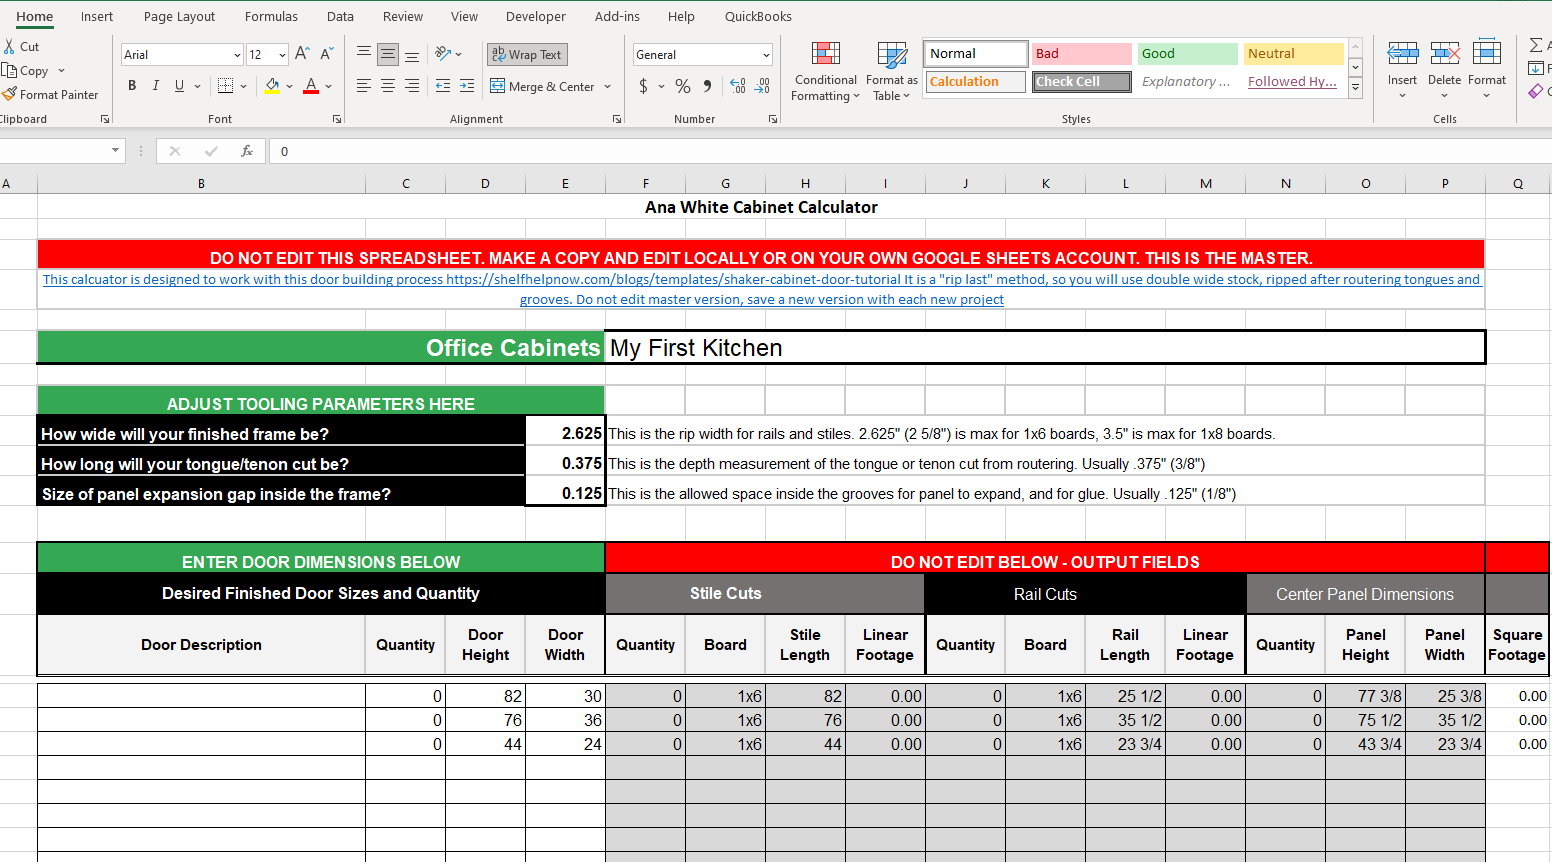
I was trying to use the google sheets cabinet calculator that Ana posted and found that others were accessing and editing the master at the same time. I thought perhaps a Microsoft Excel version of the calculator to download may be useful.
I wasn't able to upload to this site so I've created a Brag Post to link to it on my site.
UPDATE: Ana's website has been updated and the file is now an Excel Spreadsheet which can be downloaded.

I made this to match Ana's rustic x console, end and coffee table!
Tue, 10/04/2022 - 10:22
Awesome design and I love the 2 tone finish! Thanks for sharing.
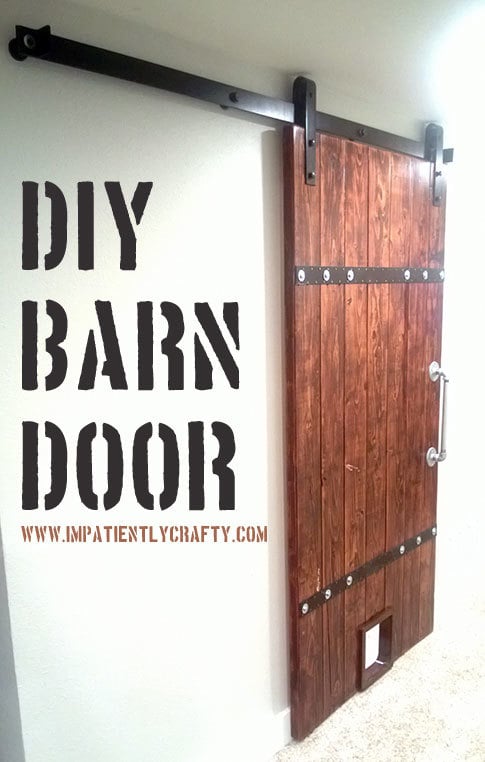
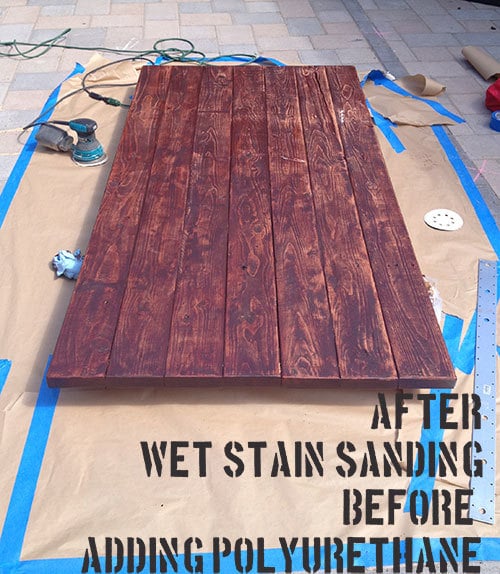
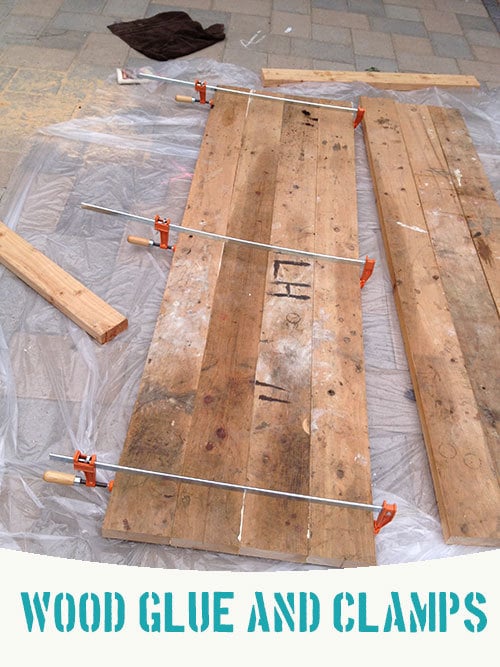
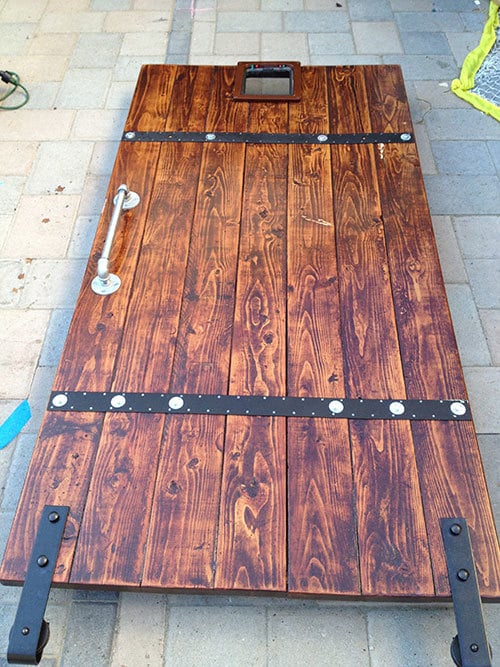
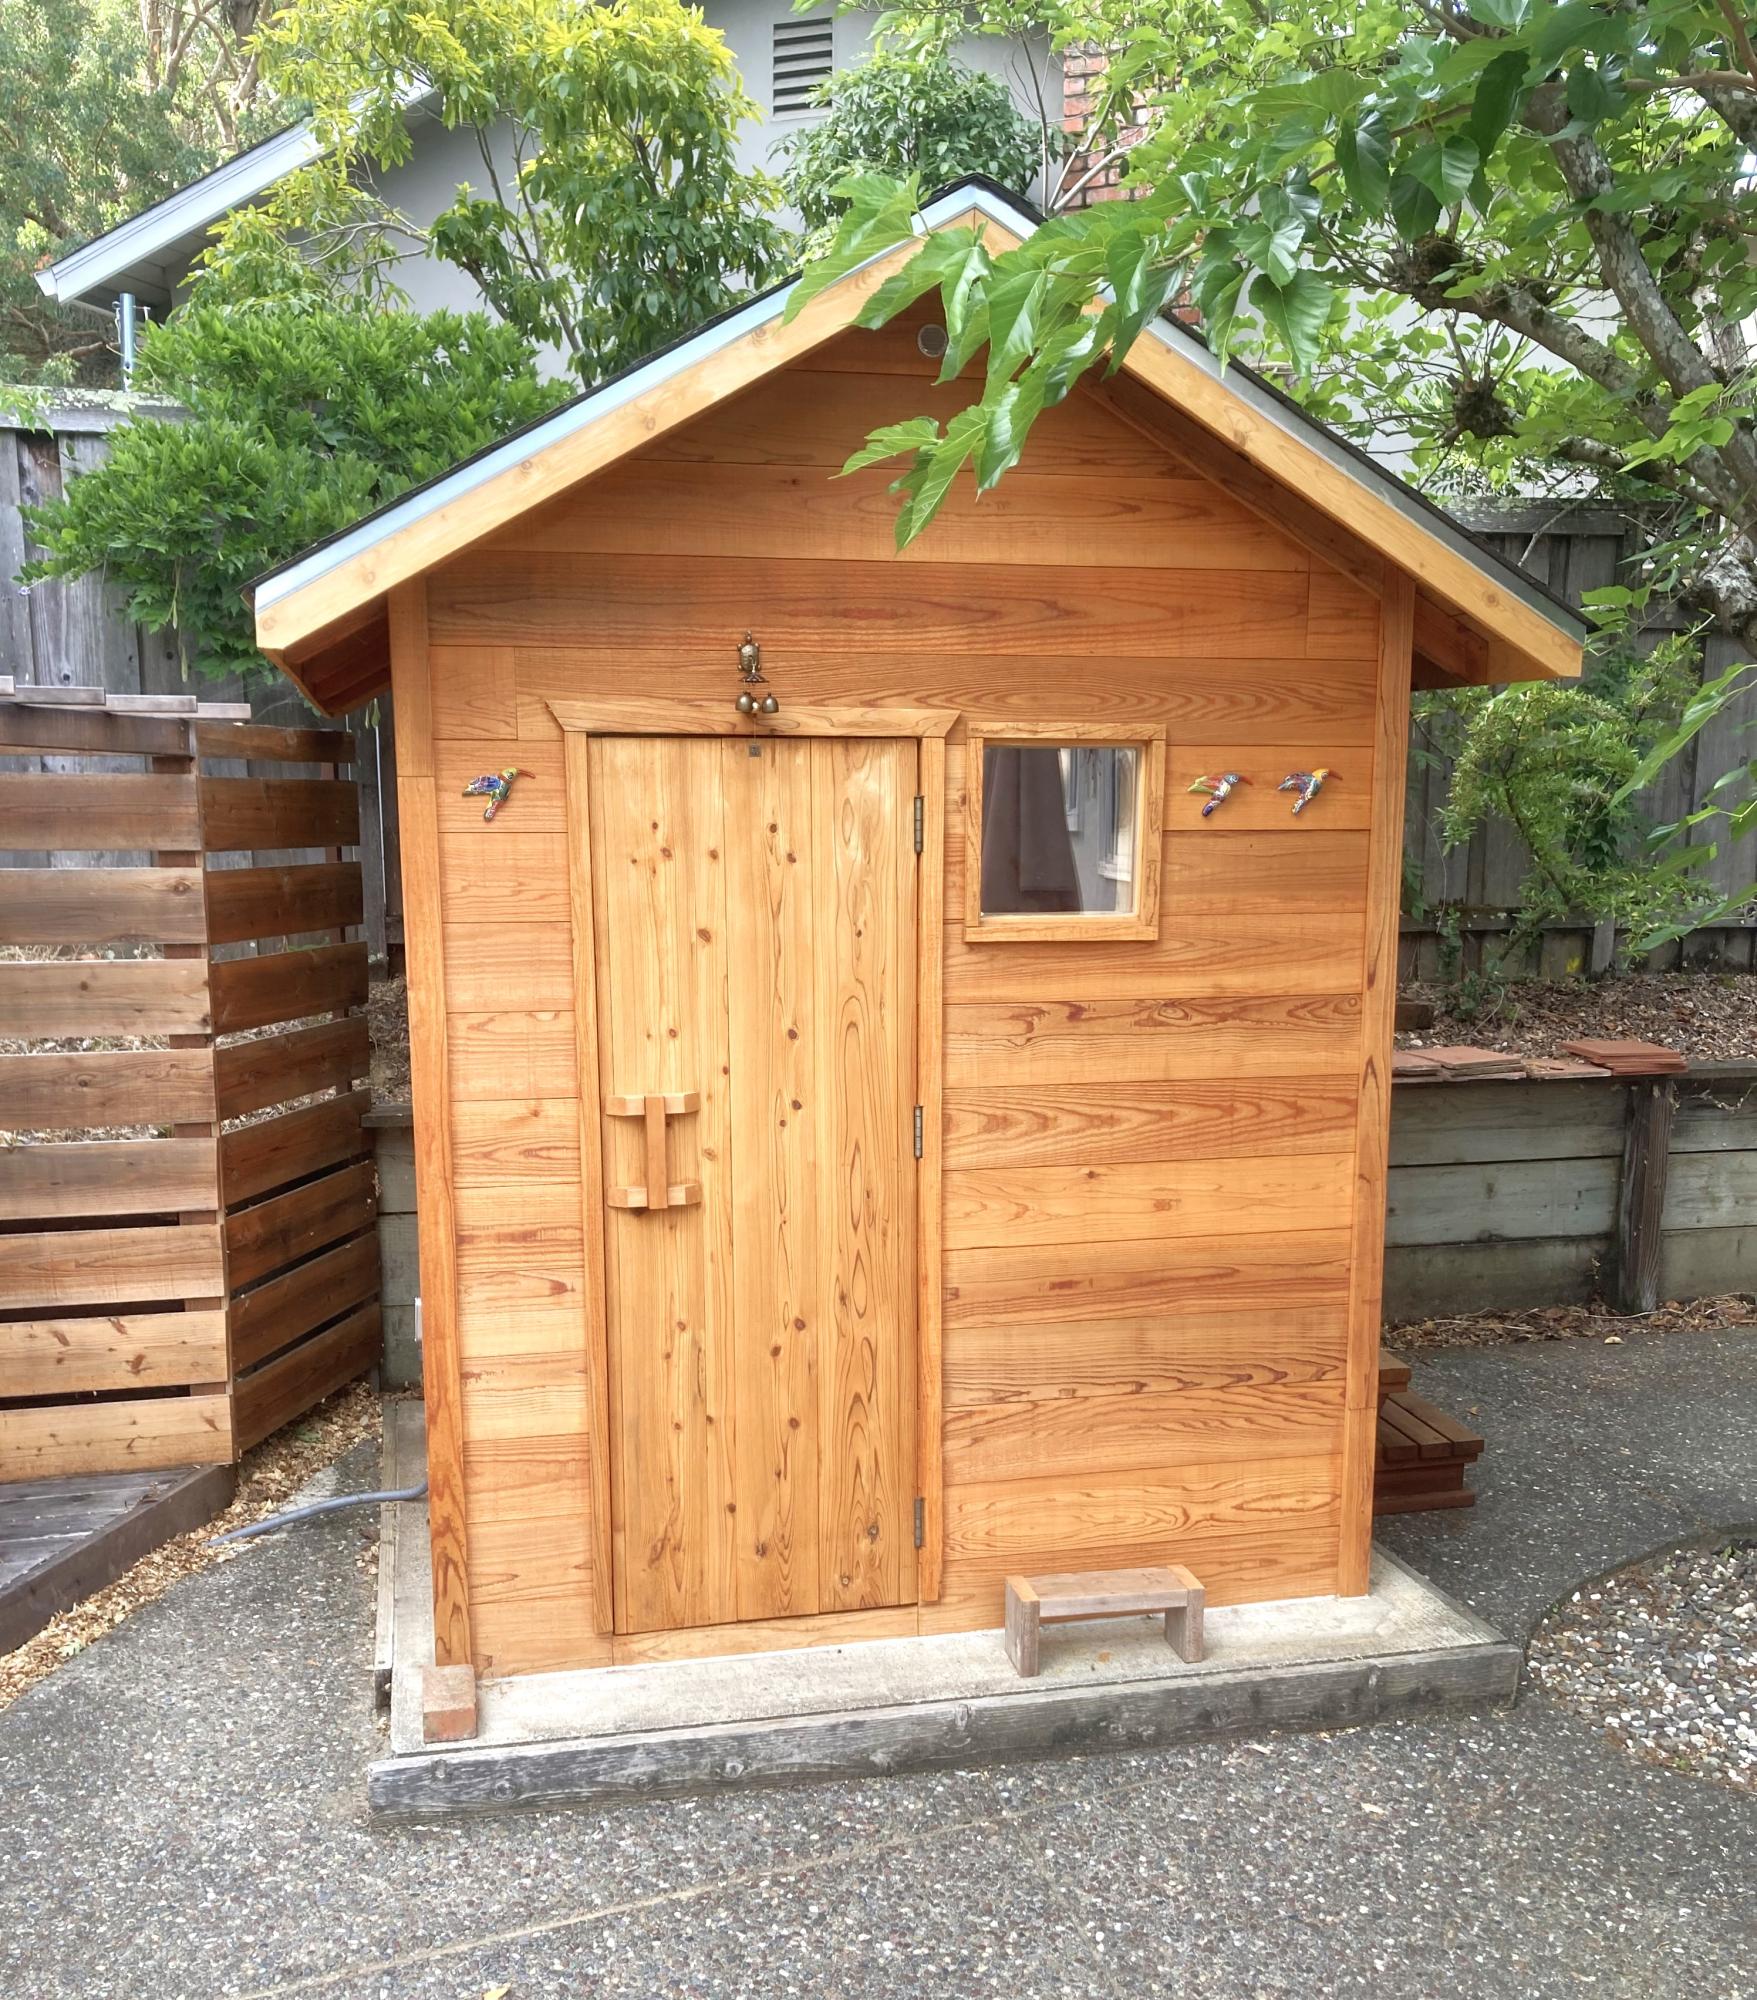
I made his Barn door out of the wood that was left in our garage when we moved in. Using (7) 2x6 boards and adding stain sanding and hardware, it became a super functional industrial rustic (is that a design style LOL) door! (I added a cat door to for our cat ;))
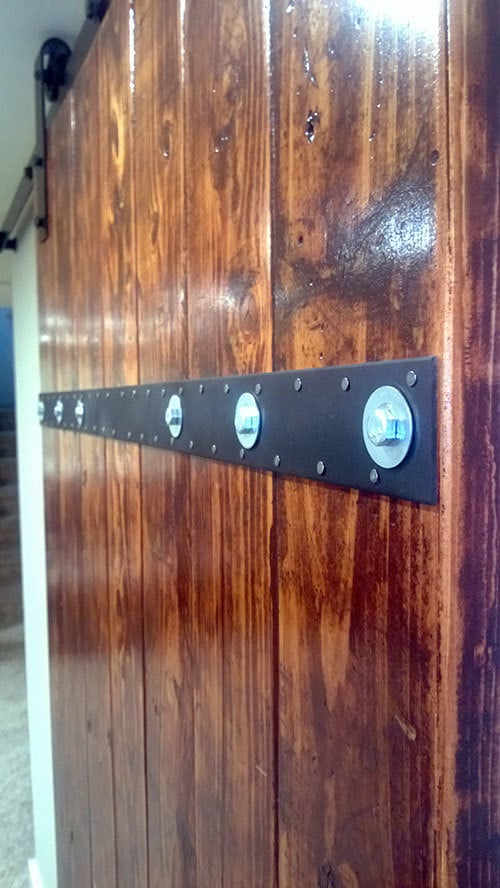
In reply to I love the strapping. This by Pam the Goatherd
Thu, 08/01/2013 - 11:08
Thank you! I was just super happy that I didn't have to cut the strap ties lol. now if our cat would just get used to using the cat door.....
In reply to I love the strapping. This by Pam the Goatherd
Thu, 08/01/2013 - 11:08
Thank you! I was just super happy that I didn't have to cut the strap ties lol. now if our cat would just get used to using the cat door.....
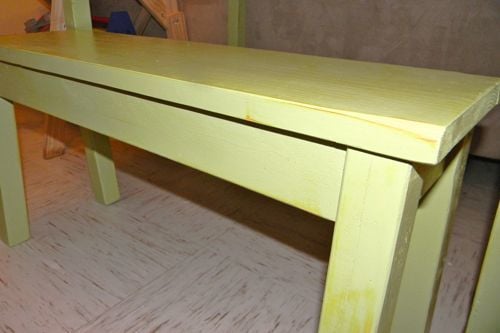
This table was quite simple to build. The hard part was the sanding and the painting/staining. It is sturdy. I also like that I can sand or touch up stain if it is ever damaged. Most store bought tables don't have that ability since the table top is usually a veneer.
Step by Step Summary on my blog - http://thequaintcottage.blogspot.com
Sat, 07/09/2011 - 18:47
Your paint job for the legs is awesome. I went to your blog to look at the whole process. Great work. The colors for the legs and top go together beautifully. Wonderfjul job! :) J
Sun, 07/10/2011 - 17:45
Thanks! I really didn't know if all the colors were necessary or if it would turn out how I pictured it in my head, but I just posted a close up pic of the finished leg and hints of the colors show. It is as close to I could get to weathered boards without waiting years to make them.
In reply to plans by grandeb3660
Sat, 09/03/2011 - 18:22
I added the plans to my blog, the link is above.
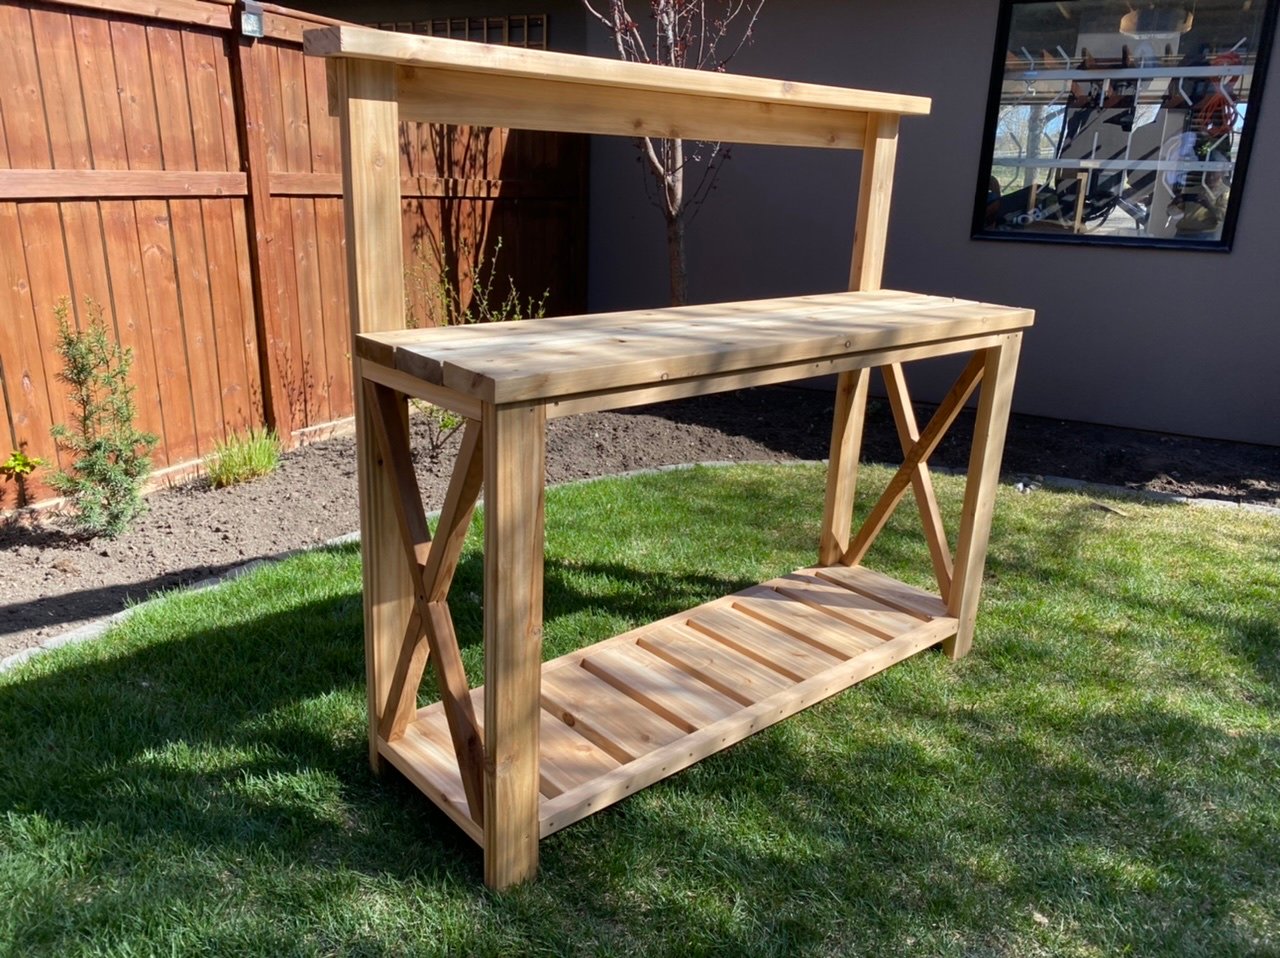
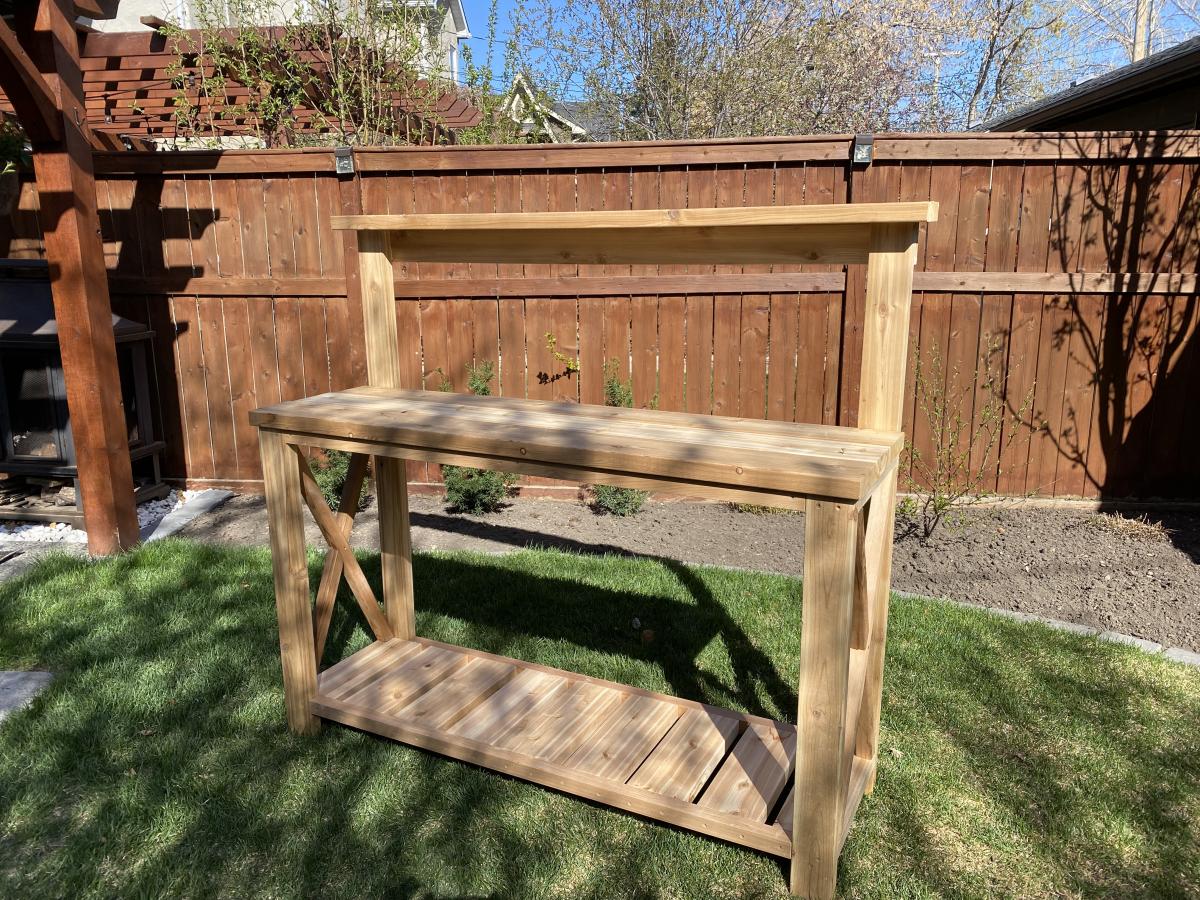
Thanks to Ana White for the inspiration, plans, and instructions to make our own Potters Bench. We had a little help from grandchildren for the final steps. We used cedar and made it 60” long rather than 48” just for a little more useable space. After purchasing the wood, we got busy and completed the whole project in a Saturday afternoon, with just the finish coat left to apply.
This was a very satisfying project to work on and complete. We will always look at it with pride and be able to say “we built that”!
Pat & Lawrence
Calgary, Alberta, Canada
Mon, 05/16/2022 - 08:24
Love the mods, this is beautiful, thank you for sharing!
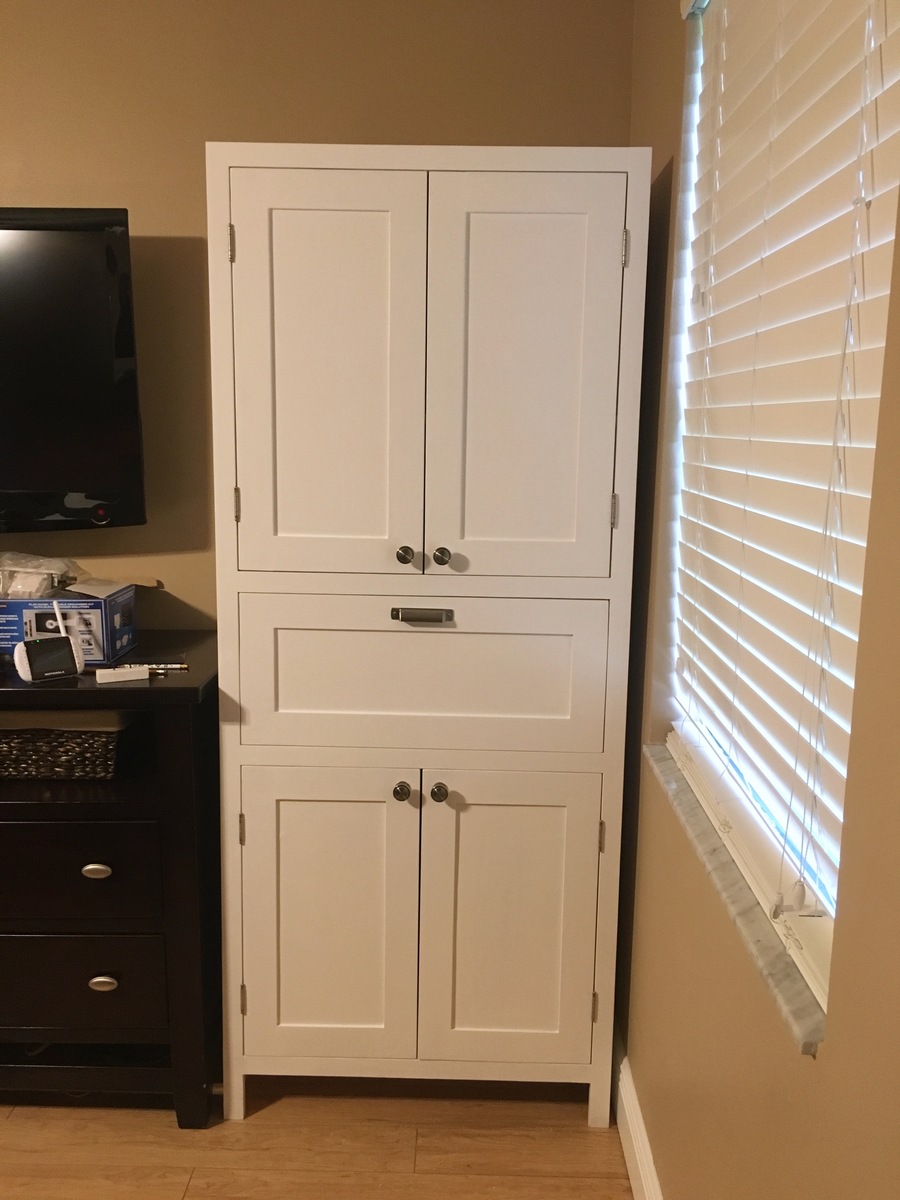
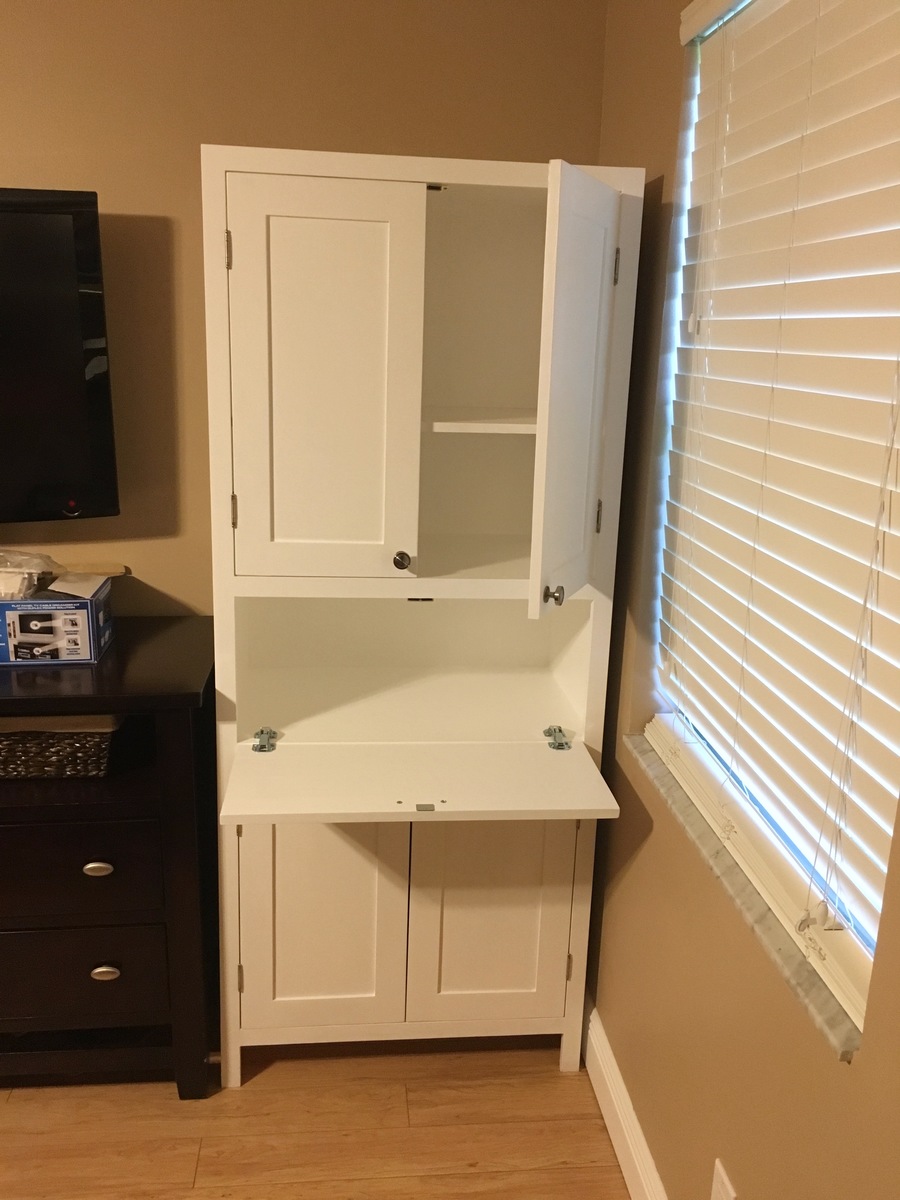
Inspired by the Tall Secretary with mail slots but with my own twist/needs incorporated in it. Finished with pure white satin paint.
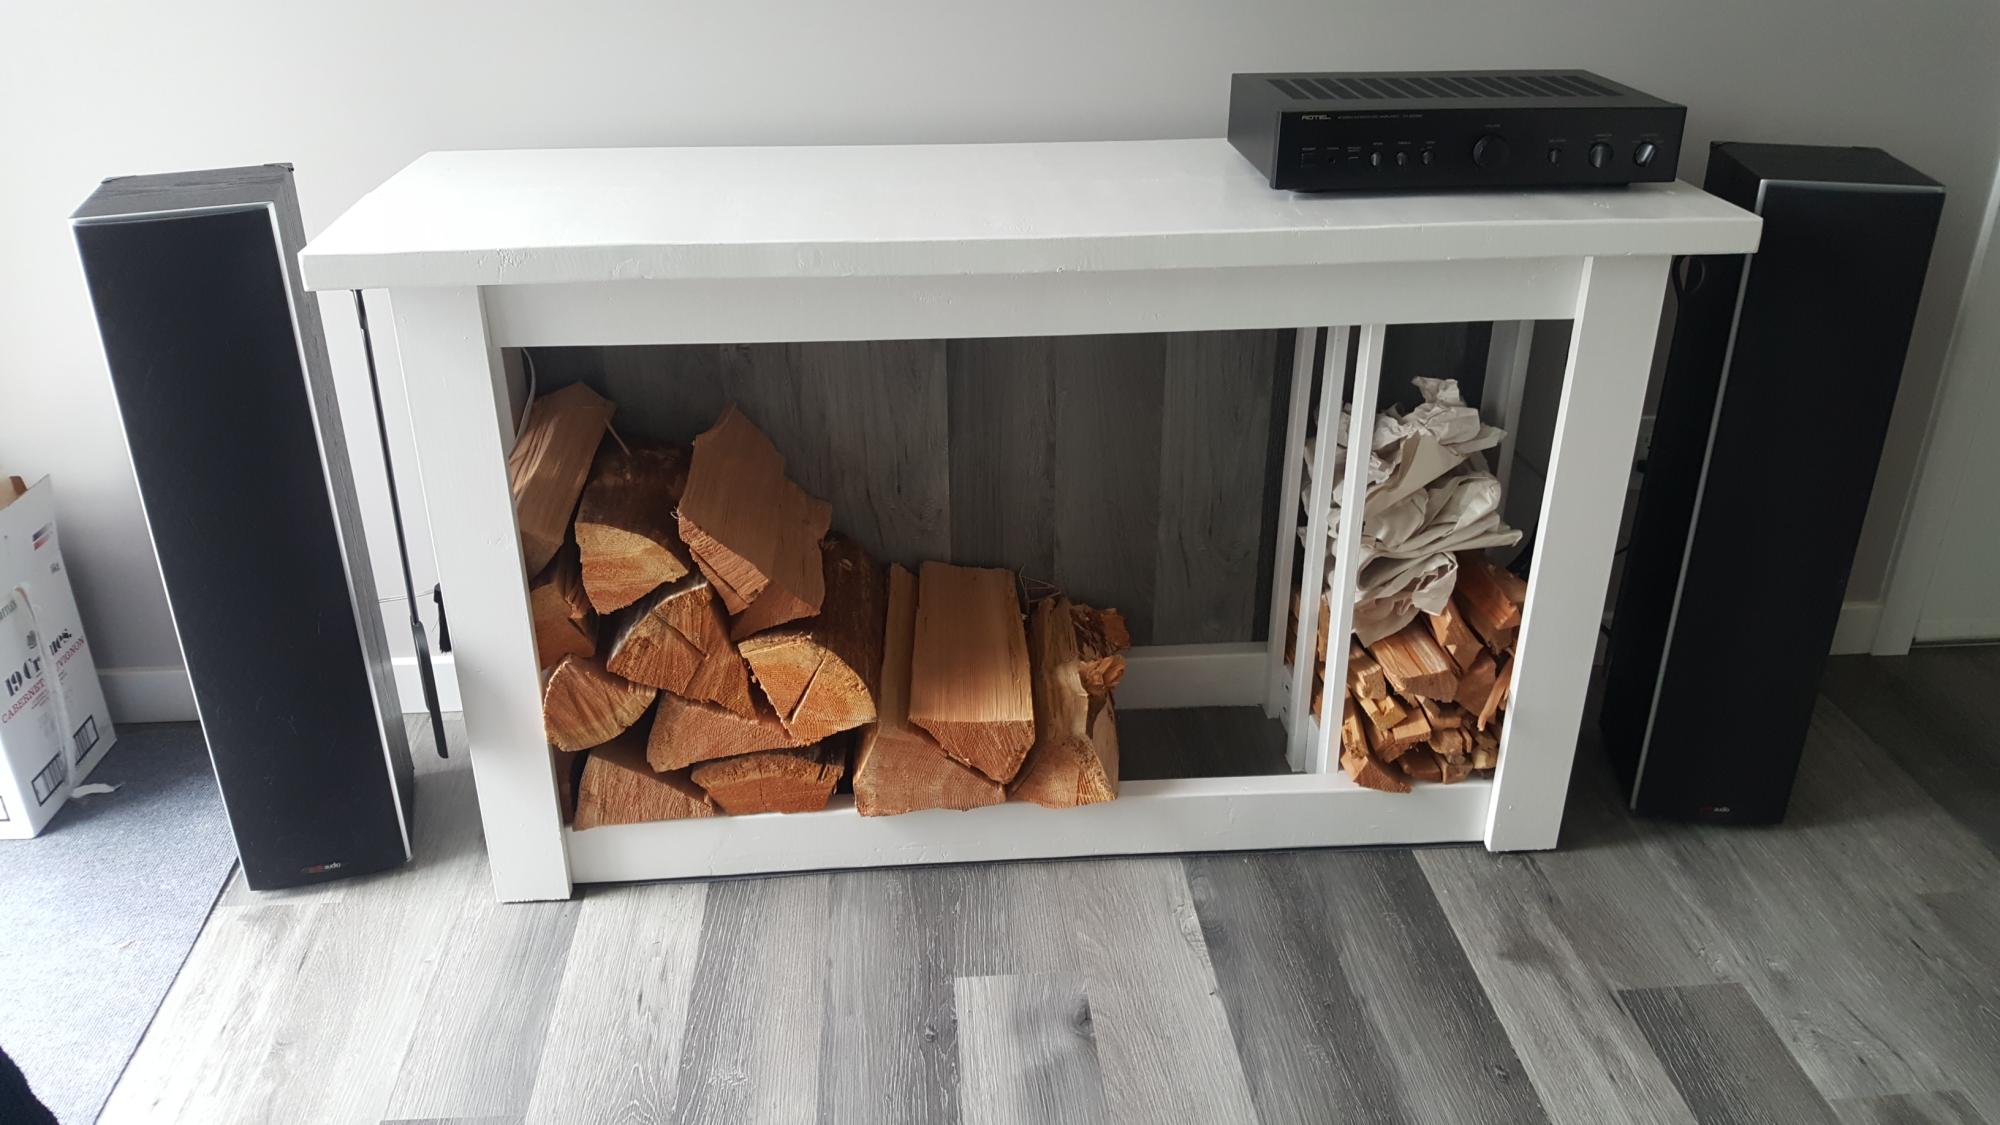
This was fun and easy to make. I made a few changes: it's only 4 ft wide and logs are 15 inches. Separate section for kindling and paper. Vinyl plank, matching our floor, for bottom and back. Added some hooks left and right for woodstove tools. I used the Kreg tool (new to me, love it). It was great to attach the top. I guess I didn't need to use it for the other parts, because the 1 by 4s would have covered the screws, but ... it was good practice with a new tool and the logs cover up the holes. Thanks Ana for all your great plans. I'm feeling encouraged to create some more stuff. Stay tuned.
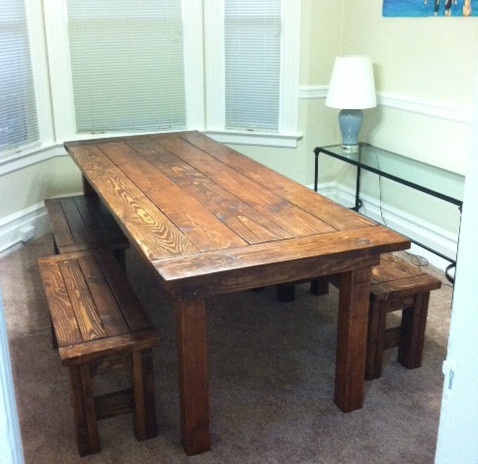
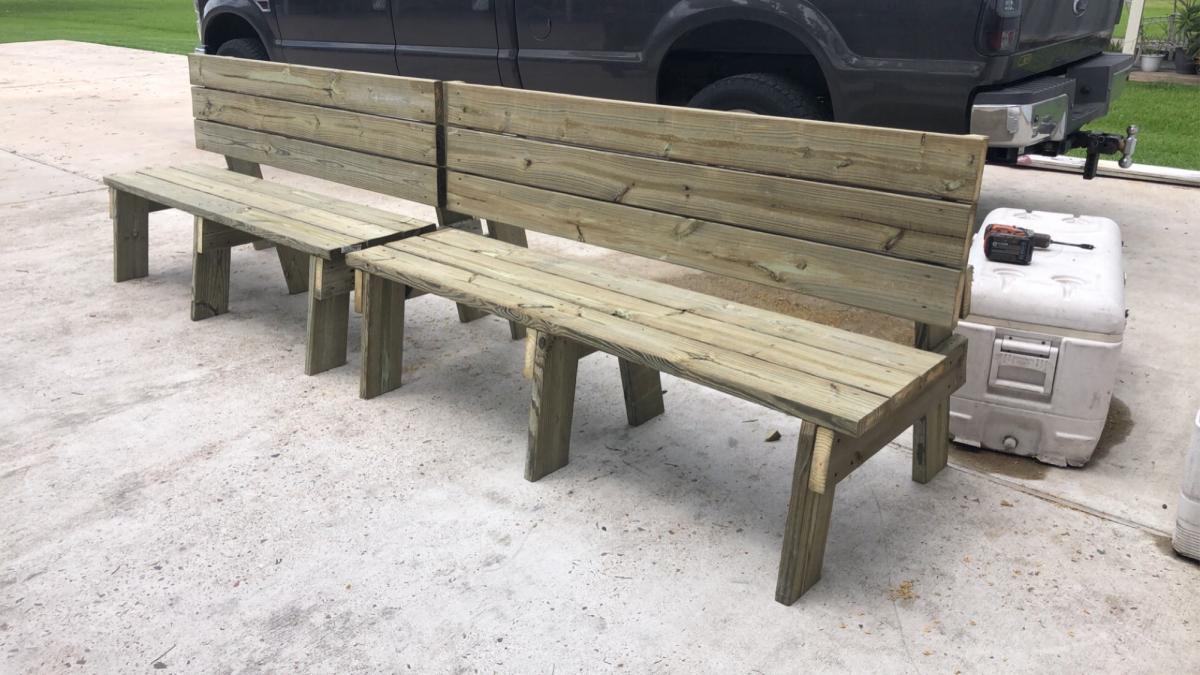
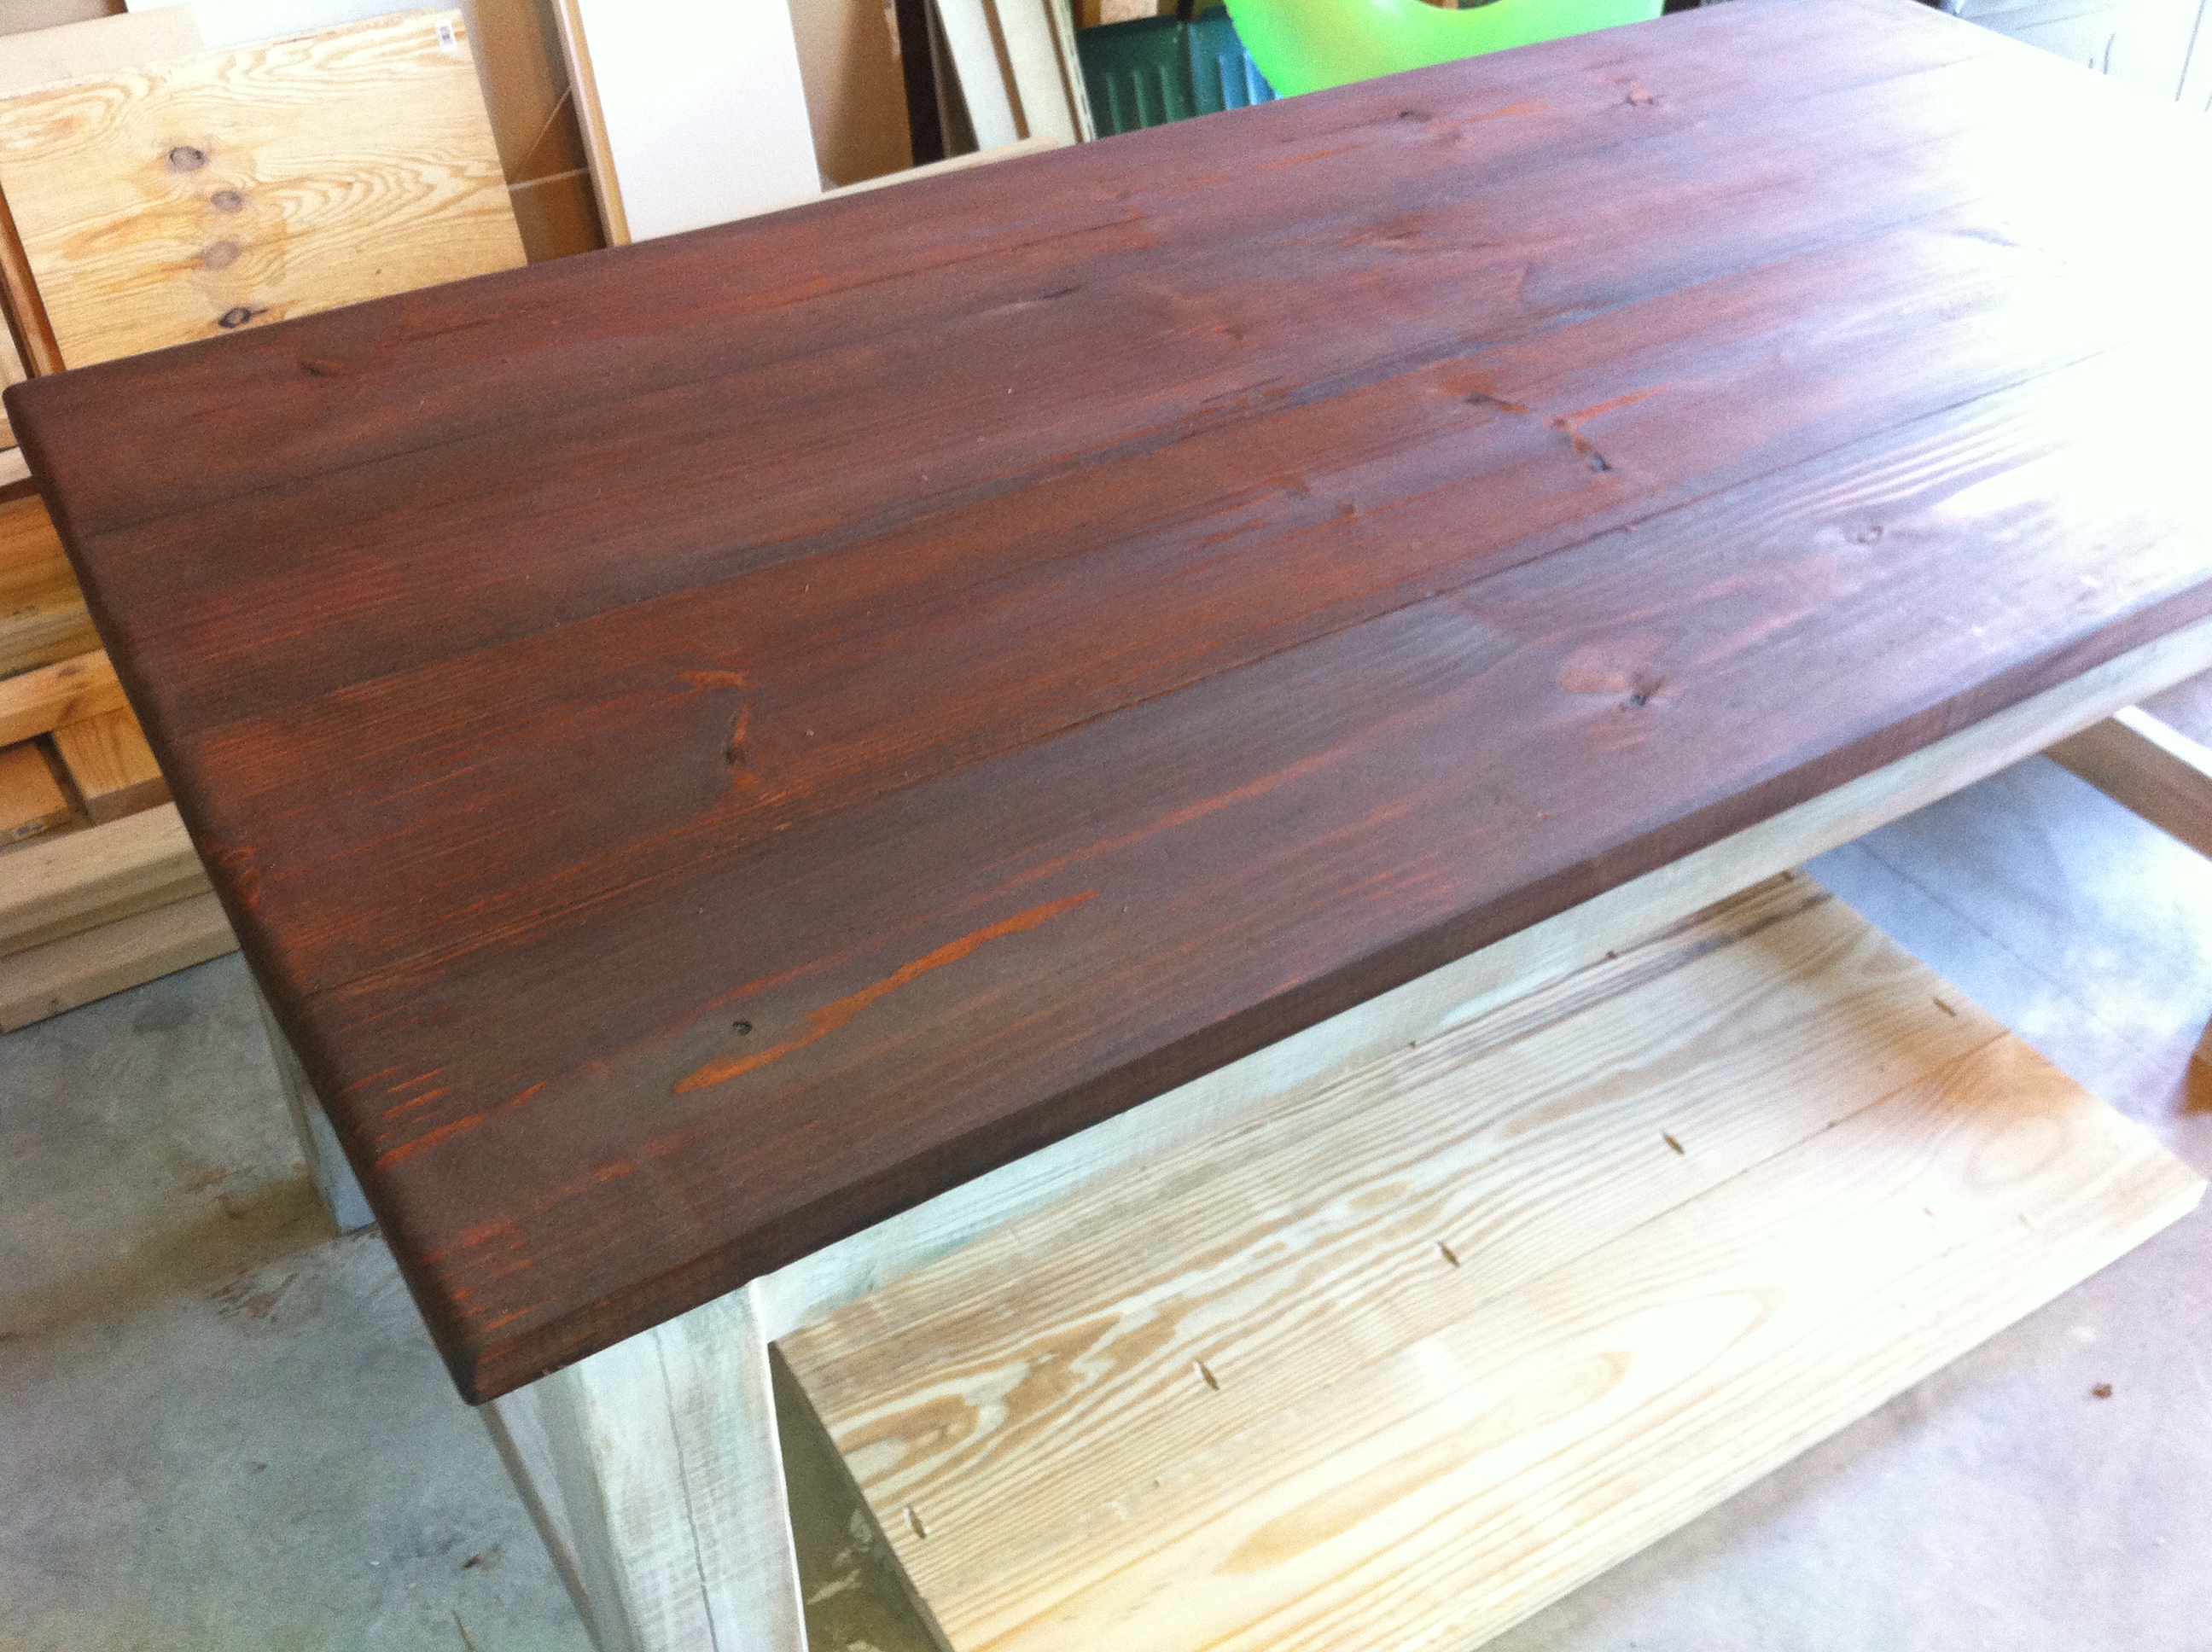
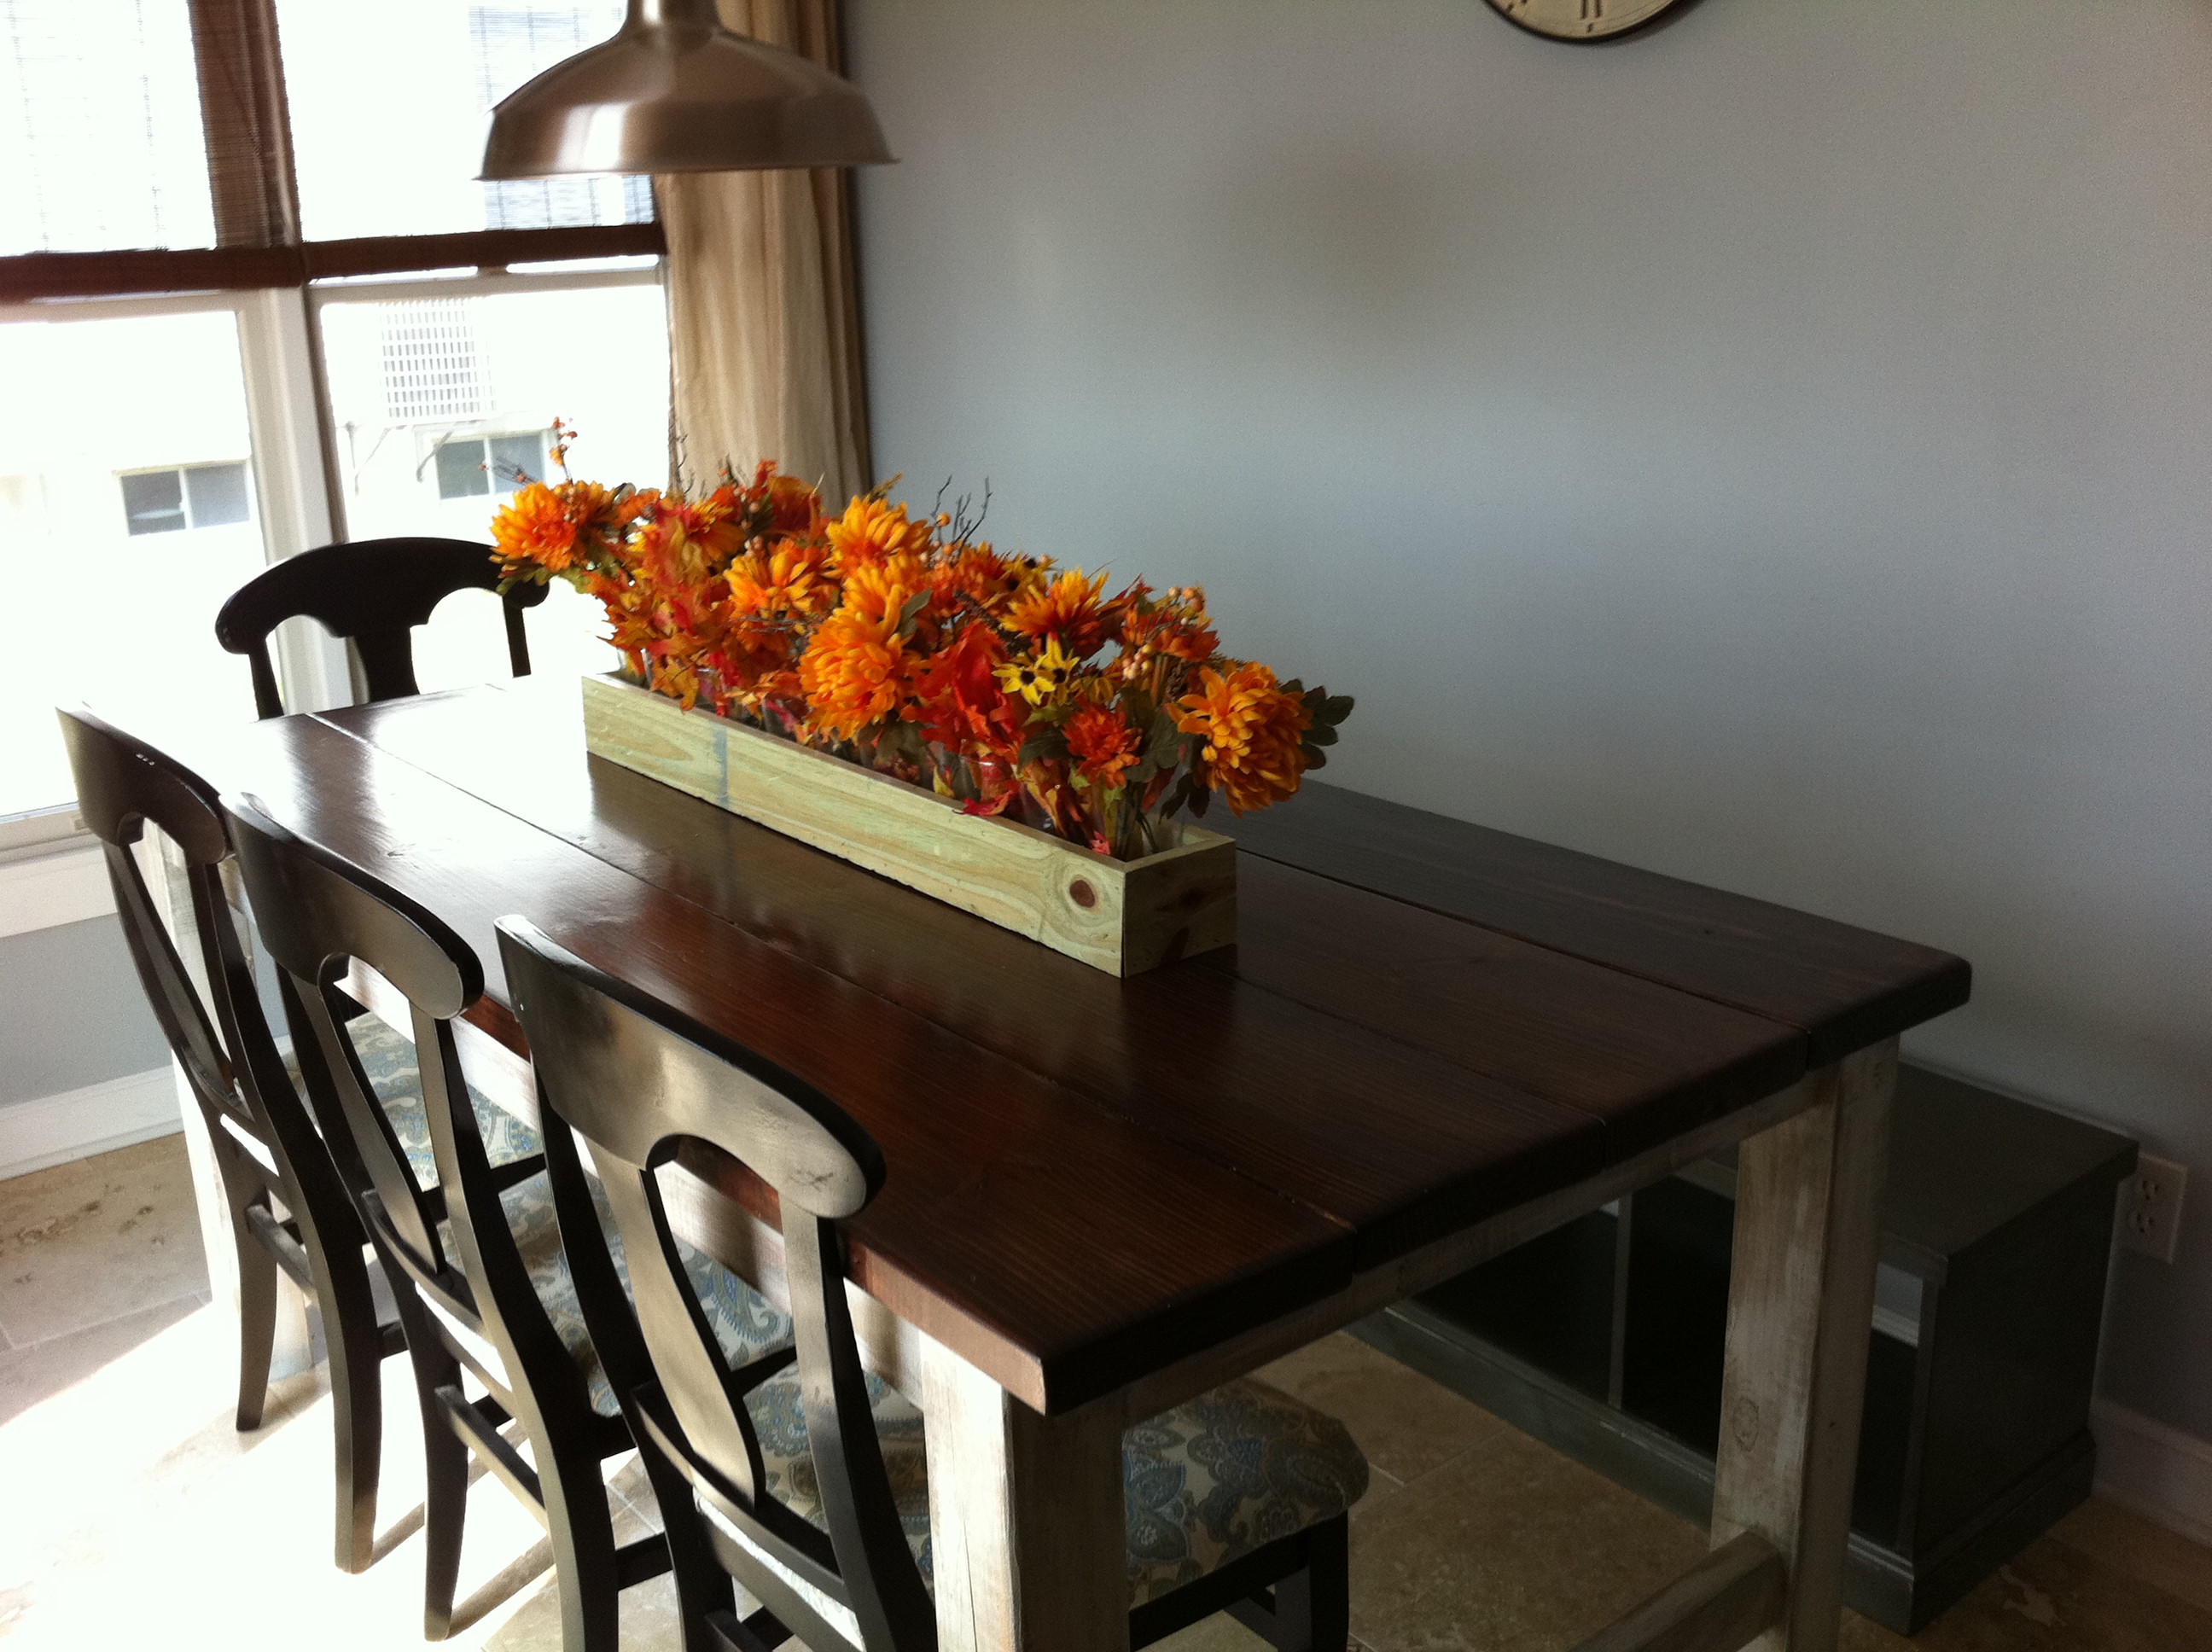
I wanted a big rustic farm table, didn't want to drop thousands on one from a store, so I decided to make my own!
I built it in the (formerly empty) dining room, with tarp on the floor and plastic to seal the doorways.
Was a big project and my first project so I started with the benches as this site and users recommended.
I used the farm house bench plan - just shortened the dimensions so that I could have two benches on either side of the table. Then I merged the two table plans so that I could have the top with the bread boards but legs that attached underneath (like the rustic table) so that they could be removed when we move. I'll work to upload my plans too.
Used Minwax Wood Stain in "english chestnut" and Deft Satin Wood Brushing Lacquer (instead of a Polyurethane).

Sun, 09/25/2011 - 12:18
Your use of short benches makes the set more family and guest friendly. I usually hand rub my finish, I think i want to build this and probably use 0ak 2X12's (know it will be heavy).
Suggestions?
I will use it on a Florida roofed concrete deck for an outdoor dining area. Typically more formal dinners. Deck overlooks beautiful cove.
Thu, 10/13/2011 - 11:00
Can you explain how you merged the plans to add the bread boards? I would love to do the same!
Tue, 03/06/2012 - 01:30
Would love to see the plans for this!
Looks amazing!!
Are the table legs 4"x4"?
Fri, 06/01/2012 - 09:09
This is exactly what I am looking for in a table to build. We want bread boards on the end and we don't want stretchers on the bottom. How did you combine the two to do this. Can you send me a copy of your plan? [email protected]
Fri, 06/08/2012 - 12:59
i would the plans for that table my daughter loves and wants me to build her one
send to [email protected]
Mon, 06/11/2012 - 13:19
We love this table! Could you please send plans to [email protected]
Thanks so much!
Mon, 06/11/2012 - 13:21
We love this table. Please send plans to [email protected]
Thanks!
Fri, 06/15/2012 - 10:00
Your table turned out awesome!
I already have old boards waiting on plans to be turned into a table. Any chance you could send the plans for your table to [email protected]?
Sat, 08/04/2012 - 13:35
Could you please send me the plans for this table? I love it and would love to attempy making it. Thanks so much!
Sun, 09/23/2012 - 14:37
Hi, Can you please send me the plans to make this table?
Thanks!!
Alex ([email protected])
Sun, 09/30/2012 - 18:34
I love this table. Can you please send the plans to [email protected]
Sun, 11/04/2012 - 11:07
I would love to attempt this!Would you please share your plans?
[email protected]
Thanks so much
Sun, 11/04/2012 - 17:17
This table is exactly what I've been looking for!! Could you please share your plans? [email protected] Thank you.
Sun, 11/04/2012 - 17:25
This table is exactly what I have been looking for! Could you please share your plans? [email protected]
Tue, 01/01/2013 - 06:09
Can you send plans for this table build to [email protected] thanks.
Wed, 01/02/2013 - 15:53
Your farm table and benches were exactly what I was looking for. Please send me the plans if they are available. Thanks
Wed, 01/02/2013 - 19:18
I would love your table plan. This is absolutely gorgeous!! Please forward table plans to [email protected]
Wed, 01/02/2013 - 19:23
I would love a copy of the plans for this gorgeous table you made. I am inspired.
Fri, 01/18/2013 - 18:01
Could you please send plans? I love the look of your table!
[email protected]
Sat, 03/16/2013 - 20:12
Can I please please please have the plans? I have a very narrow dining area and this table is PERFECT. Thanks
Sun, 05/12/2013 - 14:30
I would REALLY like the plans for his version as well. I am going to combine them. Can someone ask him to post or his he sending via email? If so, [email protected]
Thank you SO much!!!
Wed, 06/26/2013 - 13:09
Thu, 06/27/2013 - 13:34
Fri, 06/28/2013 - 10:49
Great table! I too would like plans - please send to [email protected]
Thanks!!
Mon, 07/15/2013 - 09:48
just bought a cabin and need all sorts of furniture. I love what you did and would sure love to have your plans and how you merged the two----both for the table and especially for the benches. Trying to do a 10' table for huge family gatherings. Thanks so much! You rock!
Tue, 07/23/2013 - 14:28
This table and bench set is exactly what I am looking for. You did such a great job!
Do you have plans that you wouldnt mind sending to my email? [email protected]
Mon, 08/26/2013 - 13:09
Hi! I noticed MANY requests for the merged plans. Did you post them somewhere or can you please email the plans to me at [email protected]?
BIG THANK YOU! Tina
Fri, 09/06/2013 - 13:49
I would love the plans for this table... could you please email them to [email protected]?
Thank you so much!
Beth :D
Fri, 01/09/2015 - 19:54
Hi everyone,
Well I didn't see all these comments! Sorry to have ignored your requests for plans!
This is the bench I made (I did four of these, and adjusted the measurements so they were each about 40" long)
http://ana-white.com/2011/01/farmhouse-bench
I was going to do this table, because it matches the benches, but decided I wanted a table with removable legs so it would be more maneuverable when we move!
http://ana-white.com/2009/12/plans-farmhouse-table-knock-off-of.html
I ended up using more of this plan in terms of how I assembled it, but adjusted the plans to have the tabletop include breadboards (the plank on top perpendicular to the long tabletop planks) and I used 4x4s for legs, plus the top was from 2x8s not 1x10s. I put in the optional cross supports too, and additional supports under the breadboard to connect it to the table frame and table top slats.. this is more info than you need, all to say, plans are flexible and you can do what you want!
http://ana-white.com/2010/03/plans-very-rustic-table-and-cool.html
Sorry I don't have detailed notes. I was very picky about the dimensions (based on space) and how high I wanted the table (about 1.5" taller than a normal table). I also measure the distance between the underside of the table and the tops of the benches so I could cross my legs under the table (an odd requirement).
Happy Building!
Sat, 03/21/2015 - 17:34
could you send me the plan for this rustic table that was made from the farm house and rustic table if they are available? Email to [email protected]
Sat, 03/28/2015 - 12:45
can you please send me the plans [email protected]
i love it!!!
Wed, 04/01/2015 - 15:10
I like the english chestnut stain. That works so well with this type of lumber. Great job. I plan to use the same stain on the Tryde coffee table I am building. Thanks for sharing your work!!!
Sat, 08/08/2015 - 12:30
Thu, 08/13/2015 - 19:17
Sorry! I accidentally hit the spam button but I really would like the plans for the table. Sorry for the confusion!
Thu, 08/13/2015 - 19:23
Ok, now I feel really silly. Obviously, this is my first time leaving a comment. I love the table. It is exactly what I've been looking for. Could you email the plans to [email protected]?
Thanks!
Fri, 01/08/2016 - 17:38
Fri, 01/08/2016 - 17:40


Comments
Ana White Admin
Wed, 08/02/2023 - 15:34
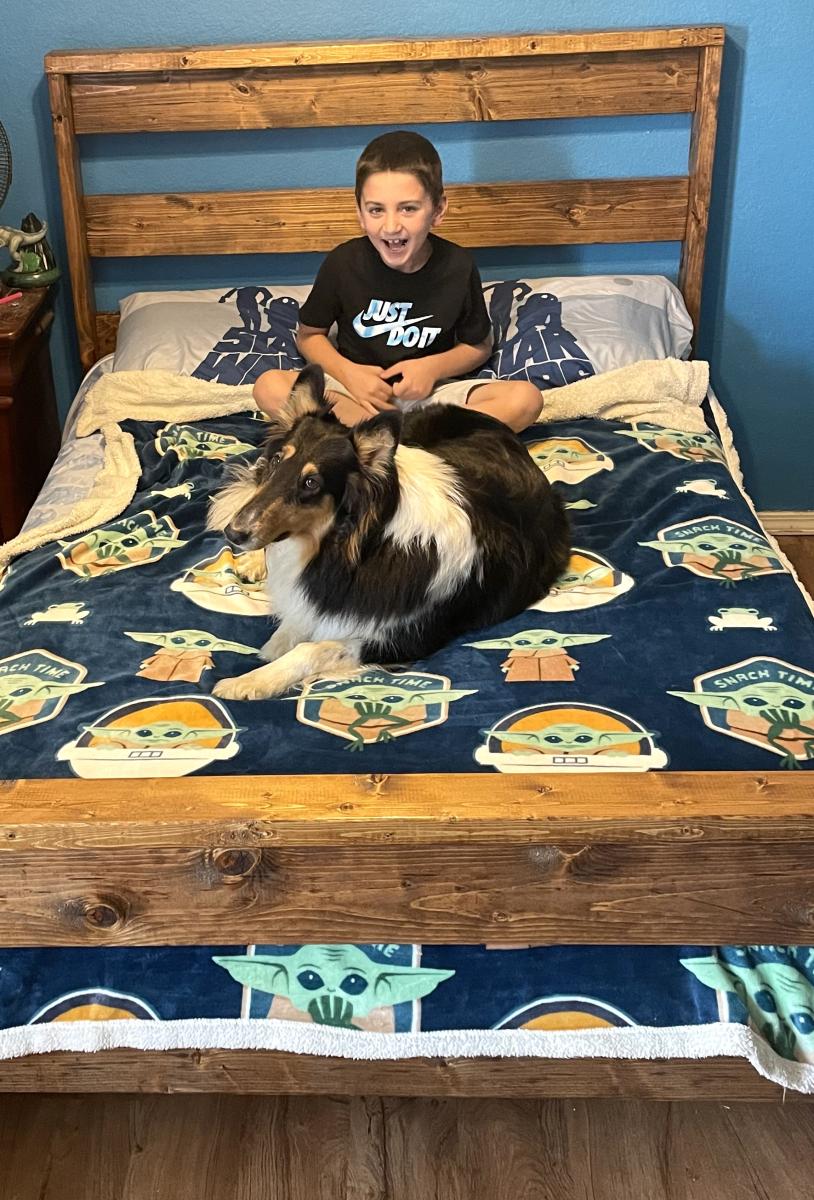
His happy face says it all!
Great build, thanks for sharing!