Community Brag Posts
Easiest $35 DIY Desk

This DIY desk provides workspace for two people. A portion of the desk is for my oldest son during homeschooling and the other portion is for my husband while he continues to work from home. Cost : $35 Difference in length, width and height will result in a change in price.
Estimated Cost
$35
Estimated Time Investment
An Hour or Two (0-2 Hours)
Recommended Skill Level
Beginner
Comments
Farmhouse Queen
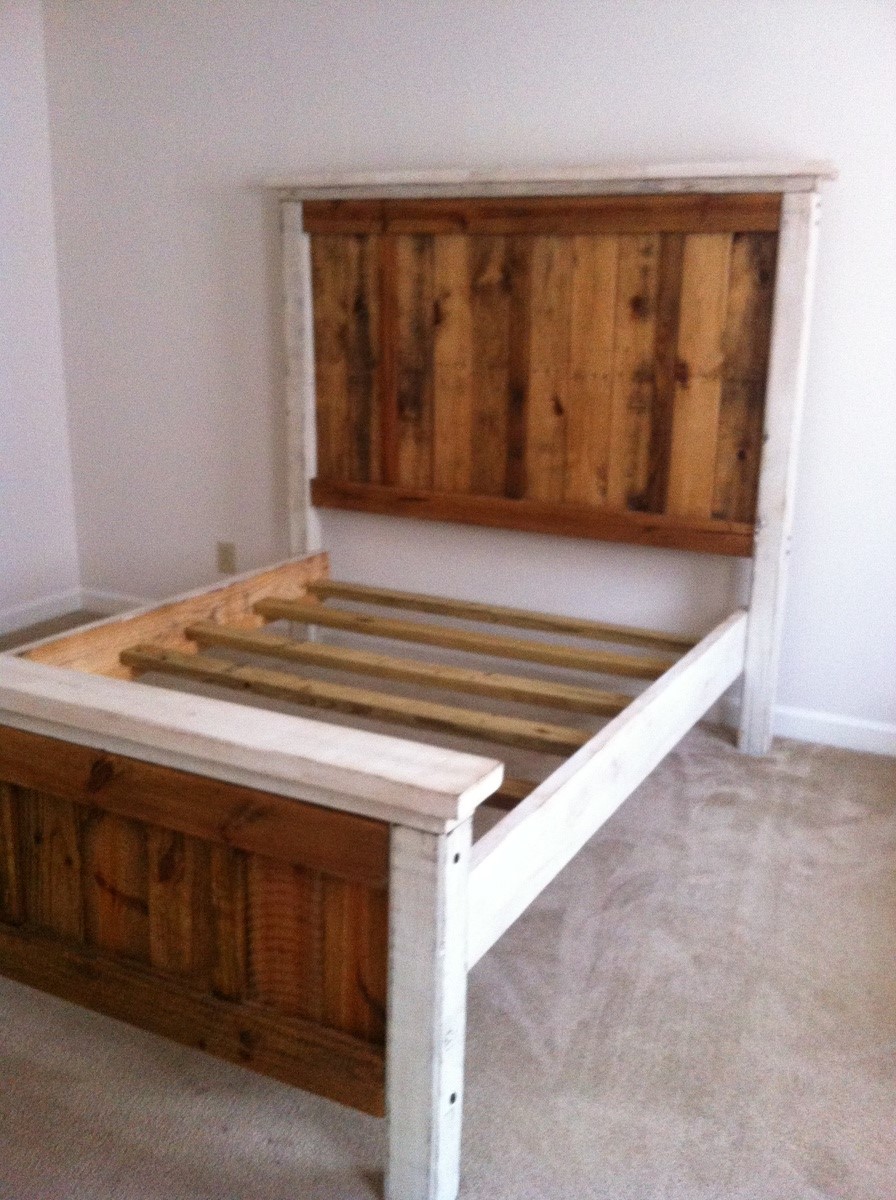
This bed was made from fence scraps and leftovers and one pallet. The only pieces I bought were the 2x6's! I love how it turned out!
Built from Plan(s)
Estimated Cost
50
Estimated Time Investment
Weekend Project (10-20 Hours)
Recommended Skill Level
Beginner
Comments
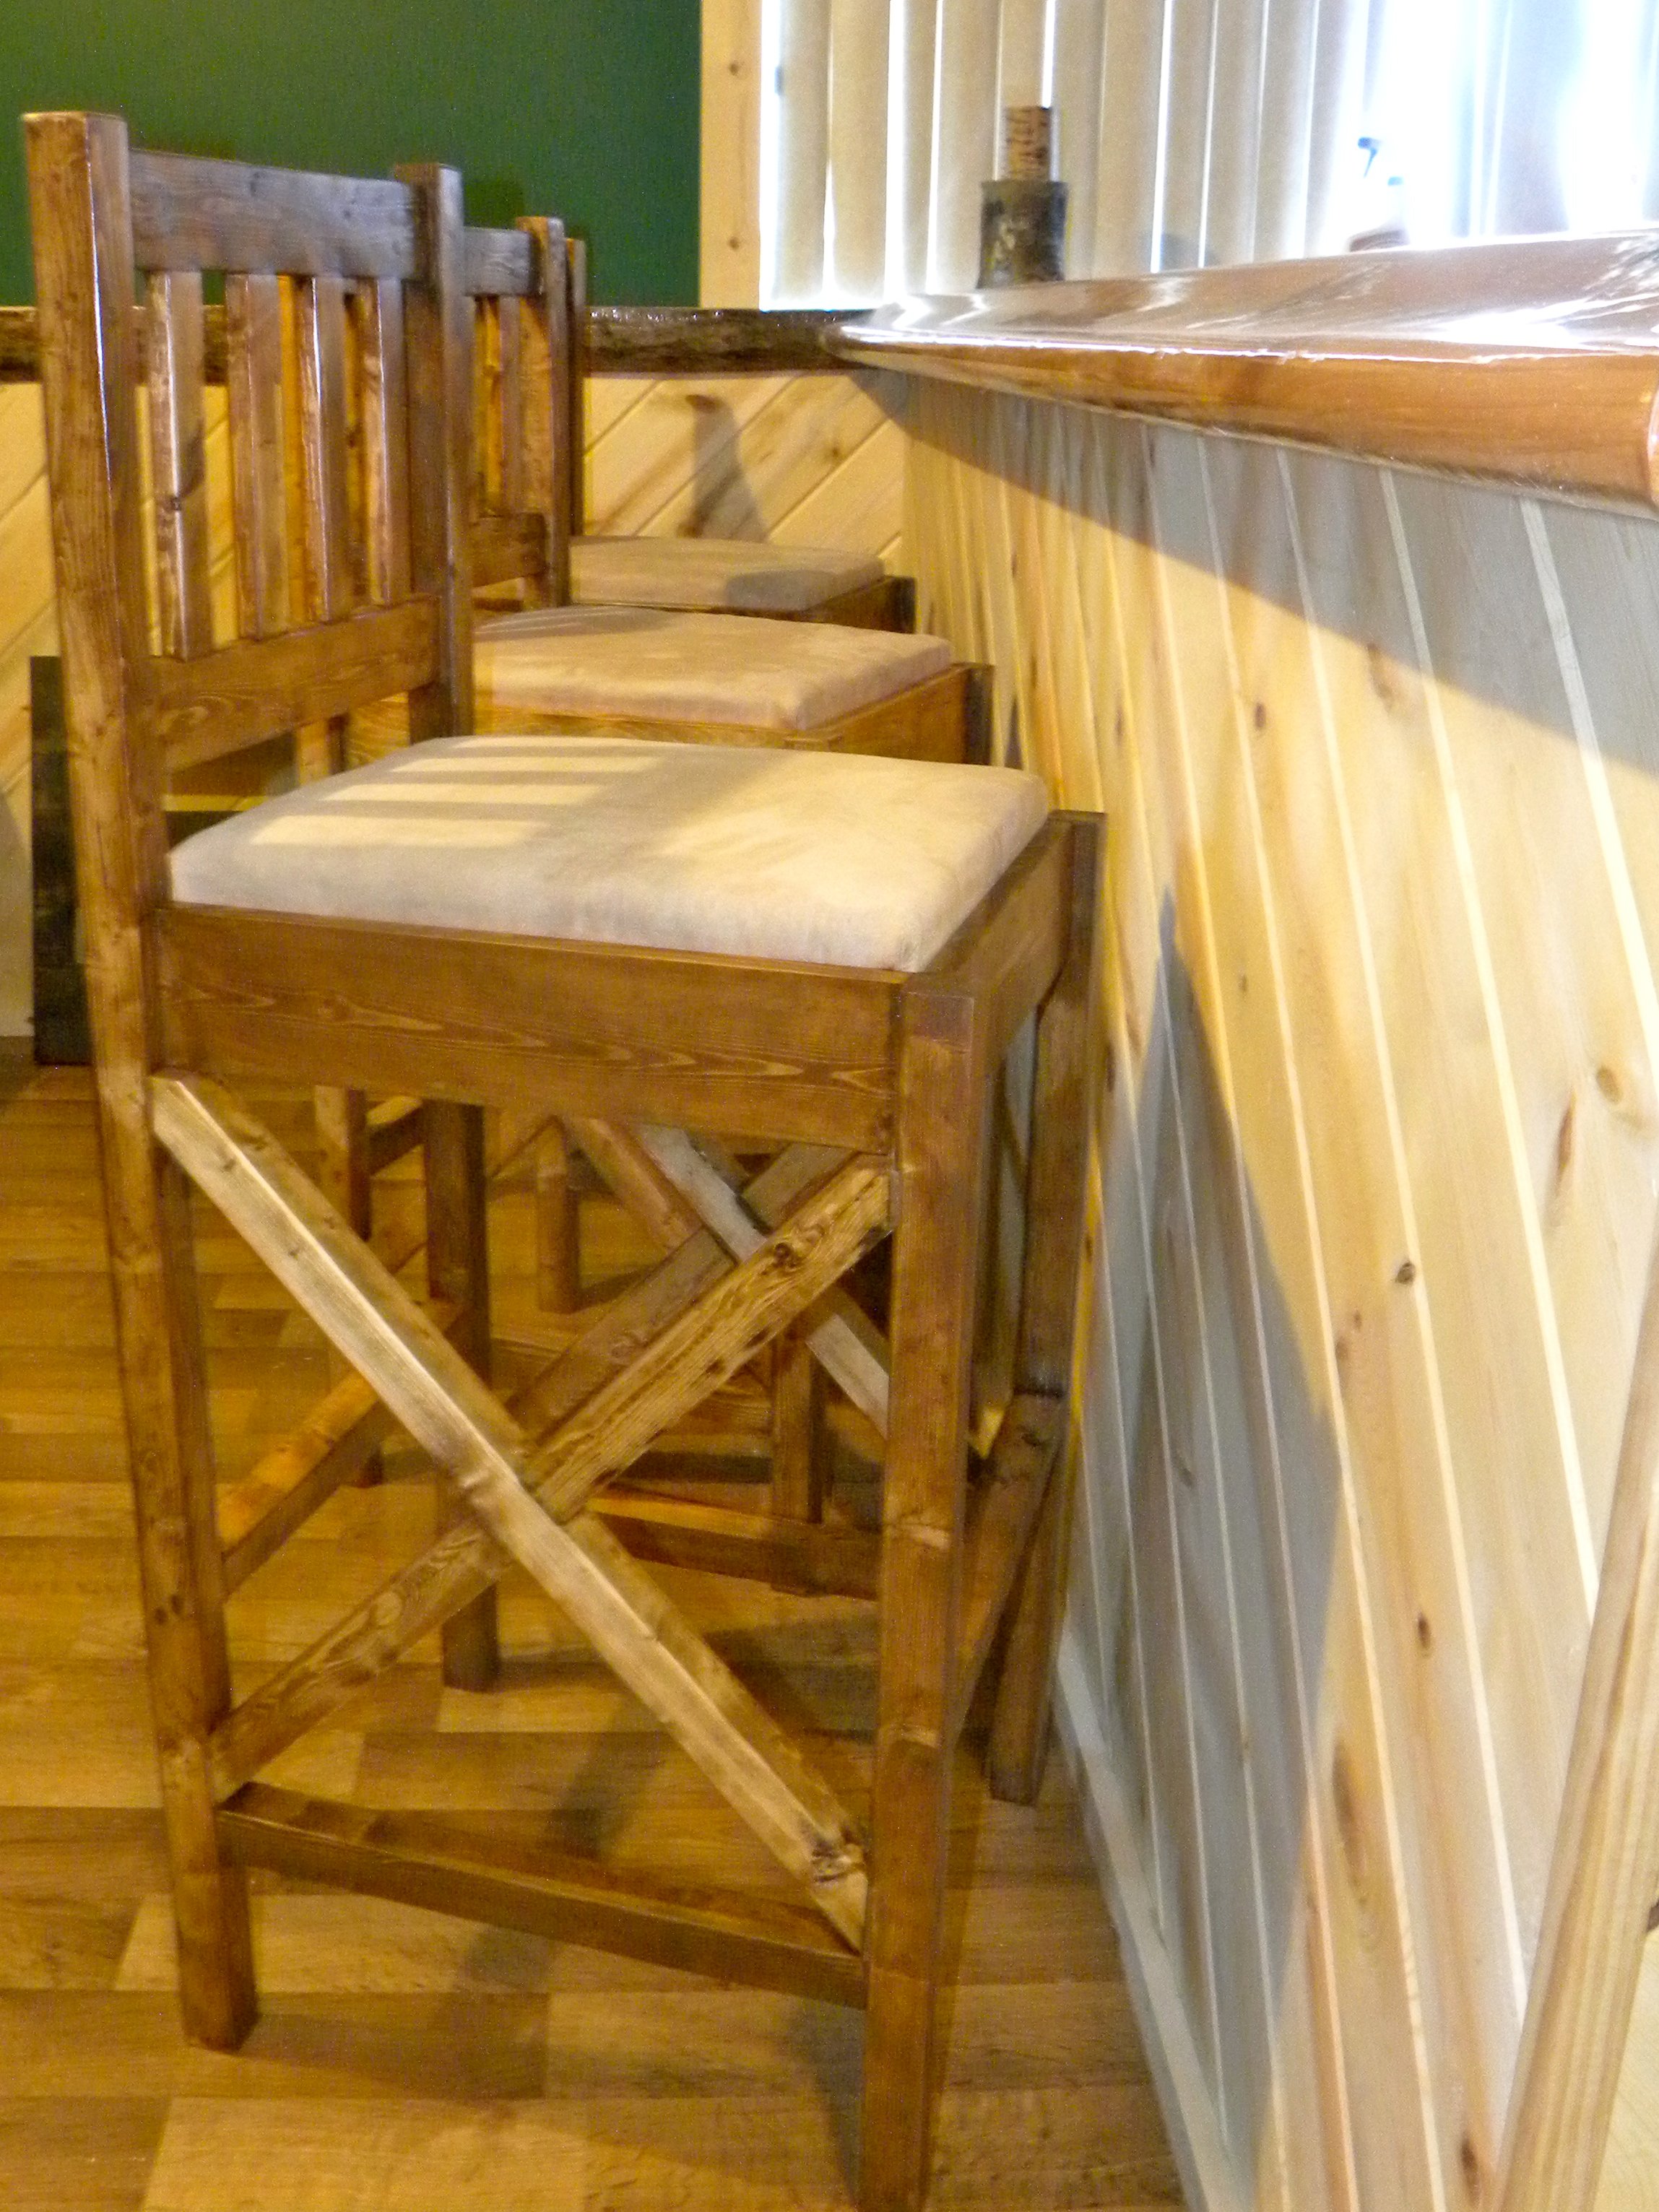
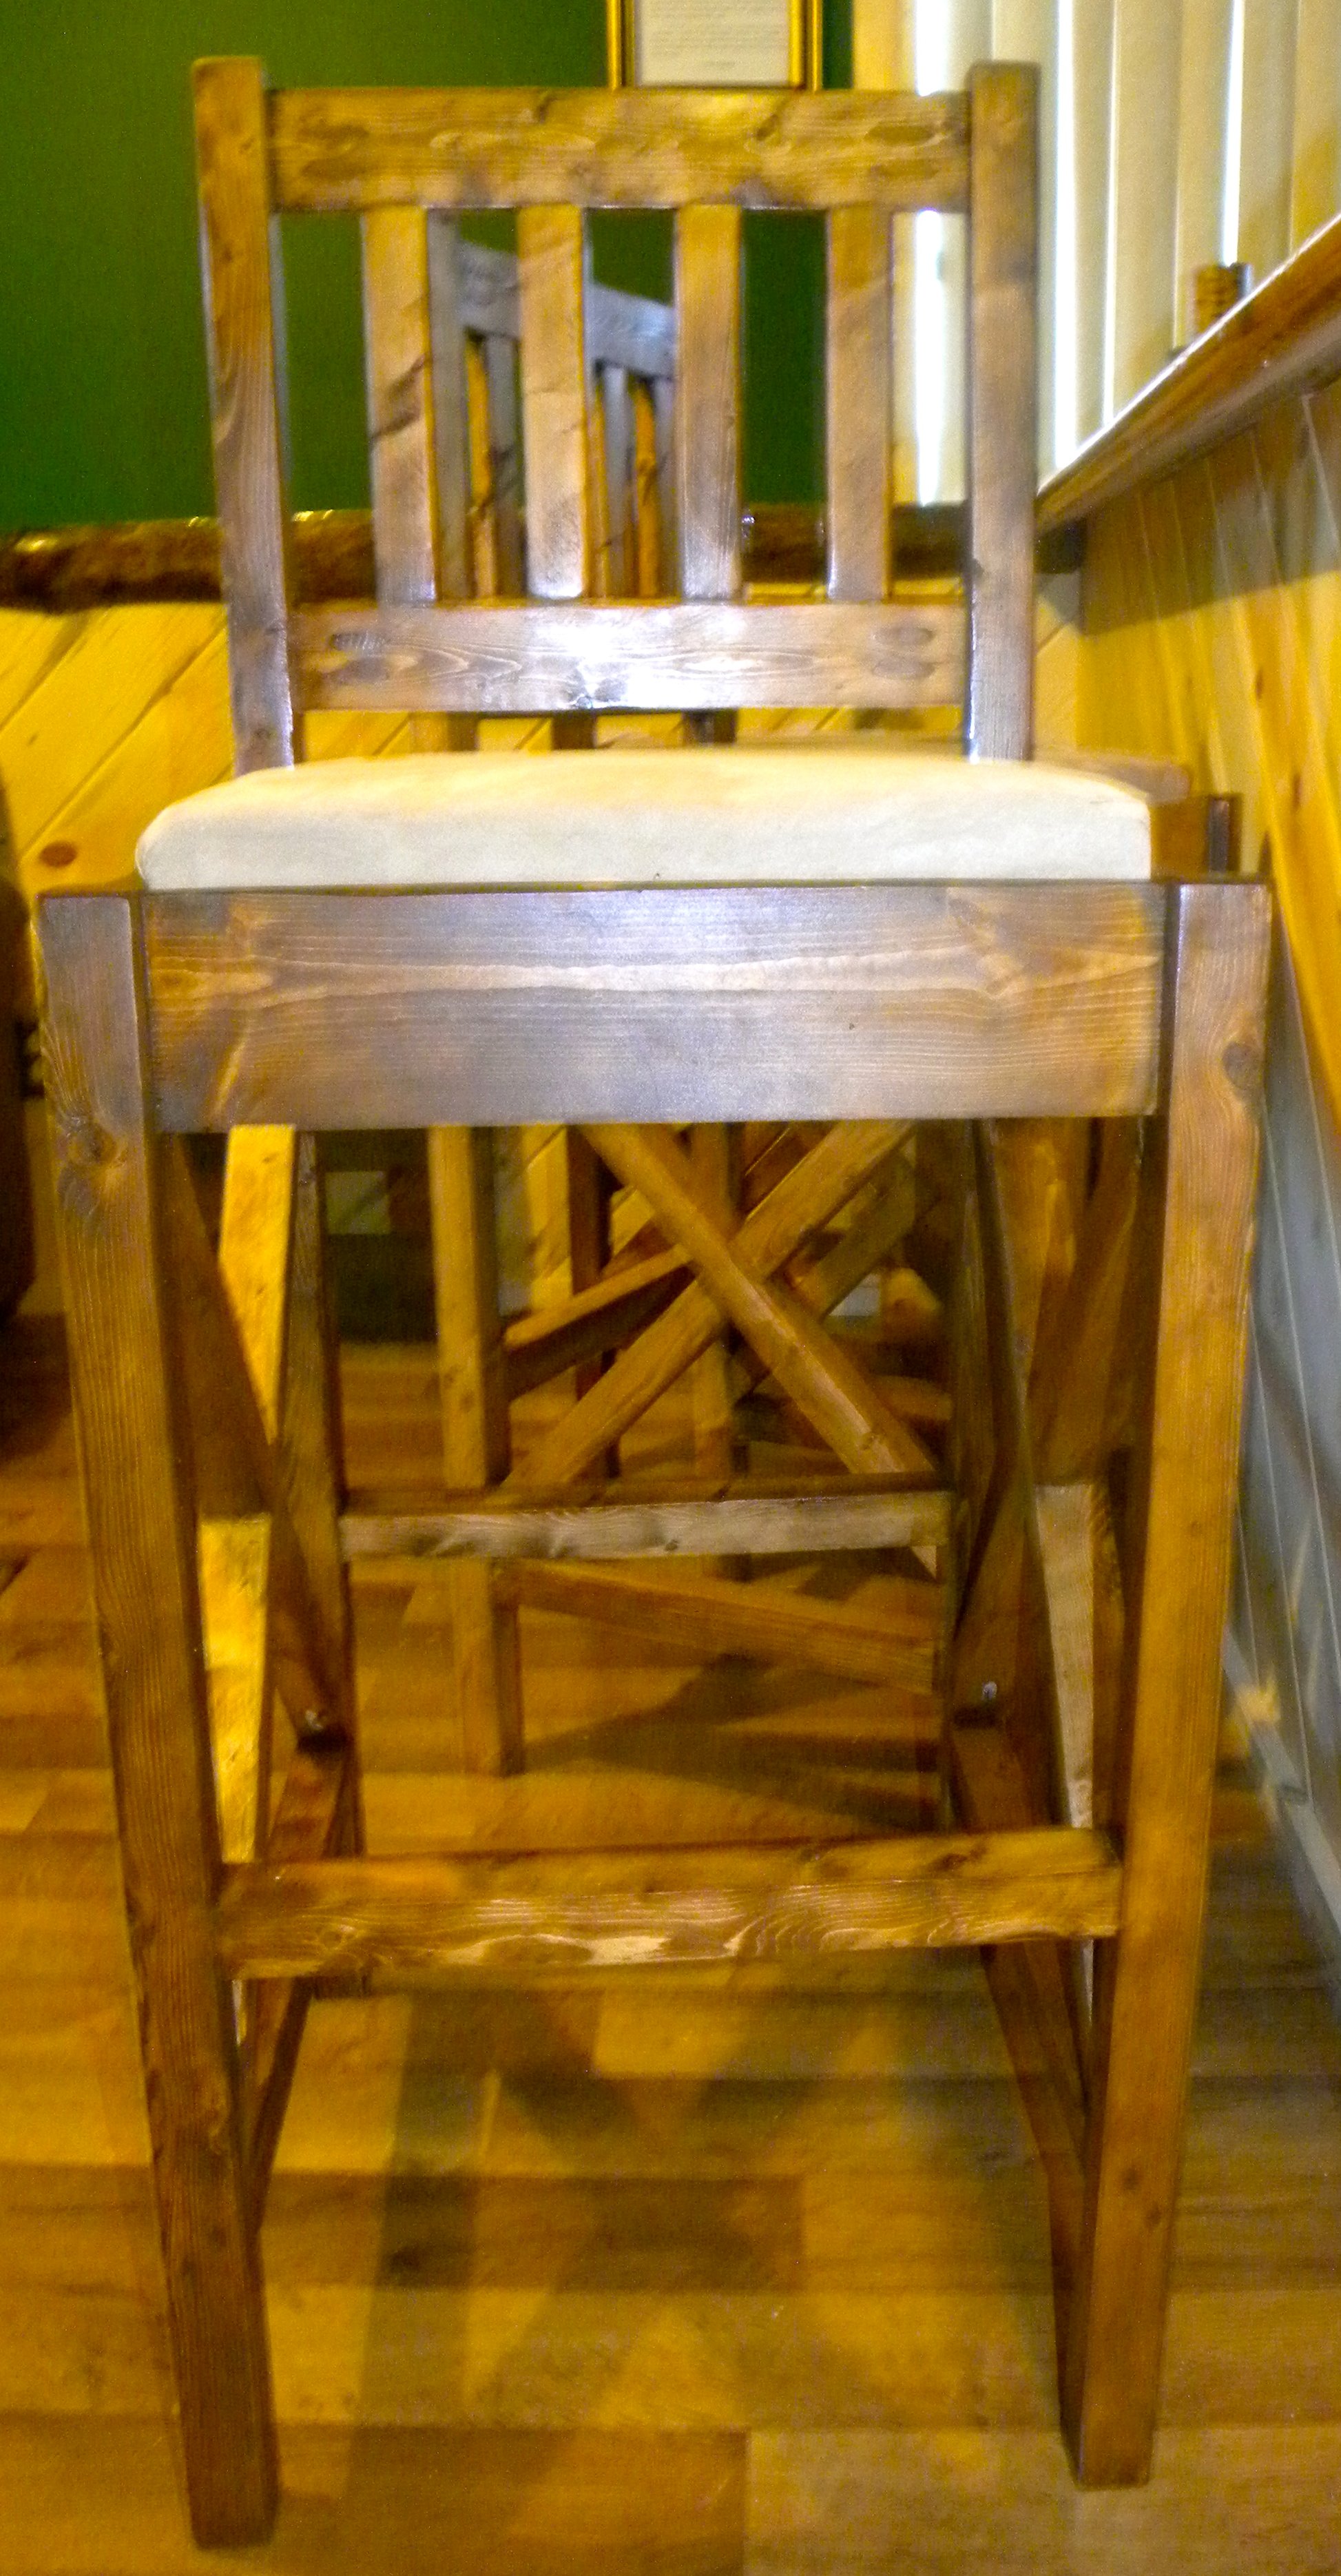
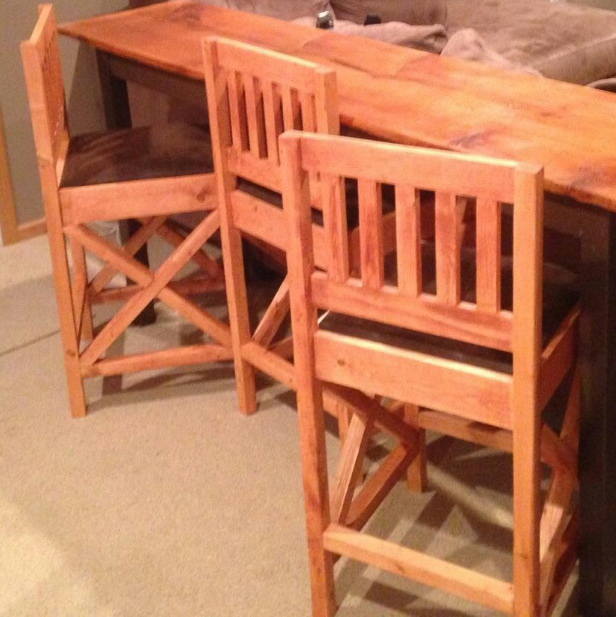
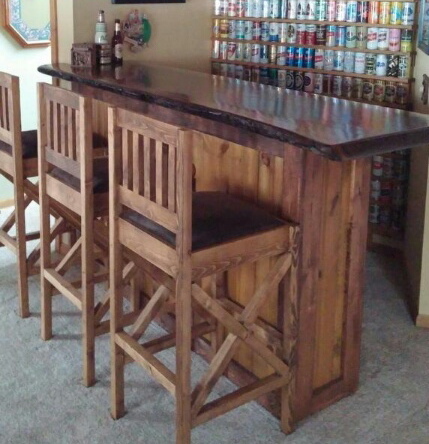
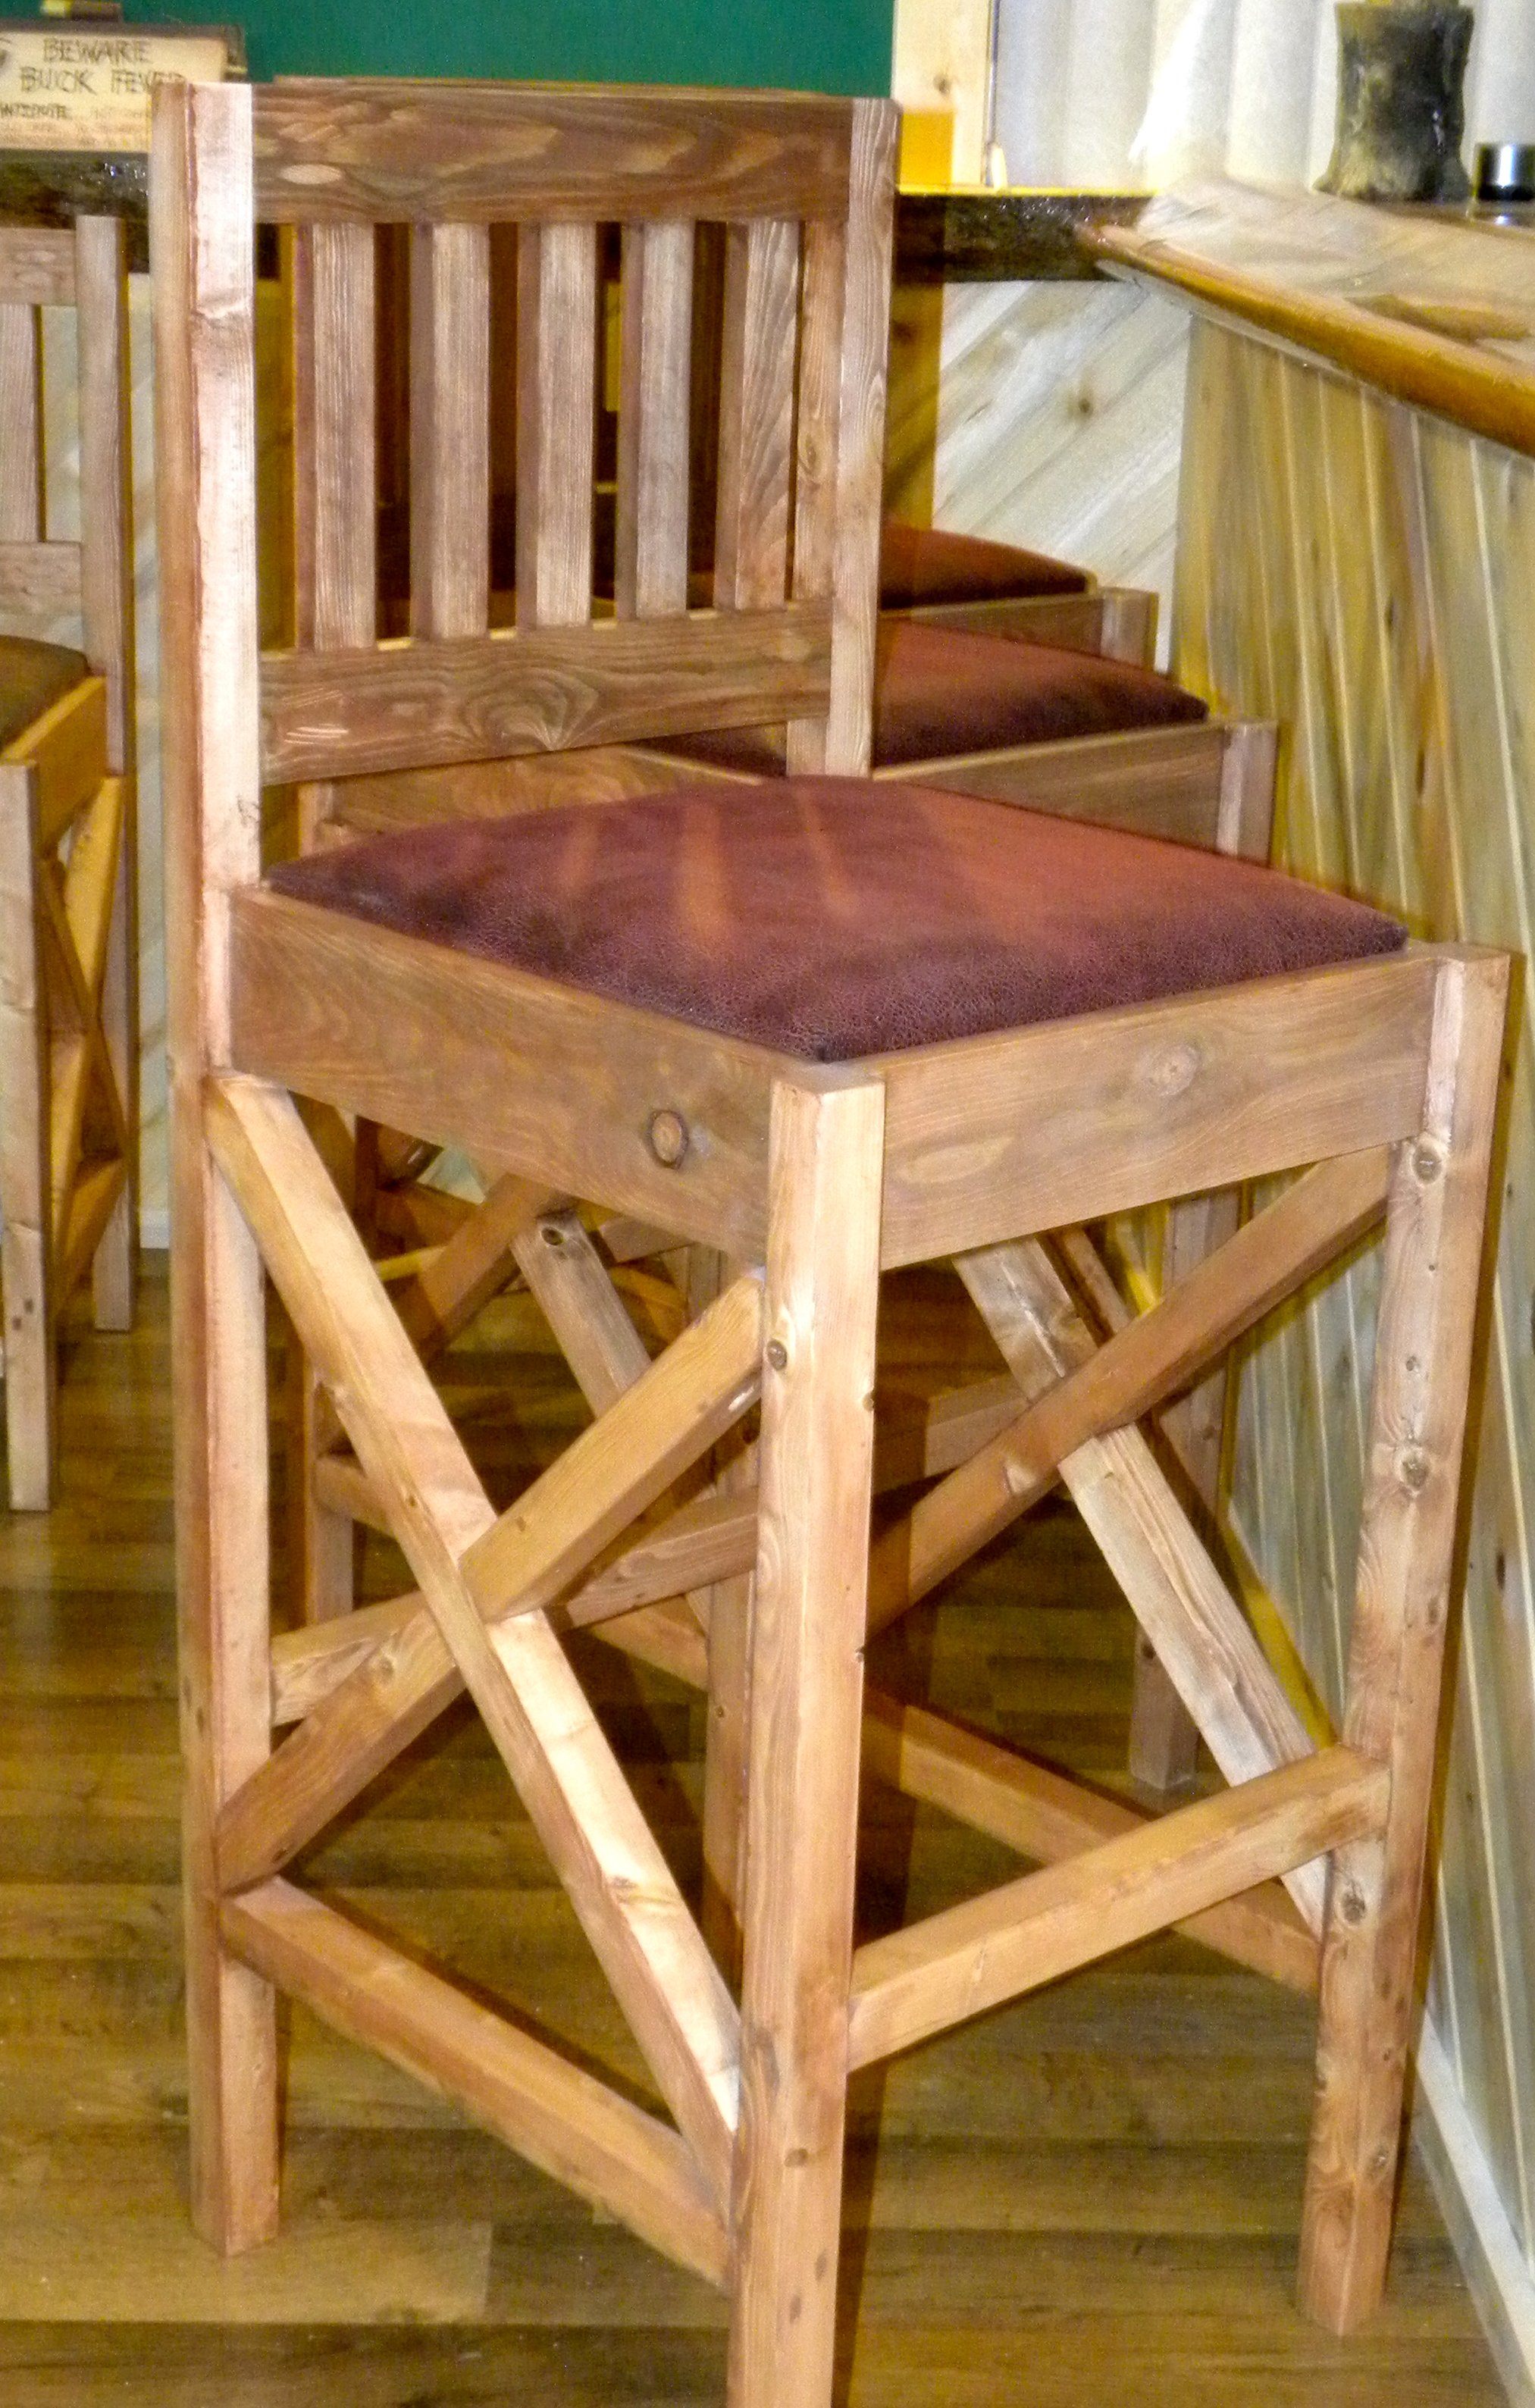
Rustic Bar Stools
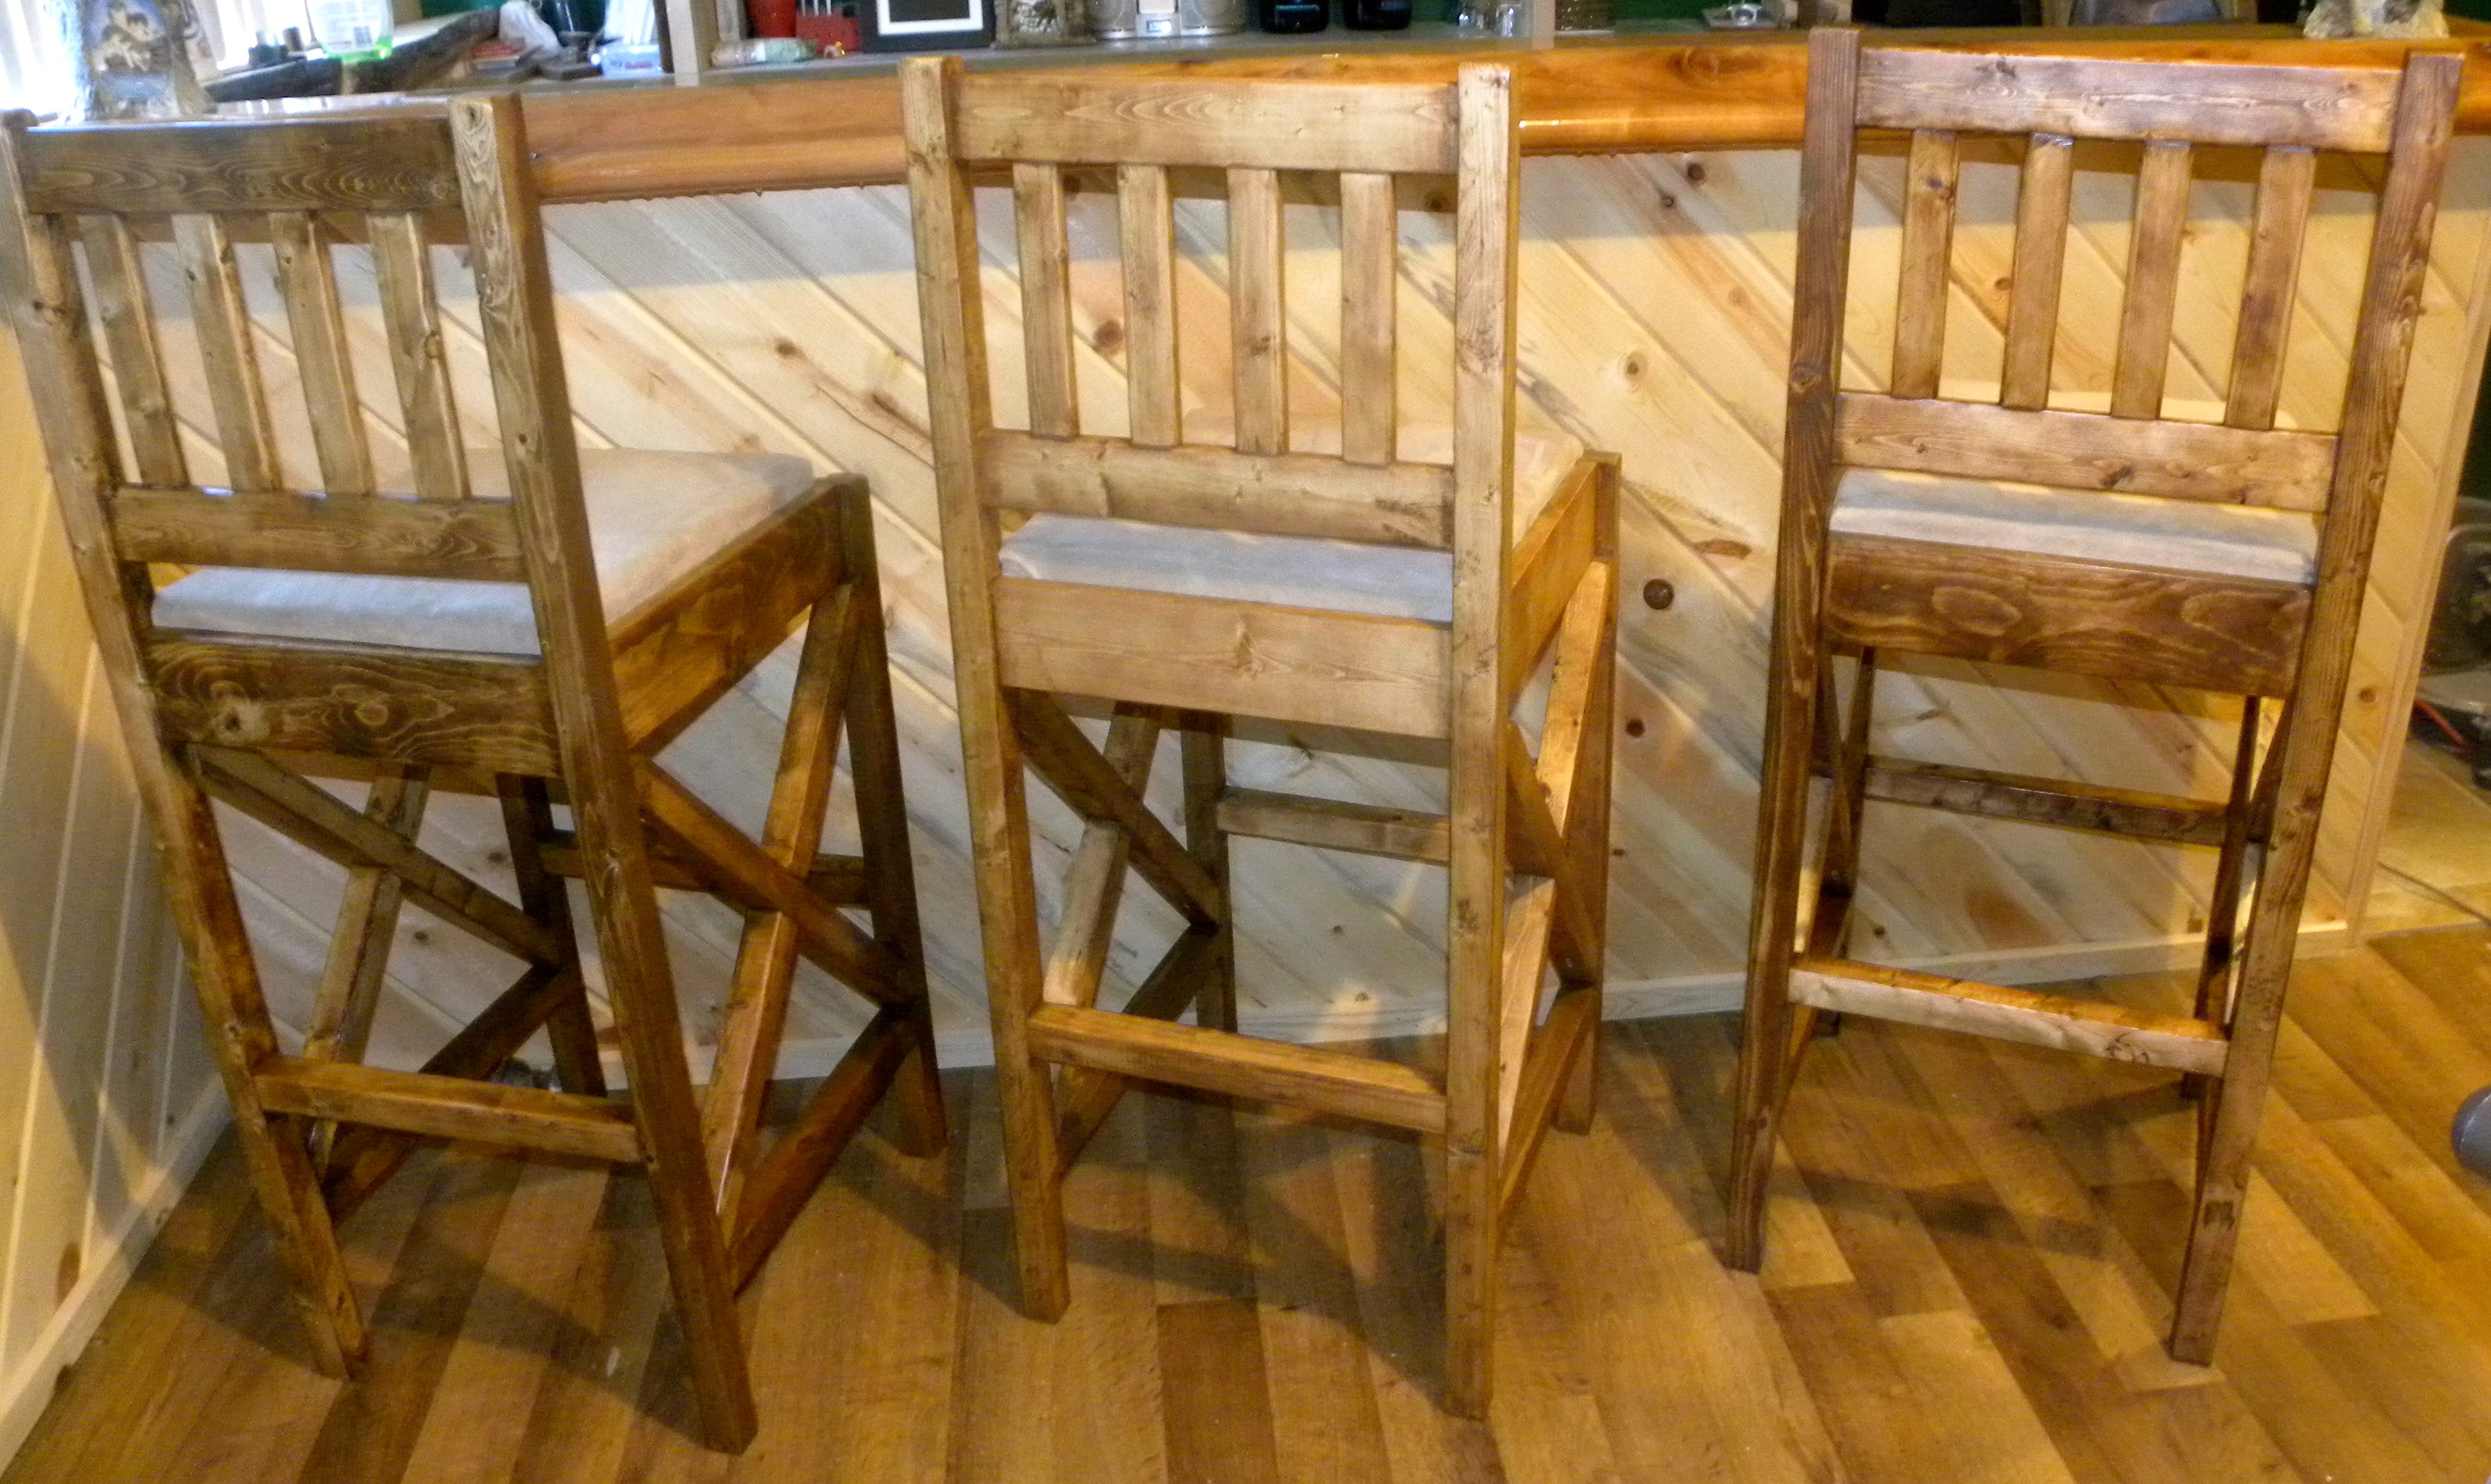
I needed new bar stools for our new bar that we designed and built in our basement family/entertaining room. Regardless of where I was looking, these things are silly expensive. I also wanted a little more of a country/rustic look that would suit my husband and my likes. I used the Vintage Bar Stool plans but my husband isn't a small guy and we have friends that aren't classified under the small frame category either, I needed more structure. After thinking about it for a few days, I liked the rustic X look and used that from so many plans. I also am all about comfort and the padded upholstered seats was a must. Can't wait for my next project. BTW. The cabinets behind the bar also came from here I simply modified for what we needed. We get compliments on it all of the time. Love this website, thank you so much for making simple to read instructions for things I actually want to do.
Built from Plan(s)
Estimated Time Investment
Week Long Project (20 Hours or More)
Finish Used
Minwax Early American
Recommended Skill Level
Starter Project
Comments
Mon, 06/26/2017 - 05:44
Rustix x bar stools
I need to build 24" bar stools with the rustic x look on the side. Do s anyone have plans to make them?

In reply to Rustix x bar stools by Daisypage
Sun, 07/01/2018 - 13:51
I am sorry. I just saw this.
I am sorry. I just saw this. Honestly I don't make any plans, I kind of fly by the seat of my pants. The X's are measured out at the end.
Thu, 12/26/2019 - 03:49
construction question???
These look great. I think that I'll add them to my build list that my wife seems to keep growing for me. How did you attach the back pieces? In the original design it showed pocket holes, but I don't see any on your work. Thanks for the help.
Tim

Sat, 06/06/2020 - 09:58
Bar stool legs notched out or not notched out
Could you please settle a discussion between myself and my husband? Are the legs notched out for the 1x4's to sink in , or are they just attached with pocket holes
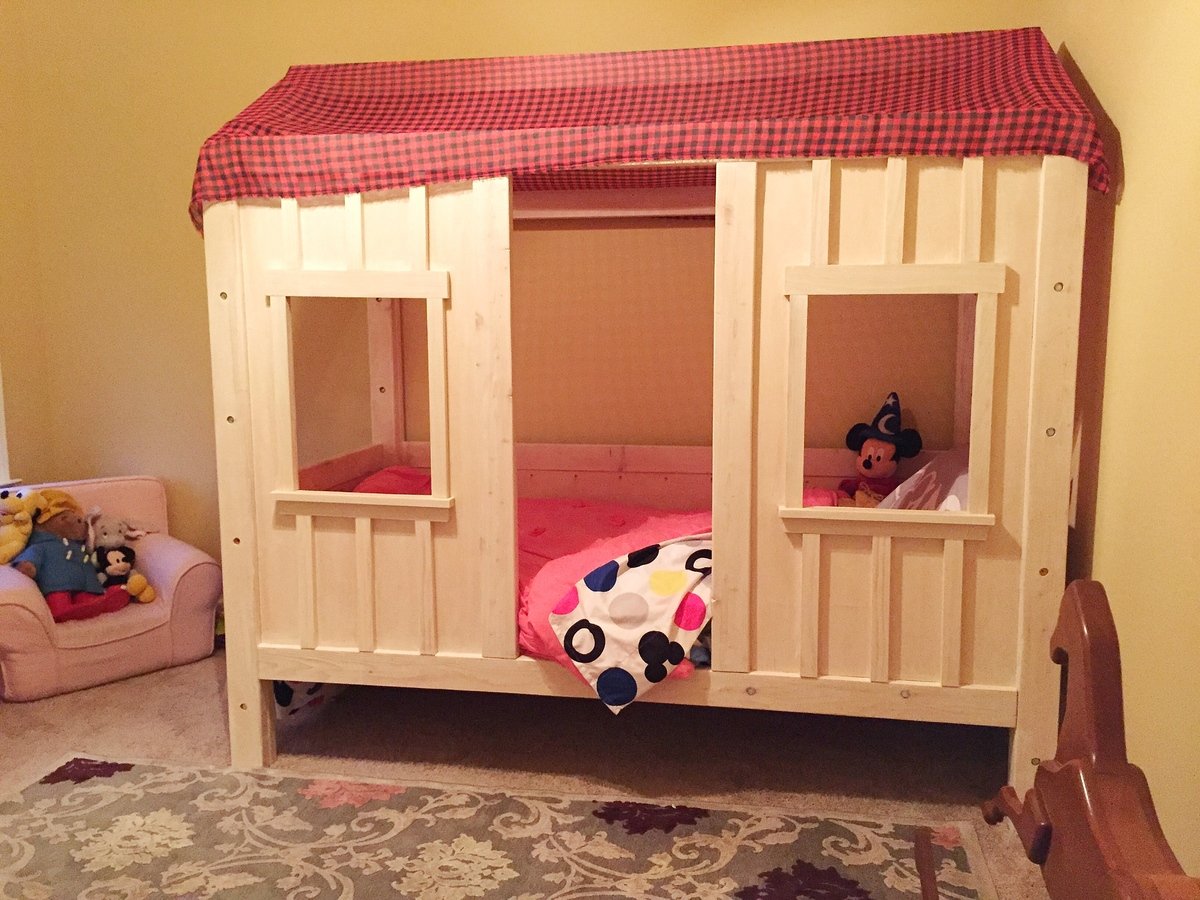
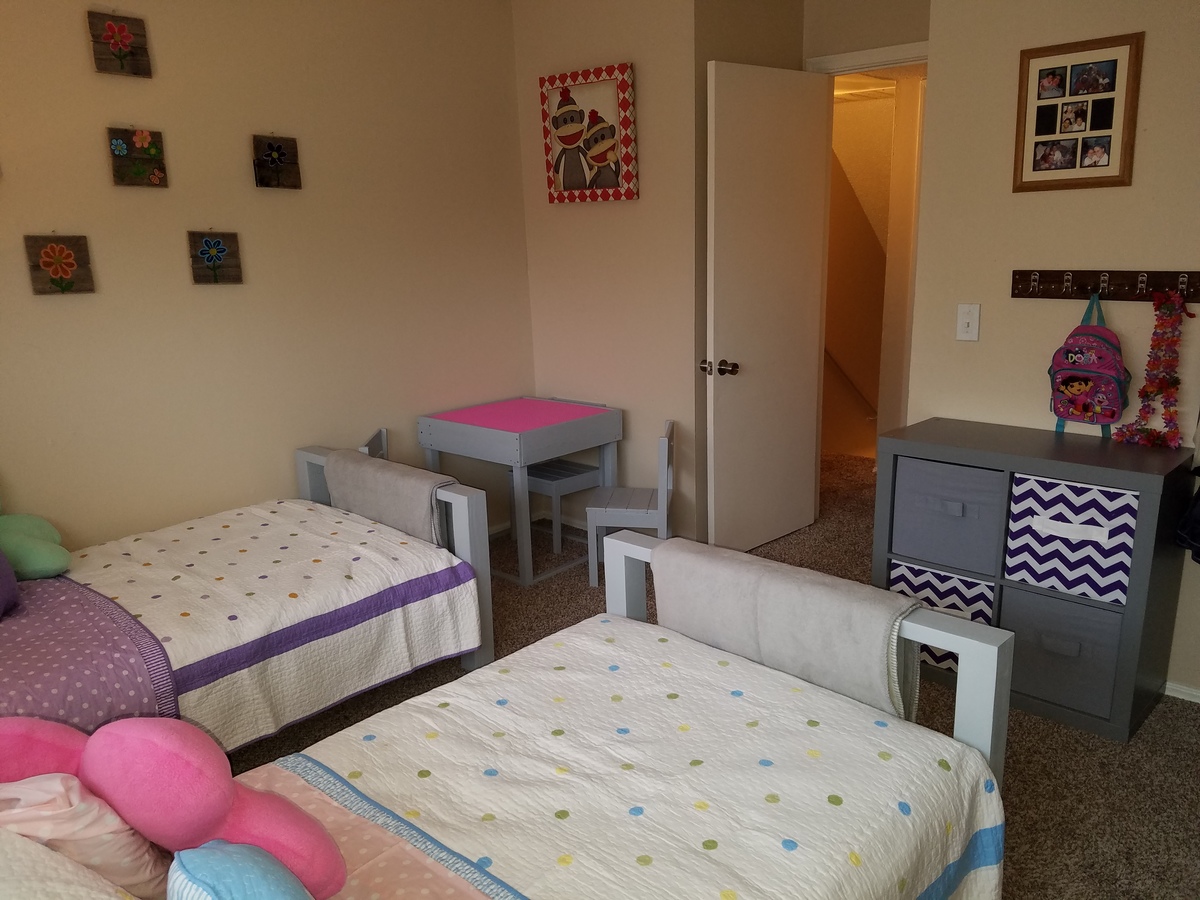
Granddaughters bedroom makeover!
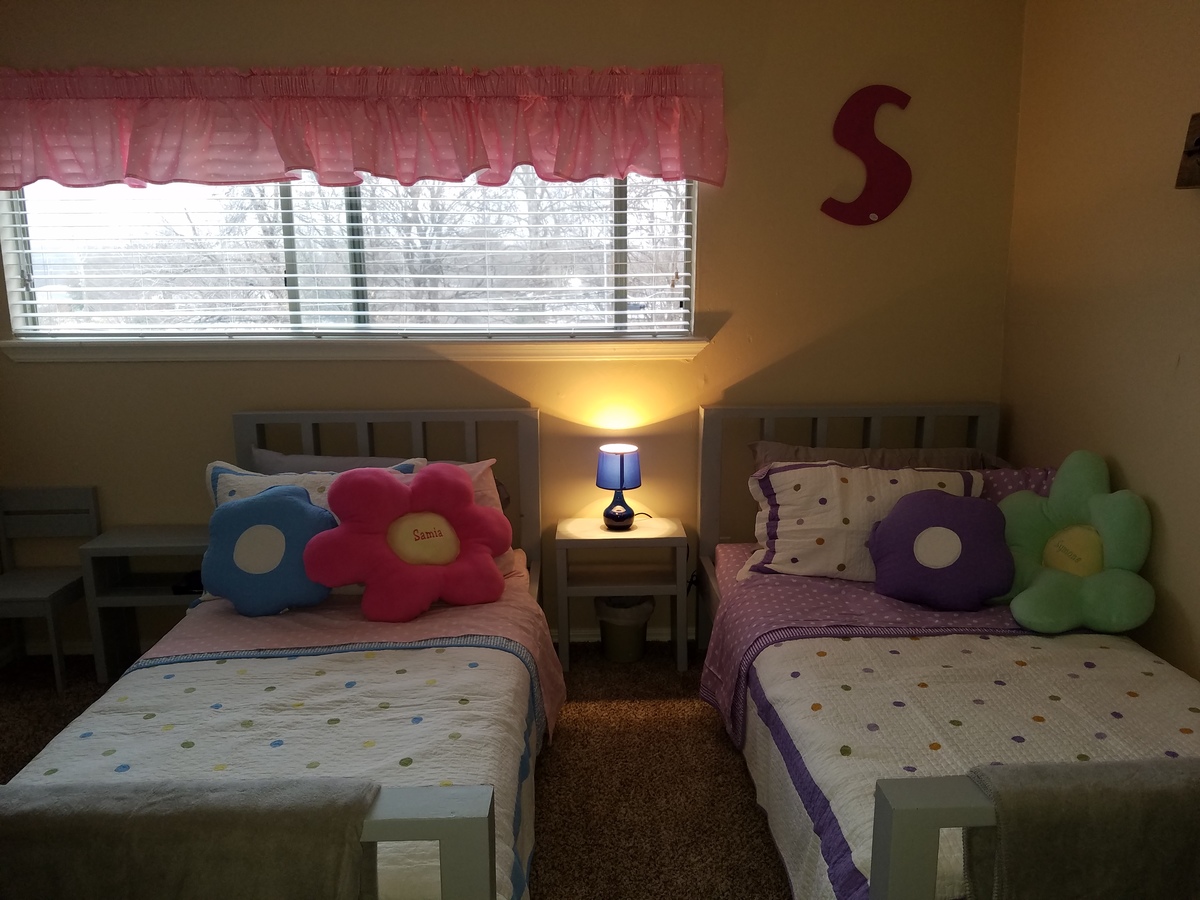
Twin beds, nightstands, play table and chairs all inspired by Ana White plans. I did a lot of improvising as I went along.
This was a Christmas gift for my granddaughter's and my second project.
My sister made the curtain, the personalized flower pillows and the bench cushion.
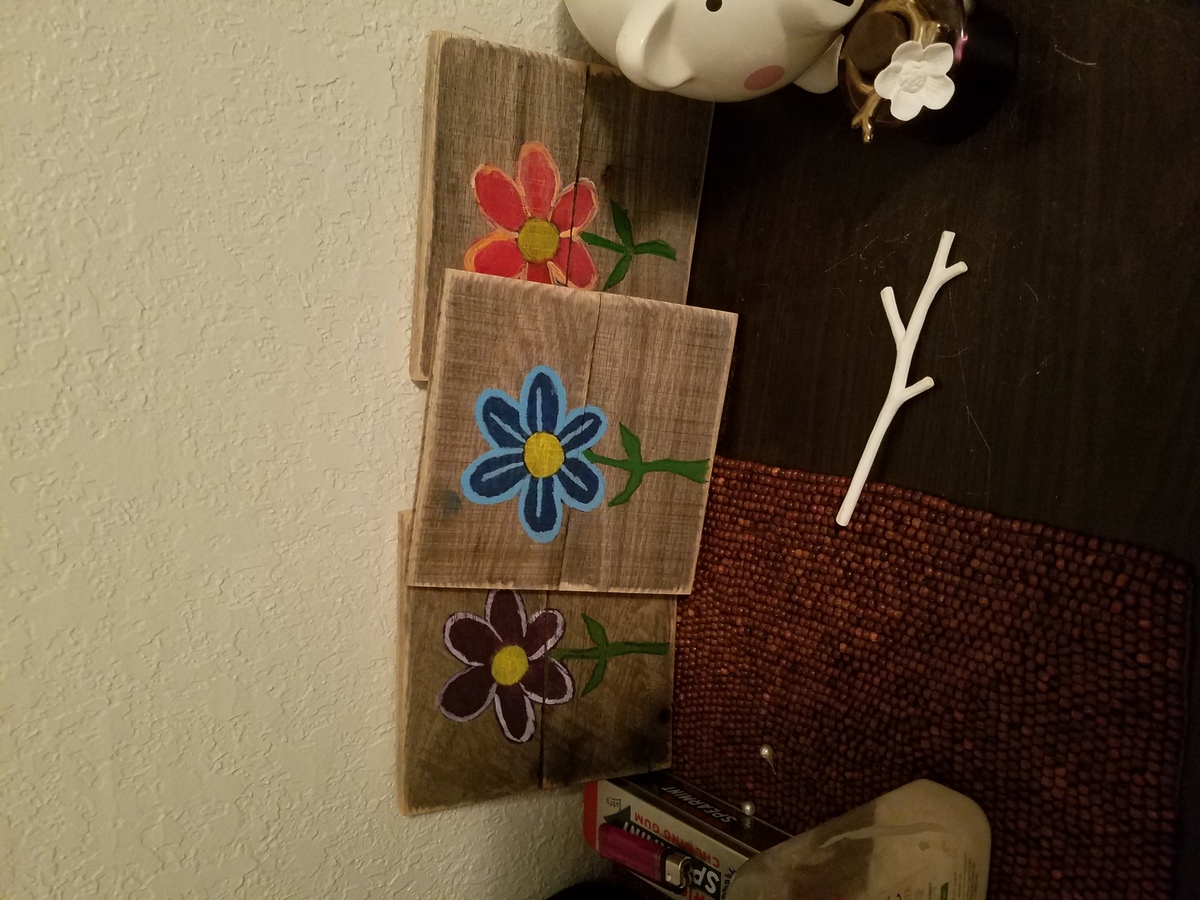
My daughter painted the flower art.

Built from Plan(s)
Estimated Cost
Honestly, I lost track! Guessing around $300. Mostly for hardware, screws, sandpaper and Lego plates.
Estimated Time Investment
Week Long Project (20 Hours or More)
Finish Used
Gray acrylic paint
Recommended Skill Level
Beginner
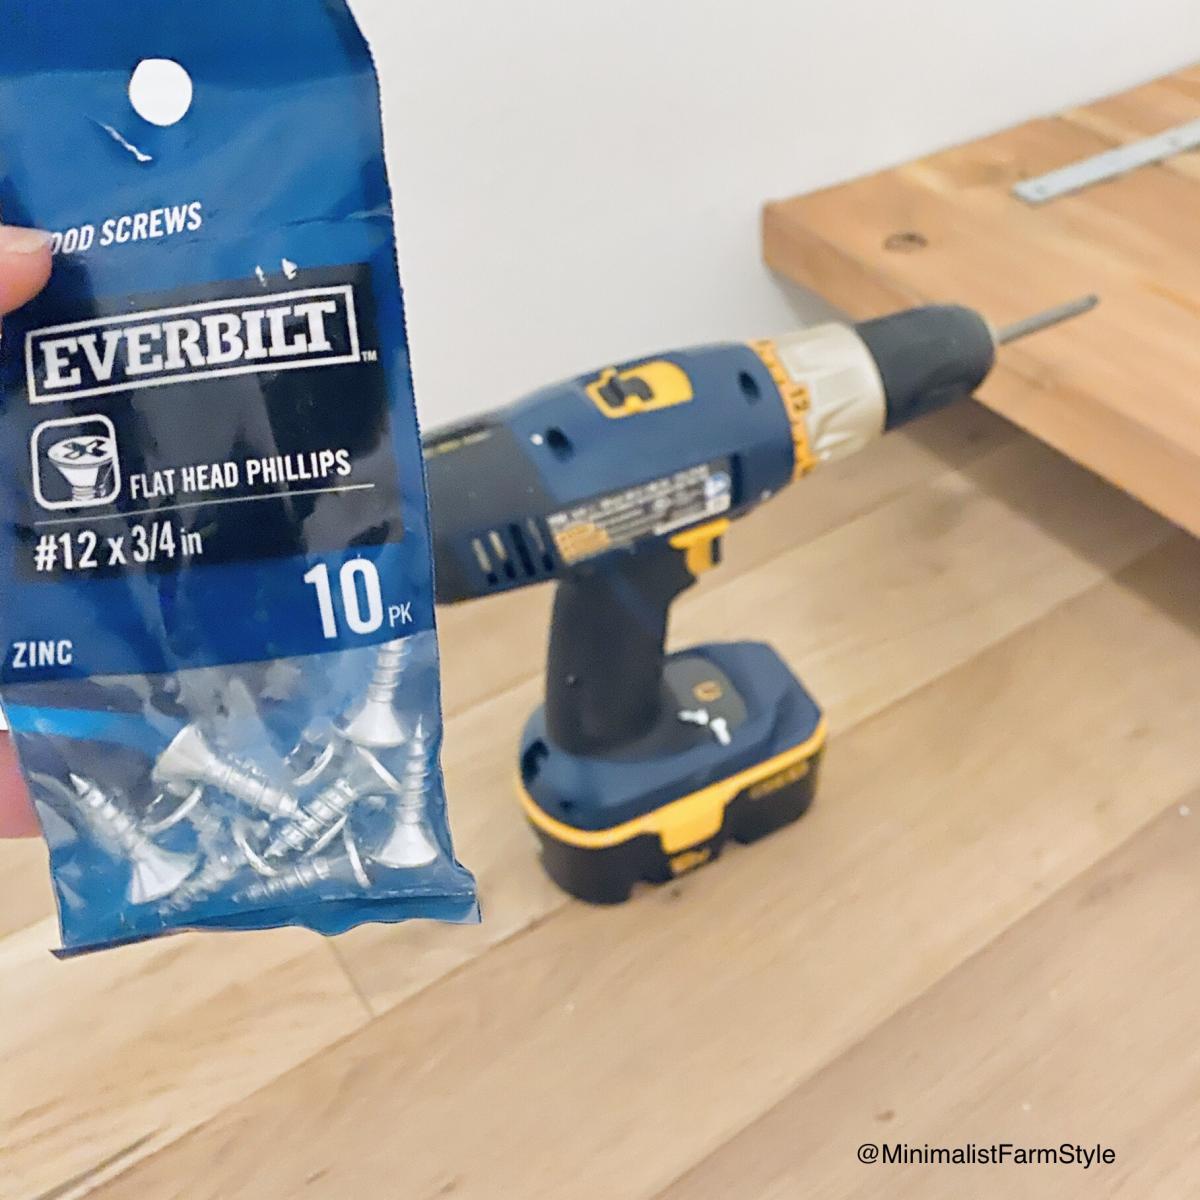
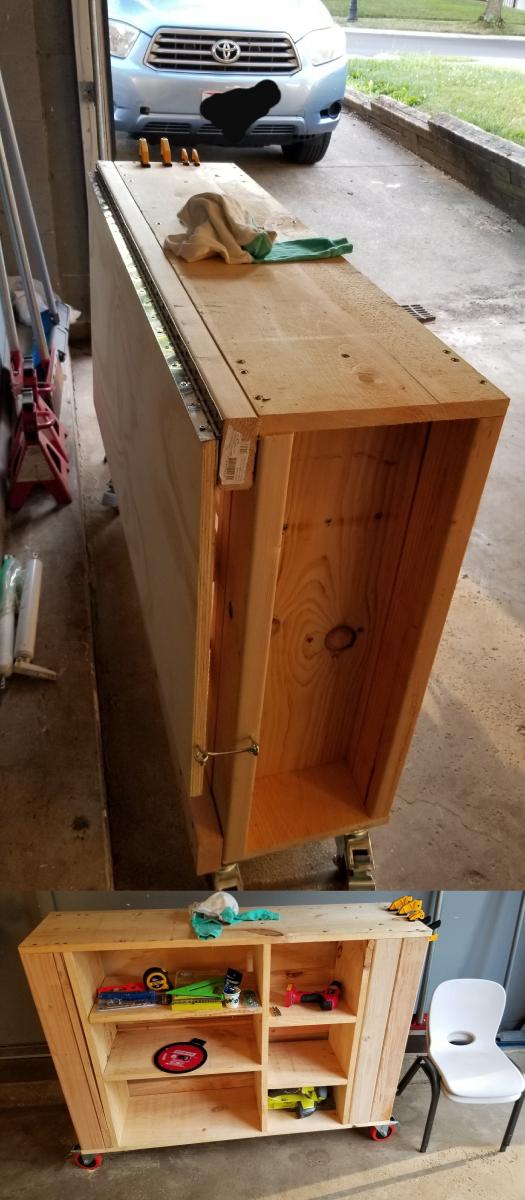
Modified Folding Workbench
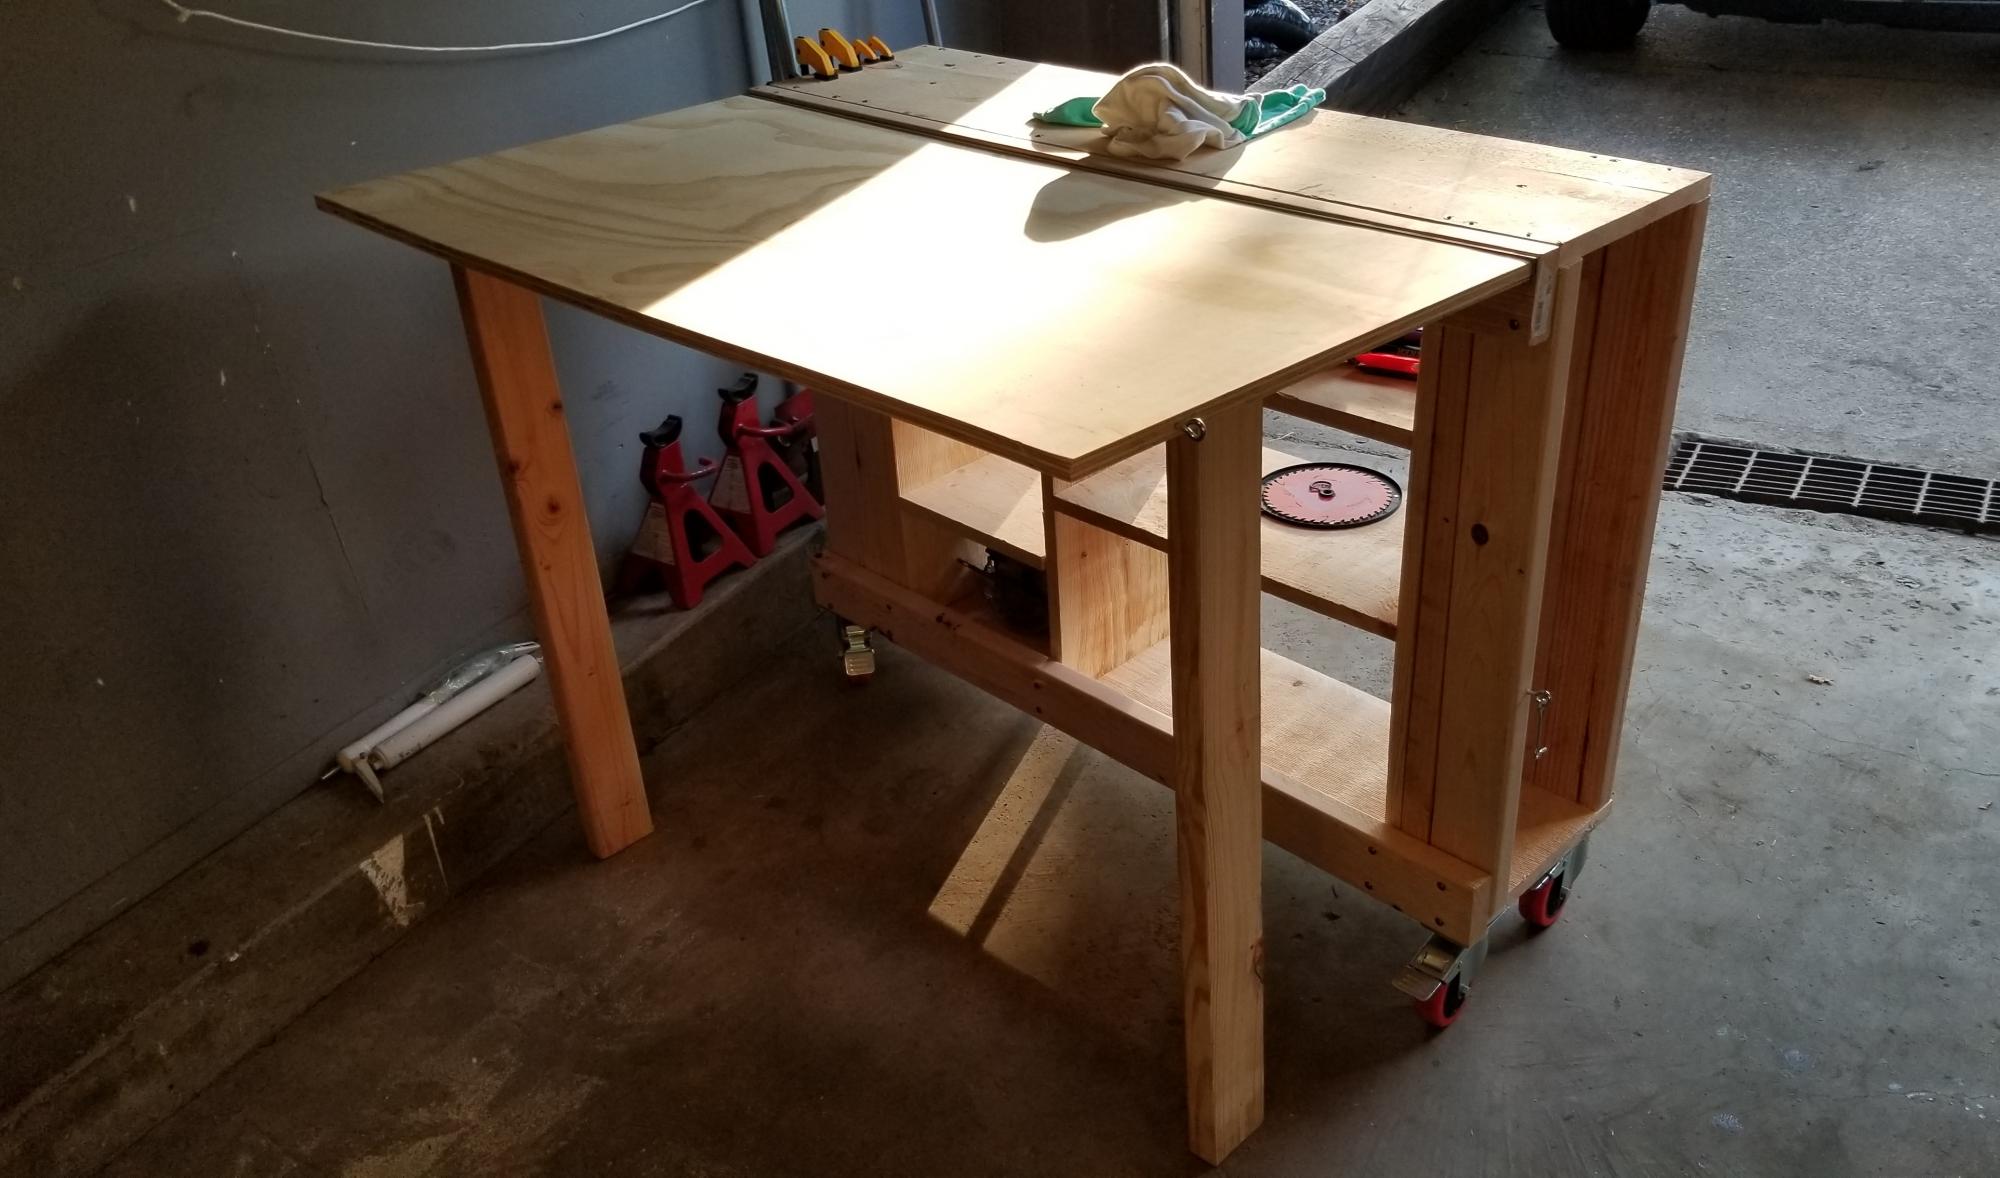
First build of my woodworking journey
Comments
Thu, 09/17/2020 - 10:50
Love seeing first builds!
Workbench is a great place to start, I can't wait to see all the projects that are built on it!
Rustic X Coffee Table
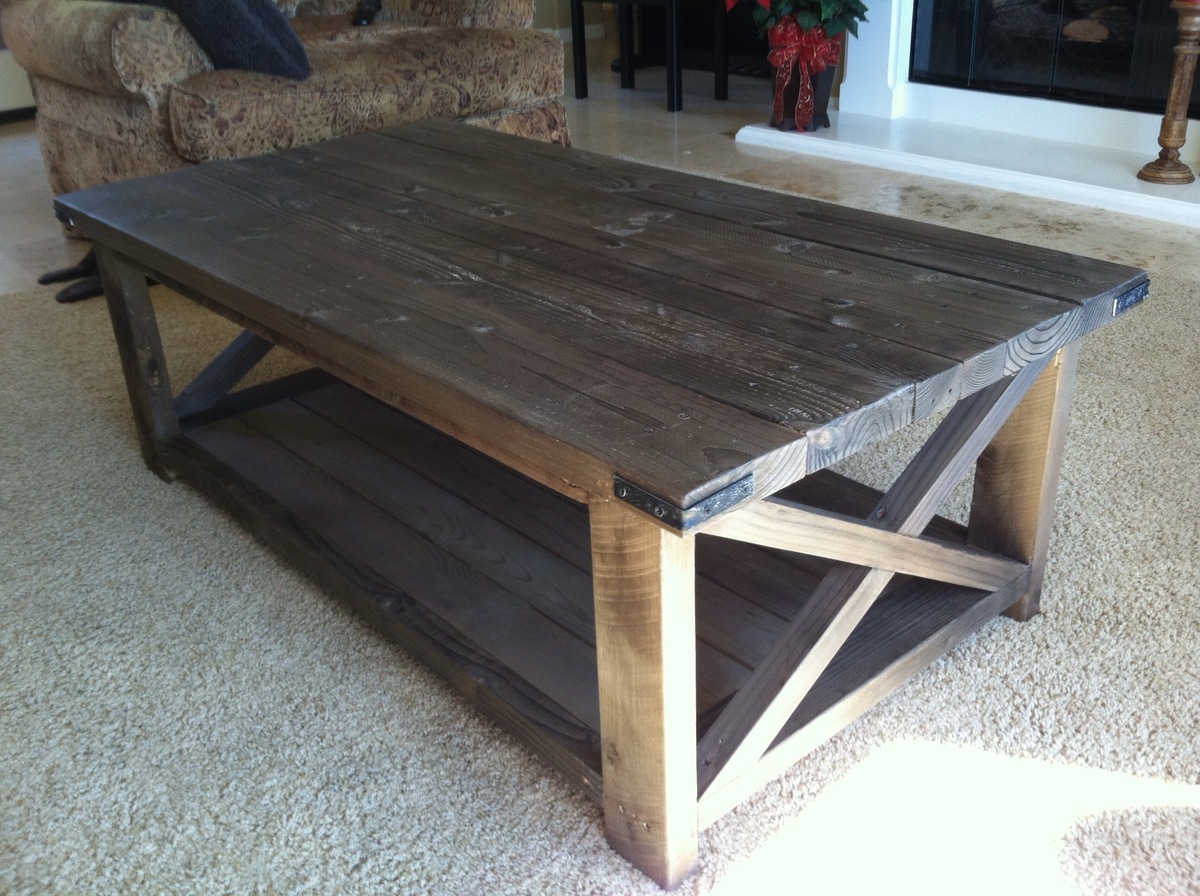
To build my Rustic X coffee table I went about it as cheap as I could. I found all of my wood either through crap piles at lumber yards or from free wood piles on craigslist. The interesting part was trying to find the pieces for the top which I had to improvise with the two 2x3 pieces in the middle of the four 2x6's also instead of using the two 1x42x12 pieces for the bottom shelf I could not find what was asked for so I used a few 1x4's which worked out great. The only other change I made to the plans was to change how the X's attached to the main frame. The original plans wanted the X's to butt up against the sides while I cut them to be flush with the top and bottom of the frame.
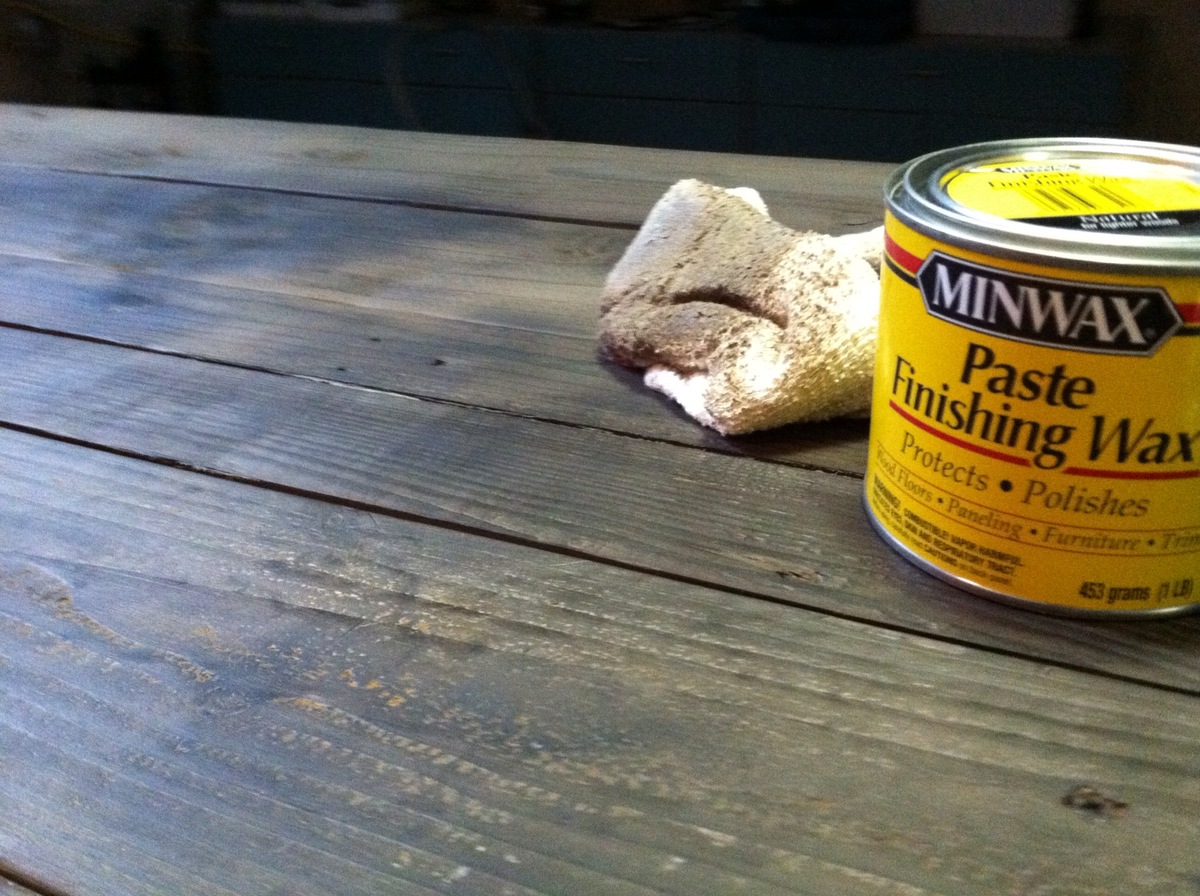
The only things that I purchased were the bracers, steel wool and vinegar and tea for the stain, and the screws. The only tools I own are a measuring tape and a pencil, luckily I have a friend with a full woodshop who helped me out. I followed the instructions on http://thefriendlyhome.blogspot.com/2012/07/how-to-oxidize-wood.html to make the stain. I left a wad of steel wool in white vinegar (about 2/3 of a pasta sauce jar full) for about 5 weeks. After all the cuts had been made and the table put together I sanded it by hand and then stained it. After the stain had dried I waxed the surface with Minwax paste finishing wax. I would love to enjoy my table but for lack of room in my 160 foot dorm room I've had to leave it in a friends apartment for now.
Estimated Cost
Since I found all my wood, I only payed for the stain and screws so roghly $30
Estimated Time Investment
Weekend Project (10-20 Hours)
Finish Used
http://thefriendlyhome.blogspot.com/2012/07/how-to-oxidize-wood.html
I followed this website almost exactly. I left my steel wool in for about 5 weeks. I used an earl grey tea and put on 2 coats for the whole table except for the lighter pine which made up the bottom shelf in which I put on 3 coats, I now wish that I had put on four or five to get the colors closer, these ended up lighter than the rest of the table. I did not sand the table after I applied the tea. After the tea dried I then applied the oxidizing agent to the entire piece. I put on a second coat of oxidizing agent to the bottom shelf which did not seem to make a huge difference. After this had dried I took a old rag and the minwax finishing paste and went to town on the top. I put on two coats for the top and just a single coat everywhere else (CAREFUL THIS STUFF IS POWERFUL APPLY IT IN A WELL VENTILATED AREA) oh and you might want to work out for a good month if you are planning on buffing by hand, I was sore! When I was done with this I let it dry and brought it inside to show it off. To my dismay I woke up the next morning to discover that my little brother and his friends had spilled something on the table that ruined the stain, this was extremely disappointing, but I took it back out and resanded the stained part and reapplied the tea, oxidizing agent and wax. The redone spot ended up close to the rest of the table but no one else could tell because it is supposed to look rustic. My other frustration was that my friends burnt a candle in a glass jar on the table which kind of burnt a half ring on the table top, but again it just adds to the rustic look I guess.
I followed this website almost exactly. I left my steel wool in for about 5 weeks. I used an earl grey tea and put on 2 coats for the whole table except for the lighter pine which made up the bottom shelf in which I put on 3 coats, I now wish that I had put on four or five to get the colors closer, these ended up lighter than the rest of the table. I did not sand the table after I applied the tea. After the tea dried I then applied the oxidizing agent to the entire piece. I put on a second coat of oxidizing agent to the bottom shelf which did not seem to make a huge difference. After this had dried I took a old rag and the minwax finishing paste and went to town on the top. I put on two coats for the top and just a single coat everywhere else (CAREFUL THIS STUFF IS POWERFUL APPLY IT IN A WELL VENTILATED AREA) oh and you might want to work out for a good month if you are planning on buffing by hand, I was sore! When I was done with this I let it dry and brought it inside to show it off. To my dismay I woke up the next morning to discover that my little brother and his friends had spilled something on the table that ruined the stain, this was extremely disappointing, but I took it back out and resanded the stained part and reapplied the tea, oxidizing agent and wax. The redone spot ended up close to the rest of the table but no one else could tell because it is supposed to look rustic. My other frustration was that my friends burnt a candle in a glass jar on the table which kind of burnt a half ring on the table top, but again it just adds to the rustic look I guess.
Recommended Skill Level
Intermediate
Comments
Mon, 12/10/2012 - 10:51
That table looks great! I
That table looks great! I agree, any imperfections in the table just add to the rustic look. And it doesn't get any better than free. :)
Mon, 12/10/2012 - 15:47
Stain saving solution
Your coffee table looks awesome, and it's so great that you were able to get free/cheap lumber. I wanted to share a little info that I learned about the vinegar stain. I used it on a picture frame and wanted a little more weathered look. I had read that lemon juice will reverse the oxidation, and sure enough, it did just that. I ended up with a beautiful frame with streaks of natural wood through it, where I brushed on some lemon juice. Perhaps your brother and friend spilled lemonade or other citrus drink that reversed the oxidation.
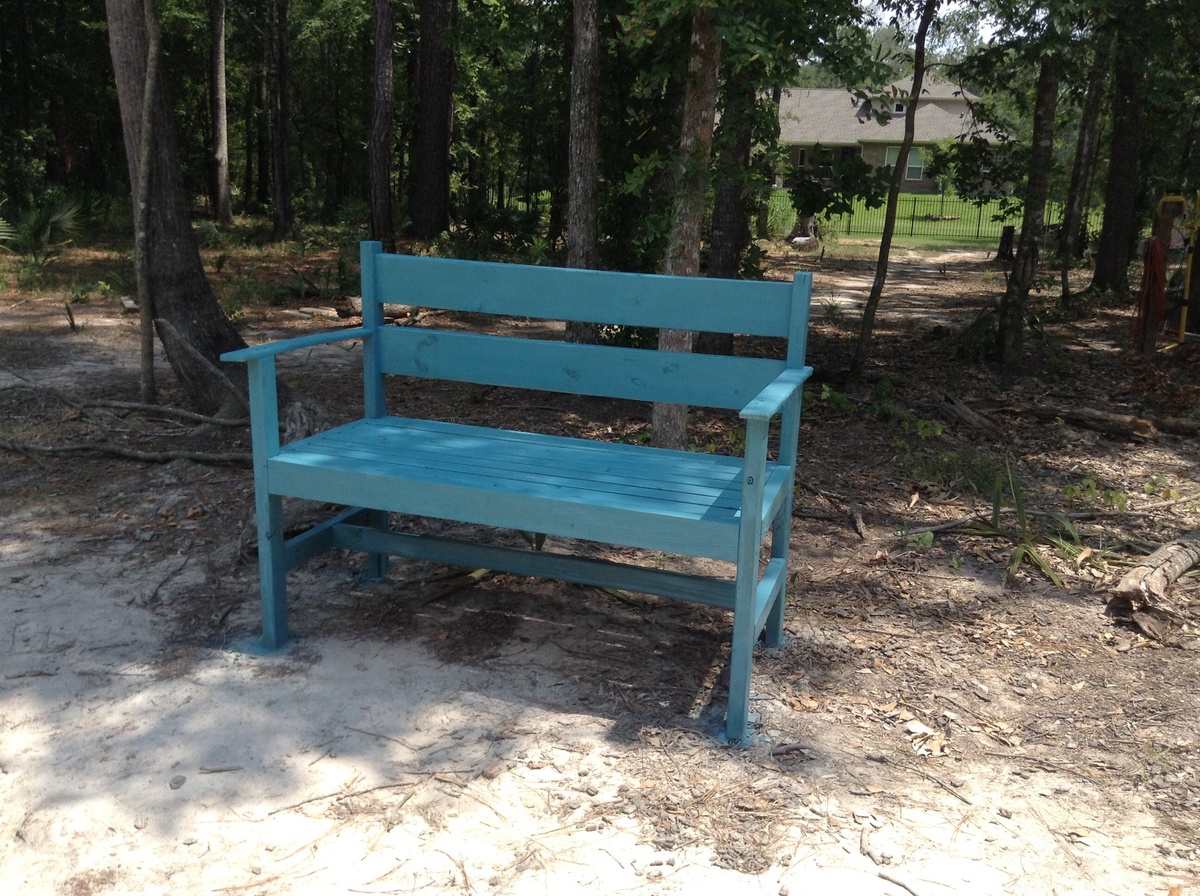
Outdoor Bench
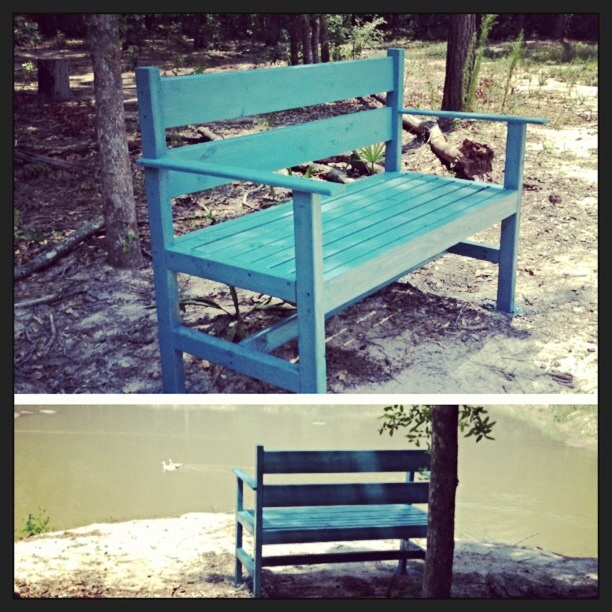
Built from Garden Bench plans. Pretty much exactly as written. I modified the arms a bit.
The seat is a little deep, but it's really great to sit out and watch the ducks by the pond. It's really heavy, so I needed help from the hubs to move it down there. On the other hand I don't worry about it floating away during occasional high water through the flood way.
It's used almost every day!

Built from Plan(s)
Estimated Time Investment
Day Project (6-9 Hours)
Recommended Skill Level
Beginner
Farmhouse Table
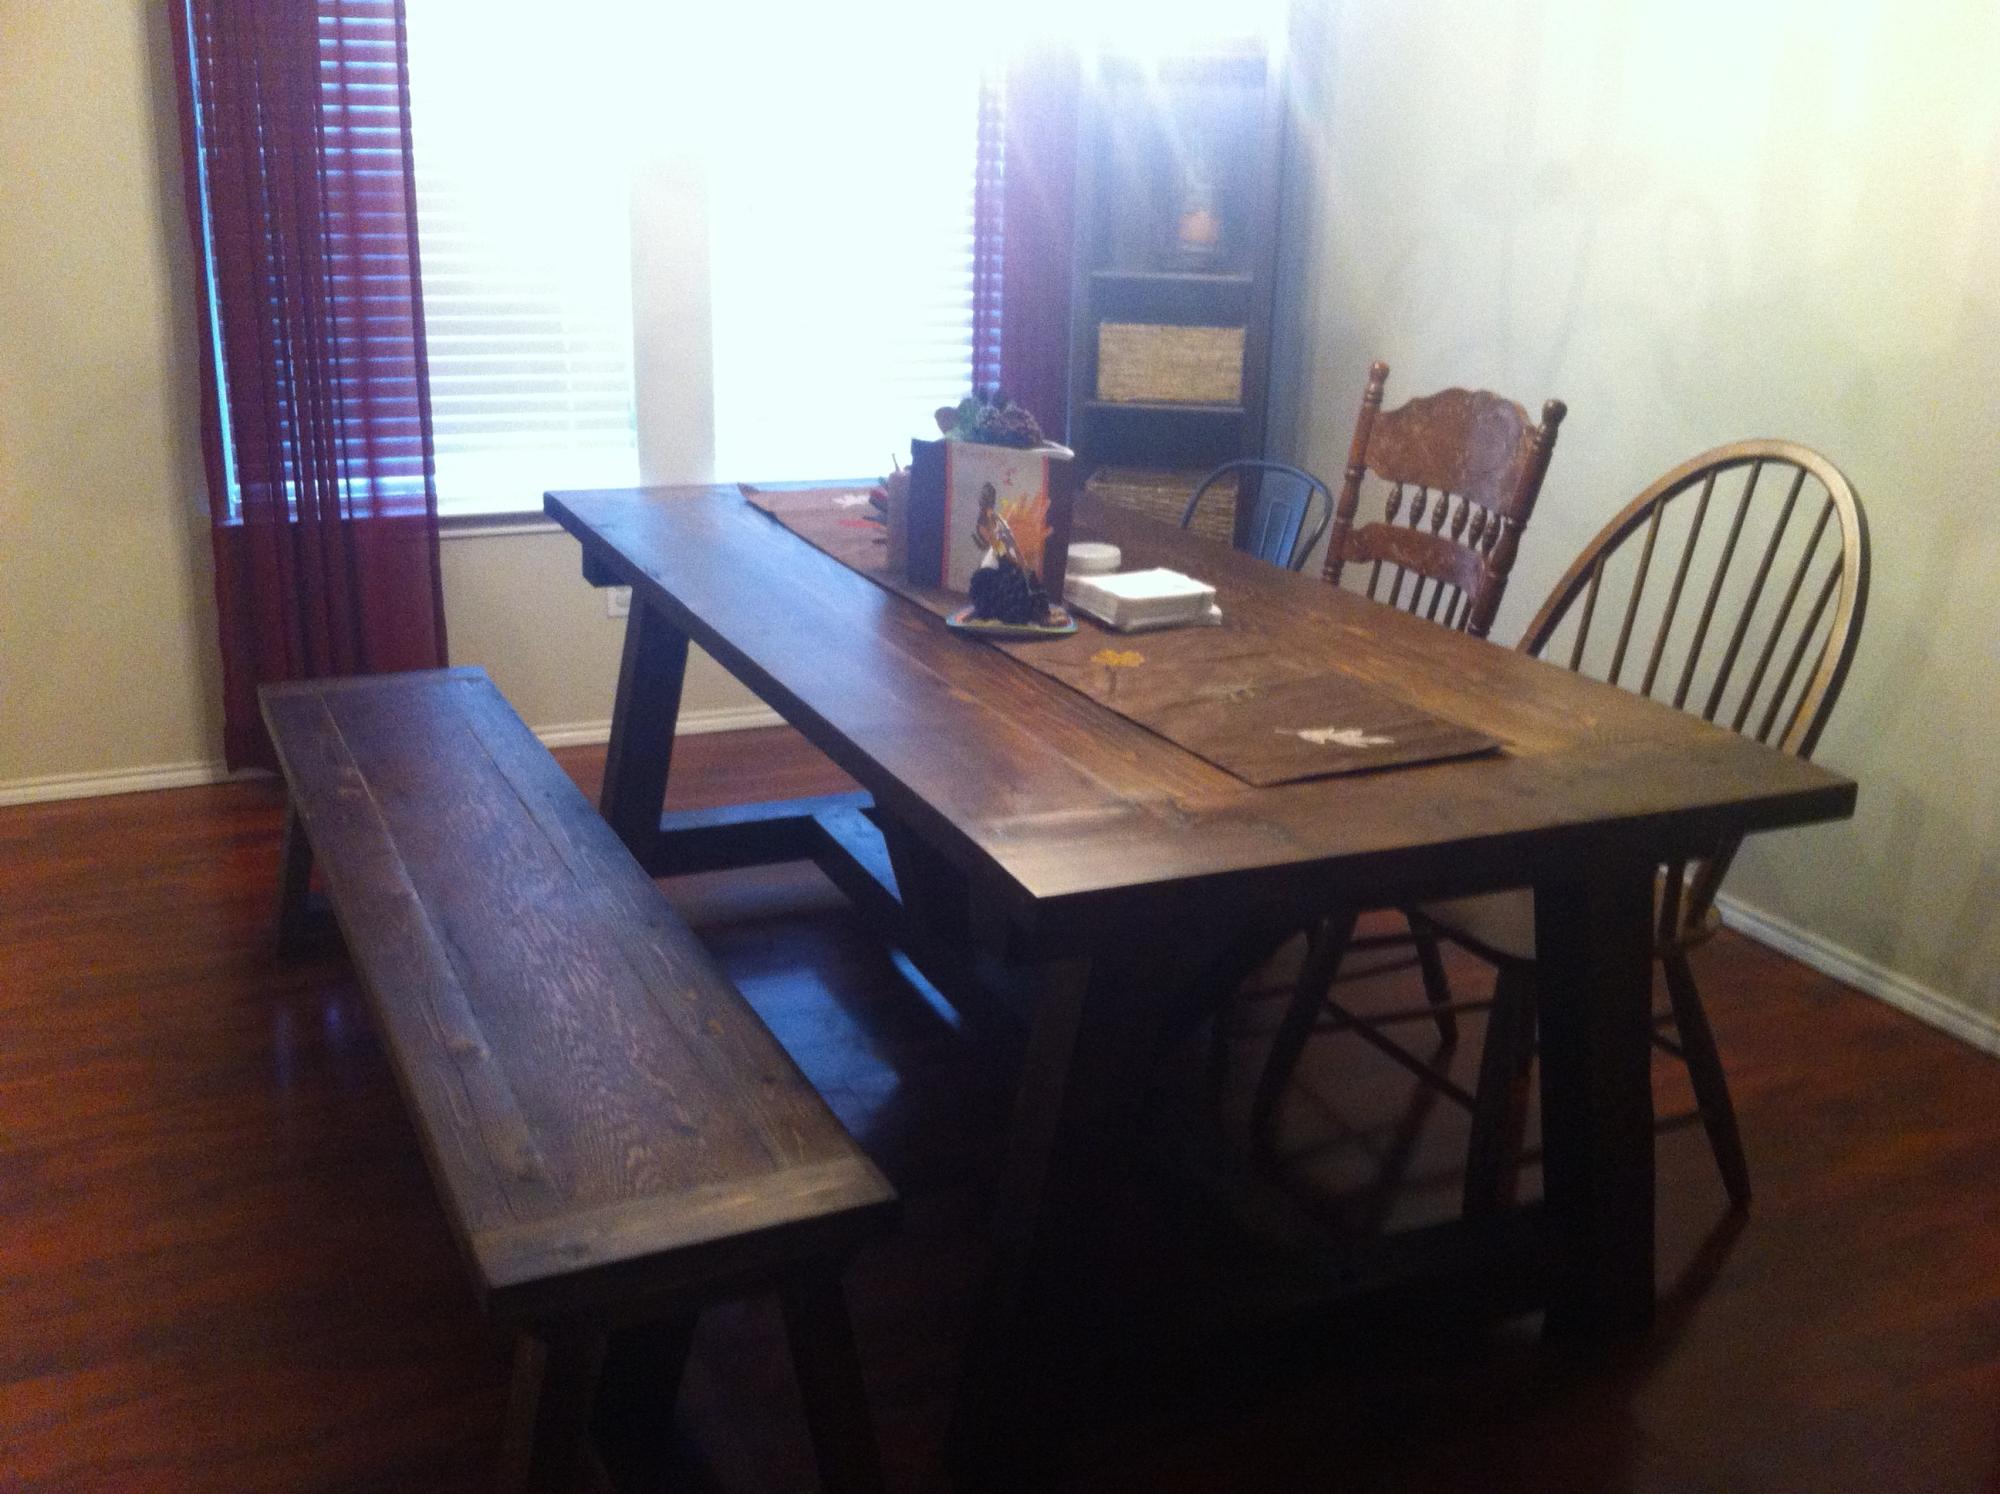
The plans provided for the table and bench were excellent. I also had help from people in the local Lowes lumber department who talked me in to using cedar. They also recommended using lag screws where possible so (for the table) I ended up using lag screws in some places where the pocket screws were recommended.
Built from Plan(s)
Estimated Time Investment
Week Long Project (20 Hours or More)
Recommended Skill Level
Beginner
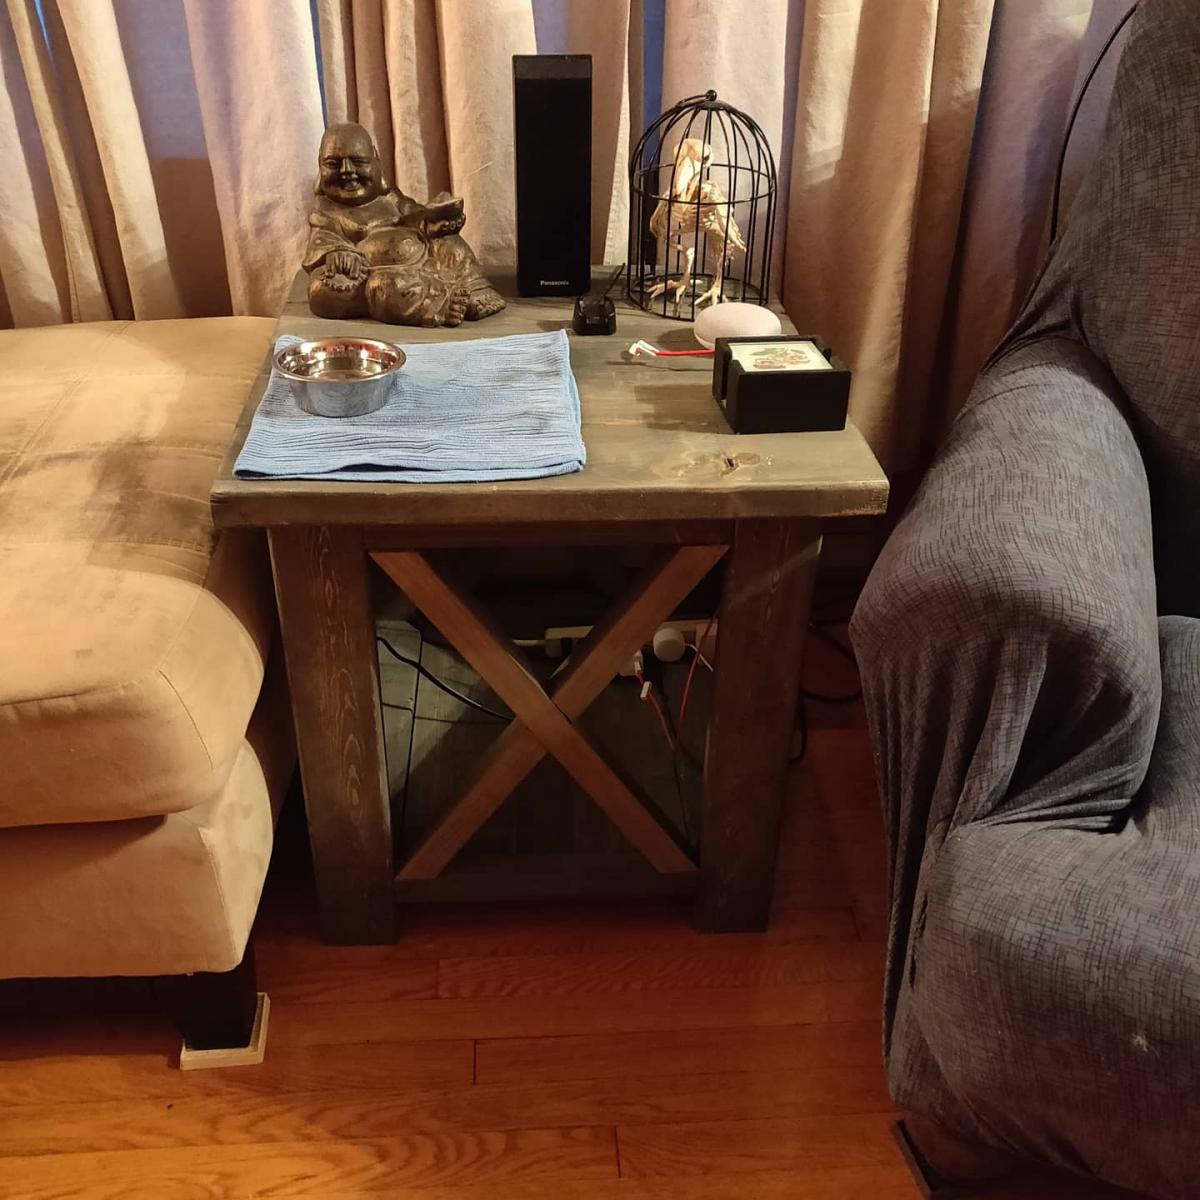
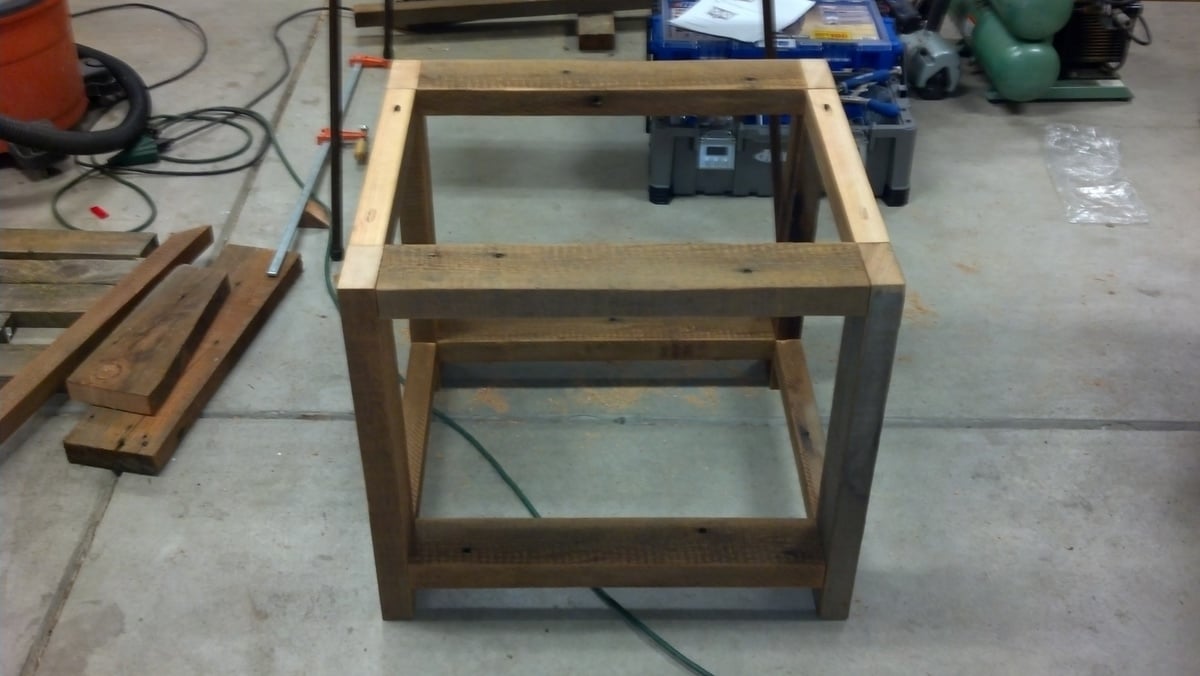
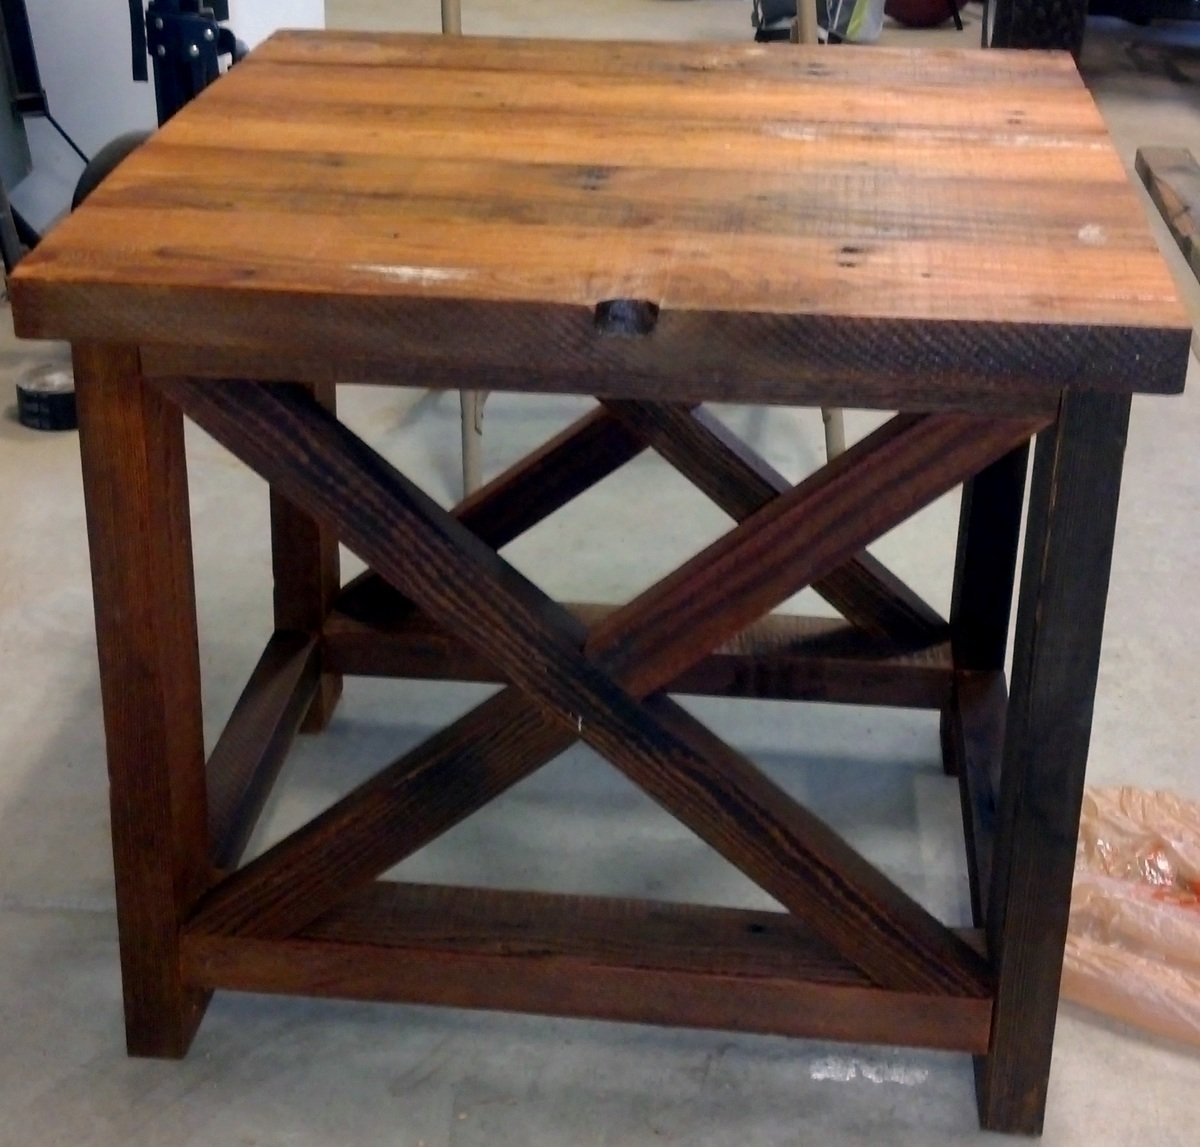
Rustic X end table
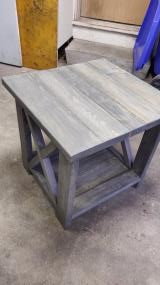
Modified the end table to fit my dimensions. This was project number two of three so $ estimate may not be accurate
Built from Plan(s)
Estimated Cost
$60
Estimated Time Investment
Afternoon Project (3-6 Hours)
Finish Used
Charcoal grey stain
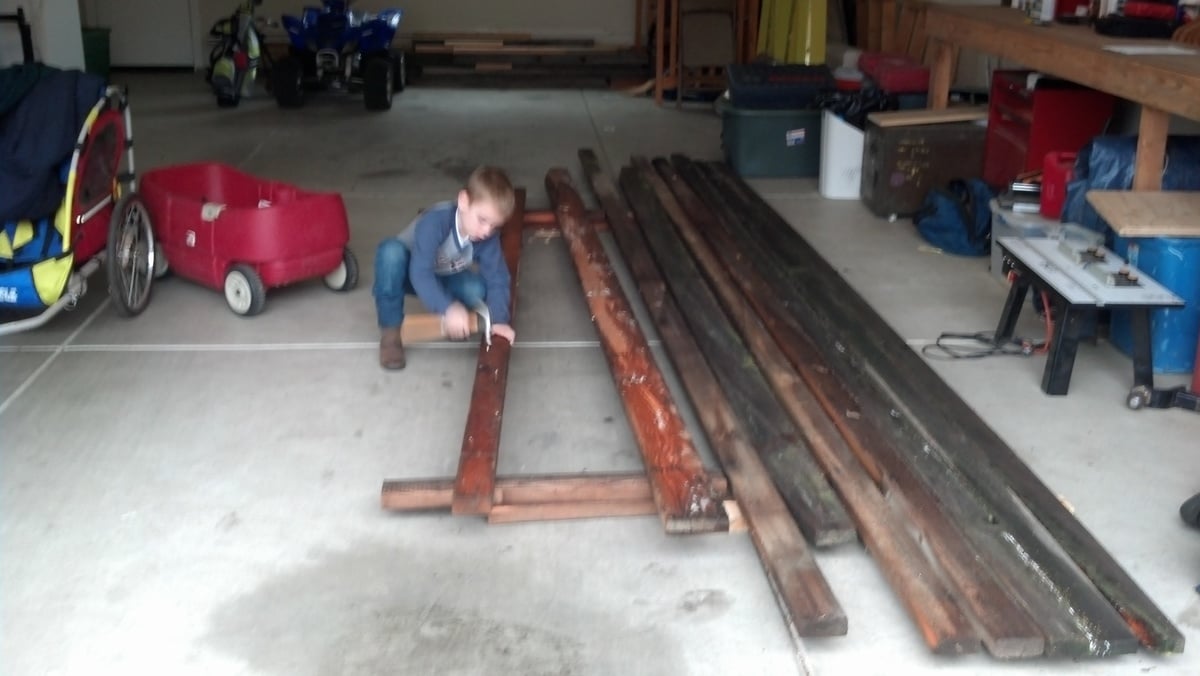
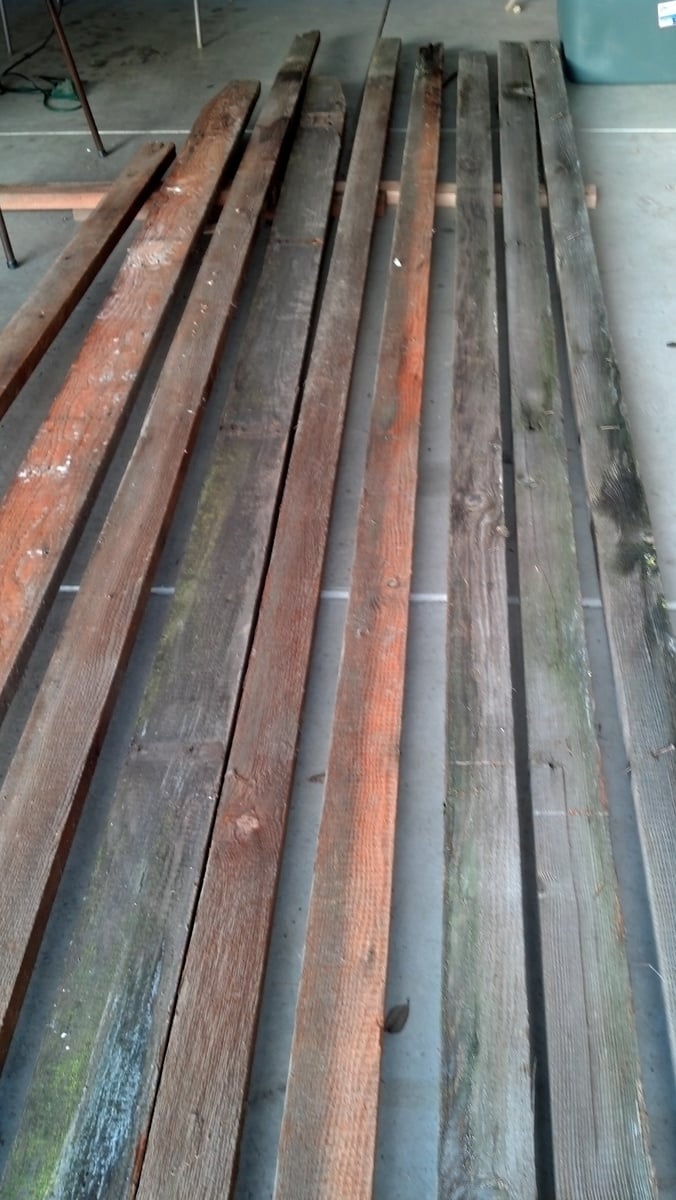
Rustic X end table
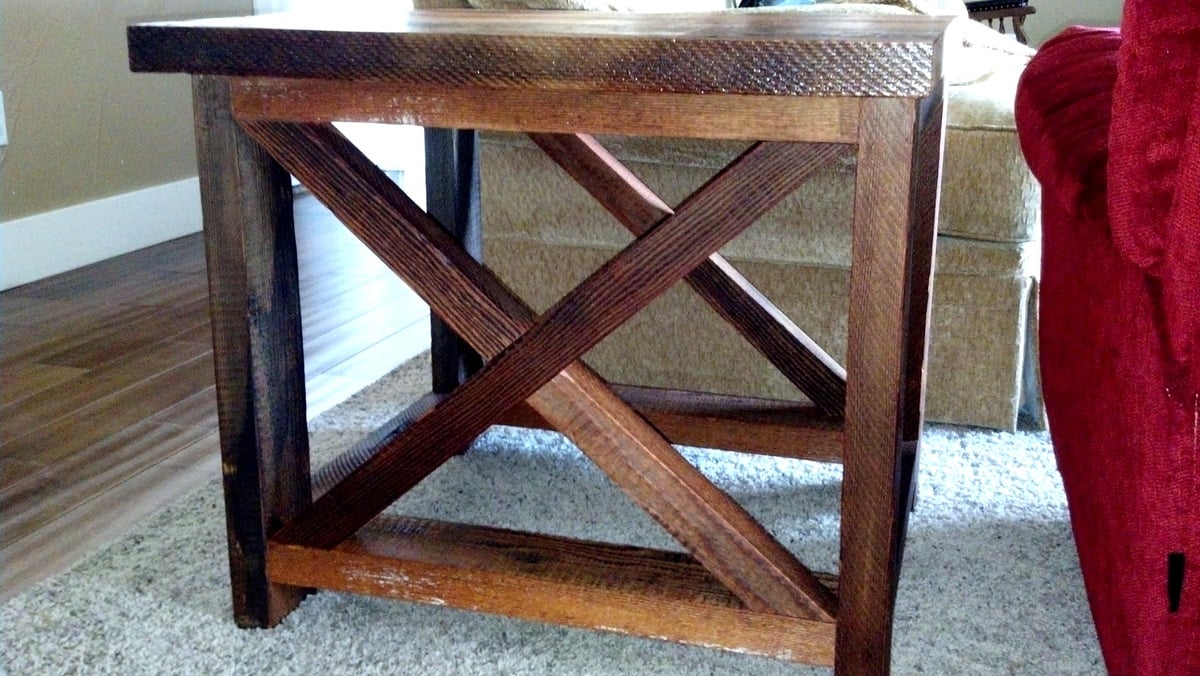
Thank you for the idea for the rustic x end table. My wife is extremely happy with her new end table. Happy wife = happy life!!! I constructed the end table of 2x4 douglas fir rough sawn material I salvaged from a project where we removed a trellis from the house. My son helped me remove all of the nails and we let the wood dry out from the rain. I cut the 2x4 to the lengths described in the directions (I had to modify the x braces in length), sanded the wood and applied natural finish stain. We also added 3 coats of polyurethane to the table top to give it a nice finish and hopefully help with wear and tear over the years.
Built from Plan(s)
Estimated Cost
$50
Estimated Time Investment
Weekend Project (10-20 Hours)
Finish Used
We used a natural stain for the first coat. On the actual table top we used 3 coats polyurethane. I was told today by a cabinet maker that I should have used laquer instead because it holds up better and drys quicker speeding up the process.
Recommended Skill Level
Beginner
Comments
Chalkboard Mail Holder
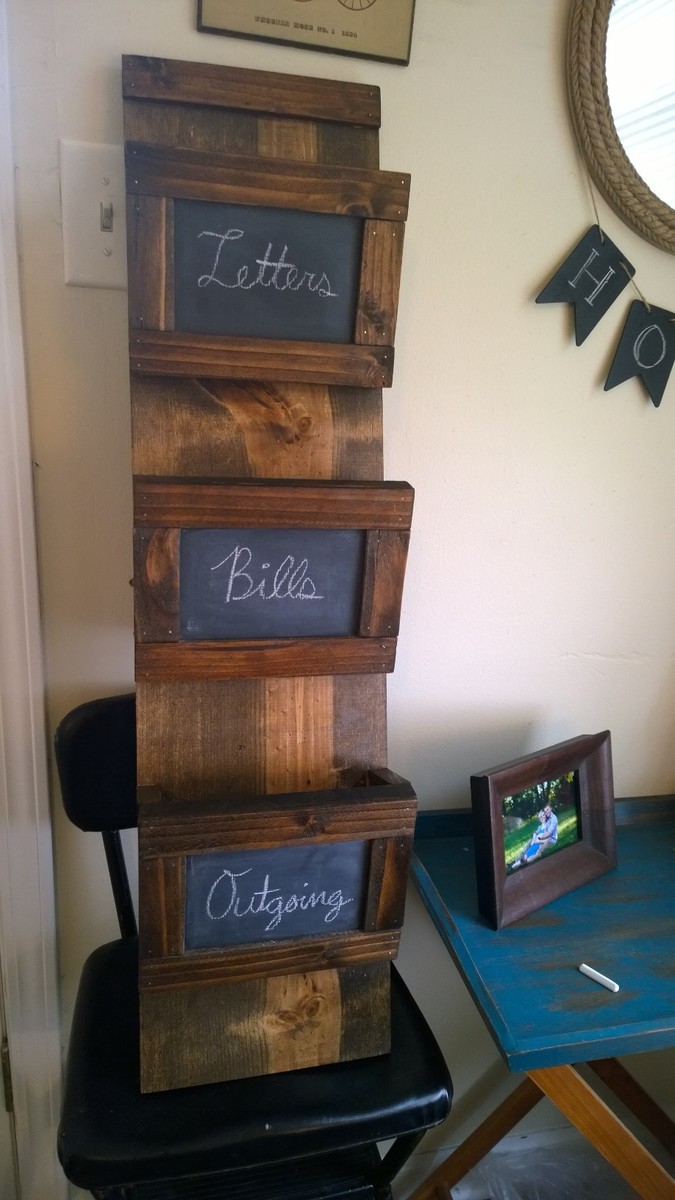
Built using the Wood Mail Holder w/ Key Hooks plan. Primed and painted the slot fronts with chalkboard paint before attaching. Stained the front lath pieces (frames around the chalkboard) before attaching. Stained with Minwax Dark Walnut. Hooks from Lowe's.
Built from Plan(s)
Estimated Cost
$17.37
Estimated Time Investment
Afternoon Project (3-6 Hours)
Finish Used
Minwax Dark Walnut, Chalkboard Paint
Recommended Skill Level
Beginner
Comments

Wed, 09/24/2014 - 10:13
Oops, just realized I had not
Oops, just realized I had not yet attached the hooks in this photo!
Pallet Chairs
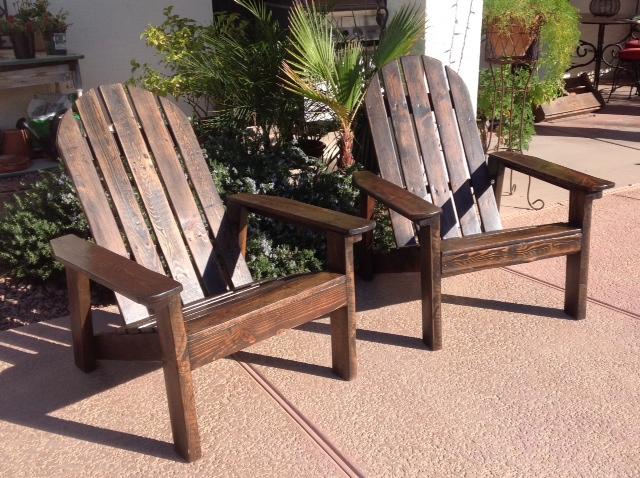
Adirondack chairs made from reclaimed pallets.
Built from Plan(s)
Estimated Cost
$20
Estimated Time Investment
Weekend Project (10-20 Hours)
Finish Used
Disassemble pallets and choose your best boards, cut to size per plan and rough sand. Assemble per plan. Stain with minwax ebony, sand again, stain with minwax chestnut. Finish 2 coats exterior poly urethane satin finish.
Recommended Skill Level
Intermediate
Comments
Mon, 01/09/2017 - 19:28
These plans were great! Have
These plans were great! Have these as a Christmas gift....they loved it!
Floating Wall Shelf
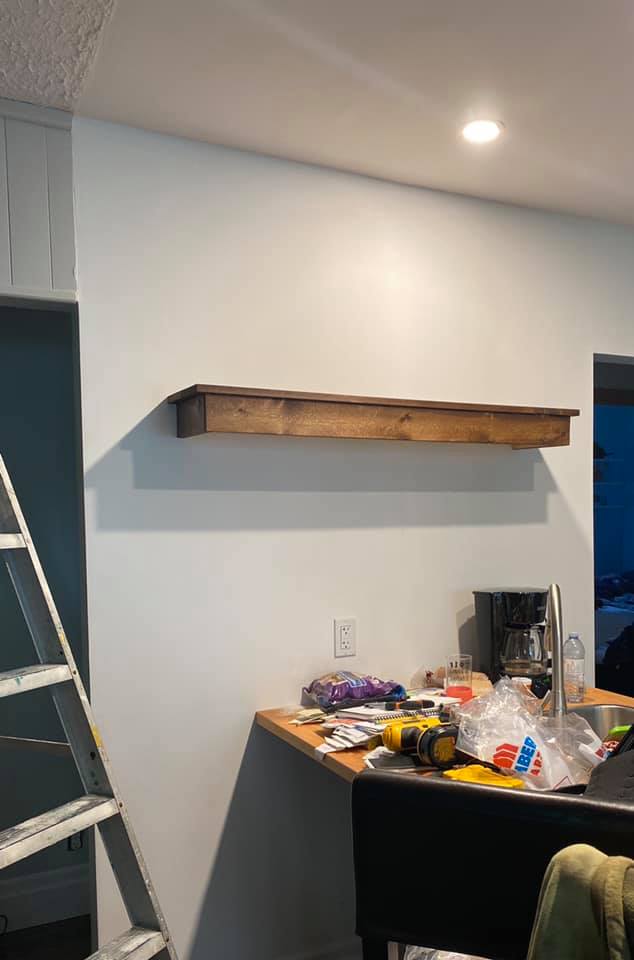
Use a combination of ideas for this floating shelf. Overhung the top to give it a lip. Finish is Minwax Provincial.
Built from Plan(s)
Estimated Cost
$20
Estimated Time Investment
An Hour or Two (0-2 Hours)
Finish Used
Minwax Provincial
Recommended Skill Level
Beginner
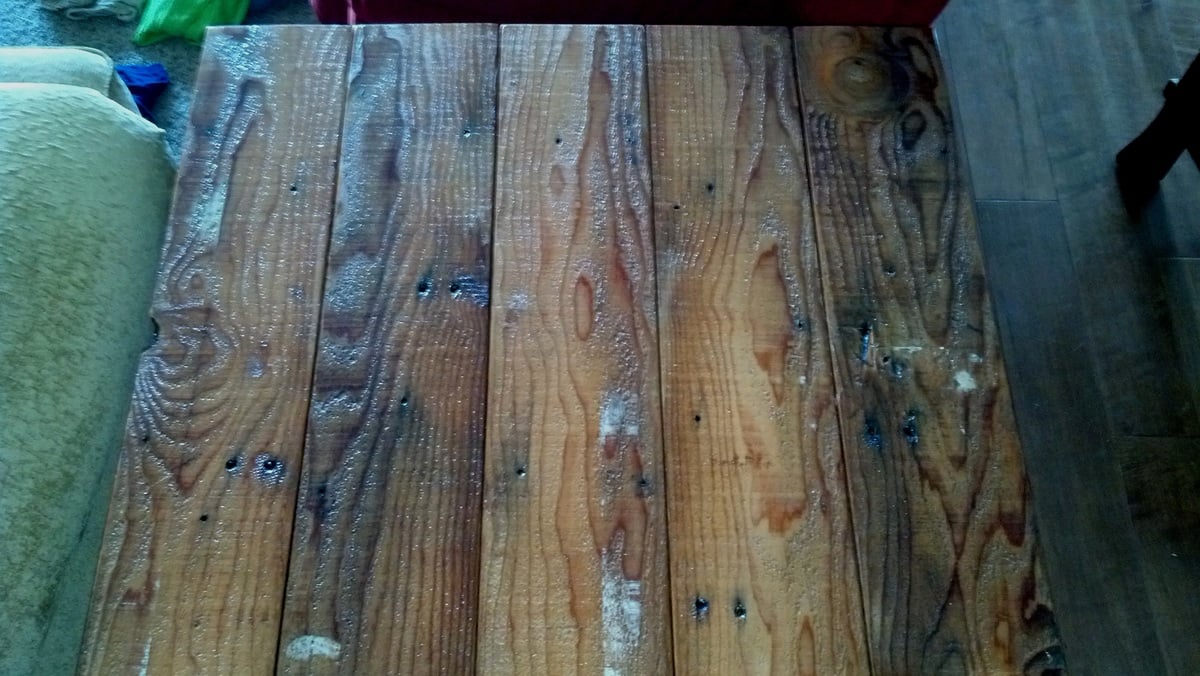
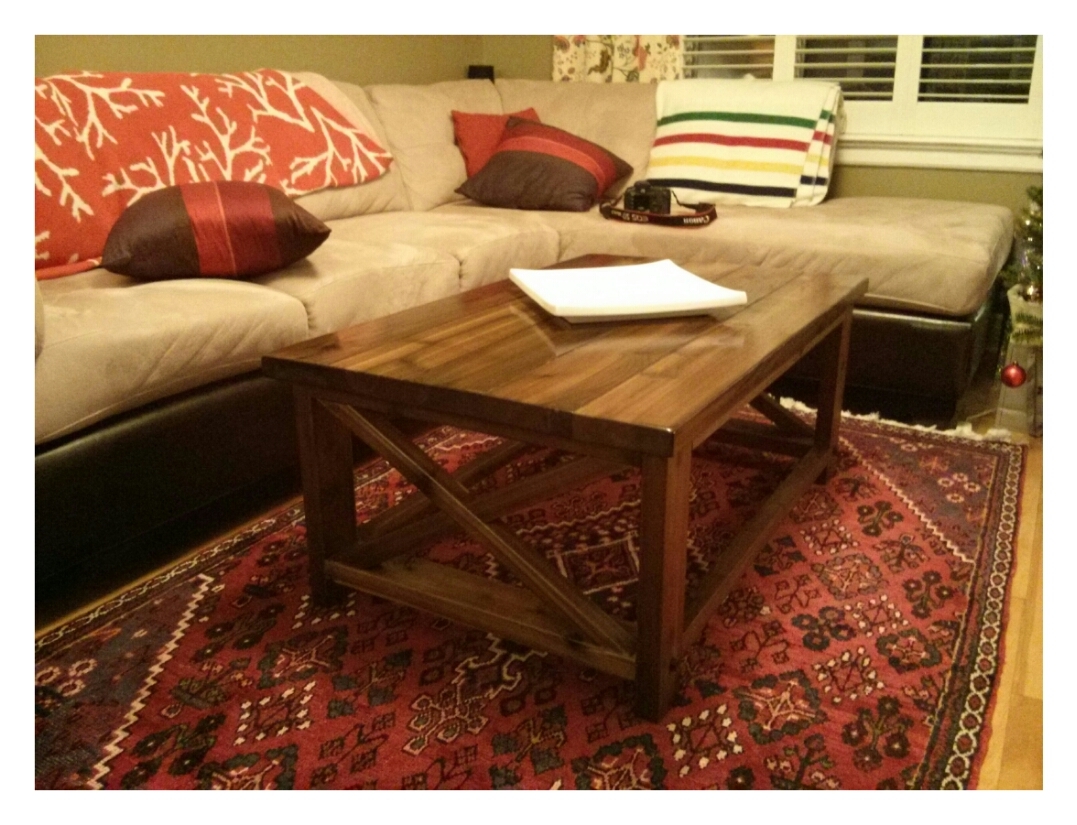
Rustic X Coffee Table

Rustic X Coffee Table. Stain is wet in the photo, so a bit glossier than I'm anticipating. Kept diagonal "X" cross-beams whole and staggered to create more depth in the look of the structure. One coat Minwax "Ipswitch Pine." Changed mind and went with 2-3 more of Minwax "Driftwood." Would have been more grey, less red had I gone with "Driftwood" from the start.
Estimated Cost
$50
Estimated Time Investment
Day Project (6-9 Hours)
Recommended Skill Level
Starter Project
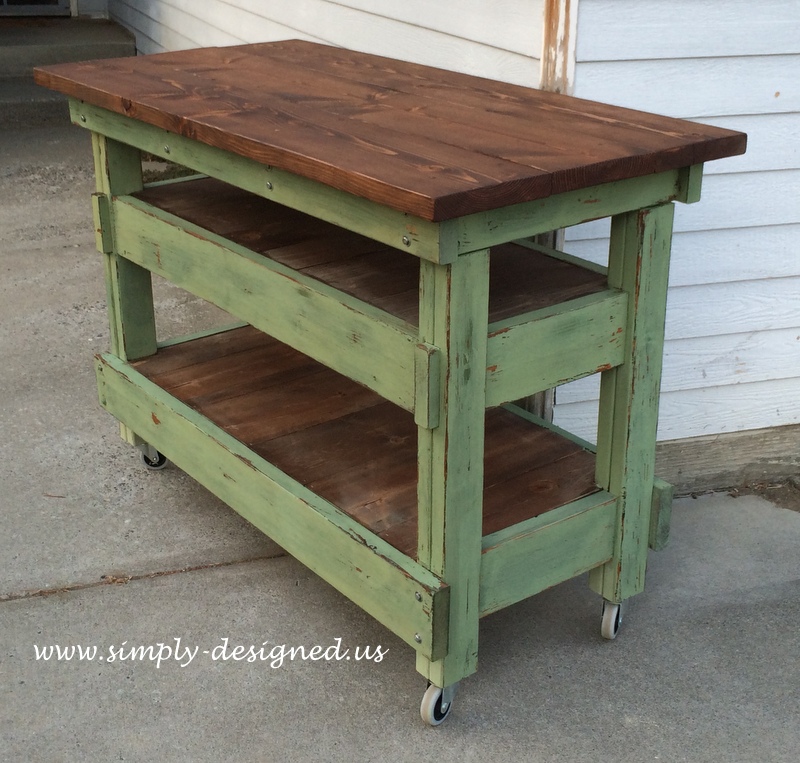
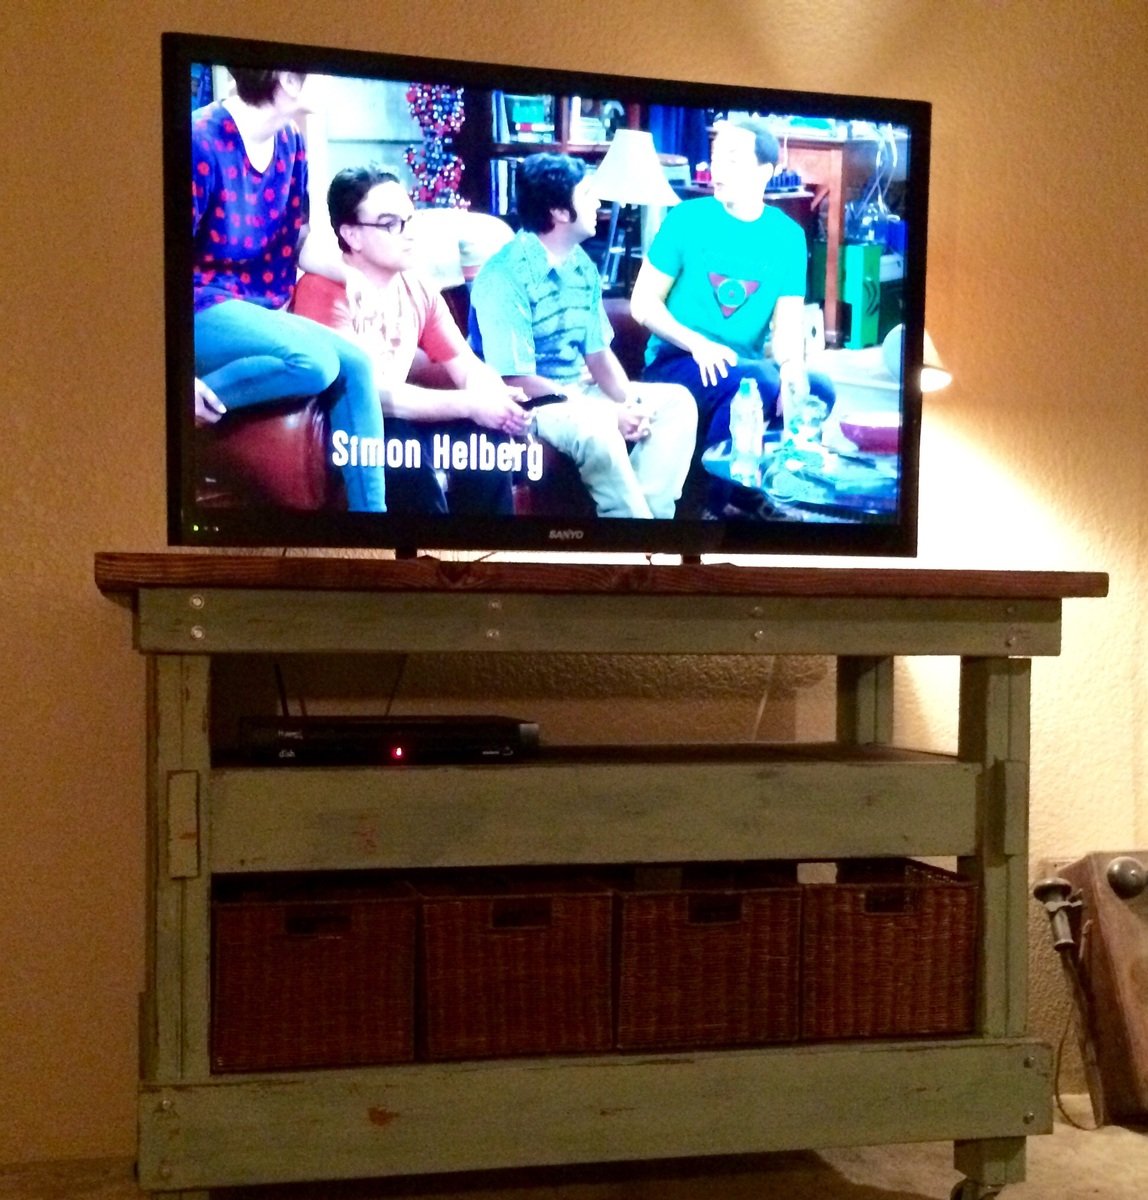
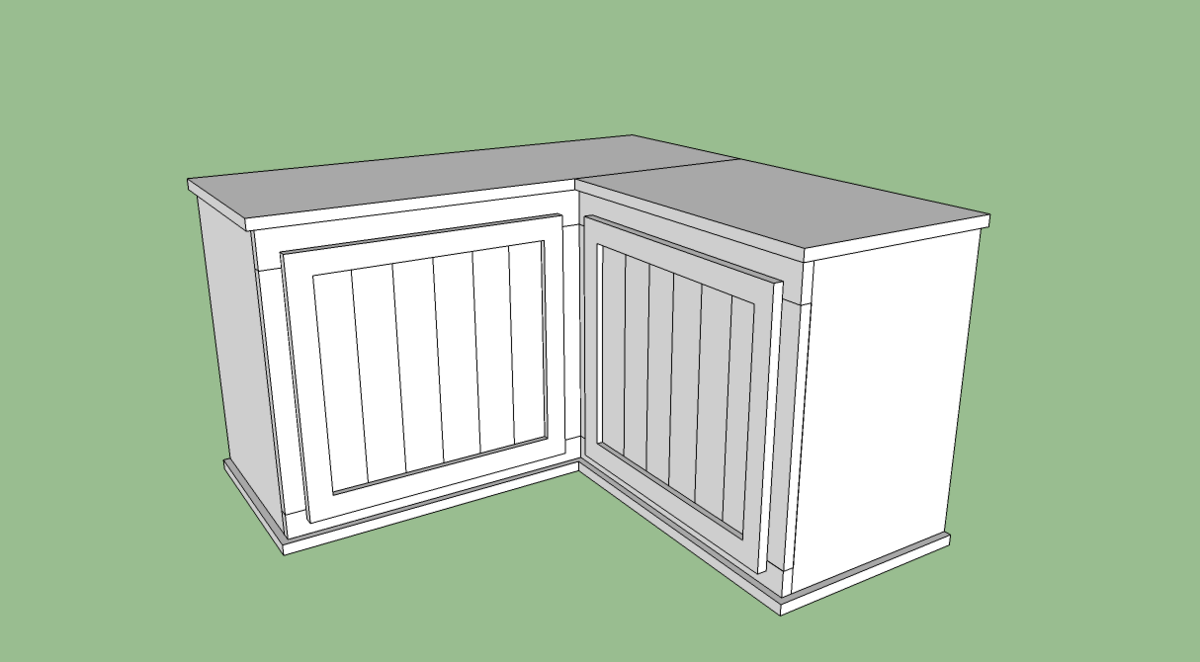
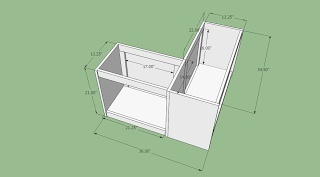
Workbench Console
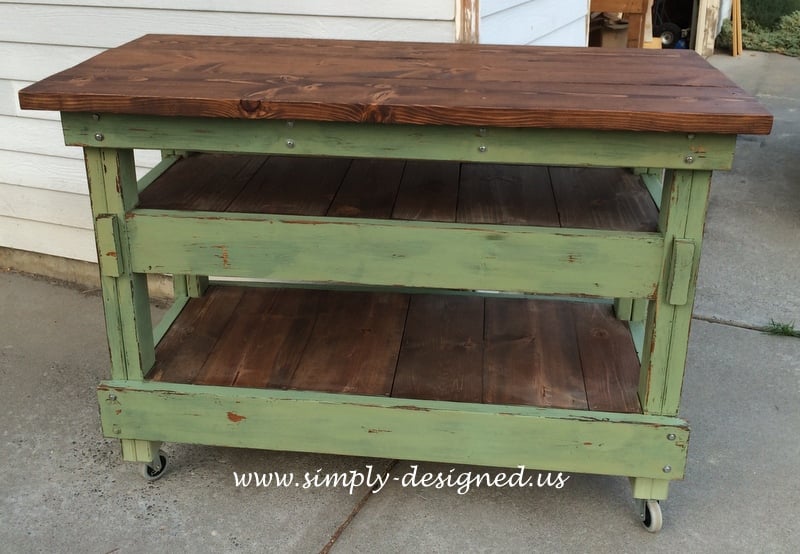
Building this was pretty fun. I've never done the type of carpentry where you would notch out a piece of wood before. I've seen it done, but never done it myself. I altered the size of this build and omitted the center divider piece as I just felt that with a 5' length, it was un-necessary and obstructed the view. Plus I wanted to use baskets underneath to have hidden storage. I also added a shelf for the TV components.
Built from Plan(s)
Estimated Cost
I used a lot of scrap material especially for the shelving as with it, it was more expensive than I wanted to spend. So, I'm estimating that it was about $60 for what I spent.
Estimated Time Investment
Weekend Project (10-20 Hours)
Finish Used
I used a Minwax mixture of stains. I used the weathered grey with chestnut. Then I covered it with a mixture of Lucketts green, Milk Paint. Used a little boxwood to have the appearance of many coats of paint and then another coat of Luckett's green. Finished off with a coat of hemp oil.
Recommended Skill Level
Intermediate
Comments

Sun, 09/28/2014 - 12:04
Beautiful Project
Tracy! This is beautiful!!!! Thanks so much for posting and also on the tip about the plan issue. Much appreciated! Ana

In reply to Beautiful Project by Ana White
Mon, 09/29/2014 - 12:52
Thank you Ana! I always geek
Thank you Ana! I always geek out a little when you respond to my work. :-)
And thank you for posting the plans! I knew this was going to be perfect for my living room cause it just fits who I am. Funny thing is now my mom wants this as a vanity in her master bath! Thanks again for all you do!
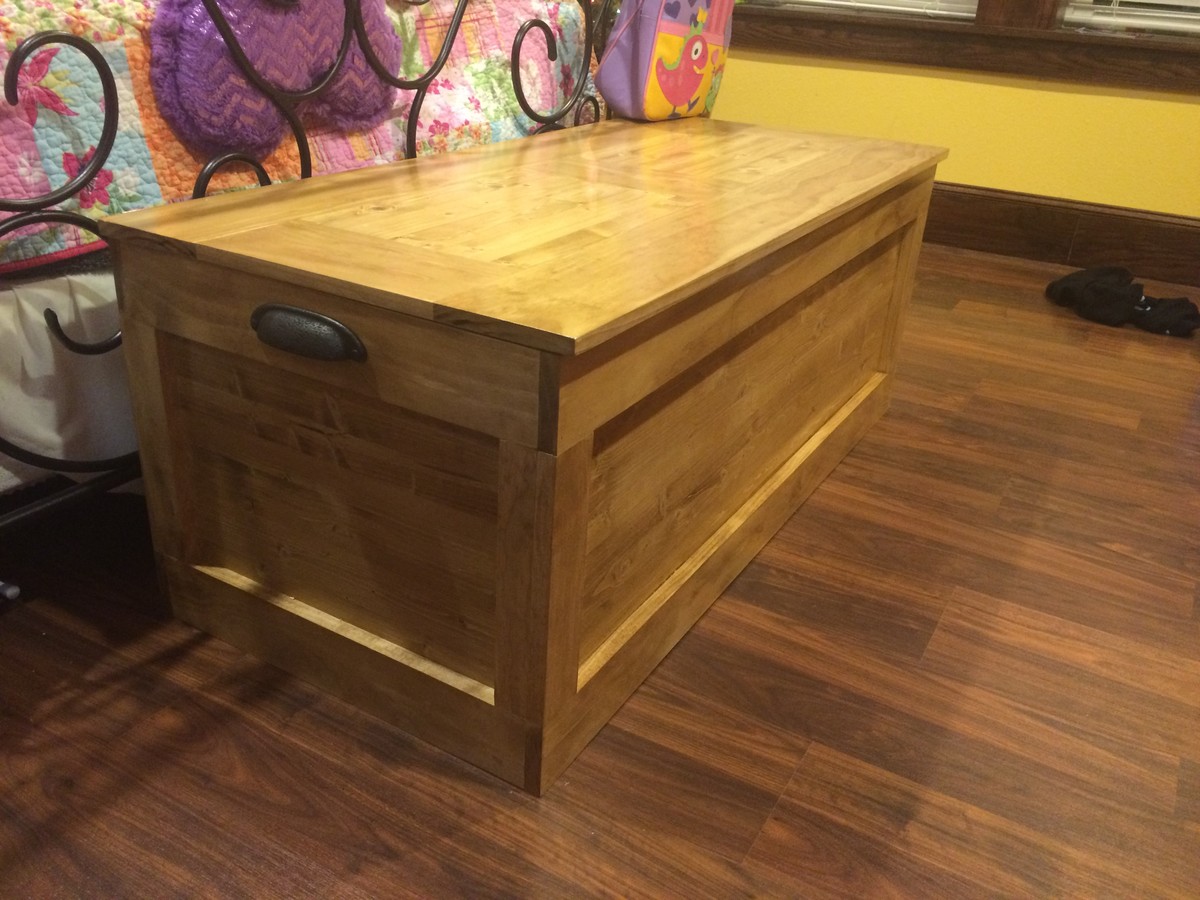
Becca Trunk slightly modified
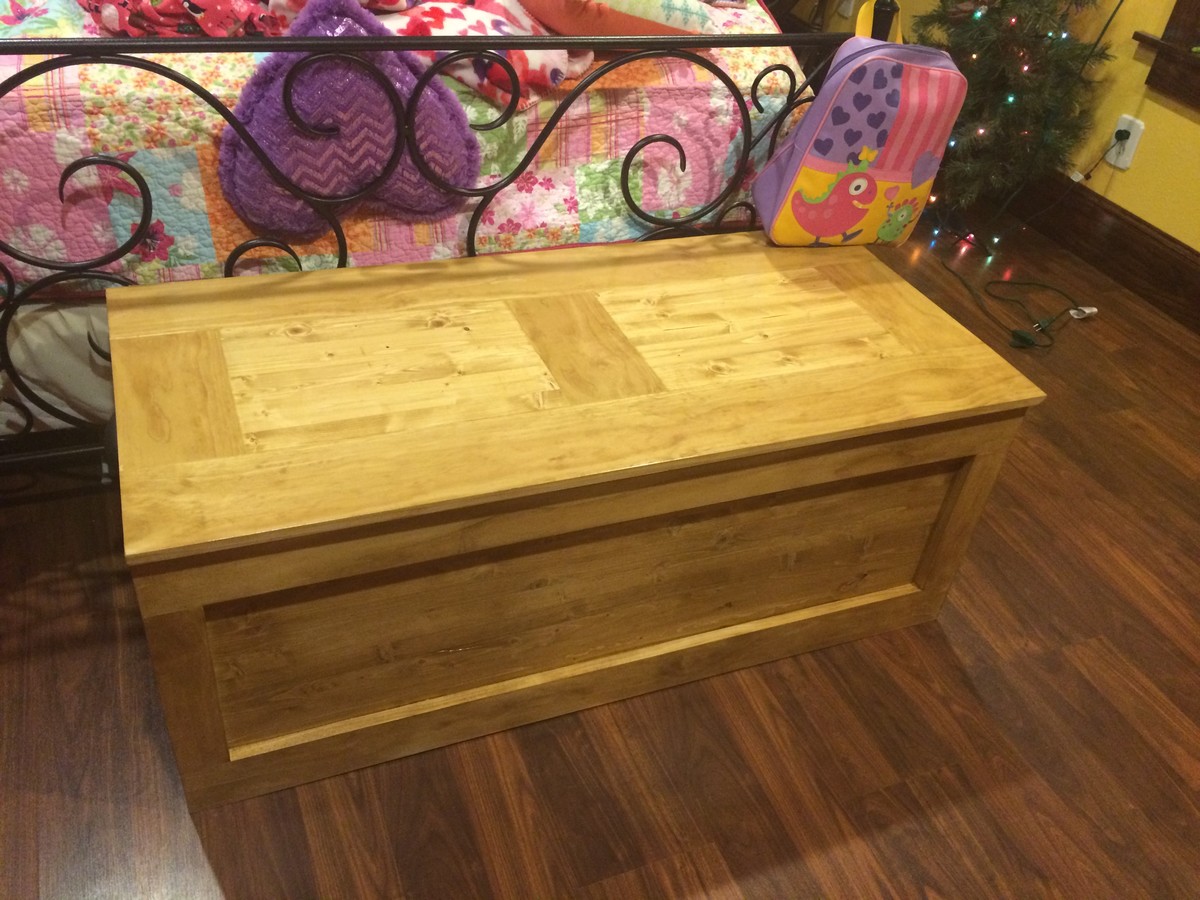
I made this Becca Trunk for my daughter for Christmas. I wanted it bigger so I made it 48" wide. I also lined it with cedar. It turned out pretty darn good!!
Built from Plan(s)
Finish Used
I believe it was a Golden Oak stain with a few coats of polyurethane over it.
Recommended Skill Level
Intermediate
Rustic X Console Table for my daughter's birthday
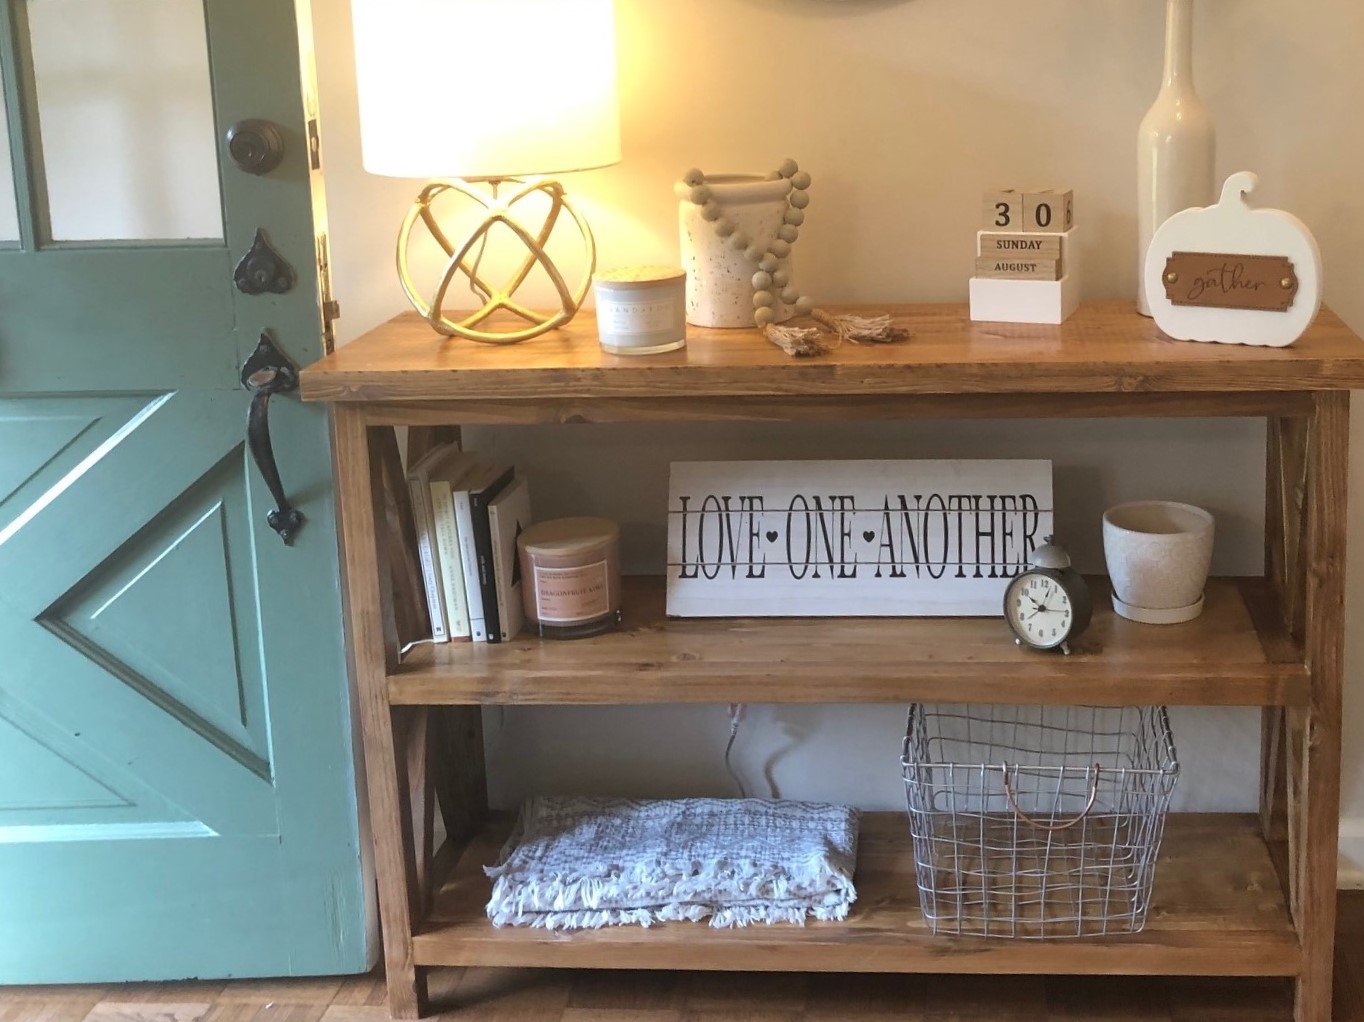
My daughter wanted a console table for her entry. I found this plan and adjusted slightly for depth (decreased to 14 inches) and length (decreased to 48 inches). This of course requires recalculating the angles for the x's. For the top, and shelves I found edge-glued panels at Lowe's and cut to size. The top is two of them laminated together. She was happy with the birthday present ... thanks for the great plans Ana!
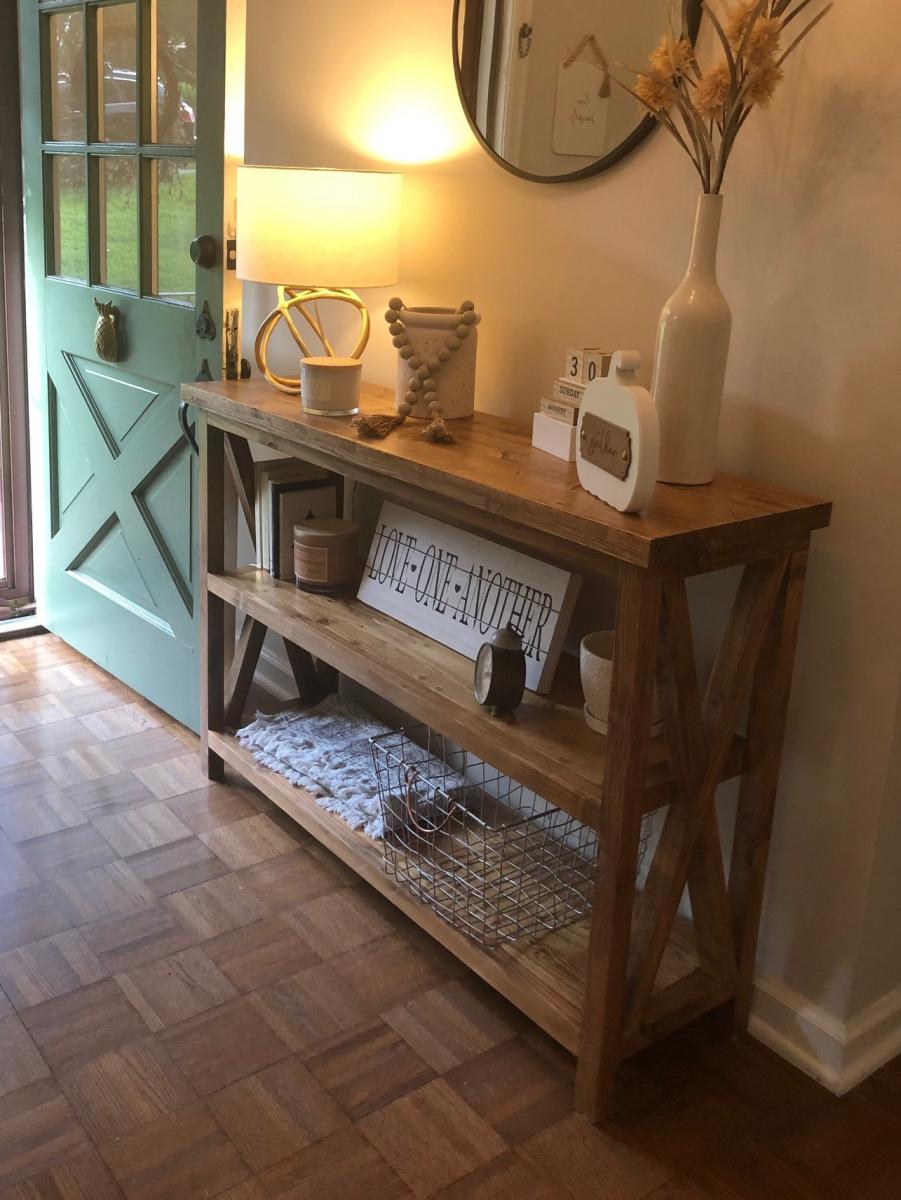
Built from Plan(s)
Finish Used
Minwax Wood Conditioner, Minwax Early American, Minwax Polypro
Comments
Fri, 09/25/2020 - 14:49
Wonderful gift!
Nothing says I love you, like building a custom piece for a loved one! Thanks for sharing:)
Rustic X Coffee Table
Used cedar wood so I applied a few costs of oil based polyurethane to compensate for the softness of the wood.
Estimated Cost
75
Estimated Time Investment
Day Project (6-9 Hours)
Finish Used
Steel wool and vinegar solution with an oil based polyurethane finish.
Recommended Skill Level
Beginner
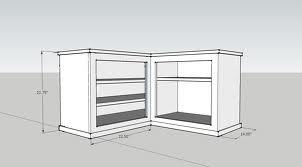
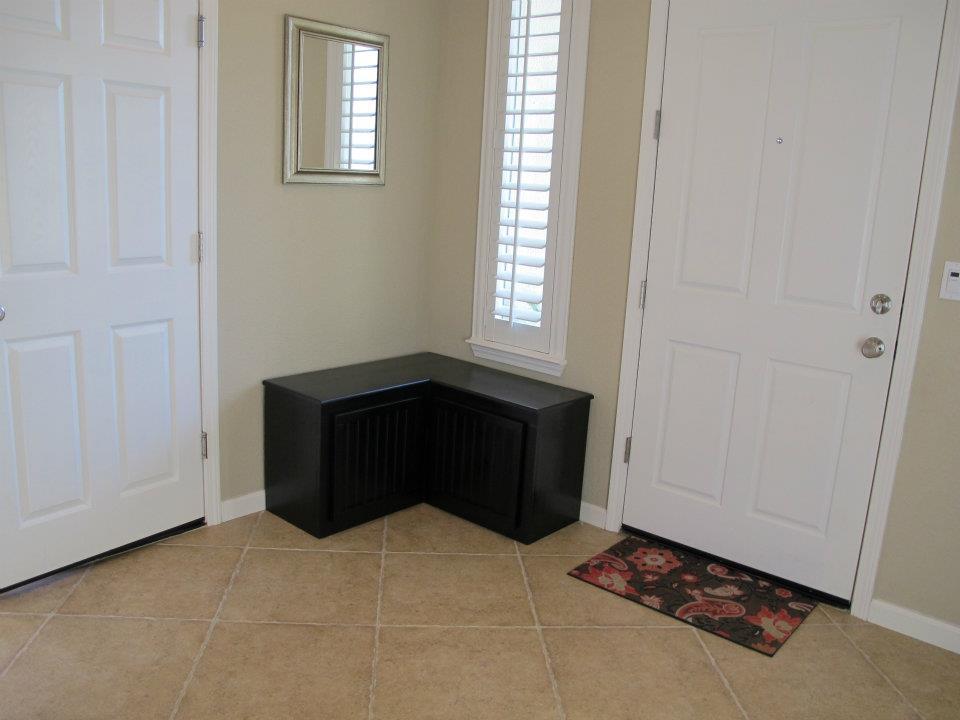
Corner Shoe bench

Custom shoe bench I built for a friend. See post on blog for more detail:
http://www.tools4moms.com/2012/06/build-corner-shoe-bench.html
Estimated Cost
$200
Estimated Time Investment
Week Long Project (20 Hours or More)
Finish Used
Black paint + poly urethane
Recommended Skill Level
Intermediate
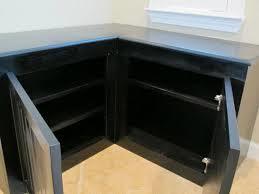
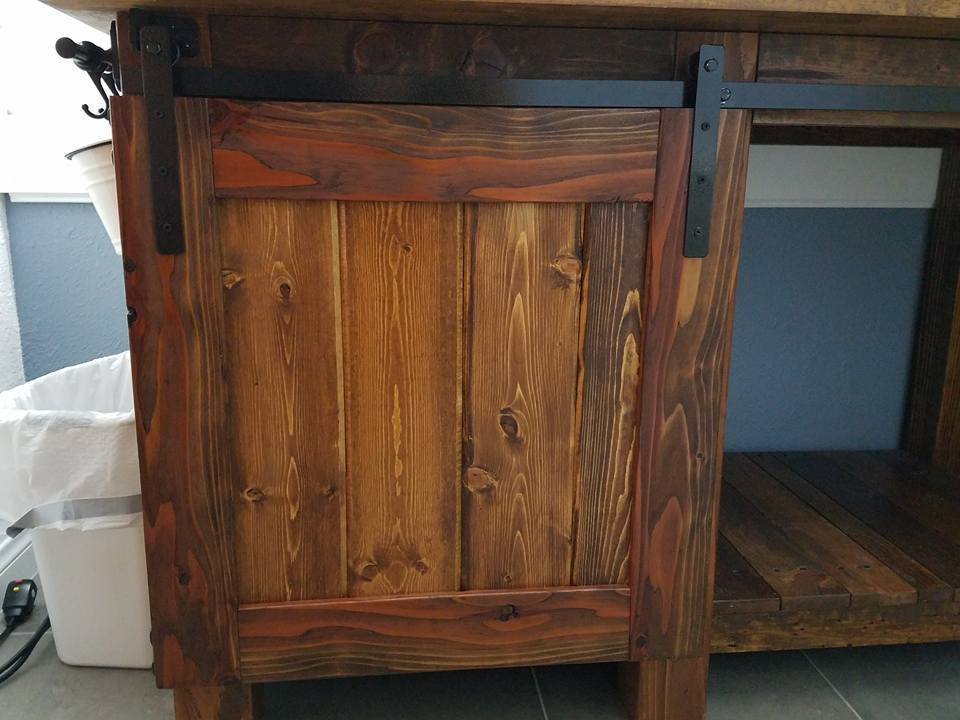
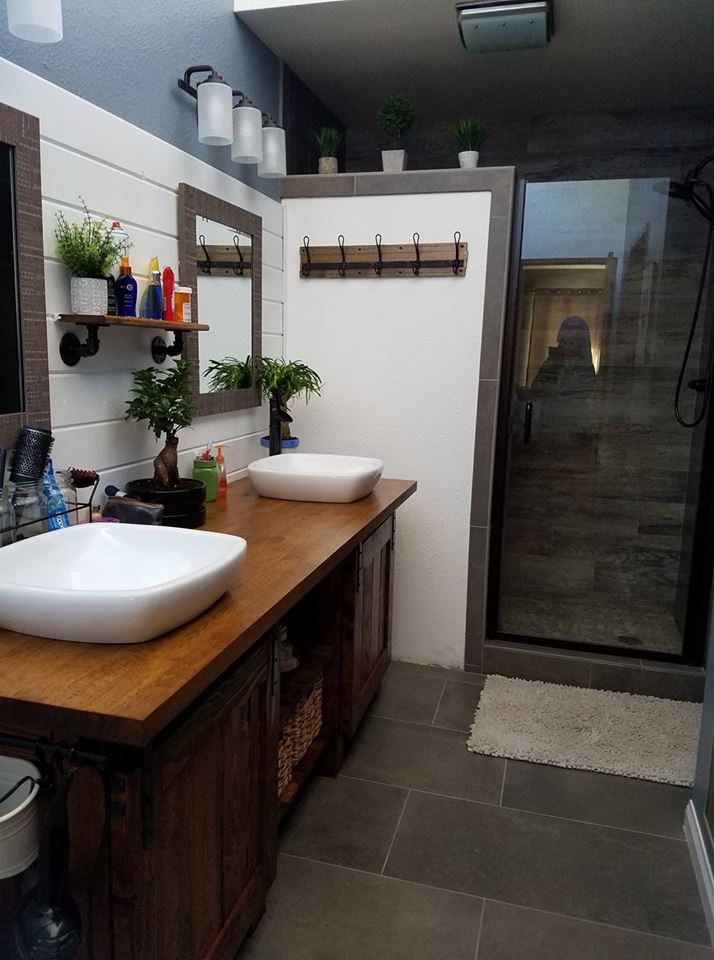
Rustic Vanity

Ana, we saw your plans for the barn door cabinet that was pinned in pinterest and absolutely loved it and felt we had to build it but we had to completely modify the plans to have it custom fit our bathroom. It was a trial and error experience never having built anything before. Thank you for giving us the idea.
Estimated Cost
$275
Estimated Time Investment
Weekend Project (10-20 Hours)
Finish Used
Lacquer and Early American stain
Recommended Skill Level
Beginner
Comments
Sat, 05/18/2019 - 19:54
This is amazing! I can't…
This is amazing! I can't believe I did not see it sooner. I'm so inspired! Ana
Fri, 01/01/2021 - 10:54
Gorgeous Rustic Vanity
Where can I find these plans. It would be perfect for my master bath. Spectacular.