Sliding Mirror hidden tie rack
Adjusted the plans to have the sliding mirror be a hidden Tie rack. Love the adjustment and being able to hide ties in the room.
We built Two children's table and 8 stackable chairs for one of our daycare's. It took a lot of work but once we figured out the first chair it was a breeze for the other 7.
Sat, 02/08/2014 - 15:54
Awesome! I built one for our homeschool and it works great. Yours look very nice.
Used your plans but make changes to the planters since I do not own an angle machine. They look great and the cost was less than $30
Tue, 05/30/2017 - 14:33
Can appreciate wanting to do projects but not having all the necessary fancy tools. I need to make two of these anyway (one to give away), so going to steal this idea to make it a wham-bam quick job!
My bench sits outside my front door to welcome visitors and provide a place to set your packages while unlocking the door! I made it two years ago, and it's weathered three Baltimore winters with out repainting. I'll probably sand t and repaint it this spring. Folks are always asking where I bought it, and I give all the credit to Ana White, your site and your wonderful furniture ideas!
Jim Dupree
My dad and I built this twin farmhouse bed for my three-year-old son. I used no-mortise bed brackets from Rockler Woodworking and modified the plan by adding slat brackets mounted directly to the rails with 1x3 slats.
Our tiny cottage pantry is complete! We followed Ana-White's 2x4 Storage Shelving modified to fit.
Materials:
Paint: Behr Whisper White
Vinyl tile: Armstrong Terracotta Clay
Ceiling: Beadboard
Plans: Ana-White 2x4 Storage Shelving (modified)
We love how these modified 3-panel adirondack chairs turned out! The pillows were from Costco- $15 for a two pack.
Sun, 05/06/2012 - 14:25
Love these! Did you use 1x8s for the back instead of 1x4's?
Sun, 06/16/2013 - 16:13
Is it possible to get the plans for these chairs??
-c
This wasn't my first DIY project but it was my build from this side and first real woodworking project and it's been the most satisfying to date. I made this table for Mother's Day for my mom who has been dreaming of the PB Cameron fixed trestle dining table but couldn't take the hefty price tag. Things I changed: - I added the "pegs" on the table ends to make it look more like the PB version. They are just 1/2" round wood plugs glued to the trestles. - I was going to add two more tabletop braces underneath (again to make it more like the PB version) but I cut one of them incorrectly so I just added on more in the middle. I'm turning the boo-boo lumber into a yarn swift; waste not. Things I learned: - If the wood is going to be stained and varnished, shell out for the *good* stuff. I had to put on way to many coats of polyurethane to make the cheapo pine boards smooth enough even after I had dampened it to raise the grain and sanded it. - Don't believe the stated length of the boards you buy. 36-inch boards are actually 36 inches and a bit. I ended up having to disassemble and re-cut my tabletop supports. - Practice with your jigsaw if you haven't made curved cuts before to see how tightly you can turn. Luckily I had extra ply to make another couple trestles after I botched the first two...
Sun, 05/20/2012 - 21:33
I've had to learn some of those things myself since I started building a year and a half ago. Sometimes it's frustrating and even costly, but when you learn it, you learn it and you never have to again. haha Unless you're really a gluten for punishment. ;-) Good job and thanks for sharing with us some of those lessons learned.
Mon, 05/21/2012 - 06:46
Thank you!
...and now I'm picturing someone with gluten intolerance being force-fed cupcakes as a form of punishment, haha.
In reply to Thank you! ...and now I'm by meggrs
Tue, 05/22/2012 - 14:55
ROFL - That was great, thanks, now I'm imagining it too.. HAHAHAHA
I needed additional seating for my dining room table and wanted something a little unusual. When I saw the vintage pew bench, I loved it. After looking at the plans, I determined I could alter the arm height so we could use it at our dining table. Now that we have moved, we no longer need it at our dining table, so it now sits in our entry. It has been a great multifunctional piece.
Mon, 03/24/2014 - 13:25
Thanks Ana! It is a painting. I bought it in South Korea while we were living there.
I may be able to track a canvas down for you, though. You would have to get it stretched...it would be too large to ship. I have a friend who is living there now. ;-)
Tue, 03/25/2014 - 10:15
Thanks for the reply, what a great find. I just had to comment on how striking it is!
Sun, 09/20/2015 - 16:44
What's the new arm height? I'm going to TRY to adapt this to a 60" bench with two drawers, and the lower arms.
After building my daughter's beds and some outdoor day beds, I finally got around to building a bed for my husband and I. I altered the plans to a king size bed. I added a second 2x4 in the middle for support and around the inside edges as I used the box springs to make the bed taller. Using the kreg jig really made this project so easy. I also used 1x8's instead of 2x8's because I couldn't find those in Hawaii anywhere, except pressure treated wood. It still turned out great.
Thanks for the wonderful plans!
Mon, 06/25/2012 - 19:40
I LOVE this bed! I'm asking my husband to build it and I was wondering if you could email me the dimensions for the plans of a king size Chestwick Platform bed? I'm pretty sure he could figure them out on his own, but I'd love to make it easier for him :) Love your work!
In reply to King platform bed by Katie Saldivar (not verified)
Sun, 07/22/2012 - 11:58
I made the bed 80 x 79
Tue, 10/26/2021 - 10:48
Amazing! can you please provide the cut list for the king size measurements?
Thank you!
Relatively simple project. Just follow the the directions step-by-step and there will be no issues finishing in a day. Have to start early if planning to stain and complete in the same day.
This was our very first project made from the plan Shoe Shrine Shelves submitted by Anna White with a few variations. The middle, short cabinet was made from left over pieces using the same dimensions as the taller shelves. The width was determined using the mirror dimensions. The mirror was my husbands genius idea! It was an old mirror just sitting around in our garage, he sanded it down, primed with Kilz and painted Antique White to match. He also suggested the trim stripes on the front (painted Pure Black for contrast) to give the cabinet some unique character! This piece can really be designed many different ways to suit your specific needs. I LOVE it and can't wait for our next project! Thanks so very much Anna!!!
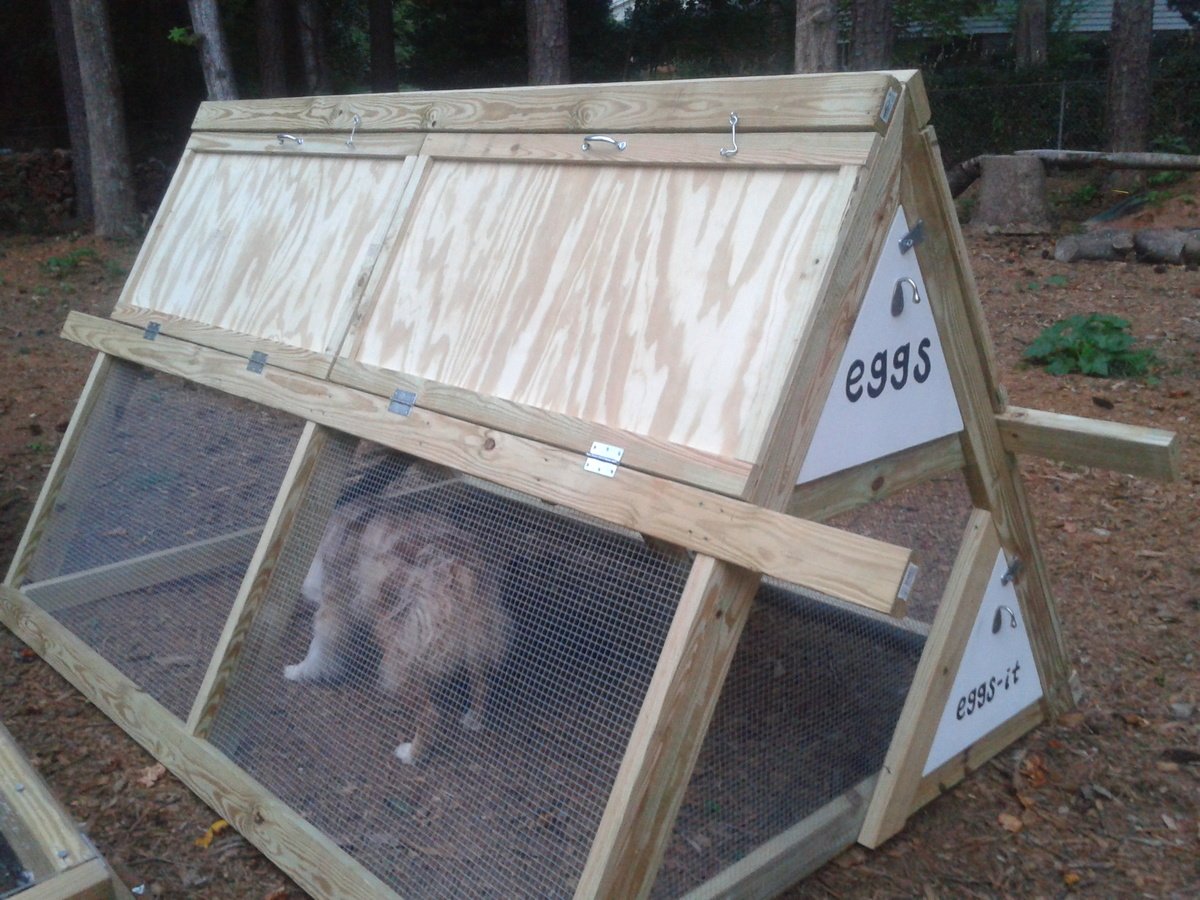
We followed the plans for the A-frame chicken coop very closely, and then modified it a bit at the end.
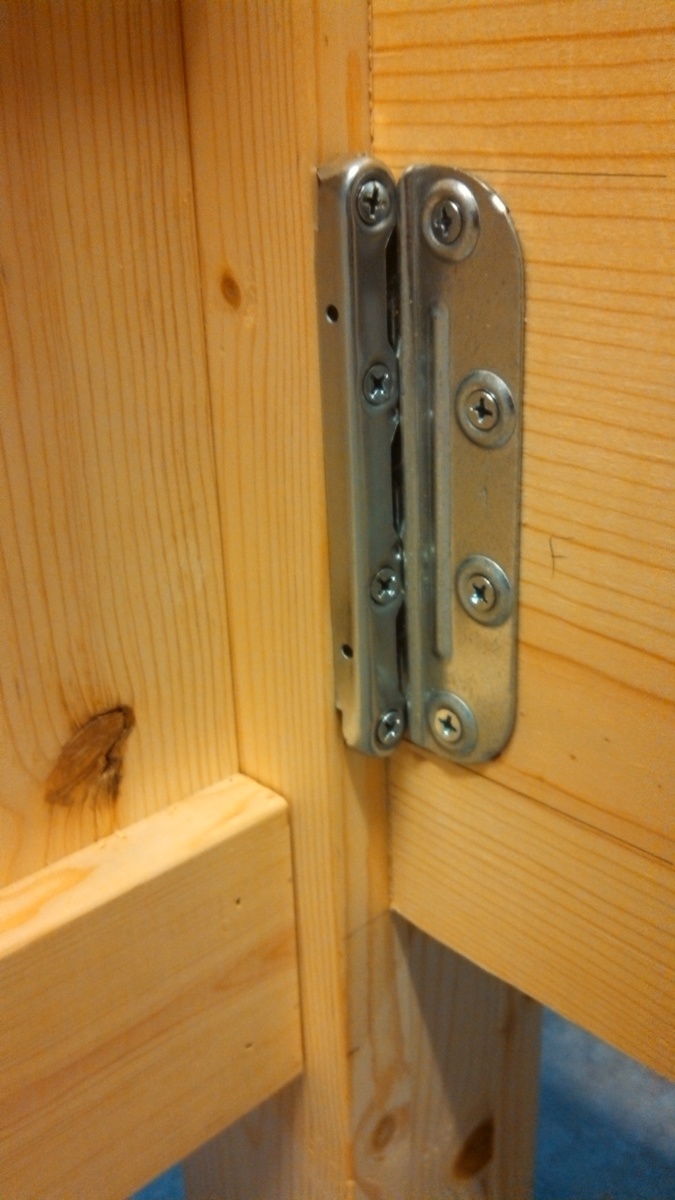
1. Trim was added to two doors on each side, as suggested. They are secured with latches at the top, more to keep them from falling open than to keep critters from getting in. We used 2x4x10's instead of 2x4x8's on the middle horizontal rail, giving us foot-long handles on each side. My husband and I are able to move the coop about 15 feet at a time, which is pretty good considering it is STURDY!
2. We used 1/2" galvanized hardware cloth instead of chicken wire, as suggested by one commenter (and lots of others in blogland).
3. I cut 1/4" plywood to fit the loft space and coated it with vinyl stick-on tile. This should make it easier to clean. We didn't screw down the plywood, so if we have to, we can remove it to hose it off/scrub it.
4. I cut a triangle of plywood to make an egg door at the end of the roost. It hinges at the bottom (with a 2x4 ripped into a 1x4 to cover the hardware cloth and provide a mounting spot for hinges) and latches at the top. I plan to use cotter pins or something to secure the latch. There is also a piece of untreated 1x4 held in place with tabs at the egg door to prevent bedding from falling out once it's converted to the nesting box (I'm planning to get pullets, not ready to lay yet, so they won't even have a tempting nest box)
5. There was no bottom door in the plans (to allow free-ranging), so I cut a piece of 2x4 to make a triangle against the bottom (same size as the egg door). It folds out (just like the egg door) and will allow the chickens easy access to the yard. We do have hawks in our neighborhood so free time will always be supervised. We also have a dog (who I coaxed into the coop for the main picture, haha!) who will need supervising. She's been around chickens before but you never know what will make her turn on them!
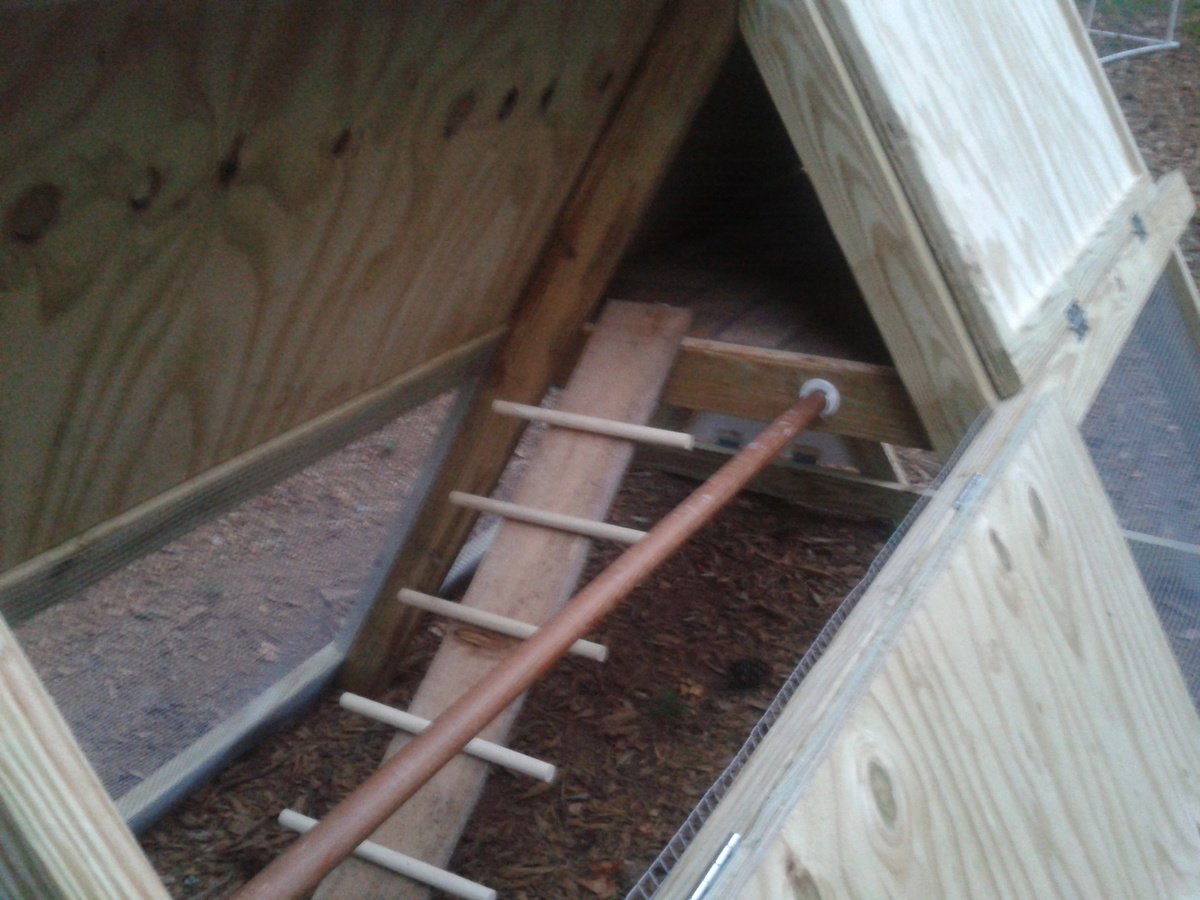
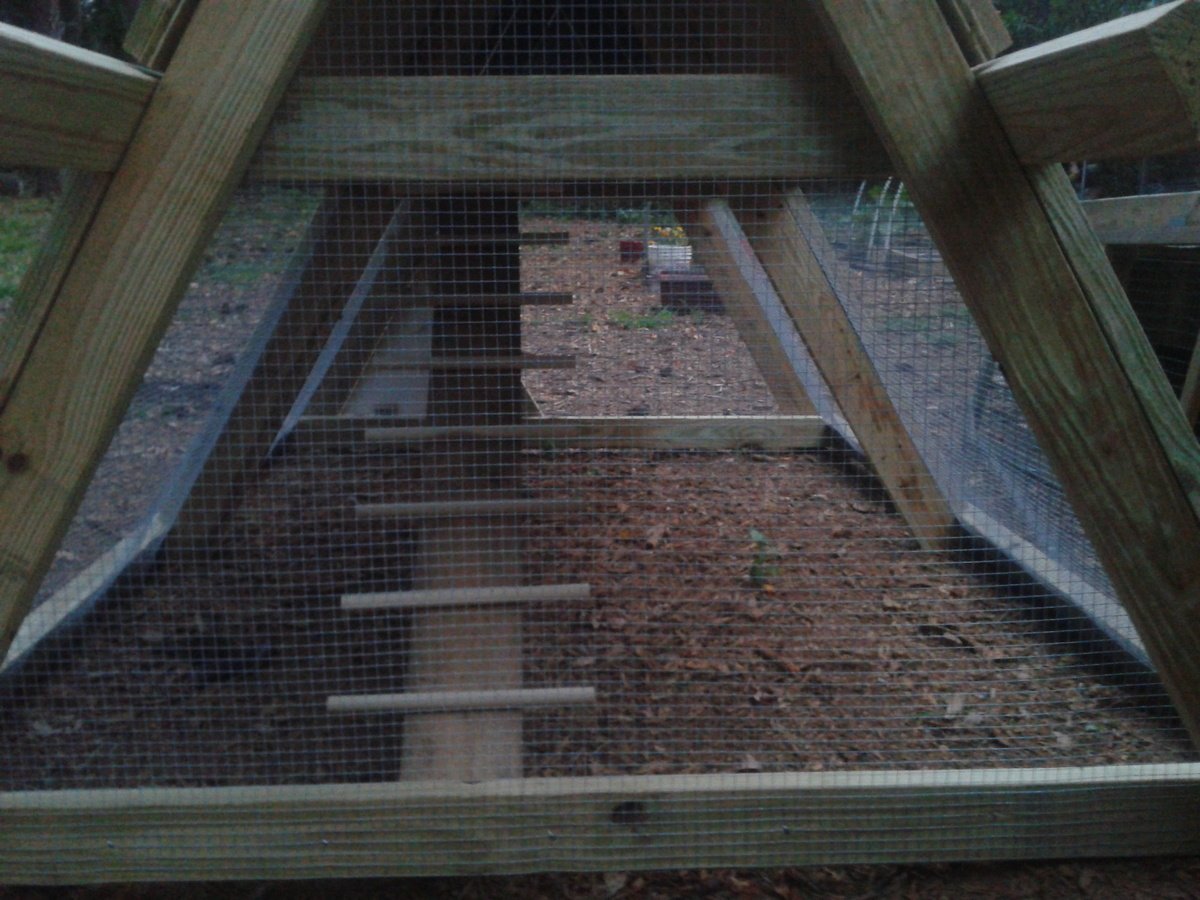
6. There was also no roost in the plans (although if you look at Ana's coop, there is a 2x4 across the middle of the side walls). I had a leftover closet rod, so I mounted that in the covered section parallel to the ladder. The ladder was shifted to the side. For the ladder, I just used a piece of cedar fencing and cut 2 48" dowels into 4 pieces each, and secured those with screws from the underside. I hope my chickens will be able to get up the ladder!
7. I also made a tube feeder from PVC and a dog bowl, and am working on a nipple waterer. Will update post when those are finished!
Now I just have to get some hens! I've been searching craigslist and can't wait!
Thu, 09/20/2012 - 19:31
I really like the addition of the roosting bar and how you made the ladder. Your little chickens will be so happy! Good luck!
I started msking tgese for my kids and couldnt stop. first was the sonic and princess then spiderman then batman and last the brave chair.
Sun, 06/09/2019 - 13:02
These are so fun! Love all the different designs!
I combined Ana's plans for Daybed with Storage Trundle Drawers and a Storage Headboard with a Small Hutch.
This is my 3rd daybed with storage drawers. It's such an easy build and gives so much extra space. The entire project took about 40 hours. I used Minwax stain in Classic Grey and three coats of polyurethane. For the drawers, I used 1.5" casters. I drilled a hole through the back of the headboard to feed cords through. Then I put the whole thing in the back of my truck and drove 500 miles for the final assembly. :) In the provided photos, some of the pieces are flush because I hadn't permanently attached them.
This is my first build from this site! I used 6" boards to give the siding a plank look rather than using plywood. To make the height work, I used 8" boards for both the top and bottom planks. I also made the door a little taller. Other than that, I followed this plan step-by-step. It was very easy to follow and I really enjoyed making this bed. My daughter (and my sons) really enjoy it!
Rustic console -first project..plan on adding X to ends
Thu, 05/15/2014 - 10:35
Love the finish and decor! Great job on your first build!
Hey Ana,
I saw your raised bed planter and decided to tackle it for ourselves. It measures 2'x8' and stands 28" to the bottom of the planter. I used redwood fencing for the sides and bottom at a cost of $1.79 each. I didn't use the wire mesh for the bottom but drilled 1/4" holes in the redwood fencing for drainage.
Thanks for the idea!!
Mike Howell
For this project, I made the headboard from the Farmhouse Bed plans. I omitted one of the 1x6 slats to fit to my metal frame. I made two planked wood bedside tables with shelves and I created a lift top bench that was inspired by both the bed, and the side tables. Finally, I threw together a blanket ladder using 2x3s.
am thrilled with my new headboard. The plans made every thing about this project FUN and DOABLE. I'm a 70 year old Granma who loves to DIY. SO fun to show my photos of what I did ALL BY MYSELF! THANK YOU FOR YOUR WONDERFUL PLANS! With out them my pretty new headboard would never have happened. WHAT FUN. I mounted an LED picture light fixture on the top for reading in bed and mounted the corded on off extension cord switch to the side of the leg for easy on off ! Again, THANK YOU!
Cheryl King
This was a fun project to do. I am going to add a piece of 24 x 24 sheet metal to the top of it to serve as a smooth flat area to write on. I didn’t have any 1 x 3′s on hand so I ripped several 2 x 4′s down to 1 x 3 which is where I came up with the 1 x 2′s that are running across the top. I’m working on imagineering a chair to go with it, I will post pictures of that as well when I get it put together. If you have a questions or comments feel free to post.