Community Brag Posts
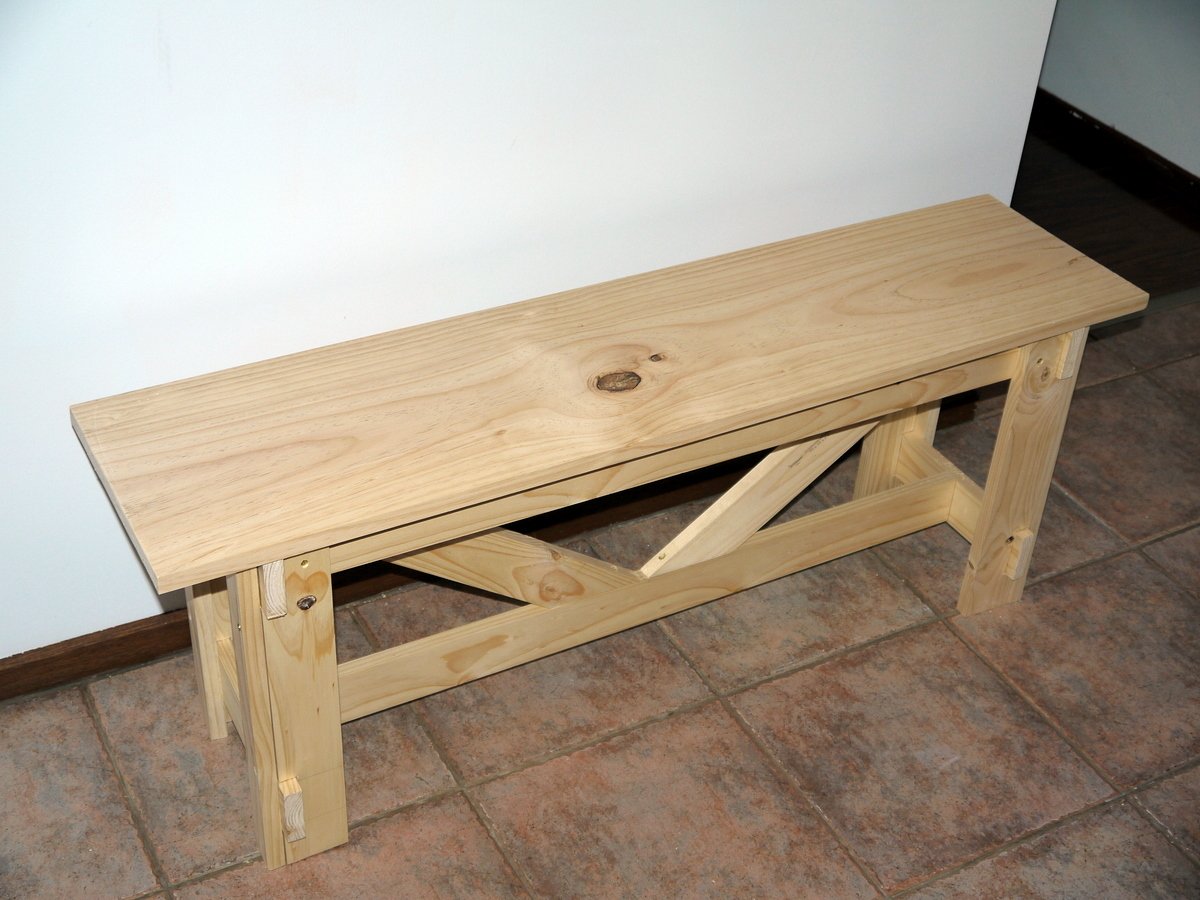
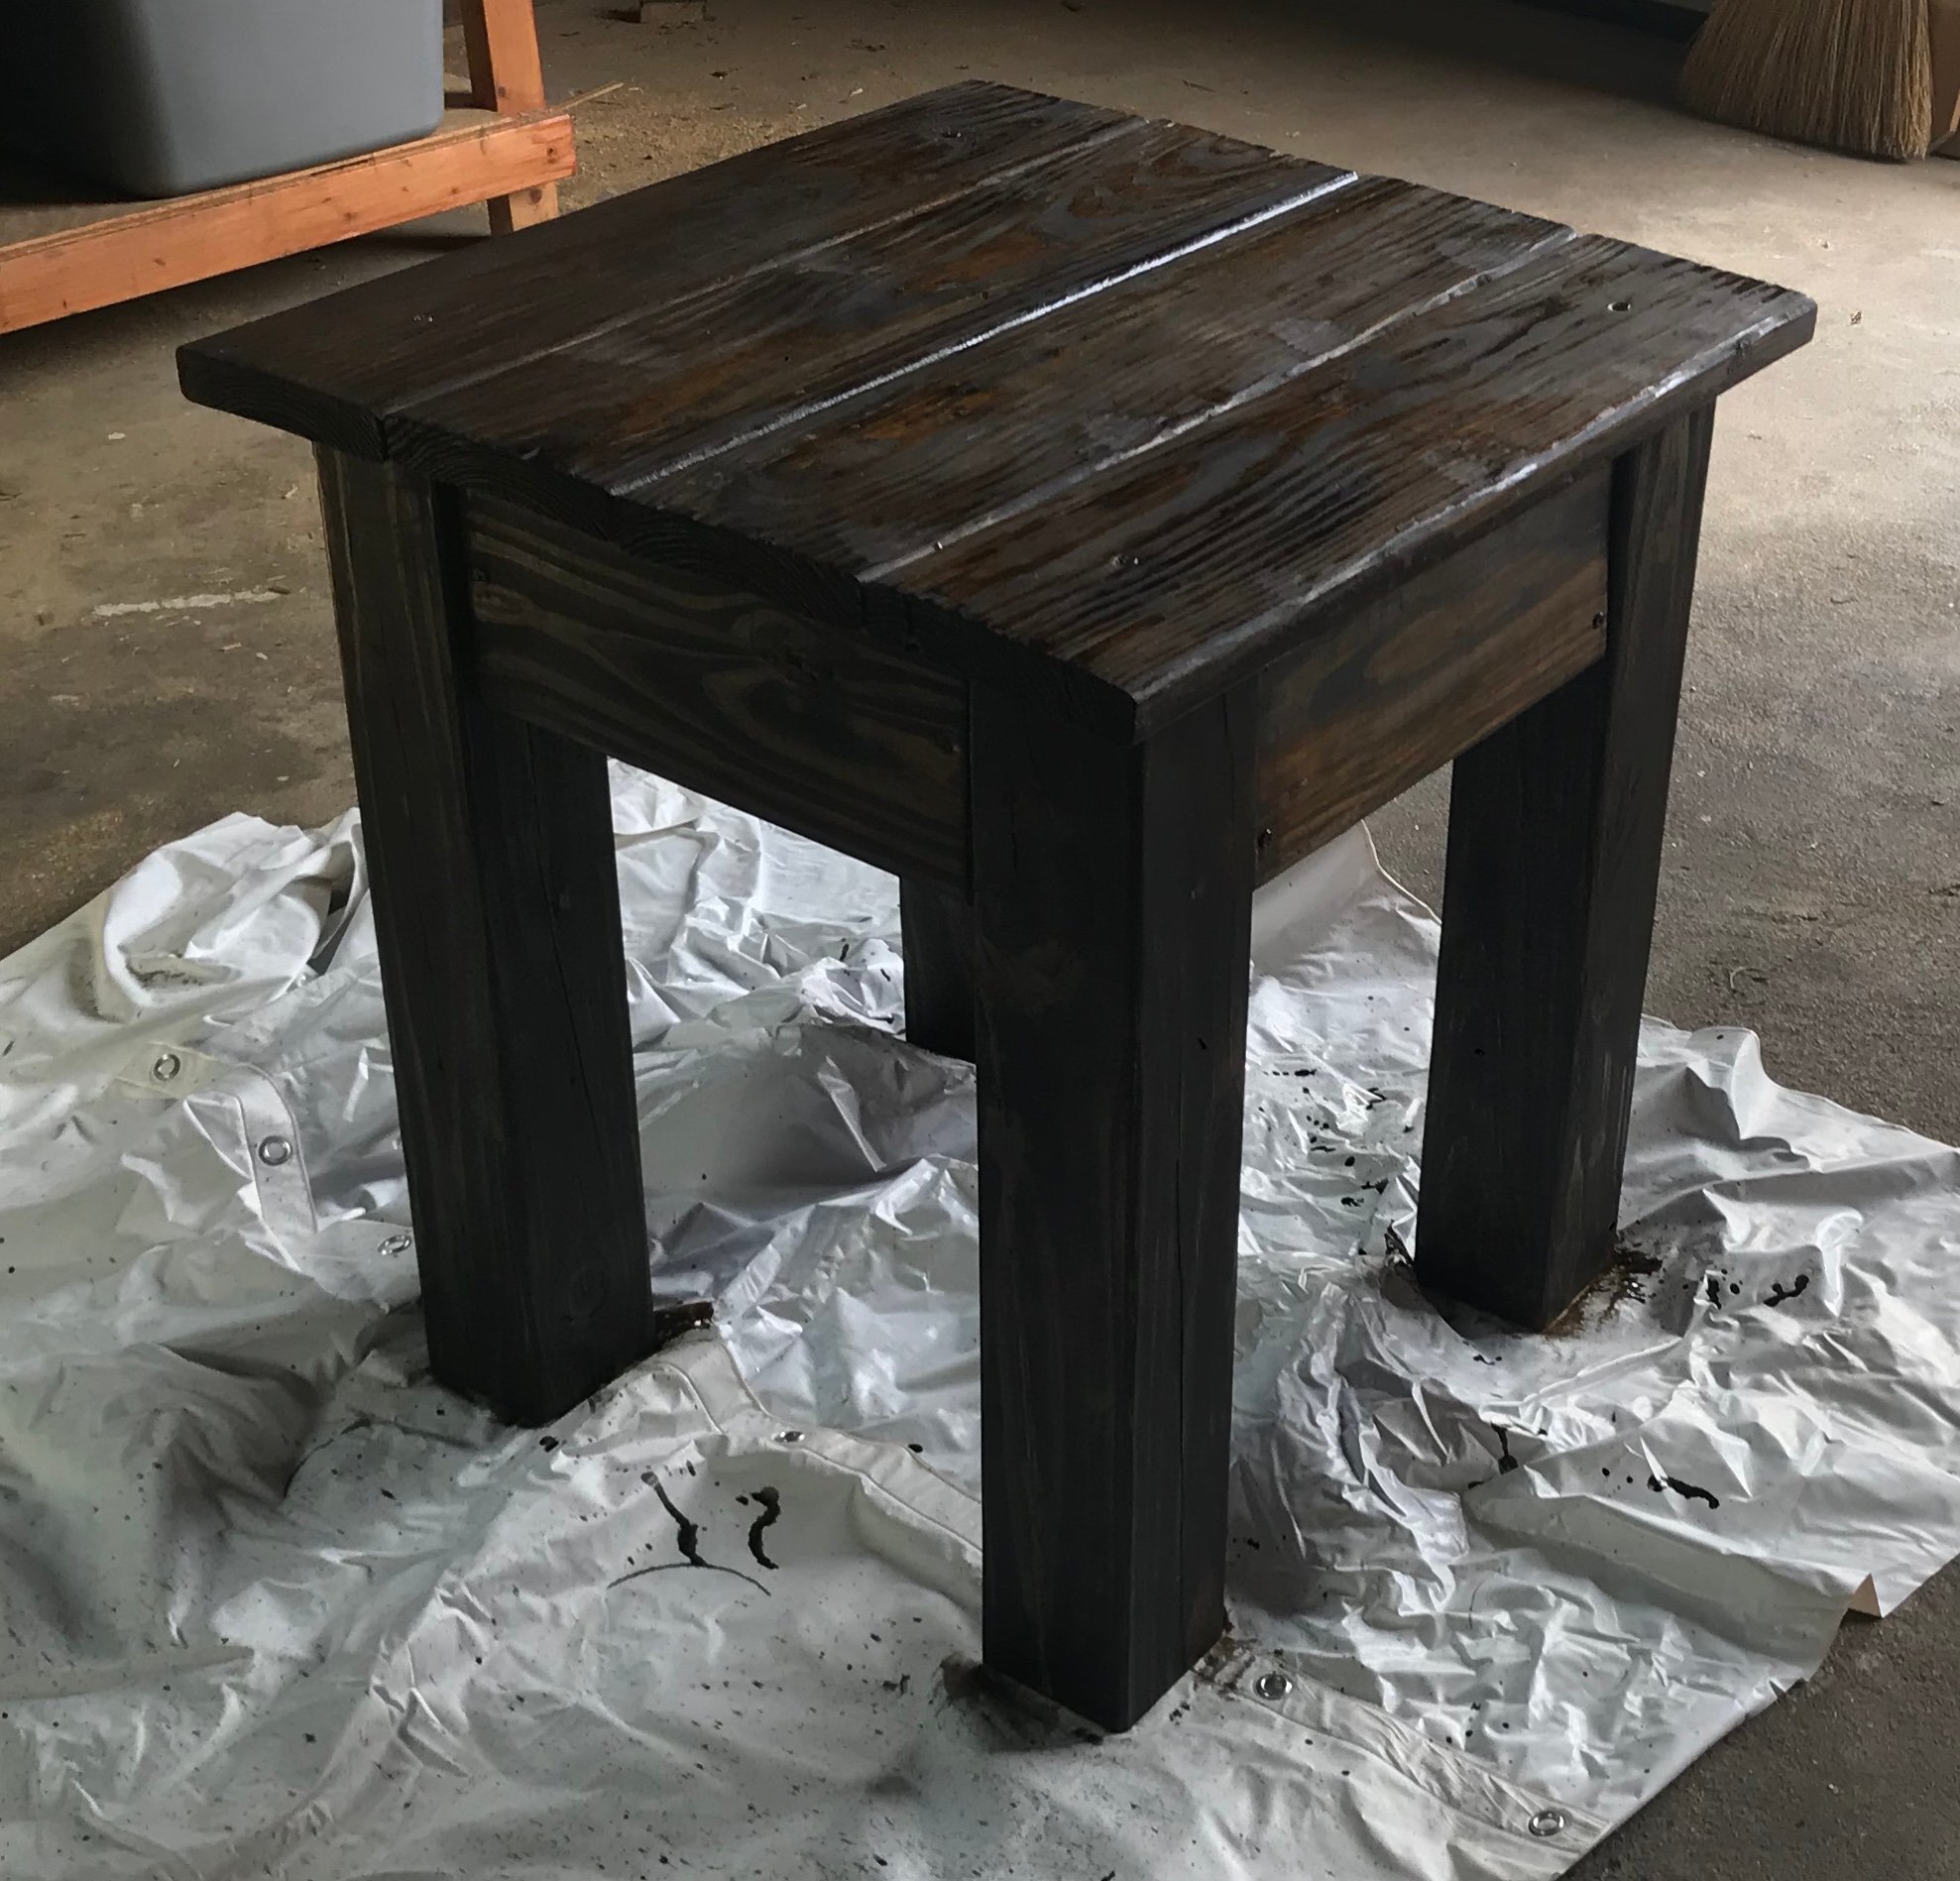
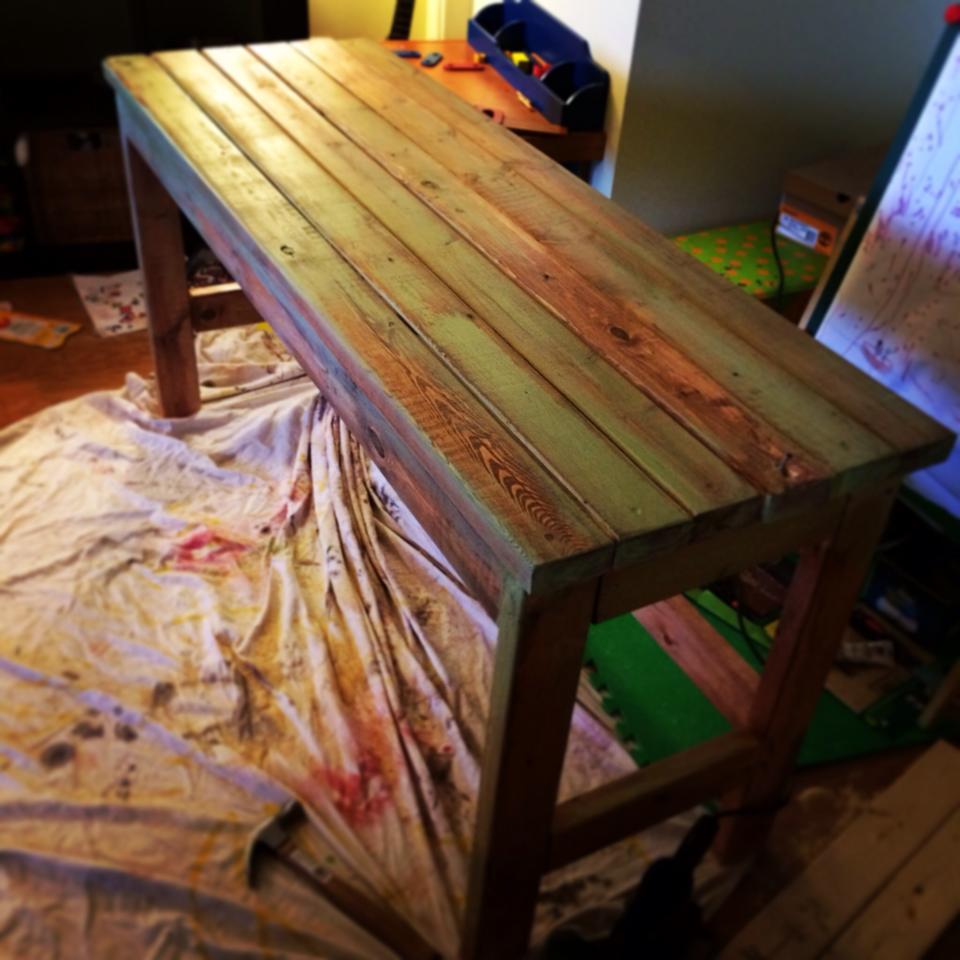
Large rustic bench
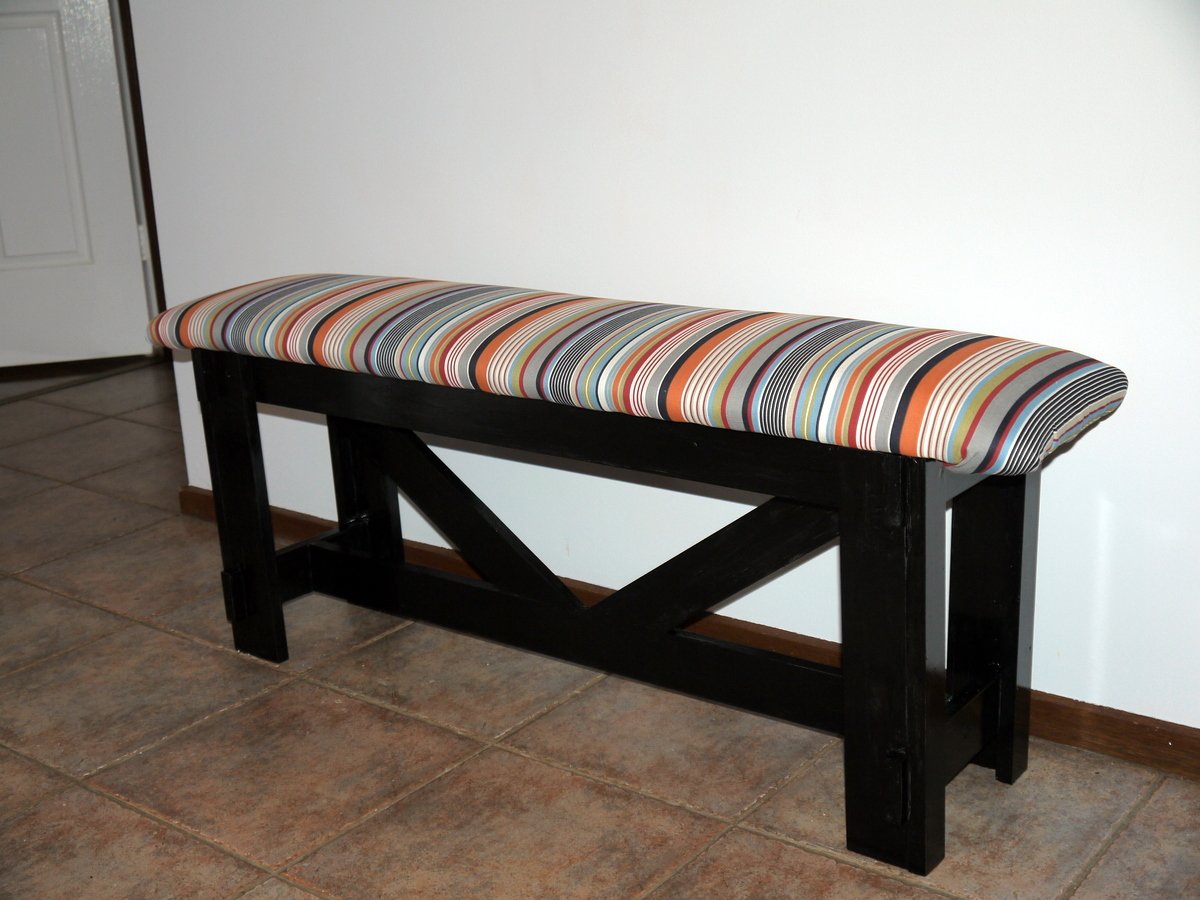
This is the first woodworking project I have done since high school (16 years ago!) and it's more ambitious than anything I attempted then!
It was easier than I thought on the whole, although I got a bit baffled by Australian standard timber sizes being totally different from USA ones. (The guy at the timber yard was all "One WHAT by two WHAT?") And because I couldn't find a 1x12 longer than 47 inches, I had to make the bench slightly shorter. I didn't anticipate how incredibly hard that would make it to calculate the cross support angles. (It's not just trigonometry, because there are multiple possible solutions).
It was the first time I've tried to upholster anything, too, so it's a bit wrinkly at the corners, but I'm happy with it.
I think the painting took the longest. I built the bench in one afternoon, but I had to do four coats of paint (and one of primer), each of which took nearly 24 hours to dry, so it took forever to finish.
Built from Plan(s)
Estimated Cost
$70 ($30 for the wood; $25 for fabric and batting; $10 for paint; $5 for screws and sandpaper)
Estimated Time Investment
Weekend Project (10-20 Hours)
Finish Used
Black acrylic "enamel" paint. Four coats over one coat of water-based primer. Upholstered top with upholstery fabric and batting, using a stapler gun.
Recommended Skill Level
Starter Project
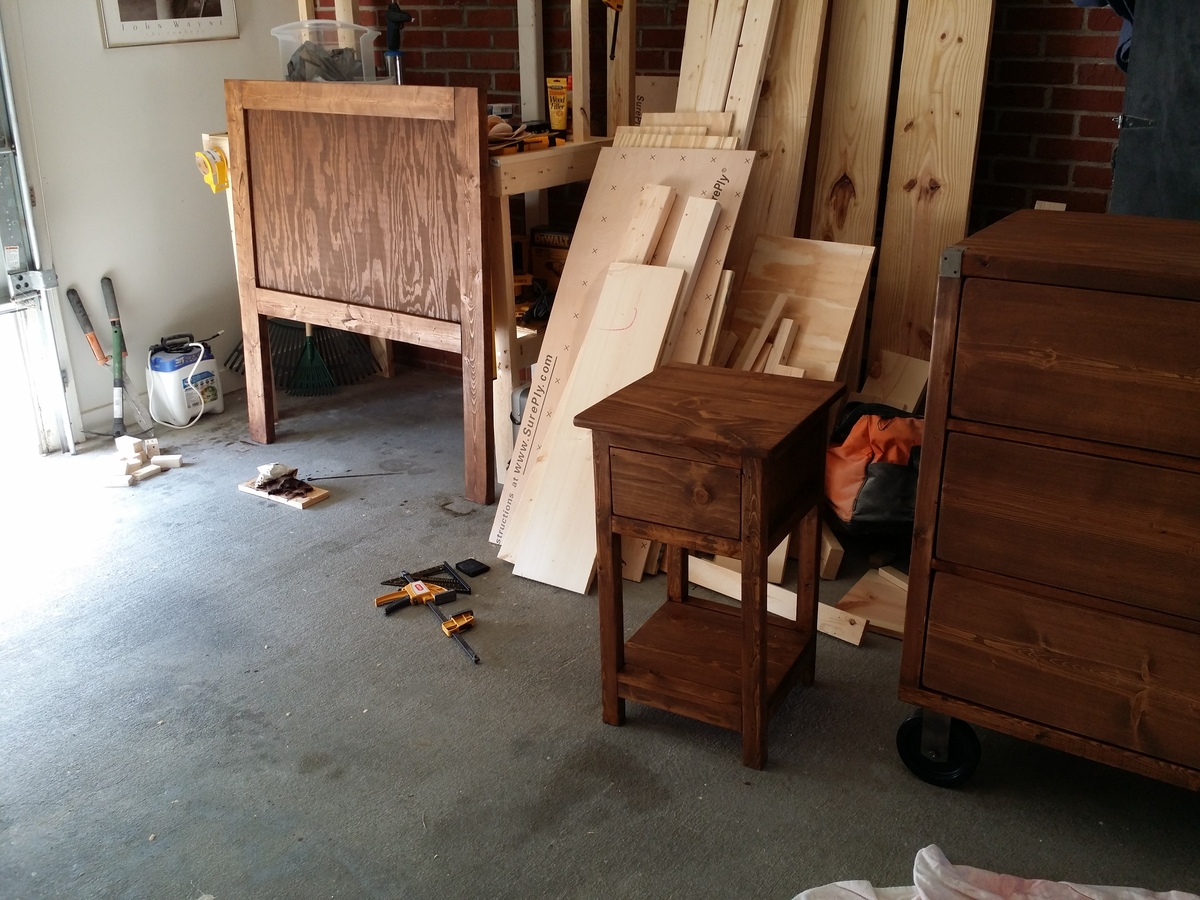
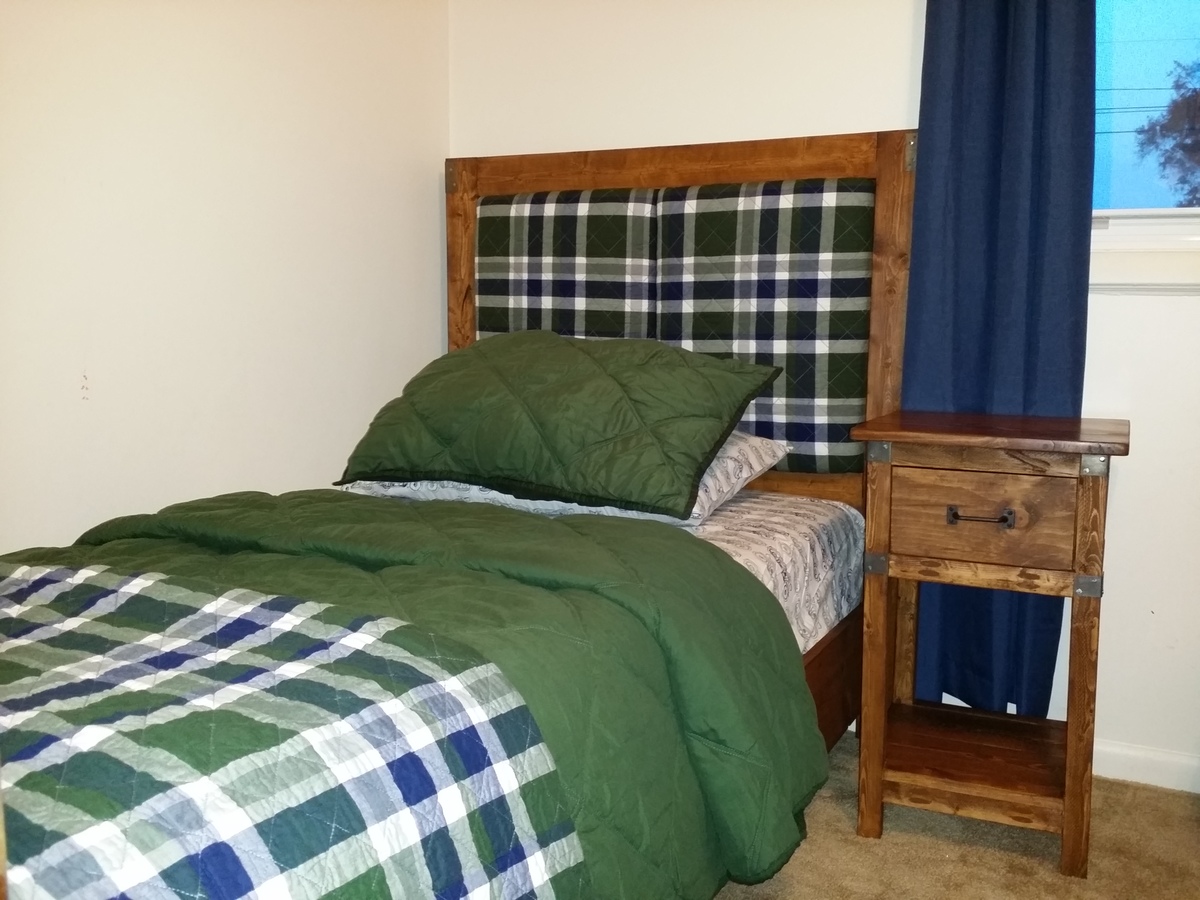
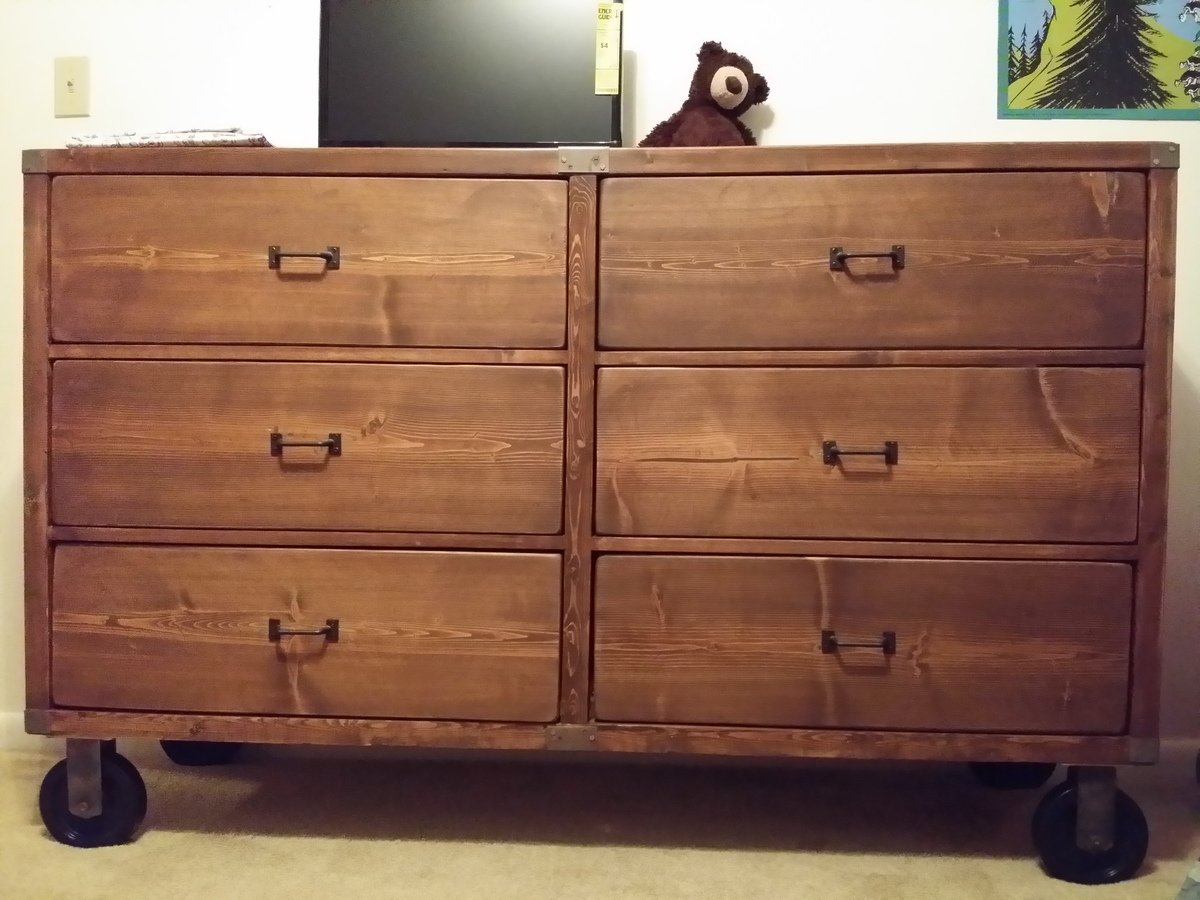
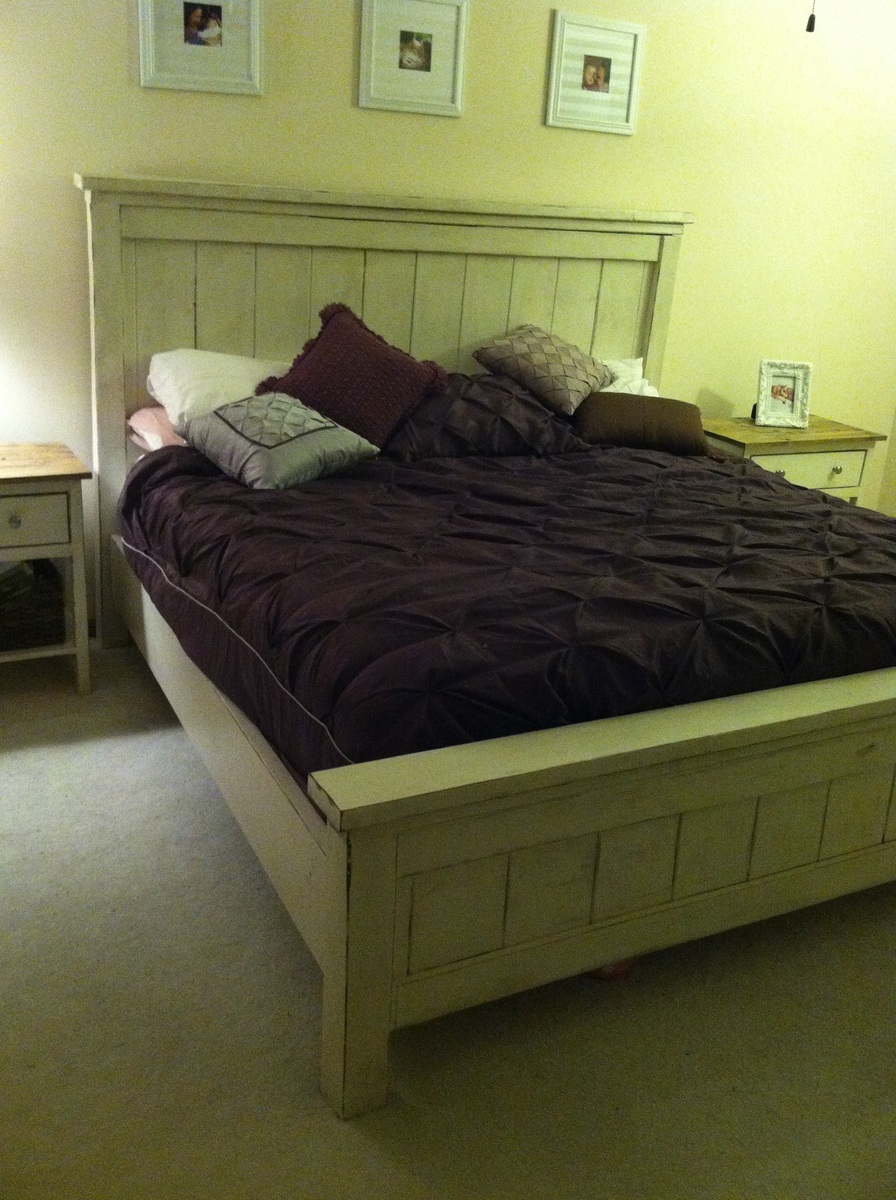
Rustic Twin Bed with Upholstered Headboard (Matching Nightstand & Dresser)
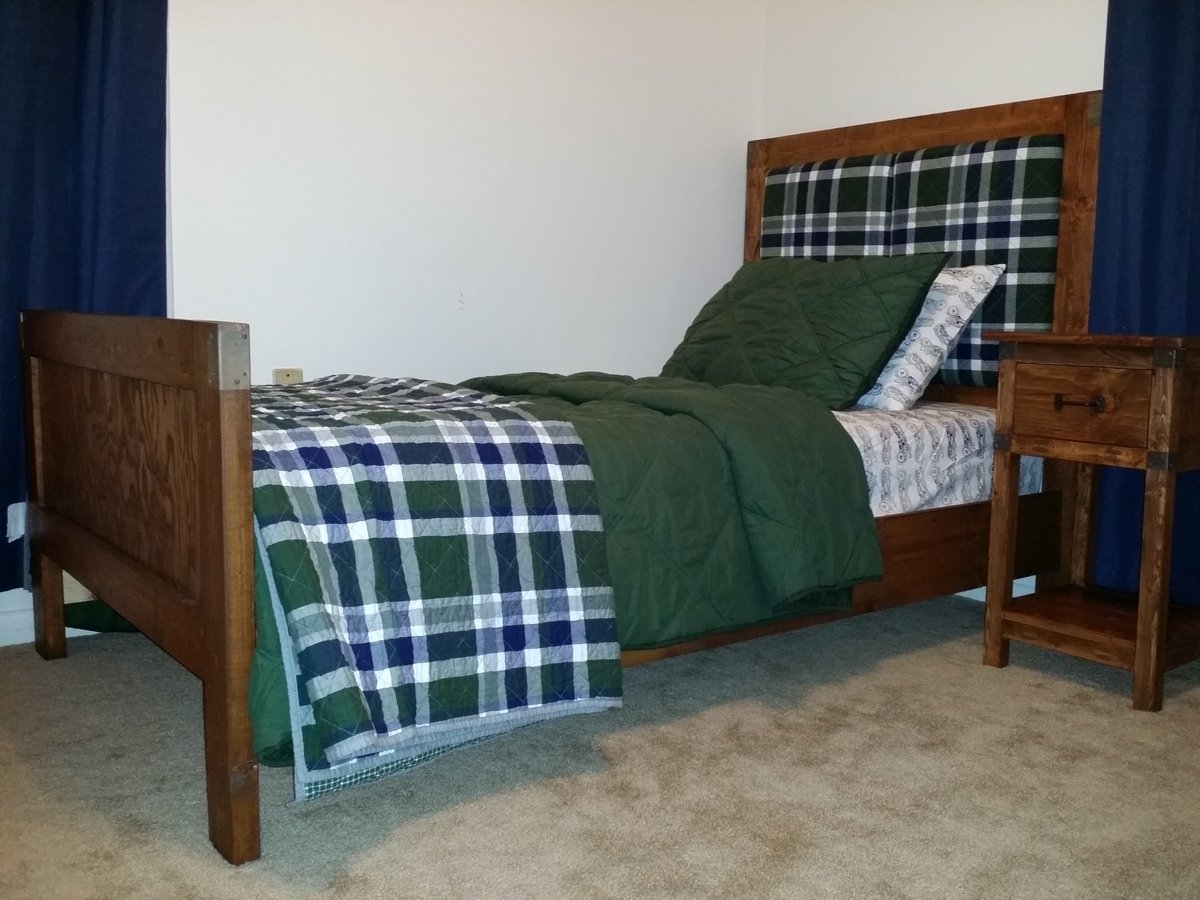
I started my son's bedroom set back at the beginning of January and have finally finished! I began by building the matching dresser (http://ana-white.com/2014/02/rustic-dresser-and-bedroom-set) and then started the bed only a week ago. The night table was taken from http://ana-white.com/2011/06/mini-farmhouse-bedside-table-0 - I had built it over the summer, but I couldn't get my pocket holes on the inside of the table because my drill wouldn't fit, so I wasn't going to use it.. until I realized it was the perfect little bedside table for a two year old who might destroy it anyways!
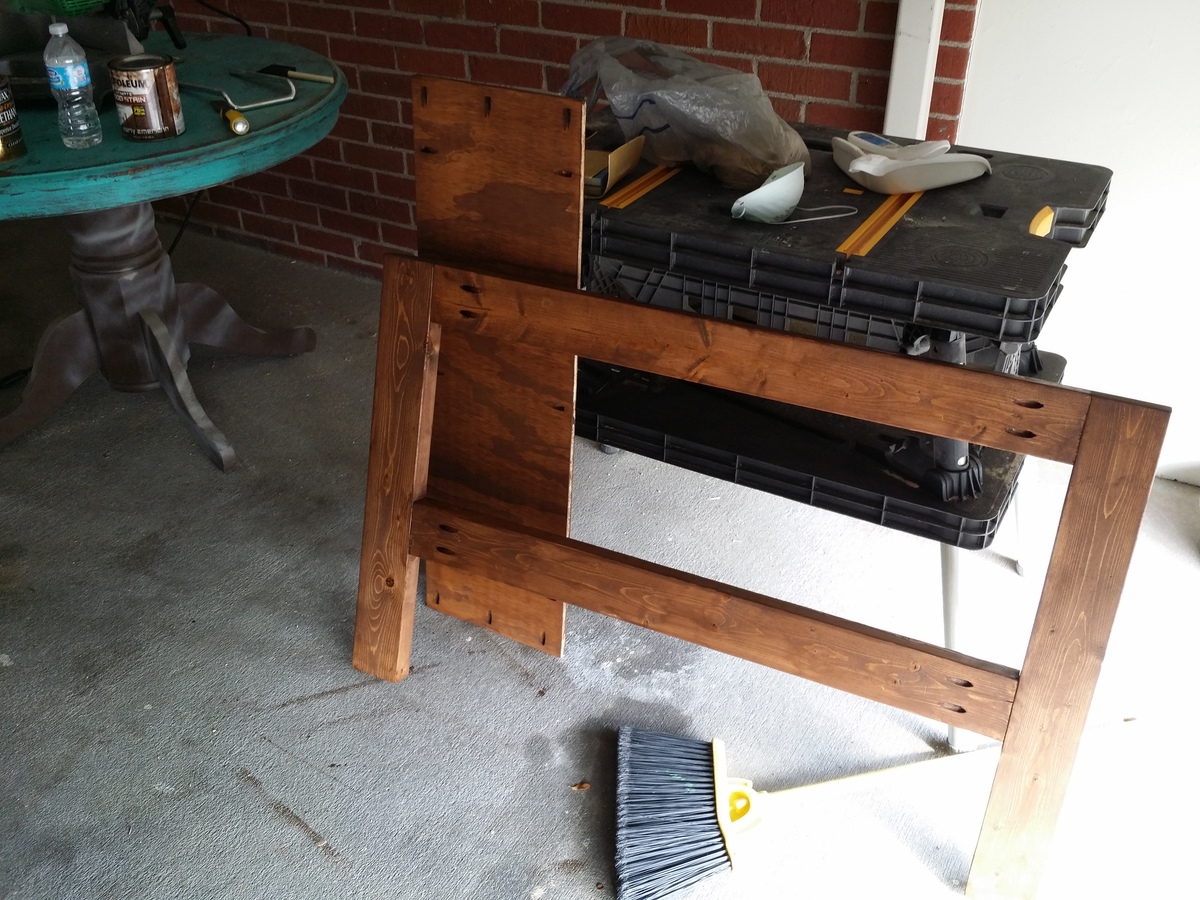
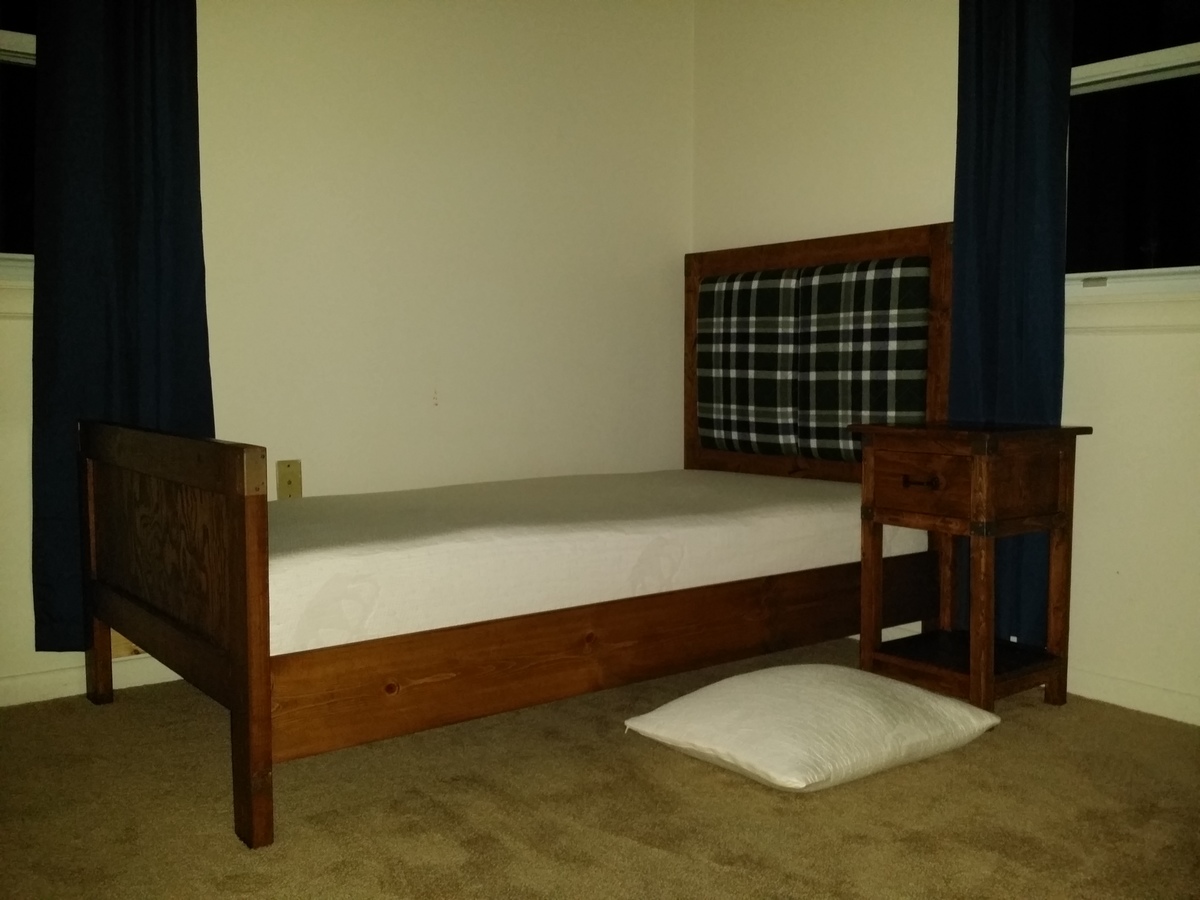
Back to the bed... I just had this vision of what I wanted my son's room to look like after seeing the rustic rolling dresser plan, and I stumbled on the Emme Twin bed plan. It was kind of perfect, but I didn't like the whole "window" look on the headboard. I still may add a divider on the foot board, but haven't decided yet. Regardless, so I envisioned something else with the same concept of the Emme twin bed. Building it exactly the same way without the dividers, I ordered the clearance shams from pottery barn that matched his new quilt and bought another piece of half inch plywood. I cut it in half and left about a quarter inch on each side of each piece of plywood to accommodate the fabric in between the 2 by 4s. I added one inch of foam and a couple layers of batting, matched up the two shams side by side, folded them each around the batting and foam, and stapled them. They fit perfectly into the headboard with some 1 1/4 or 1 1/2 inch screws (There is a gap from the fabric on the back, so your screw needs to account for that. You could put like a 1x4 onto each panel to screw through, but I placed the back plywoood attached to the 2x4s too far in, so it would have made the panels "float" and I wanted the fabric of the panels flush to the back plywood) holding them to the back plywood attached to the 2x4s. I wanted the padding on the back of the headboard because I always hear my son slam his head into the wall when he's sleeping and i just wanted to make sure he wasn't hitting the dividers that were on the EMME twin bed.
The bed was so easy to build, stain and finish. It turned out exactly how I had envisioned it. I had to lower the side rail 2x4s because I bought a ten inch memory foam mattress (You can see the foam mattress and pillow rising in the picture!) and didn't want it coming above the headboard, but now I don't think I'll need a guard rail since he is so close to the floor! The 2x4s sit 5.5 inches up from the bottom of each leg. I also added quite a bit of length to the foot board legs because I wanted the footboard to come above the mattress. I wish I had realized that there was much nicer plywood at Lowes, but when I asked, they told me "this is all of the plywood we have" and I got stuck with the ugly stuff.. I will fix the footboard with some nicer looking plywood, but it's good enough for now!
Built from Plan(s)
Estimated Cost
$50 for wood, added $30-$40 for the upholstered part, including the shams
Estimated Time Investment
Day Project (6-9 Hours)
Finish Used
Minwax Early American
Minwax Plyurethane, one coat and sanded, one coat of light wood minwax furniture wax to follow
Minwax Plyurethane, one coat and sanded, one coat of light wood minwax furniture wax to follow
Recommended Skill Level
Beginner
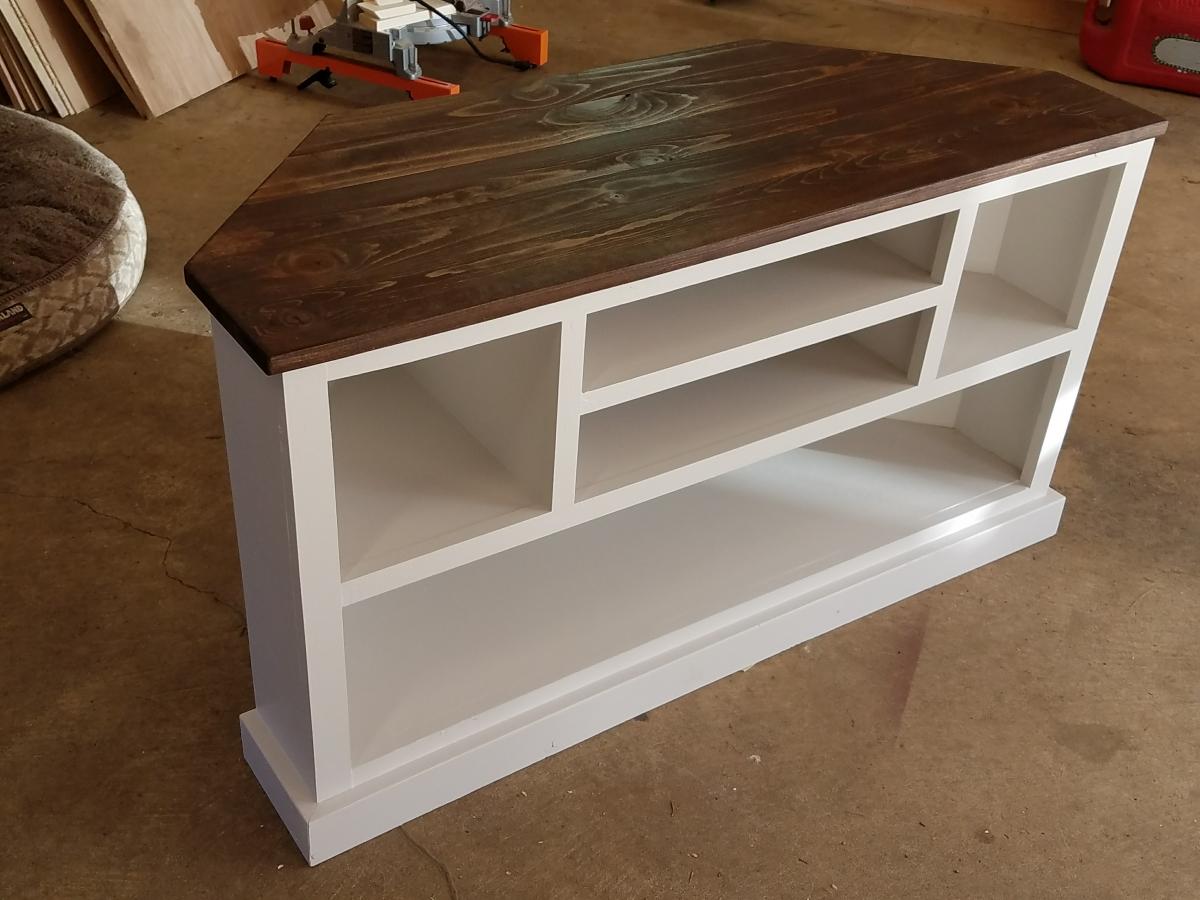
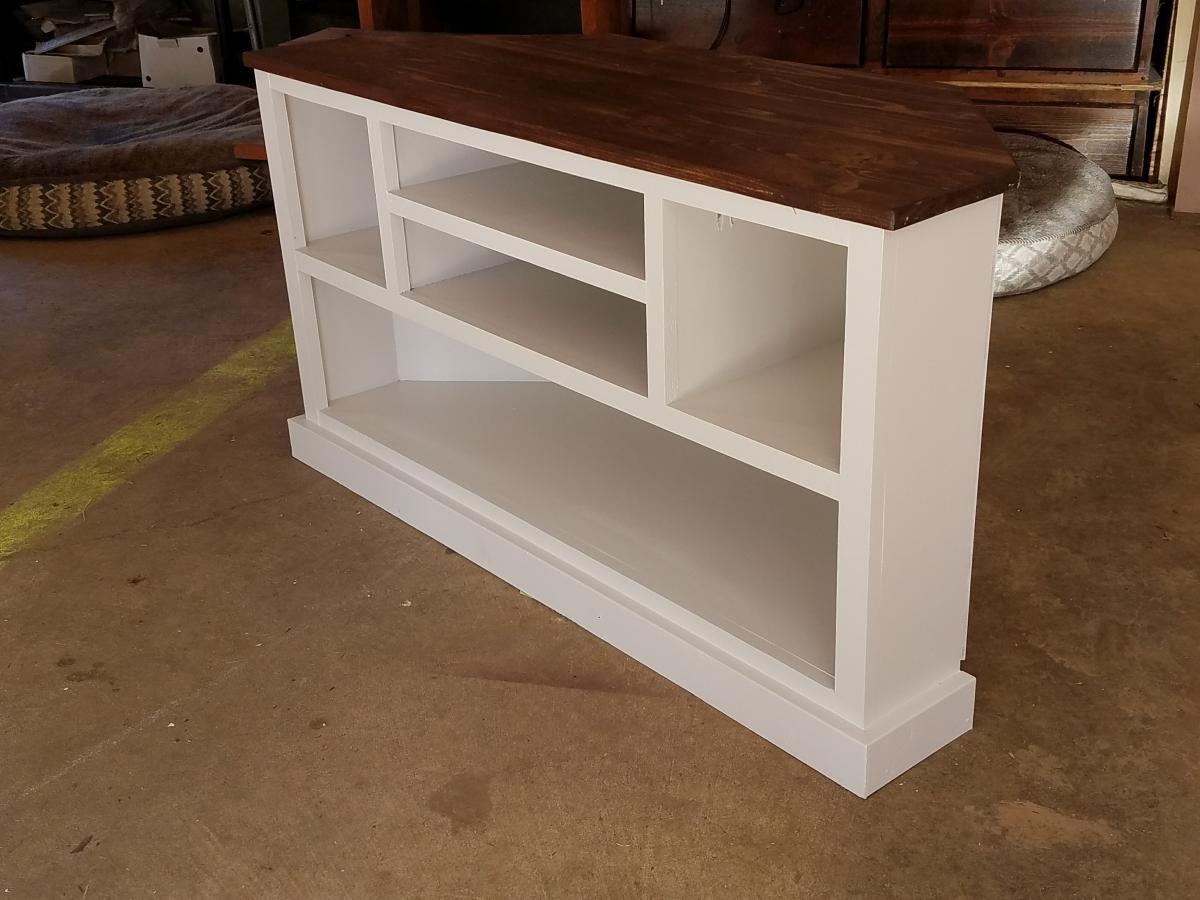
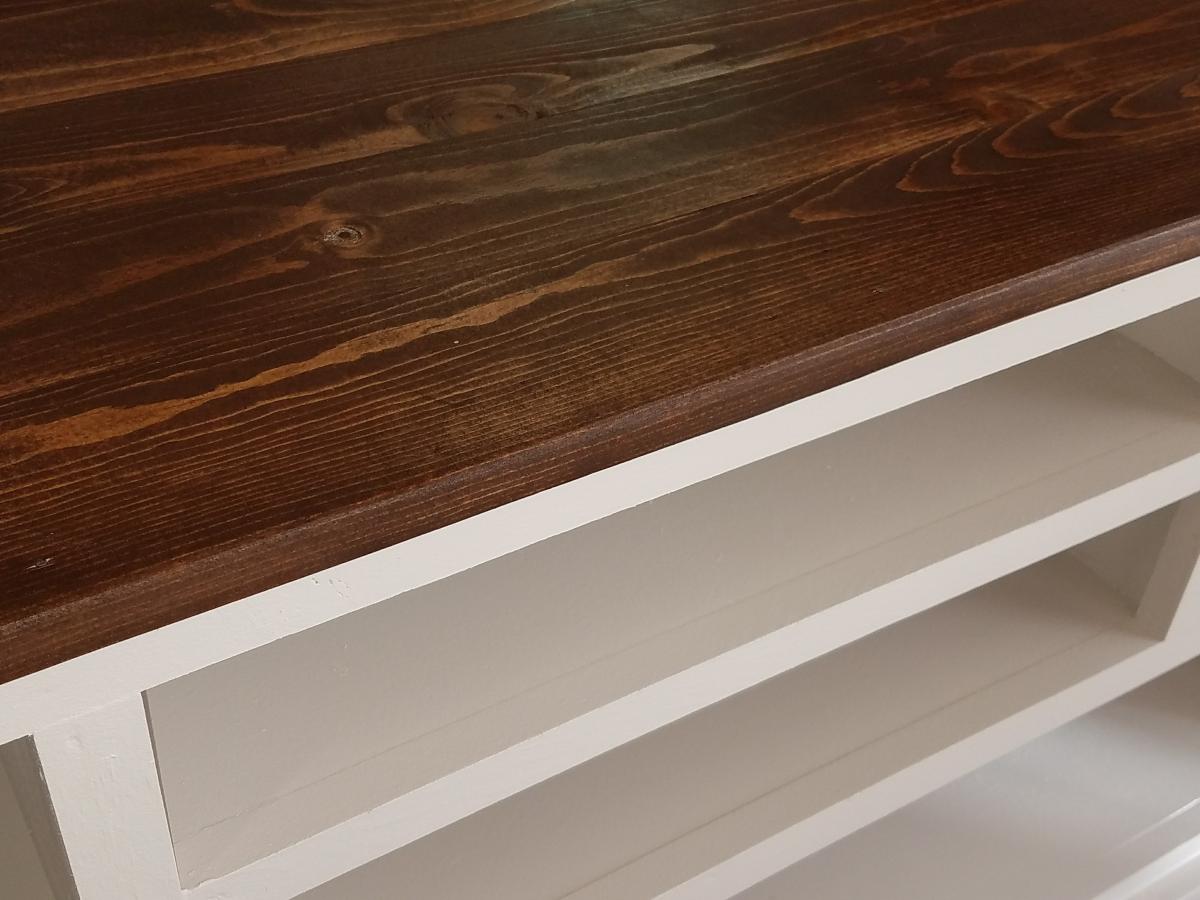
Corner Media Console
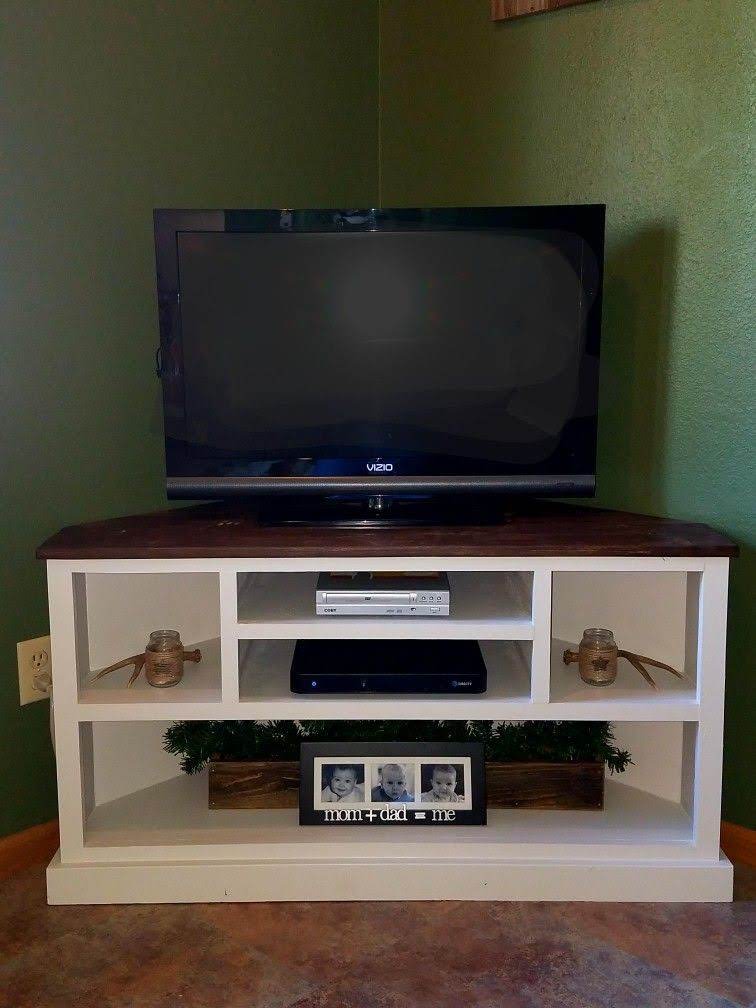
We had just moved into our new house and were using an end table for our TV stand I just didn't like it. I found this and modified it so it's shorter and fits in our room better. I also opted to not put doors on it and use it to display items instead. This was a relatively easy build and I'm learning new things with every build I make. It took about 2 days to complete not including filling holes/paint/stain. I love it, it looks so great in our room and I am planning on building end tables to match as well as replacing our buffet with movies in it to match also. Thanks for the easy-to-follow plans!
Built from Plan(s)
Estimated Cost
$45
Estimated Time Investment
Weekend Project (10-20 Hours)
Finish Used
Whatever white paint I had on hand (haha) and Varathane Kona with a satin poly for the top.
Recommended Skill Level
Beginner
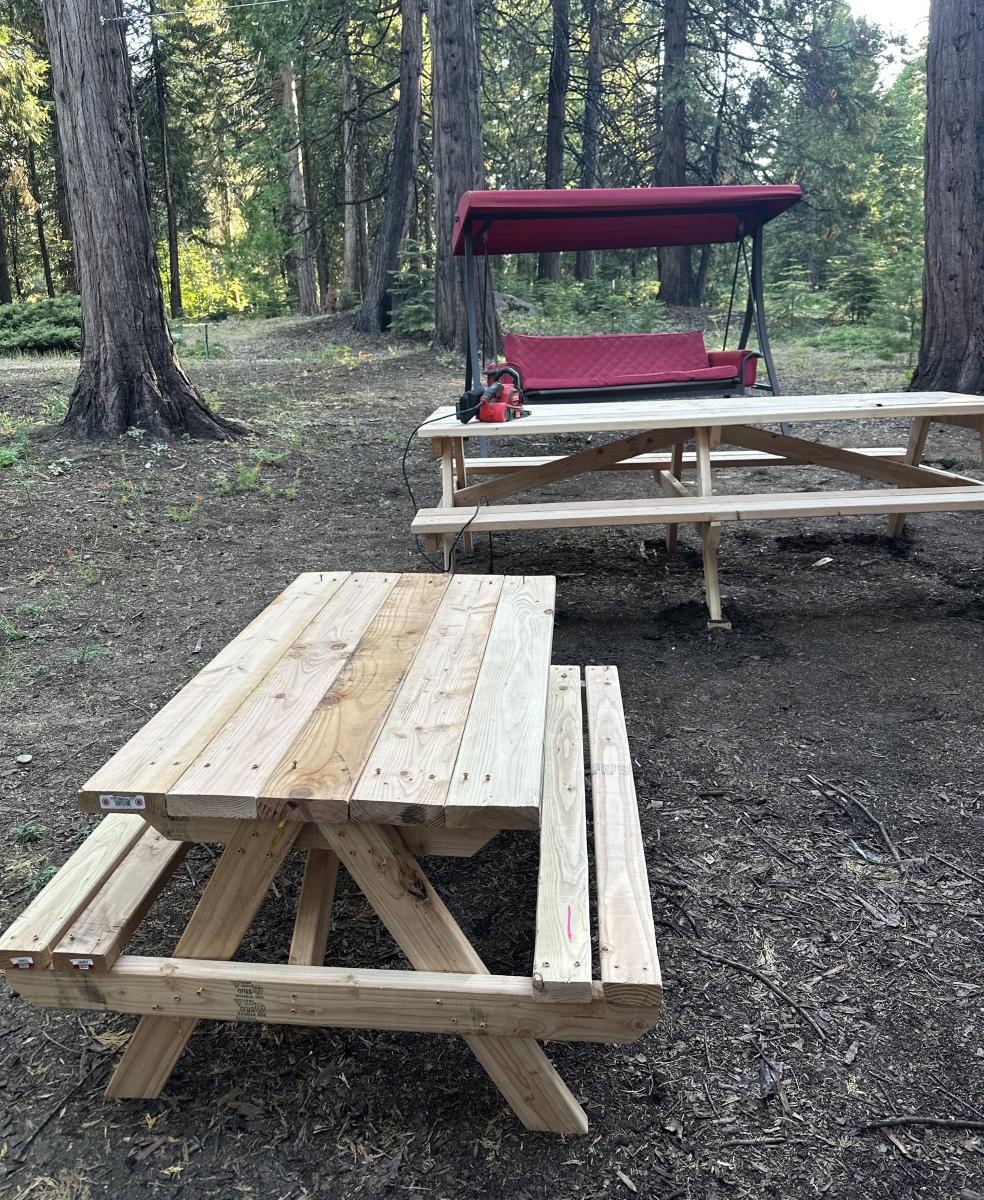
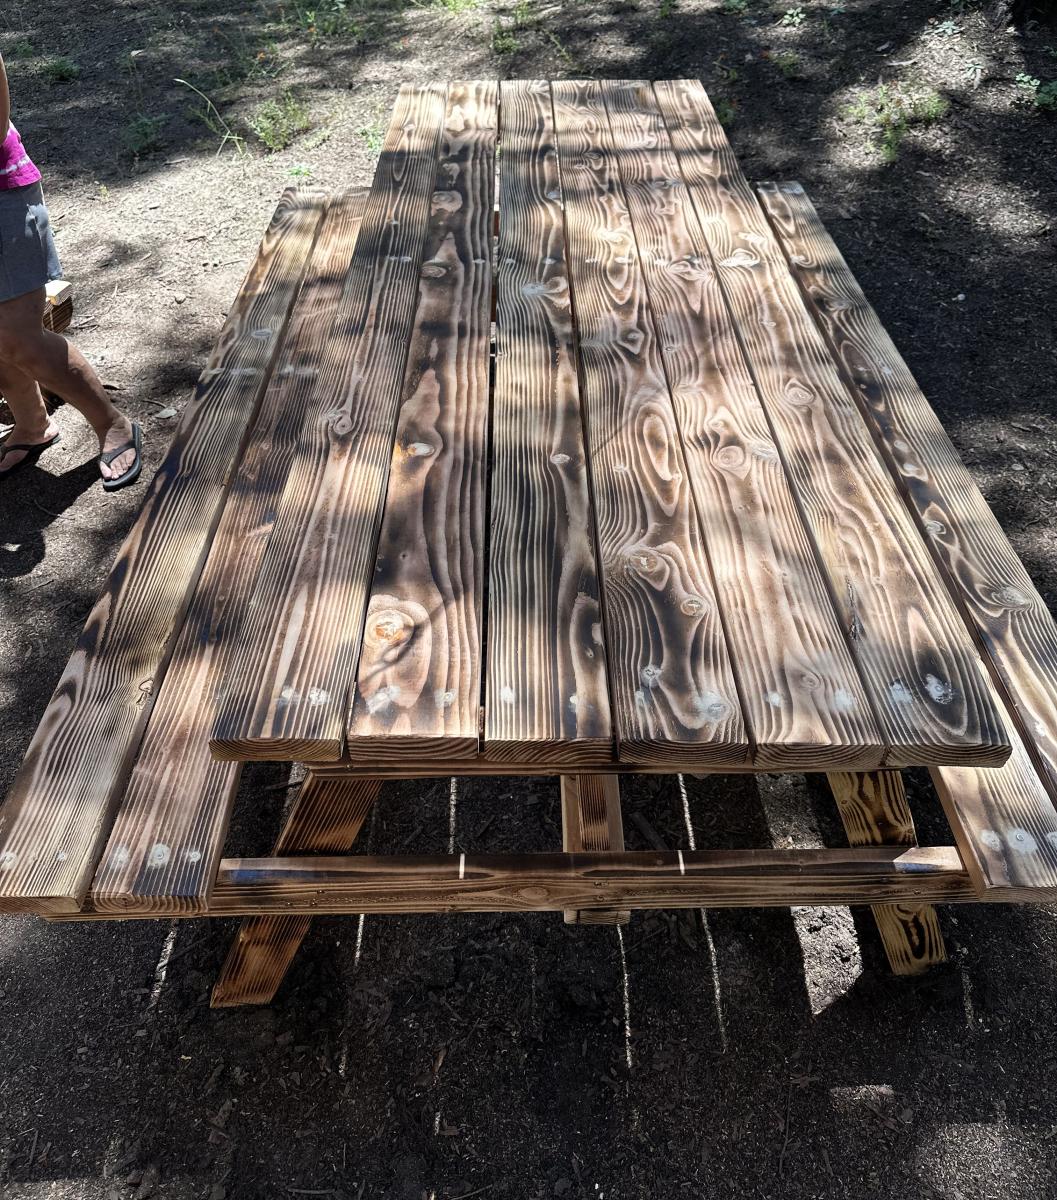
Airbnb Picnic Tables by the Lake
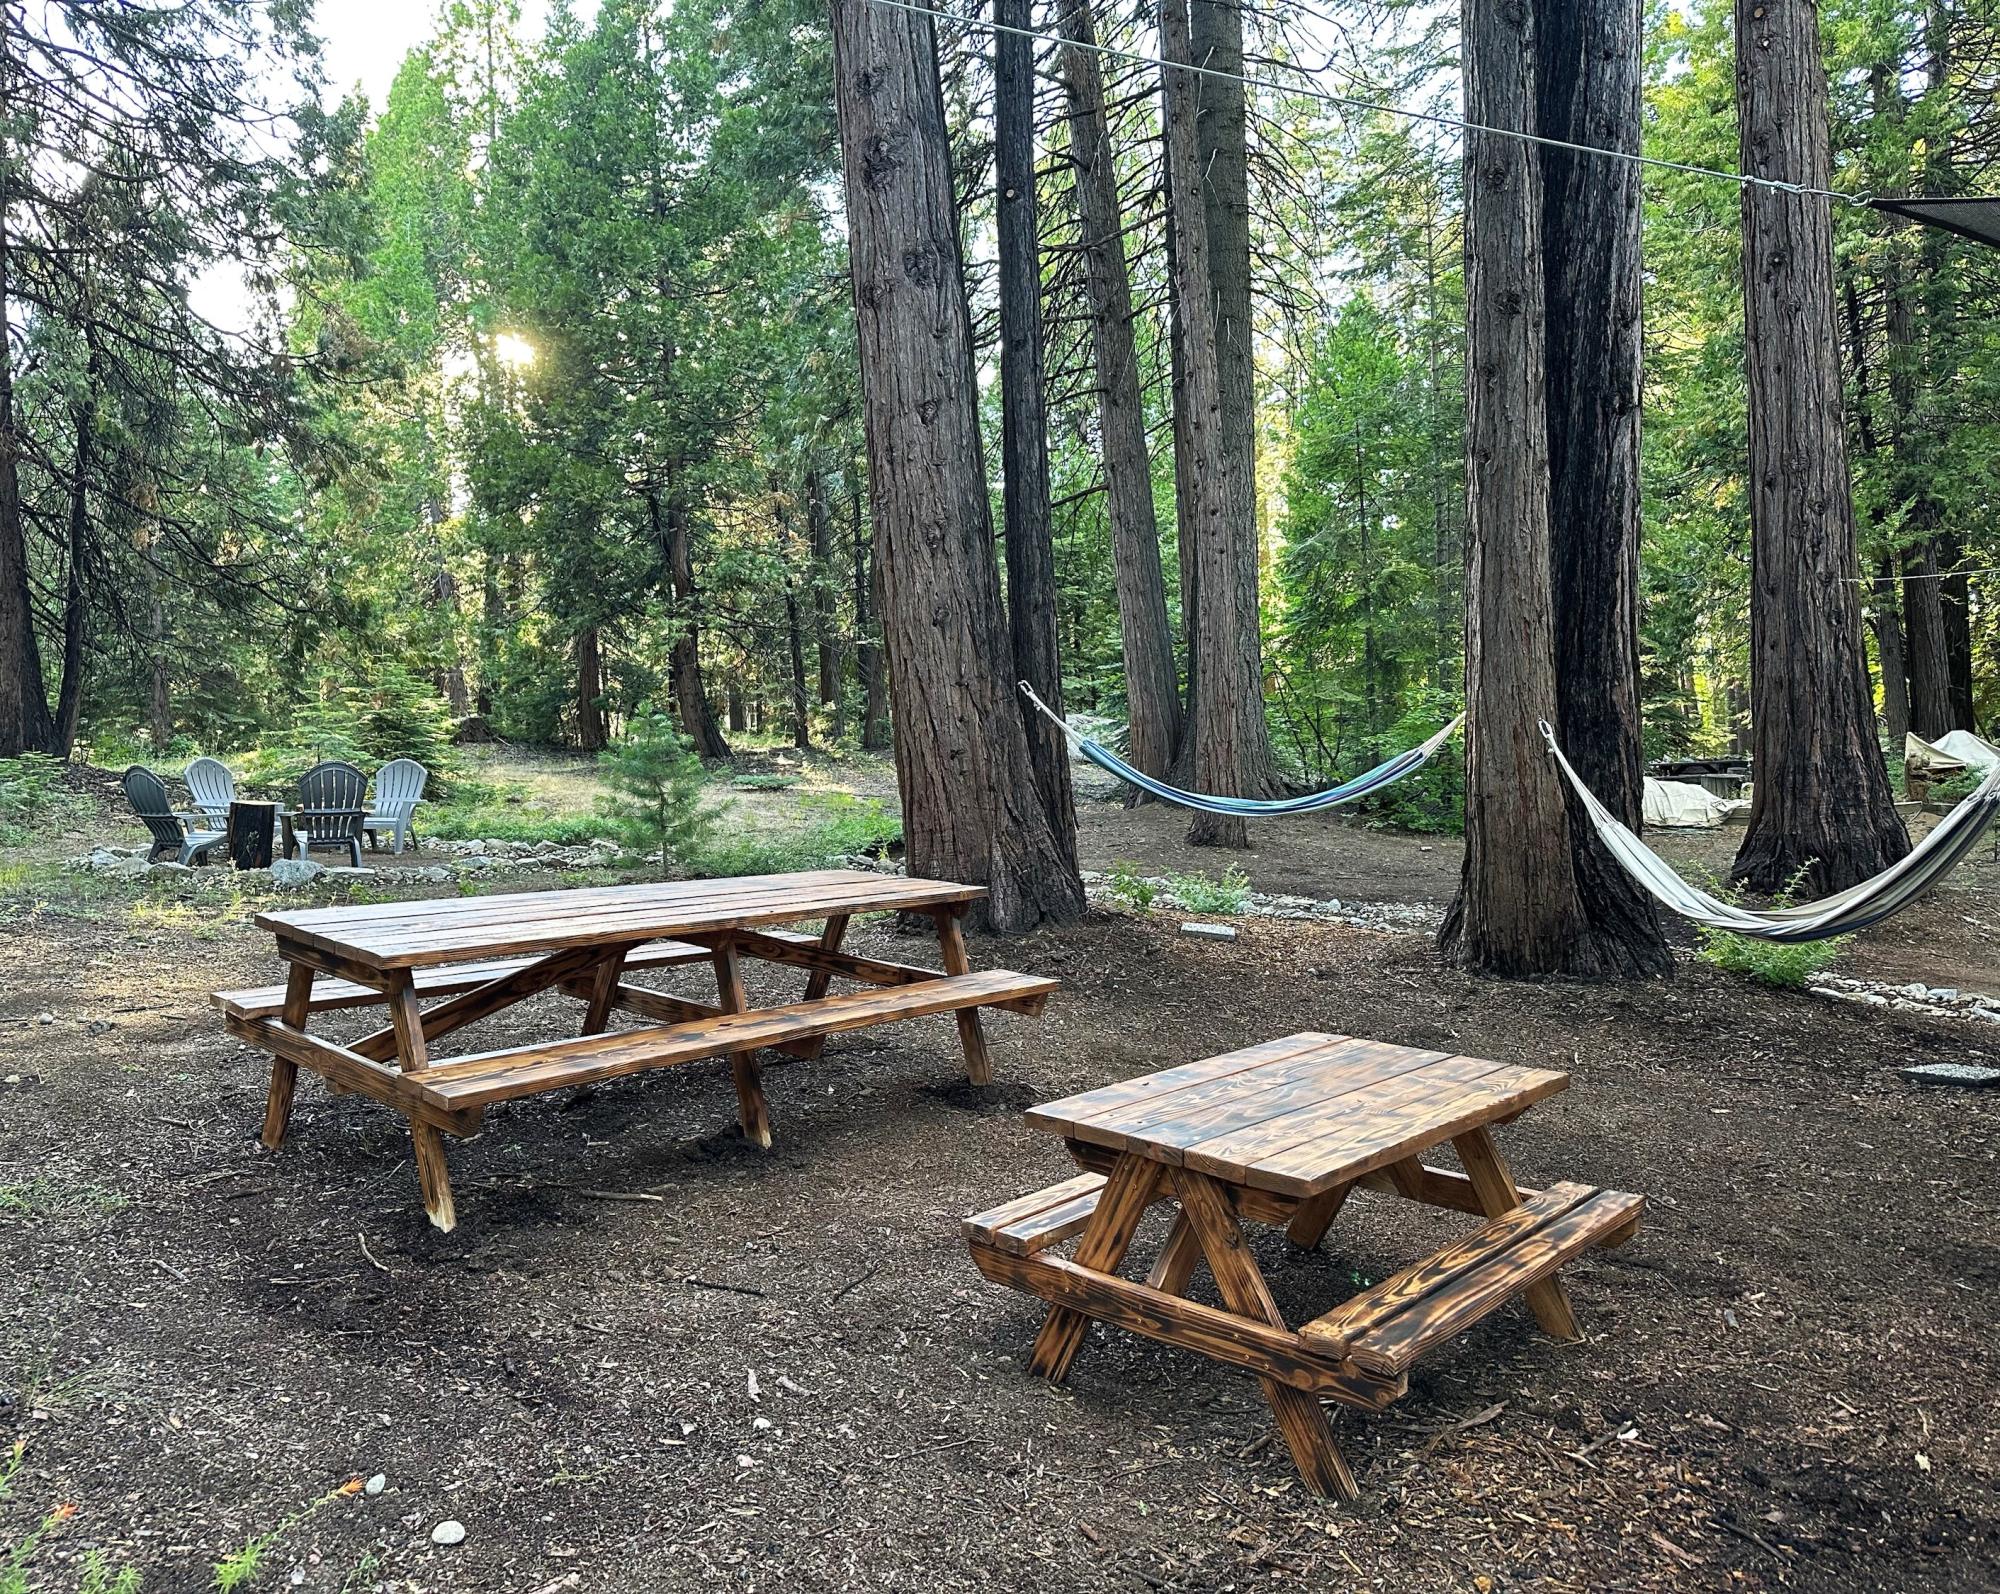
We have an Airbnb at a nearby lake. We built the large and kids picnic tables so our guests can enjoy the outdoors!!
Elaine Freitas
Built from Plan(s)
Farmhouse Table
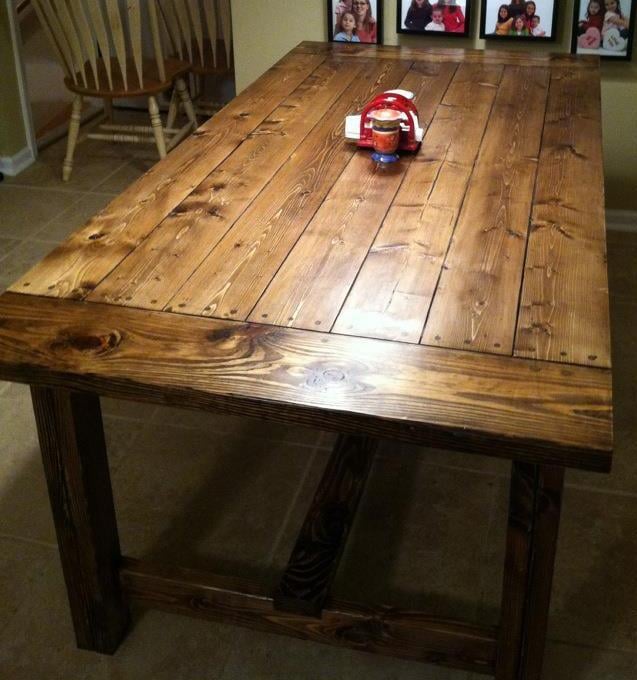
Farmhouse table from plans. Shortened length to 6.5 feet to fit our area. Good plans.
Built from Plan(s)
Estimated Cost
$90
Estimated Time Investment
Day Project (6-9 Hours)
Finish Used
Minwax oil-based Dark Walnut with two coats of brush-on poly all around. One additional coat of brush-on poly on the top followed by one coat of wipe-on poly.
Recommended Skill Level
Beginner
Comments

Sun, 06/10/2012 - 16:30
well done!
Love it. Planning to make one for our new house once we get settled.
Mon, 07/30/2012 - 12:40
Love it!!!
Great job!!! On my list to make and I too will be making it to fit my dining area. Love the stain!!
Wed, 11/07/2012 - 09:06
Filled Screw Holes
I ALSO Love the "Filled" hole look! I'm going to be building this table this weekend, any suggestions on getting that look?
Fri, 02/15/2013 - 07:21
Plans for this table
New to the site, can anyone help me get to the plans for this table? I love everything about it.
Fri, 02/15/2013 - 10:40
Plans for this table
Just go to the blue bar above Ana's picture at the top of the page where it says "plans" and type in the kind of table you're interested in. Prepare to drool over all the gorgeous furniture and projects!
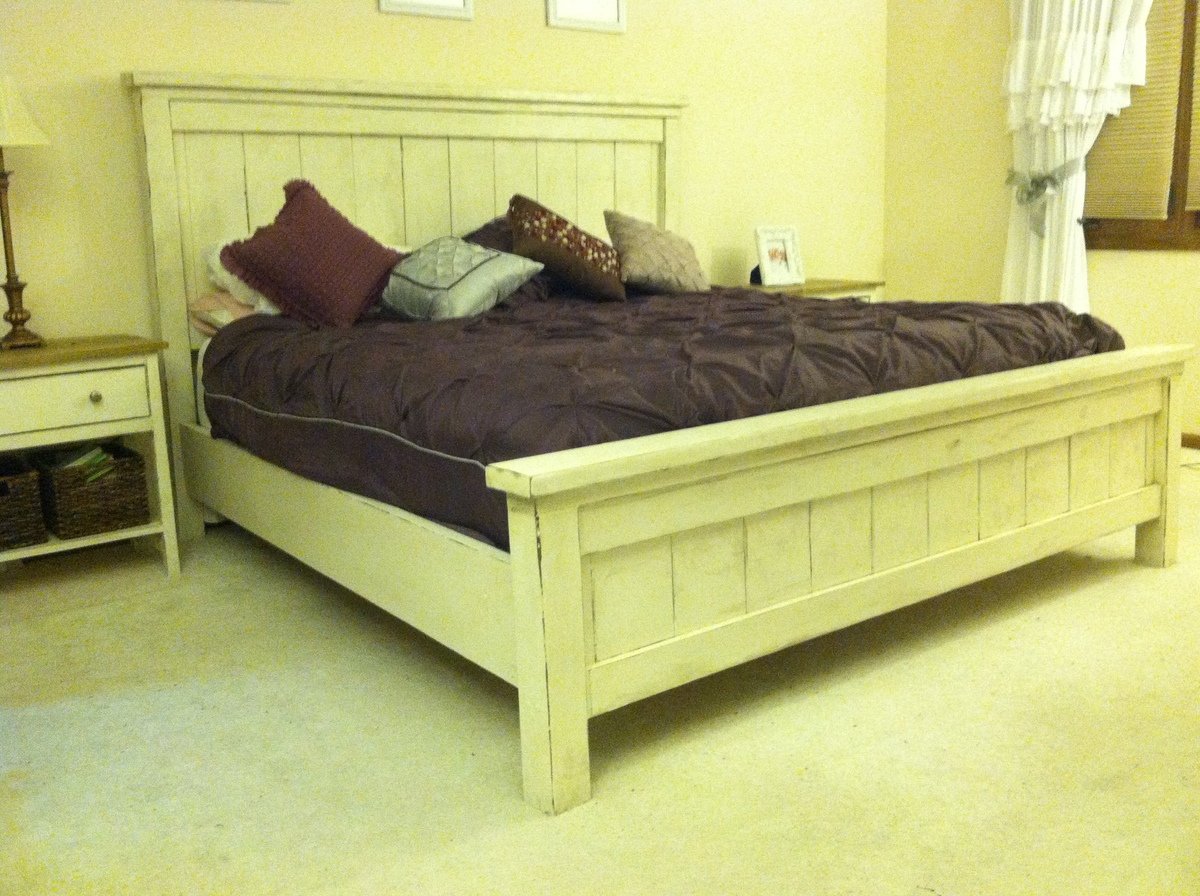
Farmhouse King Bed
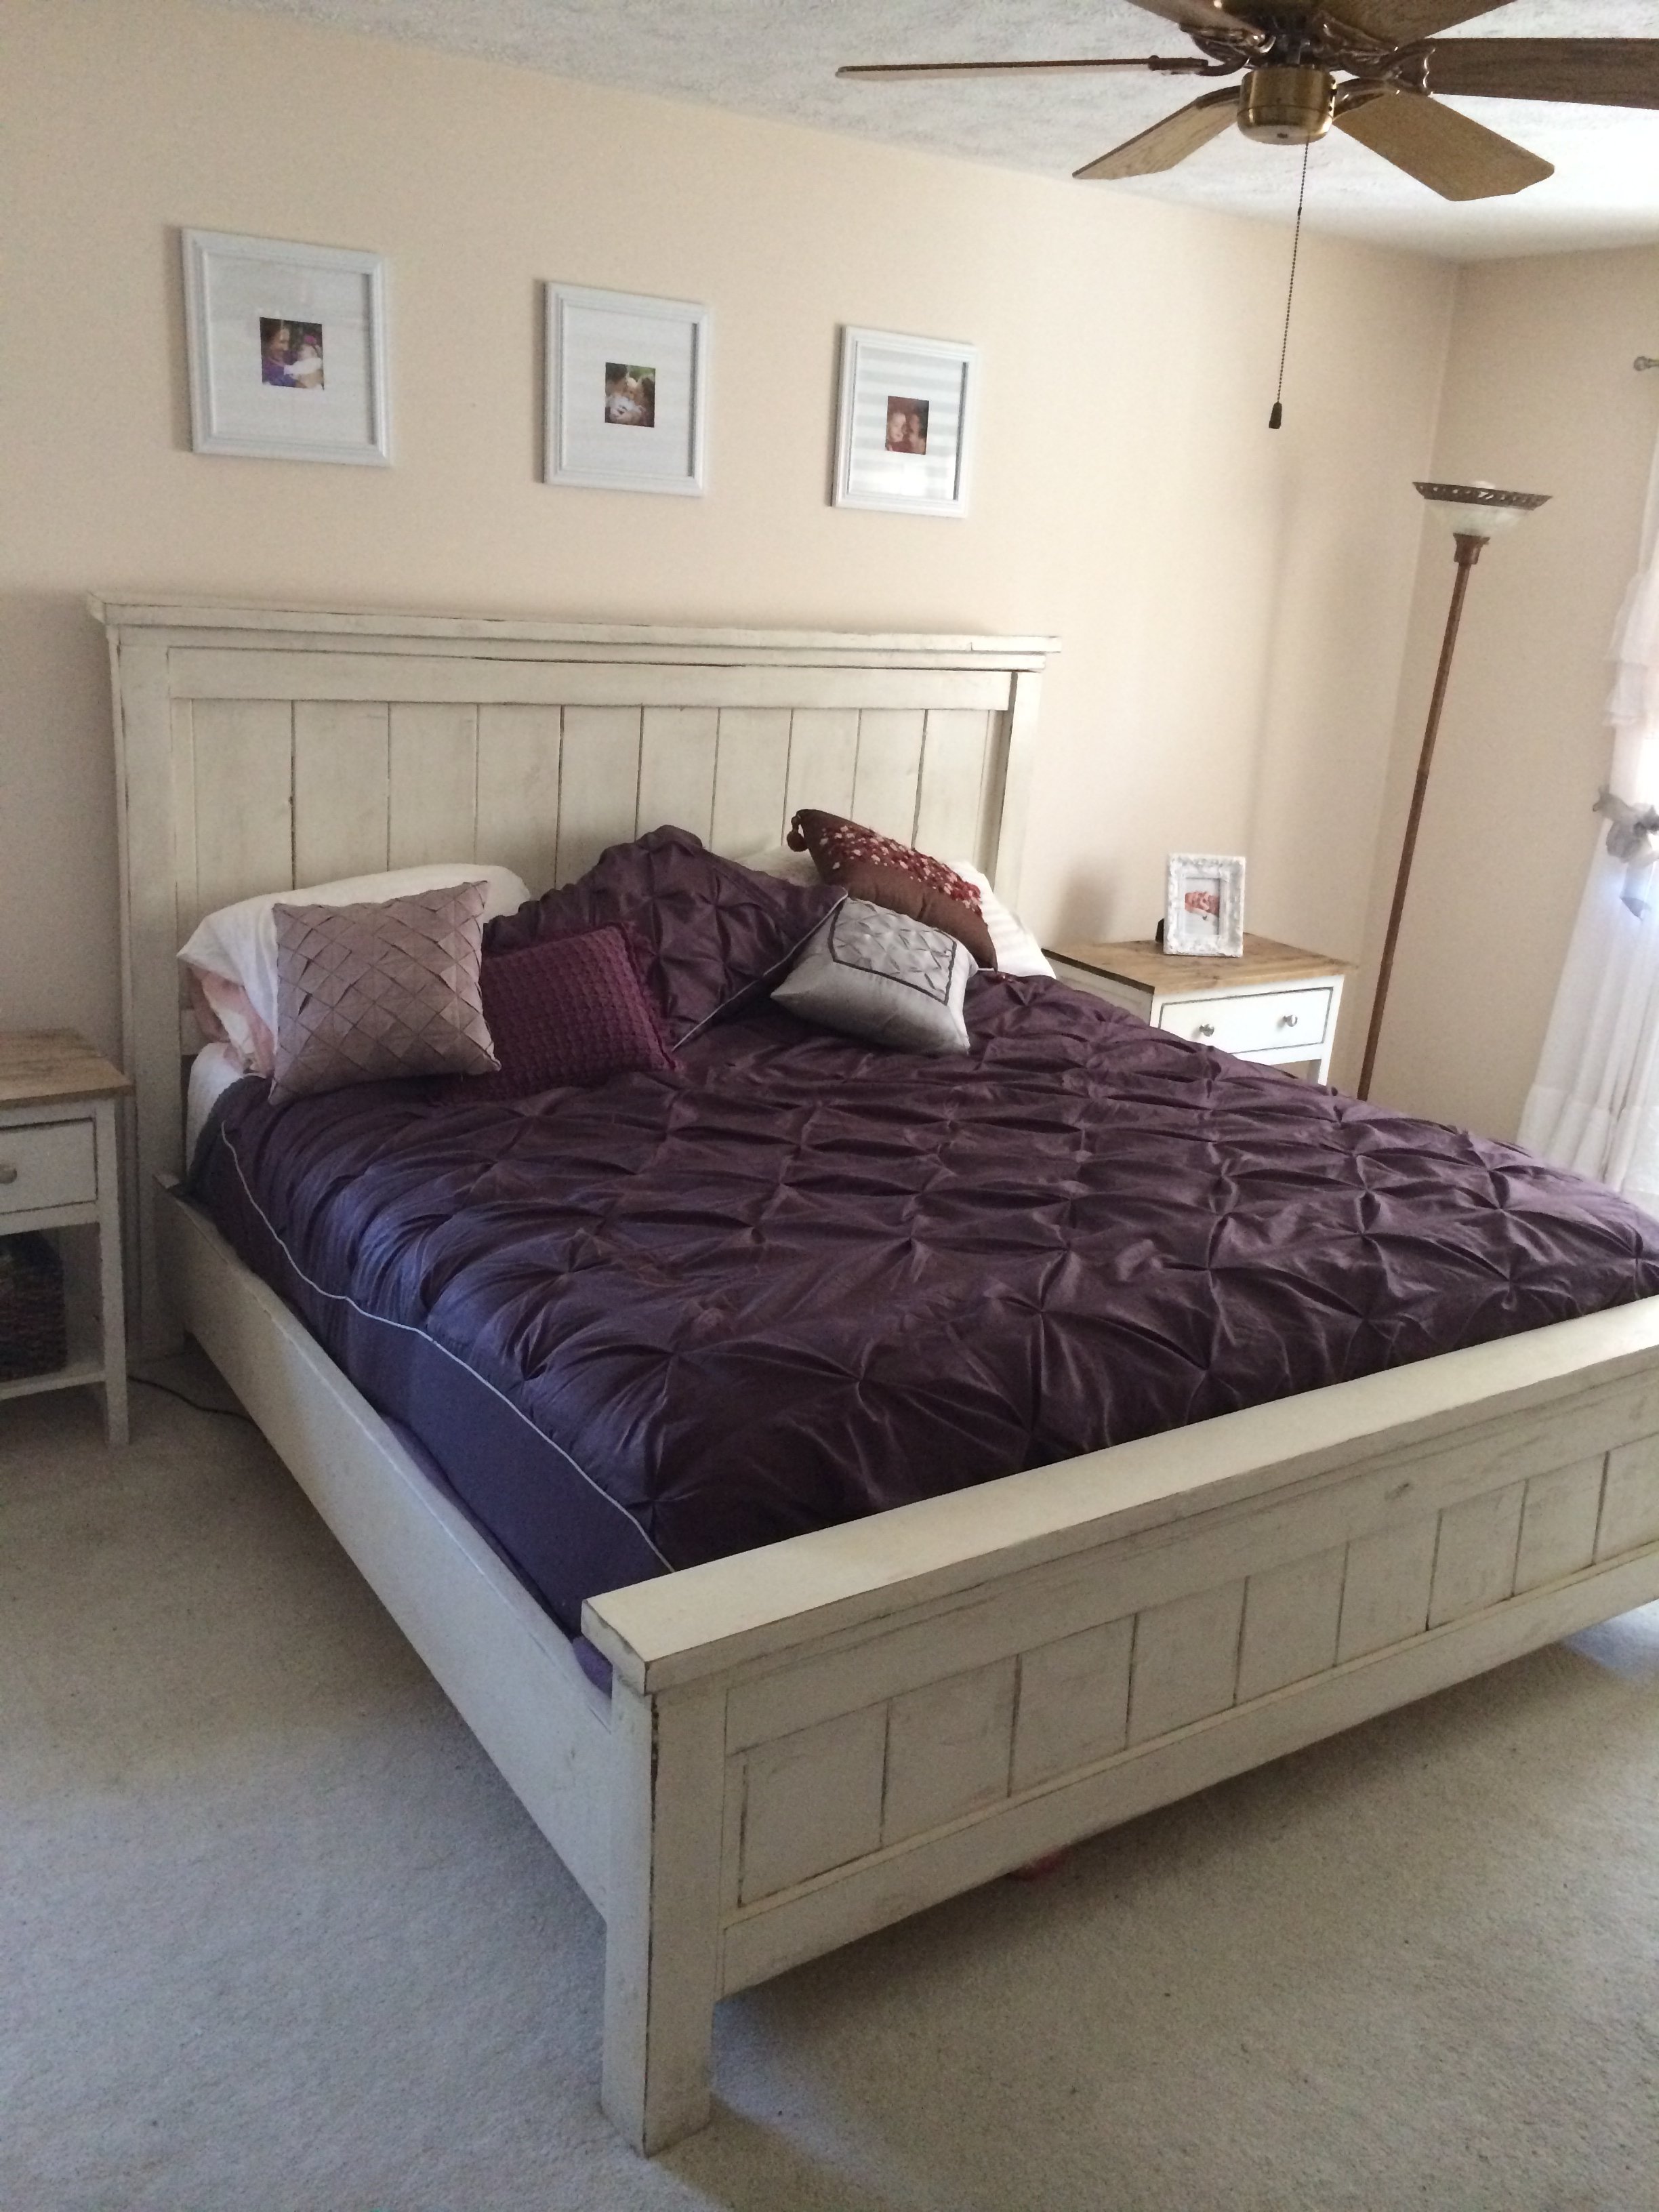
My wife has always wanted a king sized bed. While my hobbyist woodworking skills are not (yet) to the point where I can create the mahogany sleigh bed she has always dreamed of, I think she has enjoyed the farmhouse bed that I built for her X-mas present. We bought a new gel mattress for the bed, which sits on a few sheets of plywood over a frame of 2x4s. While we have no current plans to move anytime soon, using some of the advice of commenters/posters, I constructed our bed and frame with bed rail brackets and hanger joists that will allow us the option to disassemble/reassemble it in the future.
Built from Plan(s)
Estimated Cost
250
Estimated Time Investment
Weekend Project (10-20 Hours)
Finish Used
Behr off-white #1873 paint distressed with Minwax Special Walnut stain
Recommended Skill Level
Beginner
Comments

Sat, 04/22/2017 - 13:35
Farmhoue Bed
What did you ue to connect the bed rails to the Headboard and Foorboard.
I am at a loss.
Thu, 04/27/2017 - 18:57
Bed rail hardware
Janie, I ended up buying some bed rail hardware with the idea that I might someday disassemble the bed: http://www.rockler.com/surface-mounted-keyhole-bed-rail-brackets
if you want to do it cheaper, joist hangers should work.
Patrick's Beach Cottage Dresser -
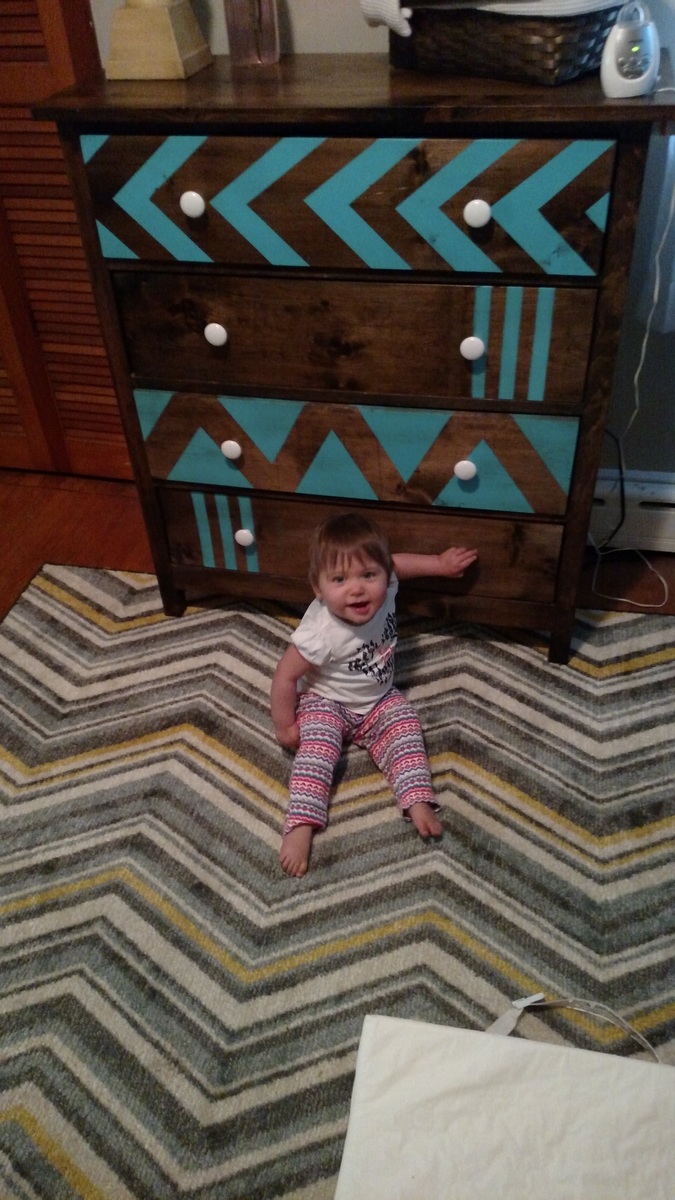
Loved making this dresser, and it works awesome in my baby girl's room.
Built from Plan(s)
Estimated Cost
$100
Estimated Time Investment
Week Long Project (20 Hours or More)
Finish Used
Walnut Stain Finished
Teal Spray paint
Water-based poly
Teal Spray paint
Water-based poly
Recommended Skill Level
Intermediate
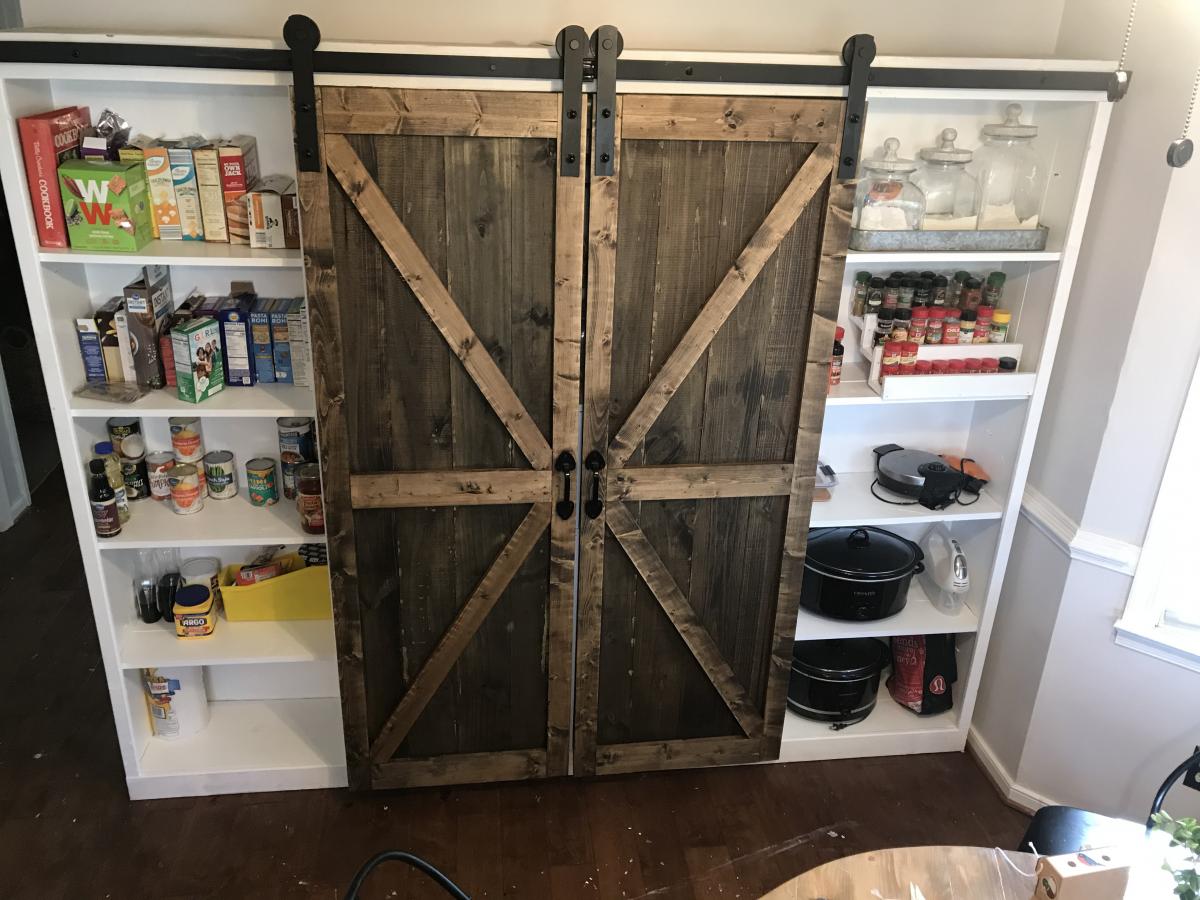
DIY Barn door Pantry/Coffee station
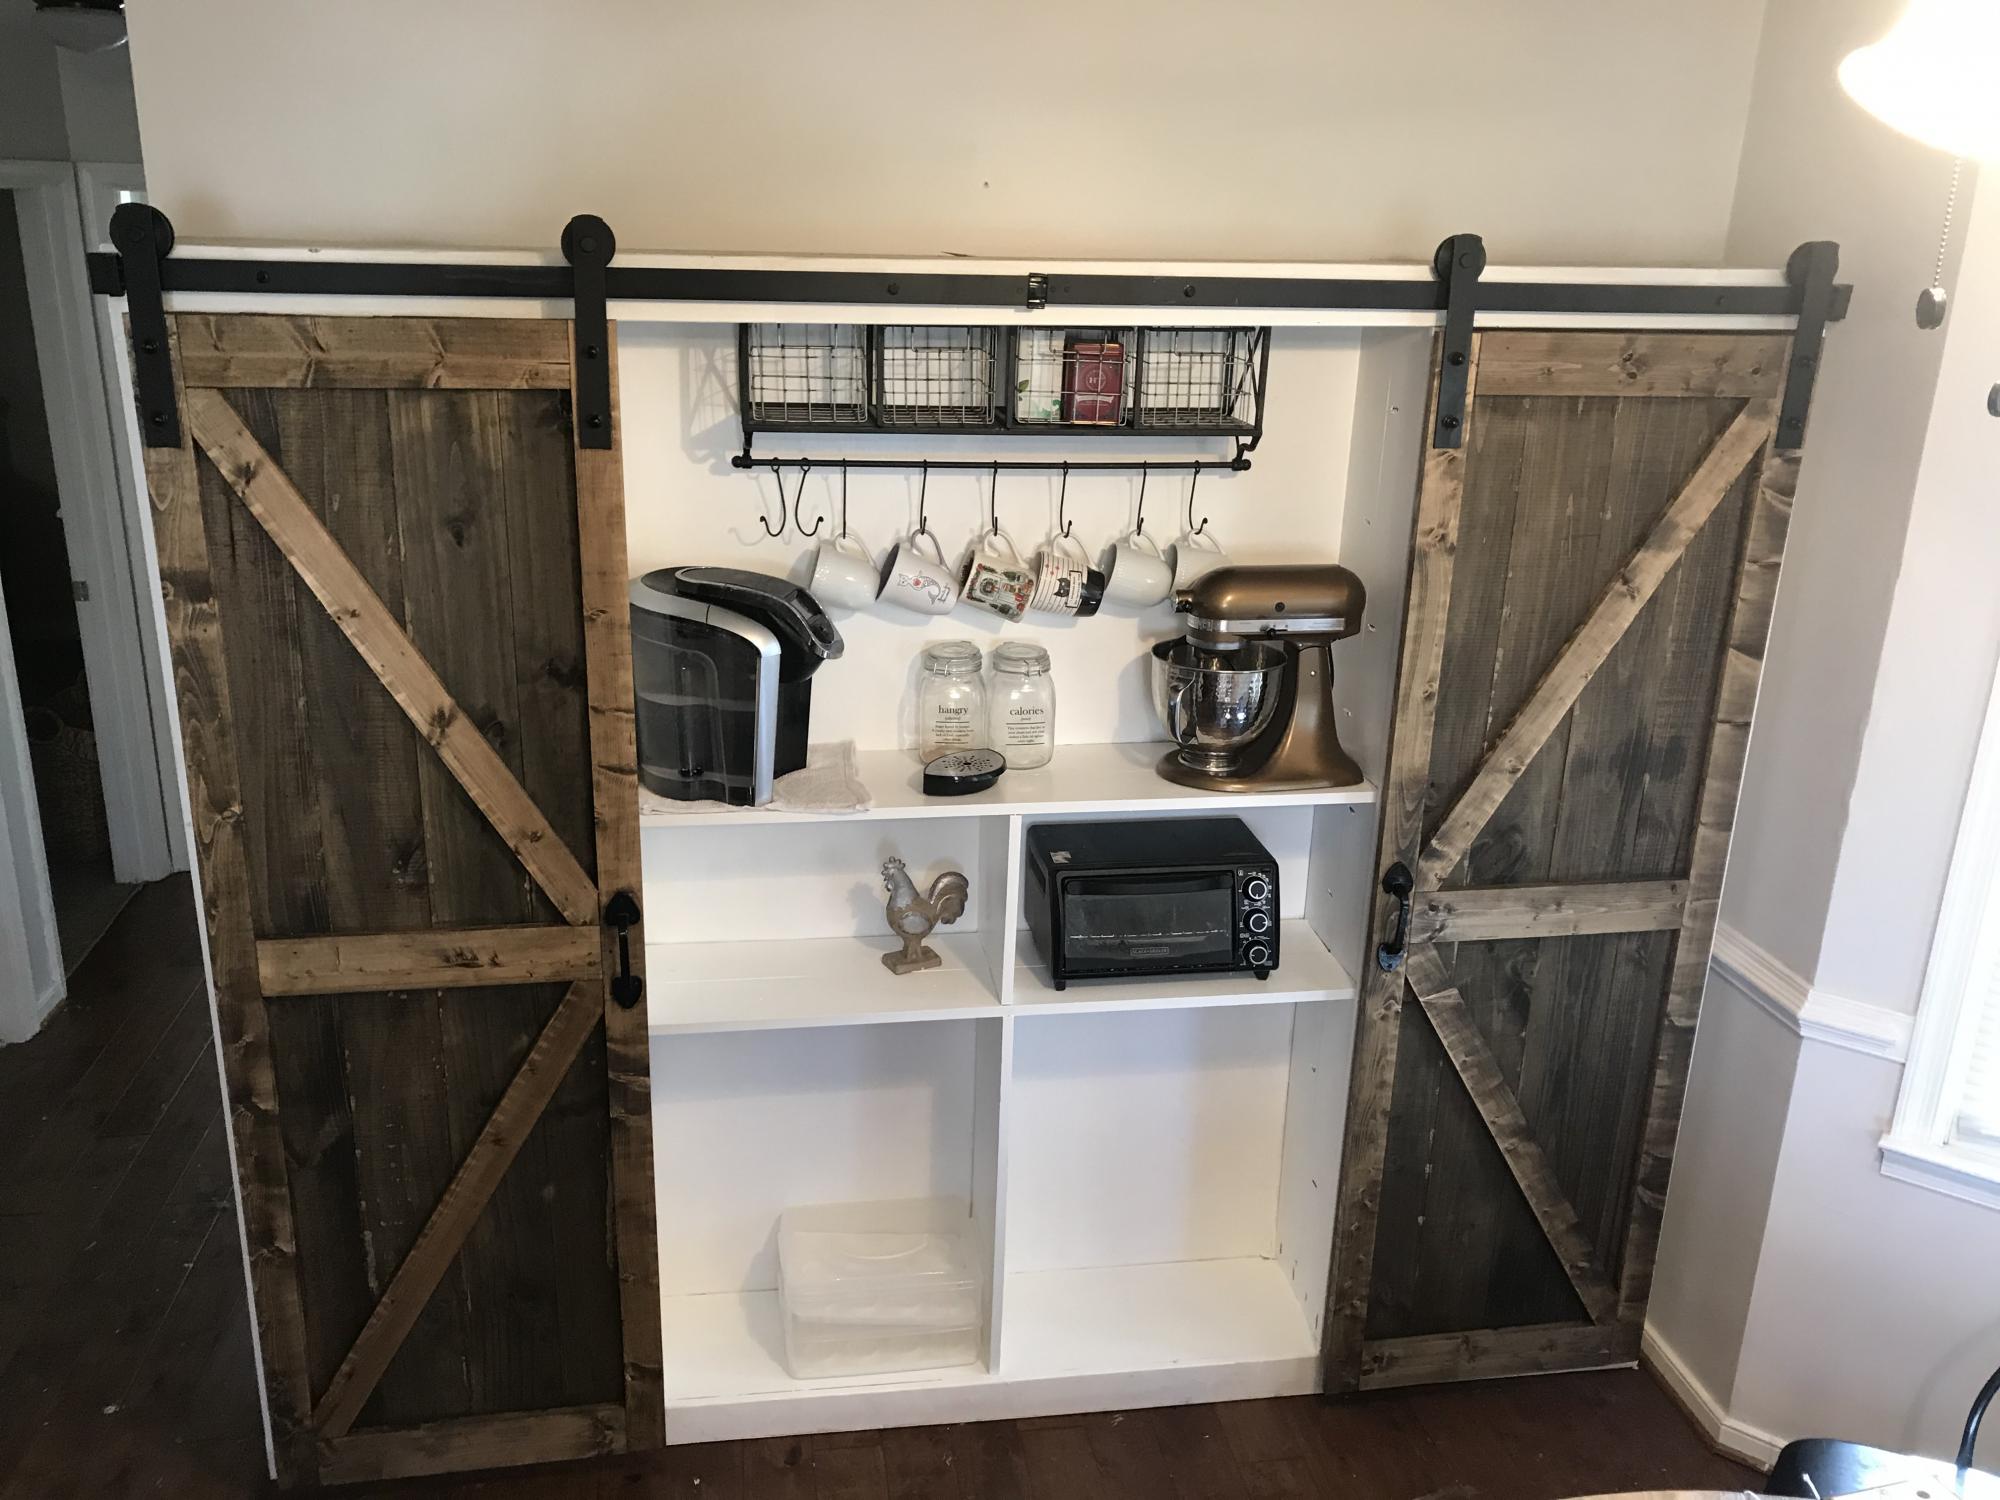
My wife has been asking me to build her a pantry since we bought our house last year and I finally got around to doing it. I used the Barn Door Entertainment center plans as inspiration but Instead of using the 1x12x8ft lumber suggested I used 1x6x8ft boards connected with pocket holes to save on costs. The Barn door hardware is the SMARTSTANDARD 8ft heavy duty (double door) which I purchased on Amazon for 73$.
Built from Plan(s)
Estimated Cost
$350-$450
Estimated Time Investment
Weekend Project (10-20 Hours)
Finish Used
Paint: Behr Plain White paint and primer
stain: Varathane classic dark walnut.
stain: Varathane classic dark walnut.
Recommended Skill Level
Intermediate
Corner Workbench
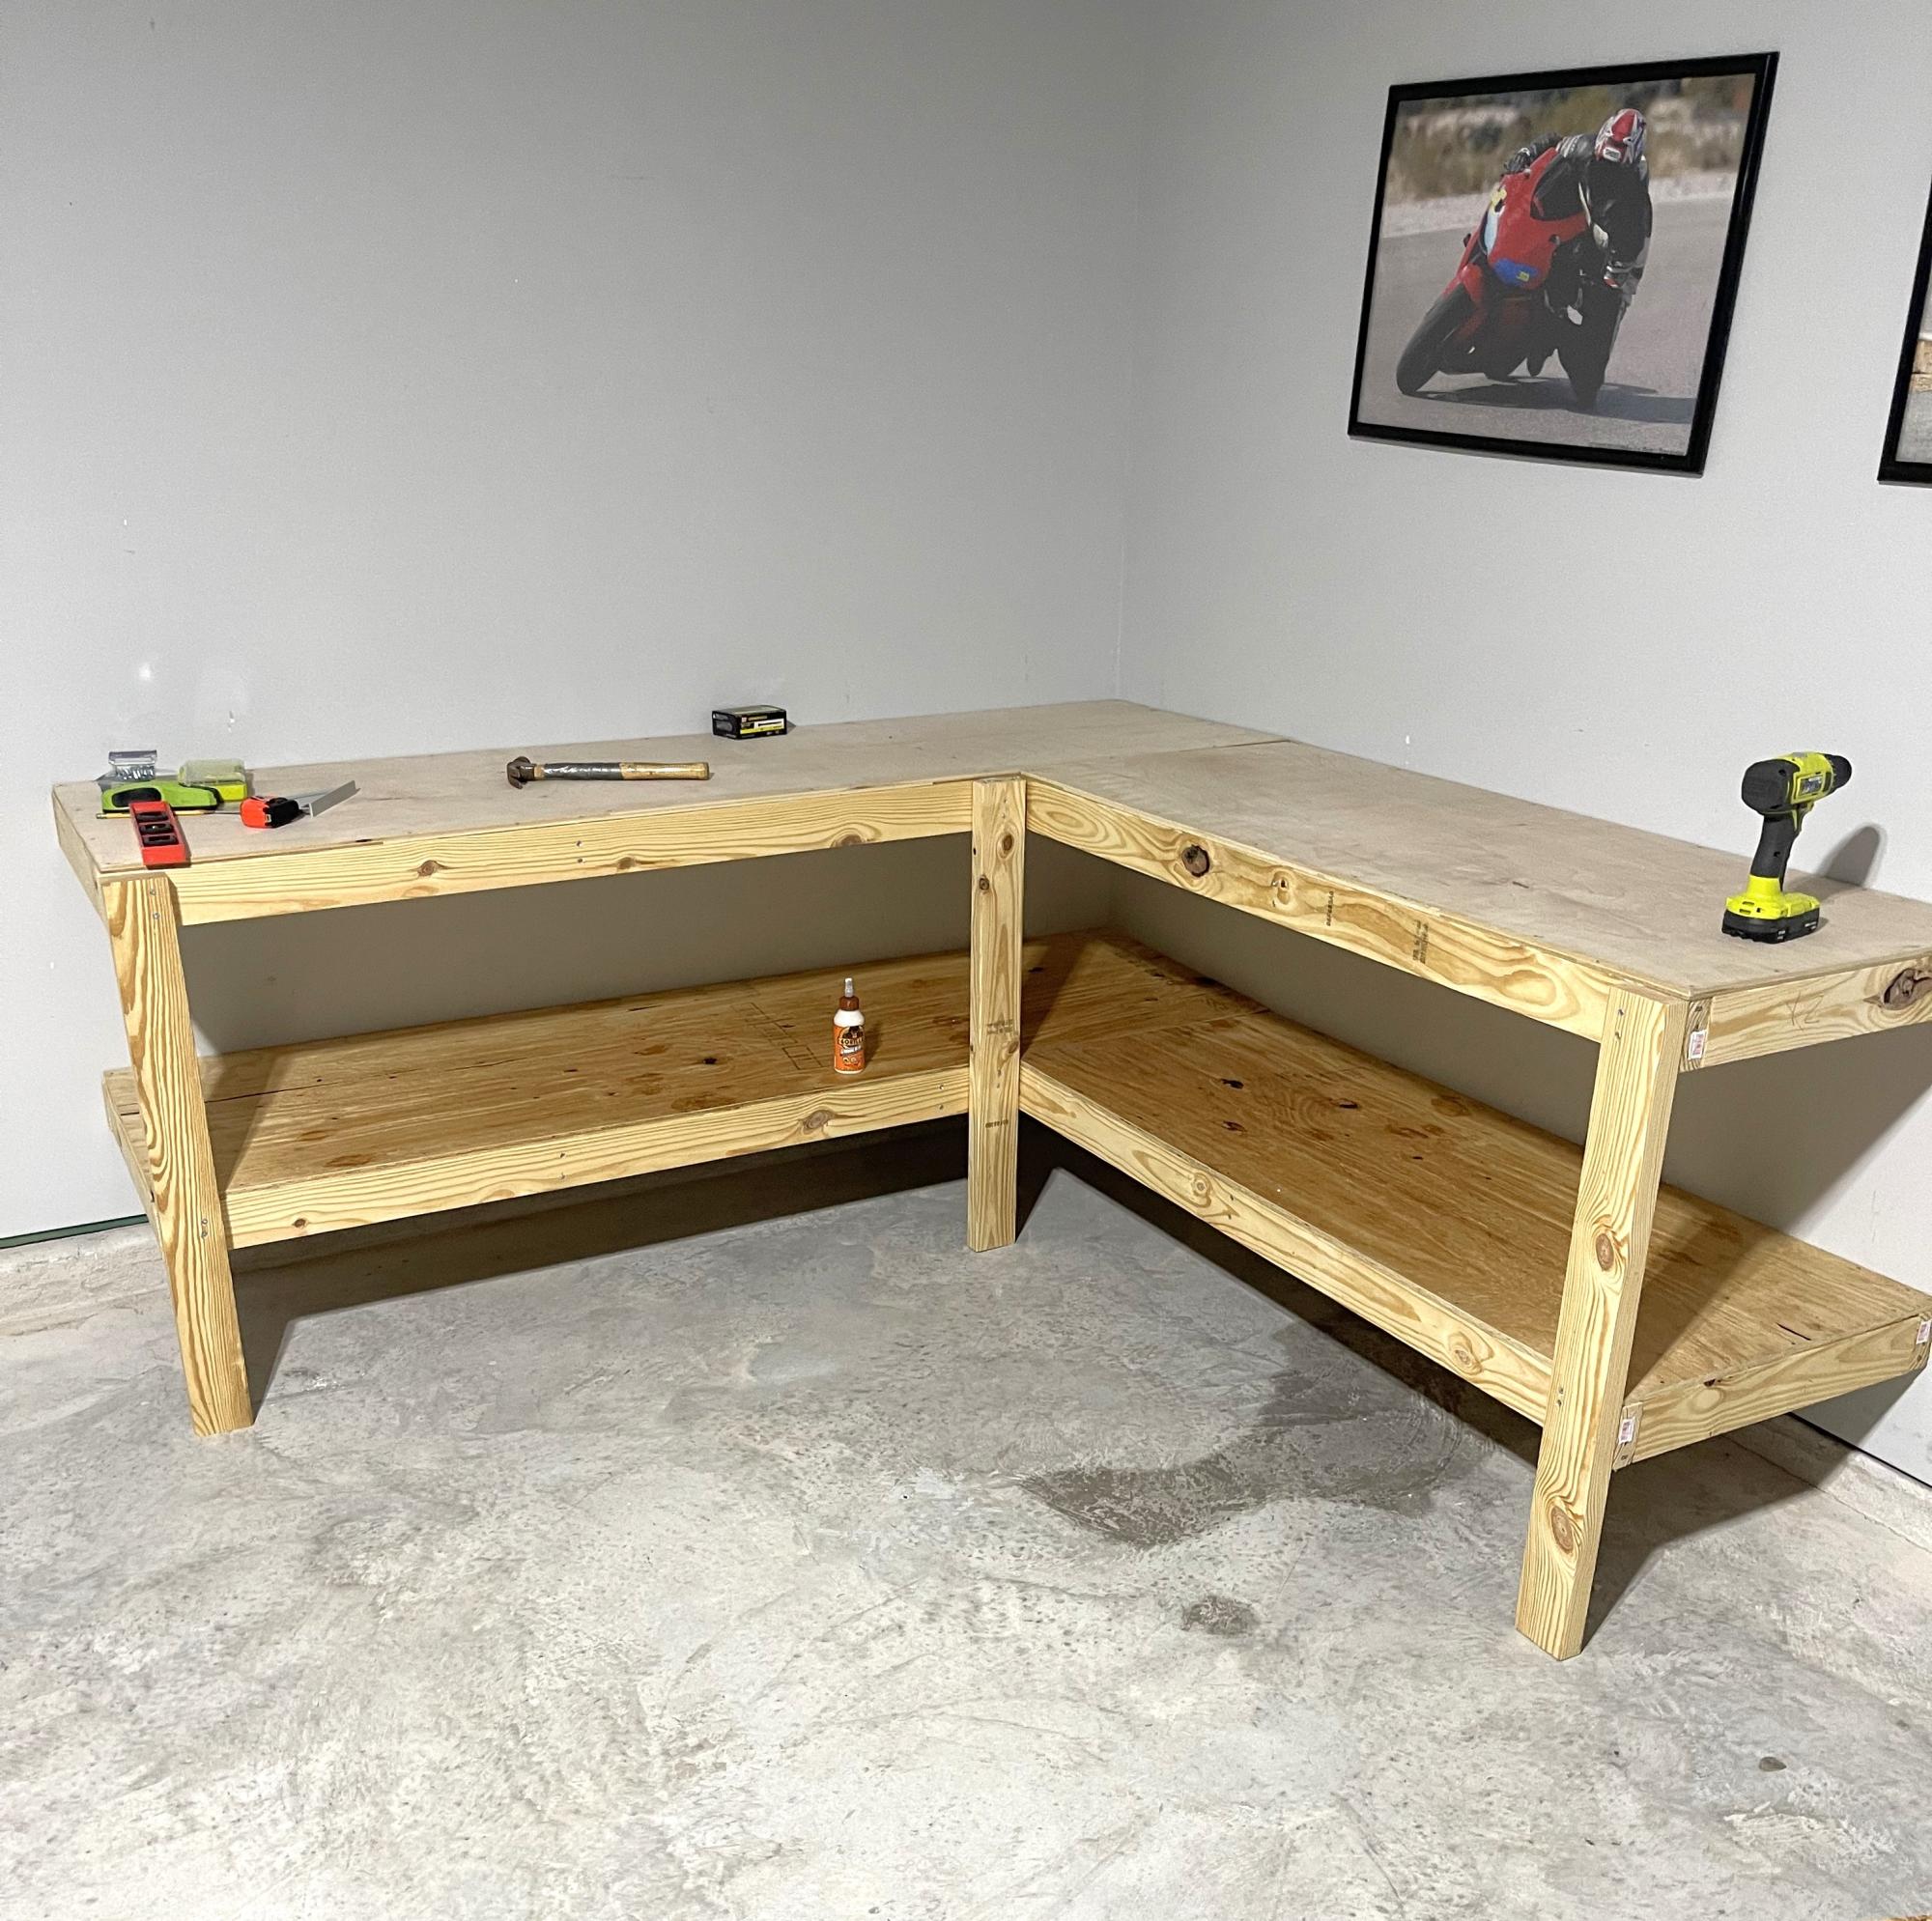
Awesome and easy build! Thank you!
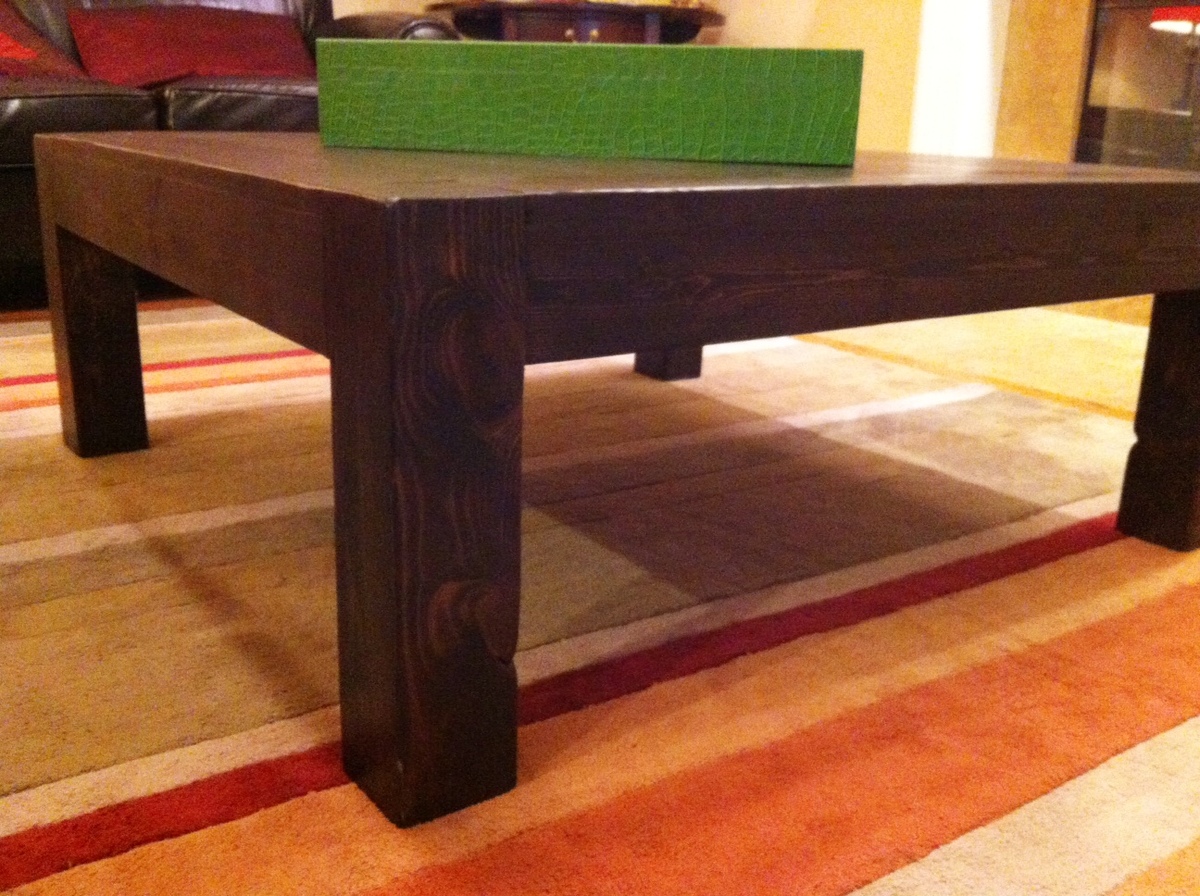
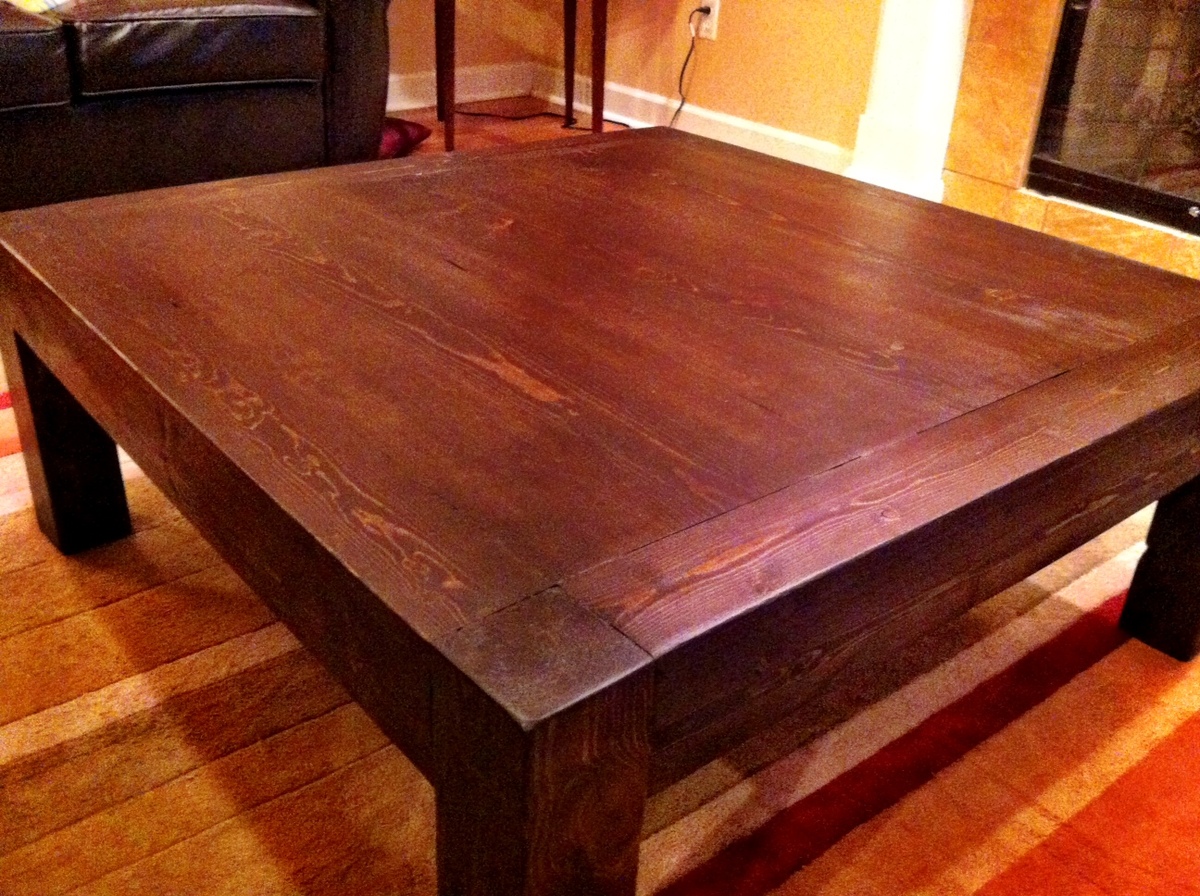
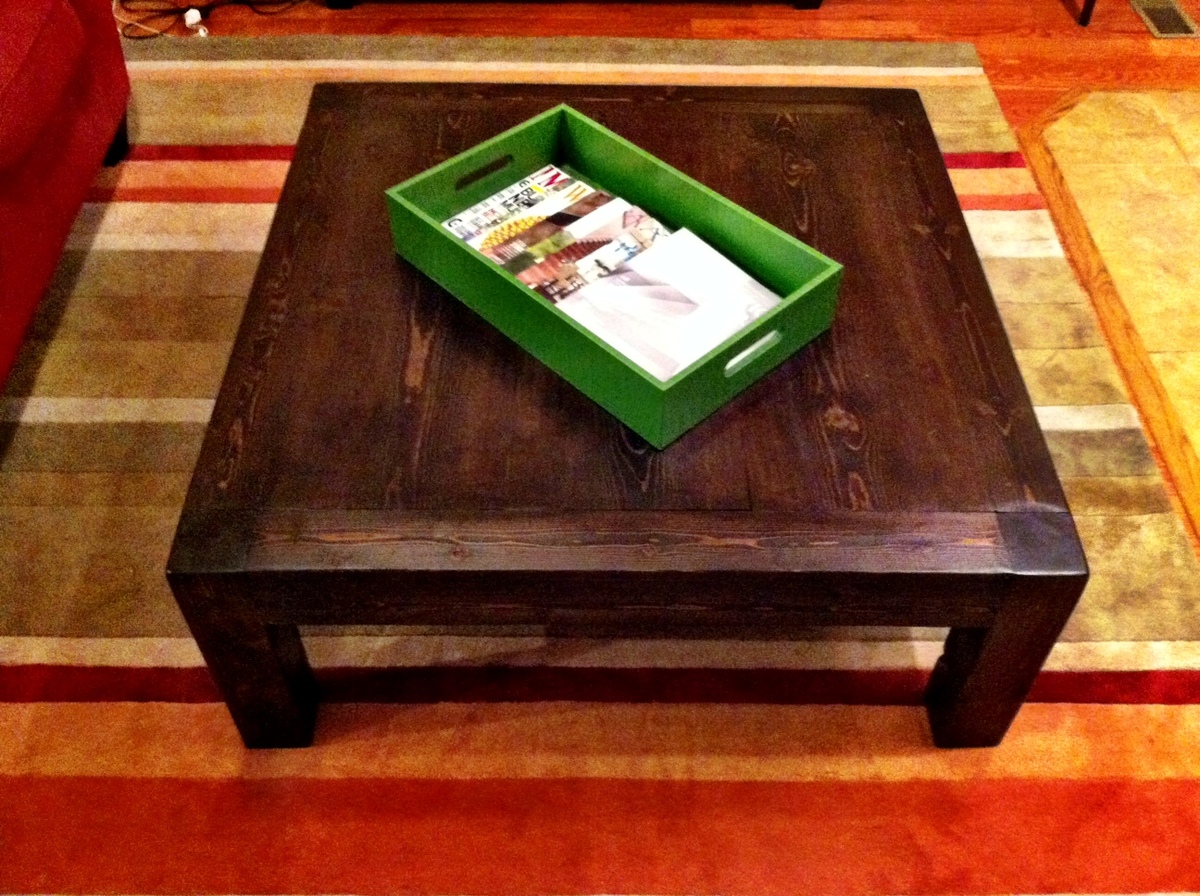
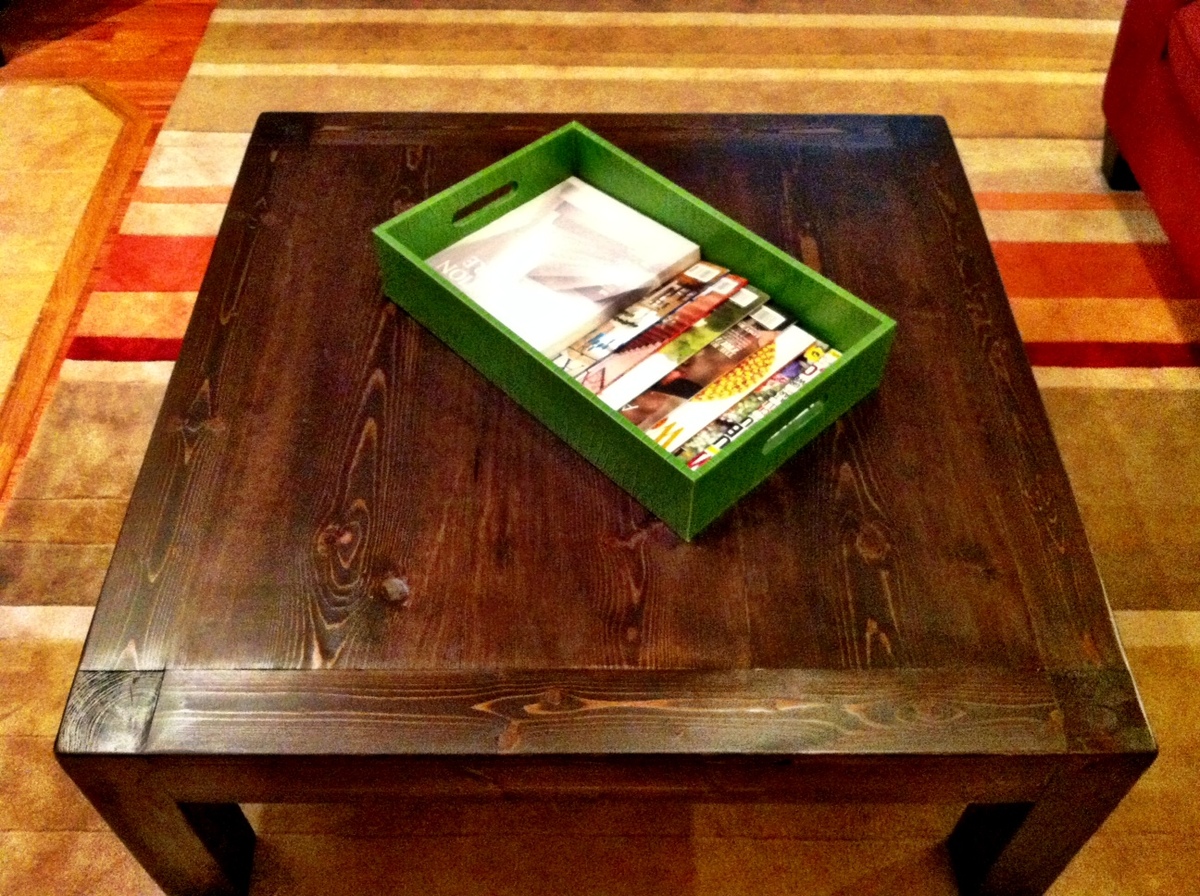
iCoffee Table
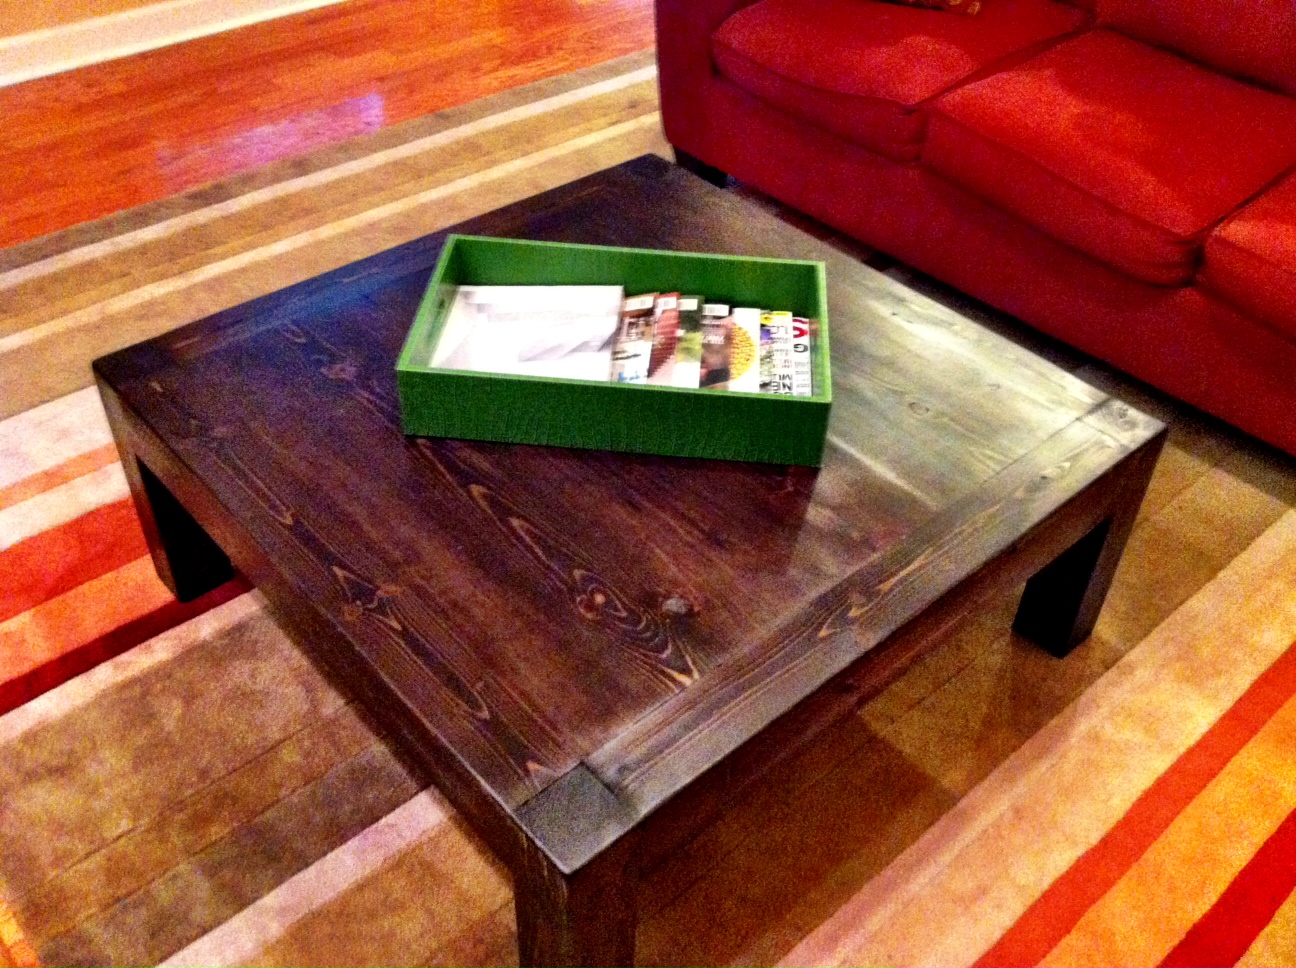
See post on blog: http://www.atouchofarkansas.com/2012/05/icoffee-table.html
Built from Plan(s)
Estimated Cost
$70
Estimated Time Investment
Weekend Project (10-20 Hours)
Finish Used
Rustoleum Kona
Recommended Skill Level
Beginner
Chalkboard Shelf Memo Board
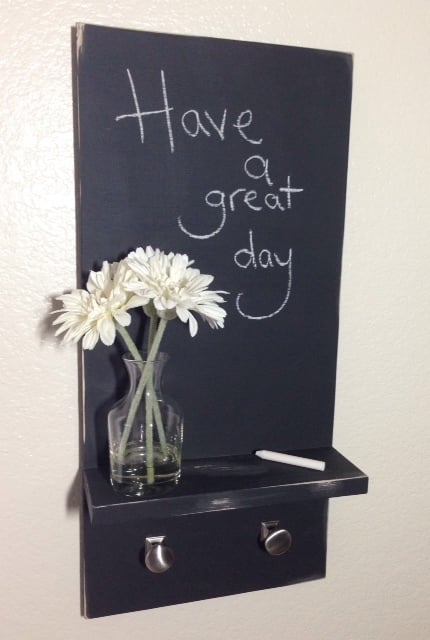
This was my first "build" and was a lot of fun. Very quick and very easy. I'm so happy with how cute it turned out!
Built from Plan(s)
Estimated Cost
$18.00
Estimated Time Investment
Afternoon Project (3-6 Hours)
Finish Used
I marked 3-6 hours only to account for drying time of the chalkpaint. I cutting, sanding and assembly went very quickly.
I used Rustoleum chalkboard paint from Home Depot along with some brushed nickel knobs that I got from Home Depot.
I used Rustoleum chalkboard paint from Home Depot along with some brushed nickel knobs that I got from Home Depot.
Recommended Skill Level
Starter Project
Great couch!
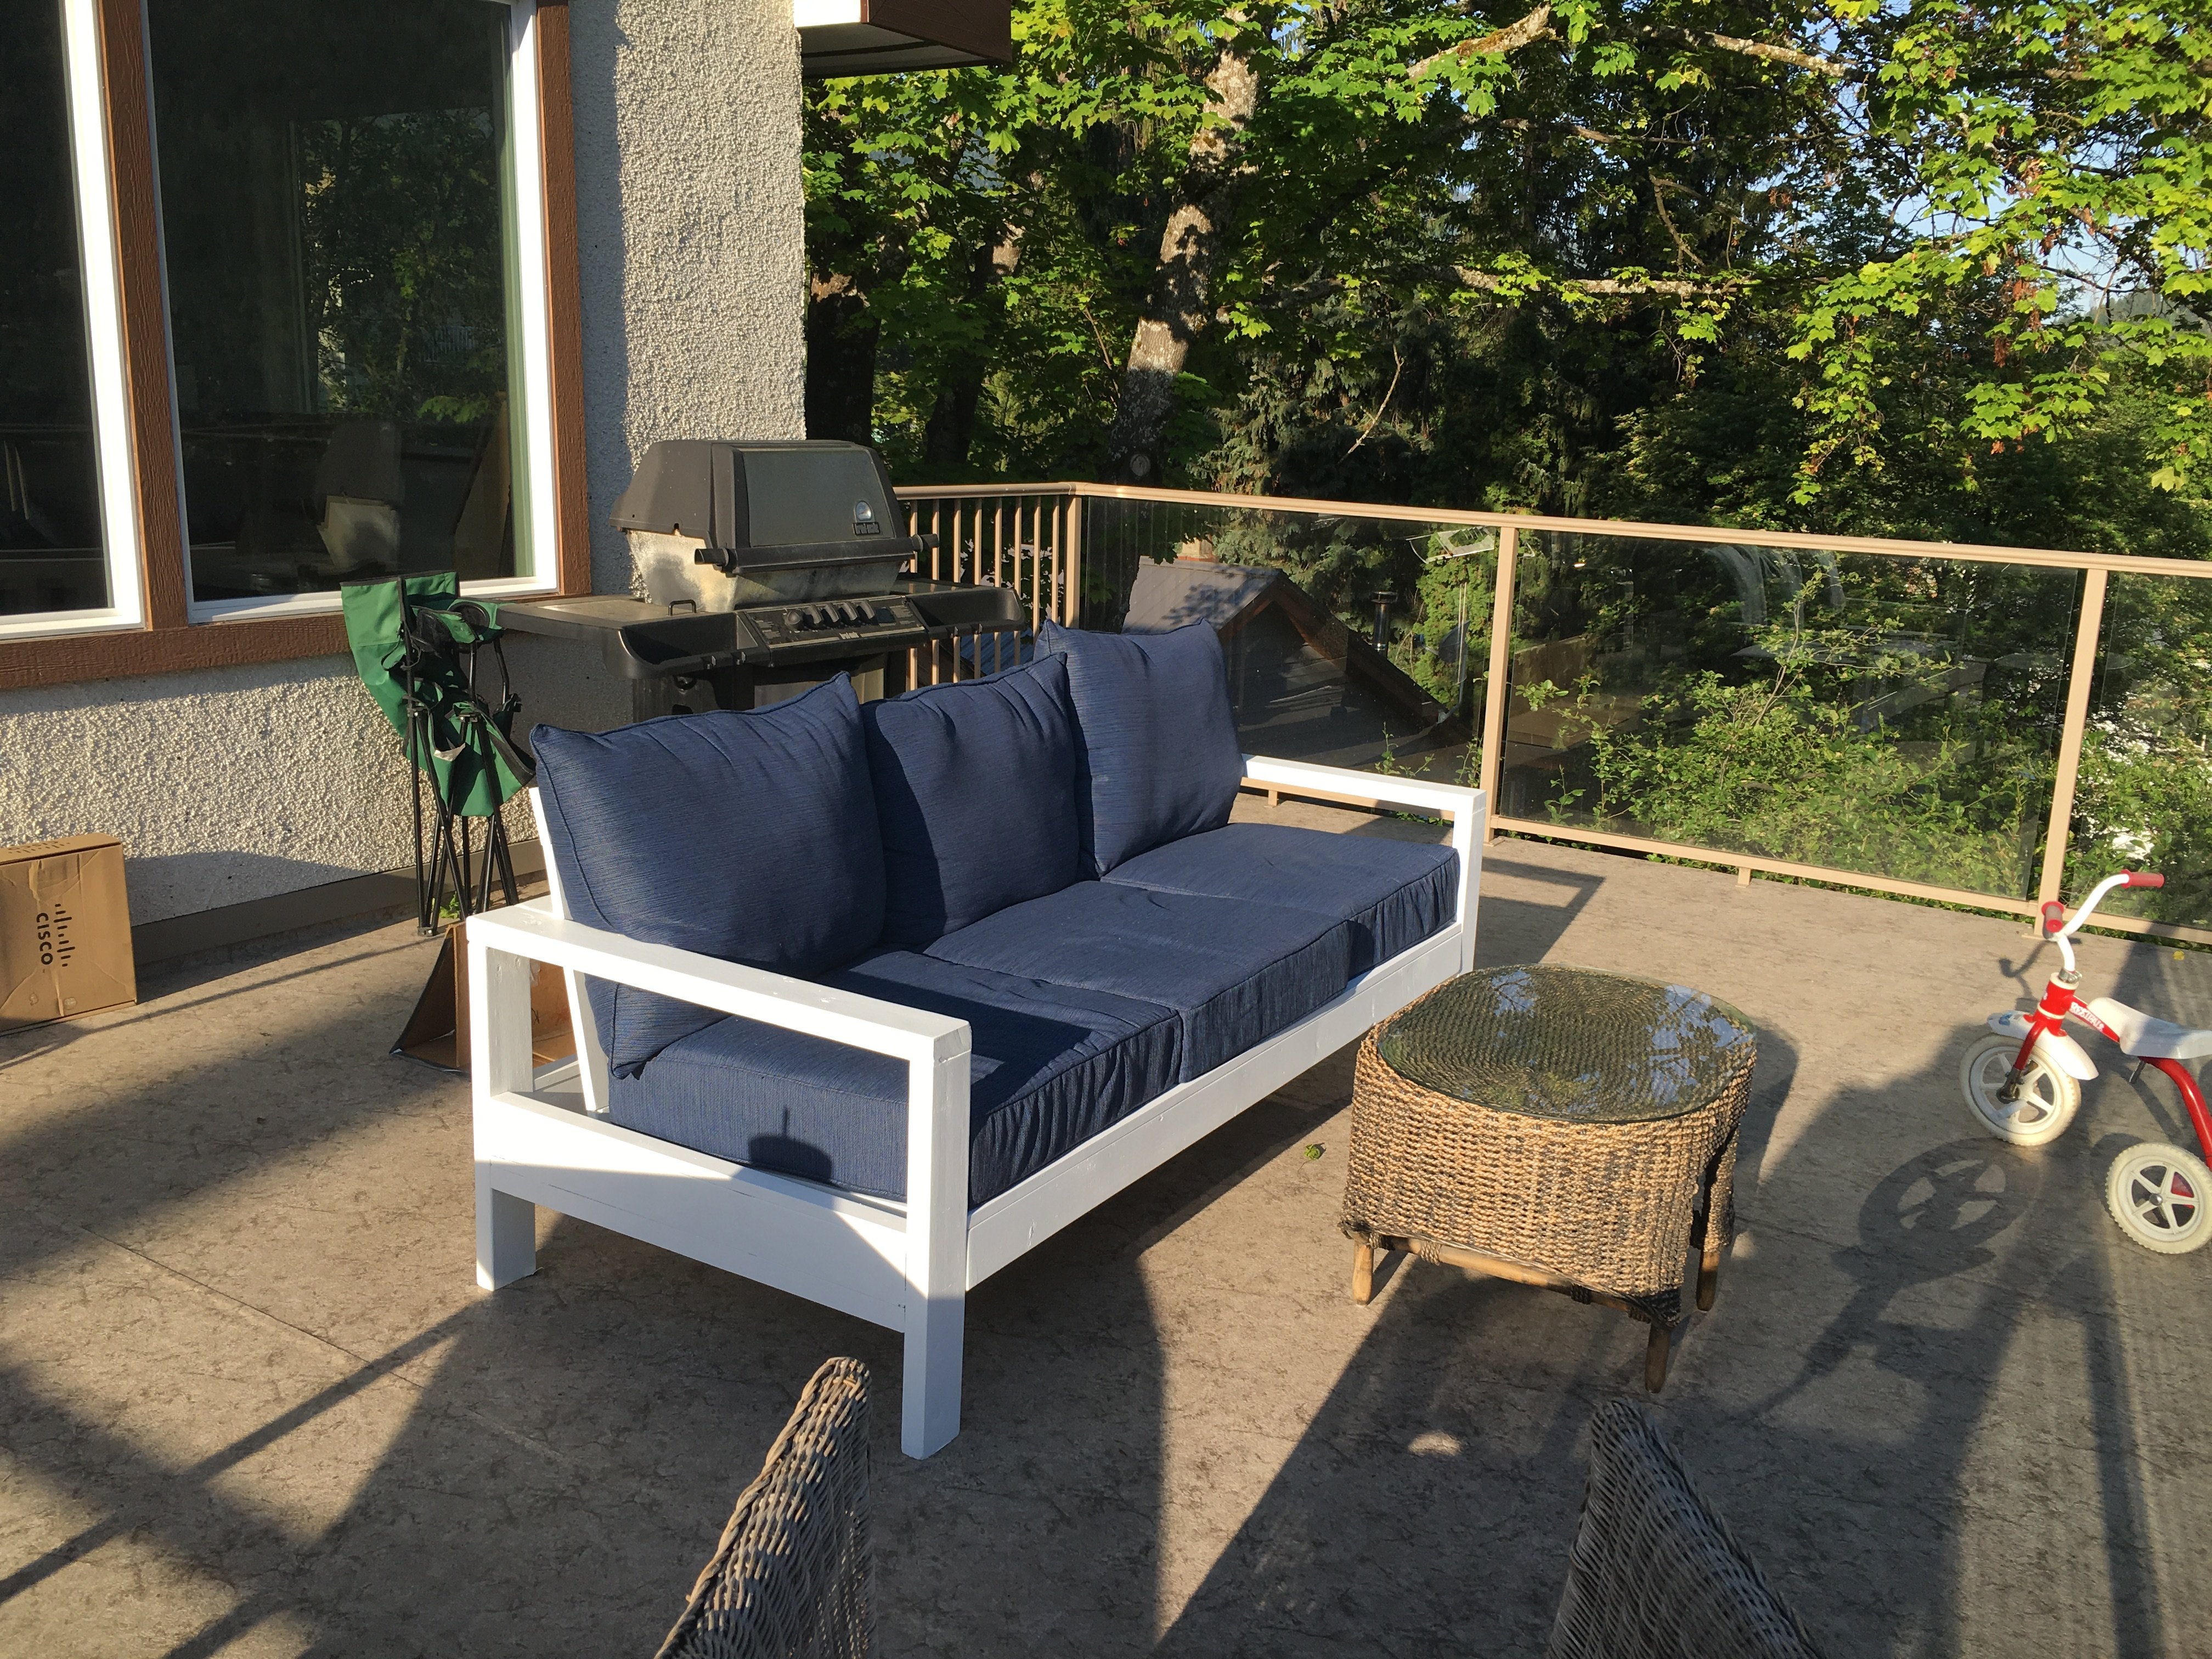
Biult this for my outdoor patio. Got the cushions from Lowes.ca for about $80 each.
Built from Plan(s)
Estimated Time Investment
Week Long Project (20 Hours or More)
Finish Used
Primer then an outdoor white
Recommended Skill Level
Starter Project
Nailed it!
I only work with reclaimed/junk wood and this has literally been the most rewarding thing I've ever done. I absolutely love these projects! can't thank you enough for sharing plans- and for free! (I also made a chair but it won't let me upload a pic.)
Estimated Cost
$10 for nails
Estimated Time Investment
Afternoon Project (3-6 Hours)
Recommended Skill Level
Beginner
Storage Bunk
I finished this a while back for my granddaughter. I modified the side rails so it could be disassembled and reassembled in her bedroom.
Built from Plan(s)
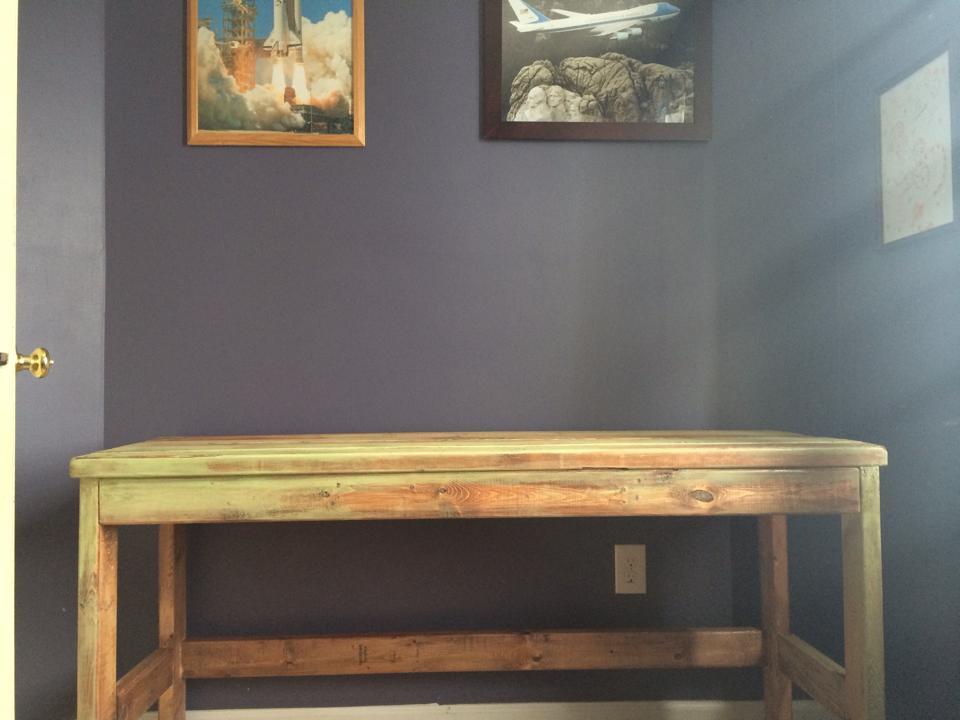
2x4 Desk
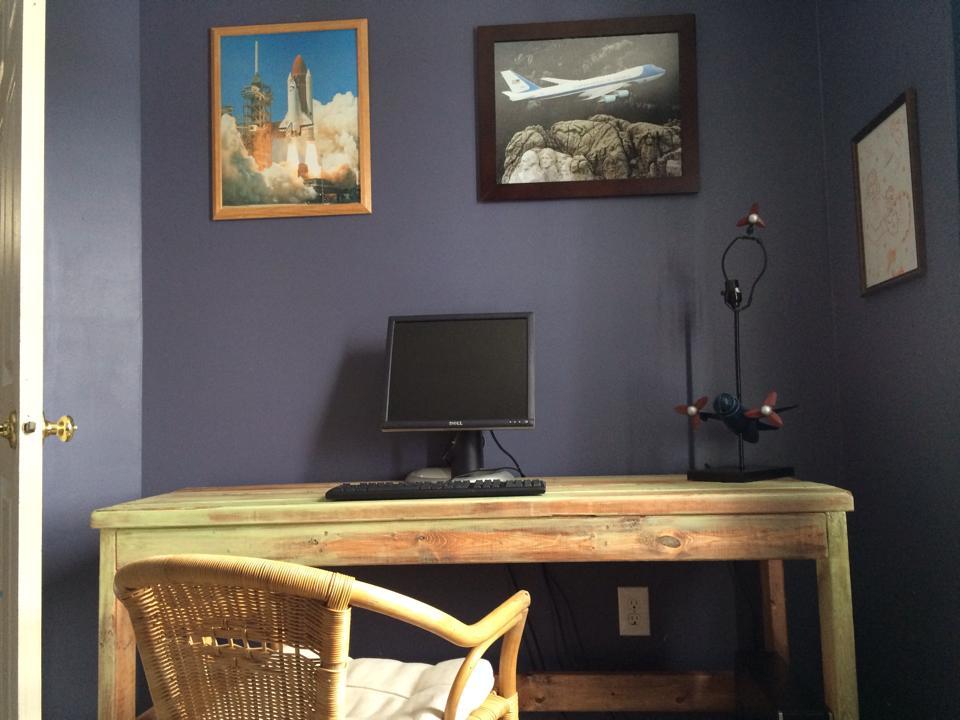
I had fun with this project. I needed a long and narrow desk for my son's room, and this was perfect. It was sooo easy. I used countersink drill bit and filled in with wood filler. I sanded to smooth it out and make soft edges. I stained first with a black cherry stain, then spread teal paint around (was inspired by a lot of rustic wood and teal pieces that I saw at homegoods), then coated it with kona miniwax stain to darken it up. I put a clear polyurethane finish on it to protect it. Super easy and I love it. Got all of my wood for under $30.
Built from Plan(s)
Estimated Time Investment
Afternoon Project (3-6 Hours)
Finish Used
Black Cherry miniwax, Teal paint, Kona miniwax, polyurethane finish.
Recommended Skill Level
Starter Project
Garage Shelving
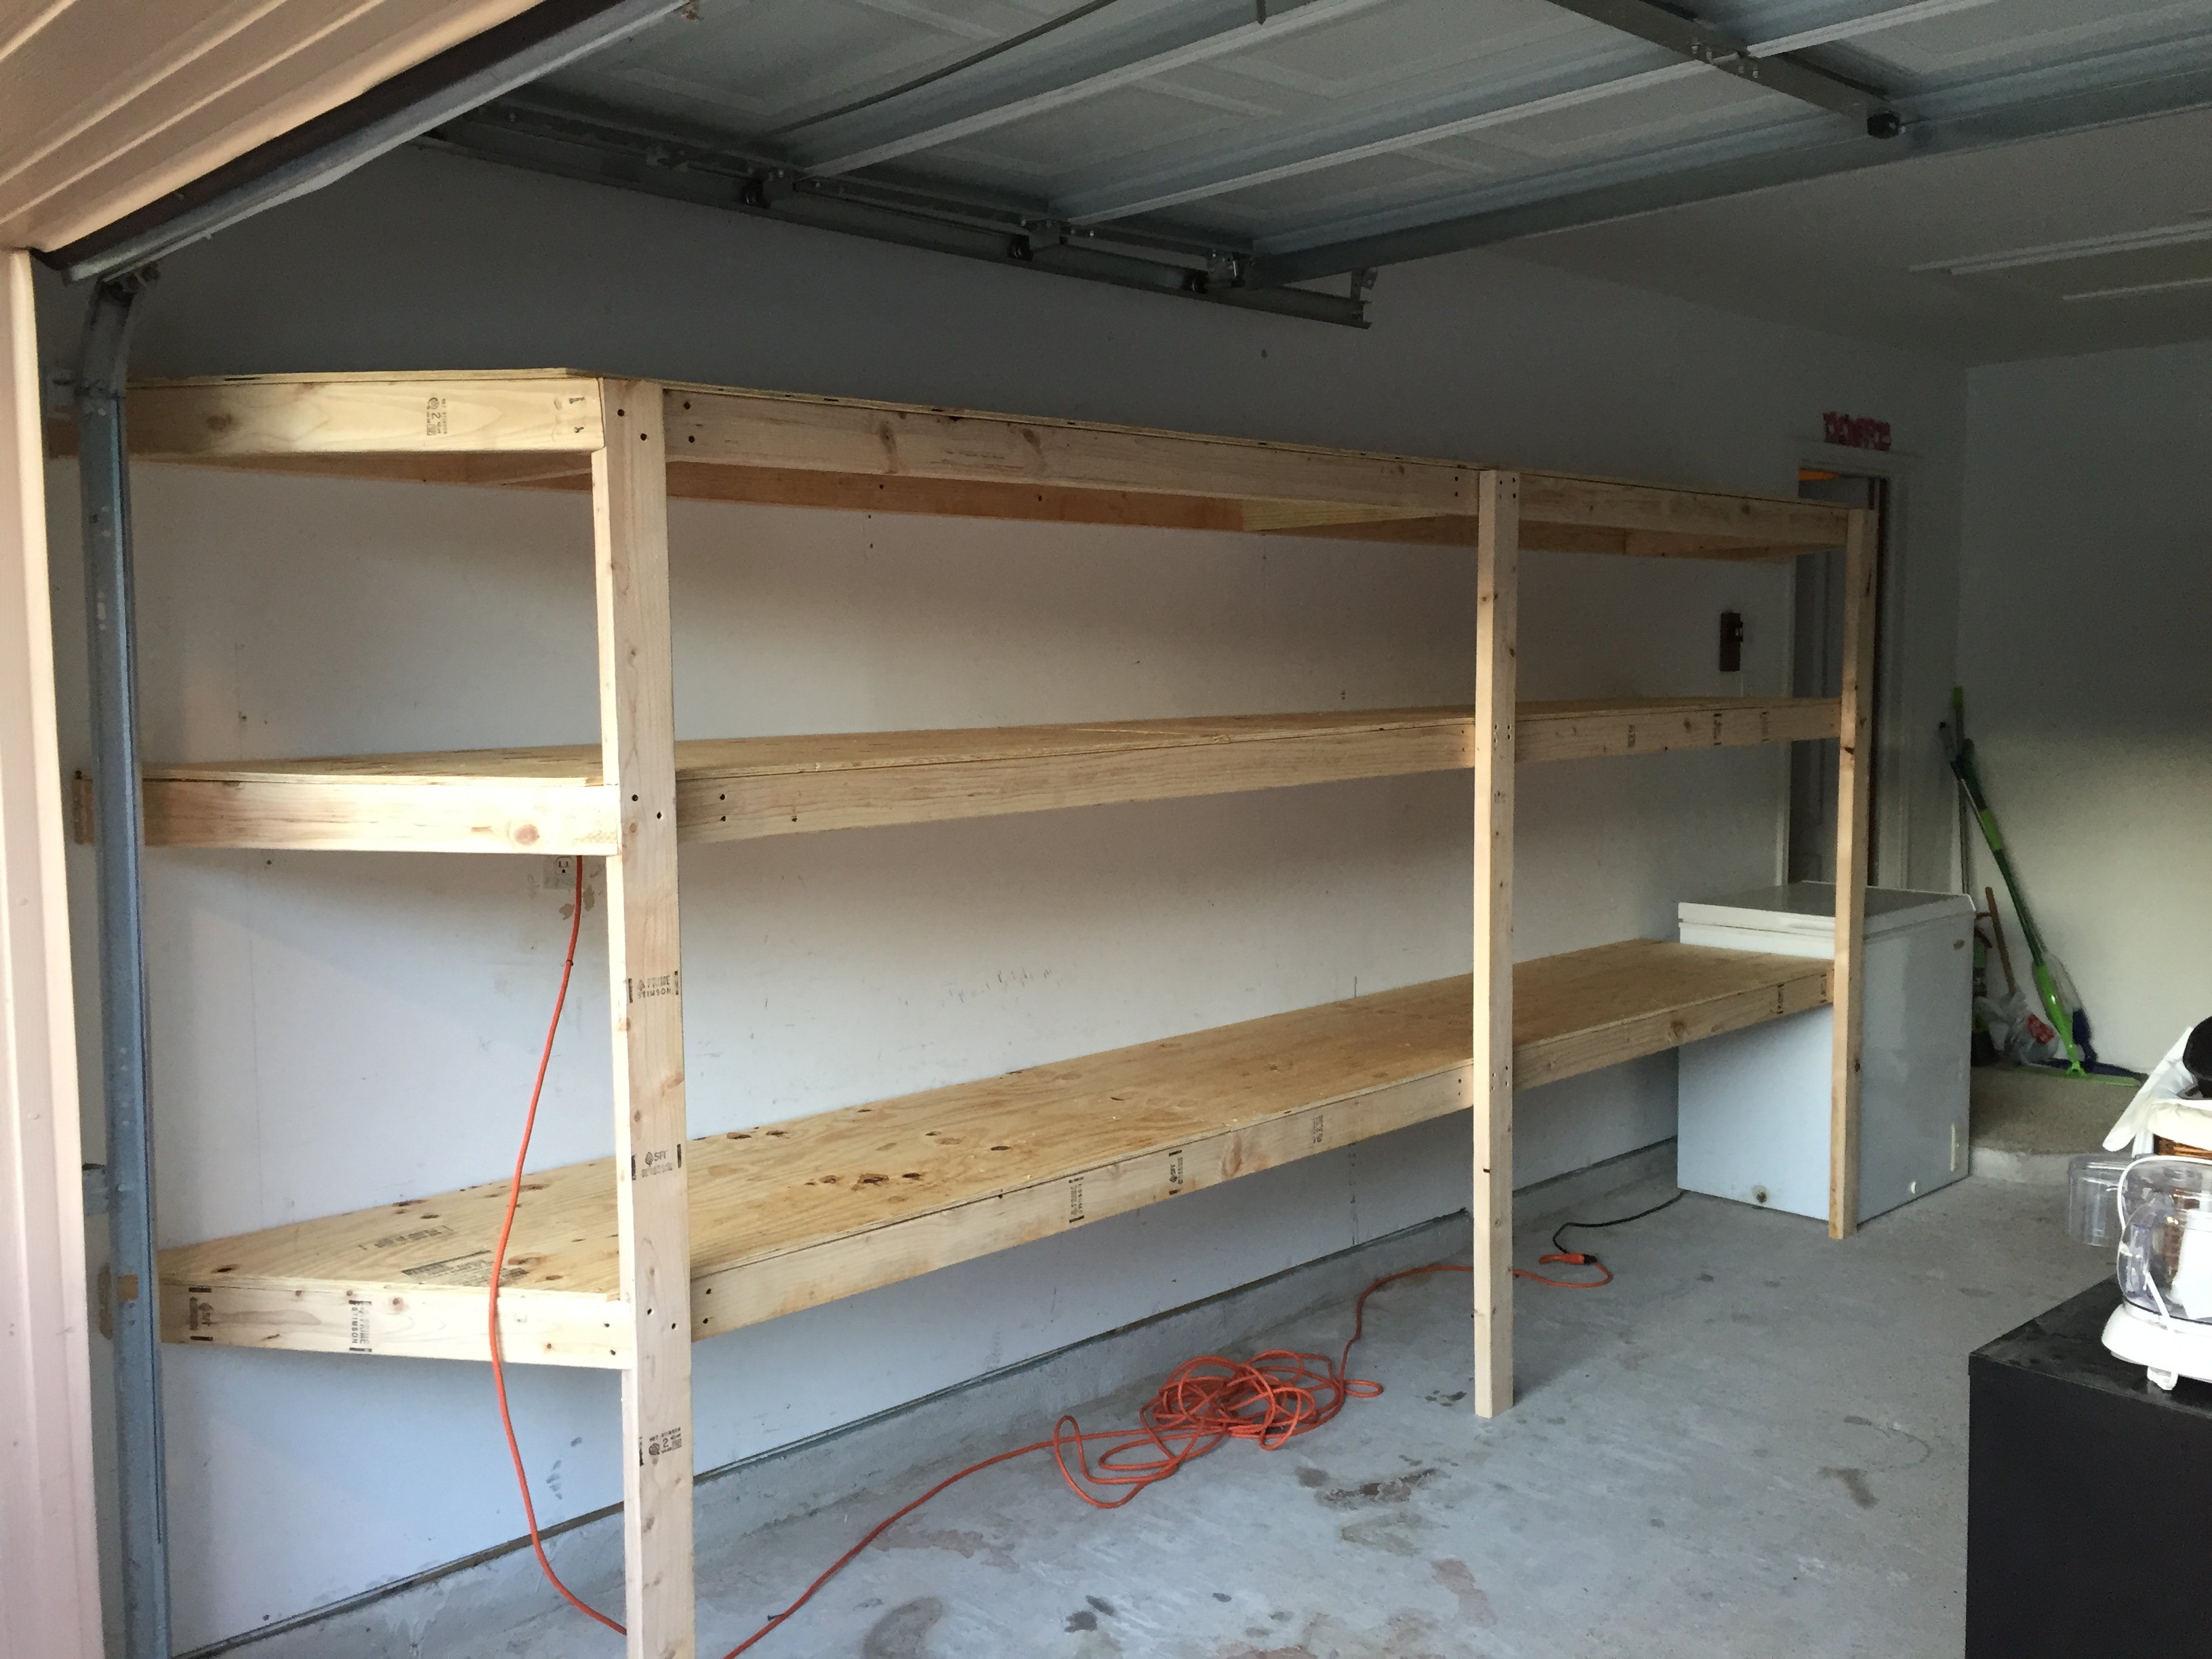
I used Anna's shelving plans from this video https://youtu.be/cTxRBckenI4 and it was super easy. I also made a cut out for the mini freezer on the far end and also cut the ends closest to the garage door track at a 45 degree. The shelves are 24 inches and the run is 16' long. The cost was right at $100. We are building more of the same shelving in the garage very soon.
Thanks Anna for the design!
Ron from Houston
Estimated Time Investment
Day Project (6-9 Hours)
Recommended Skill Level
Intermediate
Comments

Fri, 06/03/2016 - 08:59
You are welcome, thanks for
You are welcome, thanks for using my plans! Looks great!
Dog feeding station with storage
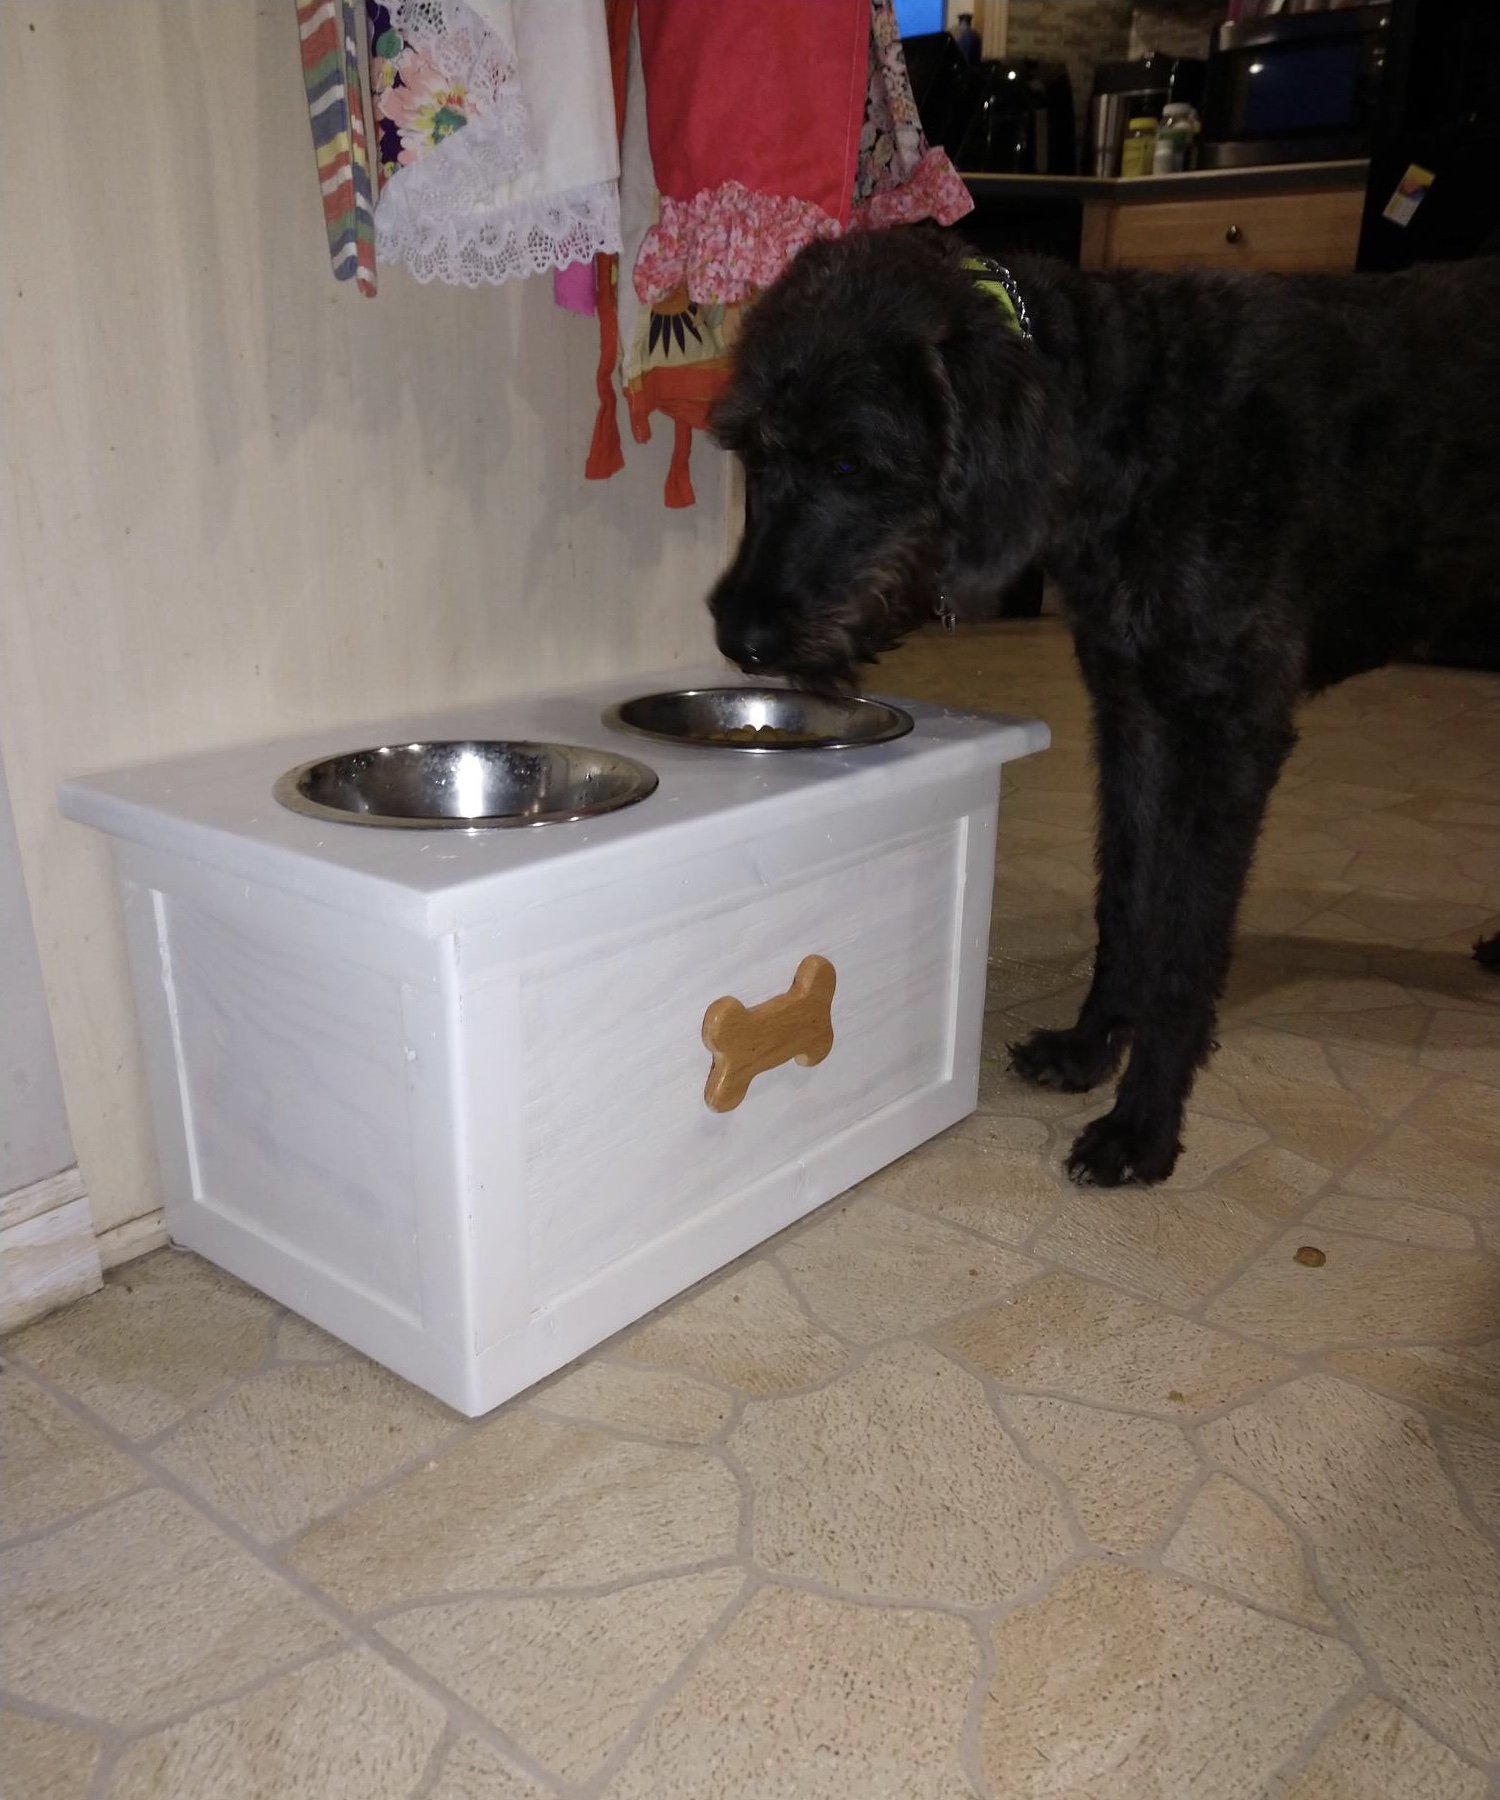
Dog feeding station with storage. Have a container of dog food underneath. Whipped up with some scraps while quarantined today.
Built from Plan(s)
Estimated Cost
Free with scraps or $15
Finish Used
Paint & poly
Recommended Skill Level
Beginner
Captains Storage Bed

We made the captain’s bed for our two grandchildren, and they love it. We have made several things from Ana’s plans. They are so easy to follow! Thanks so much!
Dena
Built from Plan(s)
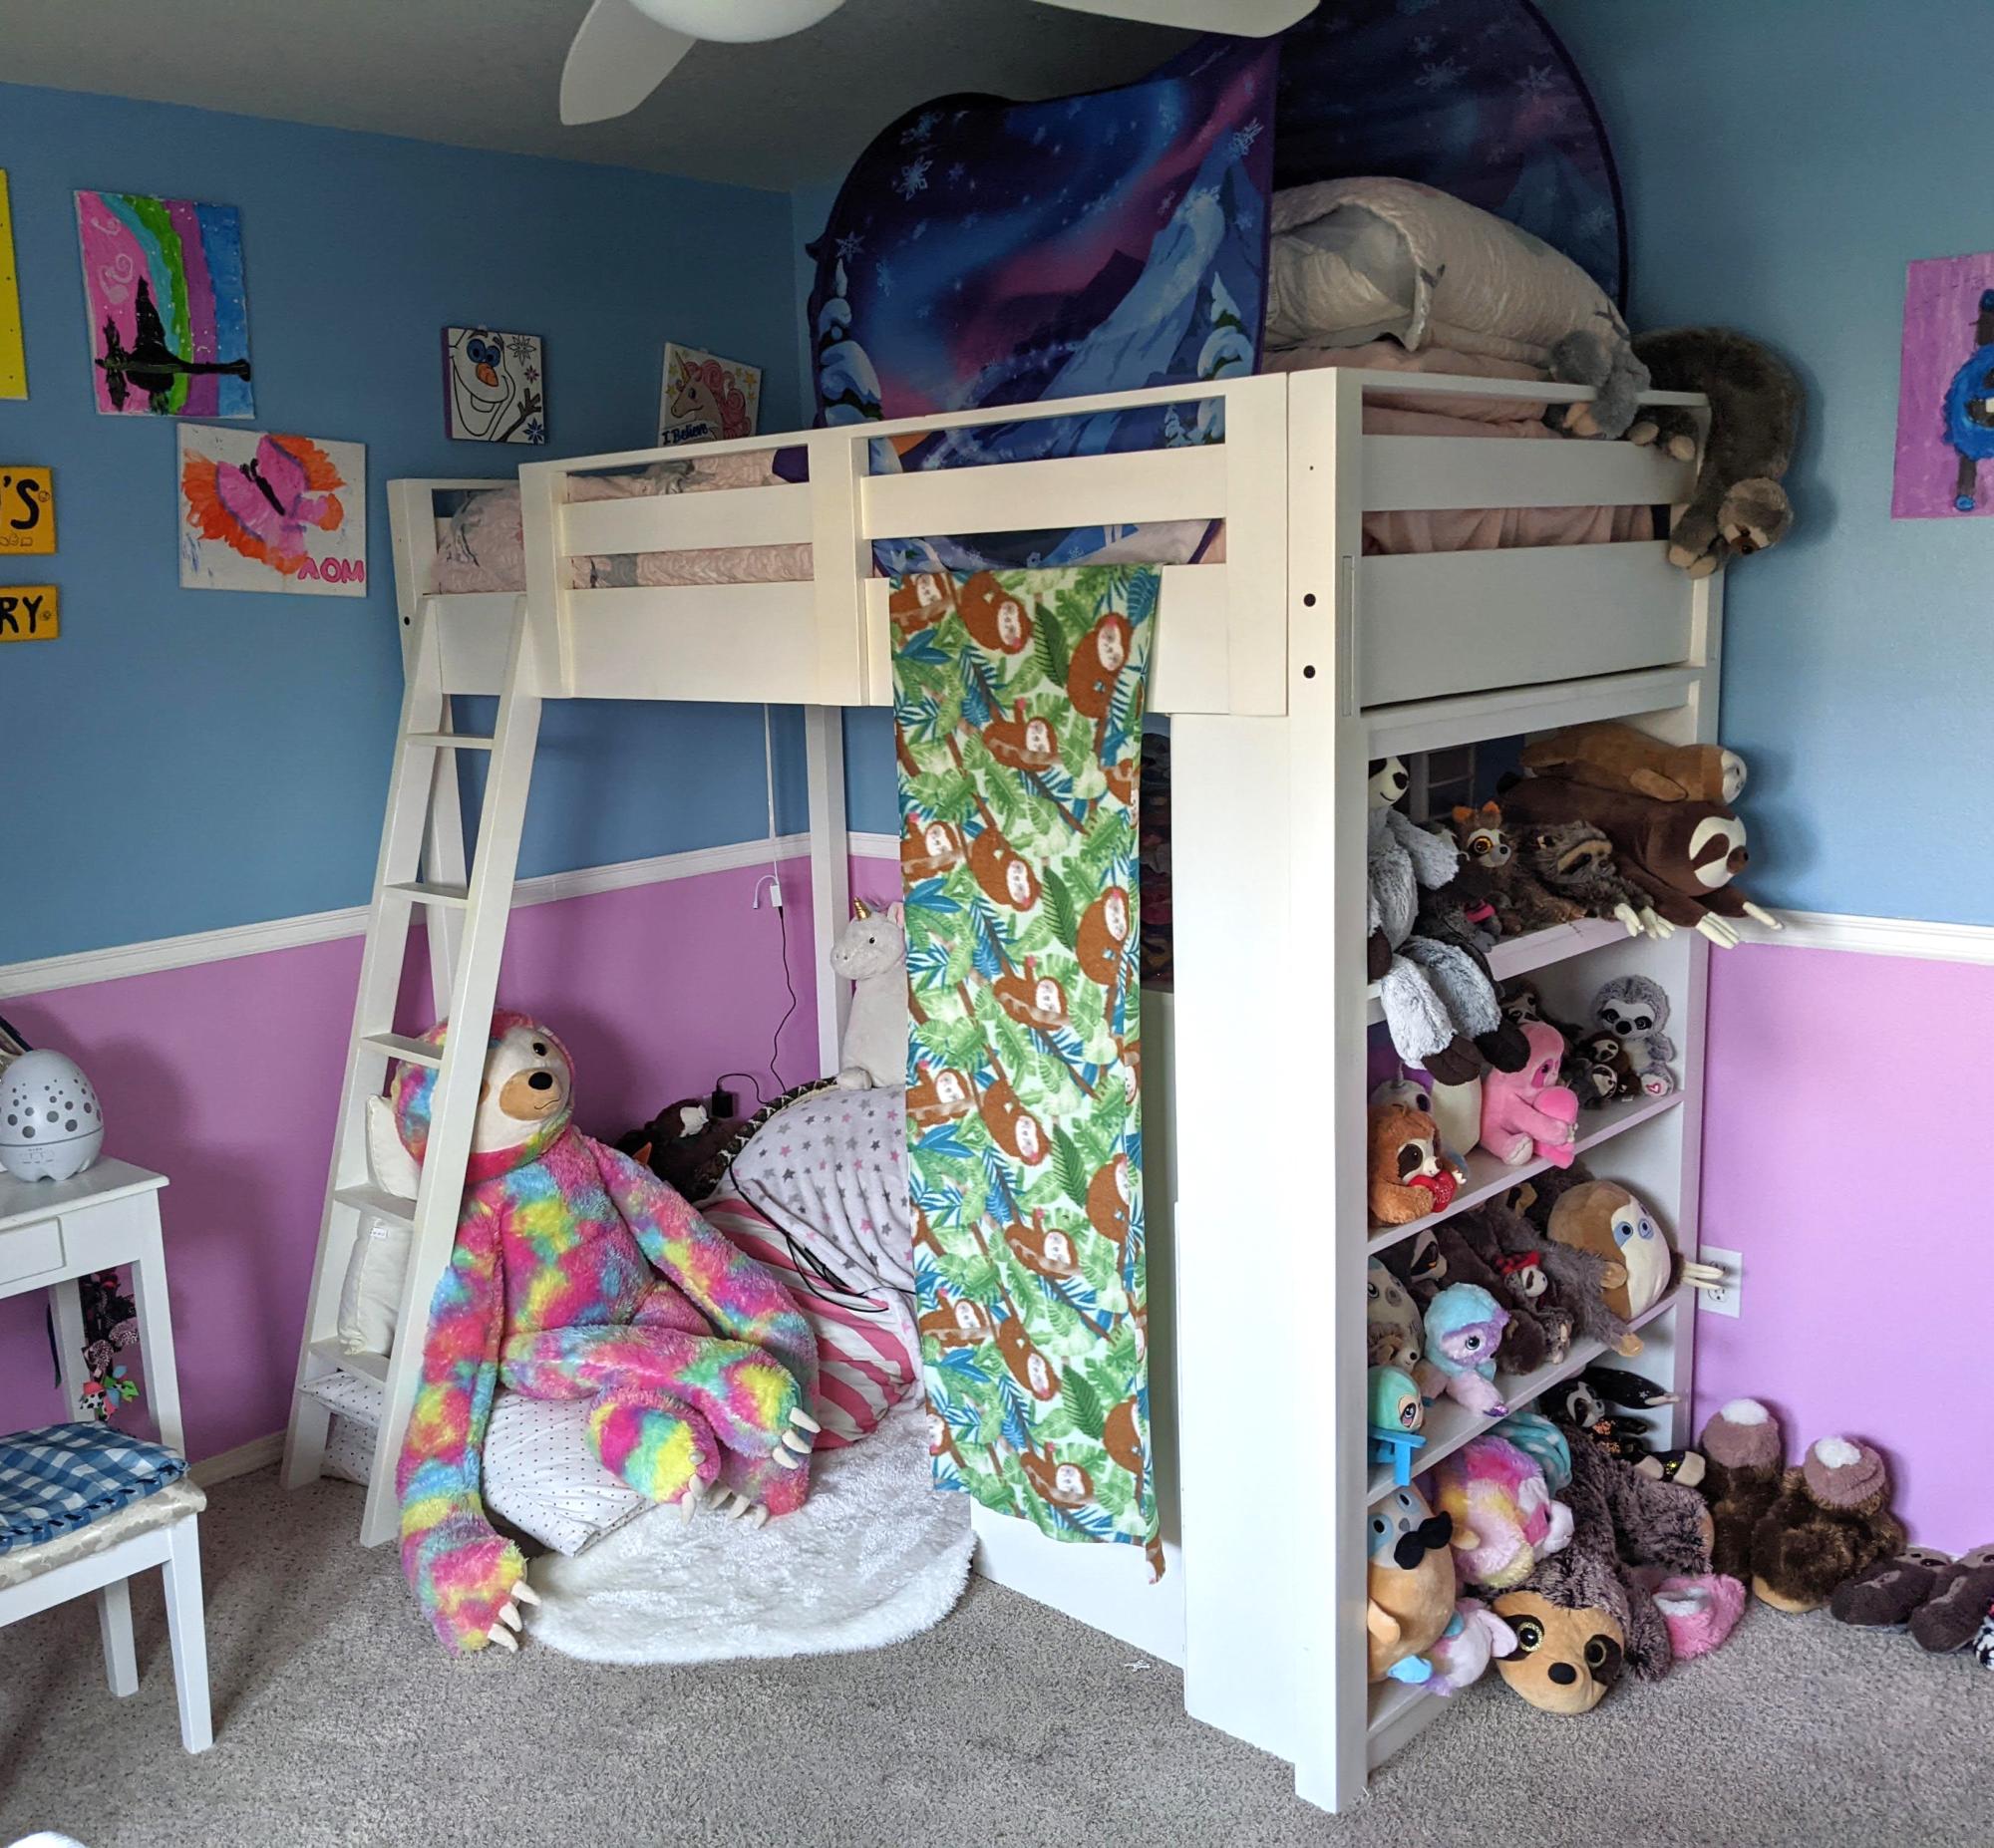
Queen Loft Bed

I made this bed for my 6 year old daughter. I loved Anna's Loft Bed plans, but she wanted a bigger play area underneath. So I modified the twin loft bed plans to fit a queen mattress. I also added extra supports for the mattress, and I used PureBond plywood on top of the supports for the mattress to sit on.
That's the Farmhouse Toddler Bed underneath. My younger daughter inherited her big sister's twin bed, so the toddler bed was put to use in the new "playhouse."

Built from Plan(s)
Estimated Time Investment
Week Long Project (20 Hours or More)
Finish Used
I sanded the wood and primed it. Then I sanded (lightly) again and painted it with Valspar latex enamel in Gloss Almond.
Recommended Skill Level
Intermediate
Comments
Wed, 02/09/2022 - 15:31
We’ve been looking for…
We’ve been looking for exactly this!! Can you share your modified plans and the list of lumber and supplies needed?
Sun, 09/02/2012 - 12:45
Modified Queen Size
I think it's great that you modified it to a queen! I live a studio and NEED something like this. Could you share the modifications? It looks beautiful = )
Sun, 09/02/2012 - 20:58
The changes I made were: End
The changes I made were:
End planks cut to 63"
Top back guard and front and back rails cut to 87"
The top guard rails on ends cut to 66"
I measured for the mattress supports and the front guard rail after the rest was completed.
You should also measure for the bookcases after the rest is completed, but each of mine wound up being about 31" wide.
Everything else was pretty much the same.
Hope that helps.
Thu, 11/01/2012 - 08:24
Thank you!
This is wonderful - I've been looking to make something like this for an urban efficiency (adult) apartment! Thanks so much for sharing your modifications!
Mon, 07/29/2013 - 14:08
queen loft for adults
Will the height of the bed allow for adults to stand under it? If not what modifications should be made to make the height fit a standing adult? (the highest being 6'1" male) Thanks! =D

Rugged Outdoor Table
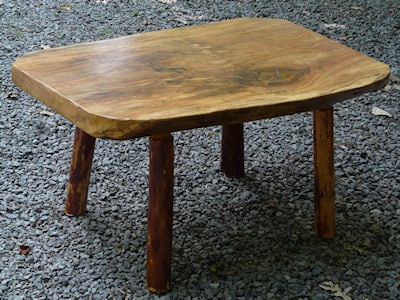
Ok I decided to construct my very first project - a small outdoor table that would look a bit ancient mostly because the need for it in my house has been screaming since I could remember. I would selfish to say that I did it alone but I got a bit of help from my hussy. I'm happy that the kids love it and all struggle to have lunch on it.
Built from Plan(s)
Estimated Cost
$50.00
Estimated Time Investment
Day Project (6-9 Hours)
Finish Used
Coated with a transparent paint/thinner as I wanted to keep it a bit raw.
Recommended Skill Level
Beginner