Community Brag Posts

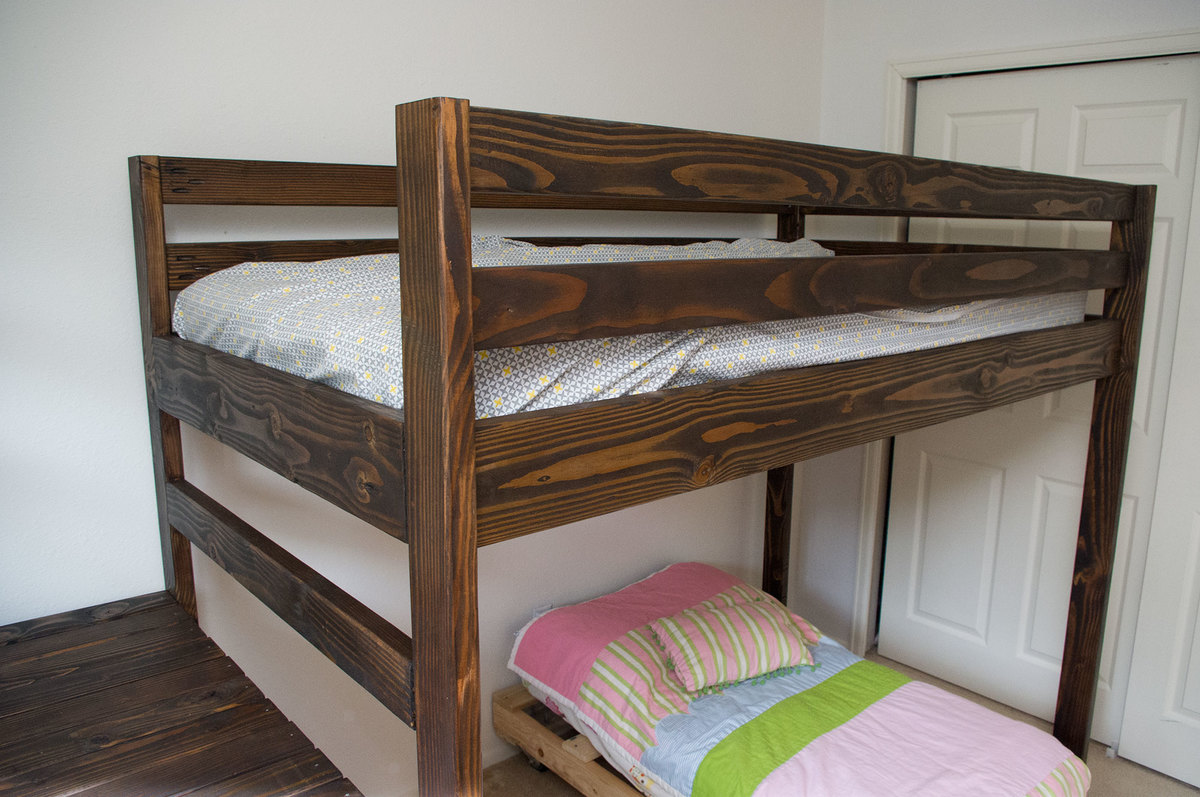
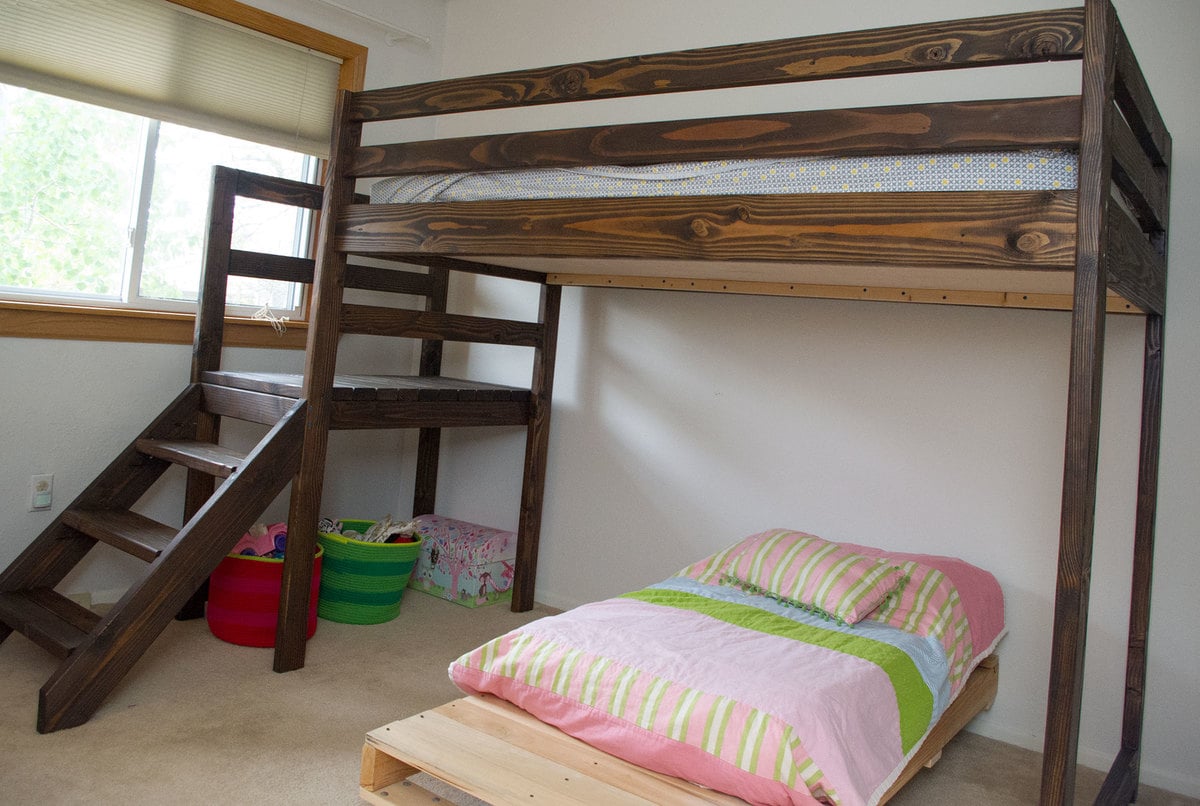
Camp loft bed with stairs

Submitted by themombot on Fri, 05/09/2014 - 13:27

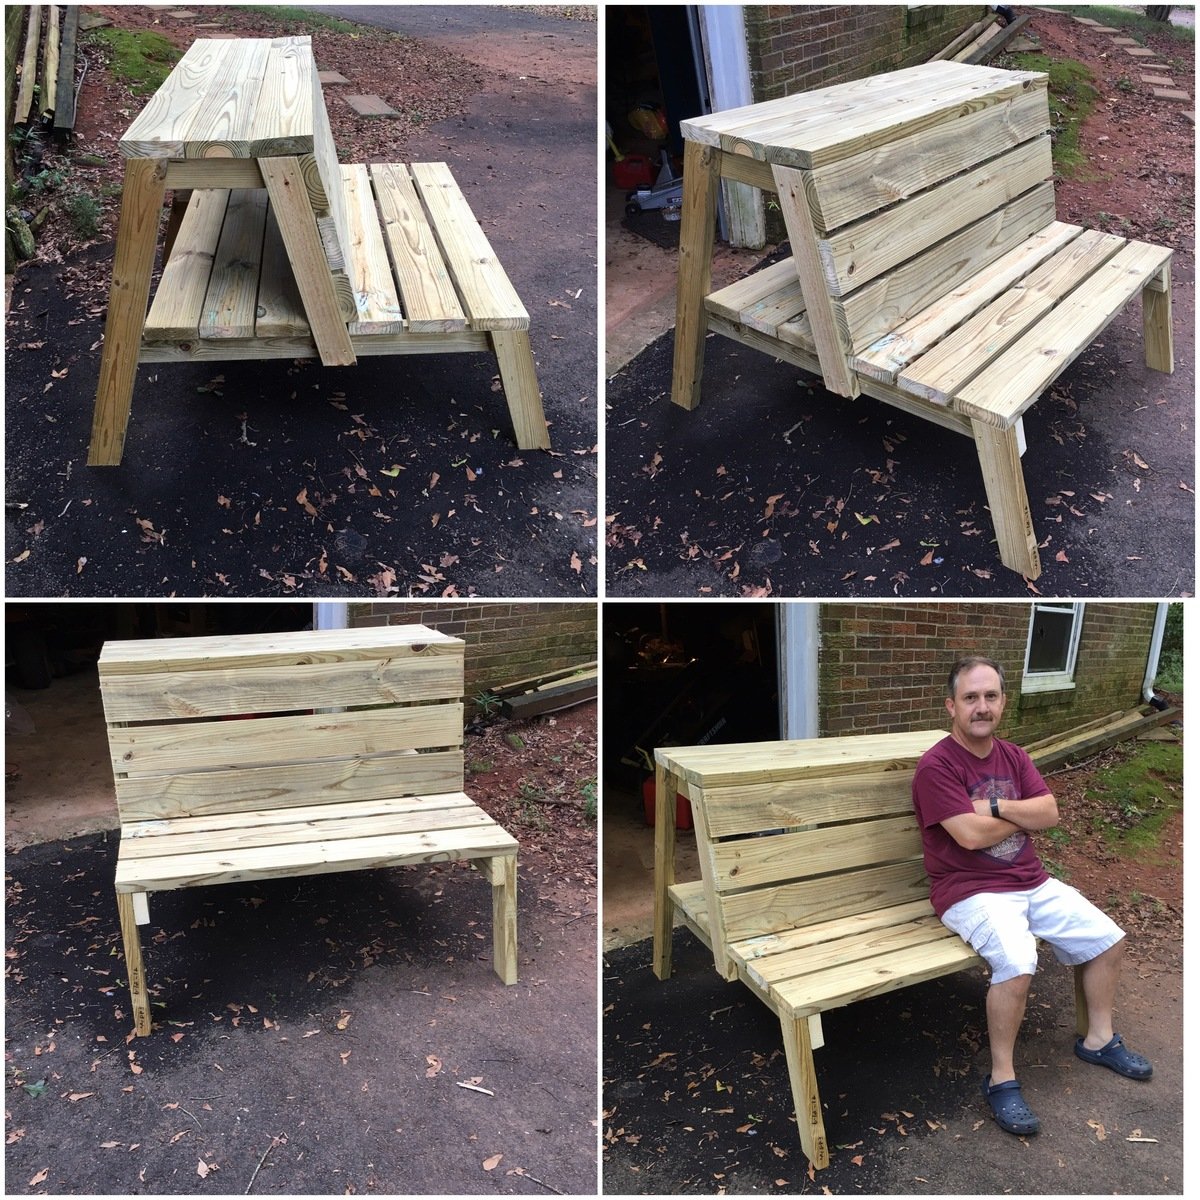
I had my dad and father-in-law come help with this project. We are all pretty much beginners, but have done some building in the past.

Because I'm not experienced, I didn't find the plans to be in depth enough. Some parts weren't not fully explained and took some guesswork.

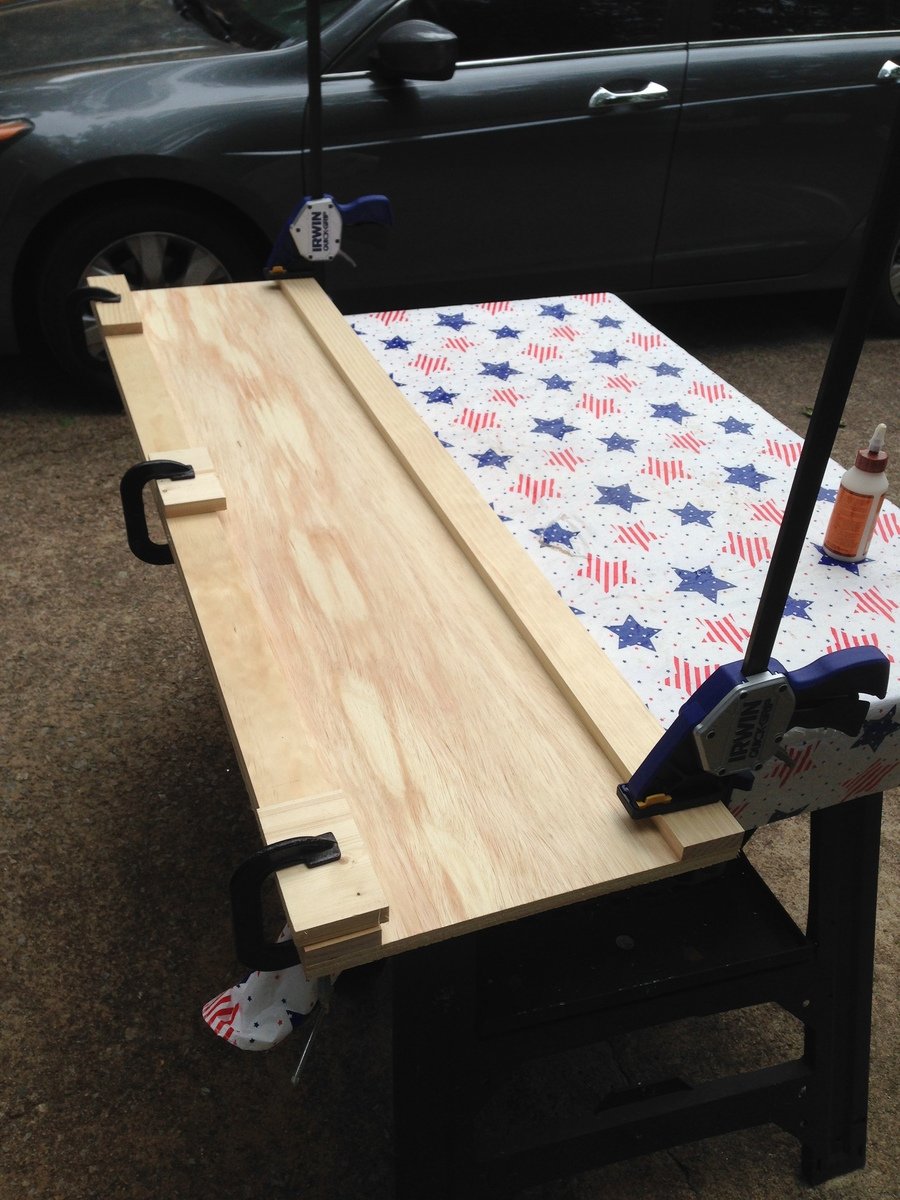
I also didn't know what a Kreg Jig was or how expensive it was! This upped my cost by $100. It was well worth buying however, and will be used again in future projects.

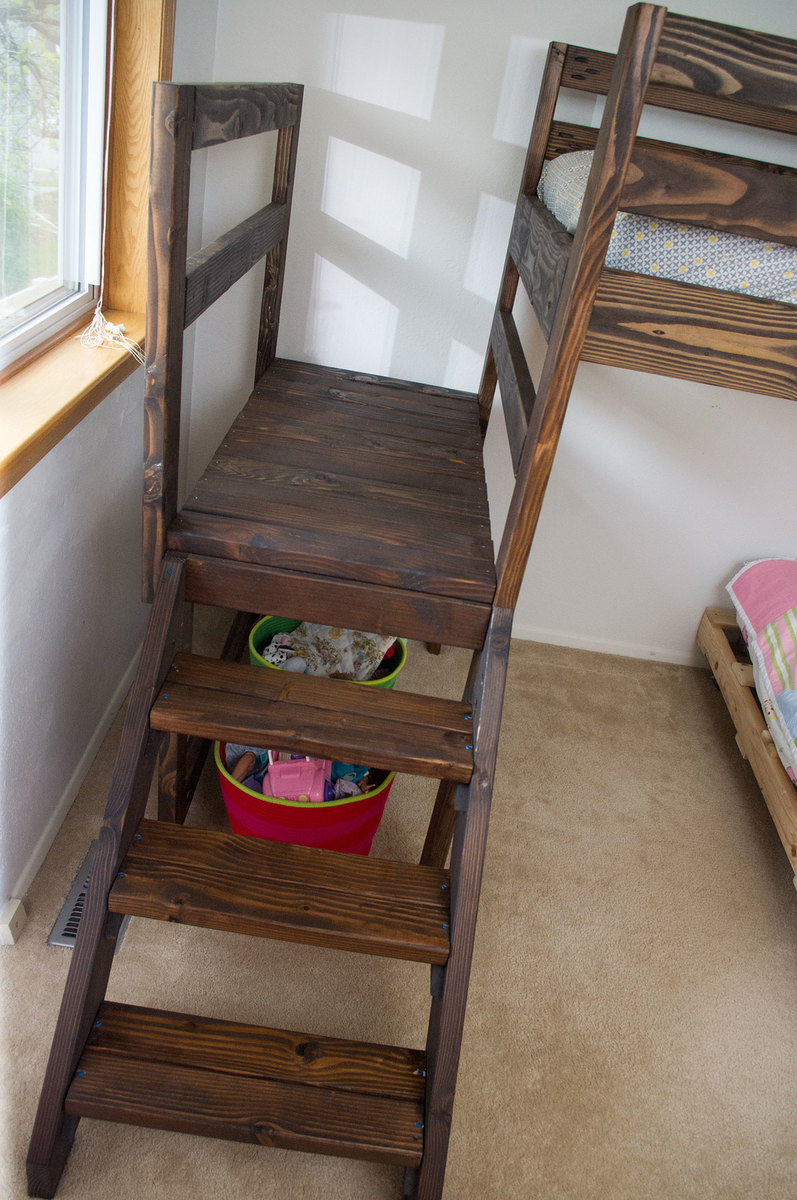
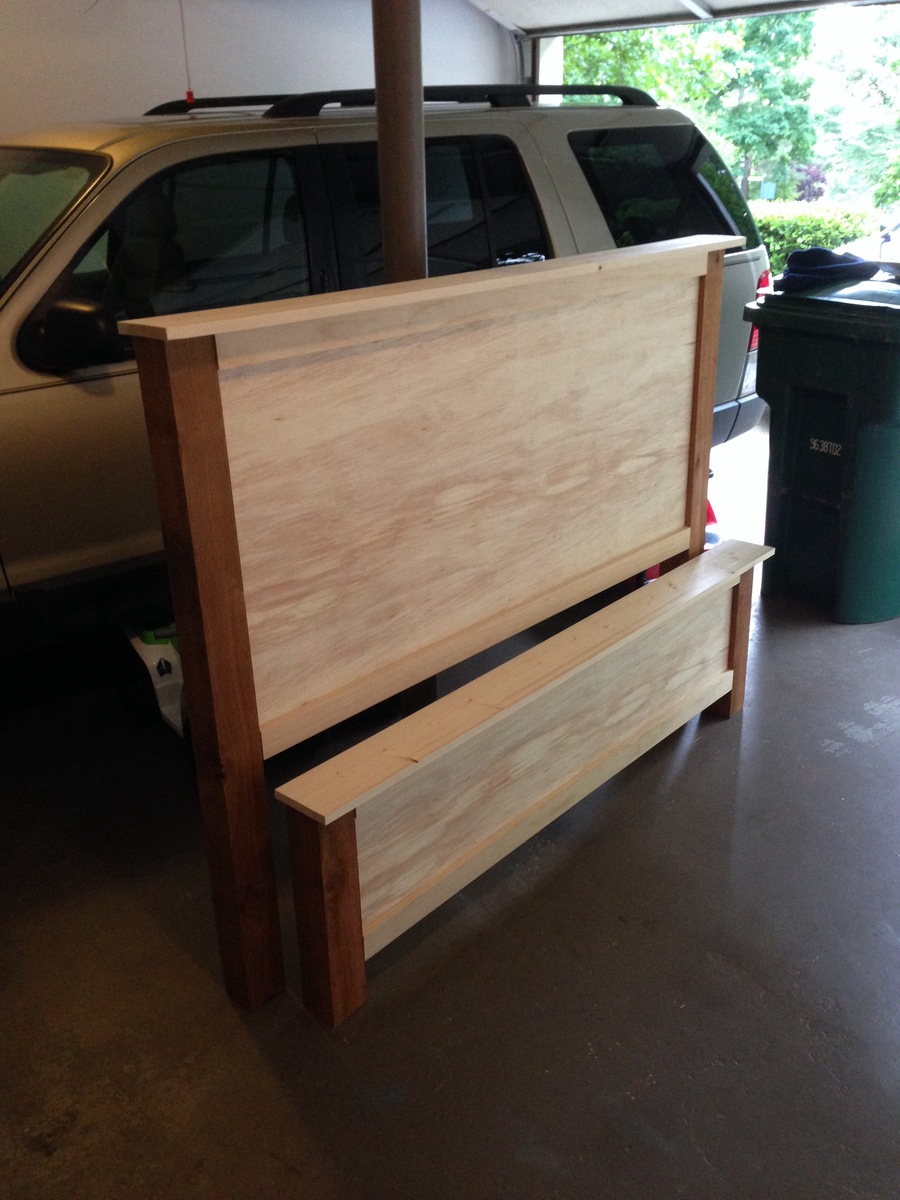
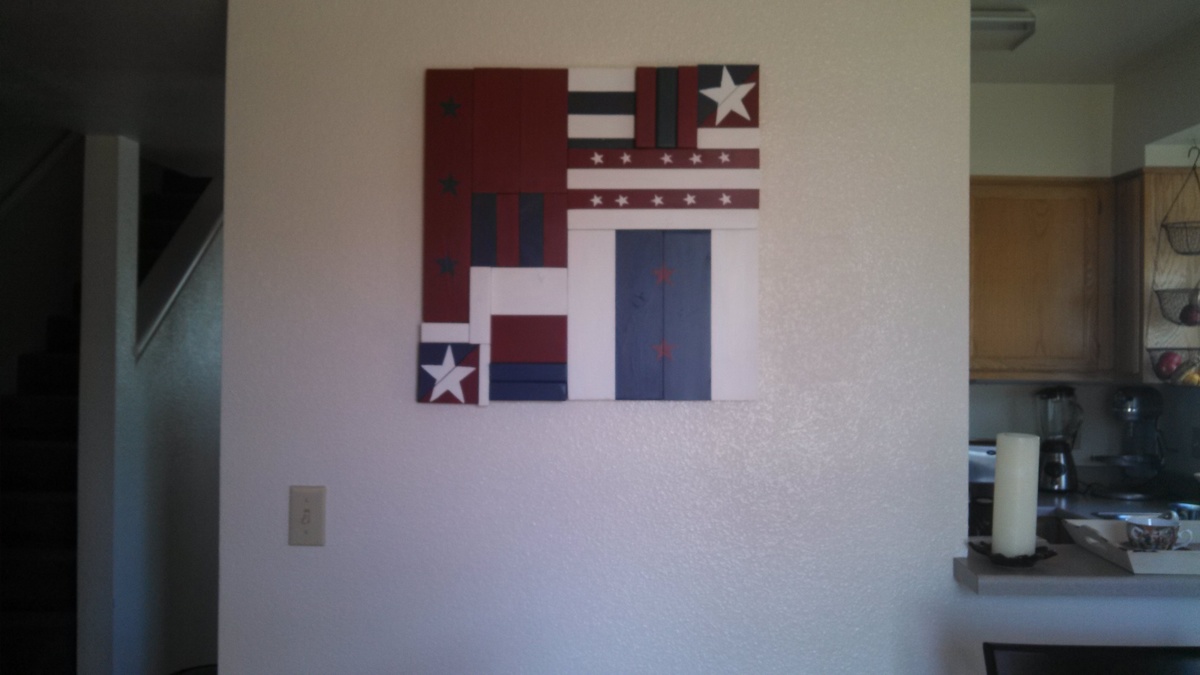
We added a railing to the platform since the bed is up against a window with a screen. If the kids were to fall off the platform and hit the screen, they could fall 2 stories. The railing is just screwed into the side of the platform and can be removed at any time.

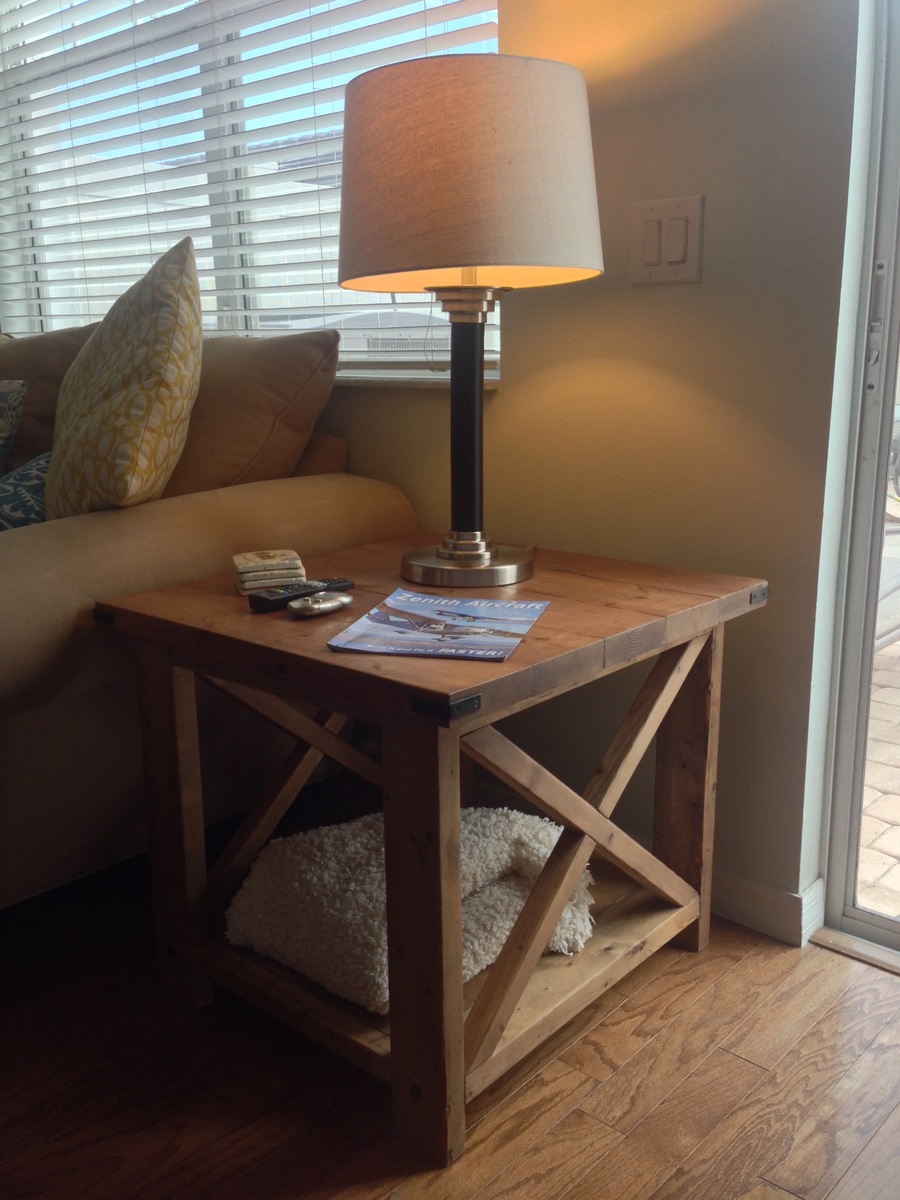
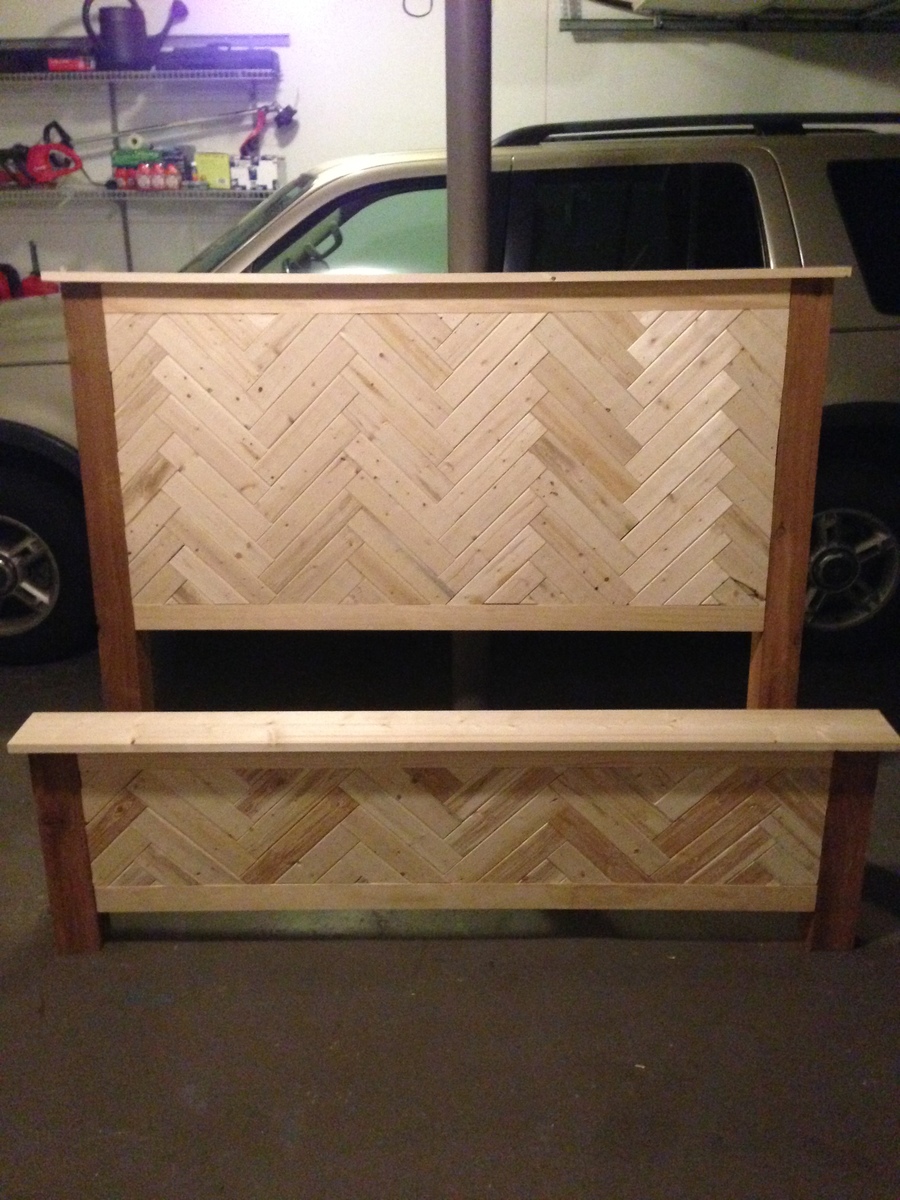
Overall, I love how it turned out and so do my kids! It fits the toddler-sized DIY bed that my husband and I built right underneath so my 4 year old and 2 year old can now share a room.

More details and pictures are on my blog: http://themombot.com/crafting/2014/05/09/details-our-diy-bunk-bed

Estimated Cost
$150-$250
Estimated Time Investment
Week Long Project (20 Hours or More)
Finish Used
Minwax wood stain in Jacobean, with pre-stain conditioner and 2 coats of polyurethane
Recommended Skill Level
Intermediate

rustic X End table

Submitted by Anonymous (not verified) on Wed, 08/10/2016 - 05:28

Very straightforward build. Lowes didn't have many 2x4's that didn't have some sort of warp or bend in them so the bottom shelf had to be trimmed slightly to fit. 


There is a sweet spot with the vinegar/steel wool that takes some mixing and testing to find. To strong a solution and the wood turns nice and brown to weak and it's a hardly noticeable light grey. My advice is get a strong 3-4 day old solution and mix 50/50 with vinegar and test on scrap, wait and hour or so to dry and adjust the mix from there until you love it. 


I finished with minwax polishing wax.

Built from Plan(s)
Estimated Cost
$50
Estimated Time Investment
Weekend Project (10-20 Hours)
Recommended Skill Level
Beginner

Rustic coffee table (simple version)

Corner accents are on order, but I'm happy with the thing as is. Went with colonial maple instead of golden oak and wow the thing pops. Put together was pretty easy for a beginner. I do recommend predrilling some of the edge/angle holes - the pressure treated wood can be unforgiving.

Great plan! Great table! Thanks!!

Lumber was $37. Screwes, glue, stain, etc cost extra, but those add up in your garage overtime - so, sunk costs. All in all, I spent about $60 and finished the project in less than 4 hours.

Estimated Cost
37
Estimated Time Investment
Afternoon Project (3-6 Hours)
Finish Used
https://www.homedepot.com/p/Varathane-1-qt-Colonial-Maple-Premium-Fast-Dry-Interior-Wood-Stain-266261/203332270
Recommended Skill Level
Beginner

Mom's Day side table

Submitted by CSaintD on Sun, 05/11/2014 - 08:52

I made this for my Mom for Mother's Day. She has been wanting a little table to put next to her recliner (where she knits, reads and watches TV). For the top and drawer, I used Douglas Fir from Lowes. The rest is whitewood and redwood (legs). Overall the wood cost me about $50. I painted the body with high-gloss white paint and the stain on the wood is a mixture of min-wax Golden Pecan and English Chestnut. The finishing took the longest, but the build went very quickly.
I did notice that the cut list is a little off. You need 4 of the 1x2 pieces for the sides, not just two.

I may put a layer of varnish on it, but as of now it is not varnished.

Built from Plan(s)
Estimated Cost
$50
Estimated Time Investment
Weekend Project (10-20 Hours)
Finish Used
White high-gloss paint on legs and body. Golden pecan stain overlapped with English Chestnut stain.
Recommended Skill Level
Beginner

Go Devils!!!

Submitted by Anonymous (not verified) on Sat, 08/13/2016 - 13:41

Made a set in Kansas, moved em to Texas with us and couldn't move them to Kentucky, so I had to build another set! I know, such a shame right! Lol. These ones turned out better than the first! The first set was just stained, I got a little more crafty with these!!

Recommended Skill Level
Beginner

High School Student Projects

Submitted by Anonymous (not verified) on Thu, 02/15/2024 - 10:47

We are a title one school located in Colorado springs C.O.. We have been using your plans for the past six years and find them accurate and affordable to build . The pictures are Jrs and Srs projects . Woodshop would not be a woodshop with out your generous helping plans . THANK YOU.

Atlas preparatory High School H.S. woodshop

Doll Adirondack Chair

Fun project!

Built from Plan(s)
Estimated Time Investment
An Hour or Two (0-2 Hours)
Finish Used
Paint and Cricut Vinyl
Recommended Skill Level
Beginner

Comments

Stuffed animal holder

I had a friend ask me to build this for her daughter. The bars are bungie cord that you can order by the roll. I made 3 frames the same size then put 2x2's on the inside corners and counter sunk the screws the stapled the bungie cord at the top and the bottom. I would highly recommend securing this to a stud in the wall incase a little one tried to climb on it.

Estimated Time Investment
An Hour or Two (0-2 Hours)
Recommended Skill Level
Beginner

Small Table Plant Stand

Submitted by Anonymous (not verified) on Fri, 02/23/2024 - 10:19

This is a revised kids table plan. I needed a plant stand. It is 36 inches tall and the top is made from 1 × 4's. The top is about 11 x 14. What did I learn from this?. The top is so small it was hard getting the kreg dill bit in to screw in the Kreg screws. I should have thought of that. Also learned that you dont get a tight fit if you have to take out the screws. 2nd time they dont grab and hold as tight. Overall I'm happy the way it turned out. But lots of room to improve.

Barb Runquist

Farmhouse Night Stand

Submitted by searcyb on Tue, 07/24/2012 - 20:28

My Wife asked me to look into a night stand for her. I am so so so thankful that I was able to come across Ana's site. I showed the site to her and she asked me to build this night stand as opposed to going out and buying her some expensive poorly built nightstand. Thank you Ana for this wonderful site and the inspiration that some of us need to "get started."

One thing that I didn't think about when I started this project:
The cut list is a suggestion of what you will need to cut. I only ran into one major issue and that was with the inset bottom of my pull out drawer. I cut my drawer sides to the dimensions on the cut list (not paying attention to the note from Ana) and had to adjust my cuts for the drawer. I ended up ripping down the remainder of the 1x12 and paired it with the 1x6 that I had left over. Using the Kreg Jig I now had a perfect fit for my drawer.

I would have liked to have had a darker stain (more of an espresso) and that is my fault for not buying different stains and testing them on my wood choices. As far as my wood choices I used 1x6 and 1x12 "white board" 1x2 and 2x2 precut pine and bought a scrap piece of 1/4in plywood for the backer.

The Kreg Jig made this project very easy to complete as well as my counter sink drill bit. Although not impossible to complete without these two tools it is remarkable easier to complete.

Built from Plan(s)
Estimated Cost
125
Estimated Time Investment
Weekend Project (10-20 Hours)
Finish Used
Minwax Bombay Mahogany and Polyurethane
Recommended Skill Level
Beginner

DIY Herringbone Cassidy Queen Bed

Submitted by mrcleland on Mon, 05/19/2014 - 06:46

I cannot be happier with the final look of my new bed. I decided to take on this task with intentions to make small changes in the plans based on my needs and preferences. The process was easy and original plans were definitely easy to follow. I had the head or foot boards completed in about 3 hours (without the herringbone pattern). I saw where someone else decided to add a herringbone design and I liked it so I did the same. It was a little tedious but overall not hard at all. Building the frame was easy as well and didn't take long at all. I started running into problems when transporting the footboard. I dropped it from about 2 ft and the leg post snapped off. I thought the pocket holes were not that strong from the beginning. This was not a problem though because I just followed the special note in the instructions and added a 2x2 to the back of each side and attached them with 3 inch wood screws. I did this for the head and foot board and it made me feel more comfortable with the stability overall. I was going for longevity for the bed so I wanted to make it easier to disassemble and move around (screwing the frame in would wear out with a few moves). I went to a woodworking shop and picked up some 5/8 inch insert nuts and bolts to match. I added one to each corner and tightened accordingly. This was by far the biggest headache for me. If I could do it over again there are a few things I would change.
1. I would have sanded my cedar post before attaching them
2. I would have attached my cedar post with the 2x2 and not used pocket holes (I l like pocket holes but not for such a heavy load)
3. I would have drilled and placed my insert nuts on the post before attaching anything to them (this would have helped to ensure a level hole).
My wife and I love the natural look of the wood but it doesn't really go well with the modern contemporary look in our home so we are having a hard time deciding on paint or stain. We are leaning toward stain because we love the grains throughout the bed.

Built from Plan(s)
Estimated Cost
200.00
Estimated Time Investment
Weekend Project (10-20 Hours)
Finish Used
To be determined
Recommended Skill Level
Beginner

Comments

spiceylg

Mon, 05/19/2014 - 08:15

I absolutely love how this came out. What did you use for the herringbone part, are those 1x3s?

mrcleland

Mon, 05/19/2014 - 11:08

I used the pine 1x3's from my local home improvement store. They were $1.39 each for a 1x3x8. I used about 15 total. I decide not to go with the select wood for the herringbone and glad I didn't. I feel the less perfect, rounded edges add character.

mrcleland

Thu, 05/22/2014 - 10:35

I like it so much, I am planning to add a box spring to mine. I really like how high yours sits. I also like the color of yours. We are experimenting with stains now and I will post new pics once it has been done. Don't be surprised if it looks very close to yours :). I used cedar for my post so I think it will be hard to match the colors.

jeannajustfine

Thu, 05/22/2014 - 19:00

I love that you like it so much. Between this and getting picked for Anas brag post of the day on Facebook yesterday, I was walking in the clouds...lol

I used Minwax 1 coat of espresso and 1 coat of jacobean for all the larger pieces. I used Cedar as well for the posts. And it does come out a little redder. Just mess with it till u get something you like. It may not match the rest of your pieces exact, but it will look great once its all together.

I also messed around with the herringbone pieces. I used the same colors of stain but did some with one coat some with 2, some for 30 secs some for as long as 15. It kept the colors along the same line, but gave some variation.

I finished with paste was

As for the mattress. I love how mine sits. Feels very regal being up so high..lol. Its such an awesome bed plan. I cant wait to see yours finished.

Thanks for making my day. That was my very first project. So very cool!

Based on FatBobK2's design.

Submitted by Kougar1994 on Fri, 08/19/2016 - 15:30

This was based on FatBob2Ks great design.  I took iut the Xs used 4x4 legs and 2x6s fir the bottom shelf.  I also put a furring strip around the edges to hide the end grain and add some surface area.  I sanded starting with 89 grit, then 120 and finishing with 150.  For stain I used a rag to rub on General Finishes Java Gel Stain for 2 coats. it's really forgiving on bare wood and you don't need conditioner.  I sealed everything with Minwax satin poly wipe-on and did three coats.  


Built from Plan(s)
Estimated Cost
$80. I bought local lumber. The big bix stores just don't have straight boards unless you're buying S4S hard wood.
Estimated Time Investment
Week Long Project (20 Hours or More)
Finish Used
General Finishes Java Gel Stain and Minwax wipe on poly
Recommended Skill Level
Intermediate

Modern Outdoor Chairs with Backrest Modification

Submitted by GBev44 on Tue, 06/02/2020 - 08:16

My first crack at building outdoor furniture. I built two of the Modern Outdoor Chairs built with 2 x 4 and 2 x 6. The first one was a little rough, but the second one was much better. In order to accommodate the higher cushions and make the chairs more comfortable, I added piece 2 x 6 secured to a 2 x 2 to make a partial backrest.

Estimated Time Investment
Day Project (6-9 Hours)
Recommended Skill Level
Starter Project

Outdoor Wood Island

Submitted by Putterer1 on Mon, 02/26/2024 - 10:43

Hello - I am new to your projects post. I really like the projects that you post. I had been looking to make a "grill storage/prep" cart and came across your plans for the Rustic X Kitchen Island with drawers. I also saw a picture of another table and decided to merge the two. Attached are pictures of the finished project. I modified some of the dimensions to accommodate what I was trying to achieve. I used a half-lap on the X's on the sides. I also used center drawer slides so they would not be seen on my version. I would be happy to provide additional pictures, dimensions or project tips. Thanks for posting your projects. Keep 'em coming. I don't have a blog, Insta.

Tom Riley

Built from Plan(s)
Seasonal And Holiday

Back To School Podium

I recently landed my first teaching position, and unfortunately my predecessor left quite a blank canvas for my classroom. I will be teaching math and definitely needed a lectern to hold my book as reference for examples during instructional time. However, I was completely unable to fork over $200 for a lectern...so of course I turned to Ana White! I saw the Podium Plan that another had submitted, and used it as a guide with some changes:

1) My dimensions are 15" wide by 21" long by 43" tall (I'm shorter than your average bear).

2) Used the table saw set at 45 degrees to create mitered joint edges with my plywood

3) Inset the shelves into the frame for added stability using a router.

4) Added casters to the base for maneuverability

5) Added an easily-removable laptop shelf for the side for easy hook-up to the Promethean Board in the classroom.

6) Decoupaging my name to the front for some visual interest...(and of course to claim ownership...:) )

My room is painted yellow, and all of my accessories are teal, lime green, and brown. This is gonna look GREAT in there, and best of all, it's attractive AND functional!

Built from Plan(s)
Estimated Cost
$40.00
Estimated Time Investment
Afternoon Project (3-6 Hours)
Finish Used
Paint and Spray-On Poly
Recommended Skill Level
Beginner

Comments

birdsandsoap

Sat, 07/28/2012 - 22:23

I don't remember having ANY teachers with anything this cool and personal in their classroom (except maybe woodshop, har-de-har-har). All the other teachers will be jealous!

Liberty Wall Art

Submitted by Malwina on Thu, 05/22/2014 - 11:52

I had a lot of leftover pieces of wood from other projects and really wanted to use them. I have been wanting to build the Liberty Wall Art for a while so I finally got to it. I already had a 2x2 piece of a 1/4 inch plywood so I made my piece smaller, fitting my plywood. Obviously, since my piece was smaller I cut and played with the pieces until it looked good to me and this is how it turned out. I glued everything to the board first and then nailed it from the back because my husband didn't want to see the nails. Also, he didn't want me to distress it so I went with his wishes. I think it would have looked nice distressed but oh well, still looks nice. With my husband being in the military, I really wanted this piece and now it's featured in our dining room! Thanks for the idea Anna! As always your plans are great. We have already build several items from your plans and I can't wait to post these brags!

Built from Plan(s)
Estimated Cost
free! already had everything
Estimated Time Investment
Afternoon Project (3-6 Hours)
Finish Used
used leftover paint from other projects and then put a layer of policrylic
Recommended Skill Level
Beginner

My fire pit bench.

Submitted by Mandy D on Sun, 08/21/2016 - 16:59

This was my first furniture build & it was very easy. I had to have a second pair of hands to help hold the ends up but other than that I did it by myself. Thank you Ana for making this build so simple.  

Estimated Cost
$75
Estimated Time Investment
Afternoon Project (3-6 Hours)
Recommended Skill Level
Starter Project

Standing Desk

Submitted by shellyward on Wed, 06/03/2020 - 18:59

During the 2020 quarantine I started working from home and had to take up an office in my grandsons room. I wanted to leave enough space for him when he comes over so I needed it to be more narrows than most but with plenty of space for multiple monitors as well as workspace. I got ideas from many plans here but ultimately designed my own with a little inspiration from multiple plans. I included a pullout for the keyboard as well as 2 additional pullout shelves for added workspace.

Estimated Cost
$500
Estimated Time Investment
Week Long Project (20 Hours or More)
Finish Used
Paint and poly on MDF, stain and poly on plywood
Recommended Skill Level
Intermediate

Wood Window Treatment

Submitted by Anonymous (not verified) on Sat, 03/02/2024 - 11:24

My has been wanting me to make some window treatments to replace aging Roman curtains on our bay windows. It was a challenge never made these before and she is well pleased with the results. The center window is 62 inches wide while the two side windows are 32 inches wide each. Each window treatment is 14 high.

Raymond Spears

Back