Community Brag Posts

A Long tapered crate

Submitted by dmcarwin on Tue, 09/03/2013 - 07:52

I love Ana's tapered crate! I decided to add some length to the sides and make it really long! It is super cute and makes a big statement, for only a small amount of work! Sa-weet!

Estimated Cost
Free, or under $5 if you by the wood new
Estimated Time Investment
An Hour or Two (0-2 Hours)
Recommended Skill Level
Beginner

Comments

Potting Bench

Submitted by DavidTR on Mon, 10/26/2015 - 11:58

I modified the collapsibile planting table by Lady Goats.  My wife asked for it to have a removable shelf to keep with the take down Idea and also to come up with a way to have a spicket added.  this was a really fun project to make, I even added carvings and painted to allow it to stand out and to give it some color.

Built from Plan(s)
Estimated Cost
$60
Estimated Time Investment
Weekend Project (10-20 Hours)
Finish Used
MinWax English Chestnut
Recommended Skill Level
Beginner

Kid-friendly Green Library Console

Submitted by romanweel on Tue, 12/18/2018 - 11:20

I did very little modification to the original plan on this one besides reducing the overall length to 28".  I had an old plate/cup display hutch that wasn't very practical or pretty, so I took it apart and used the pieces to make the shelves (and the curvy bit under the first shelf).  <!--break-->They weren't quite the right size, so I added other wood scraps (including a bit of plywood) to get the dimensions needed.  The 1x2s are crappy used furring strips I ripped out of the attic when we redid the roof, so they were all water stained and covered in nail holes.  The top was a vintage table leaf I acquired at some point and appears to be 3" pieces of poplar glued together (it took the stain beautifully).  Oh! I did do one other thing that wasn't in the plans...I connected the shelves to the base using 5/8" dowels through the horizontal pieces on the sides.  It took a little extra time, but I do feel more secure with the weight of the books+shelves (+possibly a climbing child) resting on those dowels instead of just screws.

The main thing is that this case holds my toddler's whole library.  She can even put the books away by herself without them falling off when she doesn't place them just right.  I love that it looks like it belongs in a grown-up's living room, but it's 100% classy kid-friendly furniture design!

Built from Plan(s)
Estimated Cost
Maybe $6 for screws, glue, and finish - built from scraps and a crummy wood hutch I was otherwise going to toss
Estimated Time Investment
Day Project (6-9 Hours)
Finish Used
100 grit sanding, then Zinsser Shellac-based primer and Behr Marquee oops paint for the base. The top is Minwax Dark Walnut stain followed by General Finishes water-based poly in satin (applied with a foam brush which turns out almost looking like I sprayed it: perfect with no brush strokes. I prefer the Wooster foam brushes from Lowes).
Recommended Skill Level
Beginner

Simple Bed Modified

Submitted by Anonymous (not verified) on Sat, 08/27/2022 - 14:34

My daughter needed to get out of her Toddler Bed so I built this quickly. Used 2 2x6 for each rail, and cut down the height of the headboard and footboard. Also as always I use Rocklers 5" Surface Mounted Brackets for all beds. I have the rails also sitting on 3 inch blocks to support the extra jumping this bed will endure by a 4 yr old.

Comments

5 Cube Tower Bookshelf

Submitted by rhilborn on Thu, 08/11/2011 - 12:25

This narrow cube bookshelf is a very handy addition to my kitchen! I use this shelf to store cookbooks, our iPod speakers, and some other utilitarian odds and ends. I'm particularly a fan of how to facing on the front and back acts as a stopper to keep your items in the bookshelf. It did not specify in the plans but we chose to align the back facing piece flush with the bottom of the shelf and the front facing piece flush with the top of the shelf. You can see what I'm describing in the pictures.

This piece was fast and easy. I think there is a time when finish work is faster to be done once a piece is finished but this not one of those projects. This shelf would benefit from finish before assembly.

Built from Plan(s)
Estimated Cost
$30
Estimated Time Investment
Afternoon Project (3-6 Hours)
Finish Used
existing can of Behr Premium paint plus primer; Minwax Wipe on Polyurethane
Recommended Skill Level
Beginner

Two-toned farmhouse bed

Submitted by JW on Thu, 09/05/2013 - 05:41

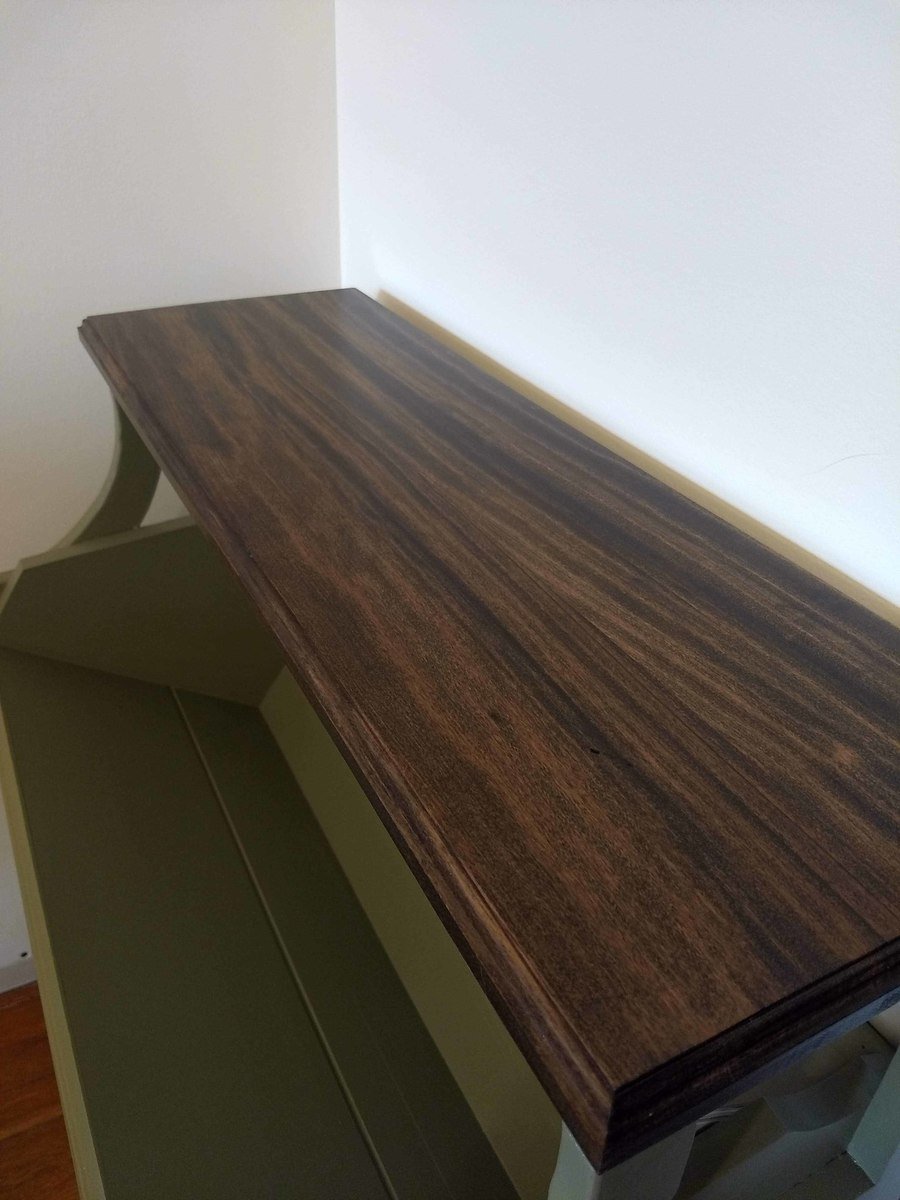
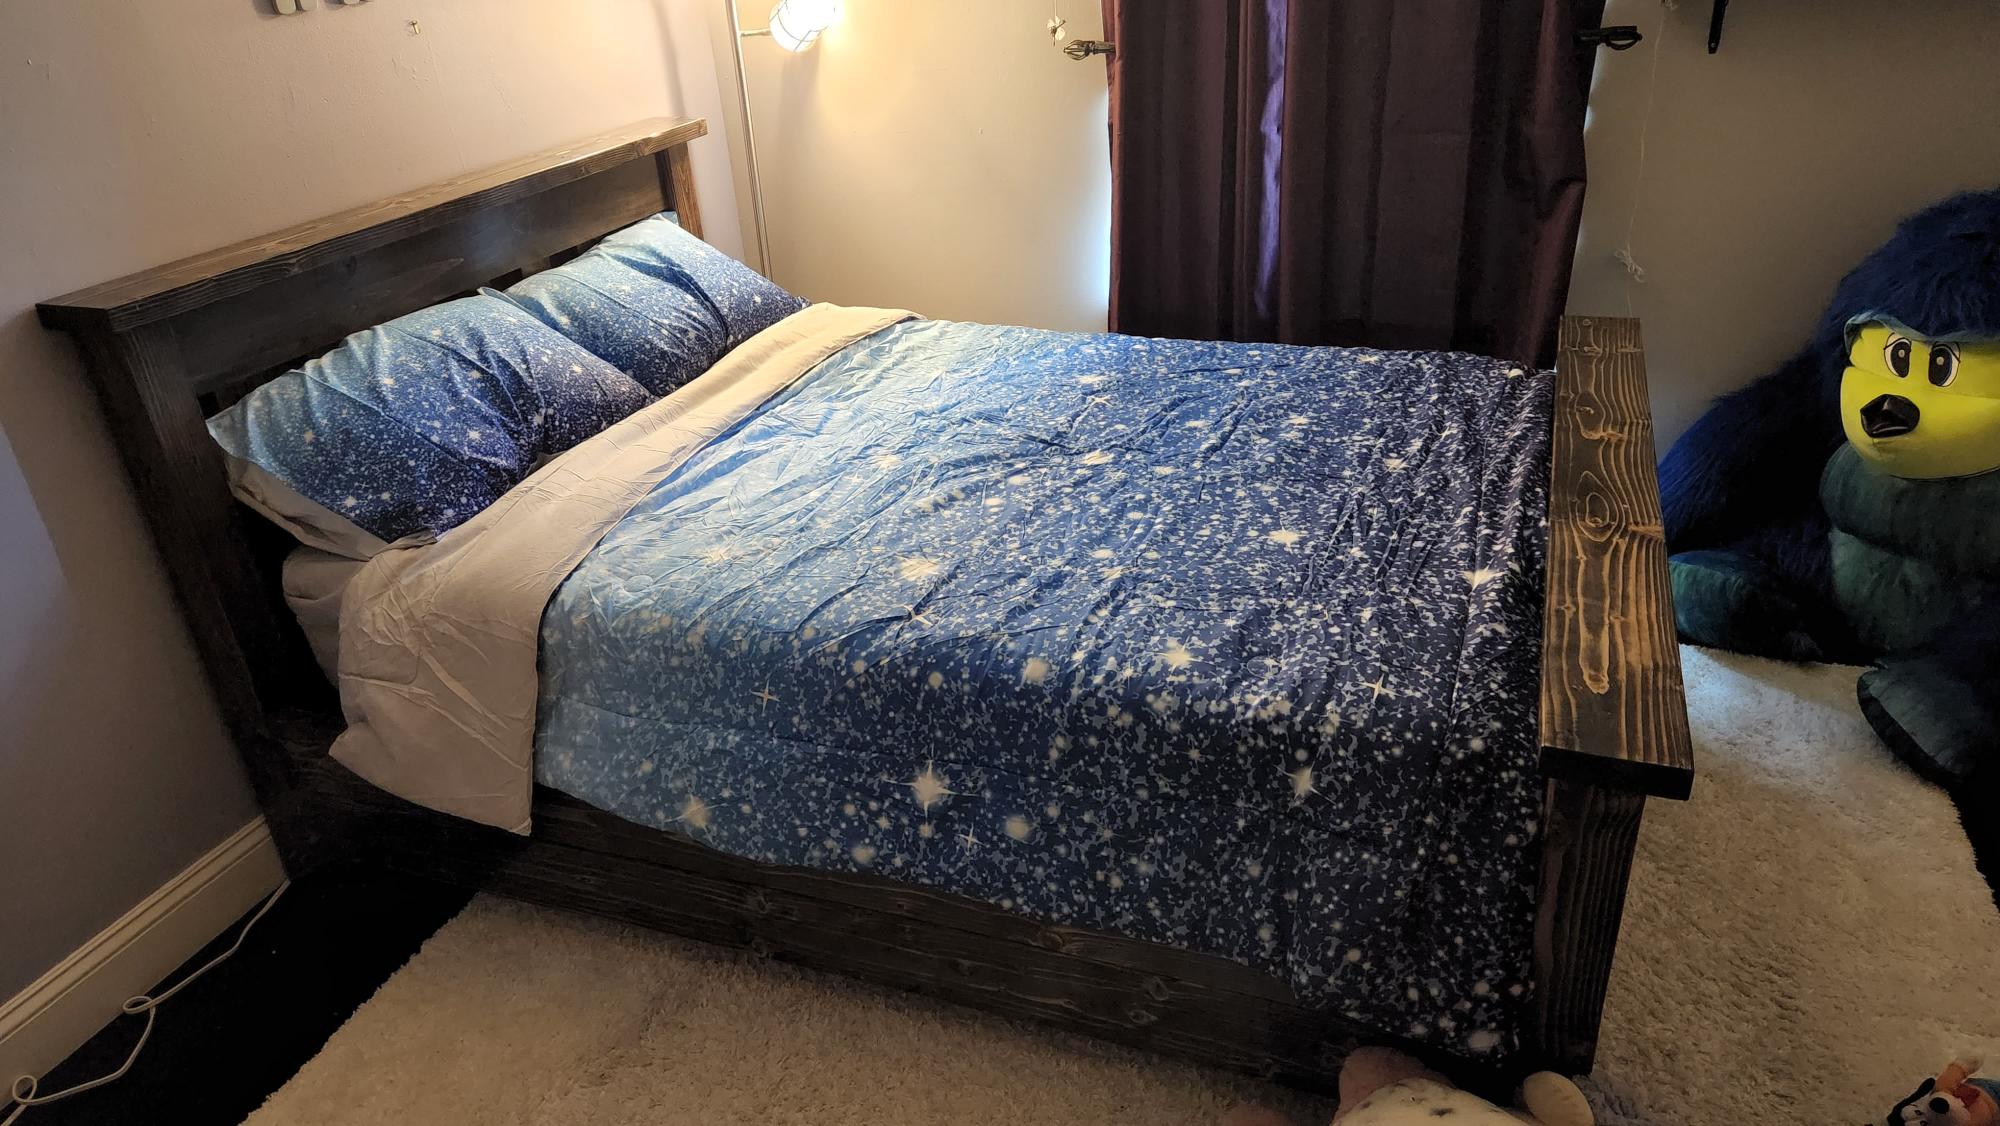
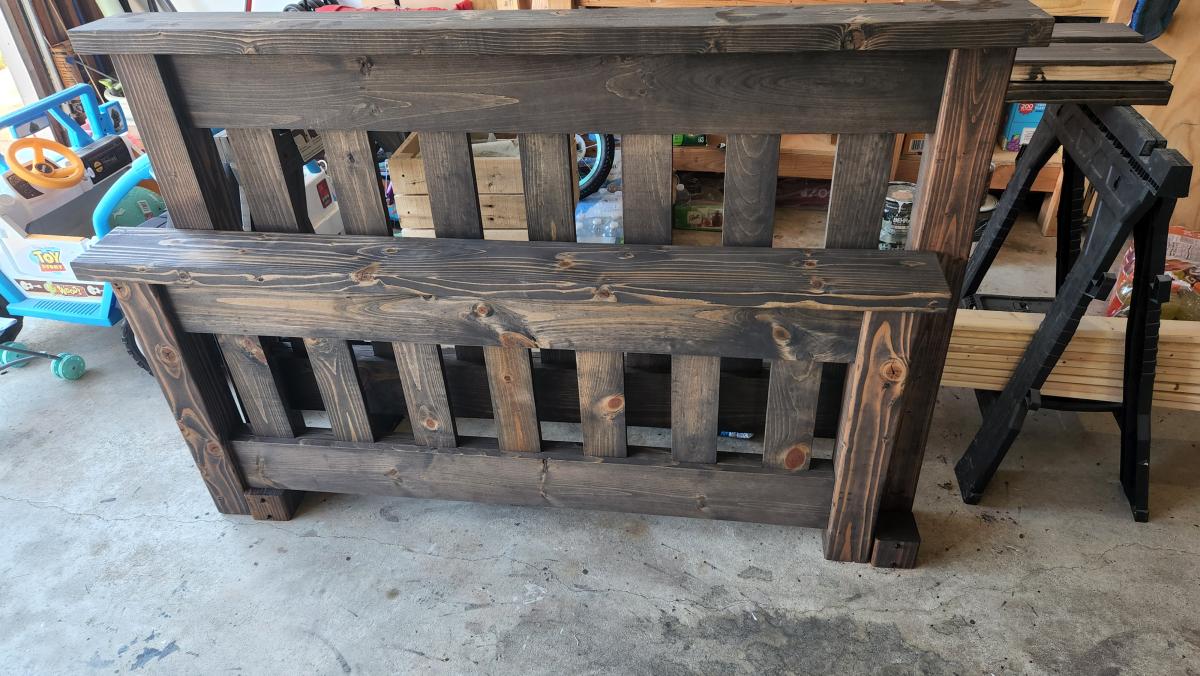
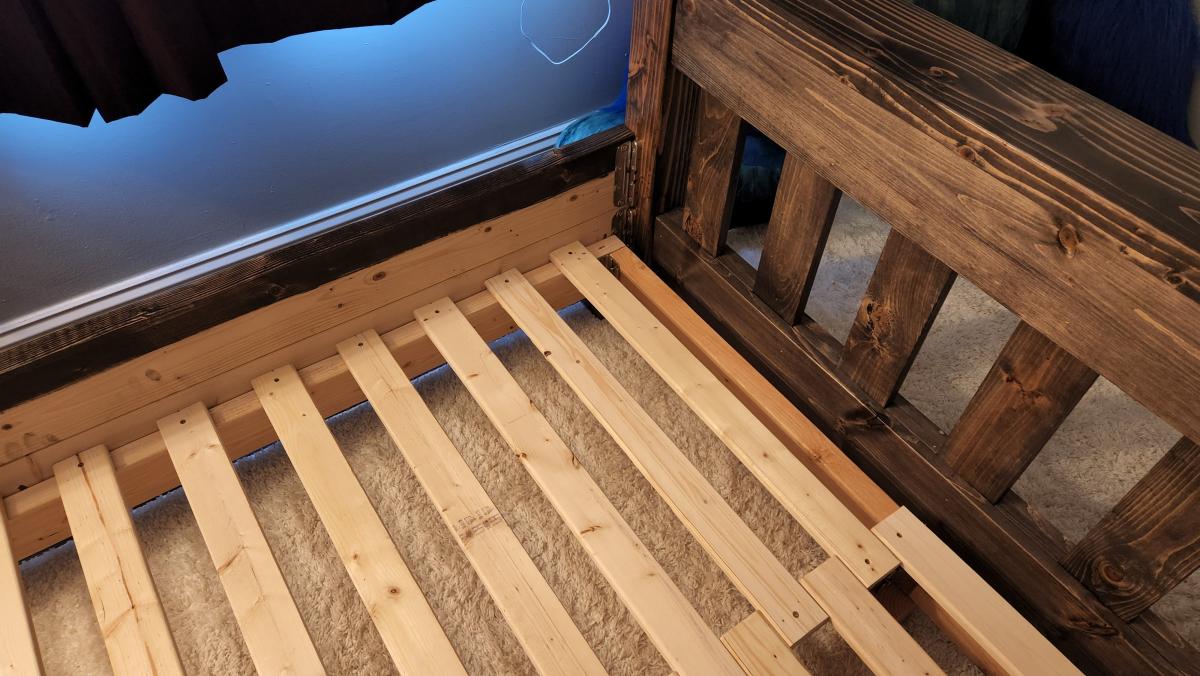
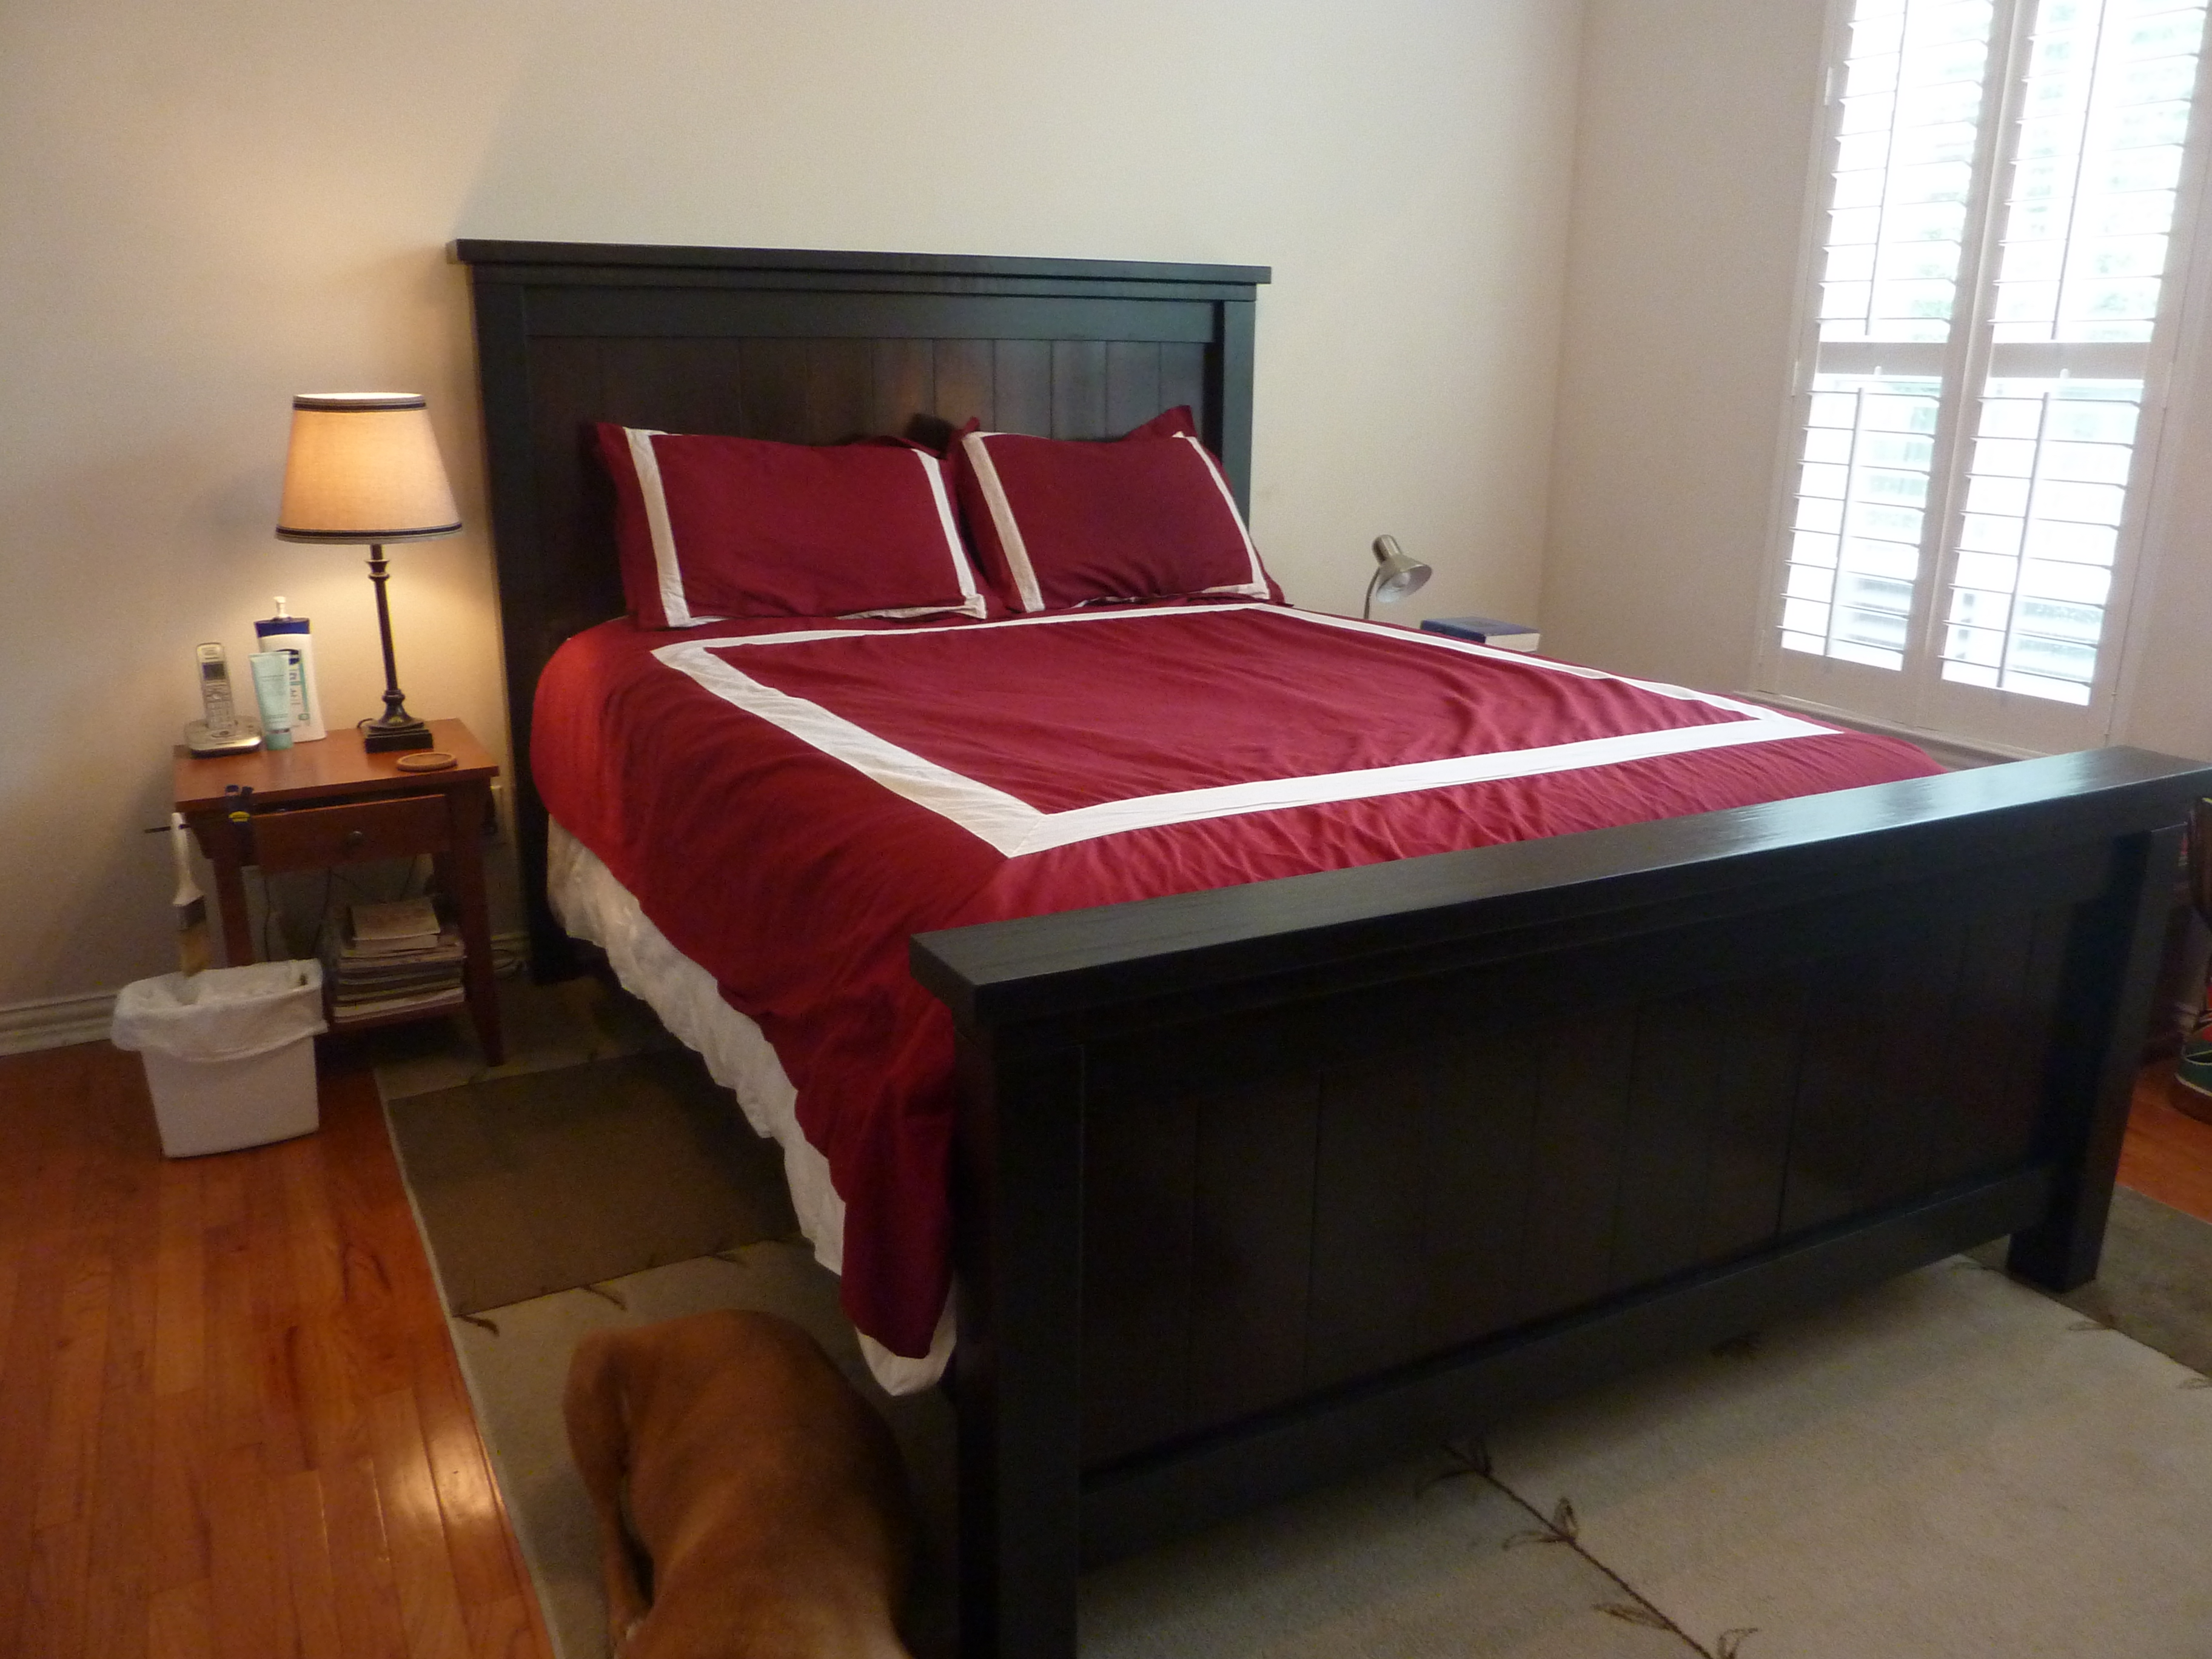
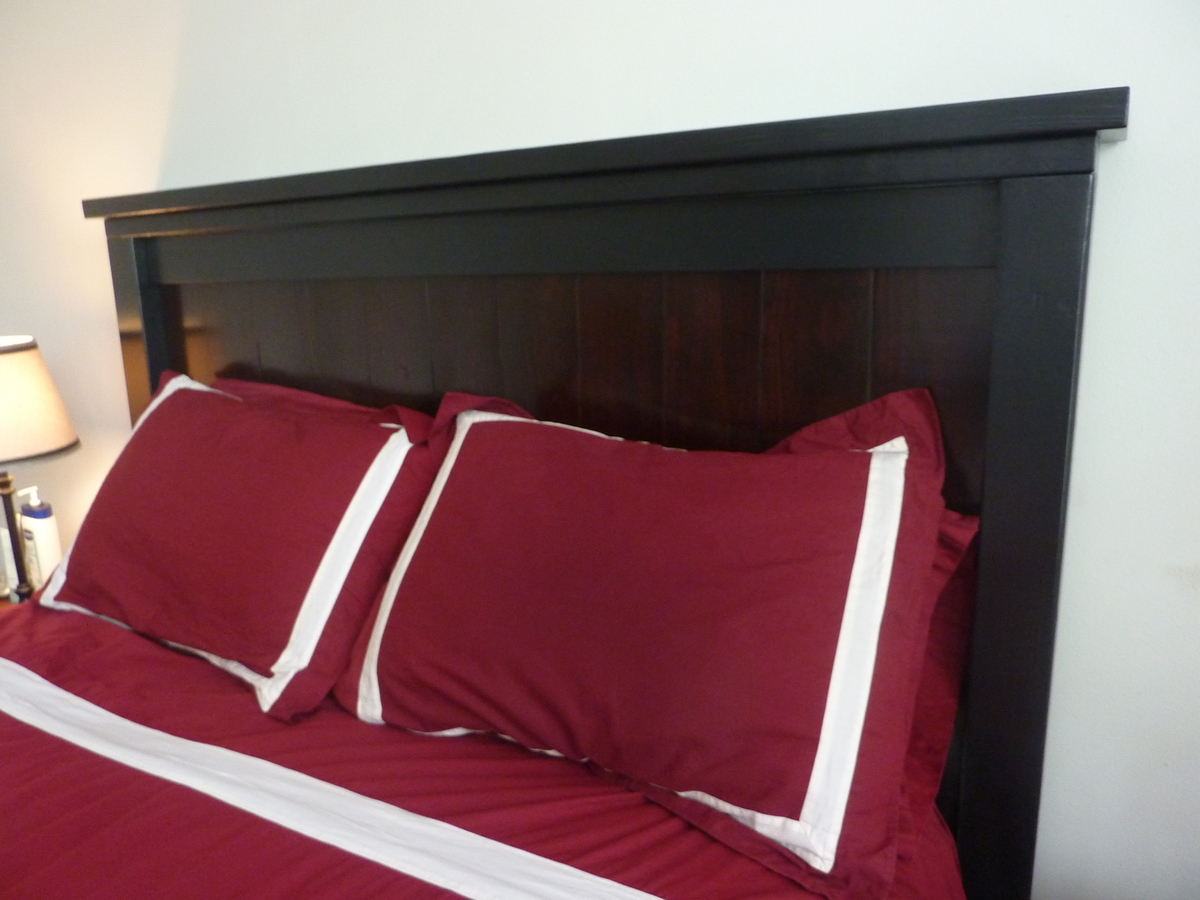
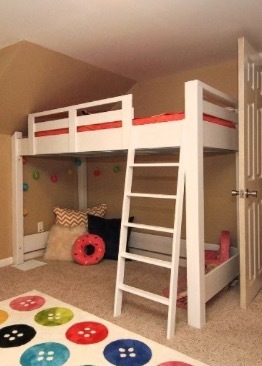
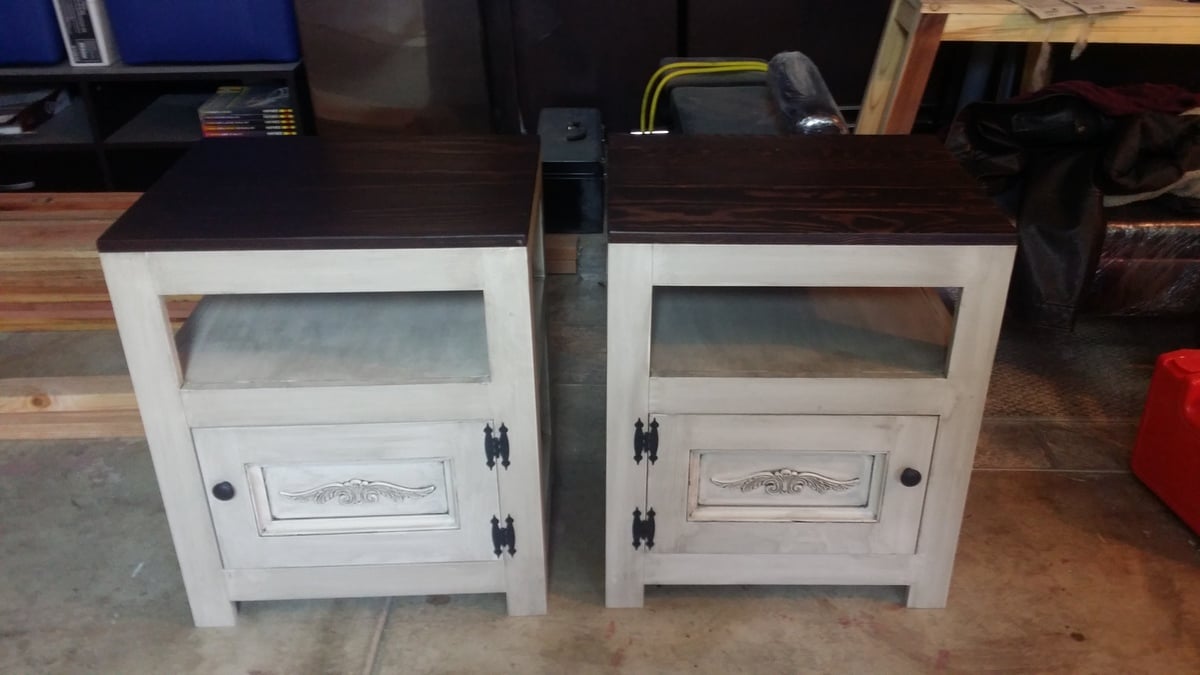
He likes natural wood, I like painted furniture. Solution: two-toned bed! Vertical slats are stained in Minwax Red Oak (took 3 times to get that dark color!), surround is painted black. I thought we'd never find a workable compromise!

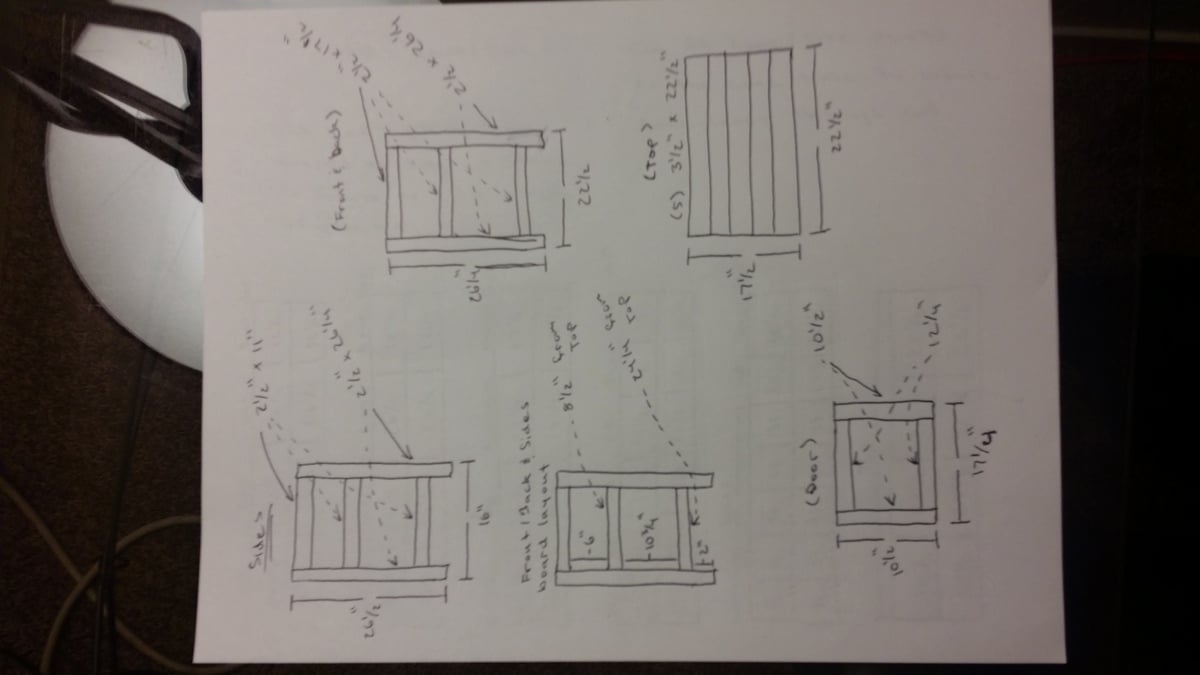
I changed up the dimensions a bit to fit my preferences:
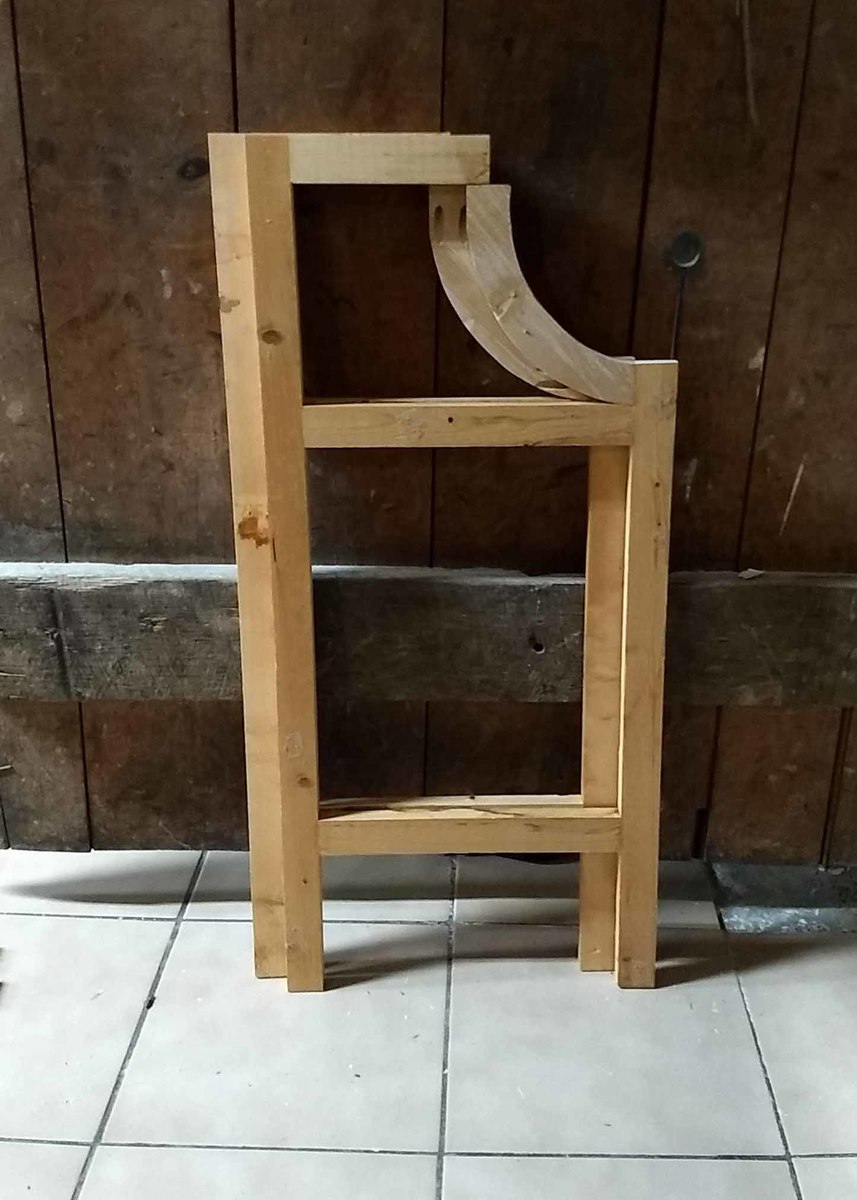
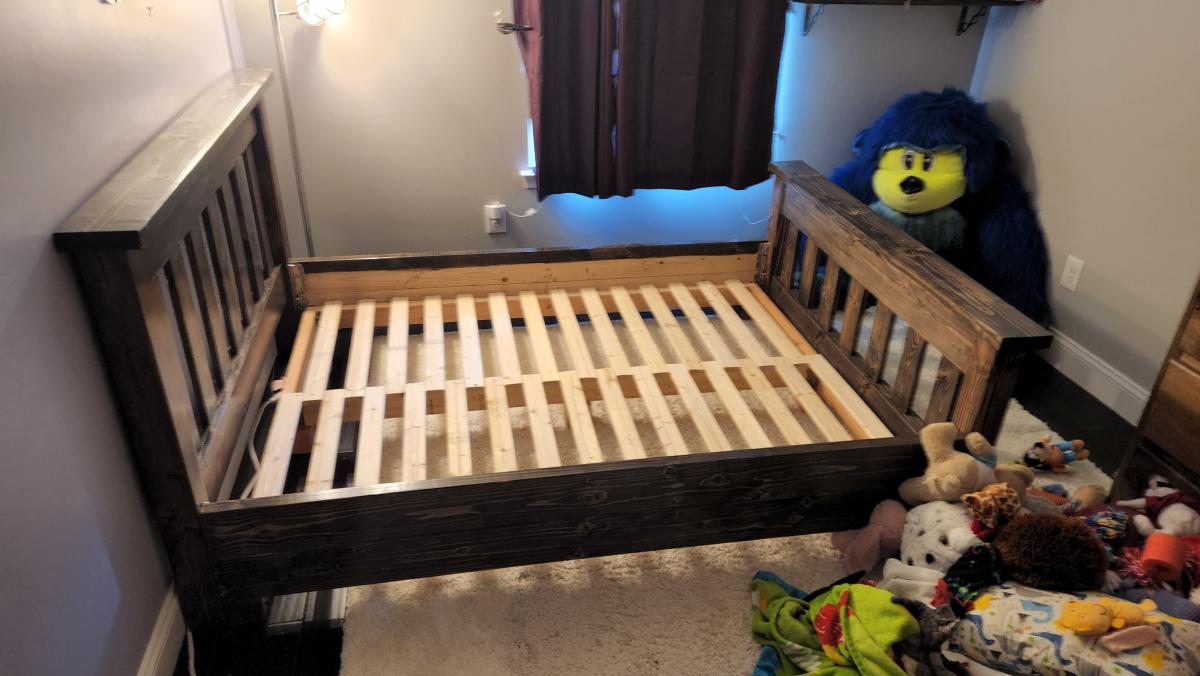
1. I like a taller headboard and footboard (dog can't rub against the end of the bed anymore - wahoo!).
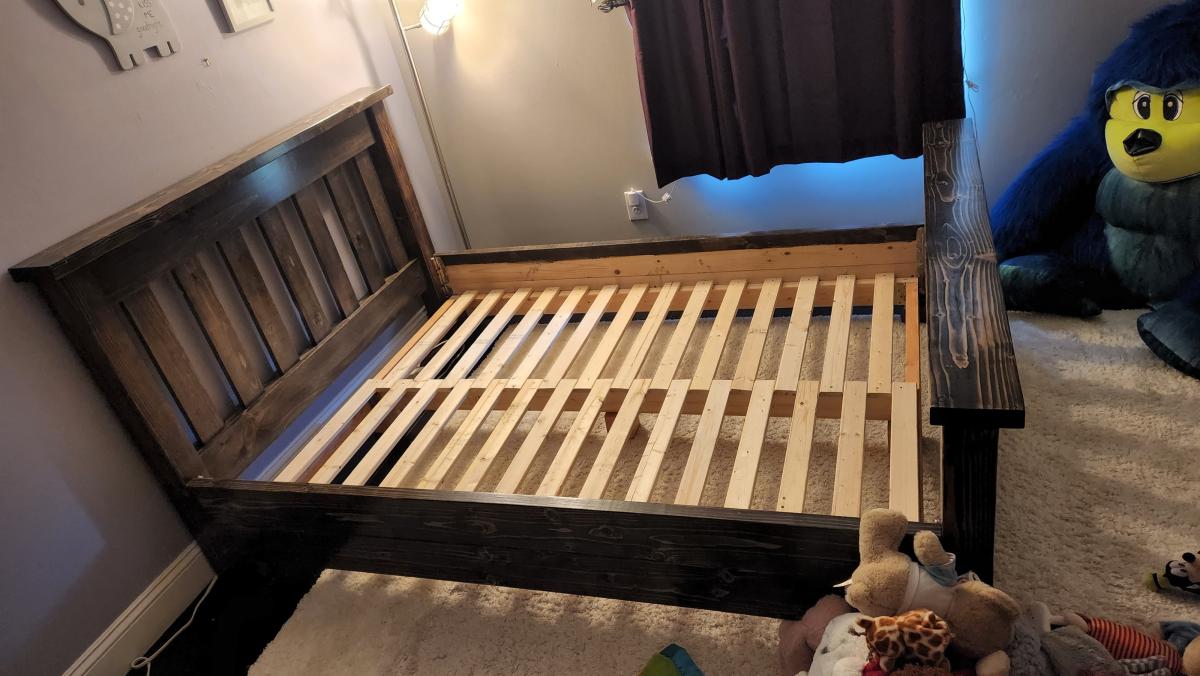
2. Also wanted the bed to be just a bit higher above the ground so I wouldn't have to buy new under-bed storage boxes.
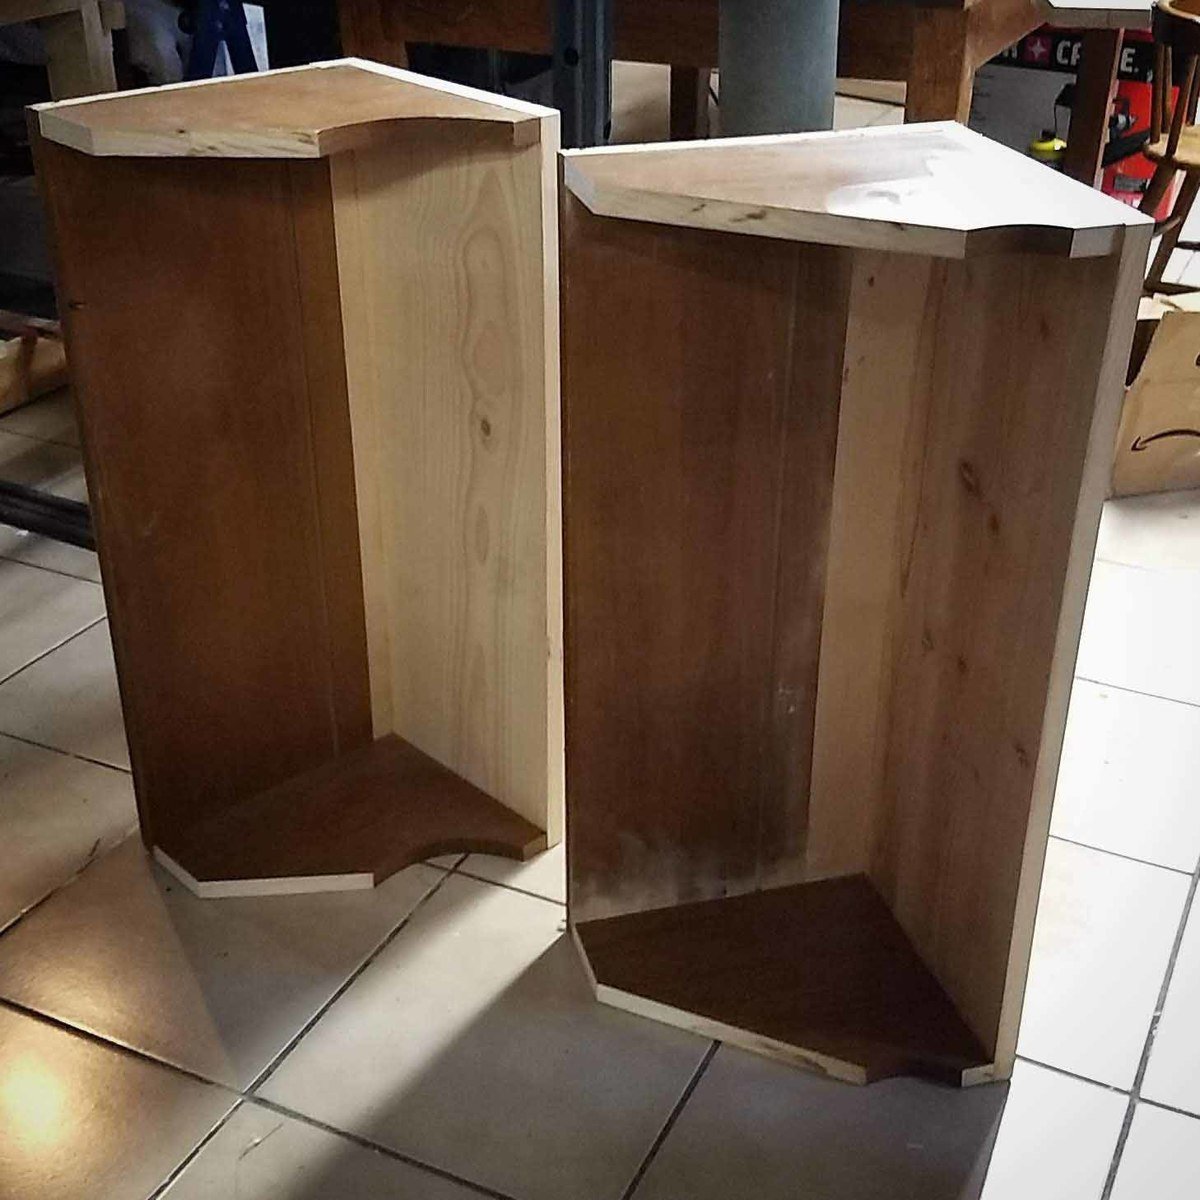
3. Used 1x6s instead of 1x8s for the vertical slats because they fit the width just perfectly - no trimming needed.
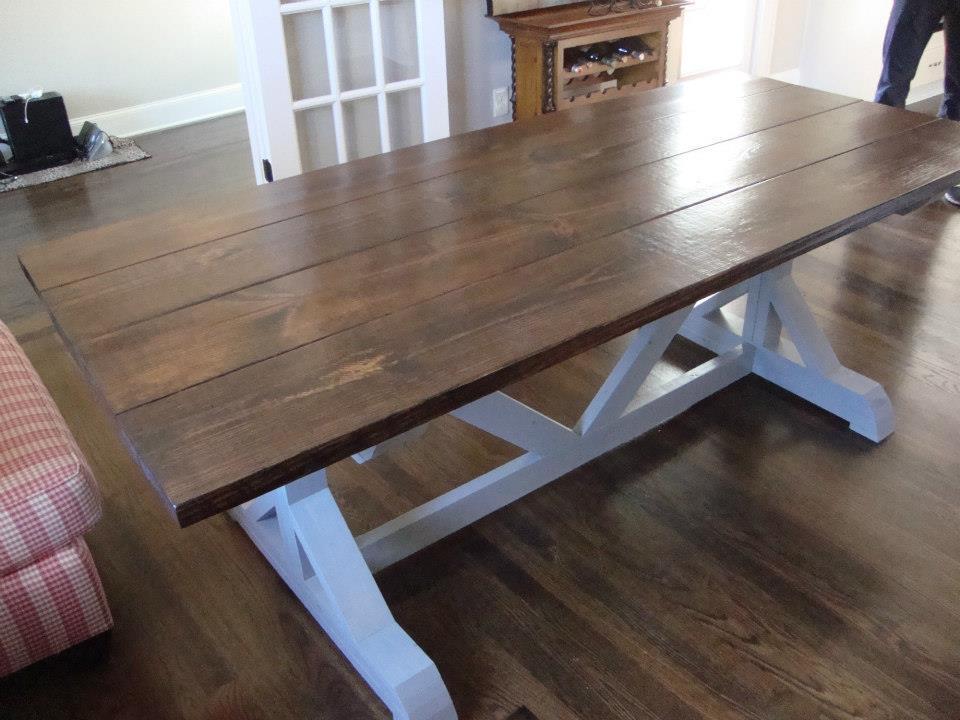
4. Added about 2" to the length so I'd have plenty of room for tucking the duvet at the end of the bed. I hate when the covers get stuck and I can't pull them up easily!
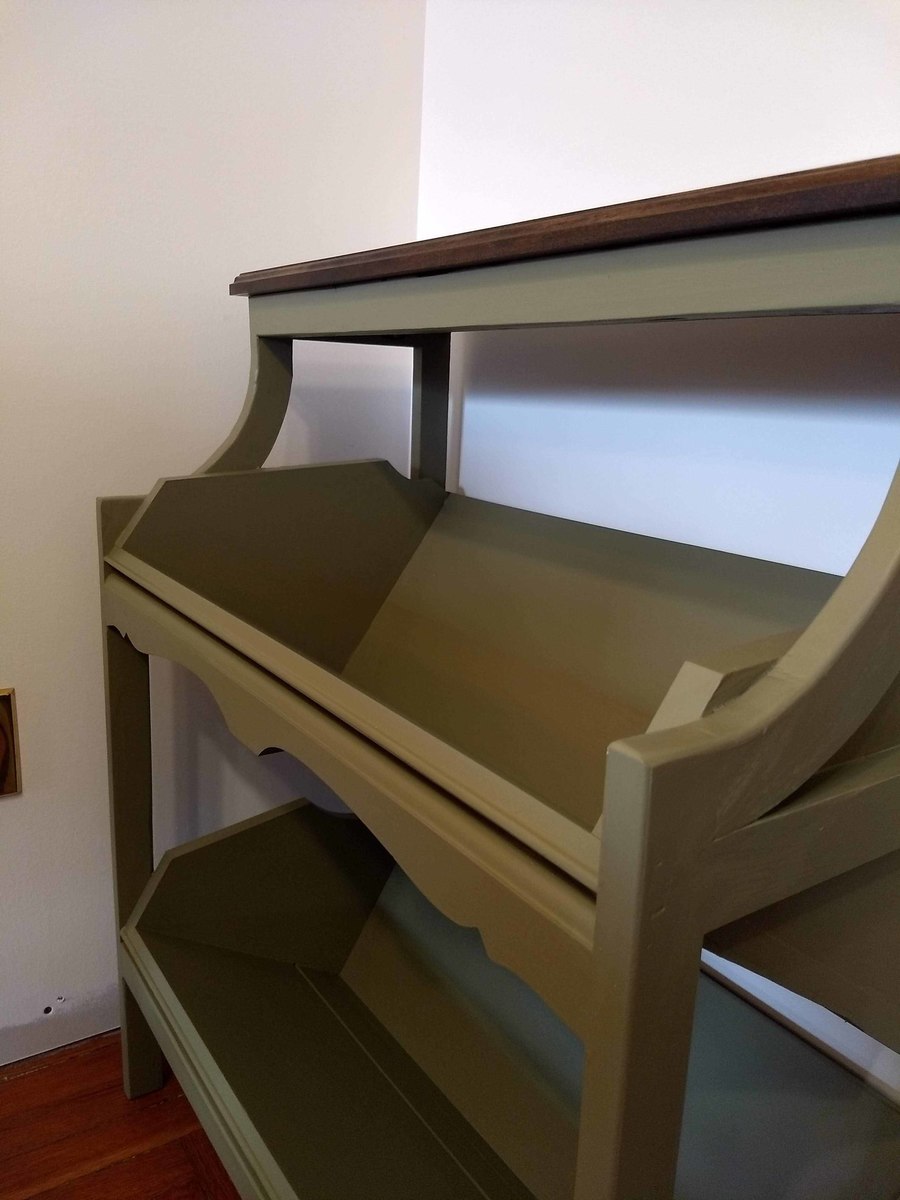
5. I routed out a groove in the posts to slide the side rails in because it seemed more secure than screws alone. Could've done it without, though.
6. We used dowels and wood glue on the 2x6 tops of the headboard and footboard pieces. I think it made a big difference in the overall appearance. We don't have a doweler, but the hubby made a guide with a spare 2x4 to keep our dowels lined up correctly. It worked pretty well.

Next time I would use pocket screws. I've acquired a jig since this piece was completed. It would definitely have saved me some time in the finishing process.

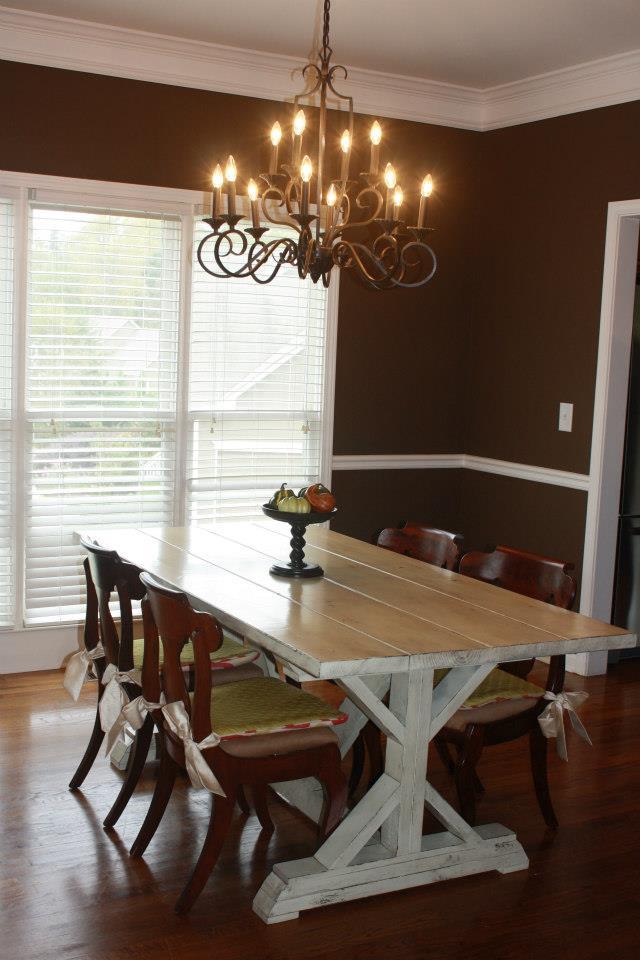
I really wish I could have talked the hubby into letting me distress the finish just a bit. The thing is, it's inevitable around here (my kids are like crazy apes sometimes!). So I really wanted it to at least look intentional. Oh well, I guess we'll get there soon enough even without it!

Built from Plan(s)
Estimated Cost
$300 (be bought the select pine for the vertical slats; wouldn't been a lot cheaper if we'd used all regular lumber)
Estimated Time Investment
Weekend Project (10-20 Hours)
Finish Used
Minwax Wood Finish stain in Red Oak - It took 3 coats to get the right color.

Valspar flat paint in the only good shade of black that I could find. This stuff was terrible - I would NOT use this again! Unfortunately, there were only about 4 shades of black paint available in all of Lowe's, and the others were all too purple in tone.

2 coats of Minwax fast-drying polyurethane.
Recommended Skill Level
Beginner

Comments

GScotti

Thu, 09/05/2013 - 09:07

I like the foot board height. I noticed it in the Arched Headboard version of the Farmhouse bed a while back but could not find dimensions. I also like the idea of having more space under the sides to fit my storage bins. Could you tell me what the cut length was for the 2x6s on the foot board? I like the finish too! Bed looks great.

JW

Thu, 09/05/2013 - 10:27

GScott -

Thanks!

I changed several things on the footboard, as follows:
Slats = 22"
Post = 26.5"
Total height of footboard = 29.5"

I made the slats on the headboard a bit longer too, but didn't change the actual height of the headboard. I just wanted the wood to extend down behind my mattress a bit so I wouldn't have a little corner of wall showing behind it.

As for more space under the sides - I just screwed the siderails in just a bit higher than the plan called for.

Heart Pine tabletop

Submitted by Anonymous (not verified) on Thu, 12/27/2018 - 06:57

Found five 2x12 heart pine planks and used this base as the template. Table is about 18" wider than the plans. It turned out great!

Estimated Time Investment
Week Long Project (20 Hours or More)
Finish Used
Classic american
Recommended Skill Level
Beginner

Comments

Ana’s Rustic Bench

Submitted by Anonymous (not verified) on Sat, 09/03/2022 - 17:42

I used Ana’s plan to build this great bench for the Master Bathroom. It works out great!

Built from Plan(s)

Comments

Bathroom storage tower

I just recently decided to try my hand at woodworking. This was my second project, first one from Ana, super easy instructions. I hadn't gotten the straightest 2x2s, since I had done my shopping with a two year old in tow, but I got it to work. After I completed it, my husband tells me it actually looked good--he seemed surprised. Anyway, I built this tower so that our new parakeet will have somewhere to live and I can conceal his food and other supplies in the baskets underneath. Without making any adjustments to Ana's plan with the exception that out 1x12s are only 11 1/4 it is the perfect size for our little bird cage. Thanks Ana for the design and inspiration to do it myself!

Built from Plan(s)
Estimated Cost
$15
Estimated Time Investment
Afternoon Project (3-6 Hours)
Finish Used
Cabot Golden oak stain
Recommended Skill Level
Beginner

DIY stackable chairs (added arms) and table

I added arms to the stackable chairs. This table and 8 chairs set came out great and I was able to build everything (including the chair cushions found on clearance) for under $350.00 thanks to this website!

Estimated Time Investment
Weekend Project (10-20 Hours)
Recommended Skill Level
Beginner

Burnt X Farm Table

Submitted by jeffwill on Thu, 11/05/2015 - 18:34

This is built off the Farm House X Table but I changed a few things around. The lower support beam has been raised up to the middle of the table. The table height has been raised to 40". The top of the table is floating. The top most 2x4s are secured directly to the top. They are also notched out a little to match the notch I put into the top support beam. The 2x4 is the female side and the support beam is the male. I finished the table by burning the top with a hand held torch and 2 coats or varnish. The base of the table has been white washed with 1 good coat.

Estimated Cost
Estimated cost of the wood, screws, varnish, and white wash is just shy of $90. I did buy extra screws, varnish, and white wash for future projects though.
Estimated Time Investment
Day Project (6-9 Hours)
Finish Used
burnt with varnish on top and 1 liberal coat white wash on base.
Recommended Skill Level
Intermediate

Keurig K Cup Holder Drawer

Submitted by Anonymous (not verified) on Sun, 12/30/2018 - 12:43

Was easy to make

Estimated Time Investment
Afternoon Project (3-6 Hours)
Recommended Skill Level
Beginner

Comments

JD_2030

Thu, 01/02/2020 - 13:02

Looks great! We were hoping to add a drawer as well but I’m not really sure where to start. What adjustments did you make to create the open drawer? Can you post a photo of the side of the drawer? Thank you!

First Finished Project!

Submitted by MrsD2008 on Tue, 08/16/2011 - 17:00

I decided to not paint it, but we sanded it REALLY well. I also decided to forgo the caster wheels just so it would fit under an entryway table. Right now I'm using it for dog toys!

Built from Plan(s)
Estimated Time Investment
Afternoon Project (3-6 Hours)
Recommended Skill Level
Starter Project

Our 67.5 square trestle table and matching benches

The square table project obviously modified the original plans a bit. We always use 4" brackets to further stabilize and level our tops. This table we used L brackets on the insides at the top of the trestles. The final finish was Minwax Special Walnut for the tops and an antique white that we color matched for our client. Oh and SEVERAL coats of poly to seal her and make her pretty!

This table was table number 22 that we have built from the plans provided here. We have modified widths, lengths and heights many times over! Come find us on Facebook book or follow us on Pinterest. Just put a /youreunique after and you are there. I would be happy to give tips on our finishes if you email me or send me a PM. Thanks for looking and have a blessed day!

Estimated Time Investment
Afternoon Project (3-6 Hours)
Finish Used
The final finish was Minwax Special Walnut for the tops and an antique white that we color matched for our client. Oh and SEVERAL coats of poly to seal her and make her pretty!
Recommended Skill Level
Advanced

Loft bed

Submitted by Kyjo5 on Sat, 11/14/2015 - 13:19

Built this bed from the look of the project done by Ana. Used 4x4s for the legs and used a router to make slots for the 1x8s to fit in. Everything was built as I went because our house was built in 1907 and nothing is square and it also has vaulted ceilings. 

Built from Plan(s)
Estimated Cost
$100
Estimated Time Investment
Weekend Project (10-20 Hours)
Finish Used
High gloss white latex paint
Recommended Skill Level
Intermediate

My modified simple, cheap, and easy console

Submitted by cbrowan on Sun, 08/21/2011 - 11:35

I wanted a simple table to highlight this retro sewing machine I inherited from my grandma. I had to modify a few of the dimensions of this table and add a different trim up top, but I really like the results!

Estimated Cost
FREE (used leftover boards/paint from a different project)
Estimated Time Investment
Afternoon Project (3-6 Hours)
Finish Used
2 coats of Minwax Dark Walnut stain
1 distressed coat of Valspar Sea Breeze, semi-gloss
1 coat of Minwax Polyurethane finish, satin
Recommended Skill Level
Beginner

Dresser For Little Girl's Room

Submitted by sraper2 on Thu, 09/12/2013 - 10:45

I built this dresser for a little girl. It was my first time doing drawers and I was a little intimidated but it wasn't bad at all! I'm going to be building one for my sons room too. Thanks for the great plans!!

Estimated Time Investment
Day Project (6-9 Hours)
Recommended Skill Level
Intermediate

My spin on kentwood nightstands

I included some pictures of very rudimentary drawings I did of all the cuts of wood you would need to build these if anyone wants to take a stab at it.  The drawings are rudimentary but you can definately build from them

Another idea I got from the kentwood posts.  Actually this was a brag from another user that got the idea from the kentwood nightstand post.  So I took to building it.  It is built out of solid pine.  For middle shelf and bottom shelf are cut from 3/4 thick plywood as my local store didnt cary pine large enough for the shelves and I did not feel like gluing slabs of pine together.  Though I ending up putting slabs of pine together for the top, because I wanted that to be pine like the rest of the nightstand.  I drilled a few pocket holes in each piece of pine.  Glued the edges and screwed them together with pocket holes which worked out great and I didnt have to clamp and wait for them to dry.  The inlay on the door is something I found at my local home depot.  It I glued it on and put a couple of pin nails around the eadges.


I finished the night stands with a cream white latex paint and glazed over the paint with valspar antiquing glaze which gave it a great ages grayish look.  Then sprayed it with a couple coats of Varethane Soft Touch Matte Polyurethane.  Which I dont recomend using.  I only used it because it was the only matte poly I had laying around.  If I were you I would opt for a much better poly to go over waterbased paint like General Finishes High Performance Poly.  The top I stained with General Finishes java gel coat and Gel coat poly.  I wasnt digging the way the gel coat looked on the pine nor did I like the color of the stain paired with the color of the nightstands.  so I have since then sanded off the gel coat and stained the top an onyx which to me looks a lot better.  Sorry I do not have any pictures of that.

Estimated Time Investment
Weekend Project (10-20 Hours)
Finish Used
Kilz Premium pimer and sealer
Off white water based paint
Valspar Antiquing glaze
General Finishes Gel Stain
General Finishes Gel Top Coat Polyurethane
Recommended Skill Level
Beginner

Comments

kbdesigns

Wed, 11/18/2015 - 08:09

Very nice attention to detail! All the small things that you've done different/better that have made this piece unique, very talented!

In reply to by kbdesigns

diversity210

Wed, 11/18/2015 - 16:56

Well thank you very much.  I like to be unique or at least try to be unique.  Though sometimes it can be hard to pull away from the cliche and the usual.  I dont take all of the credit though.  Got the idea from another users brag post on the kentwood nightstand page.  I added my own person touches to the build but its still fairly similar. 

Love My Desk

Submitted by Anonymous (not verified) on Sat, 01/05/2019 - 13:16

I absolutely love how this turned out! Great plans! I used a lot of old wood my grandfather had so this project was extra special. 

Built from Plan(s)
Estimated Time Investment
Weekend Project (10-20 Hours)
Finish Used
Antique White Chalk Paint and Kona Rustoleum Stain for Top
Recommended Skill Level
Intermediate

Comments