Community Brag Posts
King Farmhouse Bed

Modified the bed so that is was not as tall as the original project plan. We also changed the molding on the top to a 2x4 with a angle cut and then a 1x4 on top. The bed can only be positioned one way in the room and we didn't want to cover the window with a real high head board. Thank you Ana! You rock!!
Estimated Cost
$250
Estimated Time Investment
Week Long Project (20 Hours or More)
Finish Used
We used Cabot Red Oak stain and sprayed with Polyurethane clear gloss spray.
Recommended Skill Level
Beginner
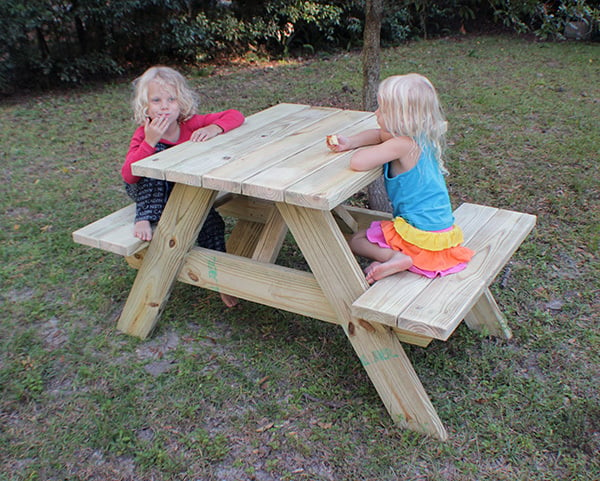
Picnic Table for Two
I've got a full how-to and FREE PLANS at
http://www.iliketomakestuff.com/two-person-picnic-table/
The whole thing was built for under $60 and could be done with only a circular saw and a drill, in an afternoon.
(optionally, a router and sander can smooth out corners)
Estimated Cost
$60
Estimated Time Investment
Afternoon Project (3-6 Hours)
Recommended Skill Level
Beginner
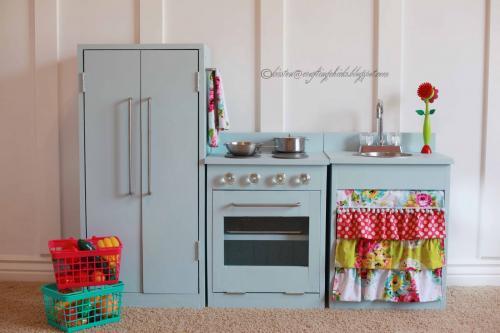
Laundry Pedestal
This was a pretty simple project that saved me hundreds and is more functional. I built it to fit our laundry baskets, unfortunately I didn't take a photo of the washer/dryer in place. I've used it for several years now without any issues. This was one of my first builds and it was a good one.
Built from Plan(s)
Estimated Time Investment
Afternoon Project (3-6 Hours)
Recommended Skill Level
Beginner
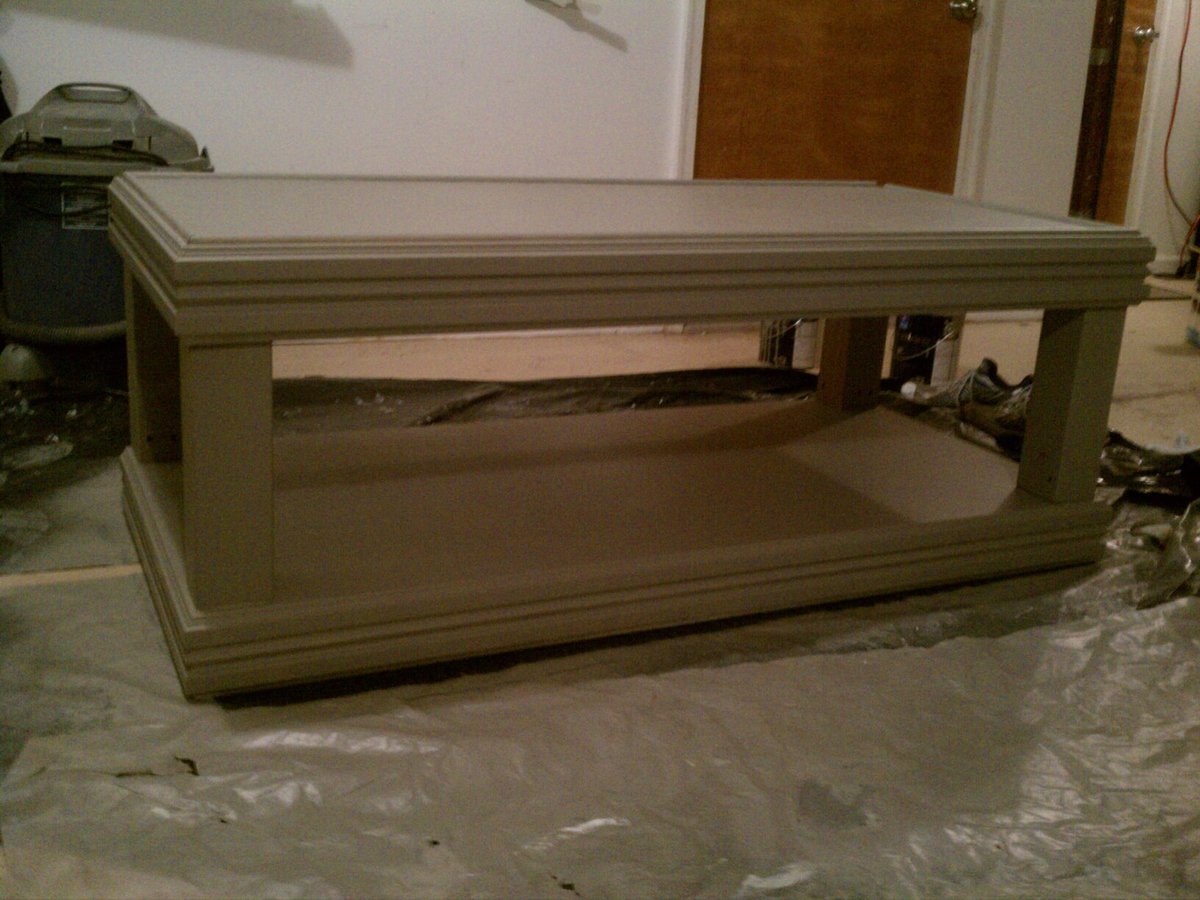
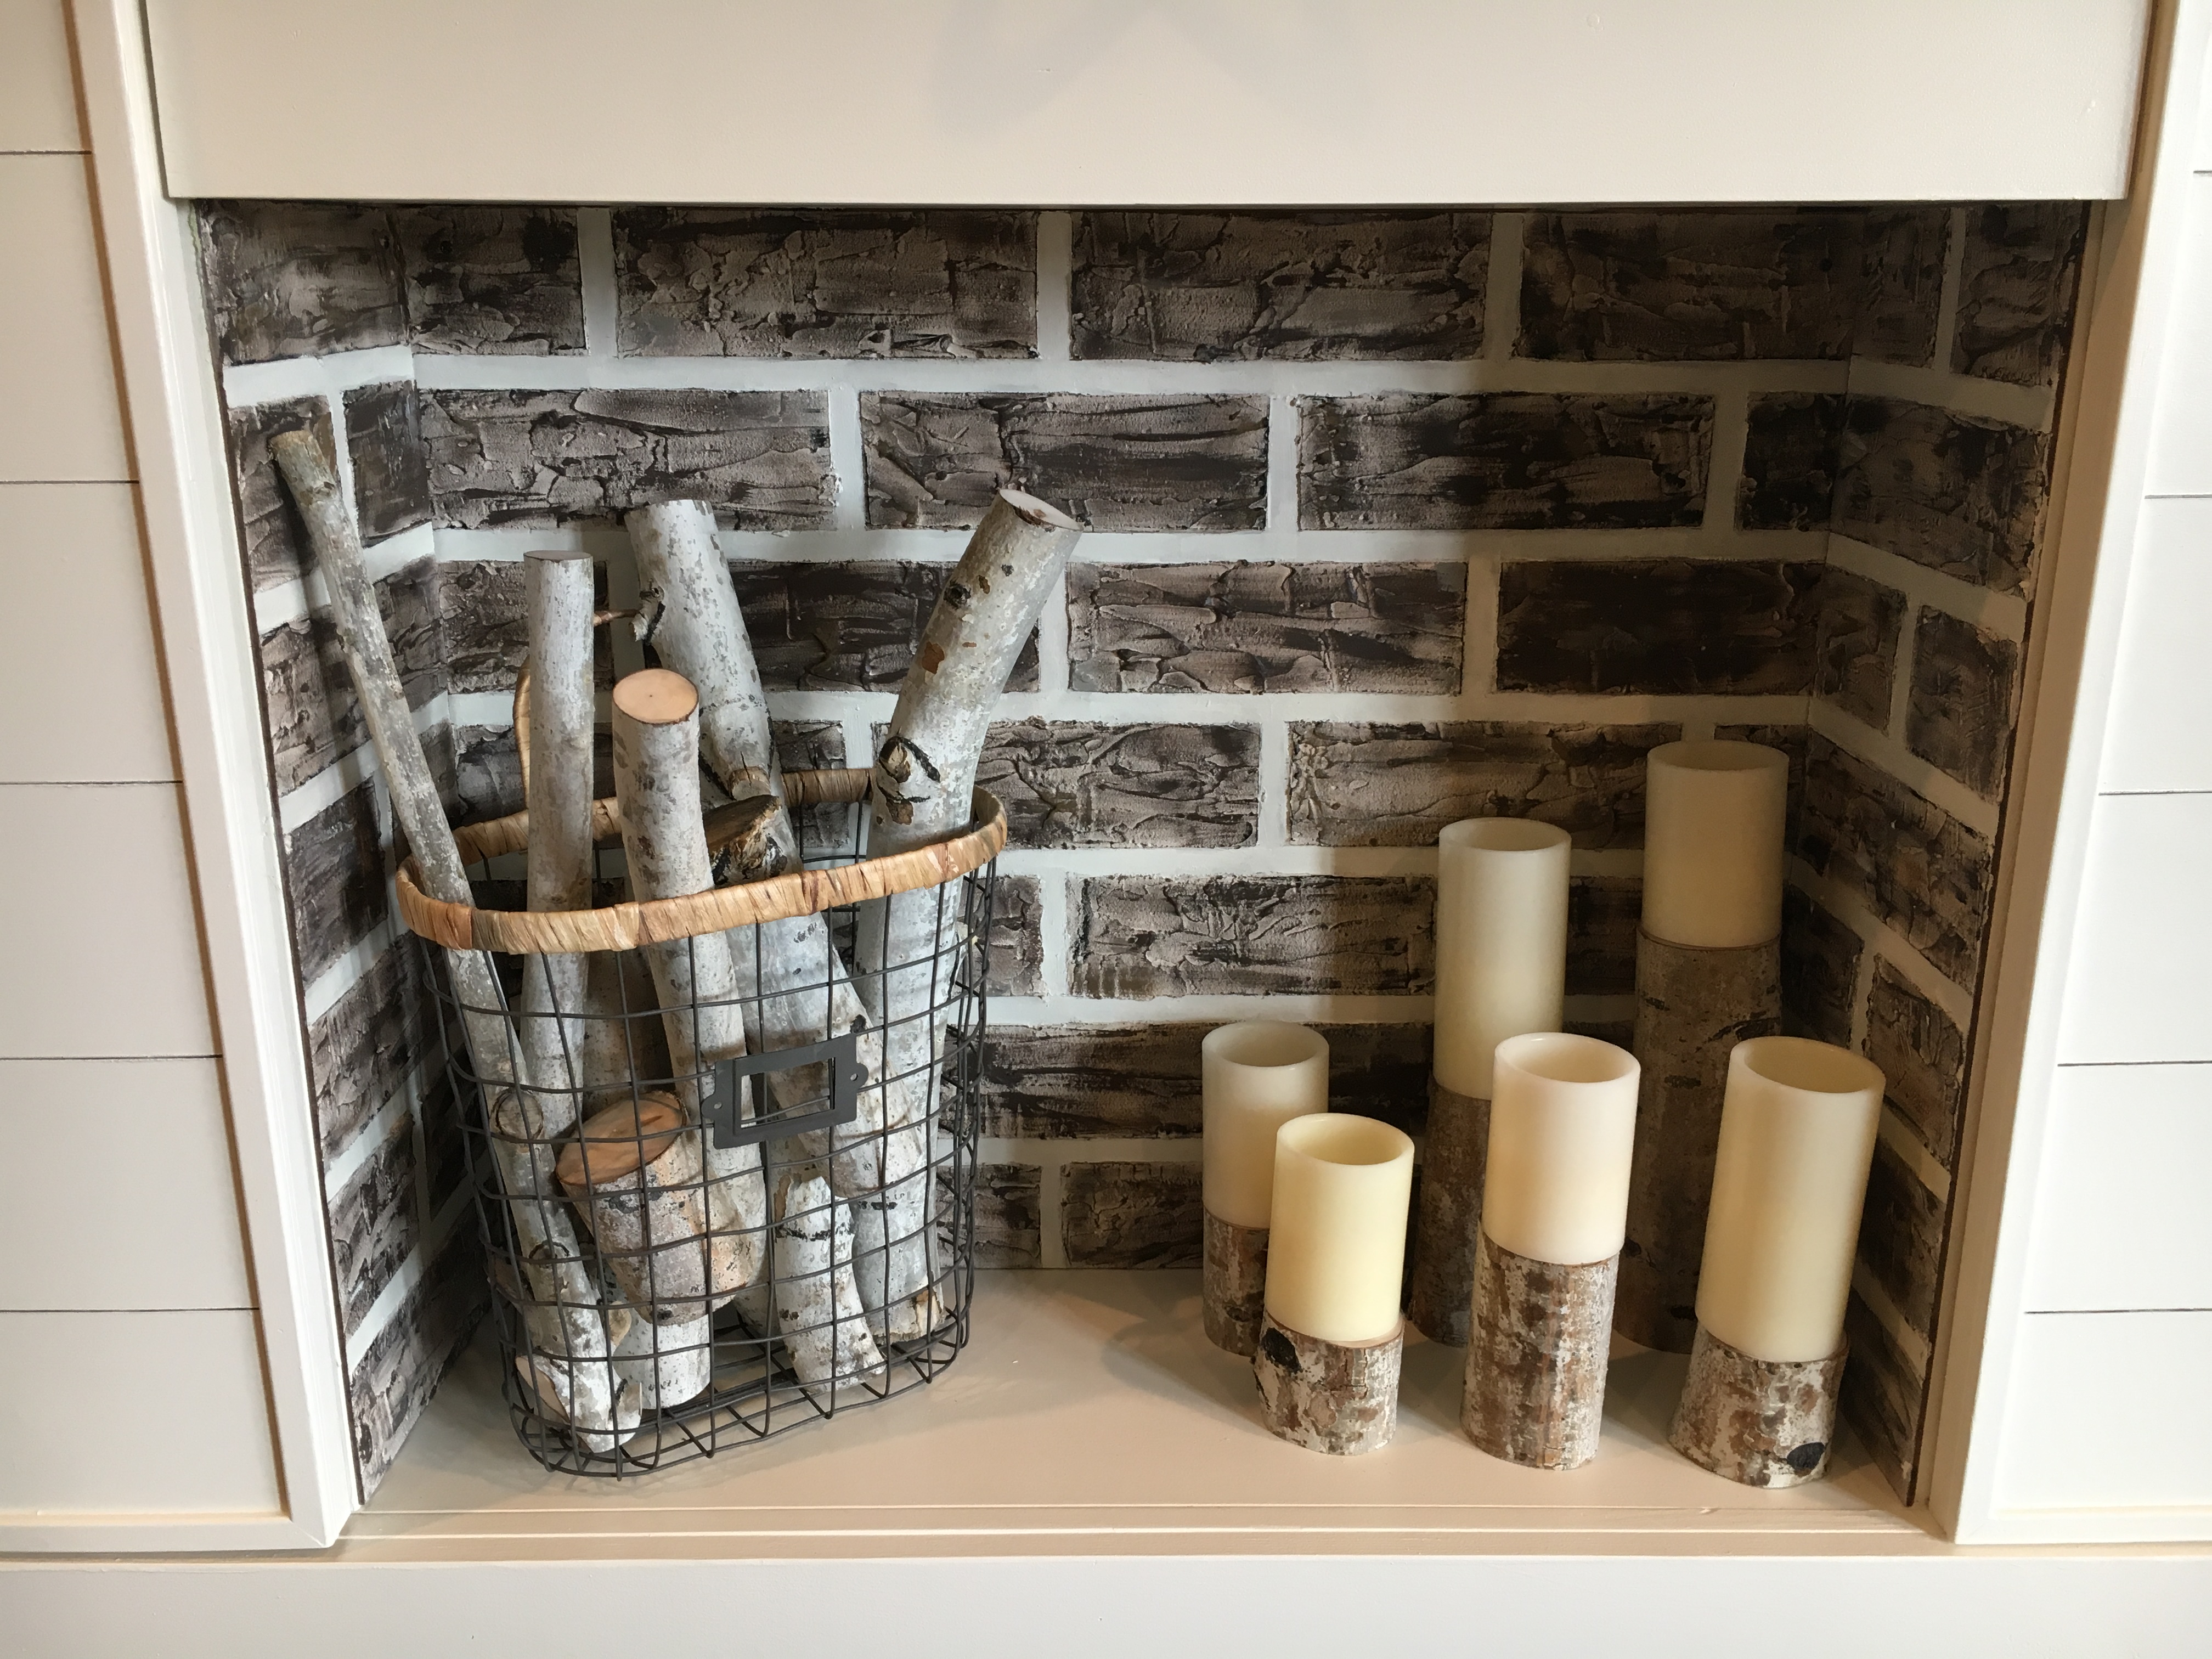
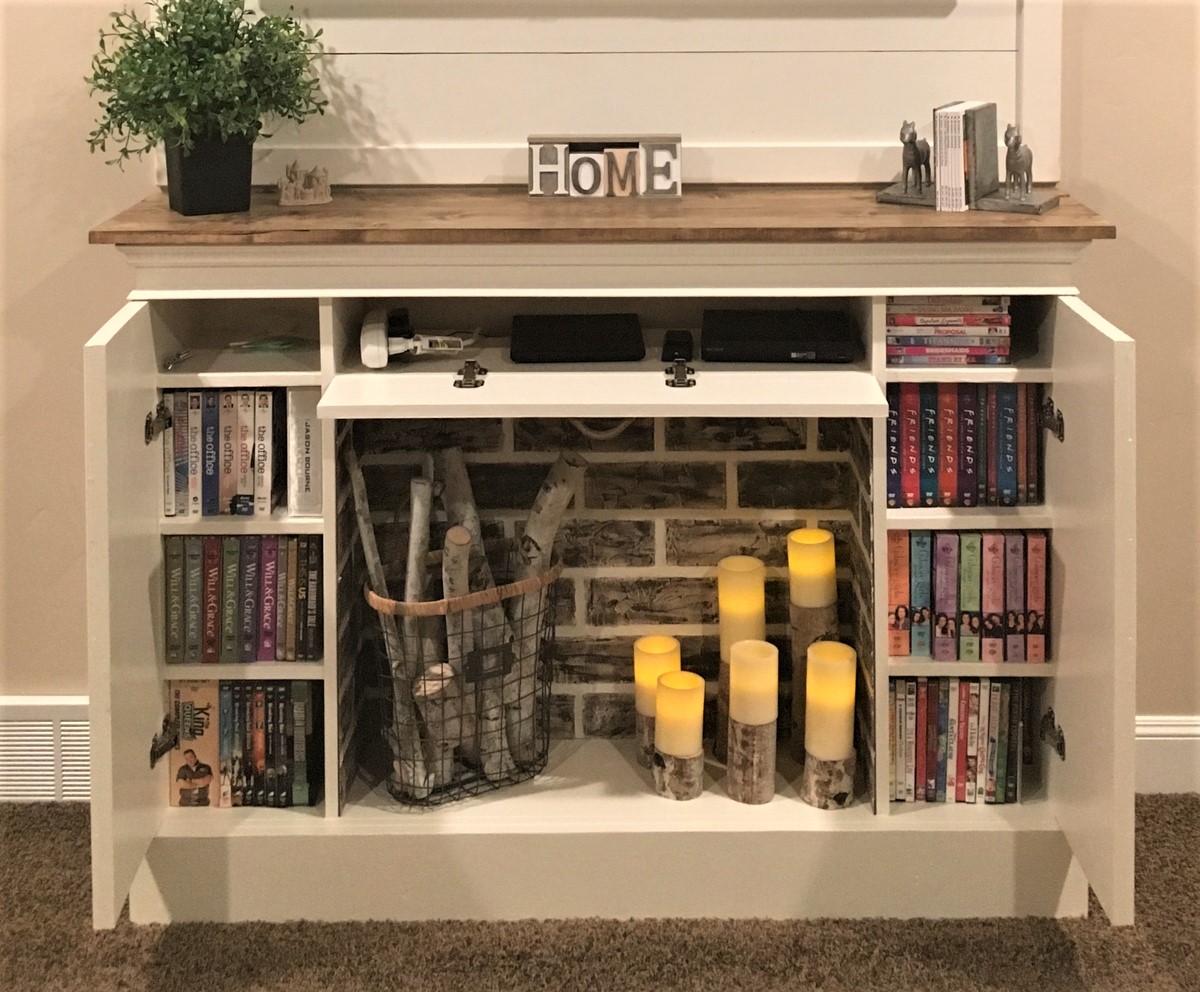
Faux fireplace with hidden storage
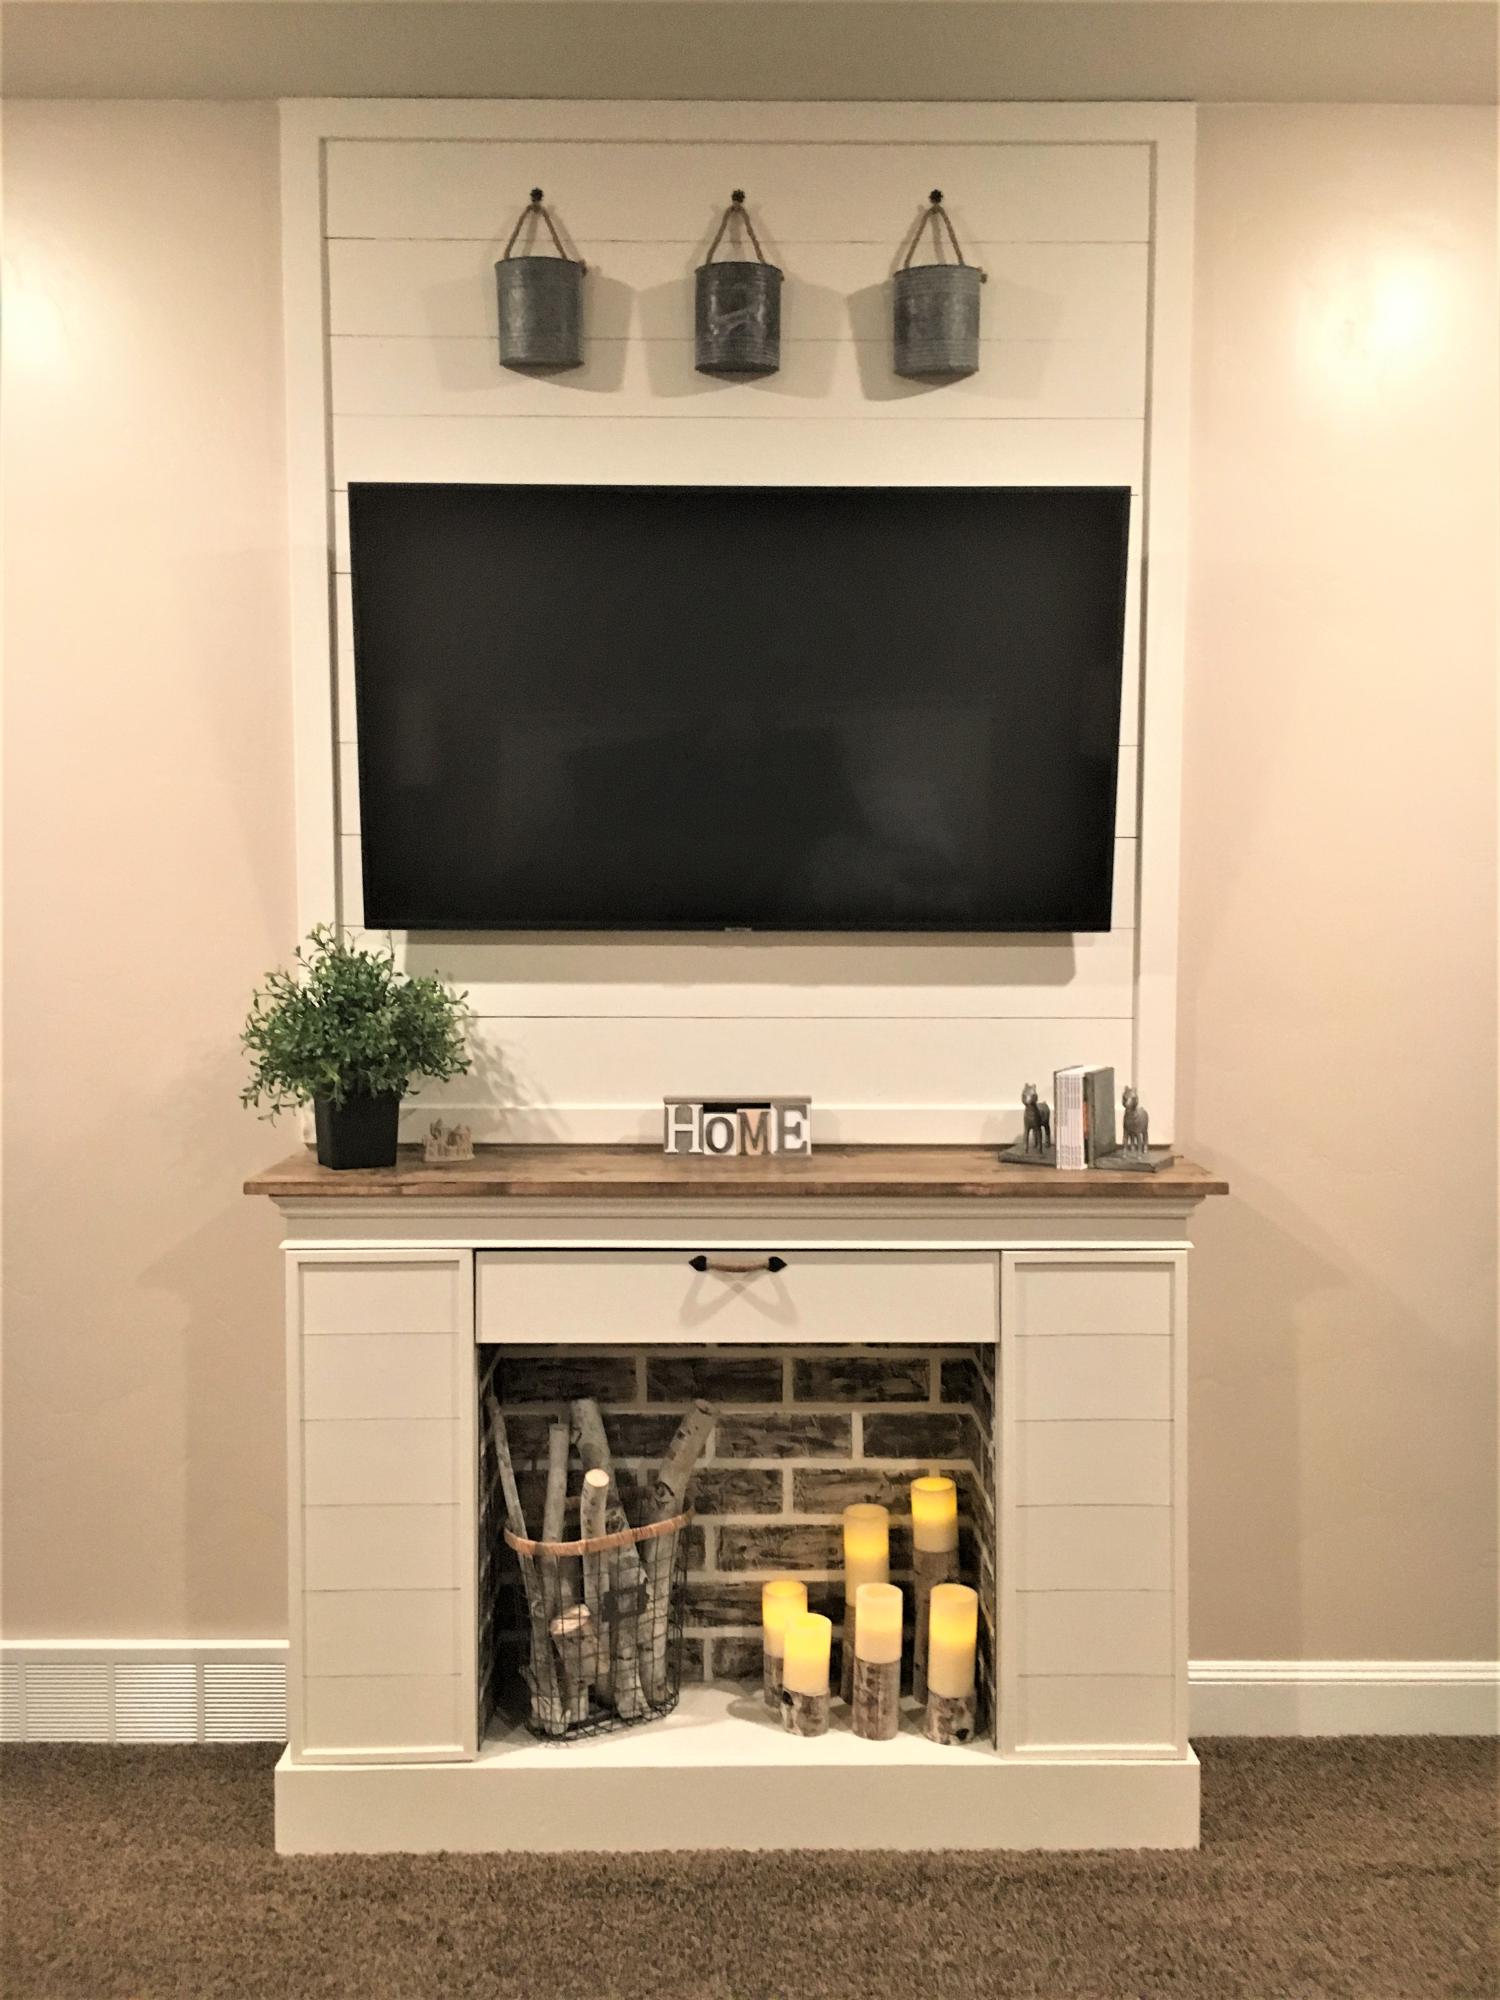
I slightly modified my build. I kept the same dimensions as the plans, but made the top shelf 7” from the top to allow for a bigger firebox. I added faux brick made from masking tape, joint compound and chalk paint. I changed the molding a bit and used 3” pine slats for the top. Inside I added 3 shelves, attached with pocket hole screws, to fit in as many DVD’s as possible. Overall this was an easy build. It took me almost as long to paint it, as to build it. Thank you Ana for the plans!
Built from Plan(s)
Estimated Cost
$200.00
Estimated Time Investment
Weekend Project (10-20 Hours)
Finish Used
Painted with Sherwin Williams Alabaster. Faux brick is chalk paint from Waverly.
Recommended Skill Level
Beginner
Potting Bench with Extra Shelf
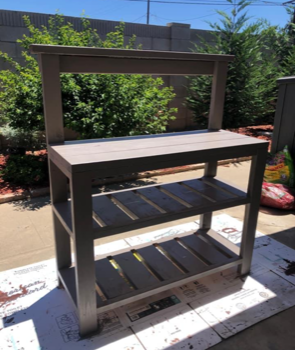
Potting Bench with an added shelf for more storage by Schoen
Built from Plan(s)
First real project: Tryde Media Console - success!
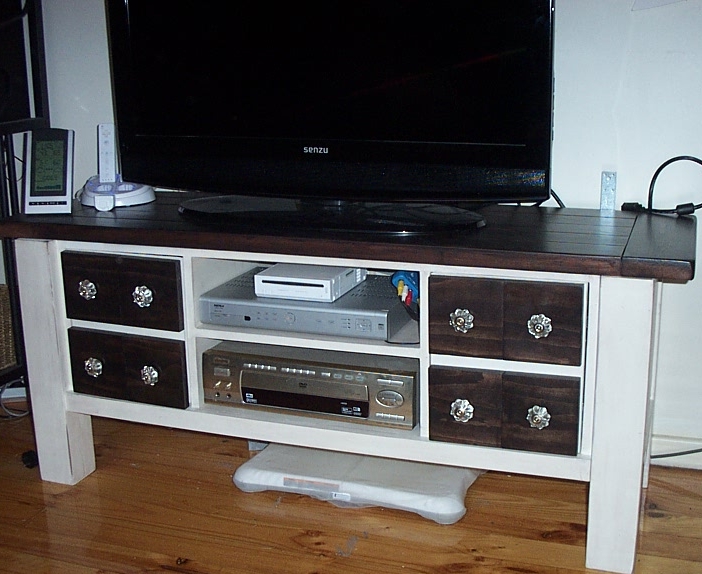
Tryde Media Console plans, with slight modifications.
This was my first real project after building a very basic woodworking bench. It might look a bit daunting but is actually very simple - build the box and add some legs. Keep your cuts square and accurate and have a lot of wood filler (putty) on hand for mistakes :)
Tricky parts of this project were:
1) building it here in Australia - our wood sizes are different, and untreated 4x4's are not easily available.
2) hinges - I hate them! Still can't use 'em and may never do again.
I began this project sticking pretty much to the plans Ana posted, just making the width of the console a little narrower as my tv is 36" wide only.
Then I saw a post by the Shanty2Chic sisters who made a Apothecary Media Console with stained doors project and I fell in love. To be honest I wasn't crazy about the open sections on each side of the Tryde Console anyway, and I thought adding doors would be easy. Plus the glass knobs used by the S2C sisters were gorgeous! So I guess you could say this is a Tryde/Apothecary Media Console hybrid.
So this project is pretty much as Ana wrote it except it's narrower, and has doors with faux drawer fronts. And as it always goes the longest part of this project was doing the finish.
Please please read about this on my blog - I go into a lot of detail about the build and finish process and I make a lot of mistakes so you don't have to.
I will be posting the matching hutch project soon as I've finished that too.
UPDATE: You can read all about the matching hutch here
Built from Plan(s)
Estimated Cost
Approx $100AUD (not incl hardware, paint, stain)
Estimated Time Investment
Week Long Project (20 Hours or More)
Finish Used
Wattyl oil-based indoor stain in 'Wenge'
Taubman's Endure interior paint (satin) in 'Milk Paint'
Custom 'glaze' (see blog posting for details)
Cabot's wood putty in 'Radiata Pine'
Taubman's Endure interior paint (satin) in 'Milk Paint'
Custom 'glaze' (see blog posting for details)
Cabot's wood putty in 'Radiata Pine'
Recommended Skill Level
Beginner
Comments
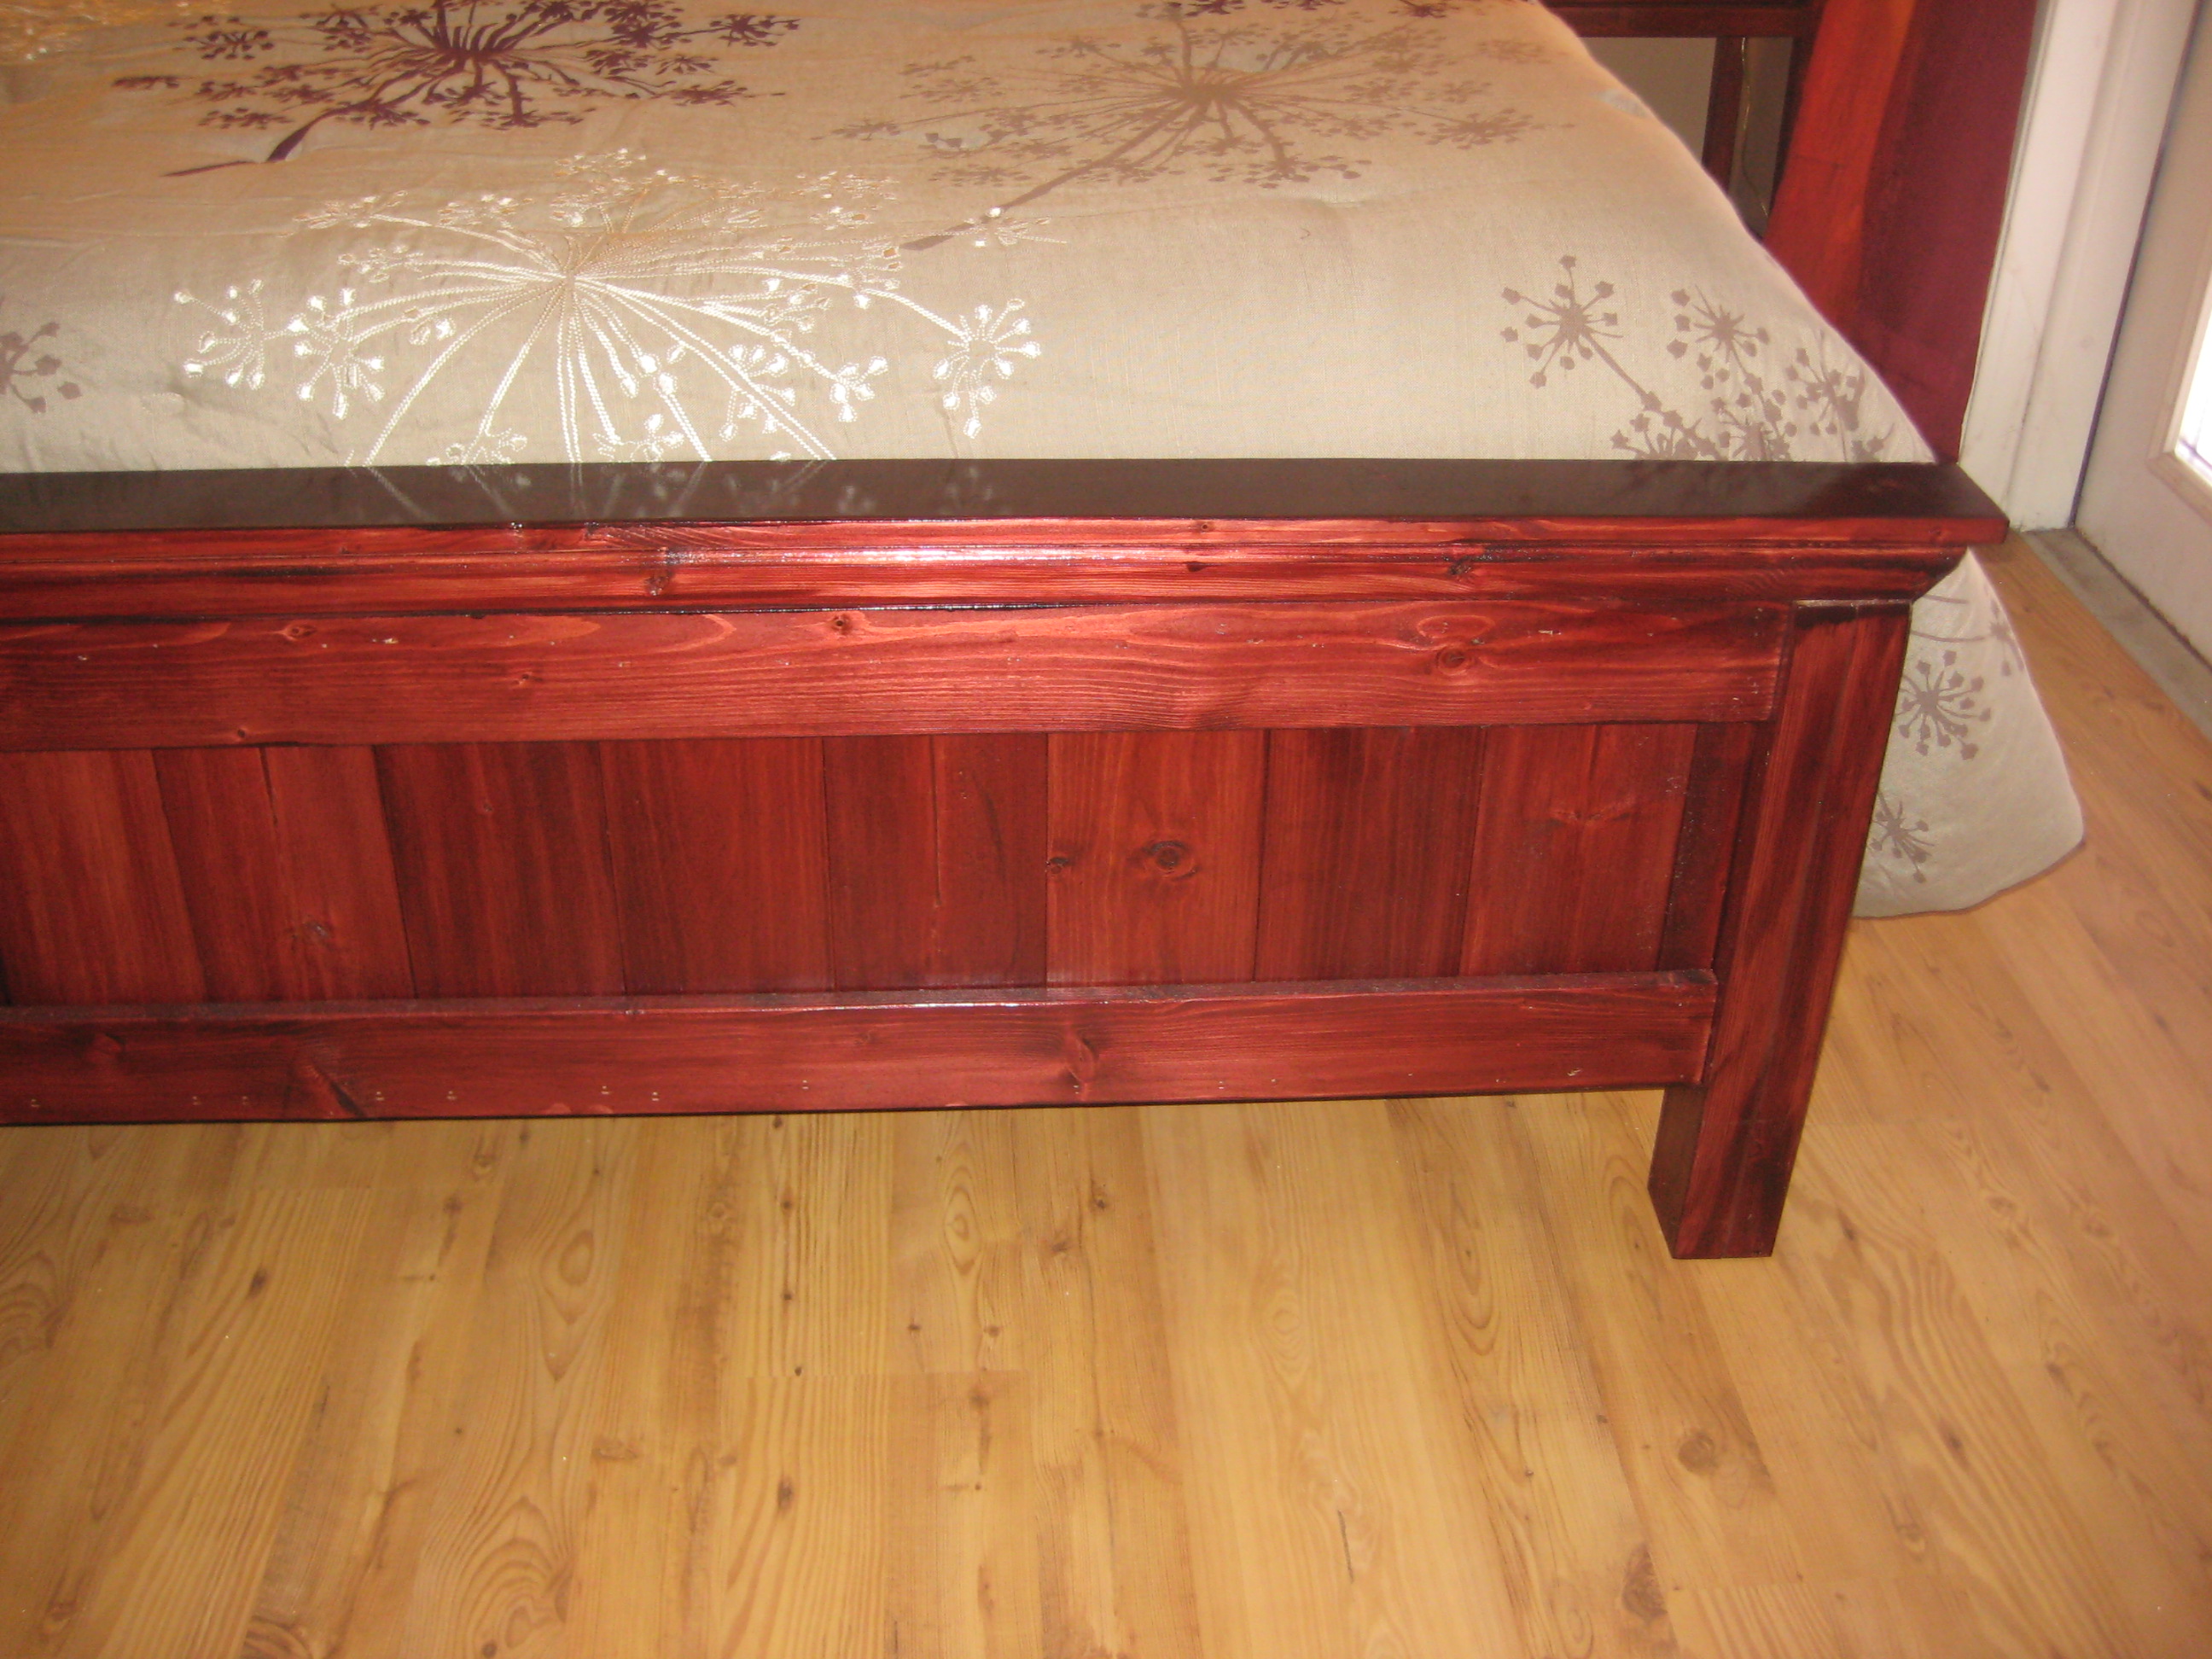
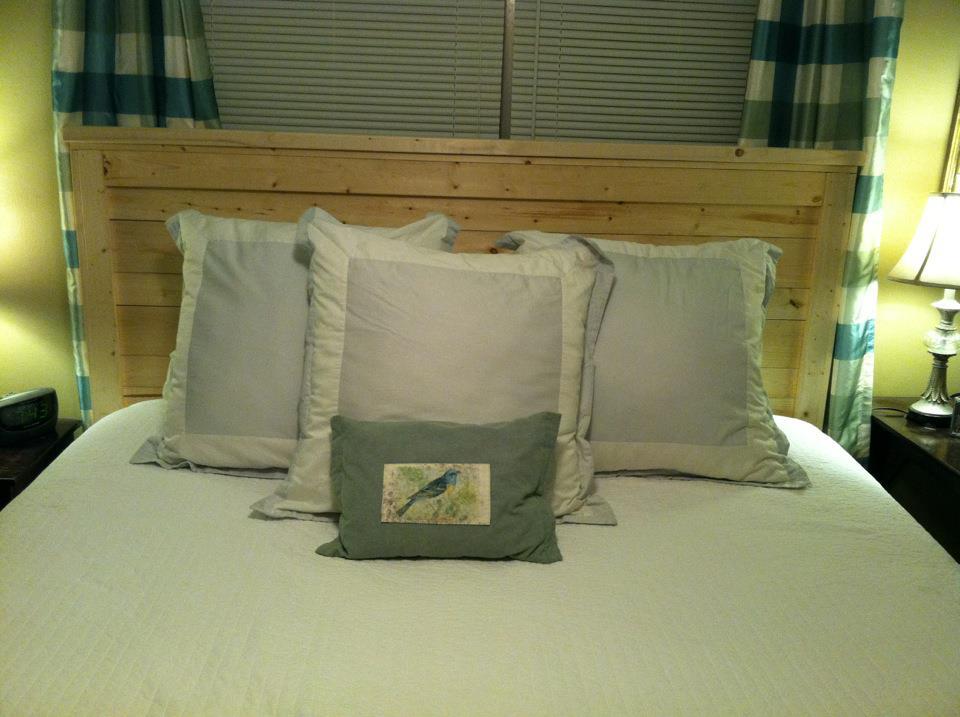
Farm House Bed-Headboard
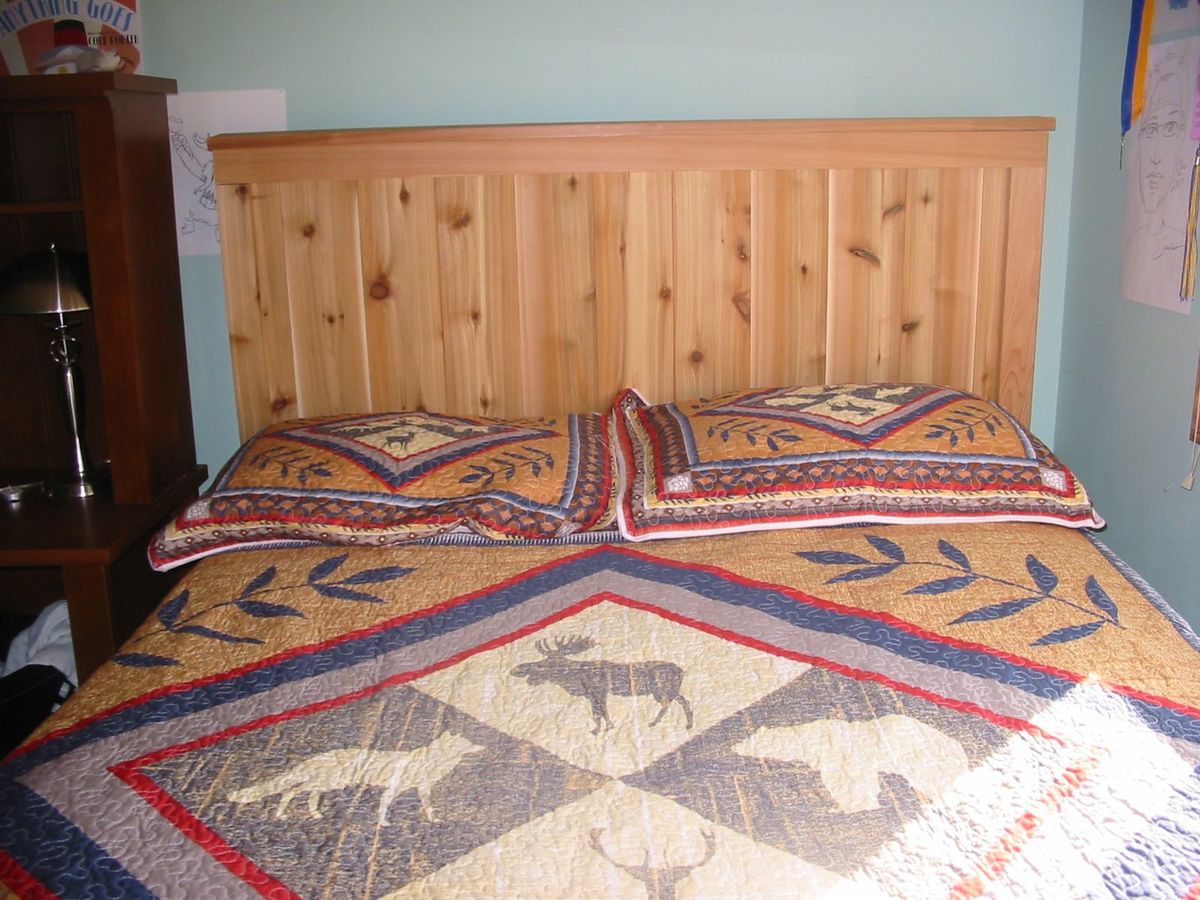
Hello,
I made the head board from the farm house bed project. I used western red cedar for this project and I bolted it to a standard metal bed frame. It came out really well and I'm very pleased with the plans and the results.
Thank you,
V. Woodcock
Minnesota
Built from Plan(s)
Estimated Time Investment
Weekend Project (10-20 Hours)
Finish Used
Minwax whip on polyurethane
Recommended Skill Level
Beginner
Comments
Corner media cabinet
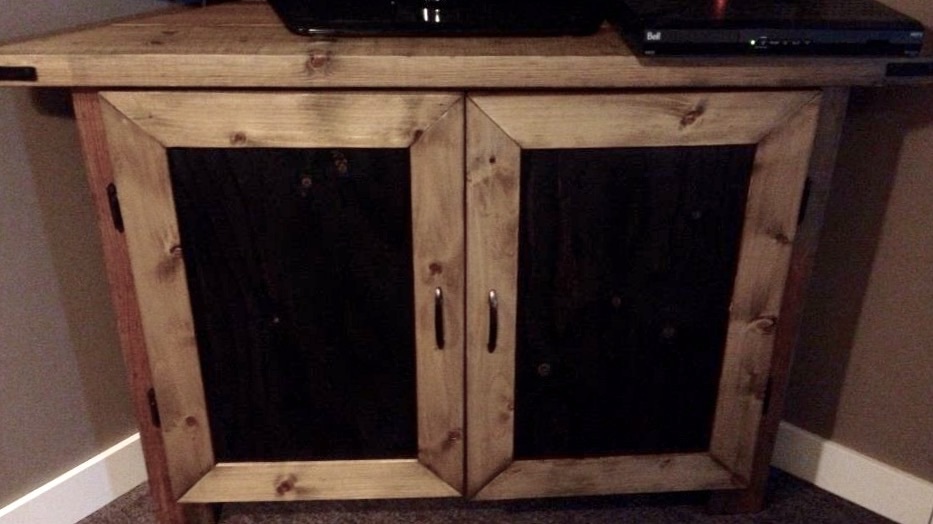
I used the Rustic x console table plans and modified them to make this corner media console. I closed the sides with plywood instead of leaving them open with the X detail. Then I closed it in further with doors to keep all our video game systems hidden and dust free. It's a good addition to the Man Cave.
Estimated Cost
50
Estimated Time Investment
Weekend Project (10-20 Hours)
Recommended Skill Level
Intermediate
Comments
Tue, 04/27/2021 - 21:42
Does it fit all the way into…
Does it fit all the way into the corner is it squared up?
Yay!!
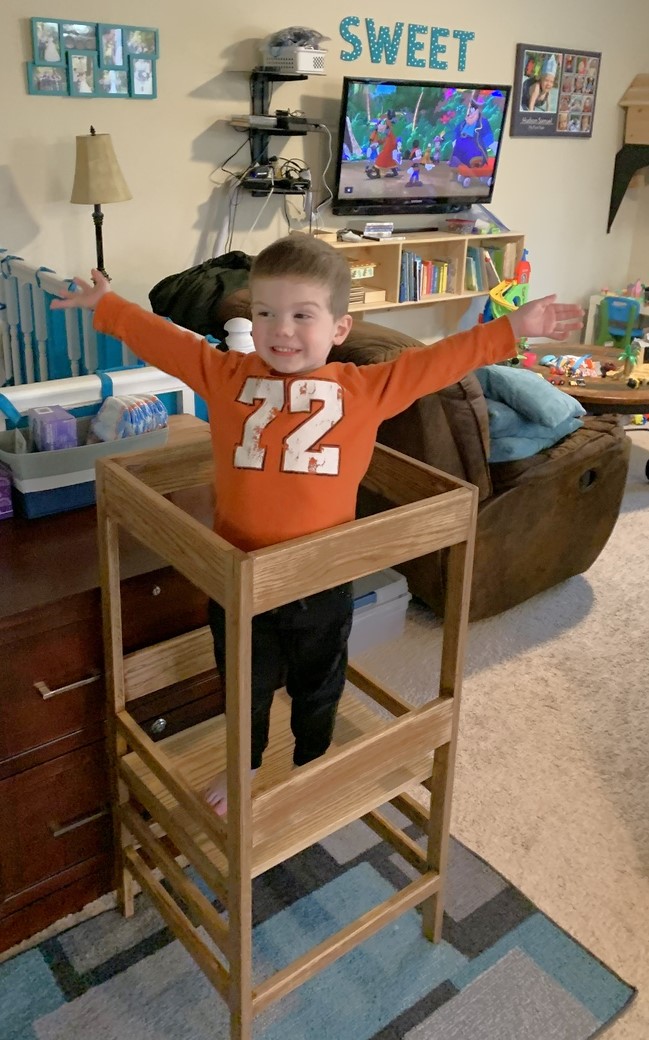
I made a simplified version without the arches, worked out great! Thanks for the plans! I used oak so cost was a little higher than necessary. :)
Estimated Cost
$90
Estimated Time Investment
Day Project (6-9 Hours)
Finish Used
Minwax weathered oak
Recommended Skill Level
Beginner
Wine Rack with Live Edge Wood Top & Shelf
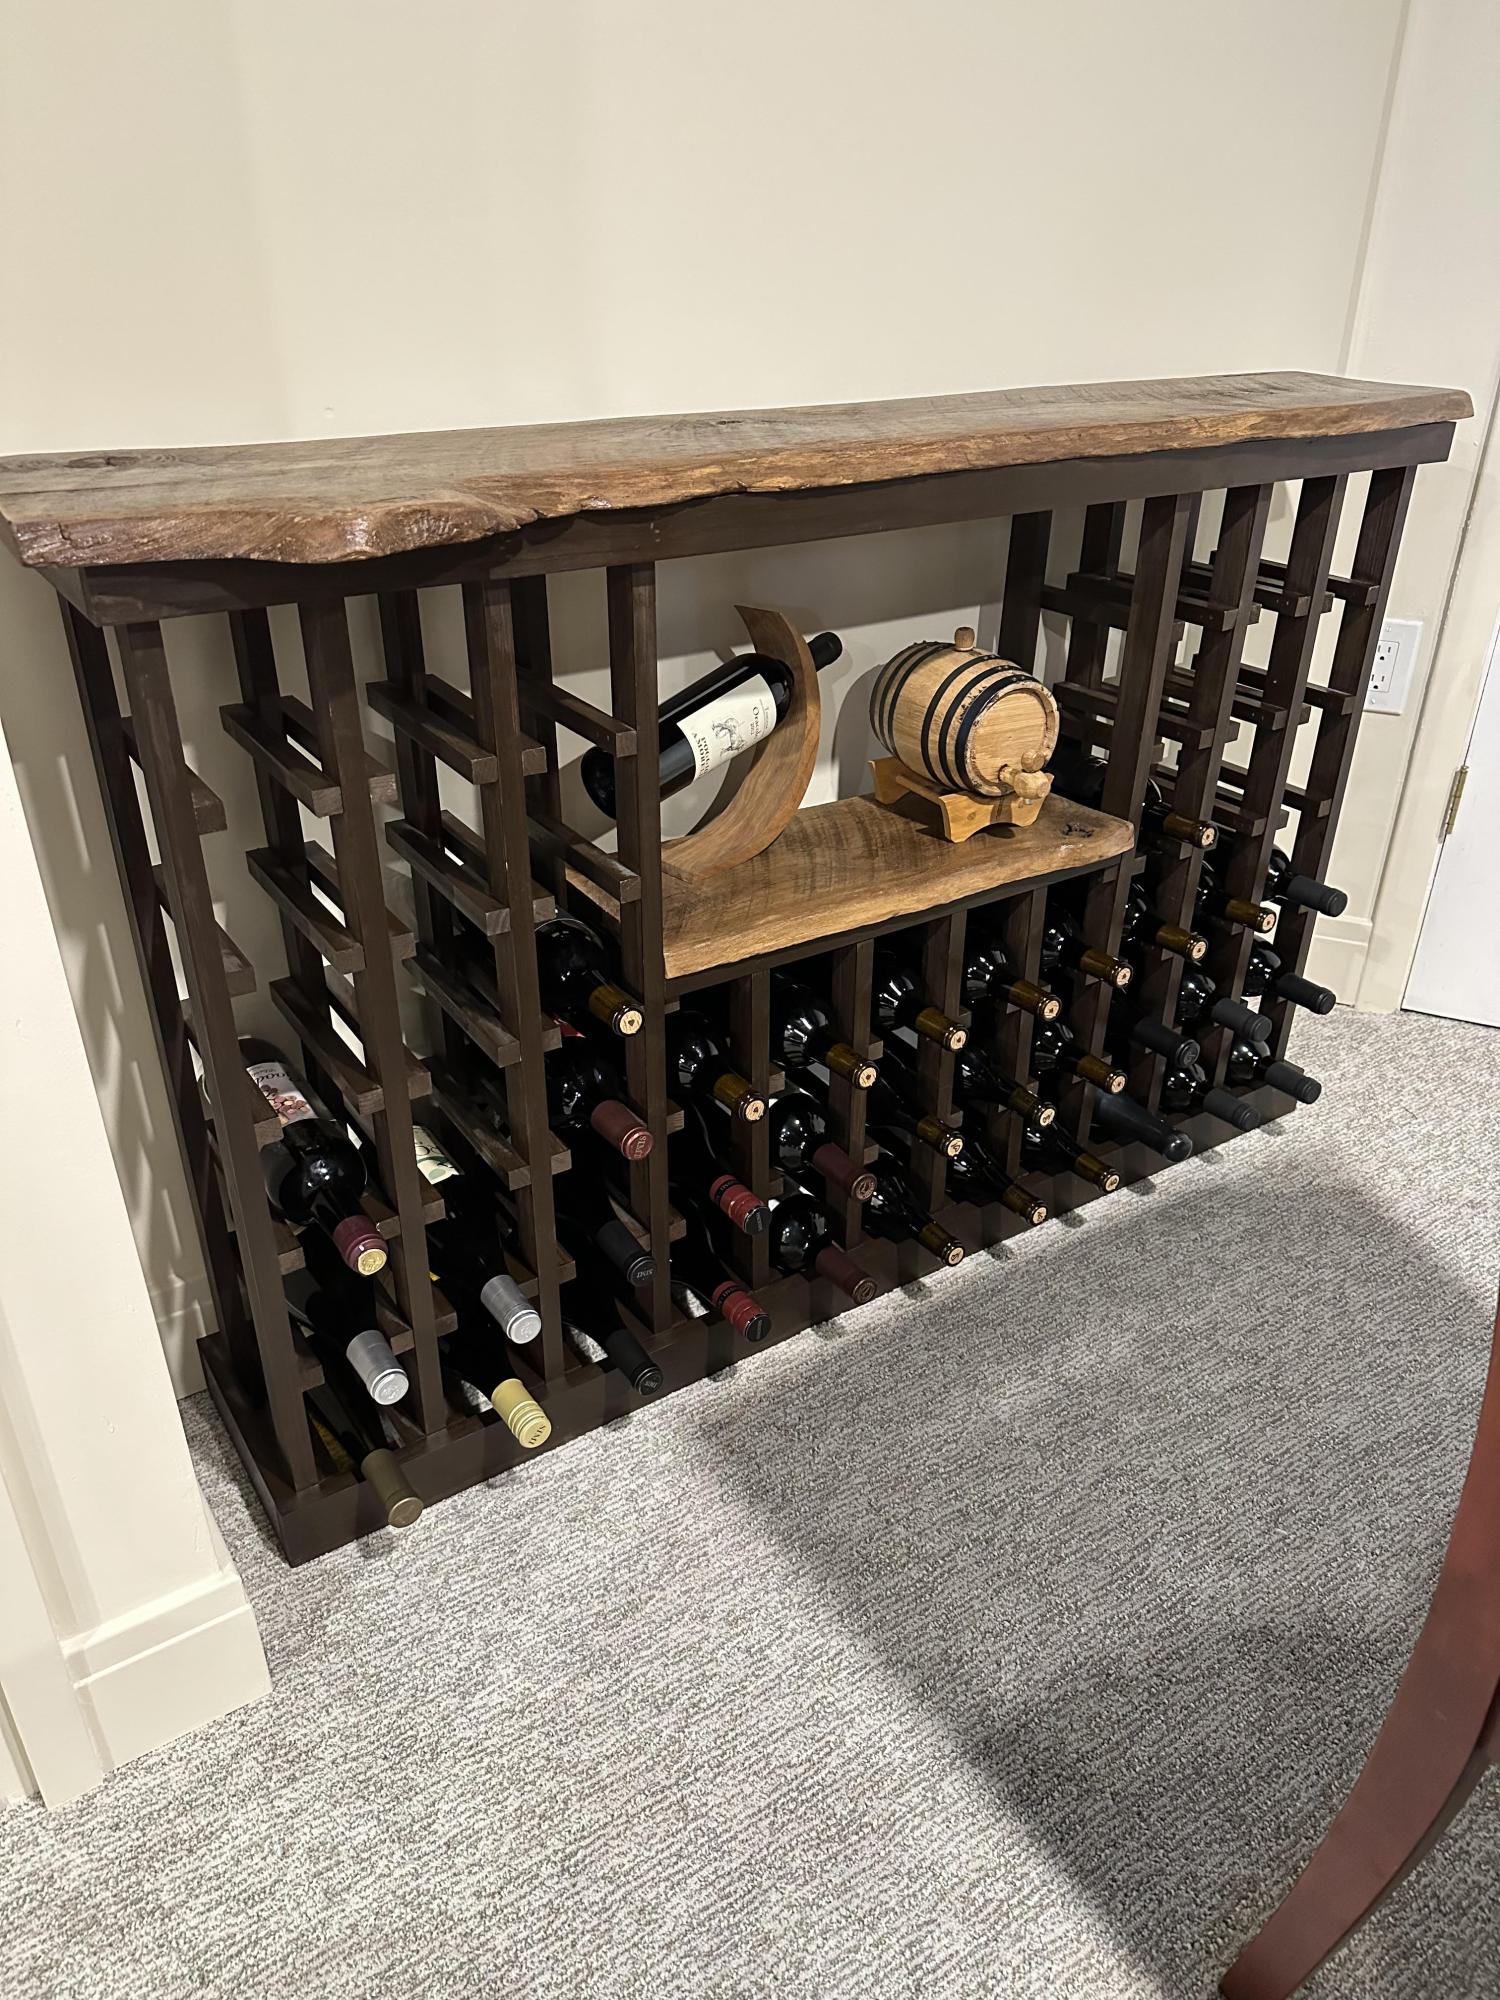
Made this wine rack for our basement rec room using live edge wood, 1x2s, and 3/4in wood dowels. Full dimensions and write up at the link below!
Comments
Ten dollar ledges with reclaimed wood
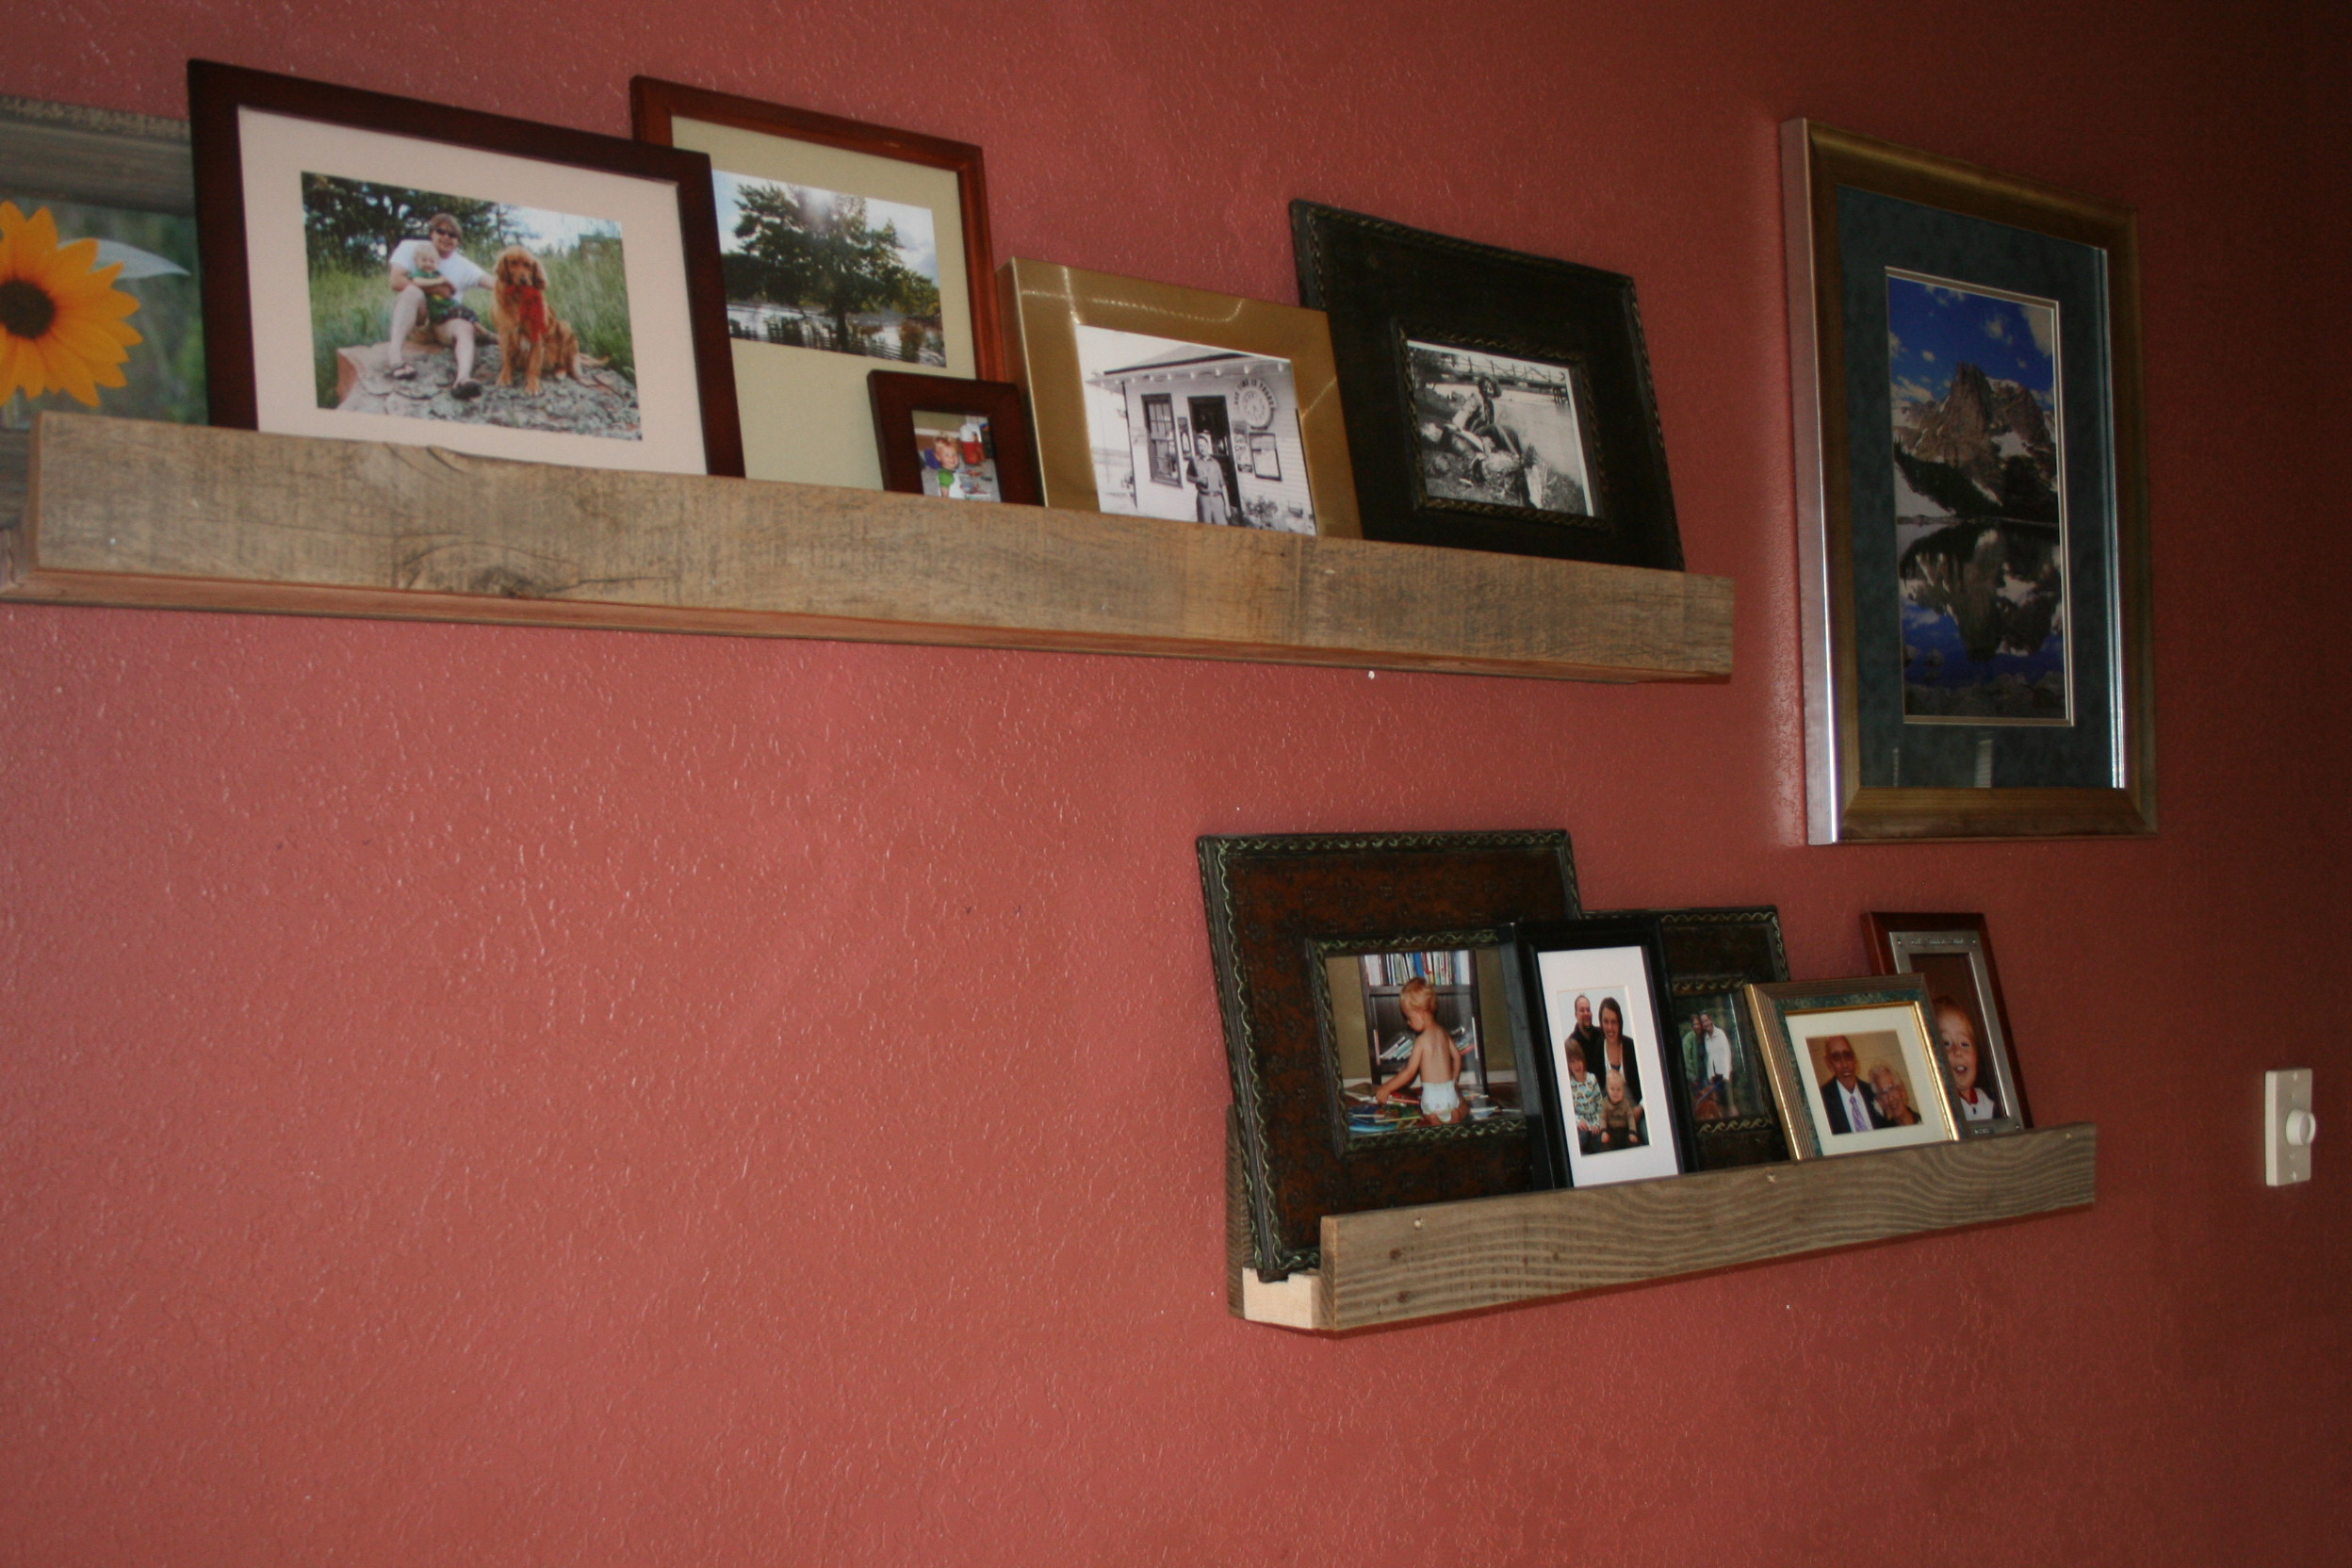
I love how this project turned out. My neighbor is a collector of of old pallets/fences. Now he is trying to clear his yard. I just had to pull out the old nails, cut and nail. The wood was perfectly weathered.
Built from Plan(s)
Estimated Cost
FREE!
Estimated Time Investment
An Hour or Two (0-2 Hours)
Finish Used
none
Recommended Skill Level
Starter Project
Comments
Fri, 10/21/2011 - 18:58
Those are some incredibly
Those are some incredibly straight bits of pallet wood, my jealousy level is high.
Farmhouse Storage Bed
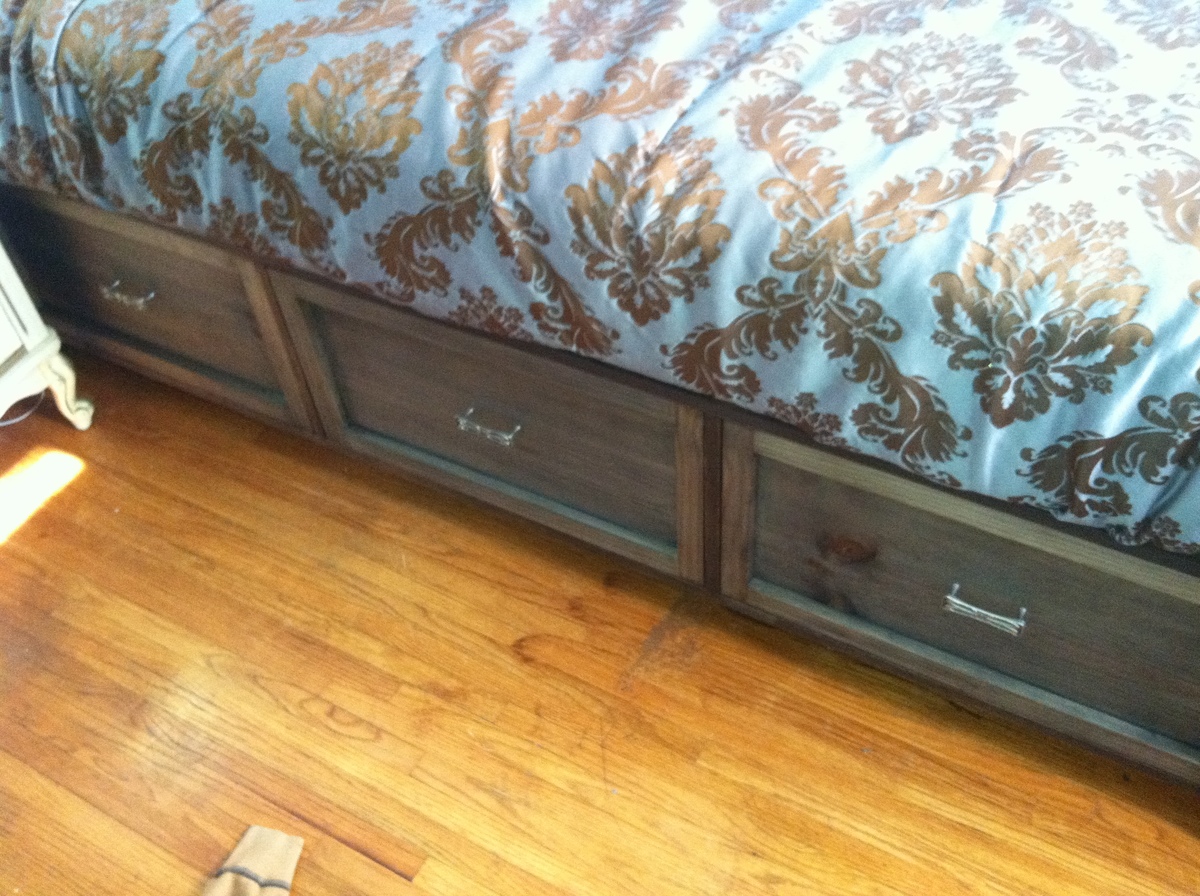
The first piece of our replacement bedroom set. We have this hand me down set from the 70's that is just awful looking. I have dressers, bed side tables, a wardrobe, and closet doors to do still. I love the way this turned out. I tried the oxidized finish from Hillary and with some trial and error I found the right colors. I replaced the standard slats with a one-piece frame that can be lifted out for the storage space below. I can't wait to replace the rest of that awful blonde furniture and repaint the room. I made wood slides like those on my built in dresser although this time they are positioned beneath the drawers. The front of the drawer boxes make up the drawer faces with a face frame. I changed the front of the boxes to 1x12 to achieve this concept. The drawers work flawlessly and will be perfect for seasonal clothes accessed less often.
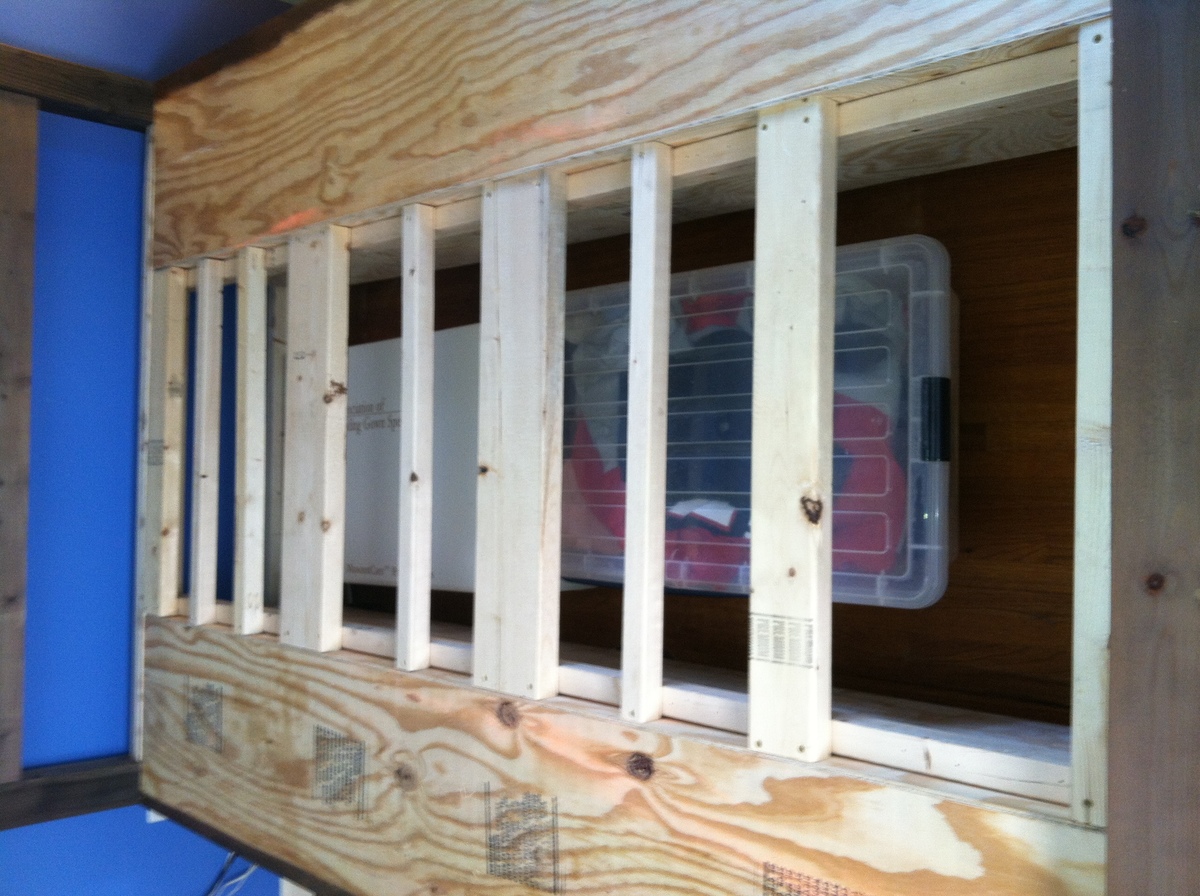


Built from Plan(s)
Estimated Cost
$350
Estimated Time Investment
Week Long Project (20 Hours or More)
Finish Used
Black tea, Vinegar, and Steel wool Oxidized finish. The top coat is simply SEJohnson Wax. I had never used either and couldn't be more pleased with the result. I really liked the oxidized colors but the wax made me love them. The only issue I ran into was with the edge banding on the plywood frame. Initial attempts came out black or cobalt blue. Shame on me I used Red Oak banding. After sanding and playing with it I ended up adding a quick coat of Rustoleum Classic Cherry I had leftover. It worked pretty well to fix the color.
Recommended Skill Level
Intermediate
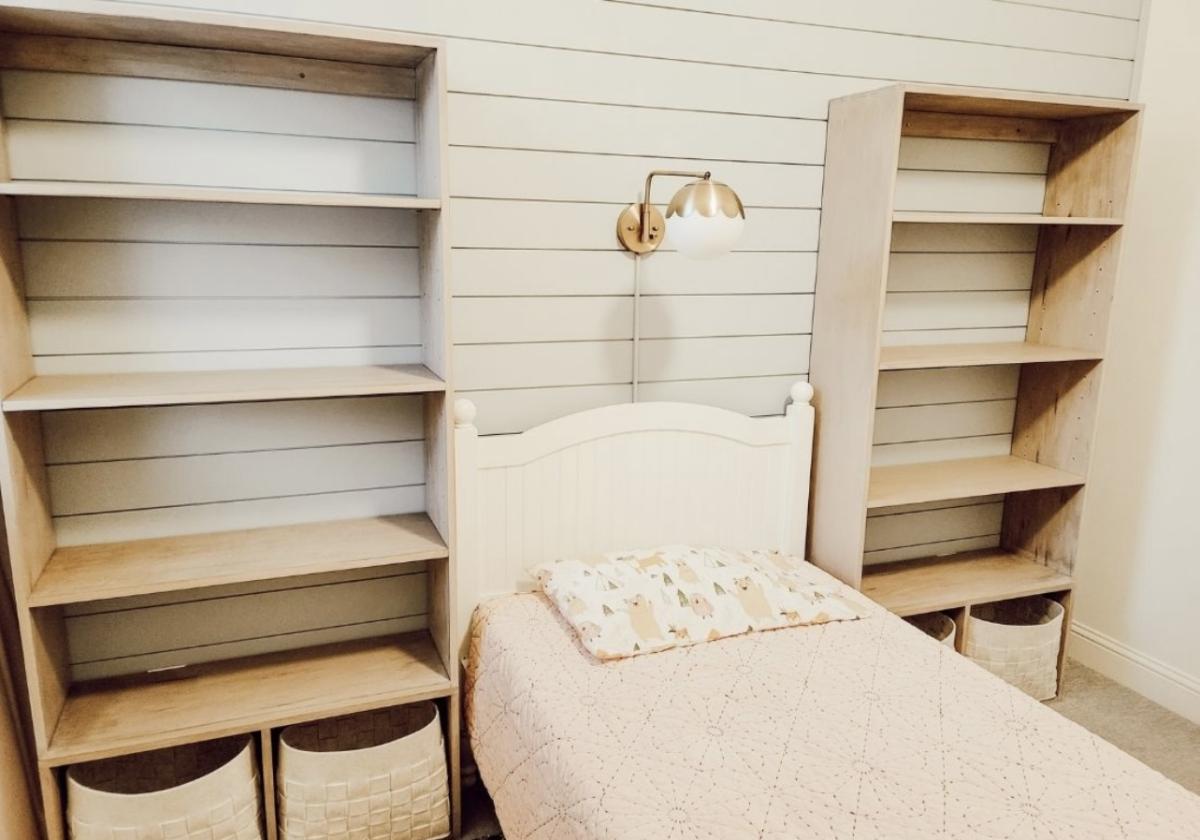
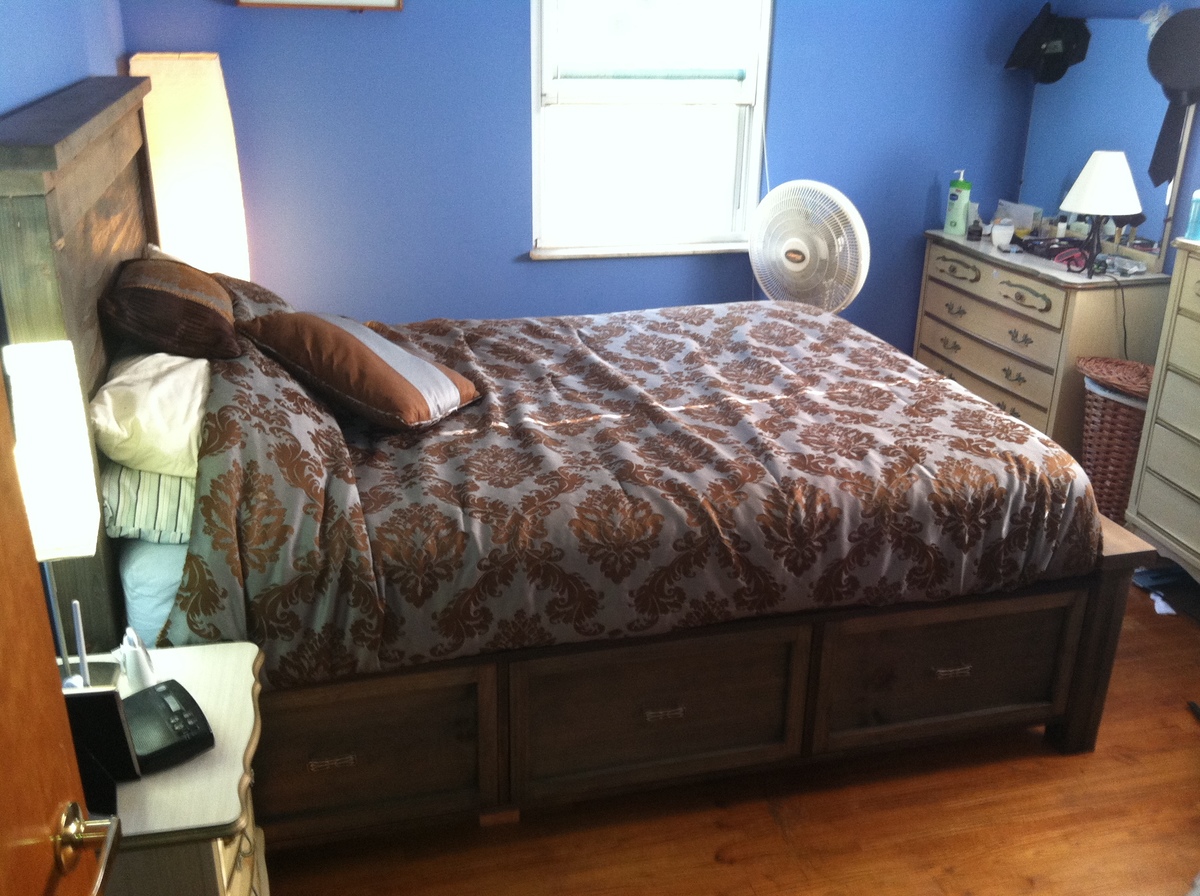
Queen Size Storage Bed with Drawers

My husband and I built this bed over the course of several weeks working on it a few hours at a time due to long work days. It came out beautiful and is exactly what I wanted and how I had it pictured for our new bedroom redo. We added the Queen Storage Bed Drawers from the Ana White plans but had to make a modification as the drawer plans did not account for the trim as shown in the picture for the bed. Then we took things a step further and built matching nightstands. I LOVE how everything turned out.


Estimated Cost
$300 for the bed and another $150 for the 2 nightstands.
Estimated Time Investment
Week Long Project (20 Hours or More)
Finish Used
Two coats of Valspar Ultra White paint with a coat of polyurethane on top.
Recommended Skill Level
Intermediate
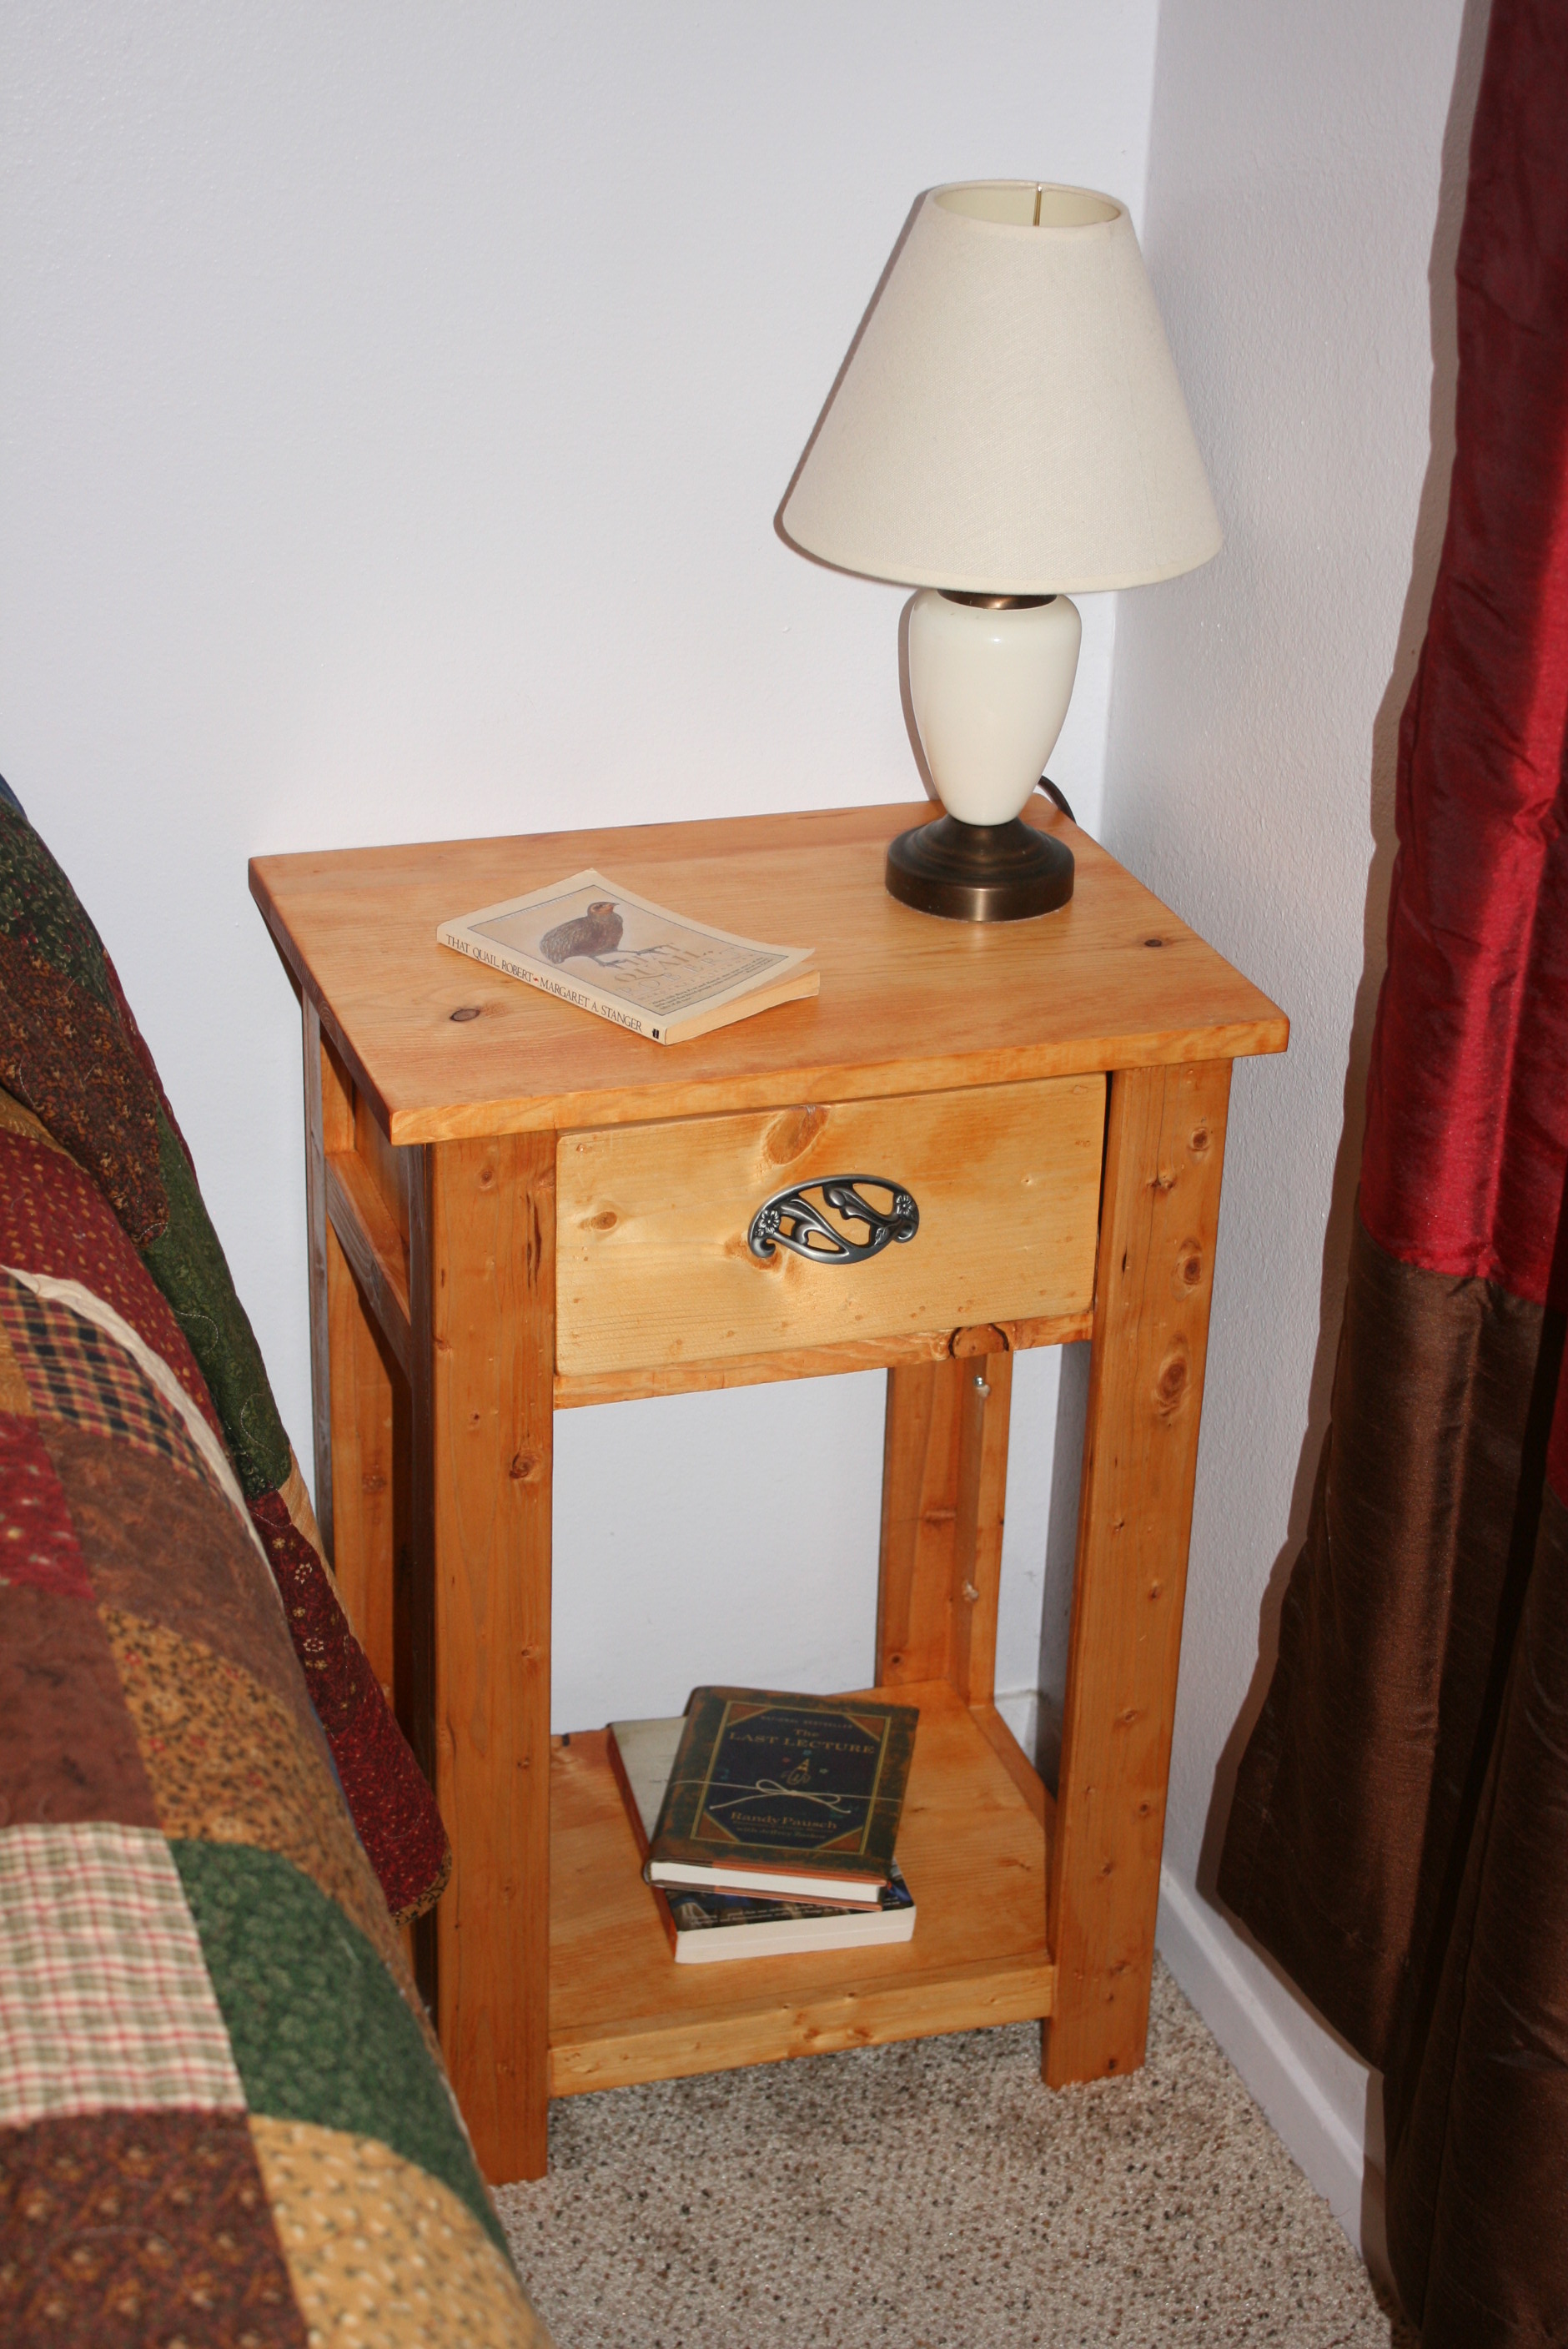
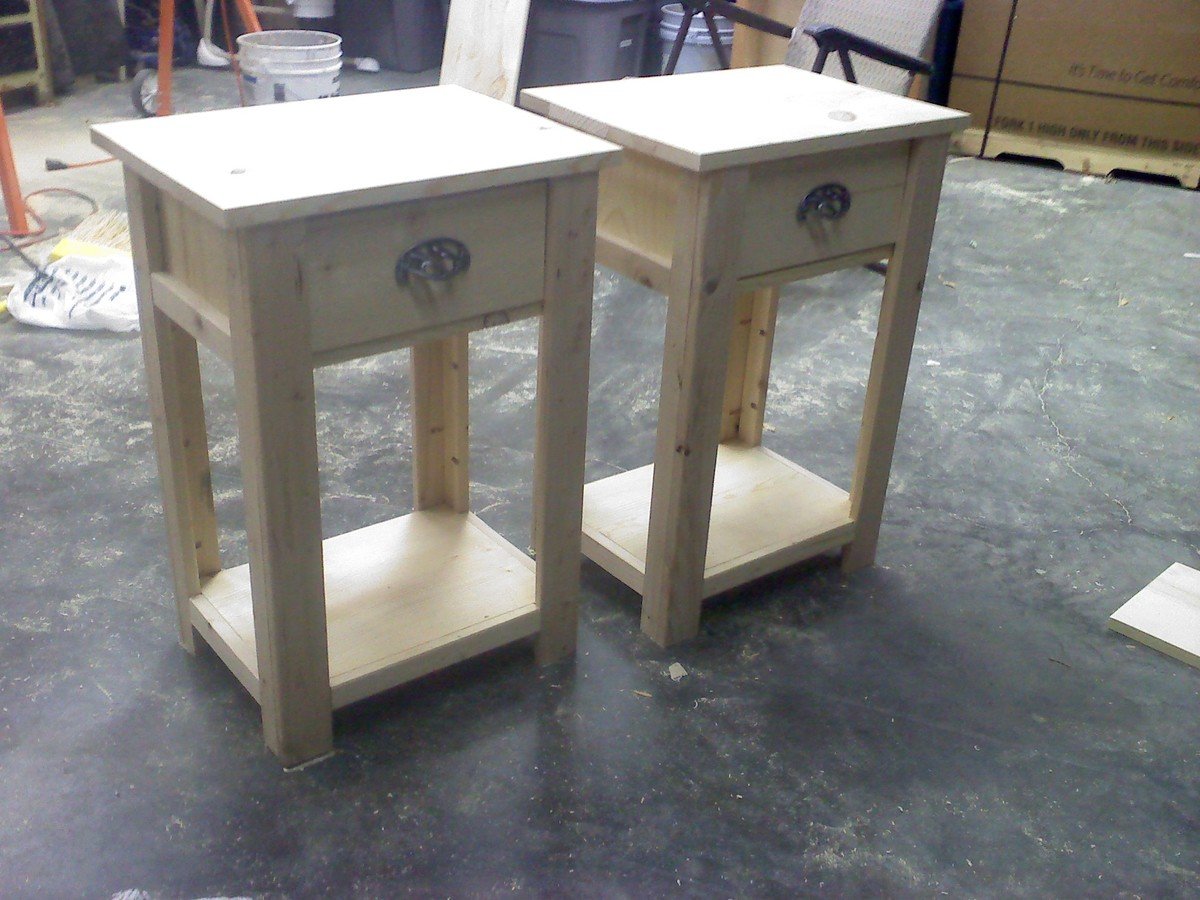
Simple Nightstand
I was itching to start another project, so when my friend said she was moving to a new house I was excited to make her a custom-made housewarming gift.
She has a beautiful pine bed and to my delight she was in need of nightstands. I looked over many different plans but kept coming back to the simple nightstand plan.
I was concerned about plans that had drawers, and some plans have multiple drawers. Since I haven't made drawers before, I decided I could tackle a 1 drawer nightstand and do the simple night stand.
I was pleased in the end how it turned out! The hardest thing was choosing stain and the perfect drawer pull.
I was pleased when she sent me a picture of it and it matched her bed well.

Built from Plan(s)
Estimated Time Investment
Day Project (6-9 Hours)
Recommended Skill Level
Intermediate
Comments
Mon, 10/24/2011 - 22:02
I'm also making this, (it's
I'm also making this, (it's half finished under my porch) but yours looks so sturdy and well built. Good job, I am feeling very inspired to go and do some work now! :)

Tue, 10/25/2011 - 05:52
thanks!
I was concerned about the strength while constructing but once I began putting everything in place it was very sturdy.
I wasn't crazy about how my drawers turned out but I wasn't about to take it apart and rework it!
I was tempted to keep it for myself, but I couldn't since my friend was expecting a special gift.
Thu, 02/02/2012 - 21:14
Simple nightstand plans
The plans are in the "About This Project" section of this page - click on the link where it says "From Plan: Simple Nightstand". You're welcome.
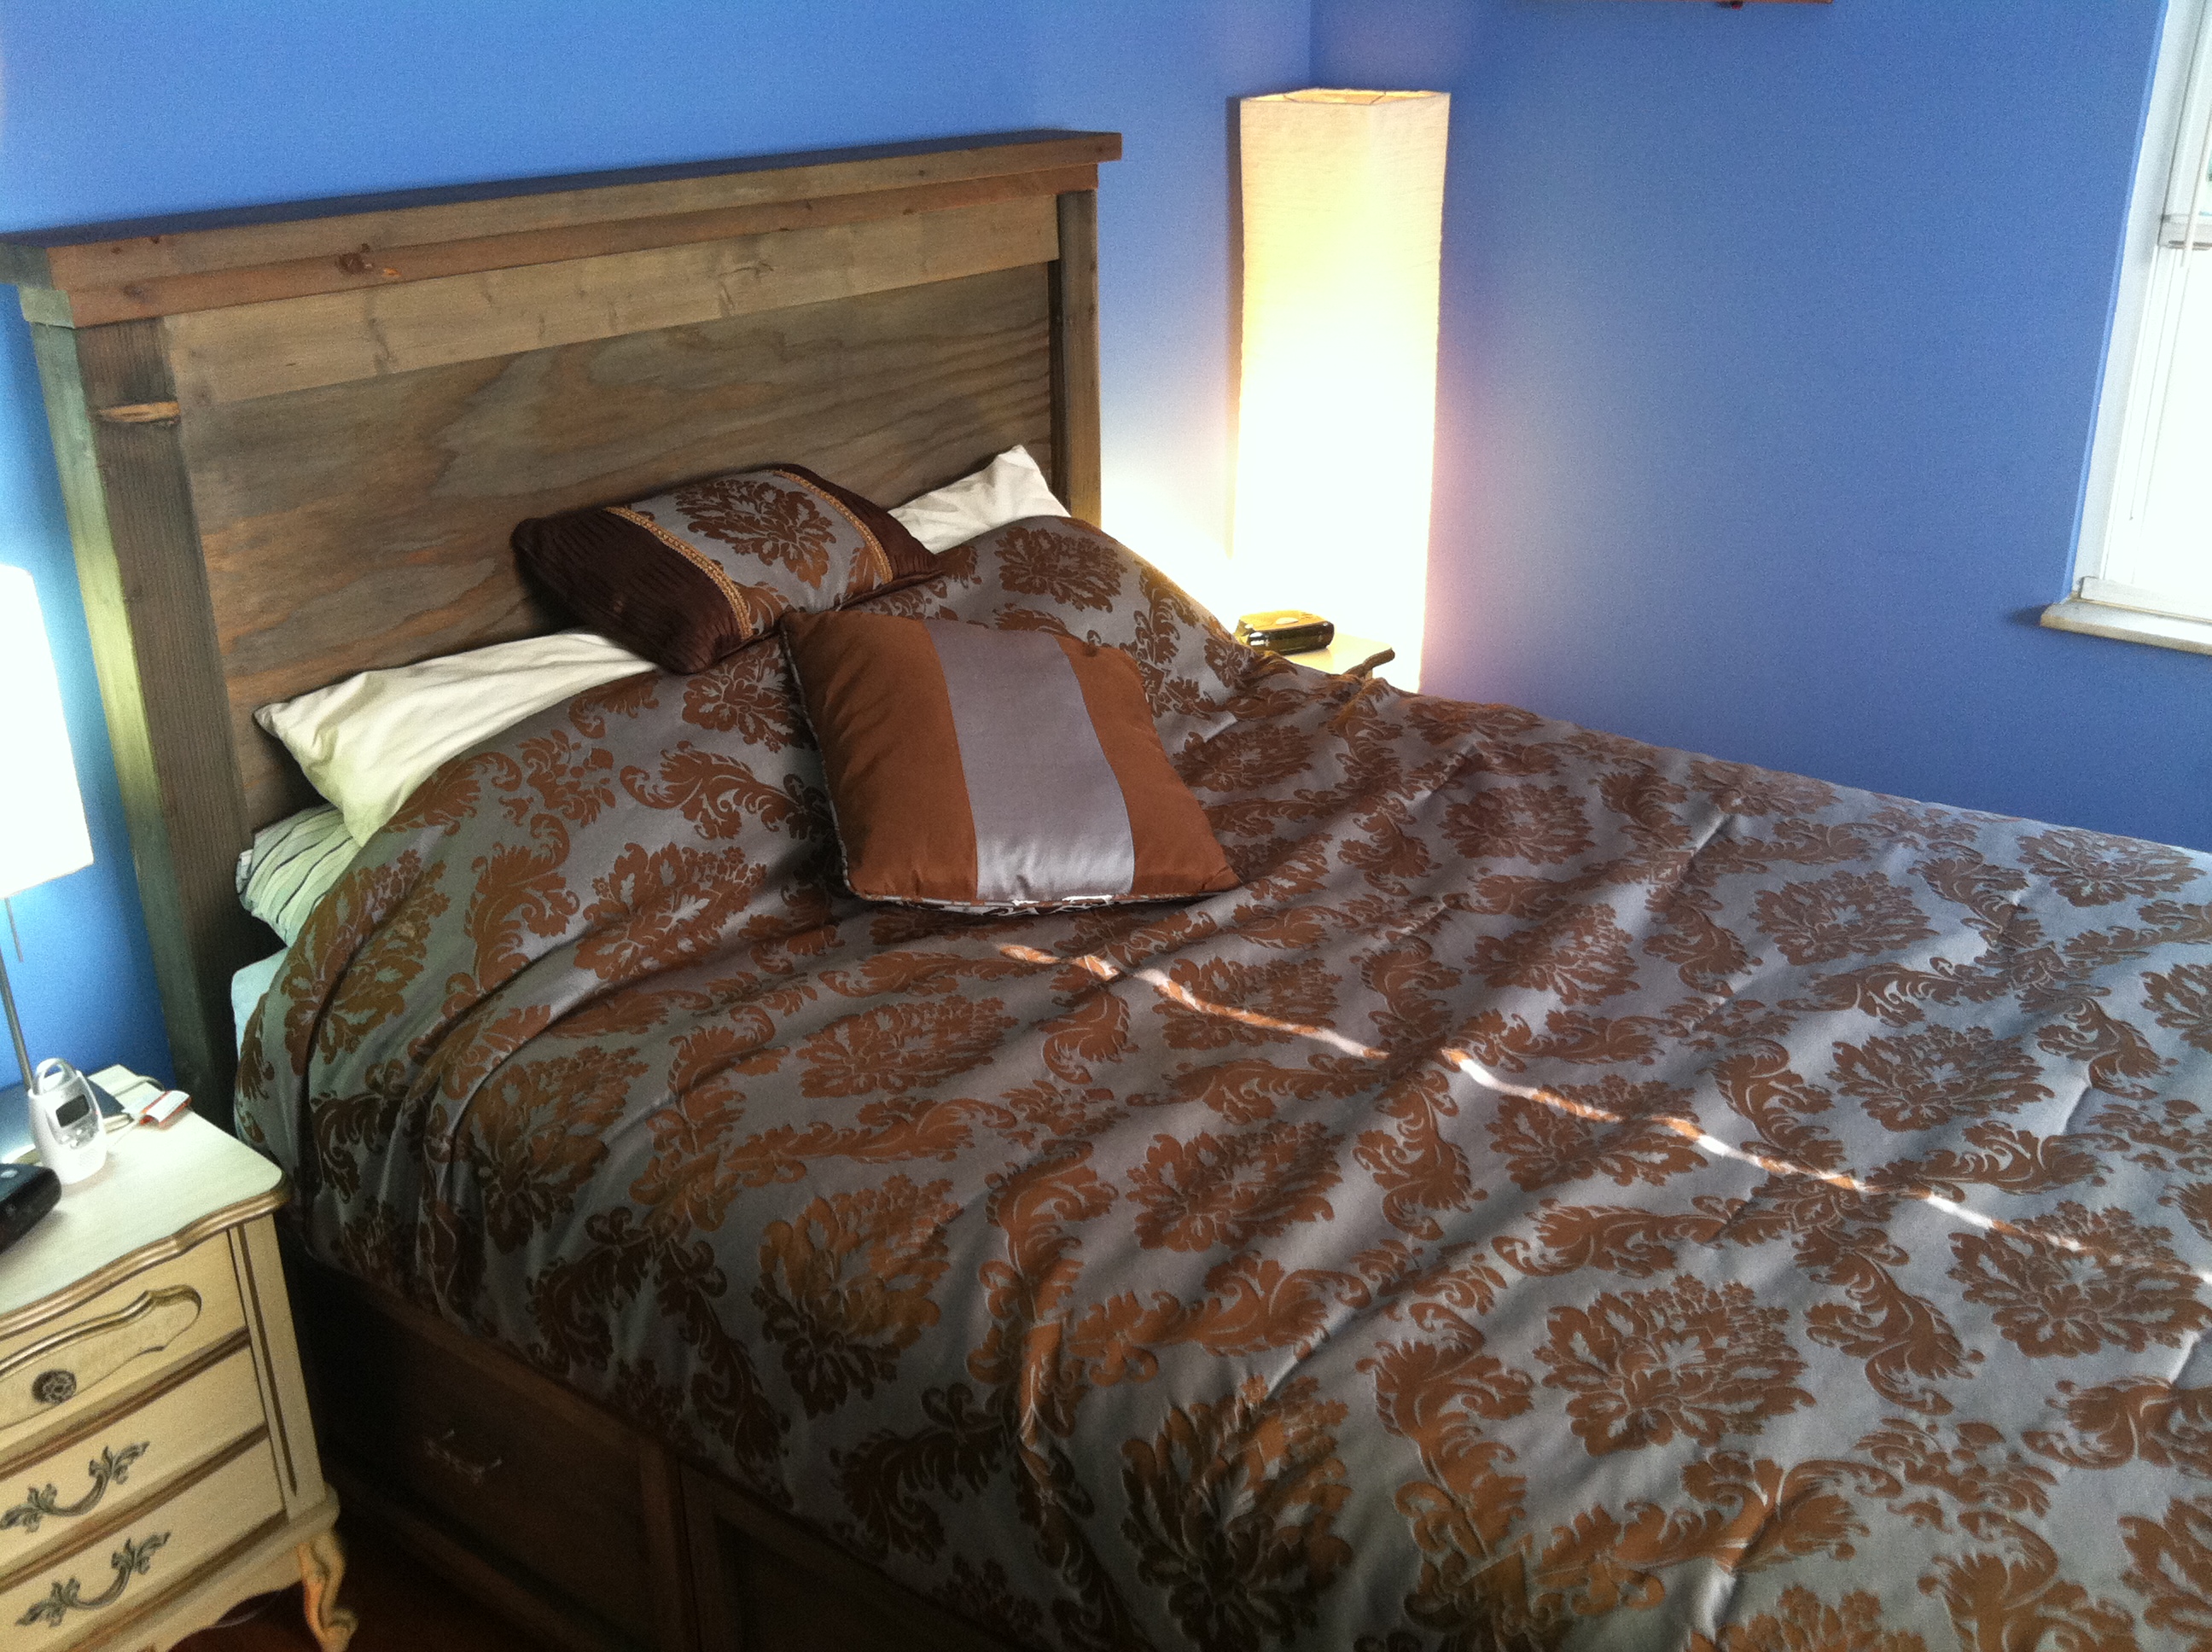
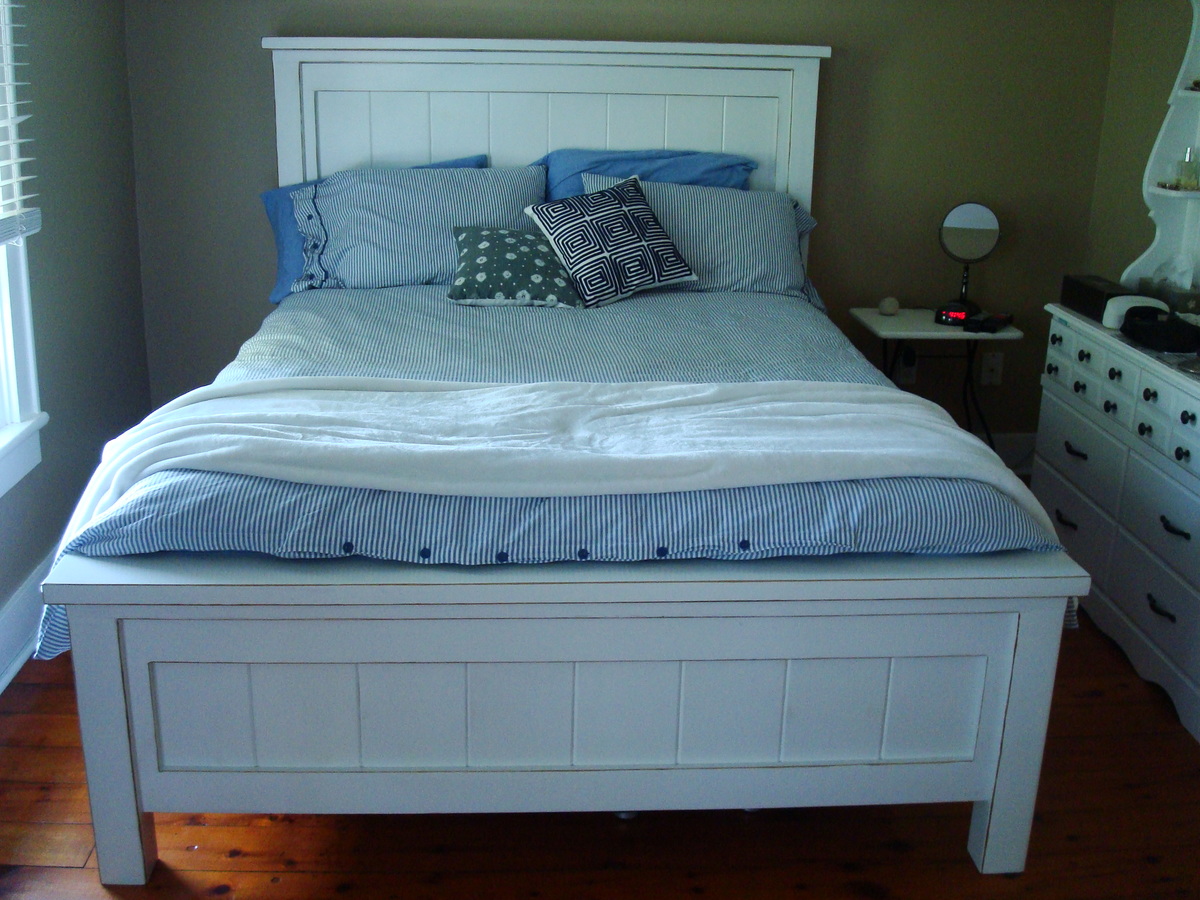
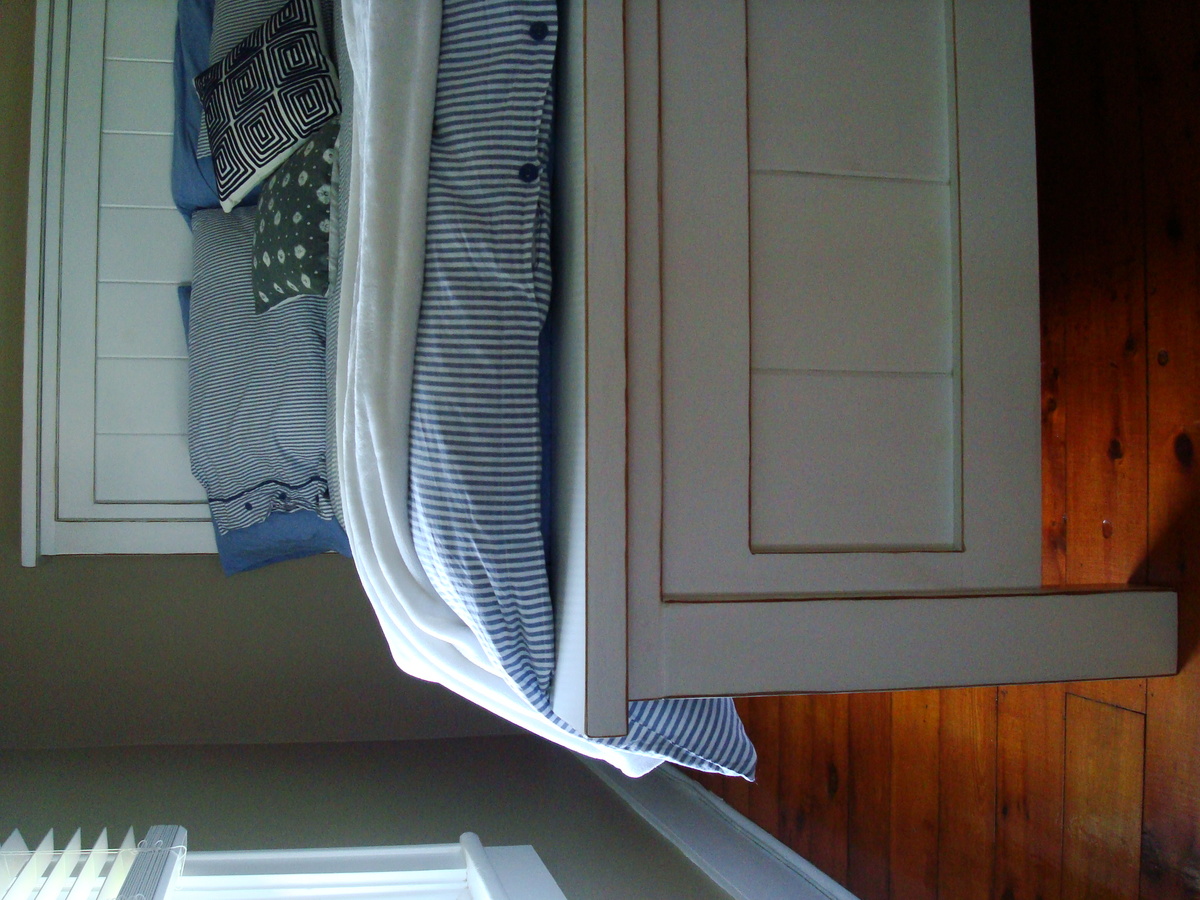
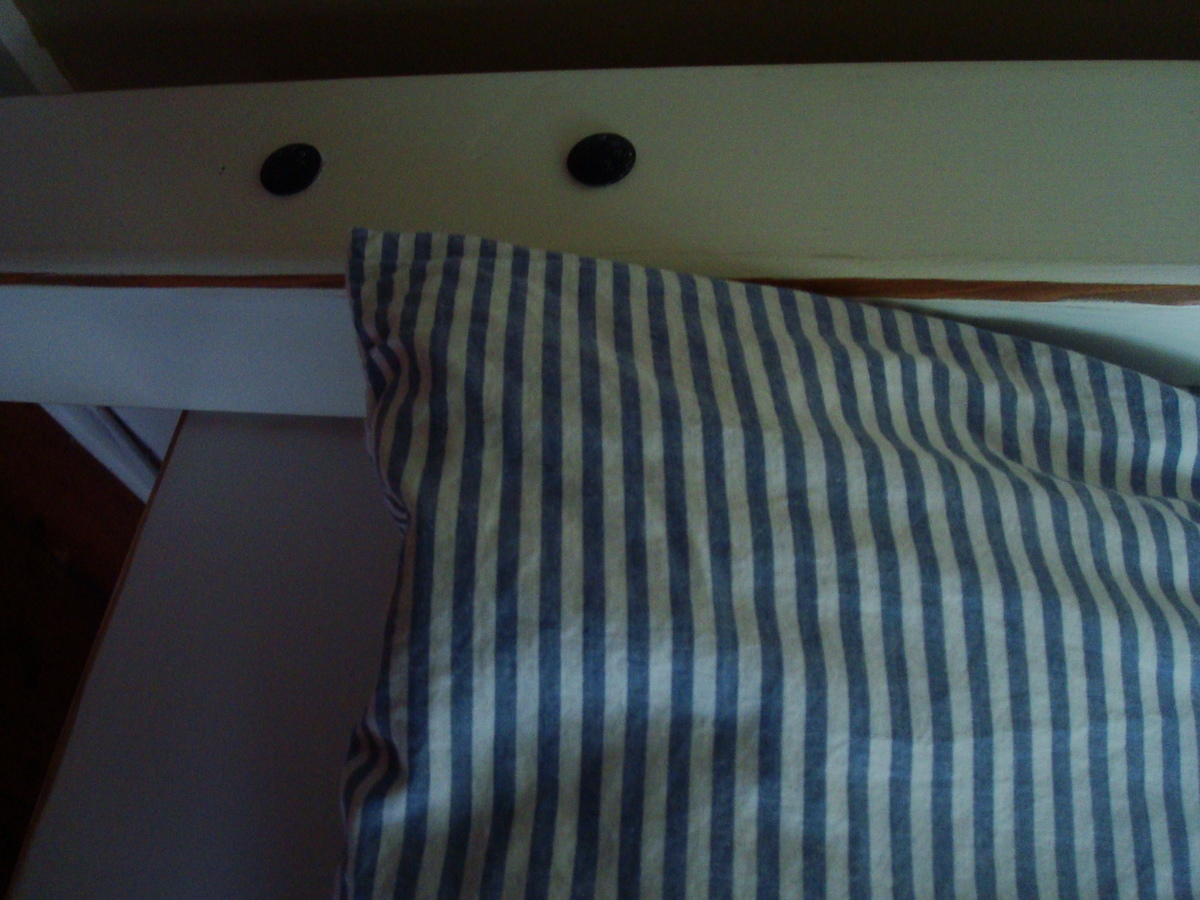
Farmhouse Queen Bed

First building project ever! I wanted a new bed for our new mattress and got inspired when I came across this website. A compound mitre saw, orbital sander, nailer, and many more tools later, I am building furniture whenever I get a chance!
Modified the way I attached the frame to the head board and foot board a bit. I used joist hangers on the footboard, which the frame slid into perfectly, and secured it with a couple screws on each side. I attached the headboard with 2 large carriage bolts on each side through the posts and frame.
Overall, I loved the way it turned out. On to the next project!
Built from Plan(s)
Estimated Cost
$200
Estimated Time Investment
Weekend Project (10-20 Hours)
Finish Used
Distressed white. I used a shade of white paint, sanded the edges and corners (mostly with an orbital sander) and used a stain pen (in Provincial shade) on the sanded spots. Sanded the entire project by hand using 220 grit sponge and finished with 3-4 coats of Minwax Polycrylic
Recommended Skill Level
Beginner
Comments

Sat, 10/19/2013 - 08:14
First Build?!?
Thanks for sharing this amazing build. It turned out beautifully, can't wait to see your next project!
In reply to First Build?!? by Ana White
Wed, 10/23/2013 - 19:38
Thank You
Your website really guided me through everything, from buying the wood to the finish. I credit you and tell people to visit this website whenever anyone asks me about my projects :)
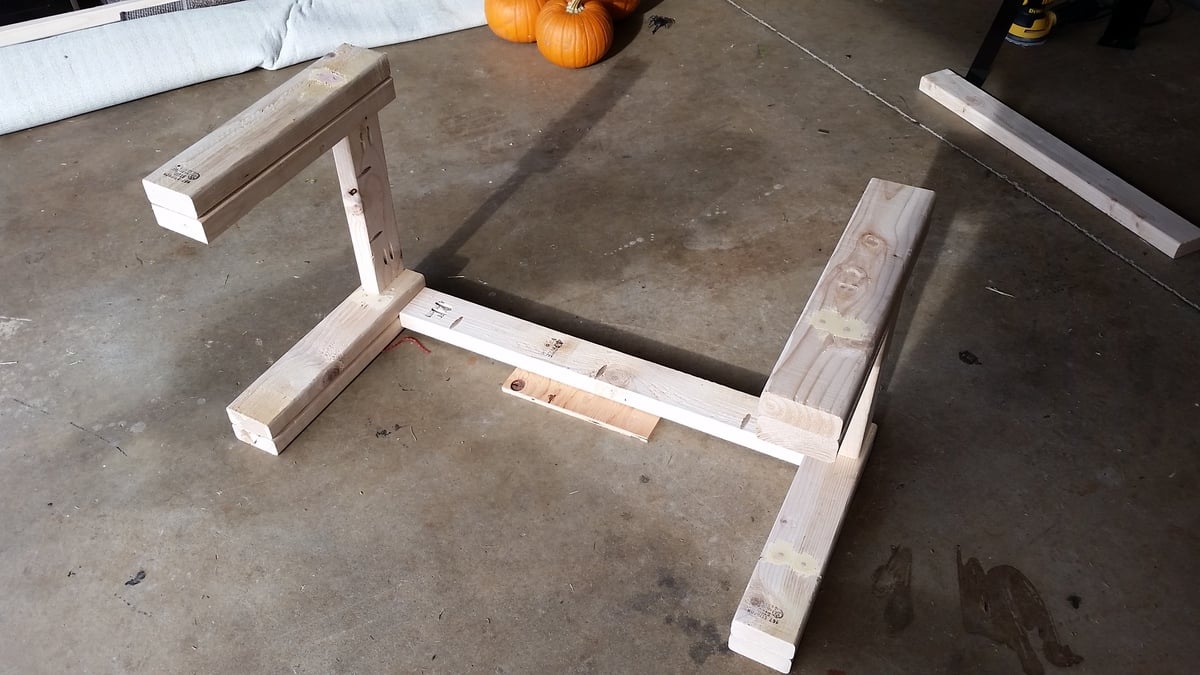
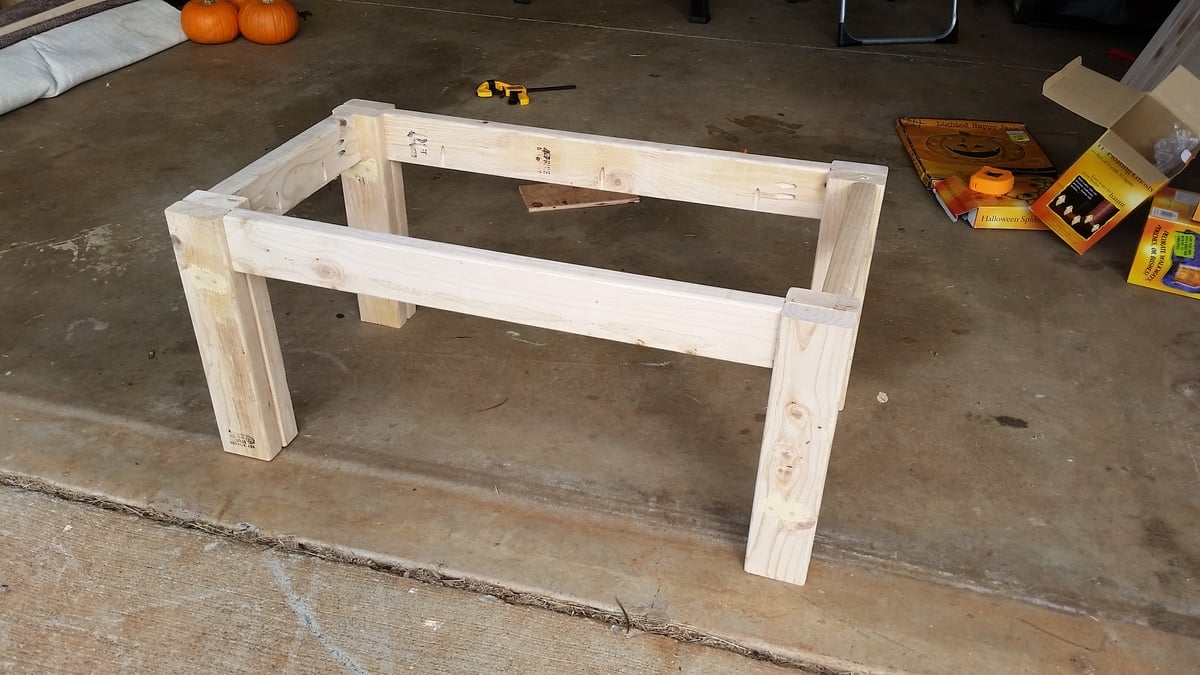
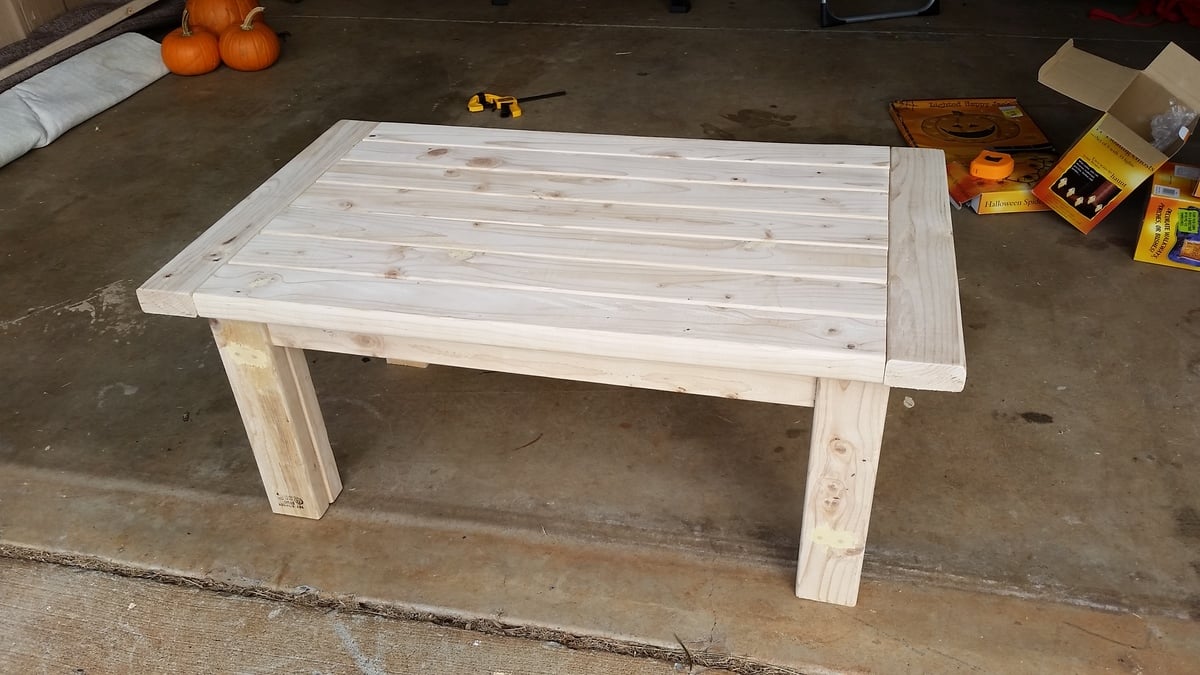
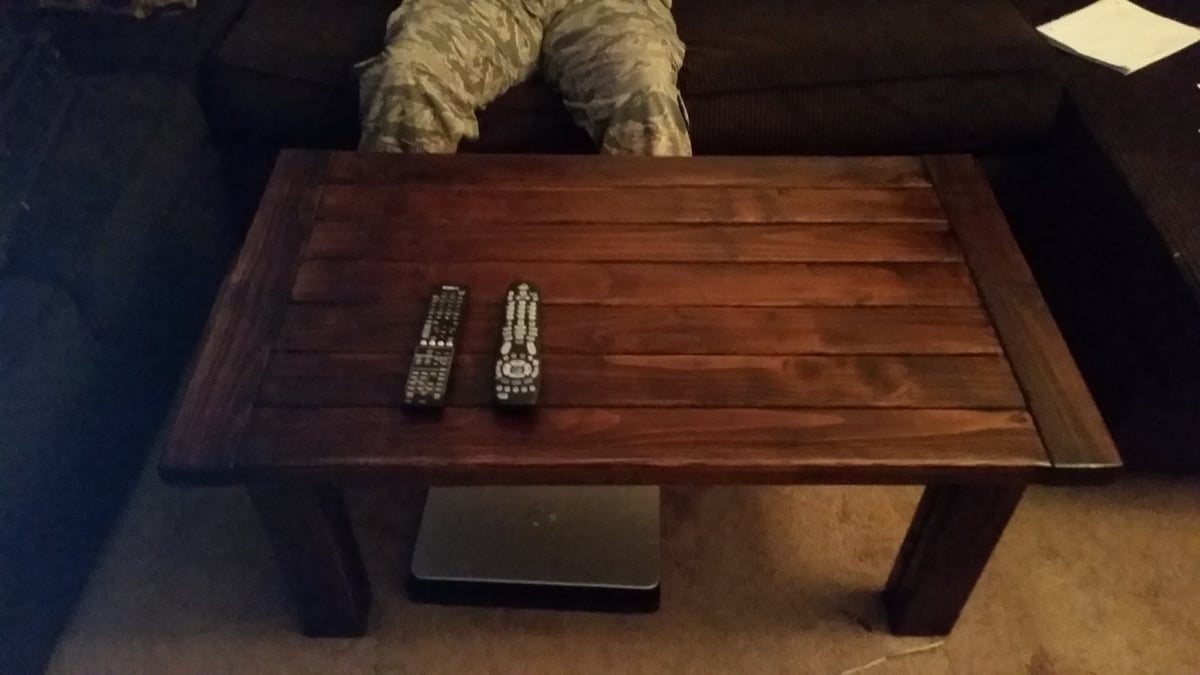
Tryde Coffee Table
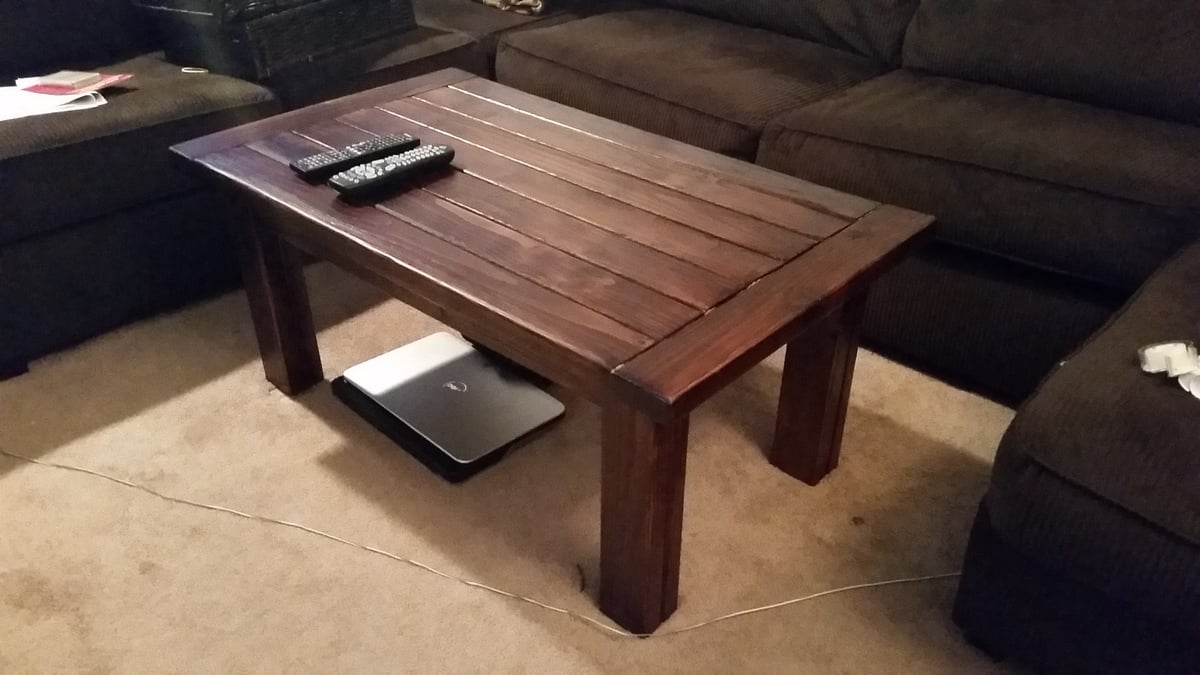
This is my first DIY build project and it turned out awesome. For some reason I was unable to find untreated 4x4's anywhere in Hawaii, so I took two 2x4's and attached them by countersinking wood screws. Beware, the dimensions of this project are massive. I scaled down the measurements drastically to fit in my living room with my sectional.
Built from Plan(s)
Estimated Cost
Unknown
Estimated Time Investment
Week Long Project (20 Hours or More)
Finish Used
A coat of Minwax Pre-Stain Wood Conditioner then two coats of Mixwax Polyshades Mission Oak Satin finish with light sanding between applications. I stained the top and legs separately for ease of application.
Recommended Skill Level
Starter Project
Modified rustic x console
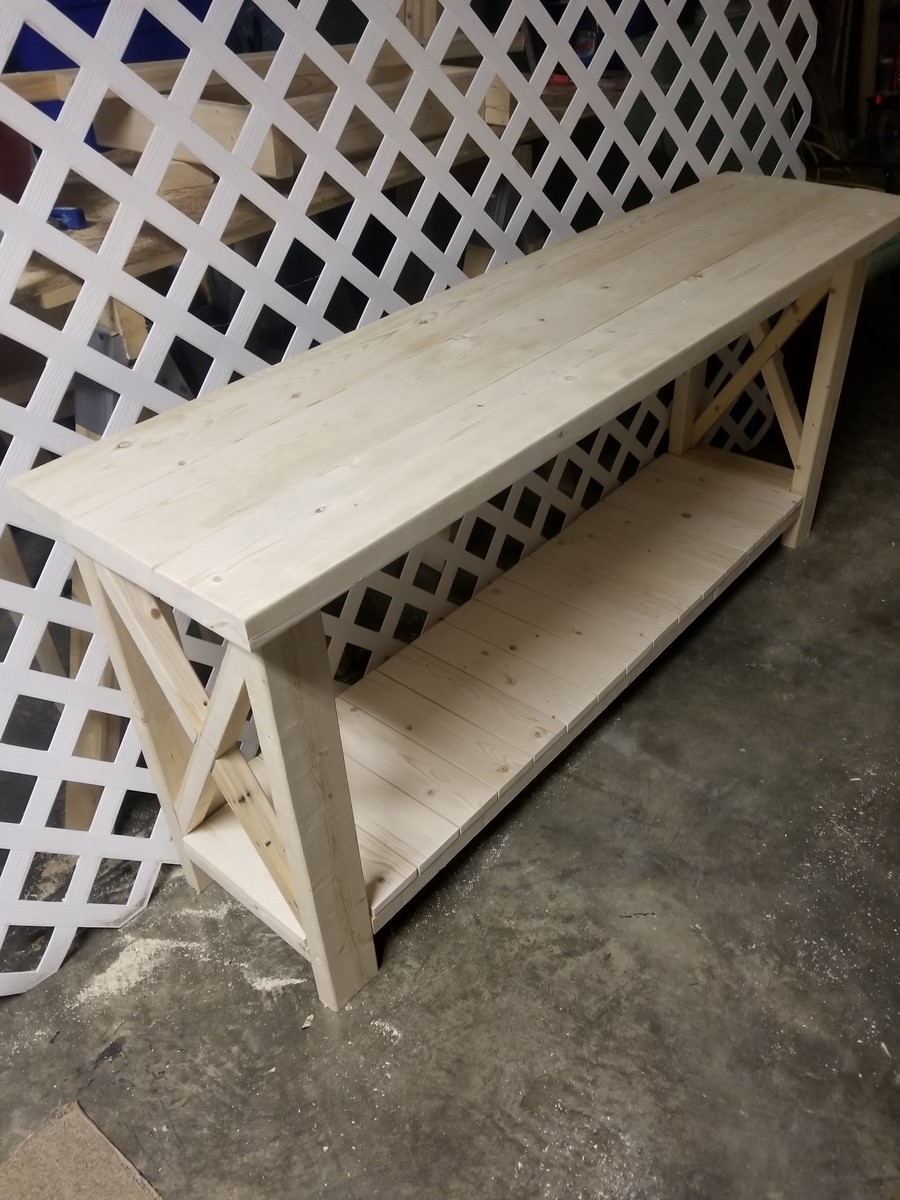
Built by request. They wanted a couple modifications, so I improvised on a few areas. The piece will be stained/painted by the owner.
Built from Plan(s)
Estimated Time Investment
Afternoon Project (3-6 Hours)
Recommended Skill Level
Beginner
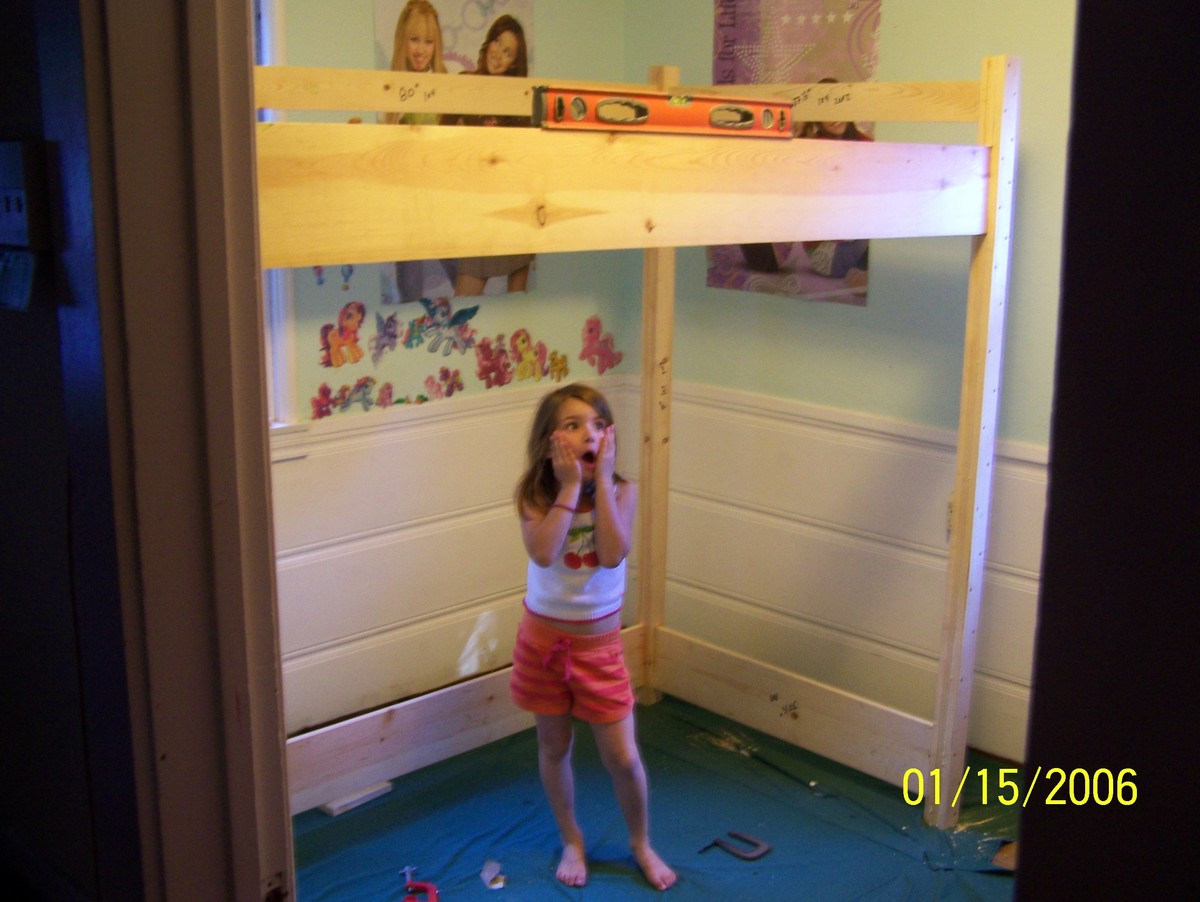
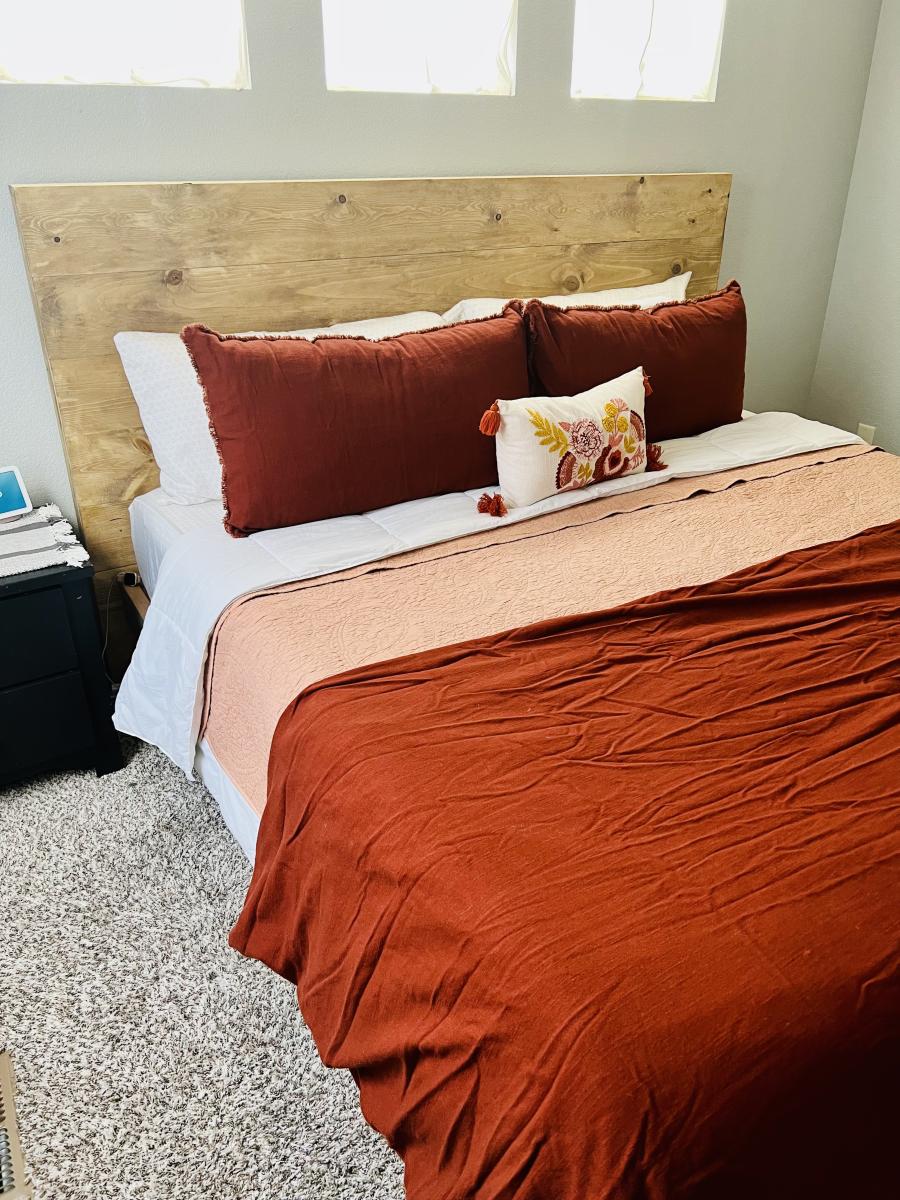
Minimalist Modern King Bed

When we needed a new bed frame recently, I began my search online. They were all $1,000 plus, and nothing that really caught my eye. I found this plan from Ana White and immediately fell in love! While it wasn’t an “easy” project, it was fun to do and I’m absolutely in LOVE with the results! Thanks again Ana!
Built from Plan(s)
Comments
Easy Build Wood King Headboard
I am in love with this project. My husband built this for my birthday this afternoon. It was an easy project for his first time. We haven't finished it yet. I would like for him to put a 2x6 on the top to give it some visual weight. The only problem i am having is I don't know how to finish it. What would you suggest? We like the beachy distressed look so I am thinking whitewash. Anyway, I love it! I told my husband that he was in trouble now because now I am going to give hime tons of projects to build for me.
Built from Plan(s)
Estimated Cost
135.00
Estimated Time Investment
Afternoon Project (3-6 Hours)
Finish Used
Unfinished at this point. We are undecided on finish. We might dark stain and then whitewash, or a turquoise wash, with Annie Sloan Chalk Paint and then waxing.
Recommended Skill Level
Beginner
Comments
Sun, 10/30/2011 - 08:48
Looks great! I love the
Looks great! I love the beachy look too. You could also do a yellowish stain (golden pine? it might be called) and then distress it and rub over with a darker stain for a different beach look.
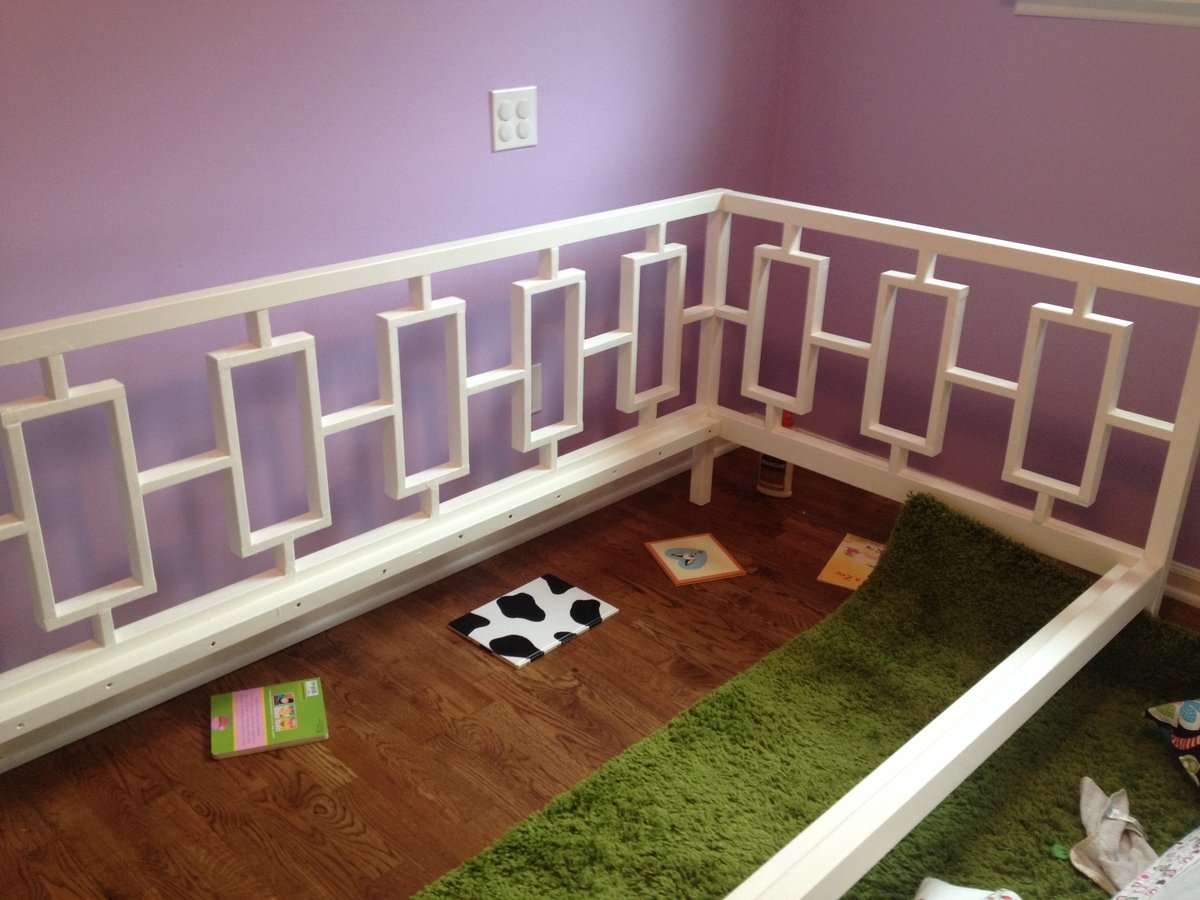
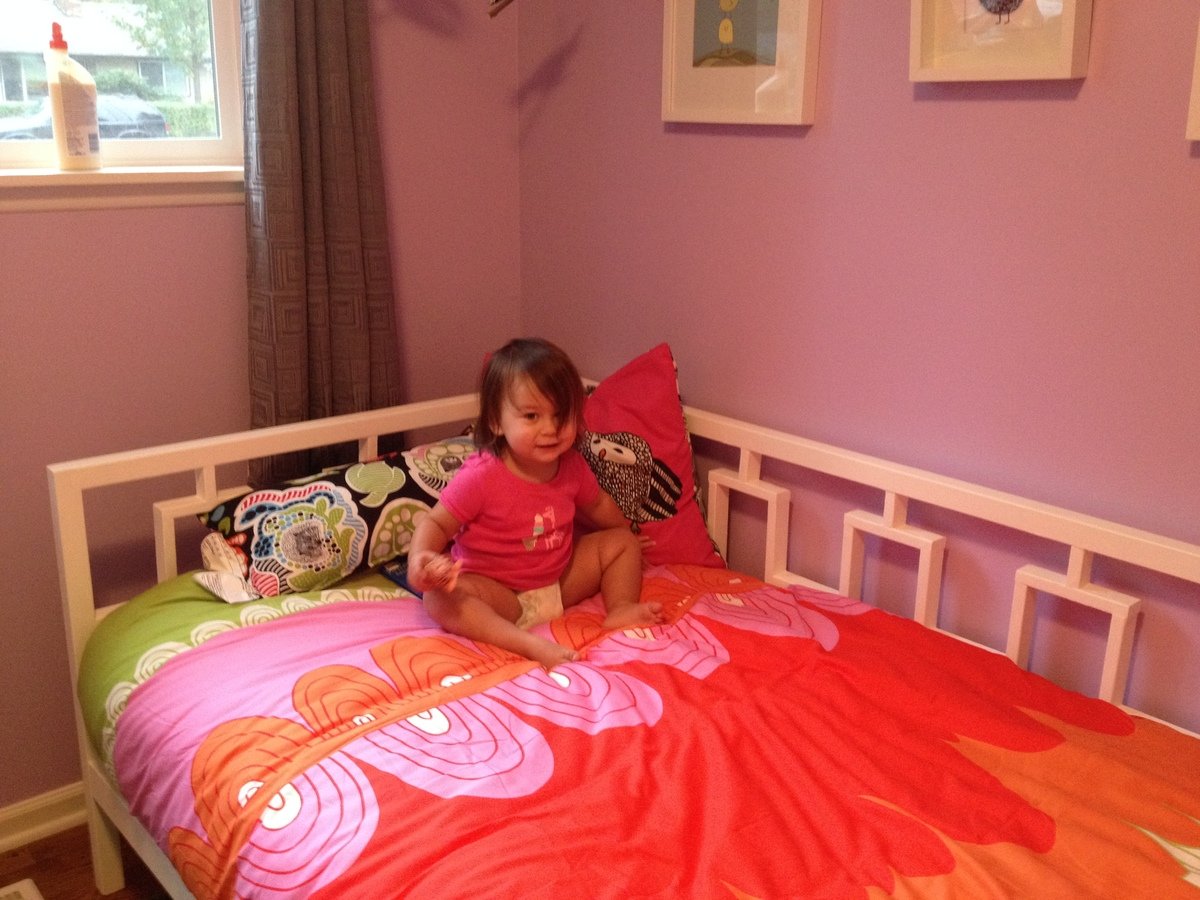
Rectangle Day Bed

This was my first ever experience working with wood, circular saw, and a drill (other than hanging pictures in my house). After catching my toddler trying to climb out of her crib on three separate occasion, I started looking around for daybeds. I found one I loved, but it was no longer for sale. Luckily, this plan is the exact replica of the daybed on West Elm! It was a fun (and educational) first experience, and I think I'm hooked! It took me several weekends to put this together and paint it. The paint alone took nearly seven hours with three coats of paint to get the right color of white. I didn't add the extra support as mentioned at the bottom, but this coming weekend I'm going to add it for additional support. My toddler LOVES it!
Built from Plan(s)
Estimated Time Investment
Week Long Project (20 Hours or More)
Finish Used
Powdered Snow from Behr.
Recommended Skill Level
Beginner
Comments
Tue, 10/22/2013 - 19:07
What a perfect daybed for a
What a perfect daybed for a little girl! I'm a big girl and I still love it! Cute.