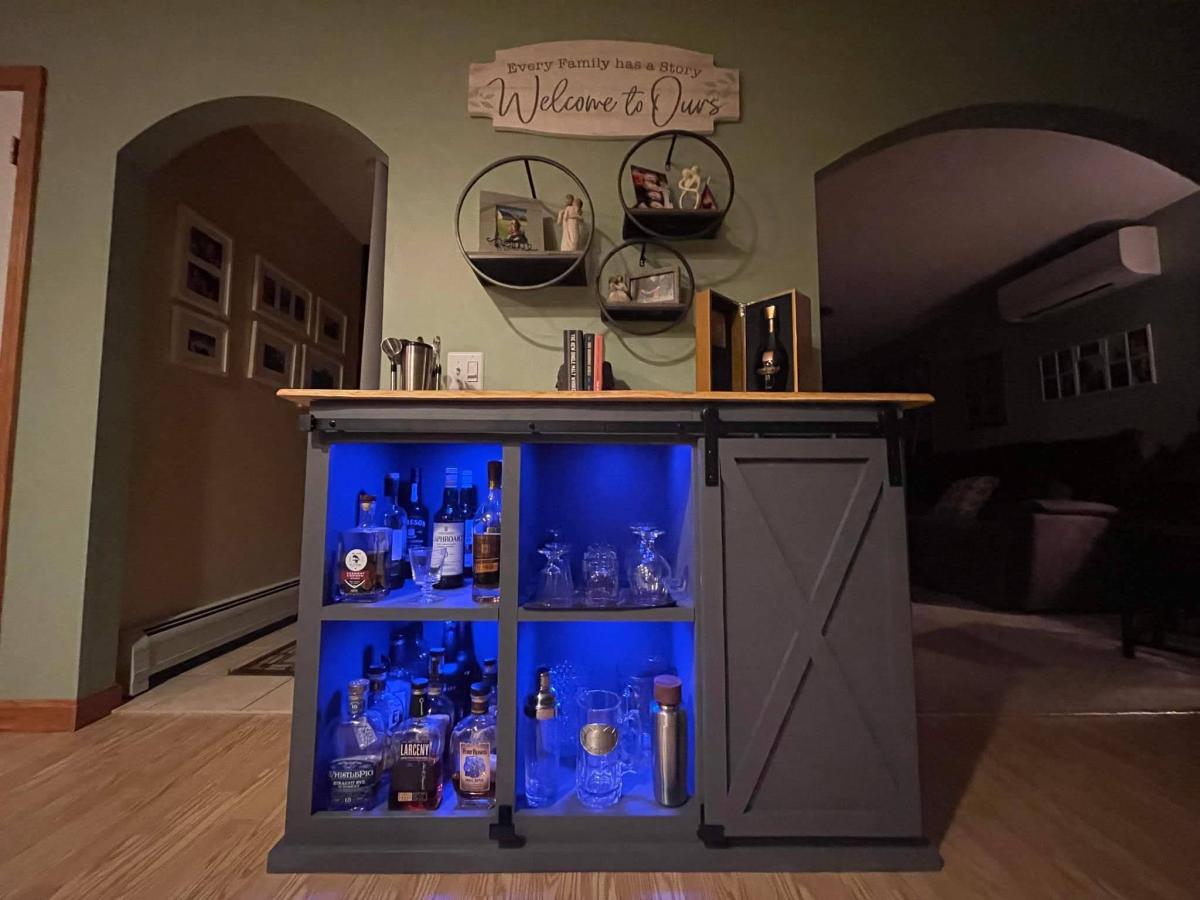
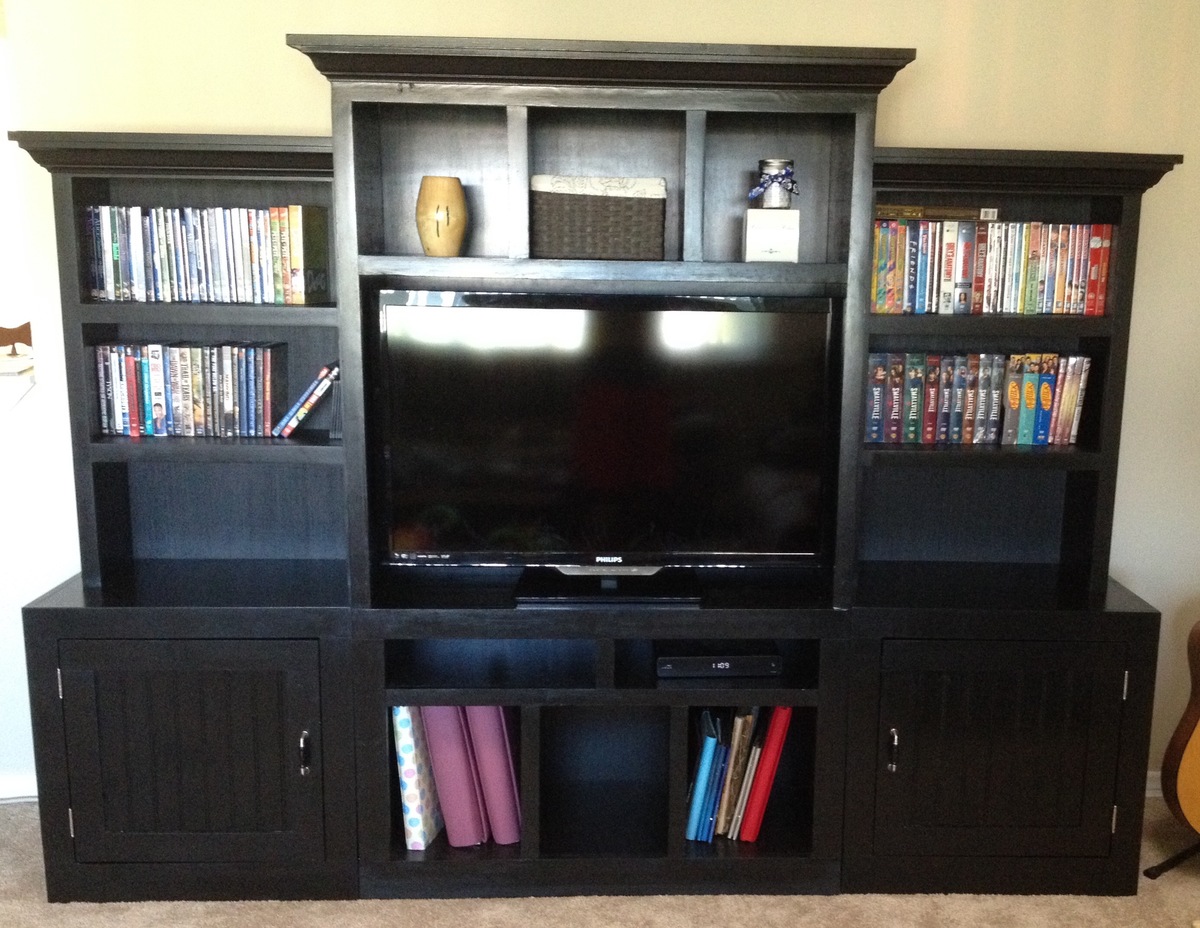
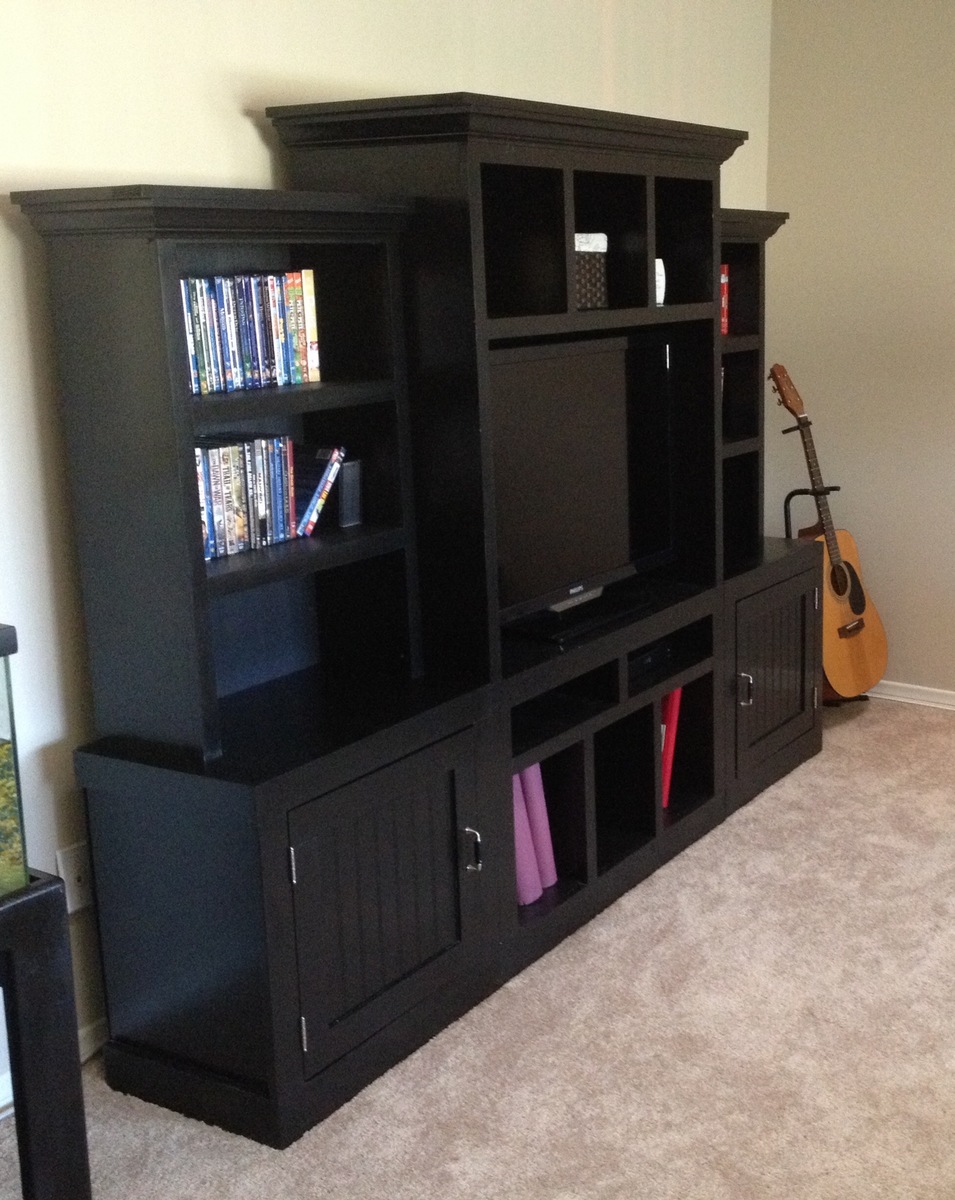
Community Brag Posts

Apothecary

Submitted by Ryanwill on Mon, 02/05/2018 - 09:14

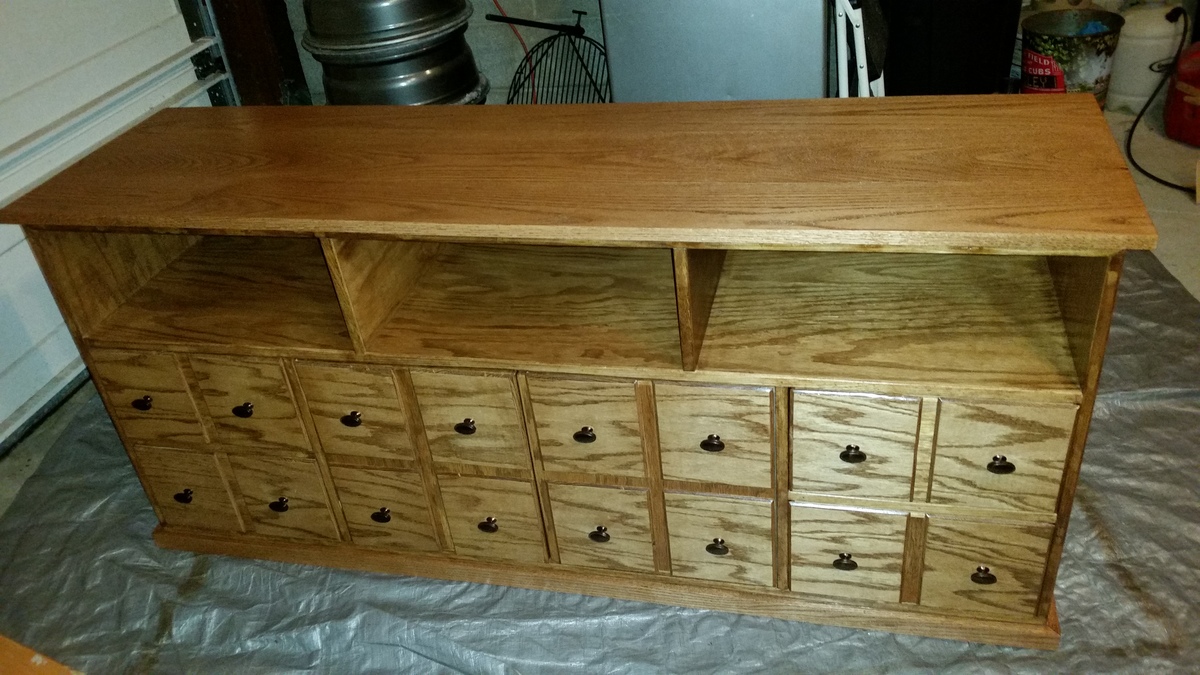
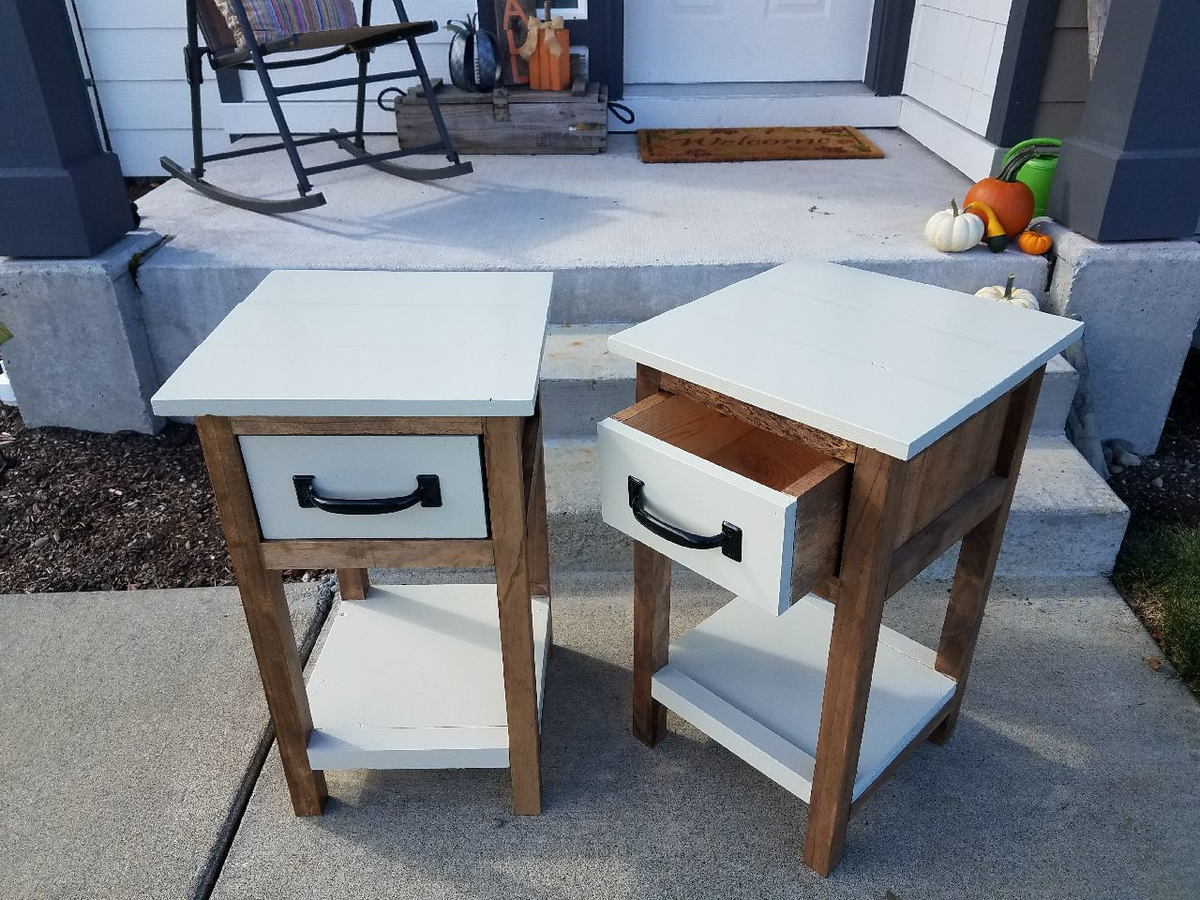
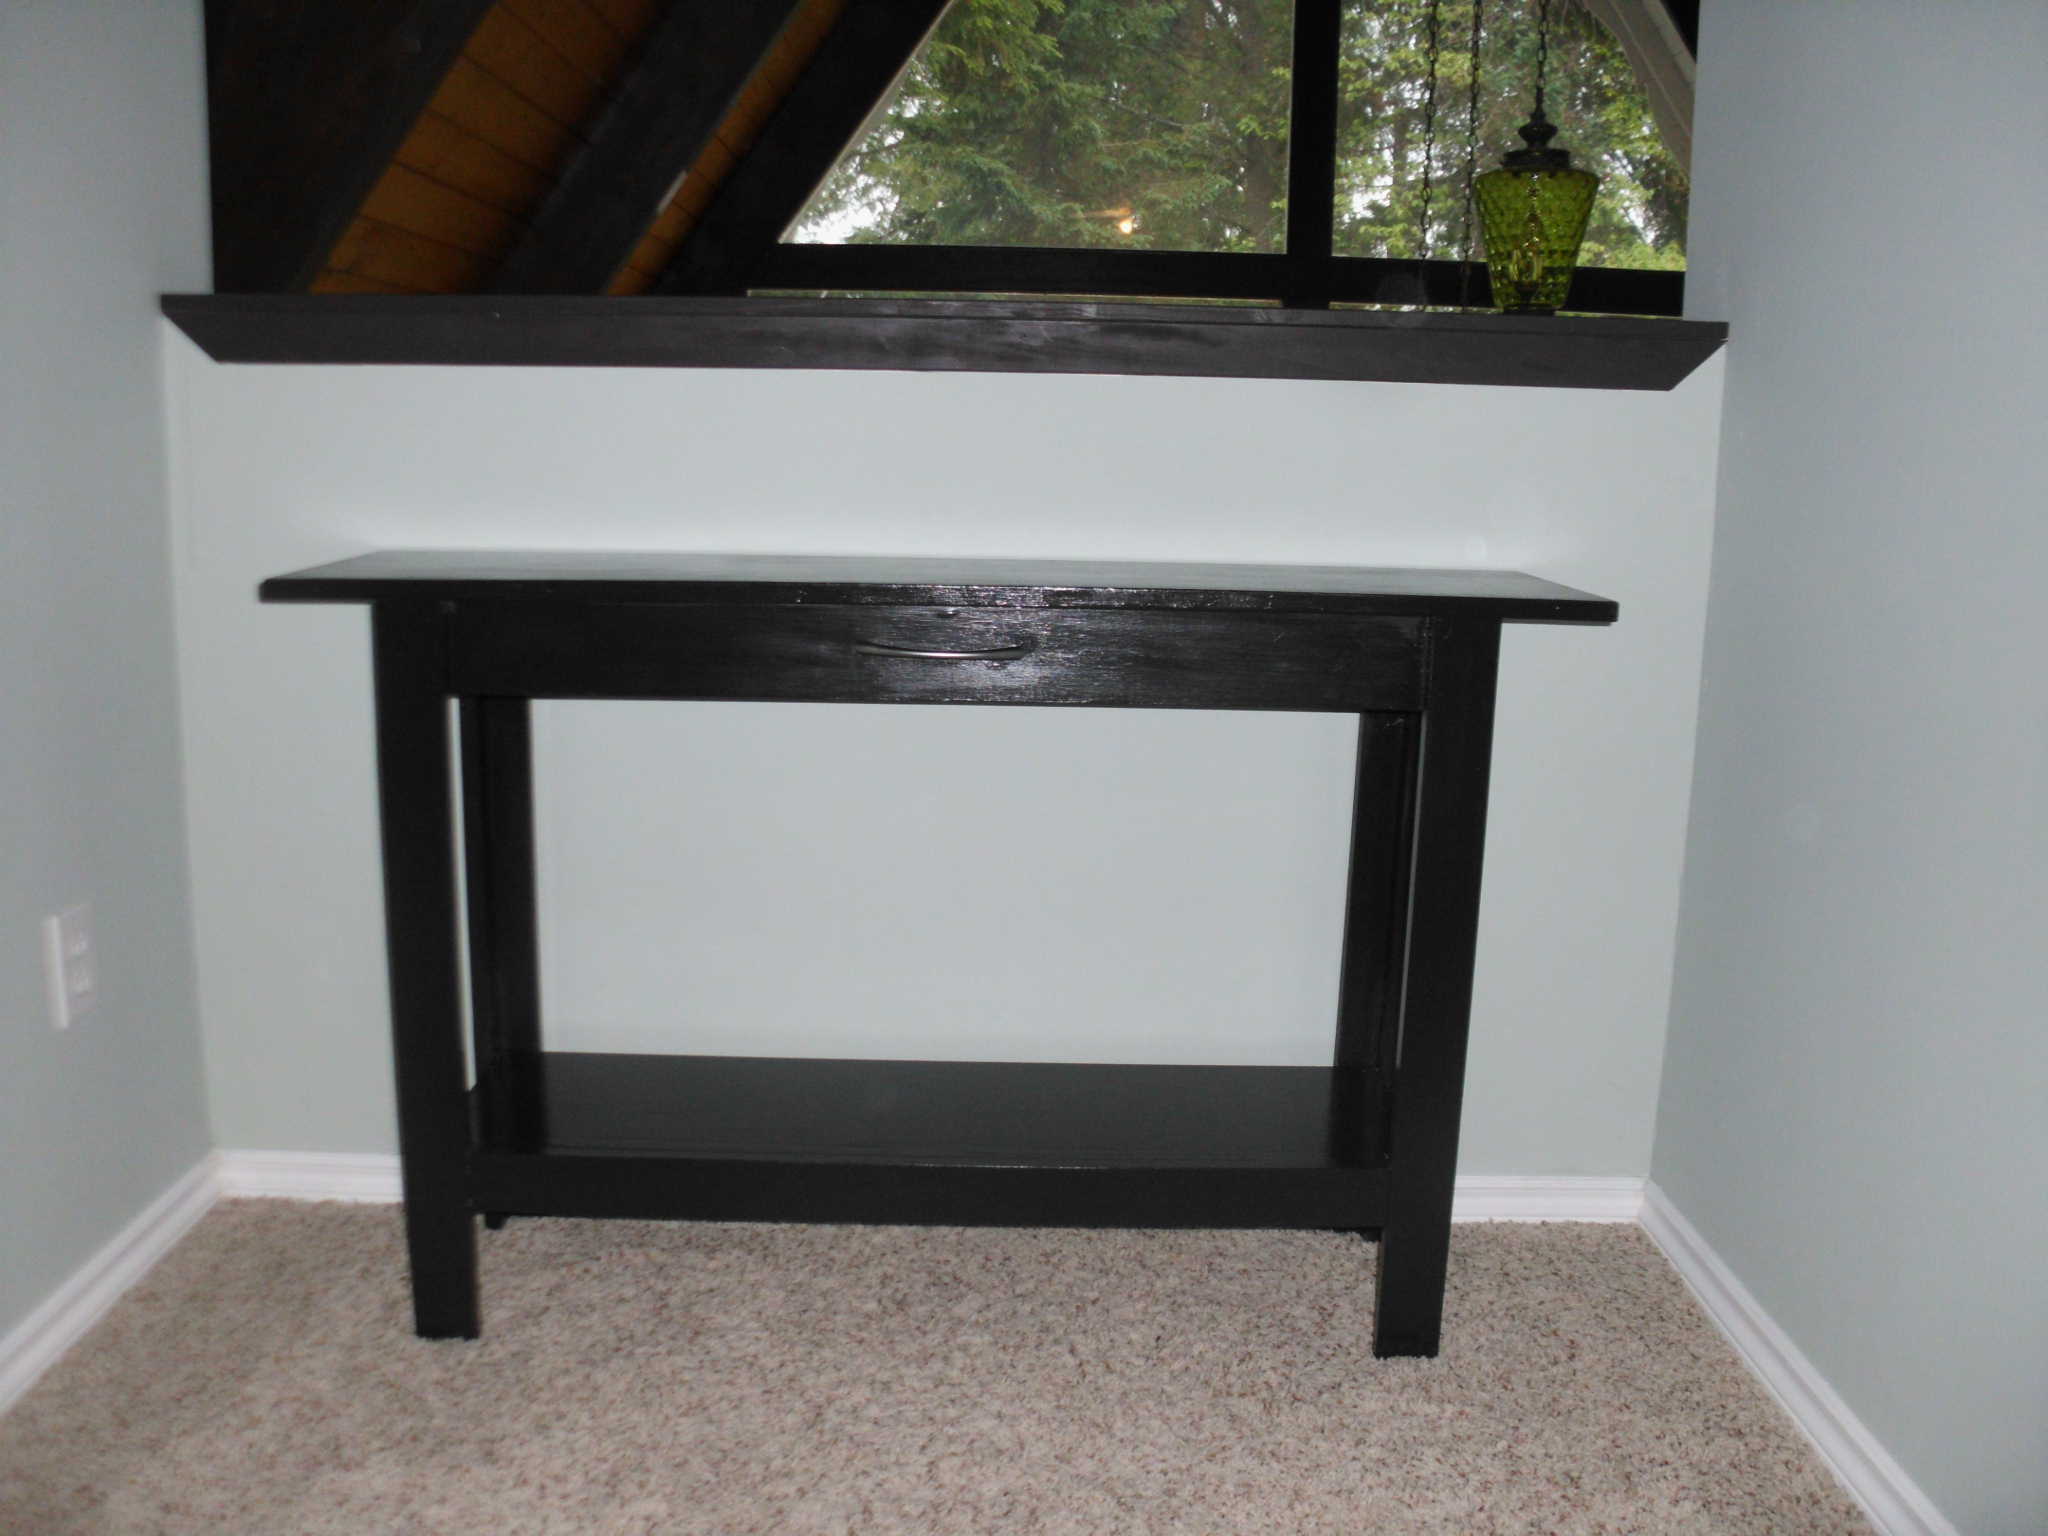
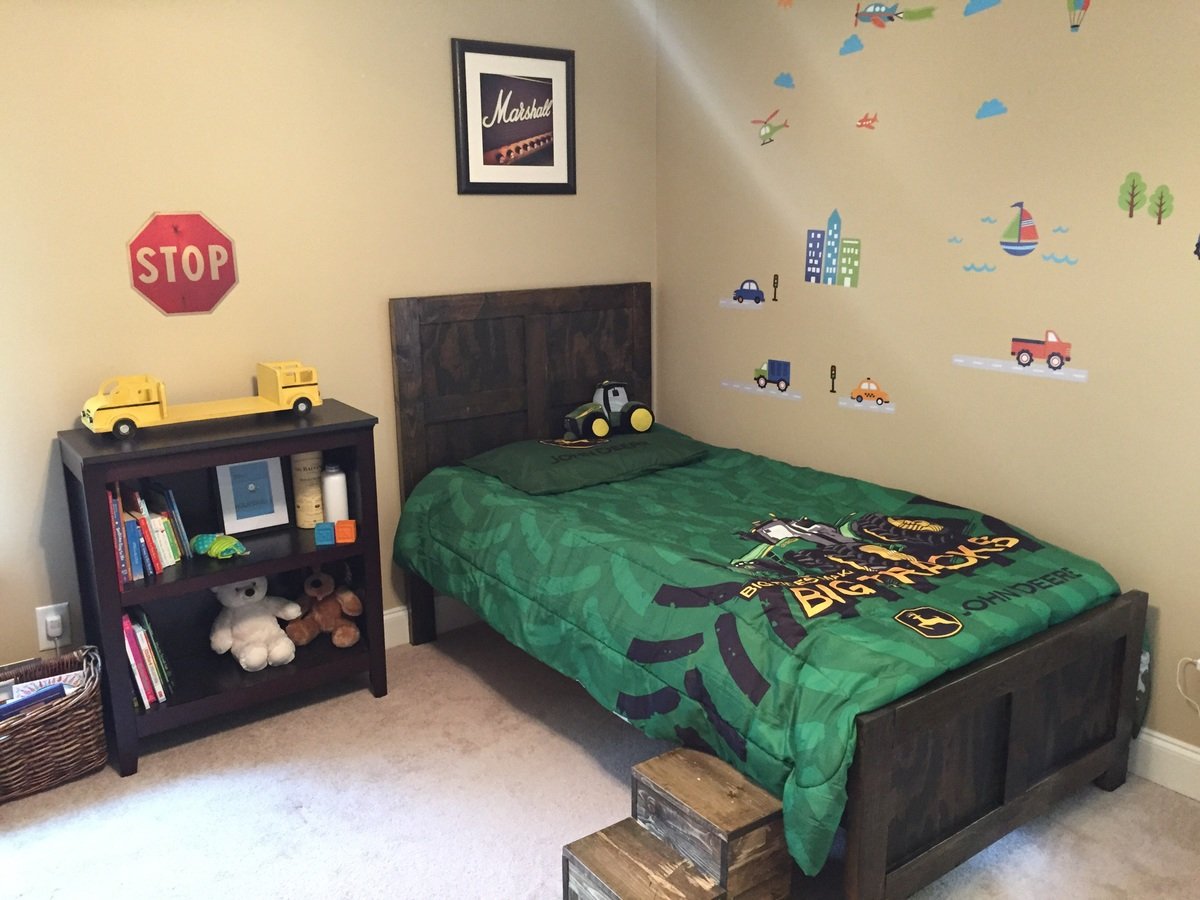
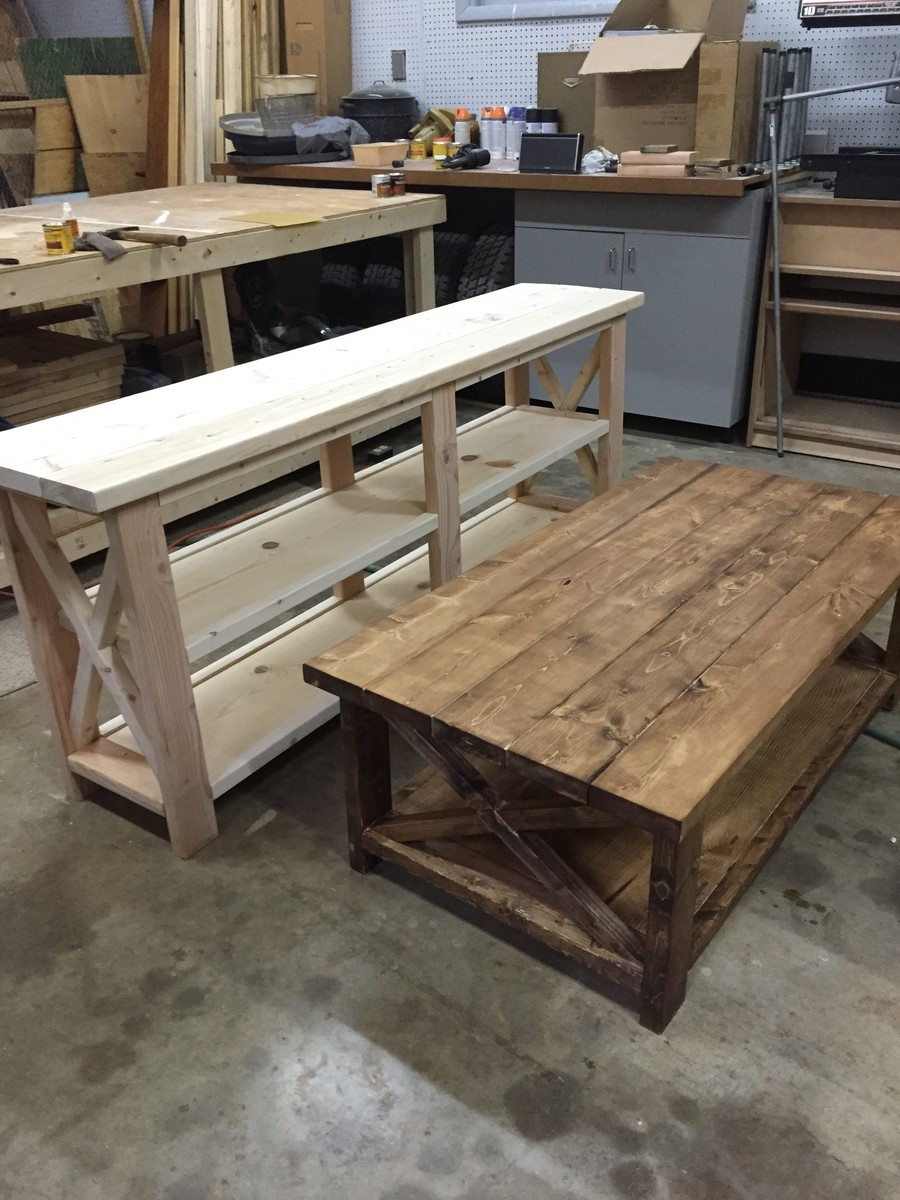
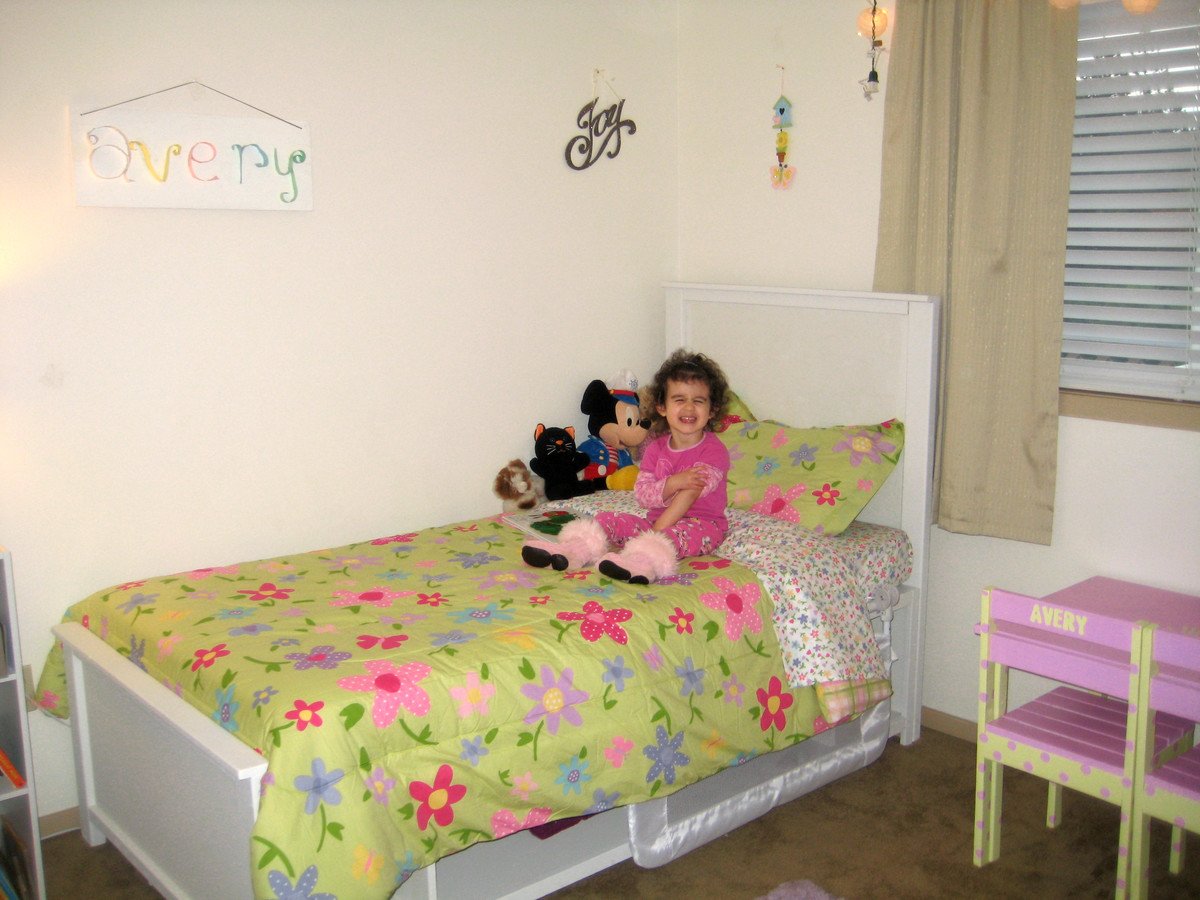
Thank you so much for the plans! My wife is extremely happy with the results and so am I. I am in the process of adapting these plans to make a matching end table. Once again, thank you!

Estimated Cost
250-300
Estimated Time Investment
Week Long Project (20 Hours or More)
Finish Used
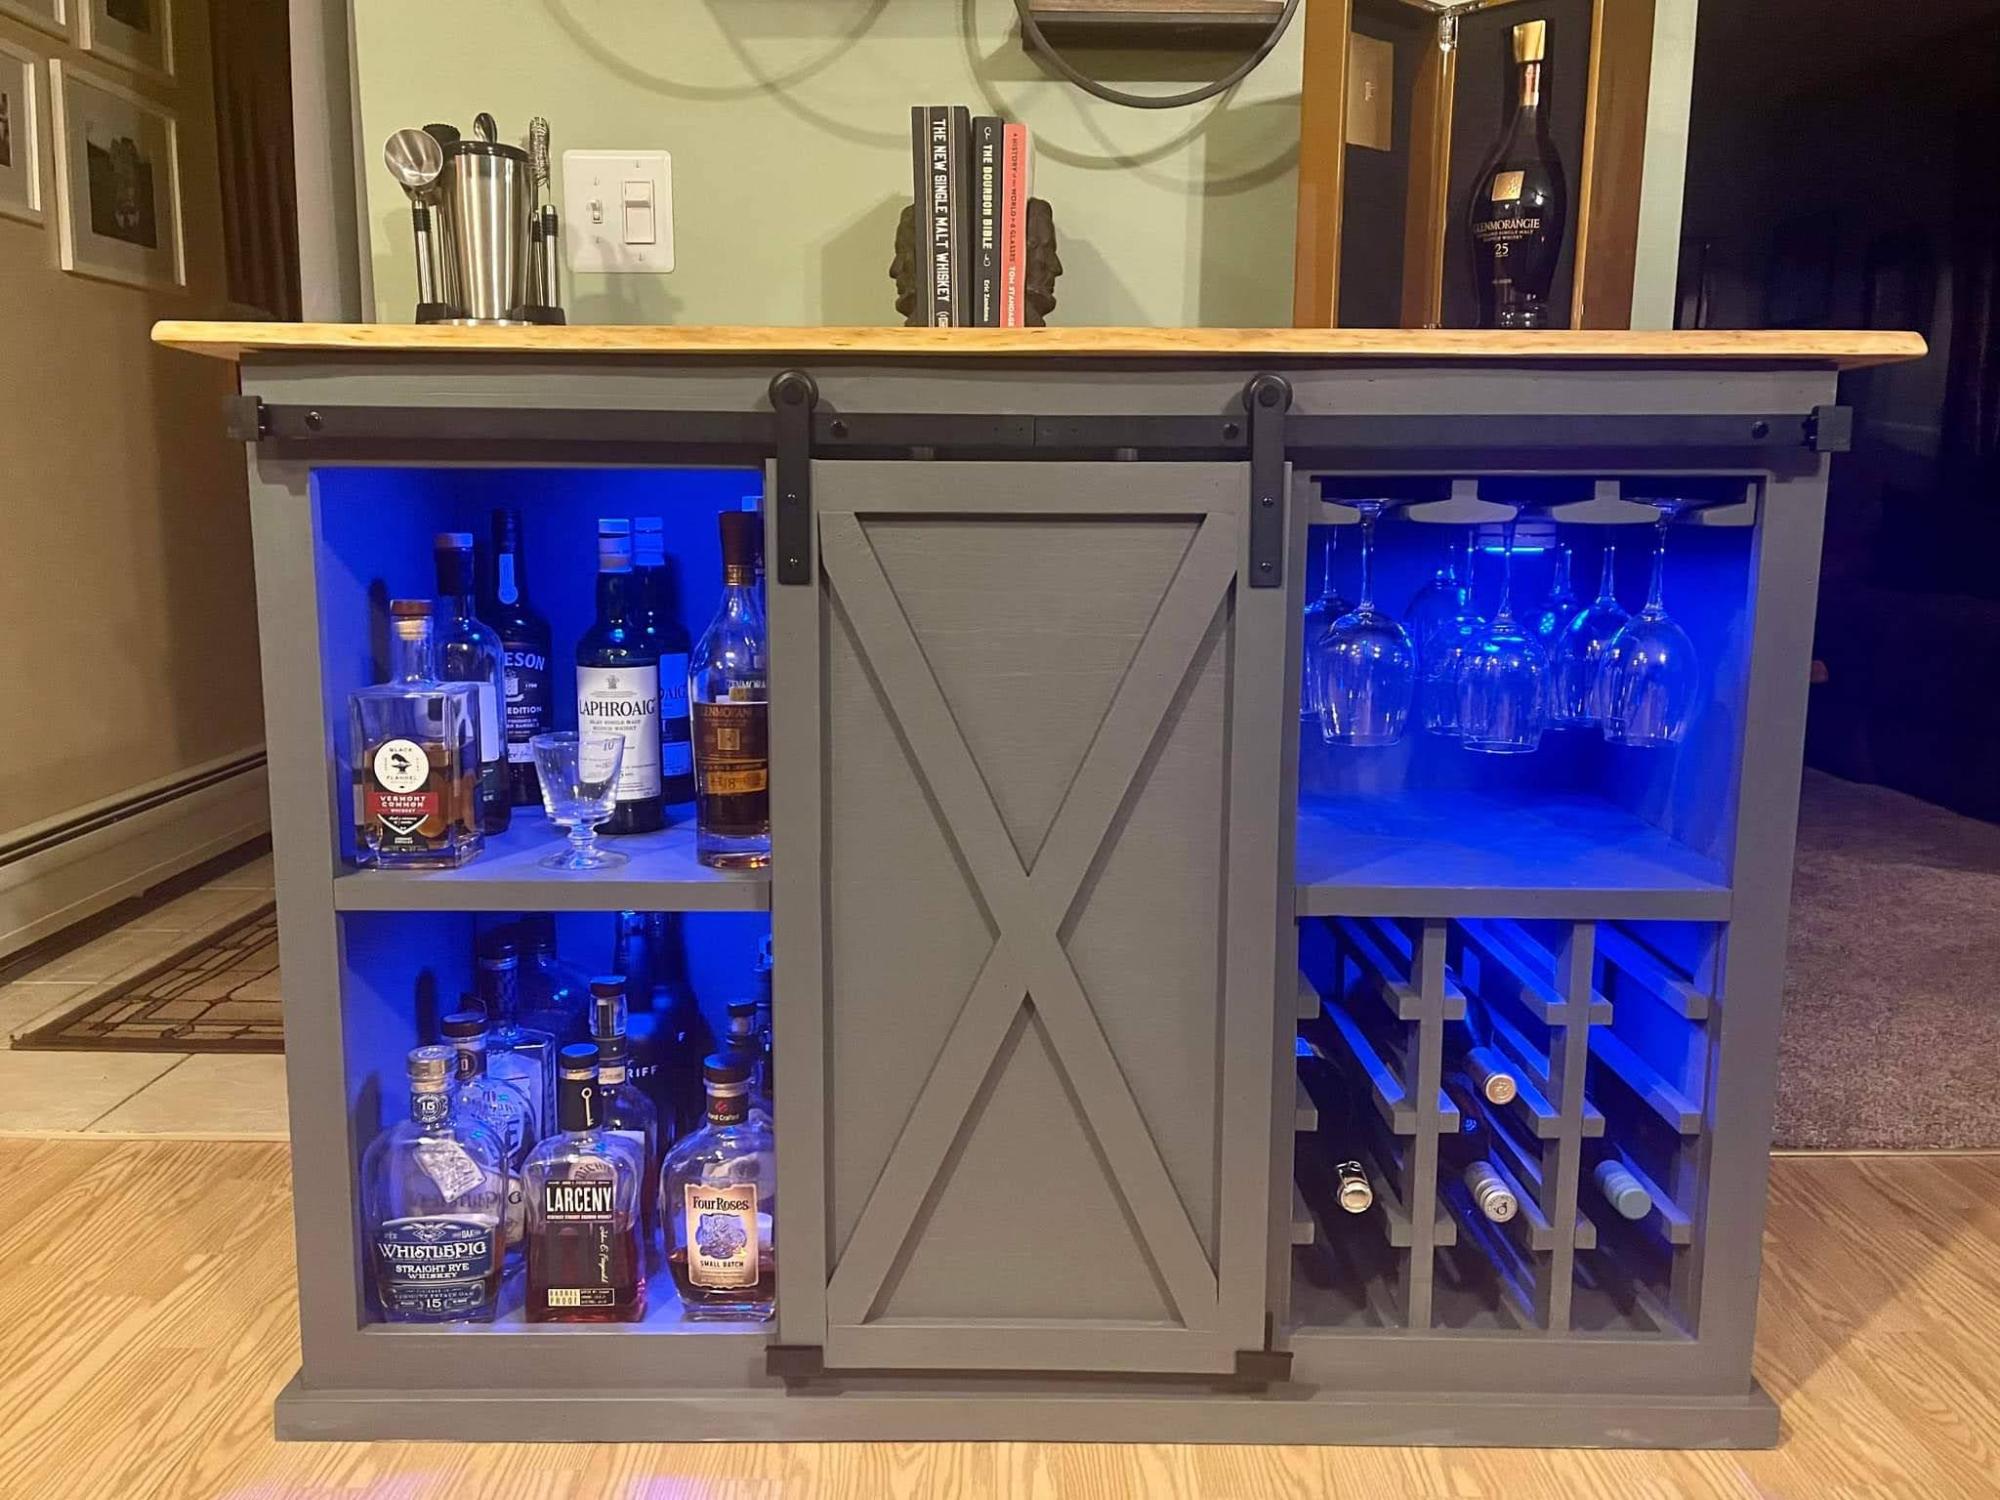
3 coats of Minwax Early American and several (lost count) applications fof Minwax Polycrylic
Recommended Skill Level
Intermediate

Two Story 18" or American Girl Dollhouse

Submitted by Anonymous (not verified) on Sat, 02/26/2022 - 09:03

My husband and I made this for our 7 year old granddaughter's birthday. She loved it!! As always, your plans are step by step and easy to follow. Thank you!!!

Comments

Joss & Emit's Train Table :)

This was my very first "Ana project"! It was a special Christmas treat for my boys and their expanding train collection. This table has had many, many hours of entertainment and enjoyment. It is a great beginner project and has very easy plans to follow! I didn't do the storage carts at the time. I may go back and do them later though...for now they like playing under the table as well. My obsession began :)

Estimated Cost
$50 (island living cost more)
Estimated Time Investment
Day Project (6-9 Hours)
Finish Used
Flat interior paint (2 coats) with two coats of poly.
Recommended Skill Level
Starter Project

Smaller size stackable chairs

Submitted by rosiejane on Thu, 07/18/2013 - 02:23

Two little girls we know recently celebrated their 1st birthdays, 4 months apart. I thought chairs would make perfect gifts. I finally got around to finishing both chairs around the time of the second girl's birthday. The other one was rather belated. The parents didn't know I was making it so it was still a nice surprise. My own 1 year old rather enjoyed testing them out.
I've previously made one of these full size chairs for my 8yo. but for these I changed the measurements to be smaller and easier for a one year old to sit on. I made the seat 28cm high and adjusted all the other measurements to suit. I enjoy using Sketchup so resizing the plan was a good excuse to use it again (I used an old ikea chair we had on hand as a guide for the sizing.)
I primed and painted the wood used for the slats before I cut it to size. This was so much easier than trying to paint in between them. Filling the screw holes was a bit of a chore and I'm not totally happy how some of them were still rather visible under the paint. A bit more practice needed I guess. Finishing took quite a while because of all the drying time. Chose to distress them to help disguise any bumps and marks they're likely to sustain. I discovered there is a fine line between distressing and distressing too much.
Really happy with how they turned out. Thanks for the fantastic plans!

Estimated Cost
$5 (not including leftover timber, I already had paint, screws etc.
Estimated Time Investment
Weekend Project (10-20 Hours)
Finish Used
1 coat primer, 2-3 coats semi-gloss white for the frame, 2 coats Dulux low sheen paint for the slats (it was a mixture of two purple shades I had on hand), lightly distressed it and then a couple of coats of Cabots Cabothane water-based poly.
Recommended Skill Level
Beginner

Comments

SHaynes

Sun, 10/12/2014 - 18:30

Love the use of the 1x6 instead of slatted for the back and the addition of the name takes it to a whole new level. So glad I saw this before making them for my littles. Btw, love the font you used for Brianna, so pretty. Well done!

Chalkboard Produce Crate

This was my first woodworking project. 

Built from Plan(s)
Estimated Cost
$20
Estimated Time Investment
Afternoon Project (3-6 Hours)
Finish Used
First dark walnut stain, then weathered grey stain, then minwax whitewashing pickling.
Recommended Skill Level
Starter Project

Whiskey/ Wine Bar

Submitted by Dan Dodd on Fri, 03/18/2022 - 13:43

Whiskey on the left, Wine rack & glass holders on the right with storage in the middle. Frame built mostly with Pine, painted with Peppercorn Grey. Cherry tabletop with live edge. Finished with boiled linseed oil and semi-gloss polyurethane. A whiskey Bar should be fun! Stick on lights in each bay battery powered, comes with remote with many color options.

Built from Plan(s)

Comments

Ana White Admin

Fri, 03/18/2022 - 17:41

It looks great and serves it purpose, love the added lights for fun! Thanks for sharing:)

Accent Table

Submitted by 3kidsilove on Tue, 05/31/2011 - 10:44

When I saw this table I knew it would be perfect for this space! I was so excited I copied "Sweet T" Table and added a faux handle (which is now my husband's new favorite word) I primed and painted it and then put a coat of poly on it. Was a fun project

Estimated Cost
30.00
Estimated Time Investment
An Hour or Two (0-2 Hours)
Finish Used
prime,paint & polly
Recommended Skill Level
Beginner

Emma's Secret Library Shelves

These shelves were absolutely perfect for hiding behind my daughter's bedroom door. Space is tight in her little room, and that 27-inch stretch of wall was not being utilized.

These shelves were so simple and took no time at all. I think total cutting and assembly time was about an hour for all four.

I put them together using pocket holes, so the order of assembly was a bit different than the original plan. I screwed the sides to the bottom, then added the front beam, and attached the back last, using pocket holes and filling them with spackle.

I can't wait to find more nooks and crannies to build creative storage from plans on this site.

THANKS!
Anna

More pics and details on the blog post:
http://lassothemoon.typepad.com/lasso_the_moon/2013/07/emmas-secret-lib…

Built from Plan(s)
Estimated Cost
30
Estimated Time Investment
An Hour or Two (0-2 Hours)
Finish Used
behr paint in "Honey Bear" yellow. sanded at the corners, then rubbed with "early american" wood stain
Recommended Skill Level
Starter Project

Big boy bed and steps

Submitted by kds199 on Sat, 07/25/2015 - 07:32

We wanted to transition our two year old out of the crib and skip the toddler bed and this worked perfectly. 

I made the cuts over a lunch hour and assembled in one night. 

If you have never used a pocket jig, just practice on a piece of scrap. Also make sure you consider how you will attach the rails before beginning. Depending on what you use you may want to make the headboard more narrow to accommodate for the rails not being flush with the insides of the posts. 


I made steps out of the scraps from the outer rails and the slats. Our little guy loves it!

Estimated Cost
$80
Estimated Time Investment
Afternoon Project (3-6 Hours)
Finish Used
The same gallon of stain we use on everything. :)
Recommended Skill Level
Beginner

New Platform birthday bed for the hubby!

Submitted by redhead_61 on Thu, 06/02/2011 - 14:56

Don't mind all the mismatched furniture in the room, isn't the master always the last to get paid attention to?

My husband had a birthday on Monday and I had drawn up the plans for this a couple months ago hoping to surprise him. Building it then didn't happen....Day of his birthday rolls around and I looked at the clock at about 11, thinking what could I really surprise him with but didn't want to break the budget. I thought to myself, "I could probably get that built by the time he gets home" And I DID!!!

I sandwiched together two 2x4's puttied and painted to make the chunky leg here.

FYI- My husband is really into selling things on craigslist right now so he told me to see what I could sell it for. I sold this within a few hours for $135. That is a pretty amazing profit while still being way more affordable than any store!!! I LOVE that.

Estimated Cost
$55
Estimated Time Investment
Afternoon Project (3-6 Hours)
Finish Used
2 coats primer, 2 coats semigloss white
Recommended Skill Level
Starter Project

Rustic X Console Table with Minwax Gel Stain in Red Elm

Submitted by pbookman on Sun, 07/21/2013 - 12:22

For this project we needed a piece quite a bit smaller than the original plan called for. We ended up keeping it simple by only altering the width. We kept the height and depth the same in order for the x's to keep their angles. So we shortened the width and only did one shelf section instead of two! Vwala...our first project-complete!

Built from Plan(s)
Estimated Time Investment
Weekend Project (10-20 Hours)
Finish Used
Minwax Gel Stain in Red Elm
Recommended Skill Level
Beginner

Smith Media Wall Build

Submitted by rbgreene04 on Mon, 07/27/2015 - 21:19

After moving to our new home, we needed an entertainment center to house our TV. I had build a DVD/Bookcase several years ago and I wanted the entertainment center to match design-wise. I was amazed how similar the Smith Media Wall is to the bookcase I built years ago--simple, clean lines with the moulding along the top.

I adjusted the plan to fit our TV and went with one cabinet door on each side instead of two. I also used some leftover beadboard for the cabinet panel inserts. I broke the first rule of carpentry and in a rush to finish, mismeasured the side hutch in comparison to the side base cabinet. (I actually had the correct measurements, I just made a calculation error when reading the plans I quickly drew up. Usually, I'm meticulous with plans, but with so many projects to do, I rushed these plans and hopefully learned from my mistake)

Estimated Cost
It probably cost just under $200 to build. I'm horrible at keeping track of project costs because I try to use scraps from other projects when possible.
Estimated Time Investment
Week Long Project (20 Hours or More)
Finish Used
To finish, I used Rustoleum Ebony Stain followed by several coats of lacquer.
Recommended Skill Level
Intermediate

Comments

Linda7

Tue, 07/28/2015 - 16:43

This is a beautiful build, and if you hadn't mentioned the measuring error, I doubt if I would have noticed it. Good job!


Outdoor Sofa

Submitted by dionneds on Sun, 04/10/2022 - 07:16

This was our first big project with our Kreg Jig. We adapted the plans to make the sofa 8' long. On Friday night, my husband did all the cuts and I pre-painted everything. With the help of our son, we had the whole sofa built in a few hours on Saturday morning. I puttied the visible holes, did a second coat of paint, and made custom cushions. The plans were very easy to follow. I followed the others' advice about pre-painting and assembling the back on a perfectly level surface. It came out better than I expected and it's super comfortable!

Built from Plan(s)

Comments

kdykes08

Mon, 04/11/2022 - 07:44

I want the plans for this one! I like this style a lot better. I really like how the bottom cushions are at a slant. I suck at modifying plans.

Seasonal And Holiday

Adult Slingback Chair

I originally started making this for a friend, but I think I may decide to keep it! I didn't purchase any wood or paint for this project - I had a lot left over from a previous project and was able to rip down other boards to 1x2s. The fabric was another left-over... I bought WAY too much to make cushions for the outdoor sofa as I decided I didn't need so many sofa pieces in the end. The only elements I purchased for this chair were the hardware and 1 can of primer... so it turned out to be under $10!

Estimated Cost
Under $10
Estimated Time Investment
Afternoon Project (3-6 Hours)
Finish Used
Primed with Killz spray primer and used less than a bottle of Rustoleum dark grey spray paint. (I ran out before doing the adjustable height piece, so I just used some old black I had sitting around.)
Recommended Skill Level
Beginner

American Girl Doll Bed

My daughter and I made this bed together for her cousin. She helped me every step of the way with the exception of the cutting. It was her first time sanding, drilling and painting (well at least painting furniture). I also let her pick out the paint color which she put a tremendous amount of thought into.

I truly enjoyed my time making this project and especially since it allowed my daughter and I to work together to make someone else very happy.

Her cousin seemed to love the bed, and my daughter definitely loved working on it and bringing it out to her.

Thank you so much for the plans and making this experience so easy!

Built from Plan(s)
Estimated Cost
$10
Estimated Time Investment
Afternoon Project (3-6 Hours)
Finish Used
I first primed the wood, and then bought a little paint sample of Rasberry Sorbet at Lowes to paint it with. I think the sample was a couple dollars and there is still plenty left for another bed.
Recommended Skill Level
Starter Project

Comments

Annie Casselman

Sat, 03/07/2015 - 17:32

This is a very confusing website, +I cannot get the plans for the doll bed+ I would like to build with my daughter. I guess i have to give up.

Rustic X Console

Submitted by aelliott on Fri, 03/02/2018 - 09:24

Had a blast doing this project! Wife was skeptical at first but it's found a great spot in our home as an entry way table! Thanks for the plans!

Recommended Skill Level
Beginner

Hailey's Bed - Avery's Edition:)

Submitted by brguad on Thu, 06/09/2011 - 17:54

My wife and I had another baby girl and Avery was moving out of her crib into a big girl bed. Definitely didn't want to buy cheap so after seeing some amazing plans on Ana-White.com, I had to build it myself. I loved the storage this bed had to offer and the simple look of the large headboard and footboard. I got started, and because of my scheduling i had this built in two weekends but total of about 10-12 hours. Very glad I did it. My daughter loves it, wife was impressed and now one crib free for little baby Vida!

Estimated Cost
$100
Estimated Time Investment
Weekend Project (10-20 Hours)
Finish Used
120 grit Sand paper, Wood filler, primer, White paint
Recommended Skill Level
Beginner

Comments

Amber R. (not verified)

Sat, 06/11/2011 - 21:37

I've been begging my husband to help me make these beds for my daughters :( Your wife and daughter are lucky

brguad

Sat, 06/11/2011 - 22:13

Thanks again Ana! I think I'm the lucky one. My wife has been supportive of me doing little projects and my daughter loves the bed. So, I built the bed but haven't found an applique like on Hailey's bed that is appropriate for a 2 1/2 year old or one that I like. I thought about different things to spice up the headboard but don't want it to look tacky. Any ideas?

Amber R. (not verified)

Sat, 06/11/2011 - 22:18

Hmm not sure I could suggest anything specific but personally I think it should be something the child won't grow out of. I have a 2yo and a 3yo and they like a different character color etc almost every day. So make sure its something your daughter won't grow out of too quickly.

redhead_61

Wed, 06/15/2011 - 20:52

I am about to paint my daughters storage bed. I too designed and added a footboard and hope the headboard she has looks ok. Yours turned out great. Good job!

brguad

Wed, 06/15/2011 - 22:08

You're too nice. Thanks for the feedback. I read some posts prior to building and added 3 inches to the footboard to keep the mattress from sliding off as easily. Hope to see your bed on here soon. I'm looking forward to it.

slsmith (not verified)

Sat, 03/03/2012 - 14:34

We were thinking about putting a cork board on there so that our daughter could pin her work on there. It probably wouldn't happen until much later, but it's definitely an option. Maybe some vinyl letters?