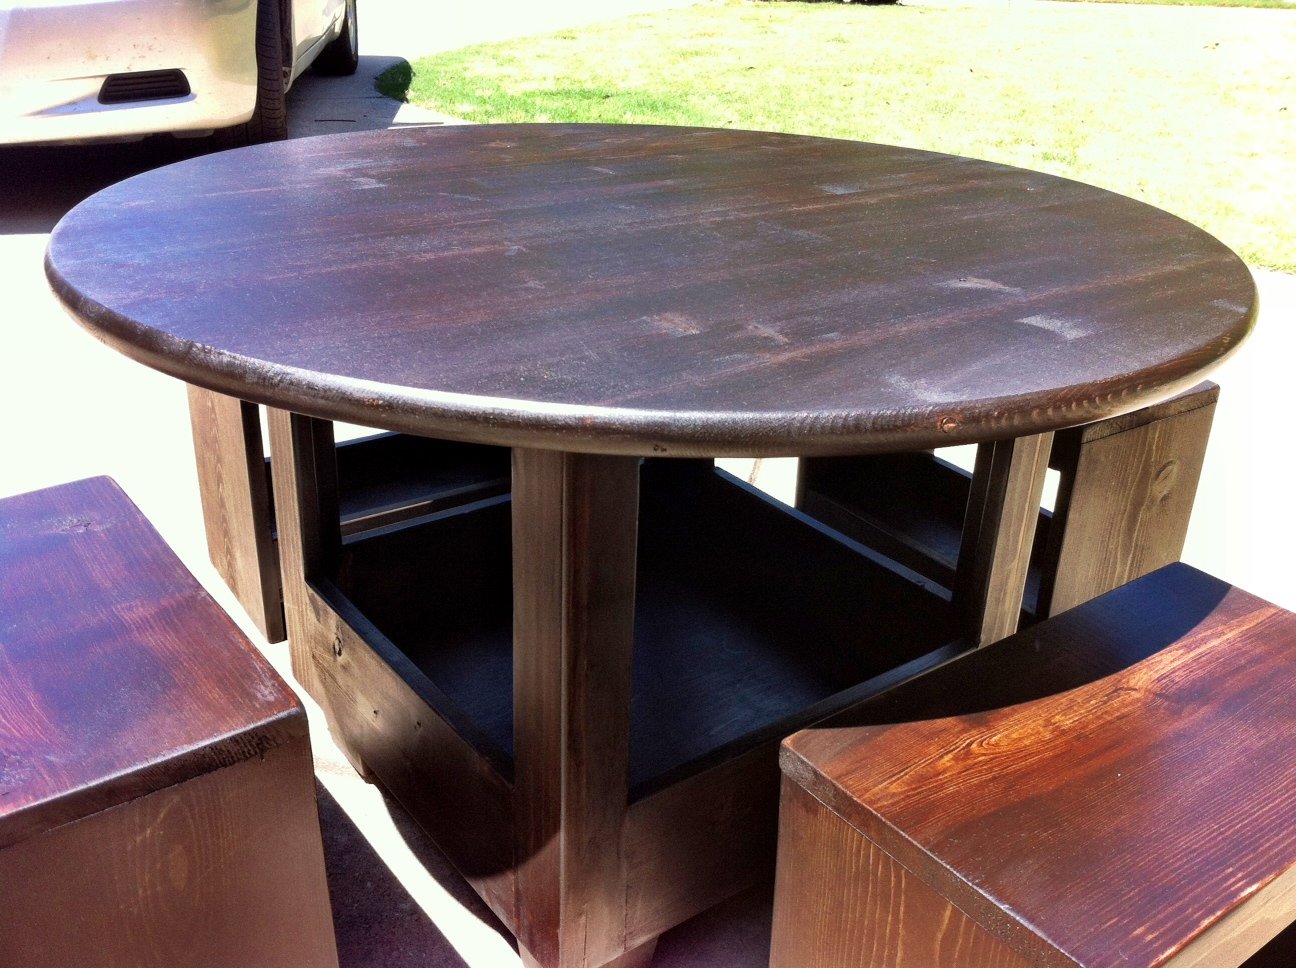
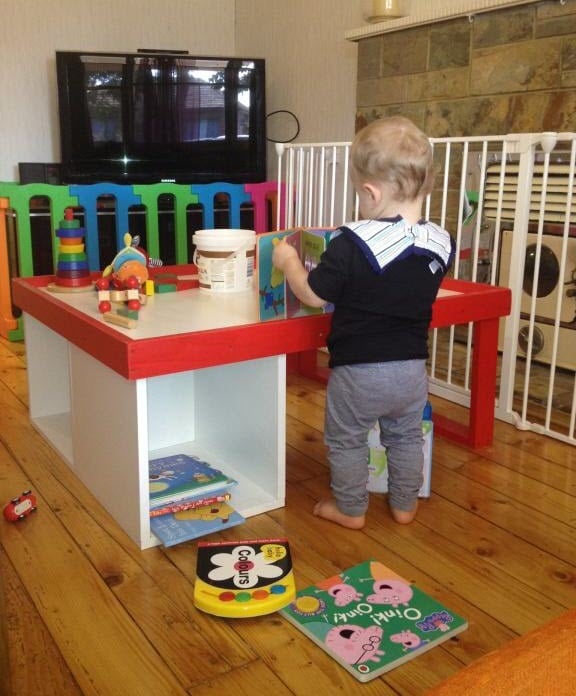
Simple Side Table

Adjusted a little from the plans to fit better the space available. Also I used some scrap plywood for the bottom.
Built from Plan(s)
Adjusted a little from the plans to fit better the space available. Also I used some scrap plywood for the bottom.
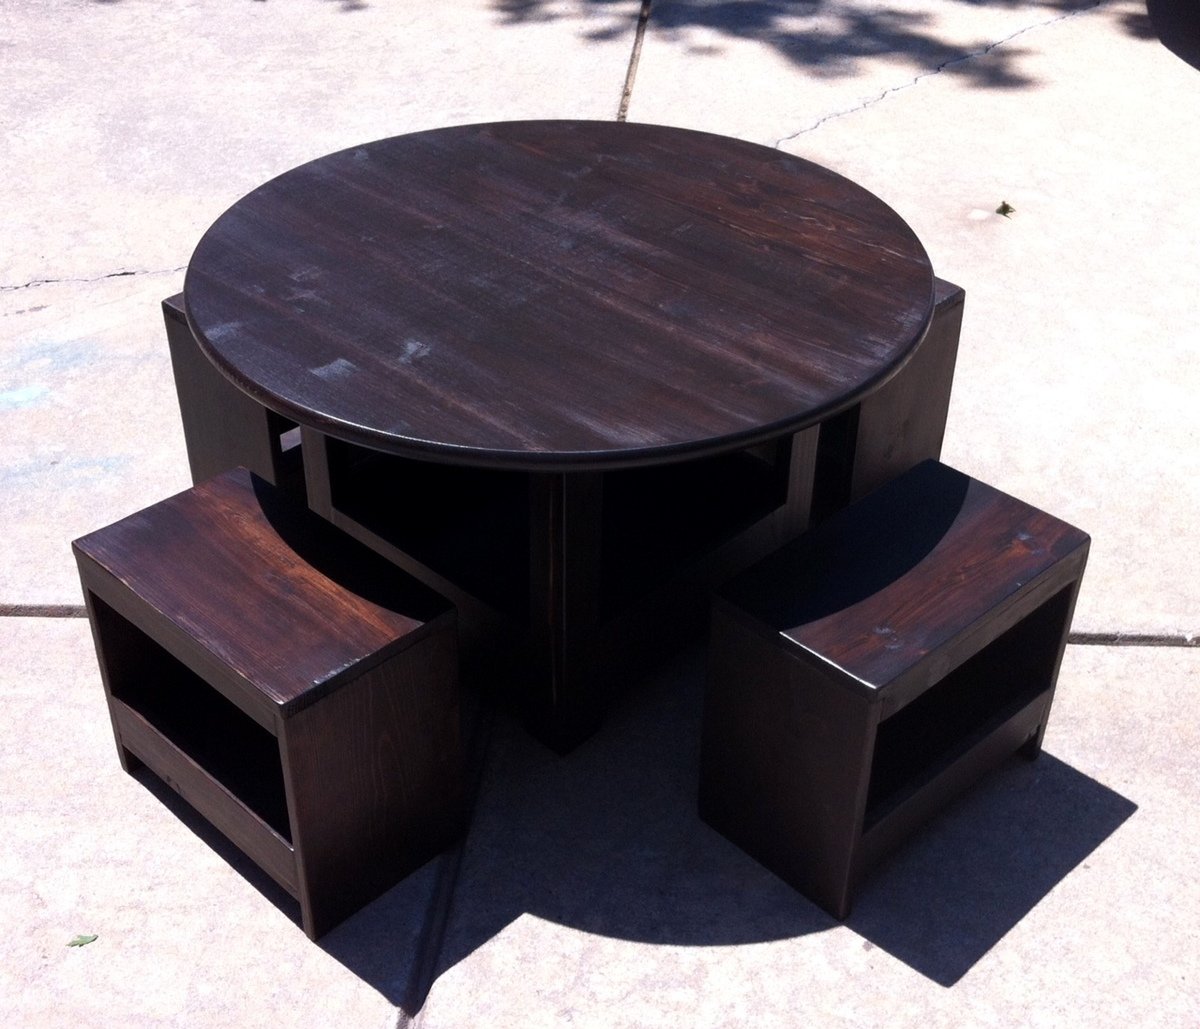
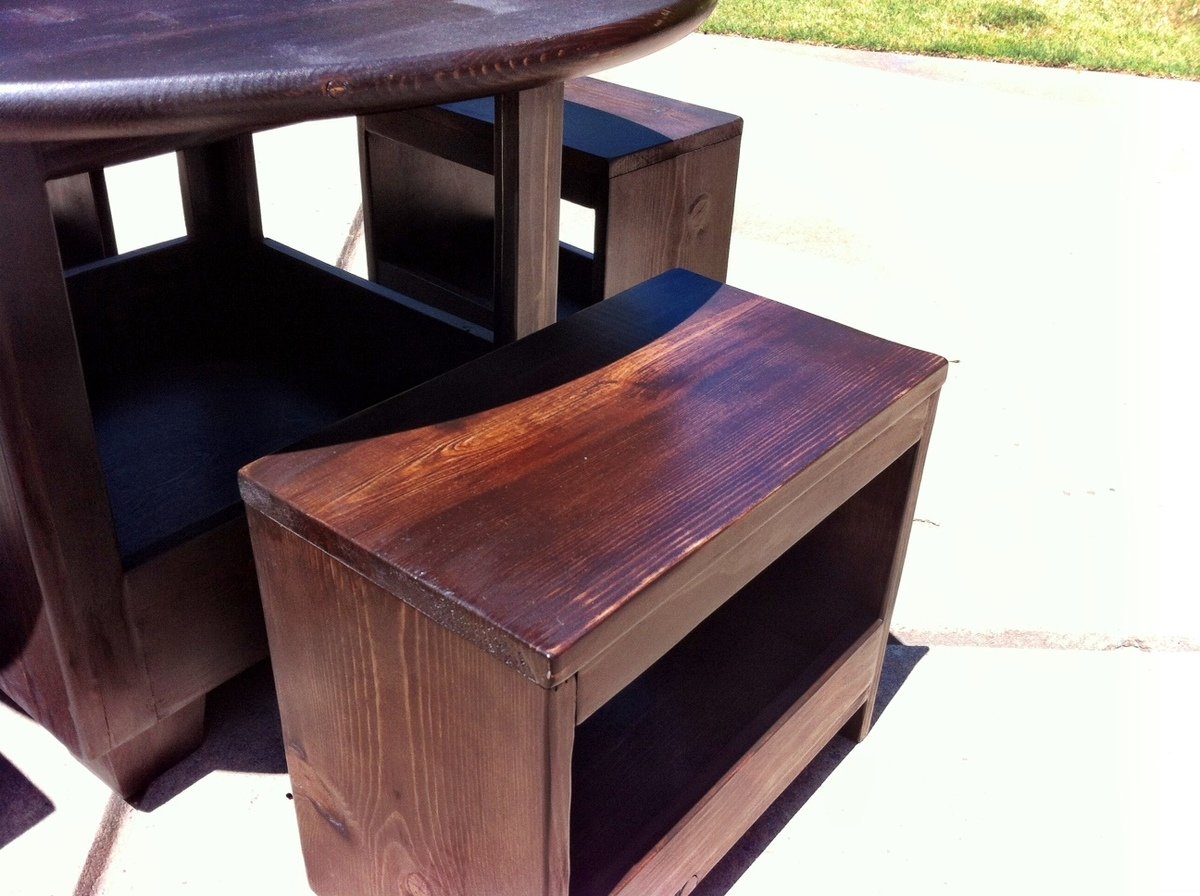
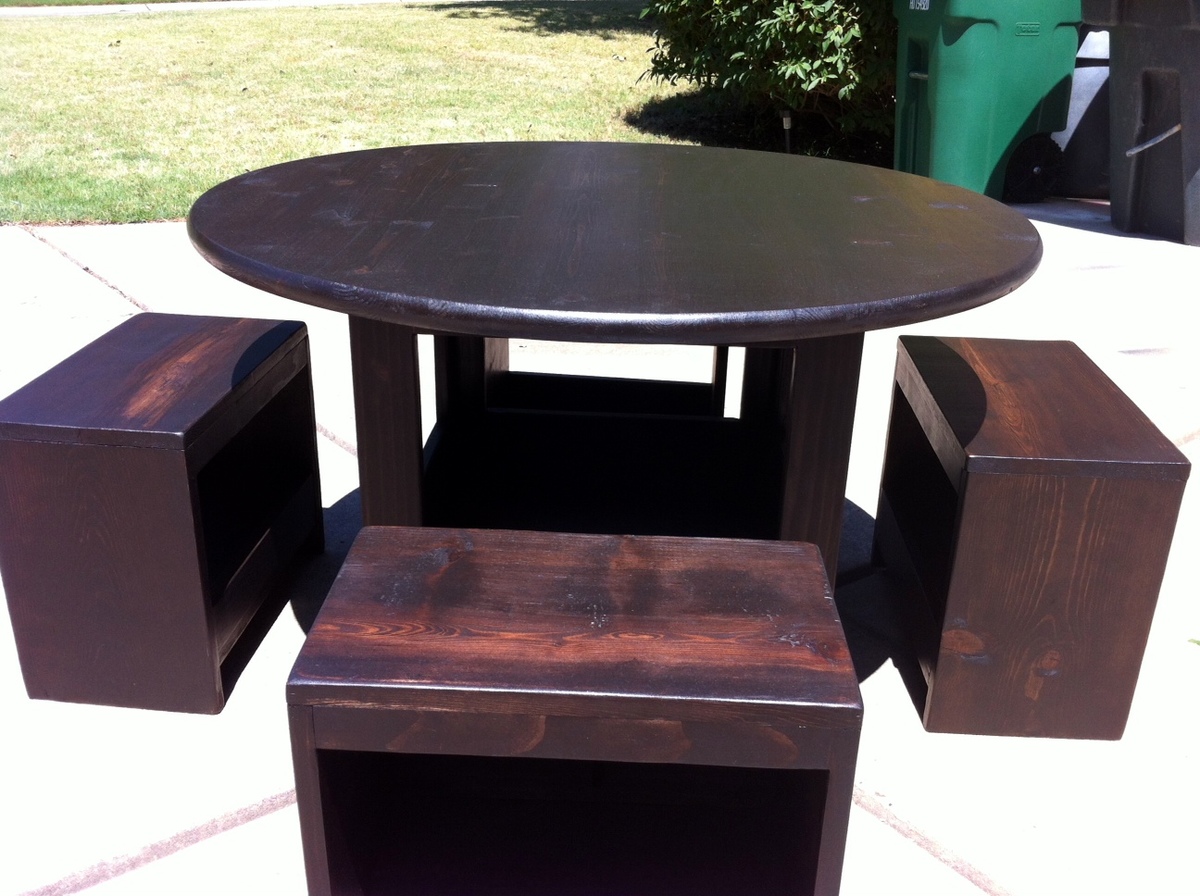
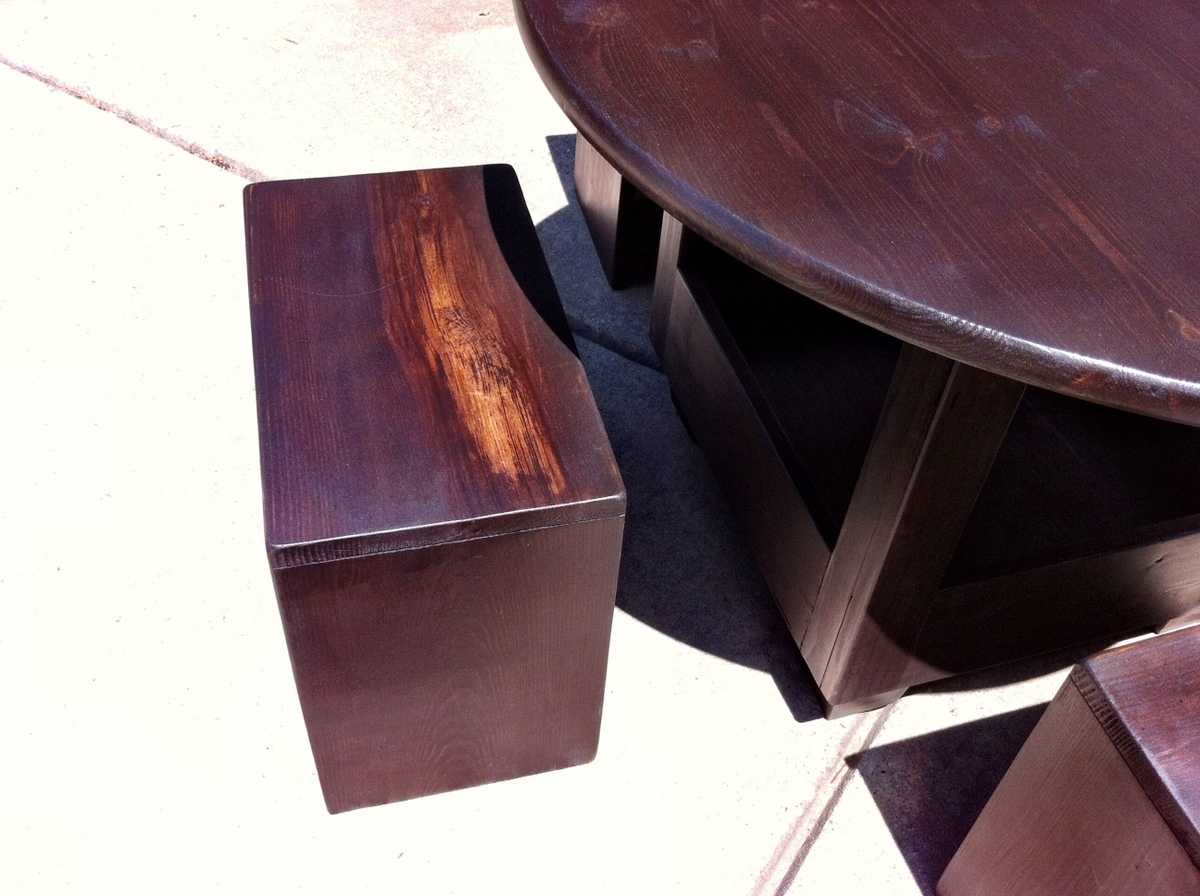
I built a storage table and stools for my son's school class project and my wife wanted a set for her mom to give to her on Mother's Day.
This was a really easy and inexpensive project. As I don't have a table saw and I'm scared to death of my circular saw, I had the laminated MDF cut to size and edged. Assembly and painting was really quick. This little man will road test it for me!
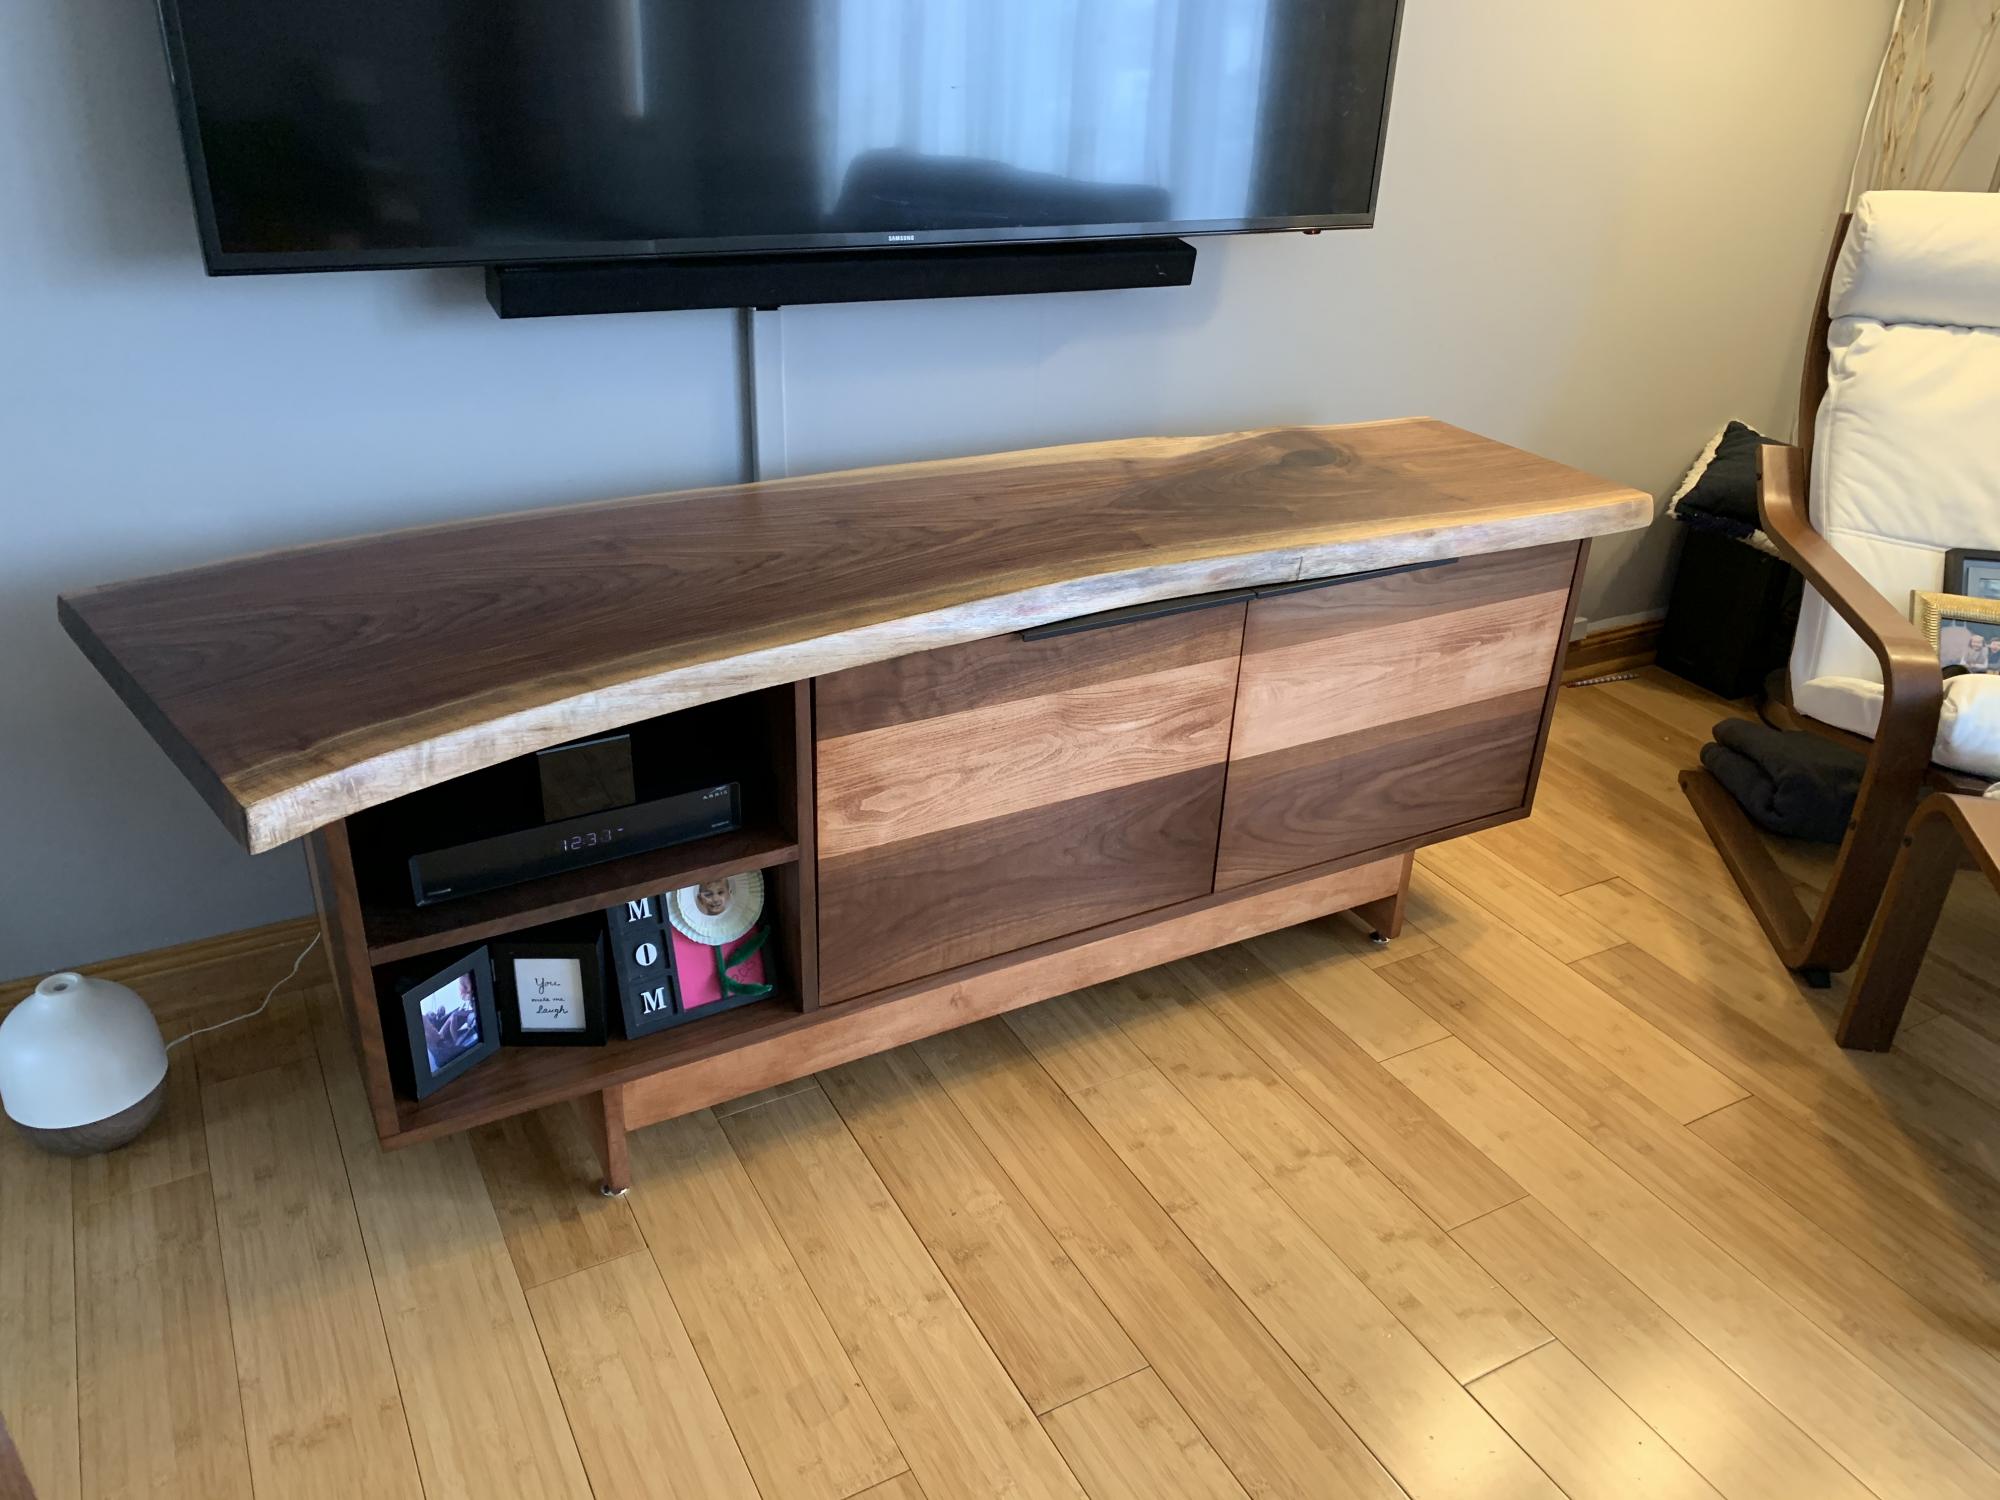
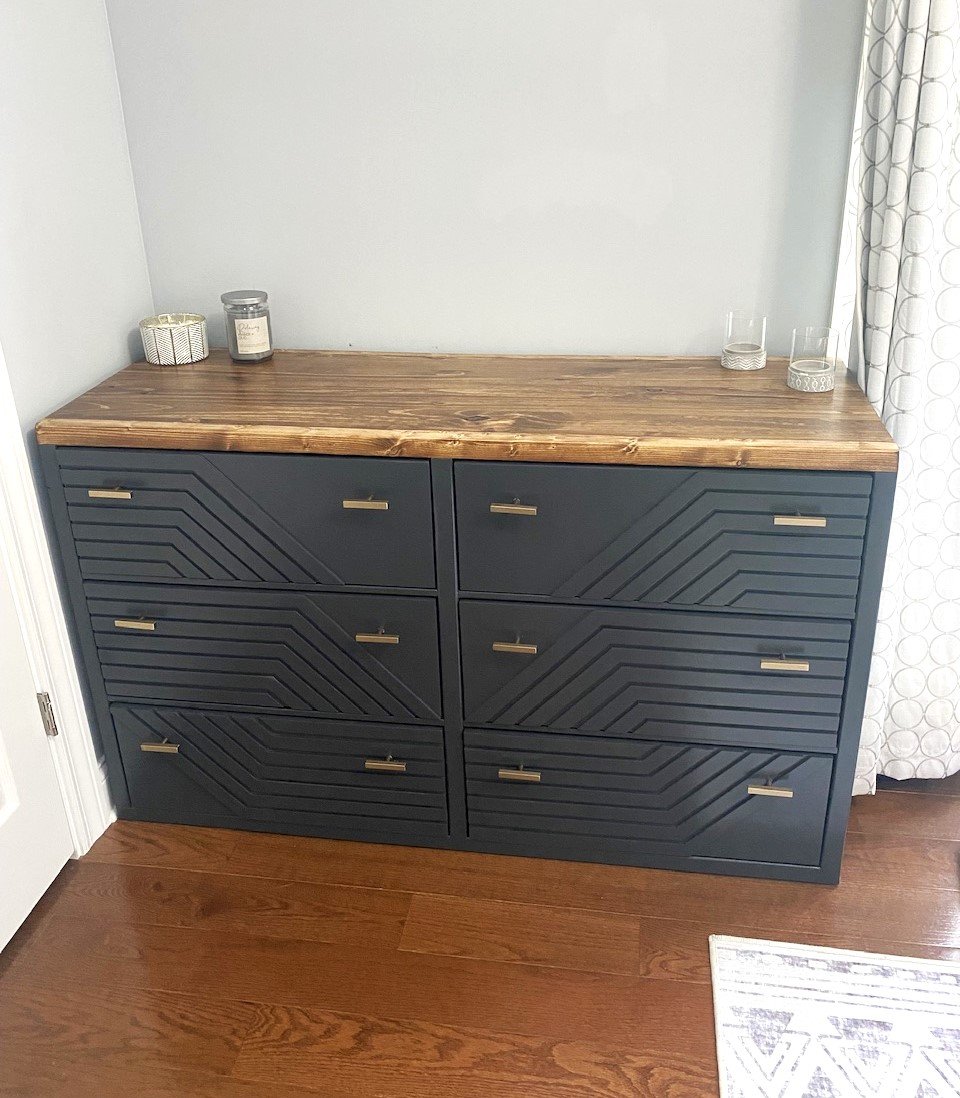
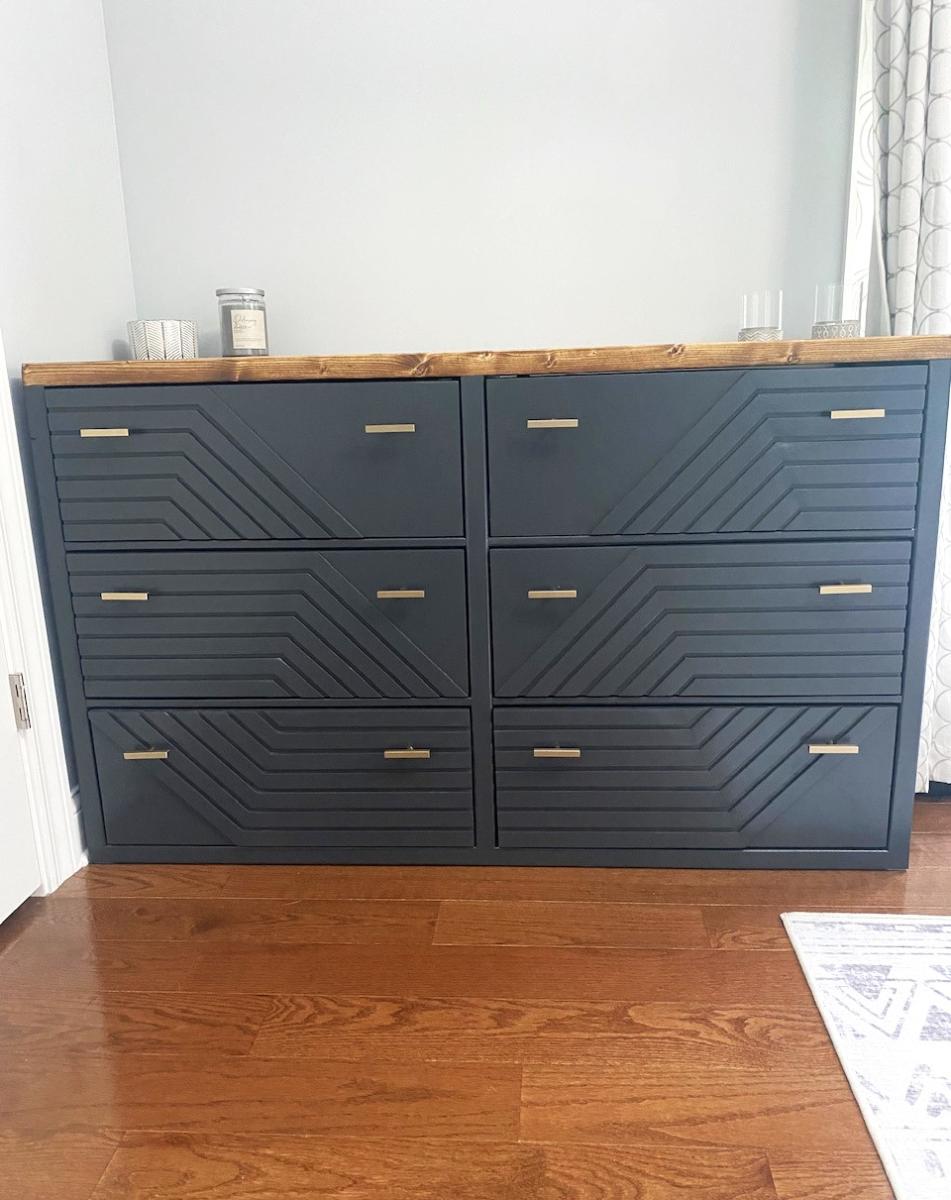
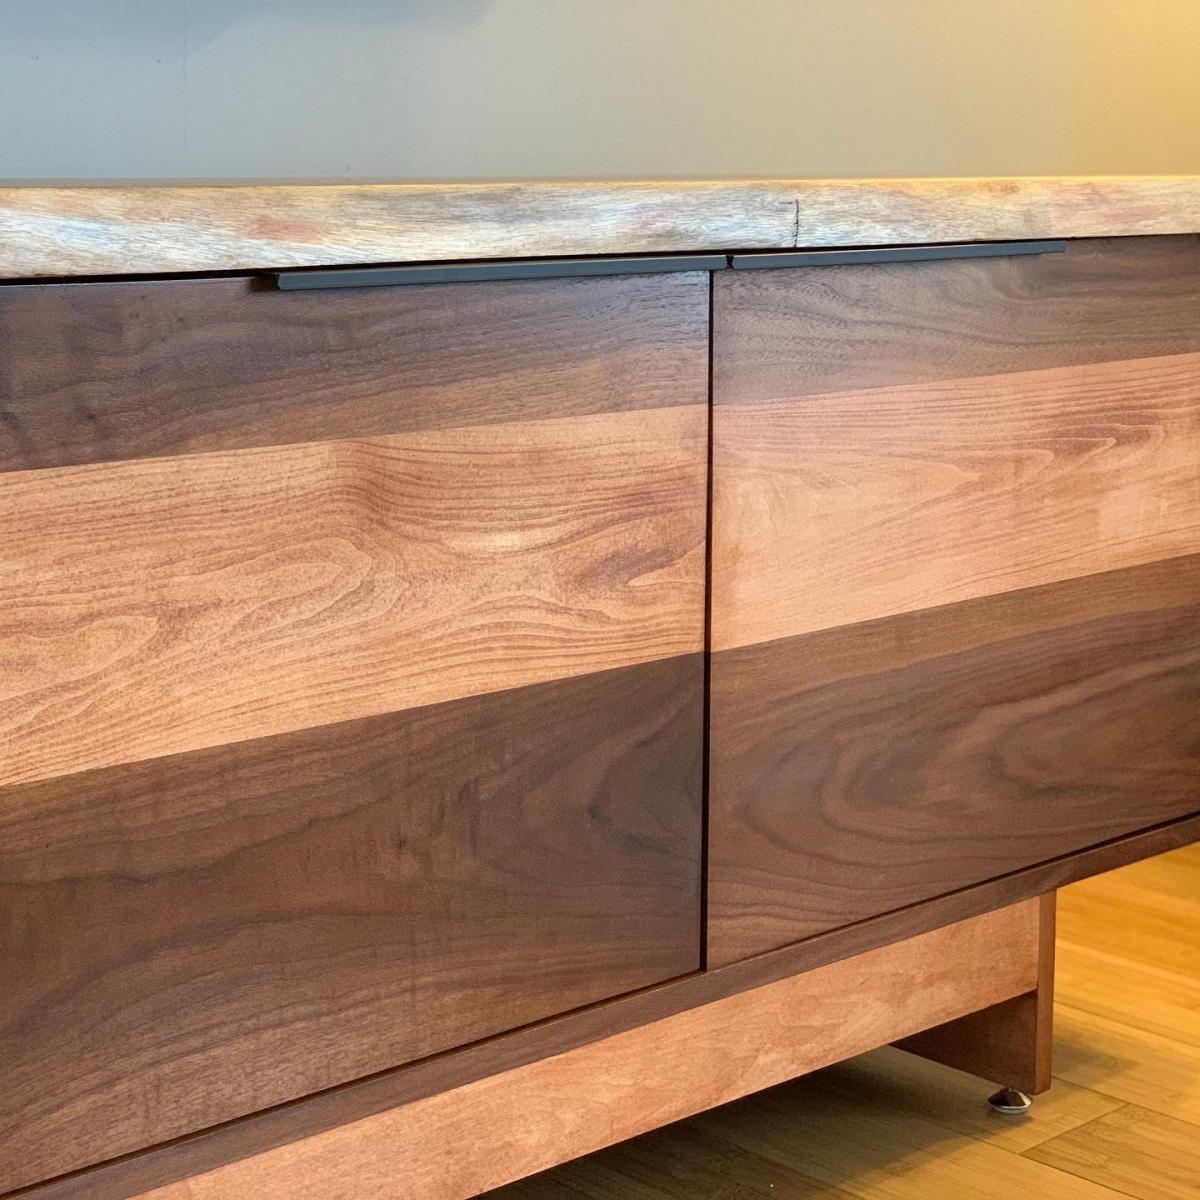
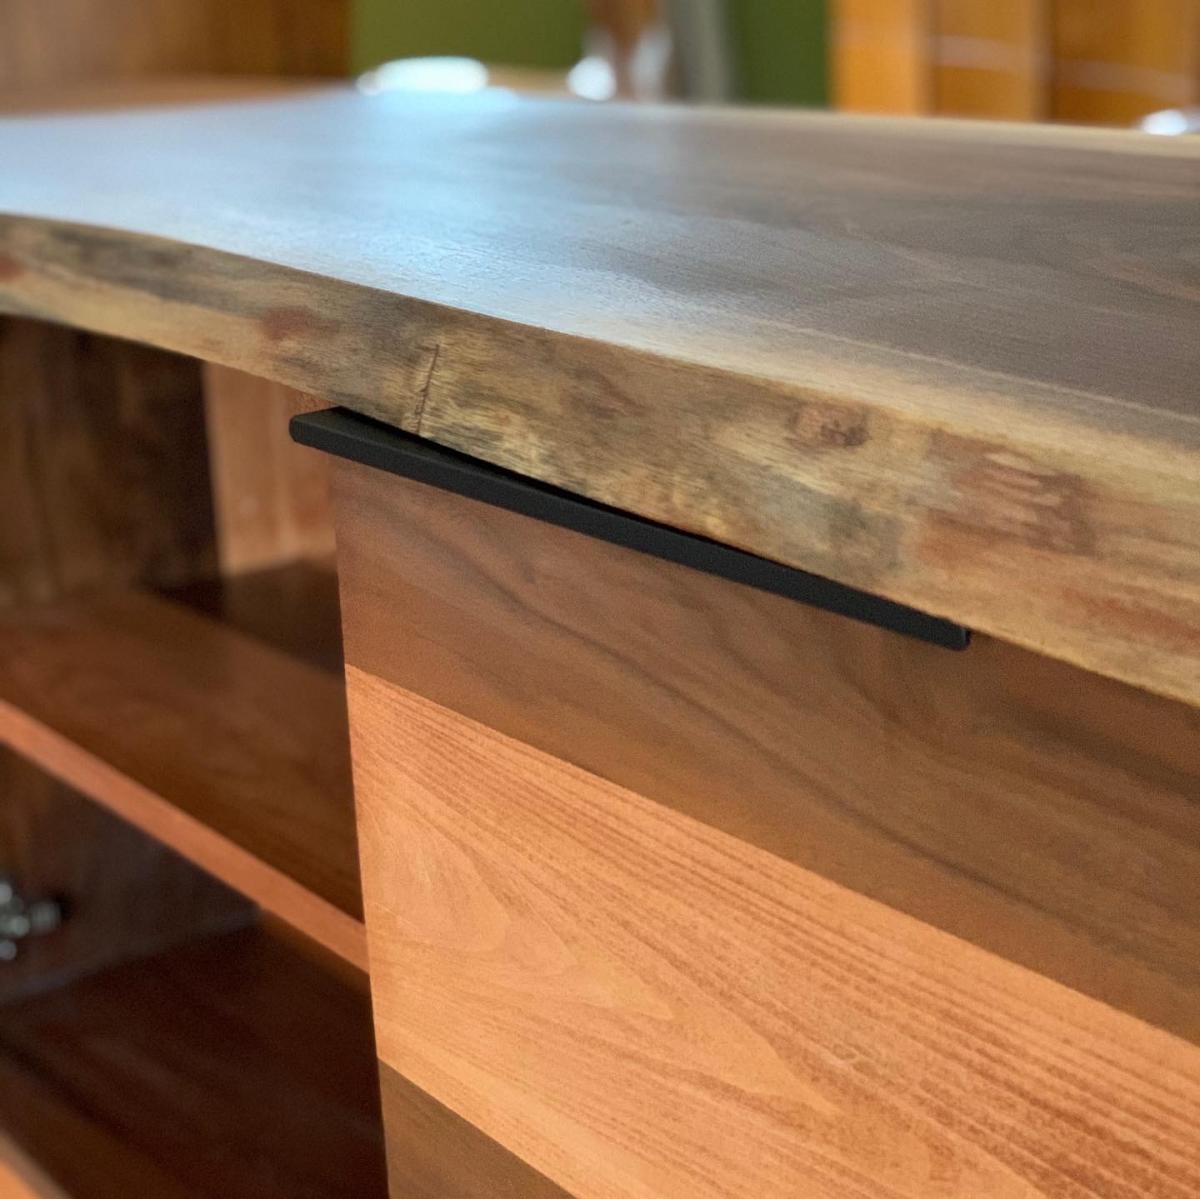
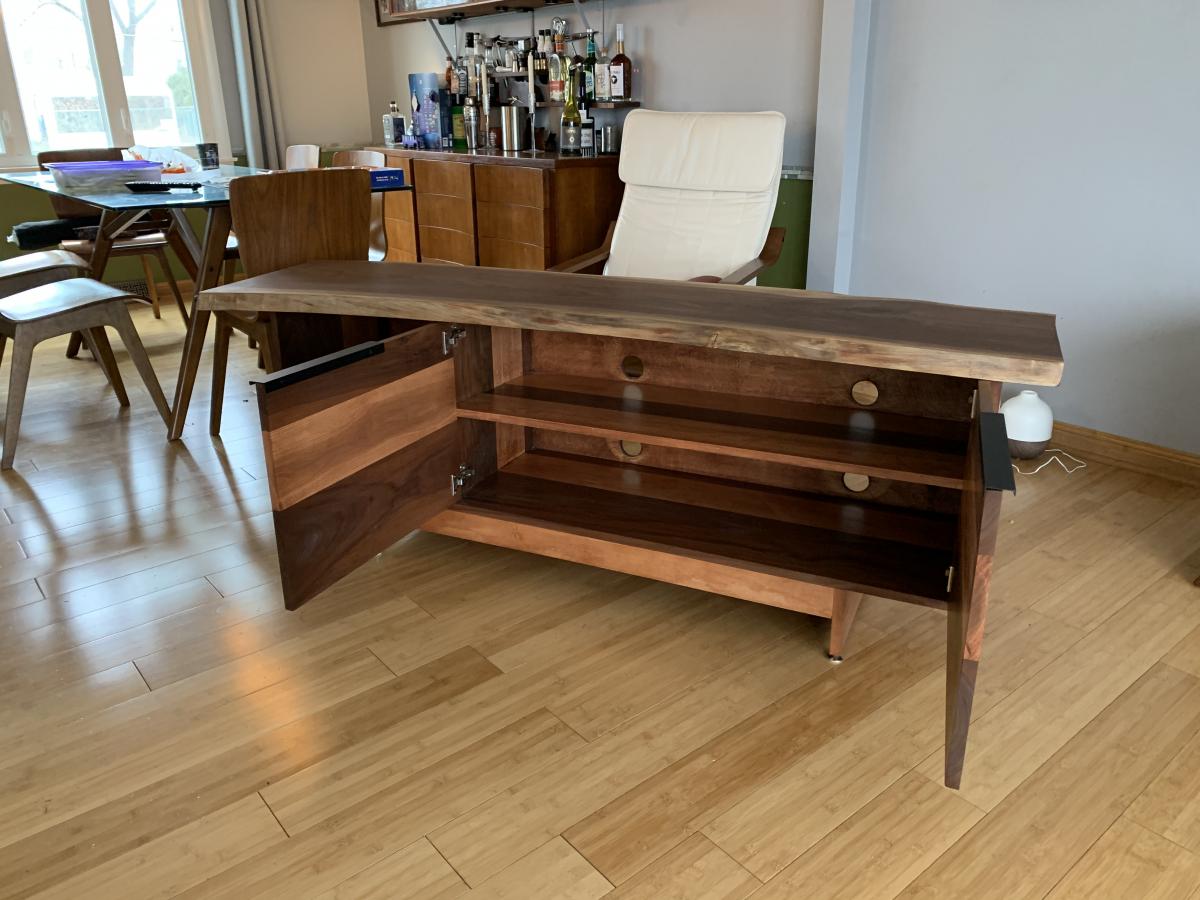
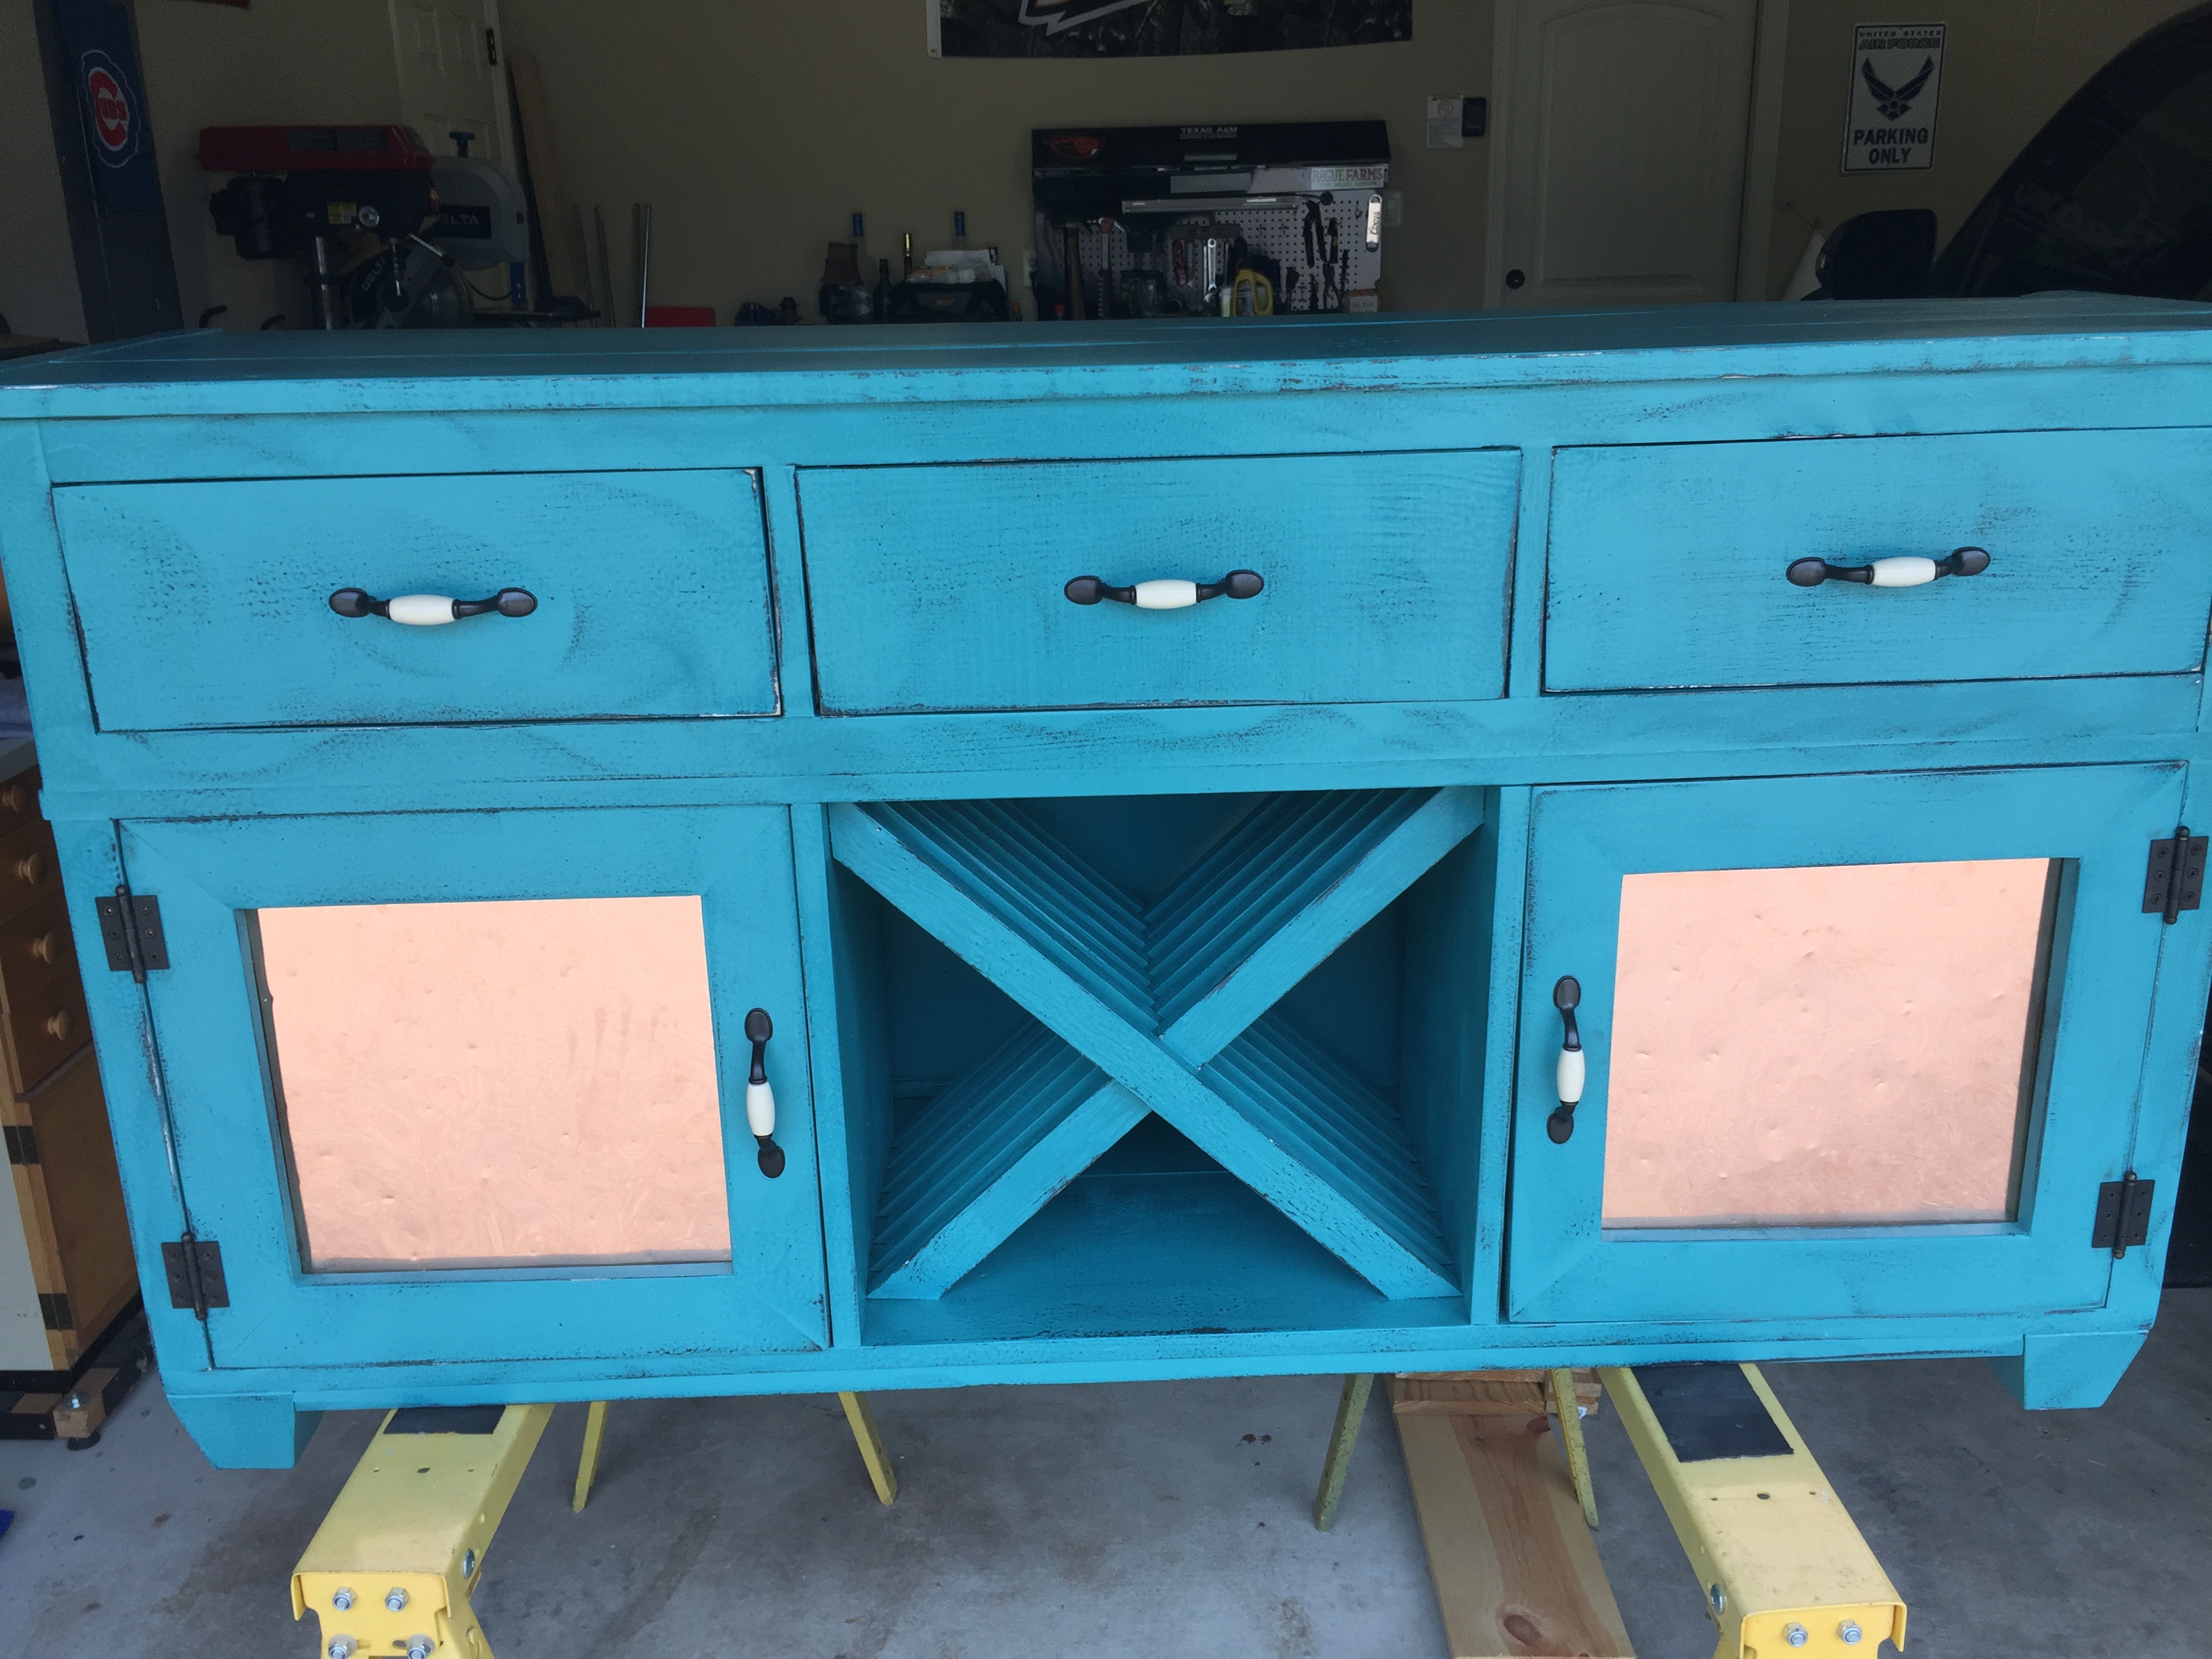
Built mainly from the Modern Media Console plan, modified in a few ways. Aside from the obvious part being the walnut slab on top, I modified the doors to be inset hinges for looks, and it’s slightly longer than the original plans. The other main modification was using the base from the Emersen Console or Buffet plan with the addition of the adjustable height leveling legs.


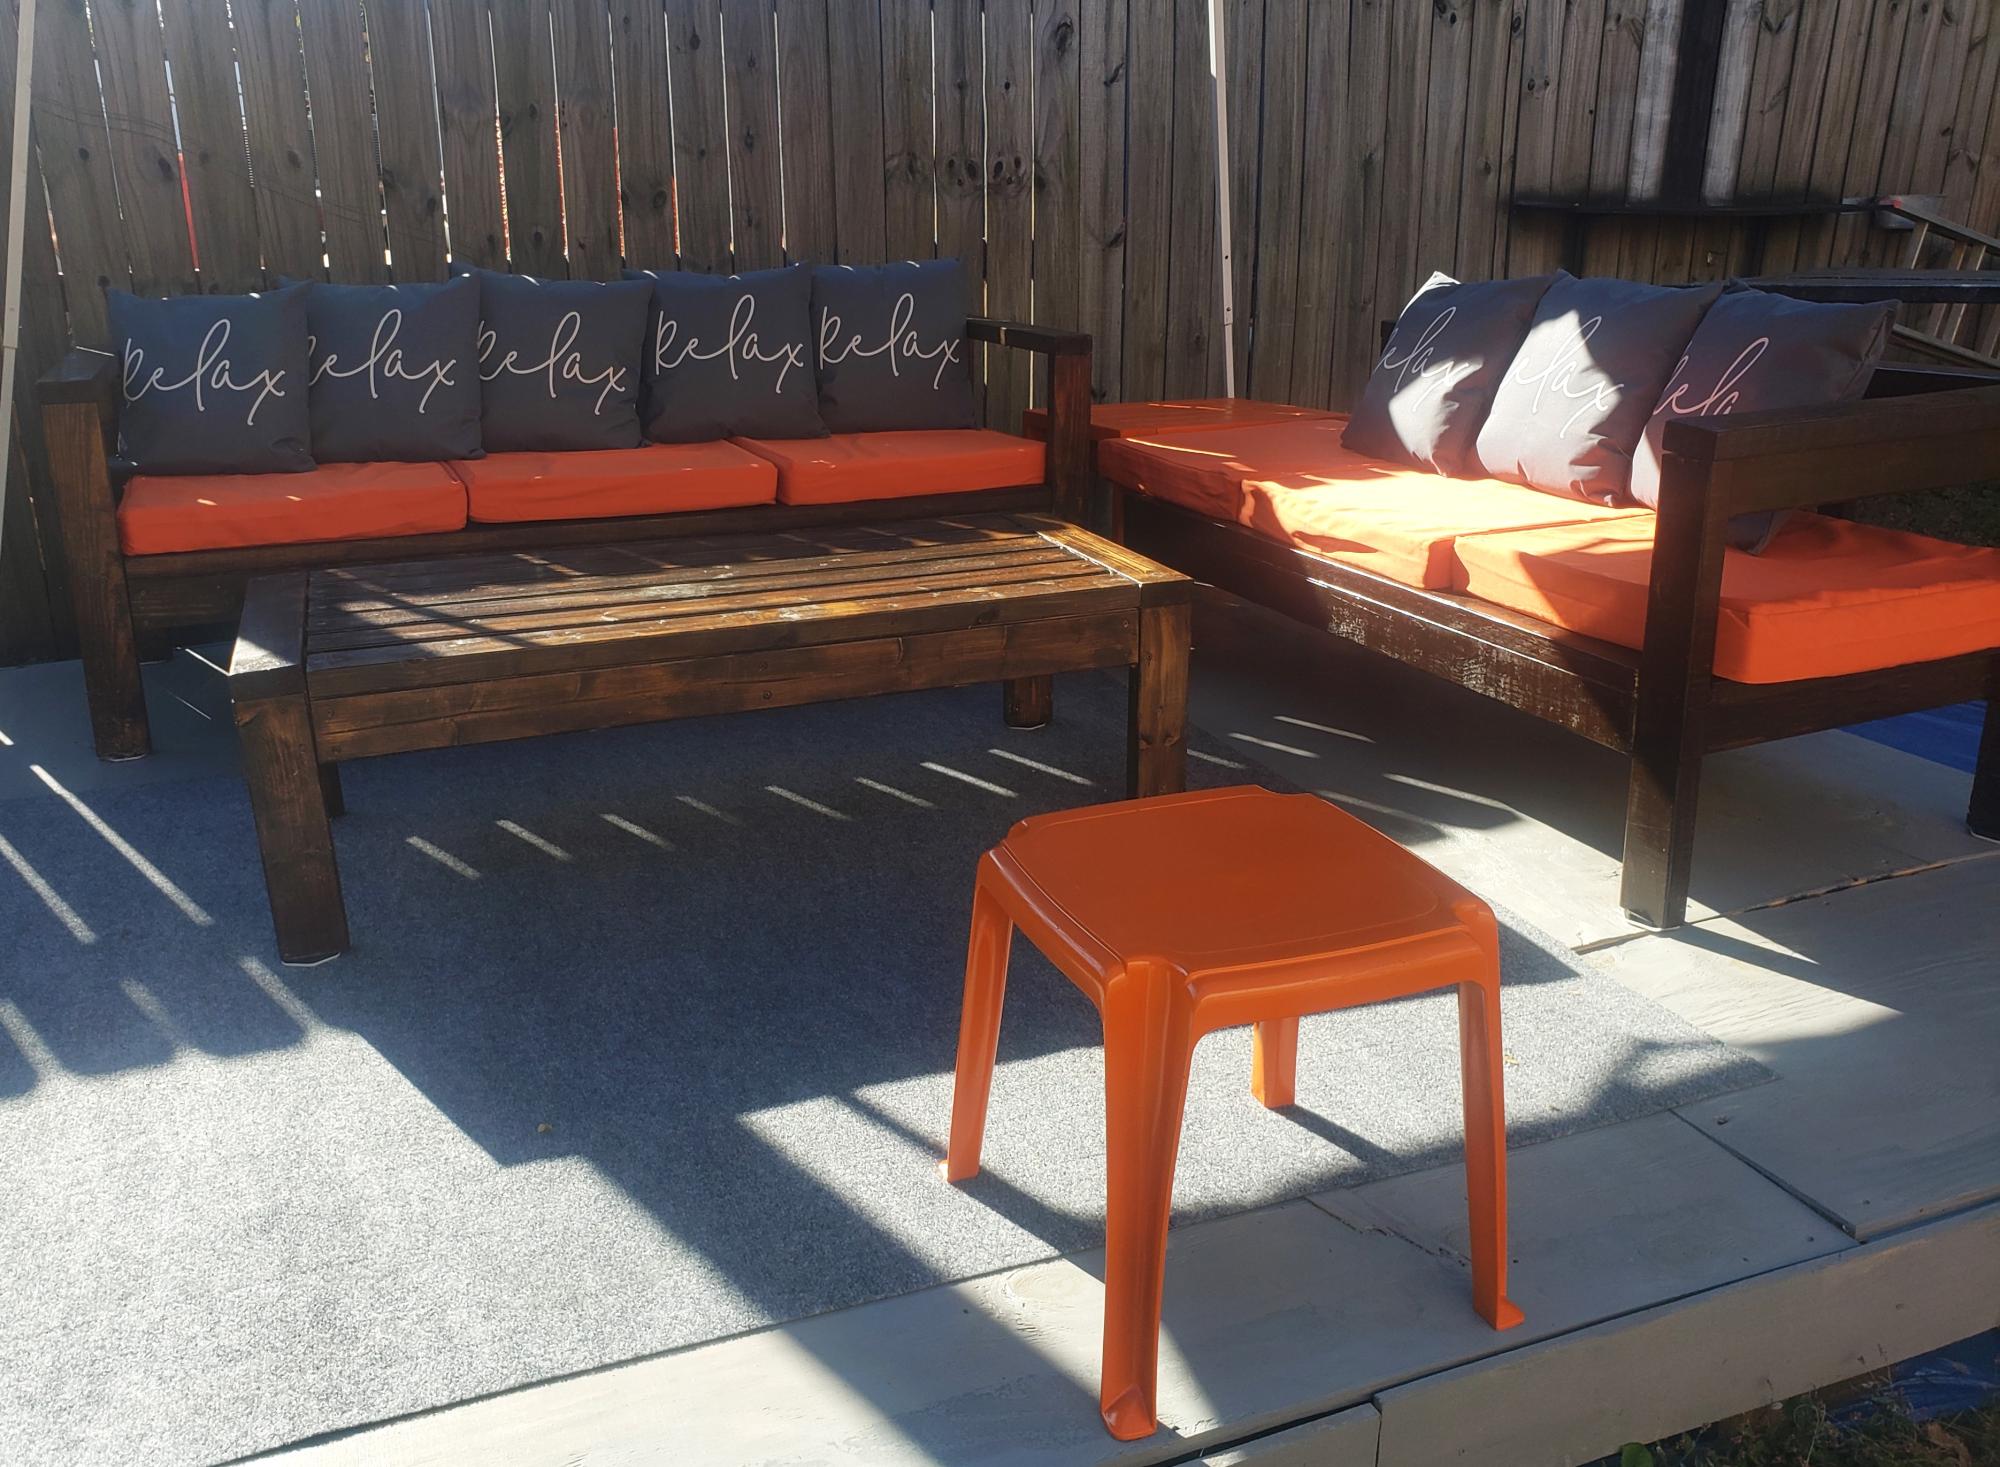
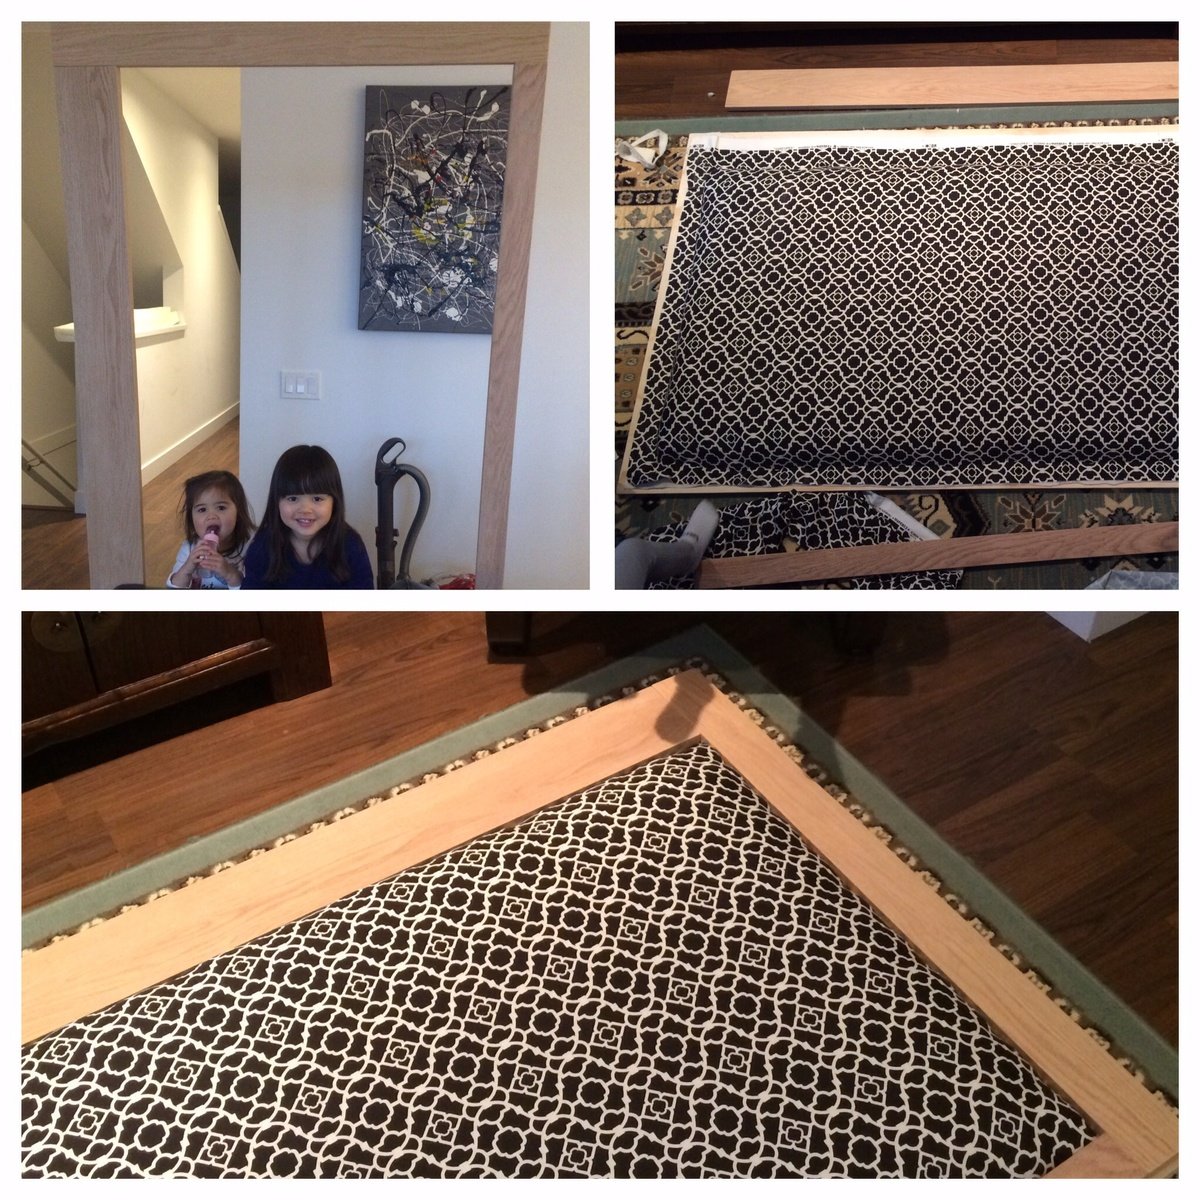
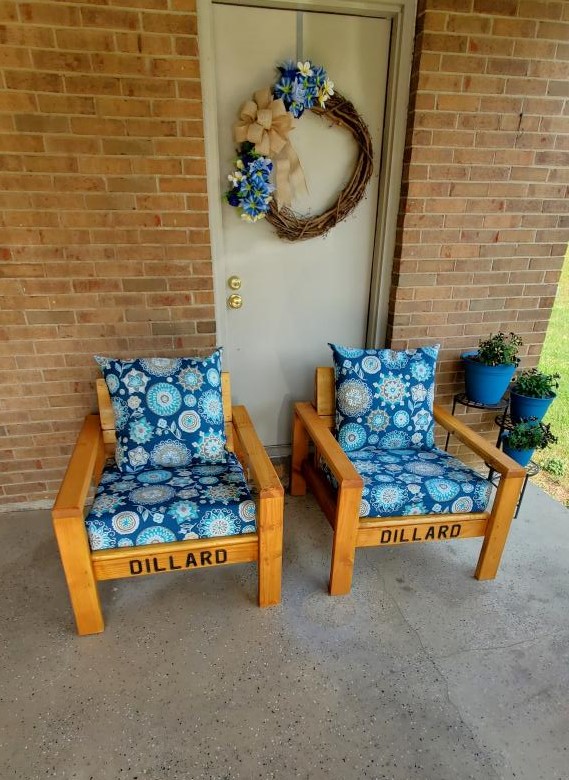
Had fun building this and and putting on the pillows and cushions.
Elite Motionz Buildz

Our 2 year old granddaughter loves seesaws, so my husband built this one for her. We had just been to Disney World and decided to make the seat Mickey shaped for a little extra fun. He used his bandsaw to cut the seat.
The seesaw is plenty stable enough for us to go on it with her and has been a BIG hit with the neighborhood kids.
More pictures on our blog: http://yearoflivingdisney.wordpress.com/2014/03/03/disney-ride-at-home/
Thank you, Ana, for these plans!

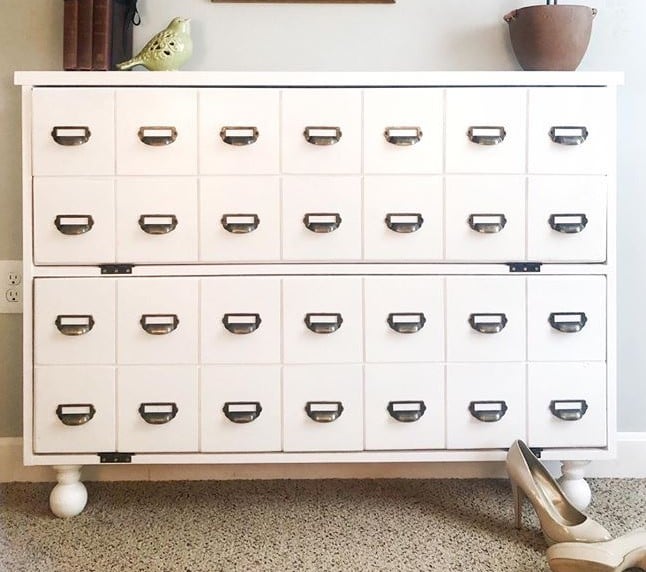
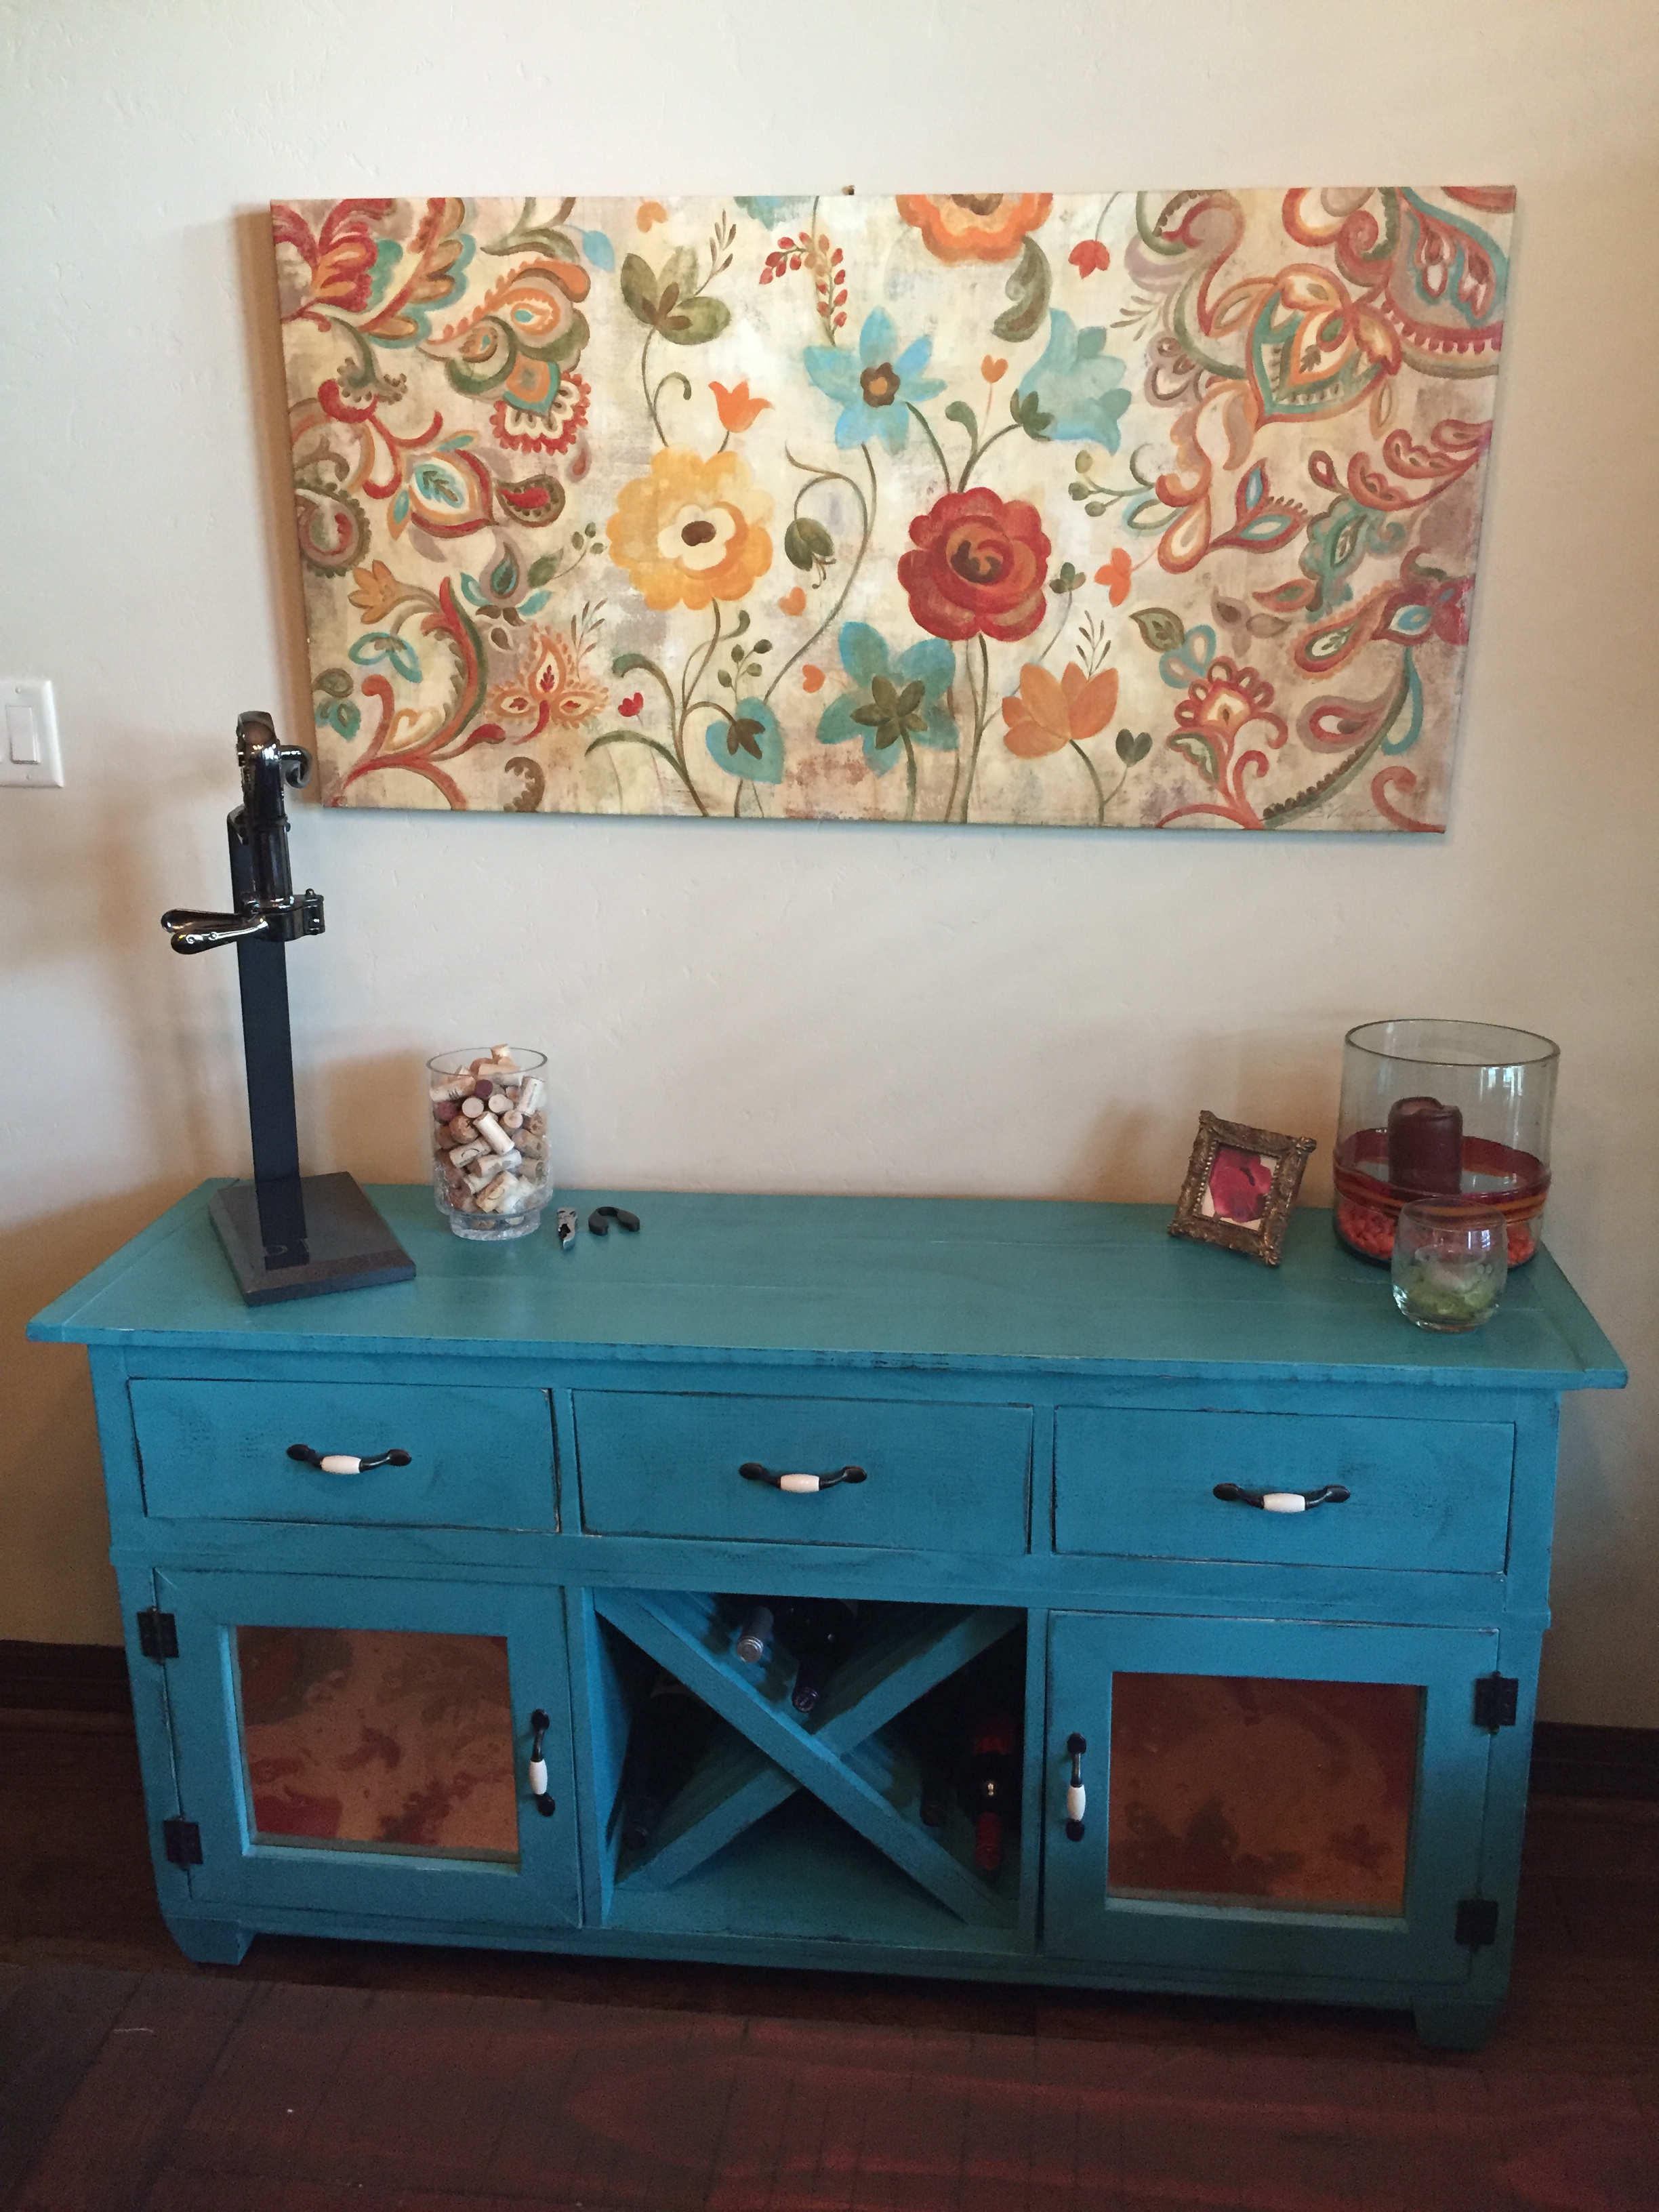
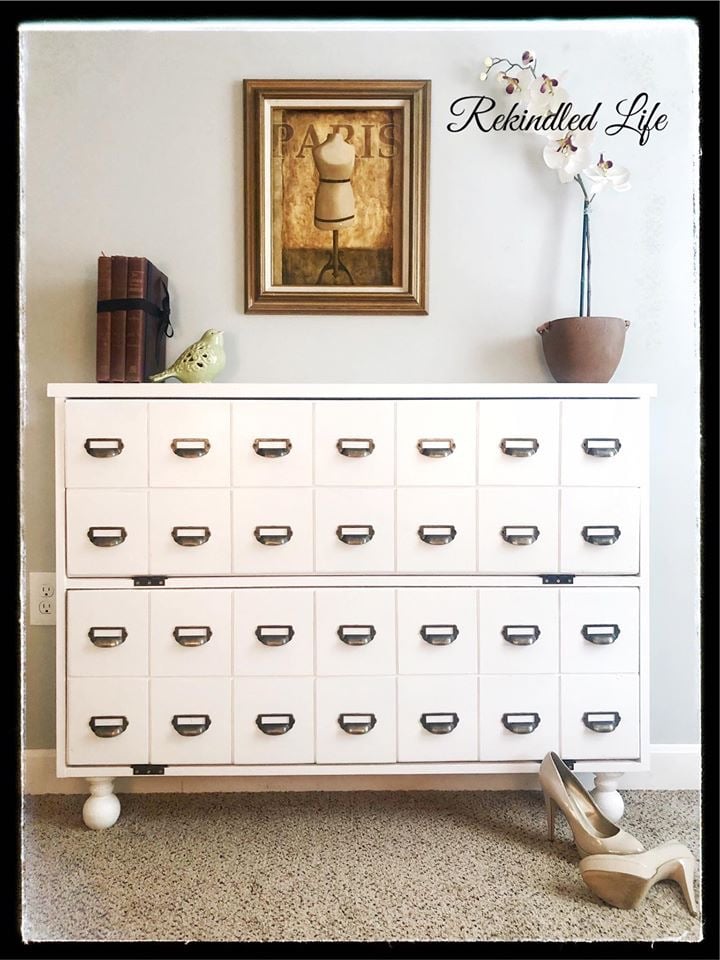
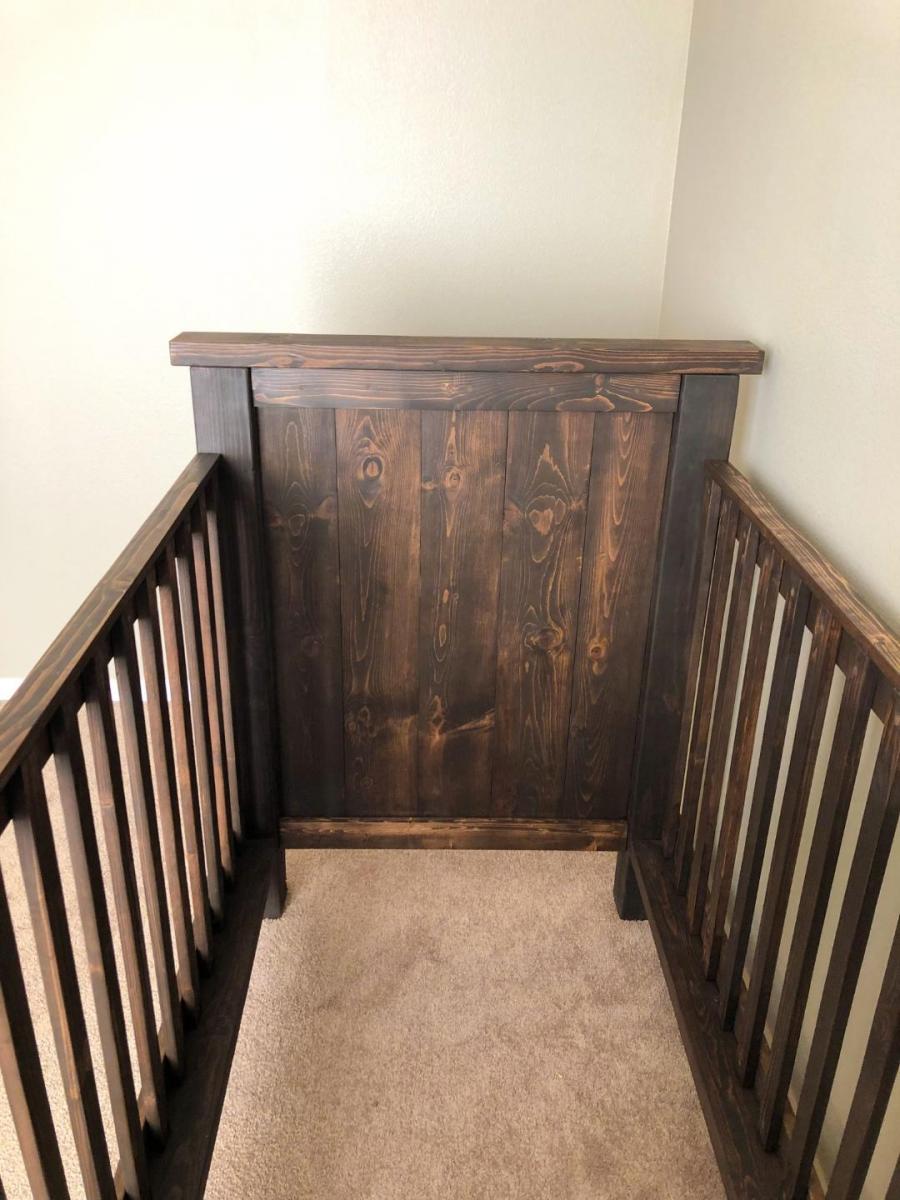
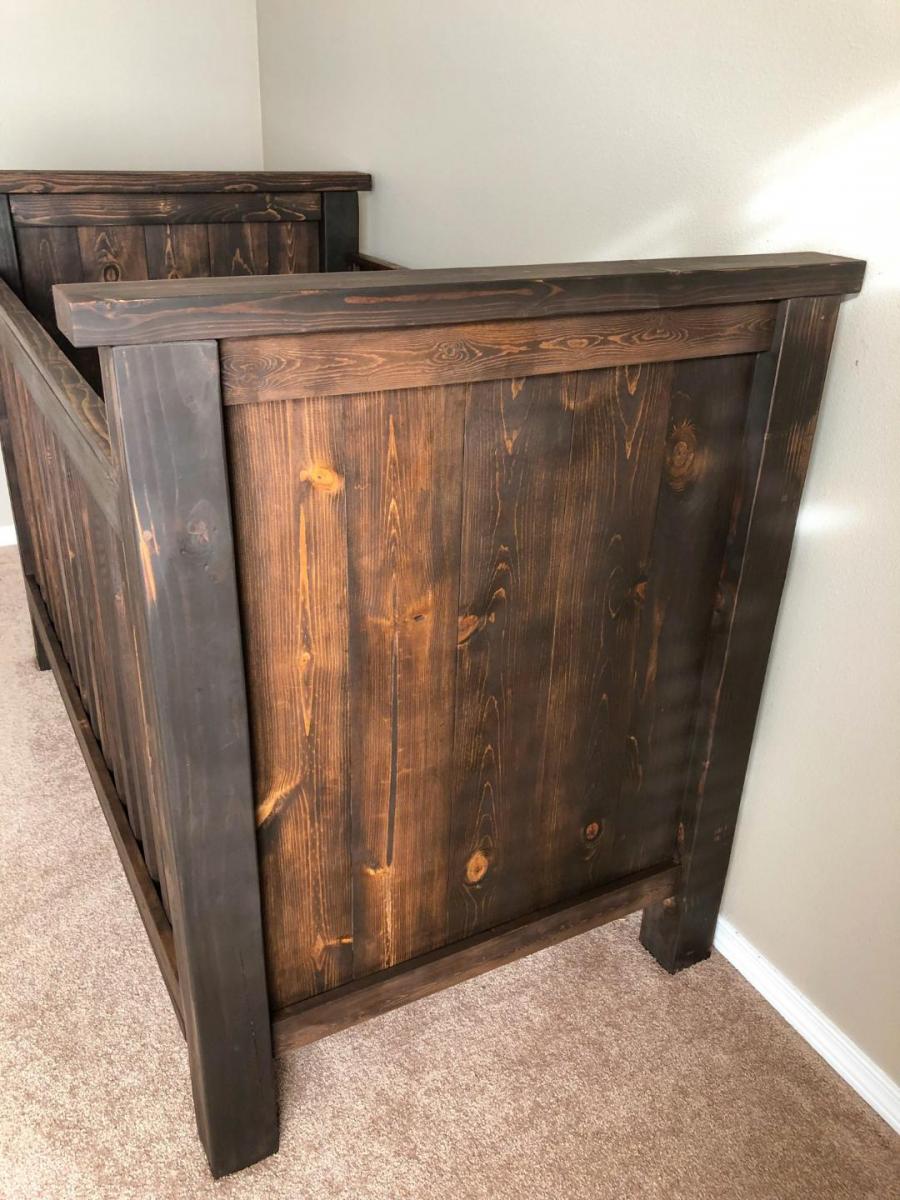
I built the shoe cabinet but added card catalog handles. Also used deck railing toppers for the feet
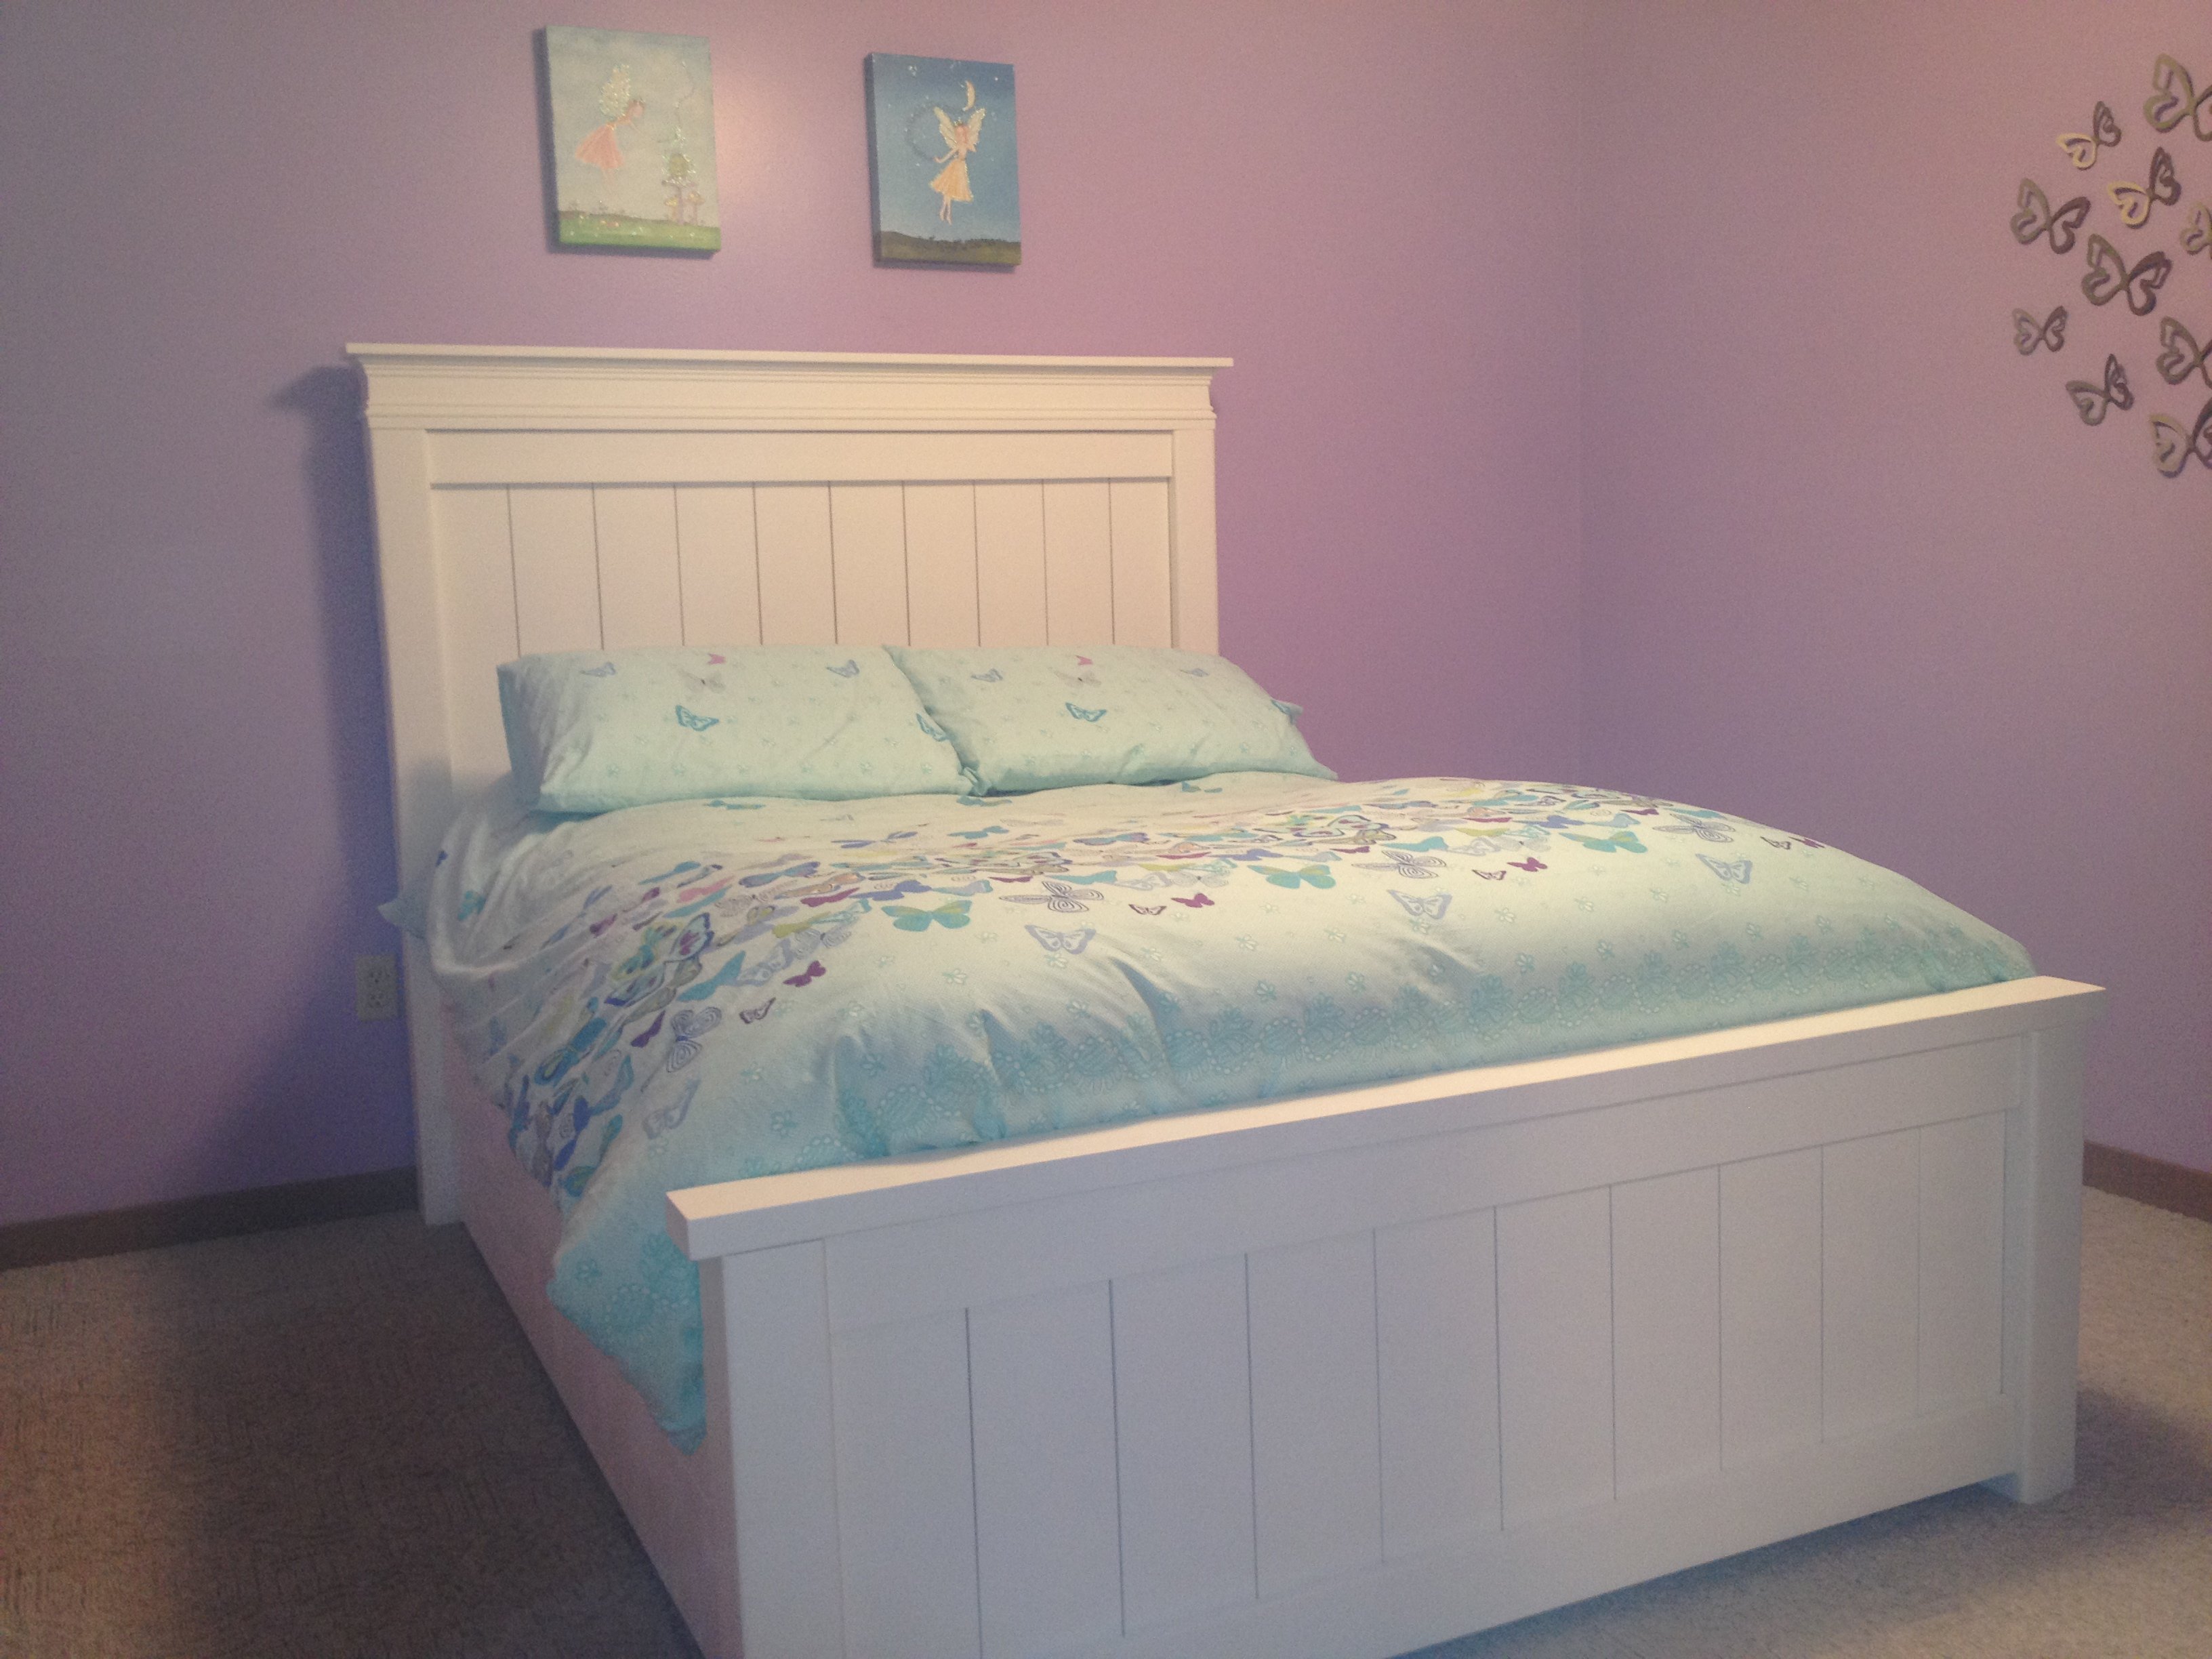
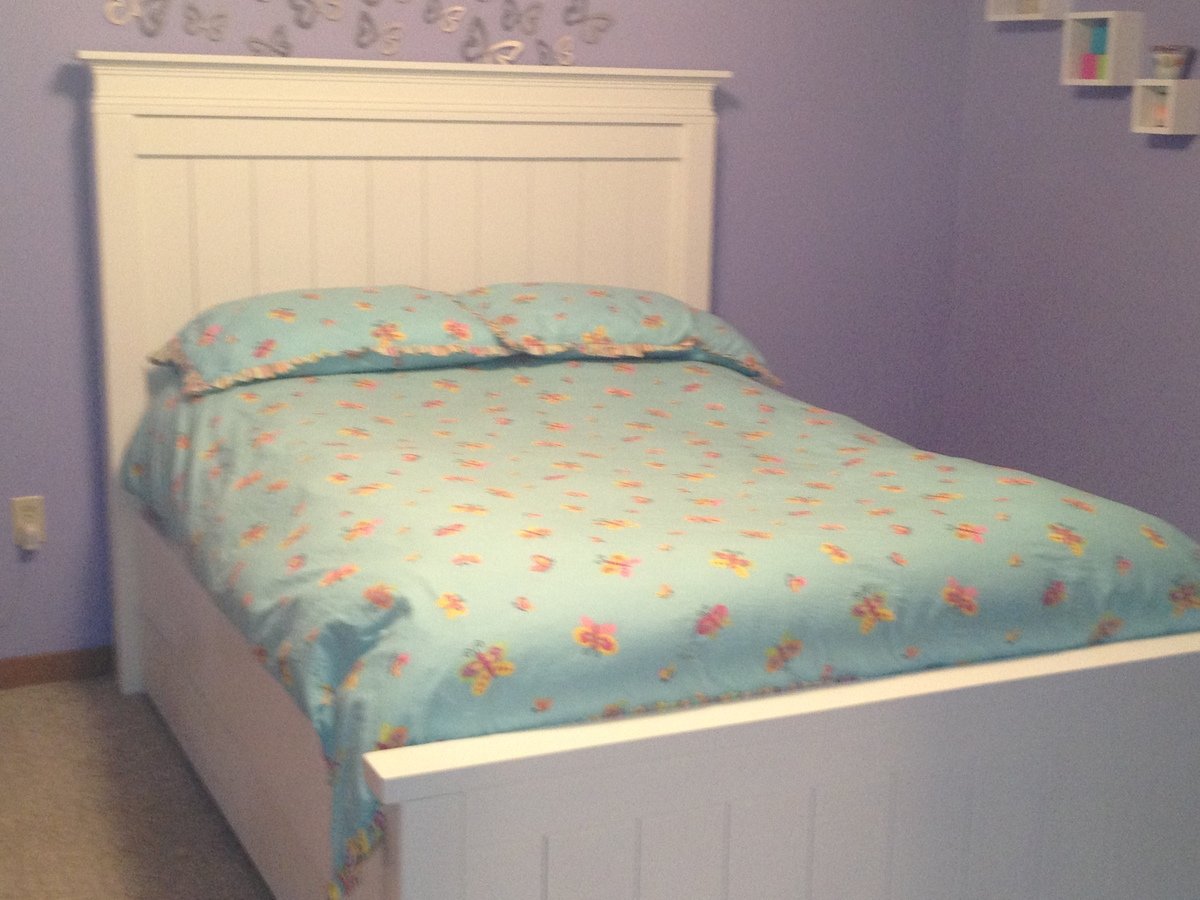
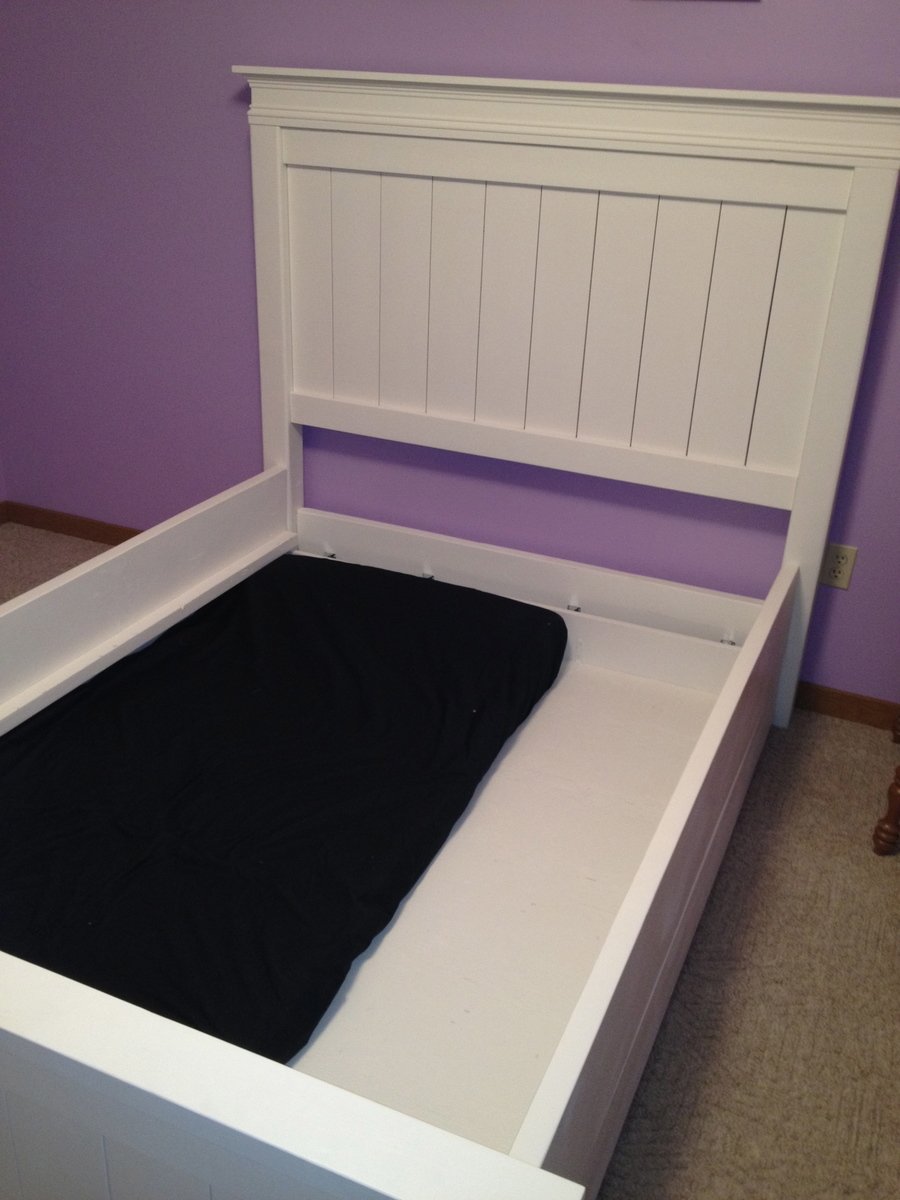
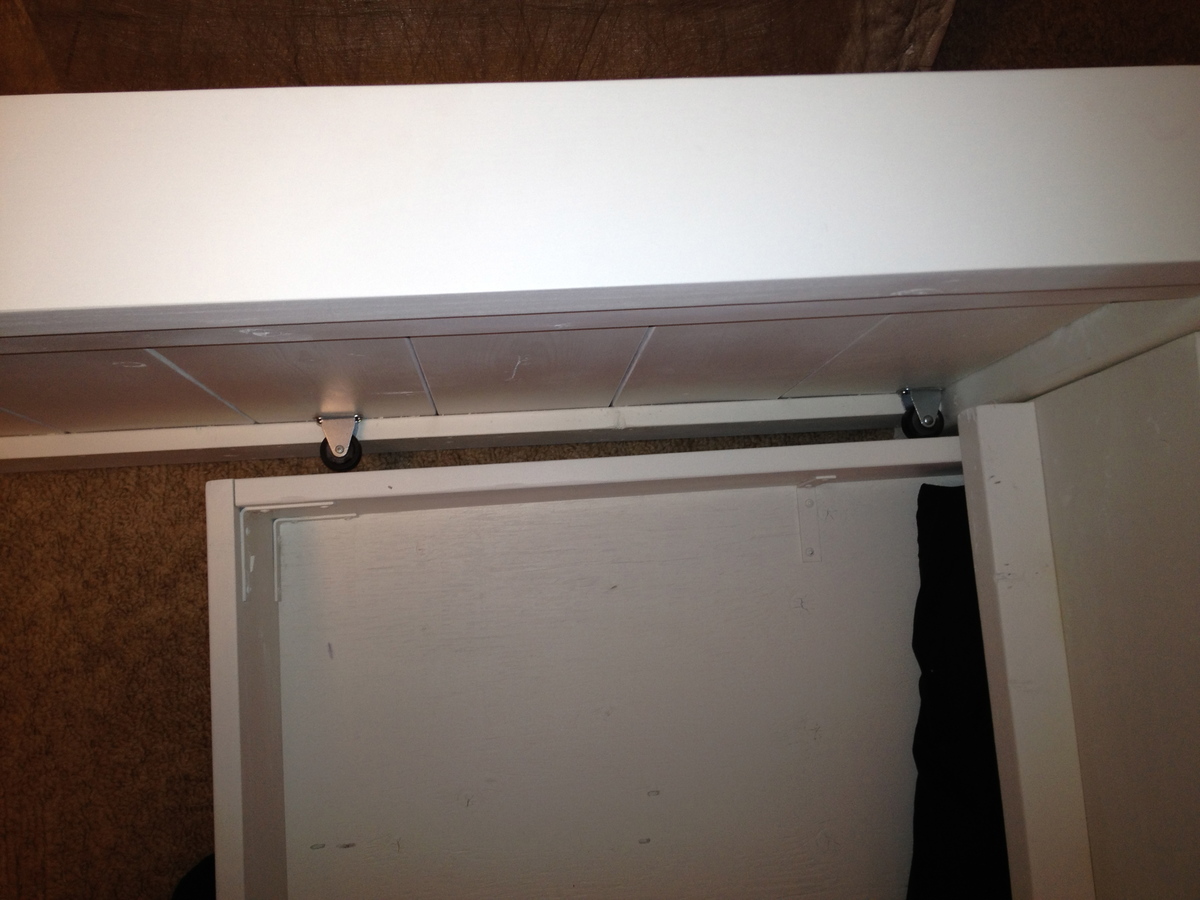
These were my first builds. I am so pleased with how it all turned out! My sister in law introduced me to Ana's page and I was off! We have twin, 5 year old girls with their own rooms. They both needed new furniture and I fell in love with the Farmhouse Bed Plans. I used a little of the Mom's Fancy Farmhouse Bed Plans and the Queen Farmhouse Bed Plans. I wanted to use our existing mattresses with box springs, so I put a cleat on the inside edge, running the length of the side rails. Another modification, being that I wanted to use mortised bed locks on the side rails to allow for quick connects to the head and foot boards. I used these from LV: http://www.leevalley.com/en/hardware/page.aspx?p=67916&cat=3,40842,4126… I routered them in using a guide. I strongly recommend them if you are able. You can paint the bed pieces independently and assemble very easily. No building in the room! The other modification I made was that I made the actual side rails higher in order to fashion a trundle bed underneath. The trundle is a double as well, rolls on stationary castors, and on carpet too. I have a single mattress in it and it can be pulled out on either side. One side is for the bed and the other can be used as storage etc. My girls can easily pull it out and put it back in place. Great for sleep overs and extra company! It is technically unattached from the bed, but there are small stationary castors that run the inside length of the head and foot boards on their sides to act as guides for the trundle. I have attached pictures to show what I mean. I did not want it banging around underneath, and the castors are great little guides. I have more detailed pictures, but am having difficulty including them as their file size is too large. Since making the beds, I have also made the farmhouse side tables, and am in the midst of making the Madison Dressers to match! It is all coming together nicely. It took me about 2 months to complete the beds, but that was a few hours here, and a few hours there. I didn't think that was too bad, as I made two of them and it was my first project! Either way, I am very excited and have the builders itch now! So many things to create. Thanks for a great site, and so many ideas.
Wed, 07/11/2012 - 17:35
I absolutely LOVE these beds you made! This is *exactly* what I have been thinking about for my spare bedroom...a mix of the farmhouse bed, farmhouse storage bed, and mom's fancy farmhouse bed! I wanted to have the option of a trundle beneath our spare bed as we frequently have overnight guests that have children, but I thought the storage would be awesome, too! Your modifications are perfect!! I would love to know more and see more pictures...and pick your brain about all you changed/did with yours! Thank you so much fro sharing!
Wed, 07/18/2012 - 12:22
Thank you for commenting. I am very proud of these, I still go and look at them! Haha! I do have more pictures, they were just too big to put in this post. There is a MB size limit. If you'd like me to send them, just leave me an email addy to send it to. I am afraid I will be of little help as far as the measurements go. It was a learning project, but in the end it went well. I can help, but I went by measurements from their existing mattresses and heights, and what I conjured from other plans from this wonderful site! If you do not have one, I strongly suggest getting a Kregg Jig. I did not have one for the beds, but now have one for the nightstands and Dressers. IT MAKES LIFE WAY BETTER!! It is an investment, but worthwhile! You will also need some clamps, but like I say, worth it! Happy building!
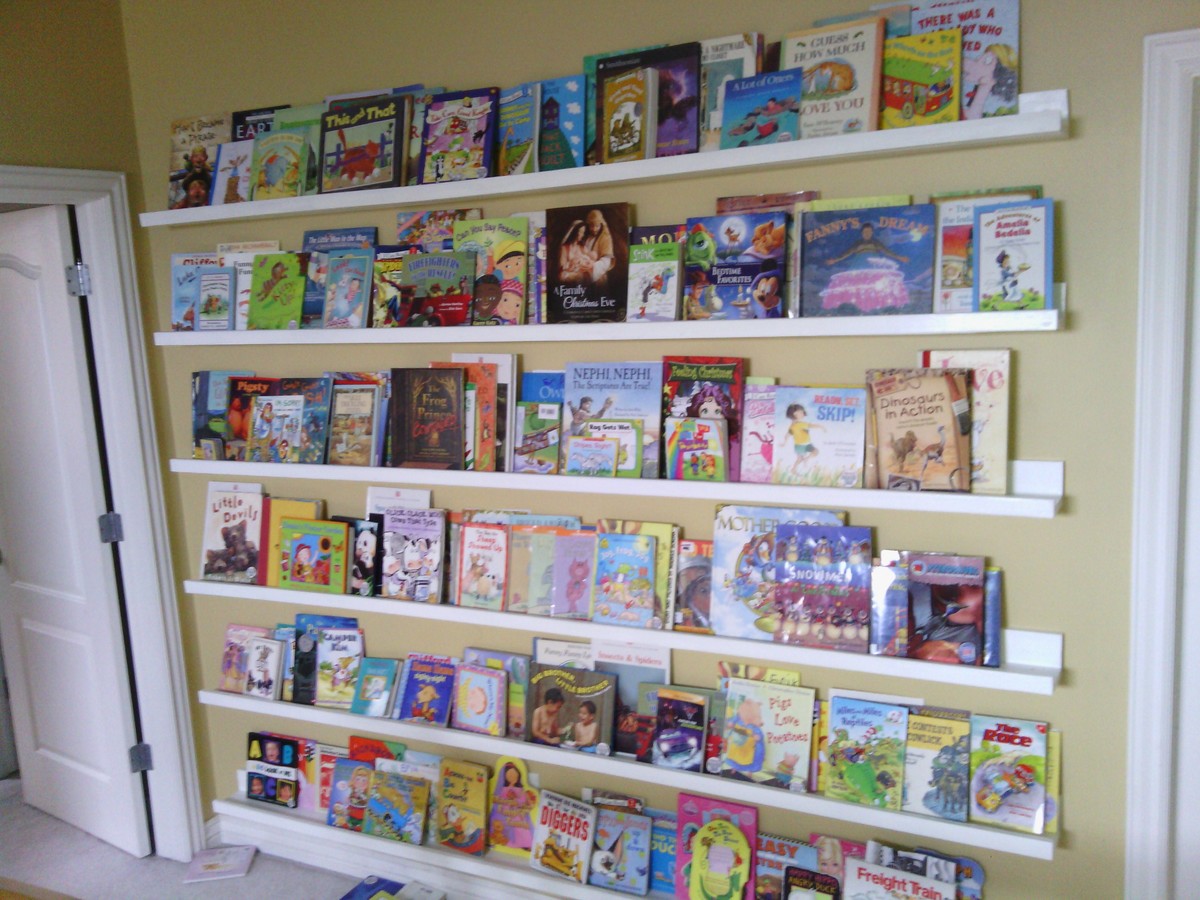
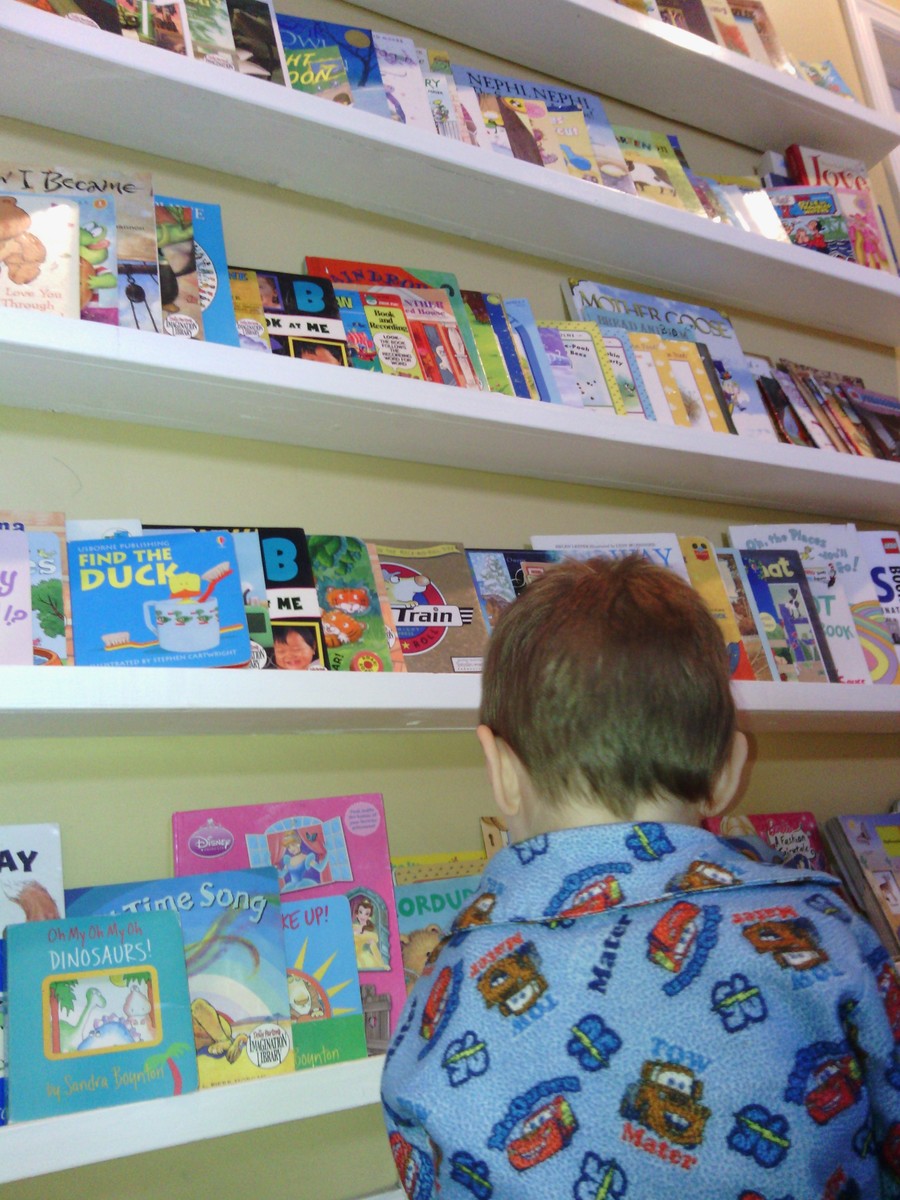
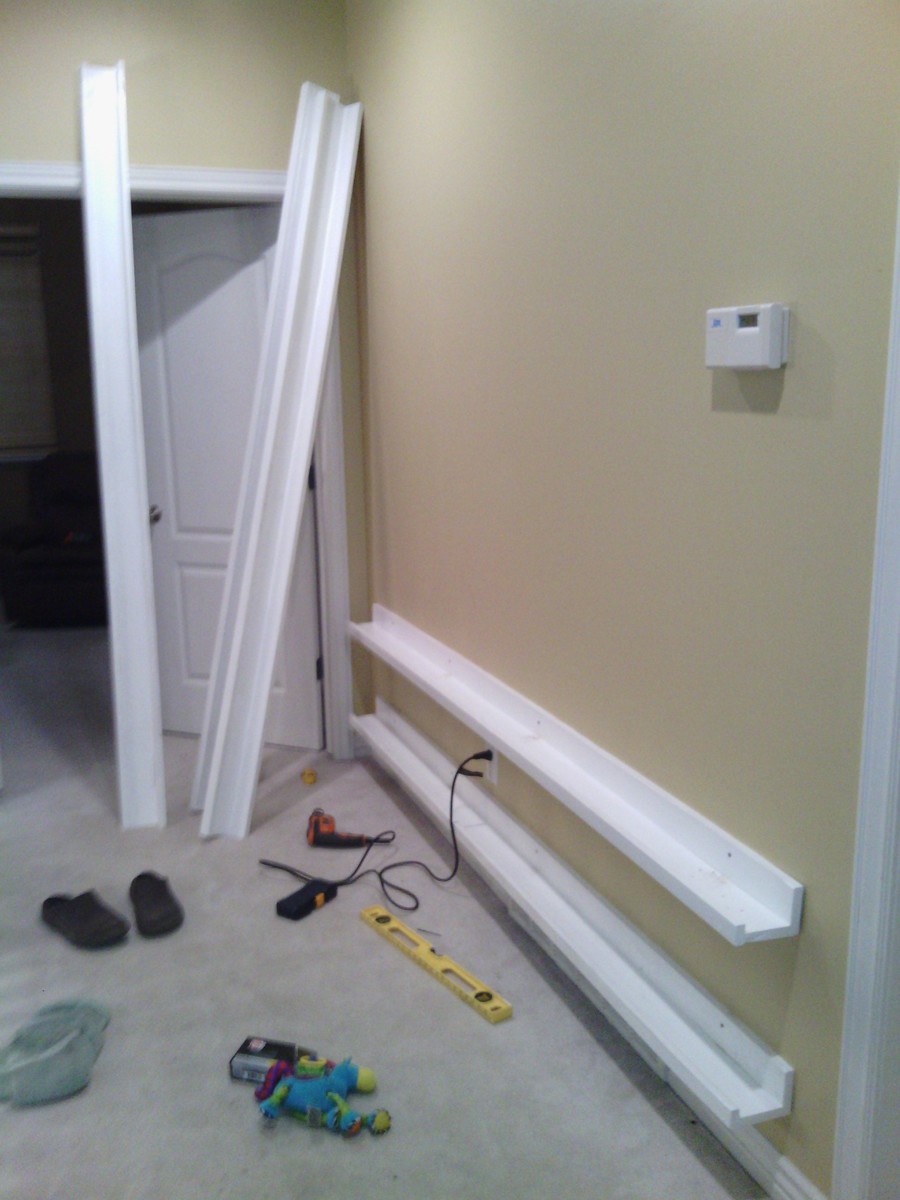
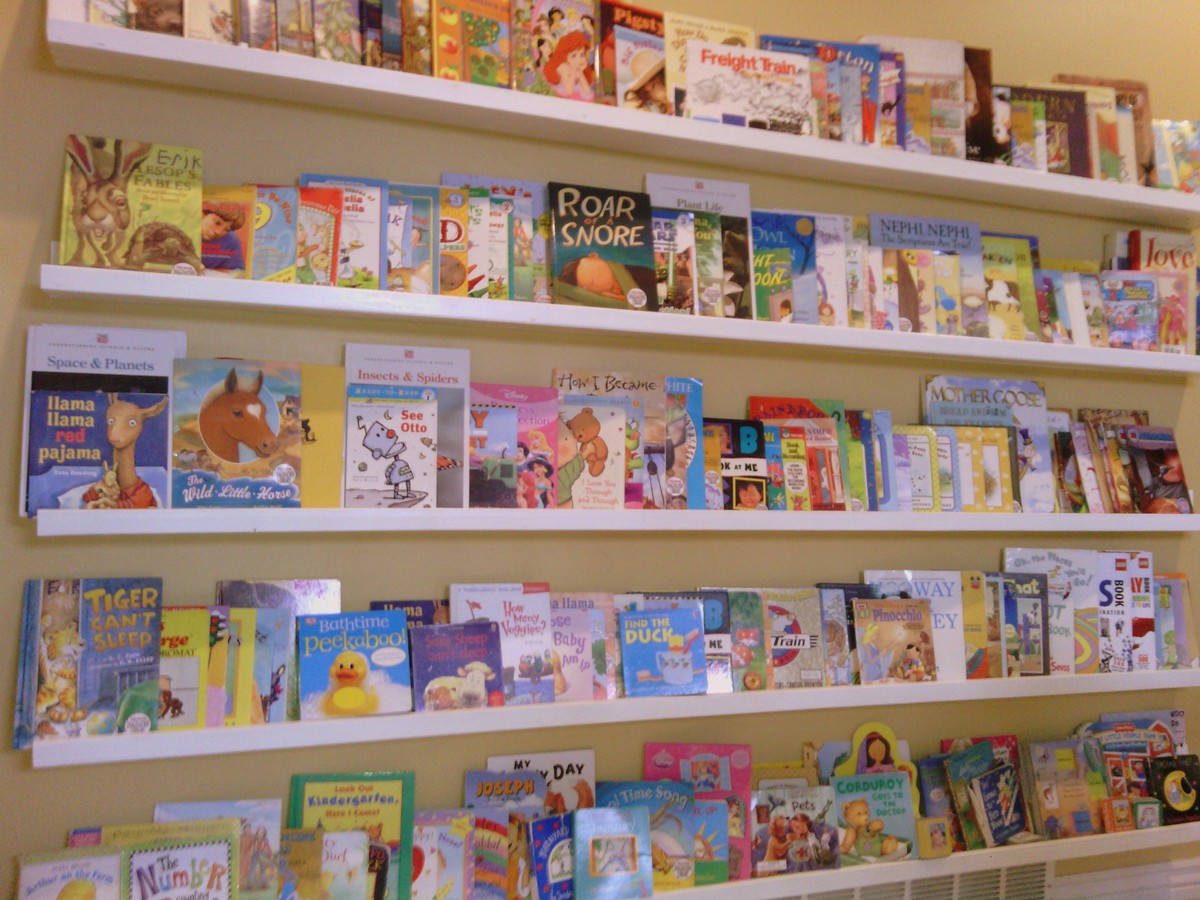
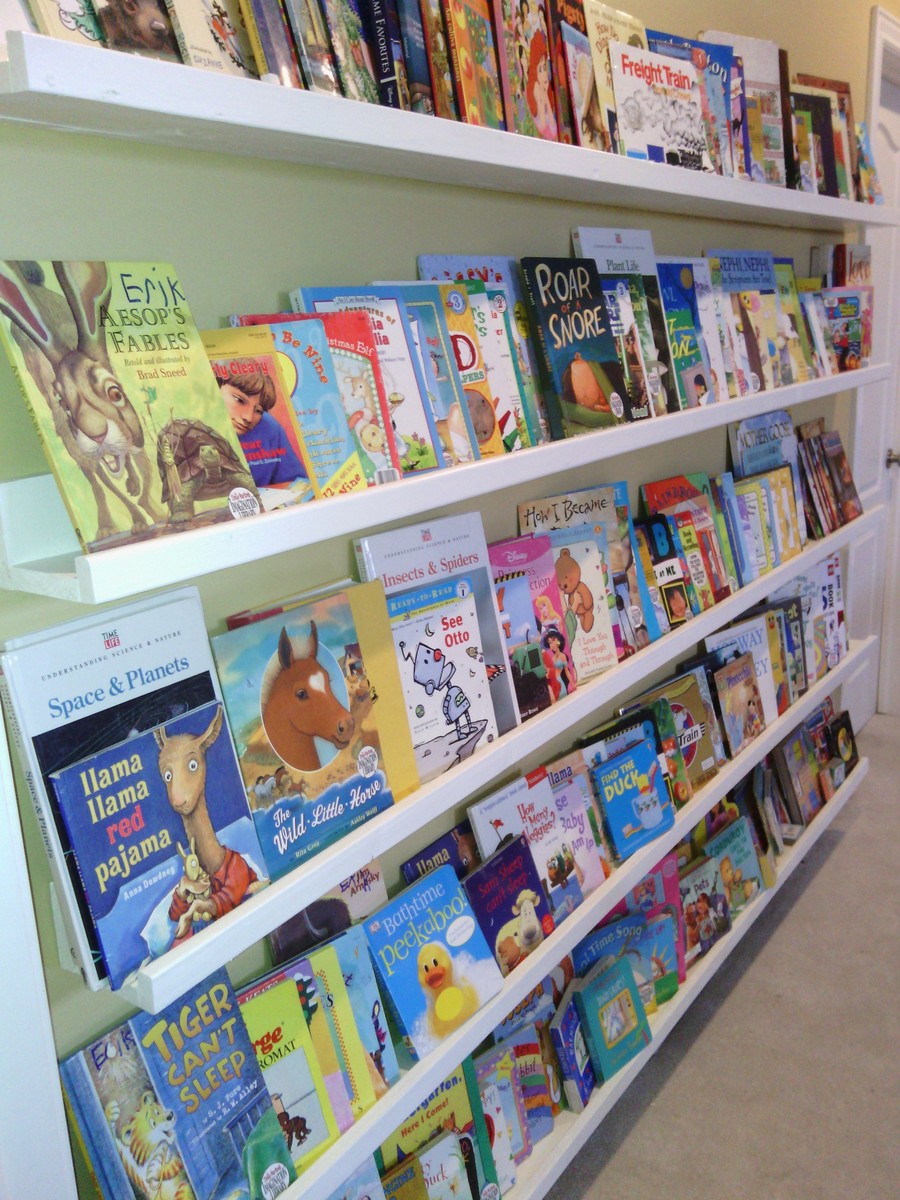
We recently created a Dr. Seuss themed reading nook on our upper level. We have one large book shelf near it, but have also wanted a way to display children's books. These ledge shelves make the books easy to access while also creating a beautiful piece artwork at the top of our stairs. Now, instead of have a long blank wall in the hallway between doors on the little landing we have a beautiful library. I have loved how they have turned out and wanted to share with others!


Wed, 03/05/2014 - 20:18
My children love these bookshelves and reach for the books easier and more often. Come see some of the other things we've made at http://myhomedonemyway.blogspot.com/
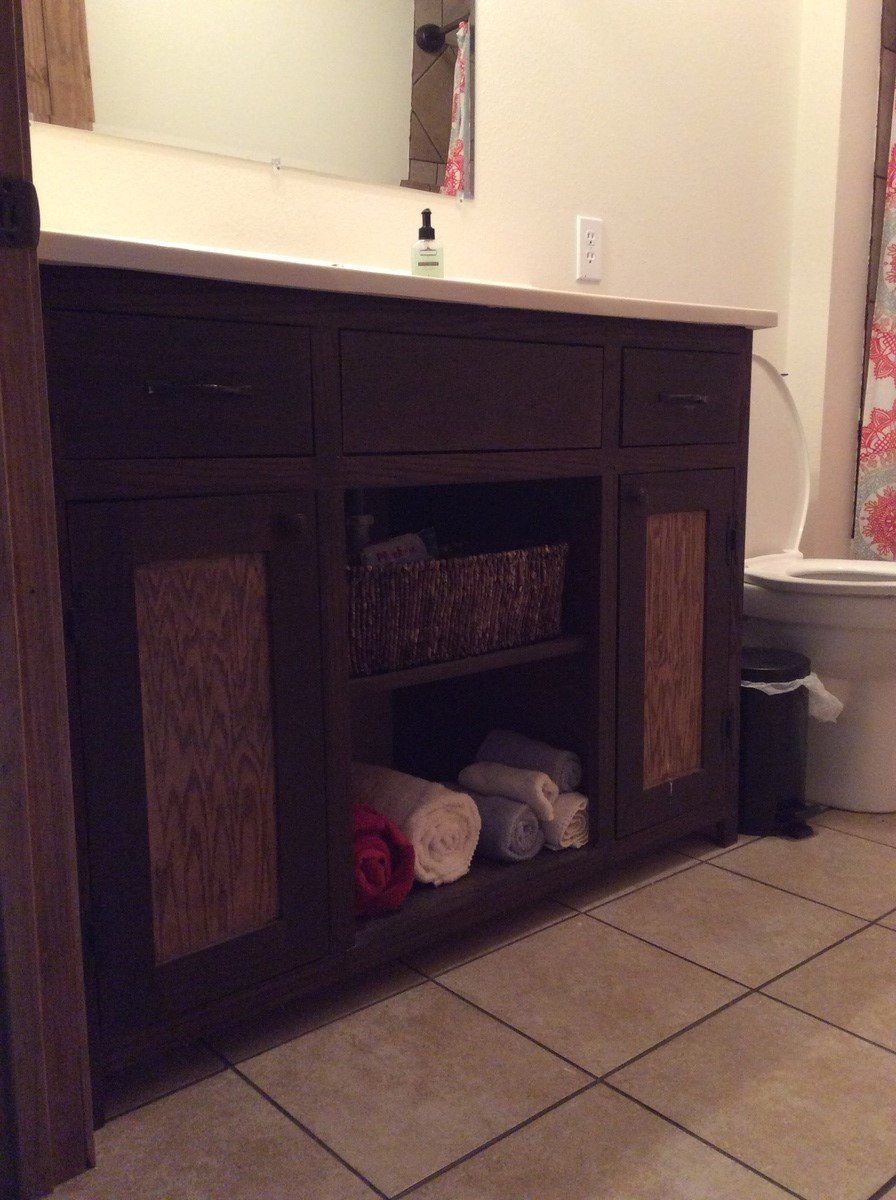
My husband and I built a house doing all the work that we could. When we started the project, I told the men in my life they were going to build the kitchen cabinets. They were pretty adamant they weren't. I started visiting with experienced cabinet makers. One kept repeating, "It's just a box. It's not that hard to build a box." With that encouragement, I found Ana's website and set about learning woodworking. First I built a step stool for my grandson, next I built some shelves for the shop, then I built this vanity. After I finally got it finished, I called an experienced woodworker to build my kitchen cabinets. Ha! I will say though, when the appraiser came out, he commented on what a nice vanity it was! Thank you, Ana, for opening up a new world to me!!
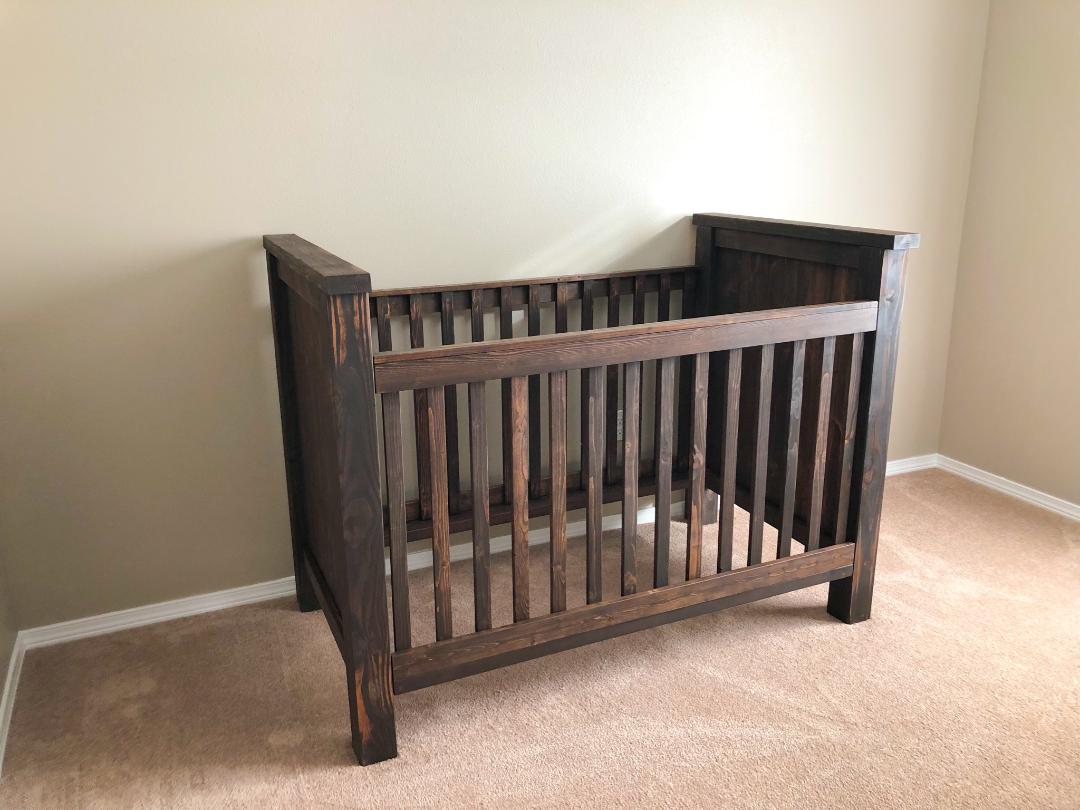
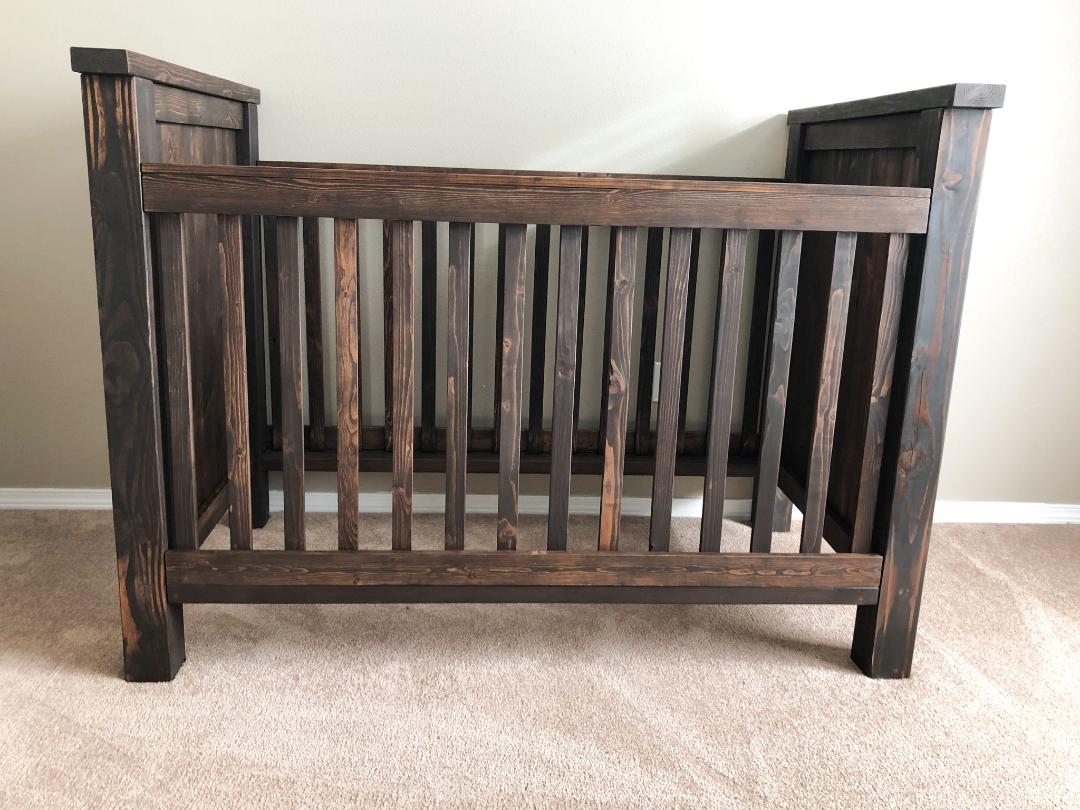
While I found the plans a little difficult to follow as there were steps left out, missing measurements, and misinformation, it was an easy project and I'm so glad I made it. Even at 21 weeks pregnant it was totally doable alone. The only thing I needed my husband for was to hold the side rails at the correct height.
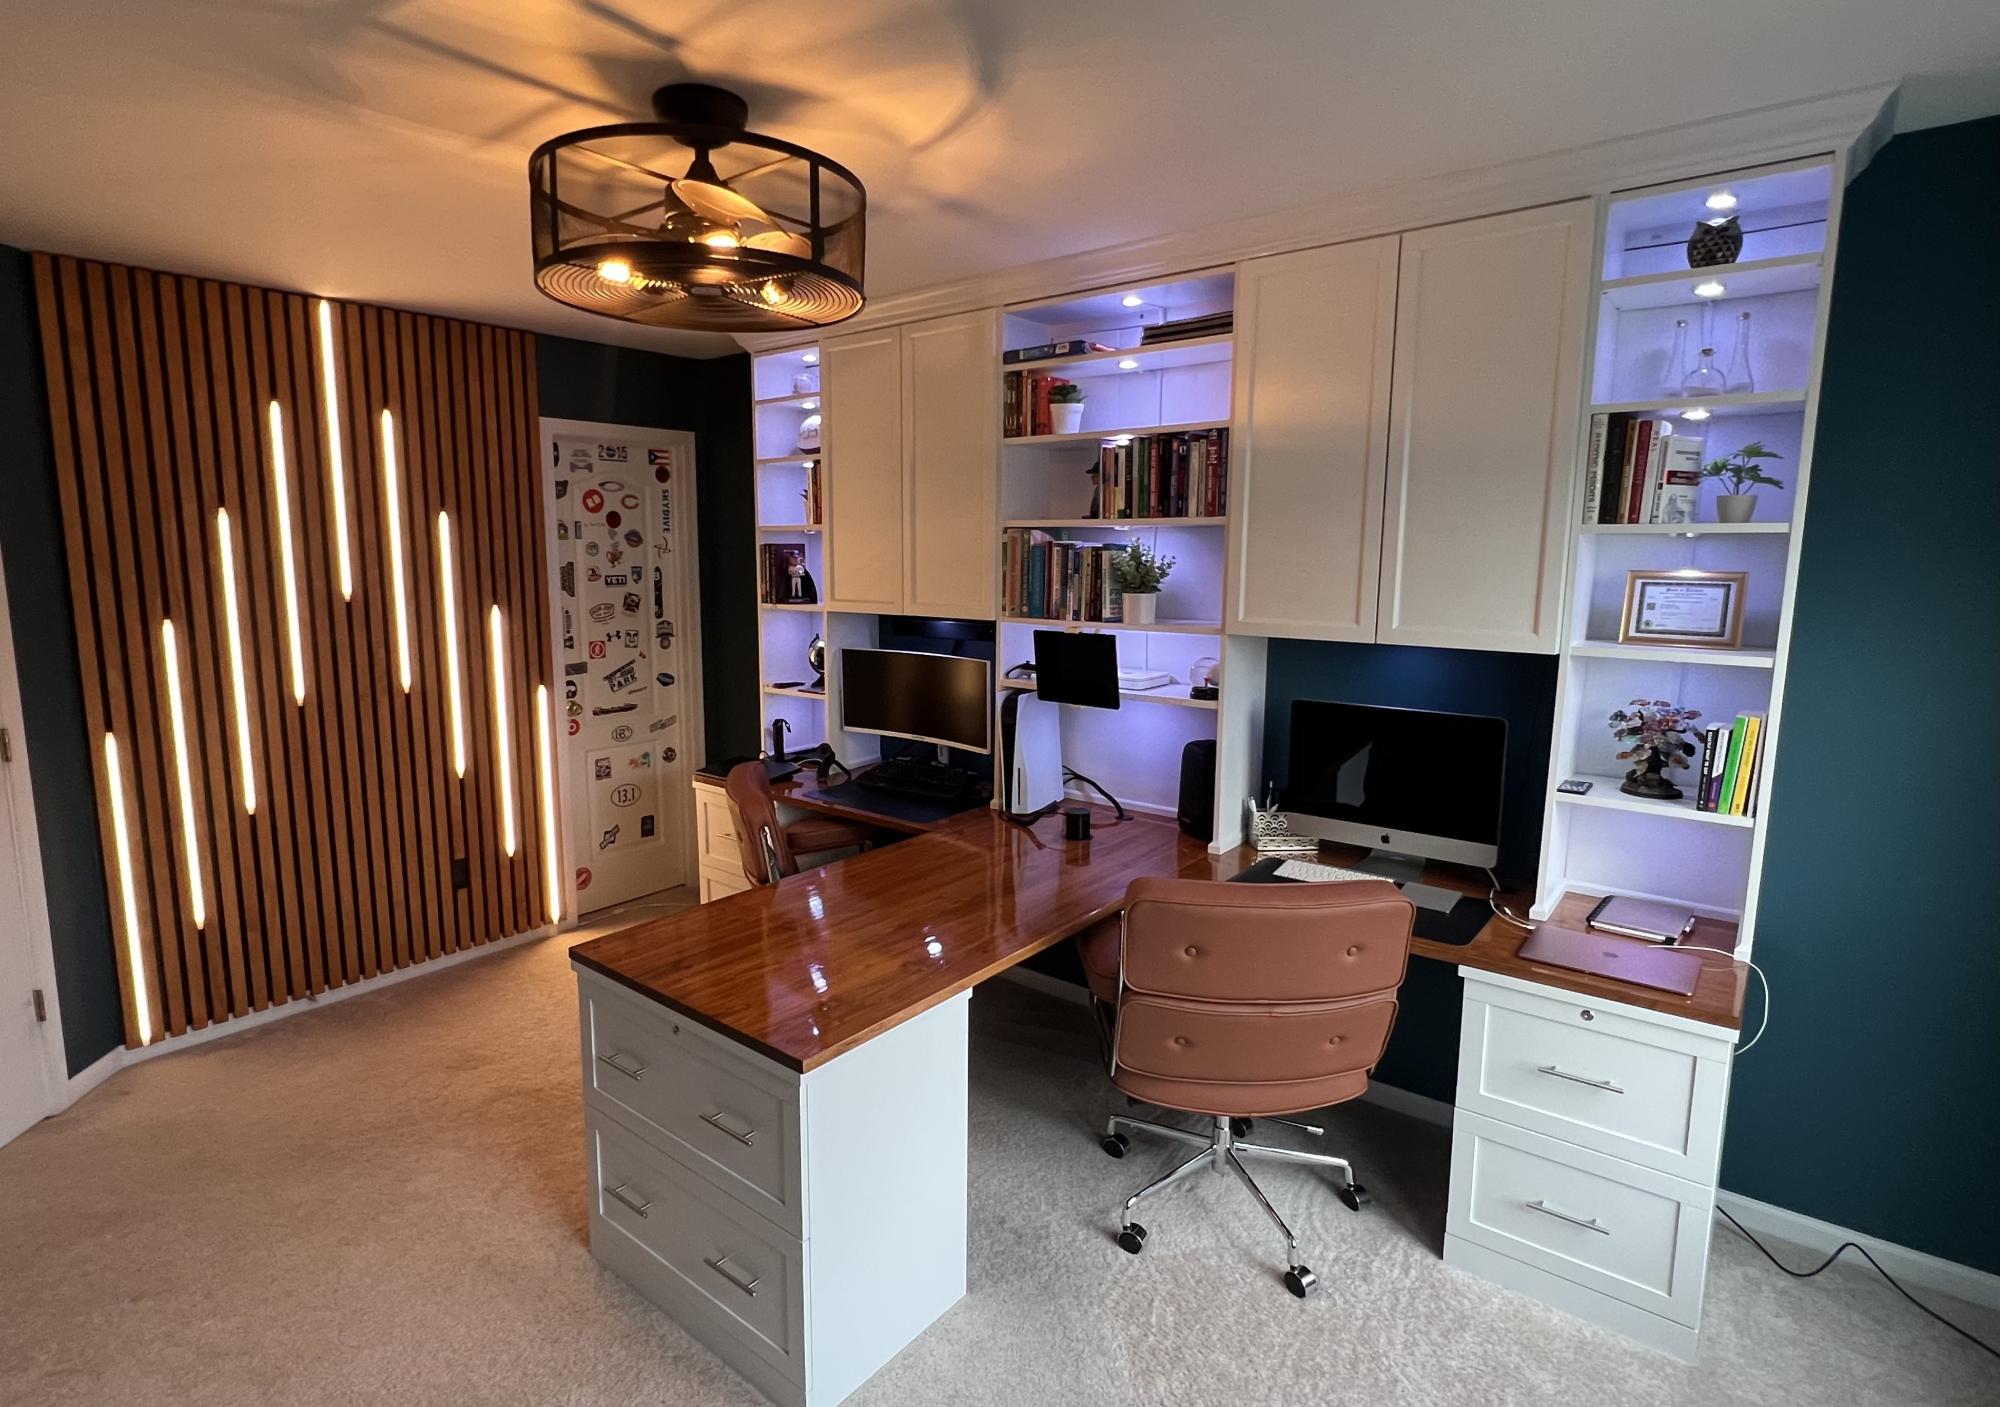
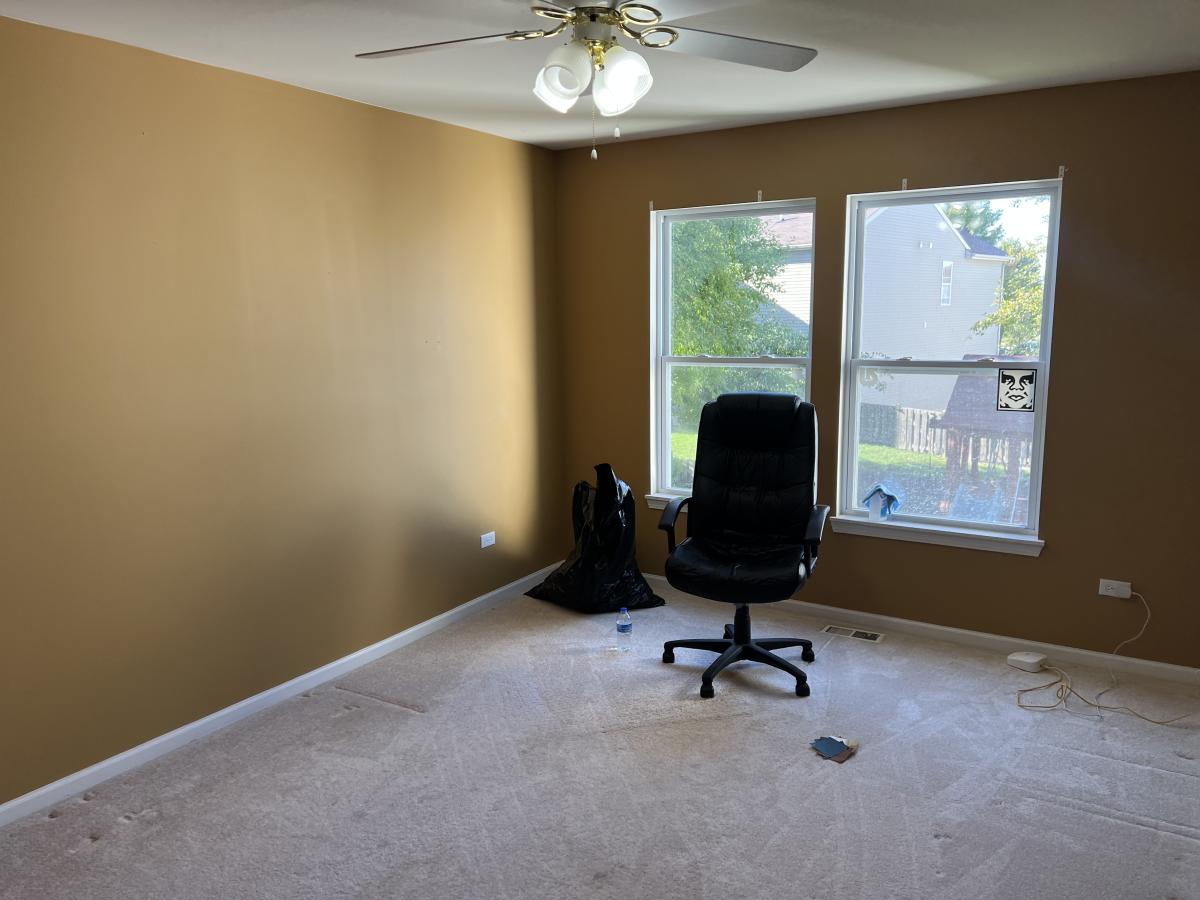
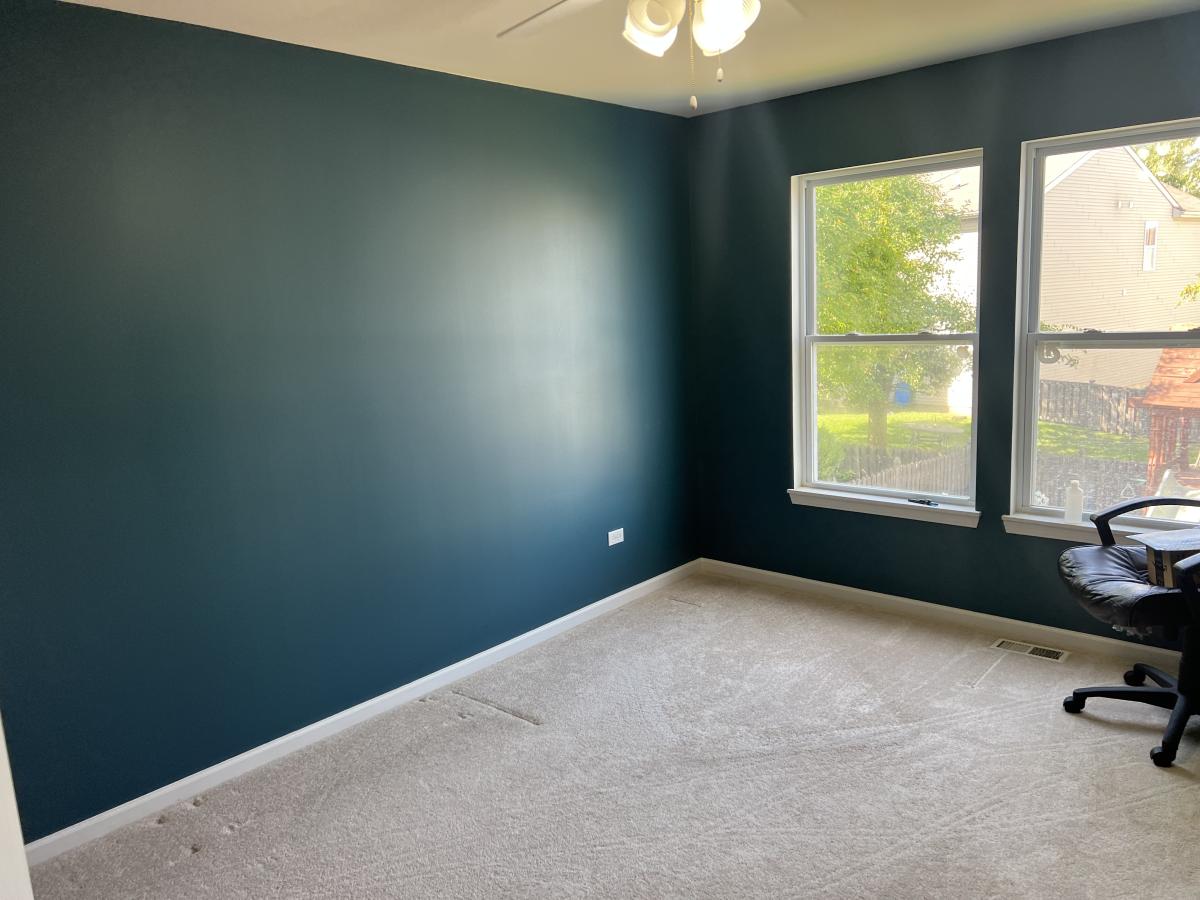
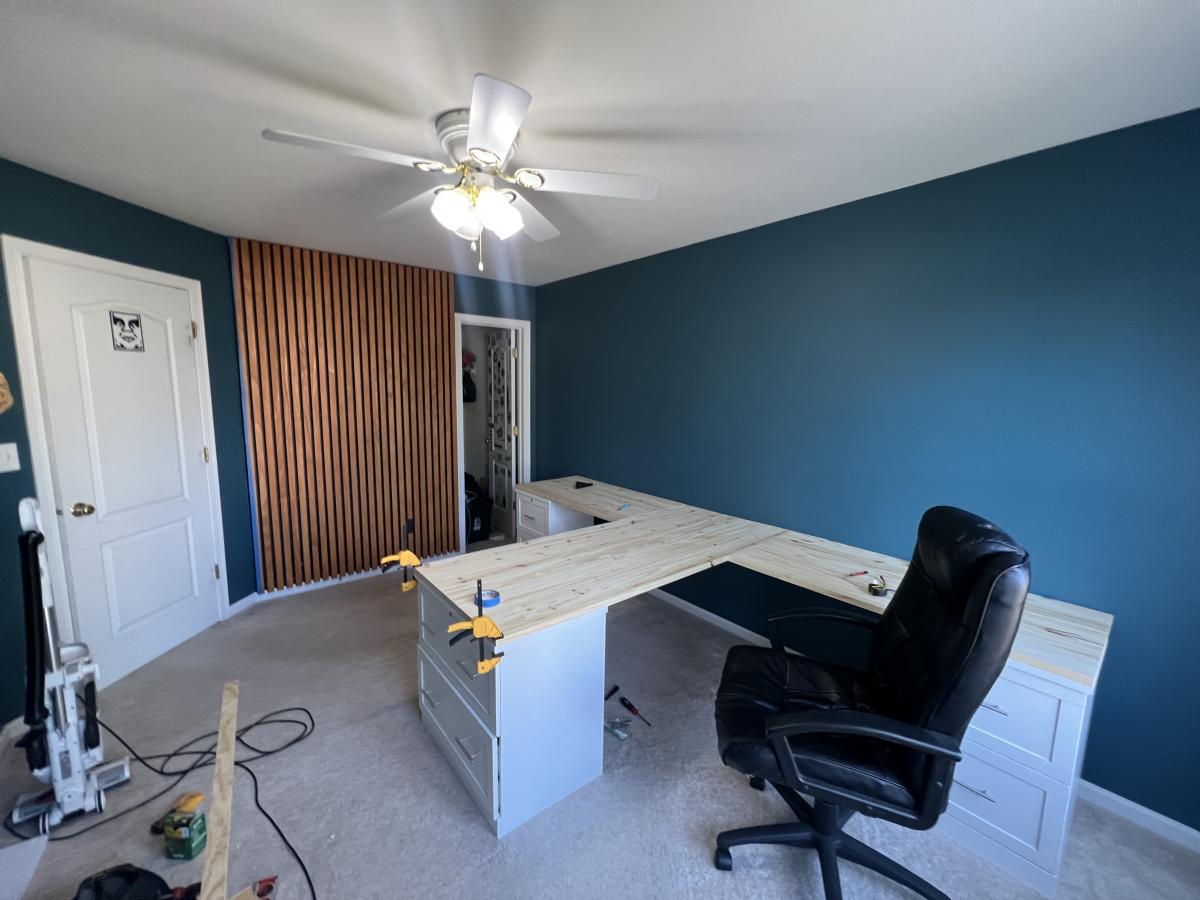
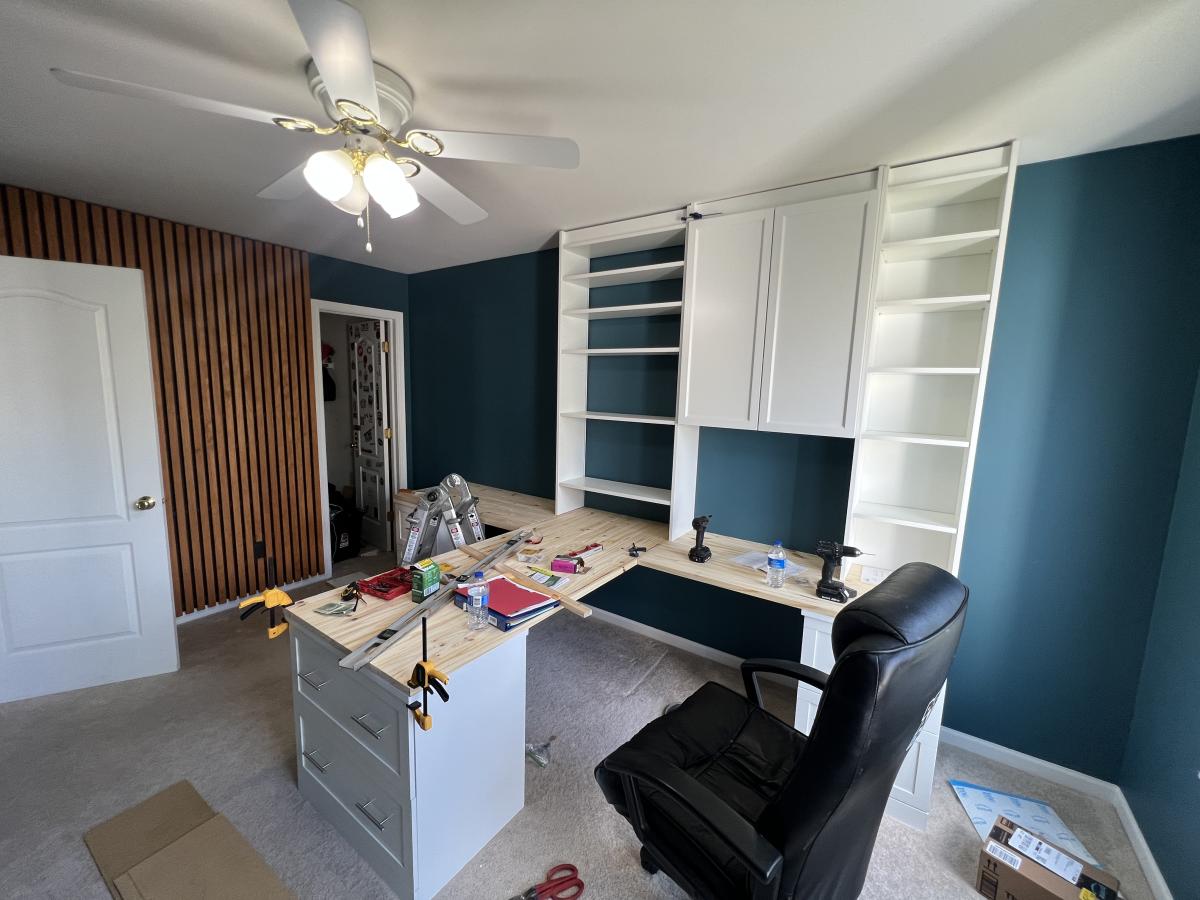
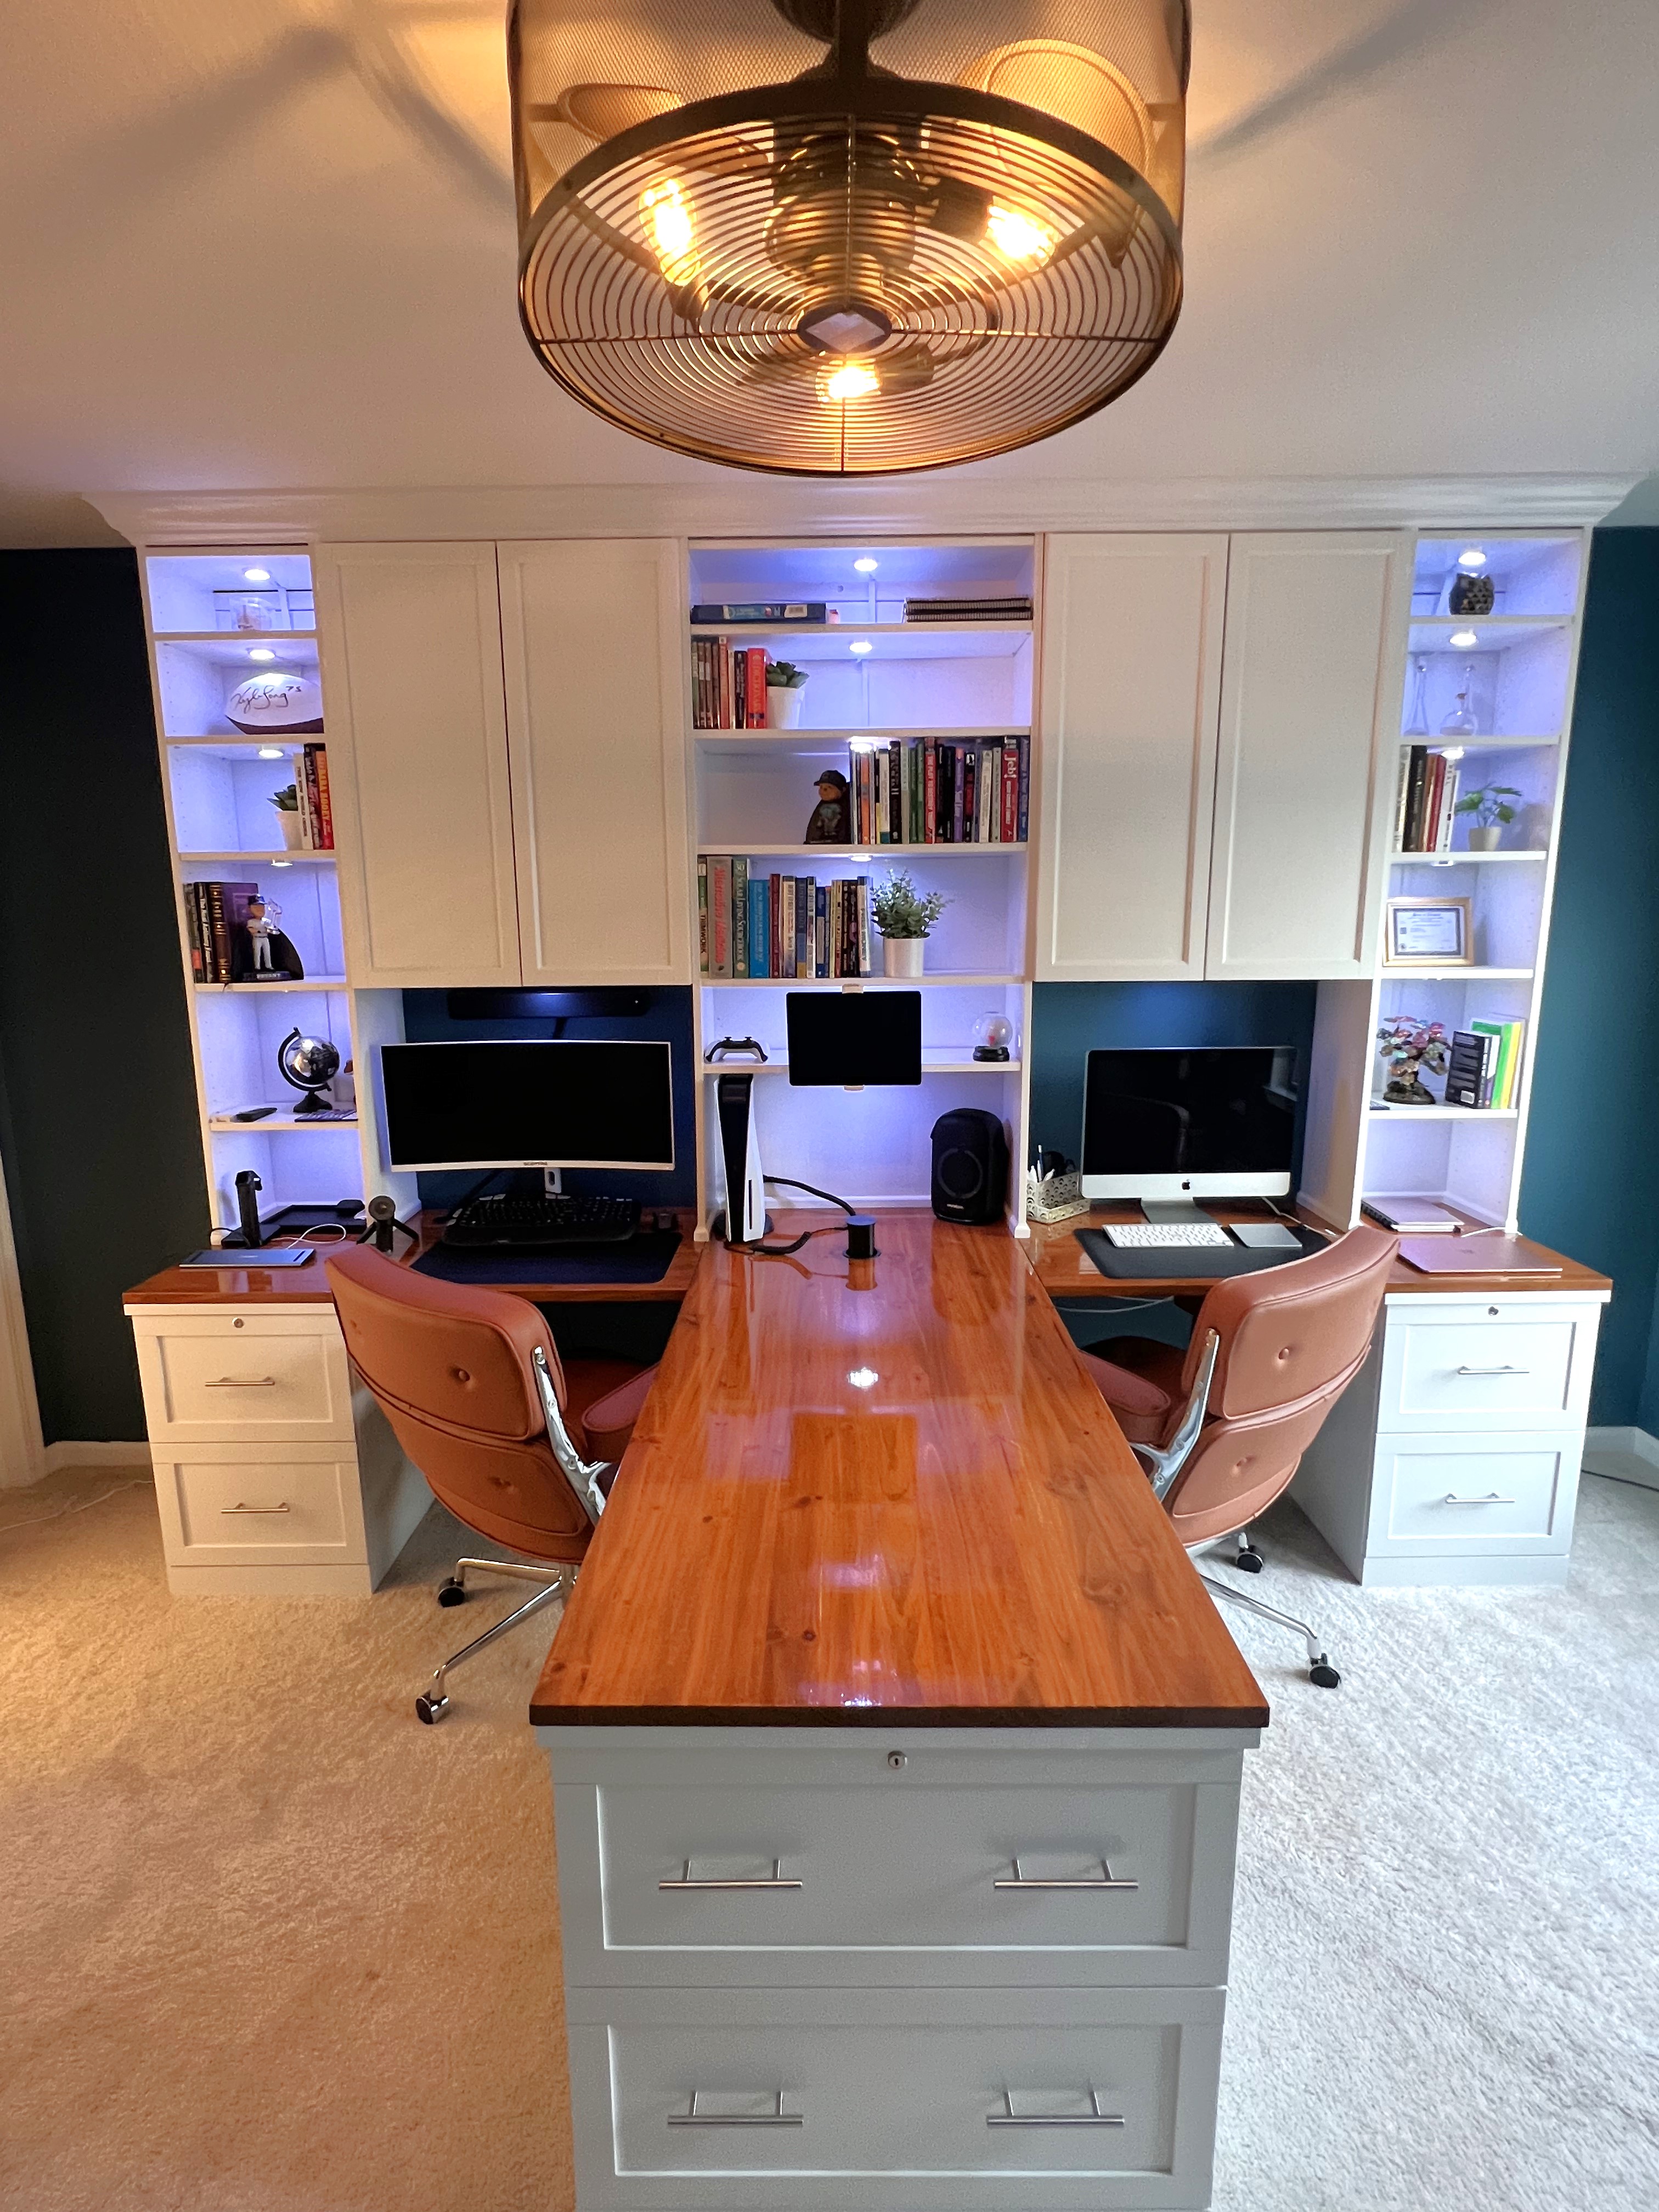 My home office remodel was inspired by a post from Ana White a few years ago. For this project I ended up using IKEA bookshelves and cutting the tops off and flipping them upside down. I used some crown mounding to cover the base of the cabinets on the tops. The desk top bases are file cabinets I found at the office supply store and the desk tops are edge glue pine. Overall I think I only had to make 8 cuts for the entire project. Saving me a ton of time and money. Thank you Ana for all of the wonderful post!
Mark Danreiter on Facebook
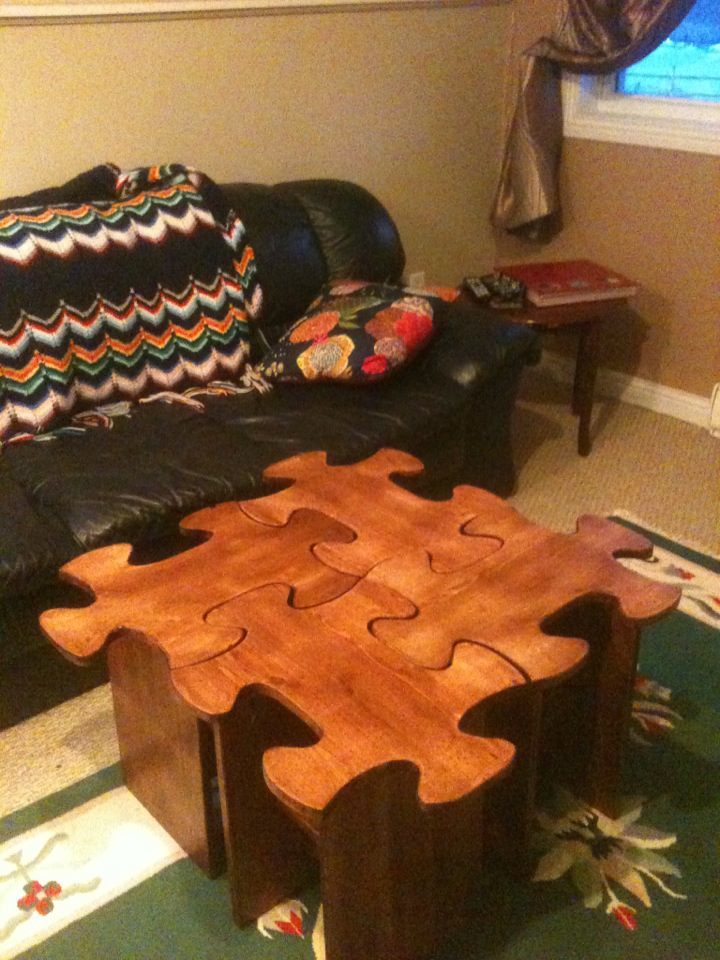
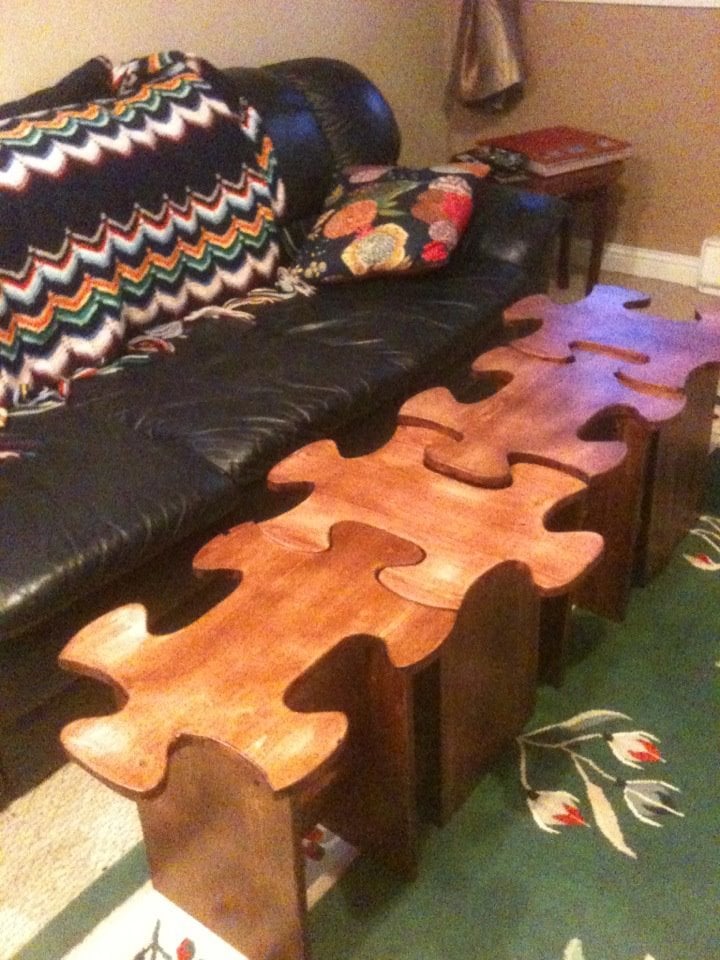
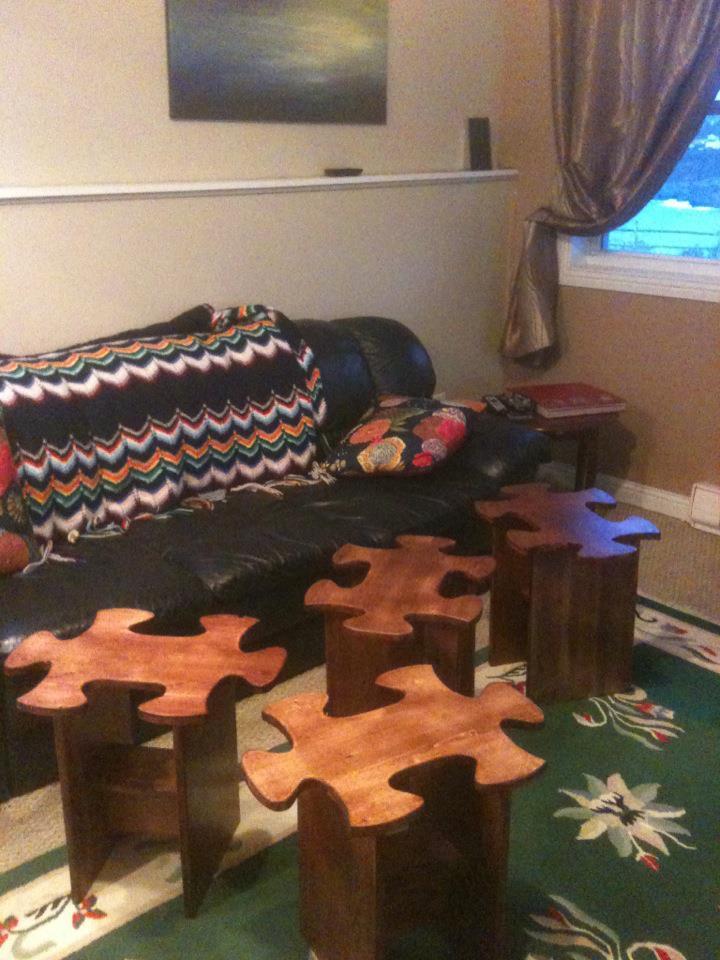
I was super inspired by the "iTable" which I am also going to build... but combined the idea with an idea I saw in a fancy home decorating magazine (a jigsaw puzzle stool).... took a lot of fiddling to come up with a 'universal puzzle piece' but in the end it worked out!

Fri, 05/25/2012 - 05:49
That is so cool! Beautiful job. Looks like those curves too lotsa patience, something I seriously lack. Thanx for sharing.

Fri, 05/25/2012 - 13:10
Love your creativity and project!!!!! So awesome!!!

Sat, 05/26/2012 - 06:29
Yes, it took ALOT of fiddling to get a universal puzzle piece template made up -- I was sorta copying one I found (google "Vector Puzzle") but had no way to blow it up so huge. Even after I cut them out, I ended up doing a lot of sanding to make the joints work, but it was fun! If you want, Sue, you could mail me an envelope and I'll trace one for ya!
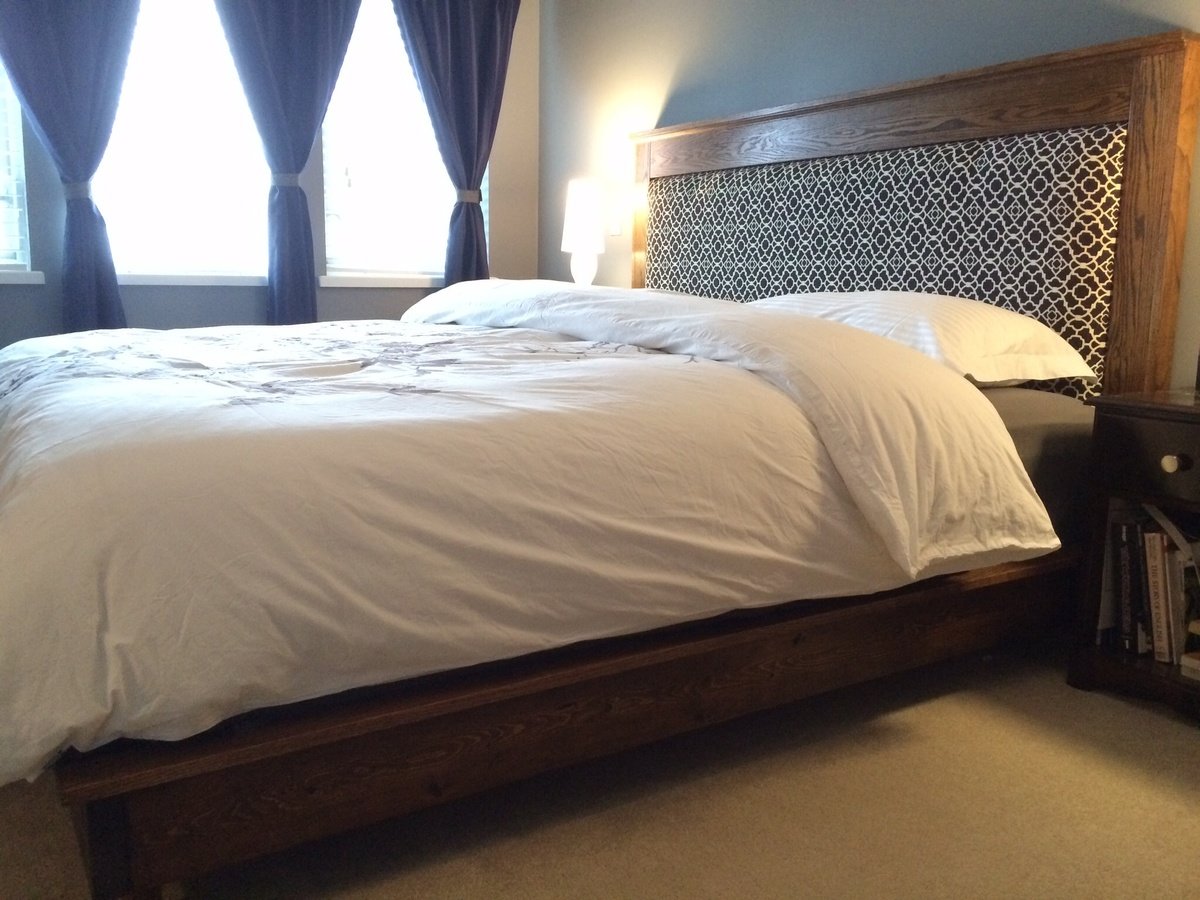
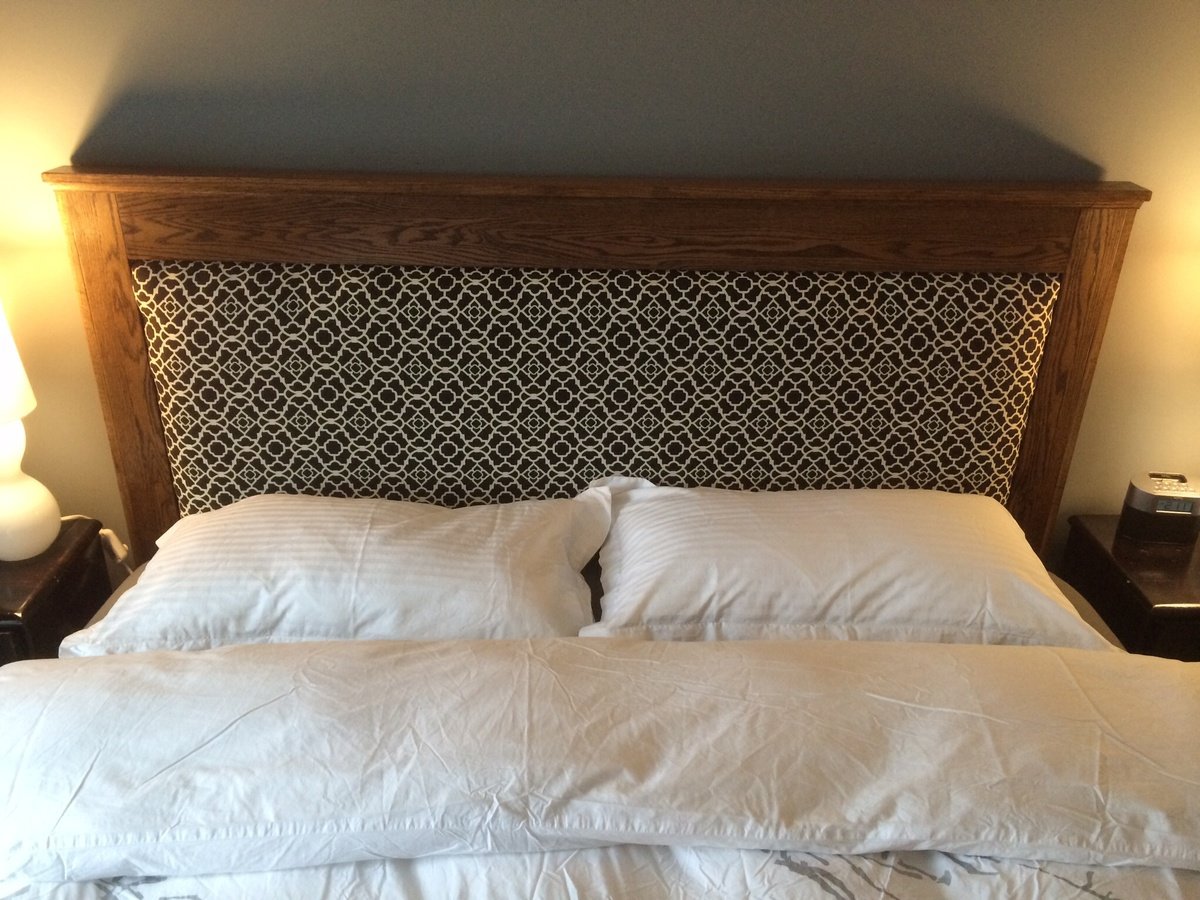
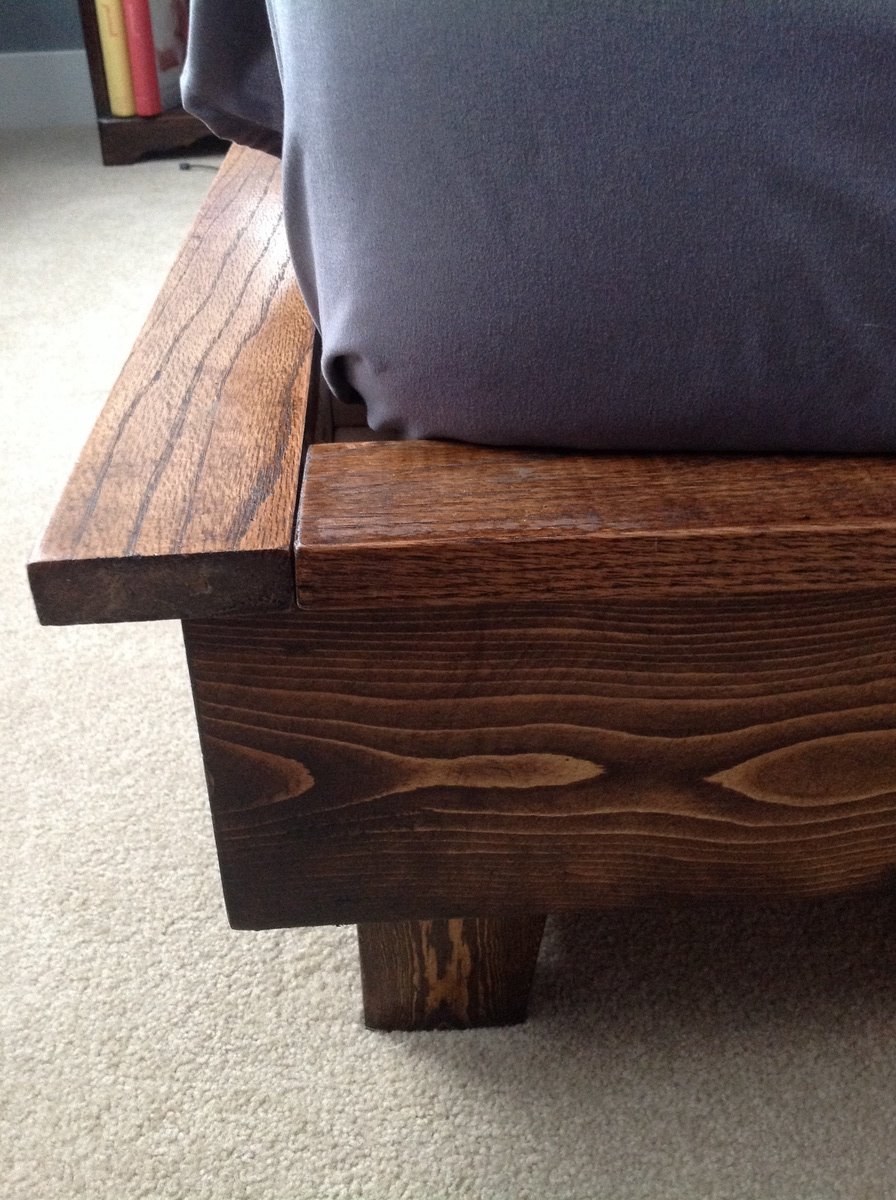
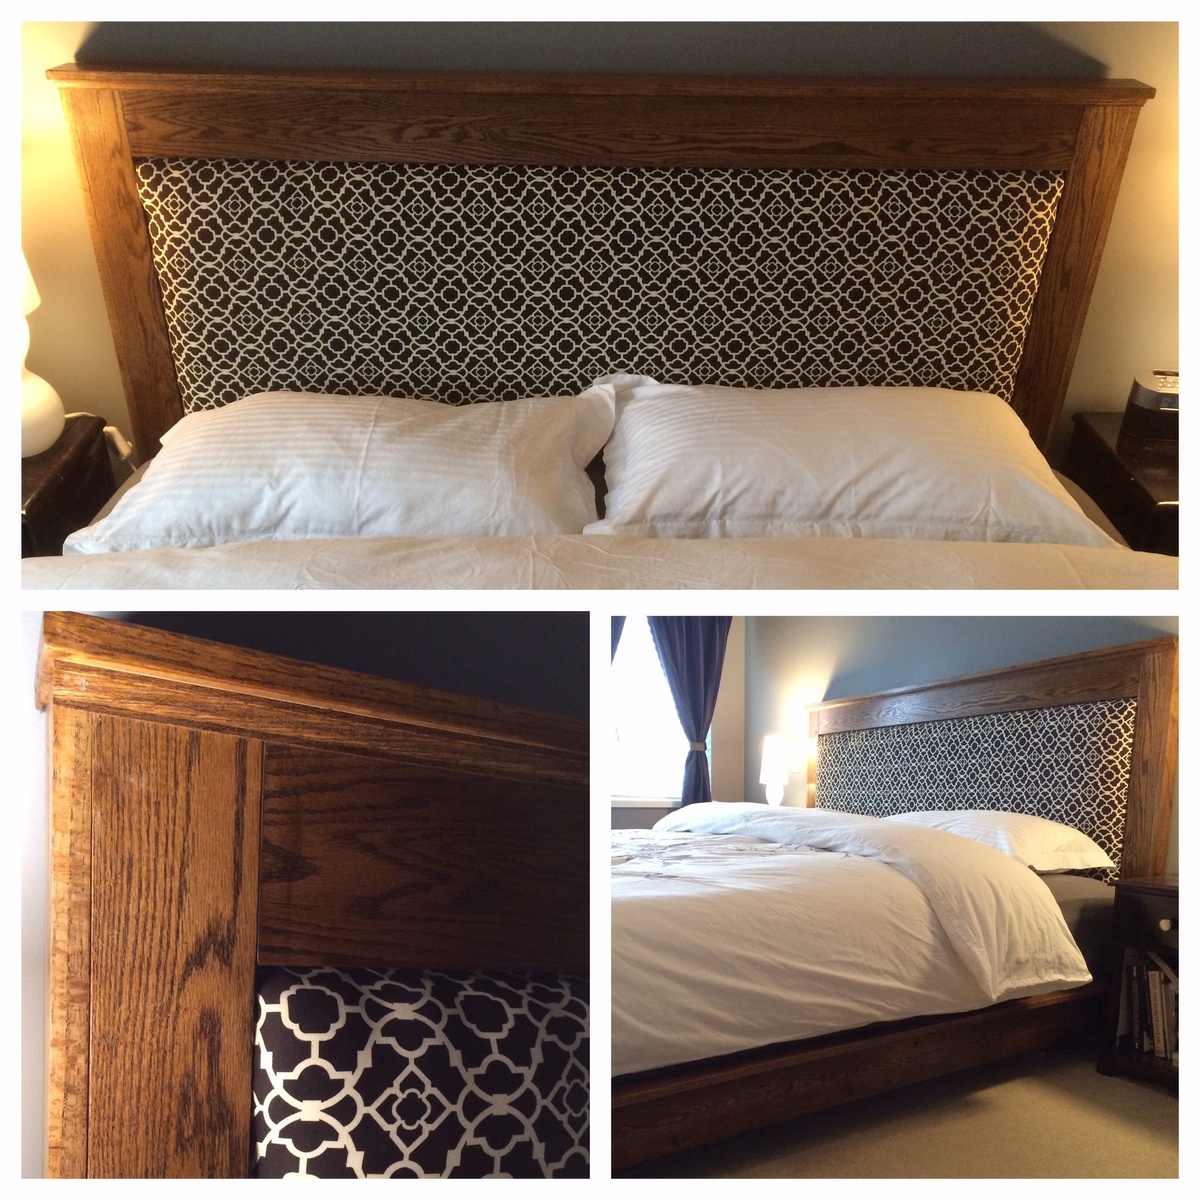
I converted the plans to king size and used oak for the headboard and the platform edge on the bed. The oak added to the cost as it is almost 10x the cost as construction lumber.
I made the headboard frame with pocket holes and attached it to the plywood with screws from behind. I also used pocket screws to assemble the bed frame.

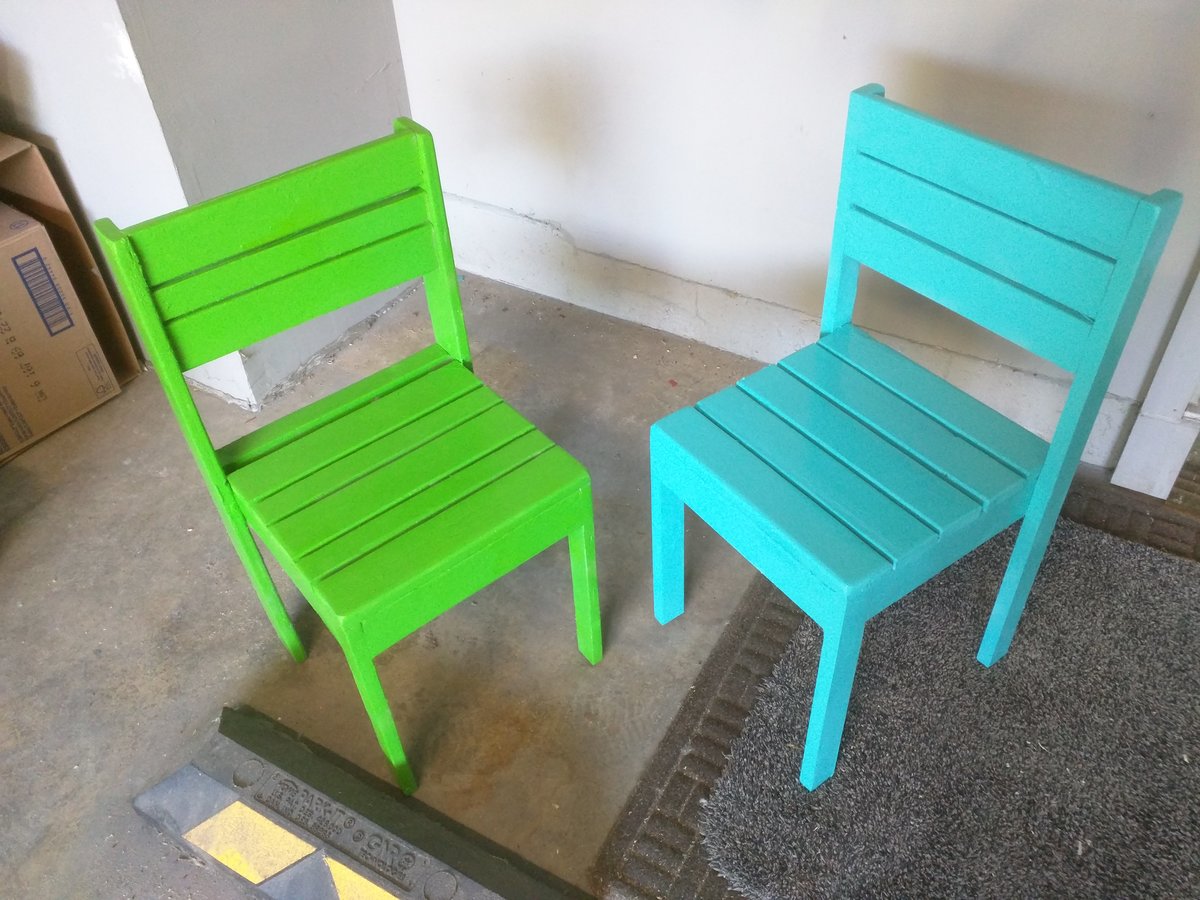
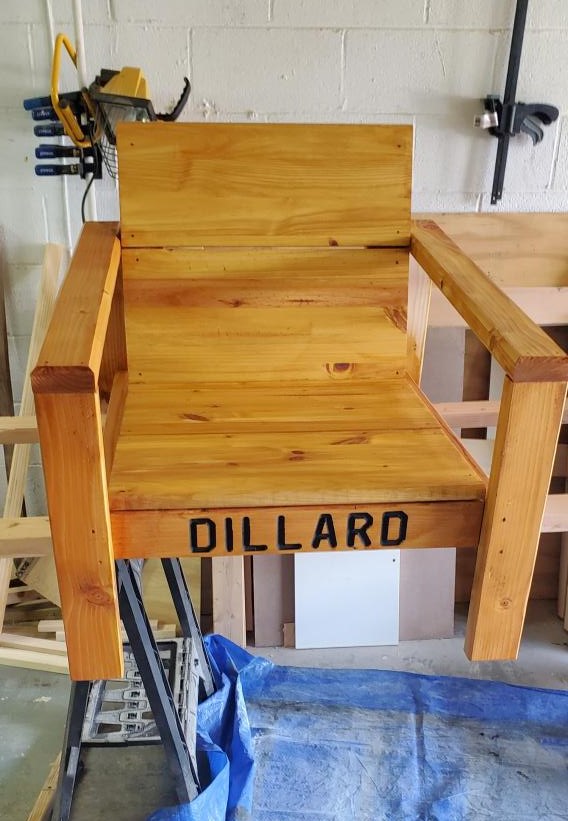
Chairs for grandkids. They picked it their colors.
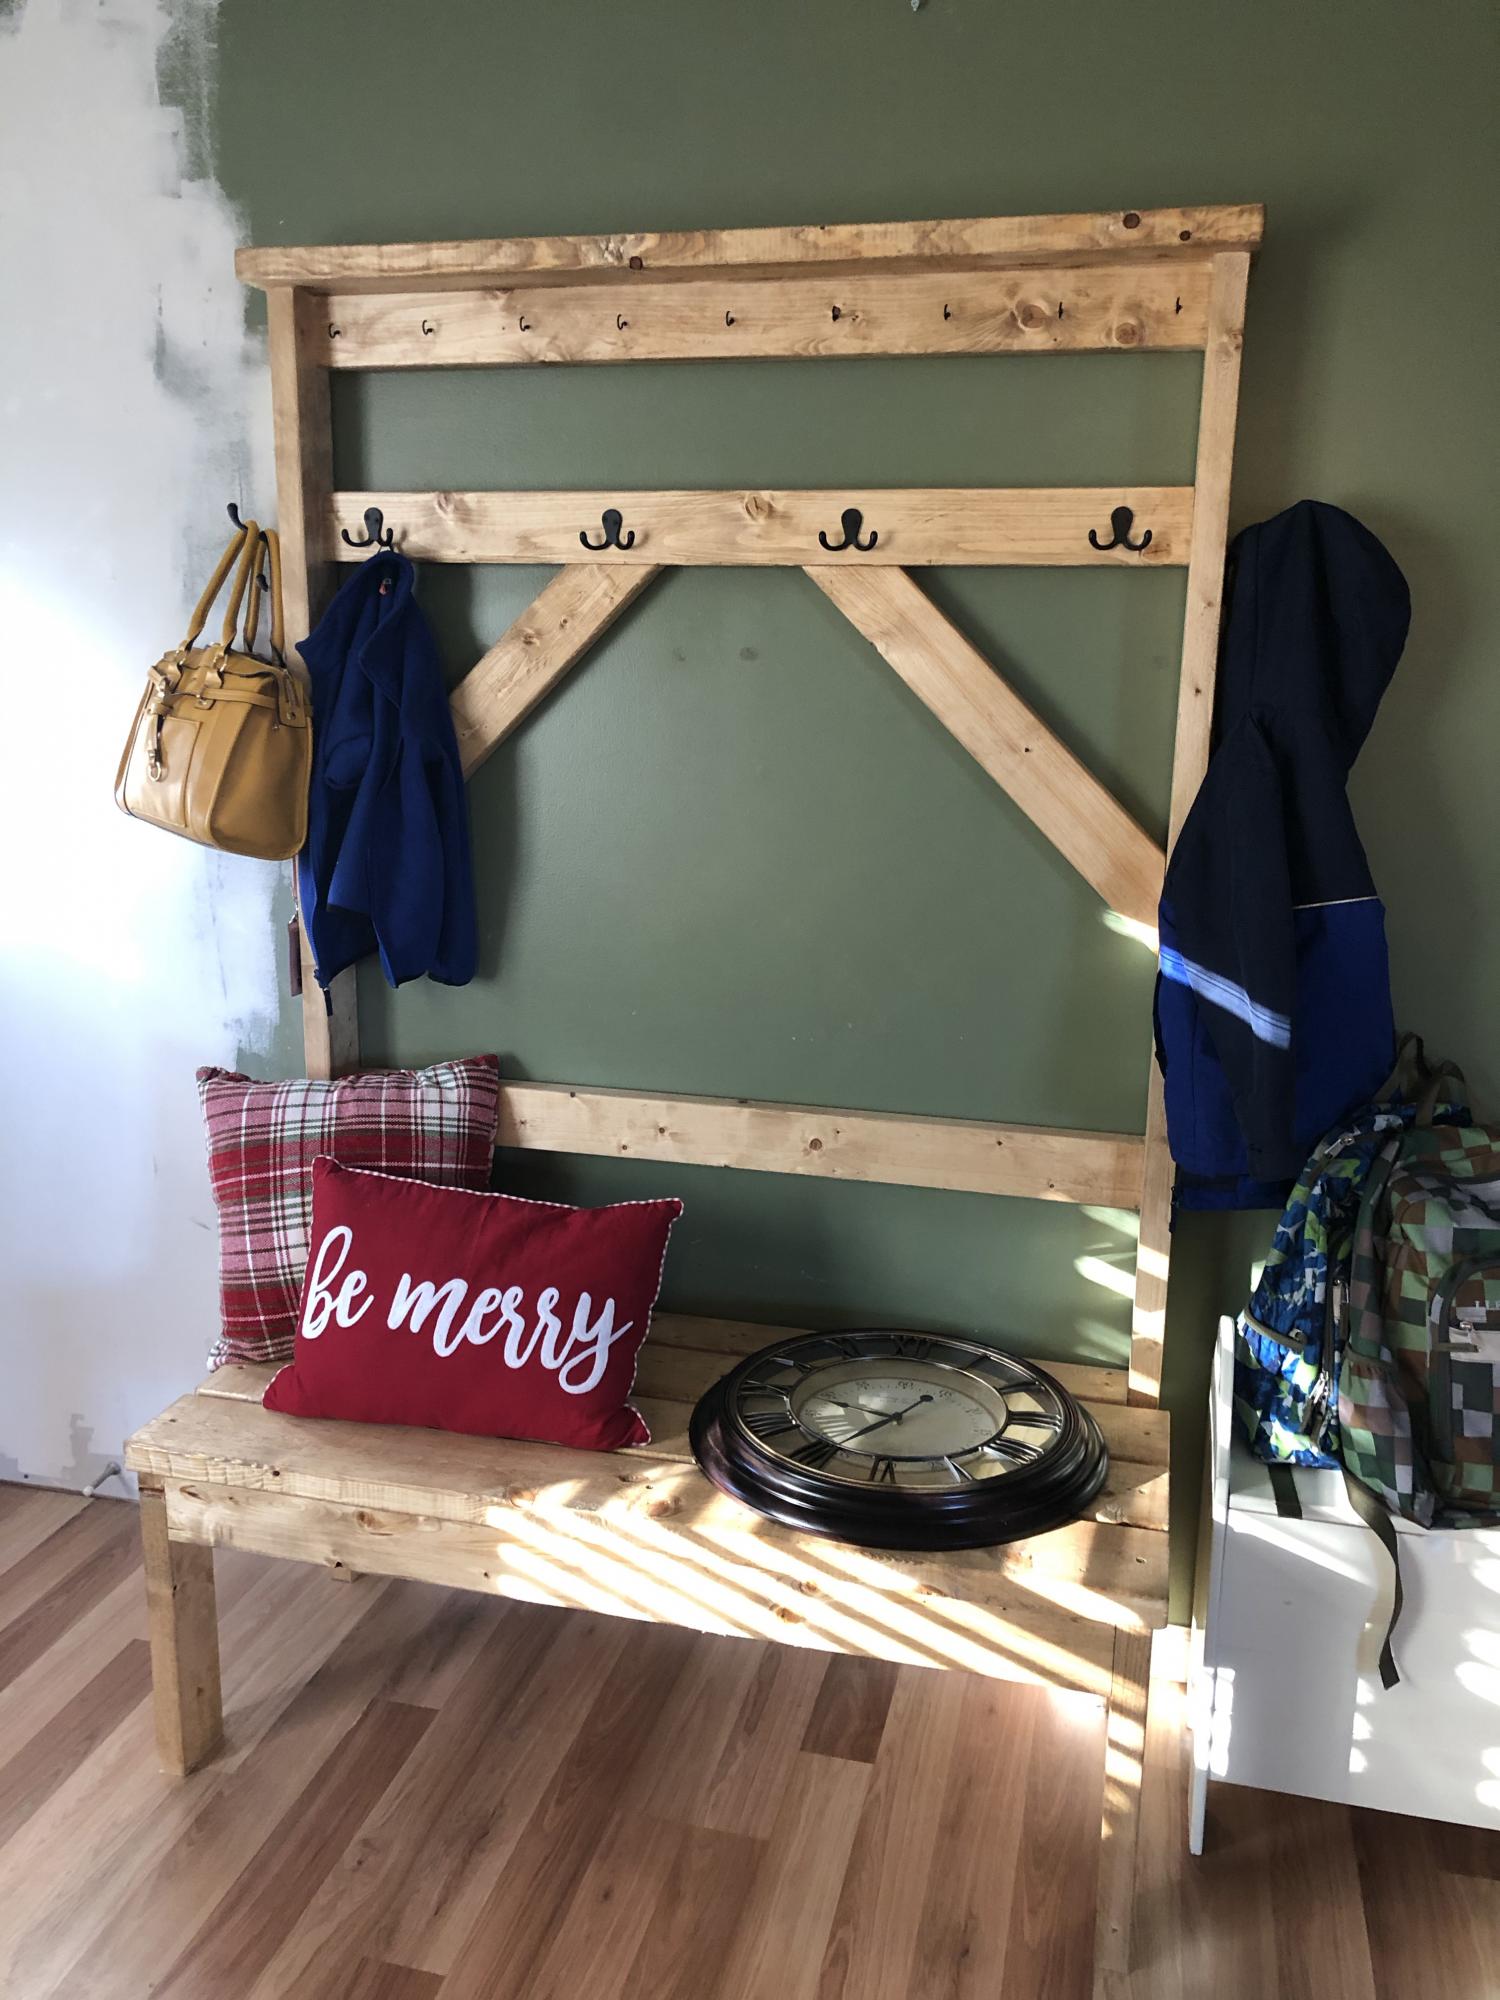
My family was all coming over for Christmas and we were going to have about 30 people at my house. I only had my mudroom hooks but no other place to store people's keys, coats, etc. When I saw these plans they looked quick enough to build in one night (the night before the party lol). So I did! And man did it get use. I wish I would've taken a picture with all the coats and purses and keys on it.
I have done quite a bit of wood working never being great at any of them . But I truly love furniture building.
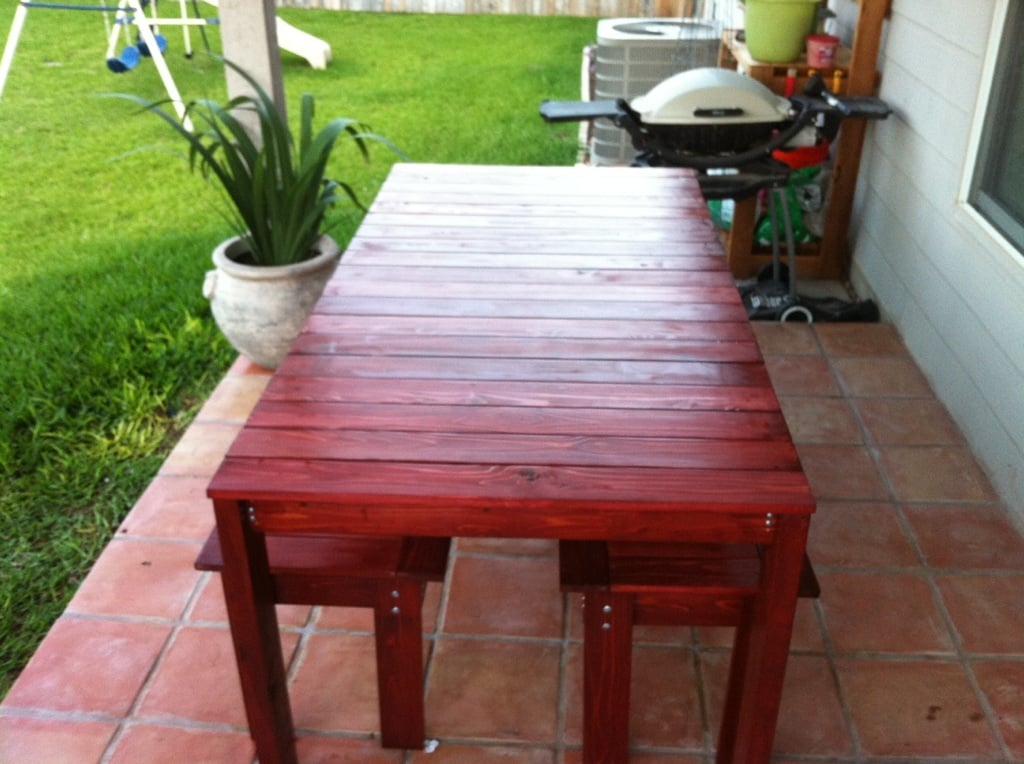
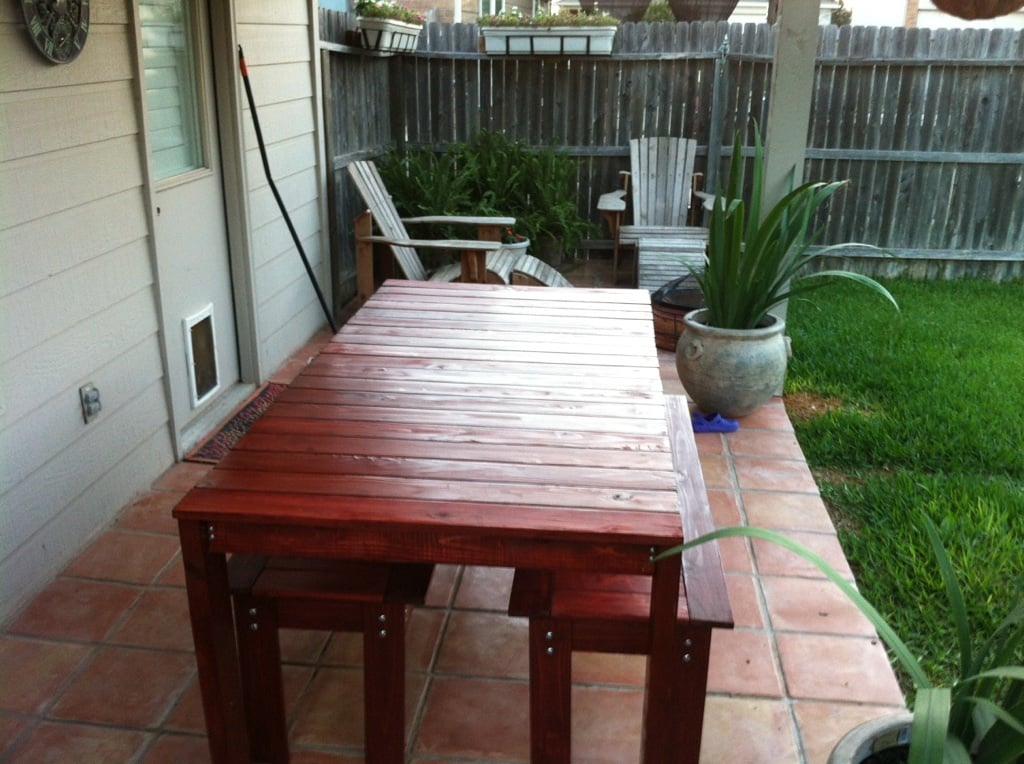
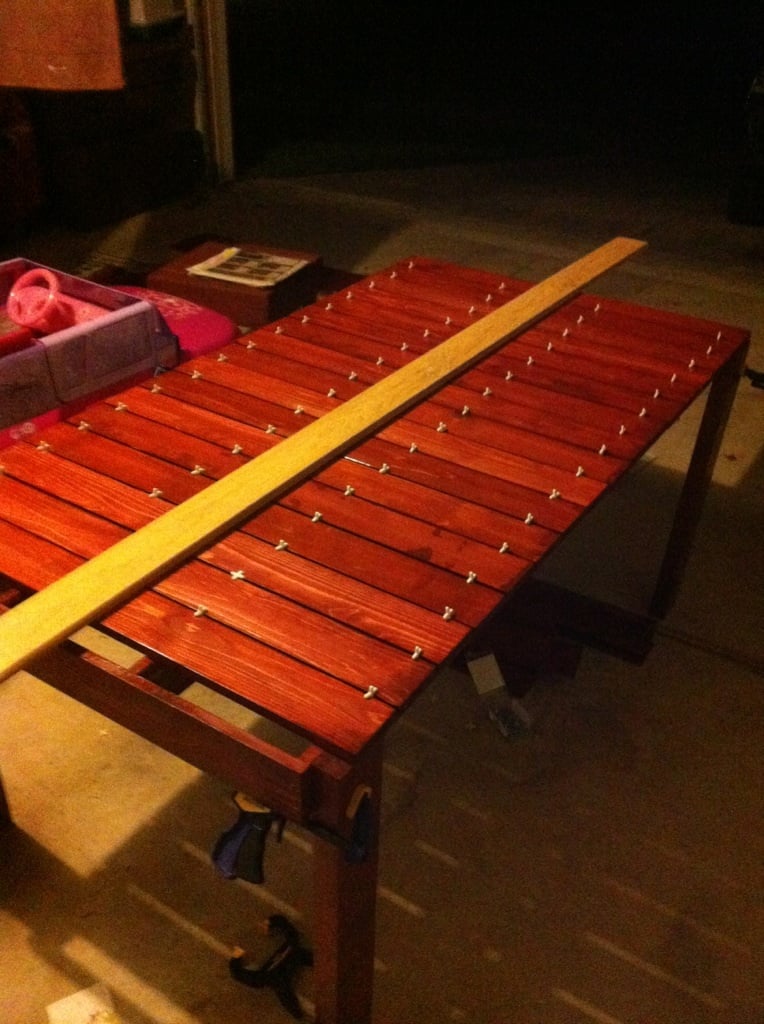
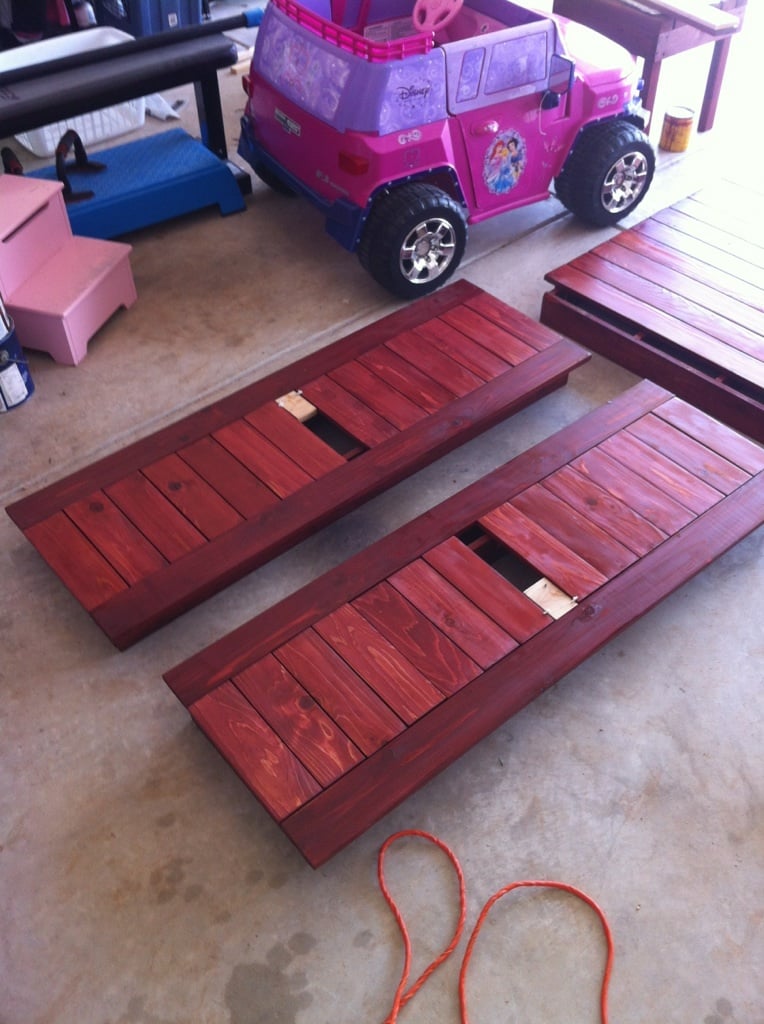
I am enamored by the Simple Outdoor Table that is usually featured on the homepage. This was my second project, and in hindsight, I it took several weeks to finish working at night because I made several mistakes that required some problem solving. Naively, though, I studied the plans, borrowed a saw and got to work.
I opted for two benches to save space on the patio when not in use. As you can see in the picture of the bench tops, I opted for a smaller spacer (1/16")because it improved the looks dramatically, but that left me with a gap. There will be a skinny slat in the middle of each bench.
I also opted for 3/16" spacers on the tabletop which required one more board than was scripted. That is much easier to account for on the table then the benches.
You can see from the stacks of lumber in the garage, assembling is the easy part! I hope to never see the words, sand, stain, and seal in sequence again. I also learned a few difficult lessons when it came to using the Kreg Jig, which was new to me.
Now that it's done, though, I am very proud of the outcome.


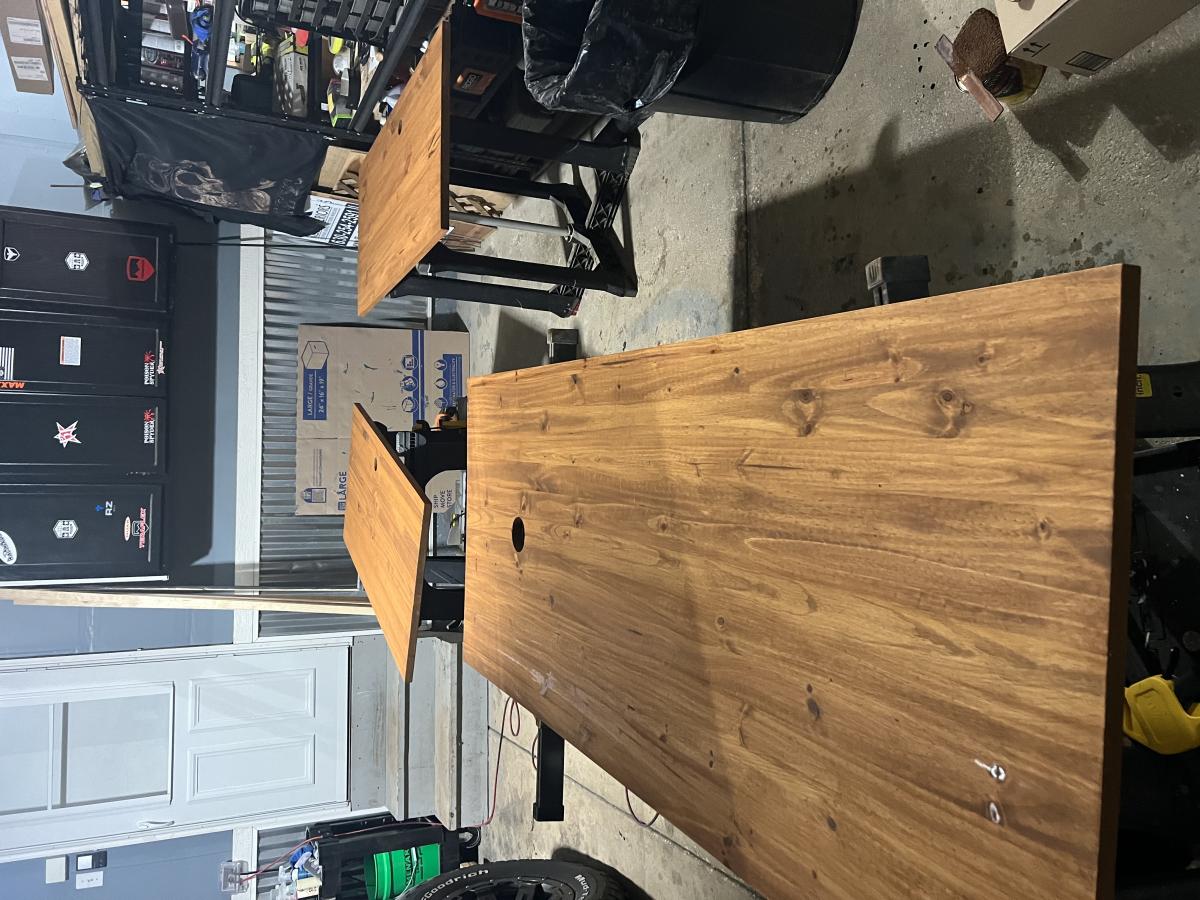
My wife wanted a new table for our dining room in our new house. I have been eyeing this project for a couple of years and finally convinced my wife that I could do it since we had the space. The plans on this site were easy to follow and I was able to really put it together. As far as the color of the stain, that is all my wife as she has the eye for colors and matching. Overall, this was a fun project and I can't wait to put the bench together next.
There is 1x10 on the shopping list! This was the first cut to make and I realized no where does it say to grab a 1x10 board. Other than that, the plans were great. Definitely made some mistakes along the way but overall I am very pleased. Thanks for the plans!