Community Brag Posts
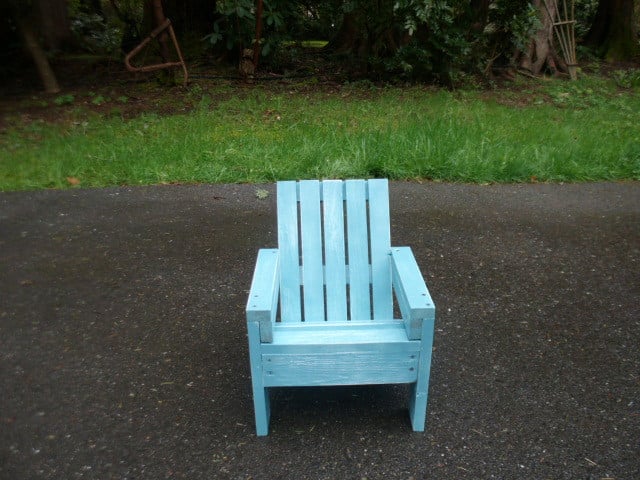
Pool Furniture
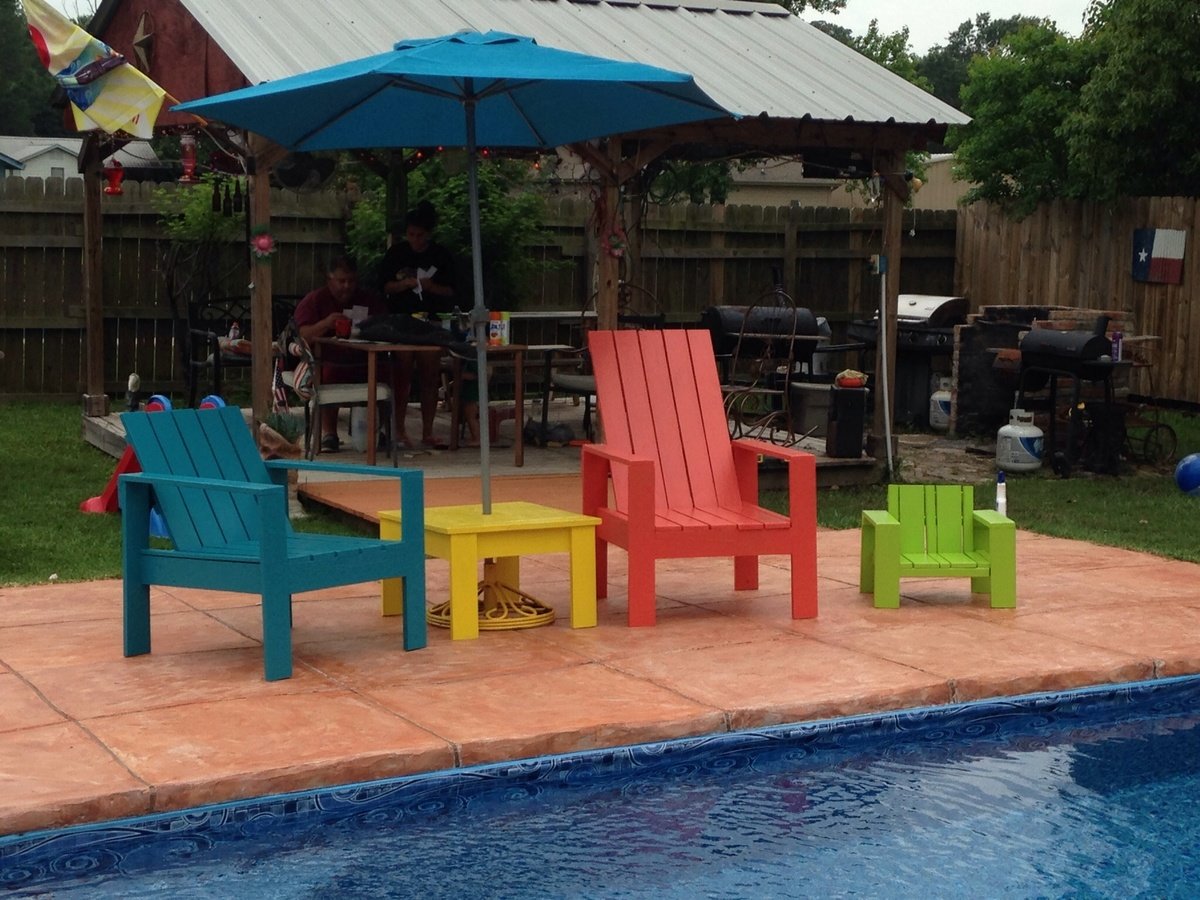
I made the back slats taller on the second chair (salmon colored one) so I could just lay my head back. They were so easy and I can't believe I did this myself! We made the baby chair with the scraps and our grandbabies love it!
Built from Plan(s)
Estimated Cost
200.00 for all 4 pieces.
Estimated Time Investment
Weekend Project (10-20 Hours)
Recommended Skill Level
Beginner
Camp Loft bed - but bunk bed ready
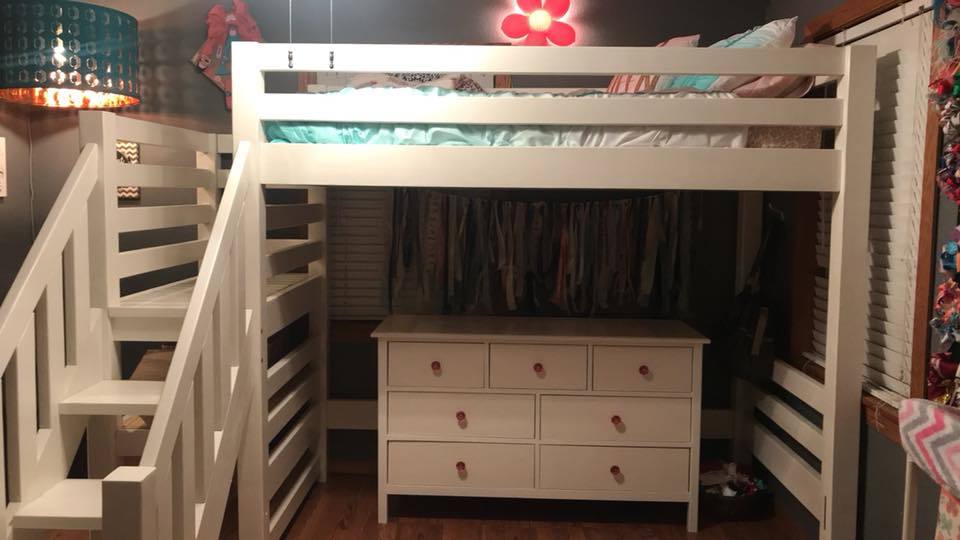
Modified the Camp Loft bed with Stairs plans slightly so that the dresser would fit under the bed without banging your head for access. The heght is taller creating the need for railings to be added to the platform. Conversion to bunk beds was considered so all bottom boards save the front rail were installed. If bunk beds are needed, just add the 2x6 front rail. The mortise slot is already cut. Went with mortise and tenon joints instead of pocket screws. Cubby storage area created under the platform accessed from left side.
Built from Plan(s)
Estimated Time Investment
Week Long Project (20 Hours or More)
Finish Used
White laytex paint
Recommended Skill Level
Intermediate
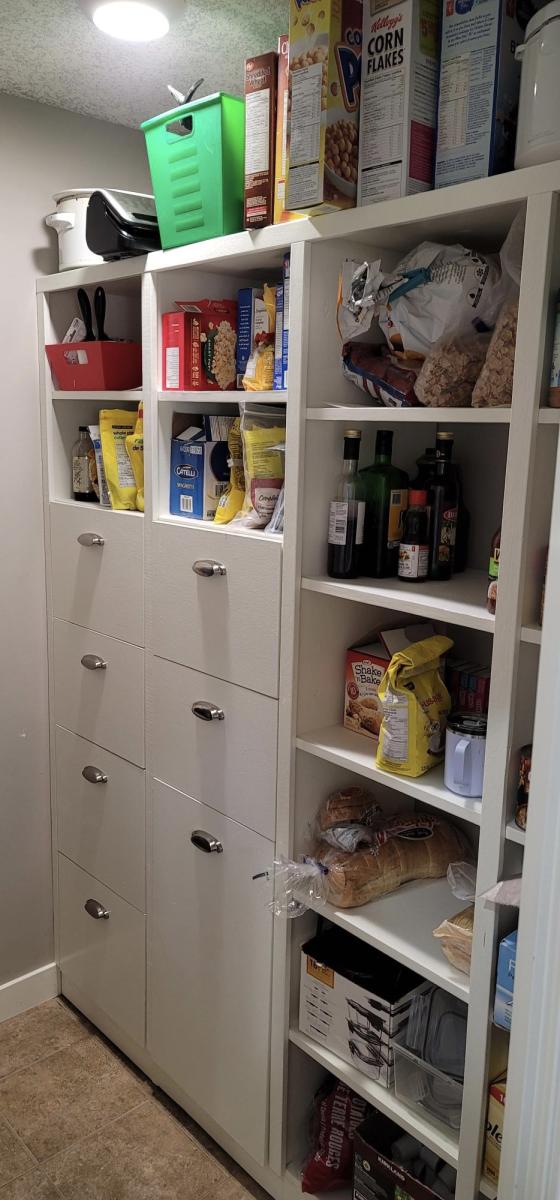
Kitchen Pantry Shelves with Drawers
Kitchen pantry project using 3/4" plywood and using Anna's shelfhelp spreadsheet to get my dimensions. Added drawers including one large for recycling. I wanted to add another large drawer beside the recycling drawer for garbage but my wife nixed it stating she didn't want to have dripping greasy garbage in her hand and try and open the drawer...so she won that one.

Comments
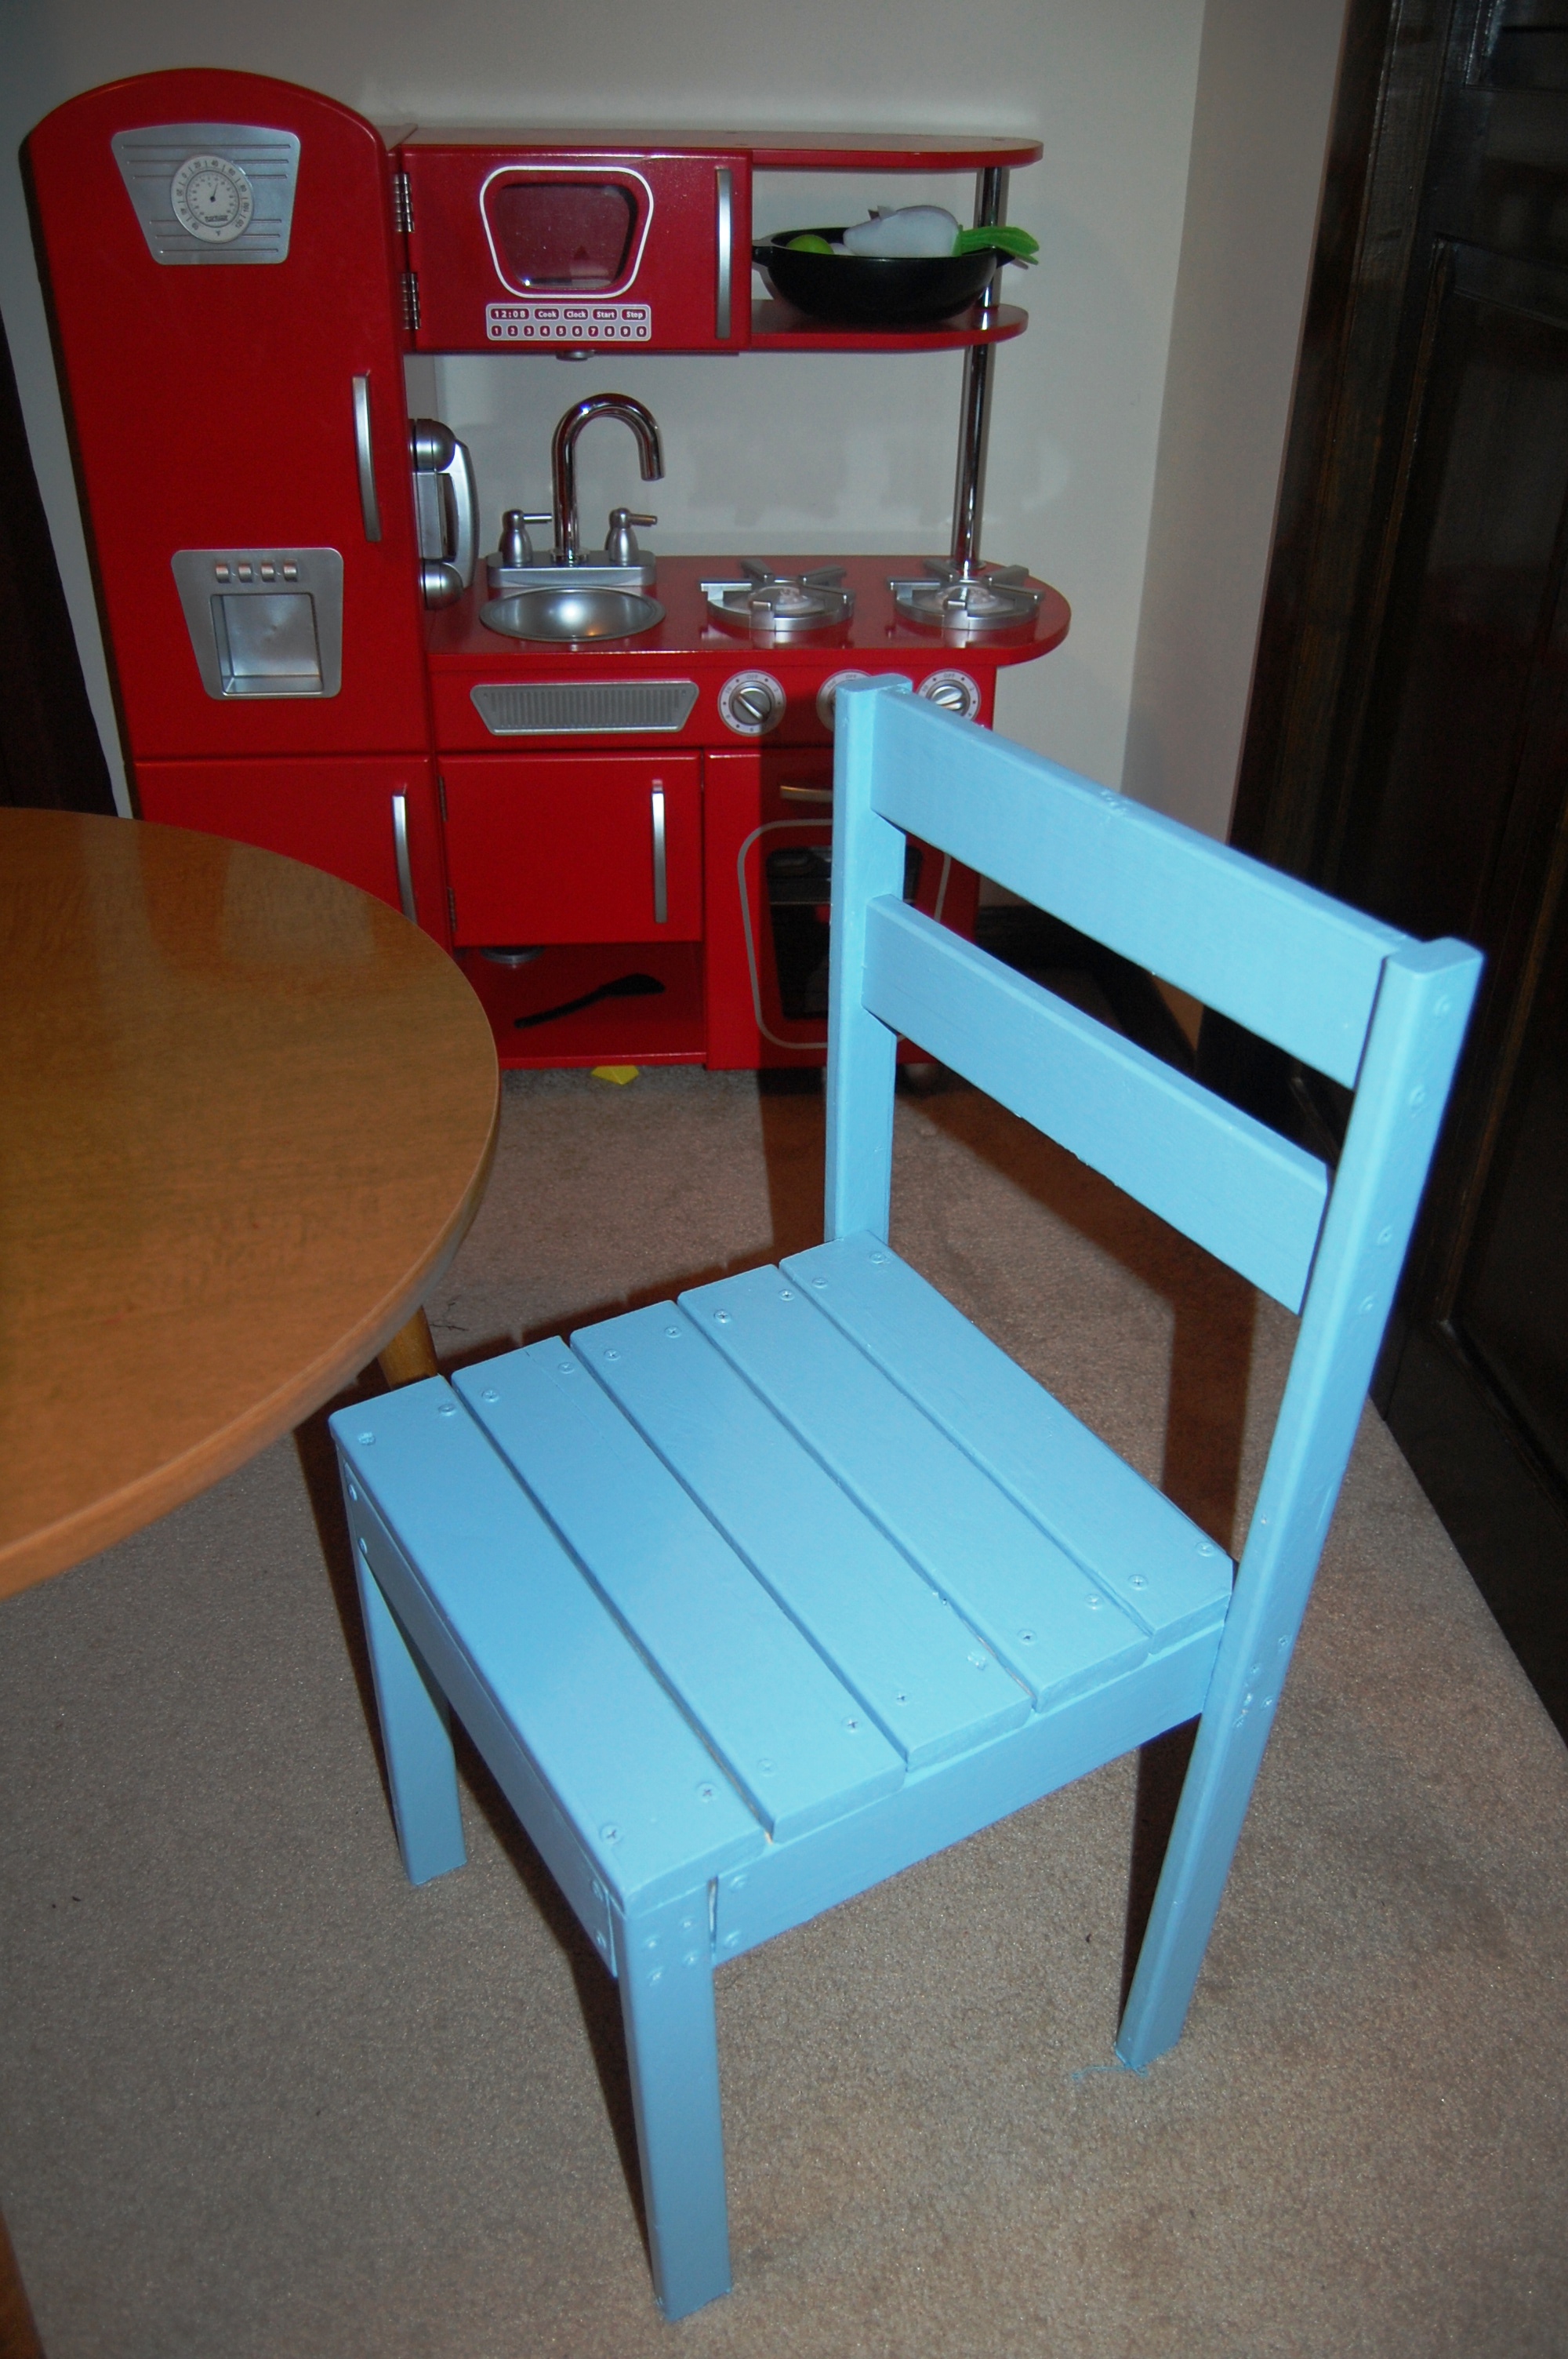
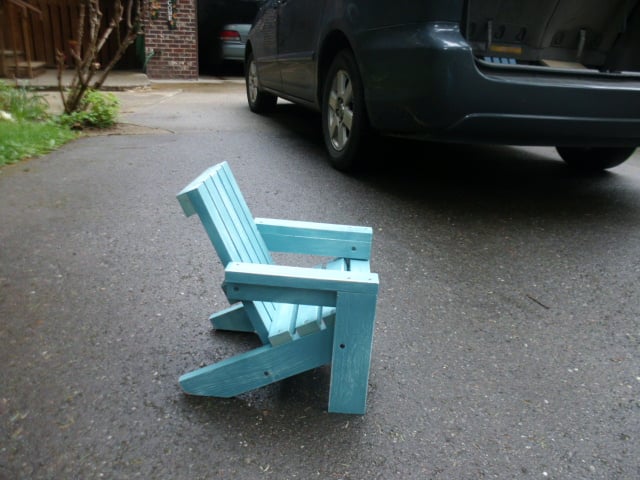
James' Play Kitchen Chair
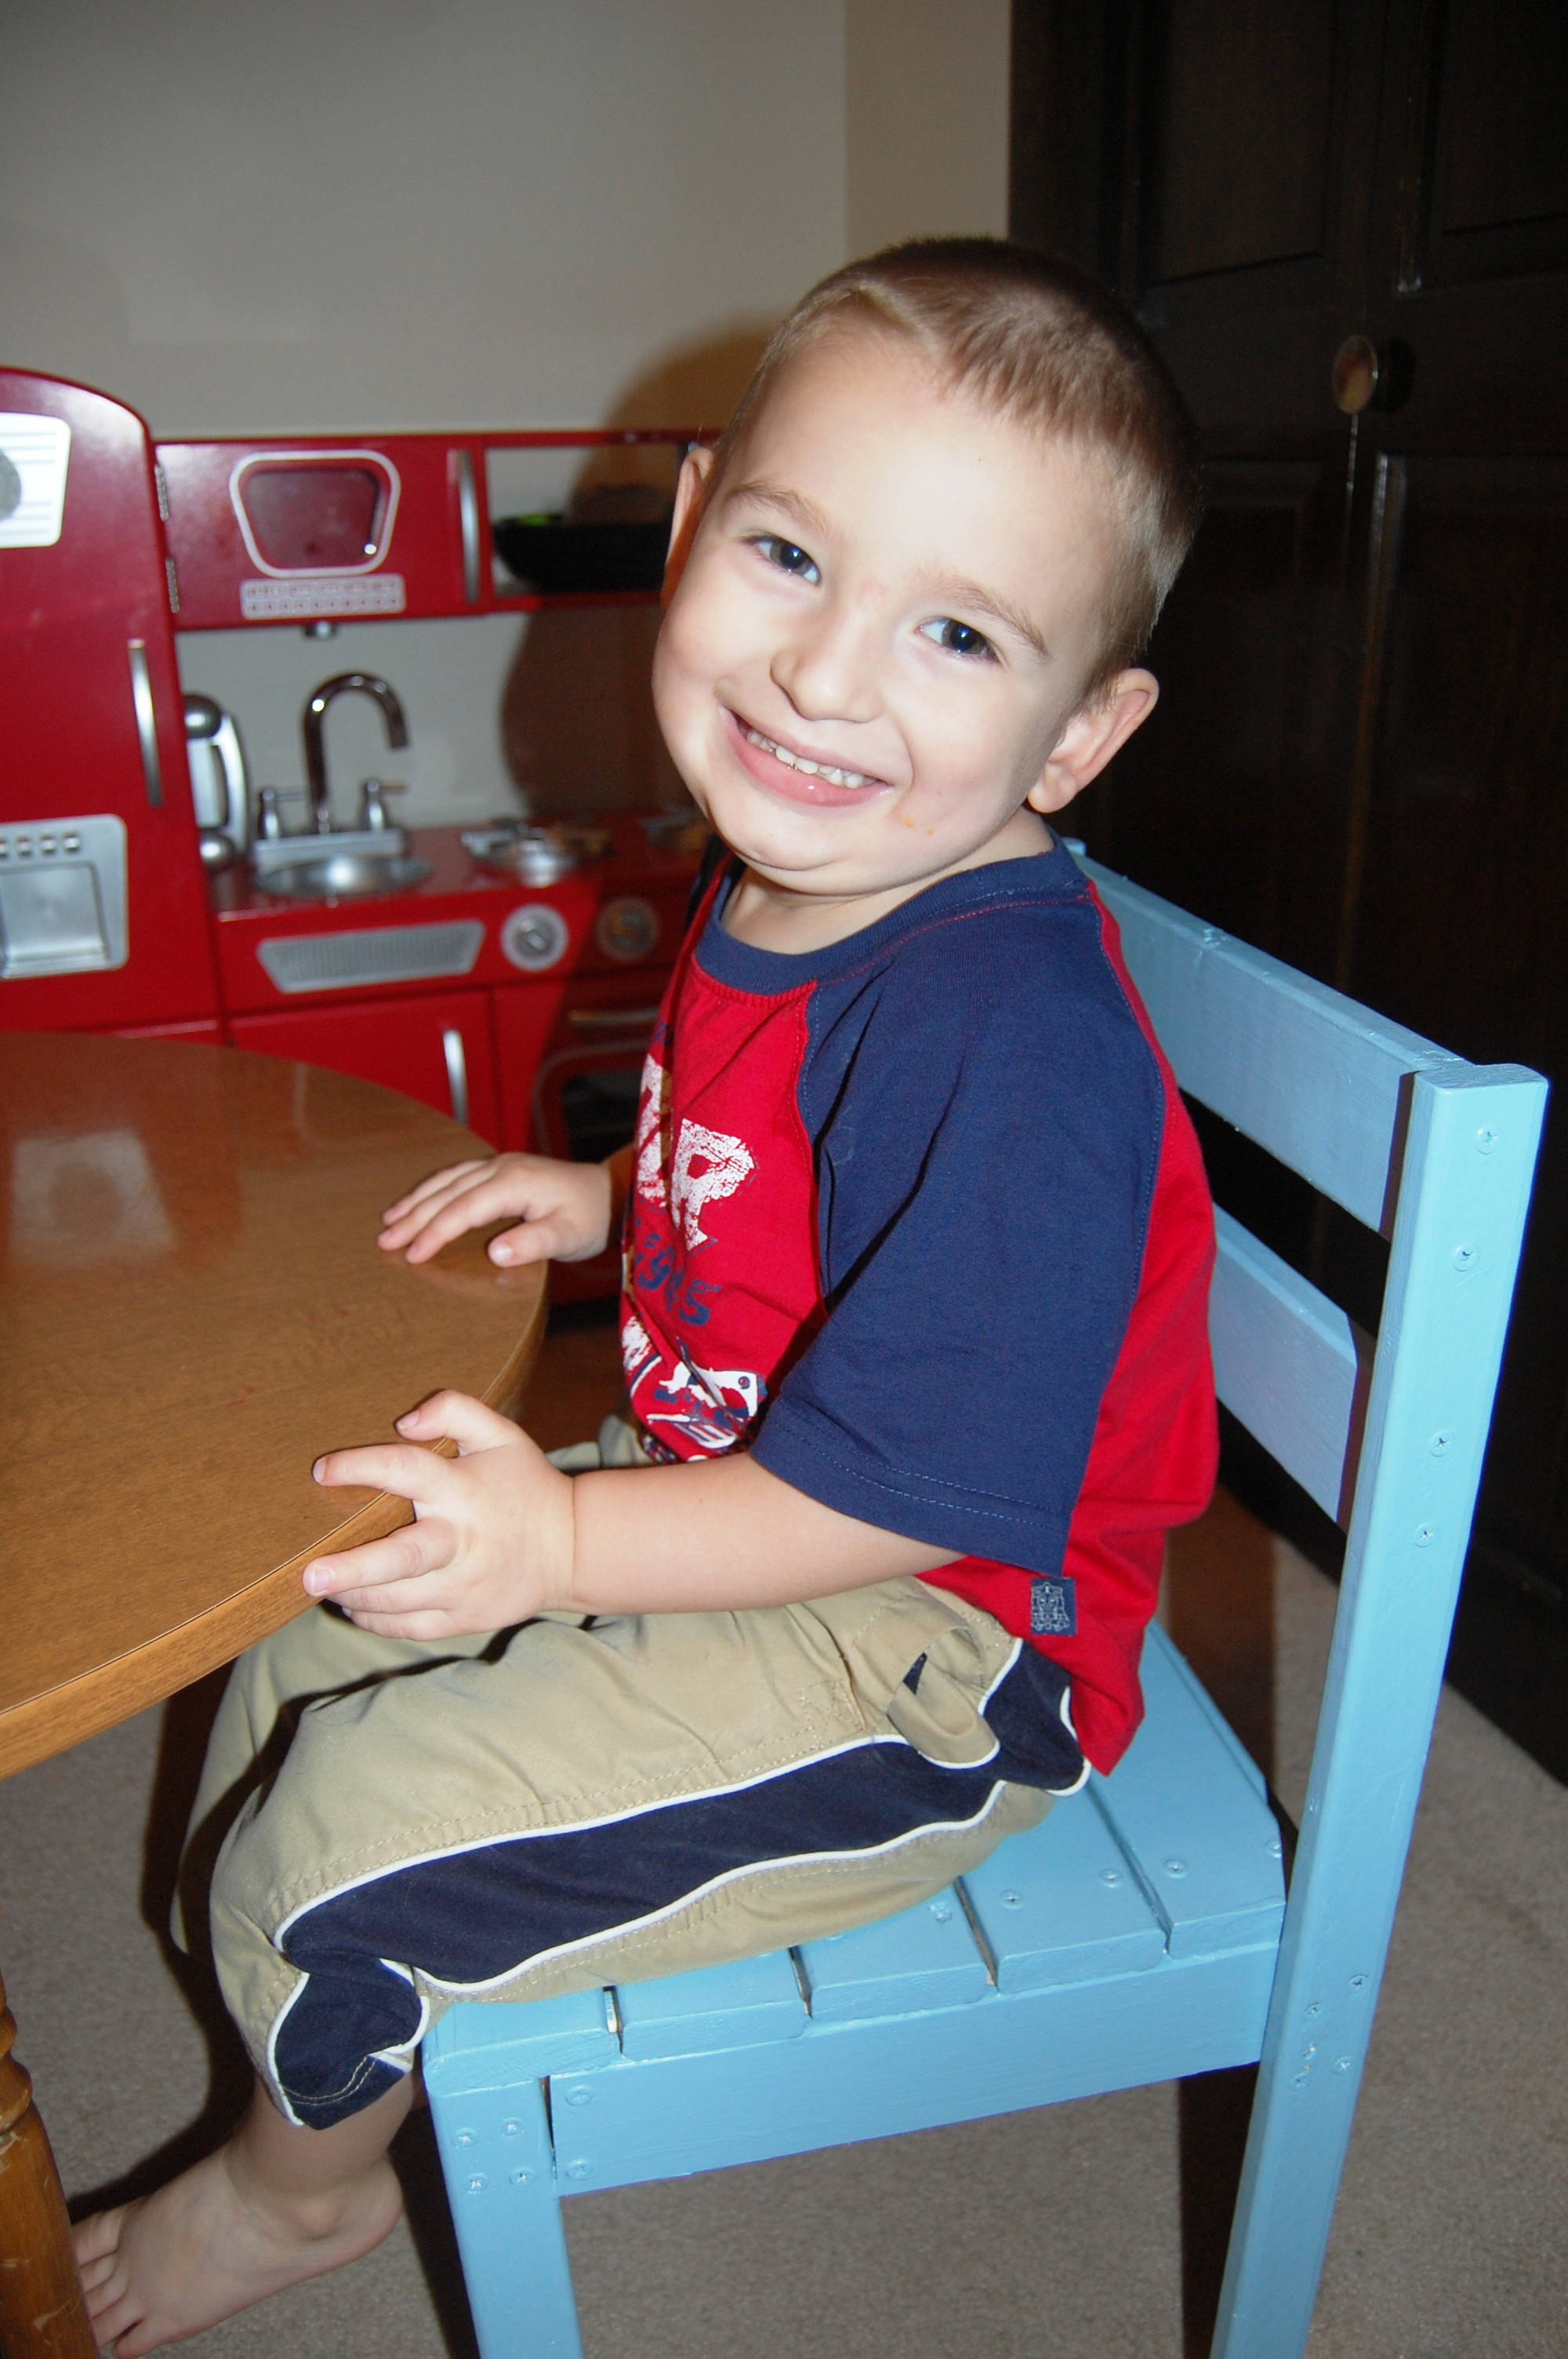
James got a sweet retro kitchen set for Christmas from his grandma. CarpenterMama scored a kids kitchen table (pretty sure it's authentic retro) at Goodwill for $8. All that he needed was a chair to sit in, and Ana's Four Dollar Stackable Chair fit quite nicely!
This was CarpenterMama's very first building project, and she is as proud as punch that she made something with her own two hands, some wood & screws, and oops paint. James is ecstatic that it is blue and he can sit in it. :-)
Estimated Cost
$5
Estimated Time Investment
Afternoon Project (3-6 Hours)
Finish Used
2 coats of Kilz primer then 1 coat of Behr medium base interior eggshell paint (from the "oops section" of the big orange store--only $5 for the gallon)
Recommended Skill Level
Starter Project
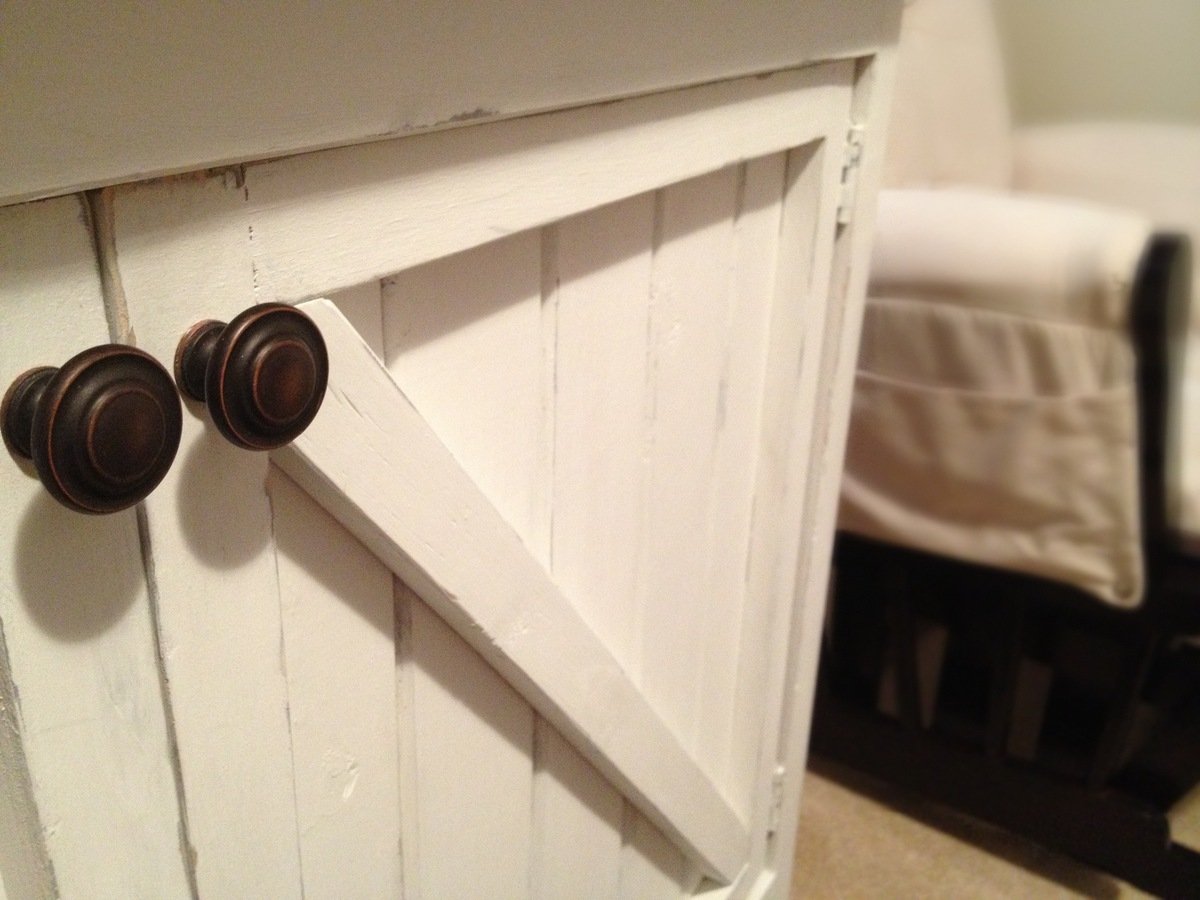
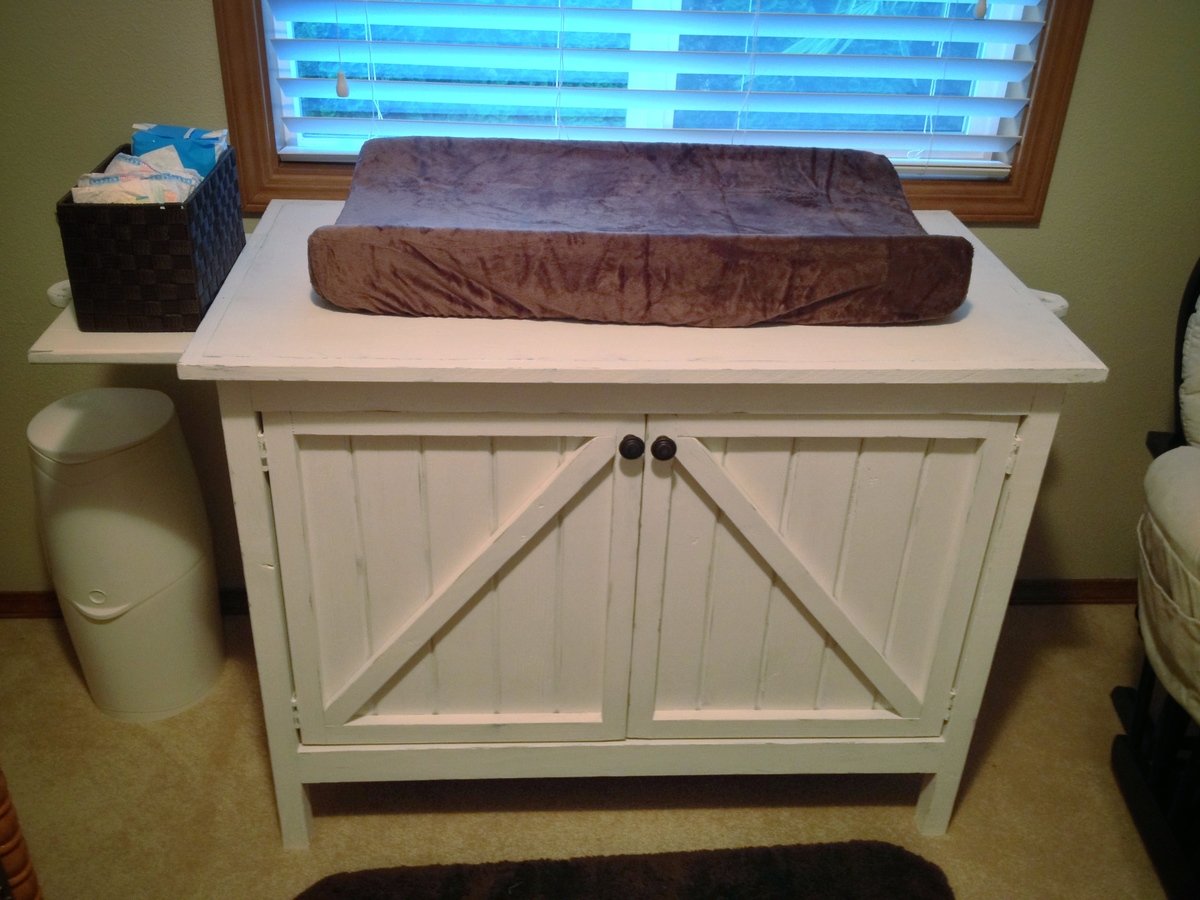
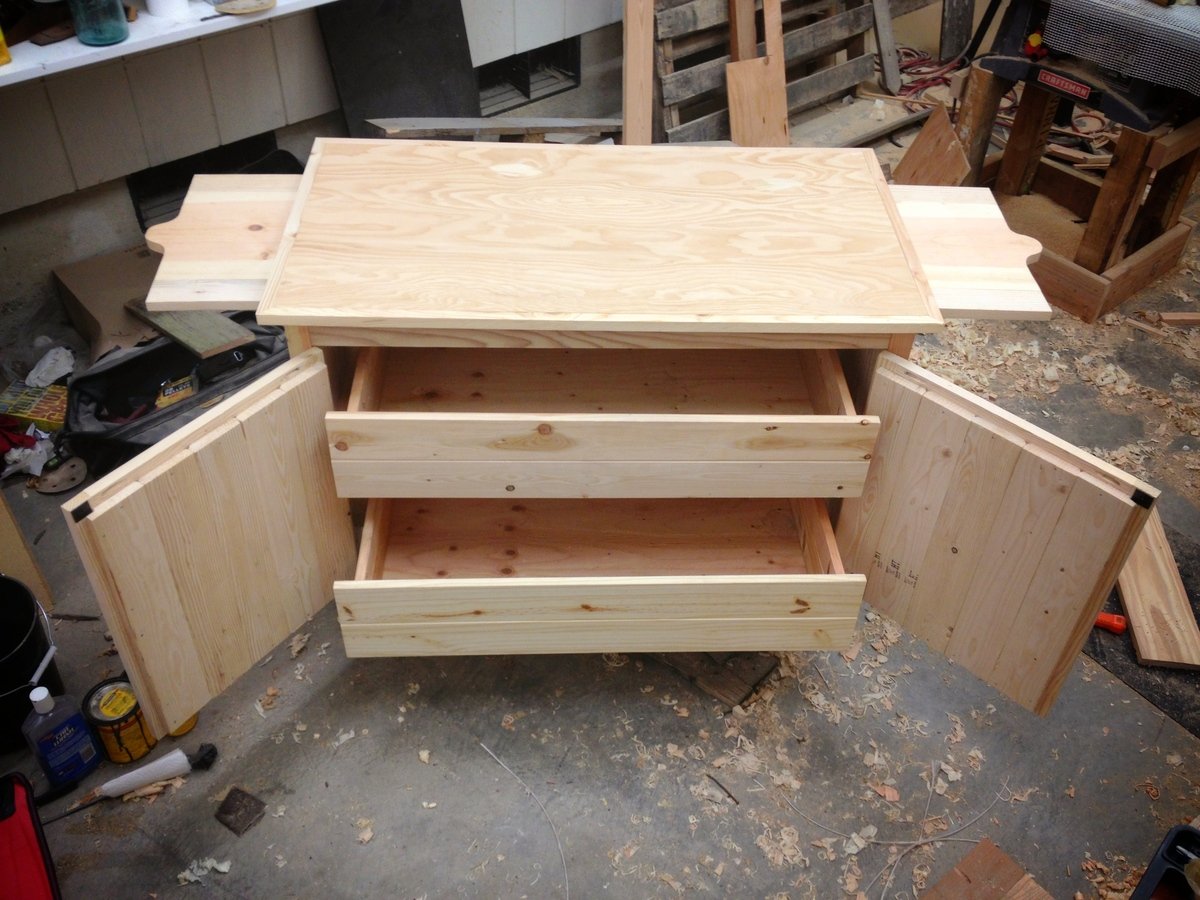
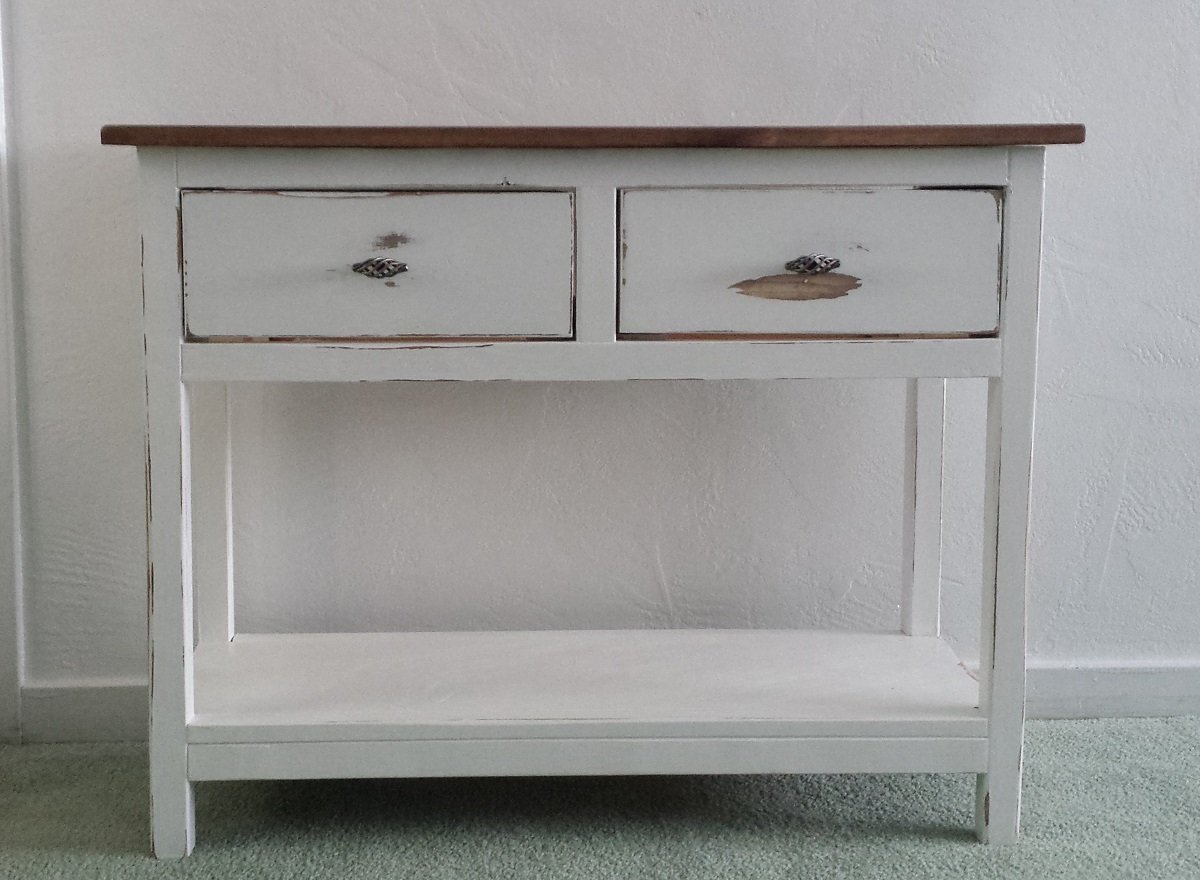
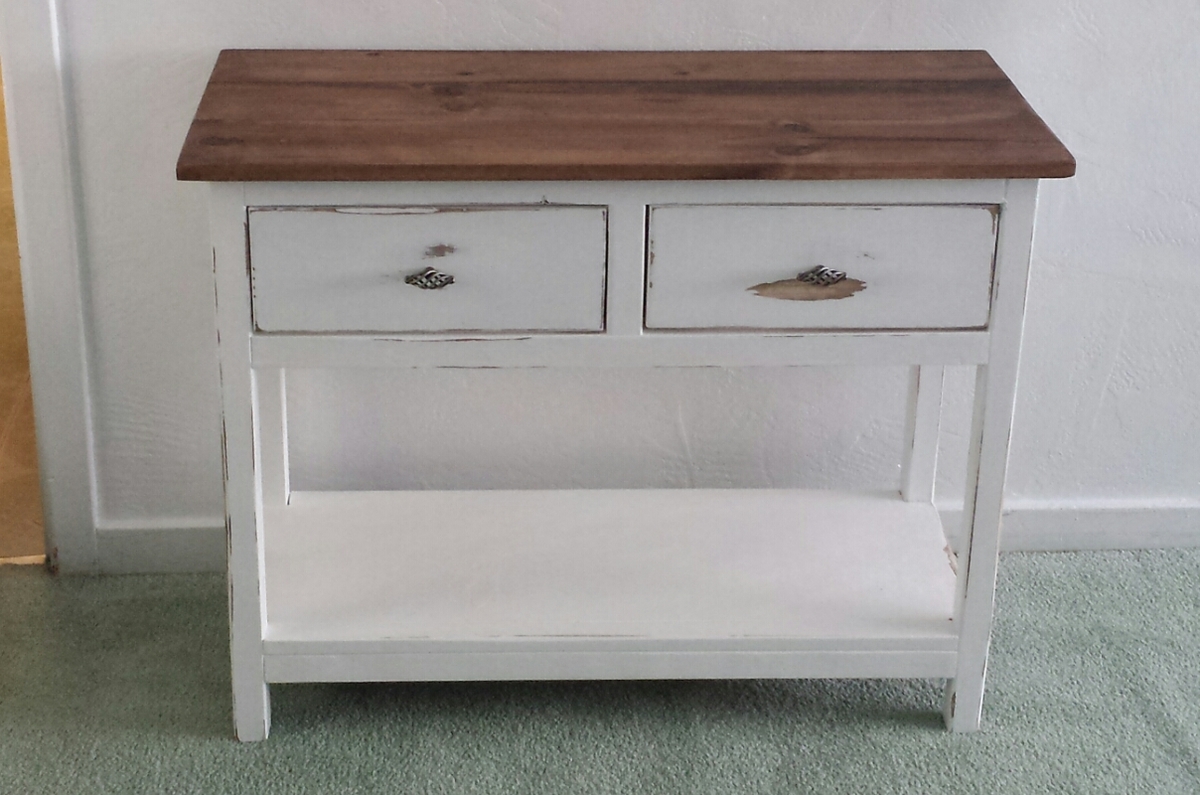
A Changing Table/Dresser for my Son's Rustic Nursery
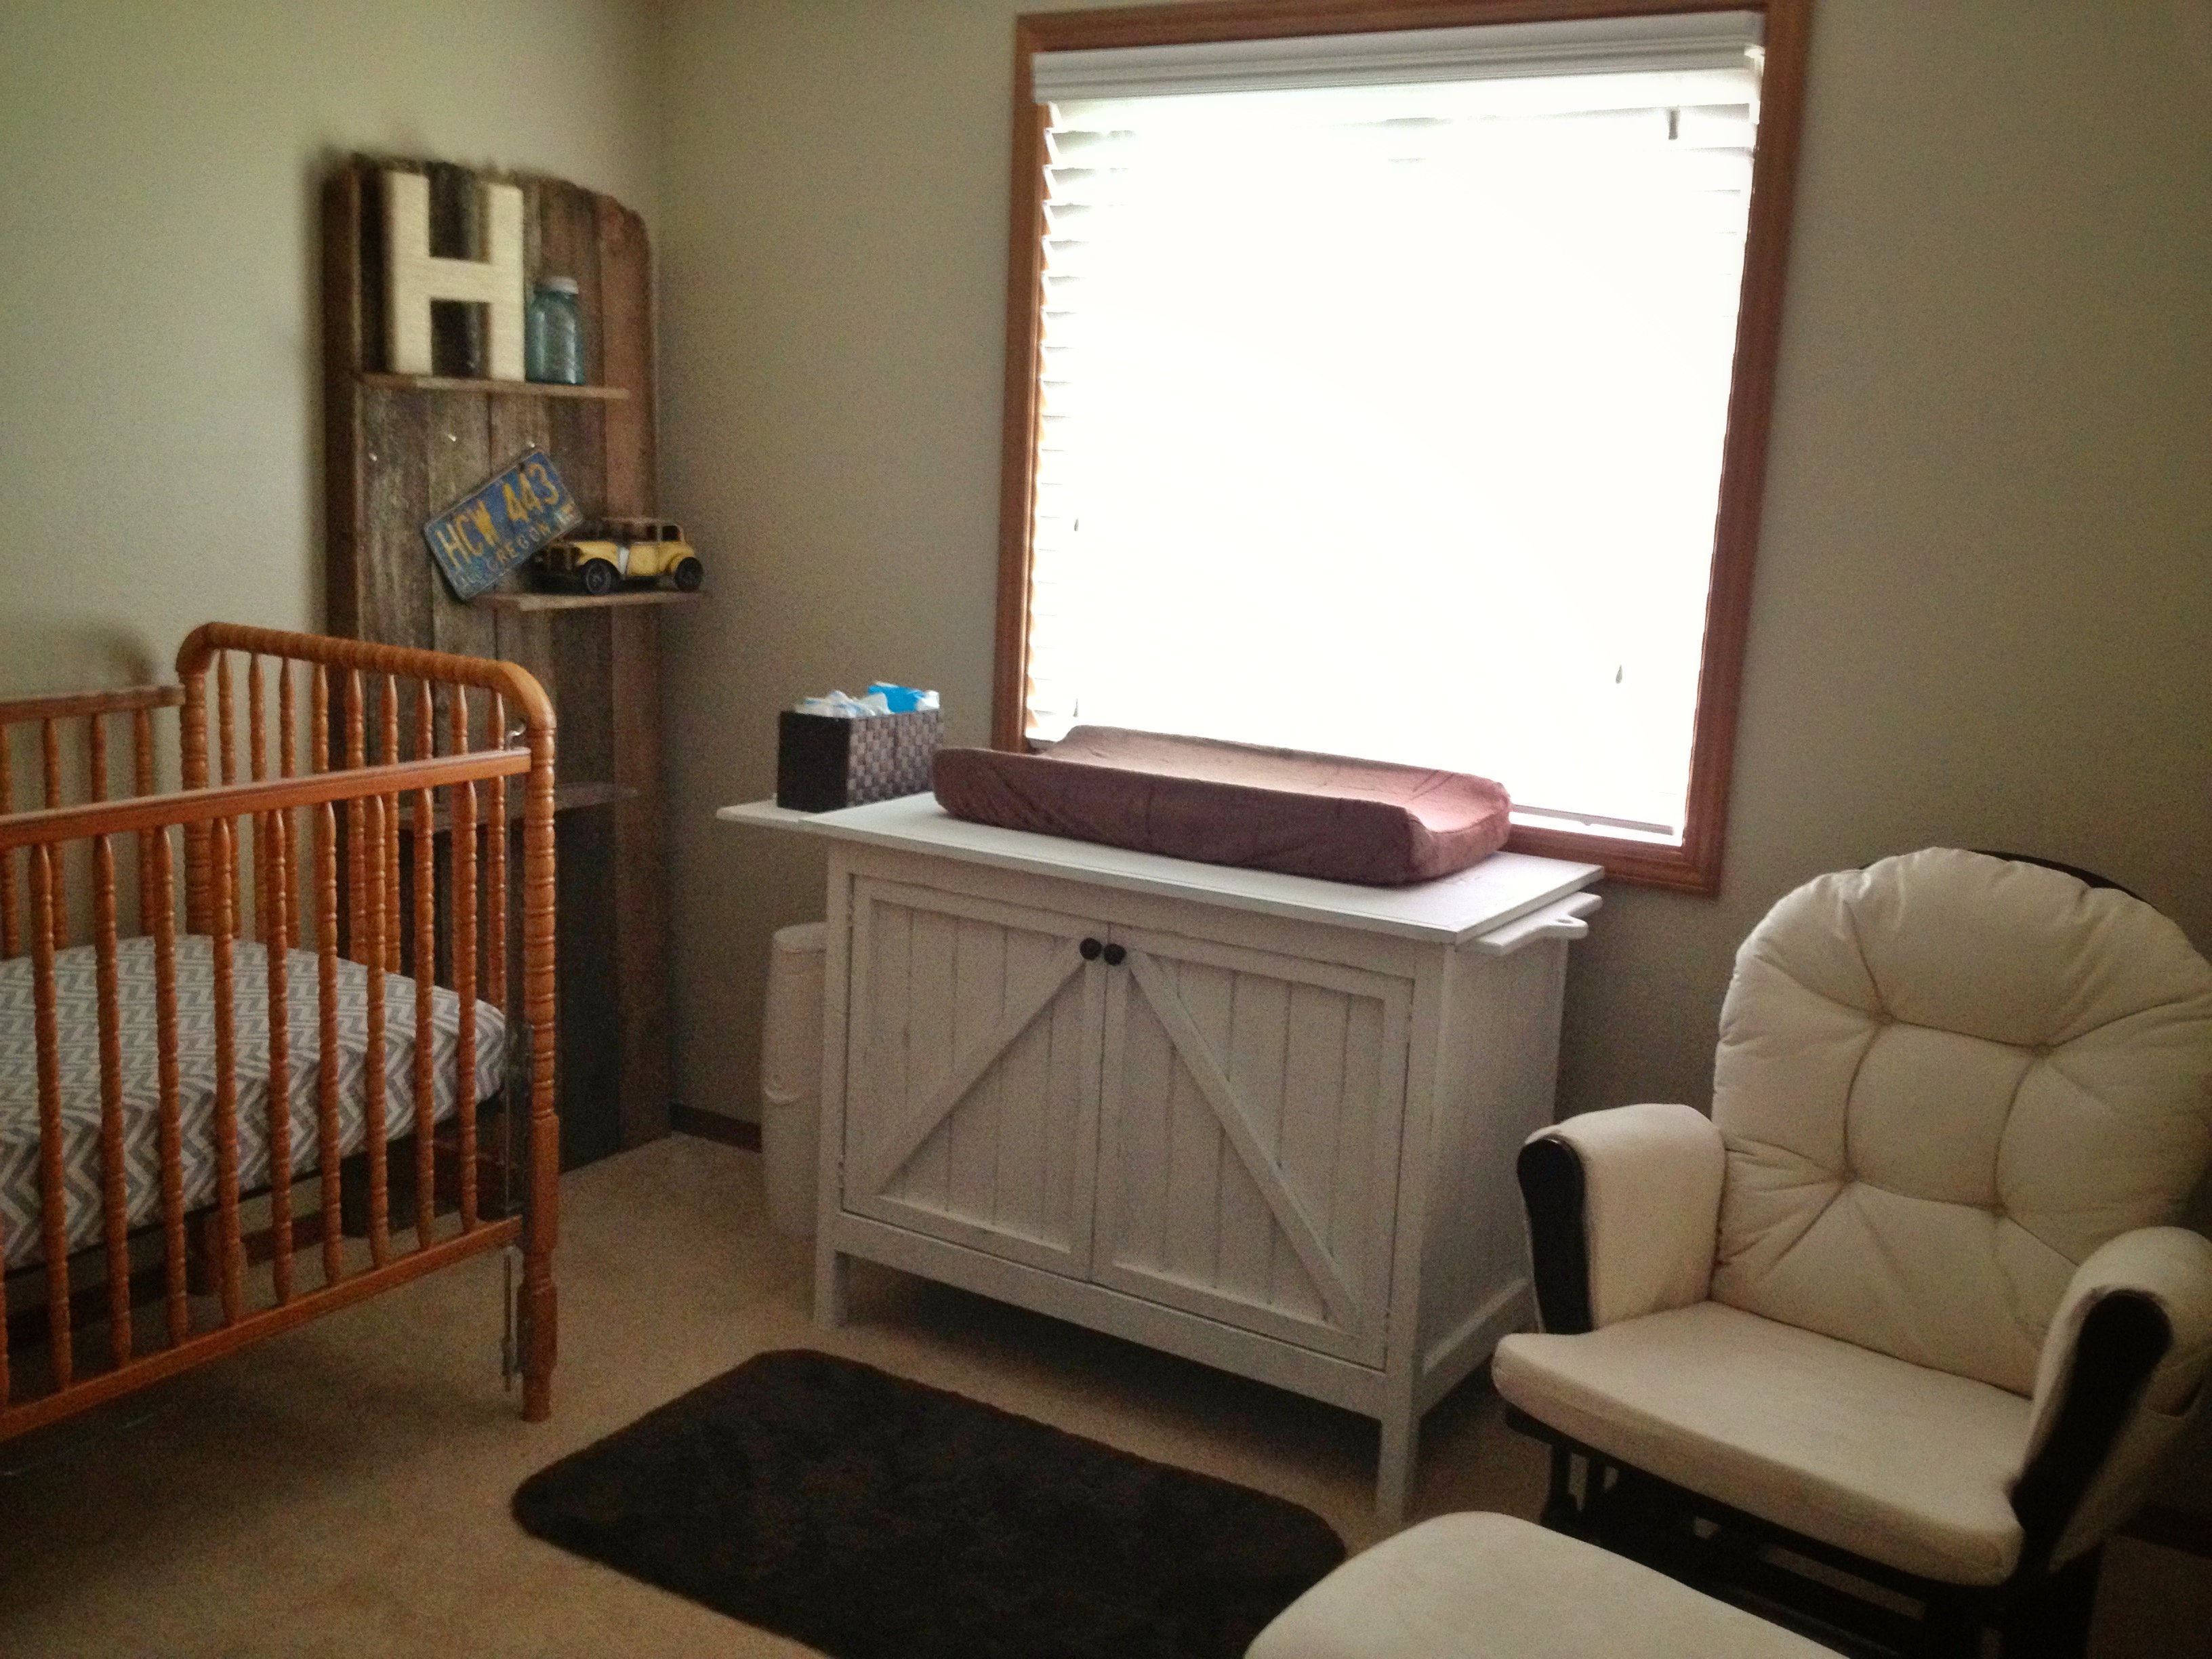
I wanted to share my most recent build with you.
With only weeks before my son is due I finished his changing table/dresser.
I am still new to this whole woodworking adventure and this was my largest project yet. (Completed project was around $95)
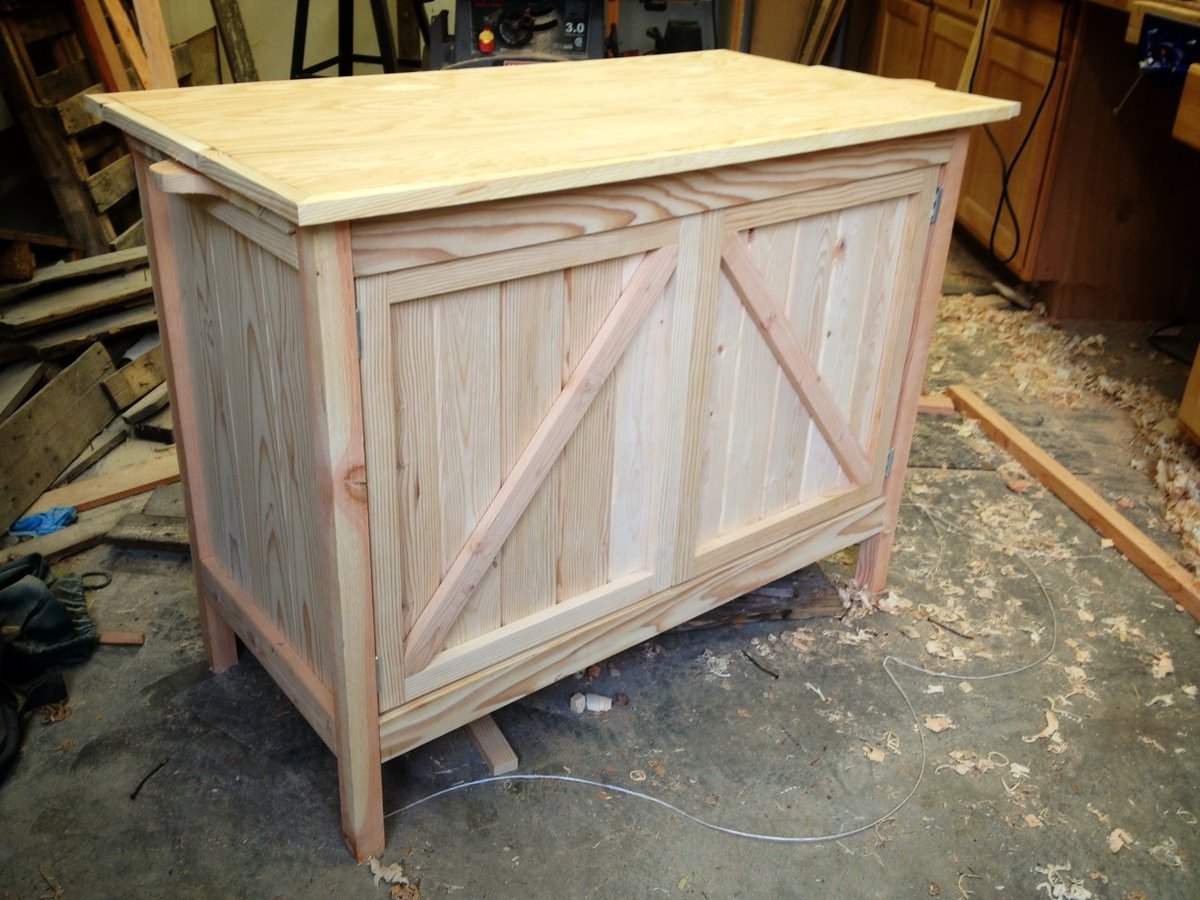
This dresser had a ton of ‘firsts’ for me and along with that I probably made nearly every mistake you can.
My firsts on this thing were:
-pocket holes
-sliding dovetails (to attach the drawer fronts)
-hand-cut dovetails (rear corners of the drawers)
-drawers with glides
-hinged doors
-table top fasteners
-distressing a paintjob
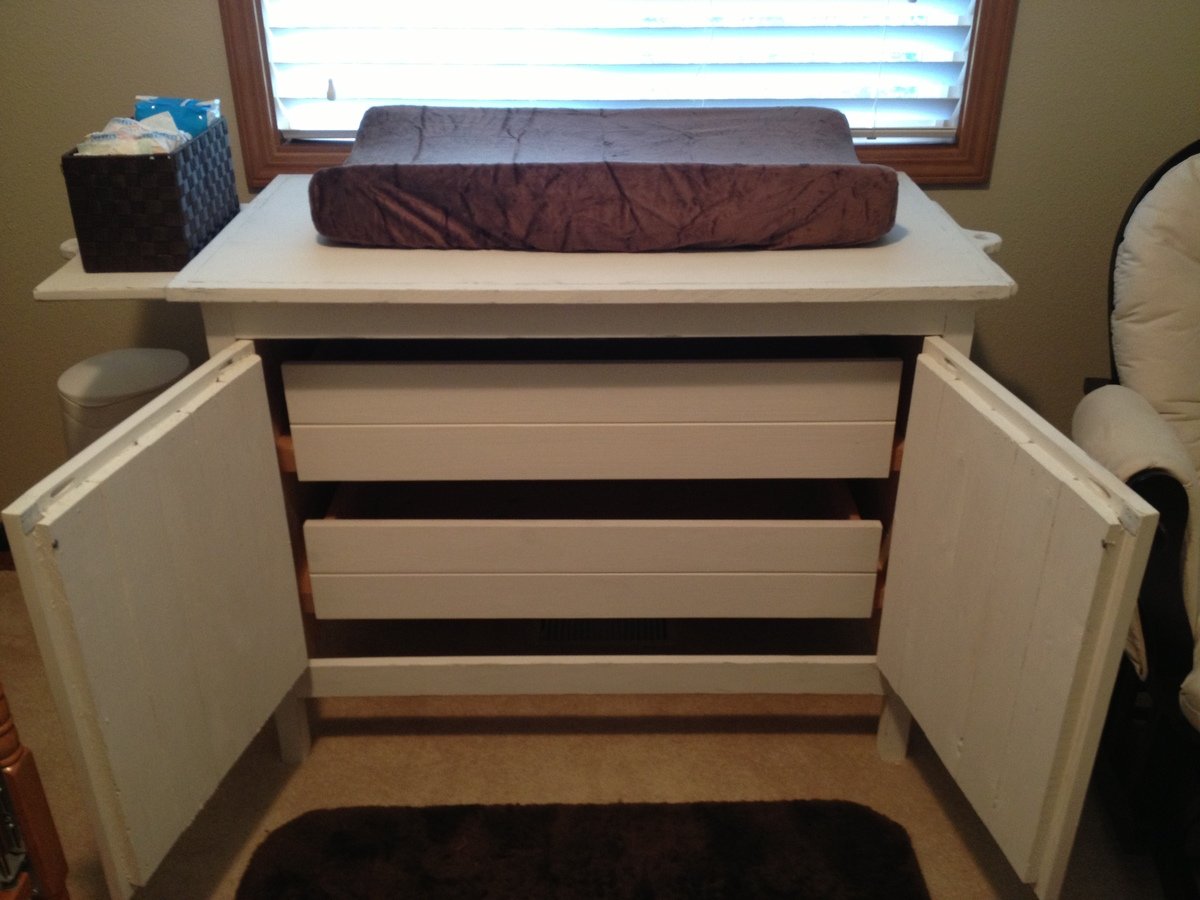
It was built knowing that my wife wanted it painted , hence the mismatched wood used(see pre-paint pics below). The nursery is designed around a rustic theme (see wall shelf unit in the first pic).
I will also be adding a hanging wall clock made from weathered pallet wood in the coming weeks.
I think one of the most challenging things for this project might have been the use of Home Depot lumber.
We were on a major budget so I purchased the cheapest wood in the sizes I needed. This meant combing throught the stacks to find acceptable pieces.
I do not own a jointer or planer, so in order to flatten and correct thickness issues with the wood I resorted to good ‘ol hand planes.
Time consuming, yes. But also very satisfying.
Built from Plan(s)
Estimated Time Investment
Week Long Project (20 Hours or More)
Finish Used
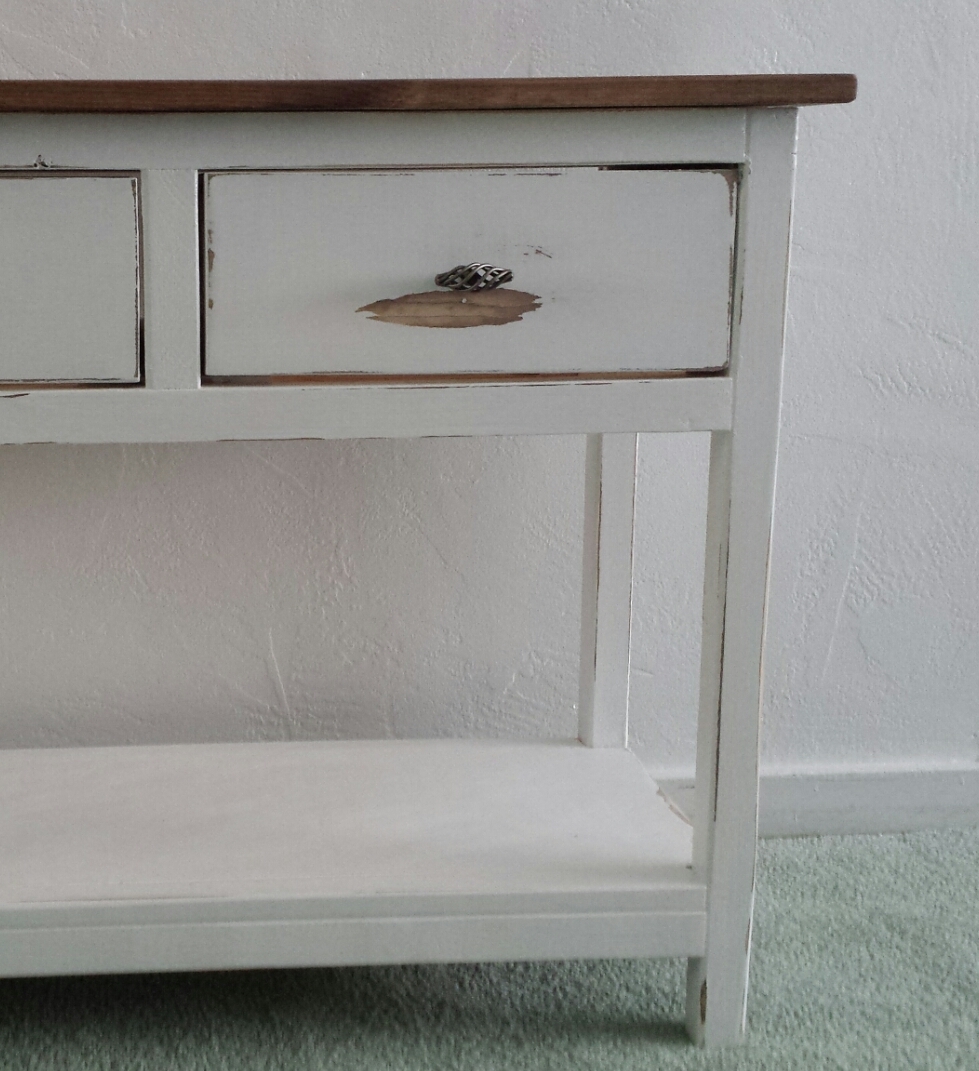
Painted all edges with a gray that matched the crib sheets, then painted over it with an off white (I think it was called Superhide White).
Next I took a file (adds texture to abrasions) to scuff up the edges revealing the gray paint and some of the bare wood.
Next I took a file (adds texture to abrasions) to scuff up the edges revealing the gray paint and some of the bare wood.
Recommended Skill Level
Intermediate
Comments

Sun, 04/12/2015 - 16:18
Beautiful!
What an absolutely beautiful changing table! It's just my style too! Do you have building plans? I'm currently 7 months pregnant with baby #4 and trying to get our nursery together!
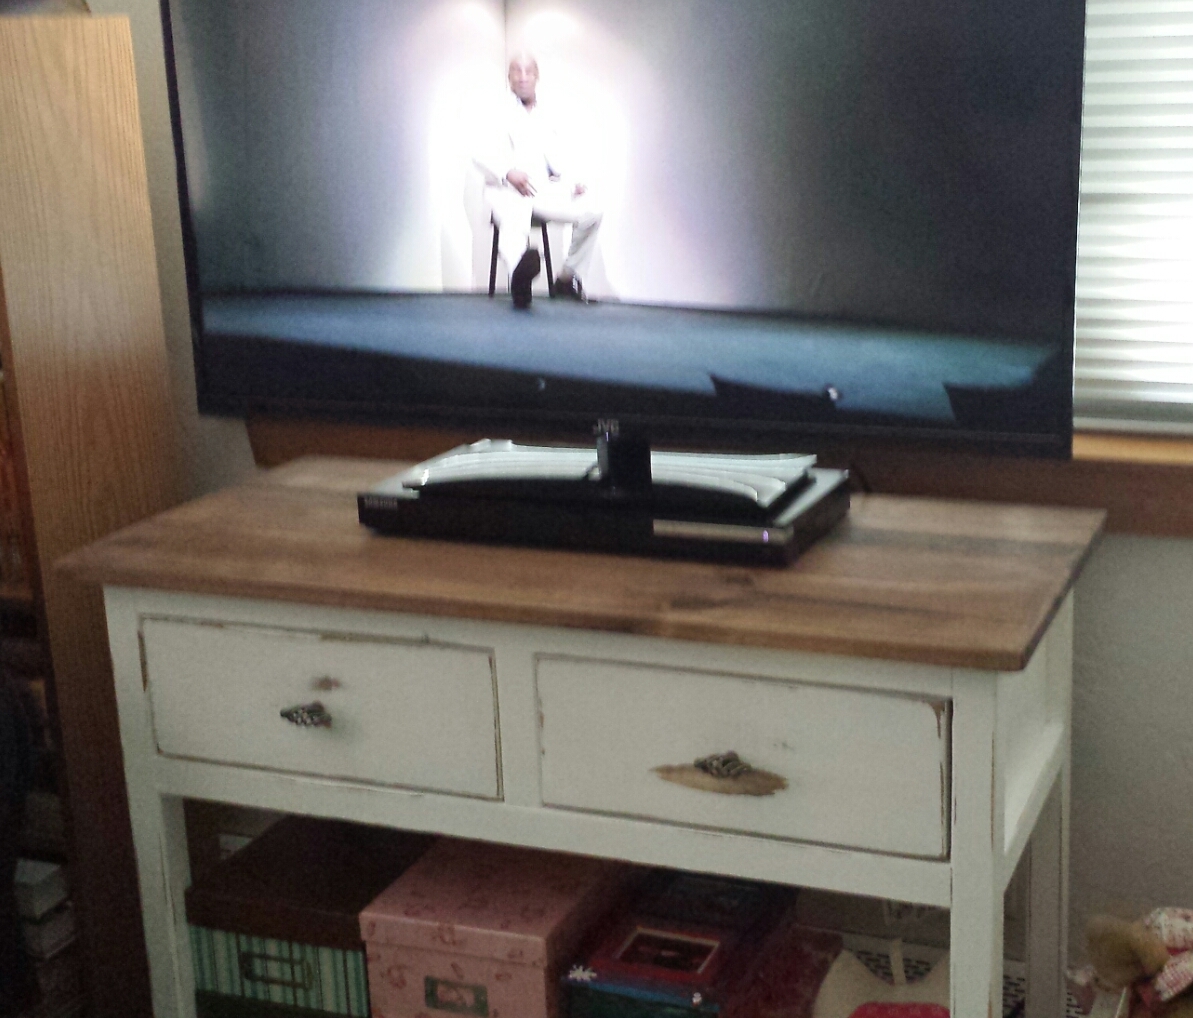
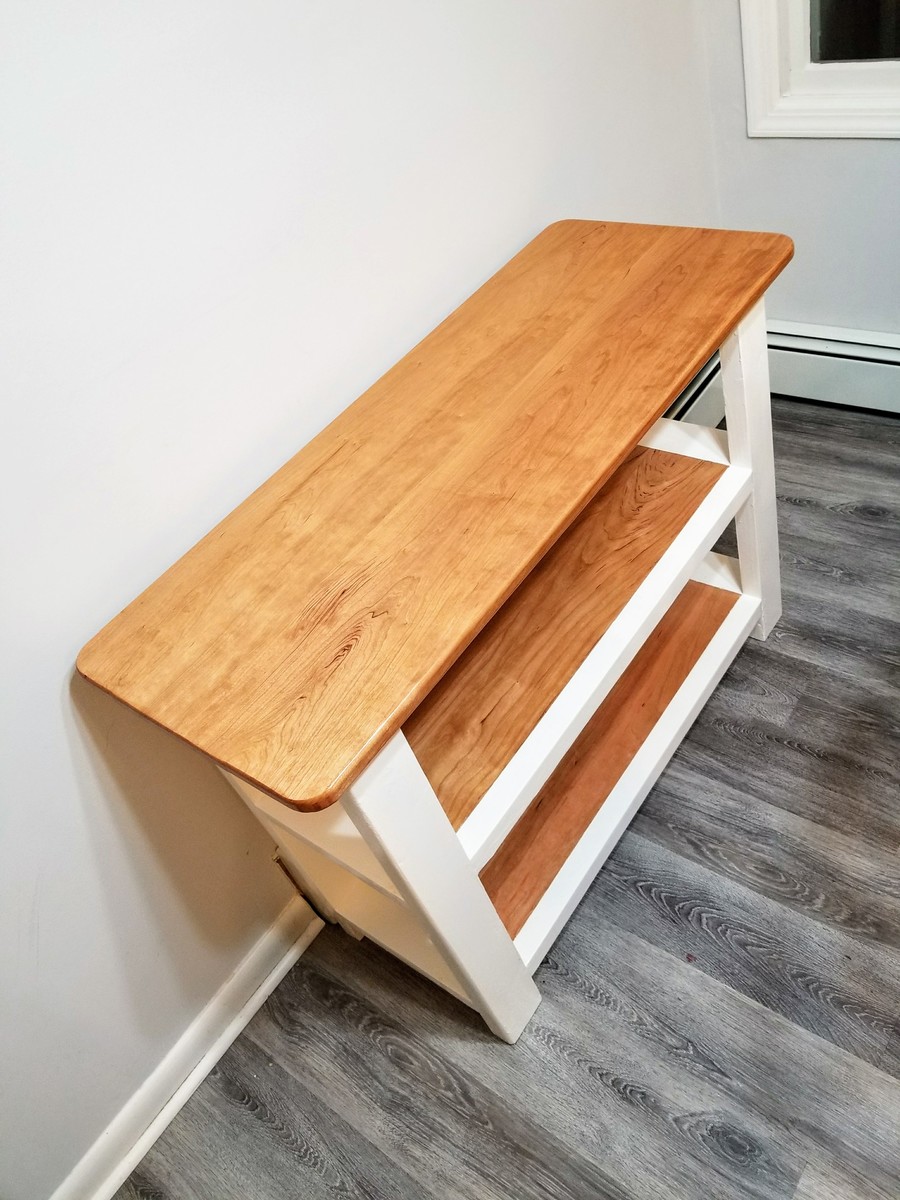
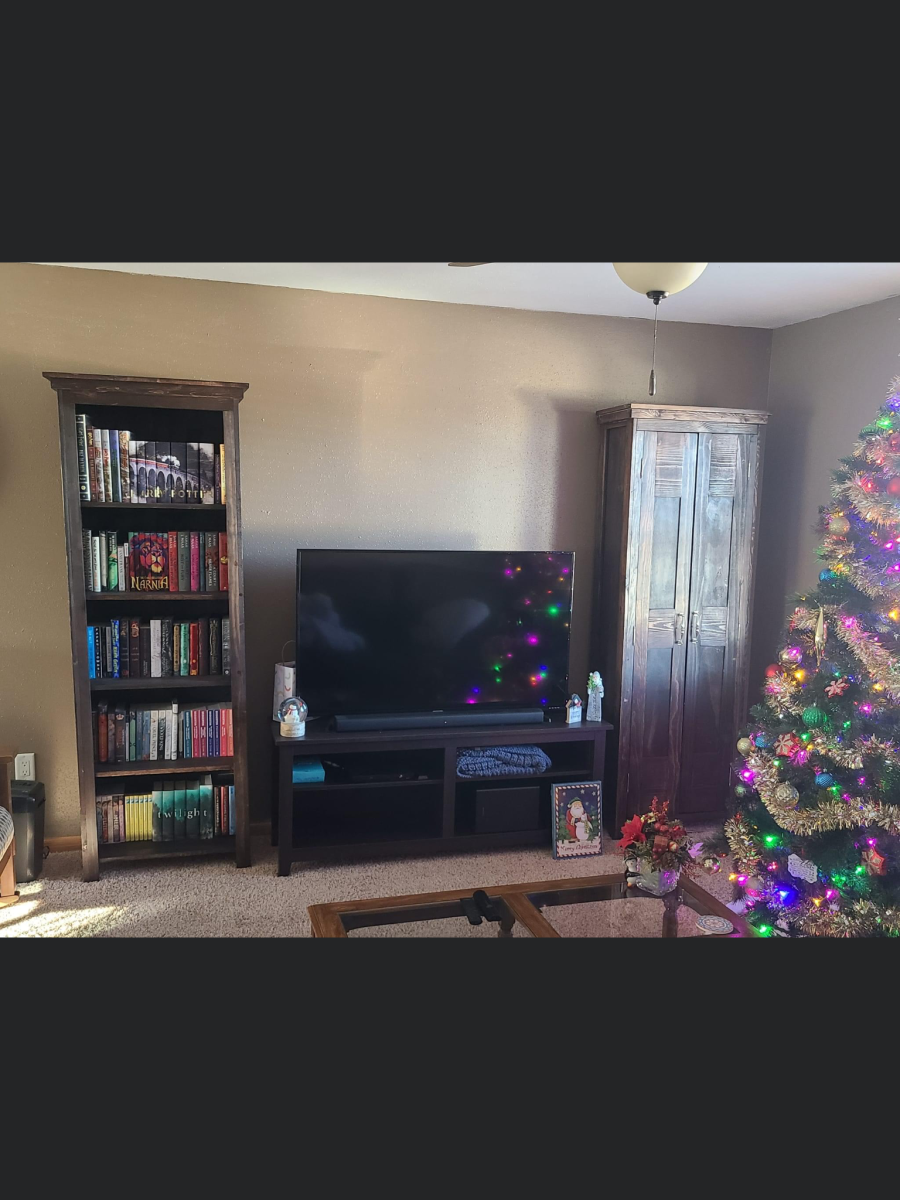
Farmhouse TV Console
So I bought a tv for our bedroom rather spur of the moment last year and when I decided I didn't to wall mount it I needed a console for the tv to sit. This was going to be my 3rd build and I had recently made the Mini Farmhouse Bedside table. I modified the Mini bedside plans to make the console a larger two drawer style. I also increased the height by about 2" to put the tv at a better viewing angle. I didn't know that there was a similar plan in Ana's book at the time, as it probably would have been easier to just follow that. Oh well.
Built from Plan(s)
Estimated Cost
$60
Estimated Time Investment
Weekend Project (10-20 Hours)
Finish Used
I built this with pine 2x2 and 1x6 boards. Stained with Minwax Special Walnut (I used conditioner first) and painted with Behr premium white paint (off the shelf- no mixing). I sanded it down to distress and did not use any poly as I felt that natural wear would add to the look. It's held up very well over the last year.
Recommended Skill Level
Beginner
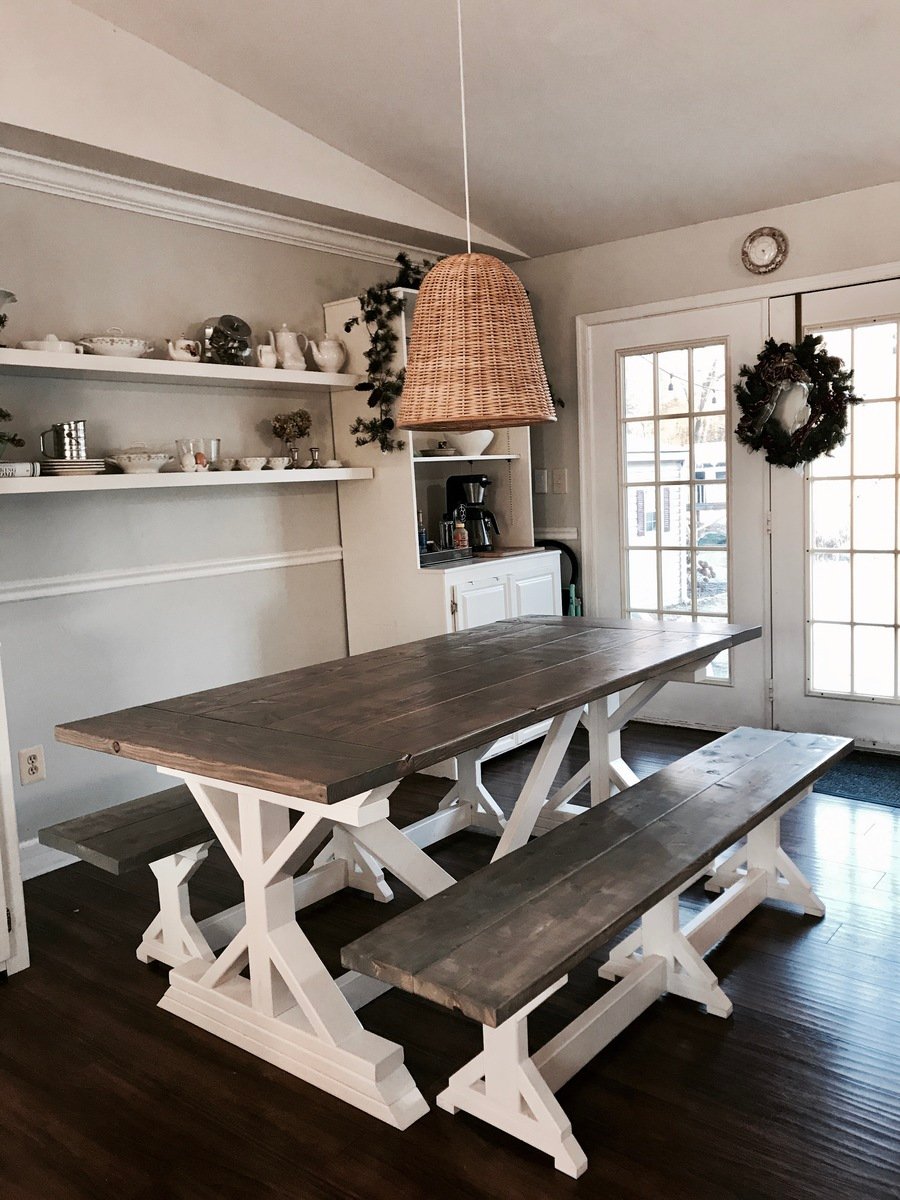
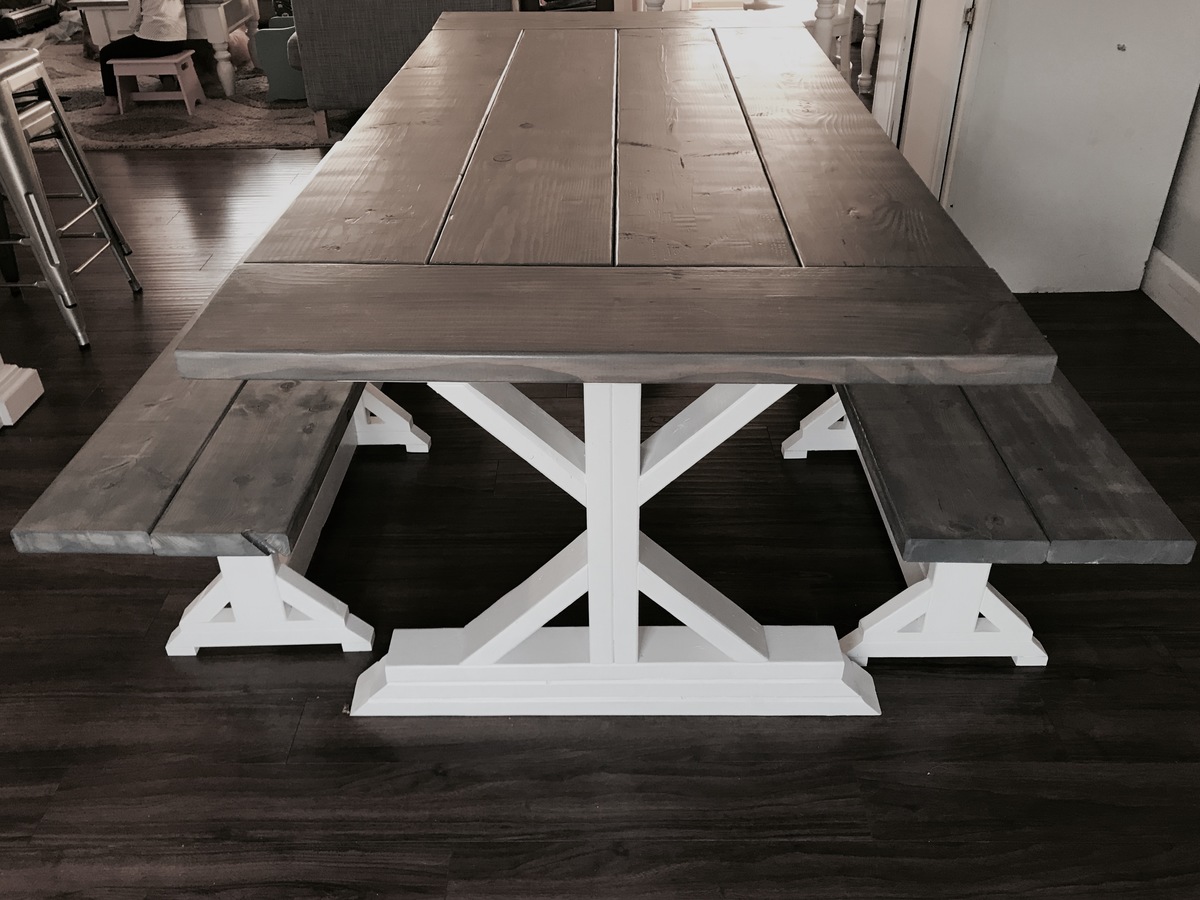
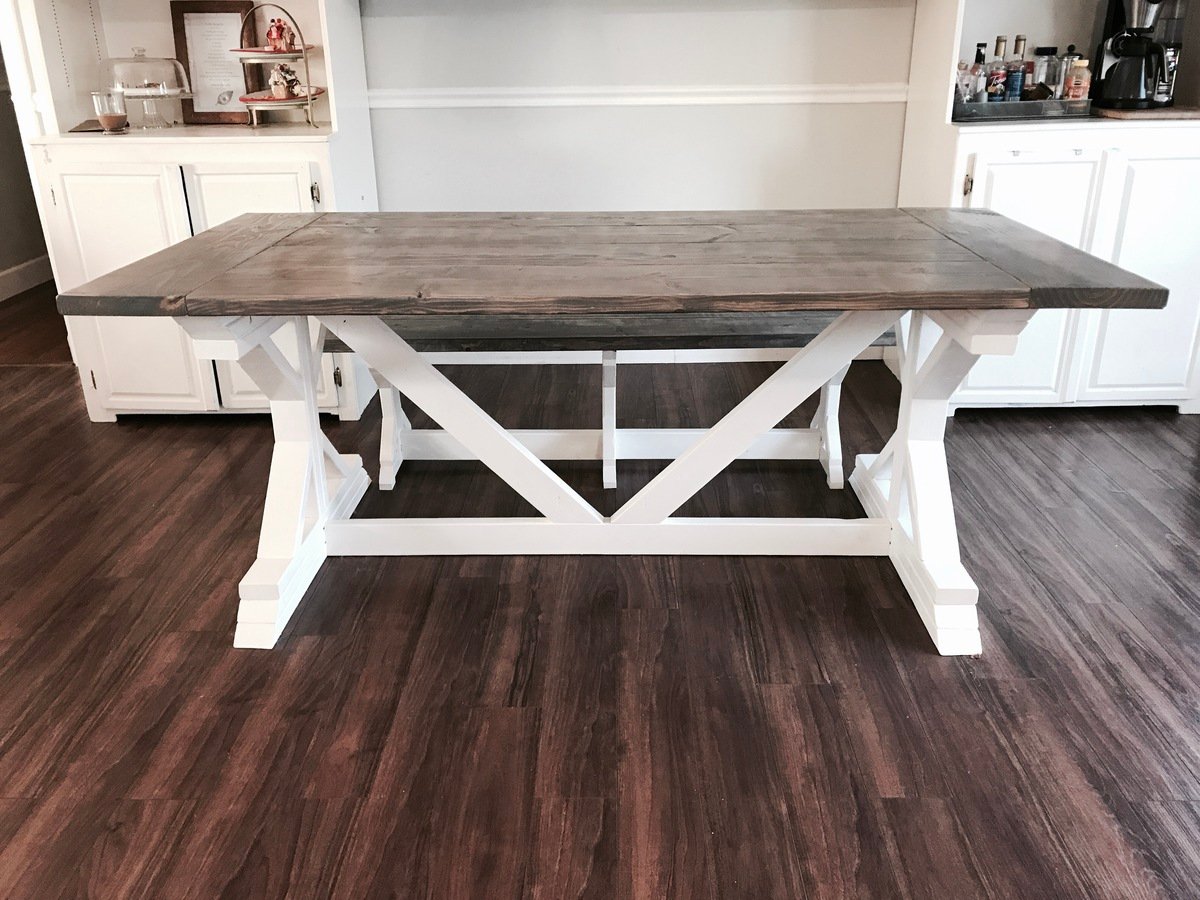
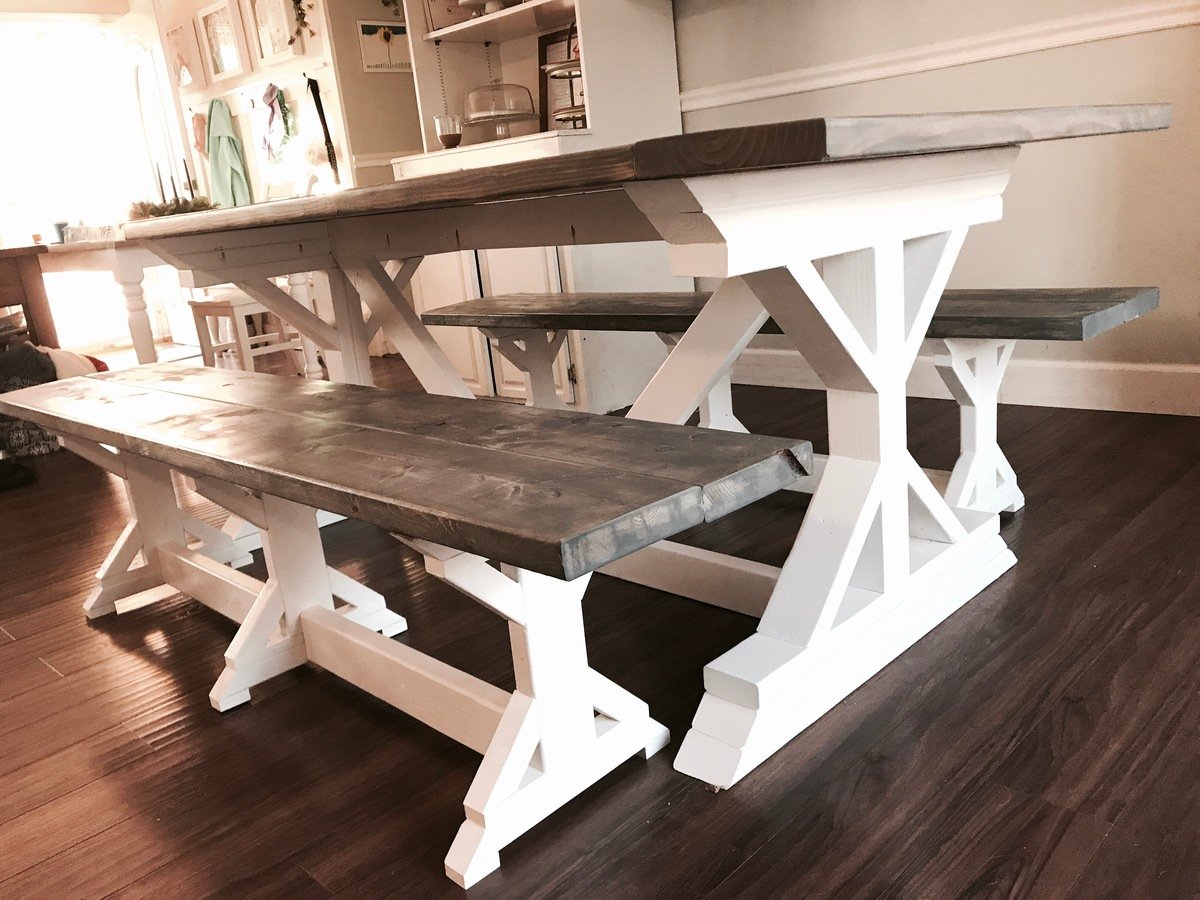
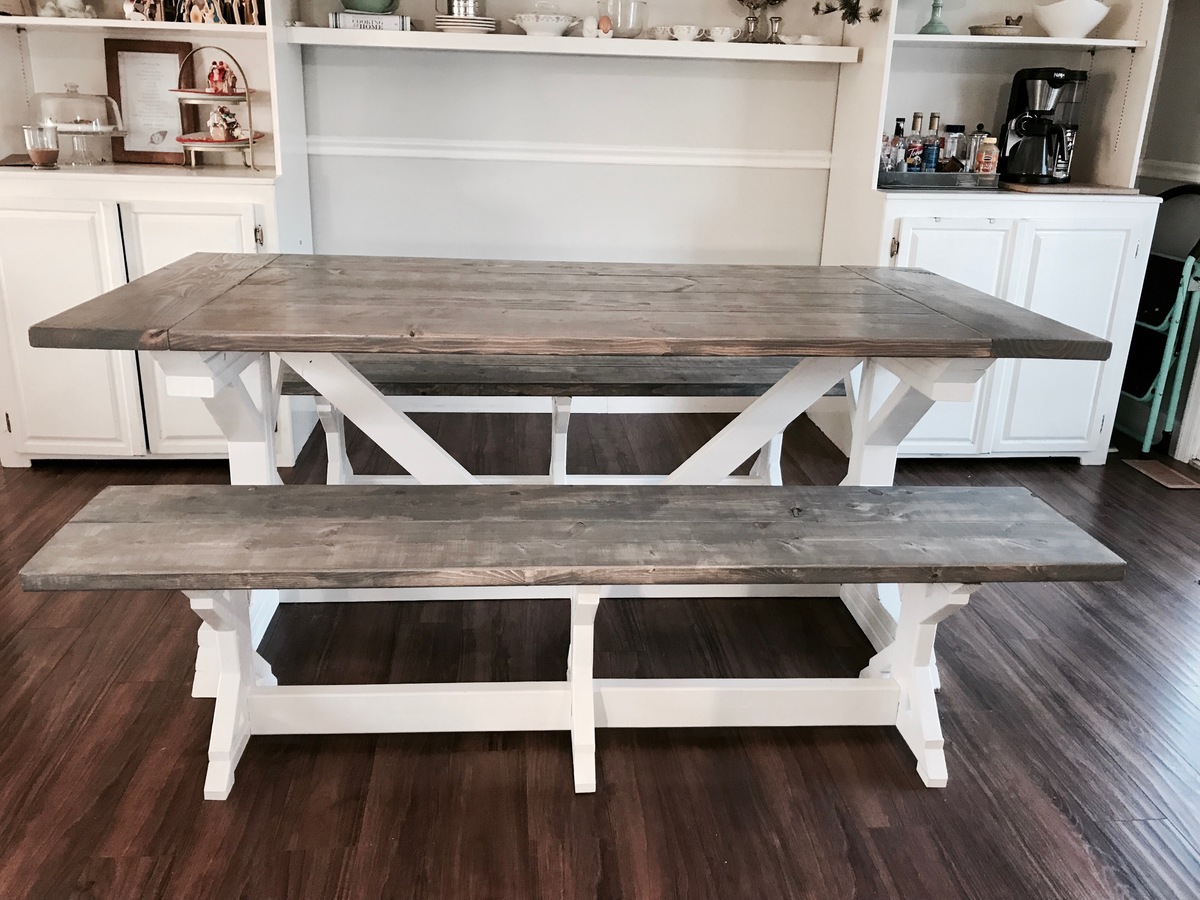
Two Tone Weathered Gray X Farmhouse Table and Benches
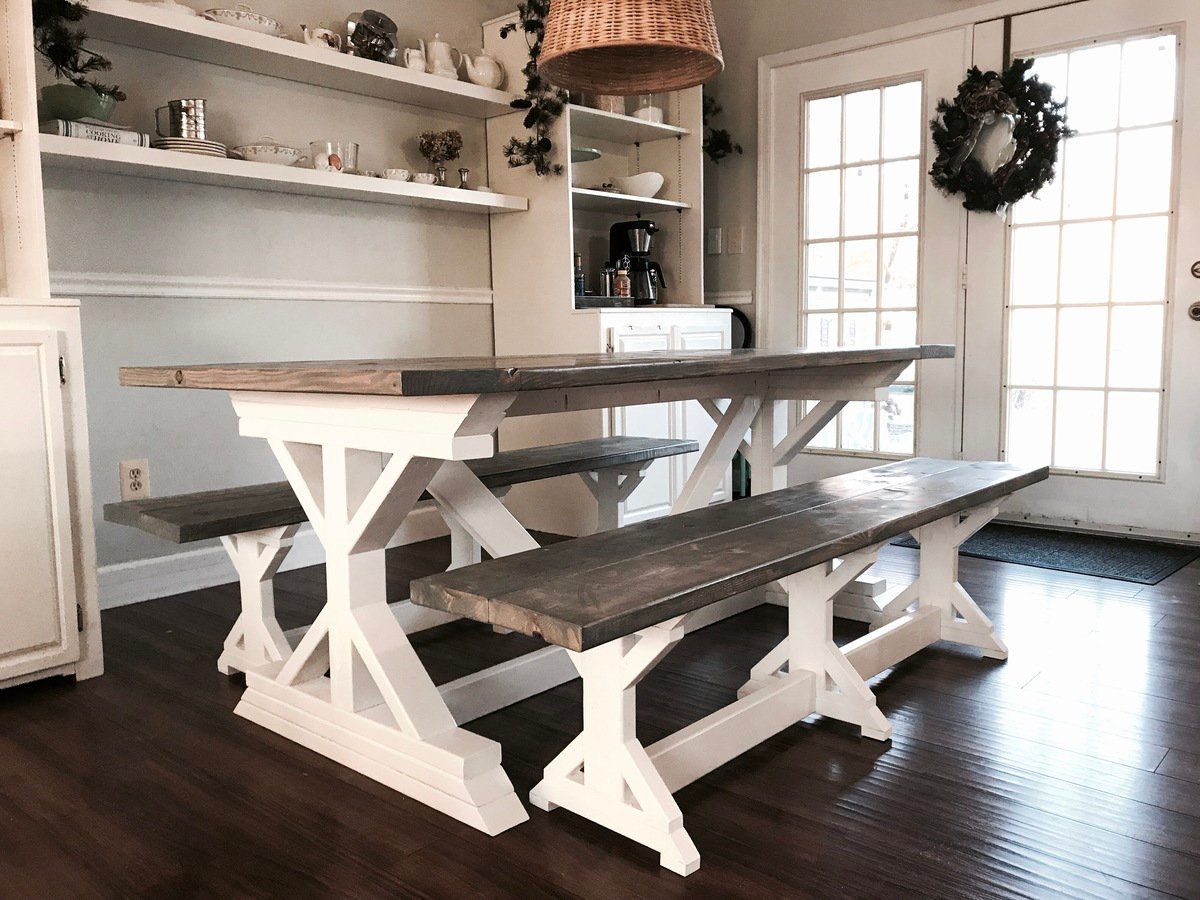
A beautiful 6 1/2 foot weather gray farm table. Thanks for the design, Ana!
Estimated Cost
$100
Estimated Time Investment
Weekend Project (10-20 Hours)
Finish Used
Top - weathers gray stain and satin polyurethane
Bottom - berh ultra white paint.
Bottom - berh ultra white paint.
Recommended Skill Level
Intermediate
Sturdy work bench the hard way
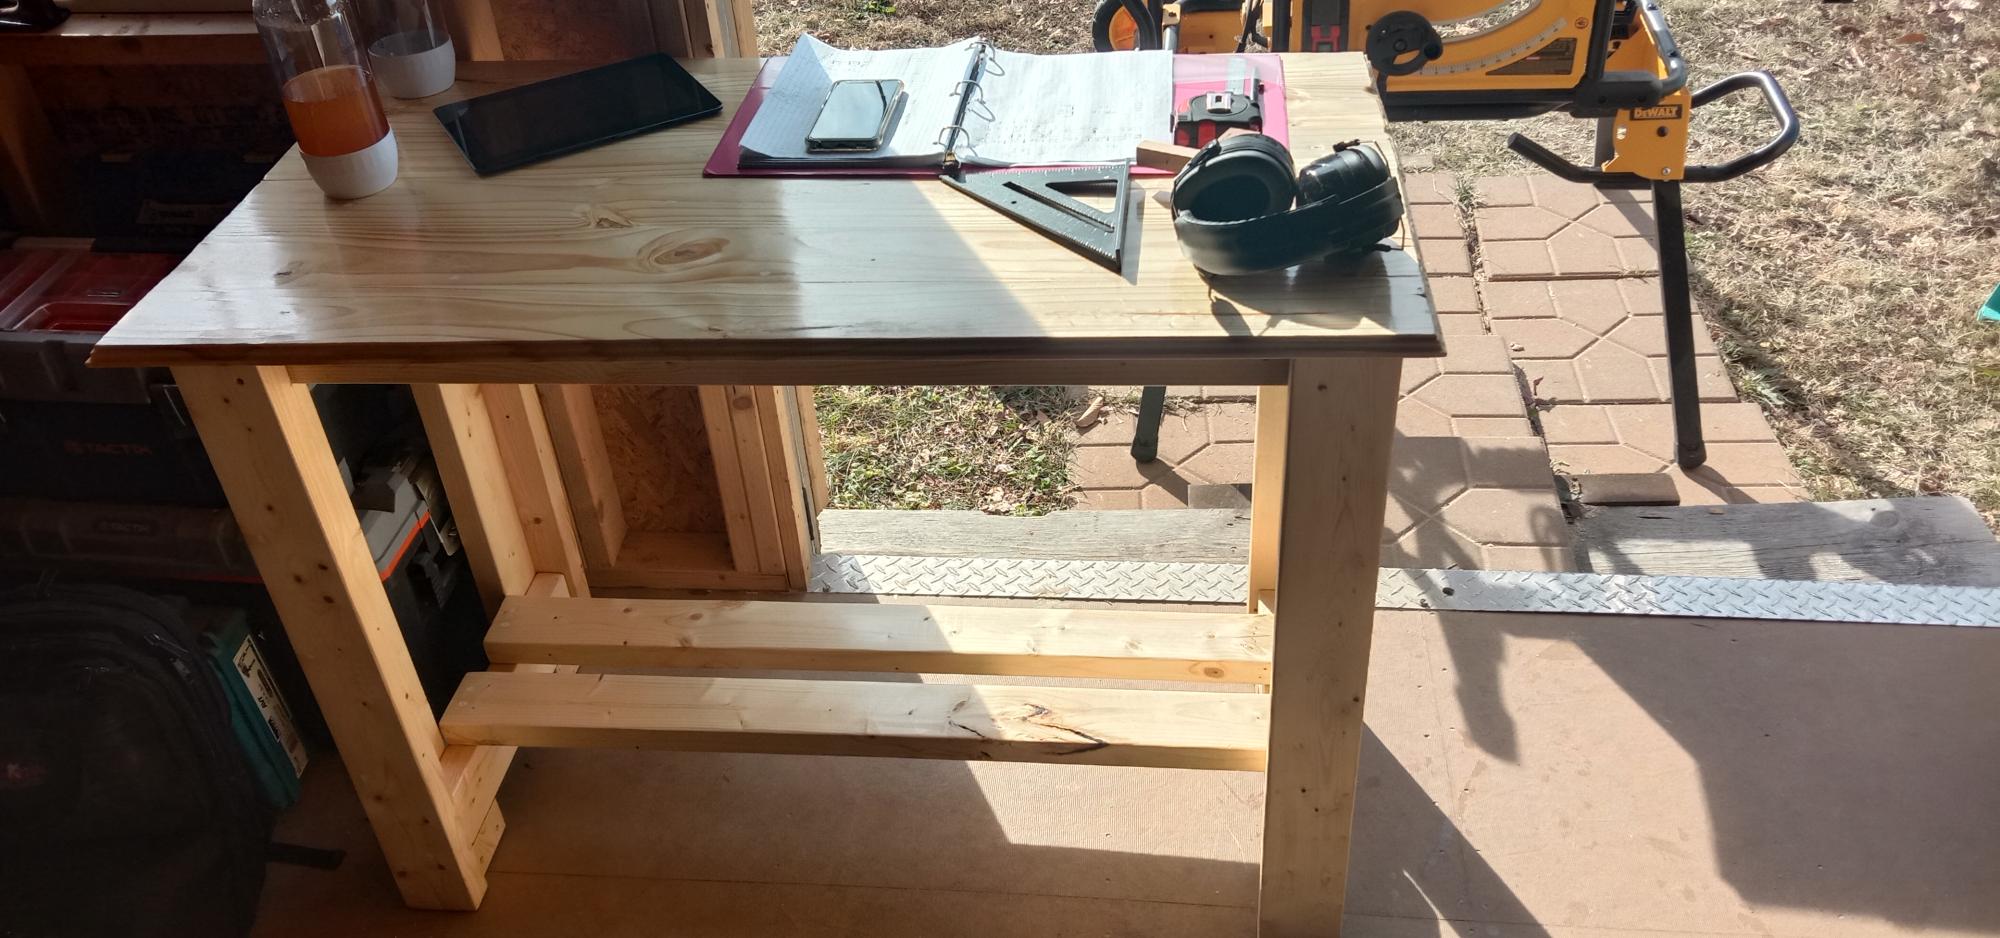
This was my first project and it was done entirely with a table saw, battery powered drill and a sander. It's uneven but stays stable in my shed/workshop. I learned a lot from making it and I hope to incorporate that knowledge in to my next project, L shaped desk for the wife.
The "decorative" edge was really just me testing a router that I got, you can see how it took chunks of the table top on the sides. I figured if I'm going to mess something up it might as well be the workbench.
As for the coating, it's just some polyurethane. I put three layers on the table top and one everywhere else, it looks slightly glossy and yellowish but its a lot less prone to denting then the bare wood was.
Built from Plan(s)
Comments
Fri, 12/17/2021 - 20:30
A workbench is a great place to start!
It looks great and functional, no doubt you learned something along the way! We can't wait to see the next project:)
Fri, 12/17/2021 - 20:30
A workbench is a great place to start!
It looks great and functional, no doubt you learned something along the way! We can't wait to see the next project:)
Doll furniture
My husband made this chair in about 30 minutes. It was are first project from this sight. So easy and my niece loved it!! I painted he cut! what a team
Built from Plan(s)
Estimated Cost
4.00
Estimated Time Investment
An Hour or Two (0-2 Hours)
Finish Used
spray primer and teal spray paint then distressed with sand paper
Recommended Skill Level
Beginner
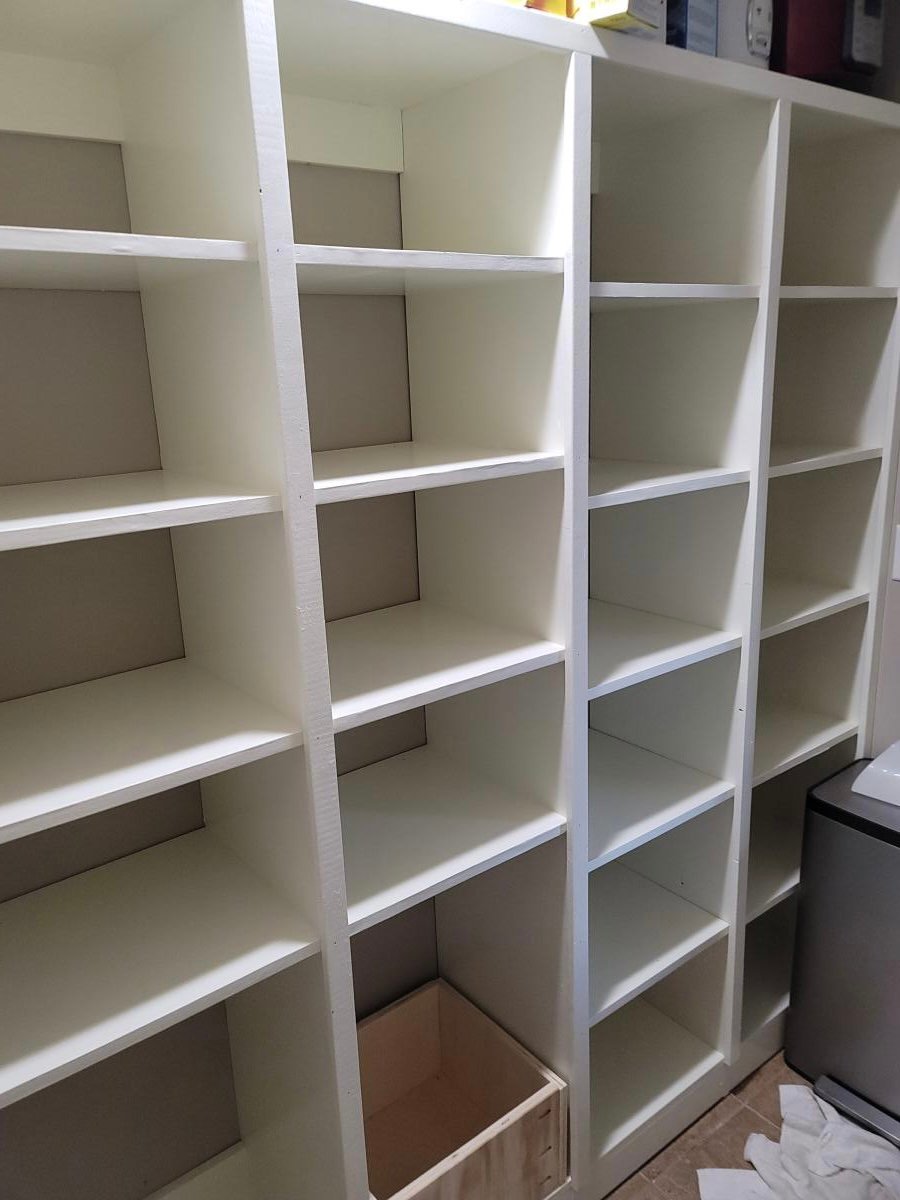
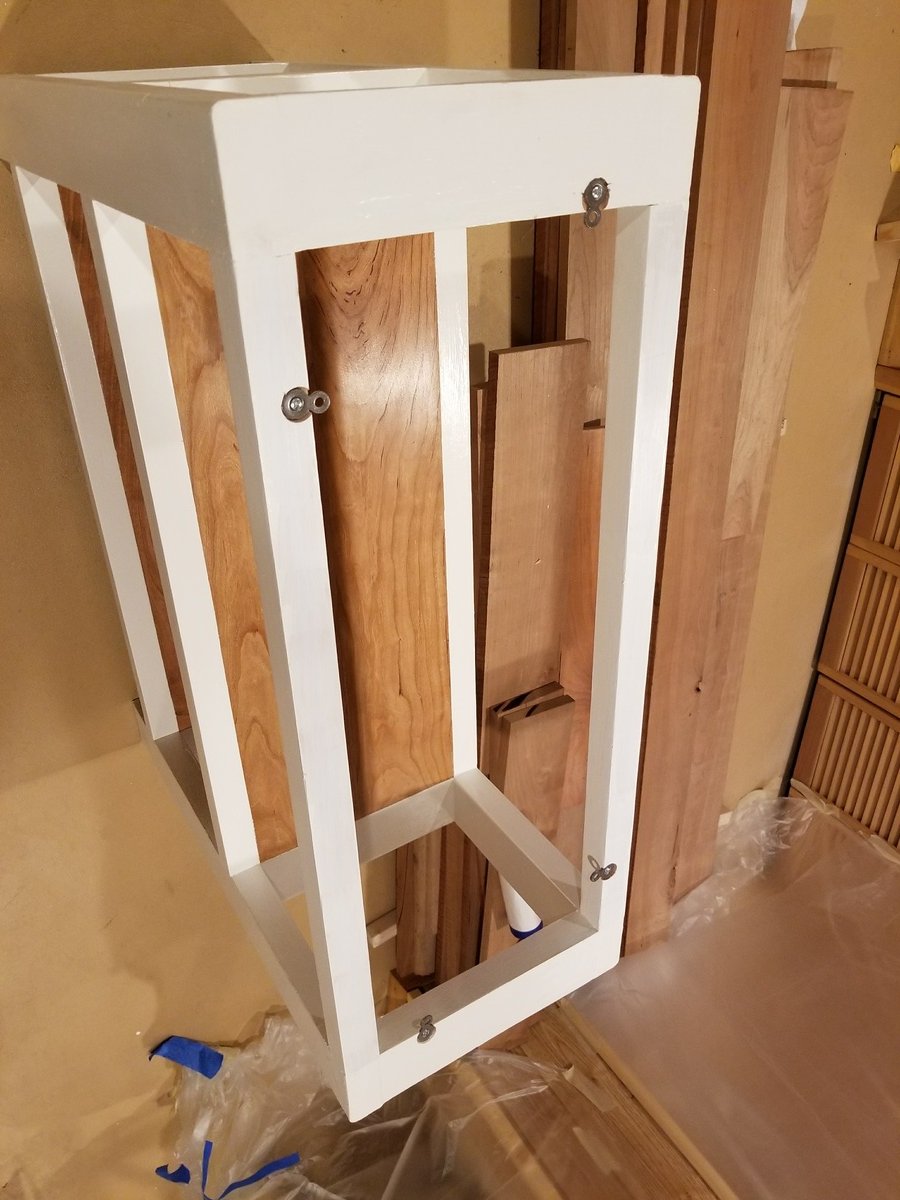
Perfect Dresser for an almost-teen boy
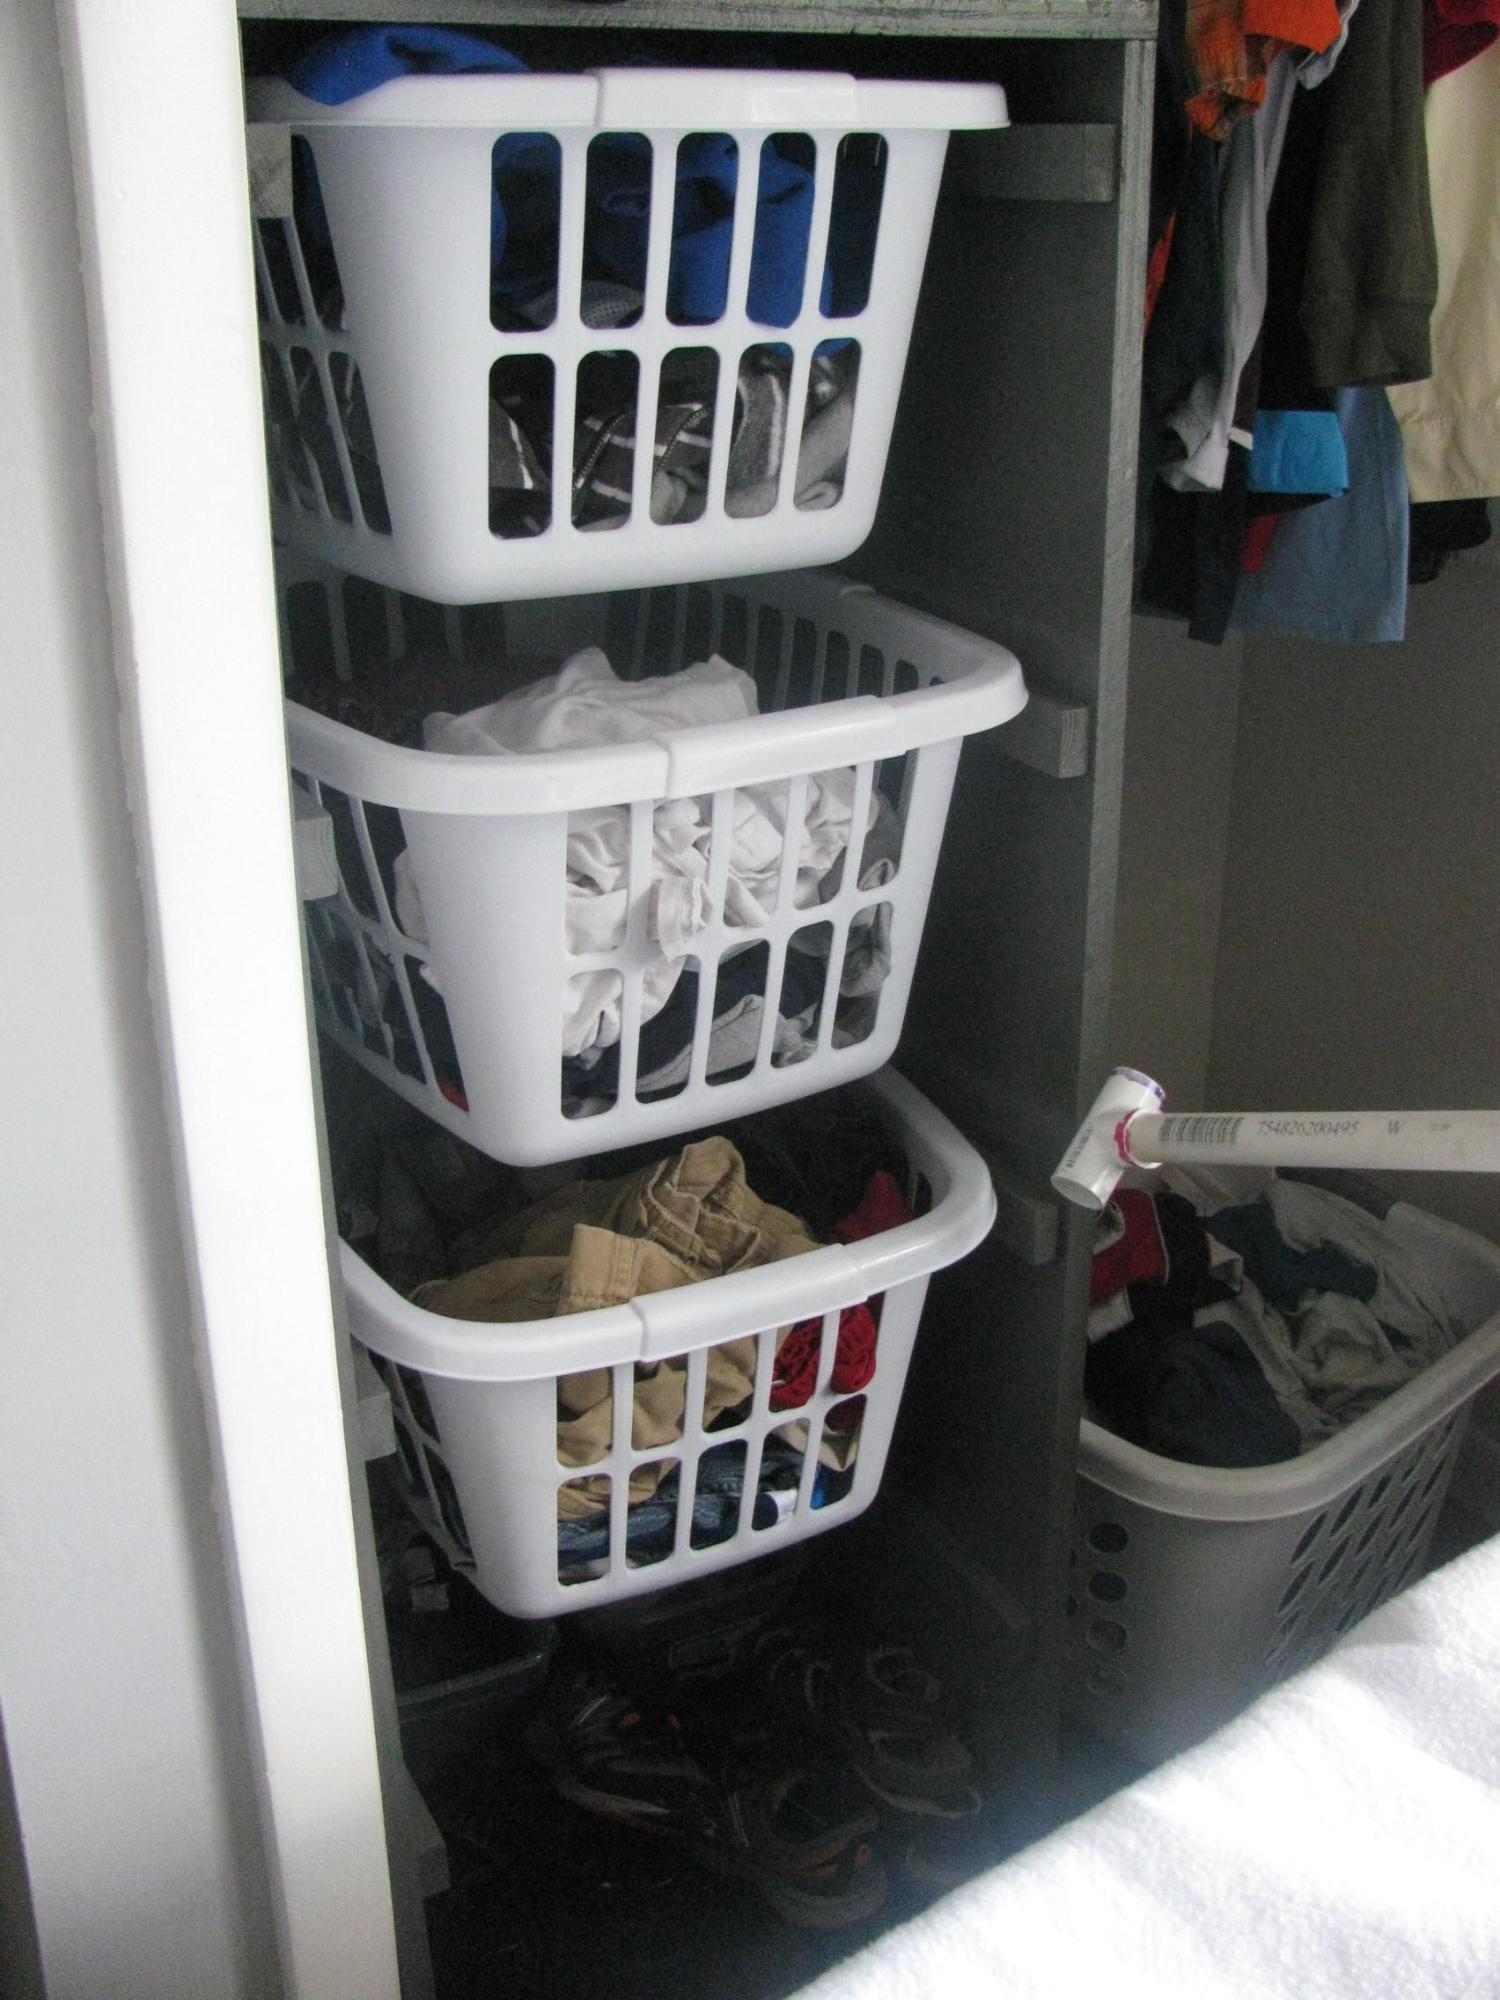
(again, I don't know why the image is showing up in the wrong direction)... While redoing my son's room, he needed a new dresser. His room is very small and we new we needed to be able to put it inside the closet. We couldn't find dressers that would fit the correct dimensions, but didn't think we had the ability (yet) to make a quality dresser for him. My kids don't like using dressers correctly anyway, so we thought this might be a great solution for him. Right now he is using the bottom area as a place for his shoes and small boxes for his underwear and socks. (We had thought about making one of the spaces into a shelf, but ended up not doing it, so I hadn't bought enough baskets).
Built from Plan(s)
Recommended Skill Level
Beginner
Modified Rustic X Console
I loved the original design but wanted to learn new skills and use hardwood.
I used a combination of pocket holes, biscuits to align the plates and the frames, and figure 8 fasteners to attach the top.
At a VERY low pace (~1-2 hours every day), and many mistakes, it took me about two months to complete this project. If I had to do it again, it would probably take me two-three weeks at the same pace.
Overall, I learned a lot and am very pleased with the final results.
Built from Plan(s)
Estimated Cost
$70
Estimated Time Investment
Week Long Project (20 Hours or More)
Finish Used
Frame - white acrylic paint, coated with wipe-on water based Minwax poly (to protect the paint)
Shelves- 3 layers of oil based wipe-on Minwax poly
Top- 3 layers of oil based wipe-on Minwax poly, then 3 layers of oil based brushed (fast drying) Minwax poly
Shelves- 3 layers of oil based wipe-on Minwax poly
Top- 3 layers of oil based wipe-on Minwax poly, then 3 layers of oil based brushed (fast drying) Minwax poly
Recommended Skill Level
Intermediate
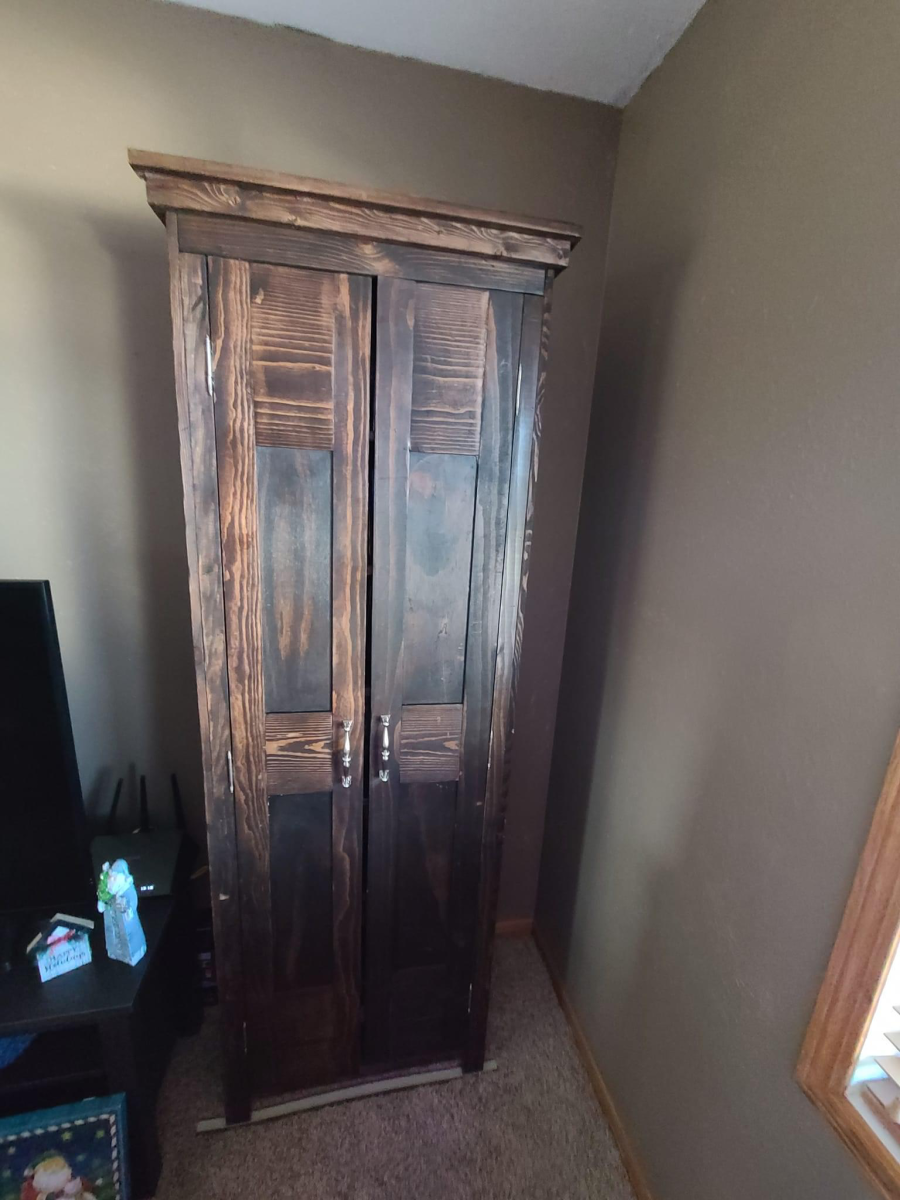
Favorite bookshelf
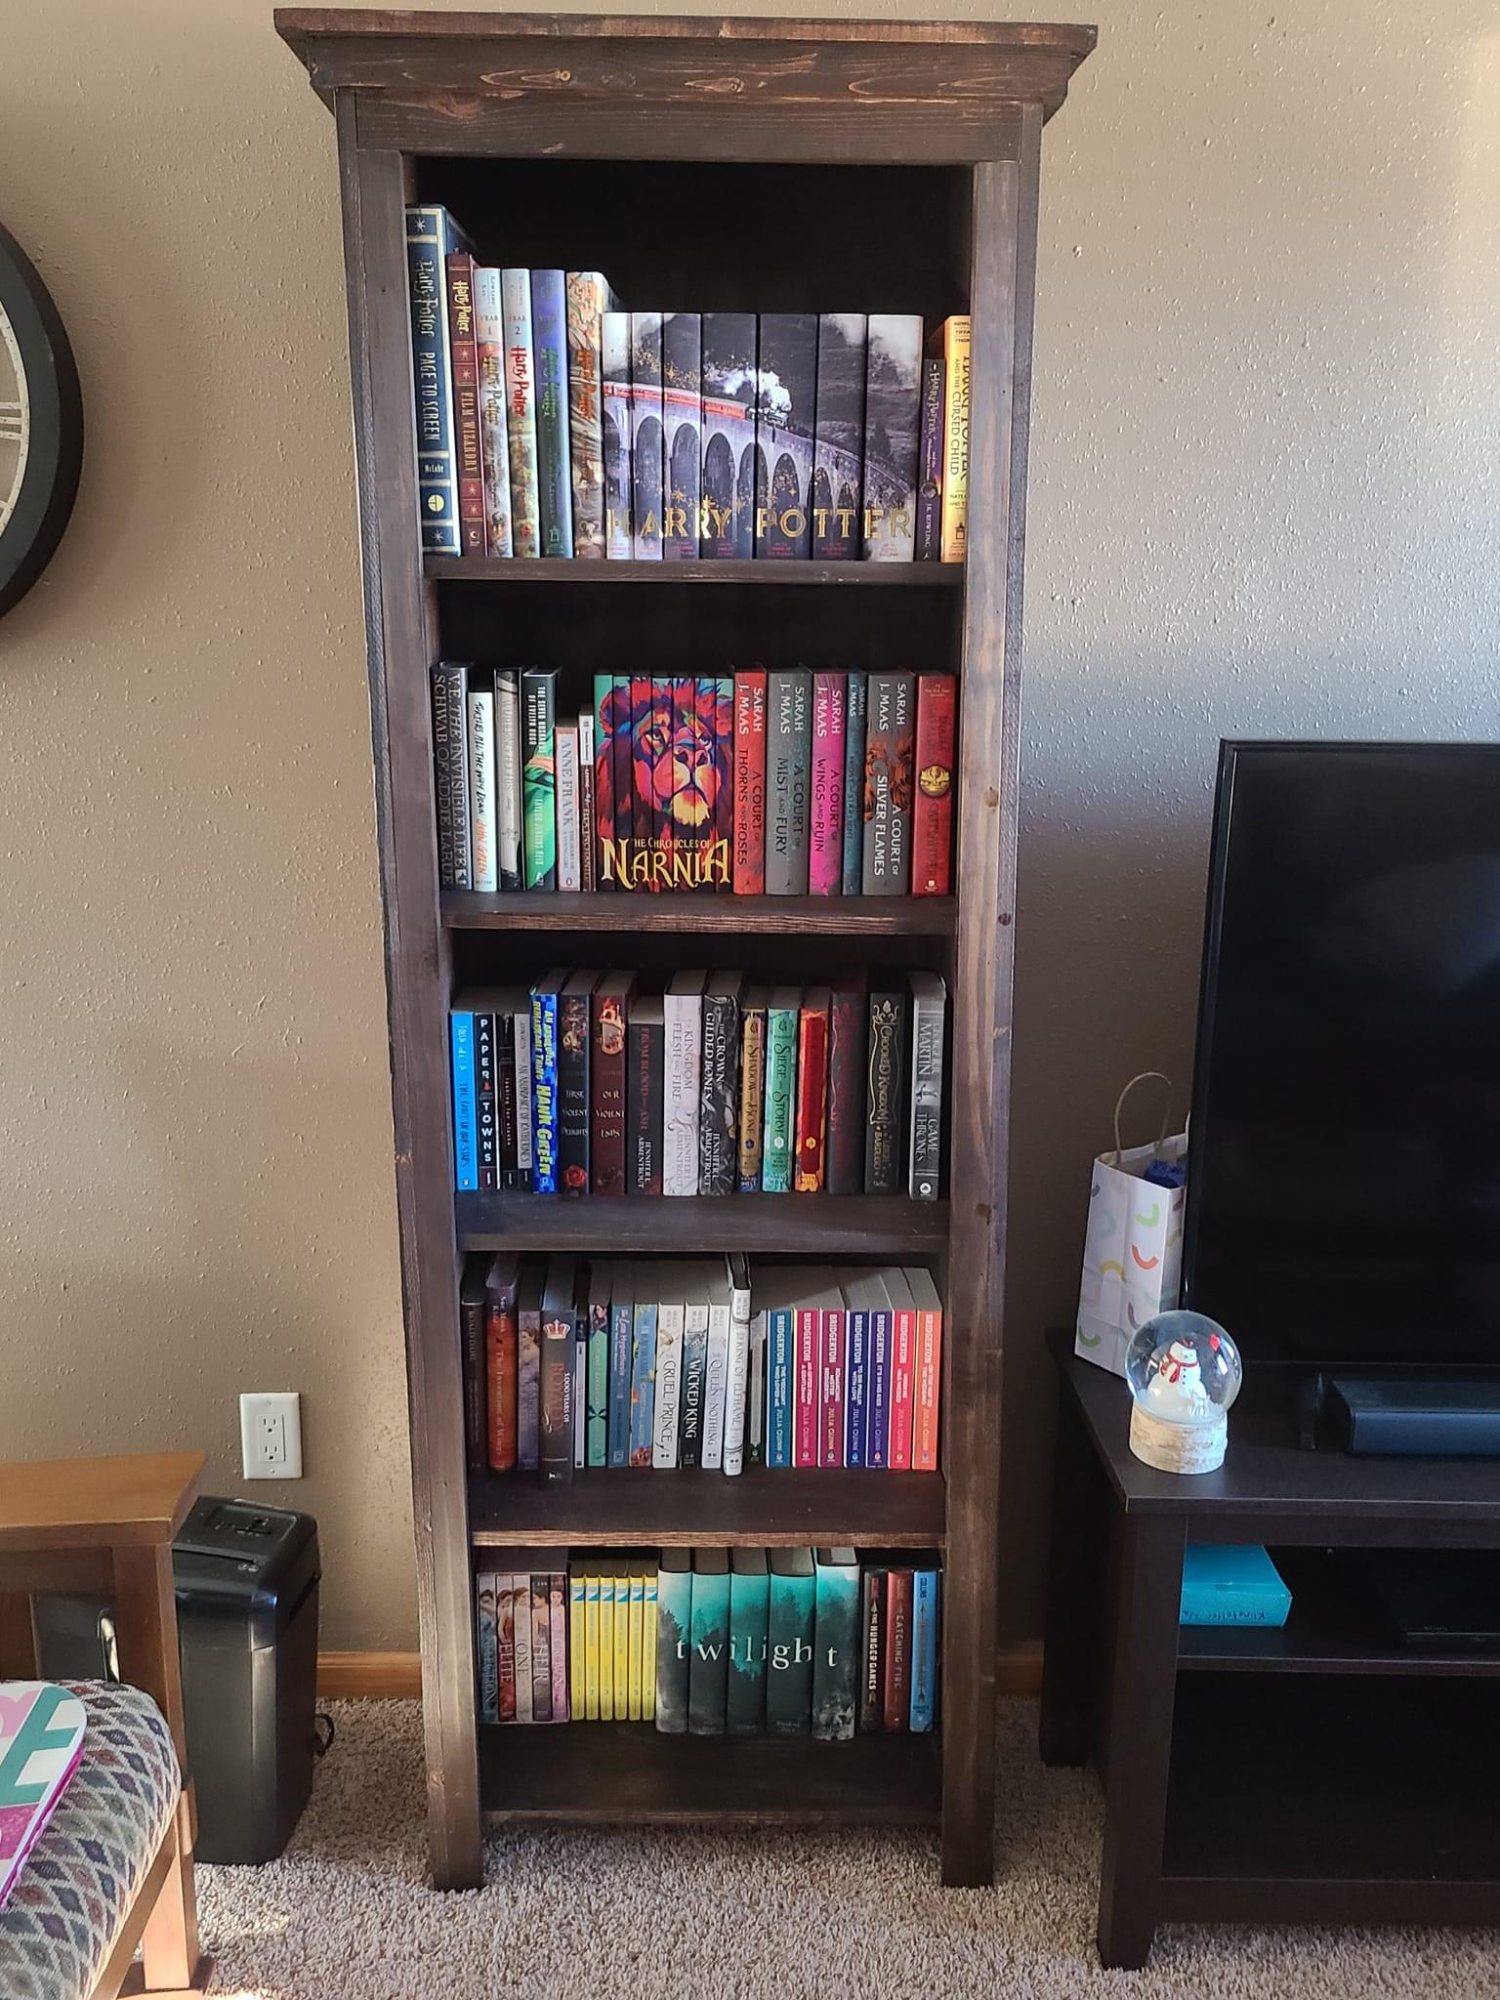
Using favorite bookshelf design I built 2 shelves, one for books (5 shelves) and one for DVD’s (7 shelves with doors). These were a present for my daughter for Christmas she loves them. They are made of pine finished with General Finish brand Java gel stain.
Built from Plan(s)
Comments
Farmhouse Bed-My first build
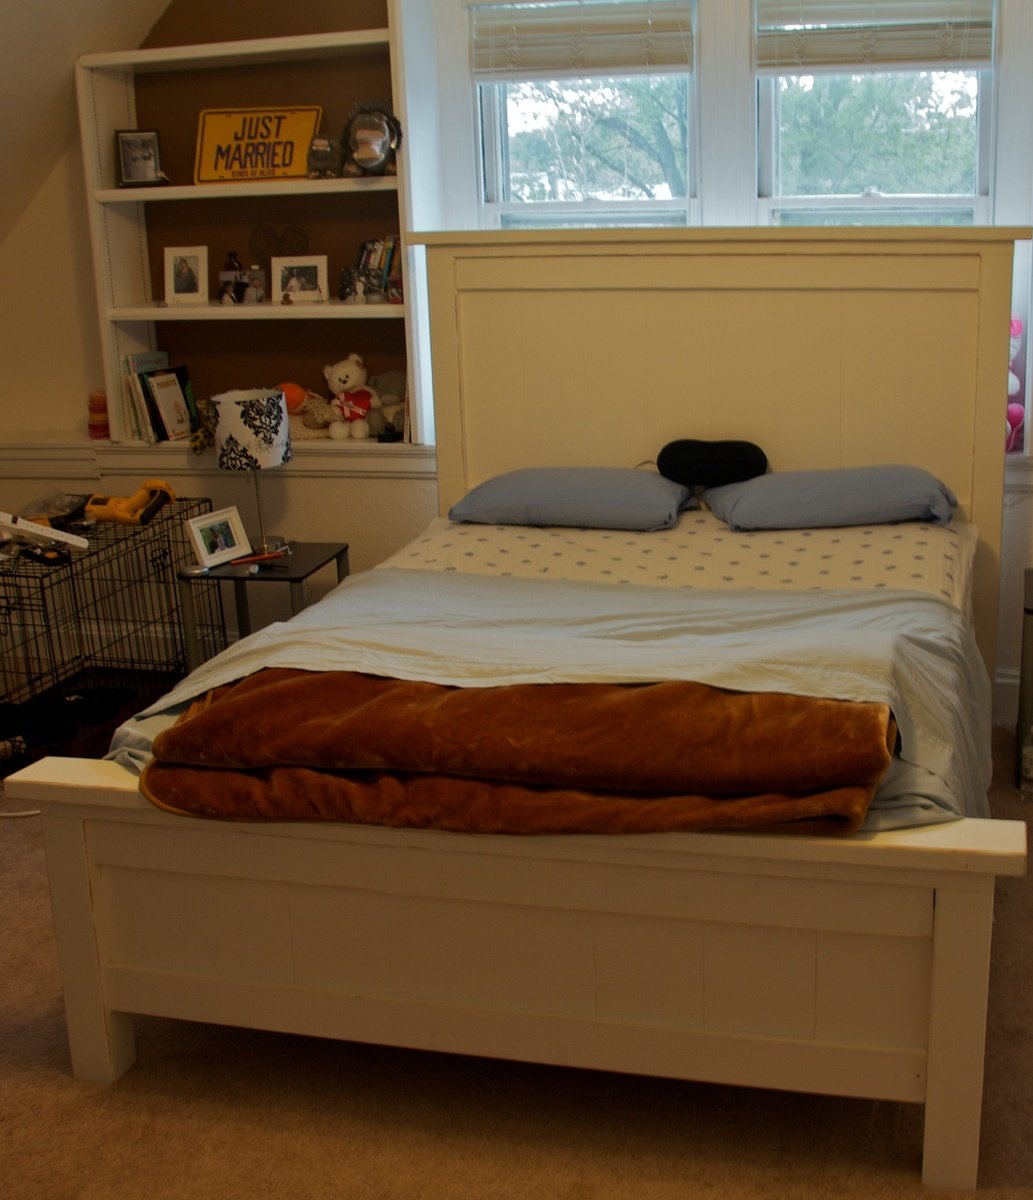
This was my first project. My wife saw it and told me to make it :)
Now I'm hooked
I already bought wood for my next two projects.
You rock Ana !!!!!
Built from Plan(s)
Estimated Cost
100-200
Estimated Time Investment
Weekend Project (10-20 Hours)
Finish Used
Dove white
Recommended Skill Level
Intermediate
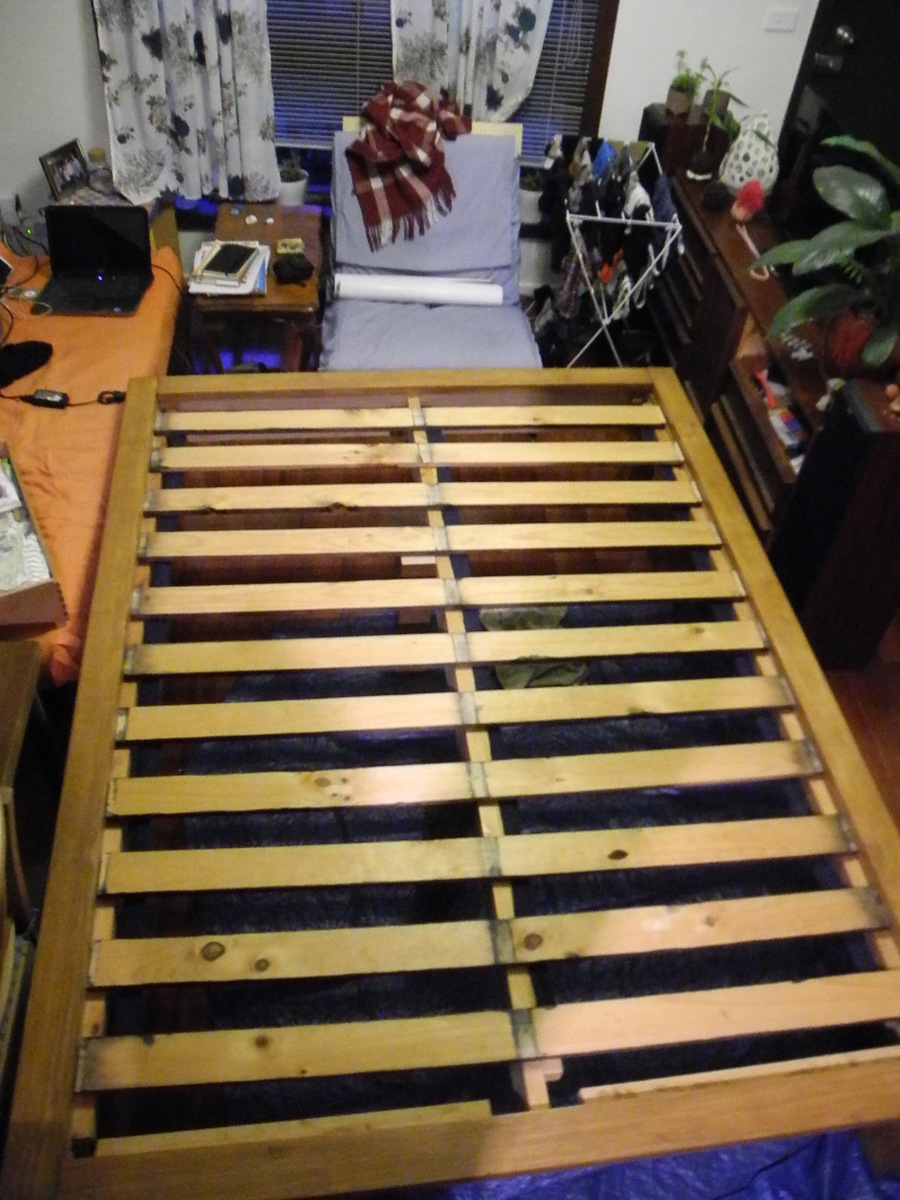
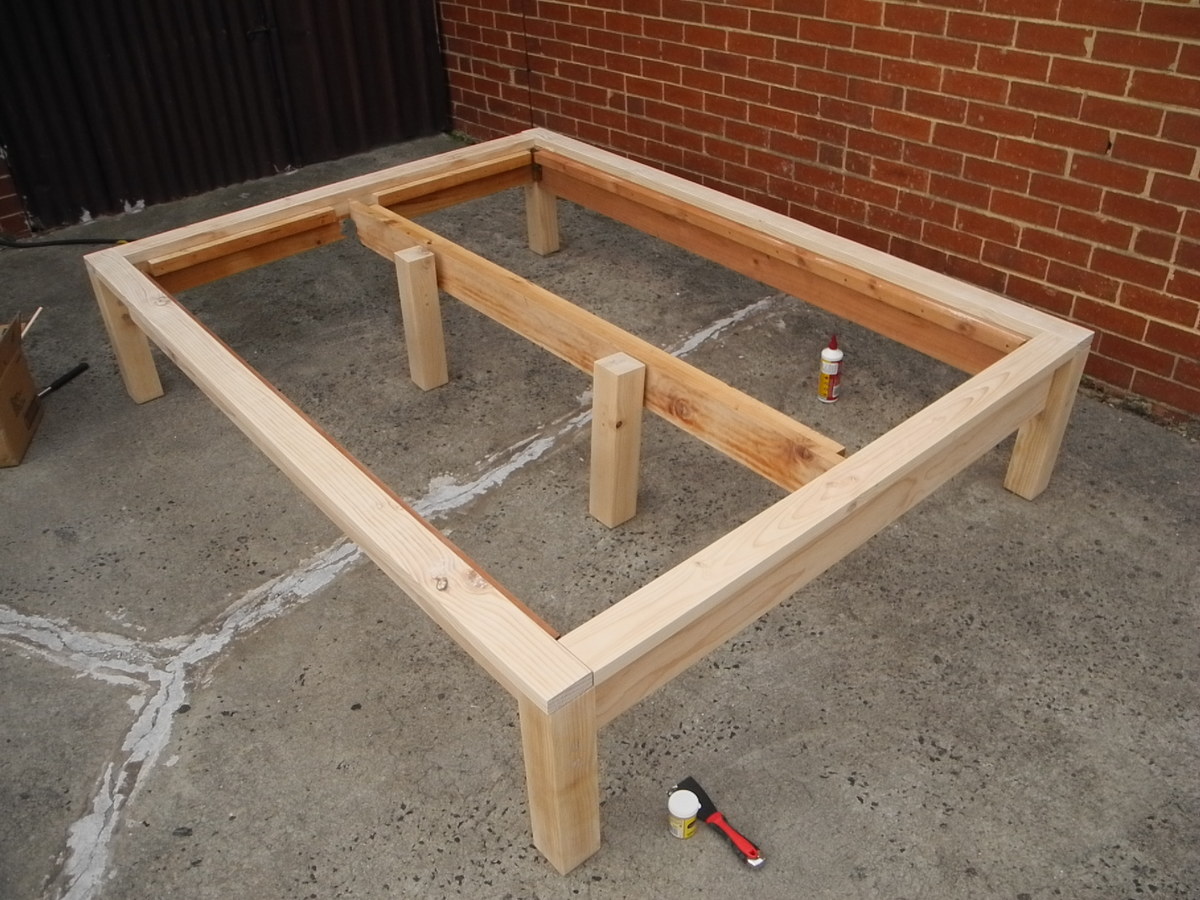
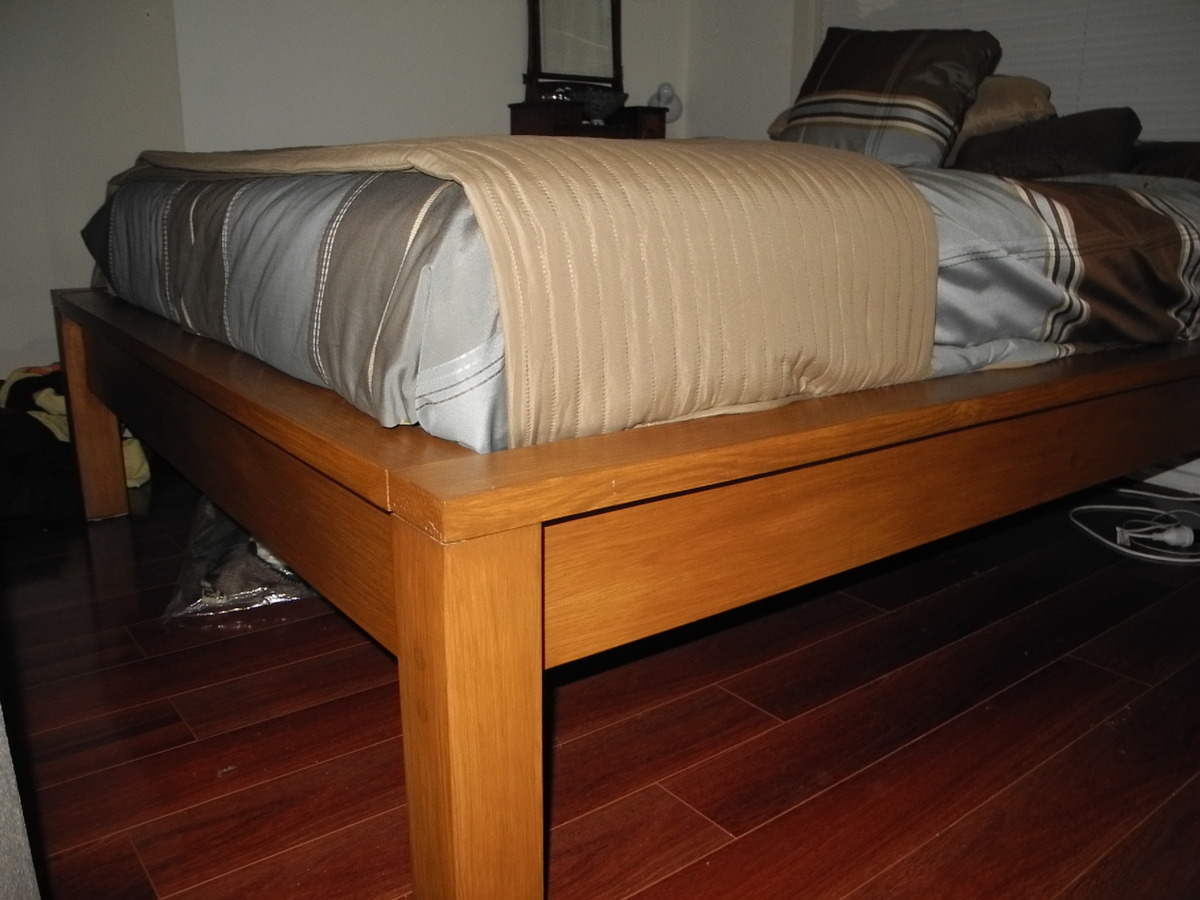
Hailey Platform Bed Modified for Recycled Wood and Building in Small Spaces
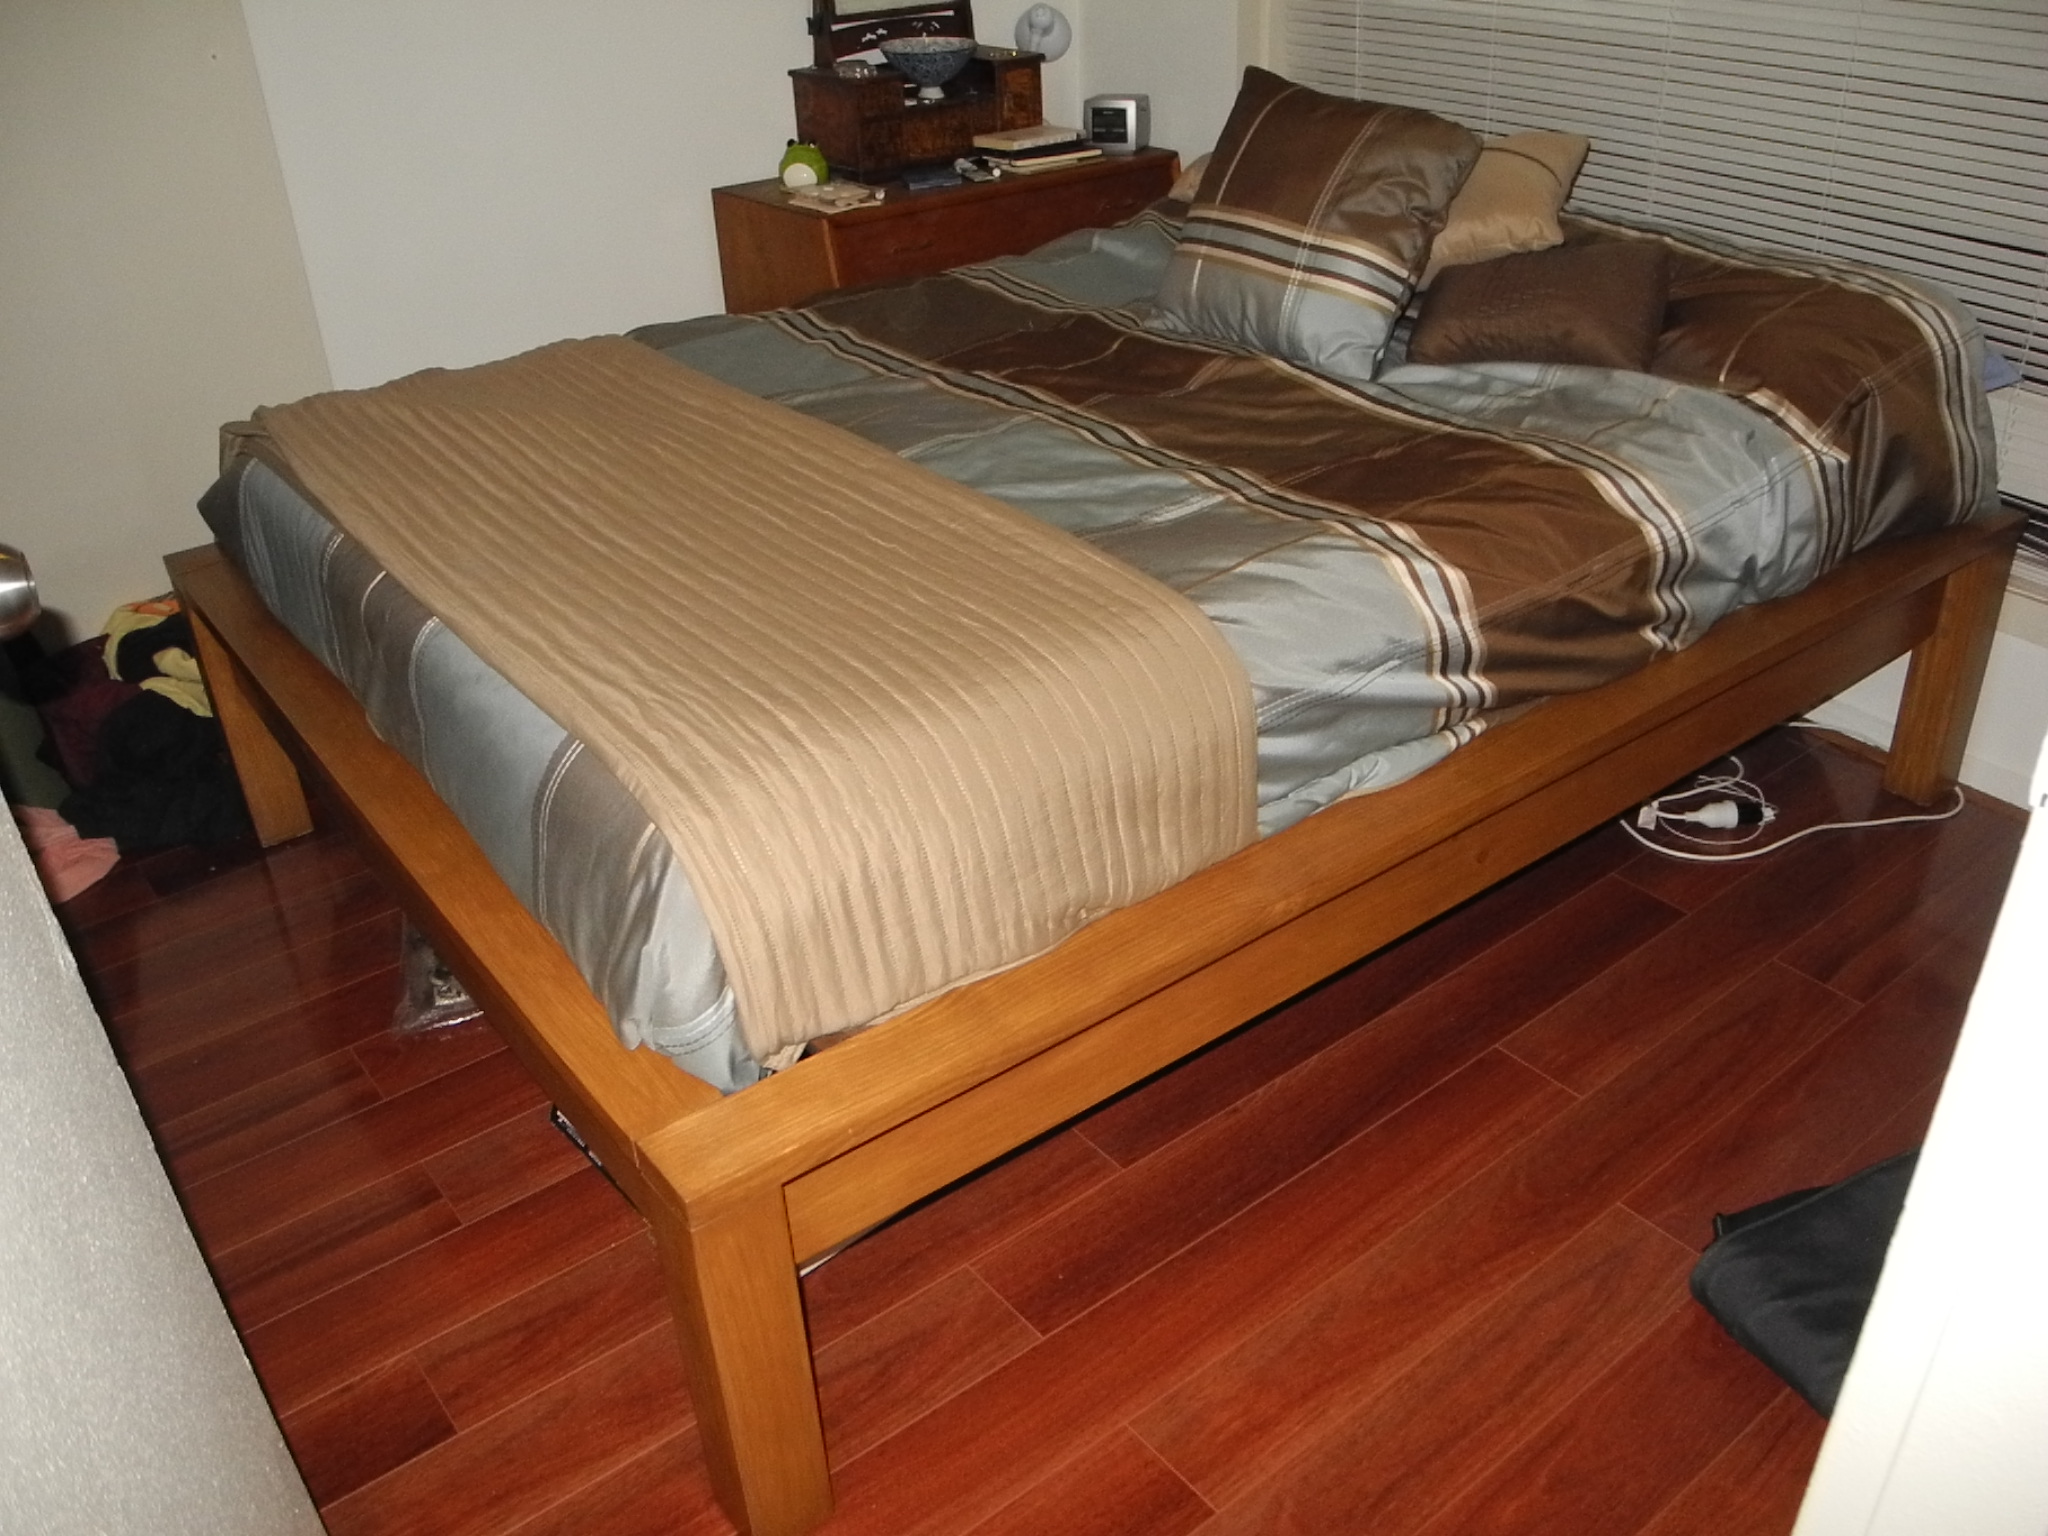
This was my first building project! The bed is built almost entirely out of found wood. I modified the Hailey Platform Bed plans to suit the dimensions of the wood I had, and my very small work space.
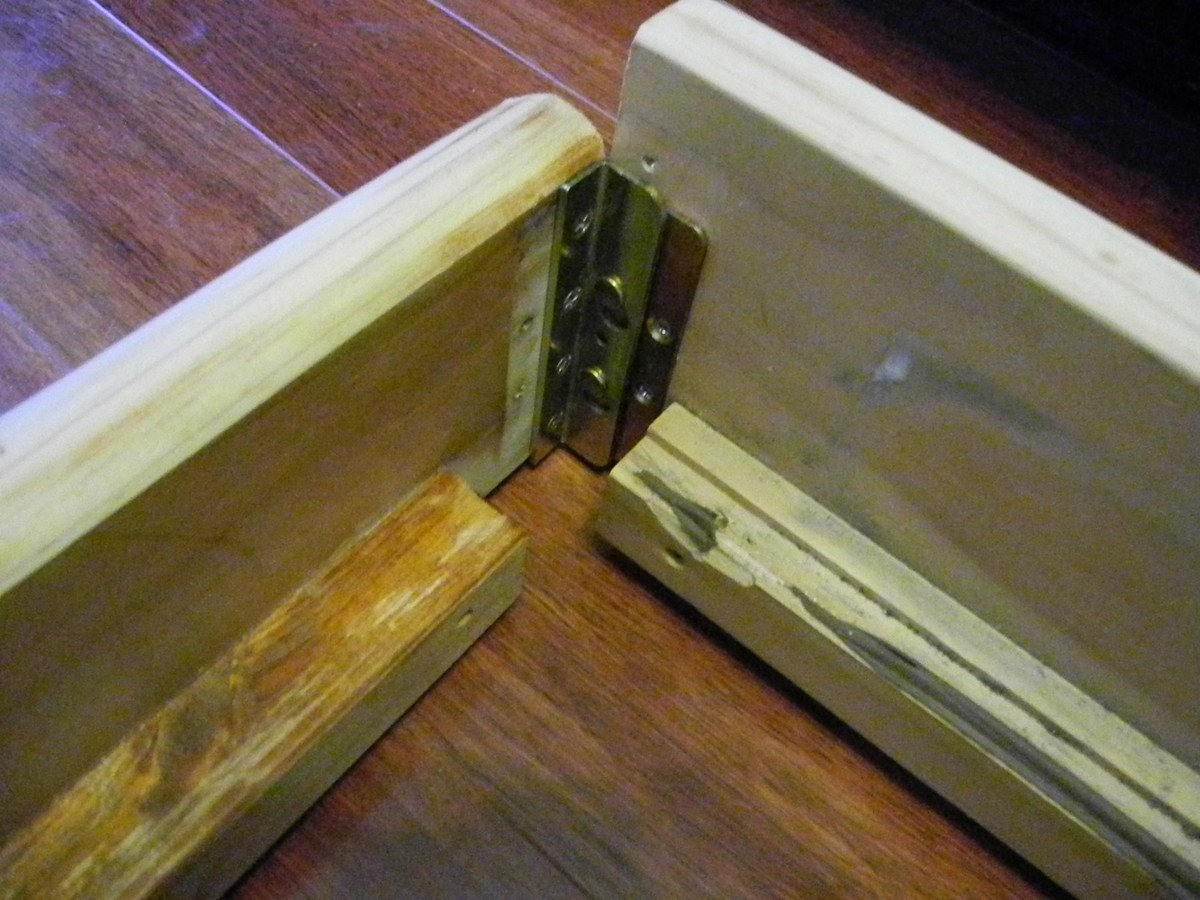
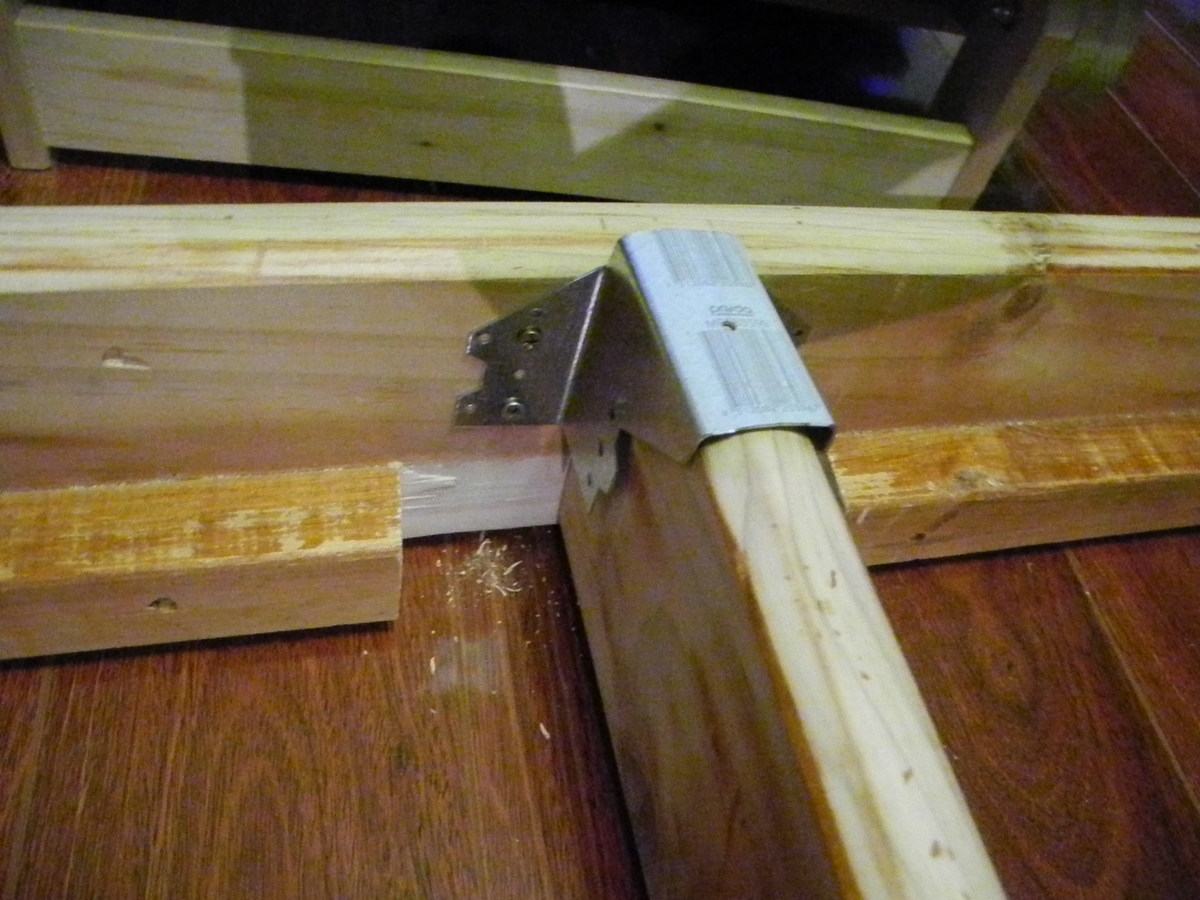
I did most of the building in my living room and my apartment's miniature courtyard, which is much narrower than a bed. Because of this, the bed had to be able to be disassembled until after it was stained. The modified plans use brackets on the corners - even these were found! Most of the wood came from discarded pieces of other beds, found in the yearly big garbage collection. The centre support strut can also be disassembled, and is attached with a joist bracket.
I think the actual assembly and finishing of the bed could be done in a day, even for a beginner like me, but I spent many hours sanding the old finishes off of my found wood so I would have a uniform finish.
Built from Plan(s)
Estimated Cost
20
Estimated Time Investment
Week Long Project (20 Hours or More)
Finish Used
Cabot's Water-Based Stain and Varnish (all-in-one formula) in Sutherland Teak; 2 coats applied with a foam varnish brush.
Recommended Skill Level
Starter Project
Comments

Sun, 06/23/2013 - 06:00
Great job!
Congratulations on your first build! It looks great! All that sanding you did really paid off -- your finish is so beautiful and smooth! Love the teak color. Great job!
Thu, 07/03/2014 - 12:02
Look great!
I just found this website and plans. I think I am going to build this for my new bed. I like the modifications you made to take it apart.
As I will be building a king sized bed, I will have to be able to take it apart in order to bring it into my room. Thank you for the ideas.
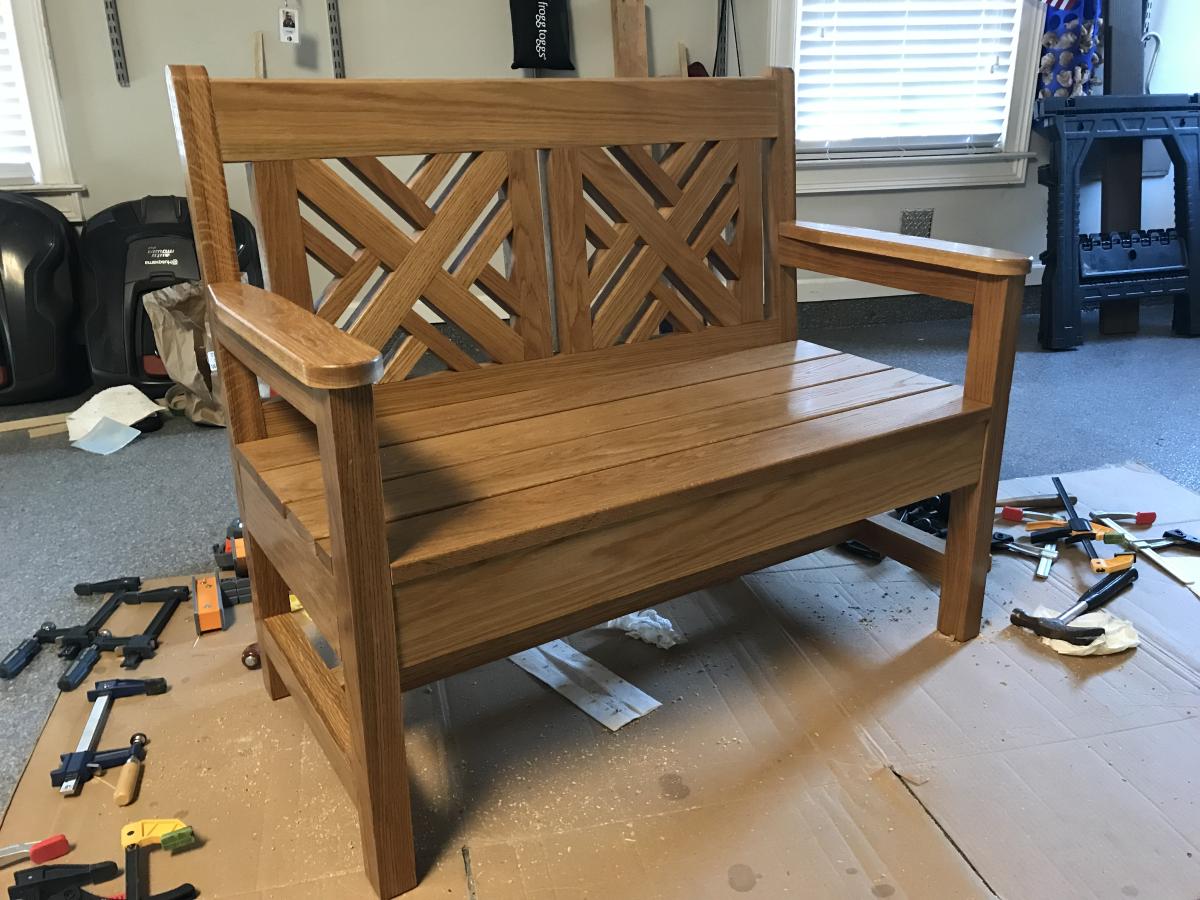
Woven Garden Bench
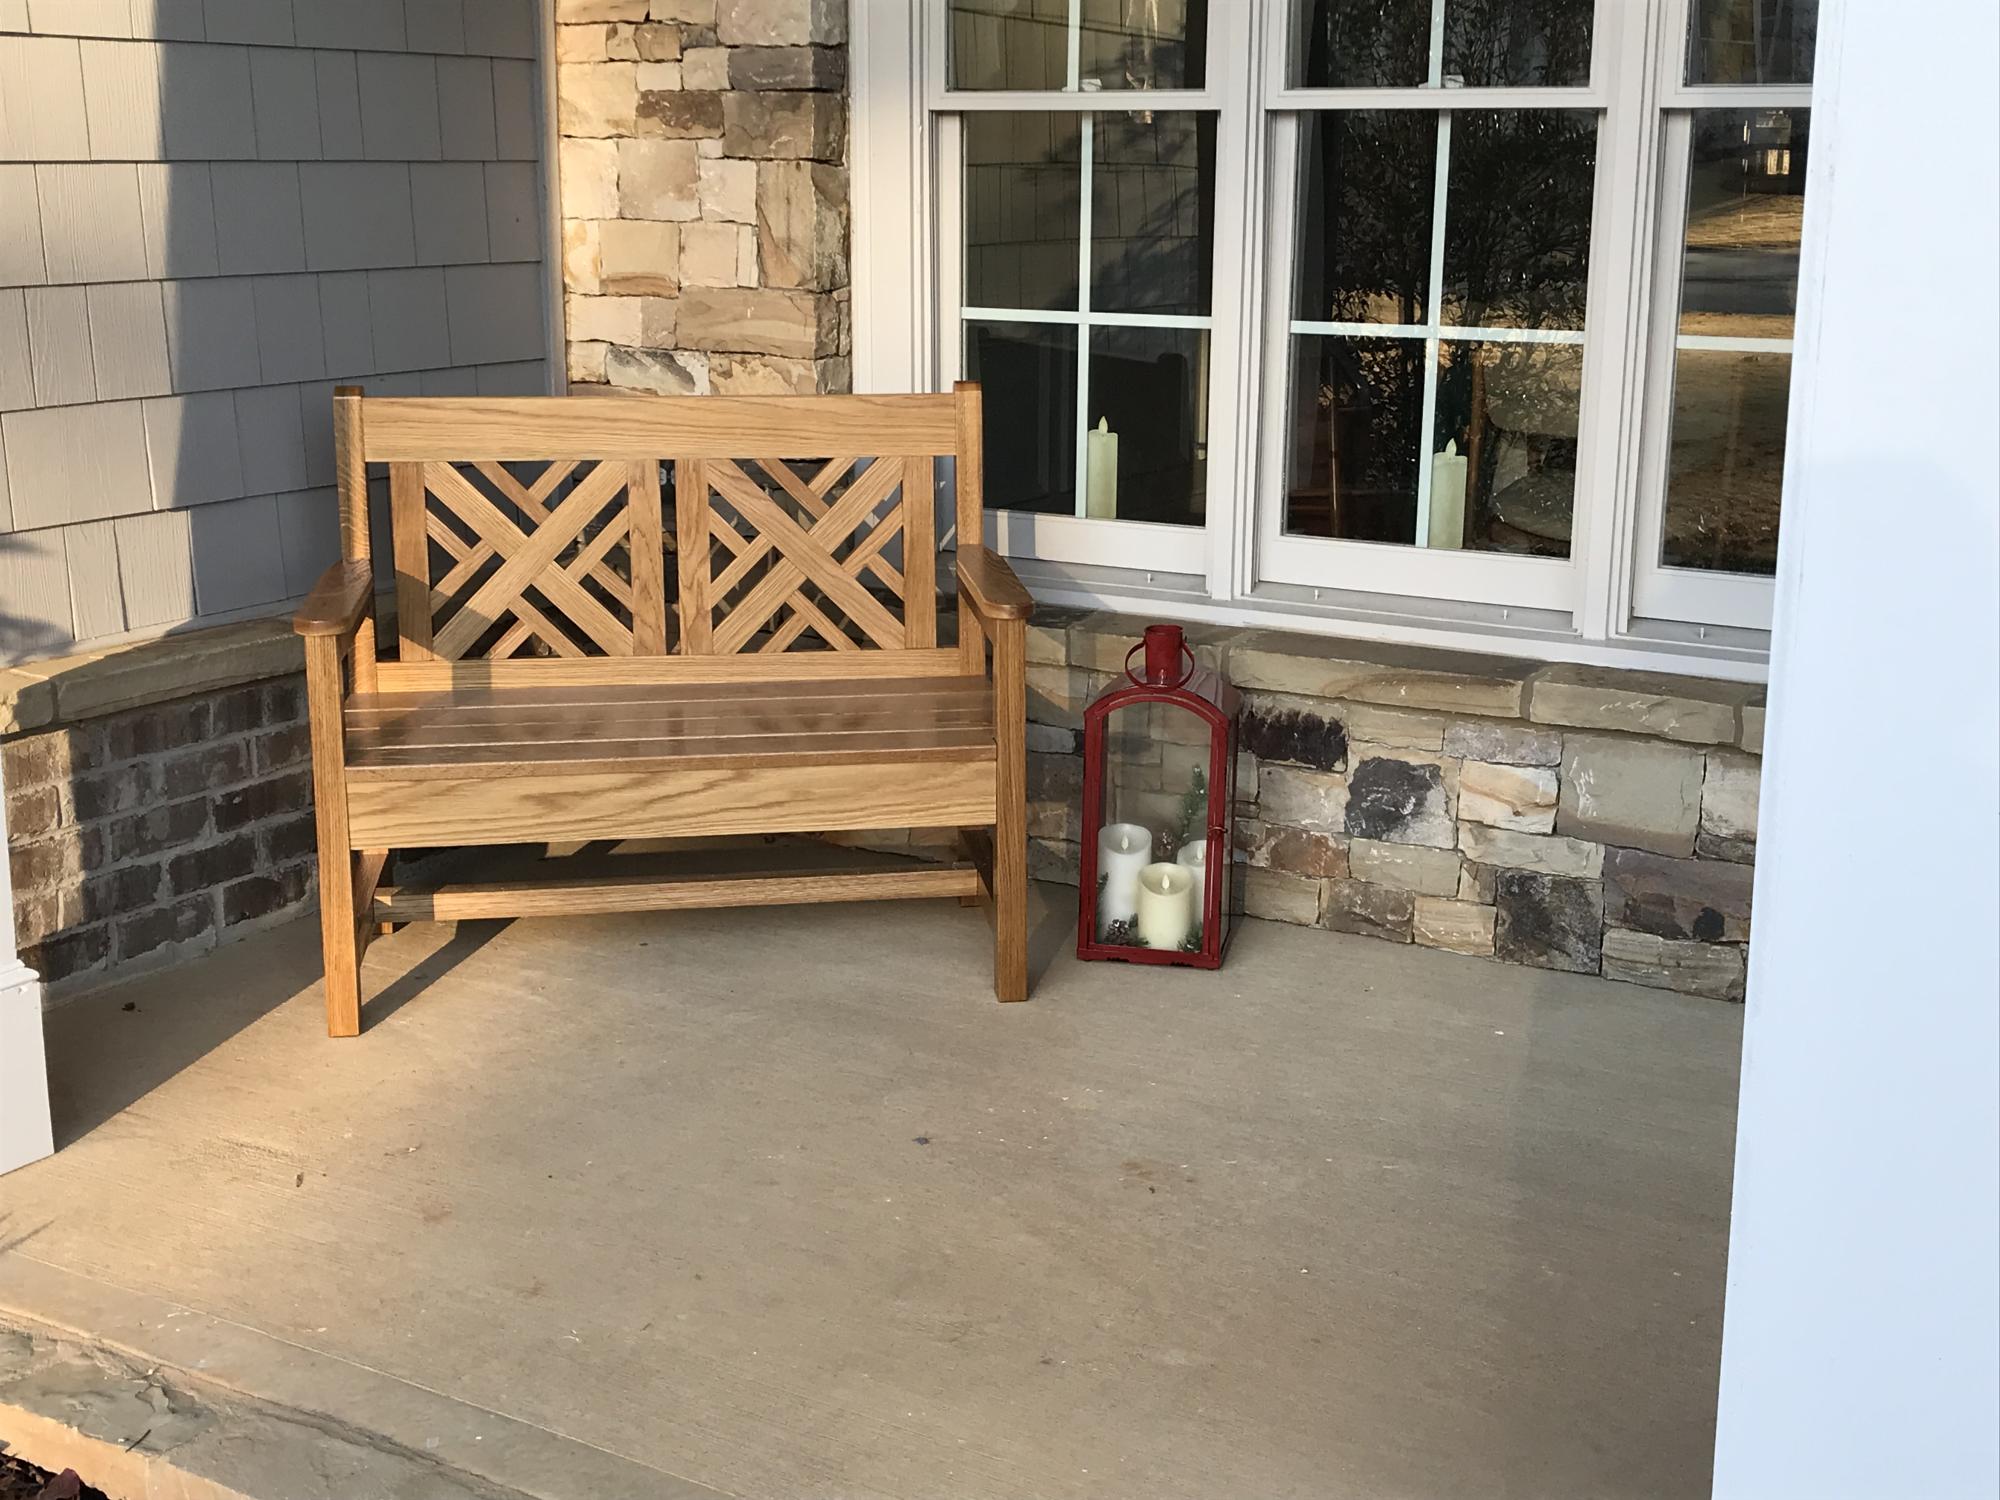
I used White Oak, 2 X 2 and 2 X 4 for the frame with 1 X 4 for the seats. This was my first attempt at mortise and tenon joinery (instead of pocket screws) and the woven pieces were held in with dowel pins.
Built from Plan(s)
Comments
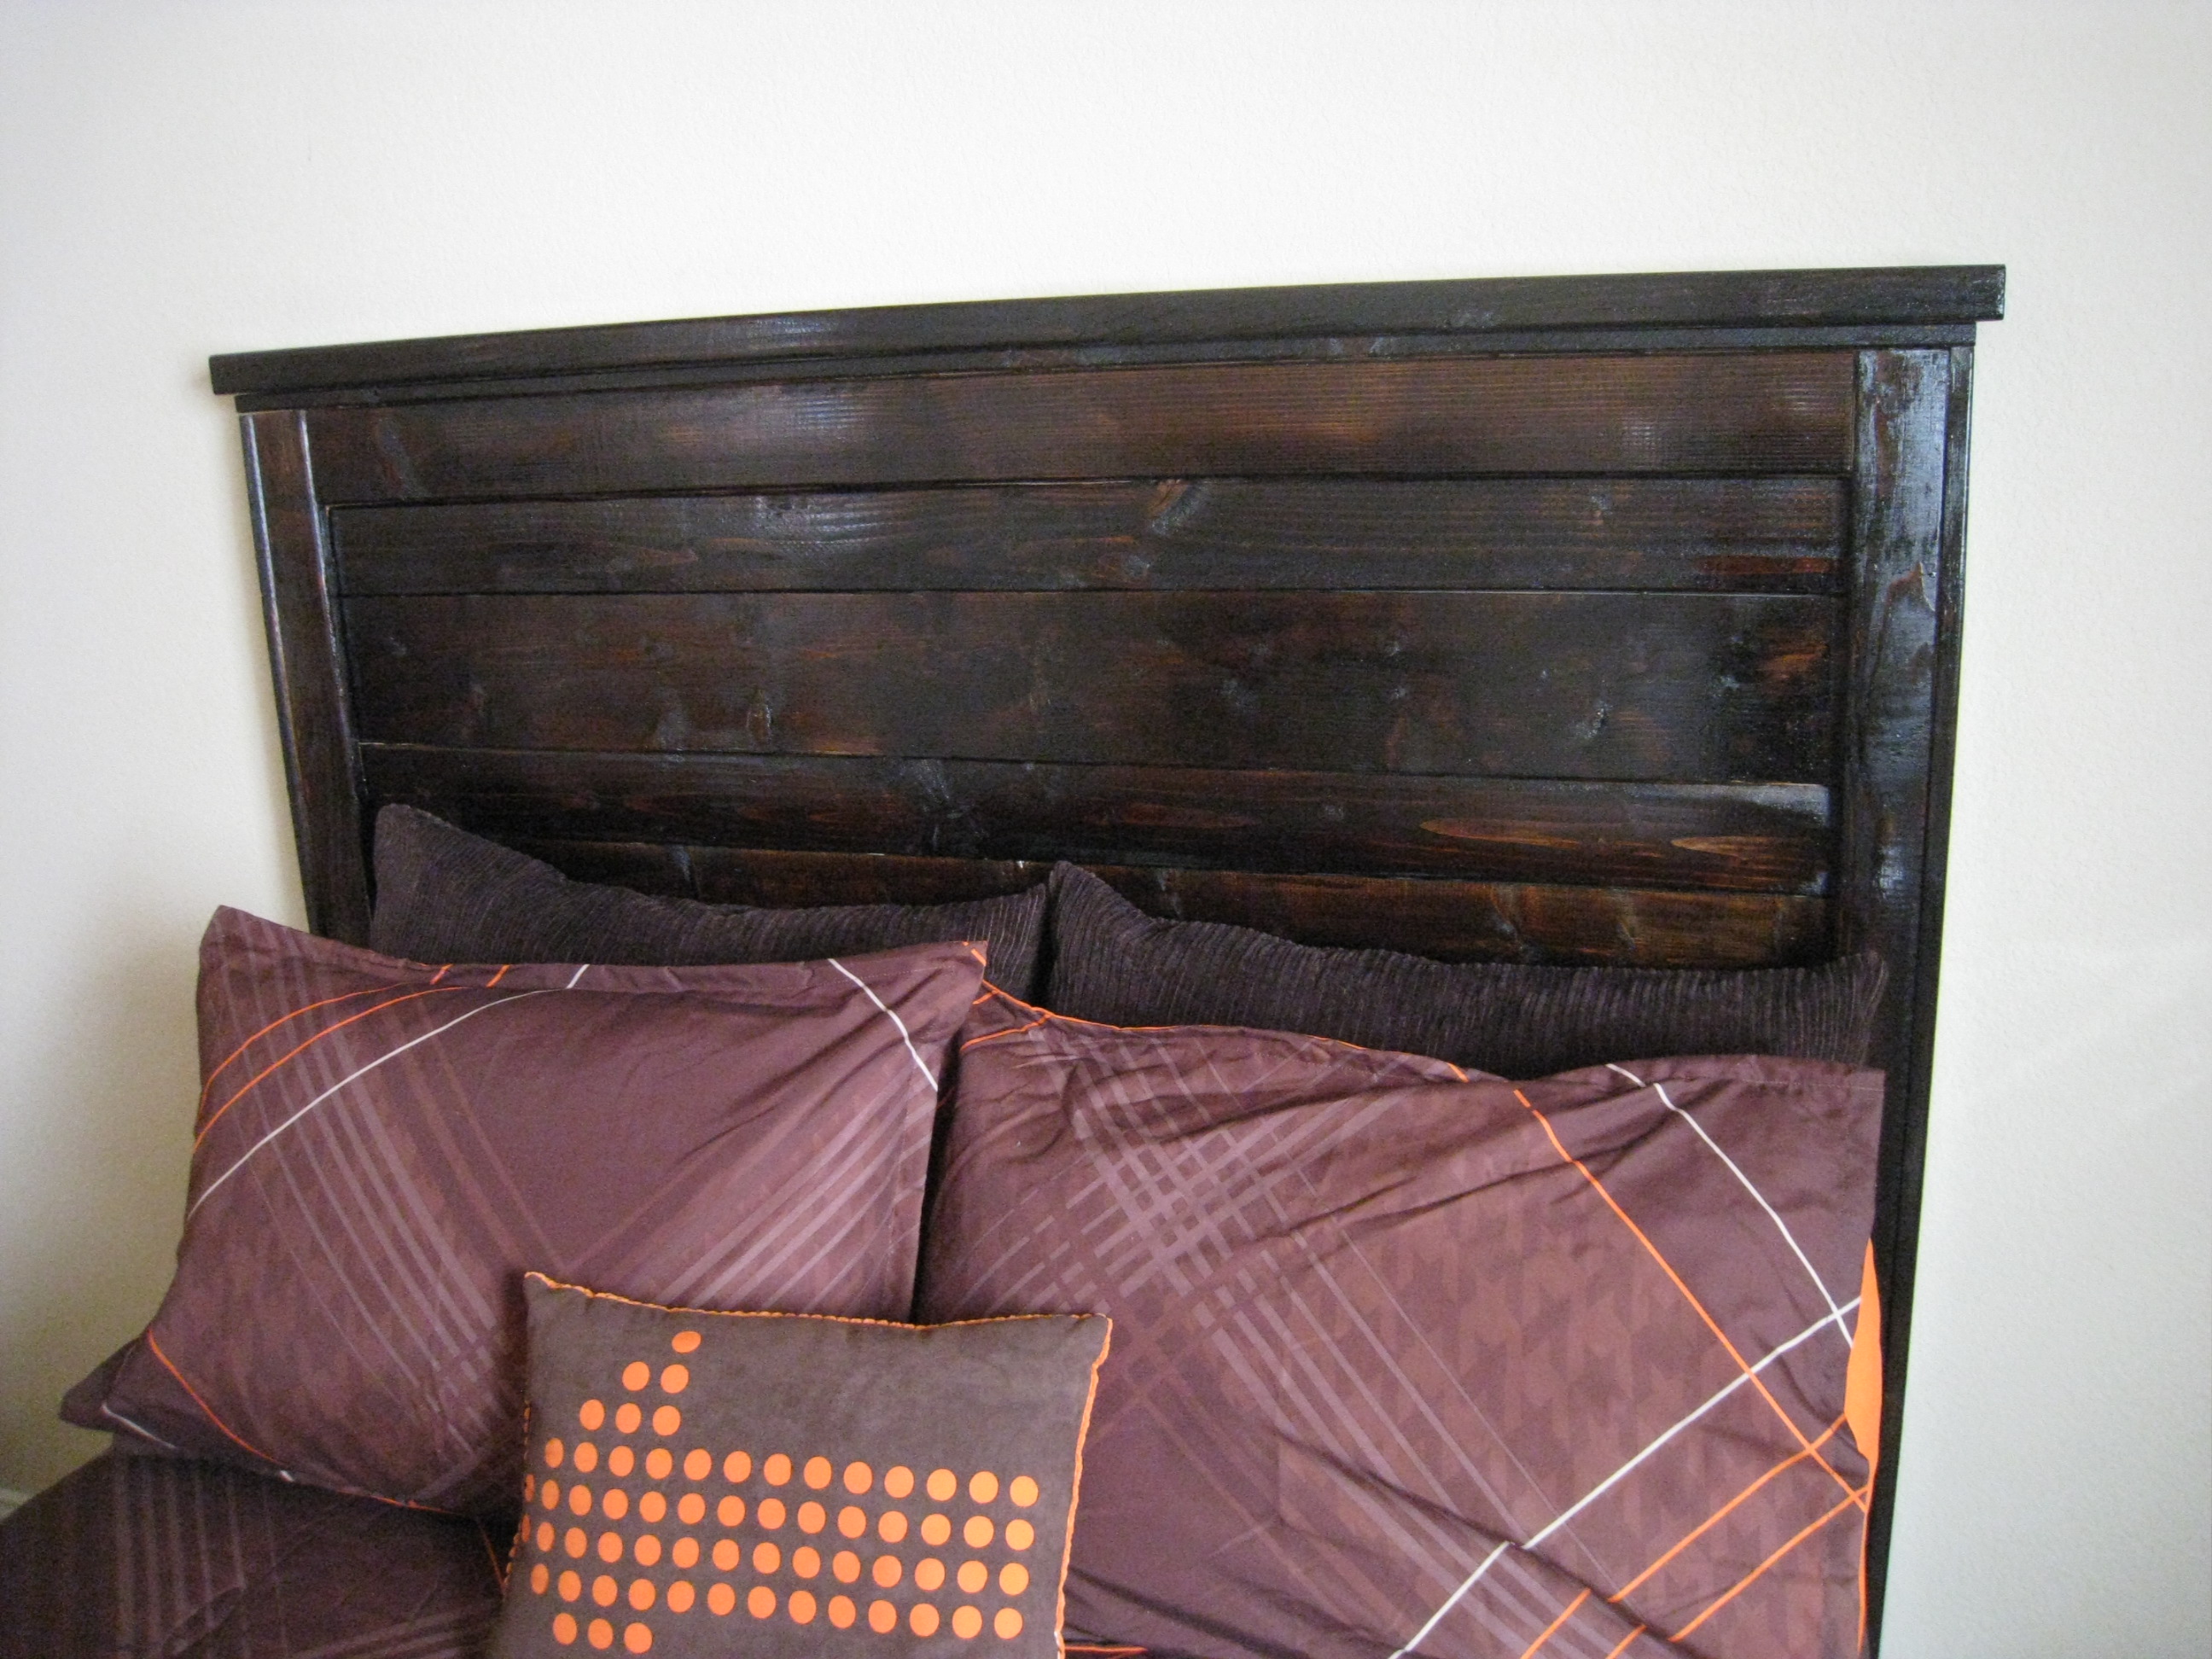
Reclaimed Wood Headboard
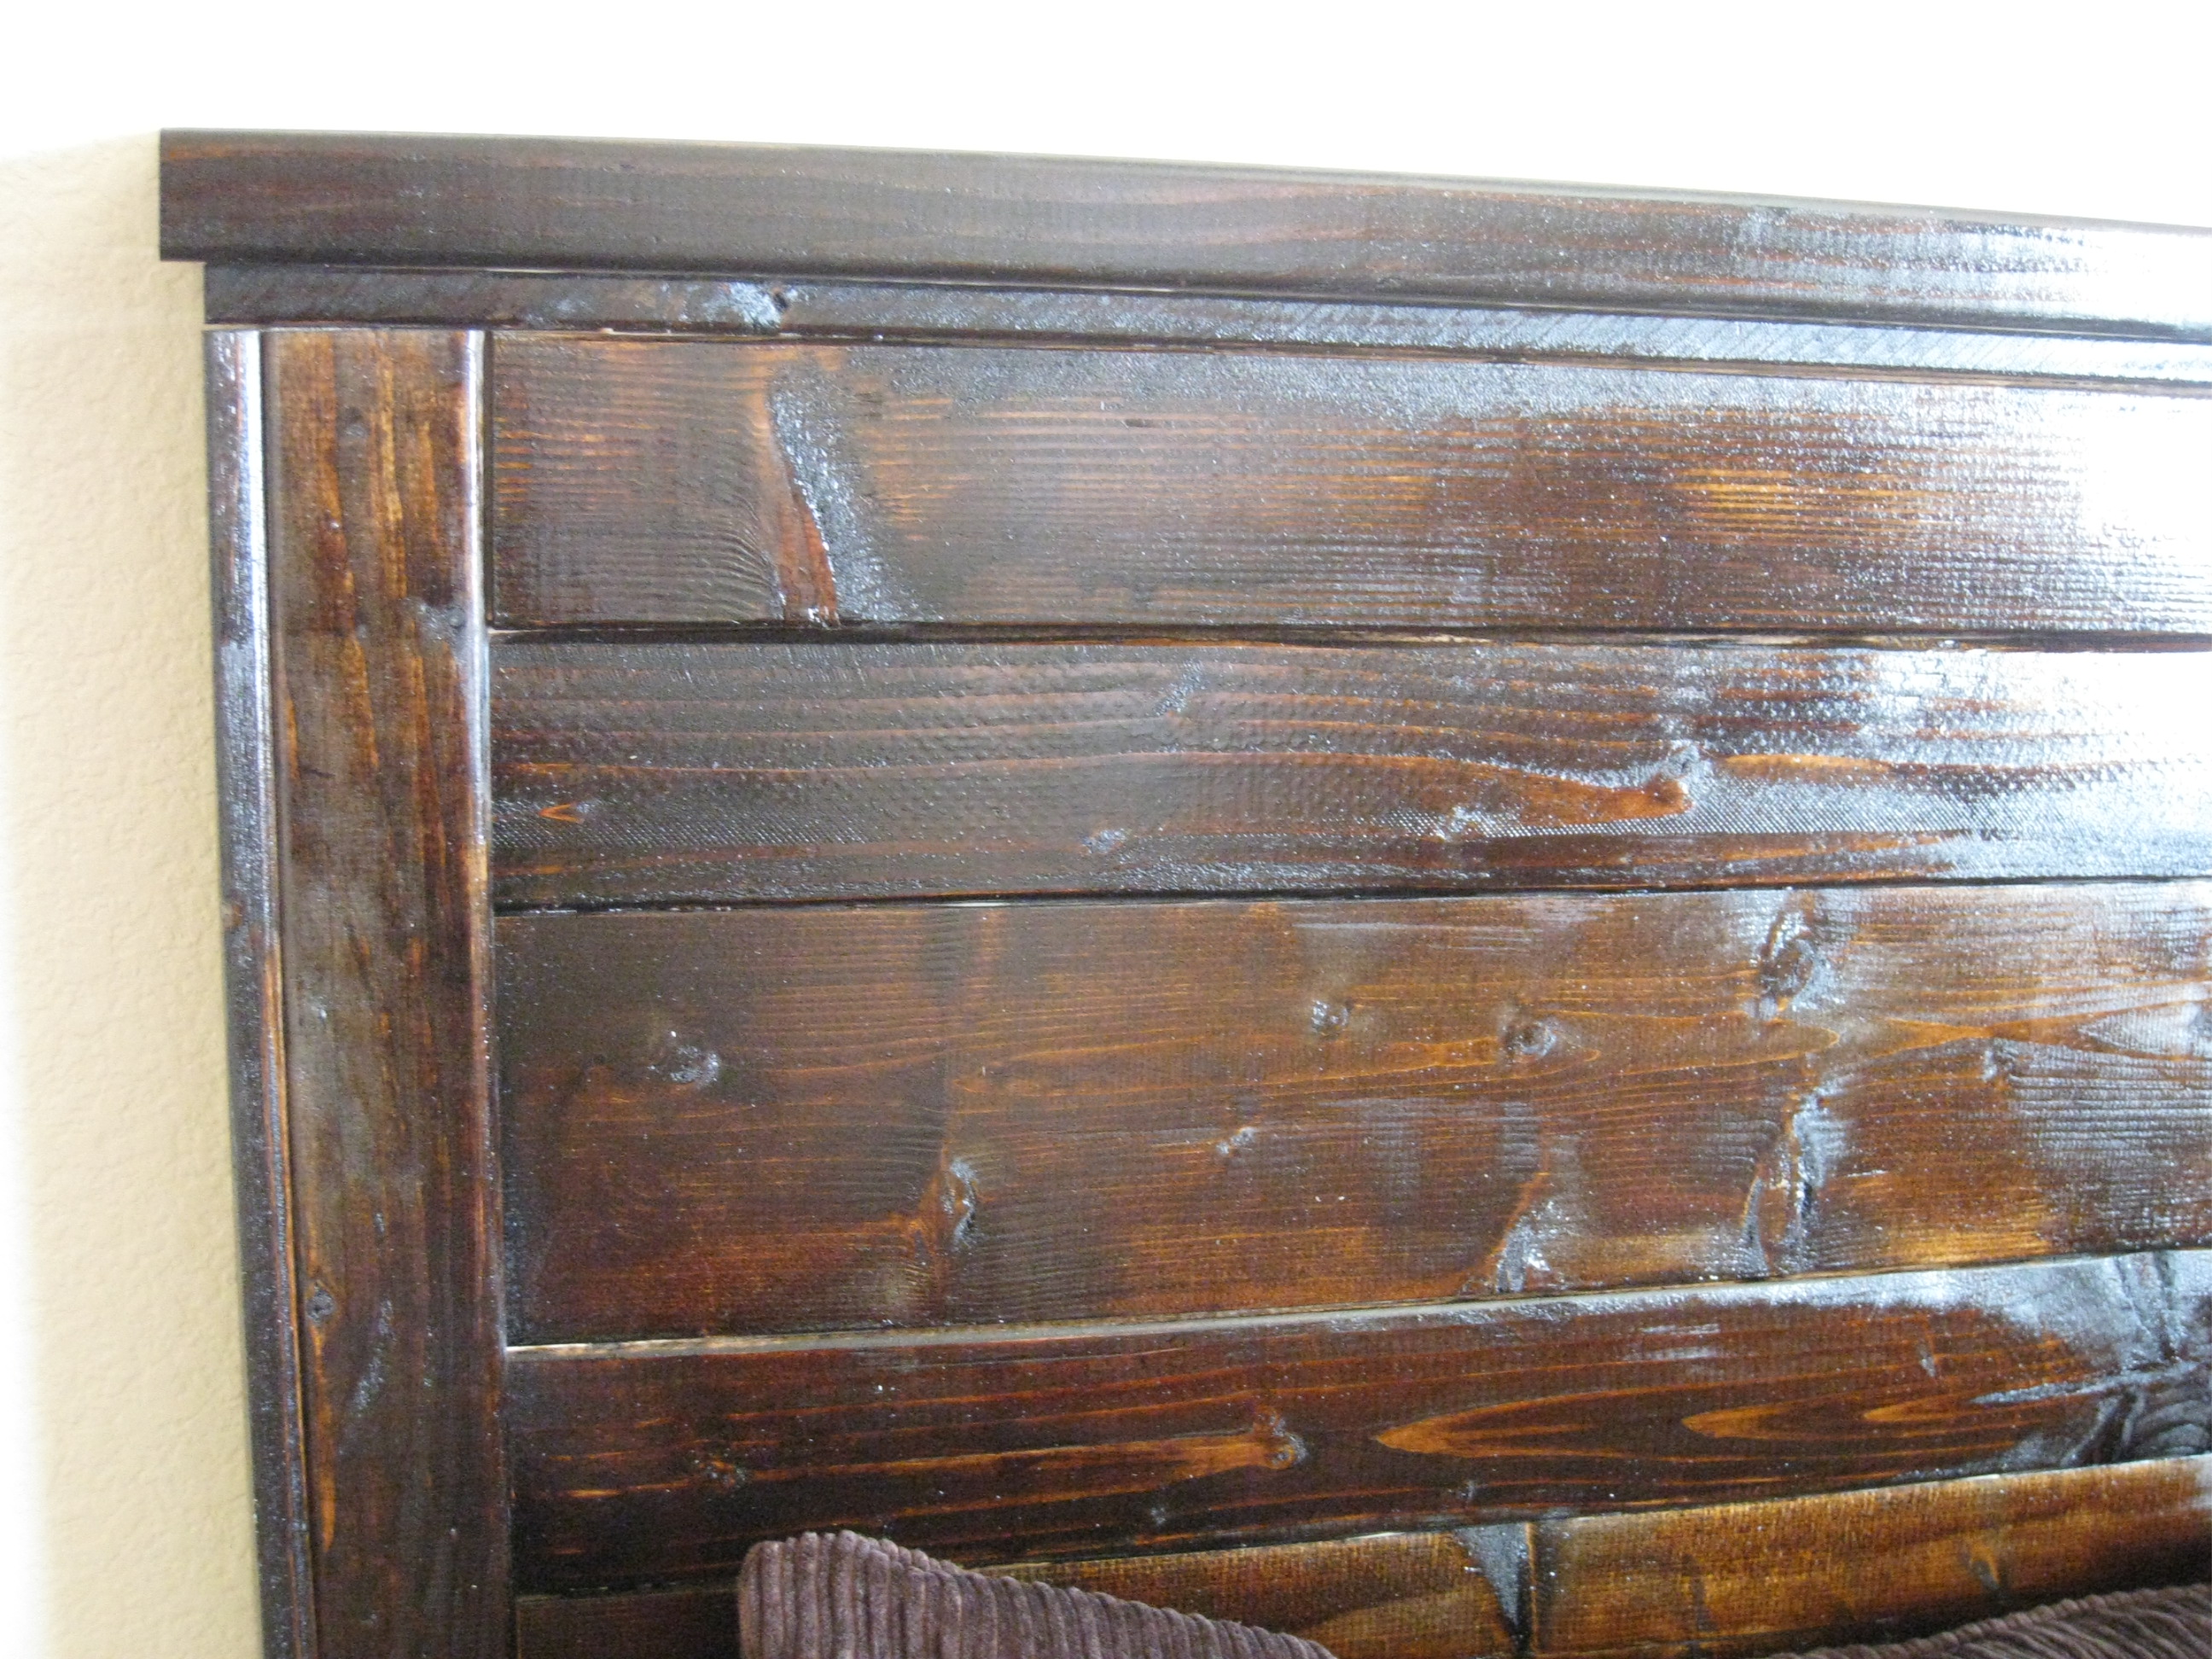
I built Ana's Reclaimed Wood Headboard. This was the easiest piece I have built so far! Very quick! You can see the steps I took to finish it at our blog http://www.shanty-2-chic.com/2011/04/diy-headboard.html
Built from Plan(s)
Estimated Cost
$50
Estimated Time Investment
An Hour or Two (0-2 Hours)
Finish Used
Minwax Dark Walnut Stain and Minwax Polycrylic Gloss
Recommended Skill Level
Starter Project
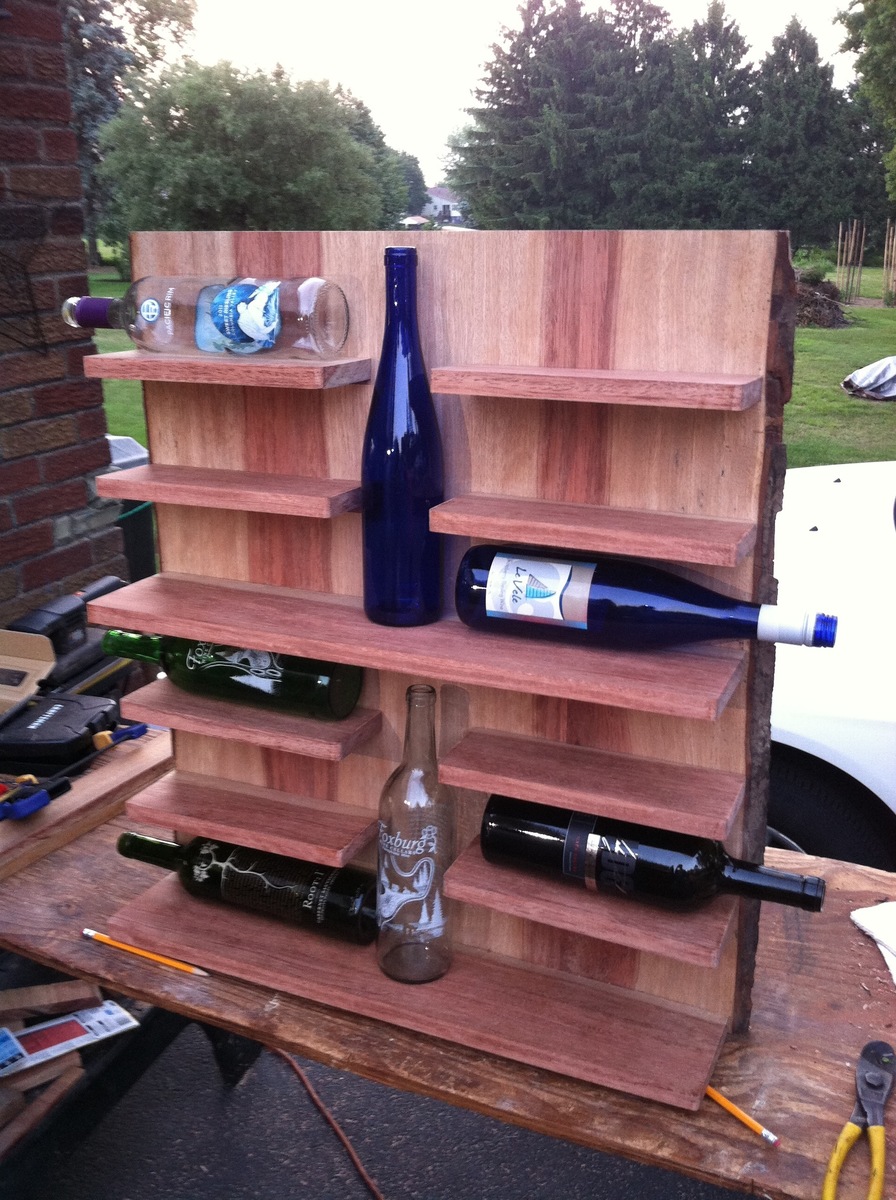
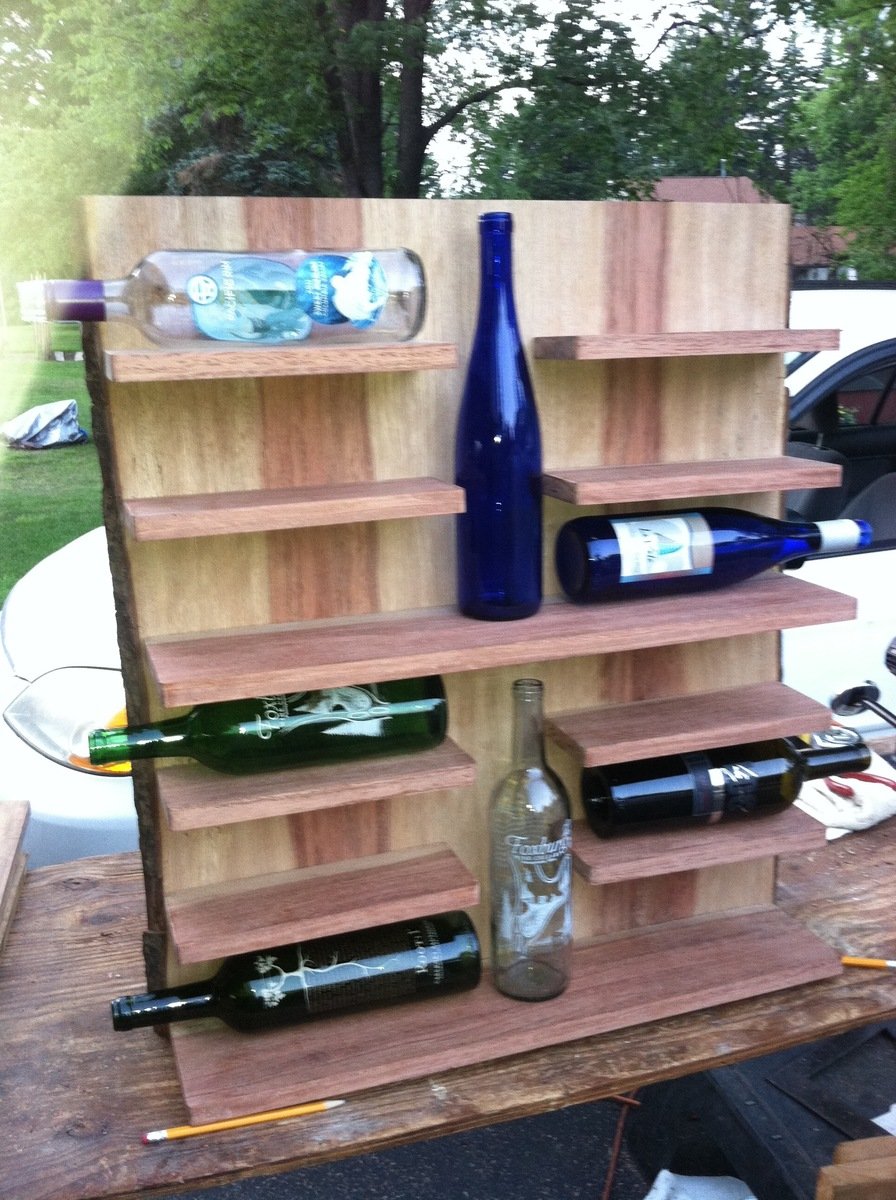
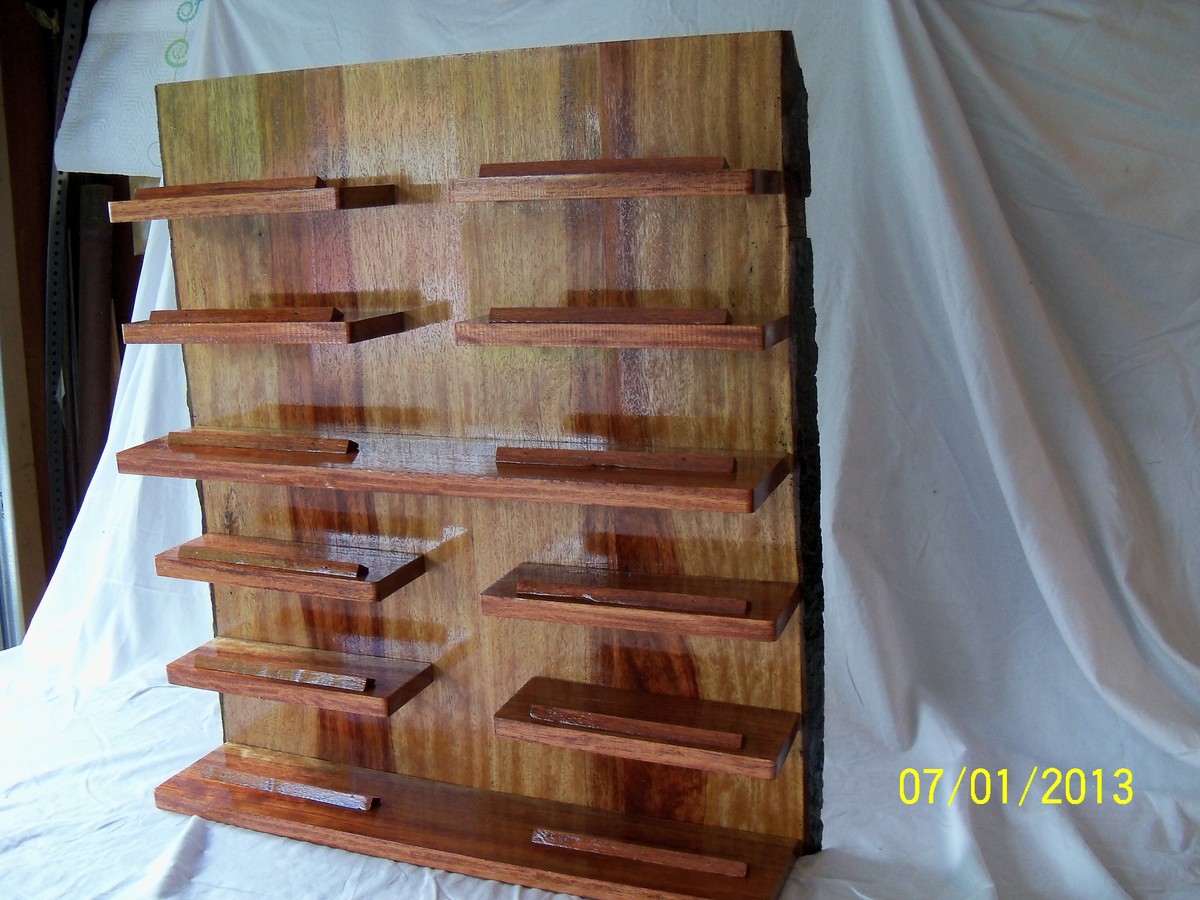
WALL-MOUNTED WINE RACK
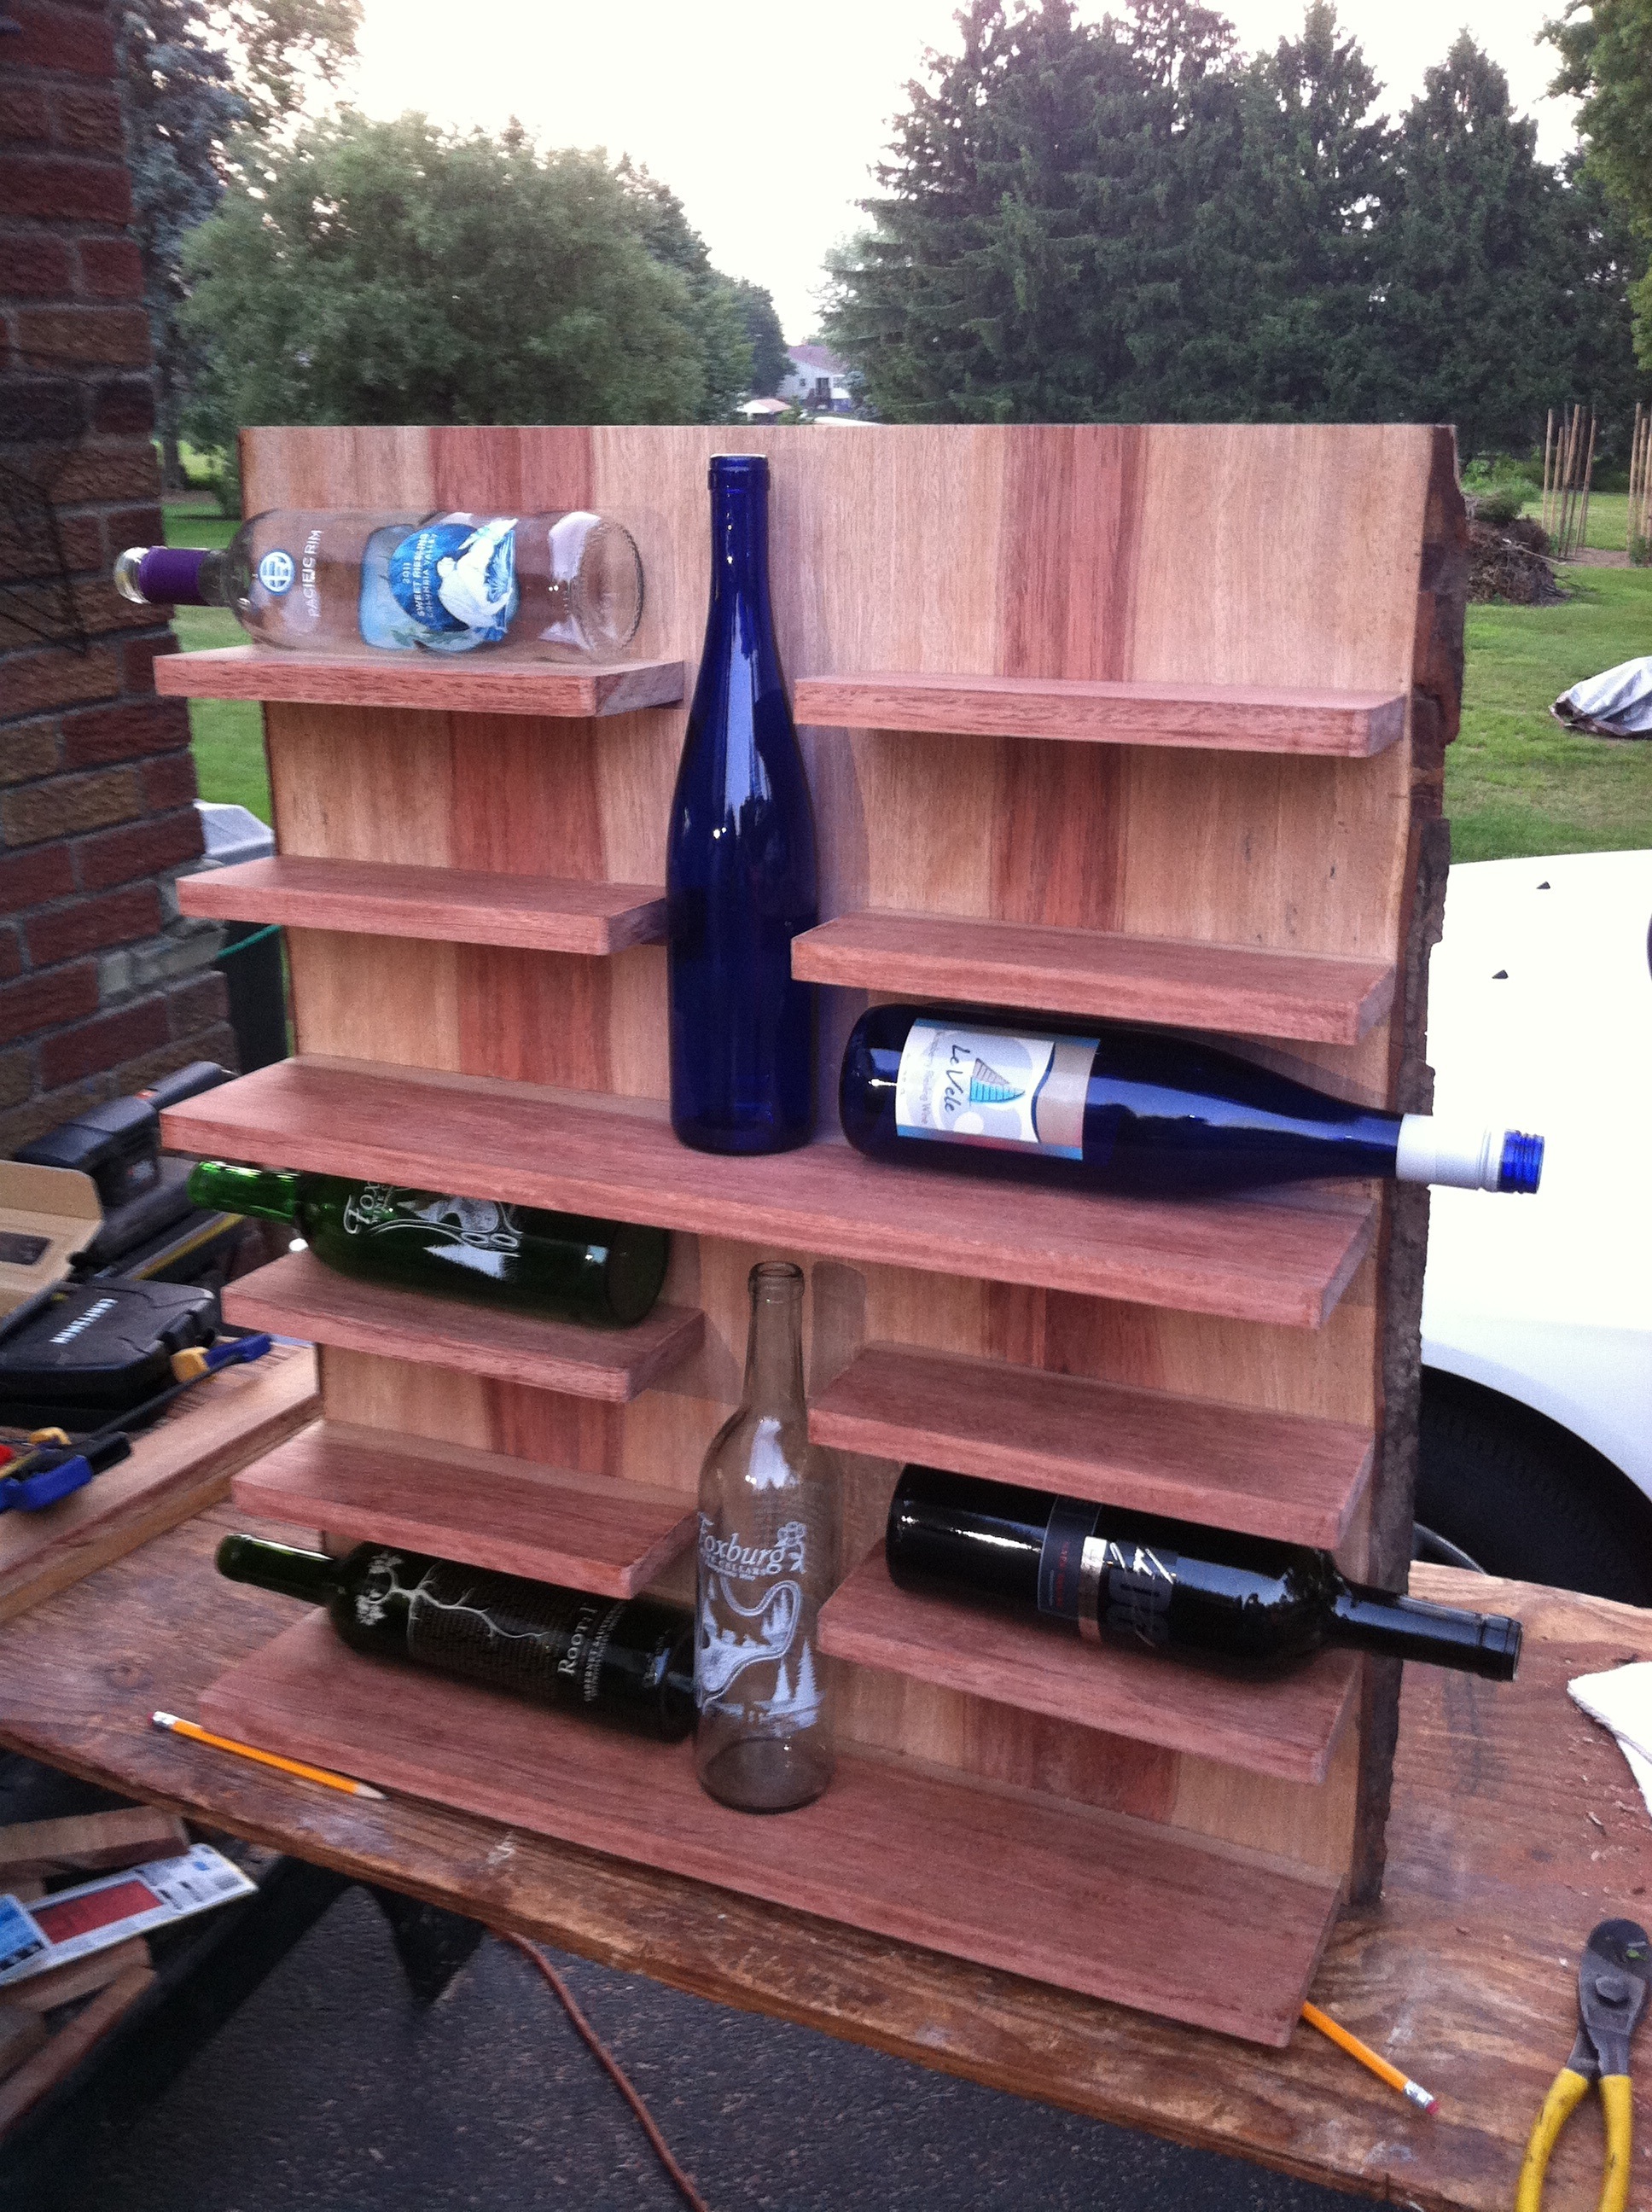
This was a rack I helped my dad make so he could give it as a wedding gift. This is an attempt to build from plans that Ana posted here:
http://ana-white.com/2011/11/wall-mounted-wine-rack-dont-forget-erase-y…
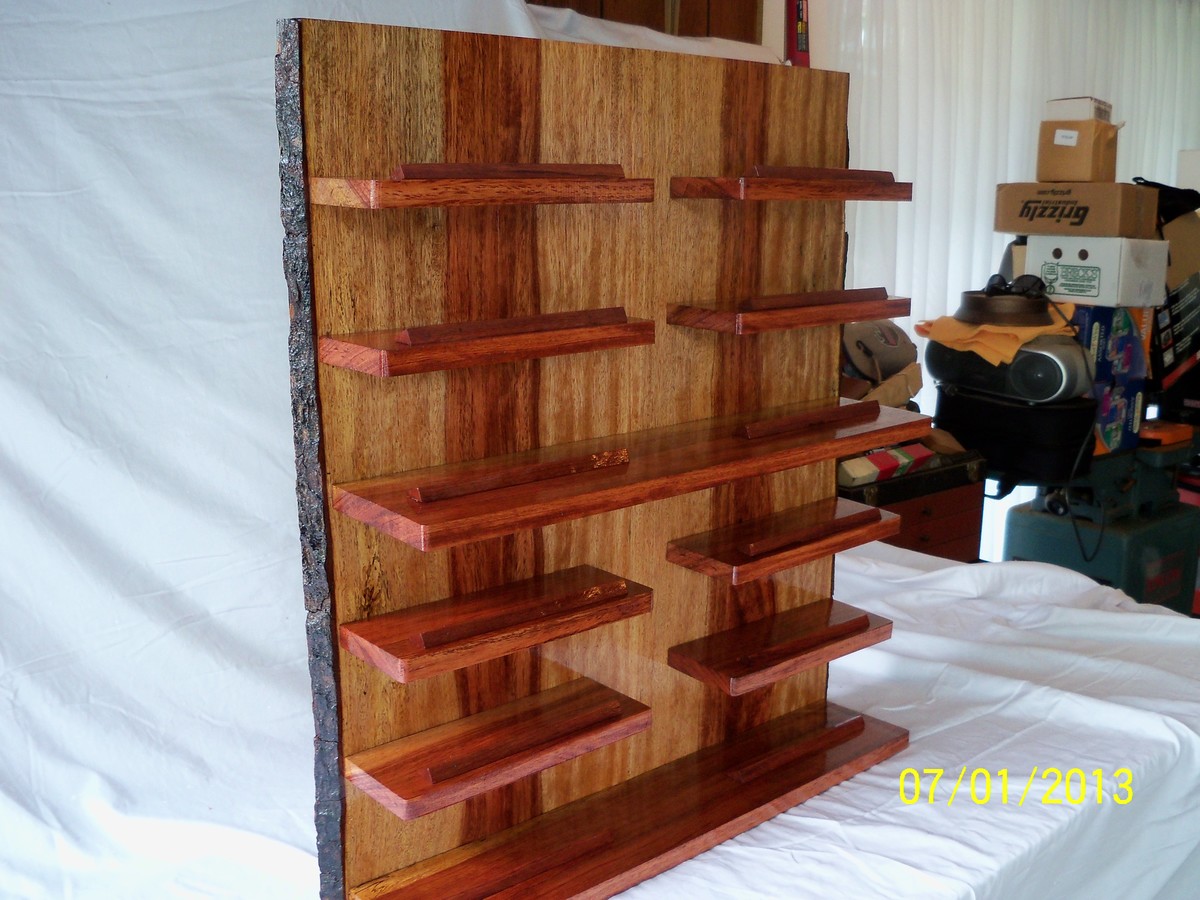
We took 2 long long cherry boards with bark still on the sides, and ran them through the planer. Then we ripped them down the center to be able to use bark ends on each side and book-matched the cherry colors, but most people wont have to worry about that since they wont be using "found" cherry.
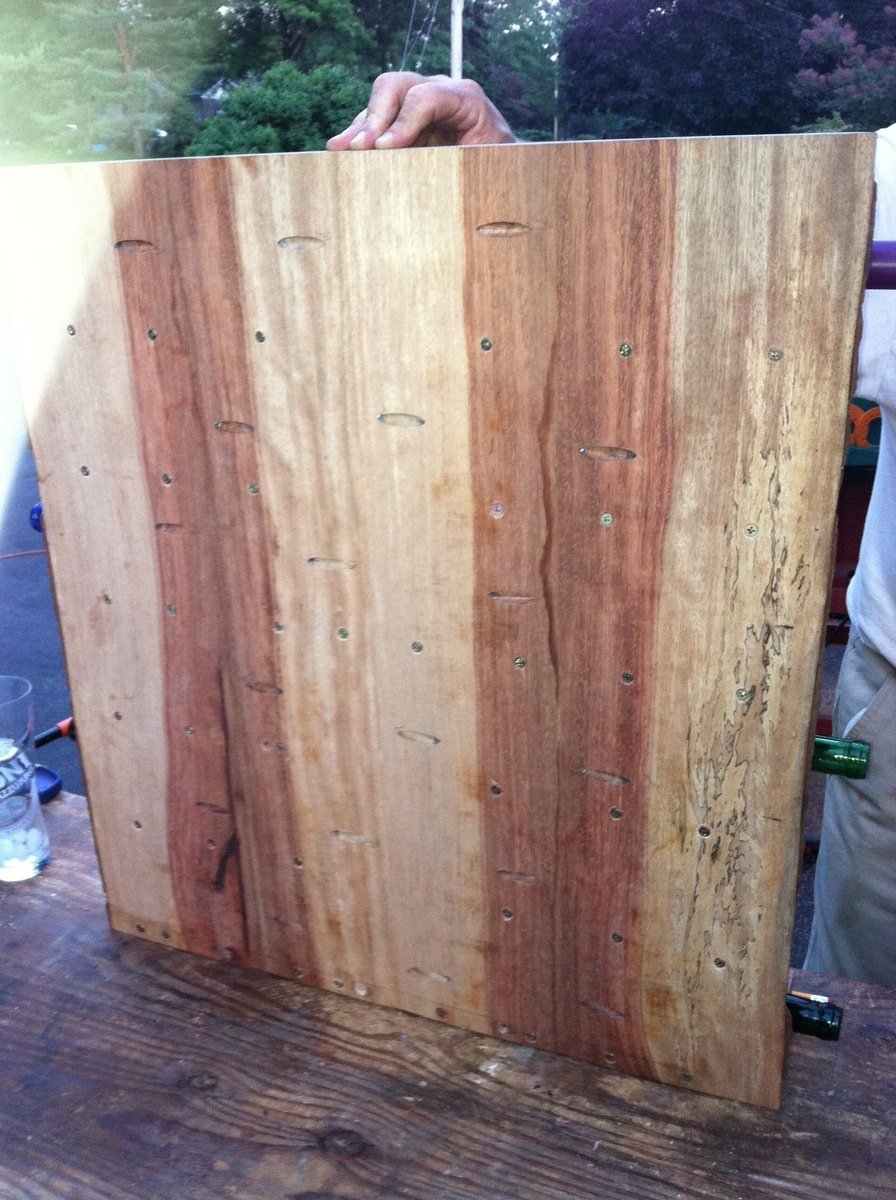
The back board is made up of four 1x7s cuts at 28.5 inches long. You can use whatever width you want, we just wound up with 7inch pieces. Then we used a Kreg Jig to screw those together flush (see picture of back). Once those 4 pieces were together we sanded the edges down to make the backboard smooth and flush.
The 8 mini shelves were 1x3.5s cut at 10 inches long. The middle and bottom shelves were 1x5s cut at 24.75 inches long. Again, we were using limited wood and had to adjust our measurements to make it work.
We spaced the bottom shelf flush with the bottom of the backboard and then would space 4.5 inches between the top of that and the bottom of the next shelf. Make sure there is still room for your wine bottle to fit between the floating shelves. ALSO, MAKE SURE YOU KEEP THE FLOATING SHELVES ACROSS FROM EACH OTHER LEVEL WITH ONE ANOTHER. You don't want your shelves to look lazily placed.
The way we placed the shelves on backboard was...involved.
- Clamp the shelves in place on the front of the board and trace them with pencil.
- Remove the shelves.
- Marke holes to drill within center of the trace.
- Drill those holes from the front of the board to the back.
- Reclamp the shelves back on and use the holes in the board to mark the clamped on shelves from the back.
- Unclamp the shelves and fully drill the shelves by themselves while they were not attached. (BE CAREFUL TO DRILL STRAIGHT and never come through the top or bottom of the shelf)
- Sand off your pencil marks after your drilling.
- Re-clamp the shelves to the backboard.
- Use 3" screws straight from the back into the shelves.
- Use 8 screws per big shelf and 3 screws per little shelf.
Then it was just slow and steadily clamping, tracing, drilling, re-clamping, drilling, sanding, re-clamping, and screwing the shelves on... You have to follow that pattern for each shelf or you risk ruining your shelf and if you have limited wood (like we did) that is not an option.
We also put very small pieces of wood to keep the bottles from rolling off their shelves. These were just scraps we had lying around and tapped them in with small finishing nails.
Good luck!
Estimated Cost
$50
Estimated Time Investment
Weekend Project (10-20 Hours)
Finish Used
These photos were taken pre-finish. That is just how beautiful the cherry looks! We will be spraying on a high gloss clear finish and we'll be done.
Recommended Skill Level
Intermediate
Farmhouse Table with Bench
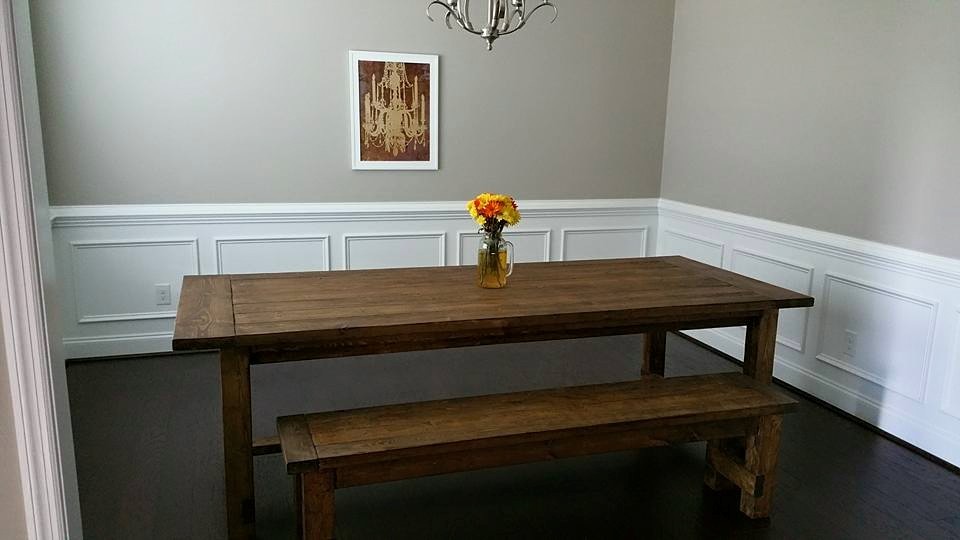
Awesome plans for a table that turned out perfect for our new home.
Estimated Time Investment
Weekend Project (10-20 Hours)
Finish Used
Honey Oak Polyerthane. Lightly sanded with a 320 sanding block after stain had dried for a day.
Recommended Skill Level
Beginner
Comments
Rustic x coffee table
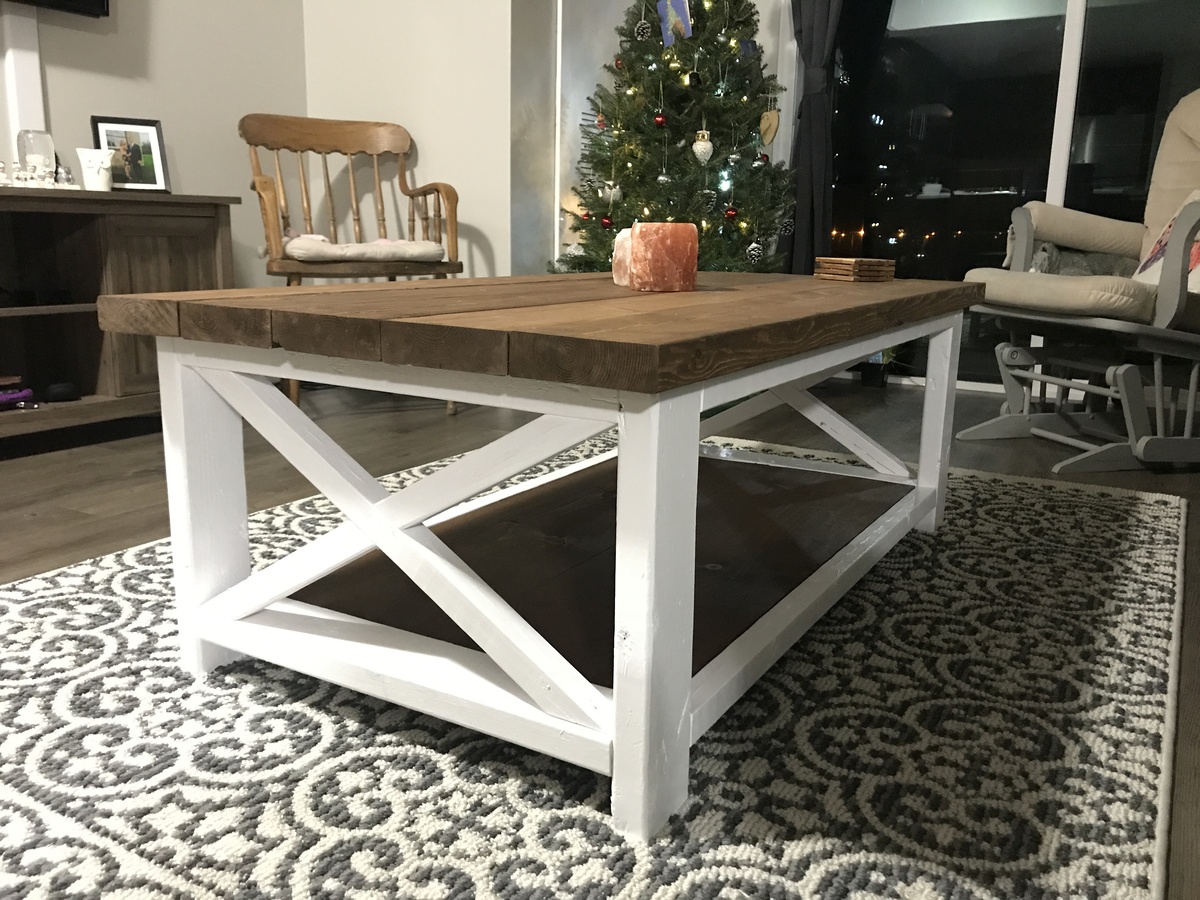
My third table like this built so far. Fairly easy project takes about a day to complete depending on stain dry time. I painted the frame white and used an American walnut stain on the table top and the lower shelf.
Built from Plan(s)
Estimated Cost
110 dollars canadian including stain
Estimated Time Investment
Day Project (6-9 Hours)
Finish Used
American walnut stain on table top applied generously with a rag and then wiped off after about a minute with a separate rag.
White cabinet paint on frame applied with a sponge brush 2 -3 coats
White cabinet paint on frame applied with a sponge brush 2 -3 coats
Recommended Skill Level
Beginner
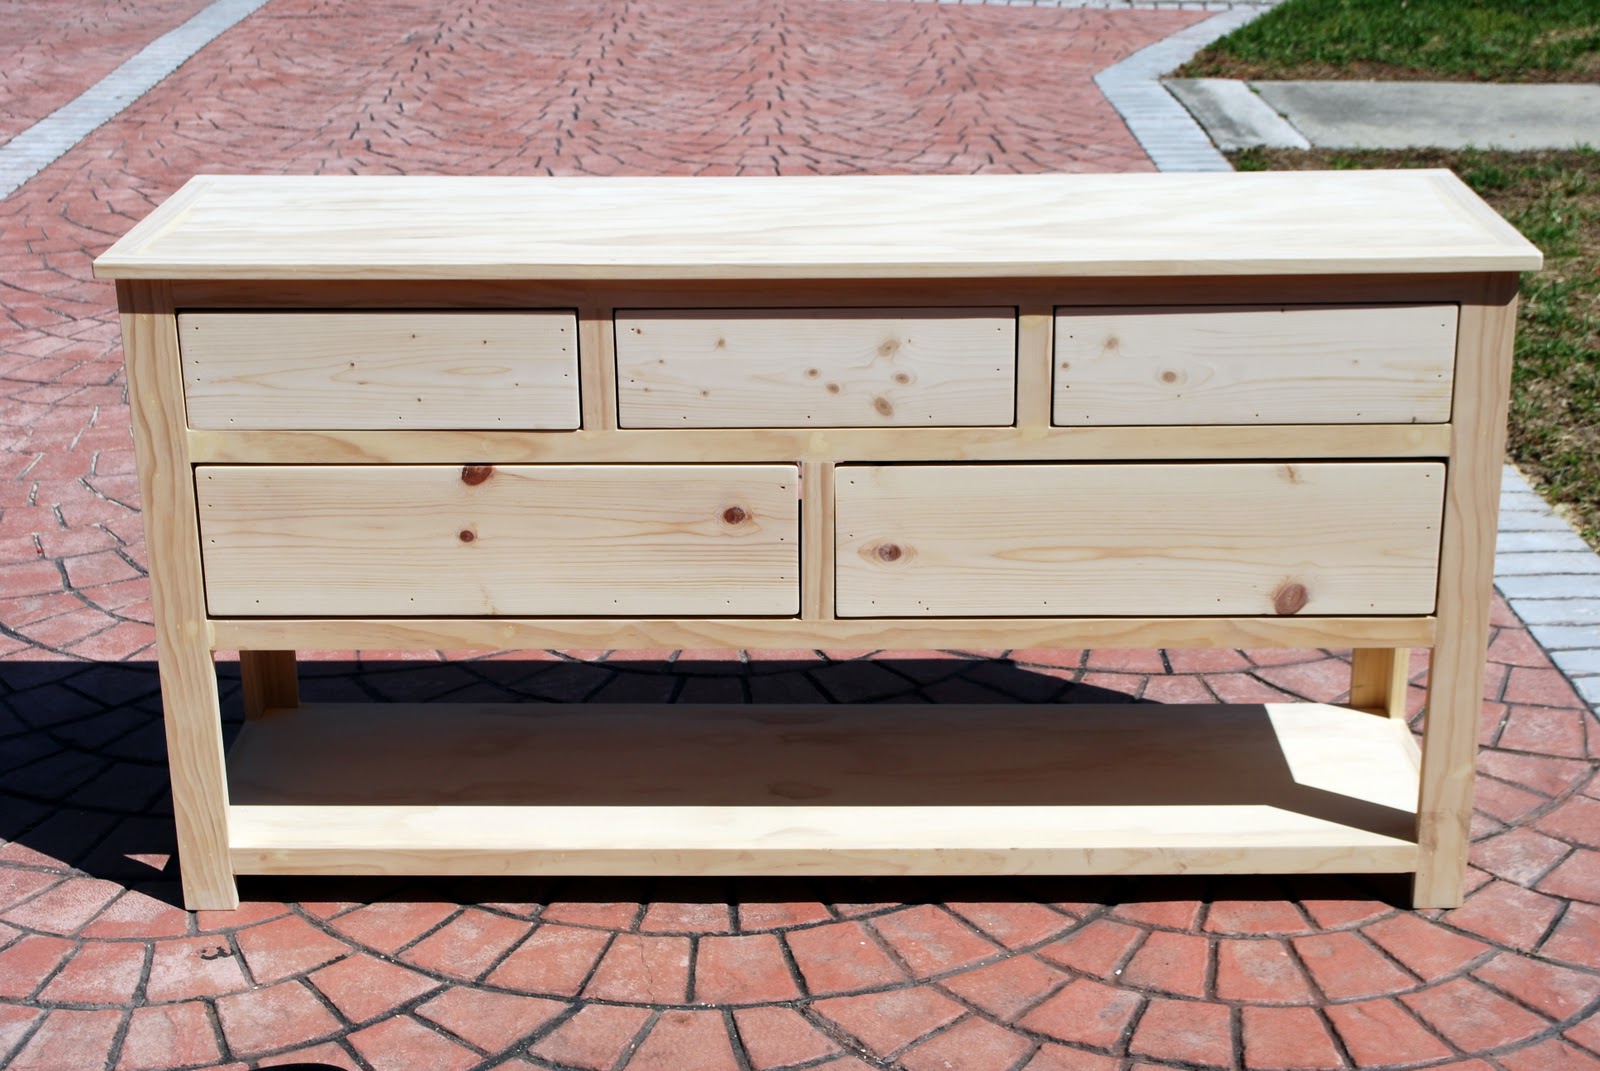
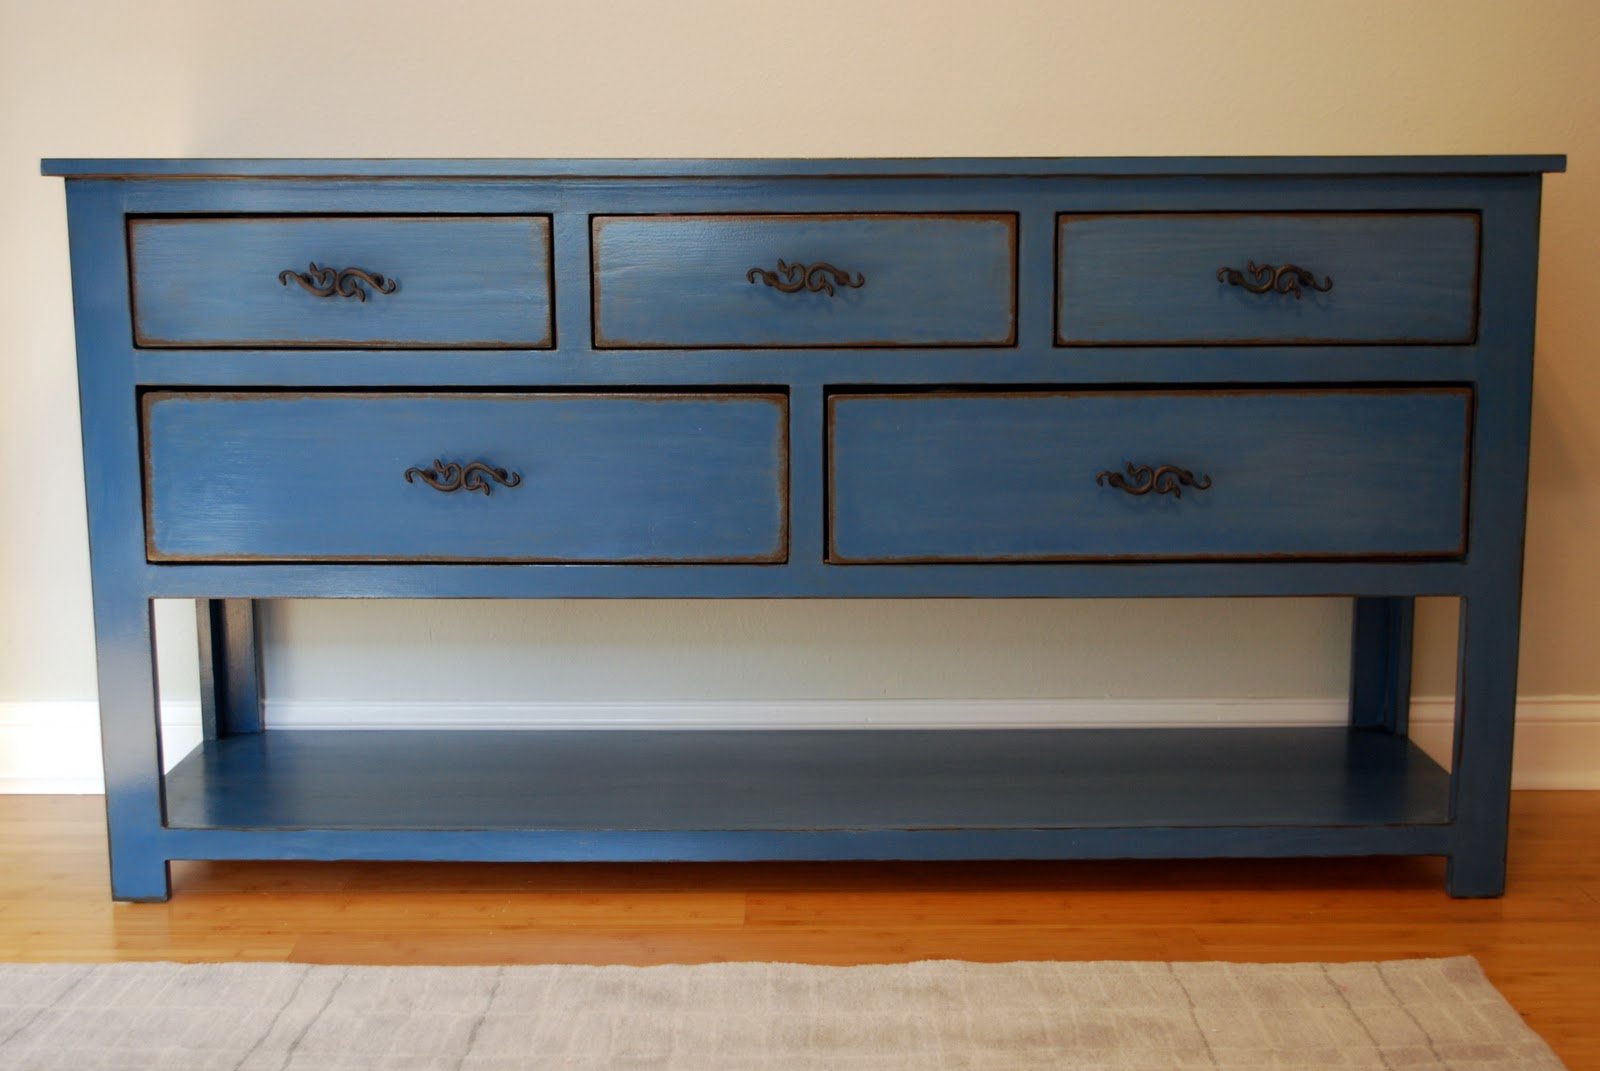
Dresser with Open Bottom Shelf for Changing Table
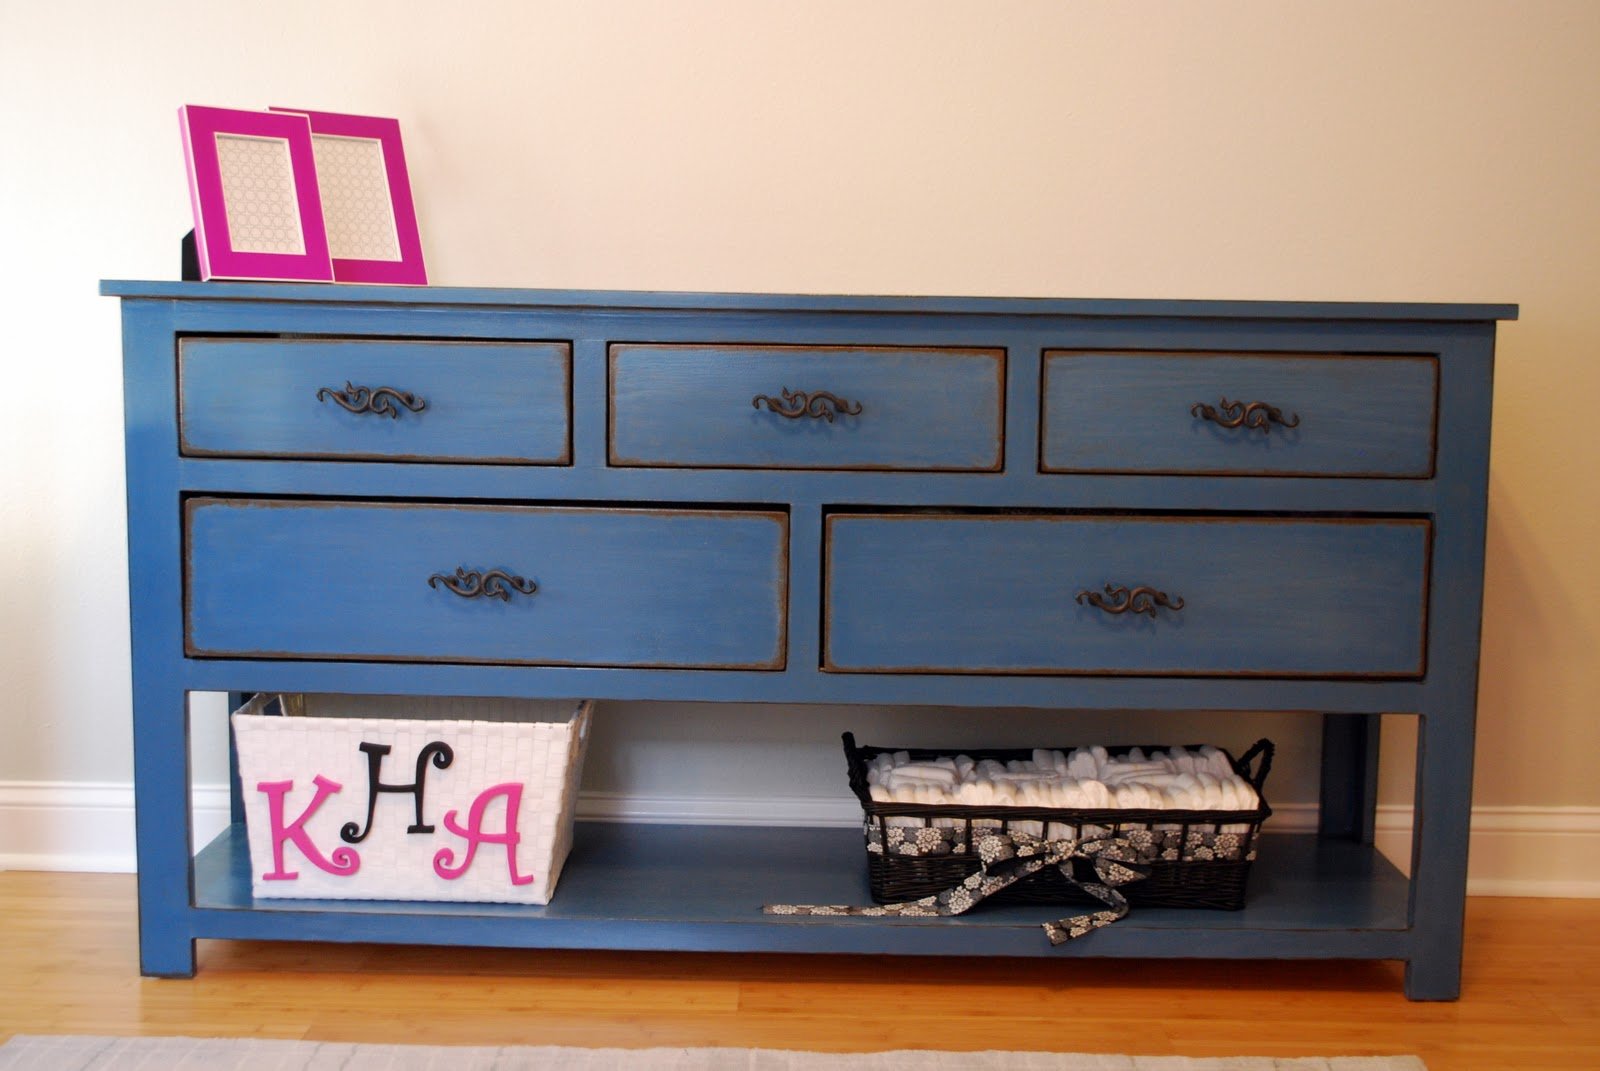
My husband and I built this dresser to use as a changing table in our daughters nursery. I explain the build process (with photos) in this blog post : http://mekhart.blogspot.com/2011/03/nursery-room-biggest-build-yet.html and the finishing process in this blog post : http://mekhart.blogspot.com/2011/04/nursery-room-finished-dresser.html . I'm so thankful to Ana...I love that almost every element of her nursery is home made!

Built from Plan(s)
Estimated Cost
150
Estimated Time Investment
Week Long Project (20 Hours or More)
Finish Used
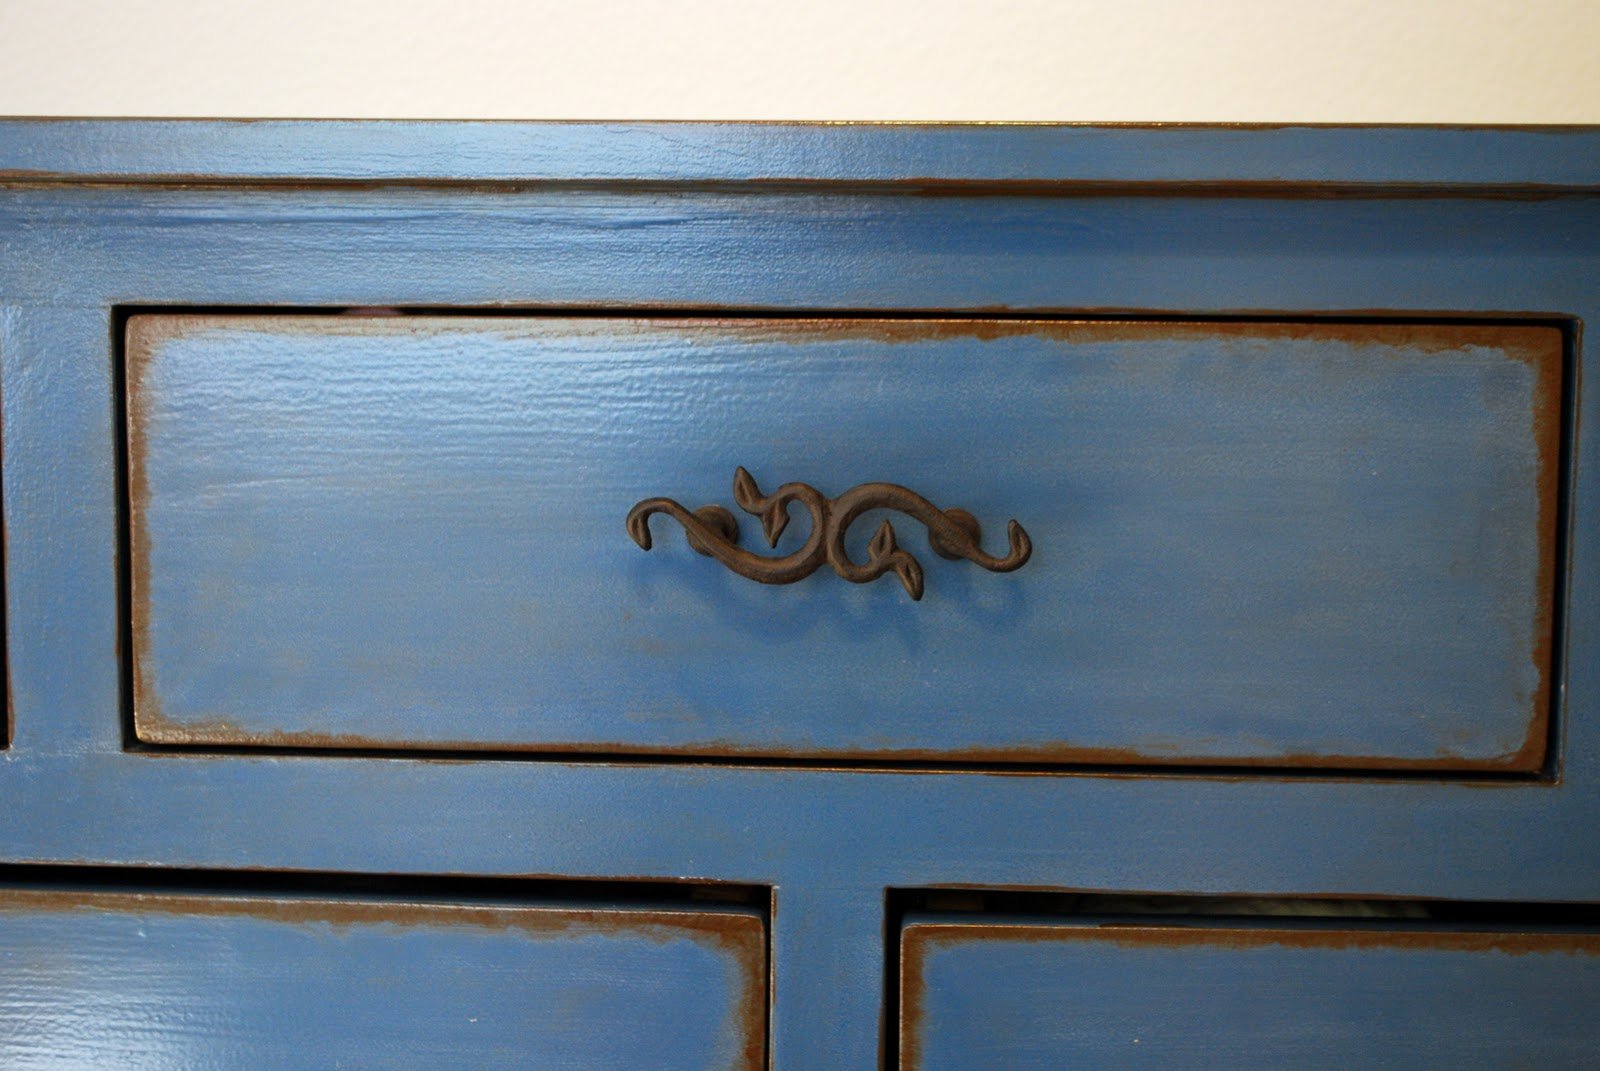
Paint with a whitewash over top and glazing on the edges. To see more details on how to replicate this finish, check out my blog post here : http://mekhart.blogspot.com/2011/04/nursery-room-finished-dresser.html .
Recommended Skill Level
Advanced
Comments
rogersbernard@…
Thu, 12/10/2020 - 12:44
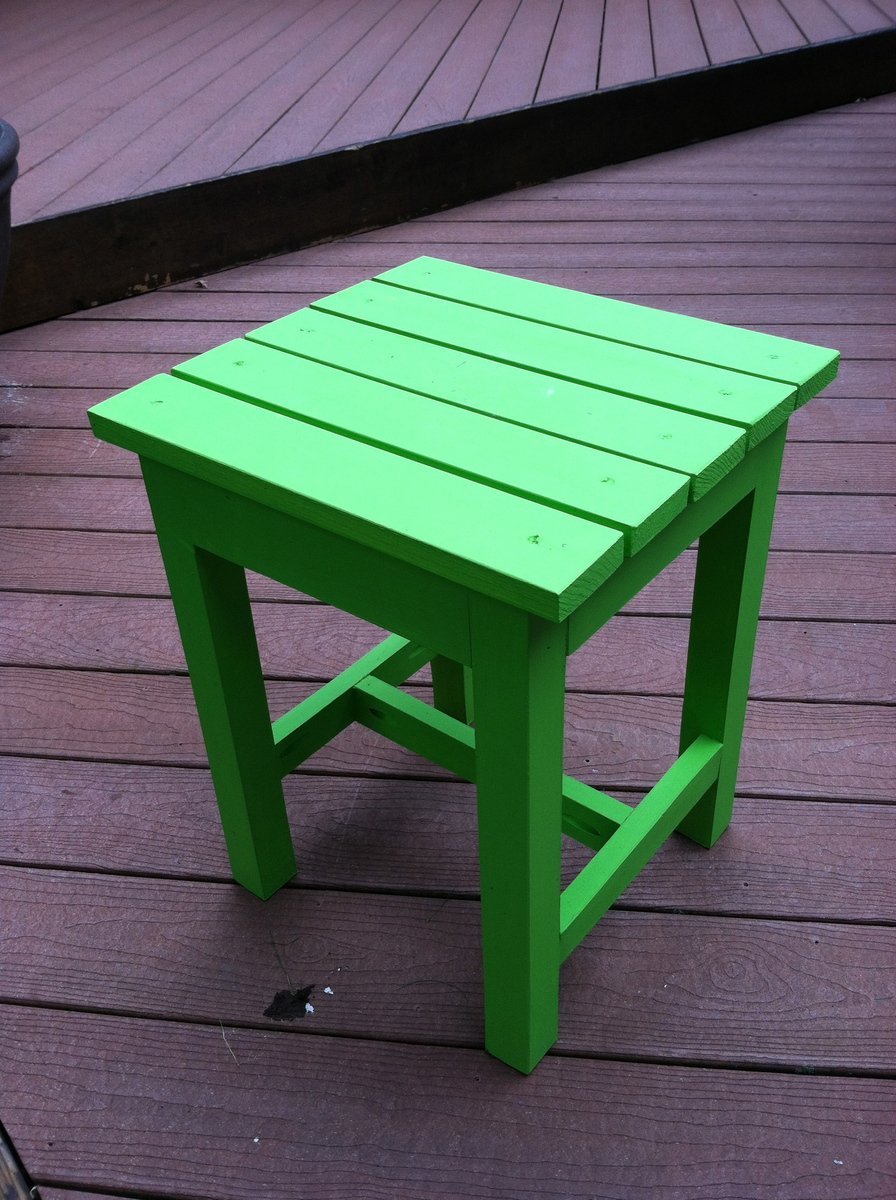
Patio End Table
Patio End Table