Community Brag Posts

William Sonoma inspire outdoor bench

This was one first project and I am very proud of it. It was challenging but I think it turned out beautiful and everyone who visits loves it. I built it out of cedar wood for better durability and protection against rain and the elements.

Comments

Photo Ledge from $10 ledges, slightly modified

Submitted by sshelby on Tue, 09/27/2011 - 06:47

8 foot long photo ledge inspired by $10 ledges project plan, http://ana-white.com/2010/10/ten-dollar-ledges.html

I used a 1x4, 1x3, and a 1x2 and added some crown molding to the bottom for a little something extra.

Estimated Cost
$15 in lumber
Estimated Time Investment
Afternoon Project (3-6 Hours)
Recommended Skill Level
Beginner

Comments

Reclaimed Pine and Poplar

Submitted by Richard714 on Thu, 10/03/2013 - 07:43

My friend saw the Gaby Kitchen Island that I posted on FB and asked me to make a wine display for him. I immediately went to Anna's site to look for a design. Added LED lights from IKEA.

Estimated Time Investment
Week Long Project (20 Hours or More)
Finish Used
Water based Poly
Recommended Skill Level
Intermediate

Cabinet

Submitted by AndyH on Wed, 12/23/2015 - 16:33

Cabinet with adjustable shelf. Finished in an antique white effect. Gave it a coat of Grey stain first then painted with two coats of white sanding back after each coat. Top was stained Walnut and then painted grey and sanded back to show some of the walnut stain and the grain through. I left the inside natural color for contrast rather than having it all white .

Estimated Cost
$170
Estimated Time Investment
Week Long Project (20 Hours or More)
Finish Used
Gave it a coat of Rustoleum Weathered Grey and painted with two coats of white sanding back after each coat.

Top was stained Minwax Walnut and then painted grey and sanded back to show some of the walnut stain and the grain through.

I left the inside natural color for contrast rather than having it all white
Recommended Skill Level
Beginner

Caged Golf Ball Puzzle

Submitted by mtairymd on Mon, 02/18/2019 - 14:17

This was a fun little project to make. The golf ball is trapped inside the 12 piece burr puzzle. As with all burr puzzles, there is a trick to solving it.

Build Instructions/Dimensions: https://www.instructables.com/id/Caged-Golf-Ball-Puzzle/

Video of Build: https://youtu.be/gcdd7ZAYNTo

Solution: https://youtu.be/IjHByz2_xMk

Estimated Cost
$5
Estimated Time Investment
An Hour or Two (0-2 Hours)
Finish Used
Danish Oil
Recommended Skill Level
Beginner

Kitchen play set

Submitted by amym on Sun, 10/02/2011 - 12:13

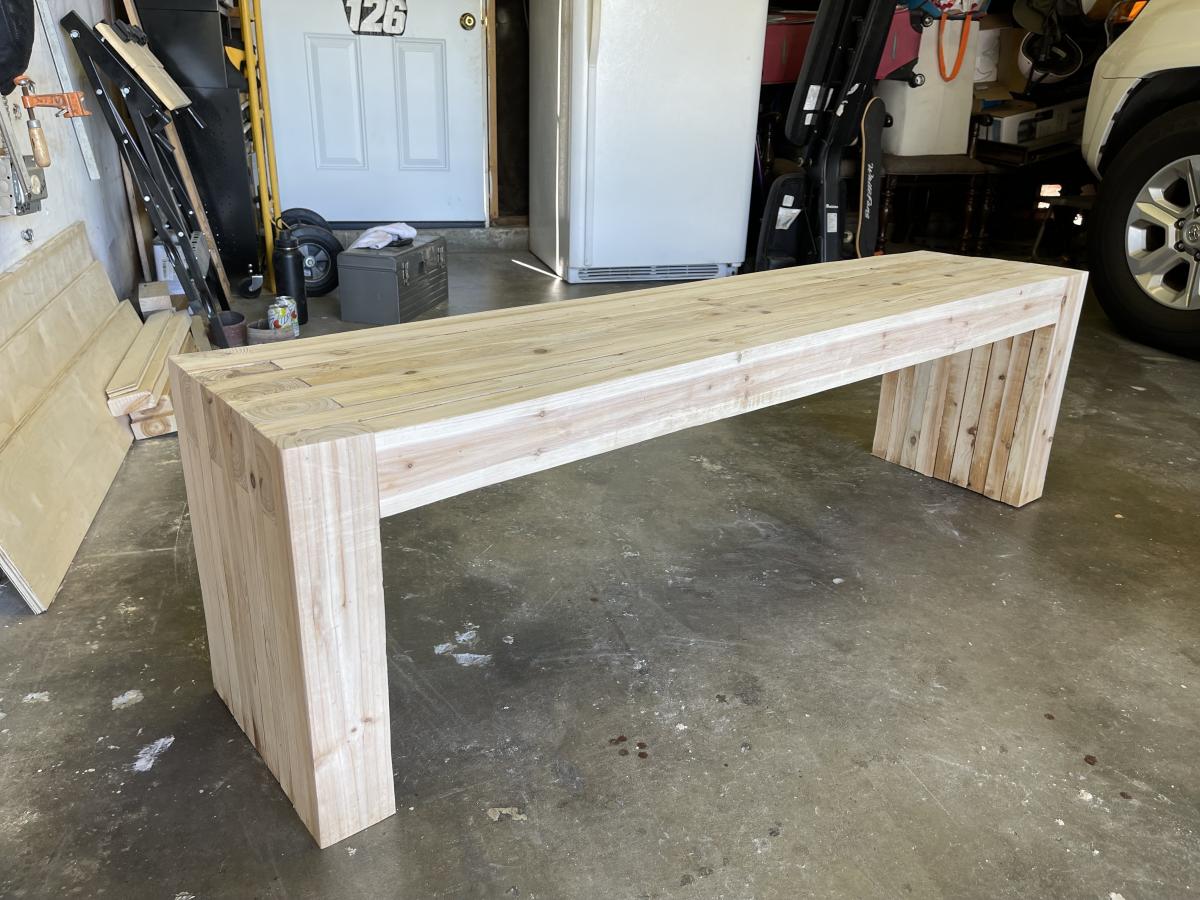
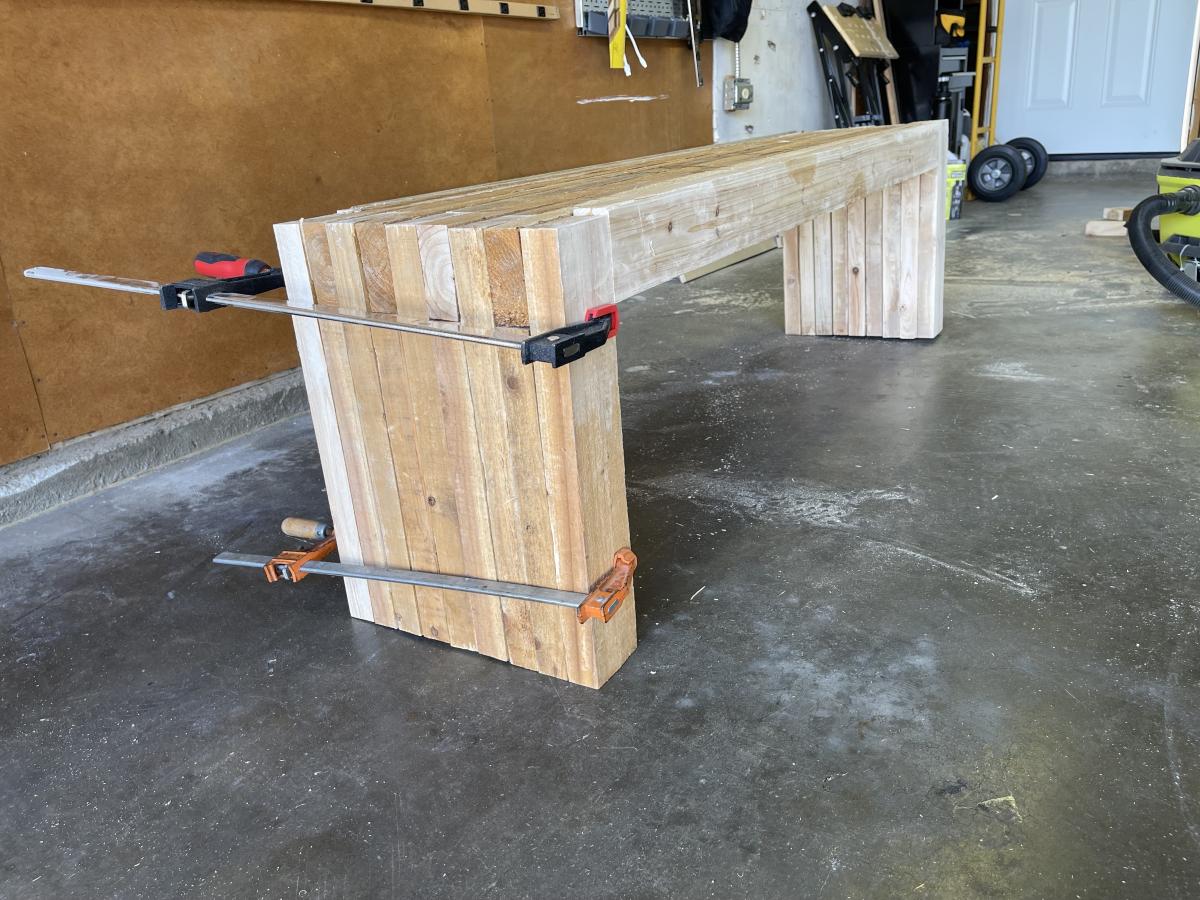
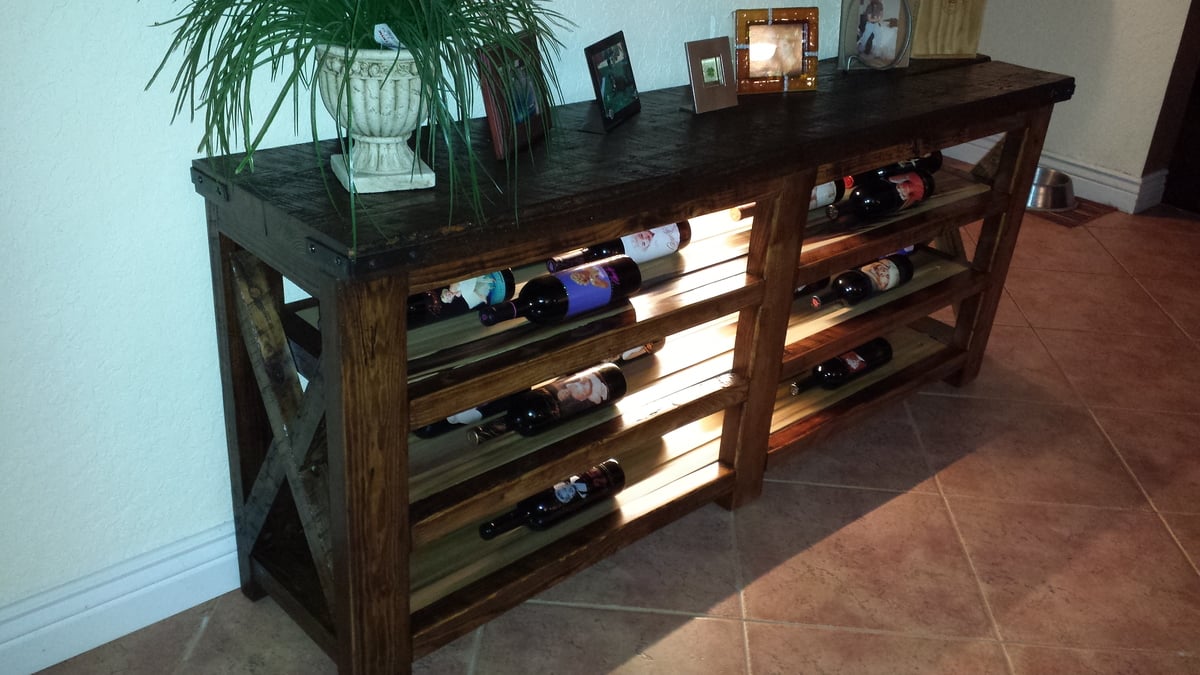
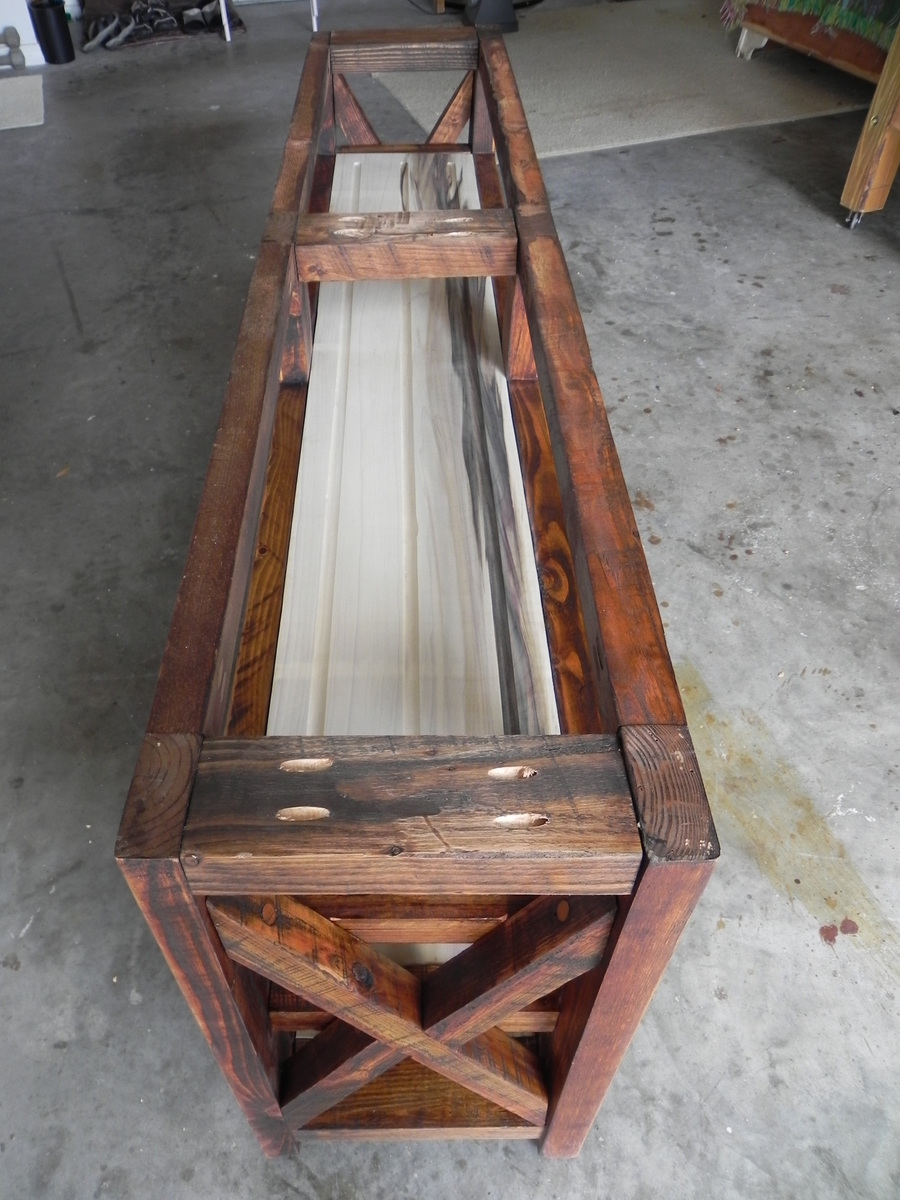
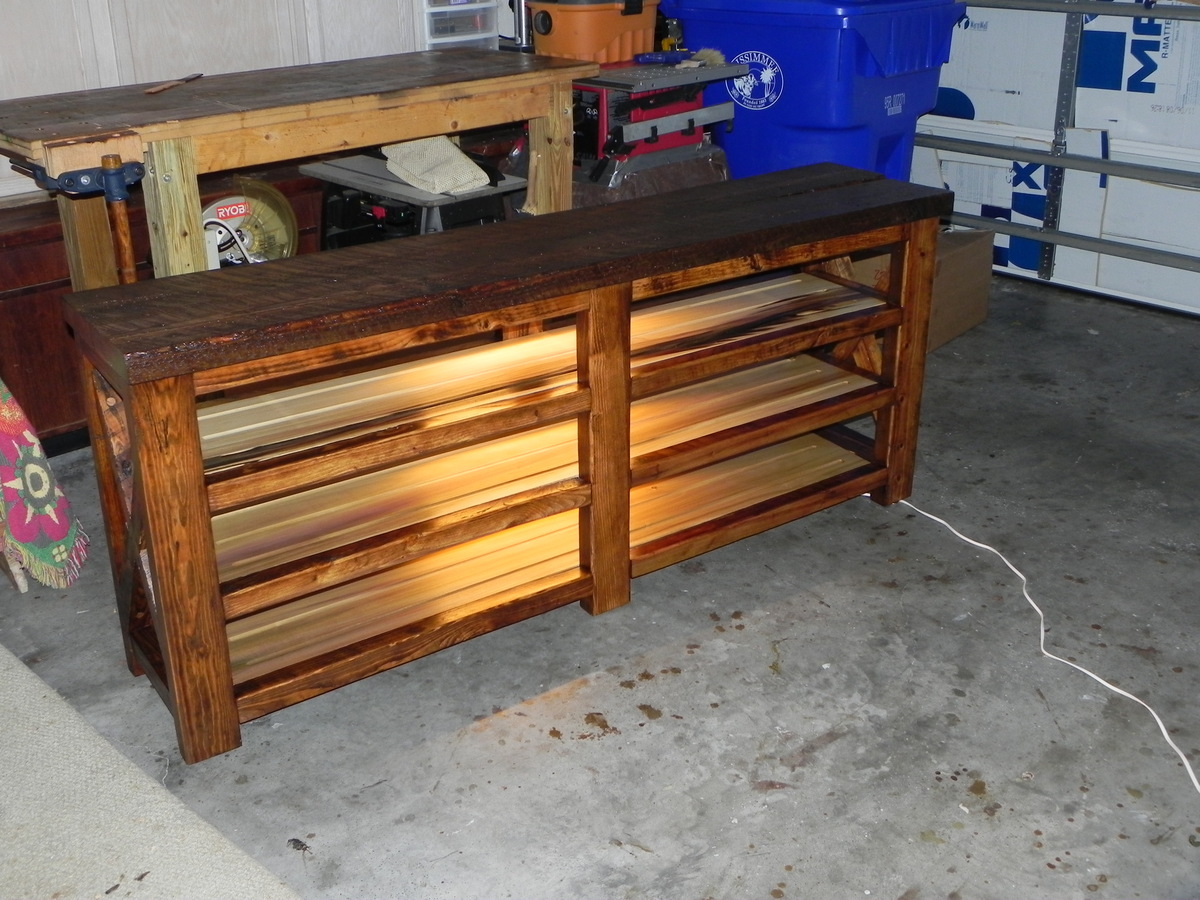
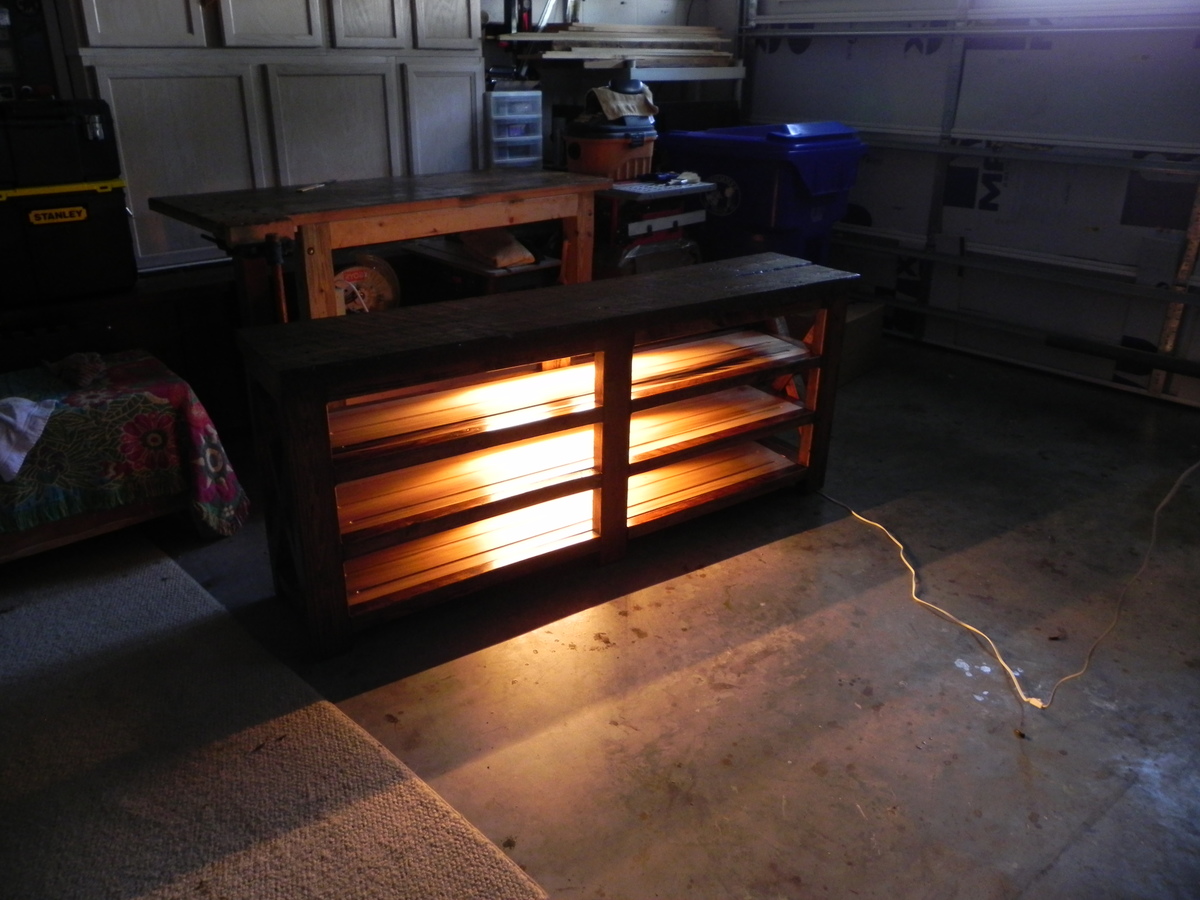
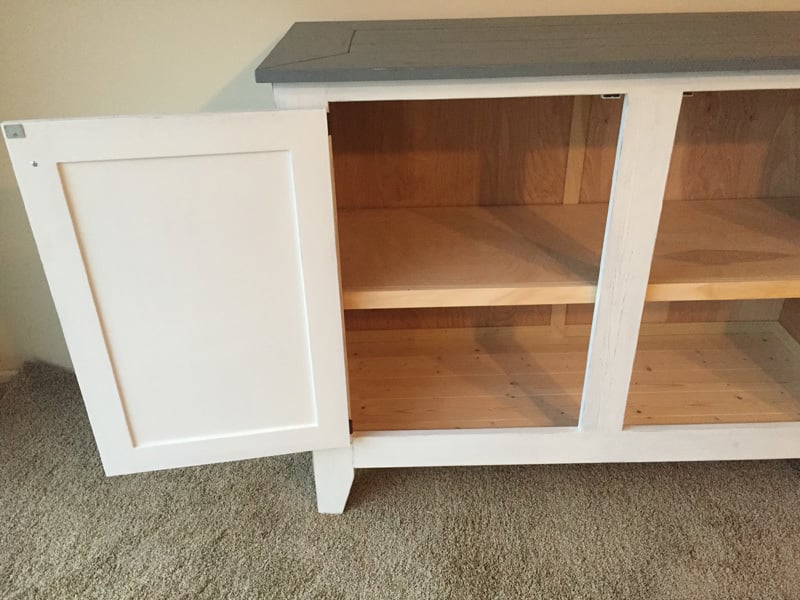
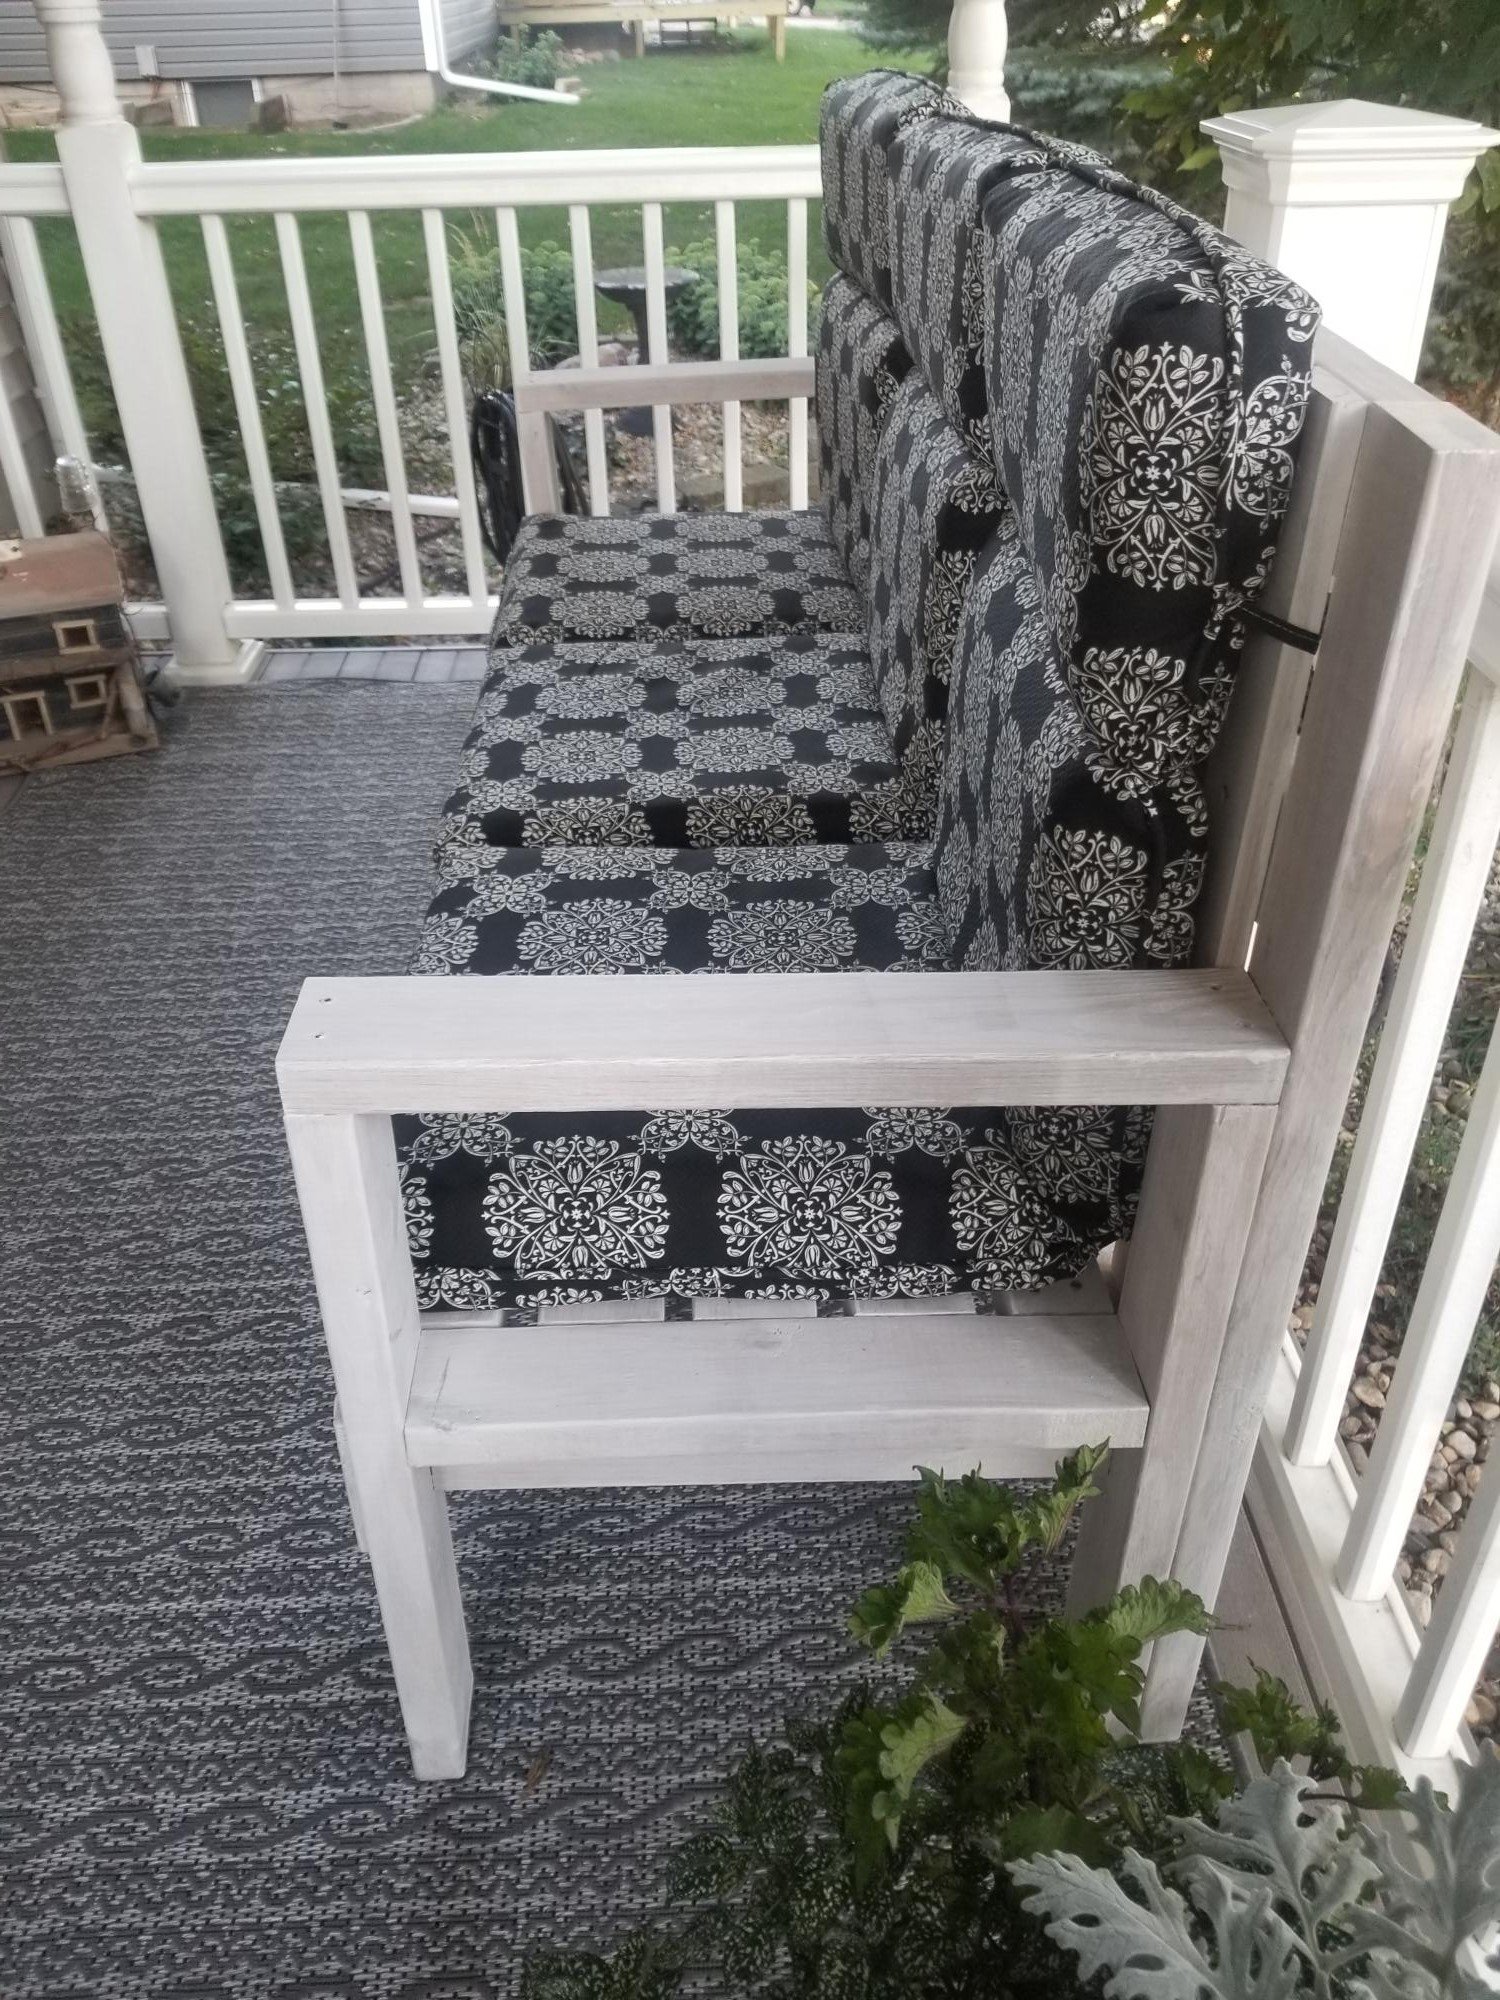
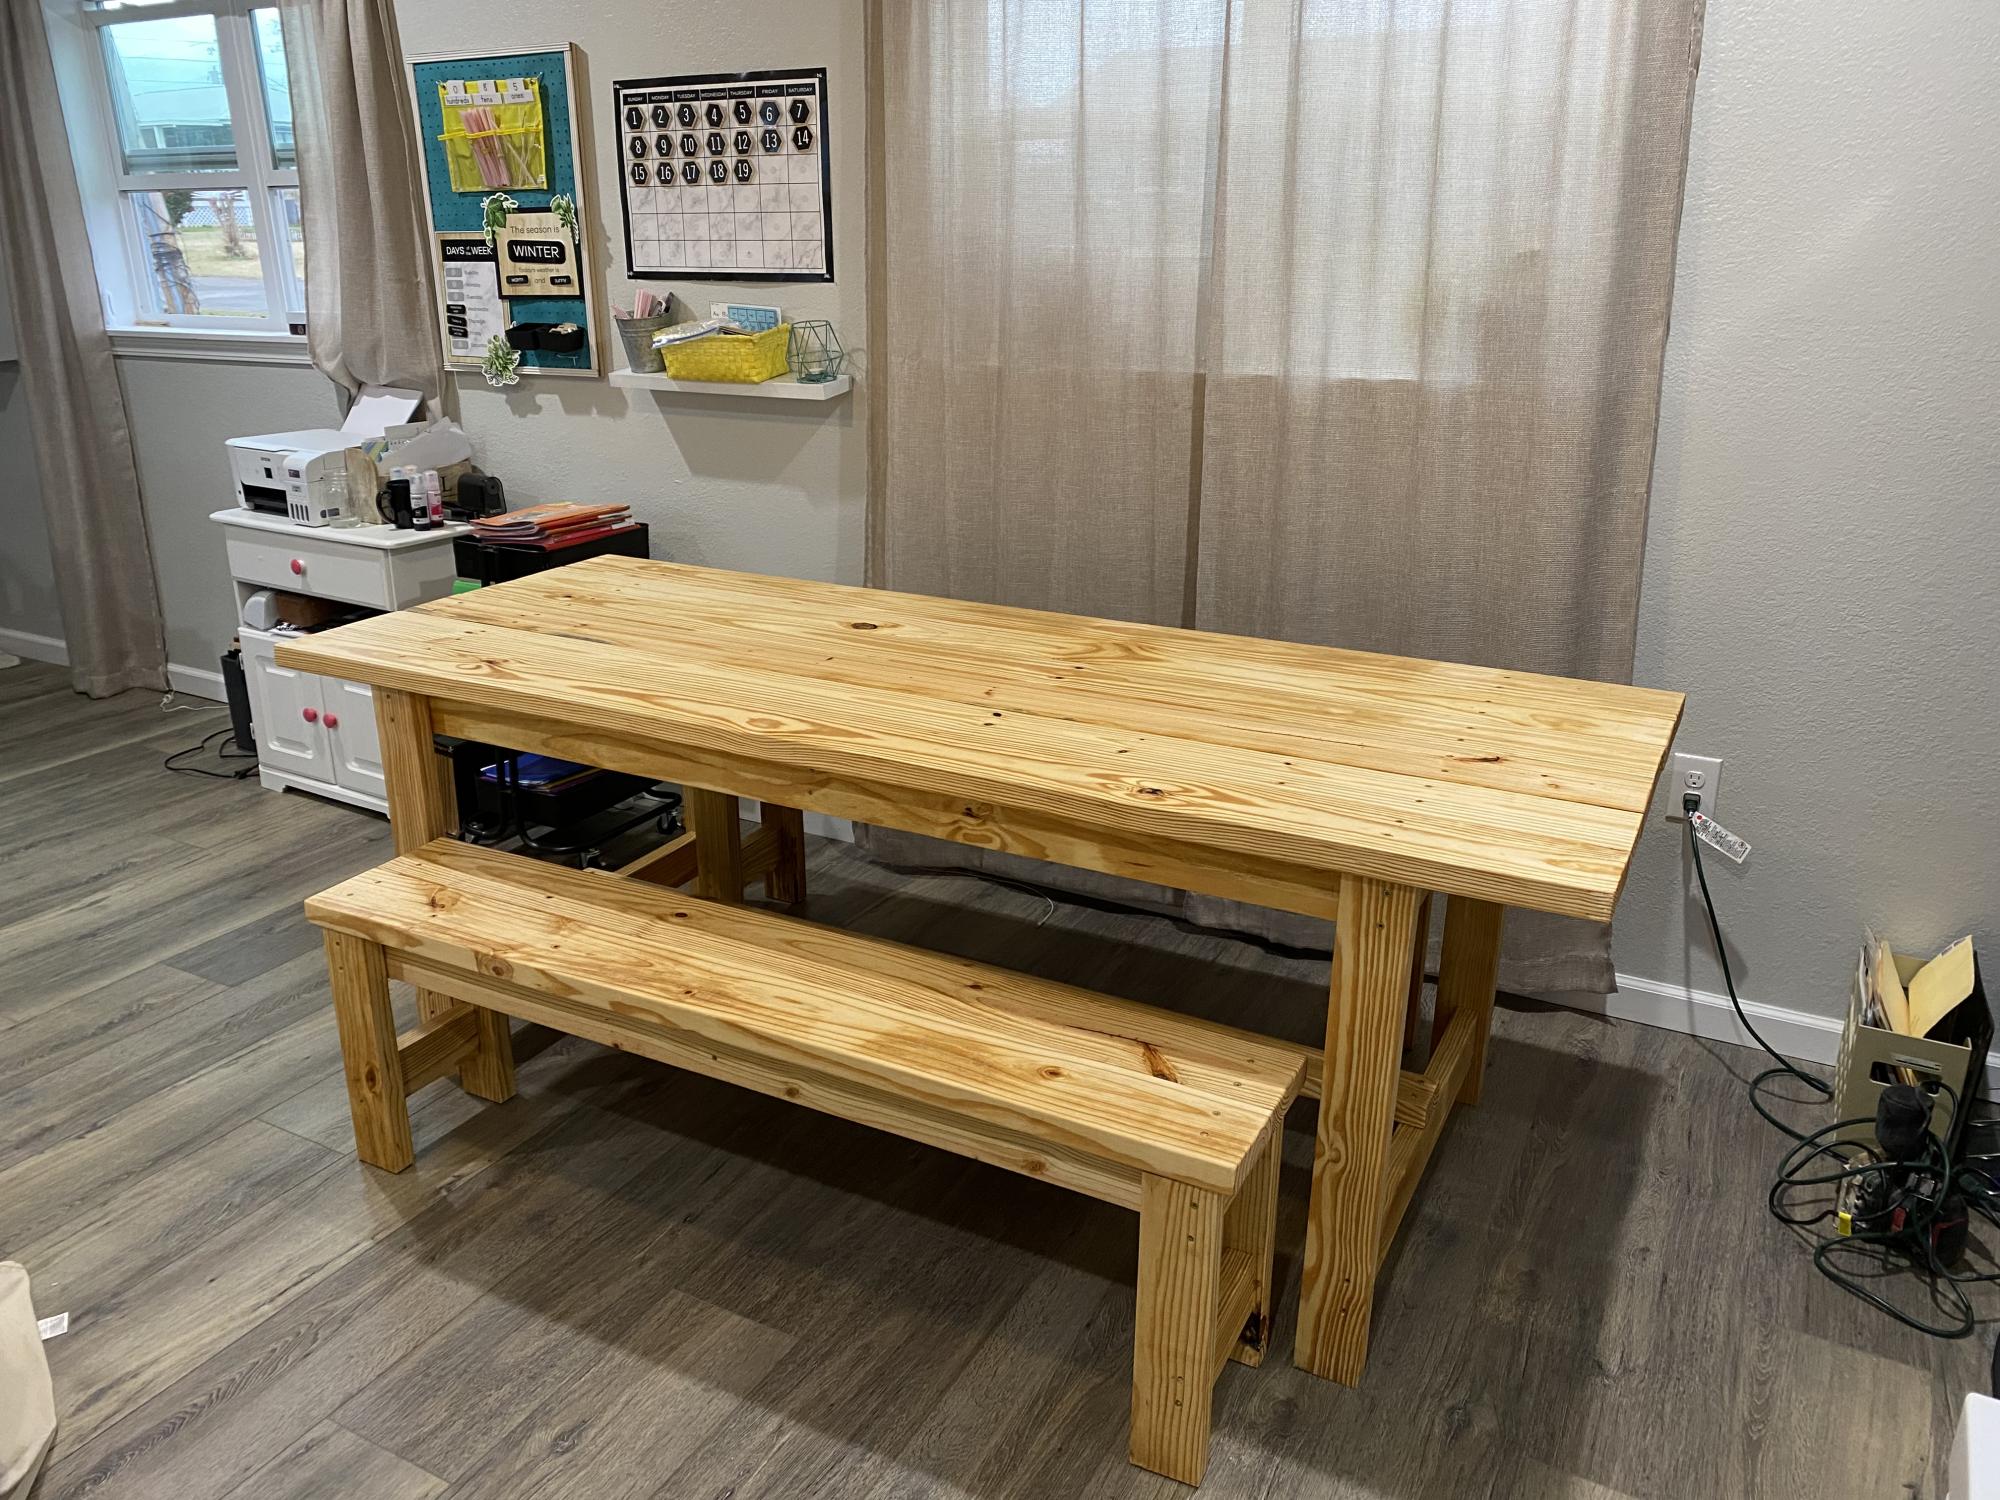
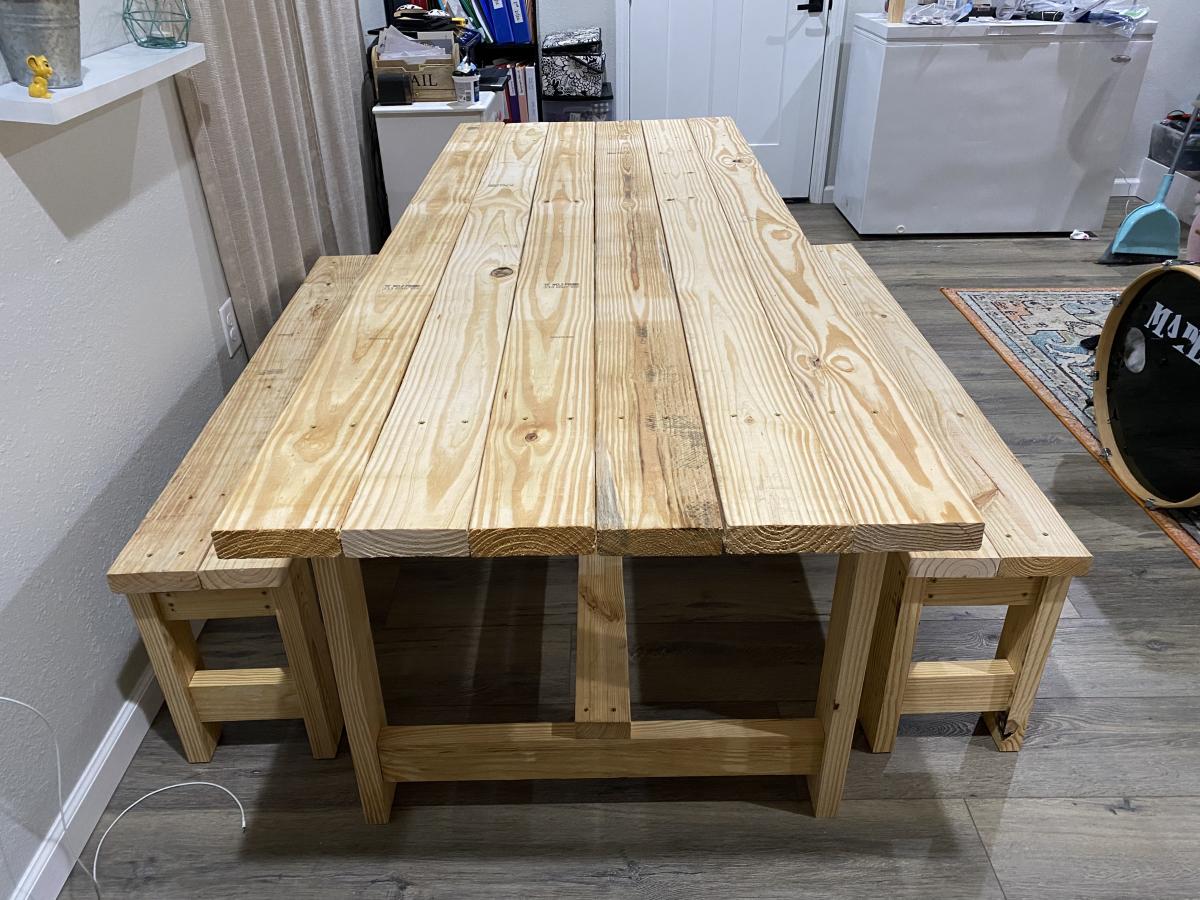
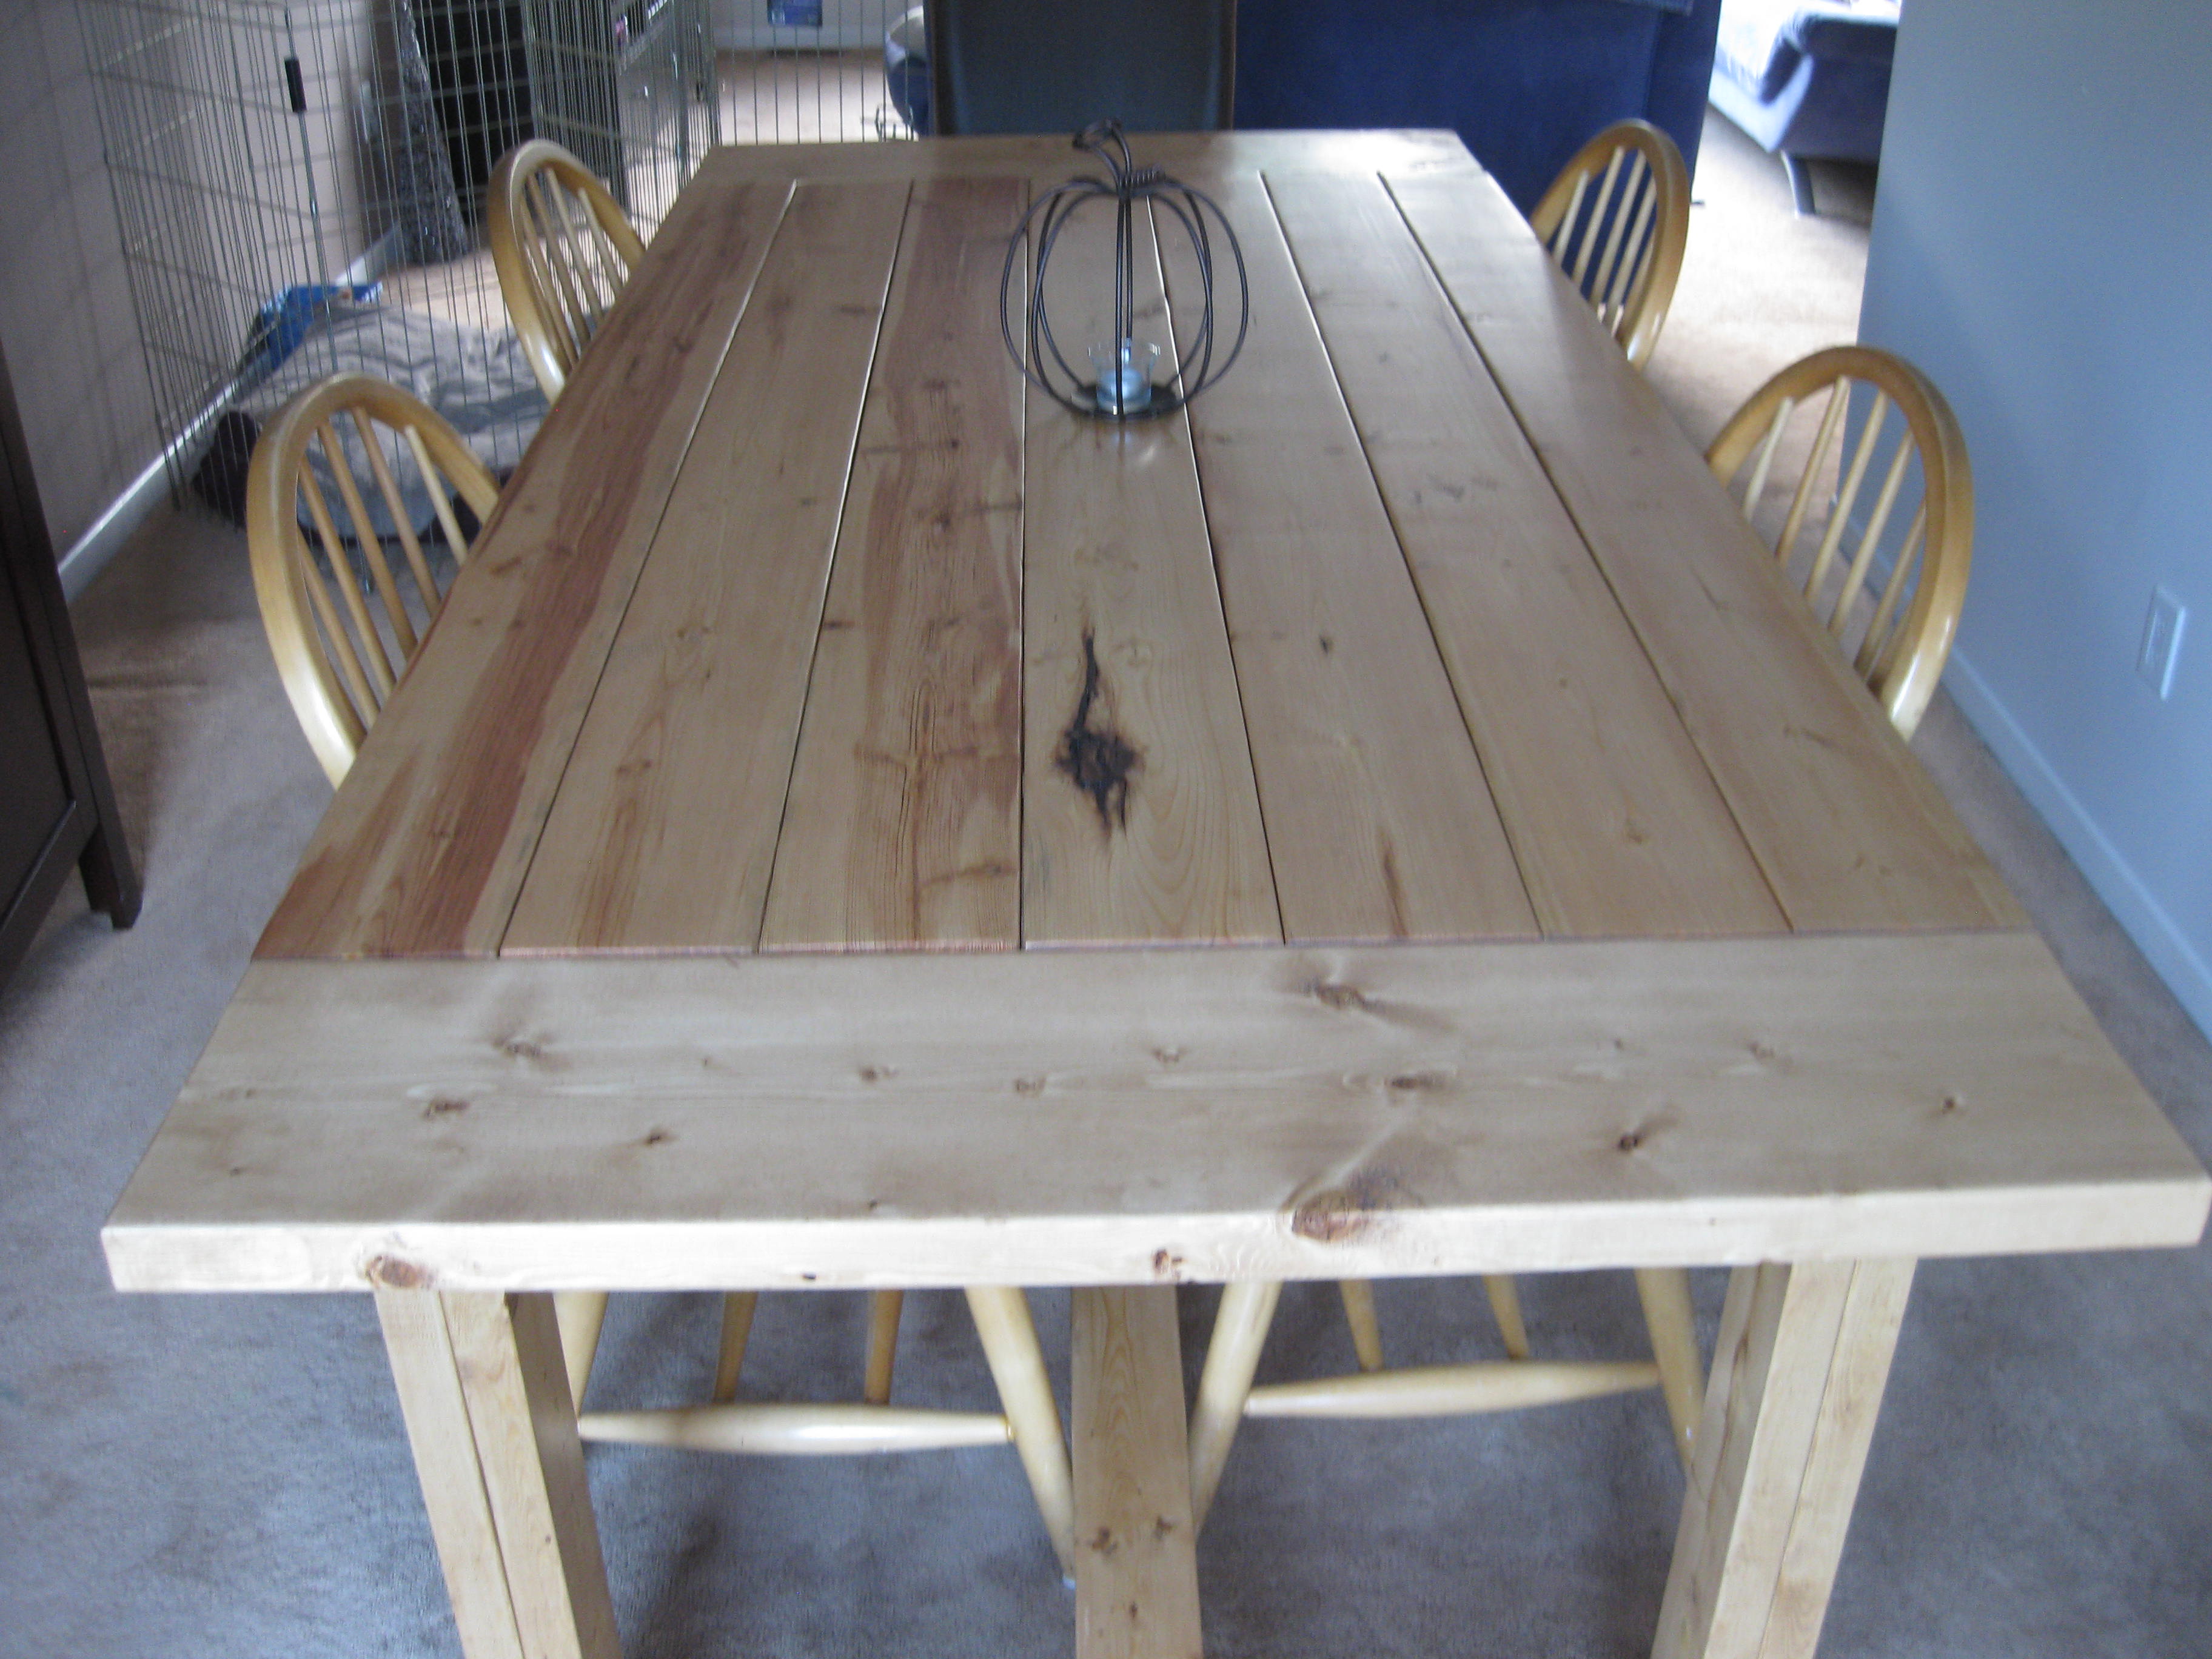
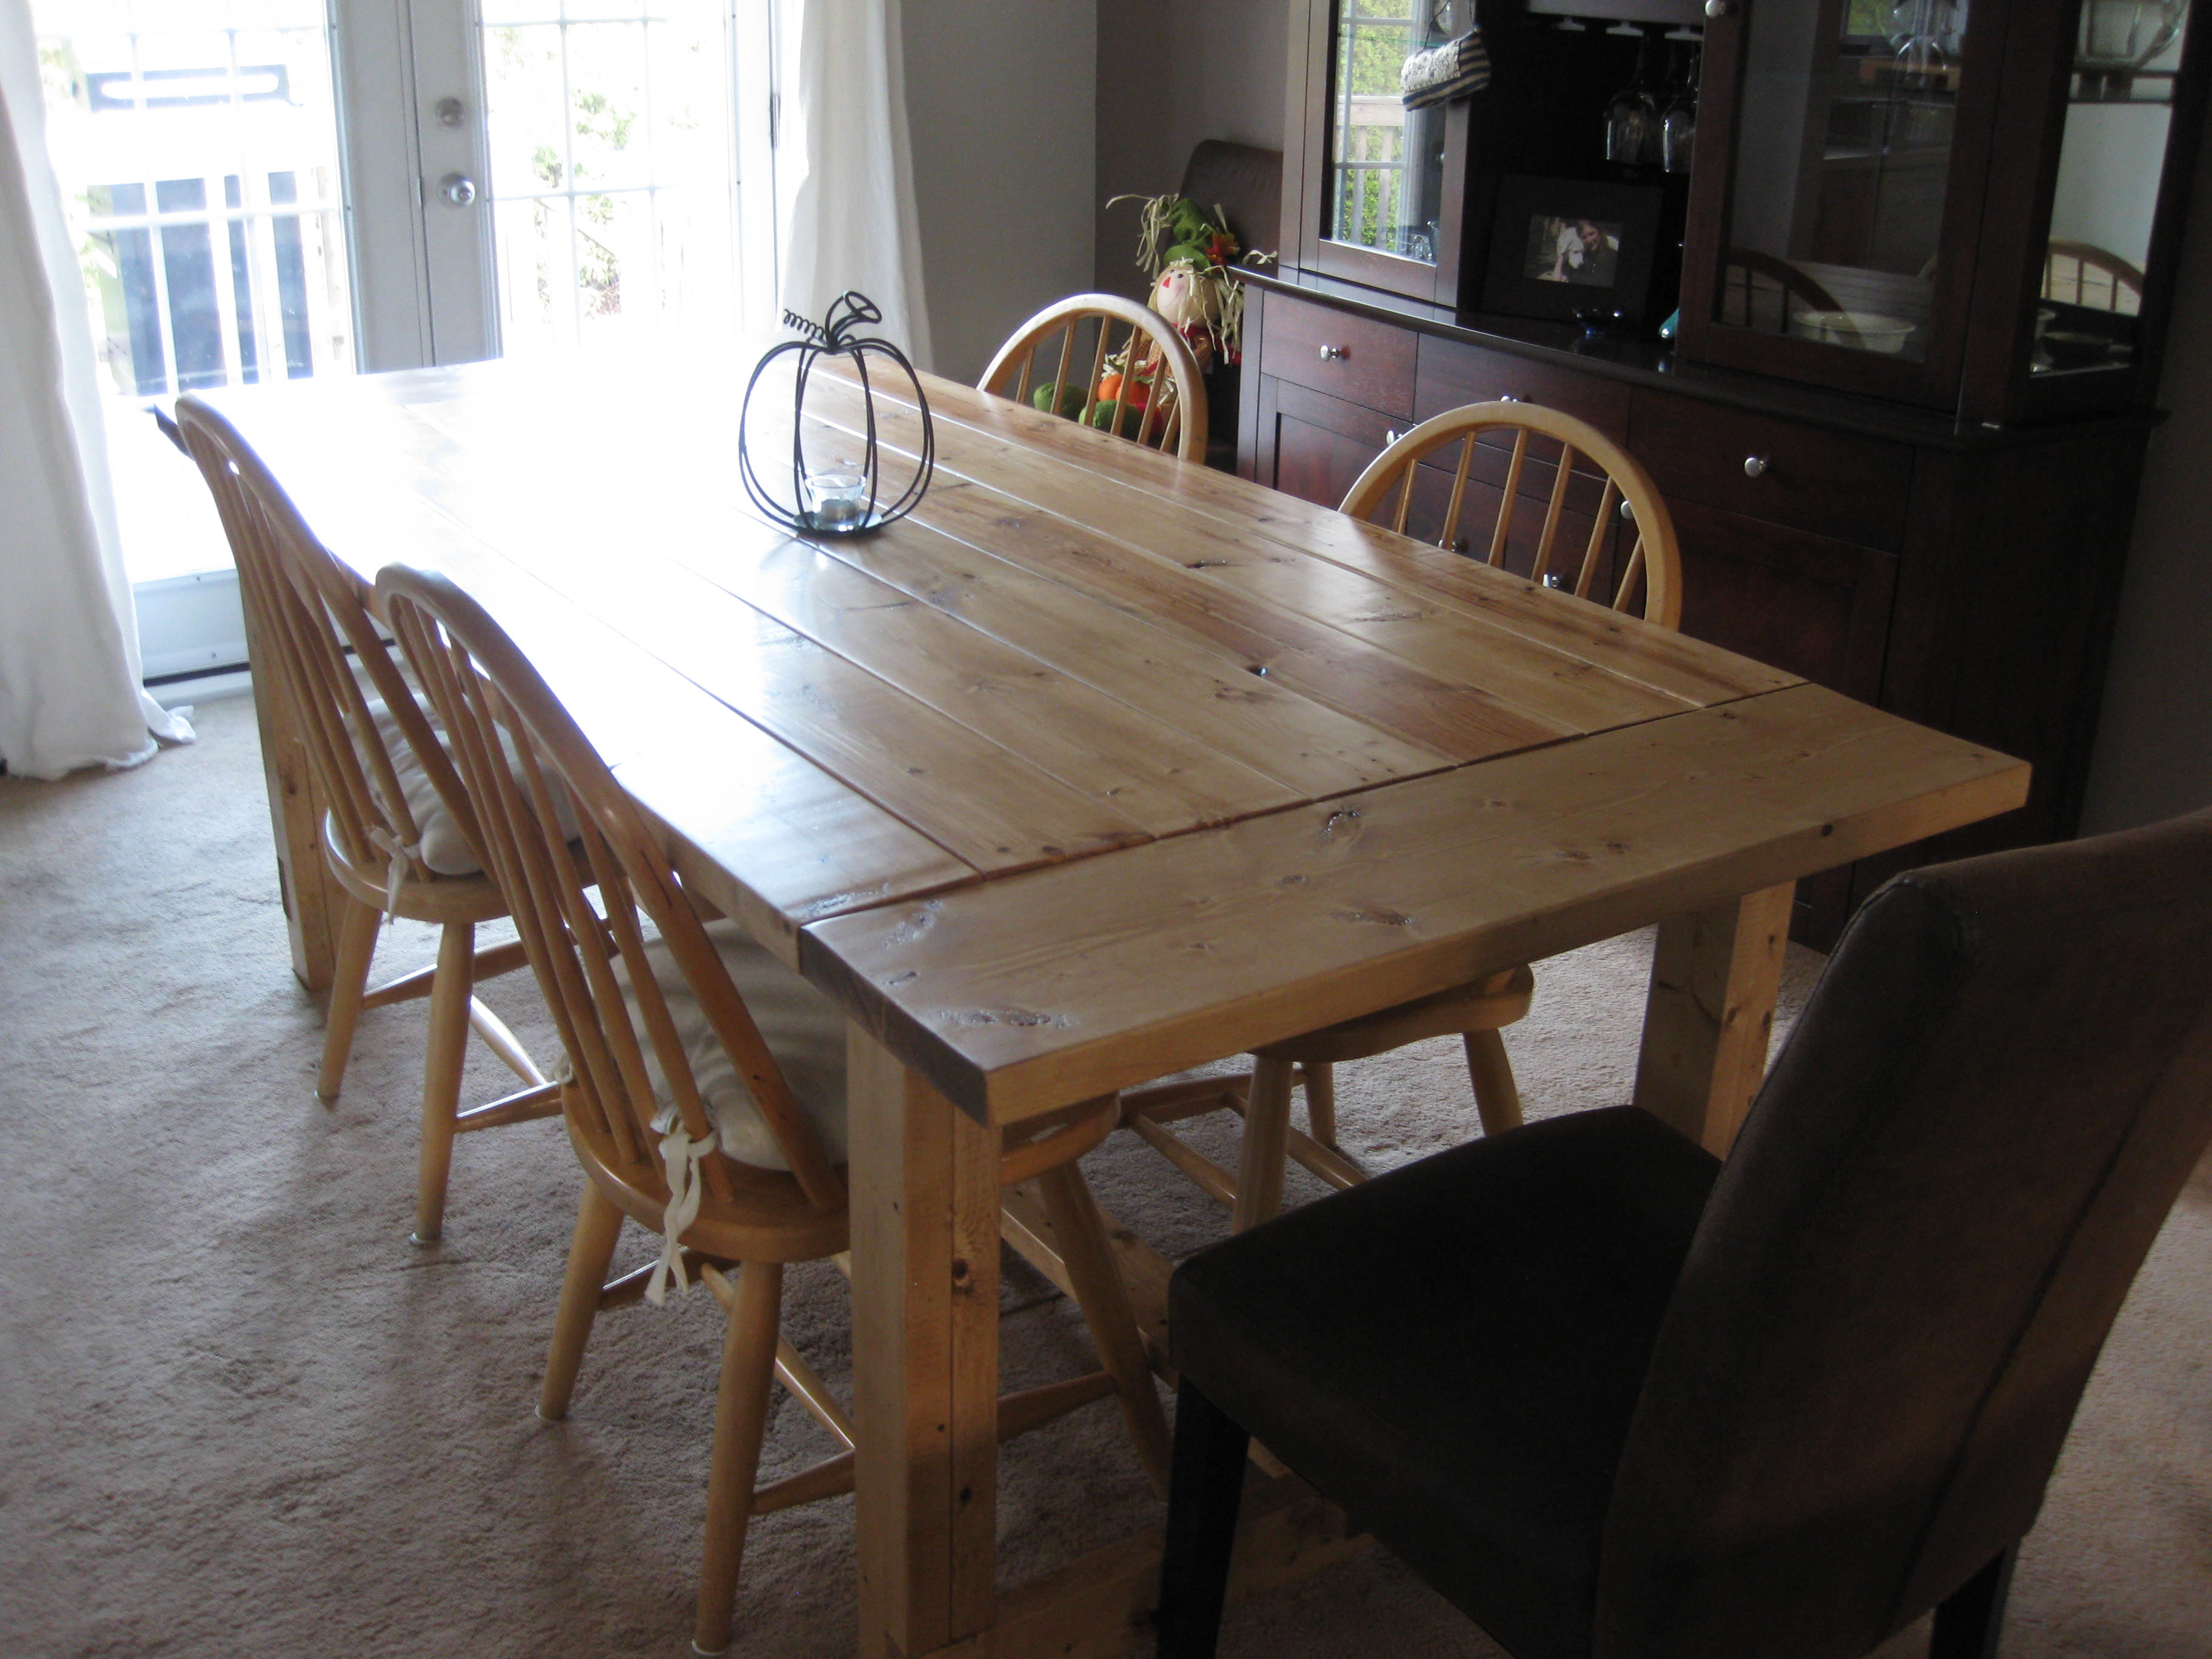
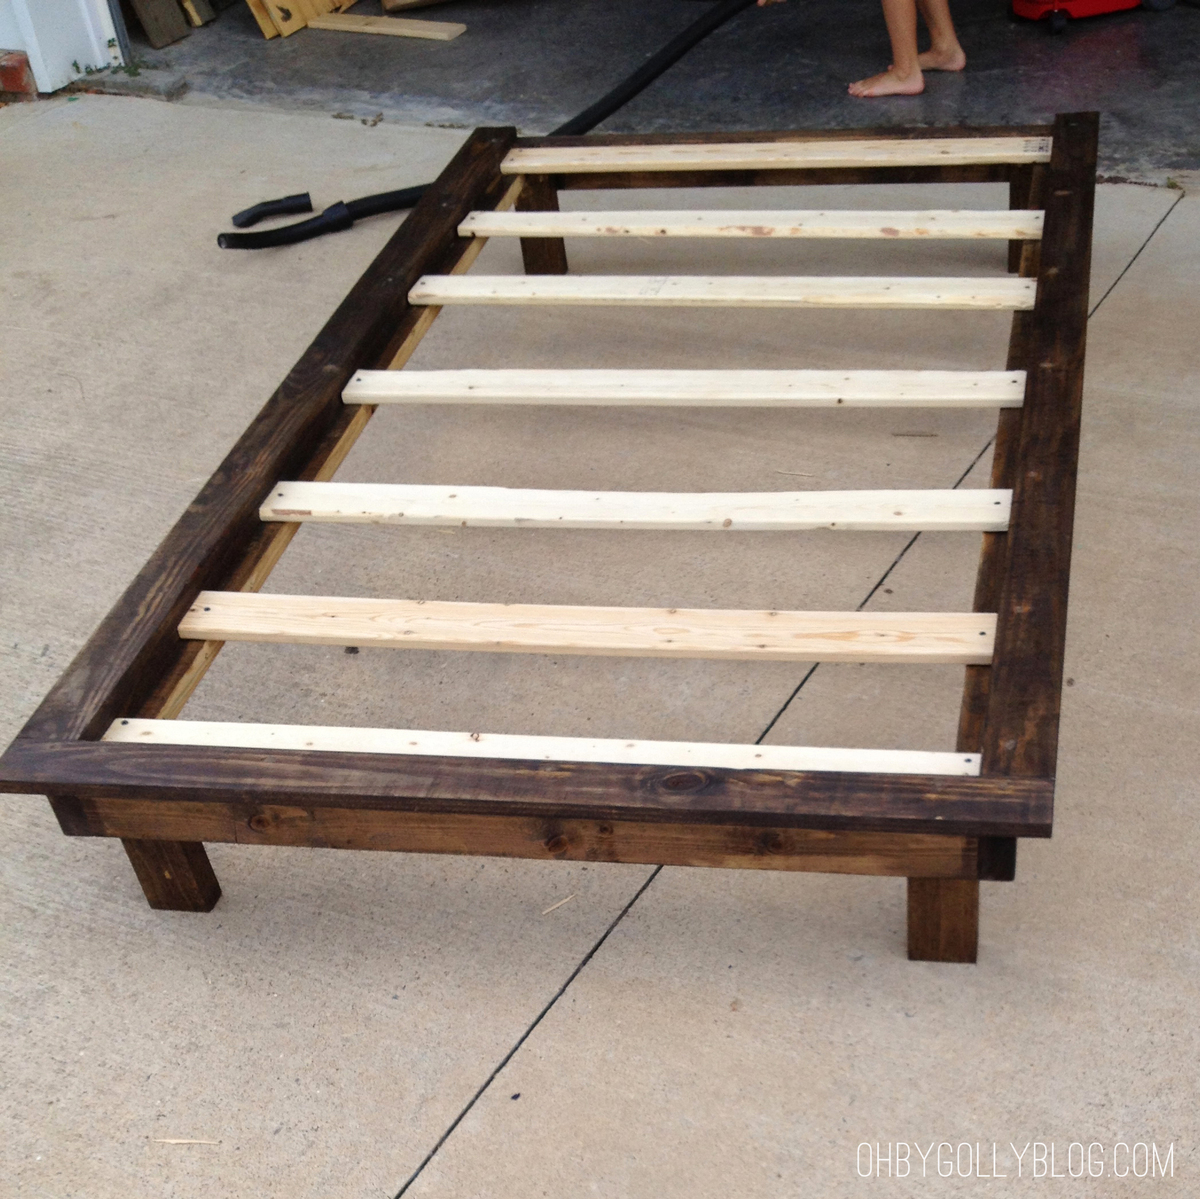
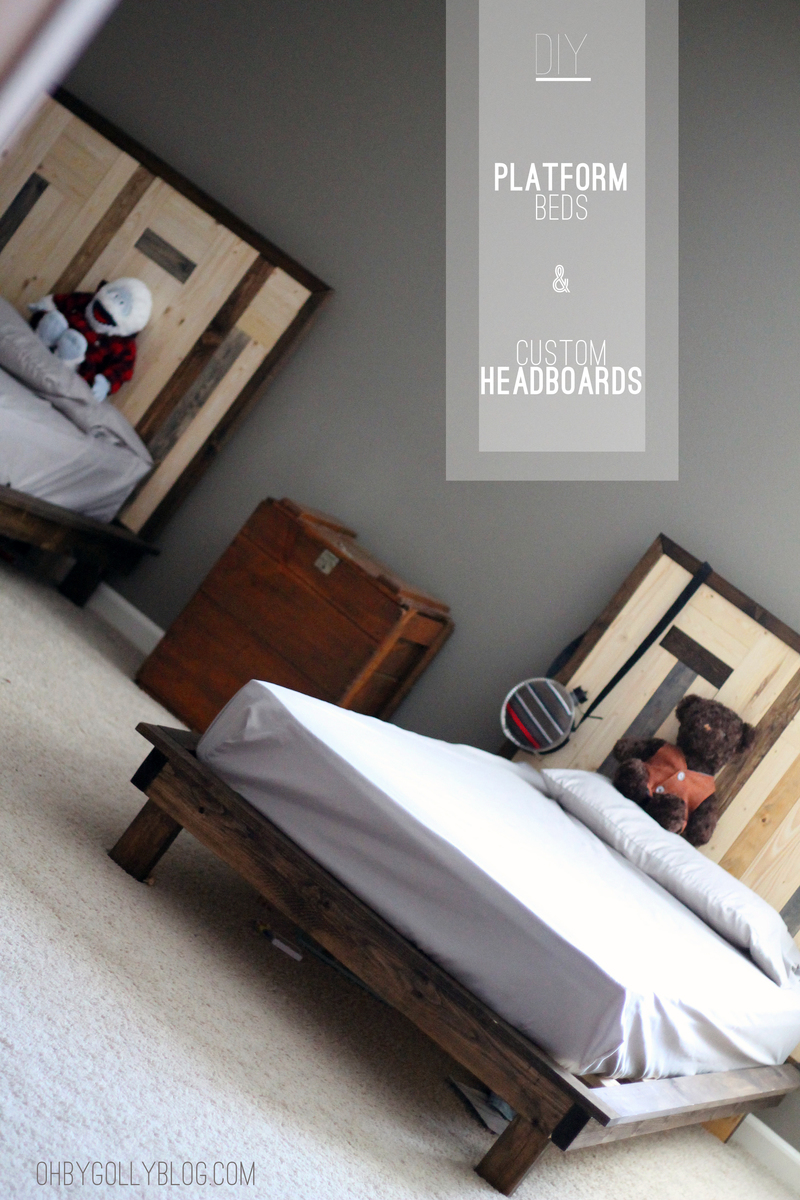
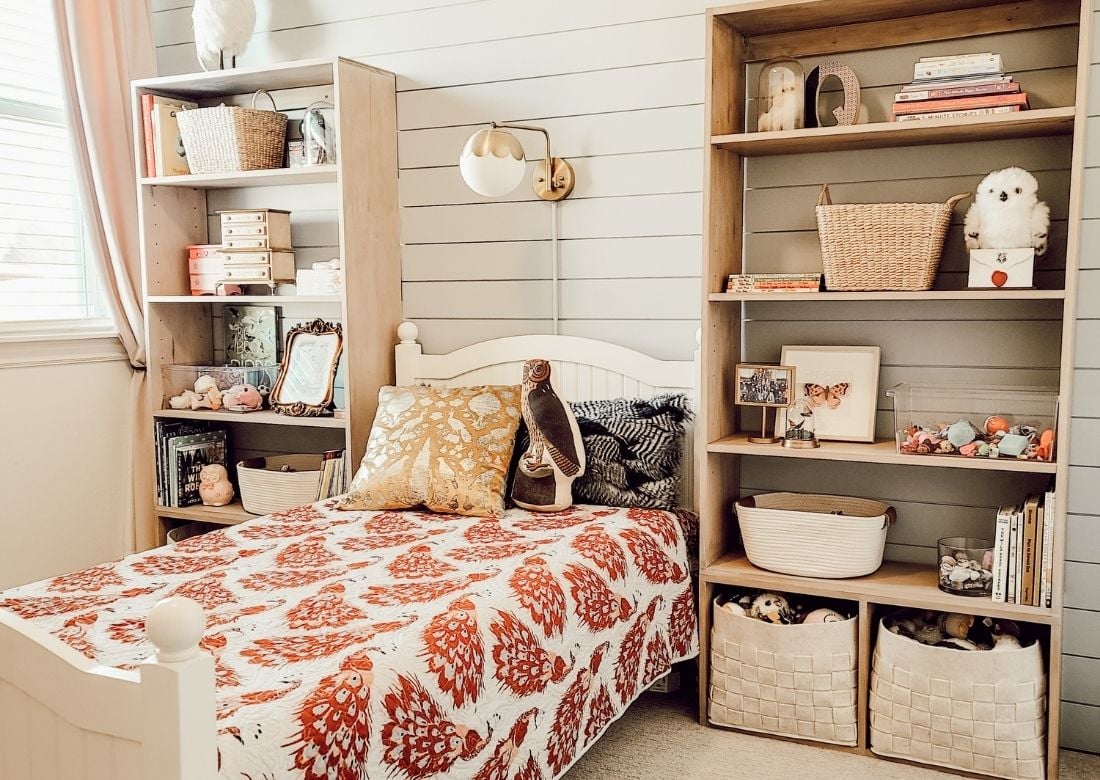
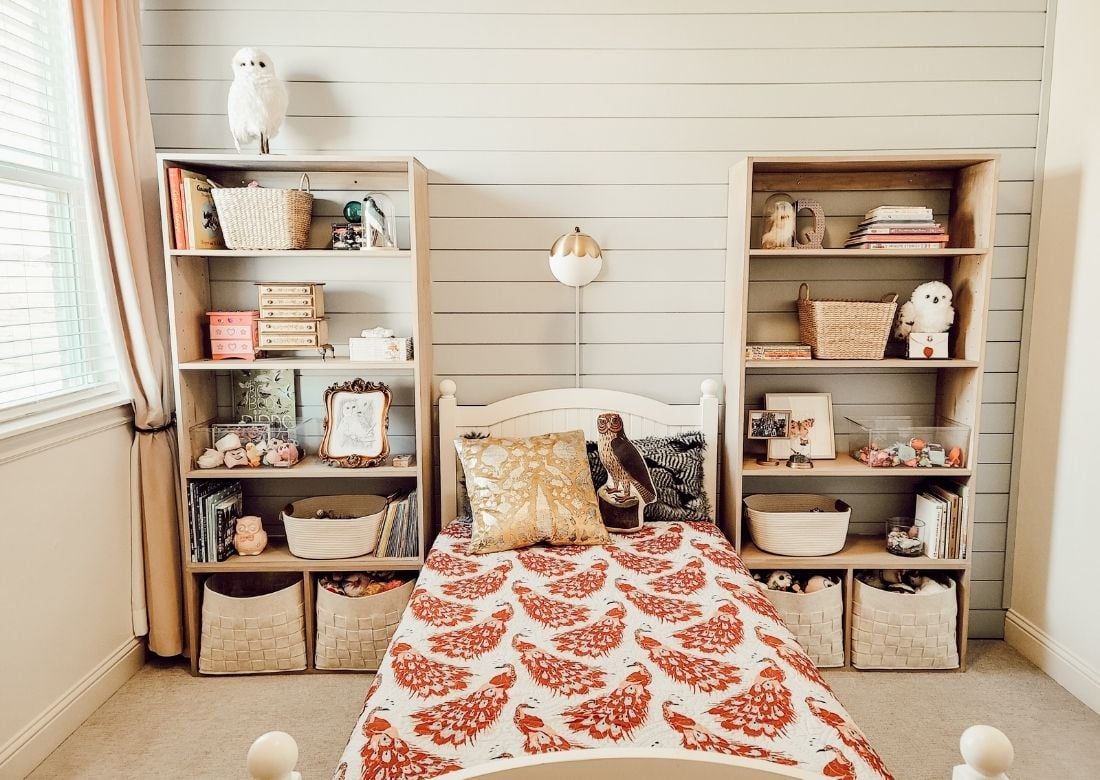
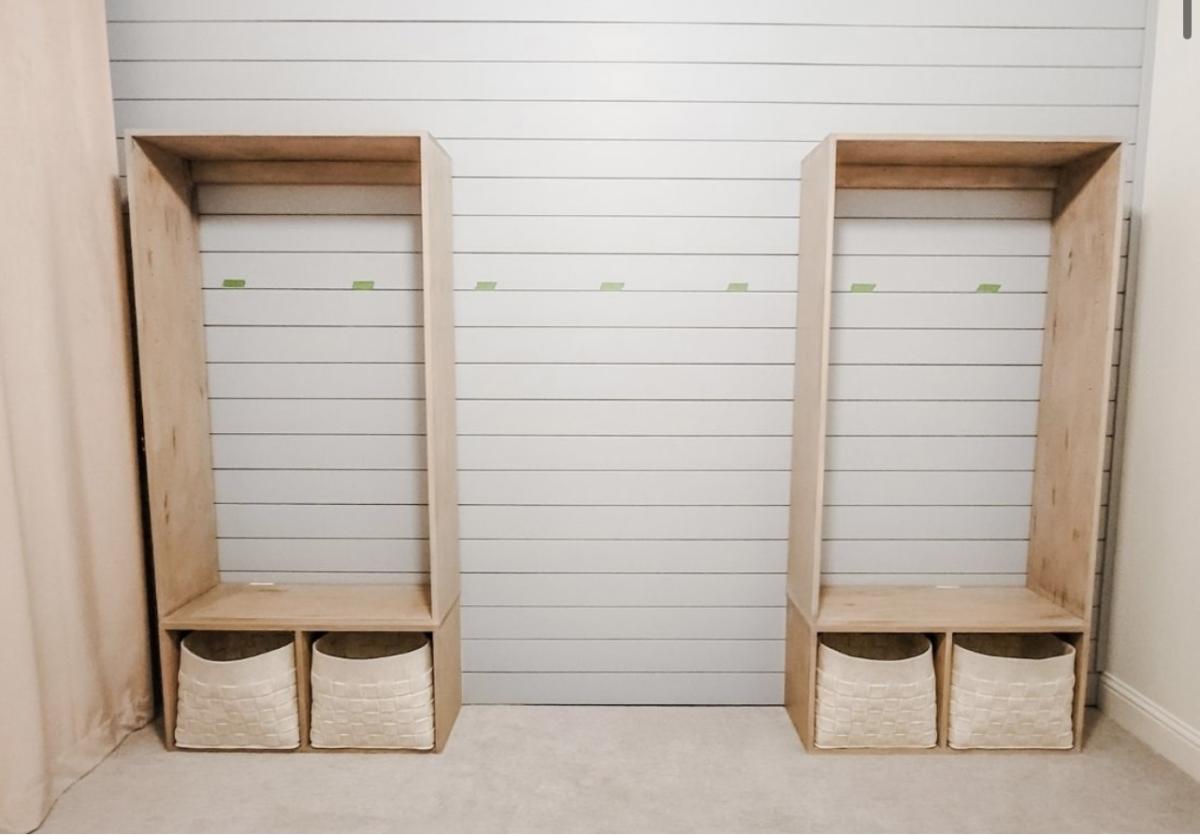
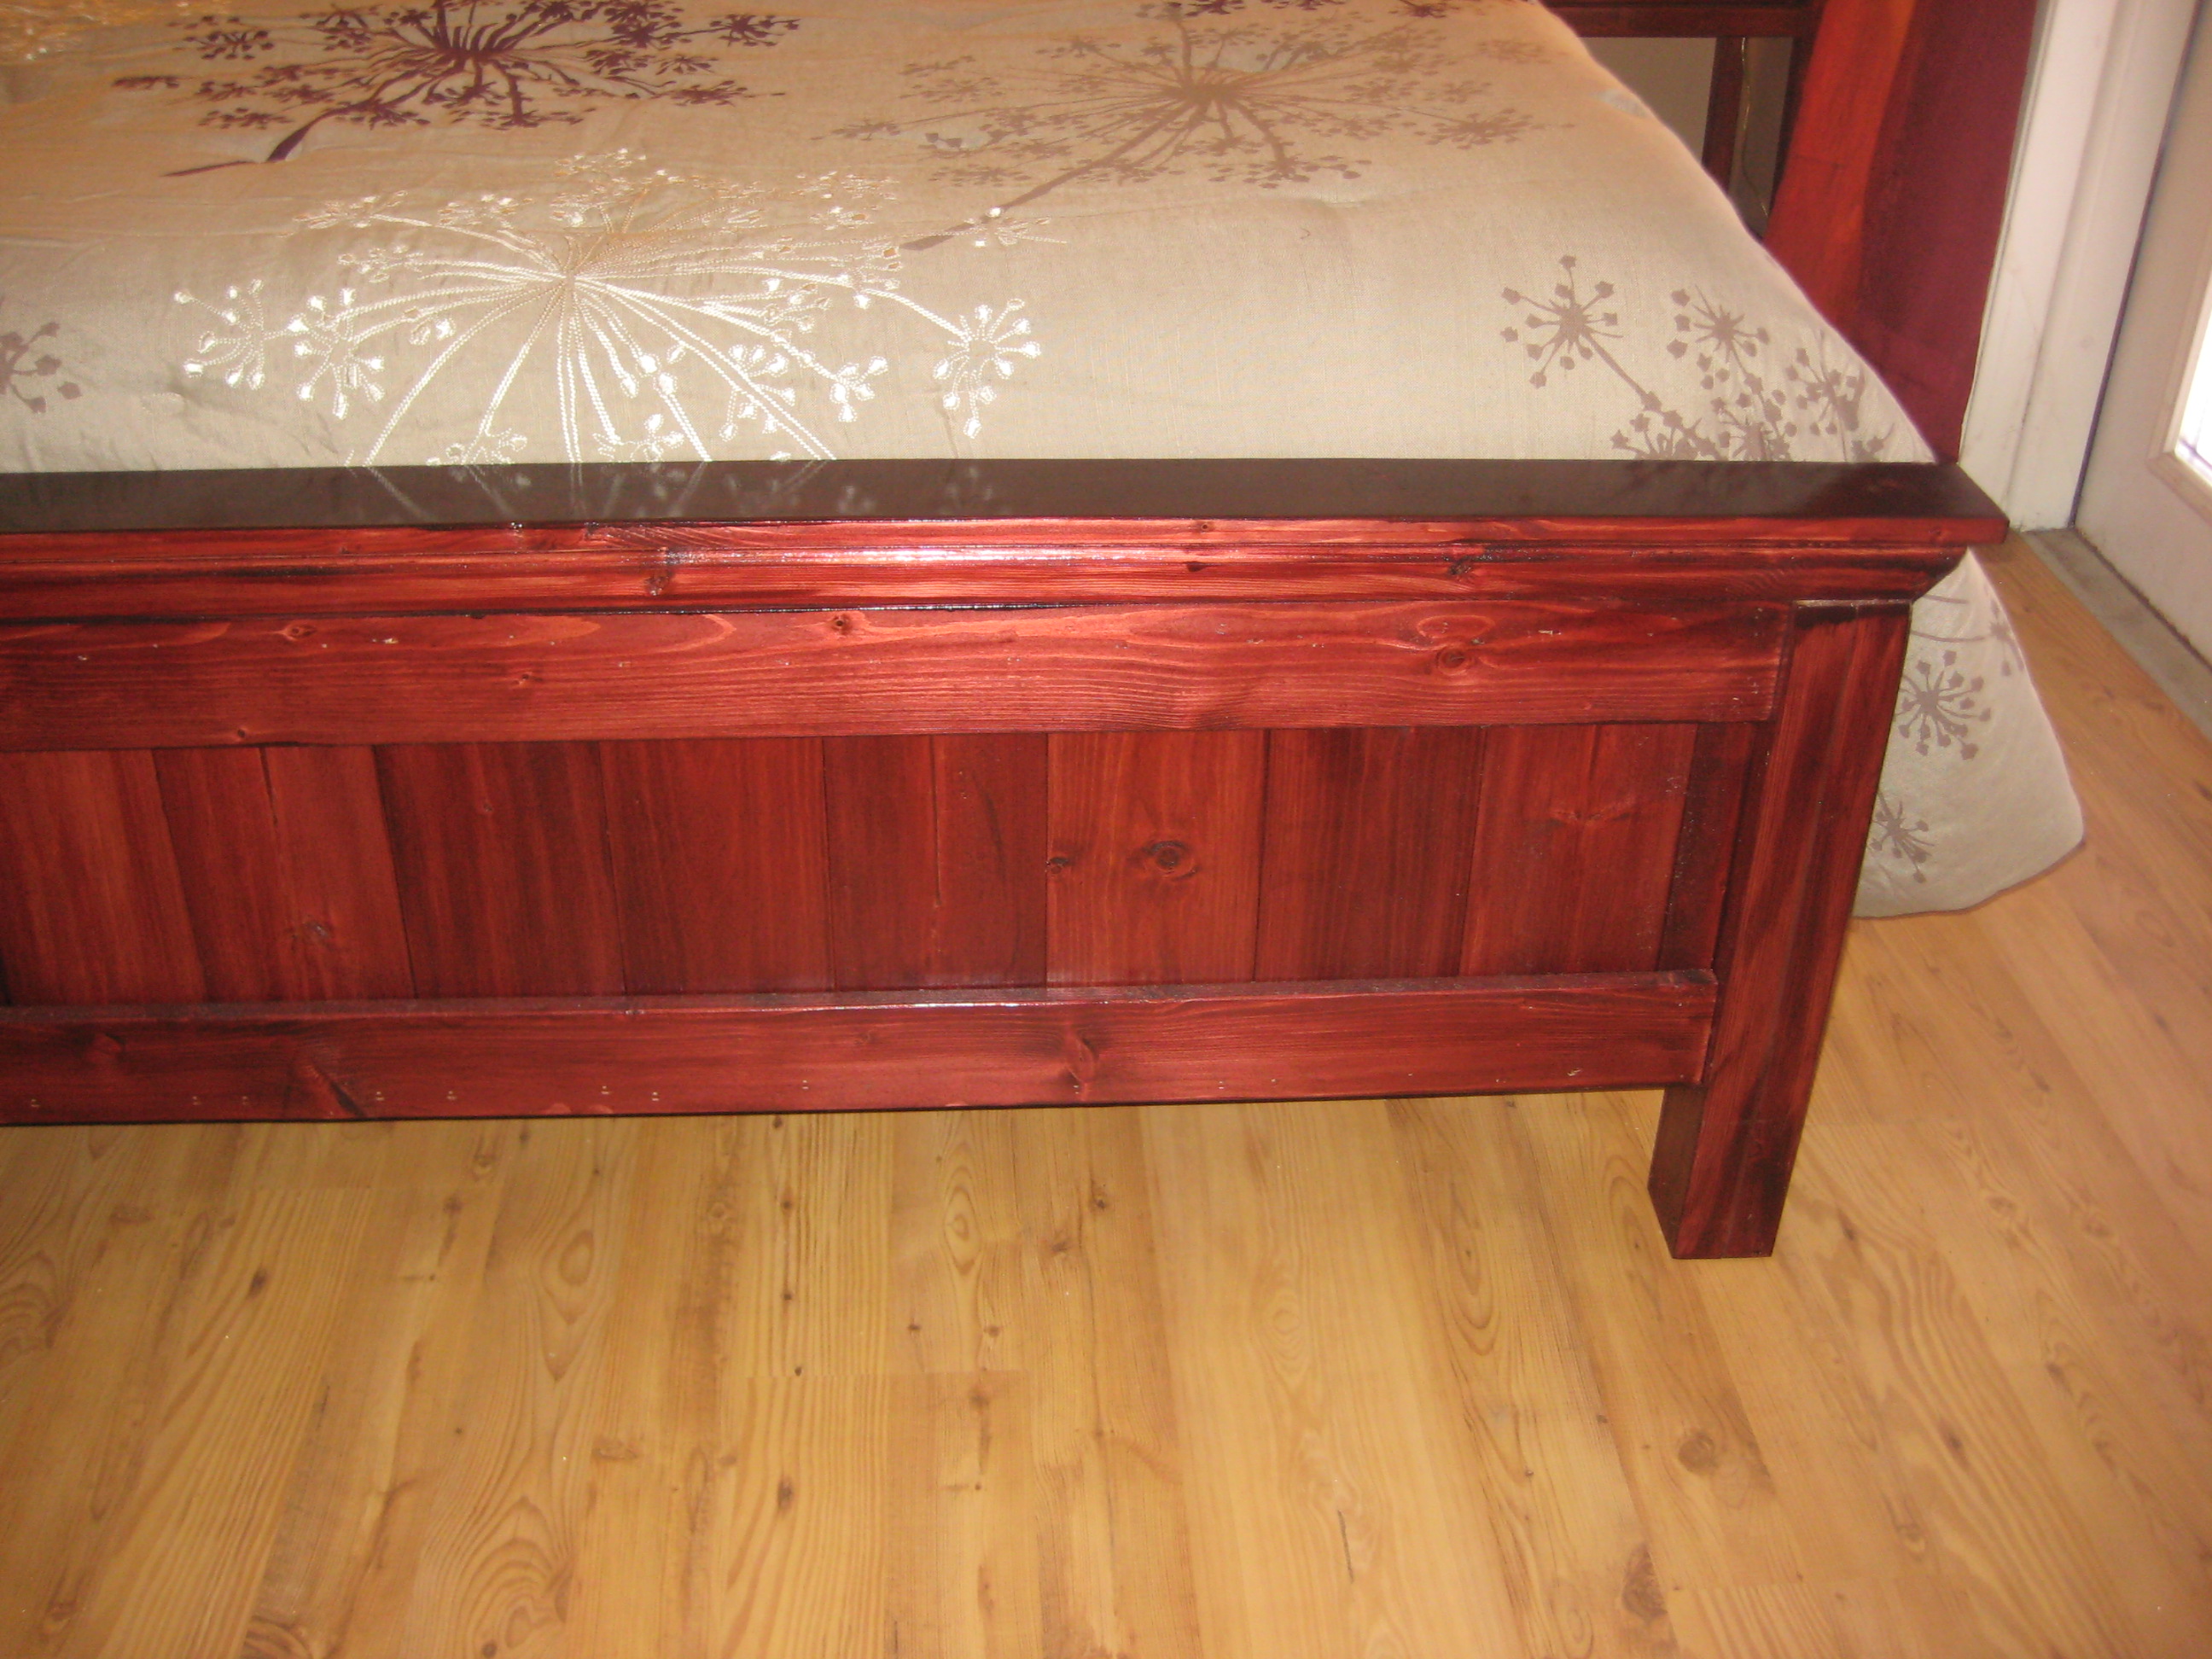
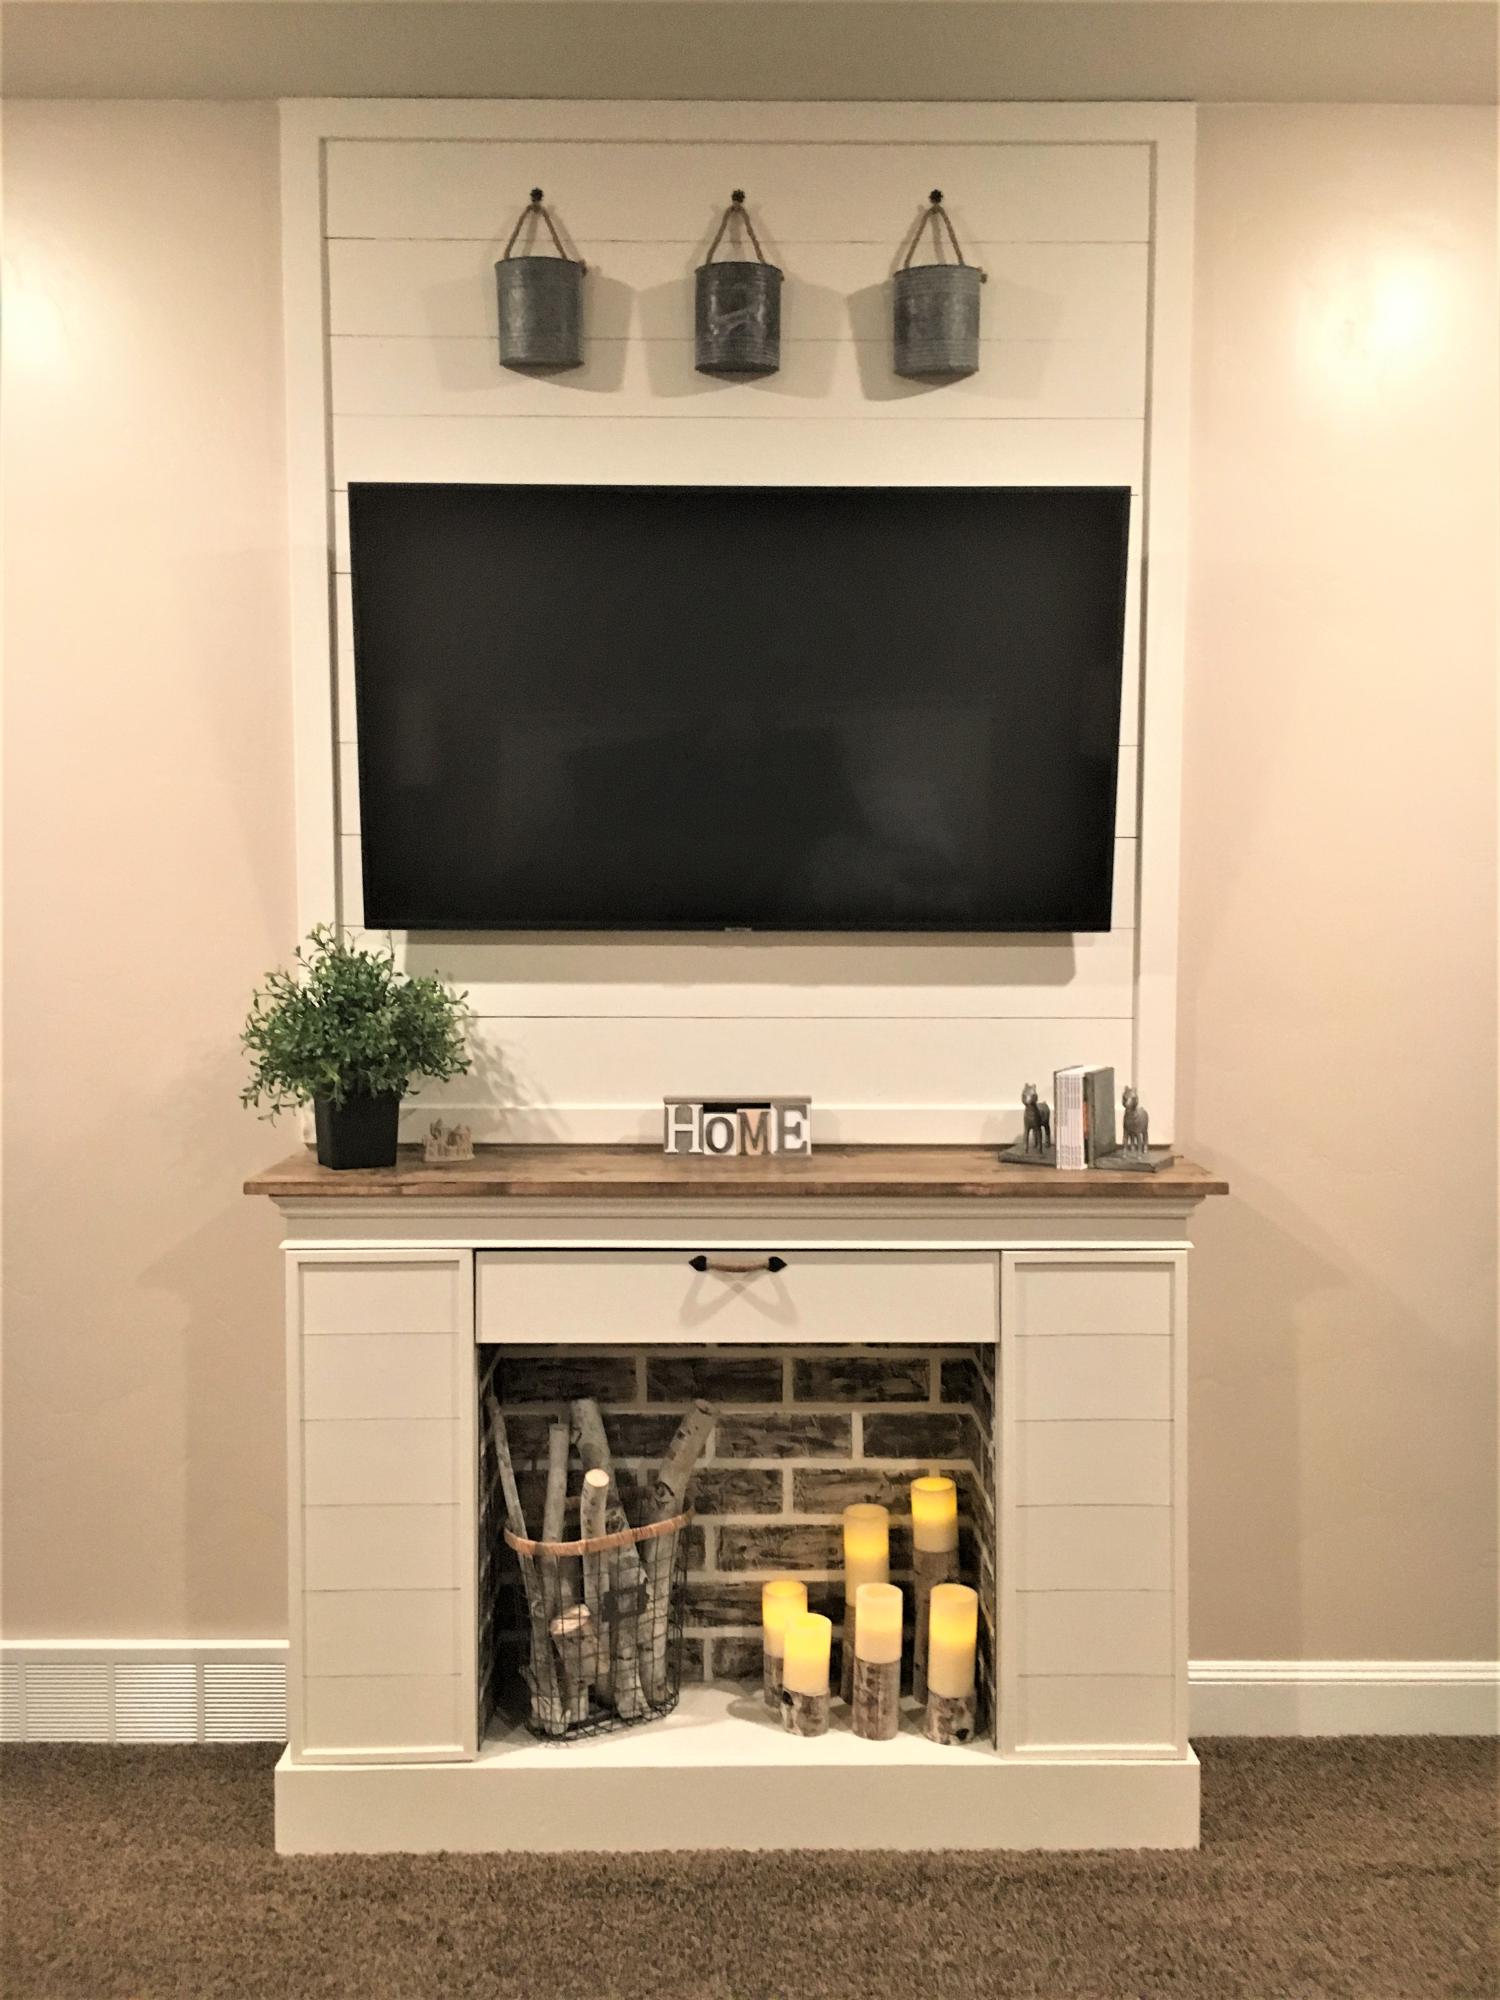
I made this for my daughter for Christmas last year. Well, actually Santa did, or at least that's what she tells people. I had one of the big companies cut the lumber for me, but a few boards were cut incorrectly. I live about 25 minutes from a local hardware store and needed to have them re-cut. Luckily for me, my father-in-law is handy and he brought out his circular saw and helped me even out my boards. Then, for Christmas I got a gift too - a table saw.

Built from Plan(s)
Estimated Time Investment
Weekend Project (10-20 Hours)
Finish Used
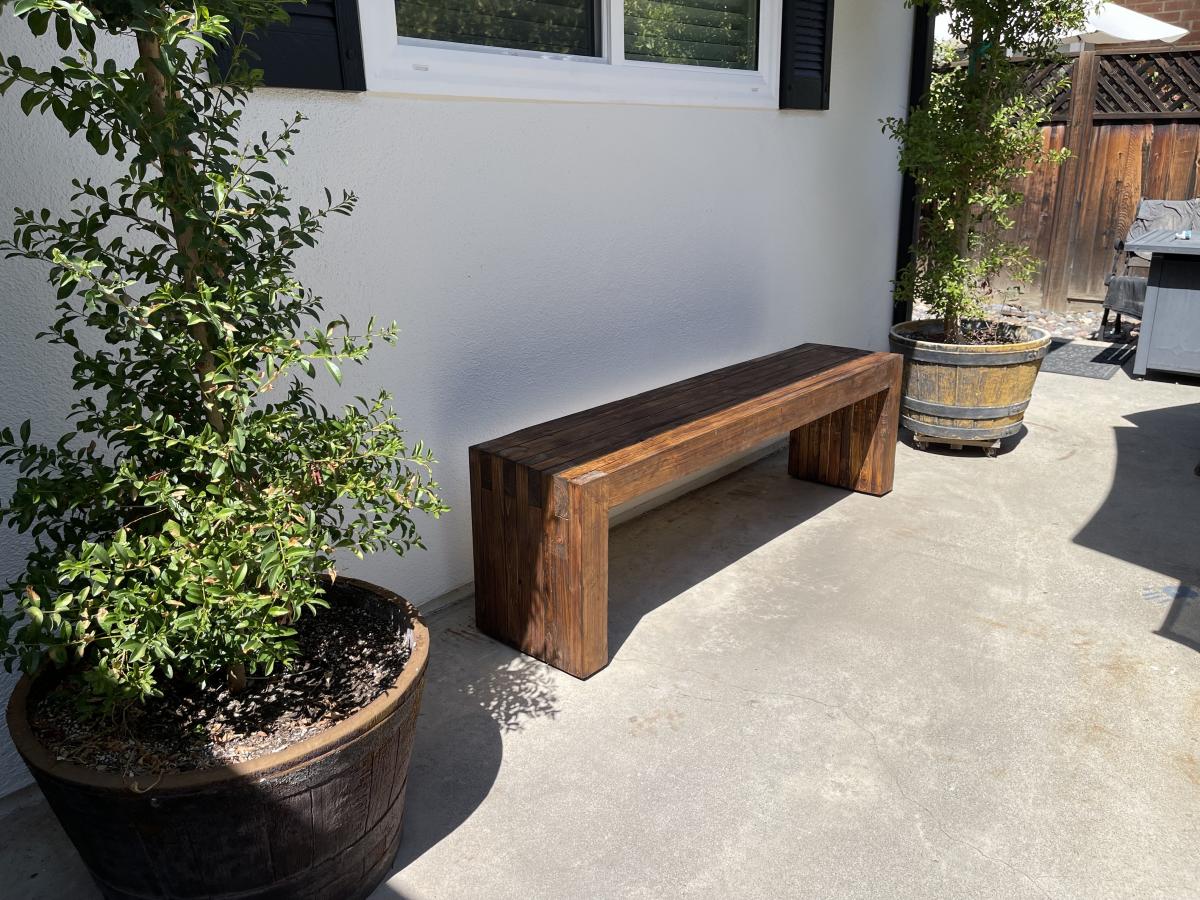
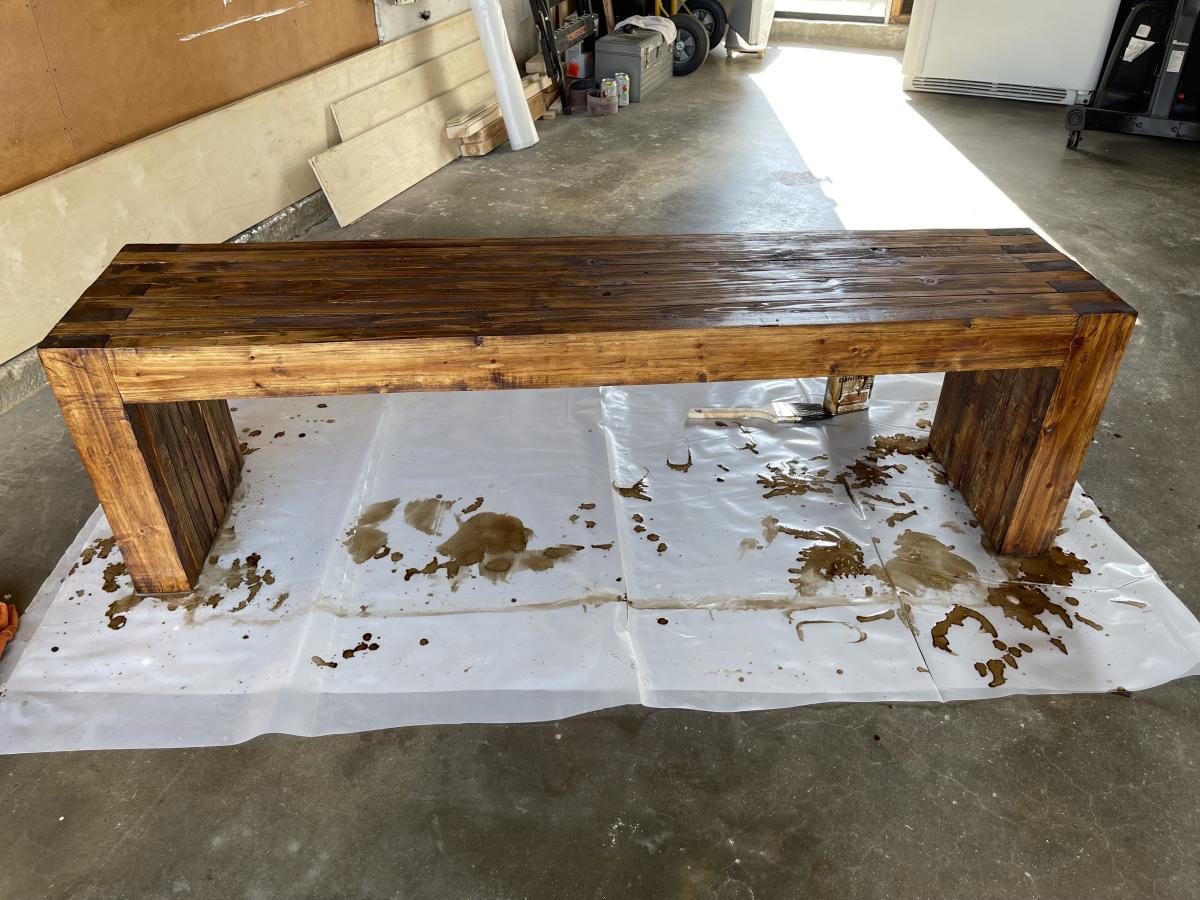
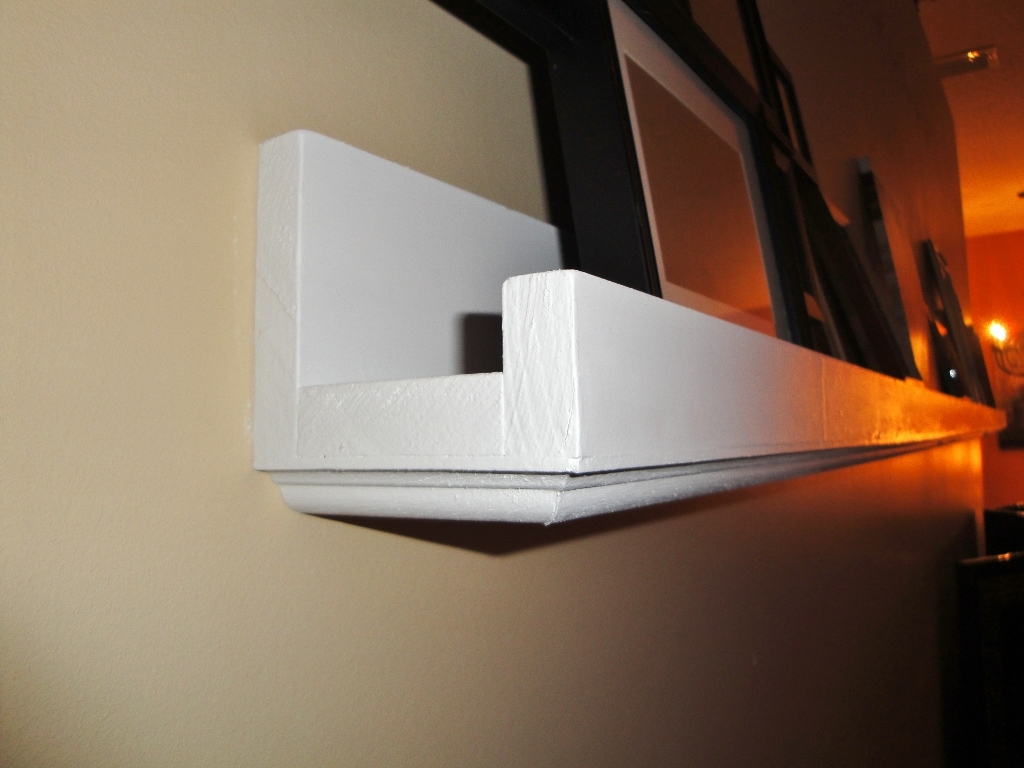
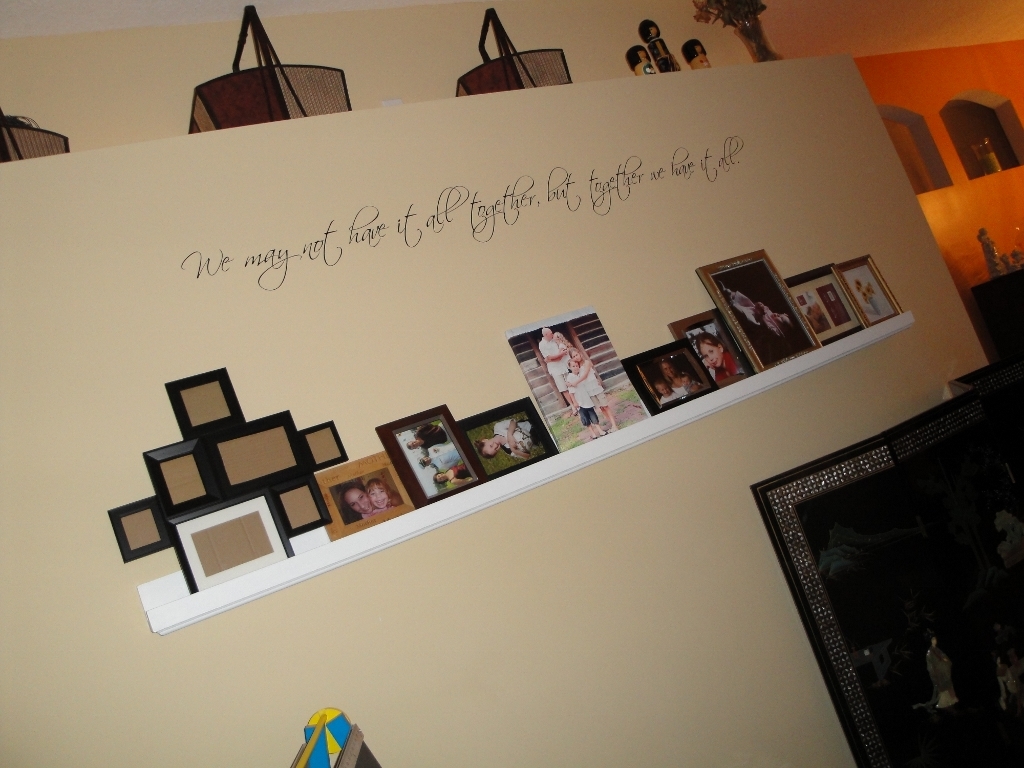
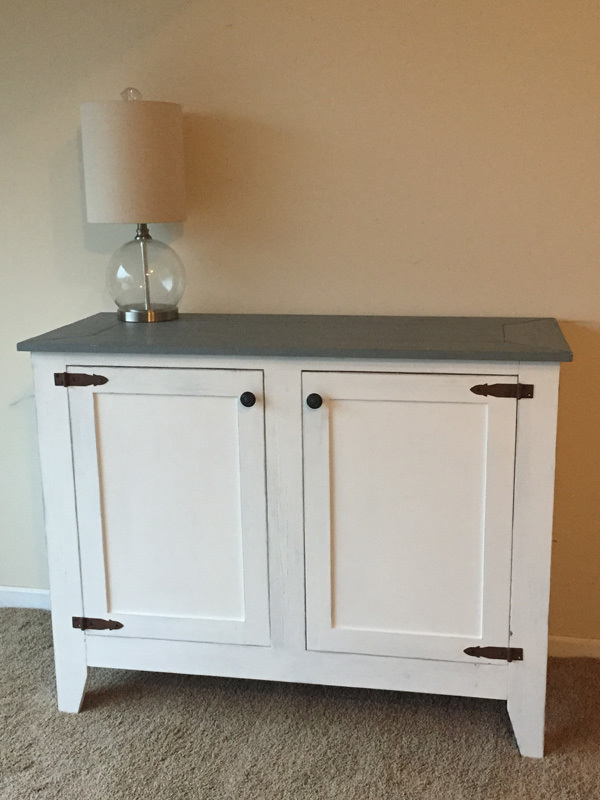
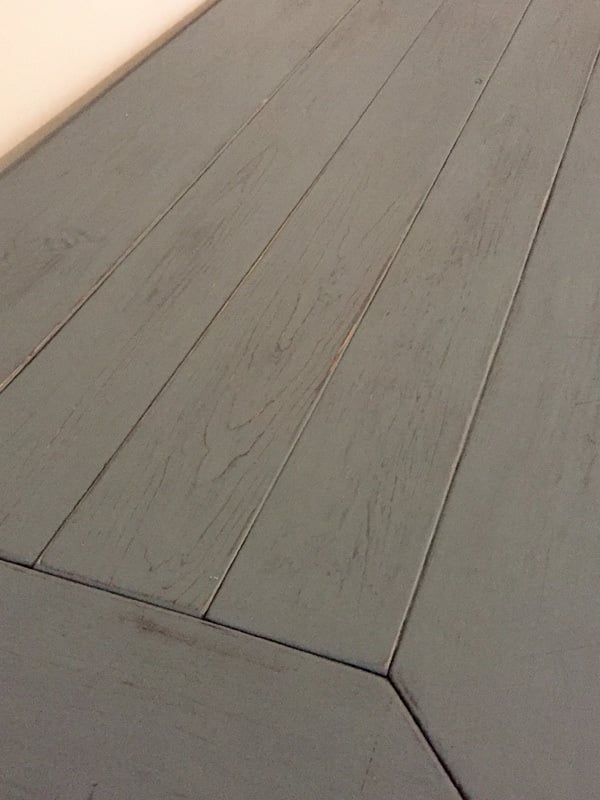
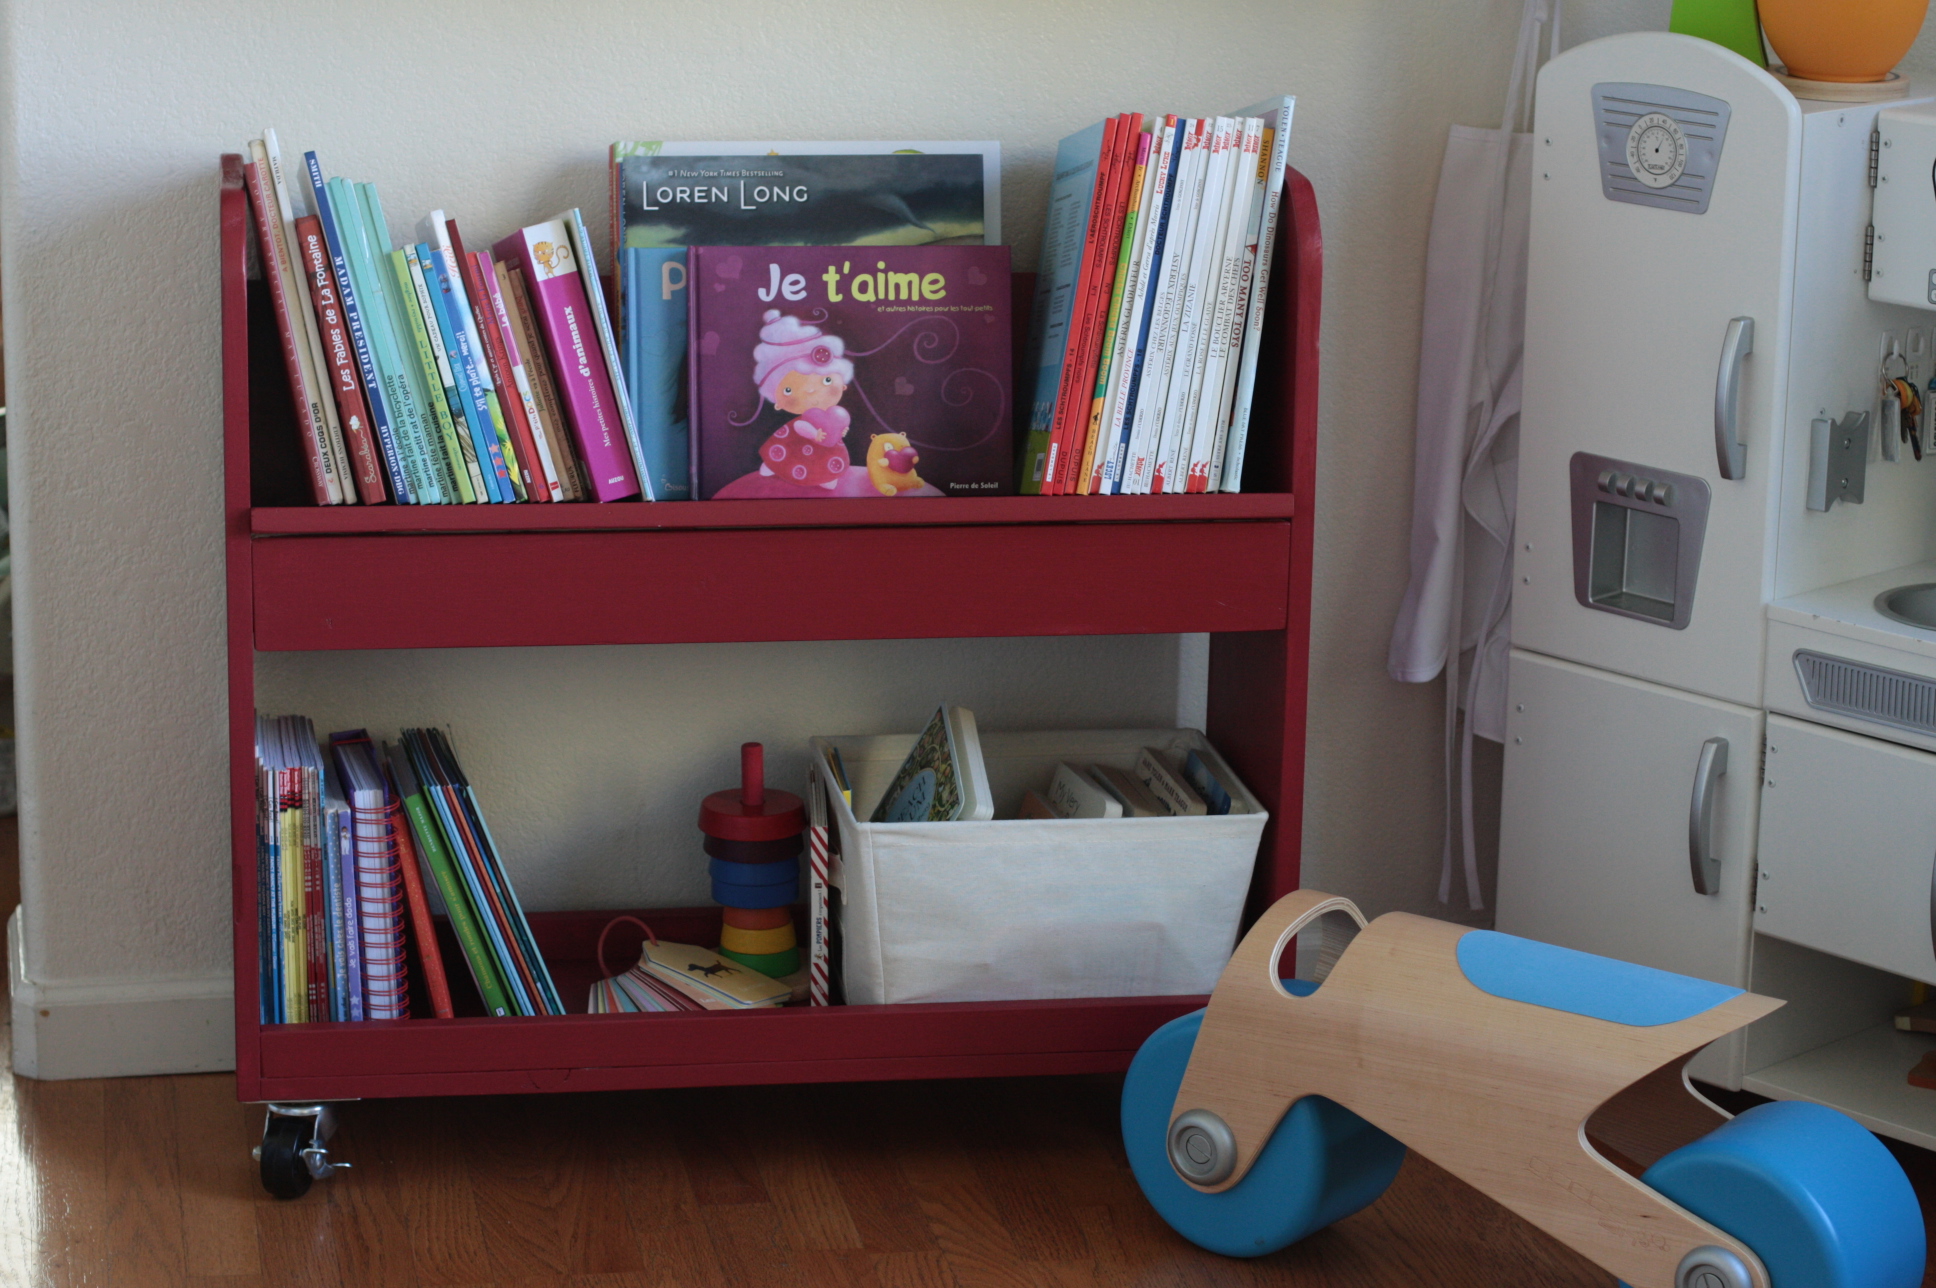
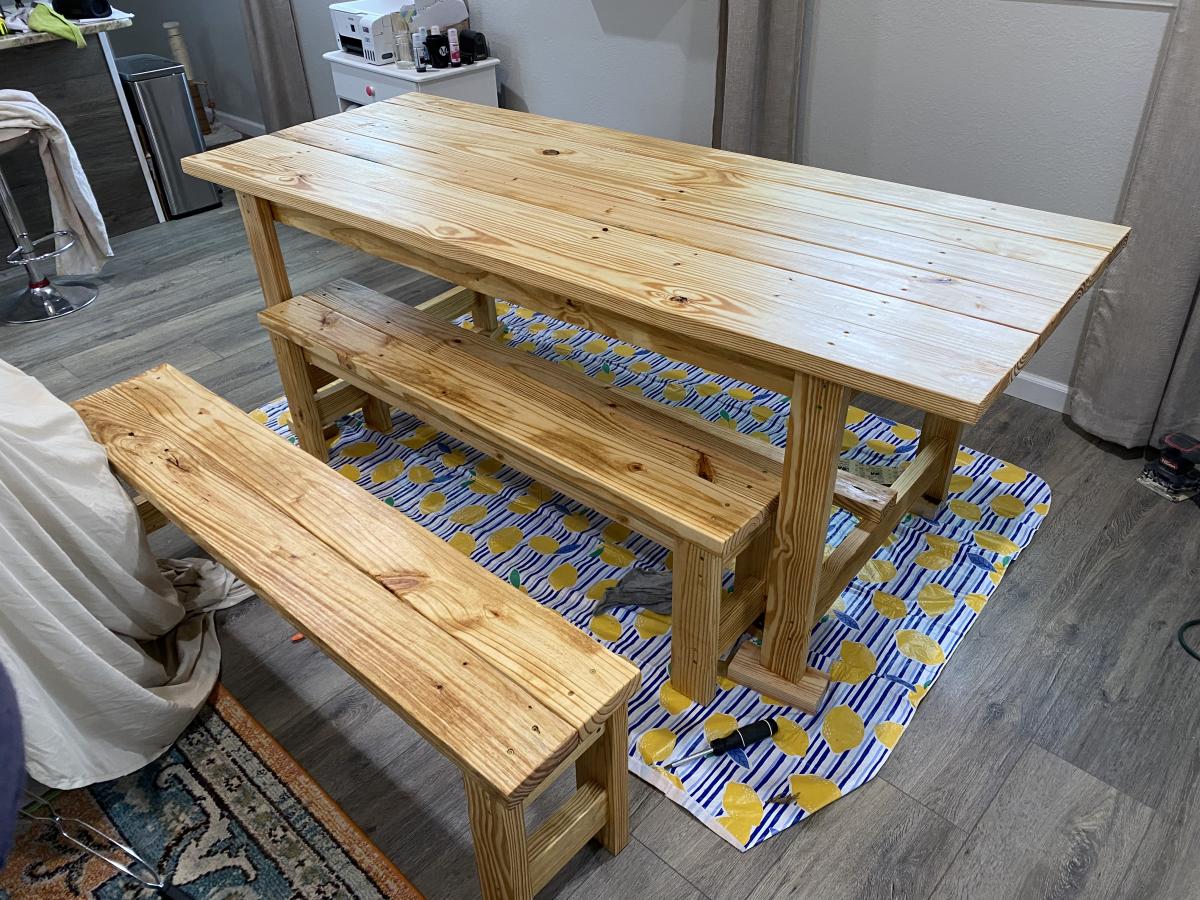
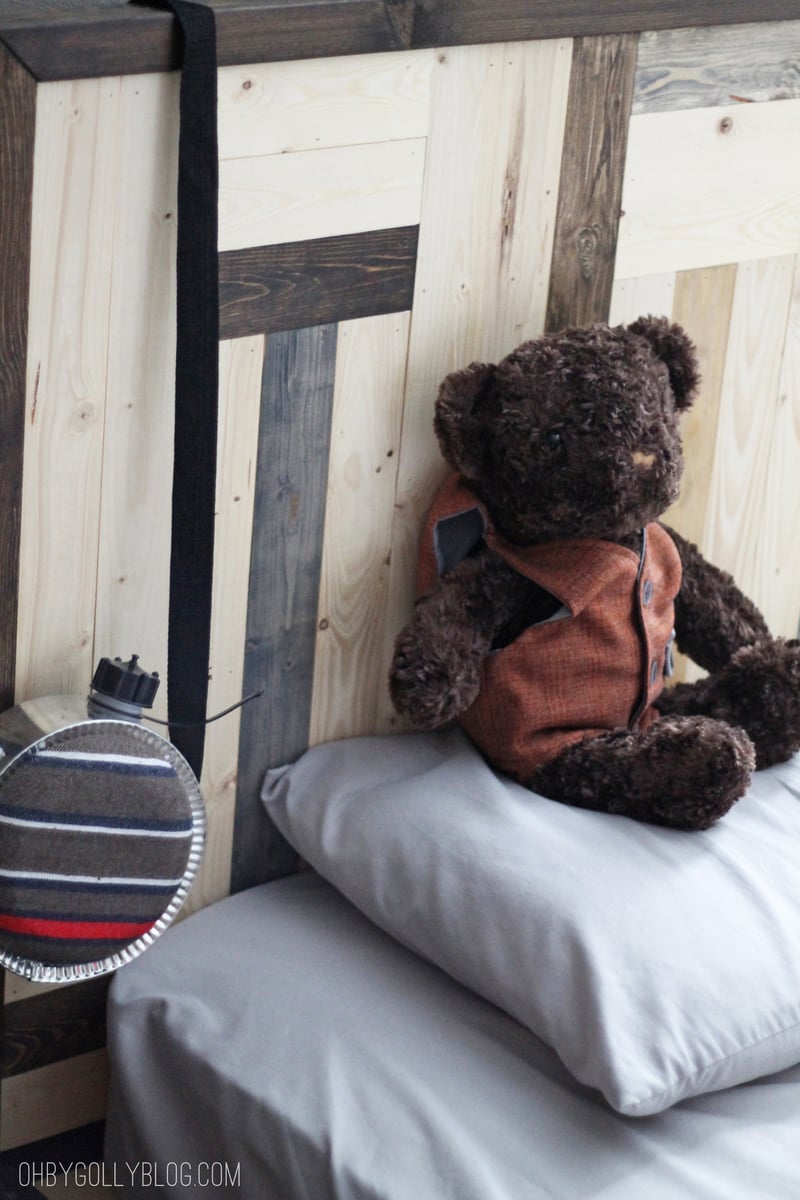
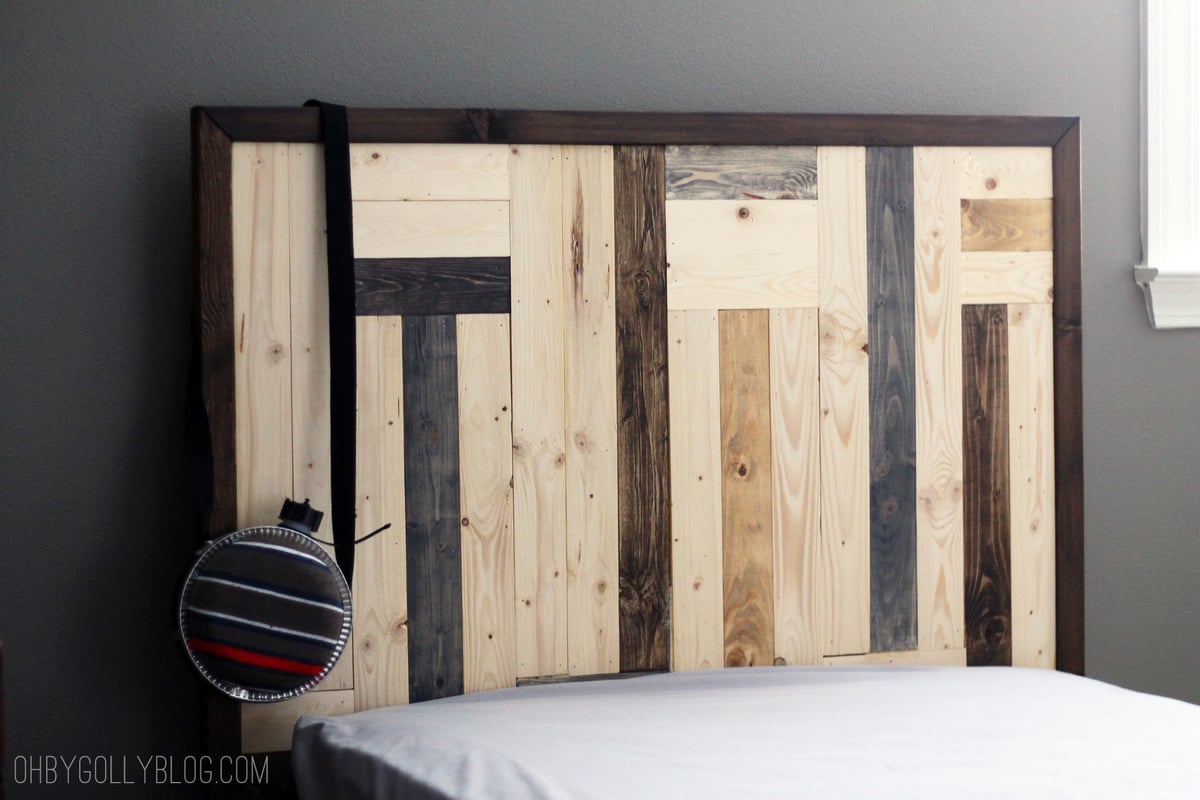
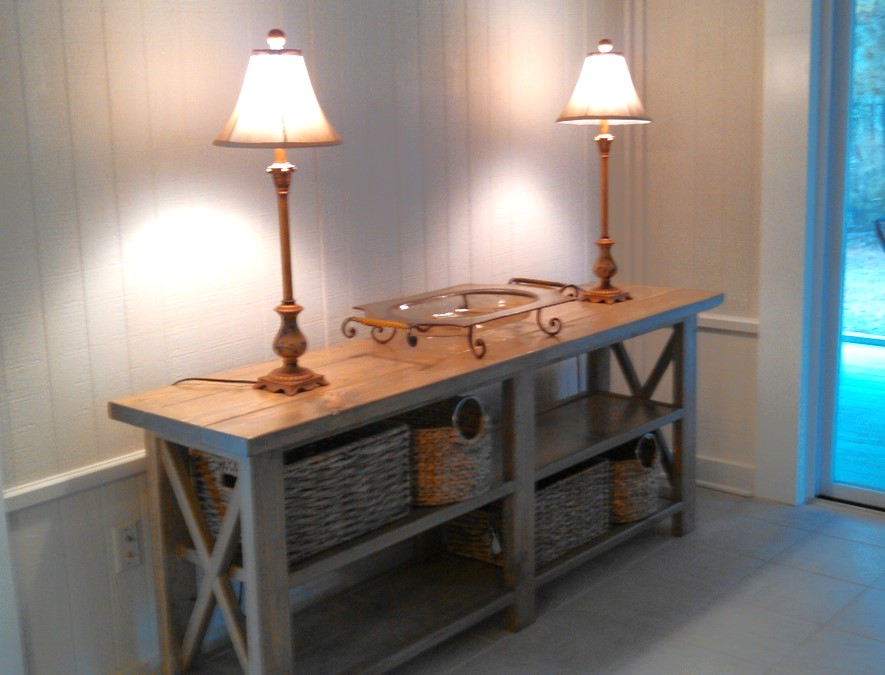
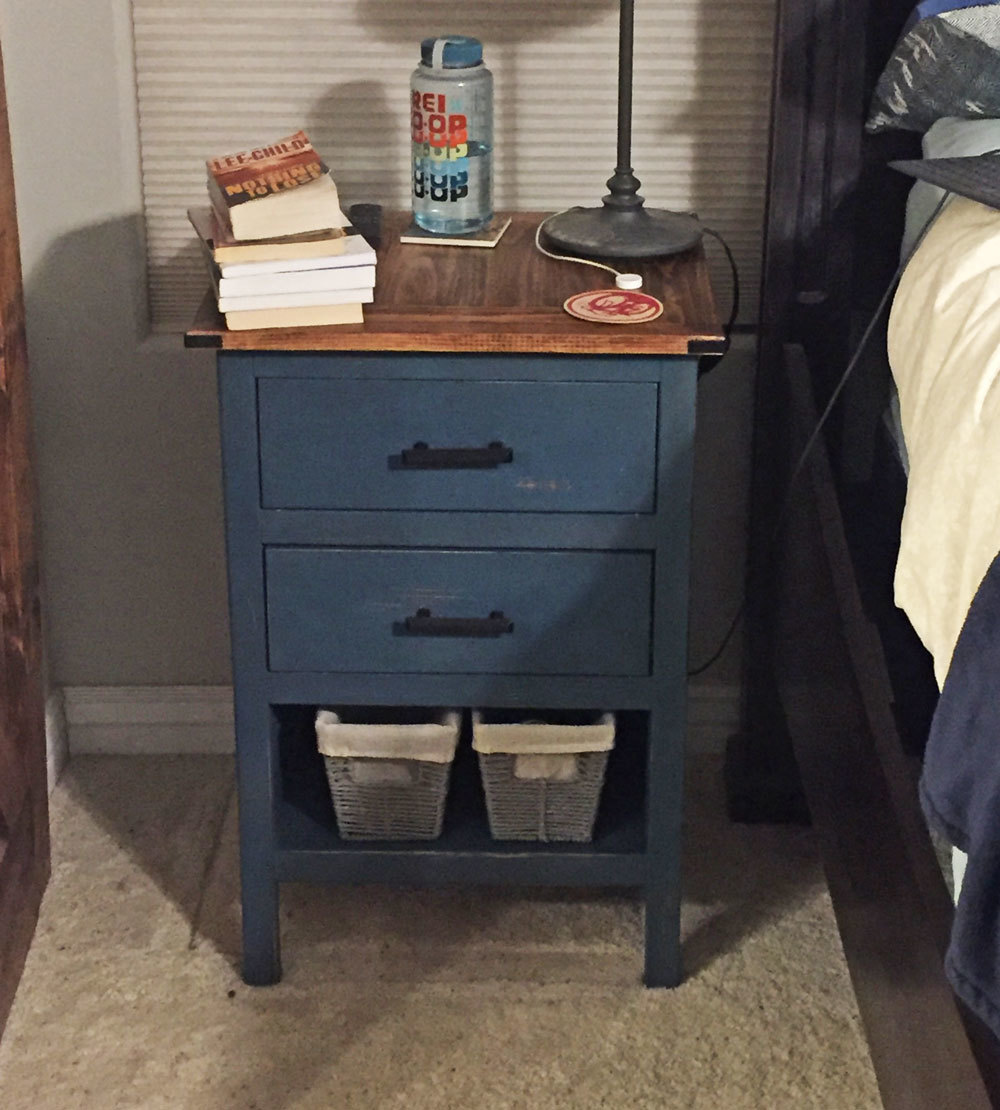
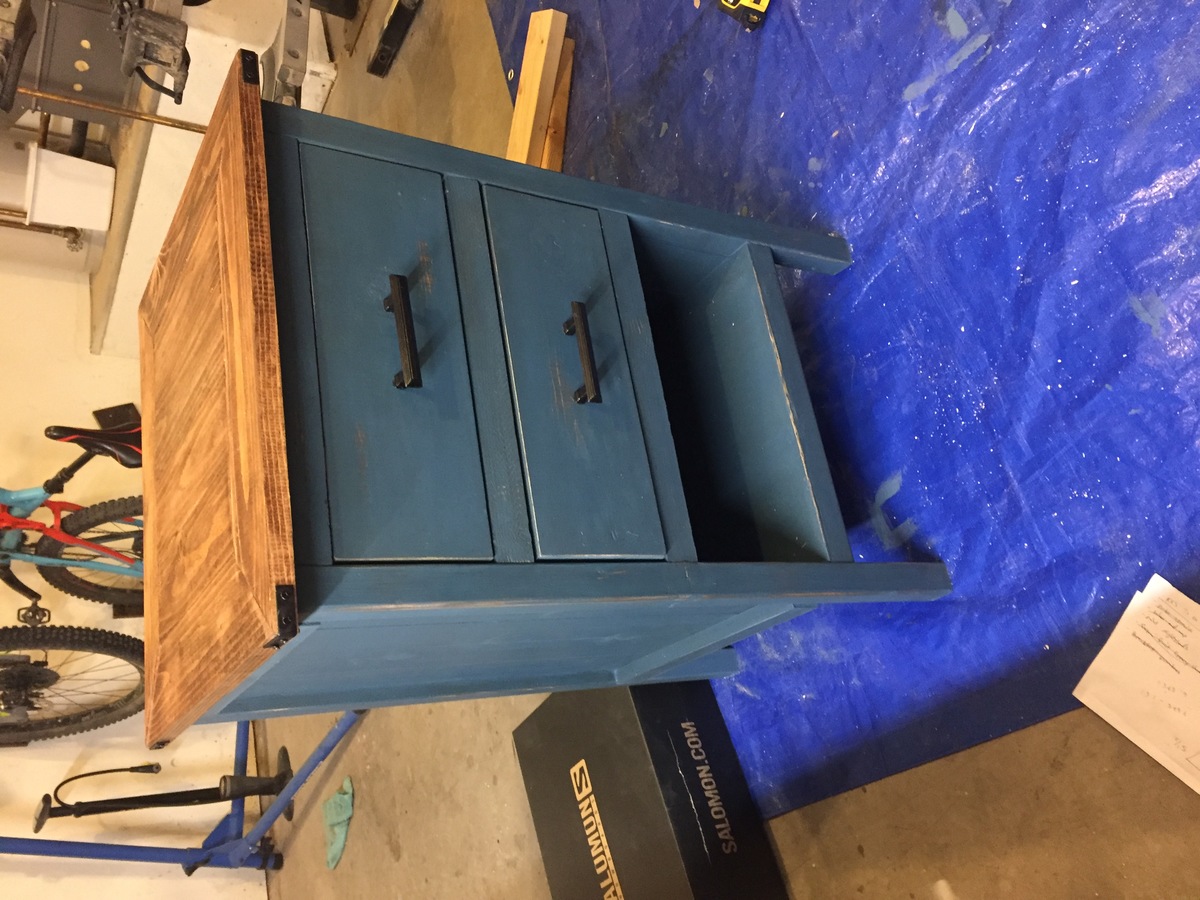
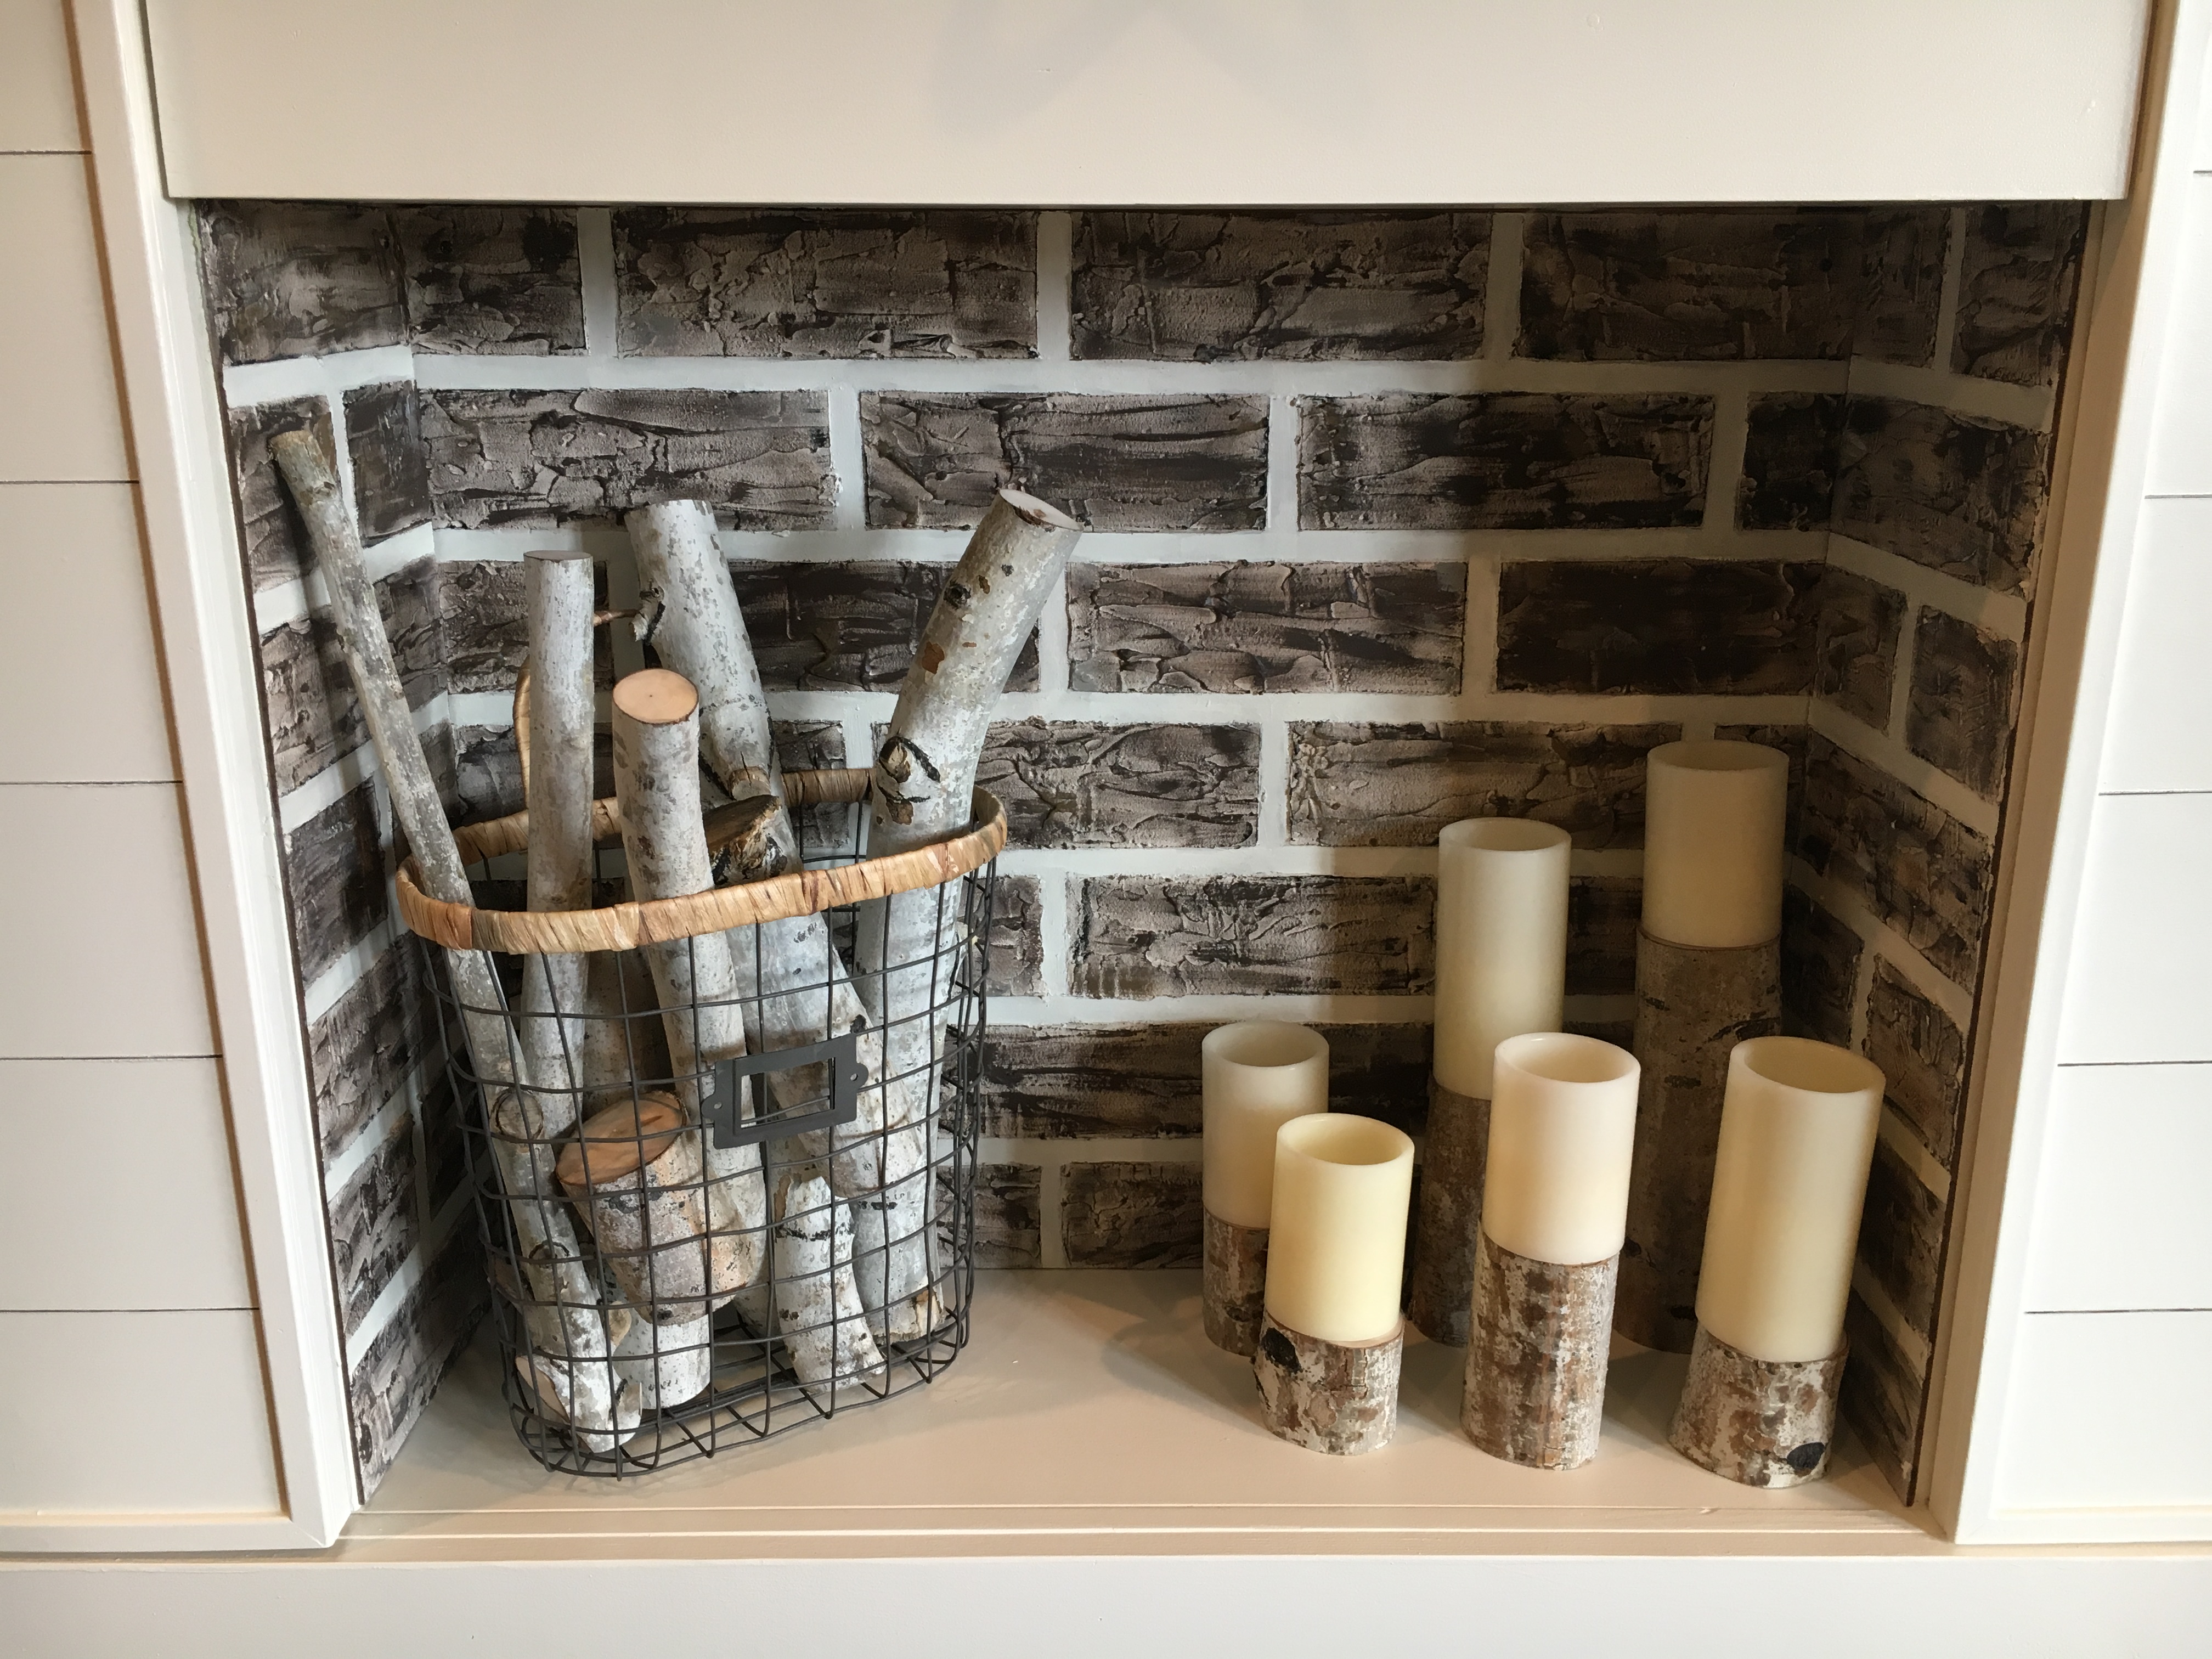
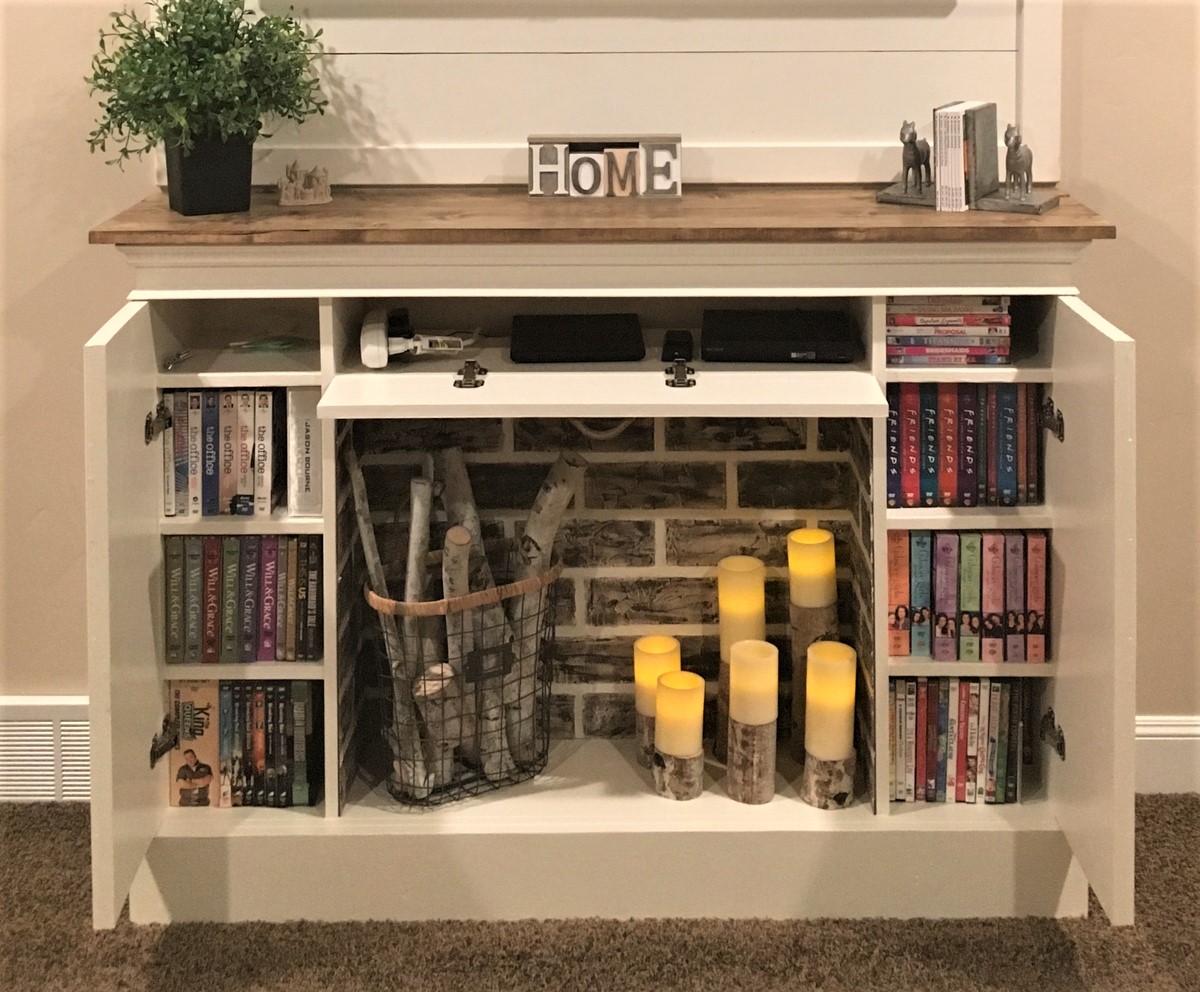
I used a tip from Ana and looked to the OOPS section at Home Depot. I had this color matched with a swatch, it didn't come out quite the color I intended, but I am happy with it. Its a little difficult to see in the picture, but the finish is quite flat.
Recommended Skill Level
Beginner

Red library cart

Submitted by Nomads on Sun, 10/06/2013 - 10:59

I've been eyeing the Land of Nod library cart for months!
...However, I wasn't sure about the price tag, so I started researching how to make it myself.
This is our first of many projects!

Built from Plan(s)
Estimated Time Investment
Afternoon Project (3-6 Hours)
Finish Used
Behr Premium Semi-gloss
Recommended Skill Level
Beginner

Standing Parson Tower Desk

Submitted by Anonymous (not verified) on Sun, 12/27/2015 - 11:08

I loved the simplicity and shelving of the Parson Tower desk plans but I really wanted a standing work station. I made it taller (approx. 40 in tall) and I made the desktop longer and wider (approx. 72 x 24in) and I LOVE it! 

Built from Plan(s)
Estimated Cost
$50
Estimated Time Investment
Weekend Project (10-20 Hours)
Recommended Skill Level
Beginner

Simple Farm Table

My mom and o completed this weekend project together! It was so fun to complete! The table is customized to 7ft and the benches made smaller than the original plans so they slide under the table when we’re not using it. We made it for our homeschool room. The kids are excited for this space already and we all have the room we need to get our work done! Under $200 start to finish! I used a prestain to prep the wood and then stained with watco danish oil in a natural finish.

Comments

Farmhouse Table - Thanks Ana!!

I tackled the Farmhouse Table over a long weekend while my boyfriend was away - he was surprised needless to say!
I have not attempted any woodwork projects since grade 8, but this was alot of fun - I did not find it very difficult and loove using power tools :)
I made the matching bench, however I guess I did not stir the bottom of the can well enough and my bench is now red :/ soo I am going to either stain it dark or paint it white and use it as a mudroom seat!

*I also made mine shorter - 7ft long to fit in our dining room and adjusted the bench to fit.

Estimated Cost
$160 for table & bench inc. wood, screws, stain, sand paper
Estimated Time Investment
Weekend Project (10-20 Hours)
Finish Used
I sanded it until I was pretty sure the risk of splinters was eliminated. After pre-stain conditioner, it got a coat of Minwax 'Ipswitch Pine'. The result was perfect on the table (two coats), however I must not have stirred the can well enough as my bench turned out dark red :/ I wanted it to look like it's 100 years old.
Recommended Skill Level
Beginner

Comments

Maggie Jaye

Fri, 10/07/2011 - 17:15

Thank you so much Ana! We are in the process of renovating our house and your website has inspired me to take on so many more projects now!! :)

Margaret Kubiszyn (not verified)

Sat, 10/08/2011 - 19:46

I love your choice of stain - it is beautiful!

Guest (not verified)

Wed, 11/02/2011 - 04:52

I built a similar table and I am having problems with my kids getting food in between the pieces of wood. Do you have this same problem, is anyone having this same problem? Does anyone have any suggestion as to how to fix it, how to keep food and other particles from getting trapped between the cracks? Thanks! You did a great job!!

Guest (not verified)

Wed, 11/23/2011 - 15:00

I am building this table as we speak. The thought occurred to me as well concerning the cracks attracting crumbs. I believe using clamps to make the fit as tight as possible will help. Also some poly finishes may be appropriate with children which may even seal the cracks... if sanded and clamped well.

Maggie Jaye

Wed, 11/23/2011 - 15:11

I did try my best to clamp the wood together as tight as possible - due to the pieces of wood not being completely straight, they are there.

I haven't had this problem yet. I do use place mats when eating at the table, that generally stops any crumbs etc.That's probably the easiest way to avoid it :)

Thank you for your comments!

Custom Headboard and Filman Platform Bed

Submitted by ohbygolly on Mon, 10/07/2013 - 19:50

More images and details can be found at http://ohbygollyblog.com/?p=4029 Come visit me!

Estimated Cost
1 bed= $120
Estimated Time Investment
Weekend Project (10-20 Hours)
Finish Used
Minwax wood stains
Recommended Skill Level
Beginner

Comments

Handmade by horseminded

Only change to original plan was width of top.  Used 2  2x6 boards with 2x8 for middle board instead of 3 2x6 boards. One note: deck or porch spindles are less than 2 inches and will not fit tightly against the shelf boards. .Cut the lengths form 8ft 2x2 and sand smooth.


Built from Plan(s)
Estimated Cost
$60
Estimated Time Investment
Weekend Project (10-20 Hours)
Finish Used
Minwax Weathered Oak stain with 3 top coats of waterbased Polycrylic, semigloss
Recommended Skill Level
Intermediate

Blue Nightstand with Open Shelf

Submitted by Anonymous (not verified) on Wed, 03/06/2019 - 18:22

Awesome night stand designs we needed. We increased the height to match our bed height. We finished with honey stain on top and Anne Sloan chalk paint that we distressed for the body

Estimated Time Investment
Weekend Project (10-20 Hours)
Recommended Skill Level
Beginner

Comments

King Farmhouse Bed

Submitted by Pswag on Tue, 10/11/2011 - 14:08

Modified the bed so that is was not as tall as the original project plan. We also changed the molding on the top to a 2x4 with a angle cut and then a 1x4 on top. The bed can only be positioned one way in the room and we didn't want to cover the window with a real high head board. Thank you Ana! You rock!!

Estimated Cost
$250
Estimated Time Investment
Week Long Project (20 Hours or More)
Finish Used
We used Cabot Red Oak stain and sprayed with Polyurethane clear gloss spray.
Recommended Skill Level
Beginner

Picnic Table for Two

I've got a full how-to and FREE PLANS at
http://www.iliketomakestuff.com/two-person-picnic-table/

The whole thing was built for under $60 and could be done with only a circular saw and a drill, in an afternoon.

(optionally, a router and sander can smooth out corners)

Estimated Cost
$60
Estimated Time Investment
Afternoon Project (3-6 Hours)
Recommended Skill Level
Beginner

Laundry Pedestal

This was a pretty simple project that saved me hundreds and is more functional.  I built it to fit our laundry baskets, unfortunately I didn't take a photo of the washer/dryer in place.  I've used it for several years now without any issues.  This was one of my first builds and it was a good one.

Estimated Time Investment
Afternoon Project (3-6 Hours)
Recommended Skill Level
Beginner

Faux fireplace with hidden storage

Submitted by Anonymous (not verified) on Sun, 03/10/2019 - 22:32

I slightly modified my build. I kept the same dimensions as the plans, but made the top shelf 7” from the top to allow for a bigger firebox. I added faux brick made from masking tape, joint compound and chalk paint. I changed the molding a bit and used 3” pine slats for the top. Inside I added 3 shelves, attached with pocket hole screws, to fit in as many DVD’s as possible. Overall this was an easy build. It took me almost as long to paint it, as to build it. Thank you Ana for the plans!

Estimated Cost
$200.00
Estimated Time Investment
Weekend Project (10-20 Hours)
Finish Used
Painted with Sherwin Williams Alabaster. Faux brick is chalk paint from Waverly.
Recommended Skill Level
Beginner