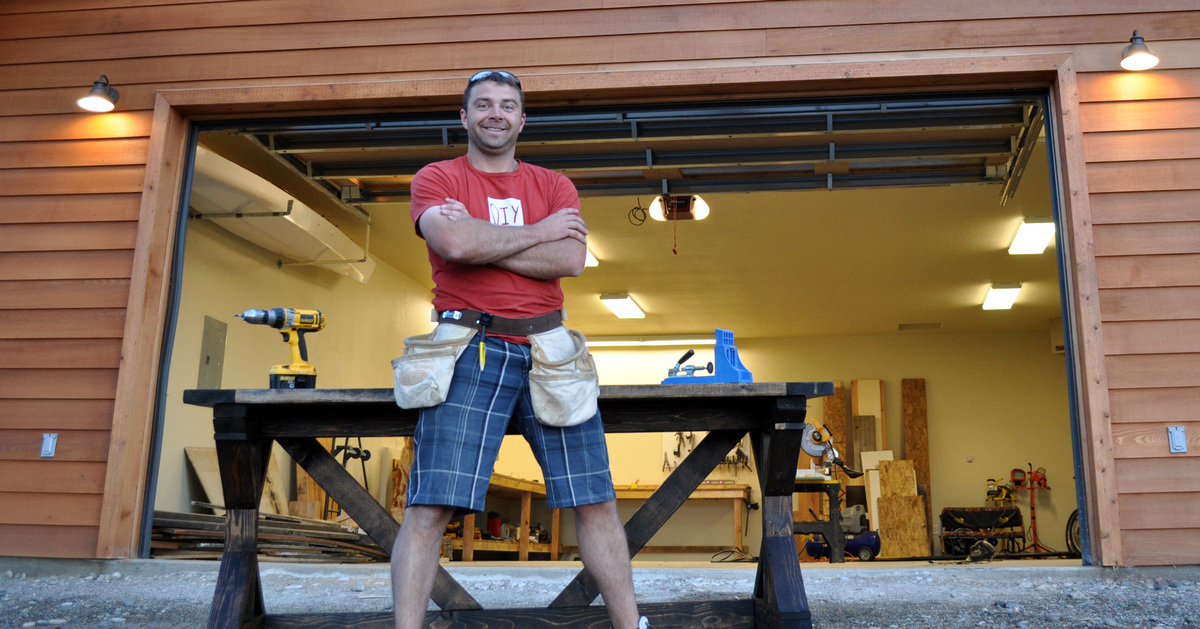
Community Brag Posts
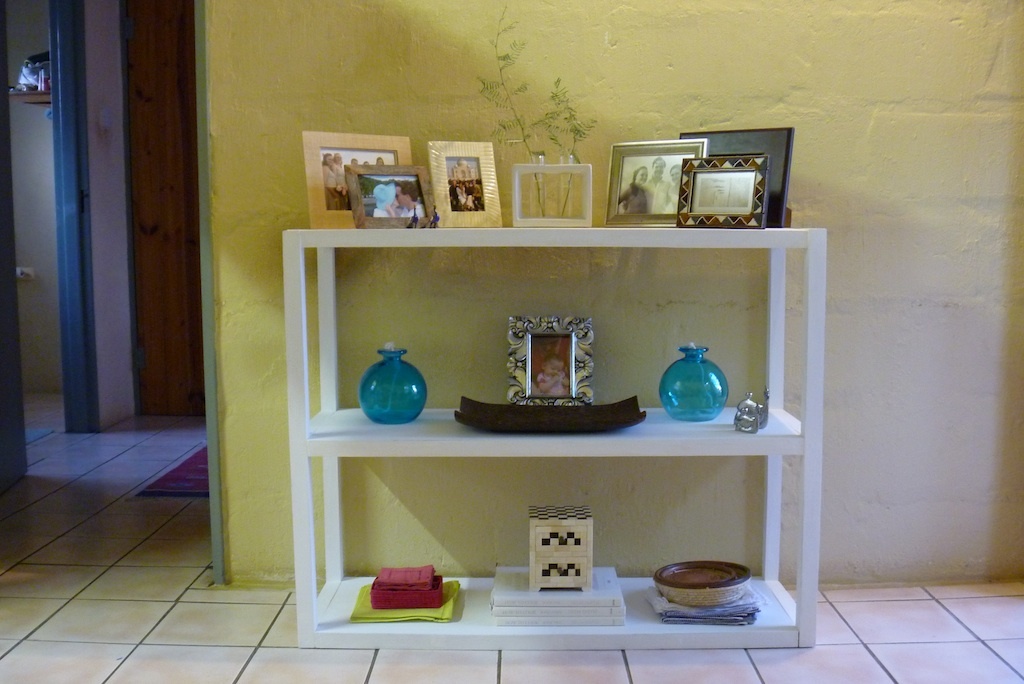
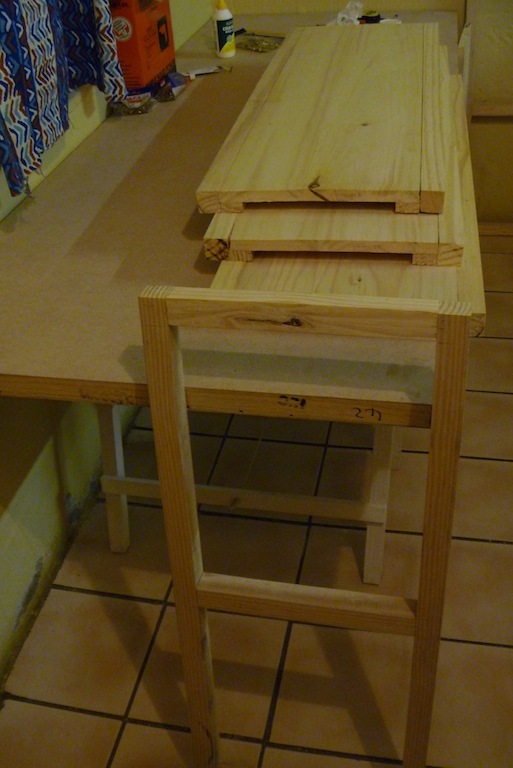
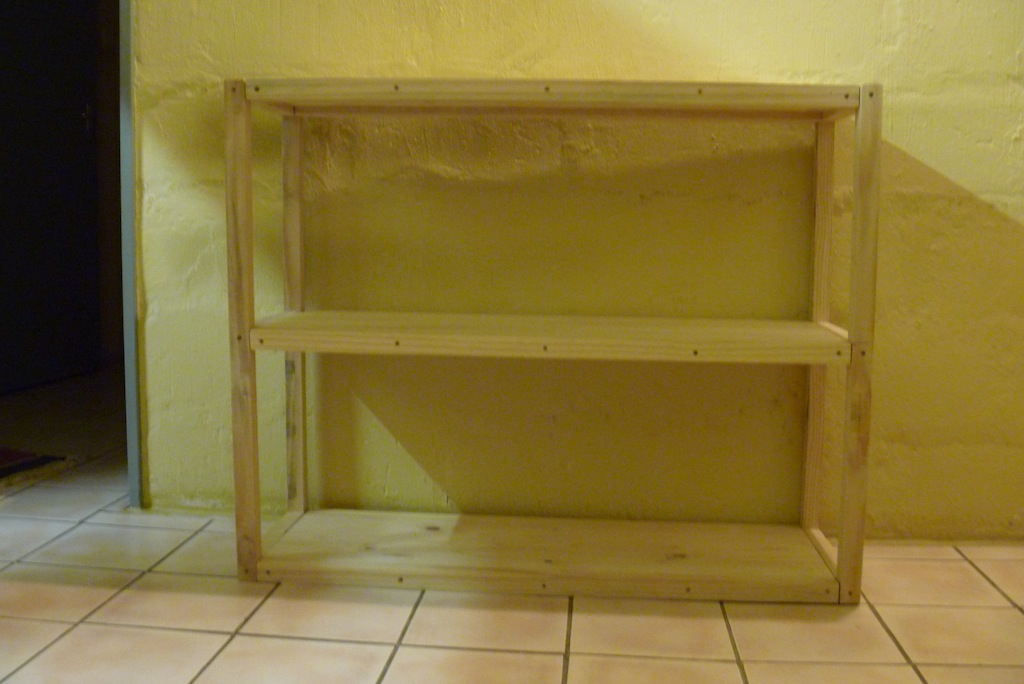
Live Edge Shelf
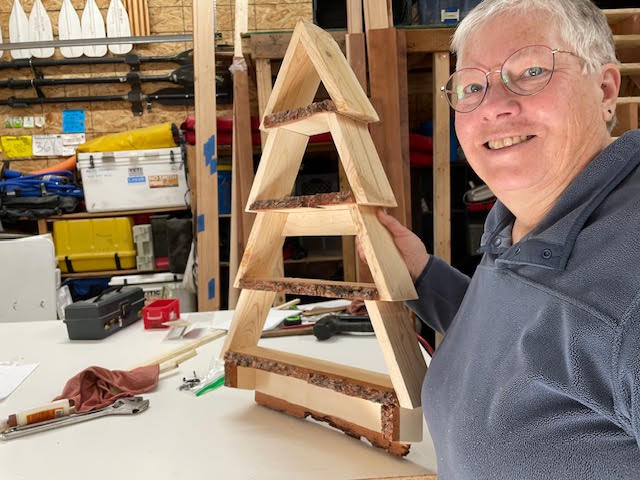
Live edge Christmas tree shelf.
Built from Plan(s)
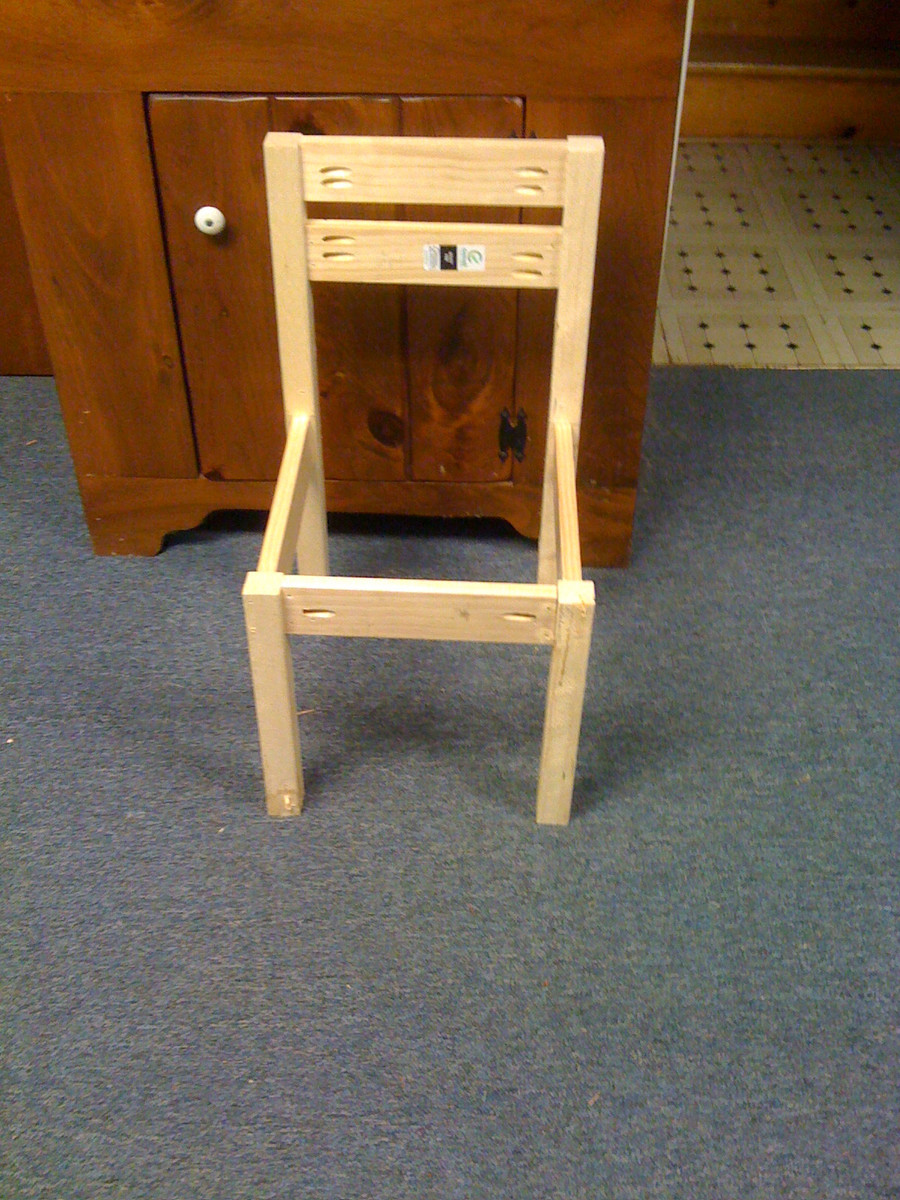
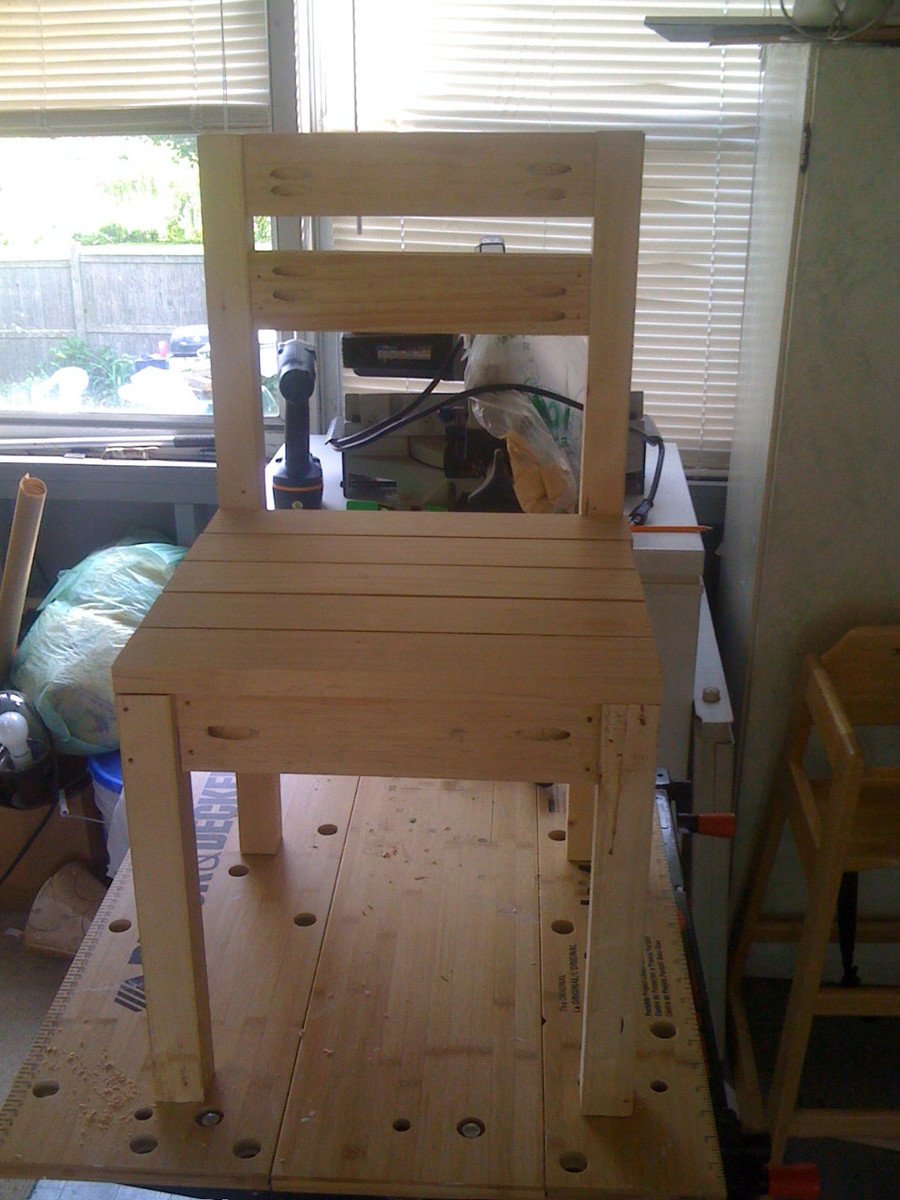
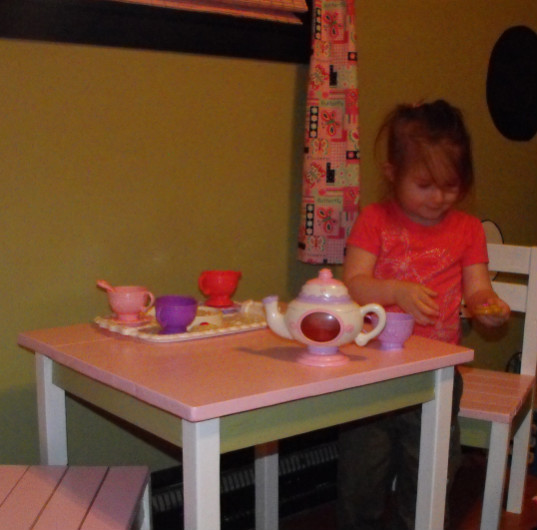
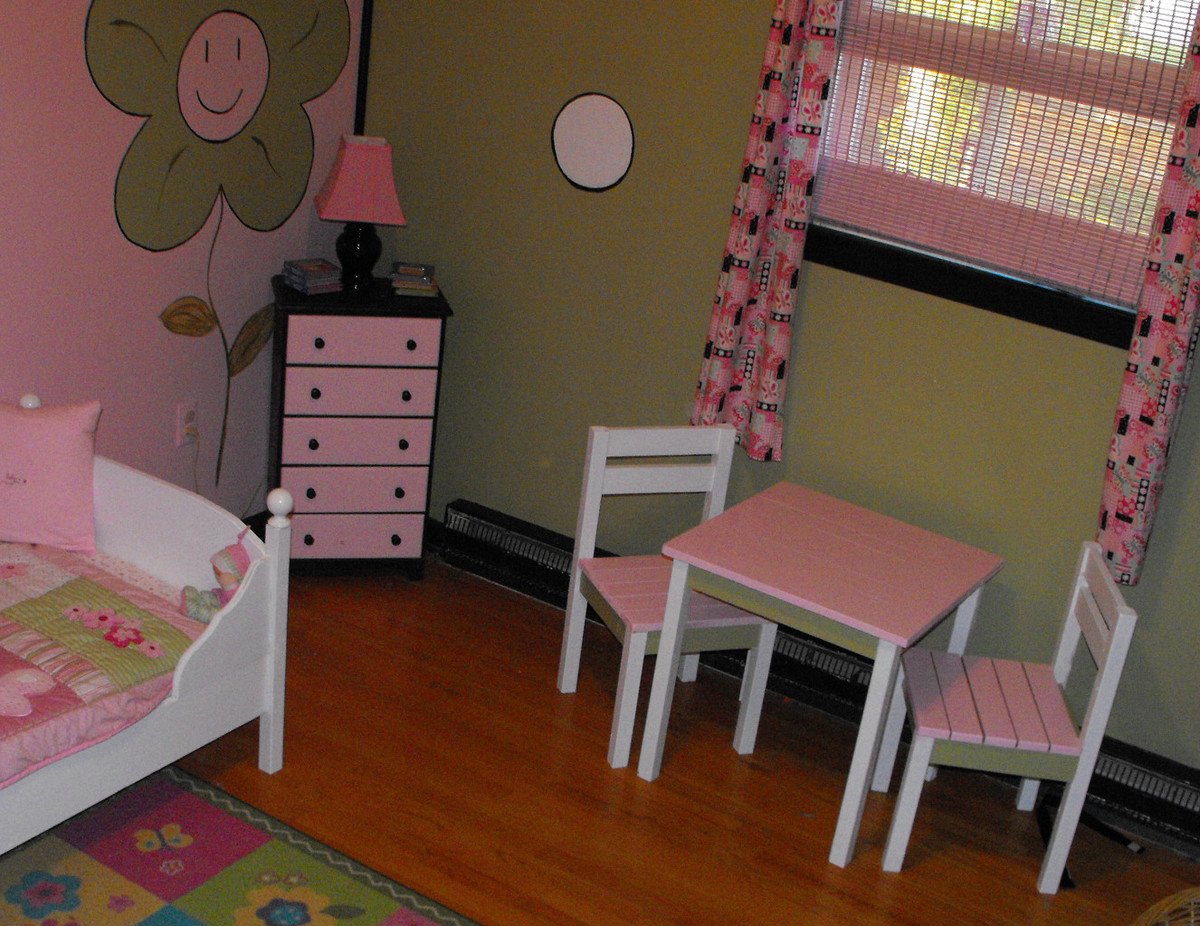
Marlee's Table and Chairs
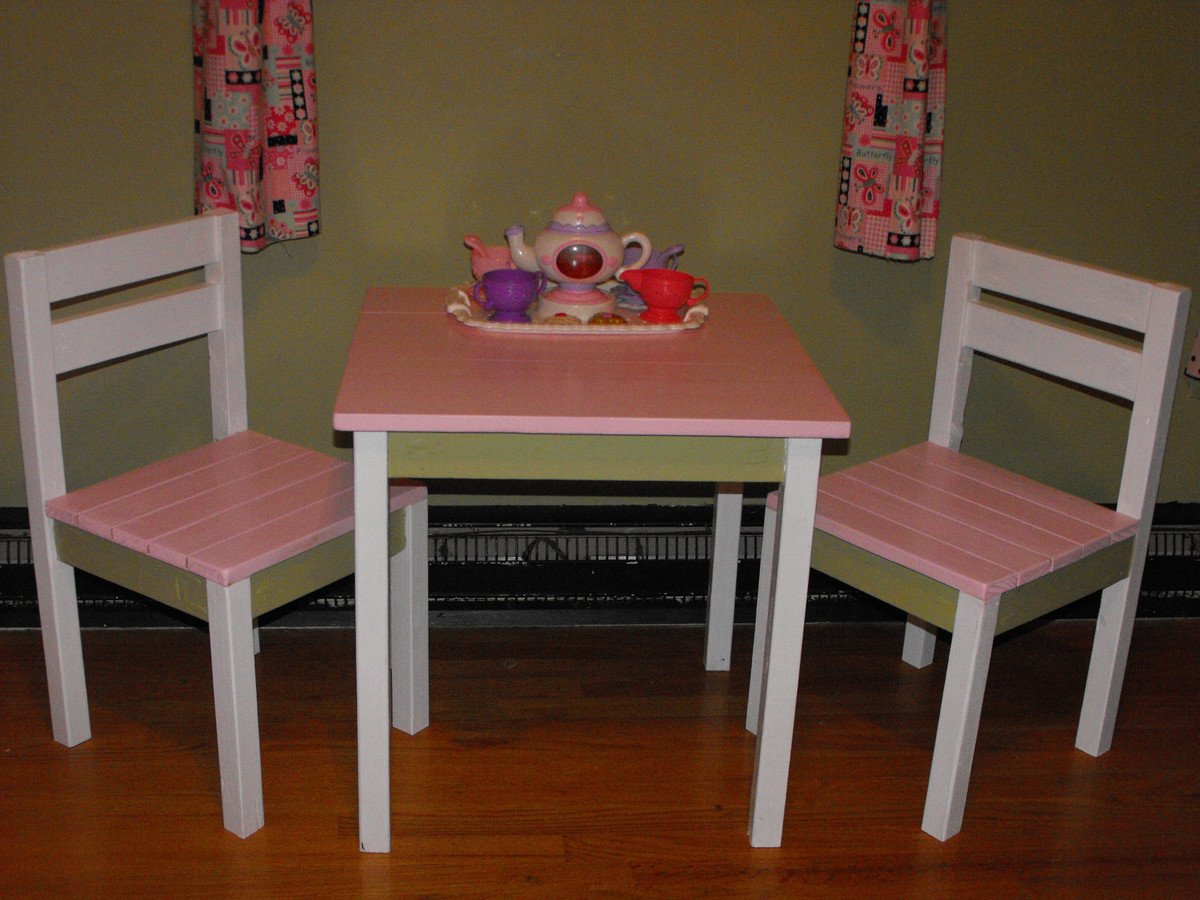
I modified the Clara table and a few of the chair plans to come up with Marlee's new set. I had scrap 2x2s, 1x6s and 1x3s from the Lydia Toddler Bed and so I modified the dimensions a bit and used 3 boards 1x6 and 2 1x3 to make up the table top. The chairs are a combination of the Four Dollar Stackable Chair and the Classic Chairs Made Simple. I kept splitting the wood on the legs for the Four Dollar chair, so I modified the plan to have the legs 2x2 like the table and bed. It was a lot of trial and error but I finally got it right... The only thing was I had already cut the seat slats to size so I used them as the seat supports and so I only had to purchase two 2x3x6, other wise every thing else was scrap.
She was so excited to see it... we already had 3 tea parties!! Thanks to you Ana for your inspiration. I so can't wait to start the doll high chair for Marlee's next surprise!!!
Built from Plan(s)
Estimated Cost
Only spent $12.
Finish Used
3 coats of paint and 3 coats of poly. Pink is Sherwin Williams Azalea Flower, Green is Sherwin Williams Rye Grass. The same colors on her walls.
Recommended Skill Level
Beginner
Comments
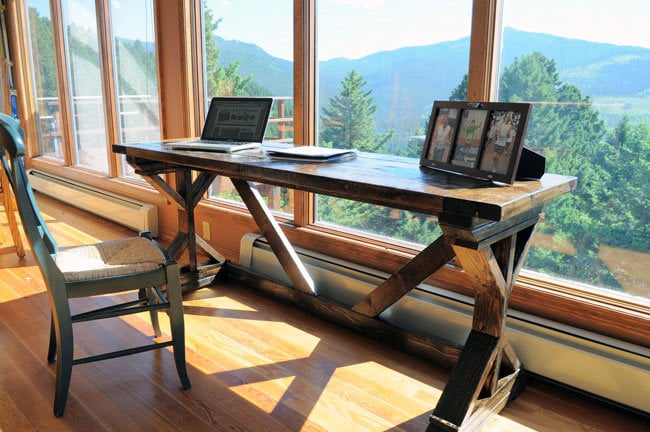
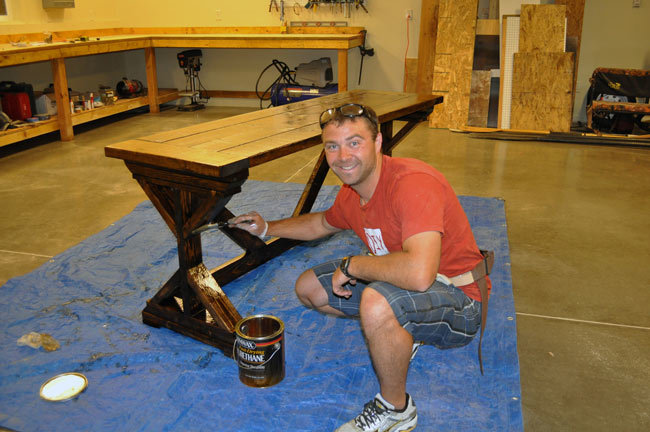
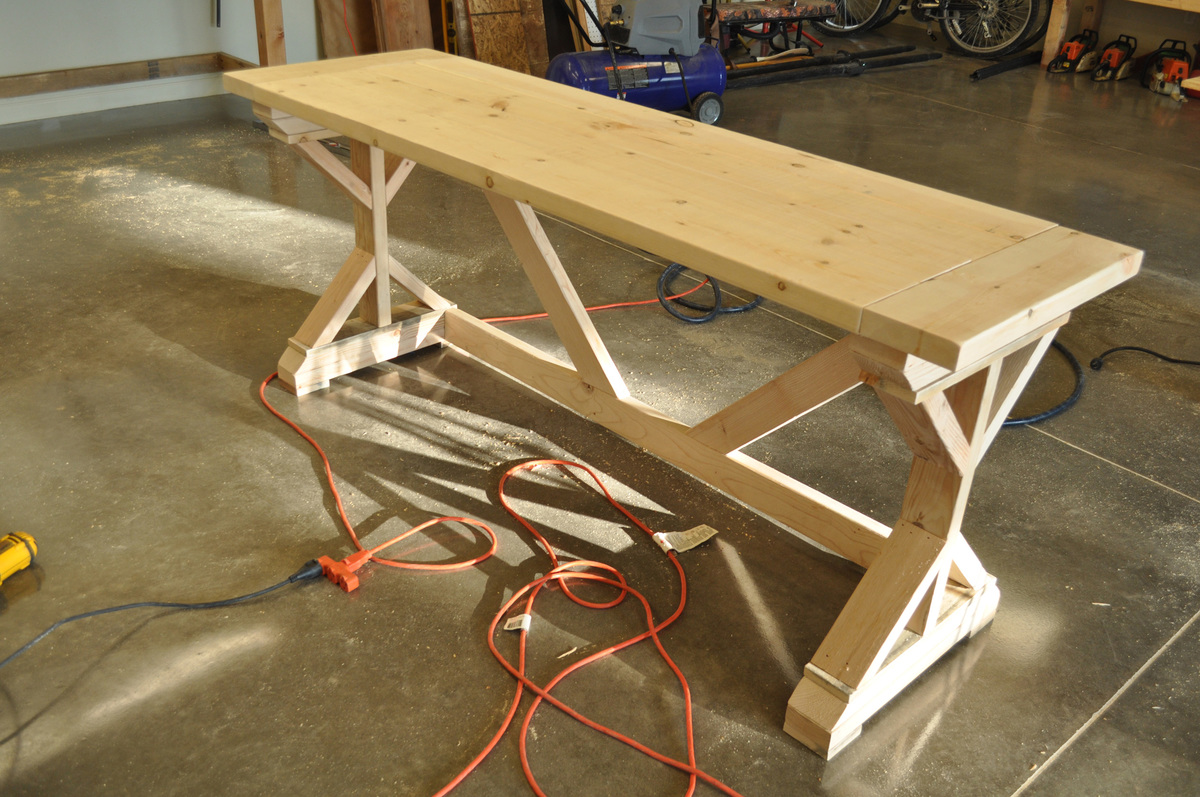
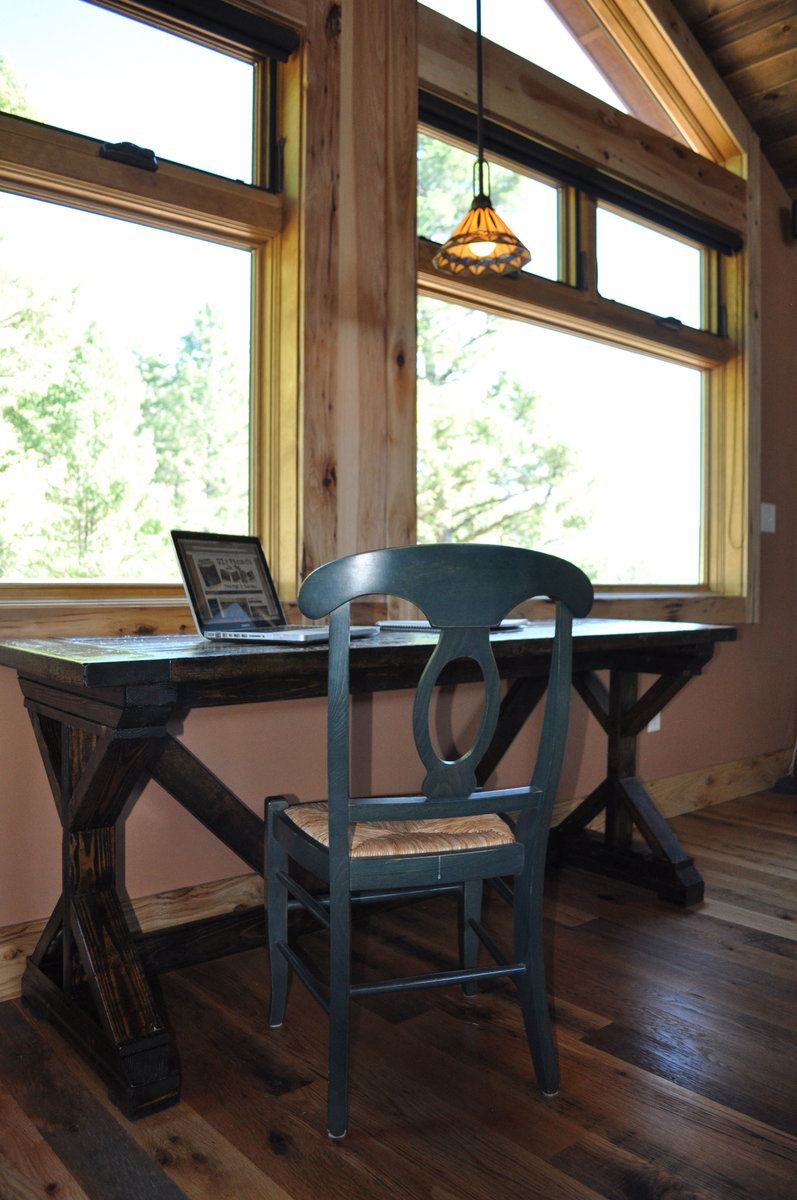
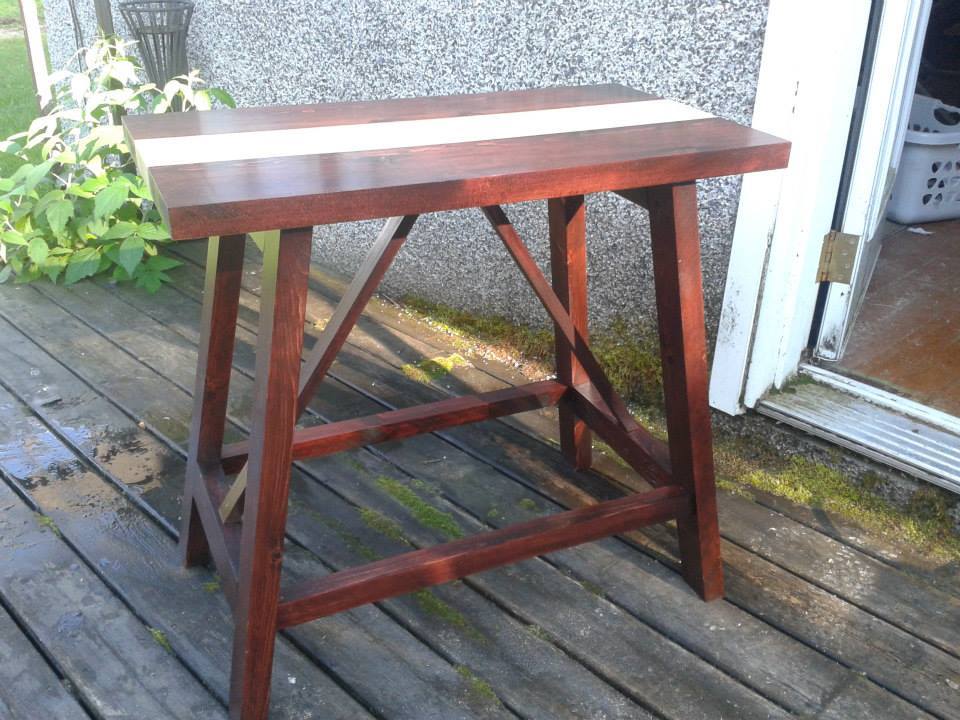
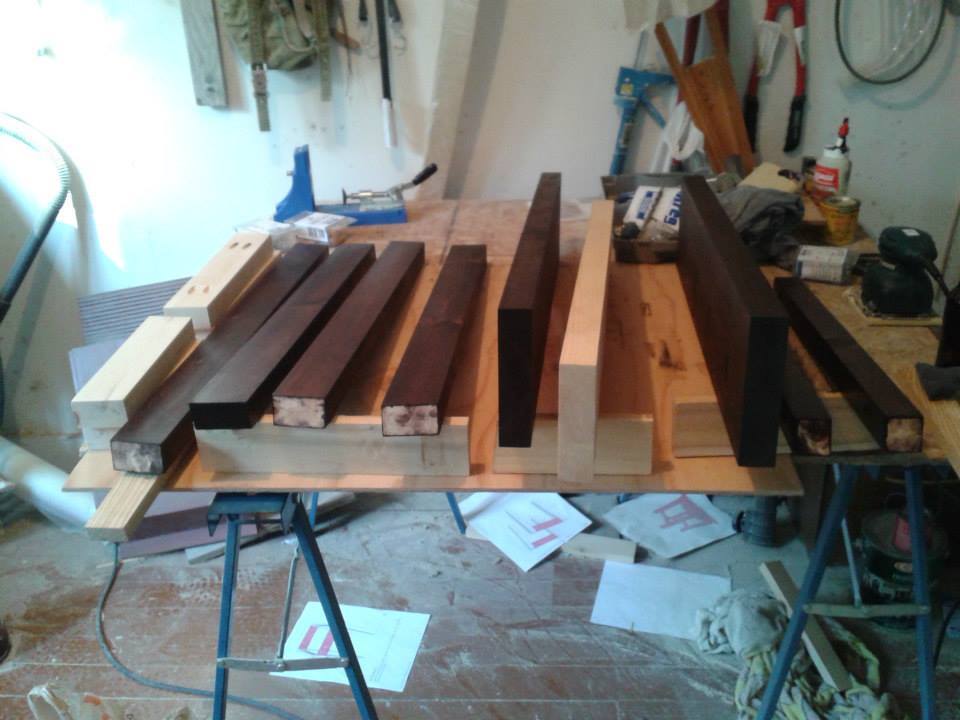
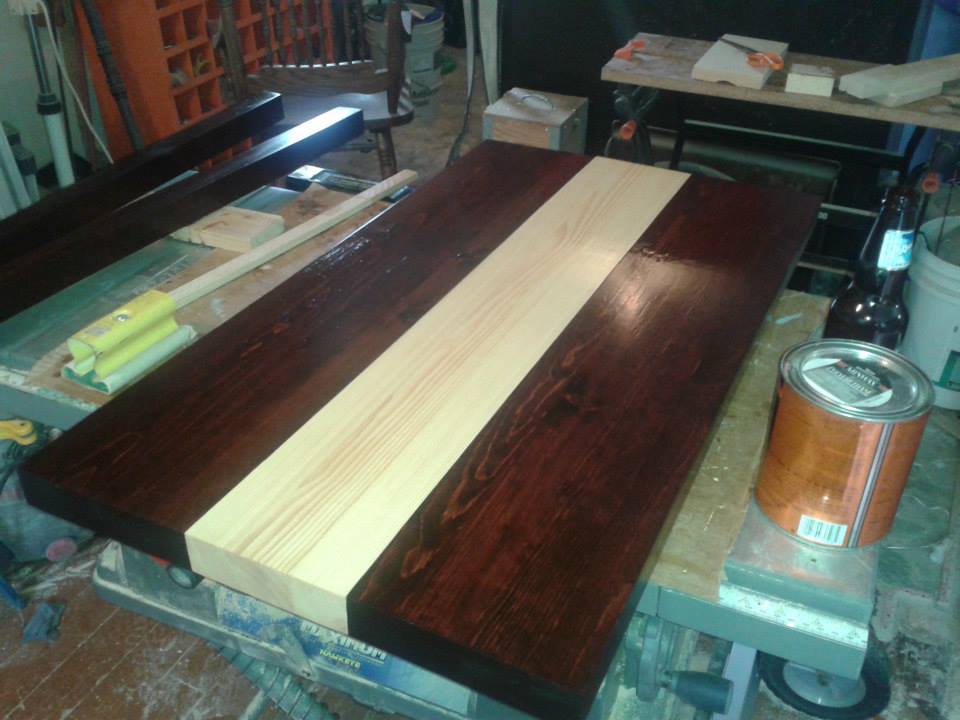
Fancy X Desk with Breadboard top
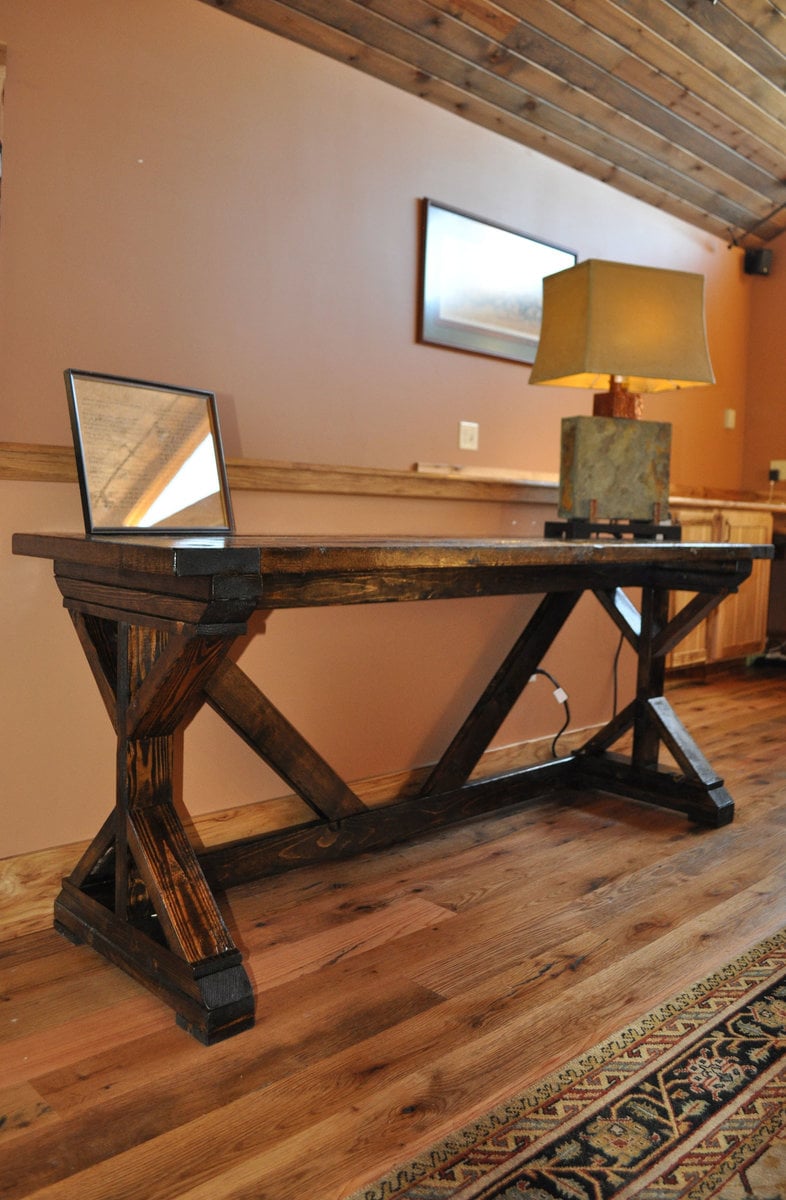
When I saw this project on Ana's site I had to make it. It turned out great and get's compliments from all my friends.
The only modifications I made were to the top. I used 2x6 boards and did breadboards on each end.
I documented my build with photos and did a 10 minute video tutorial showing the whole process of building Ana's table.
Built from Plan(s)
Estimated Cost
$55 For Lumber
Estimated Time Investment
Weekend Project (10-20 Hours)
Finish Used
Minwax Walnut Stain with 3 Coats of Polyurethane
Recommended Skill Level
Beginner
Comments
Mon, 02/09/2015 - 02:57
Nice Work!
I really like the stain you chose and the overall project! The breadboard ends adds a little something more...I may do the same when I get around to making this desk!
Oversized Reclaimed Barn Wood Dining Table Set
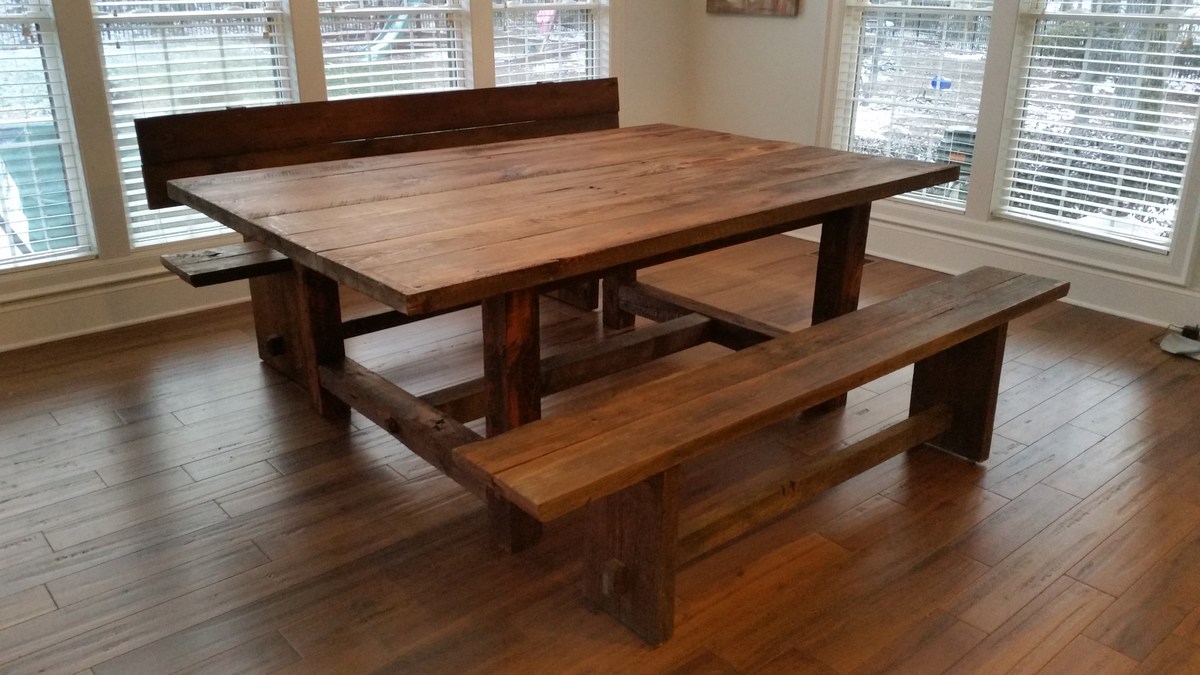
This oversized reclaimed barn wood dining table measures a whopping 96″ by 54″ – that’s quite a dining room table, with seating options to easily fit ten people. You can comfortably sit three adults on each side of the table, while also accommodating two adults on each end. In a pinch, you could actually fit four adults on each side of this table while having the two still sit at the ends; having four kids on the sides would not be a problem at all.
This table top was constructed from 2×6 and 2×8 beams, while the base was built out of 4×6 and 4×4 posts. I believe “behemoth” may be a proper word to describe it, as I even had to deliver the top in multiple pieces and assemble it on site. The benches were also constructed mostly from 2×6 beams harvested from the same barn as the material used in the table itself. We added a light coat of Provinicial stain to help bring out some uniformity in the color, and finished with a few coats of liquid wax to help protect the table. We informed the client of the trade offs of using a wax instead of a polyurethane, but they really preferred the “softness” of the wax finish and understood that they will have to reapply every year.
More pictures are available on our blog: http://famousartisan.com/oversized-reclaimed-barnwood-dining-room-table/
Estimated Time Investment
Weekend Project (10-20 Hours)
Finish Used
Provincial stain and liquid wax
Recommended Skill Level
Intermediate
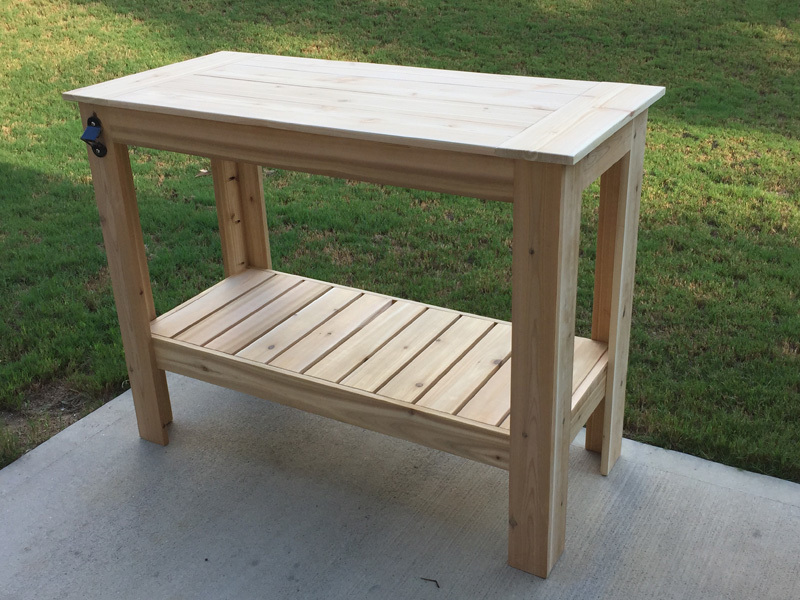
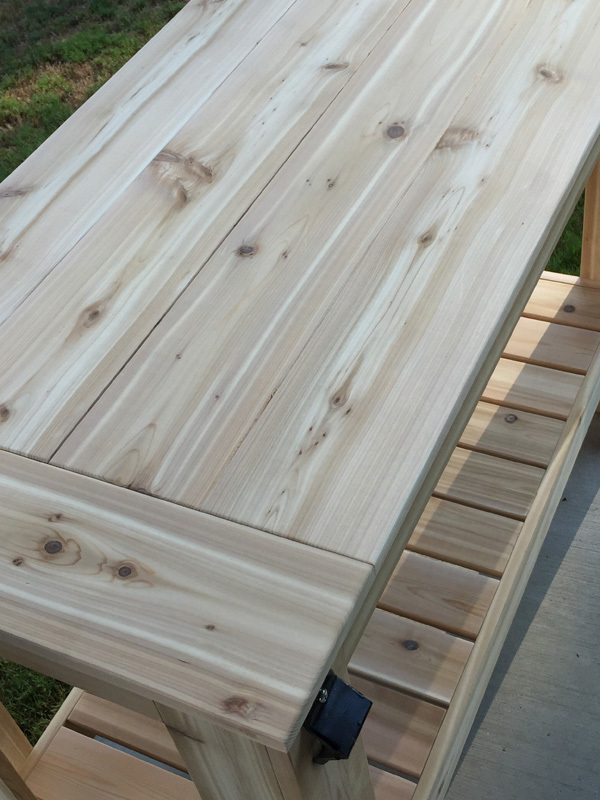
A "Kitchen Island" For our Deck
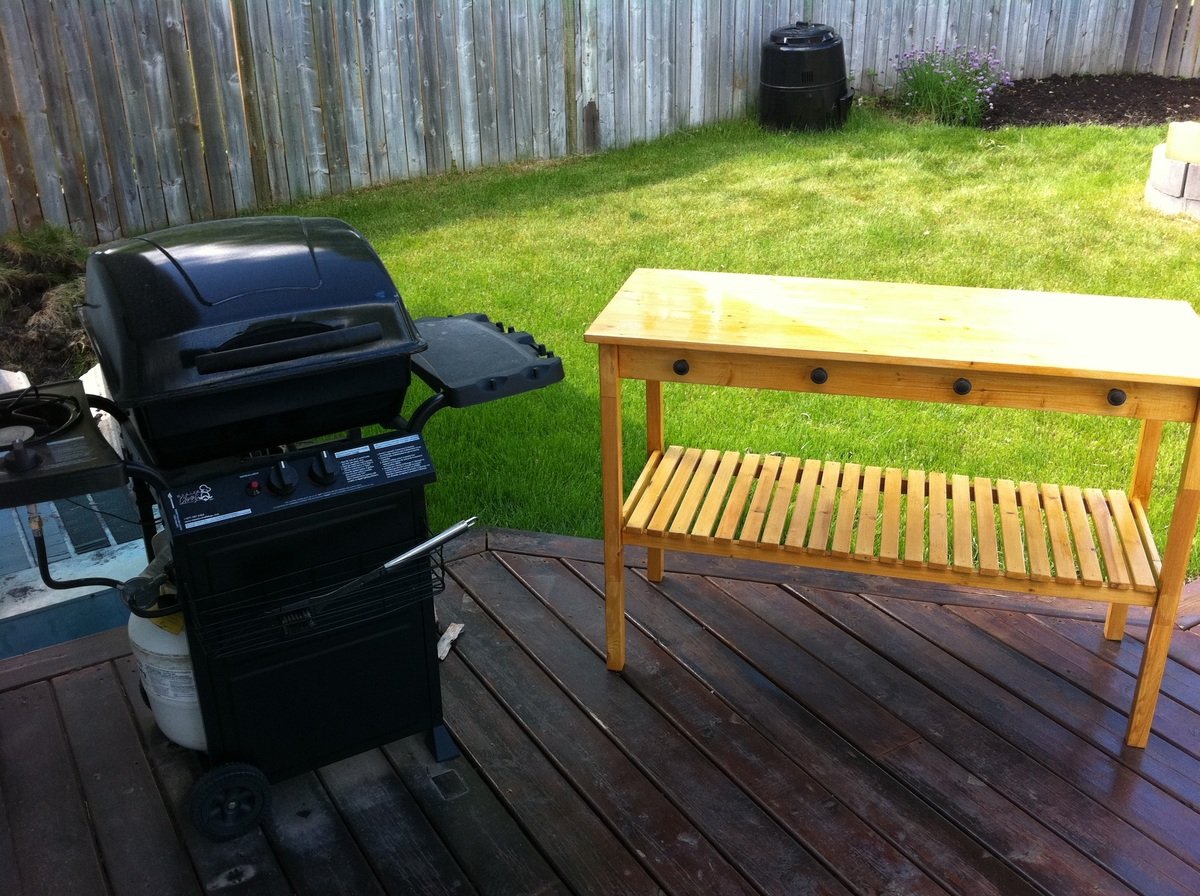
We needed a prep area for our BBQ, so I decided to use the plans for the Simple Kitchen Island. I made it a little bit narrower (20 inches rather than 24), and added drawer pulls to hang up our BBQ tools. It's coming in very handy!
Built from Plan(s)
Estimated Time Investment
Weekend Project (10-20 Hours)
Finish Used
Mildew resistant stain (natural colour), and 3 coats of polyurethane
Recommended Skill Level
Beginner
Comments

Wed, 06/15/2011 - 19:01
So Exciting!
Love how you used the plan! It looks great, and I bet it's a great prep-station and buffet area.
Modified changing table
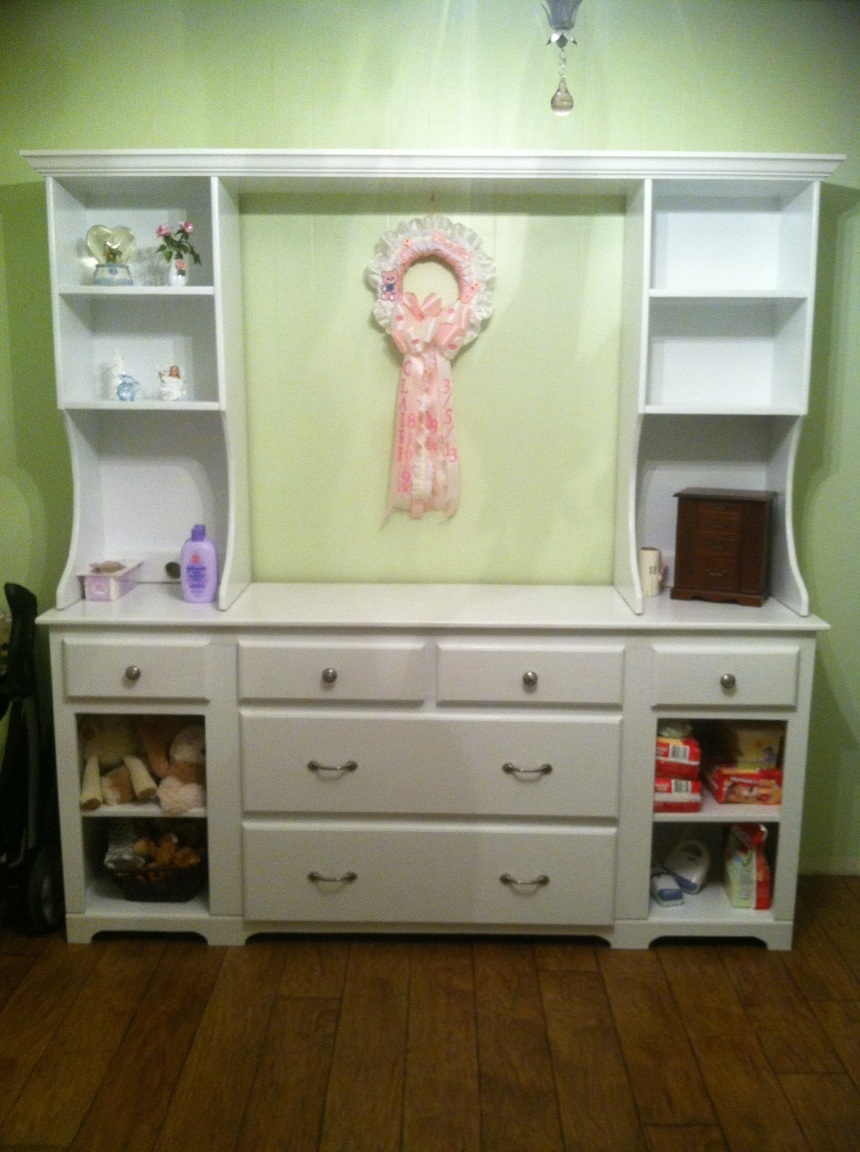
I used Ana's changing table plans to build this for my new granddaughter. I modified it to be more like a dresser that she will be able to use for many years.
Built from Plan(s)
Recommended Skill Level
Advanced
Comments

Cedar Planter
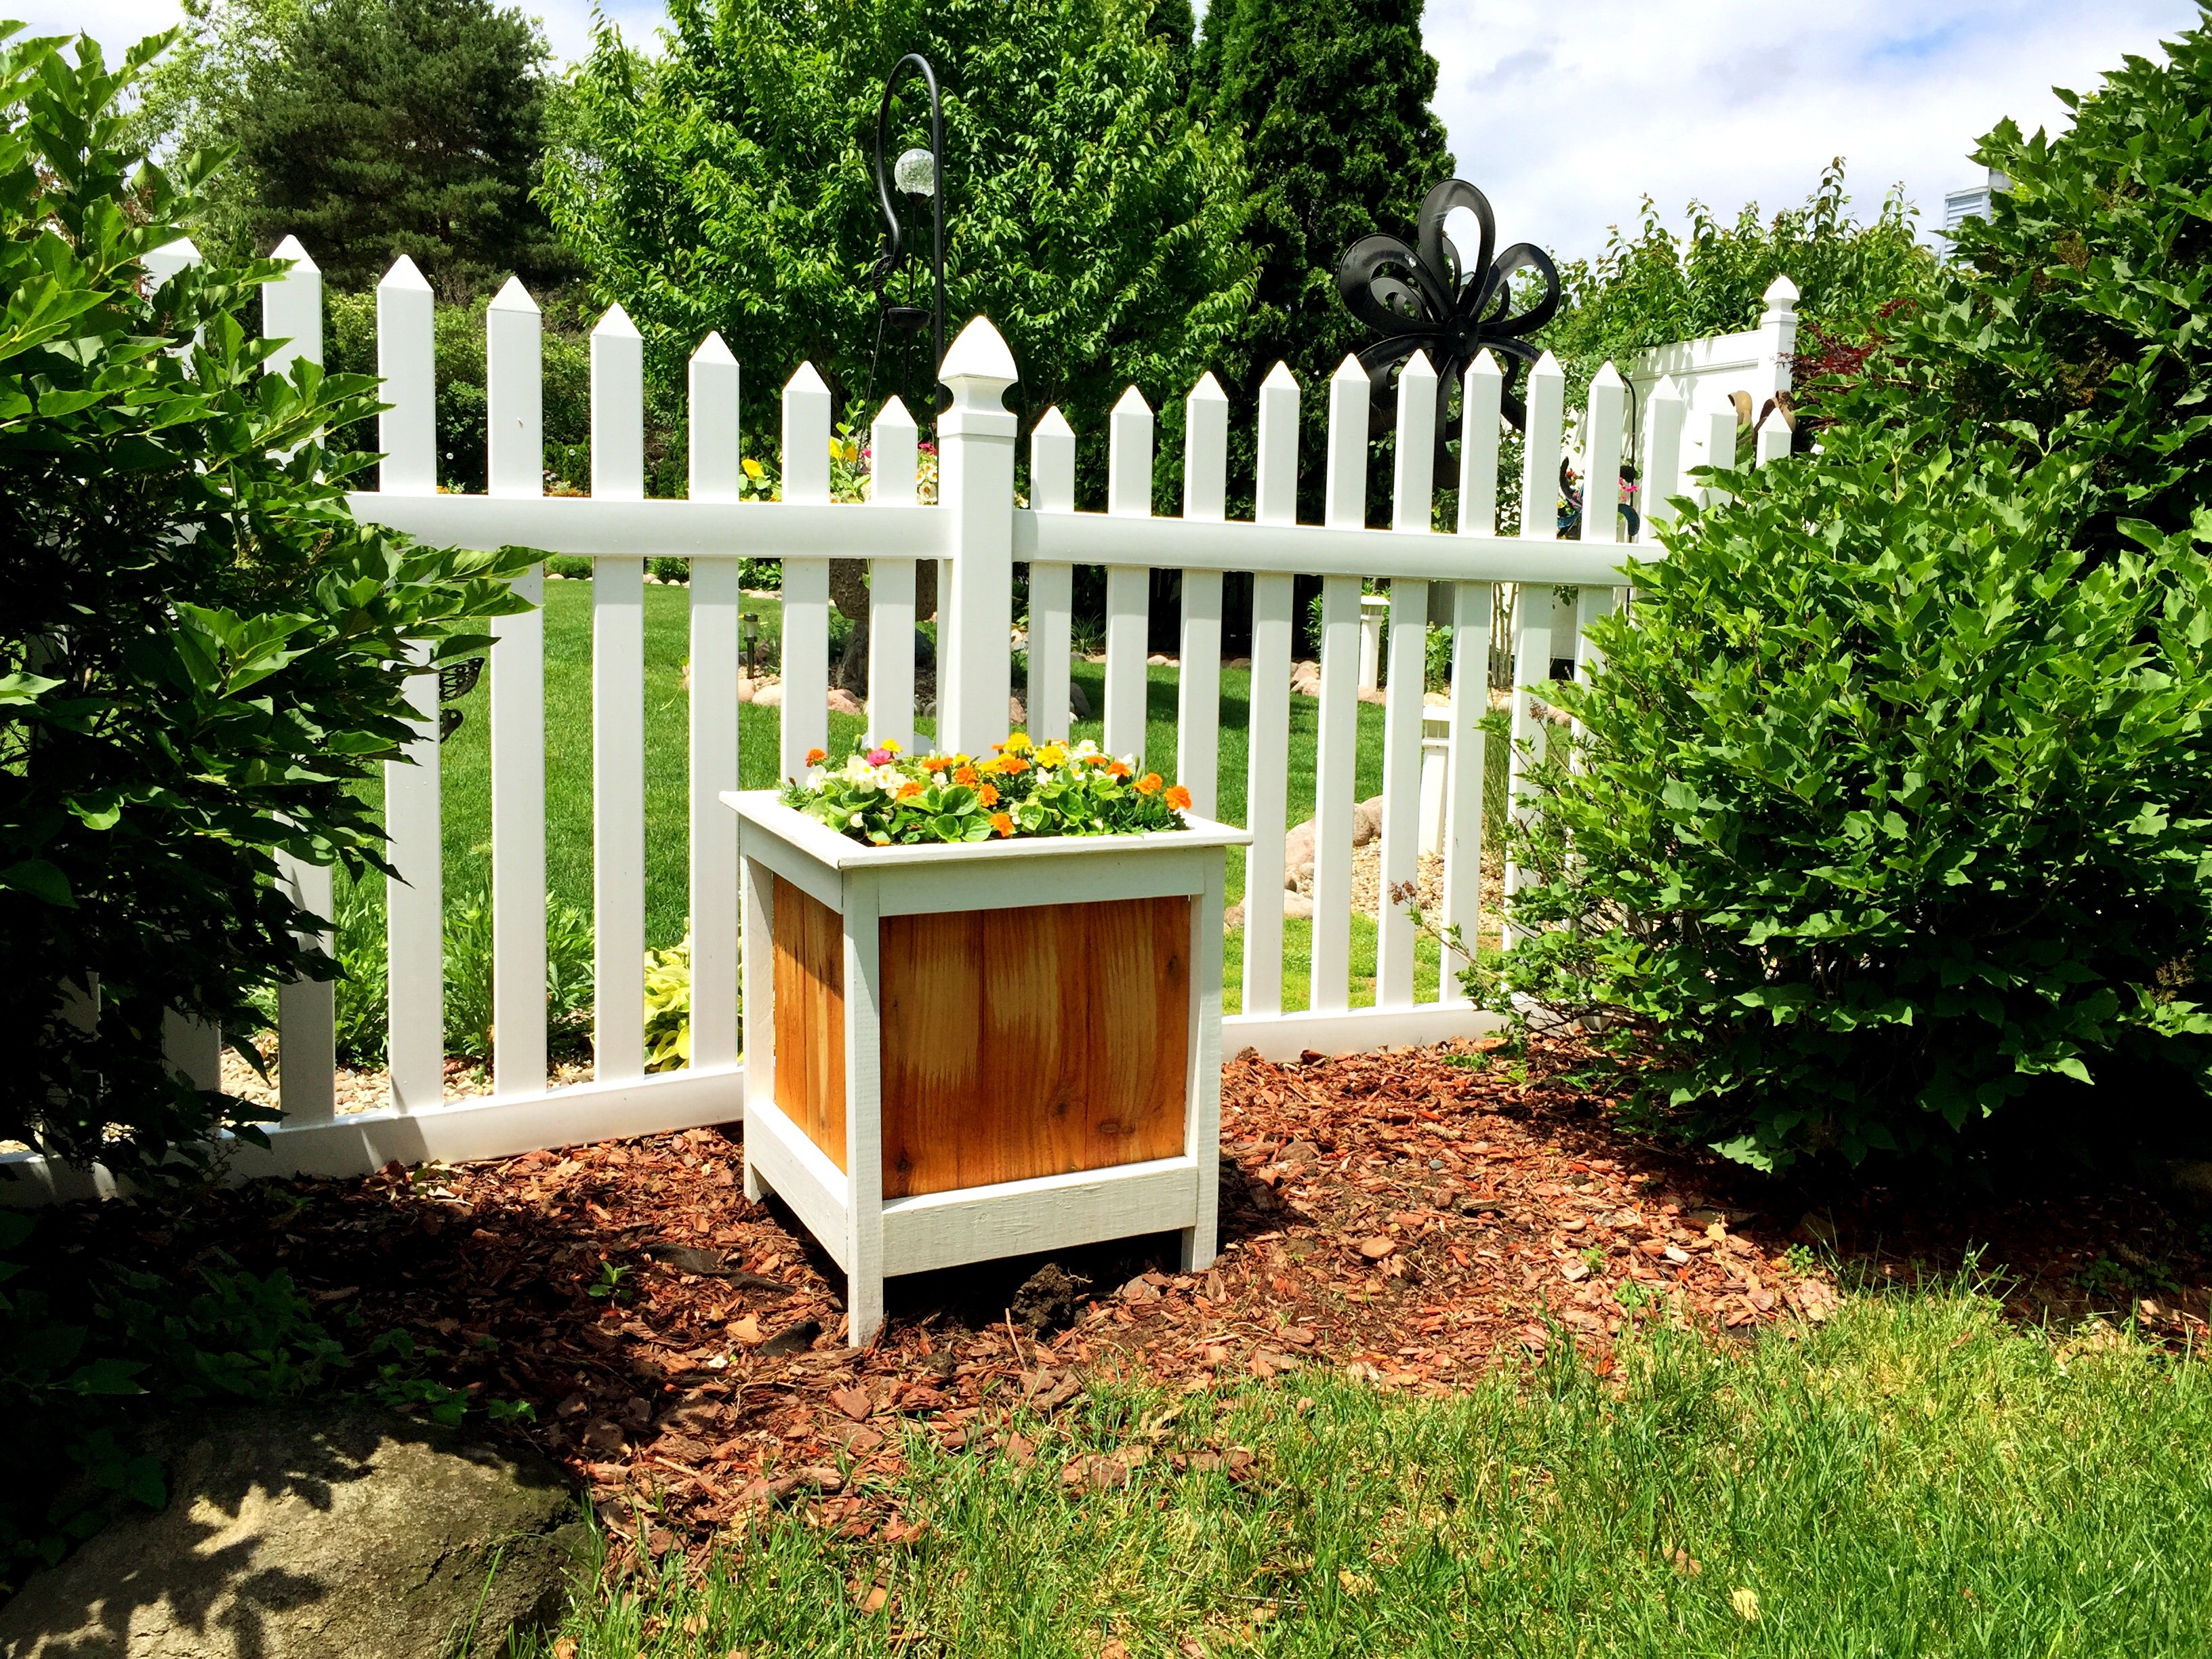
When one of our bushes died, we replaced it with this planter. It compliments our yard and the neighbor's fence nicely.
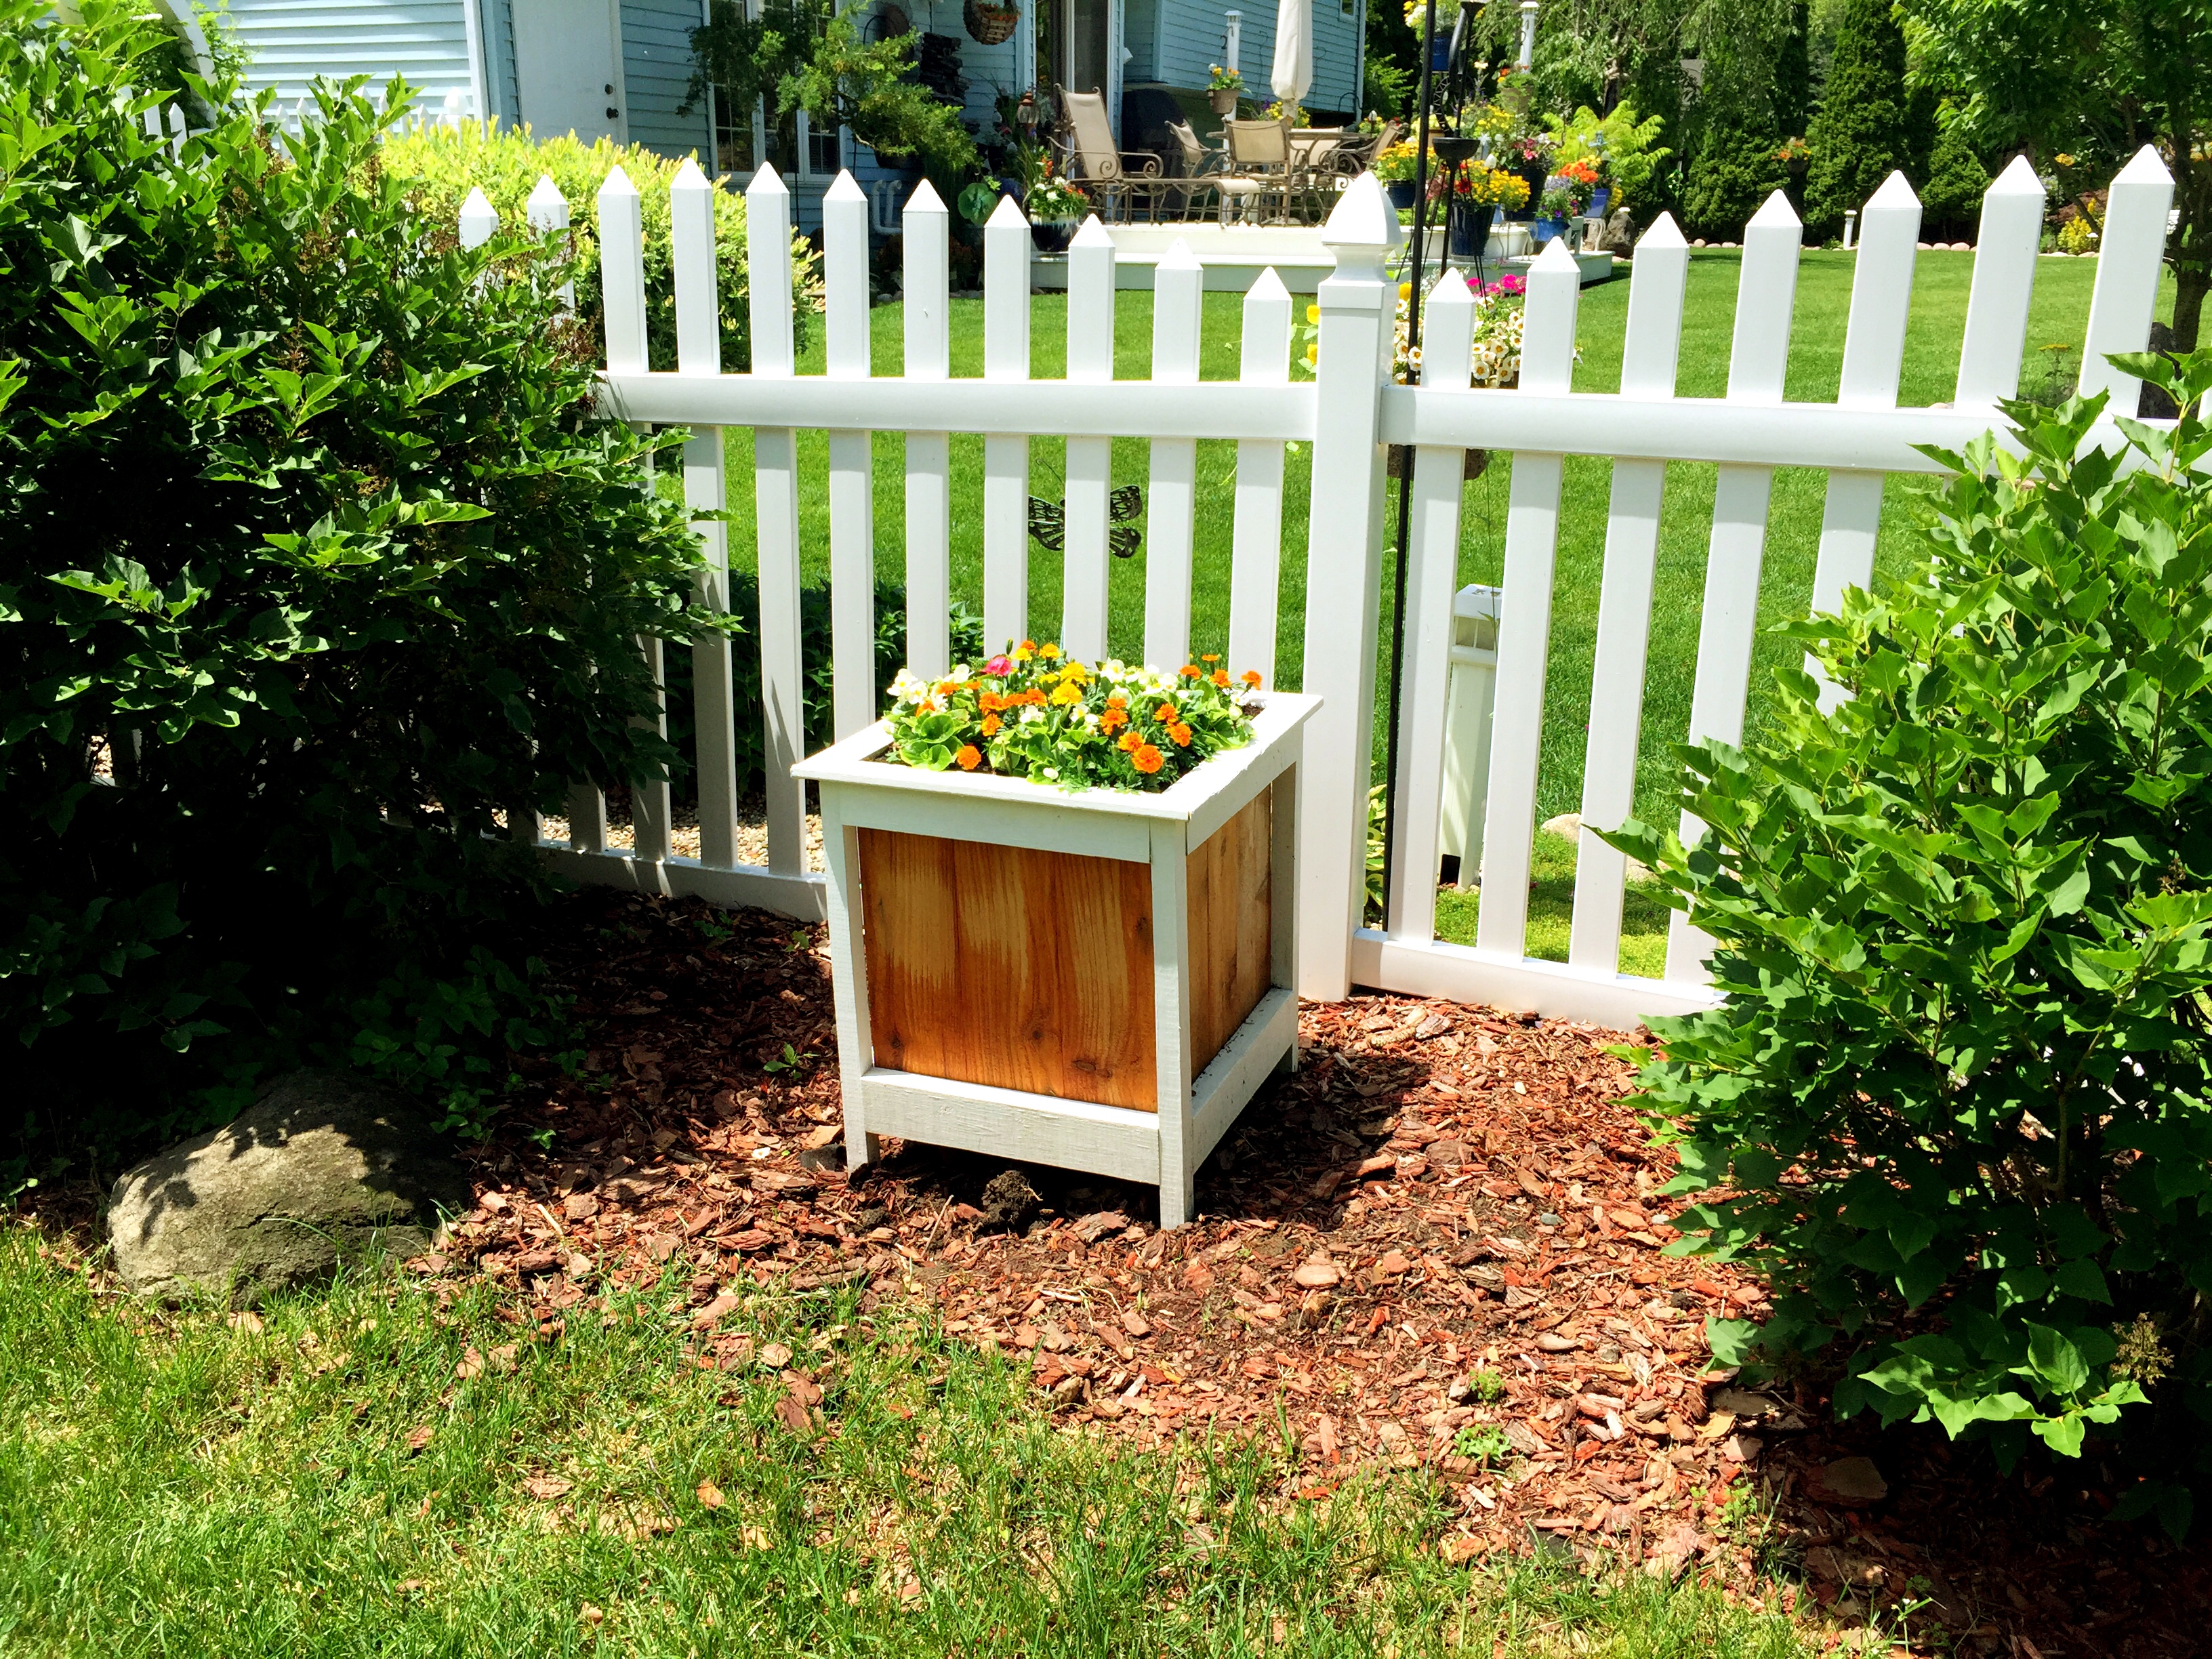
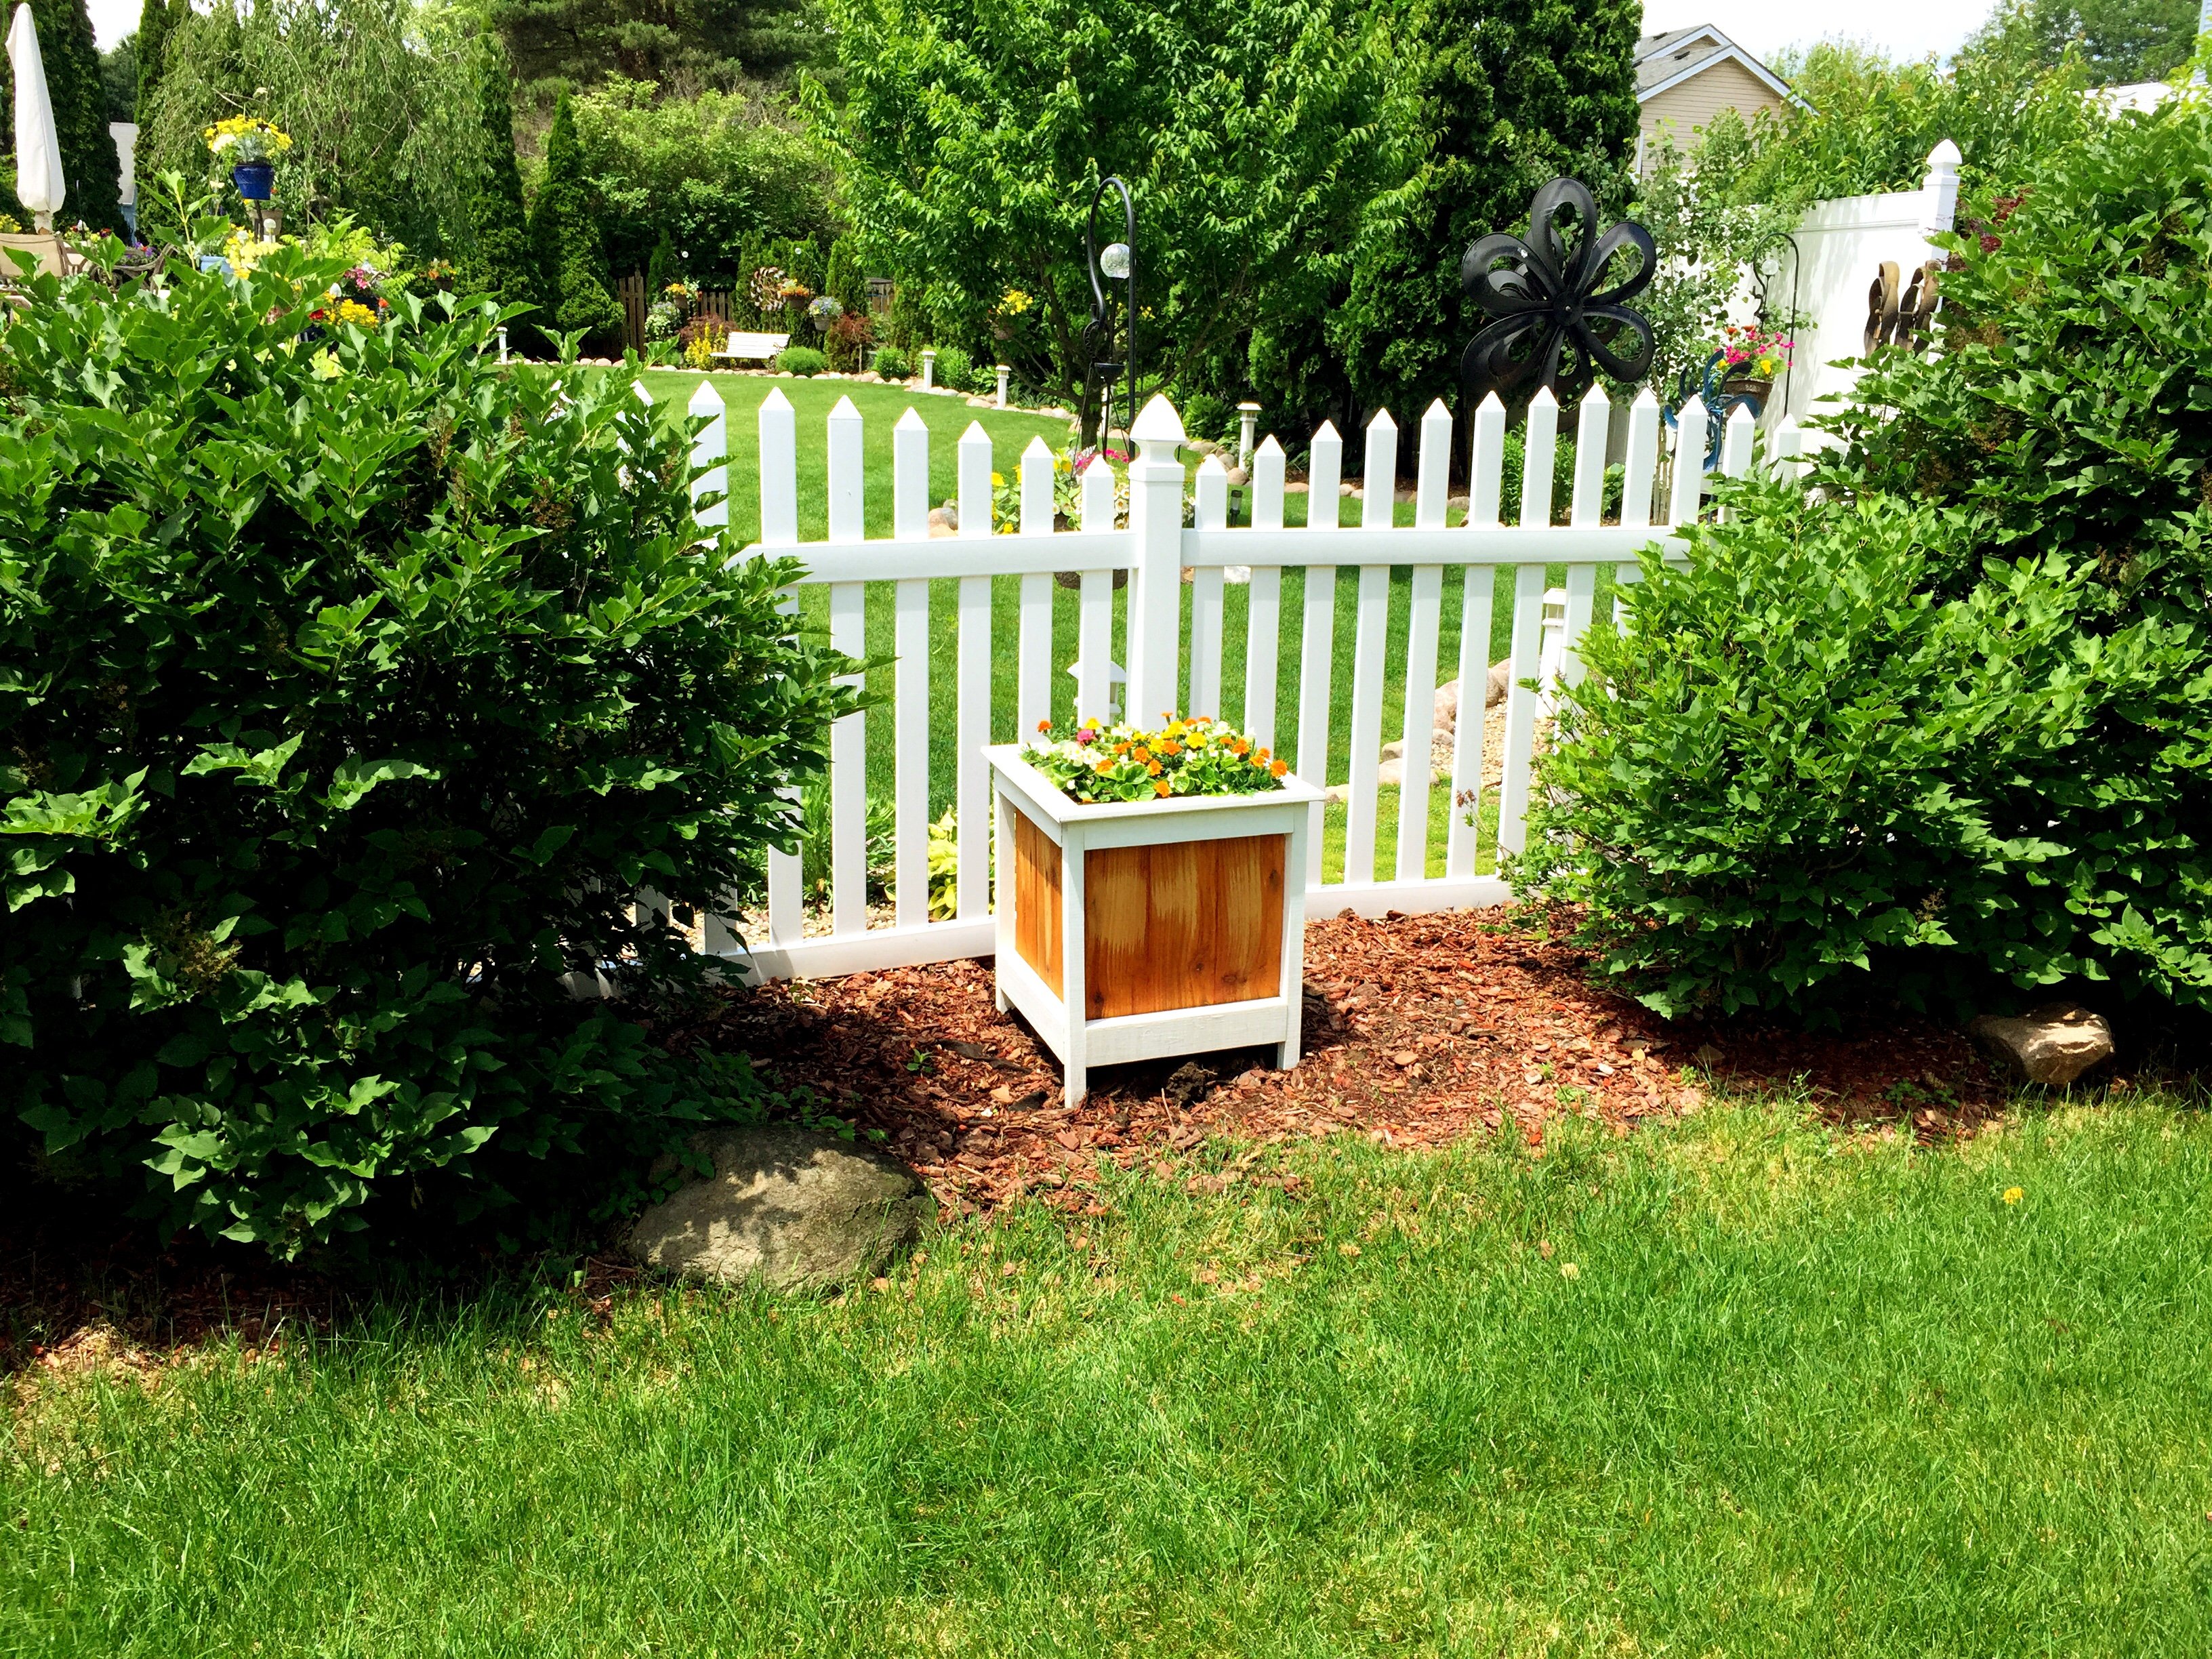
Built from Plan(s)
Estimated Cost
$20
Estimated Time Investment
Afternoon Project (3-6 Hours)
Finish Used
Behr Solid Color Waterproofing Wood Stain in White
Recommended Skill Level
Beginner
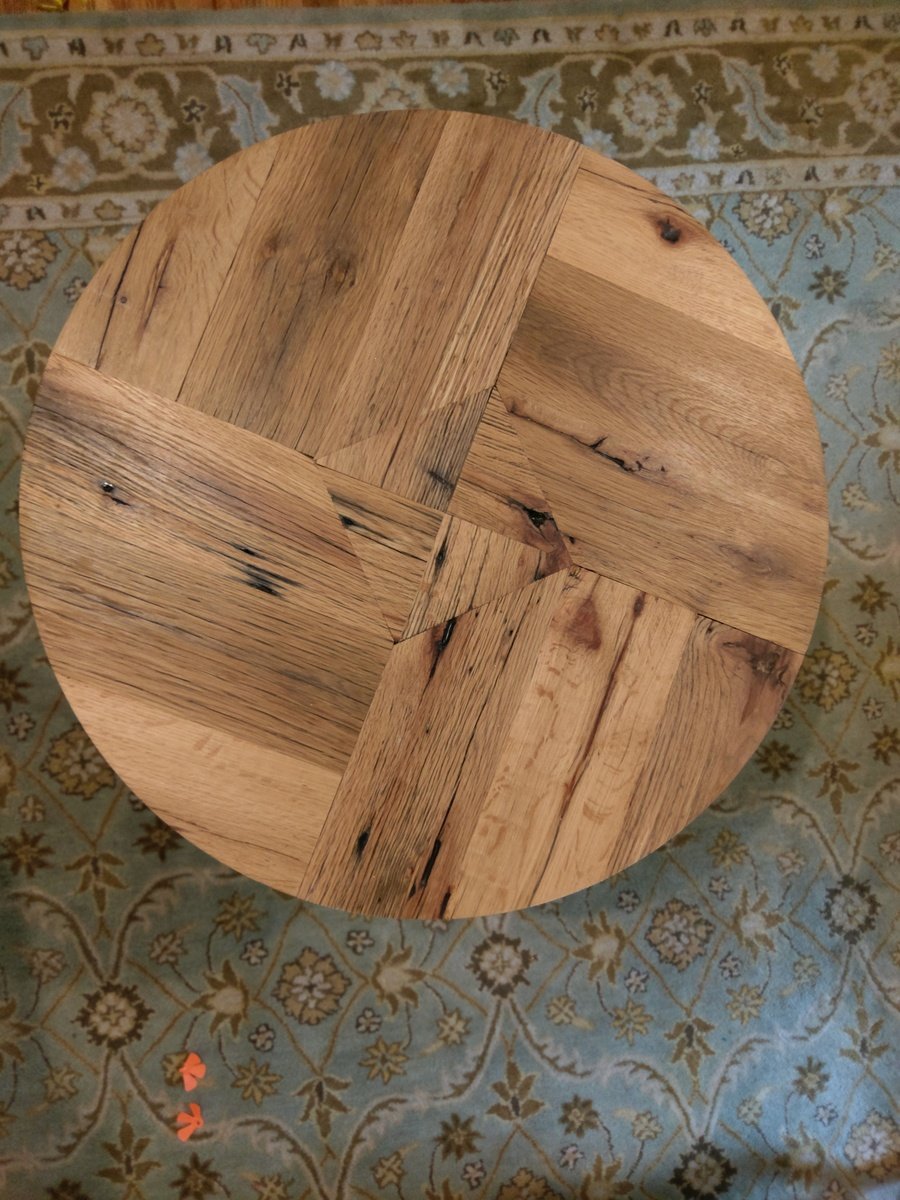
Reclaimed Red Oak Side Table
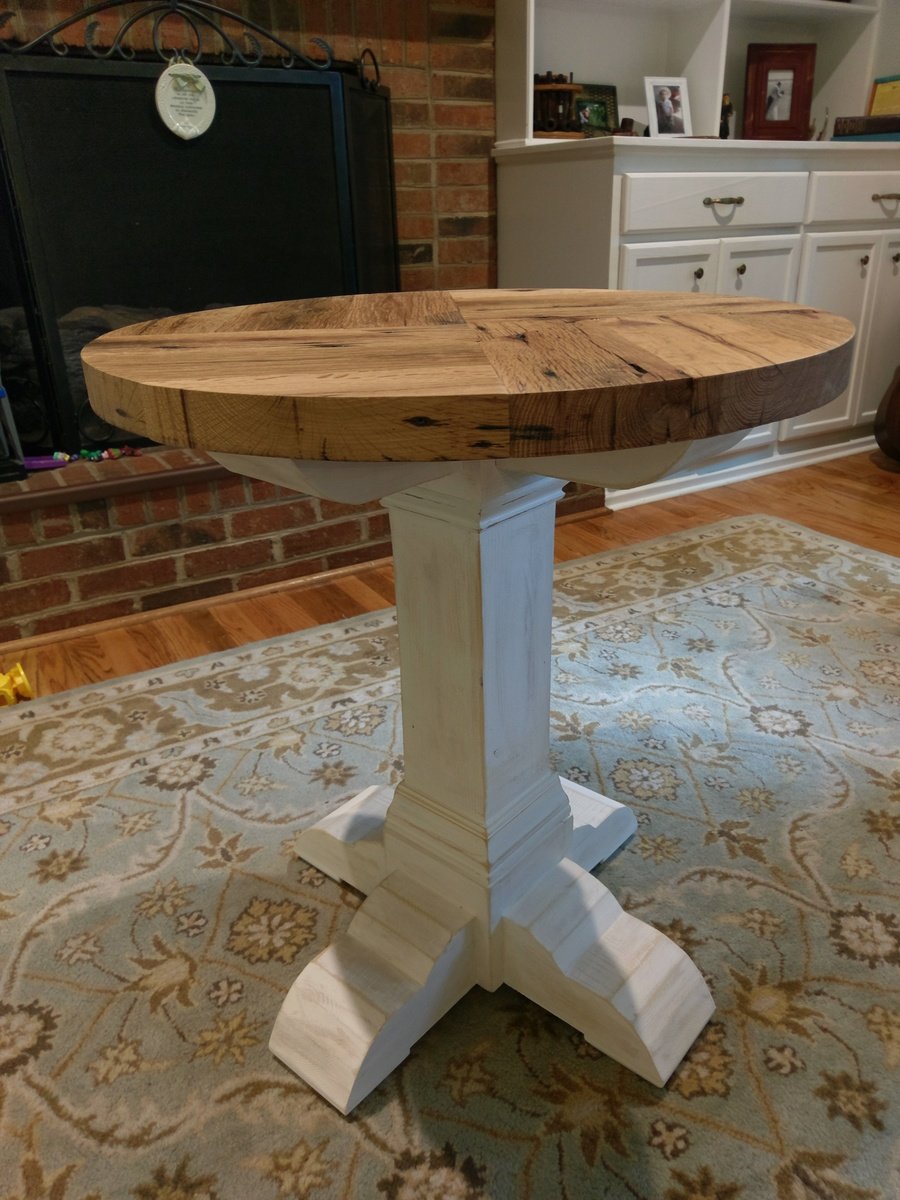
Here's a round top side table I built. The top is made from reclaimed red oak barn wood, sourced from a barn right here in Charlotte, NC. The base is made from standard 2x6s and trim.
More pictures and information is available on my site at http://famousartisan.com/reclaimed-red-oak-barn-wood-side-table/
Estimated Cost
$100
Estimated Time Investment
Weekend Project (10-20 Hours)
Finish Used
Chalk pain and wax
Recommended Skill Level
Intermediate
Parson's bookshelves in white
This is our first project! My Husband did most of the work but was a team effort in places. We wanted shelves that we could easily make with the very limited selection of cuts available in Botswana (really only construction lumber around). We modified the width of the shelves to what was available, increased the height a bit so more of a console and shortened it to get the best use of timber. I did not want it looking too modern so went with white and distressed edges to keep it comfortable. Construction did not take very long but finishing took a while due to 3 coats needed.


Built from Plan(s)
Estimated Cost
$60
Estimated Time Investment
Weekend Project (10-20 Hours)
Finish Used
We started by staining whole shelves but then decided it coloured paint too much so applied stain to edges of shelves and legs only. Painted with pure white acrylic water based paint (3 coats) and then lightly sanded edges of legs and shelves to distress.
Recommended Skill Level
Starter Project
Comments

Magic Tree House
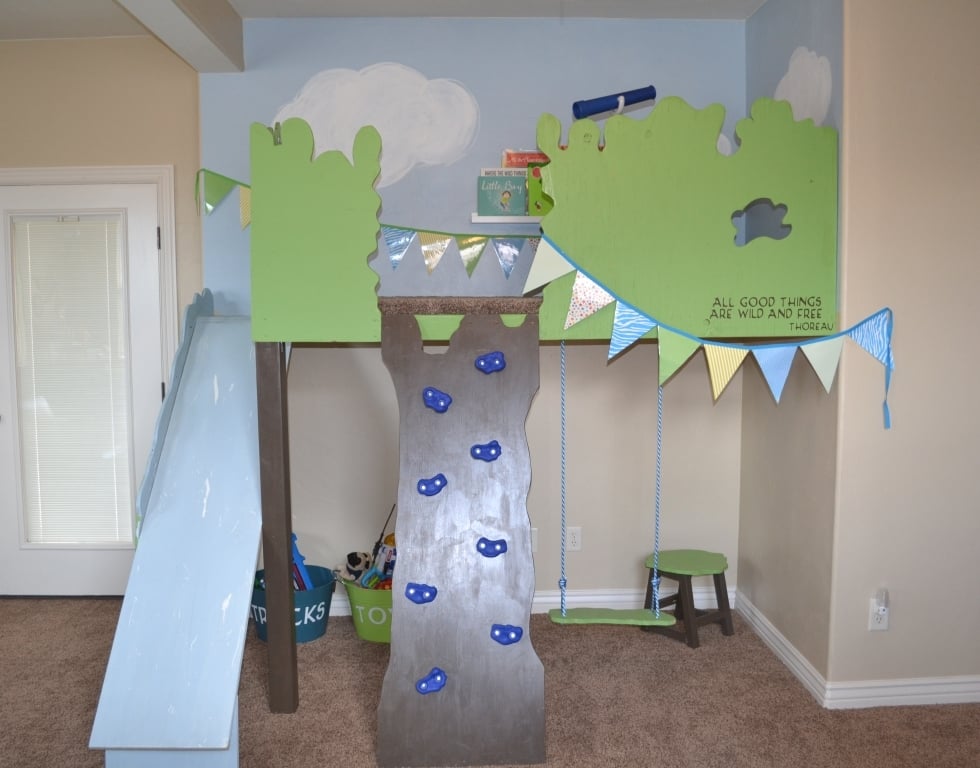
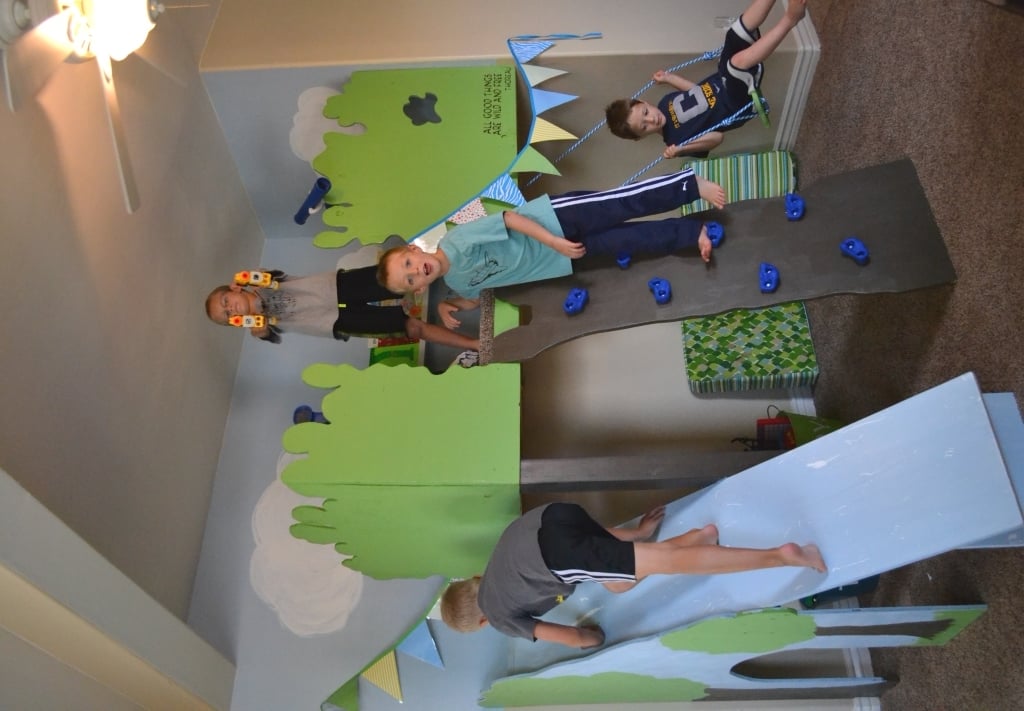
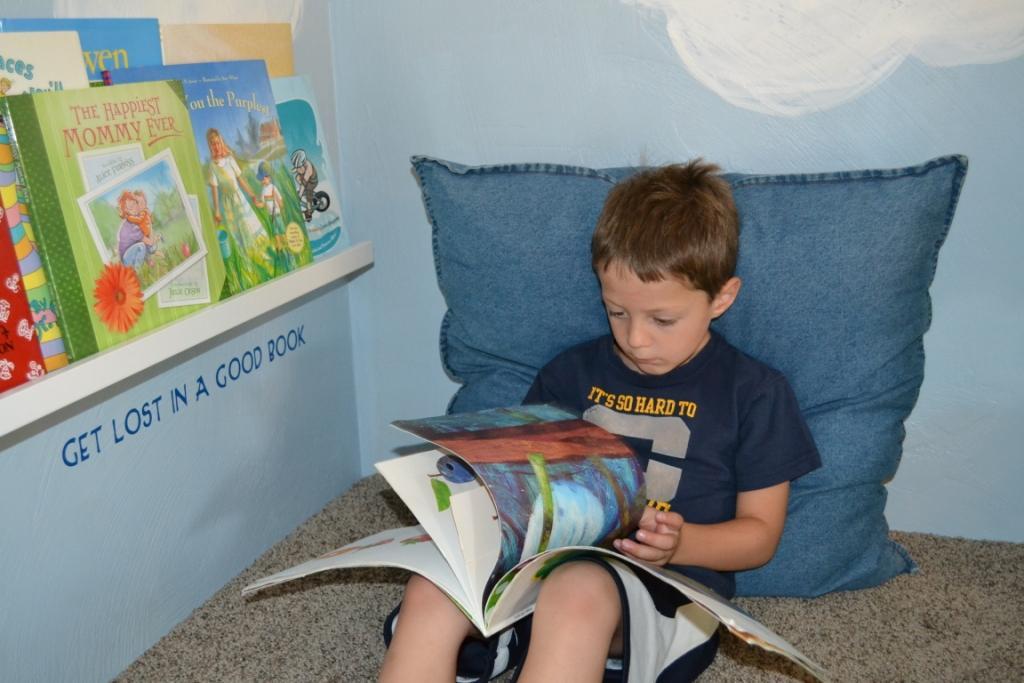
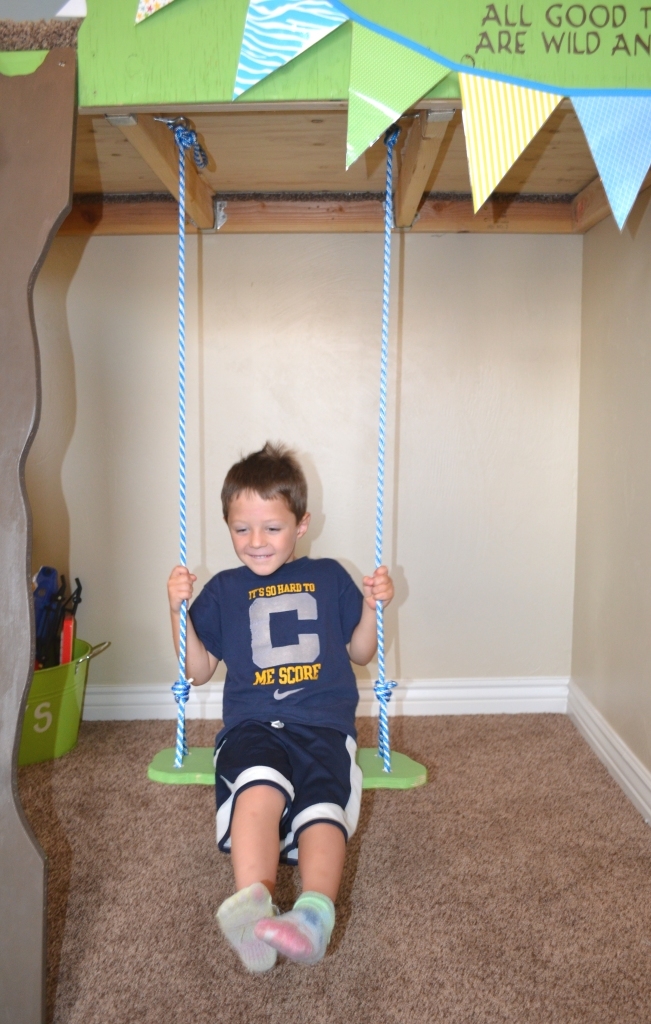
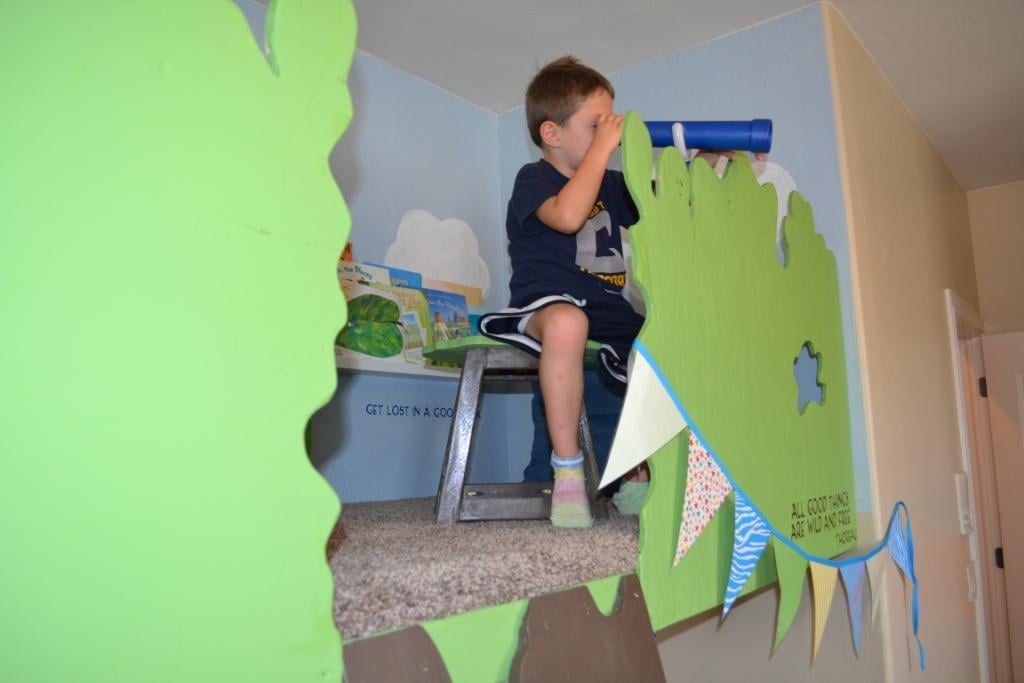
We adapted these plans to build our tree house, I hope it's not too much of a stretch for brag posts! Every kid seems to have two wishes: a fort or tree house and a secret passage way. Or is it just my kids? Turns out we live in the desert and trees are hard to come by. Our solution? Build a tree house in the house. Why not!? Our magic tree house is well used and well loved. This is one of those projects that simmered and in my mind trying to think of the perfect way to build the thing. The stuff our parents built and played in was a hodge podge of left over wood and their own creations, crooked construction and messy paint. So, I set the perfect aside and dove in. The only things our tree house really needs to be is safe and fun. Most families try to find indoor activities for the winter, but in the desert it is so blazing hot we need indoor retreats in the summer. This tree house is the solution a gagillion times over! Thank you Ana!

Estimated Cost
$150
Estimated Time Investment
Week Long Project (20 Hours or More)
Finish Used
paint
Recommended Skill Level
Intermediate
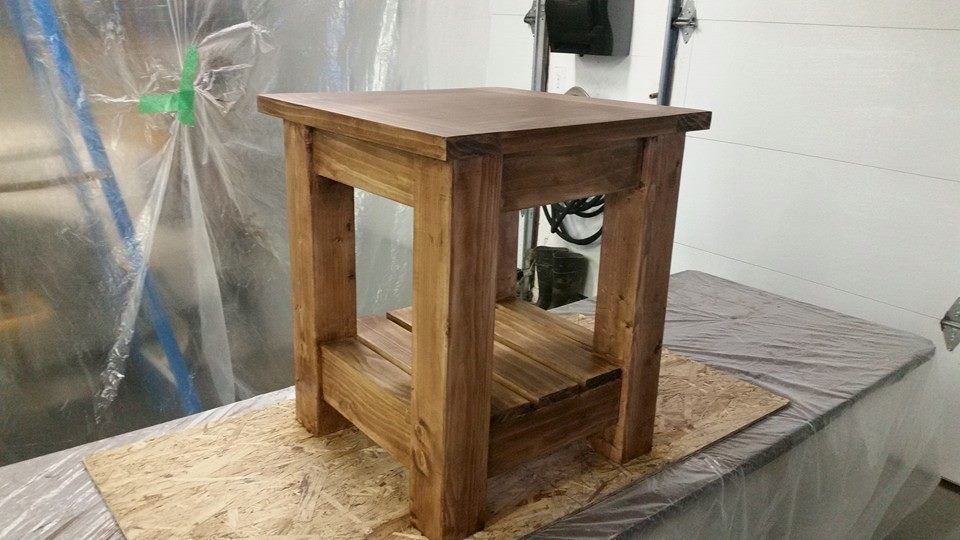
Truss Side Table
A modified version of the Truss End Table. I used select pine instead of construction grade 2x4s. Also, I laminated the table top together seamlessly instead of using 5 separate boards.
The legs were also increased to 28.5" instead of 27".
Built from Plan(s)
Estimated Cost
50$
Estimated Time Investment
Weekend Project (10-20 Hours)
Finish Used
Minwax Red Mahagony/Pickled Oak
Minwax Semi-Gloss Varathane.
Minwax Semi-Gloss Varathane.
Recommended Skill Level
Intermediate
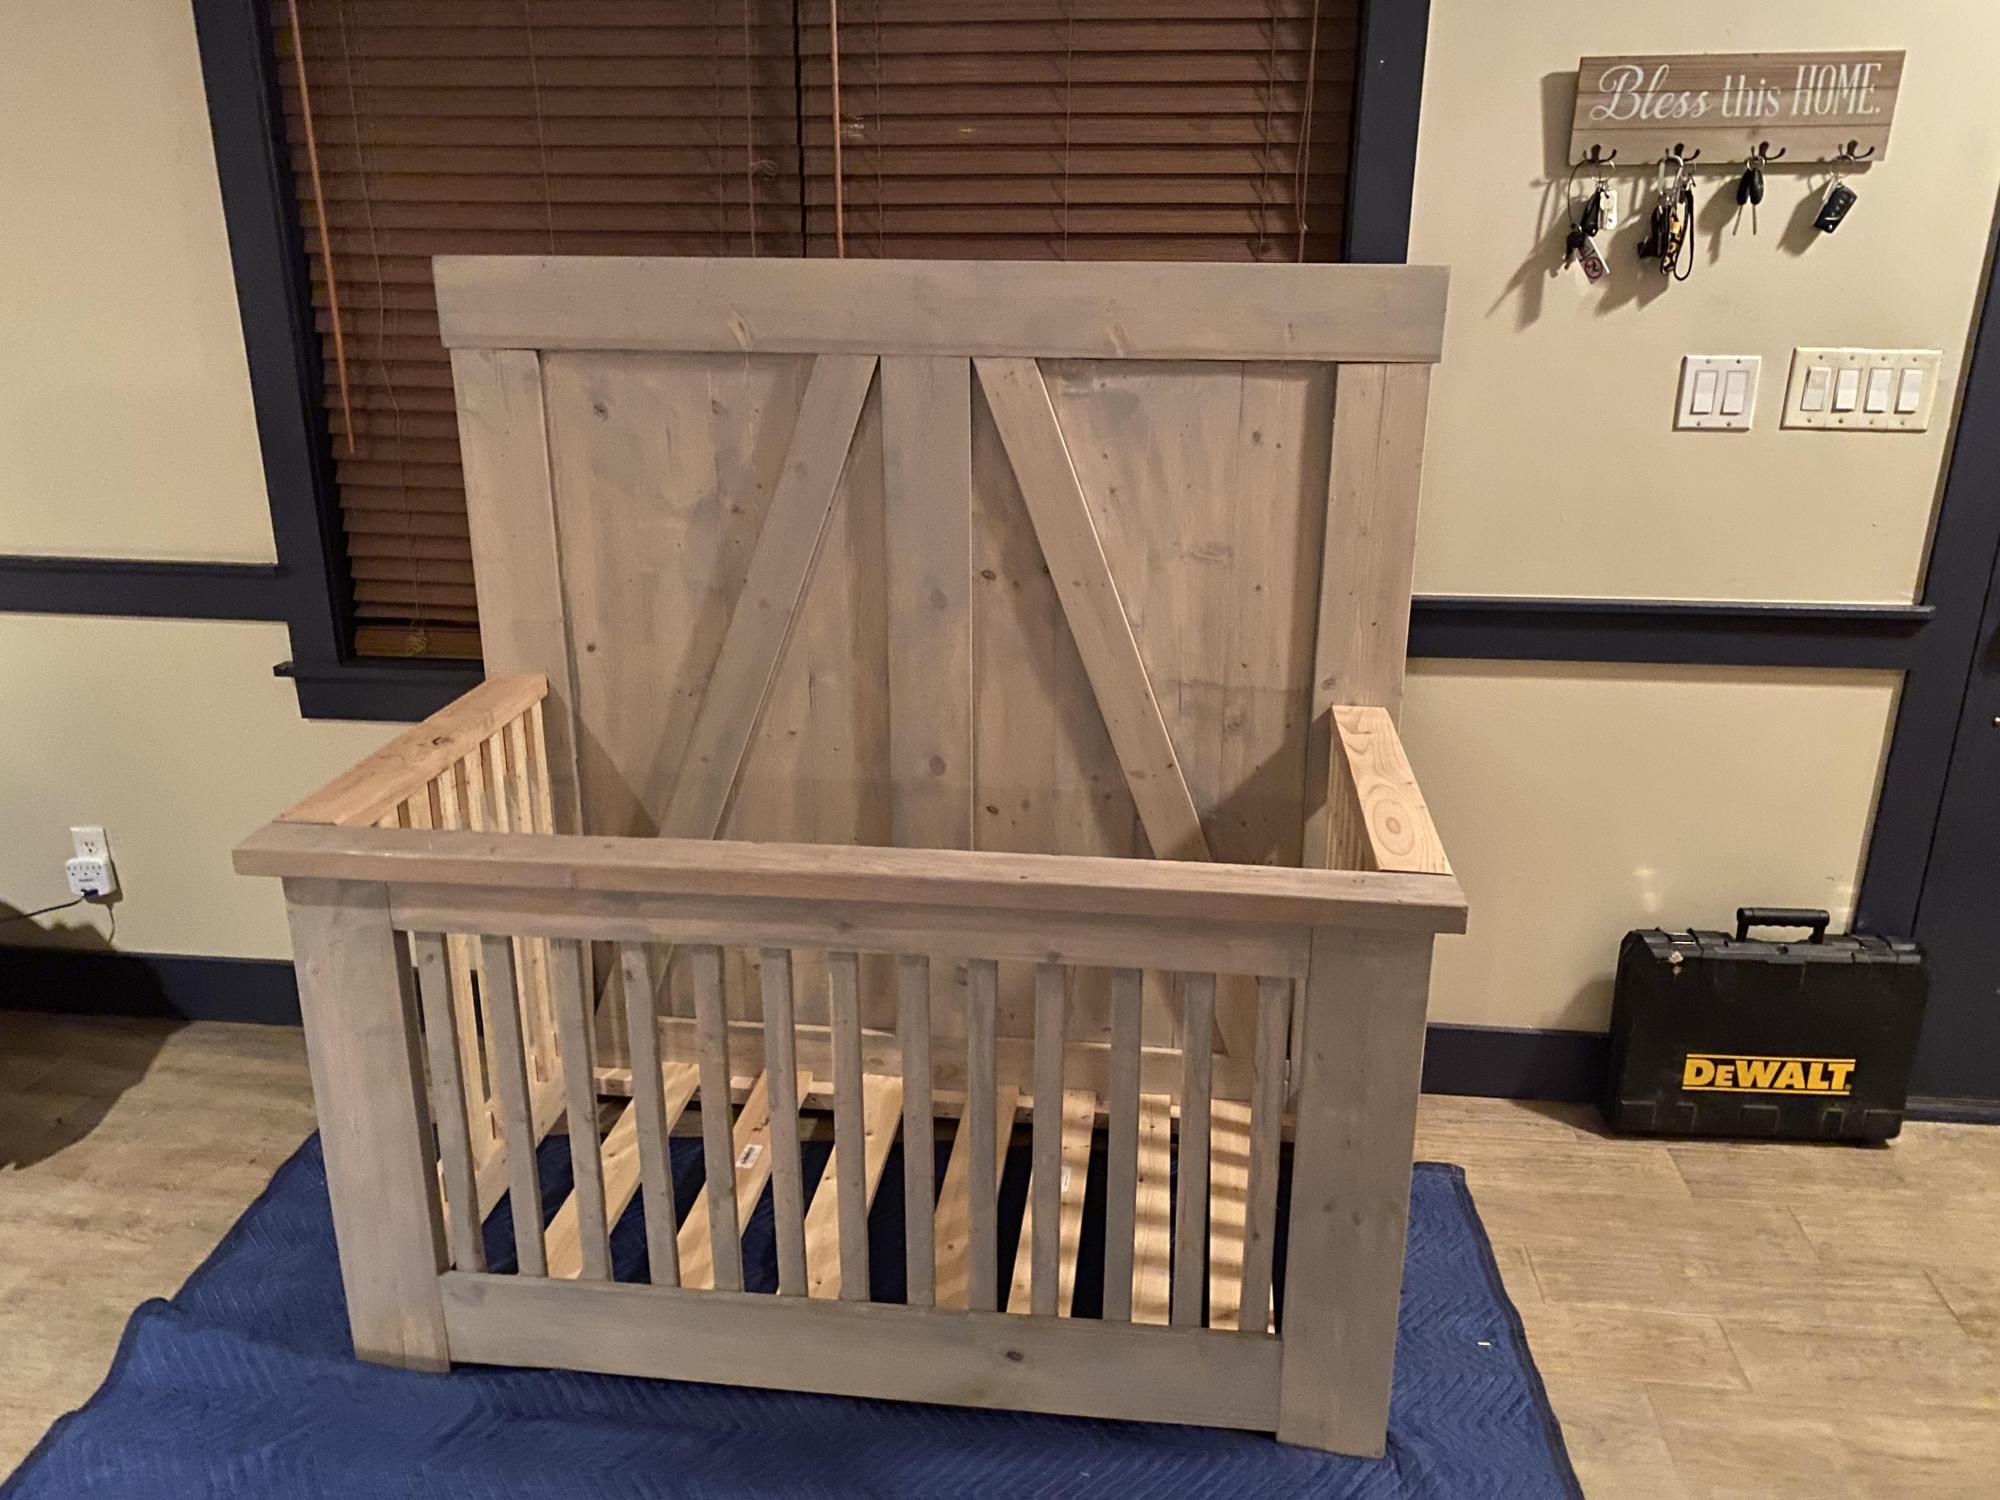
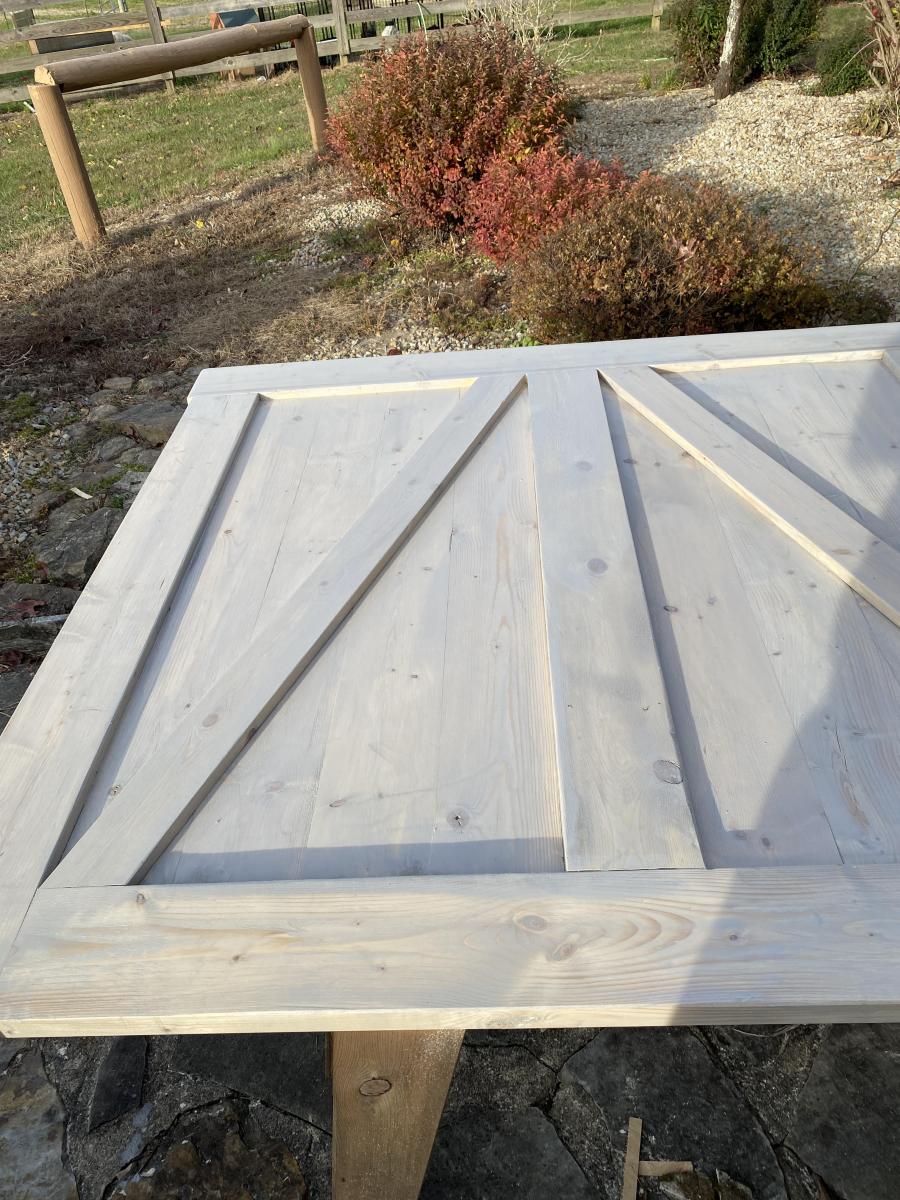
Captain Lydia!
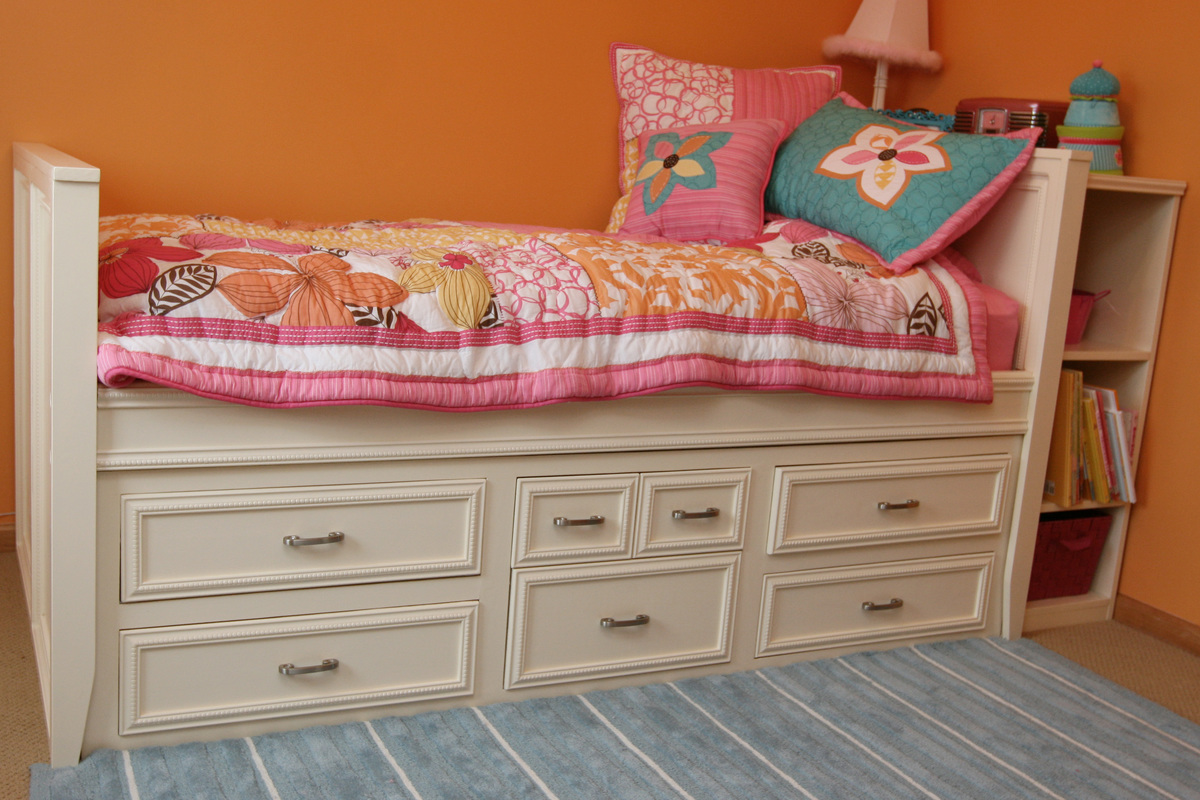
Bed based of Ana's Lydia plan.
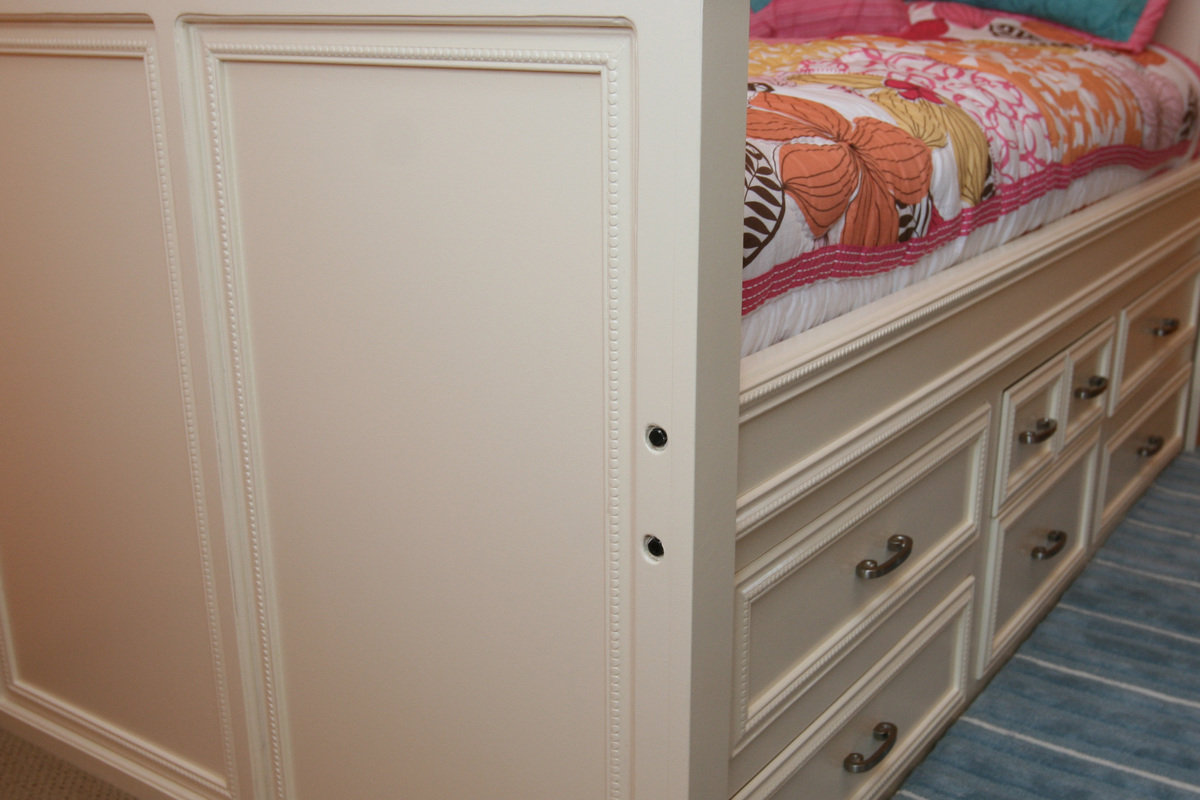
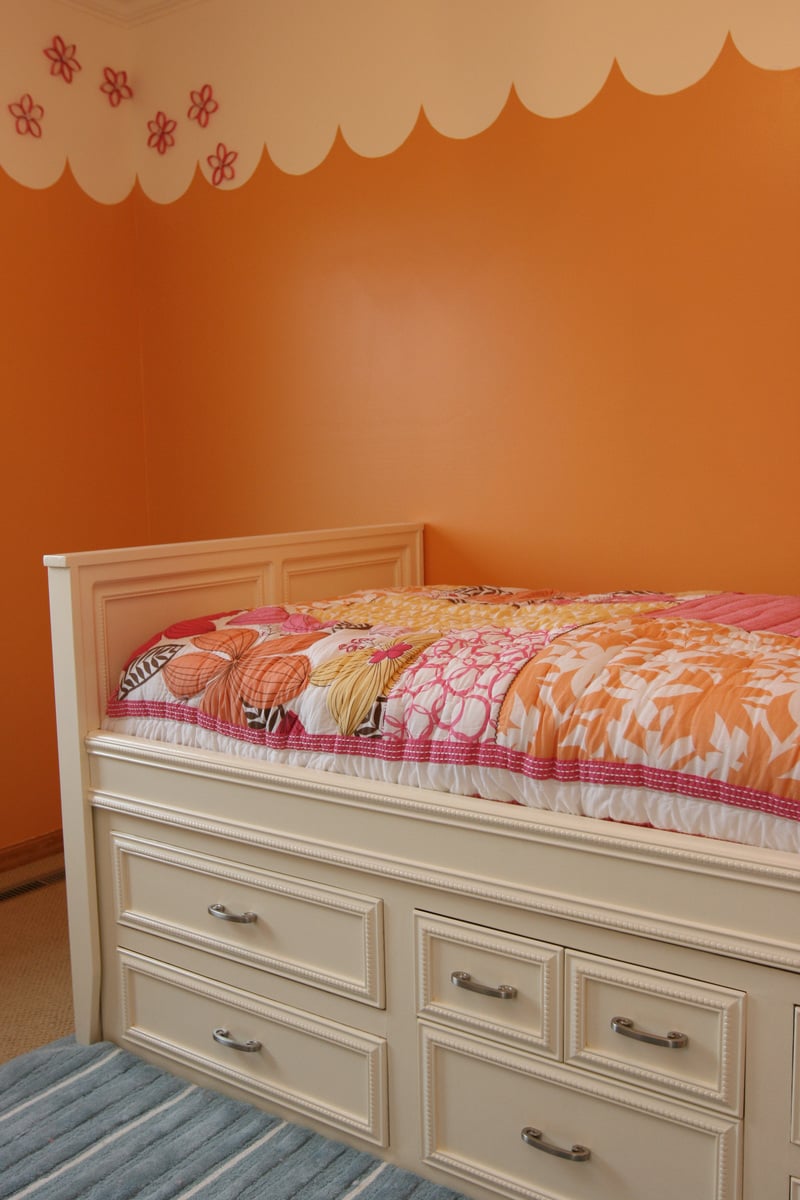
Built from Plan(s)
Estimated Time Investment
Week Long Project (20 Hours or More)
Finish Used
Satin paint with 3 coats of poly.
Recommended Skill Level
Intermediate
Comments

Fri, 06/24/2011 - 06:32
wonderful!
What a great job! Did you build the drawer unit as a separate piece? I was recently asked to build a big girl bed for my niece who has a storage limited bedroom, so this could be a great solution for her...
In reply to wonderful! by ohiomomma
Sat, 06/25/2011 - 08:27
I actually bought the under
I actually bought the under bed storage unit on craigslist as I didn't want to mess up all the places I could have not getting it square. But, yes, it is a complete separate unit that then I build the head/foot boards.
Fri, 12/16/2011 - 07:02
DIY, Recycled and Repurposed. Perfect!
You've done a fabulous job on this. Well done!
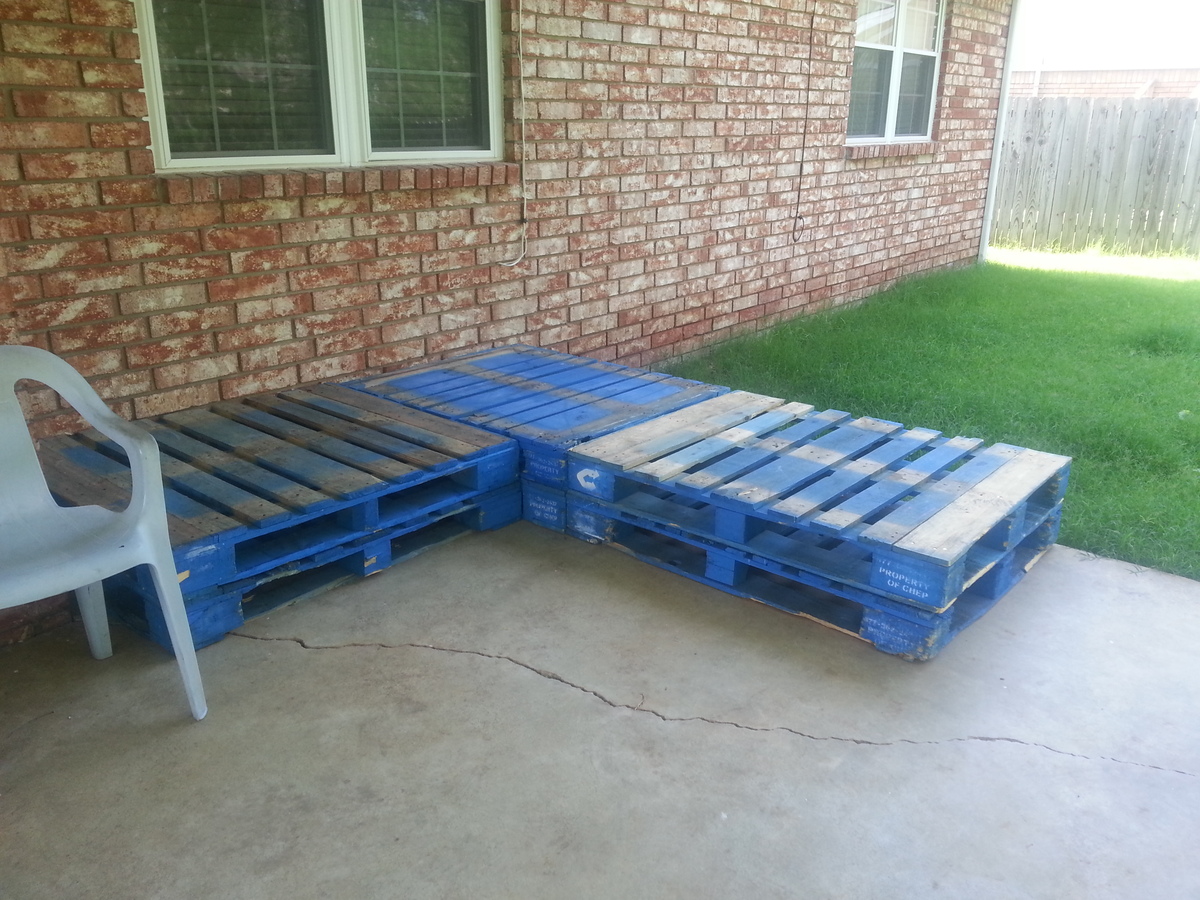
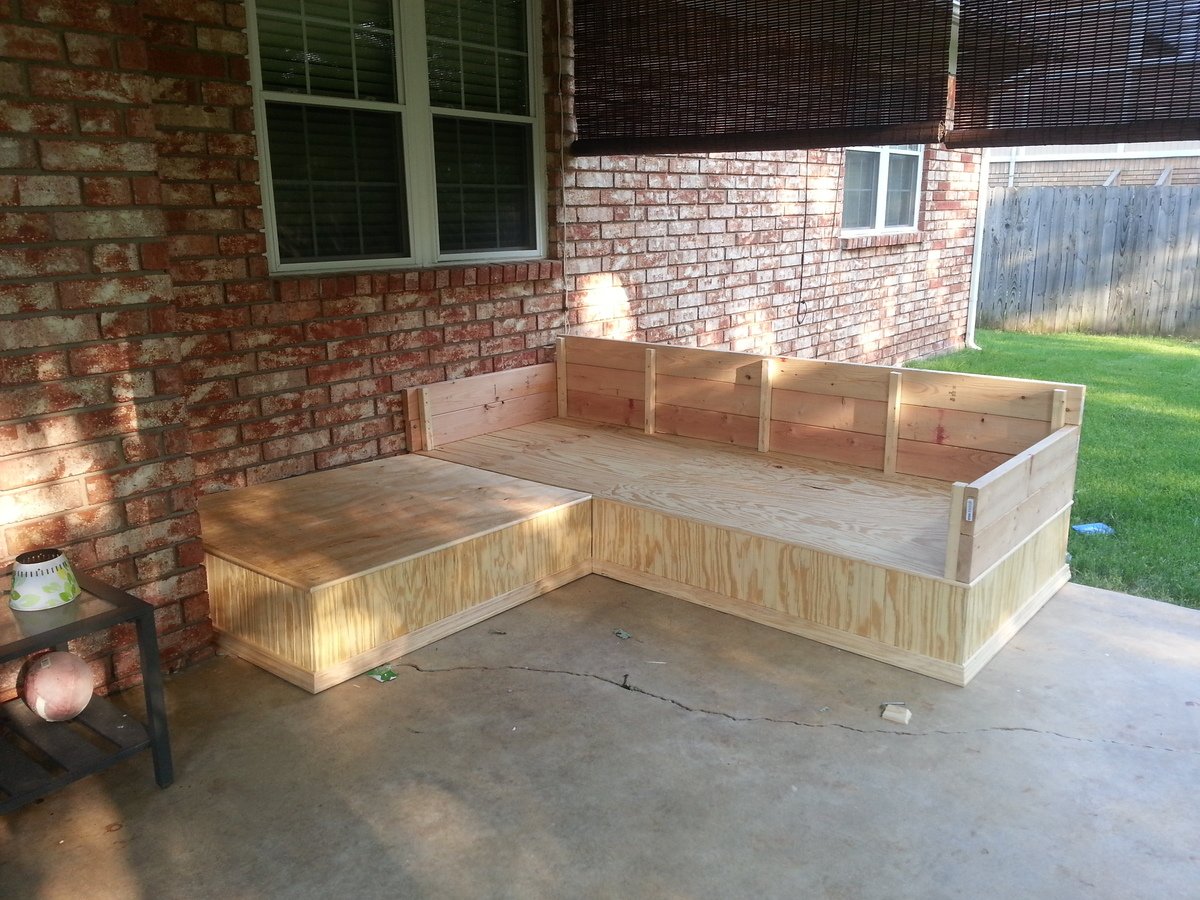
Outdoor seating area from outdoor sectional plan -with a twist!
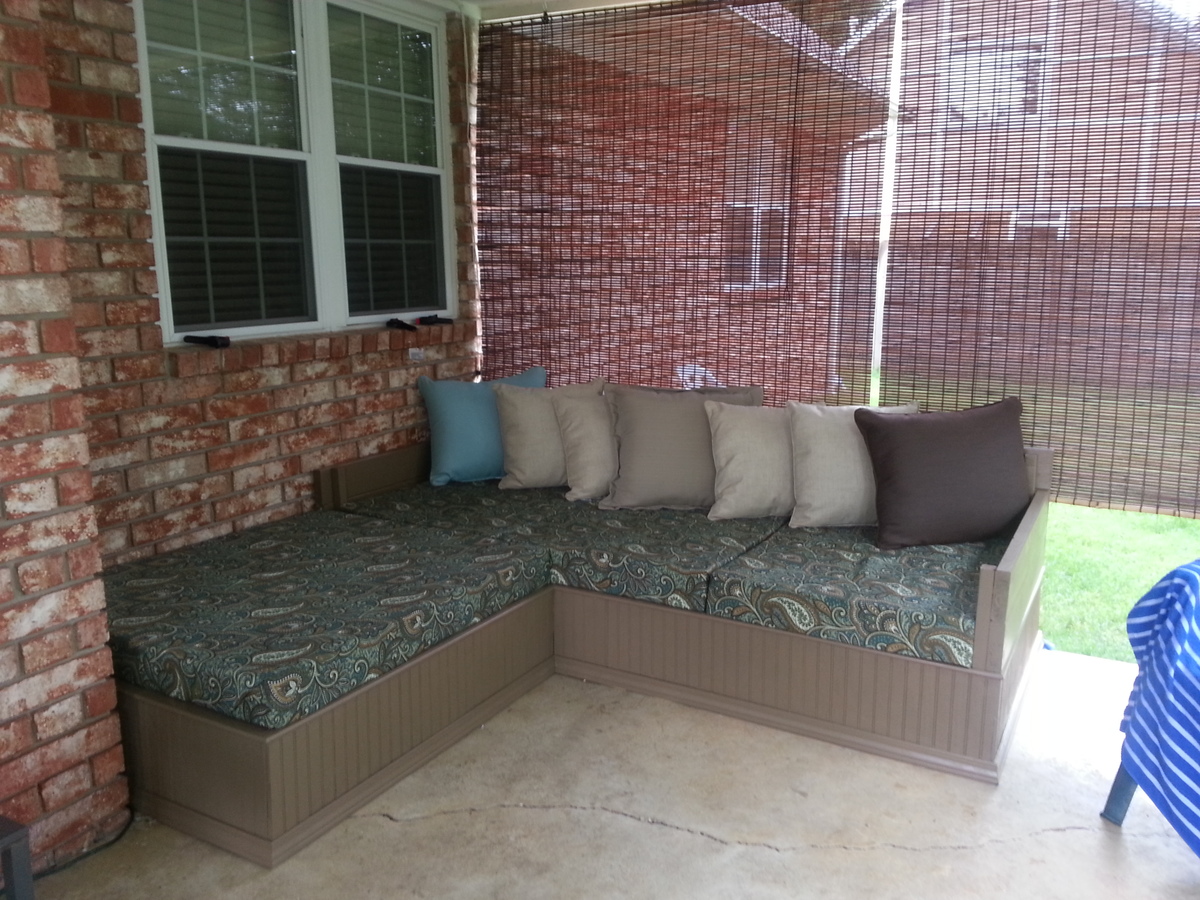
It started out as 6 pallets and I wrapped it in plywood but couldn't think of a way to make a back/armrests. Then I stumbled across Ana's plan for the outdoor sectional, and I ended up with a hybrid of sorts!
Built from Plan(s)
Estimated Cost
350 including cushions, fabric and paint
Estimated Time Investment
Weekend Project (10-20 Hours)
Finish Used
Outdoor paint and primer in one.
Recommended Skill Level
Starter Project

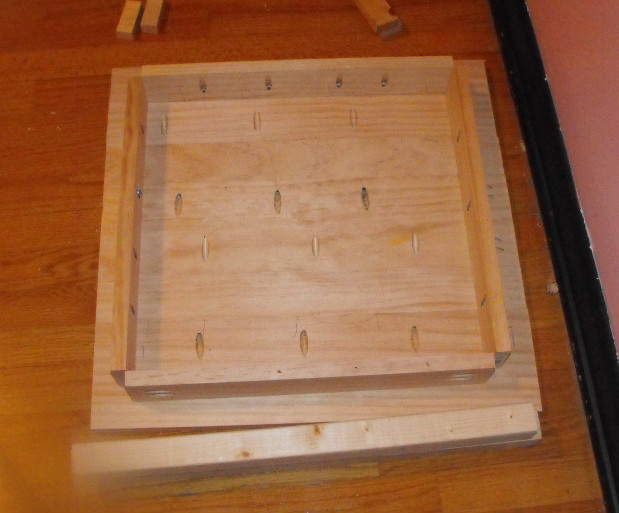
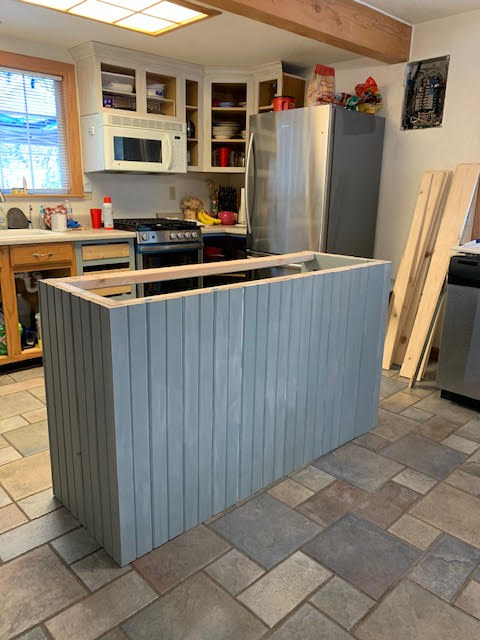
Storage Island
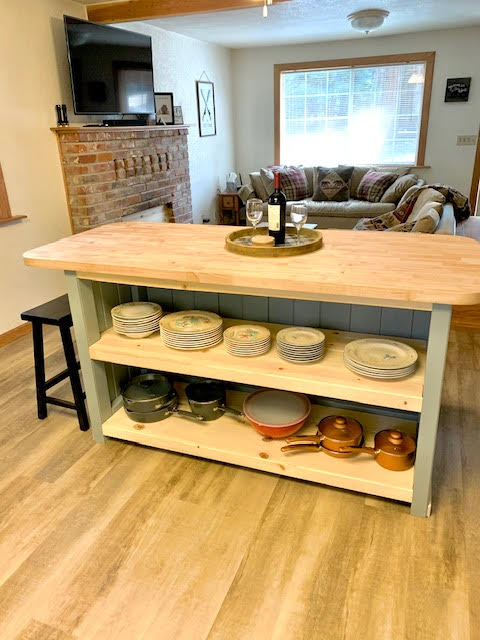
Great storage island project!
Built from Plan(s)
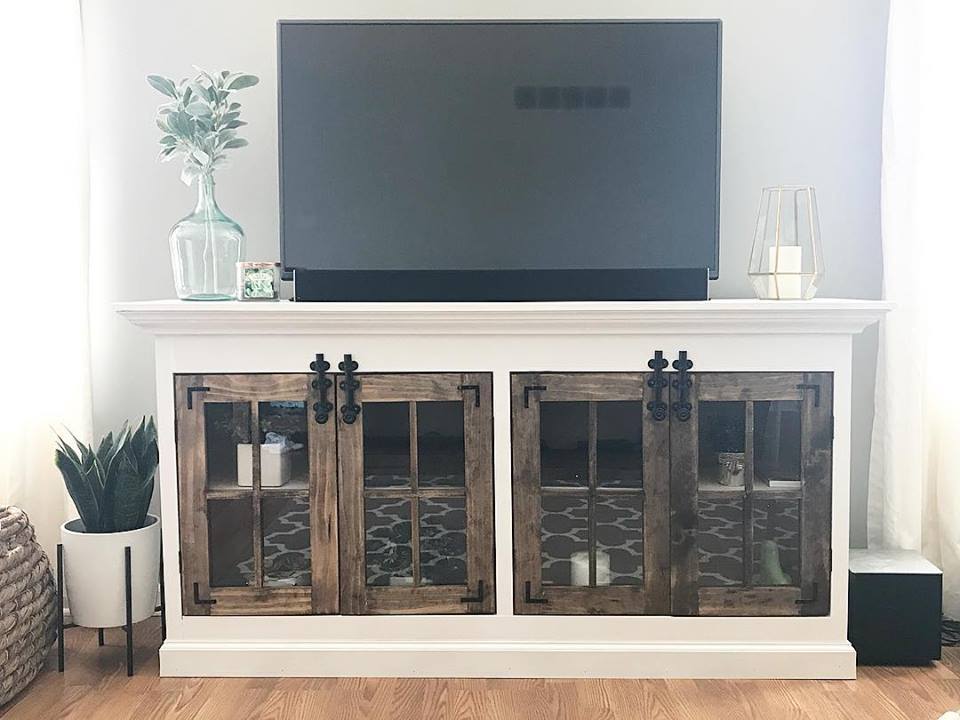
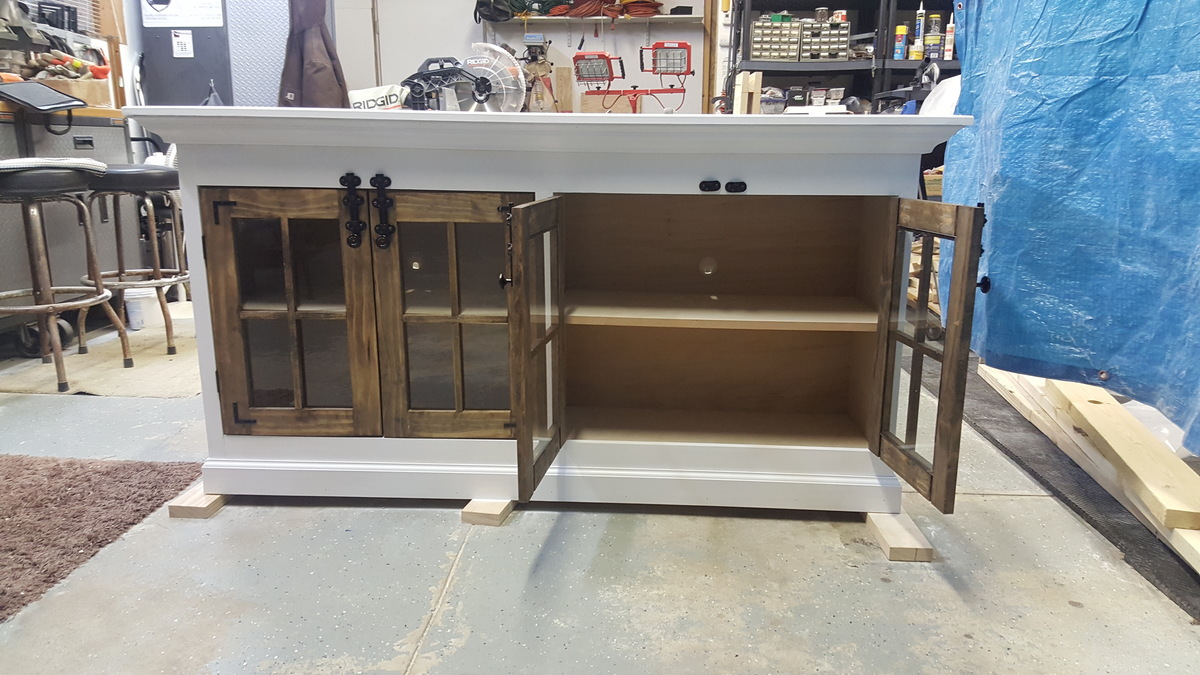
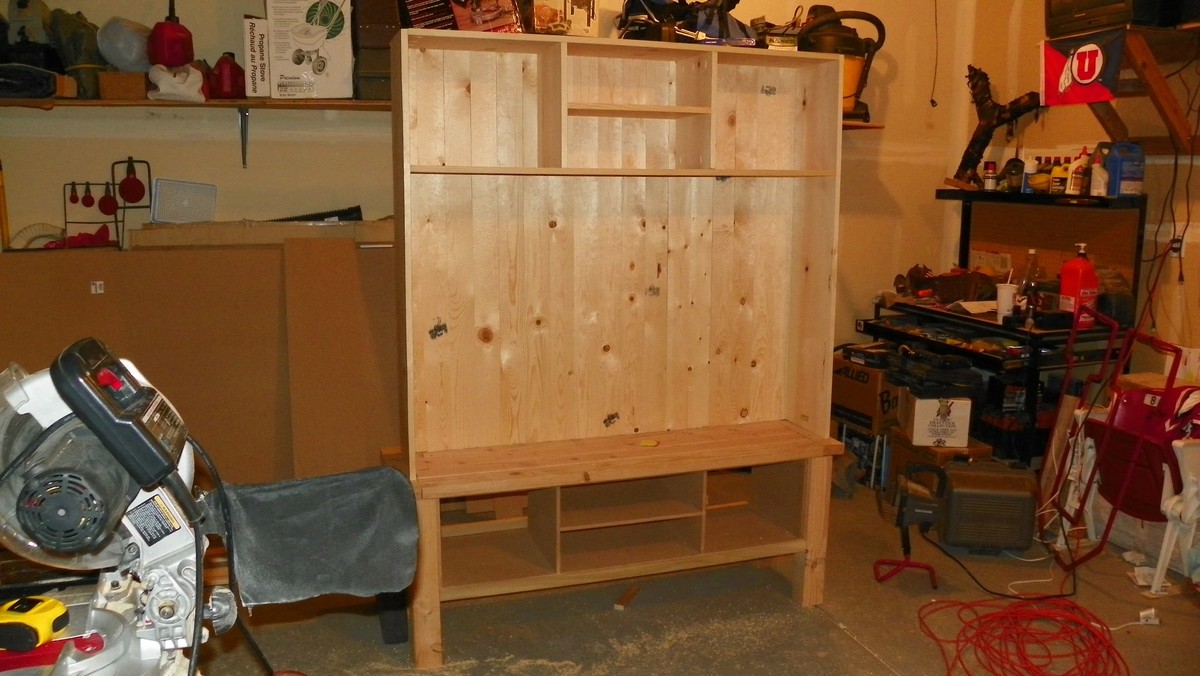
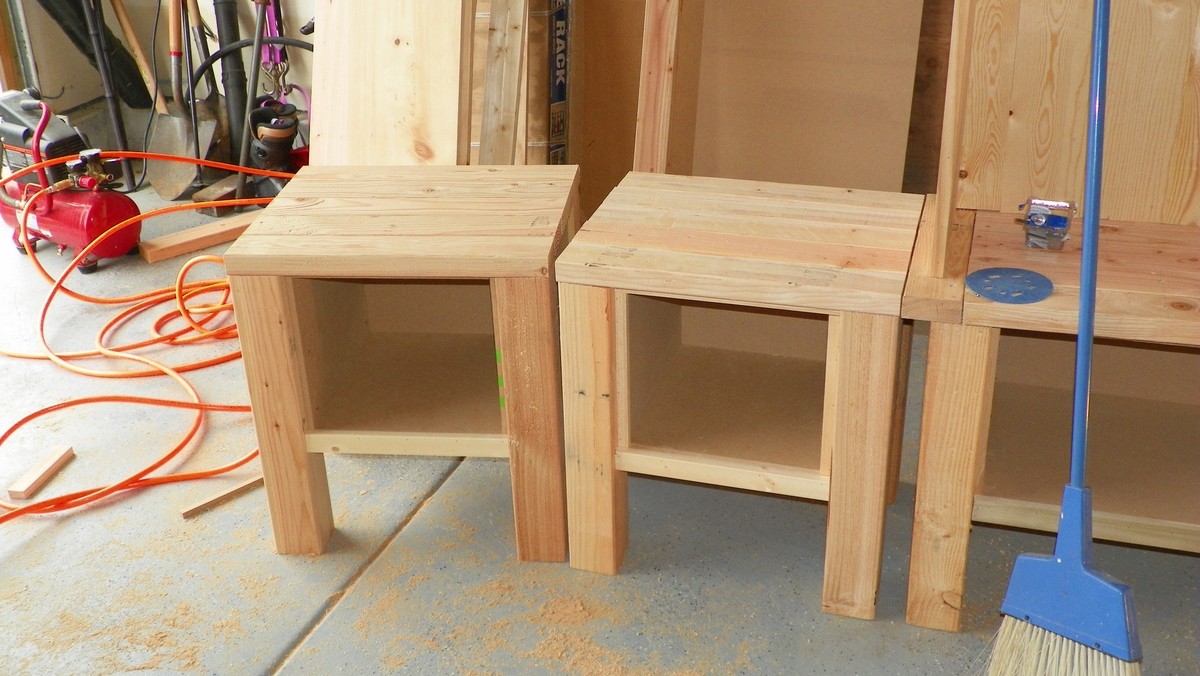
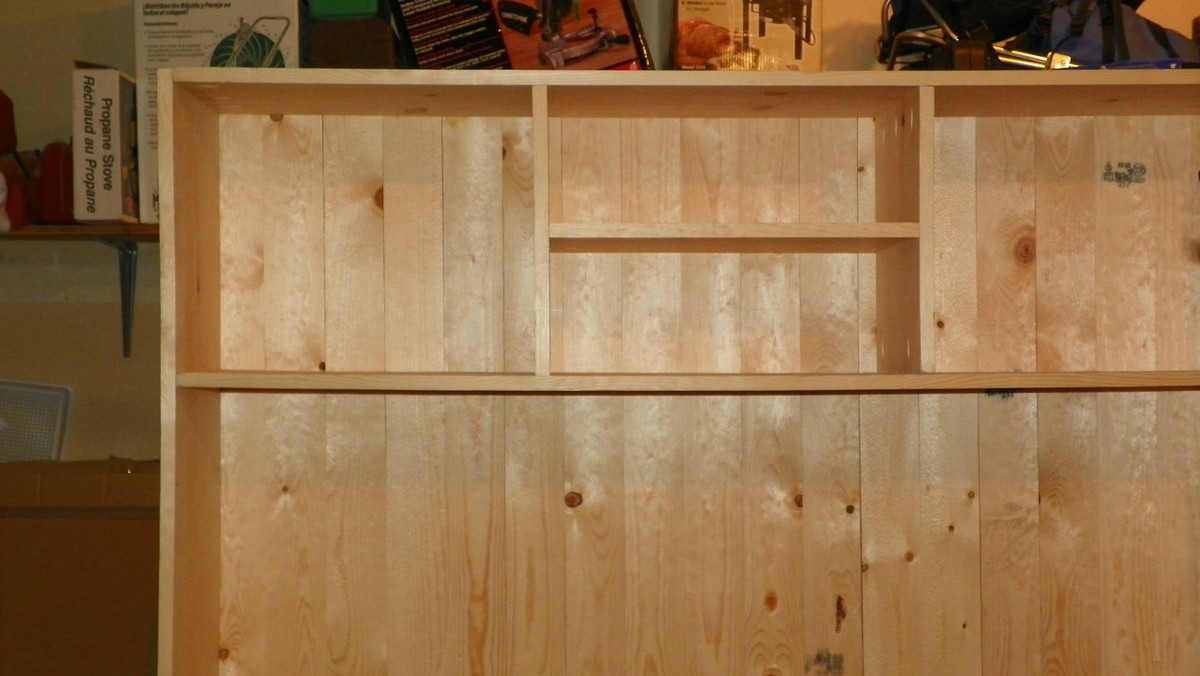
Tryde Media Console
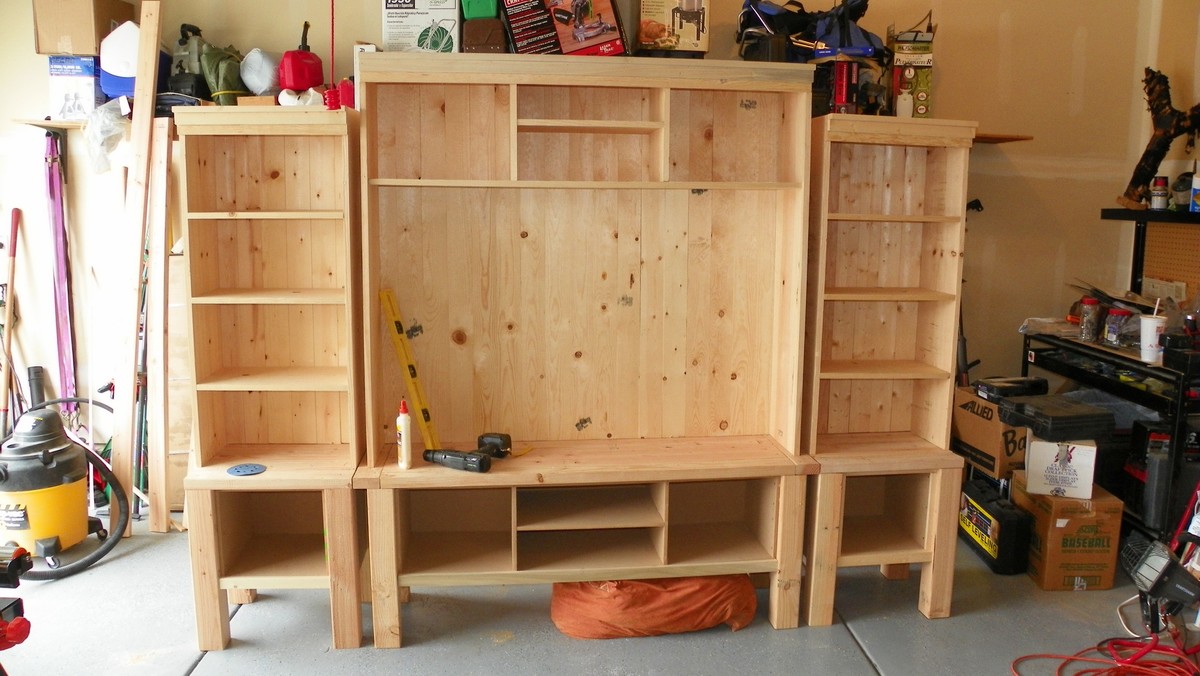
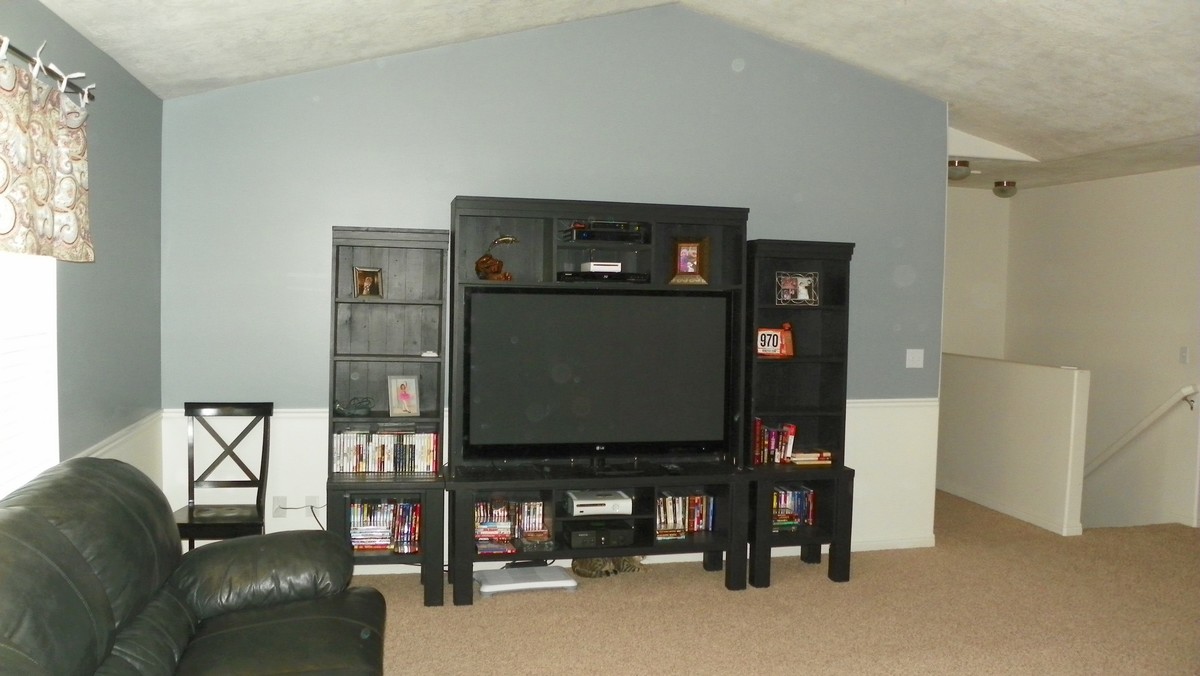
I built the Tryde Media Console with a few modifications. I had to increase the size to of the console to accommodate the 60" T.V. that it would be housing. You will also notice that I added a shelf in the top center of the console so that I could fit more components on the top. I also modified the console plans to create new plans for building two matching bookcases, one for either side of the console, giving it the "built-in" appearance. This turned out beautifully and we couldn't be happier with the plans that we downloaded from Ana-white.com! P.S. - The Kreg jig was a must for this project. All of the boards creating the back of the console are joined using pocket screws, pre-drilled with the kreg jig. After using this inexpensive tool for about ten minutes, I couldn't believe how long I had gone on without it!

Built from Plan(s)
Estimated Time Investment
Week Long Project (20 Hours or More)
Finish Used
Primed and Painted
Recommended Skill Level
Intermediate
Comments
Tue, 07/05/2011 - 18:41
Beautiful!
Very custom look - my eyes immediately went to the awesome spaces you have for the xboxes :-D
Tue, 07/19/2011 - 13:14
anyway you could post
anyway you could post dimensions of the main console that you had adjusted to fit your TV as well as cabinets that flank it? Looks great!