Community Brag Posts
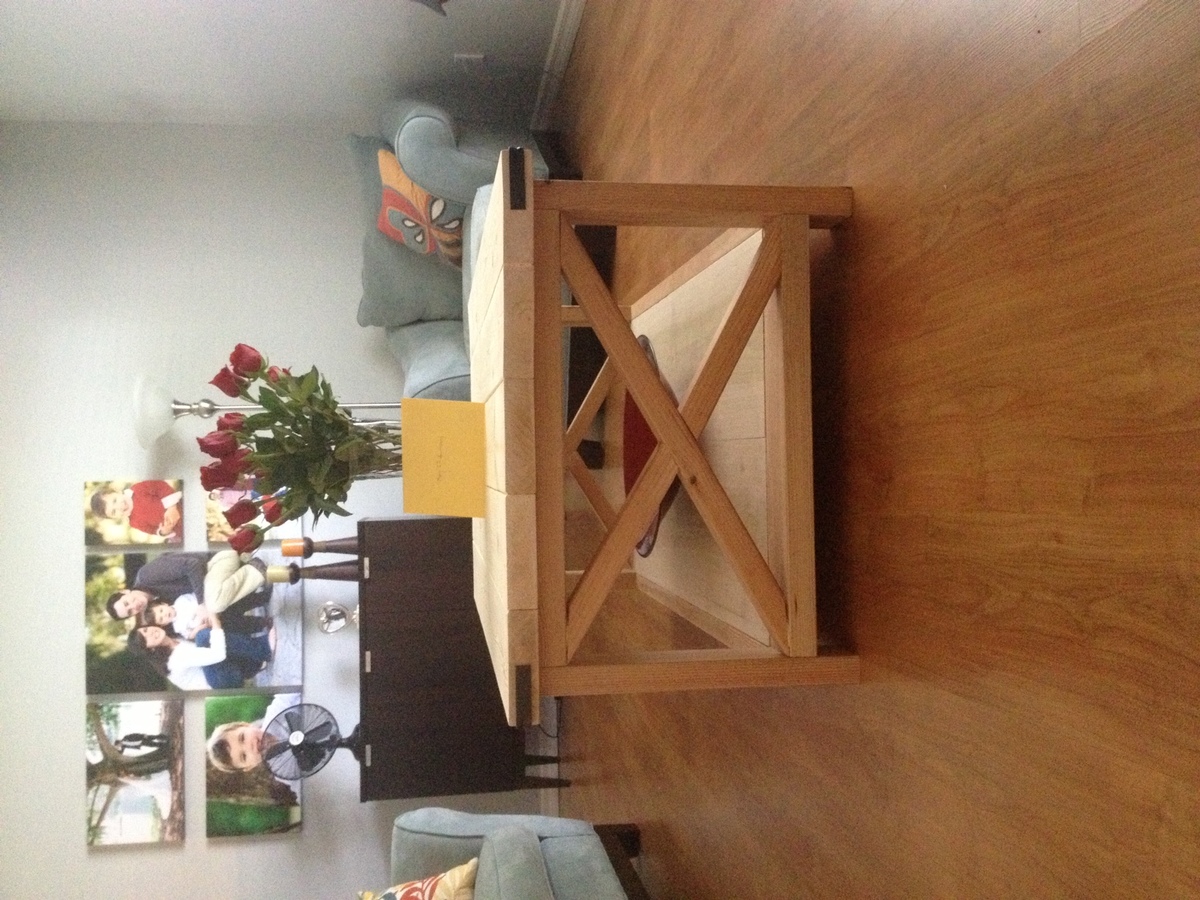
RUSTIC X COFFEE TABLE
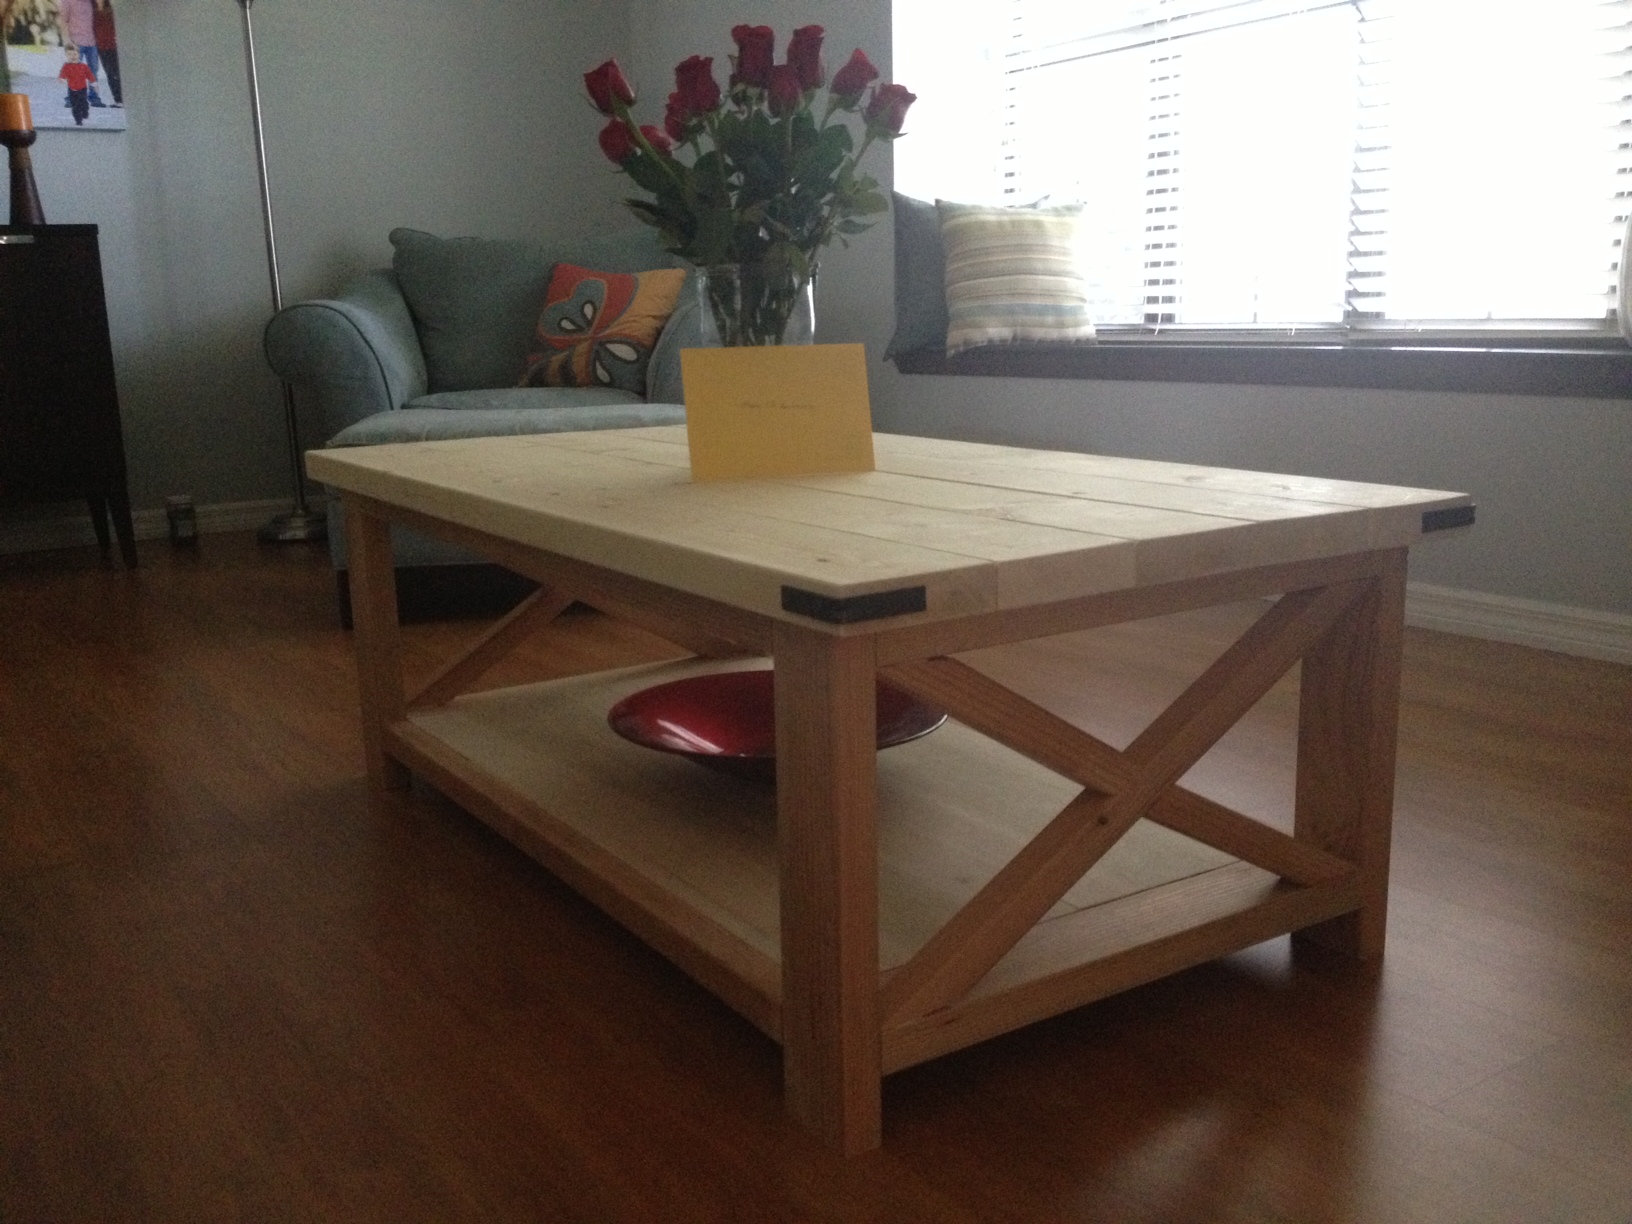
Since wood is the traditional 5th wedding anniversary gift, I thought this table would be perfect.
Estimated Cost
$200
Estimated Time Investment
Afternoon Project (3-6 Hours)
Finish Used
el natural .......for now.
Recommended Skill Level
Beginner
Comments


Thu, 05/02/2013 - 15:11
Metal Hardware
Lowes. I had to spray-paint them to get the color I wanted. I think they are called corner brackets.

Thu, 05/02/2013 - 17:58
Beautiful job
The table looks lovely, and I love the "au natural" finish!! ;-)
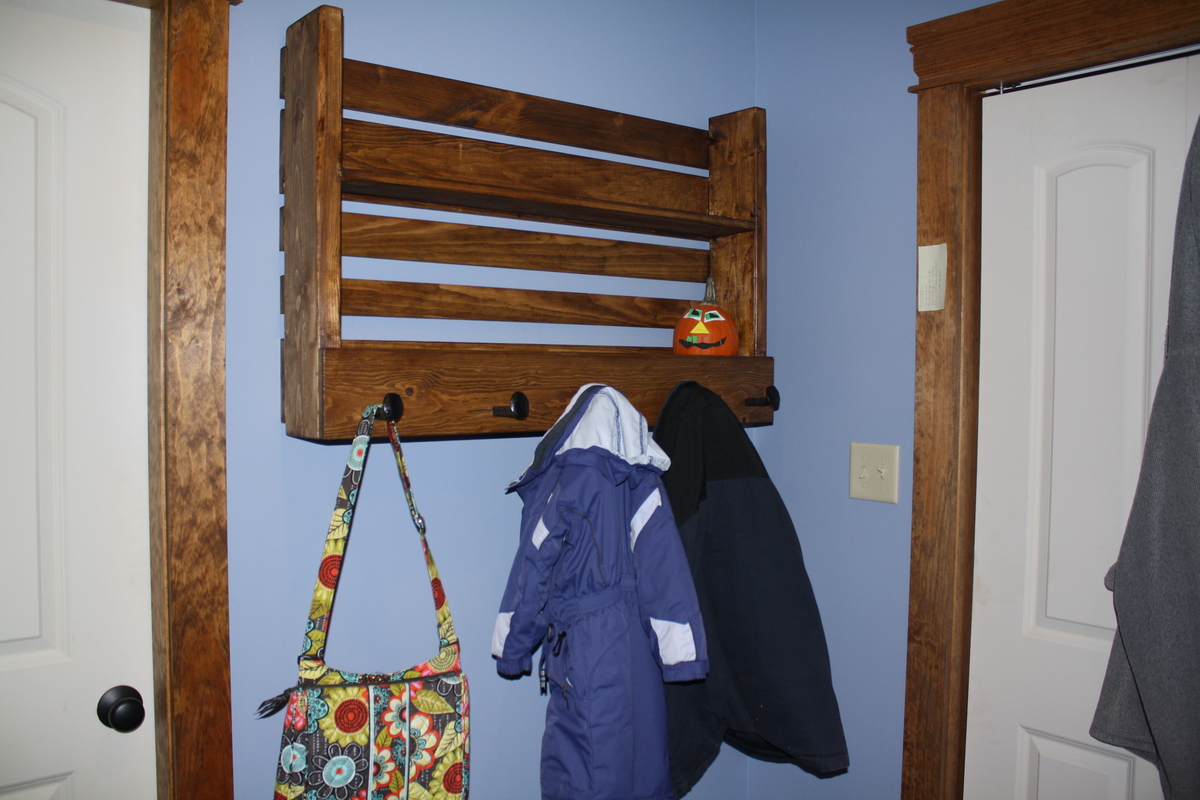
Pallet Style shelf & coat rack
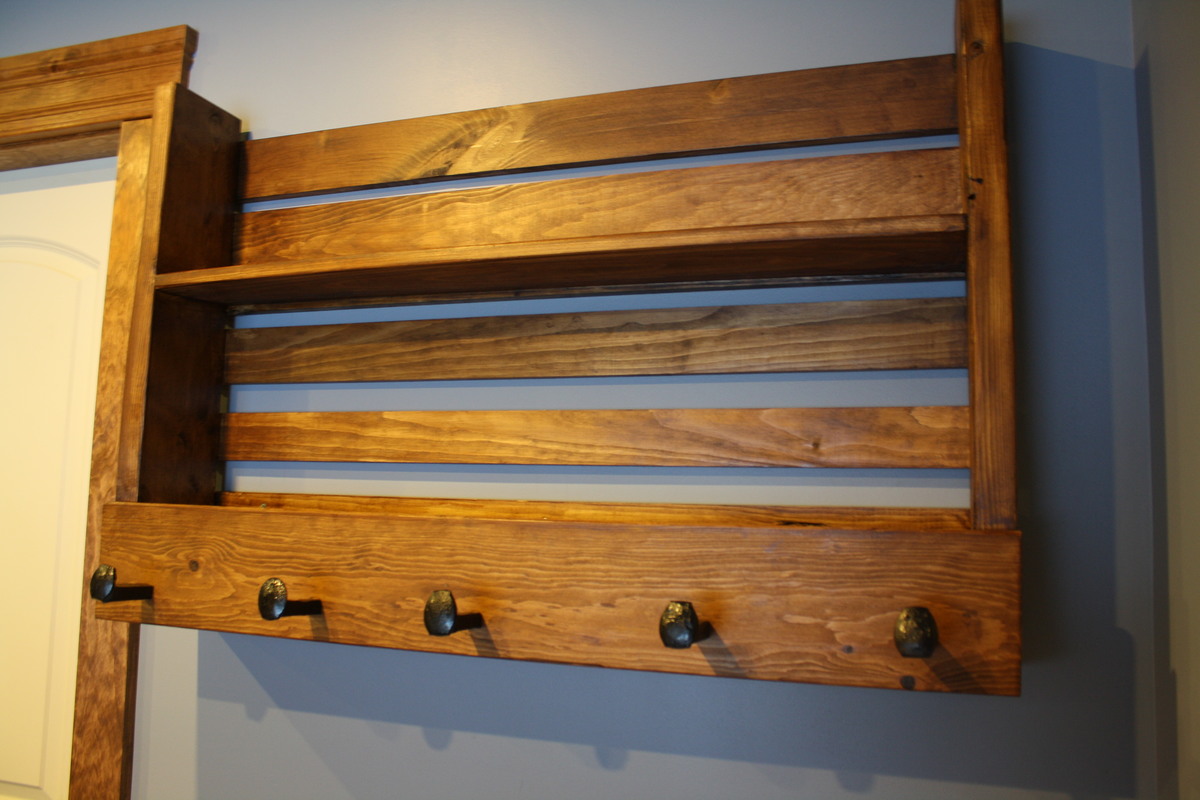
From the pallet style coat rack plans we saw from Ana and what she did for Ryobi Nation. Real simple to follow. I just change measurements to fit my space and other modificaitons because I didn't have quite enough 2x lumber. I saw the railroad spike hook idea on Pinterest and had a metal worker down my road cut them and thread them for me. I am very happy with it. I found a water-based stain (I HATE the clean up for oil based stuff) in a color called Aged Leather.
Built from Plan(s)
Estimated Cost
$50
Estimated Time Investment
Afternoon Project (3-6 Hours)
Finish Used
Cabot brand: color is Aged Leather
No topcoat on this project.
Just two coats of stain wiped down with a cloth. I use a staining sponge for all my staining work now as they are cheap, quick and easy.
No topcoat on this project.
Just two coats of stain wiped down with a cloth. I use a staining sponge for all my staining work now as they are cheap, quick and easy.
Recommended Skill Level
Beginner
Comments
Skull Adirondack Chair
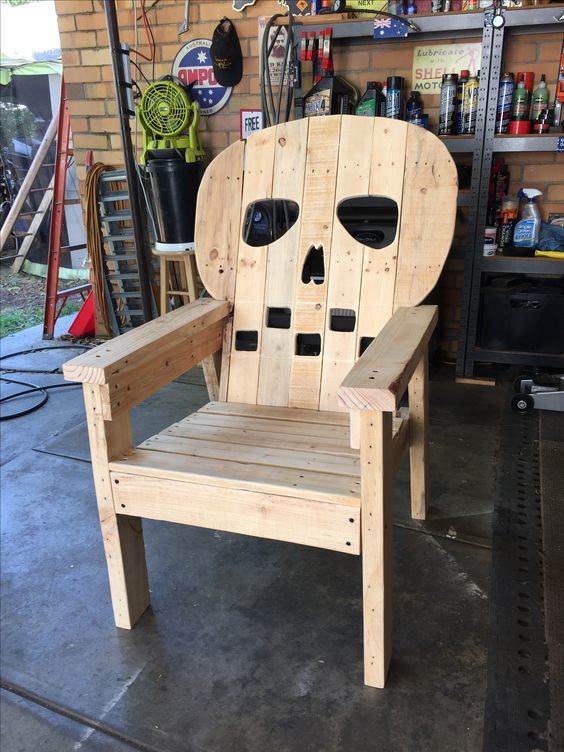
I made this chair from plans in Ana's book. Obviousy I modified the back to make the skull.
Super easy to make. I used all pallet wood for this project so the only cost was the screws.
Built from Plan(s)
Estimated Cost
$0
Estimated Time Investment
Afternoon Project (3-6 Hours)
Finish Used
I stained this chair in walnut stain
Recommended Skill Level
Beginner
kingsize frame
built this to go around our adjustable bed. for the posts i took 2 select pine 5/4 (2x4) and 1 - 1x4 and glued them together and left a gap to slide the side rails (2 - 1x8's) into the post approx 2-3"s and then ran 2 screws from the side to anchor the side rails to the head/footboards
Built from Plan(s)
Comments
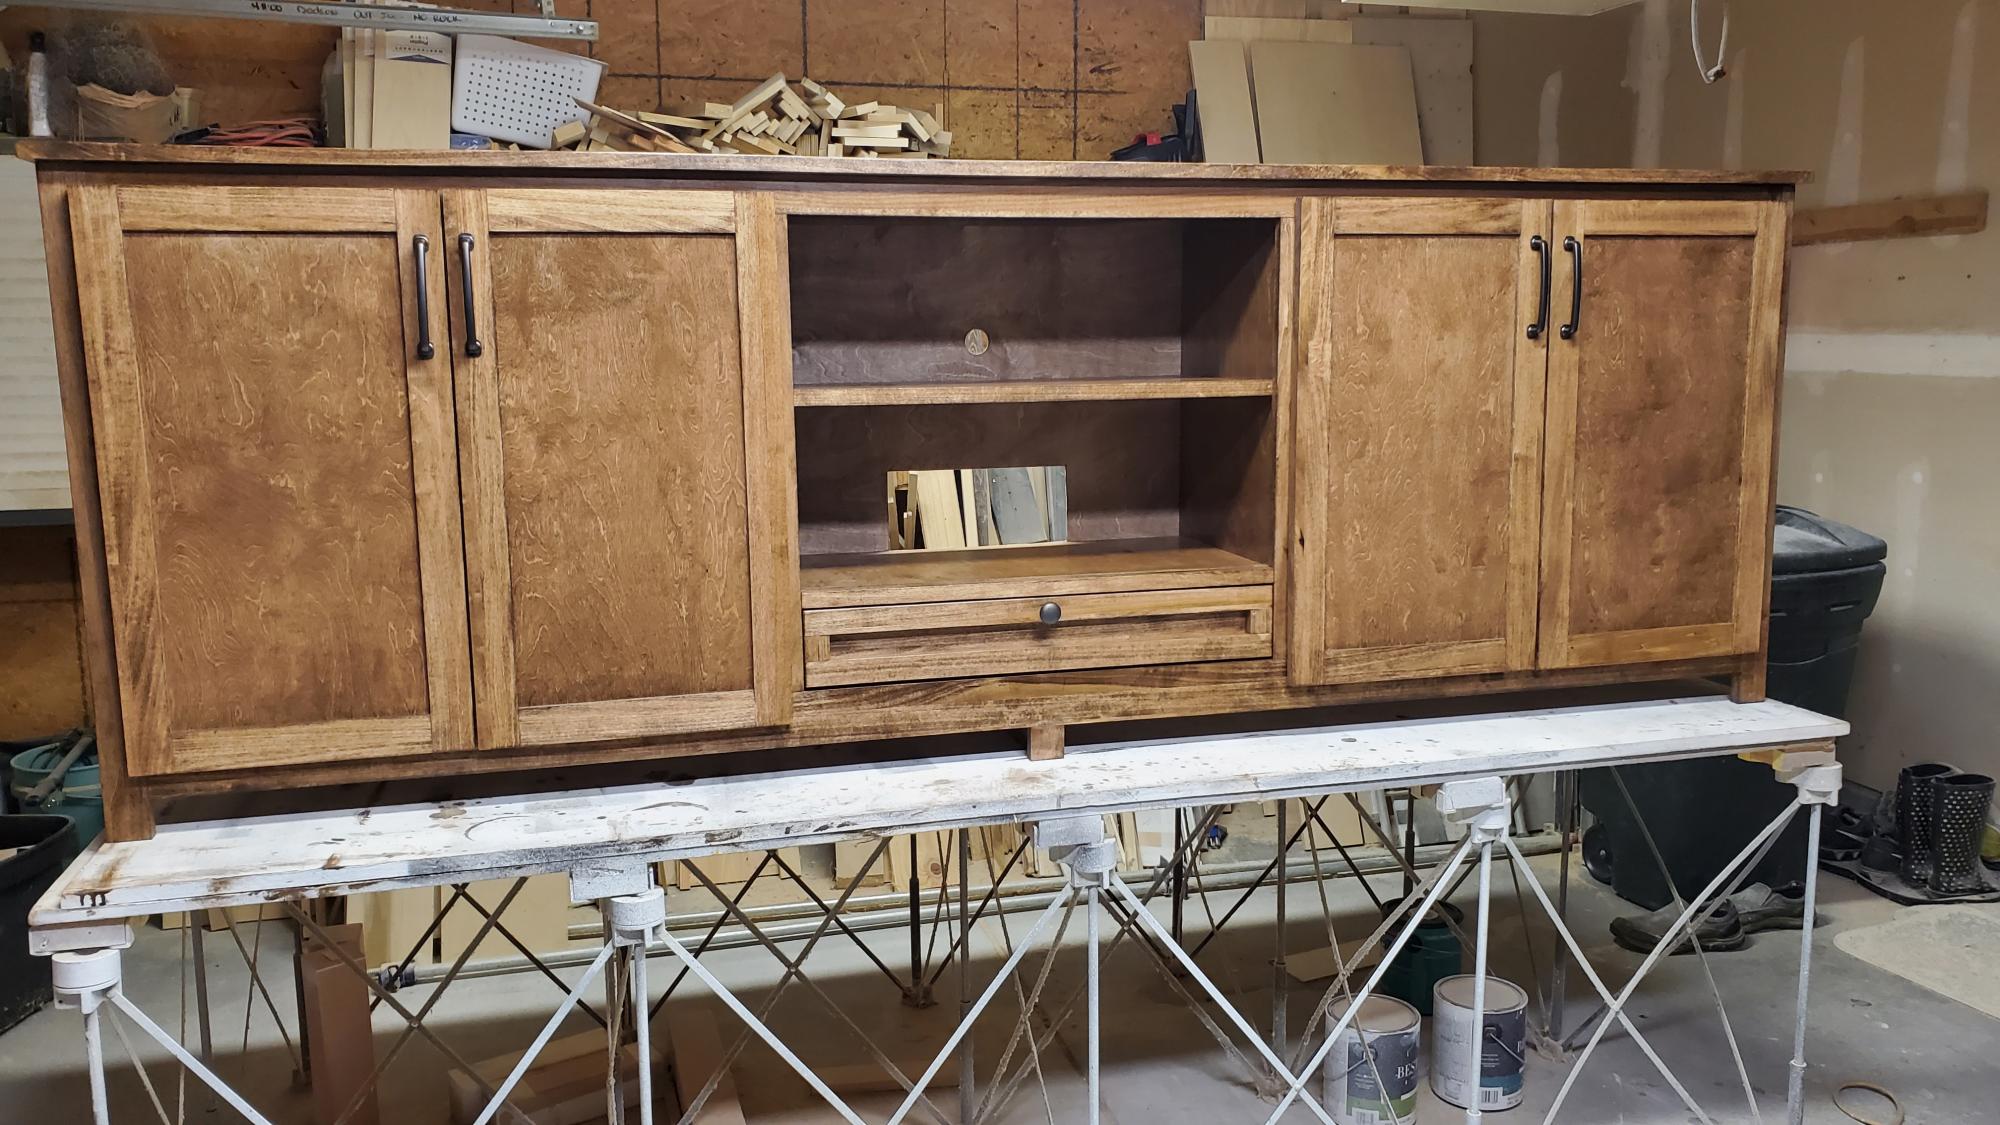
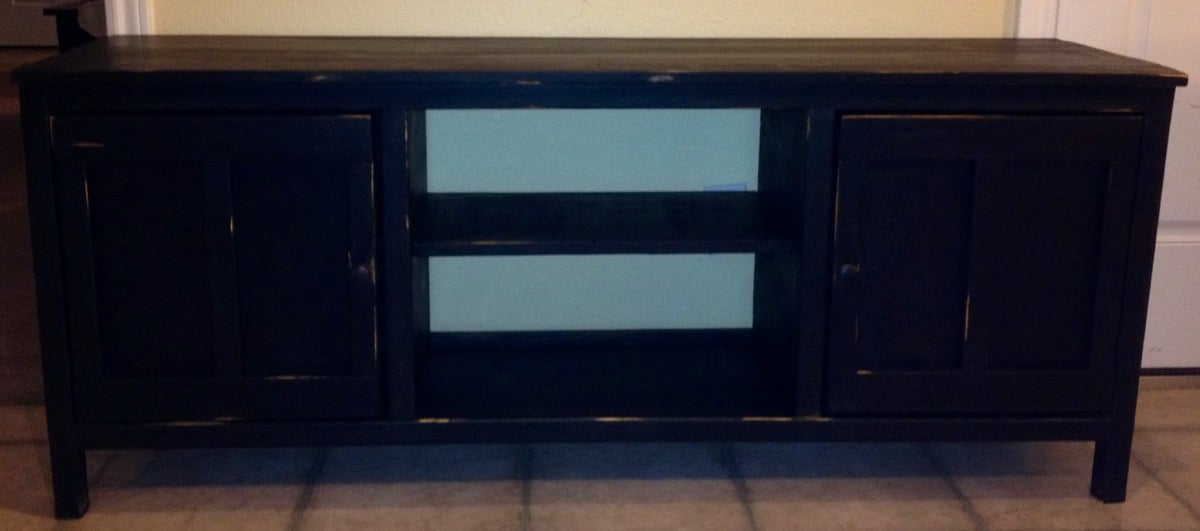
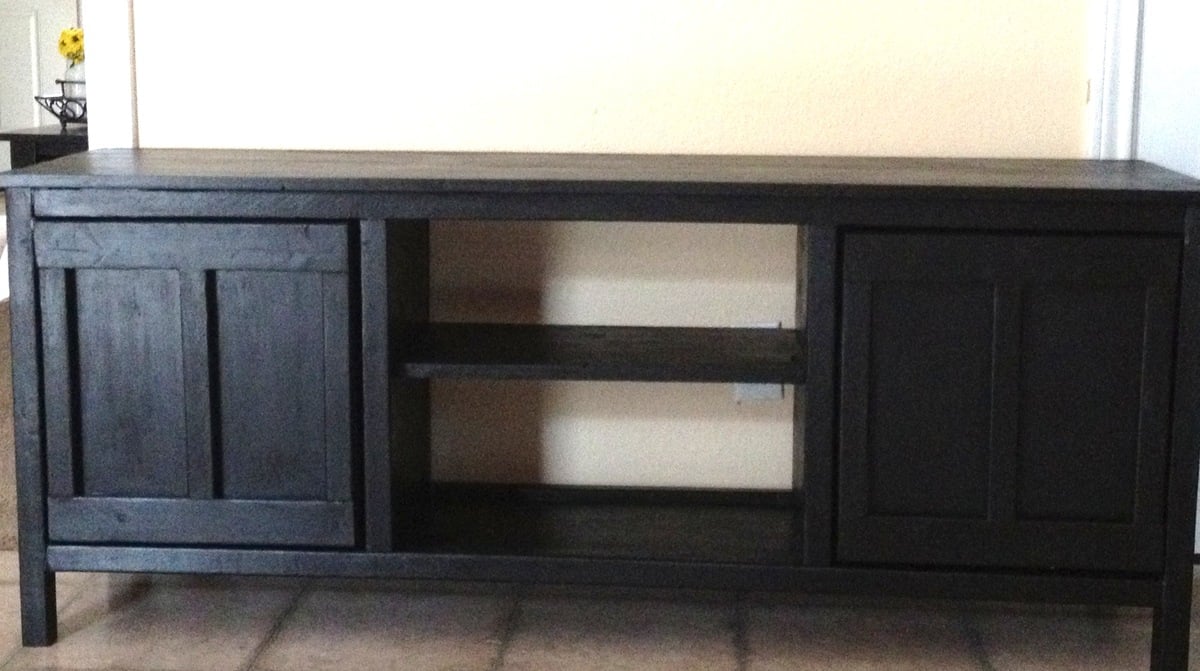
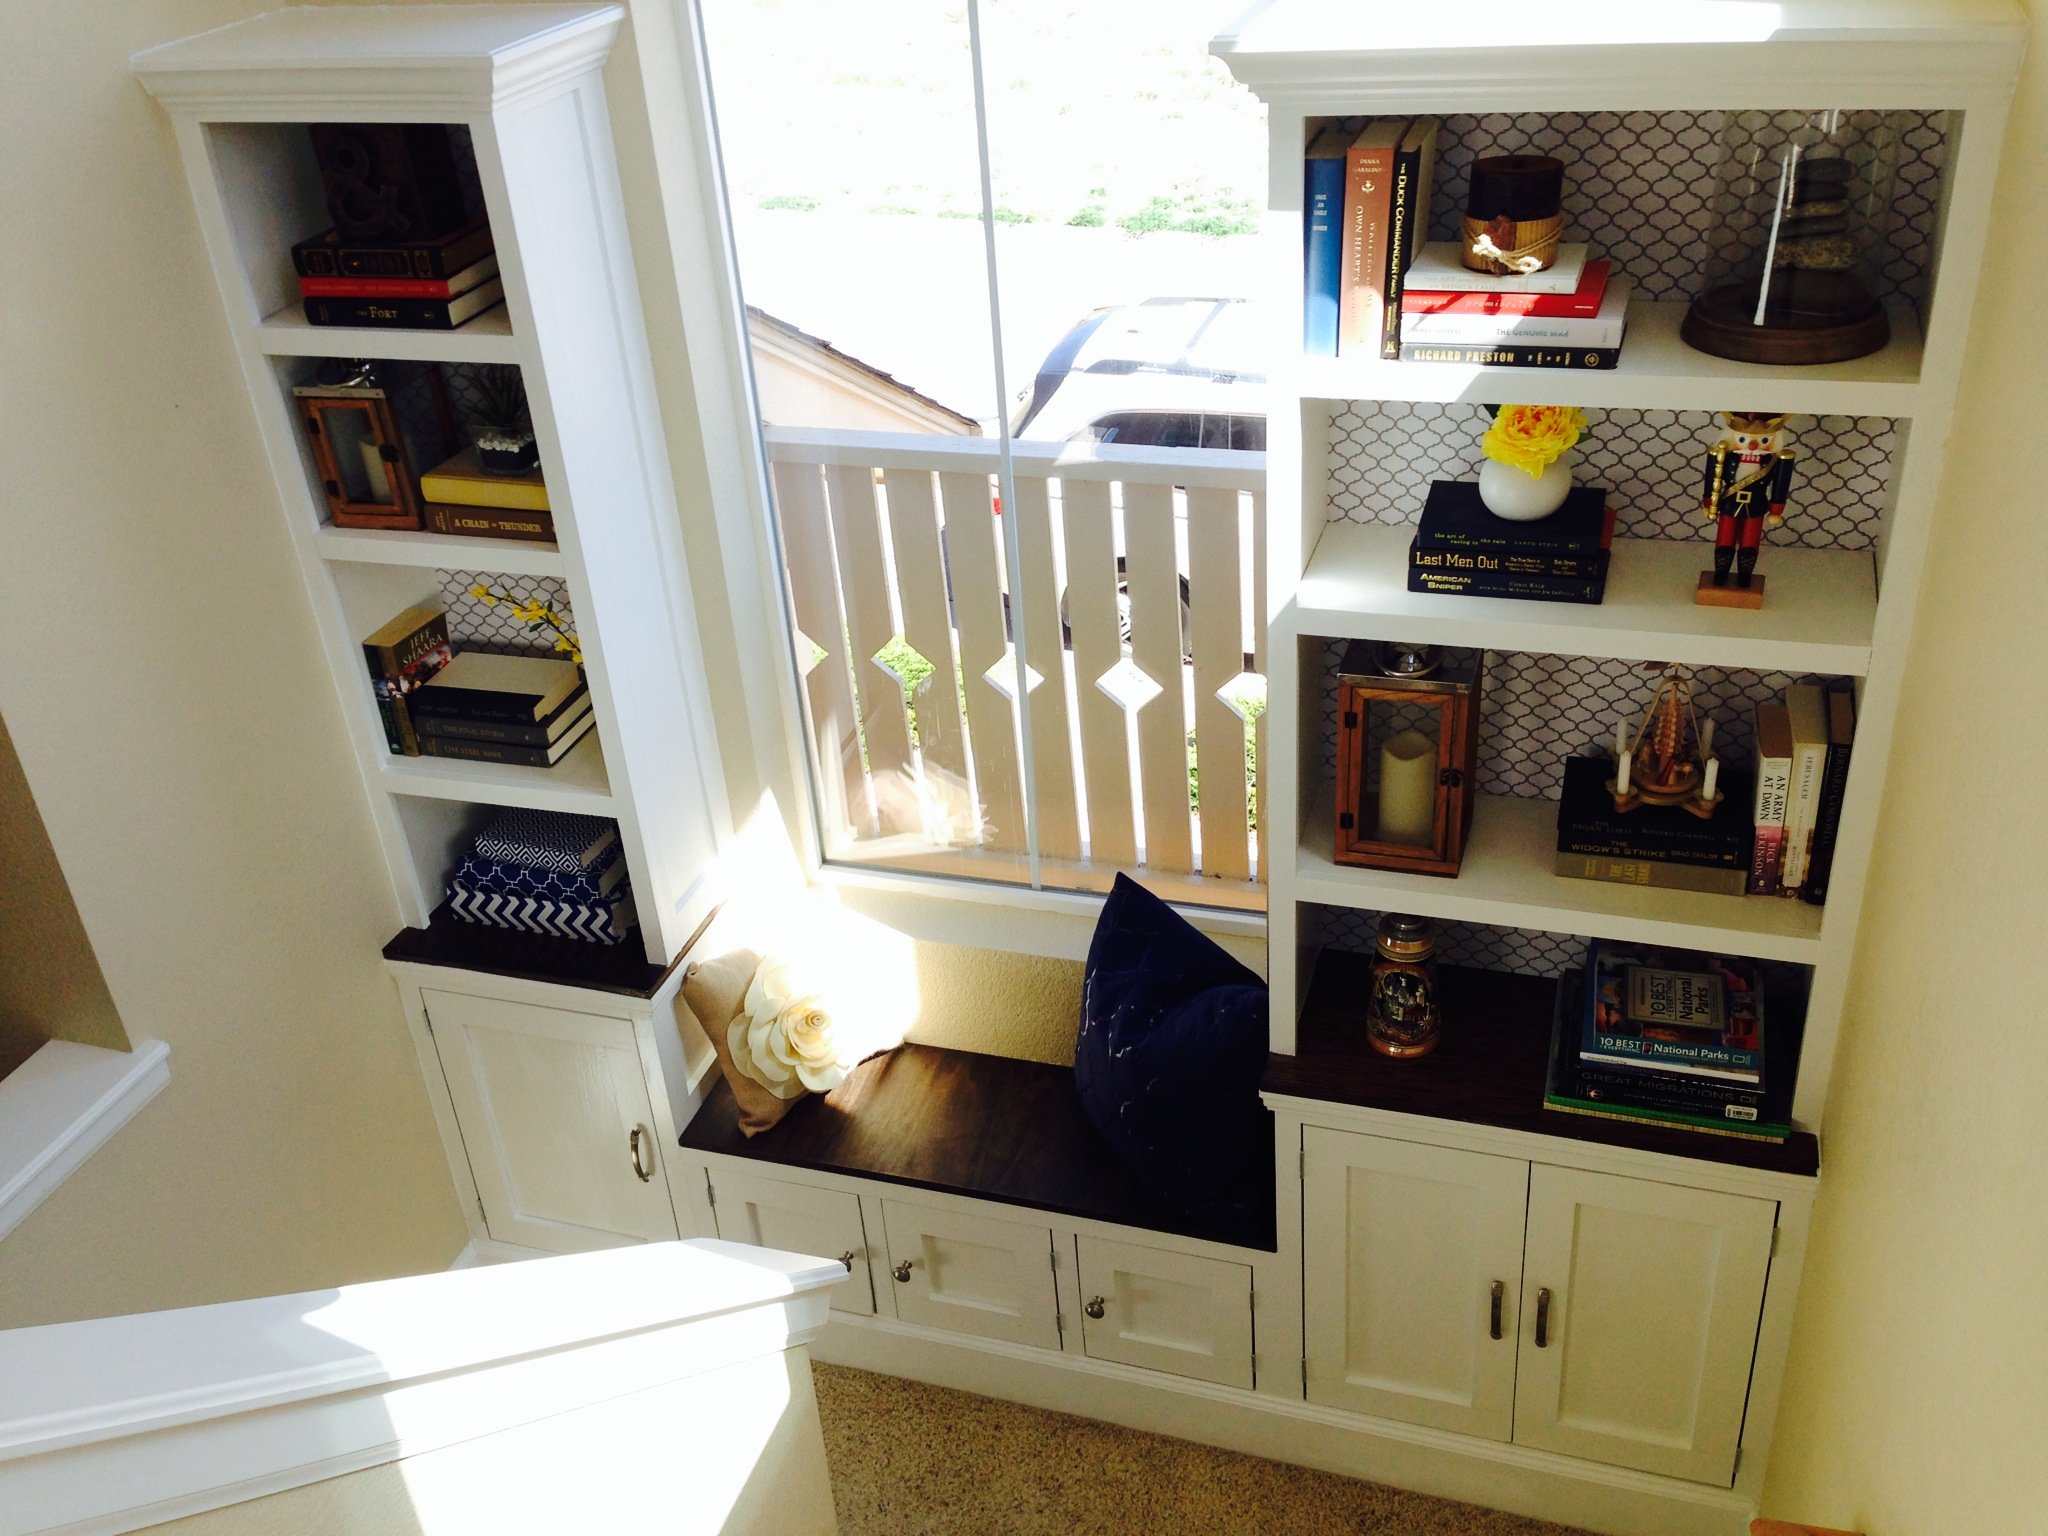
media console
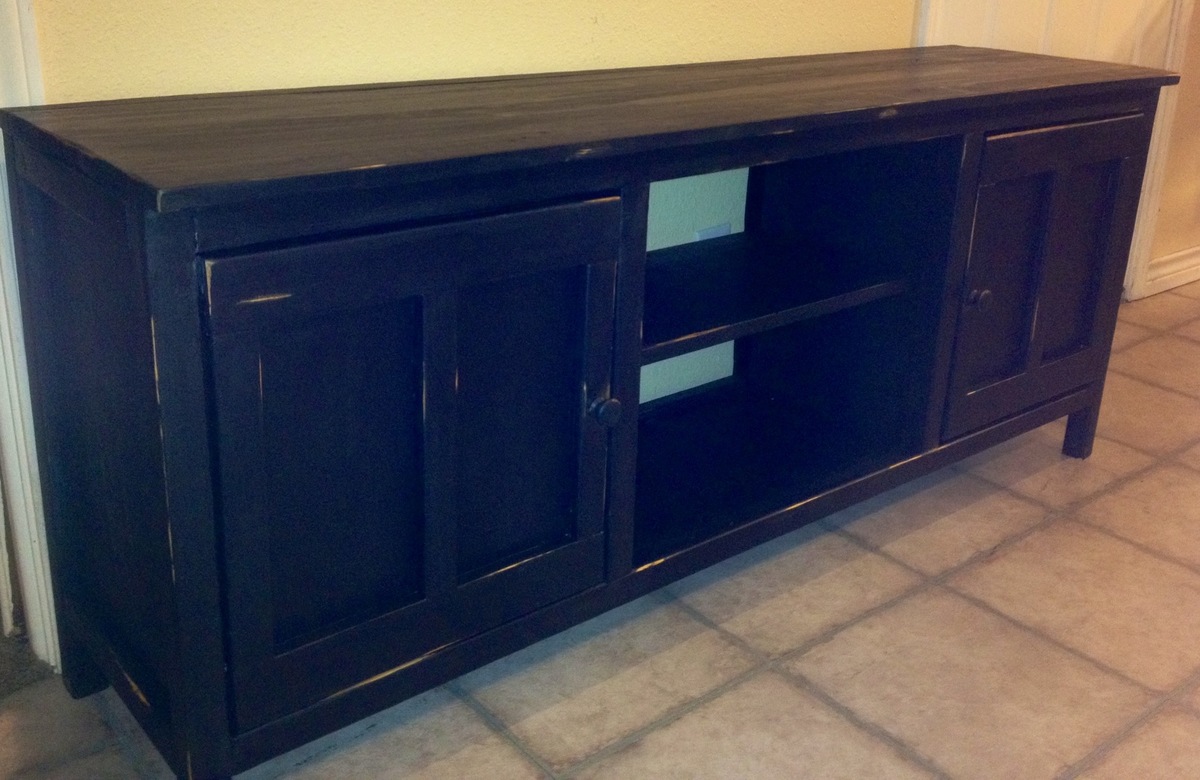
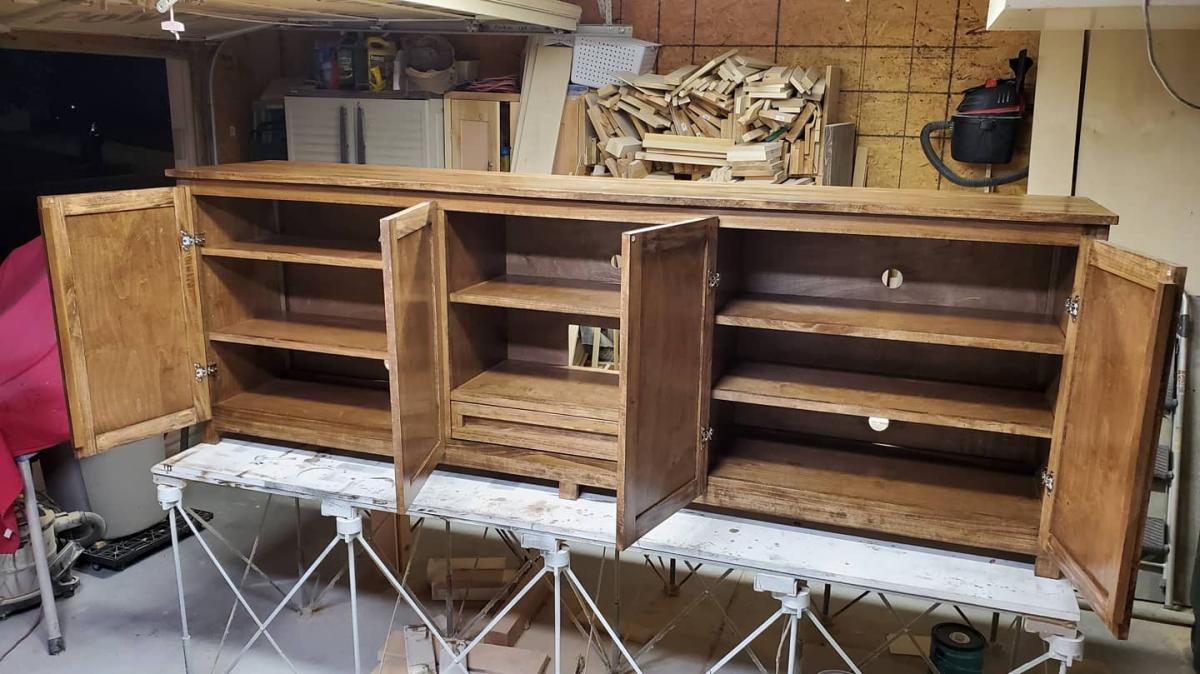
This was built using Ana's media console plan with slight modifications. I decided to forego the drawers for simples shelves, like so many on the brag posts did. I also added shelves in each of the cabinets for extra storage. And, I added some scrap 2x2s for vertical trim on the cabinets. I opted for knobs instead of handles, because I thought it looked better and they were recycled from another project of mine.
I painted black, since that's my thing and it's seemingly safe, but distressed with my sander and used a q-tip to stain the "weathered" parts. For whatever reason, I let my husband select the stain and he chose the Minwax Classic Gray. This is a gorgeous stain, but do not use it on black as a distress stain. This color takes a bit of manipulation, as it doesn't take on certain pieces of wood as it does others (Ana does a tutorial on this color--watch it and you'll see what I mean). From there, if you get any excess on the black paint, it looks a sloppy mess--I had to wipe it down with a wet cloth as best I could, repaint it, sand it, and restain with Rustoleum Summer Oak (I personally prefer all Rustoleum products to Minwax, but that's my preference).
Also, I wish I had used higher-quality wood and/or spent more time finding better cut pieces. I used pine, and some of the pieces (especially the 2x2s) were very wonky.
This was my first "big" project and it took a really long time because I made a ton of mistakes. But, it's wood, and mistakes can be corrected. Just like life, mistakes are learning experiences--some more costly than others. While this isn't the most beautiful piece of furniture, it was a great learning experience, and that's why this console is so valuable to me.
Estimated Cost
$65 (including paint/stain)
Estimated Time Investment
Week Long Project (20 Hours or More)
Finish Used
Valspar Black Satin paint and Rustoleum Summer Oak
Recommended Skill Level
Advanced
Comments
Sun, 05/05/2013 - 07:08
Very Nice!
LOVE the console. Any "wonkiness" just gave your piece character!

Counter-Height Stool

I made these stools to use with my counter-height dining table. The only modification I made to the original plans were I did not use the diagonal support and I used 2x6s to make the seat for the stool.
Built from Plan(s)
Estimated Time Investment
Afternoon Project (3-6 Hours)
Finish Used
Red Mahogany Stain
Recommended Skill Level
Beginner
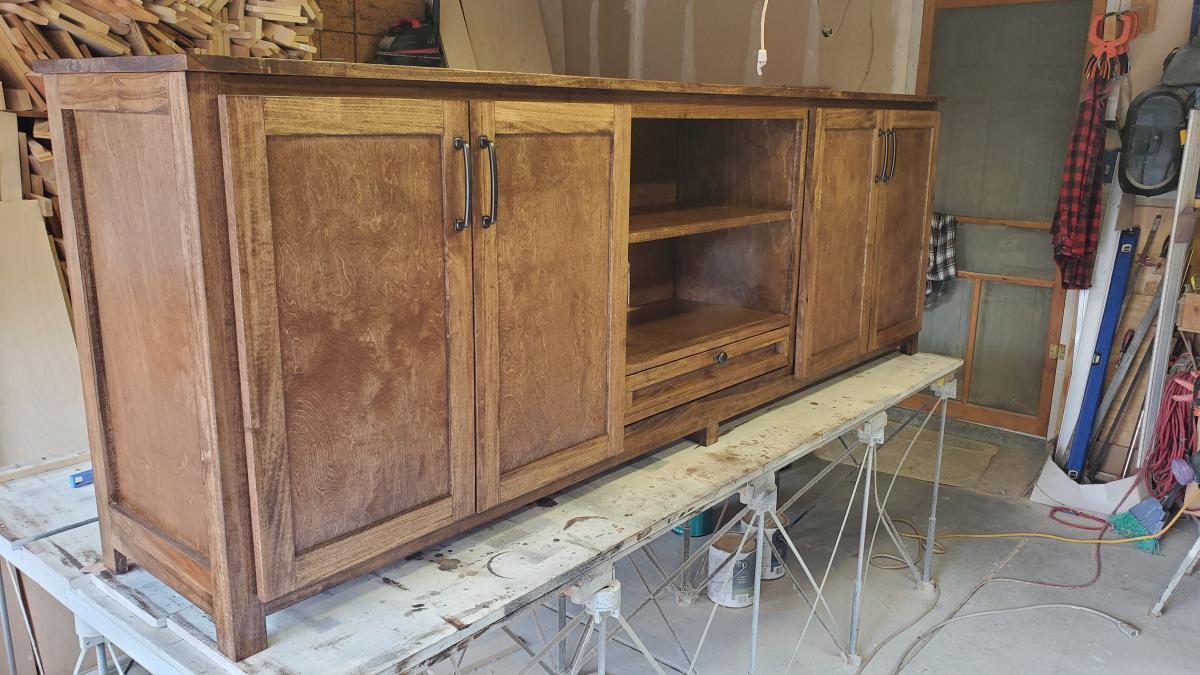
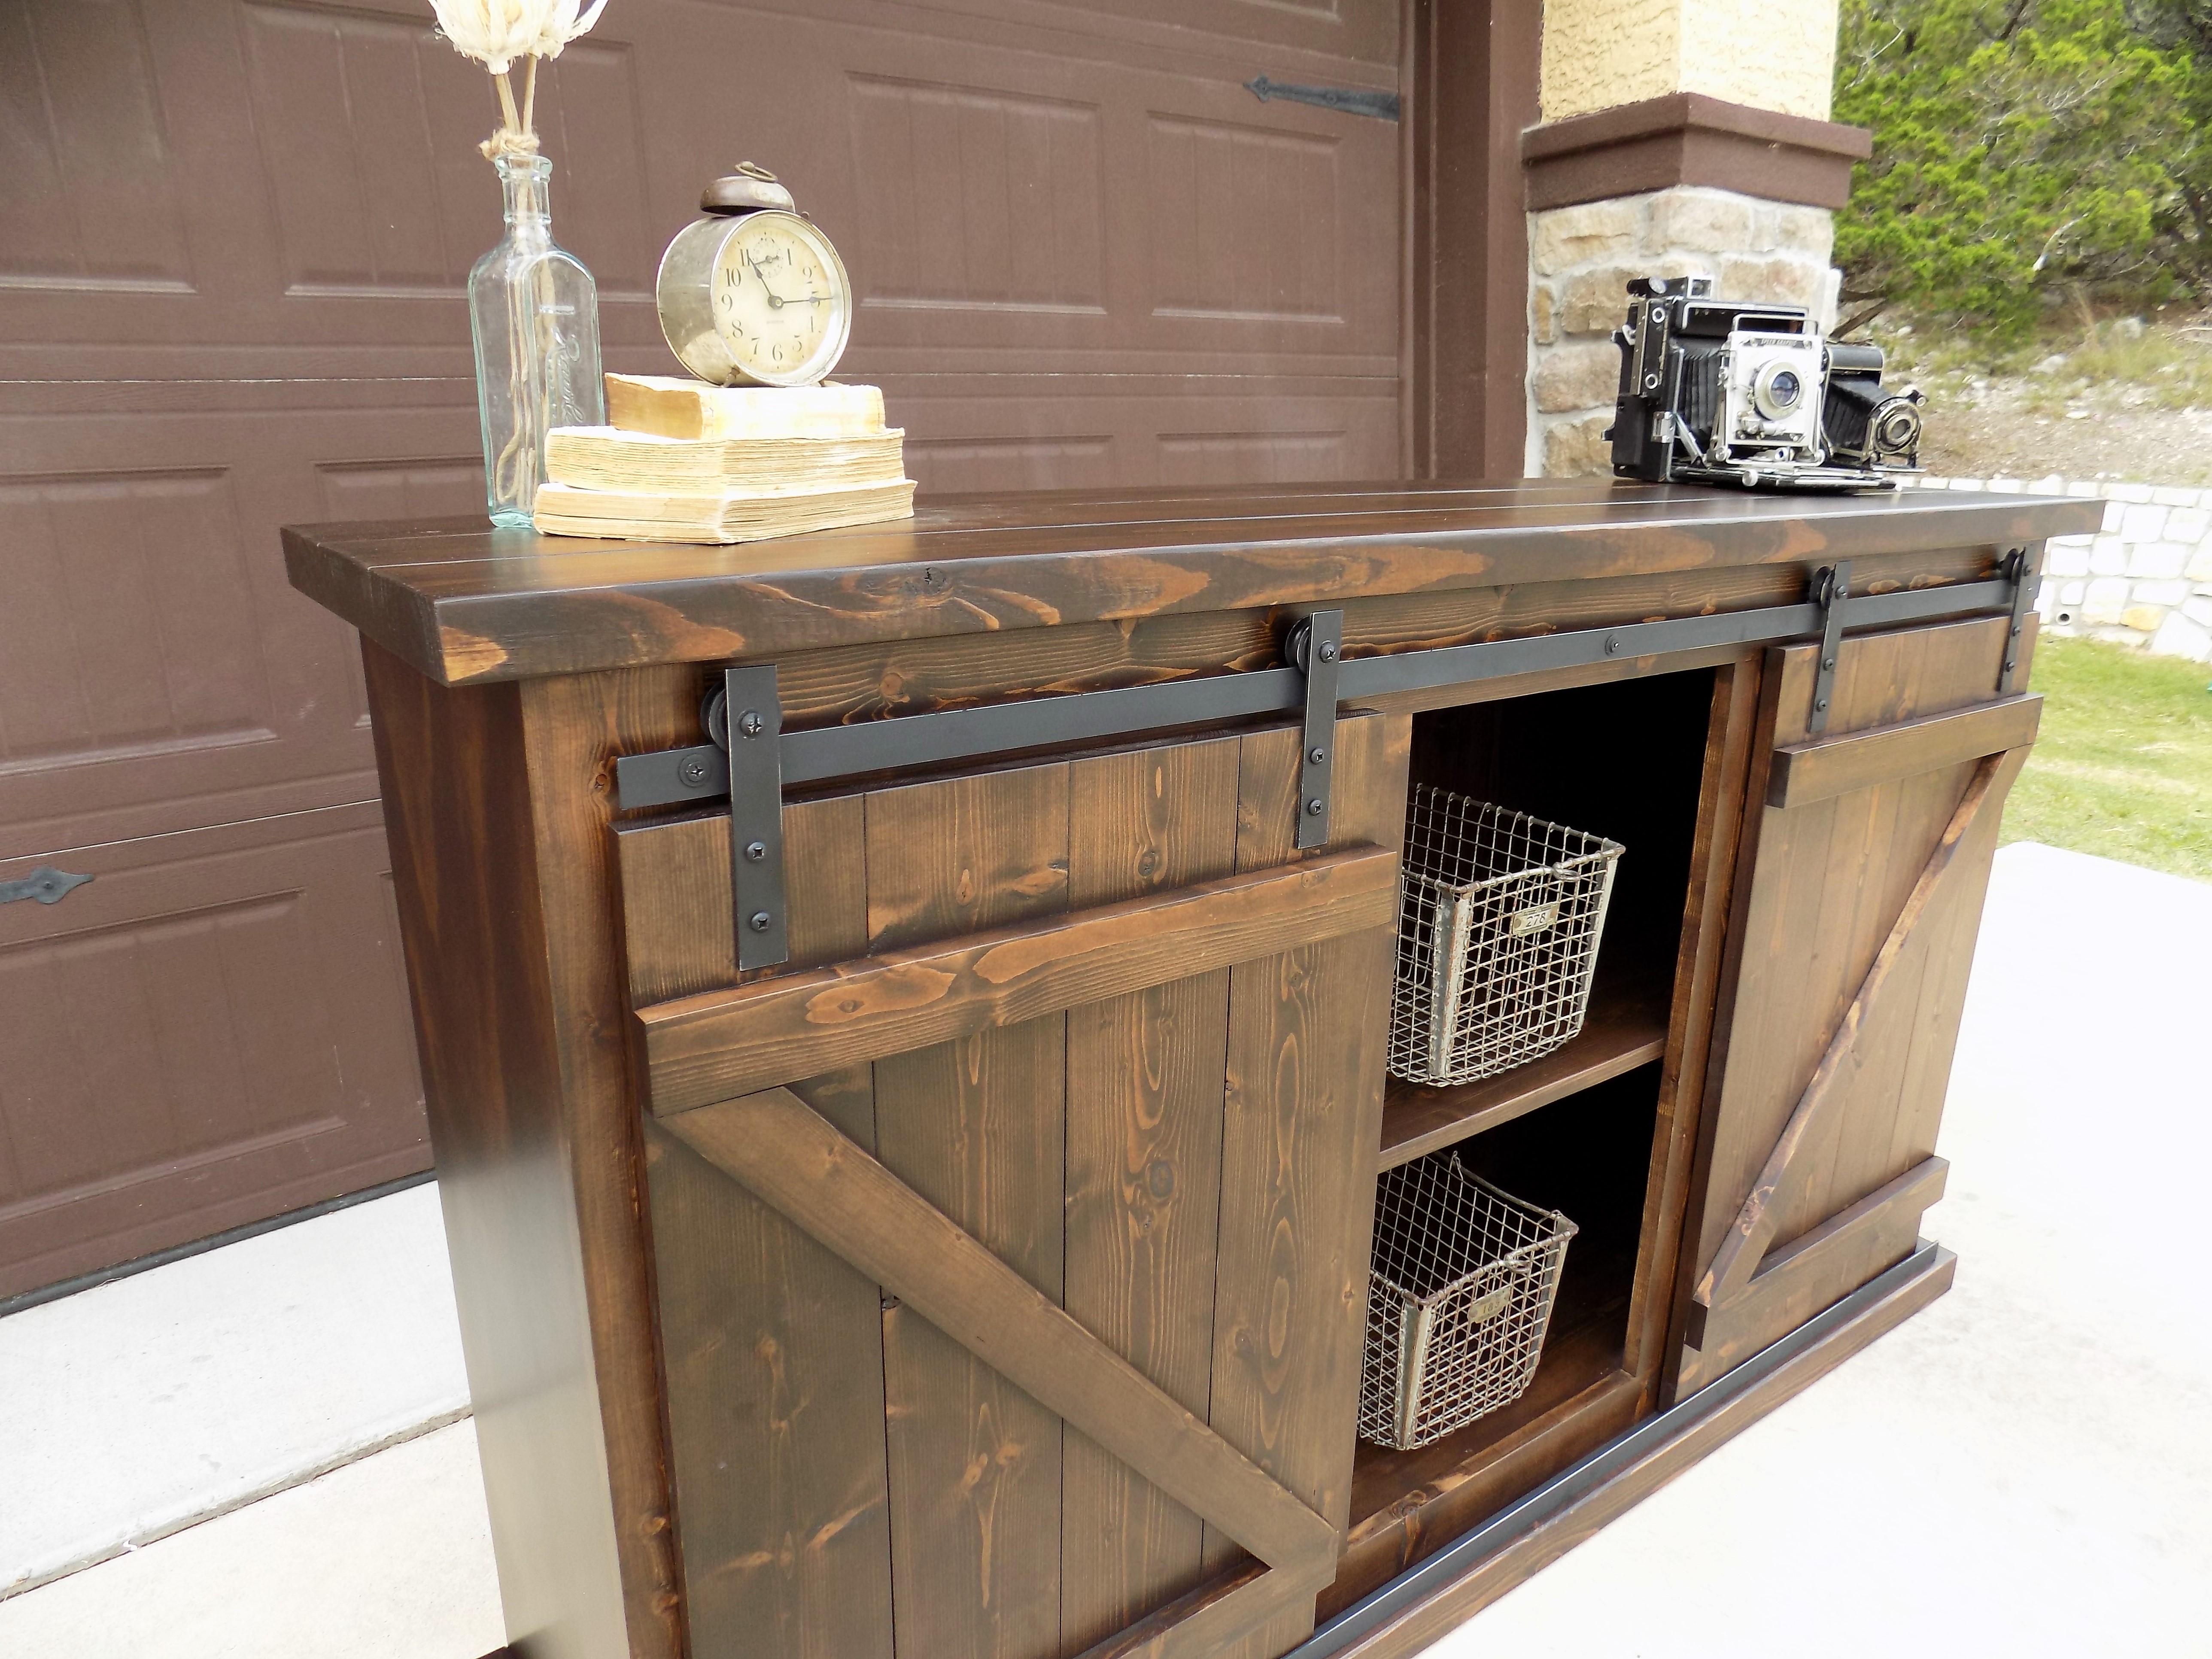
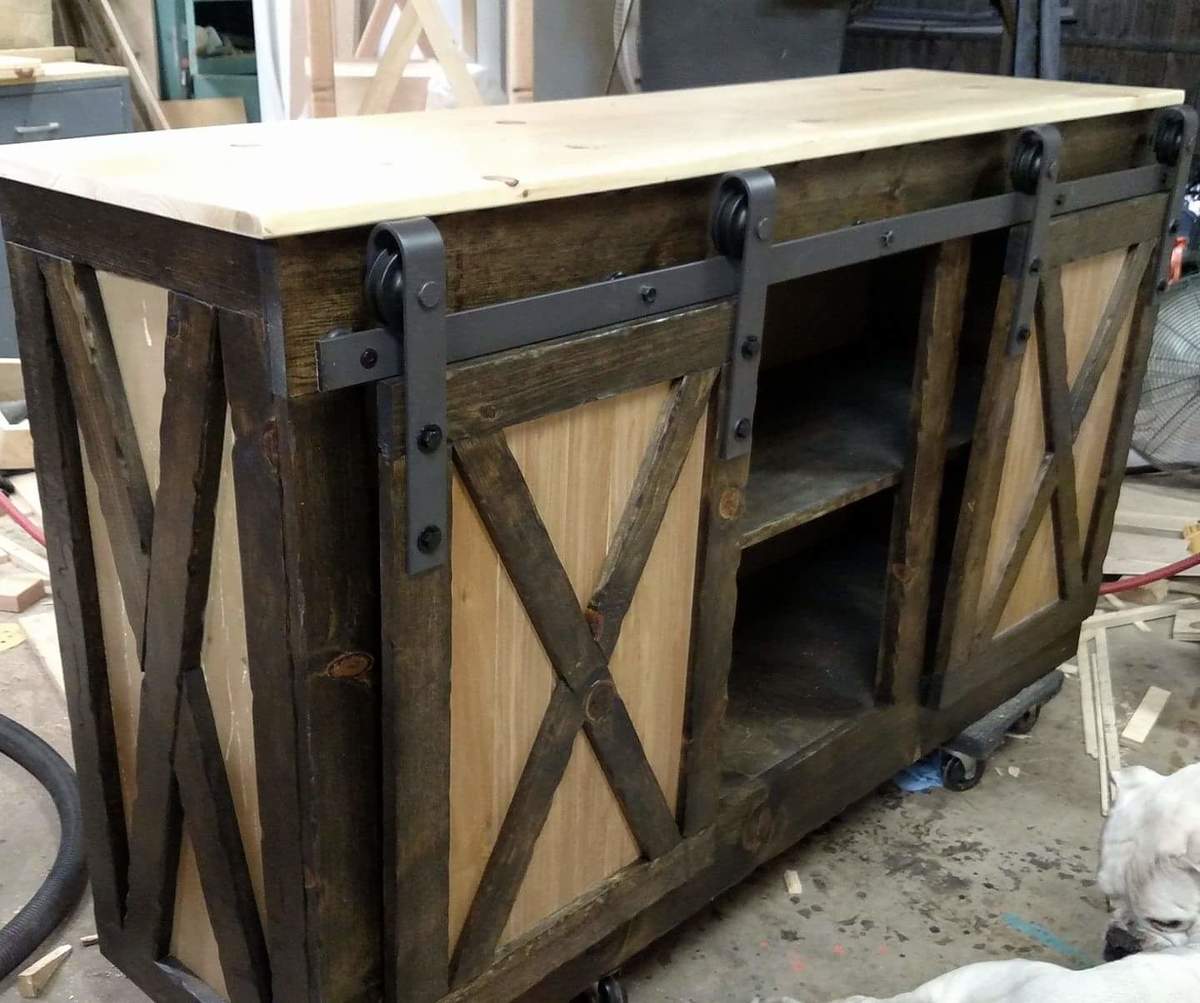
Modified grandy siding console

We slightly modified the grandy console plans and did a different door style per the customer request and also added a 1 1/2" x 2" toe kick with a door guide. Console measures 66" long x 16" deep x 36" high.

Built from Plan(s)
Estimated Cost
180
Estimated Time Investment
Weekend Project (10-20 Hours)
Finish Used
Stain was SW Sherwood BAC Wiping Stain in a custom espresso color. Finish was 4 Coats of Gemini Gem Coat Pre-cat flat lacquer.
Recommended Skill Level
Beginner
Comments
Toy box
Had the hubby make this! Nice project. Thanks for sharing the plans
Built from Plan(s)
Comments
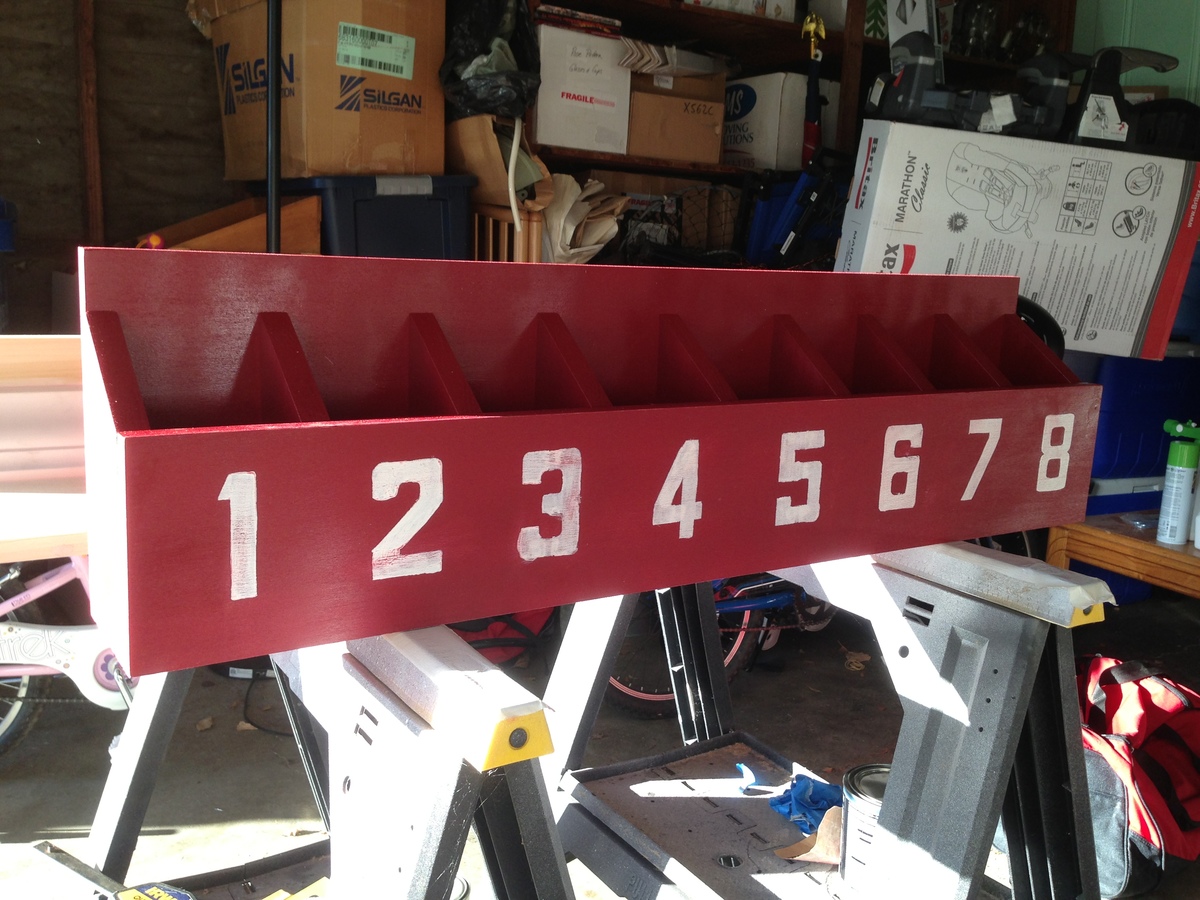
My version of the simple cubby for the wall.
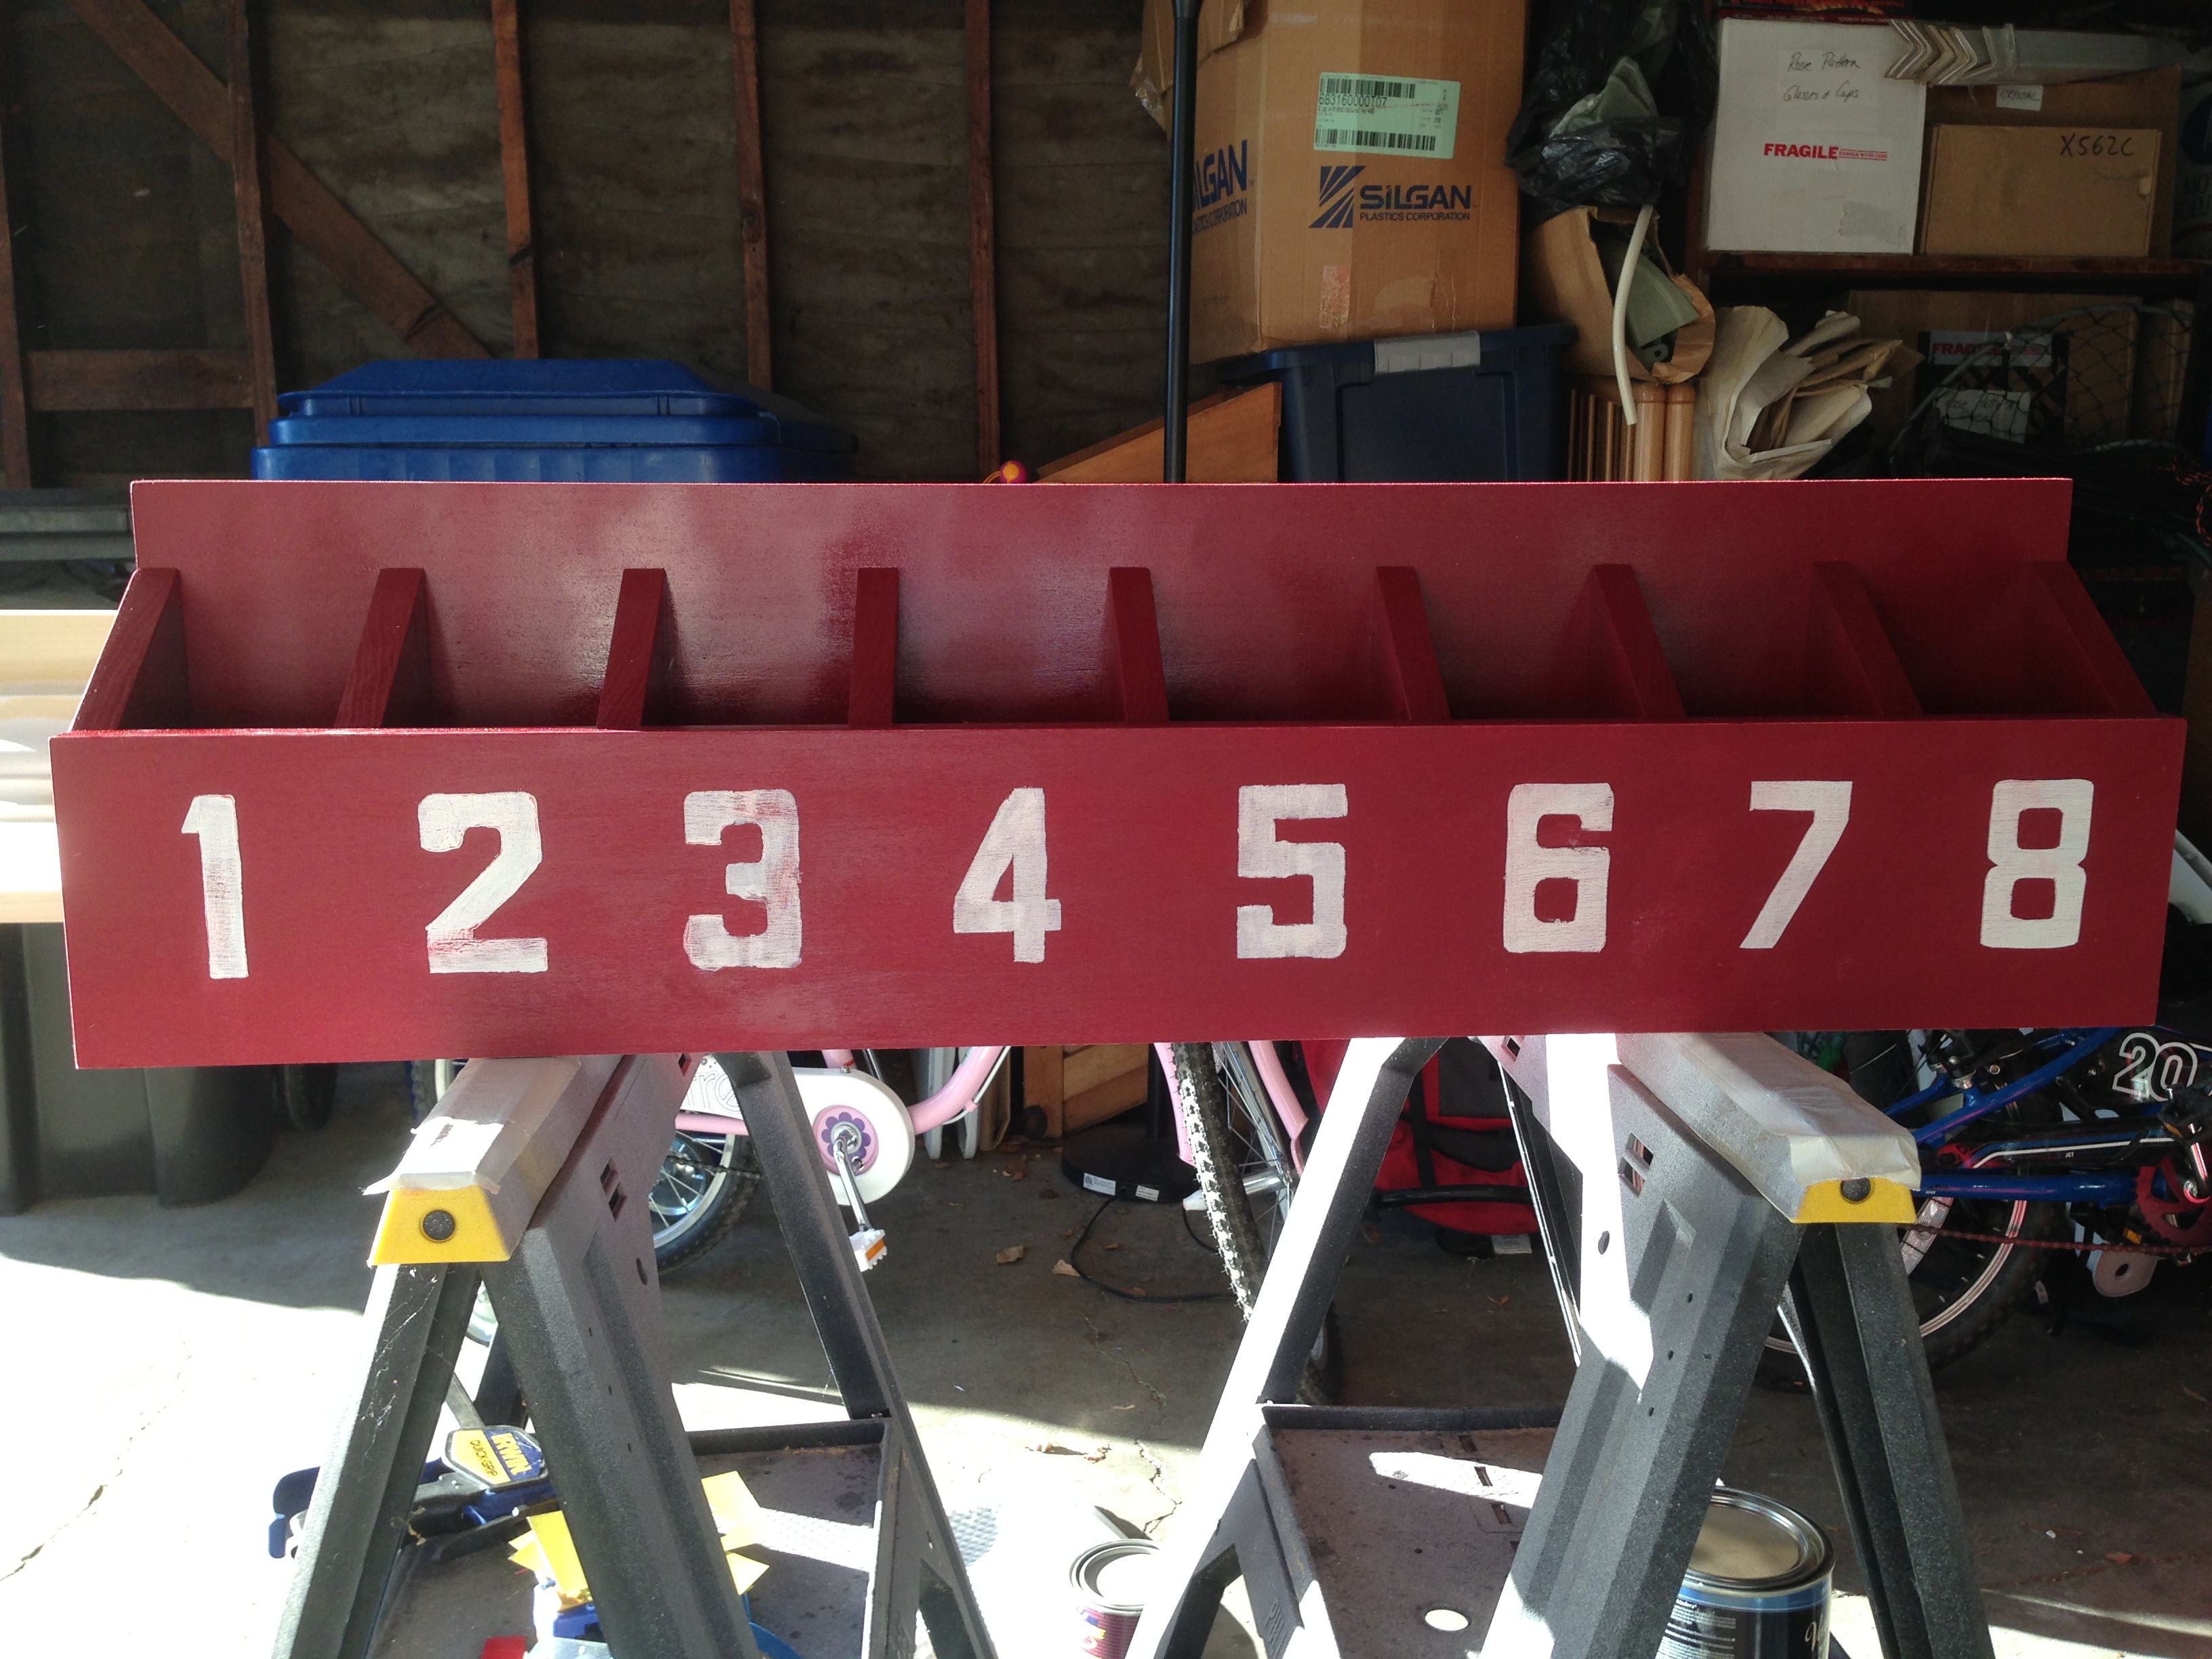
I saw this project on this site and thought it would be a great item to build and to store my kids art supplies. The 8 cubbies are perfect for glue sticks, pens, crayons, and scissors.
Estimated Time Investment
Afternoon Project (3-6 Hours)
Finish Used
Spray Paint: Cardinal semi-gloss (had it in my tool shed)
Recommended Skill Level
Beginner
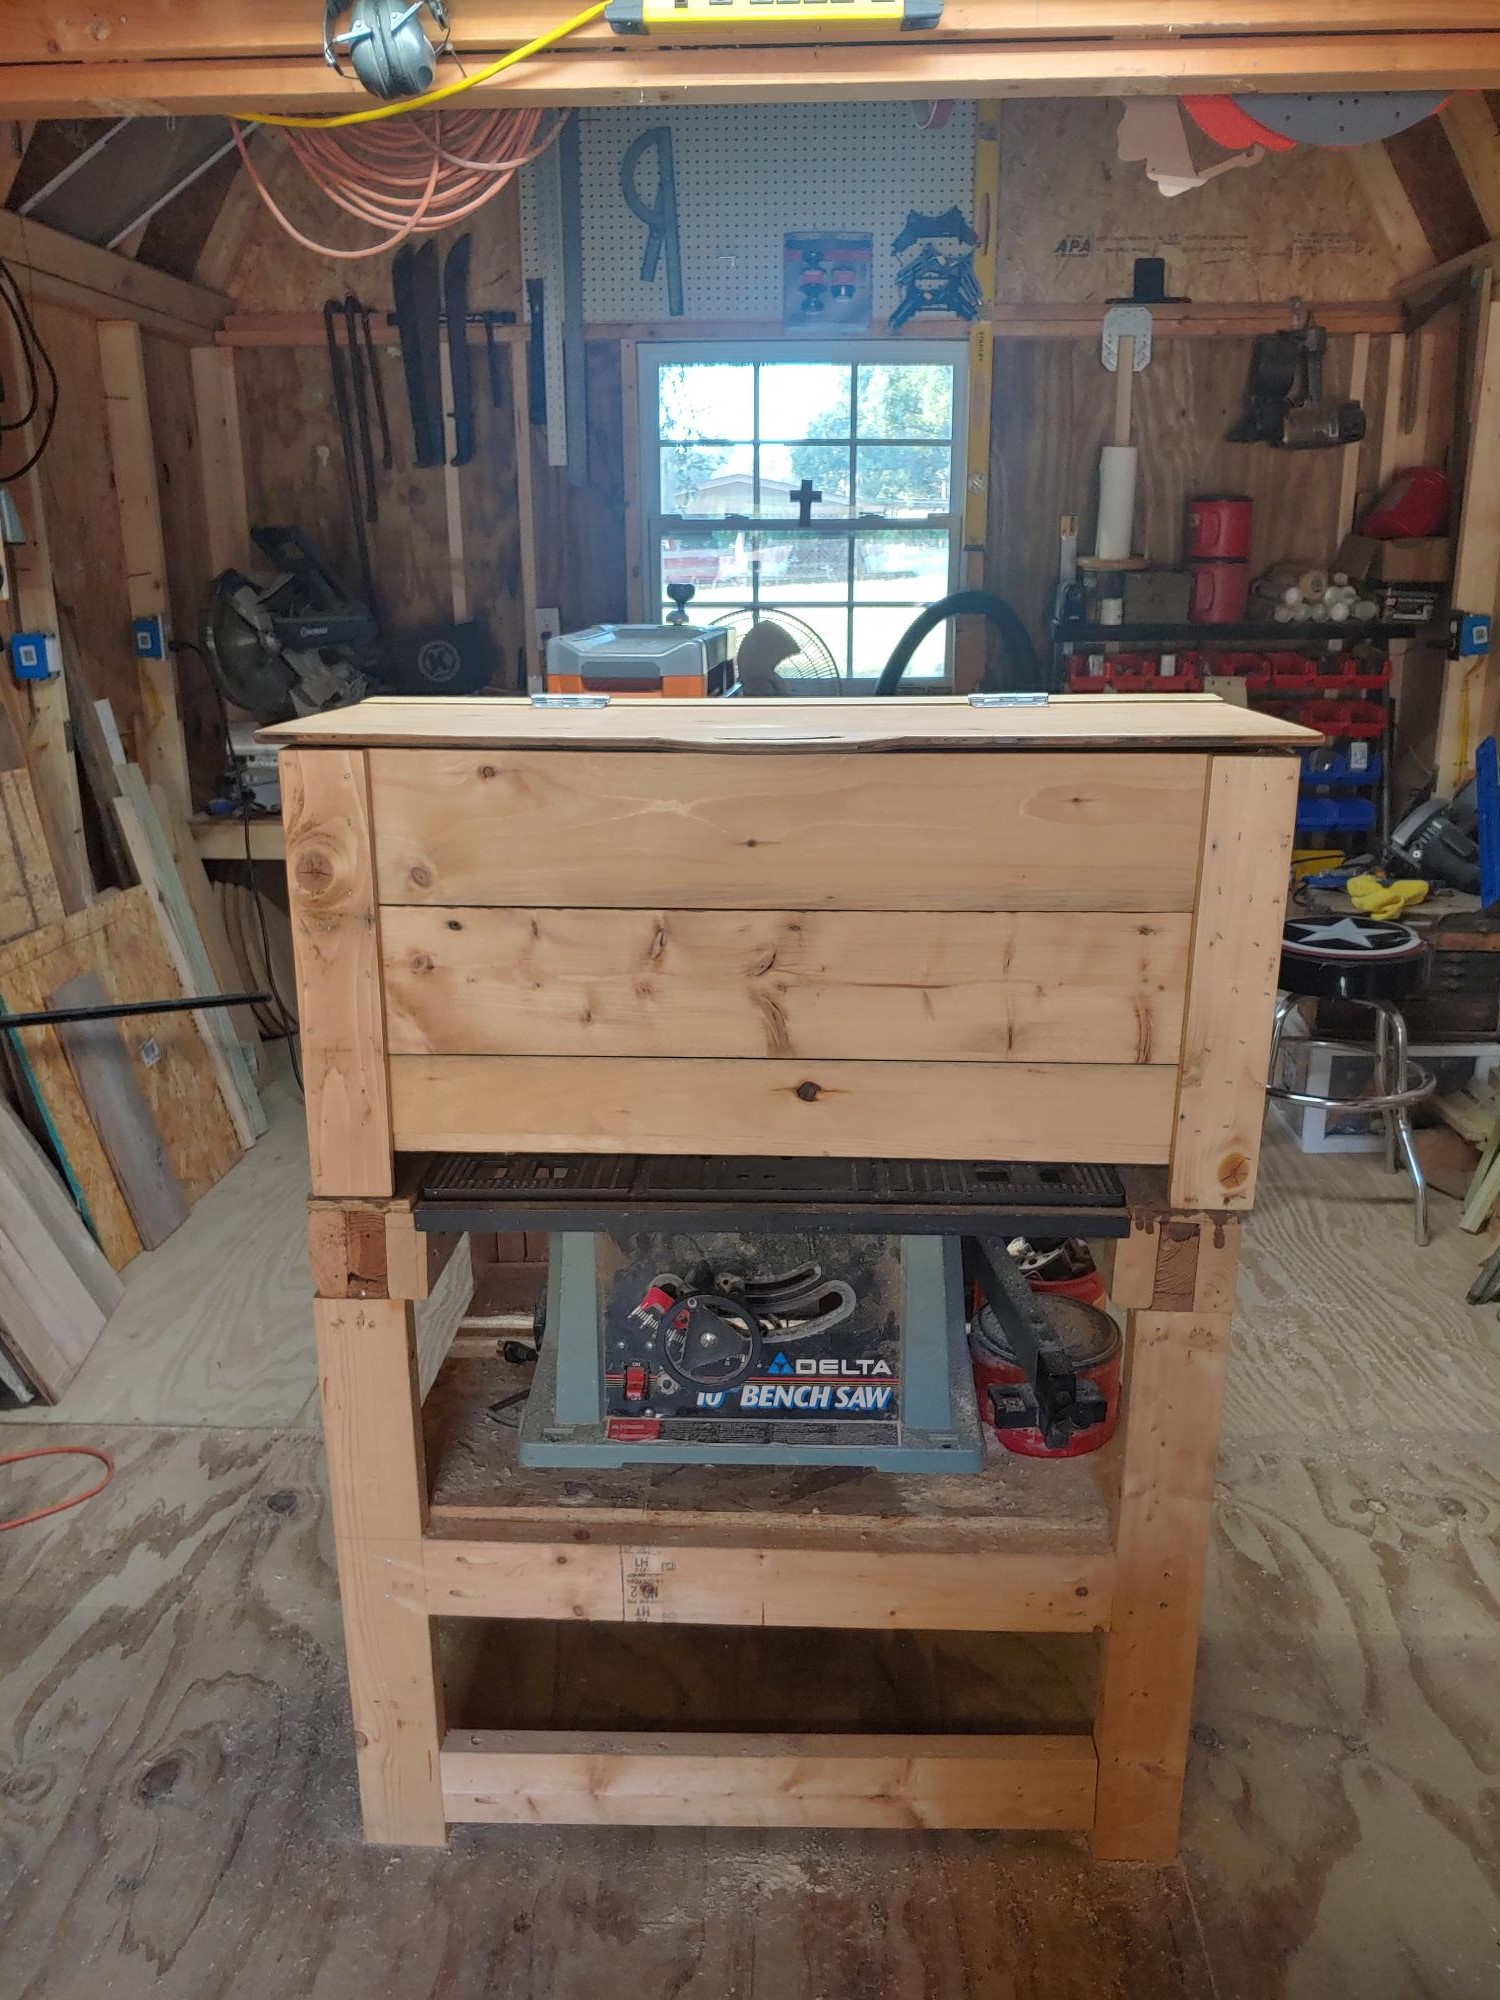
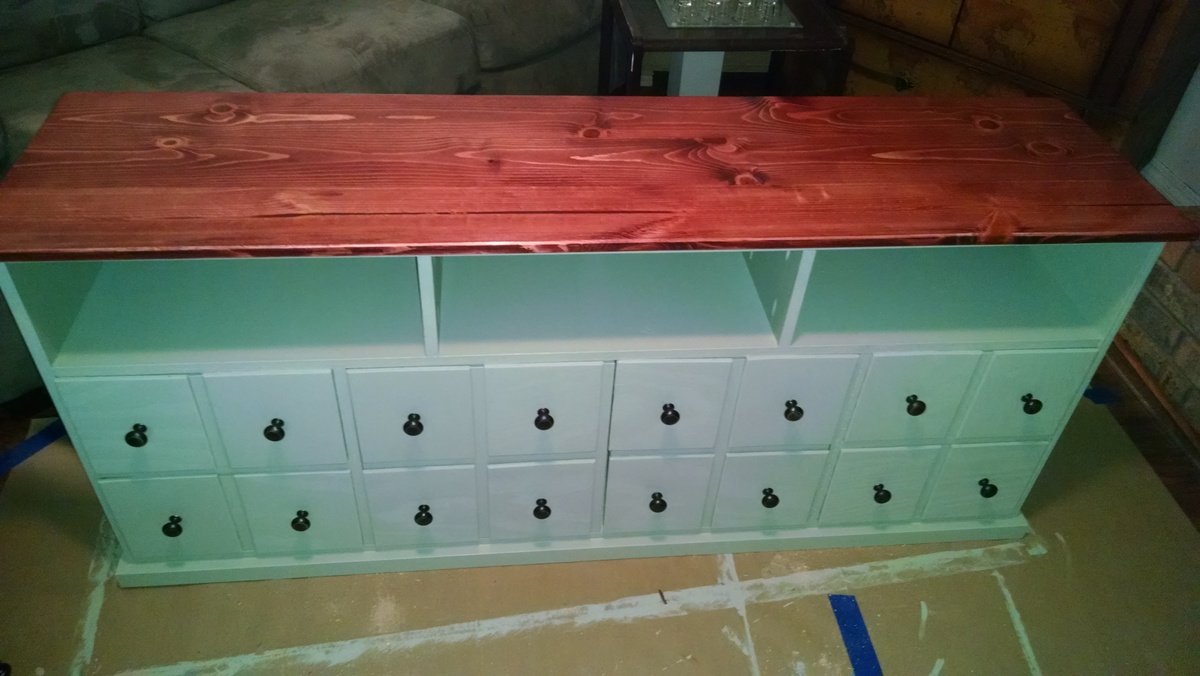
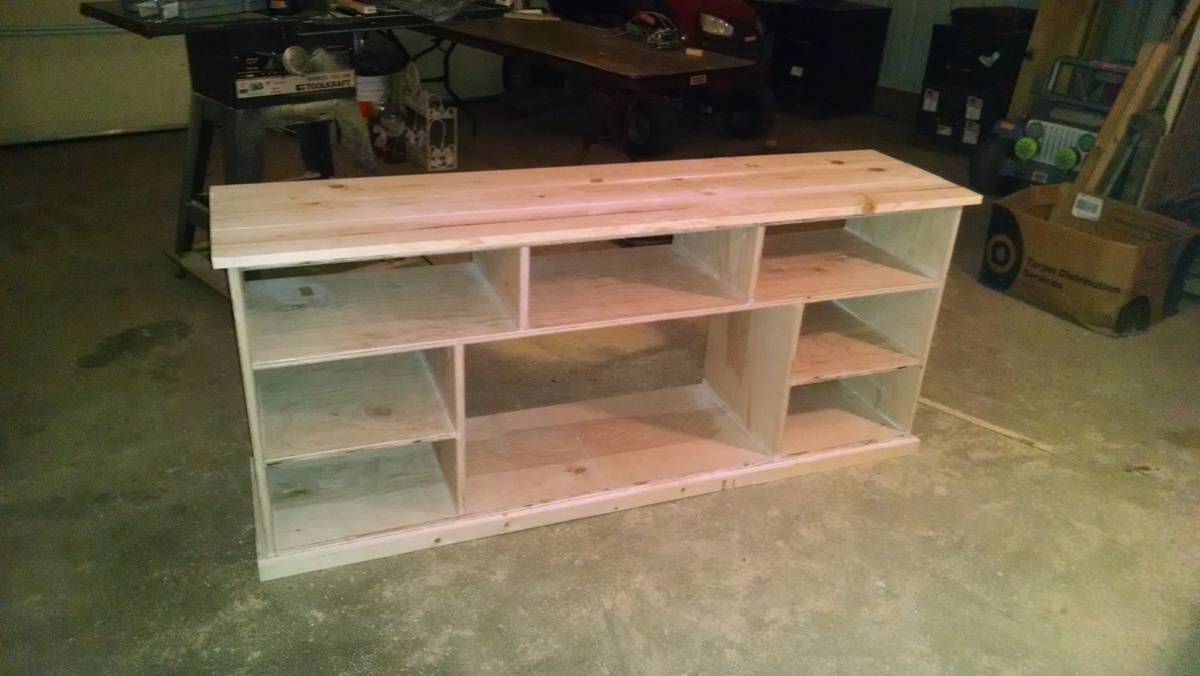
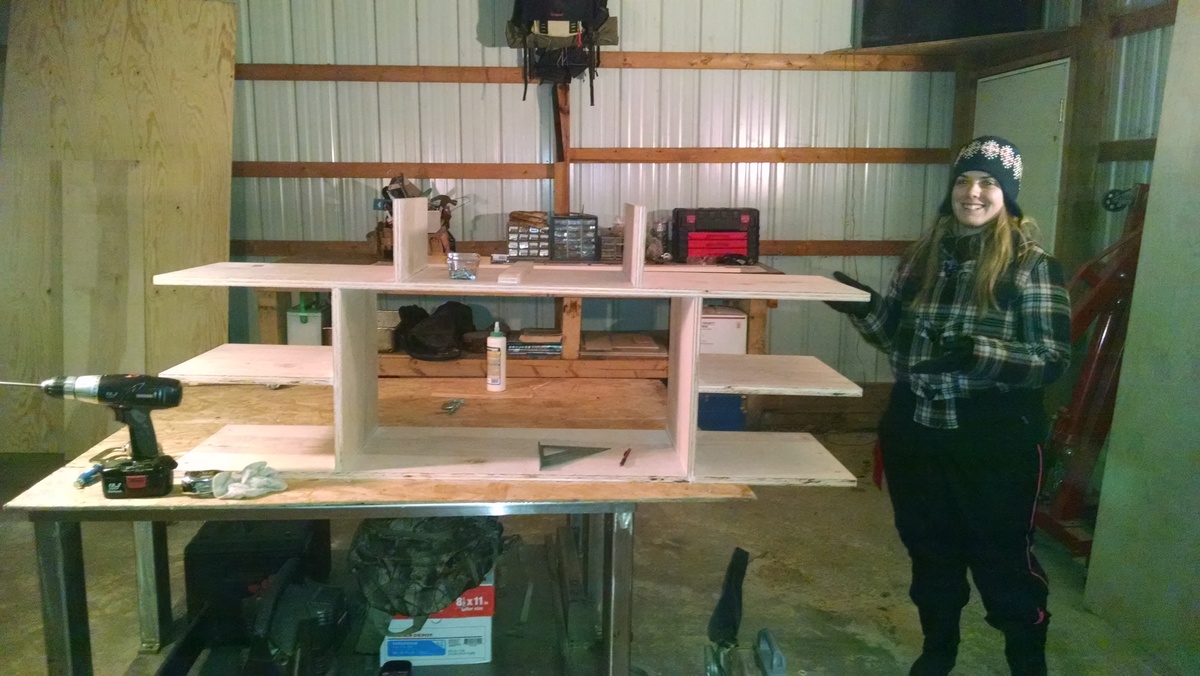
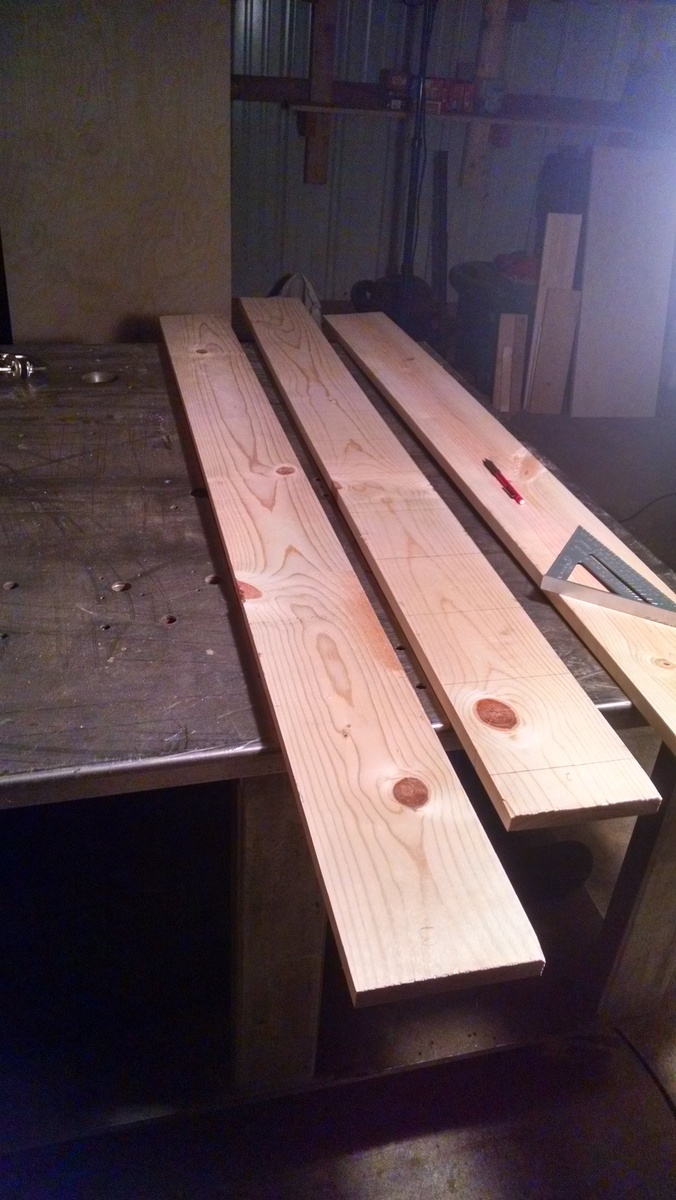
Apothecary Media Console

This was my first real build and it was a lot of fun. My girlfriend helped me out from time to time even though it was brutally cold in my un-heated, uninsulated, detatched garage.
We used a sagey green for the paint and 2 coats of gloss poly on the top. Added holes in the back with a hole saw for wires and cables. I stacked the false fronts and drilled them for the knobs all at the same time for consistency.
All in for about $210 including $40 in knobs, but I did make the drawers out of some scrap I had laying around.
The pocket hole joinery makes this pretty easy, but I'd highly recommend a table saw for consistent cuts and deminsions. Also, definitely use lay out lines and double check for squareness before driving the screws during assembly. Take your time, and enjoy the process. It starts to look very much "diy" in that not good "ummmmmm..." kind of way before the end where it all comes together.

Built from Plan(s)
Estimated Cost
$210-$250
Estimated Time Investment
Week Long Project (20 Hours or More)
Finish Used
Sagey paint and gloss poly over red stain on the top.
Recommended Skill Level
Beginner
Fancy X Desk L Desk
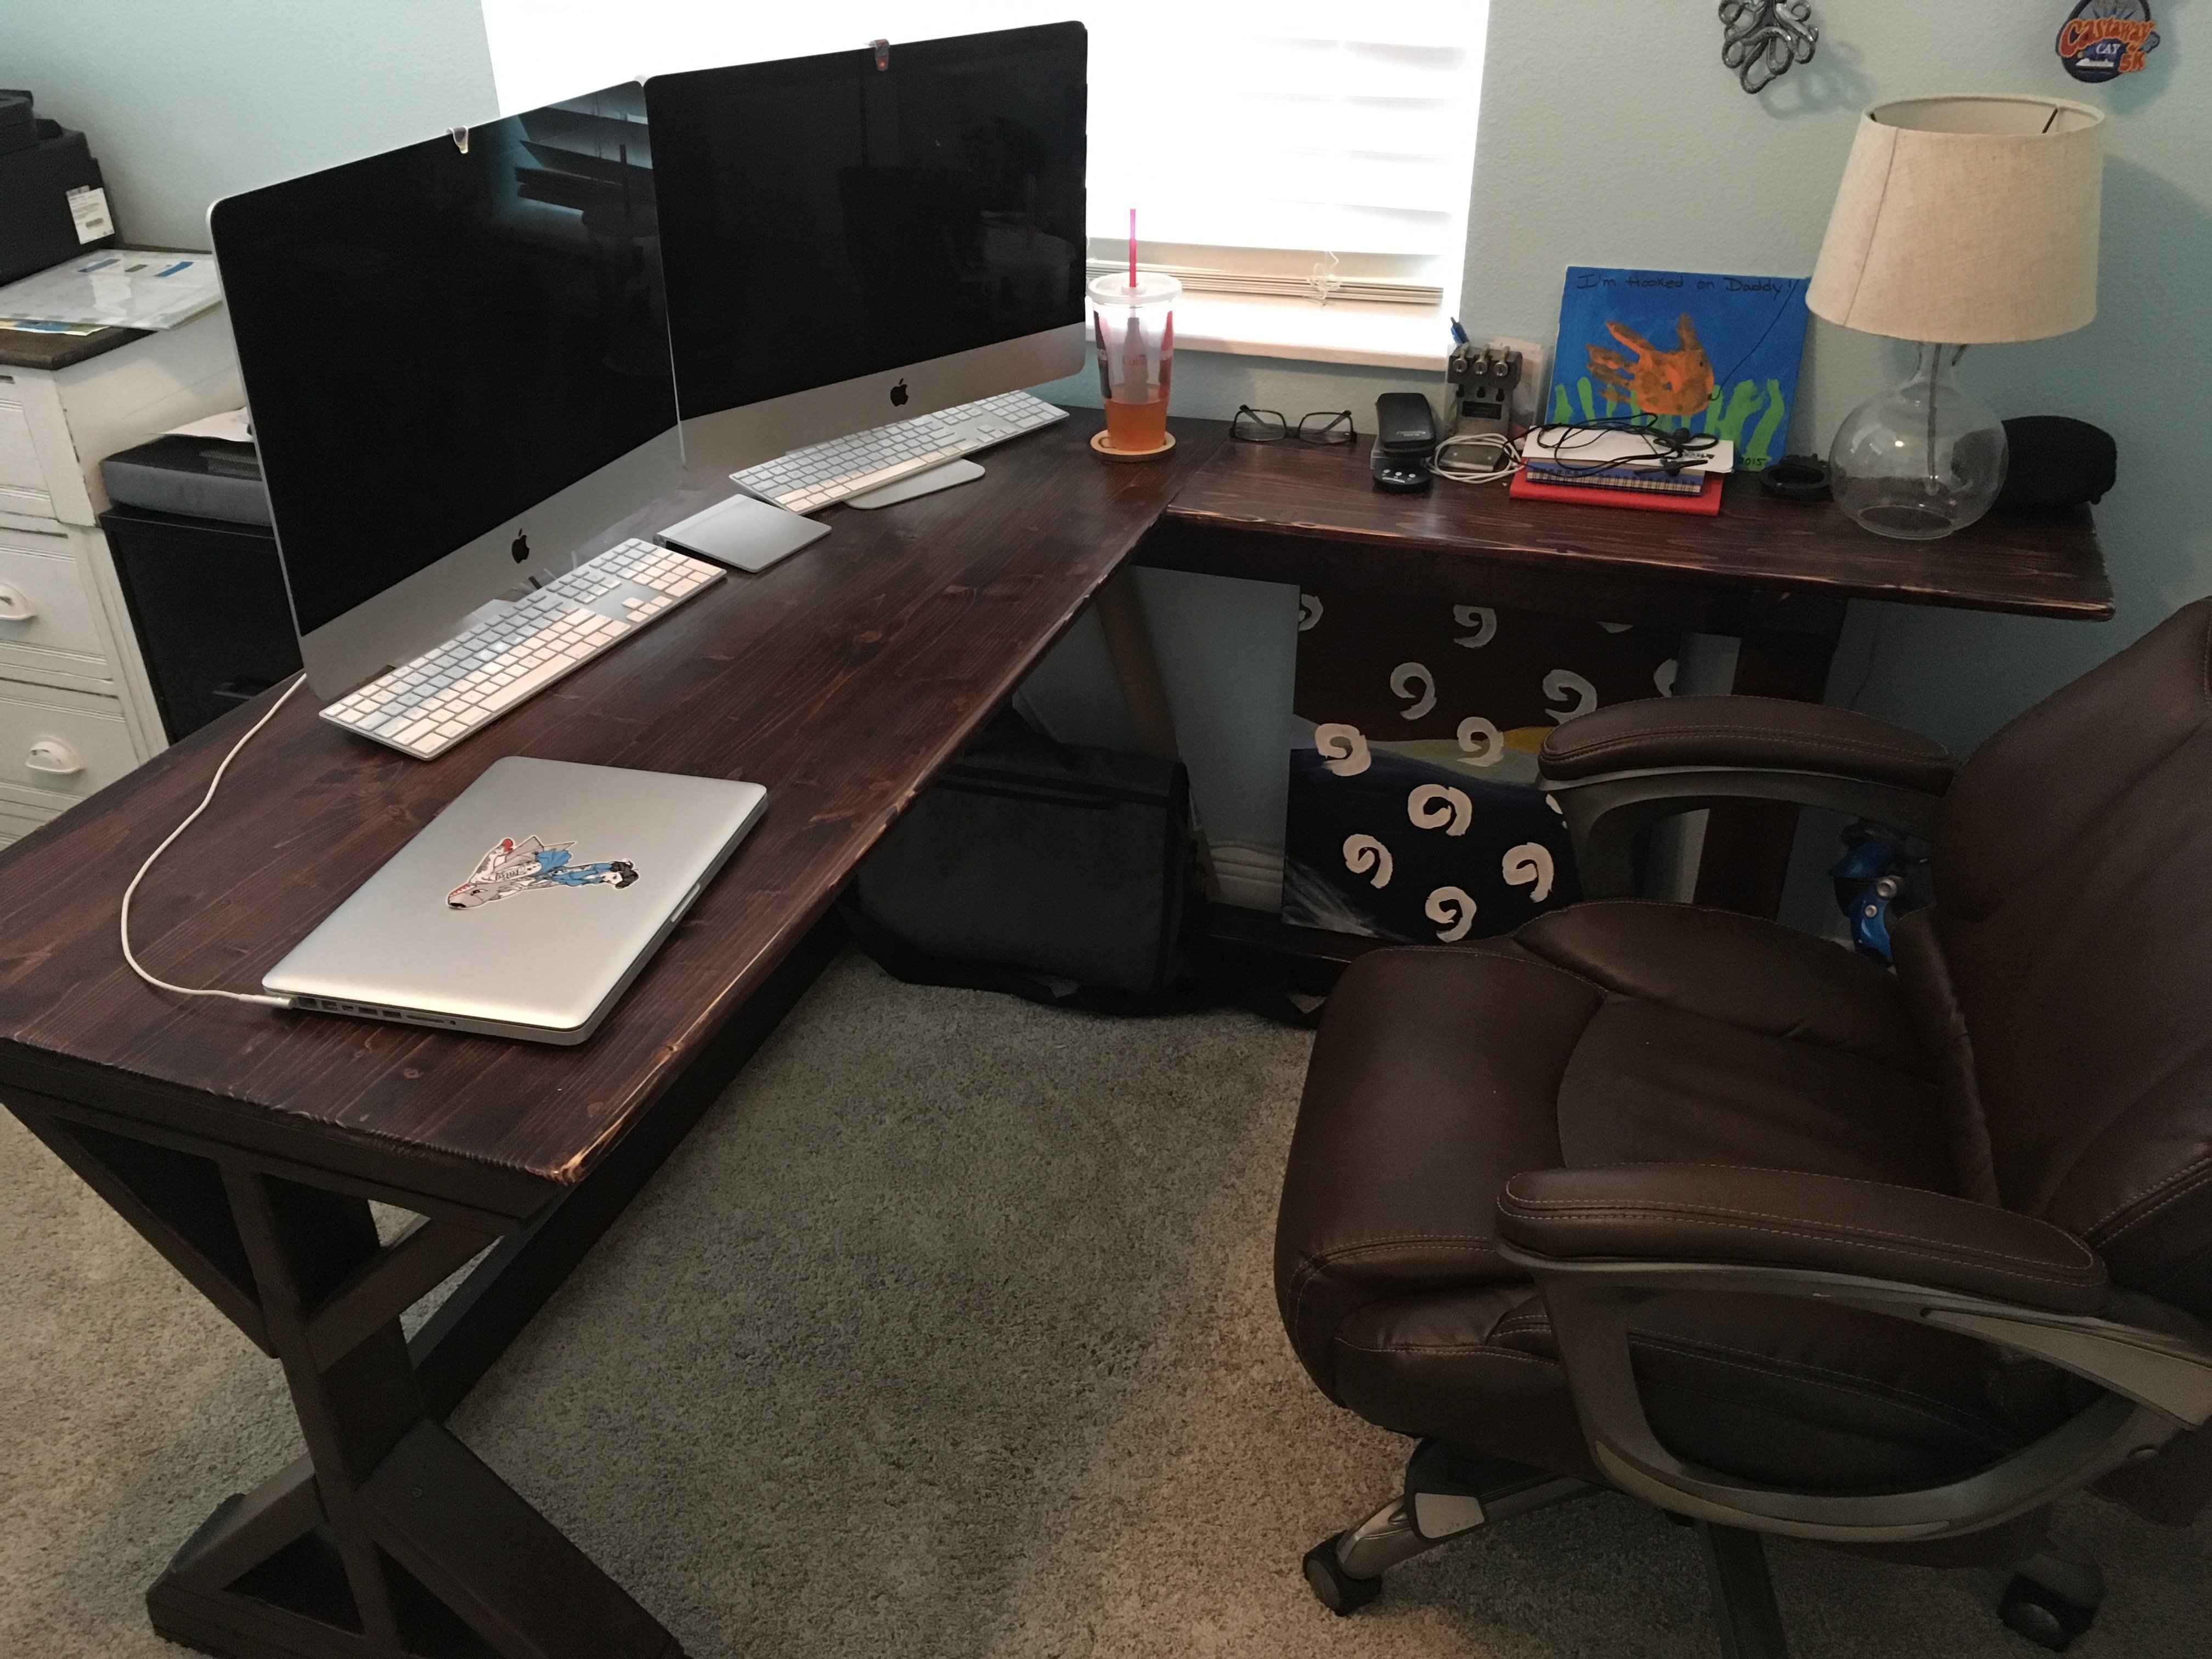
Added an L section to the Fancy Desk to increase usable space So far it still stands strong for me. Thanks Ana
Recommended Skill Level
Beginner
Comments
another Little Helper Tower
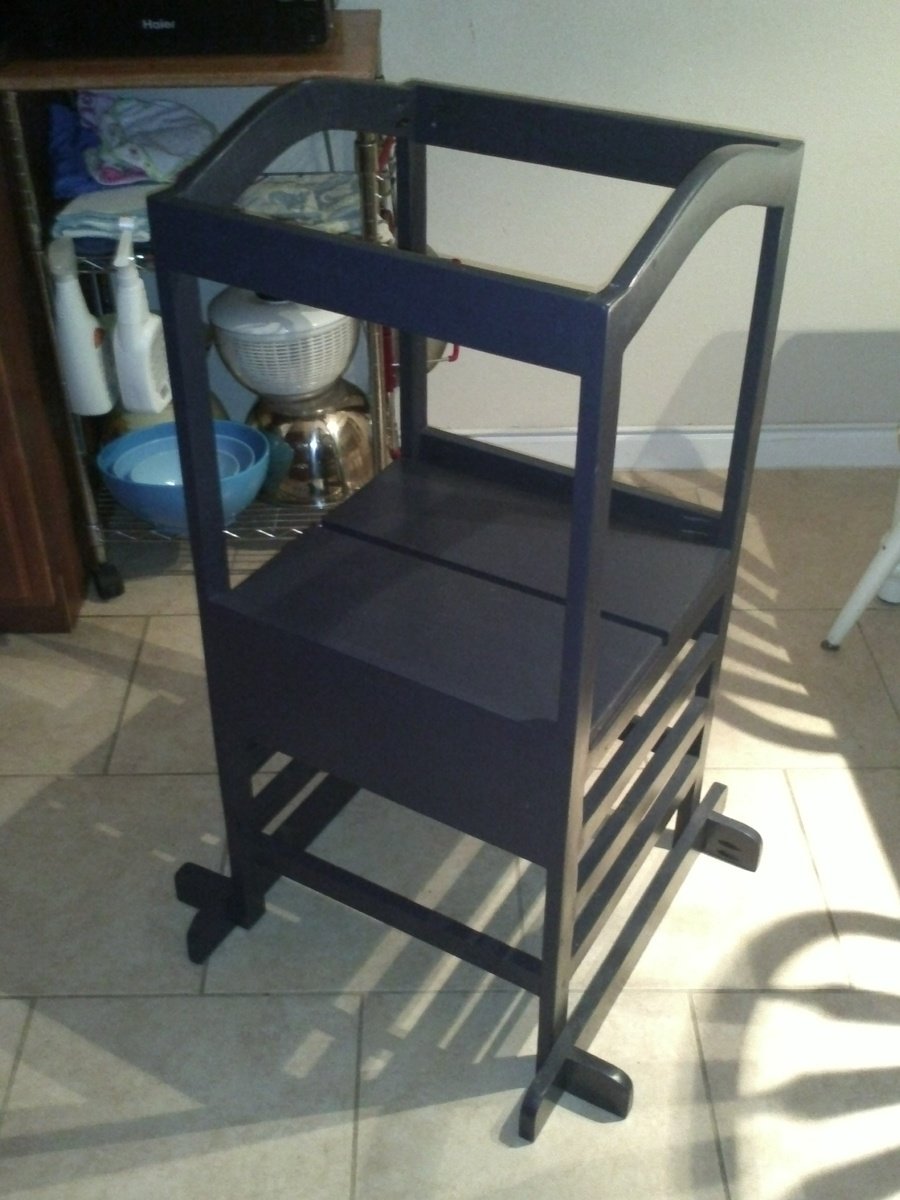
Built this for my daughter this past Christmas, she was 15mo then and not too enthusiastic about being in the tower. Now at nearly 20mo she demands her "towah" when it's time to "wash a hans" and she doesn't mind being plopped in it while we do things in the kitchen (as long as its not for TOO long...) We're looking forward to many years of use out of the tower, thanks for the plans! This was my first project with the Kreg pocket screw jig, really liked it and wished I'd had it for some of my past projects.
Built from Plan(s)
Estimated Cost
$50
Estimated Time Investment
Afternoon Project (3-6 Hours)
Finish Used
interior latex paint; bathroom/kitchen type
Recommended Skill Level
Beginner
Custom Sutton Outdoor Bar Stools
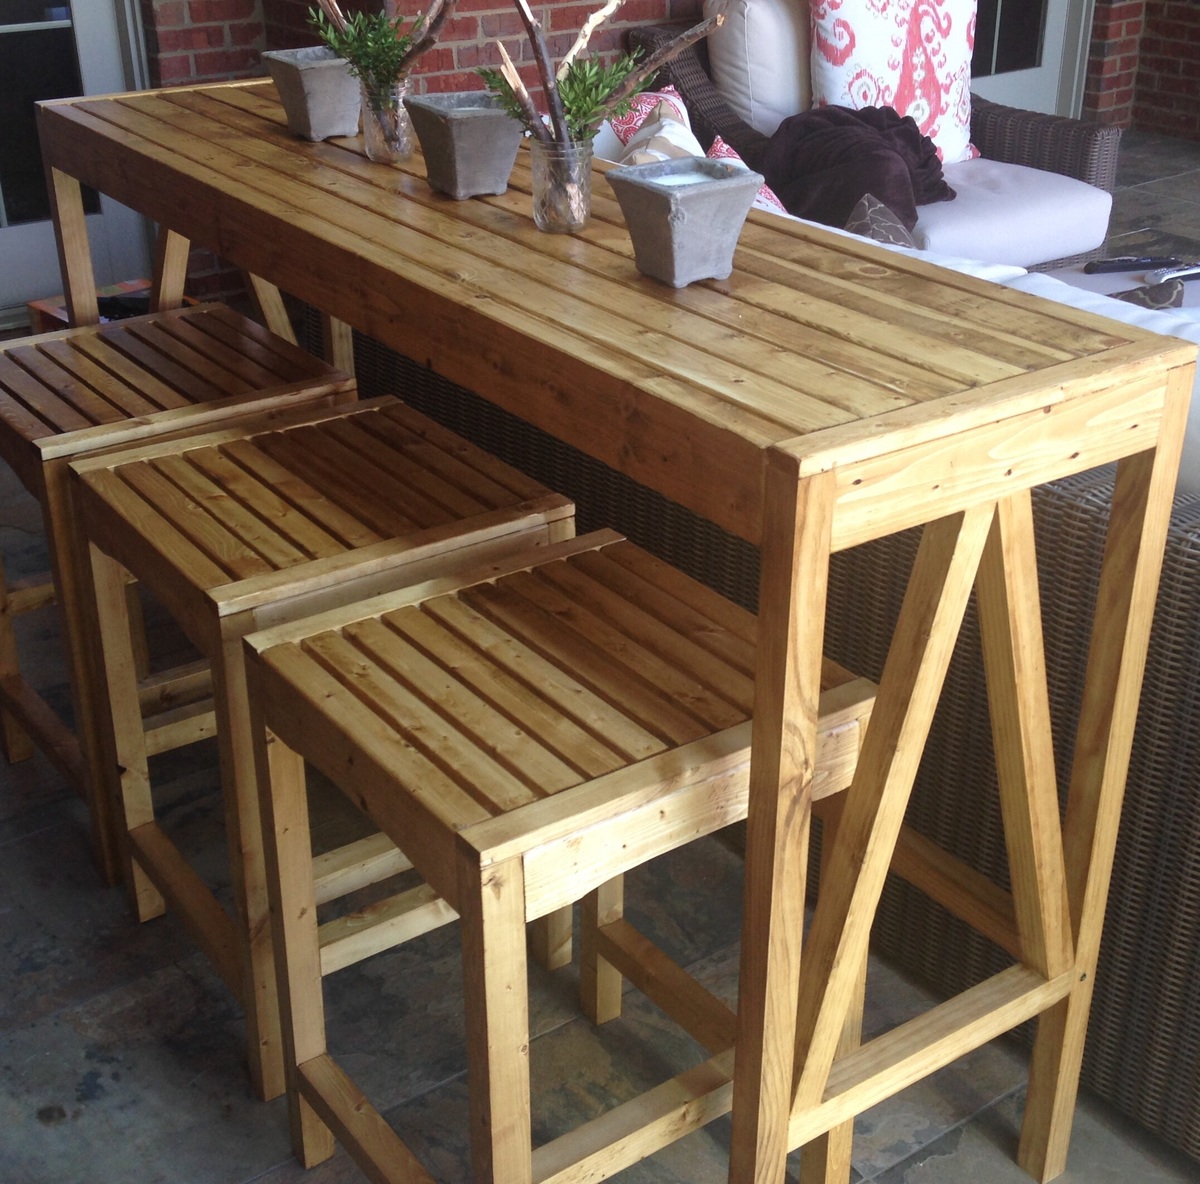
My first brag post!
UPDATED: New photo with bar and stools on covered porch. Very happy with how it worked.
We wanted the Ballard Sutton Console Bar Table and three stools to go with our outdoor furniture. Unfortunately, that little package was going to run about $2,500. Decided instead to see if I could build the things and make up my own stools to match. So basically by studying the picture a little bit figured out my plan. Then the stools are more or less a mini version of the table with a couple modifications.
I haven't itemized the bill, but built 3 stools for about $50, and the table was a little less. Incidentally, I can never find decent common 2x2s, so I have started ripping 2x4s into two 2x2s, and they come out clean, sturdy, smooth, and most important, straight!
Stained them using MinWax Puritan Pine to try and get the new teak look we wanted. Not too dark -- wiped the stain after 5 minutes.
Have the stool plans if anyone is curious!
Best regards!
cstarliper

Estimated Time Investment
Weekend Project (10-20 Hours)
Finish Used
Minwax Puritan Pine
Spar Urethane Satin Clear Finish
Spar Urethane Satin Clear Finish
Recommended Skill Level
Beginner
Comments

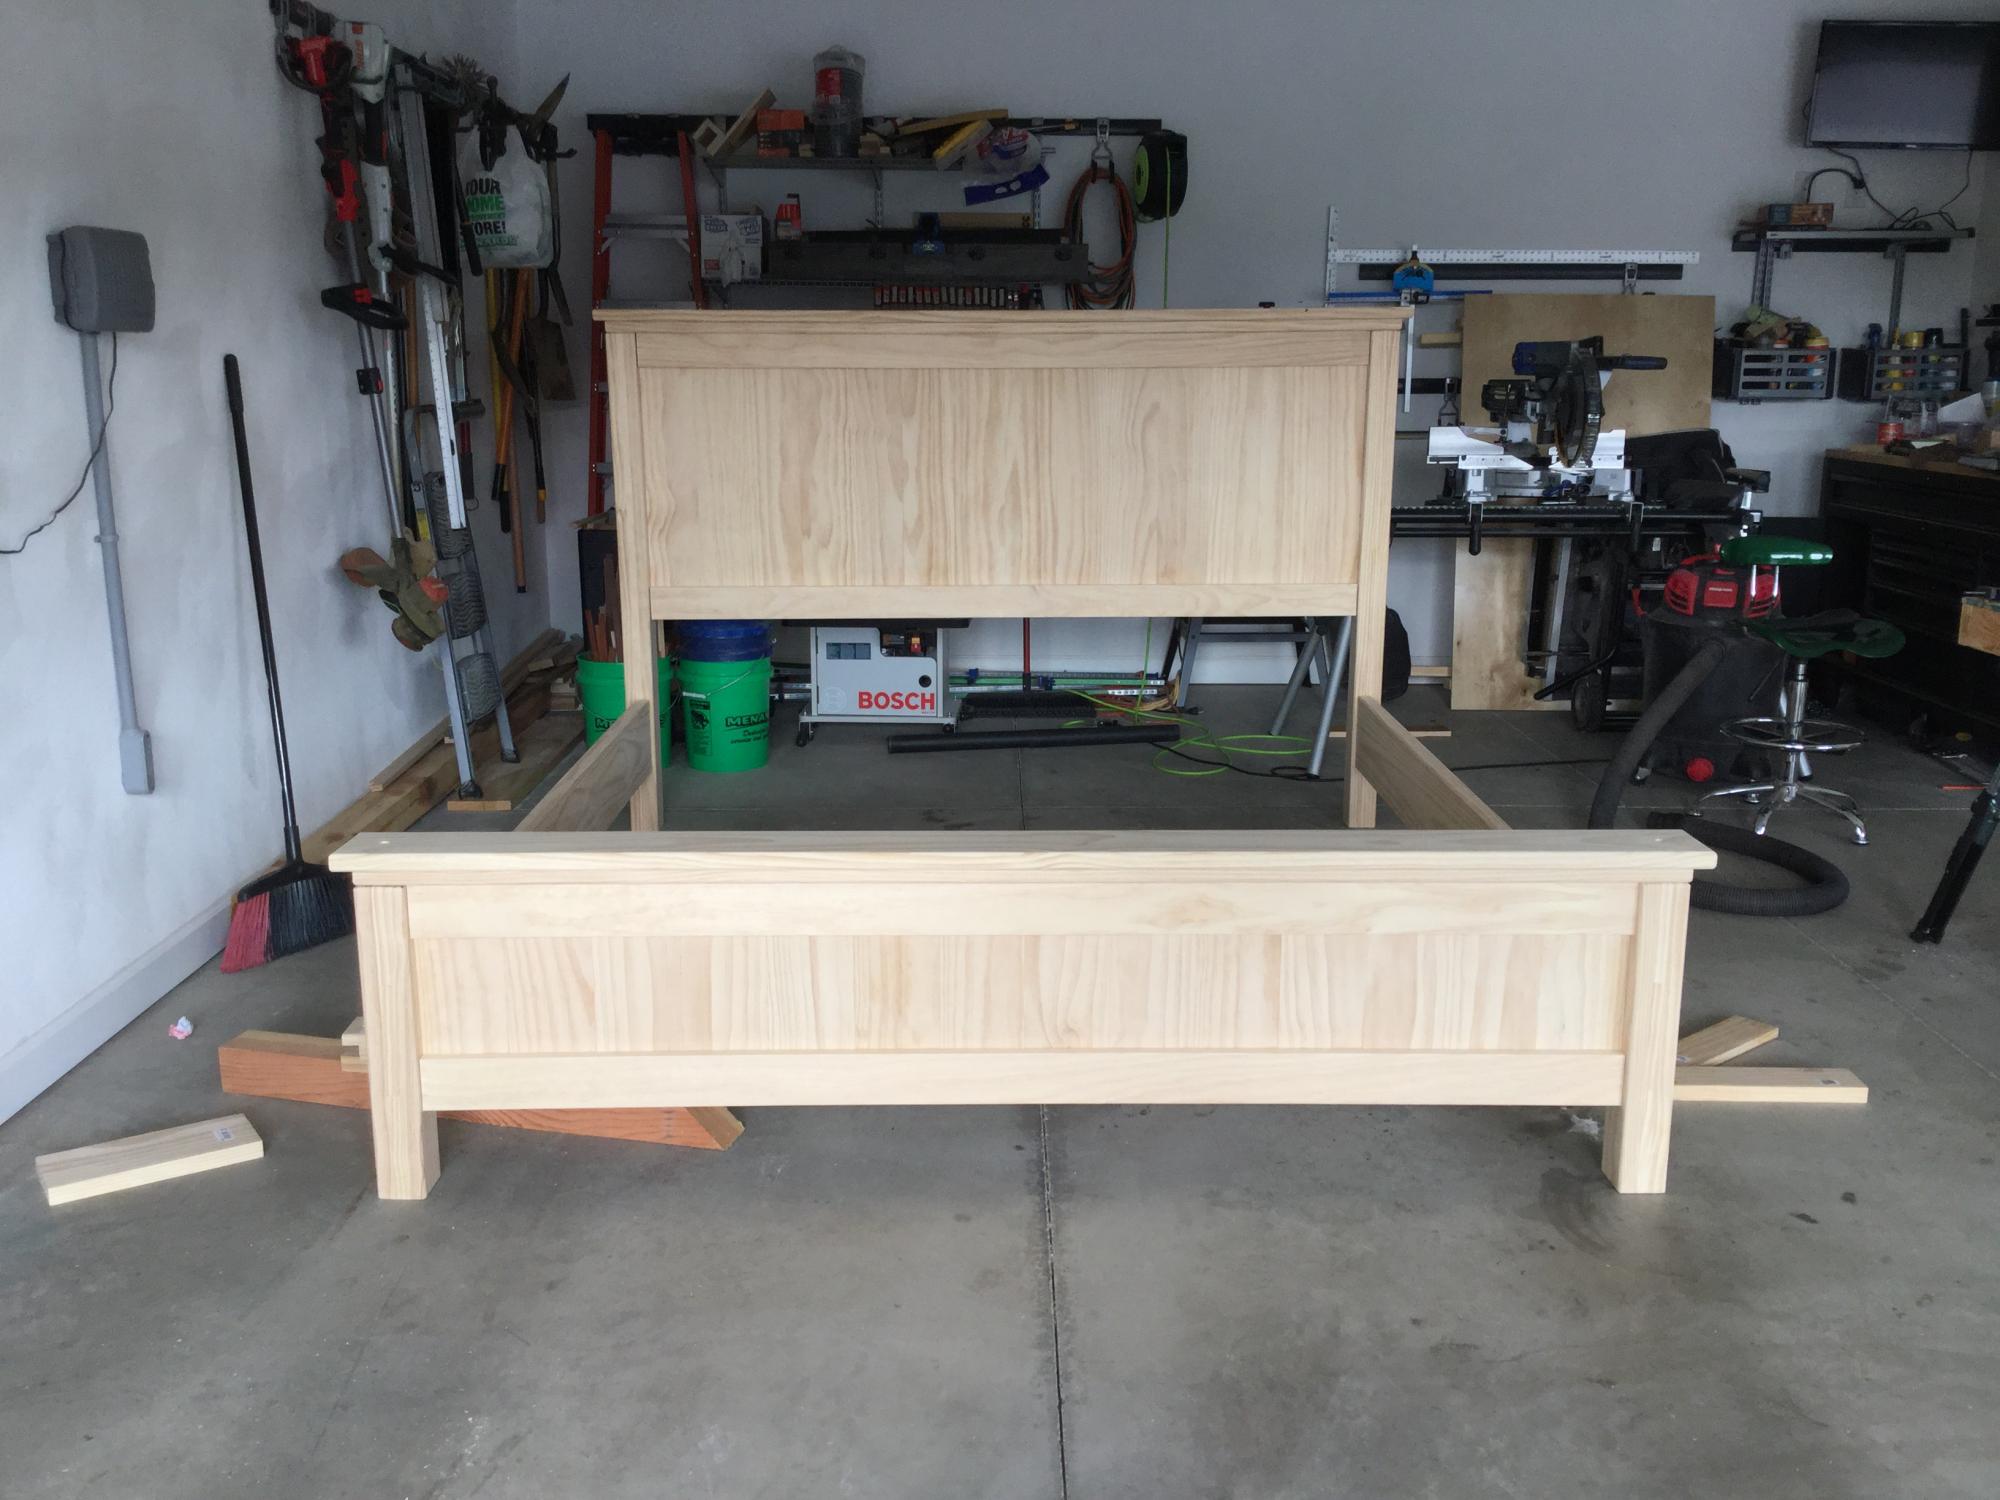
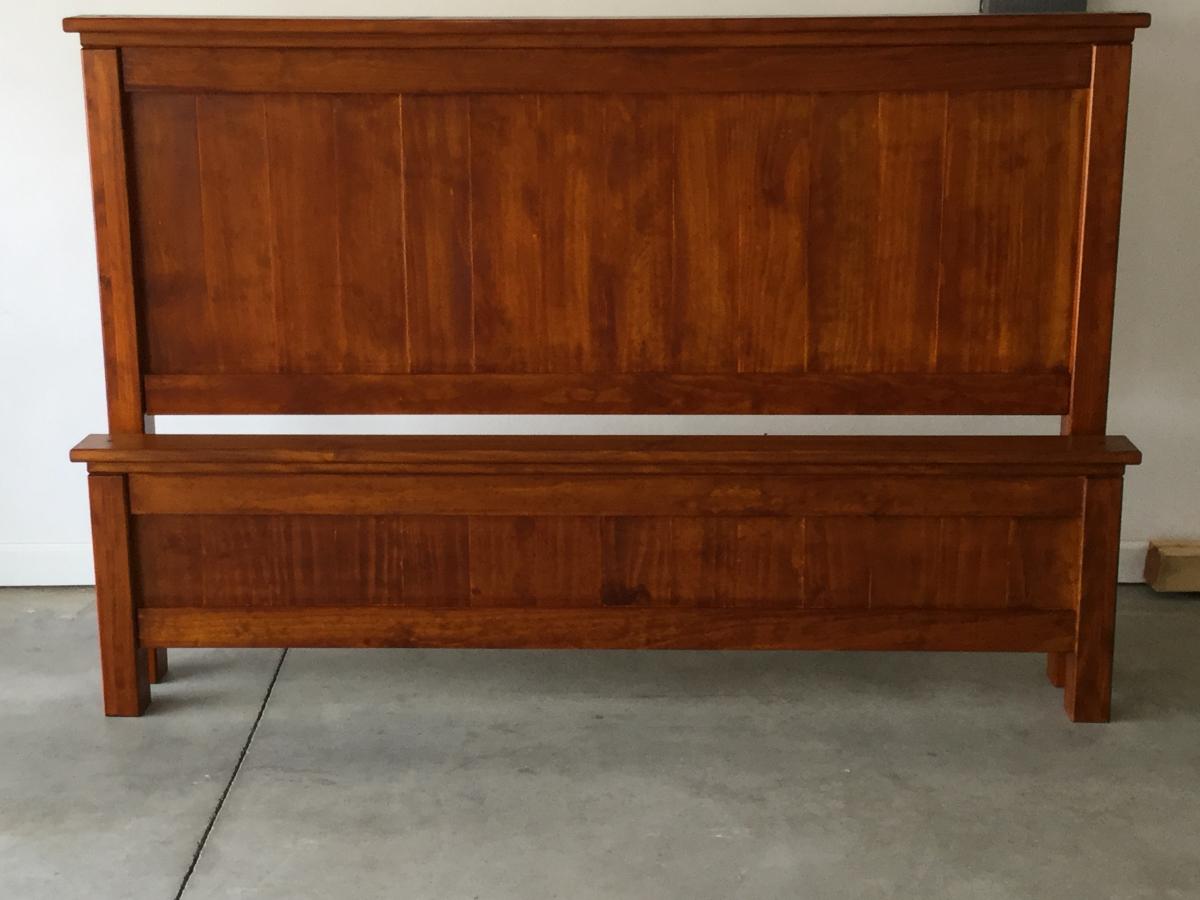
Farmhouse bed
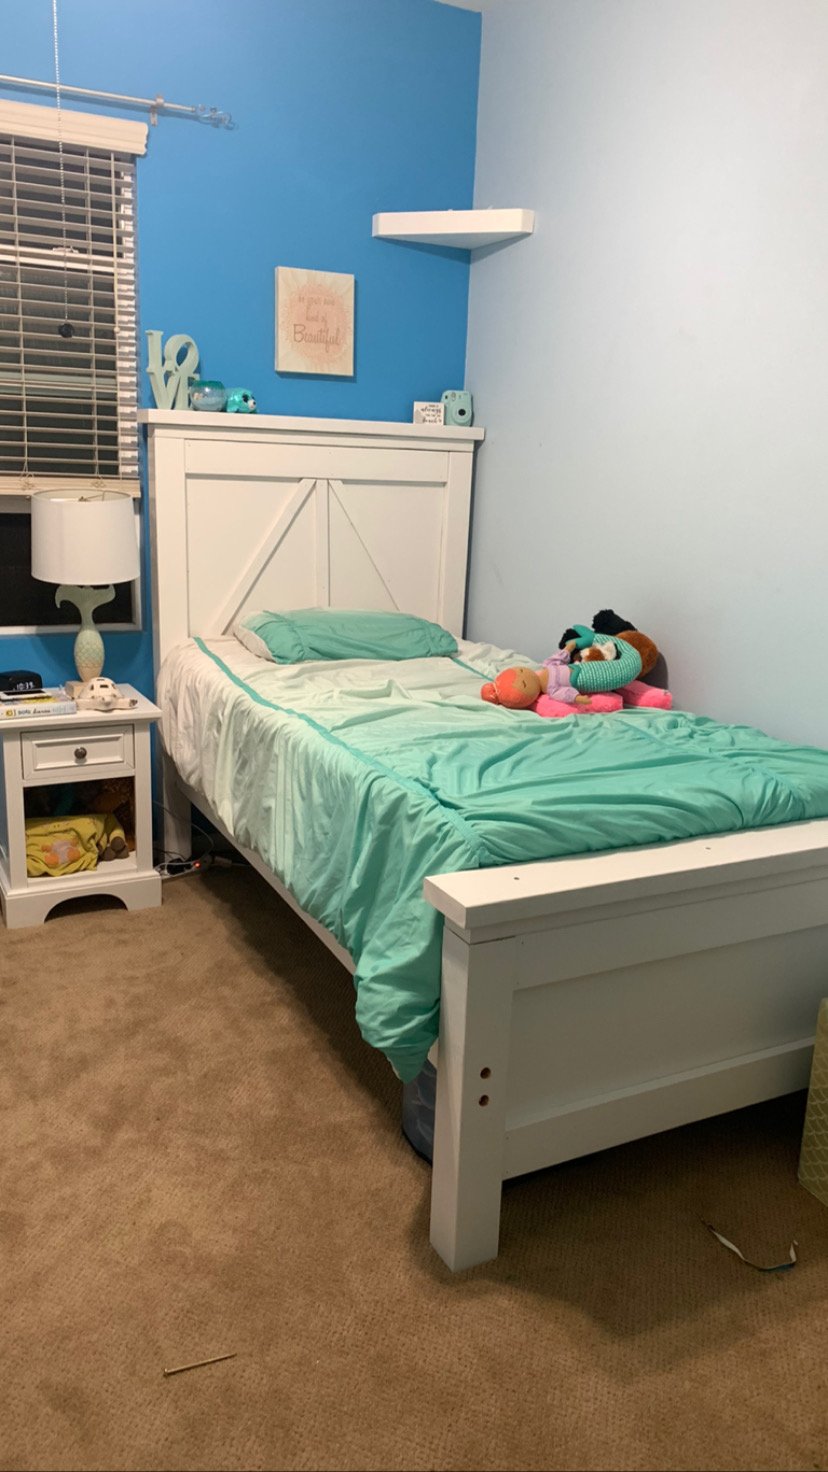
This was a fairly easy build following the plans. We changed the headboard slightly though.
Built from Plan(s)
Comments
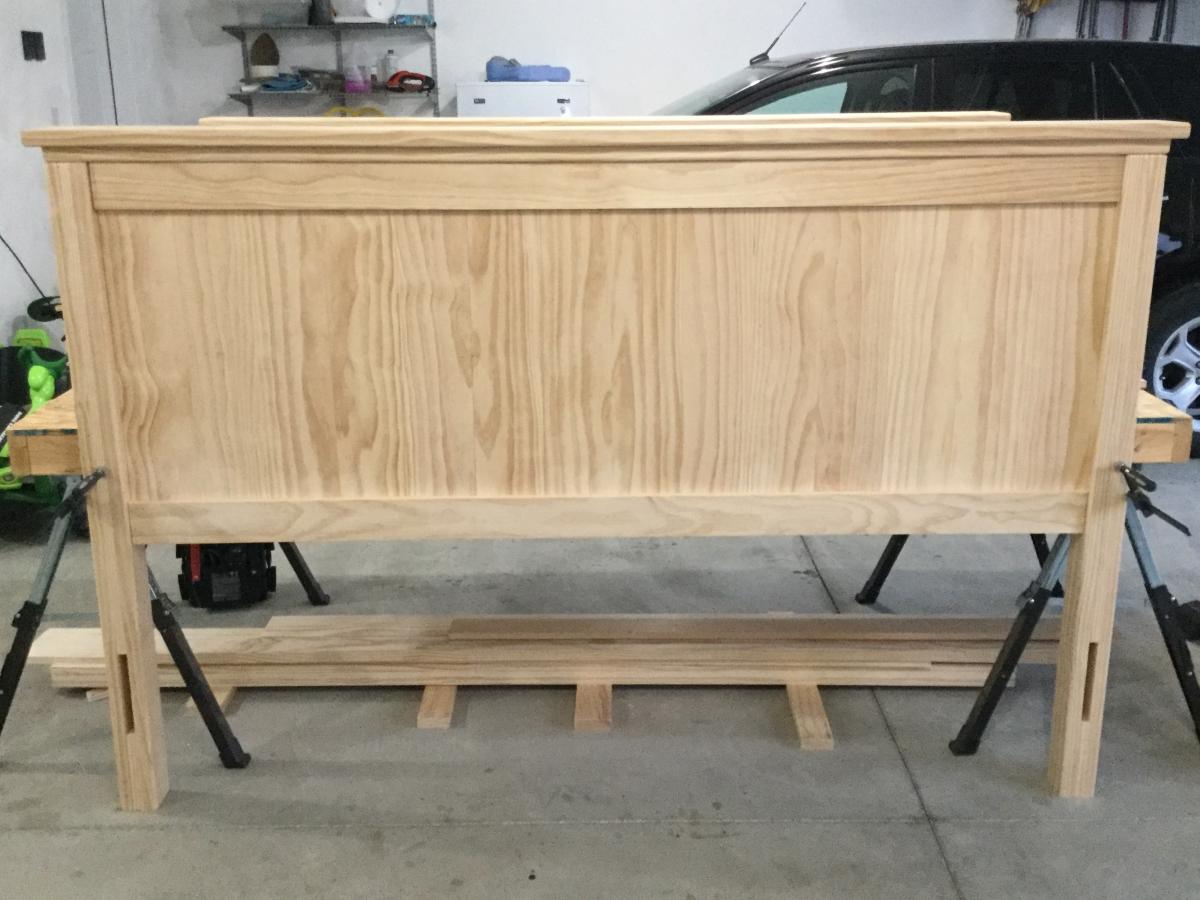
Planked Wood Headboard- King
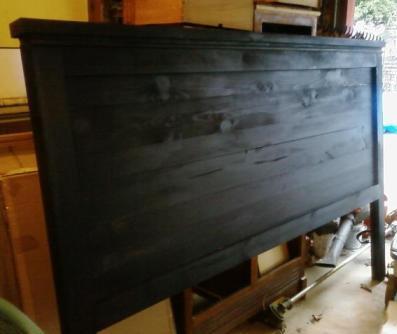
I made this in an afternoon as a wedding gift for my brother and soon to be sister-in-law. This was my first project using Ana's plans and I can't beleive I got it finished in a day. The hardest part was getting everything filled in and painted since I used paint grade pine. I did add a length of half round to the top just under the ledge for a little more decorative effect. I didn't realize how huge and heavy it would turn out. Guess that's just what happens when you build something entirely out of wood
Built from Plan(s)
Estimated Cost
$120.00
Estimated Time Investment
Day Project (6-9 Hours)
Finish Used
Satin finish Valspar paint in black.
Recommended Skill Level
Starter Project
Doll House Book Case

doll house book case with a Hot Pink Roof, also trimmed/painted the doors and window frames. Marking this as a week long project as I was only able to work on it in the evenings, however I believe this could be tackled in a weekend
Built from Plan(s)
Estimated Time Investment
Week Long Project (20 Hours or More)
Finish Used
PPG's HPC Pink and HPC White sprayed with gun
Recommended Skill Level
Beginner
Comments

Fri, 05/10/2013 - 07:19
Doll House Book Case
Wow, that is one happy little girl! And no wonder, what a beautiful job you did! Looks like a great gift for grandkids, too!
Blanket Ladder
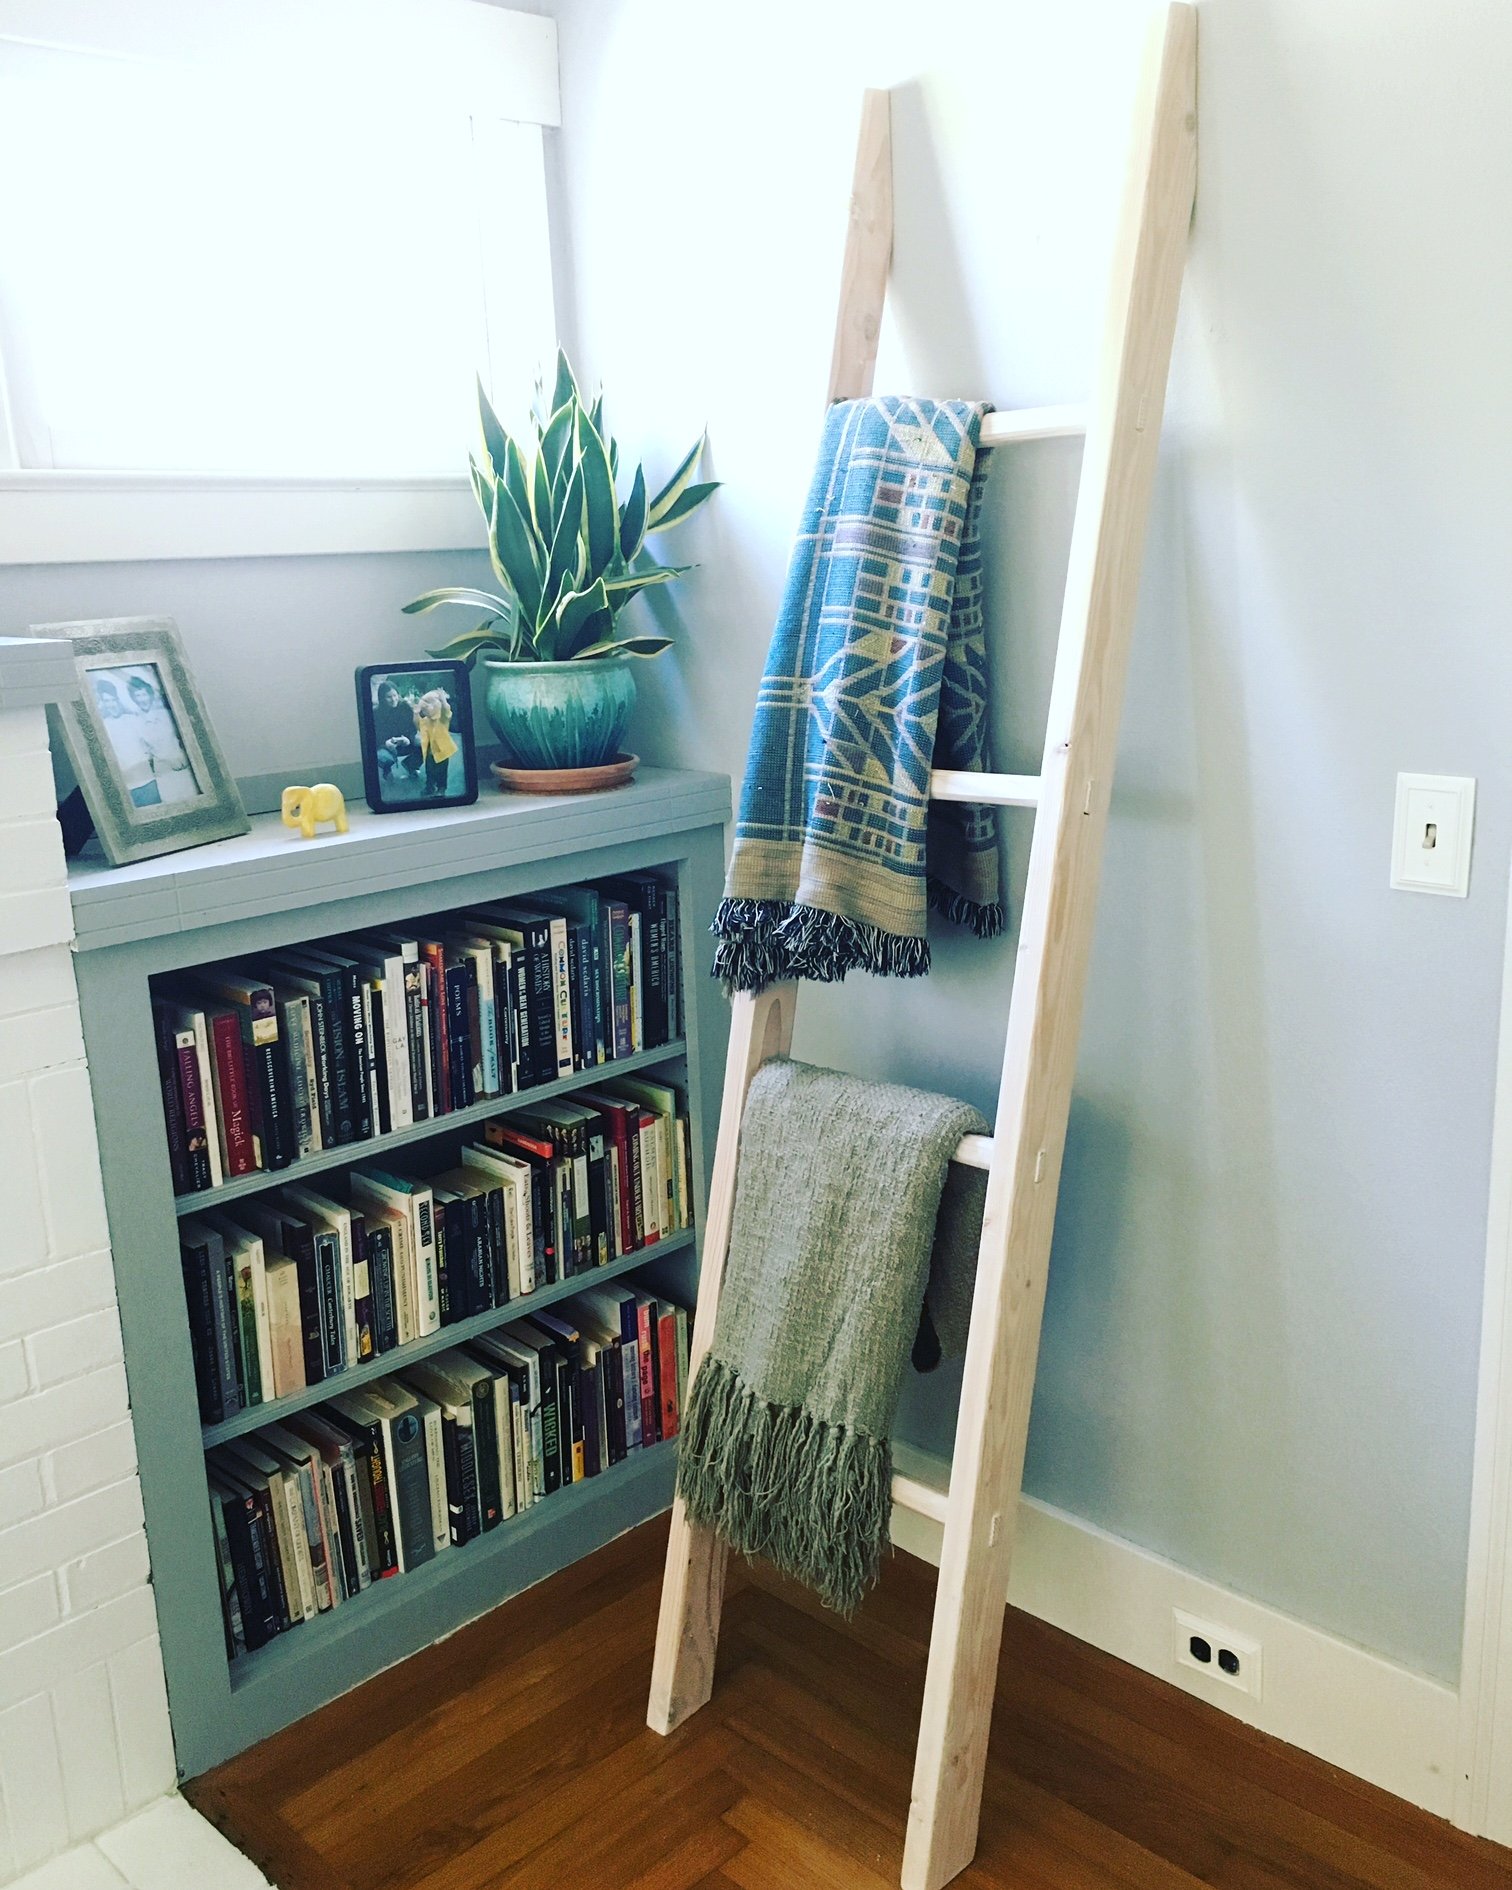
Created with hand chiseled mortise and tenon joints and a whitewash stain.
Built from Plan(s)
Recommended Skill Level
Intermediate
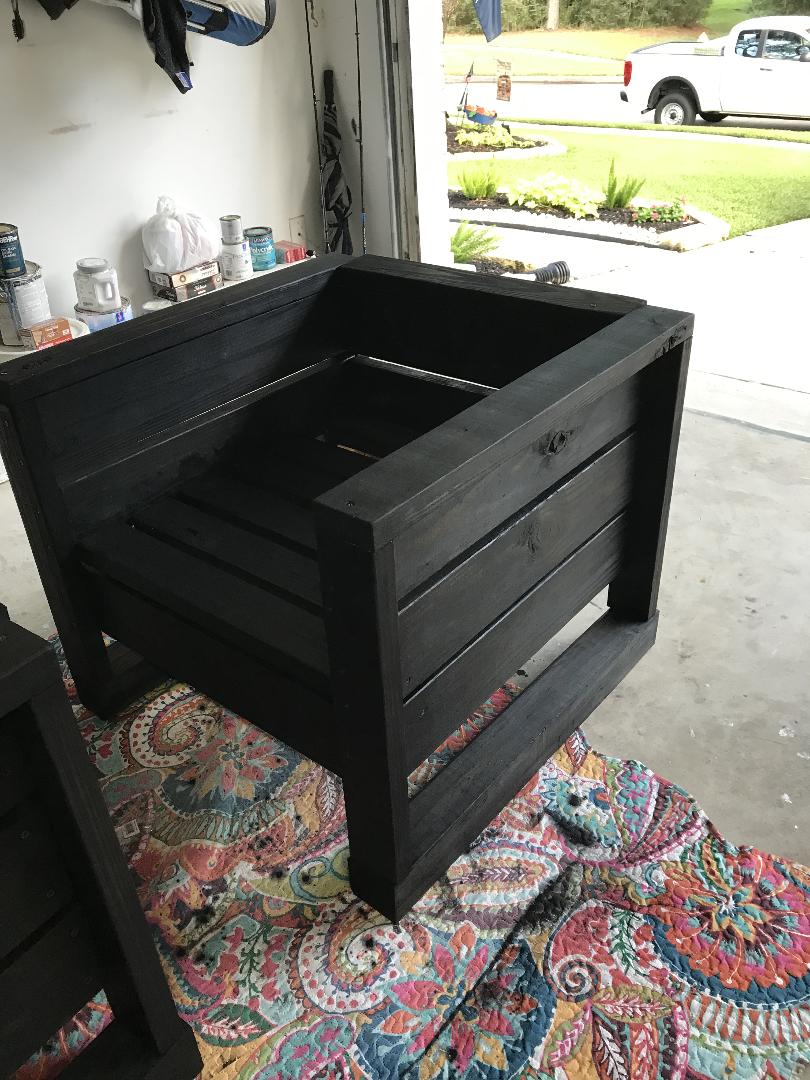
Modern Outdoor Chairs!
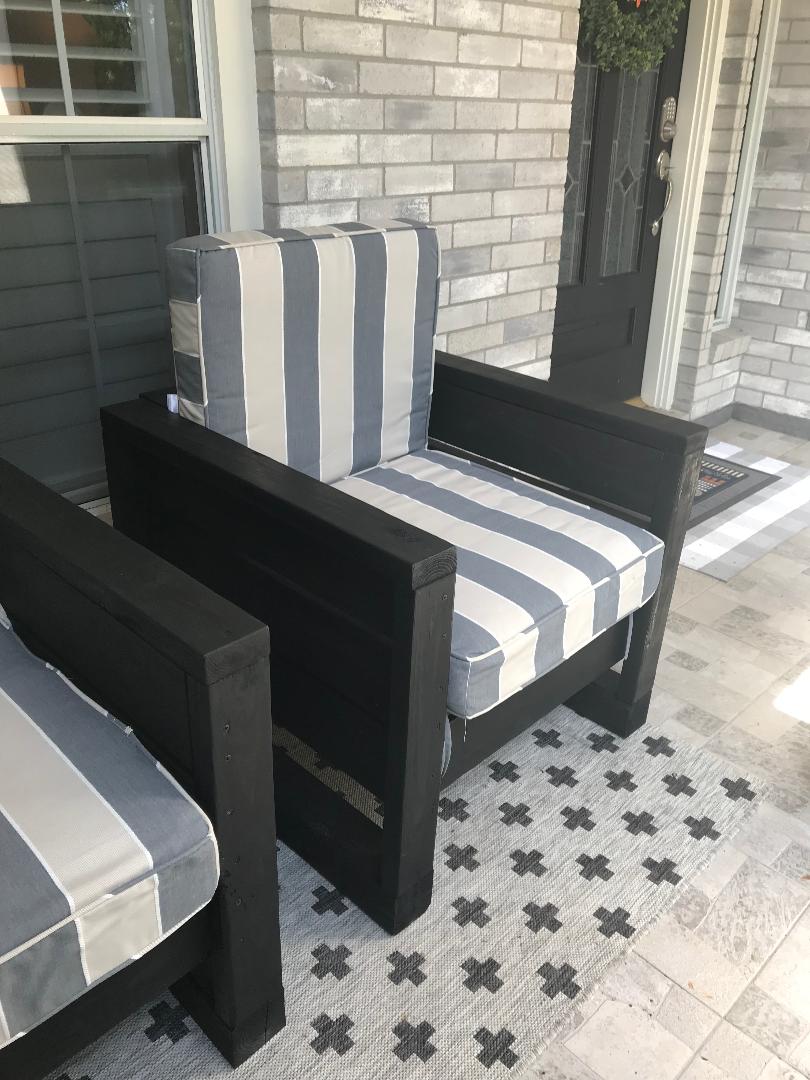
We love the new chairs on the front patio! My daughter and son in law's FIRST project! They completed both chairs in 1 day. We did add an additional 4x4 on the bottom to raise them as my son in law is tall. They sanded and stained them black to go with the gray brick and black door of their home. We picked up the cushions at "At Home" on clearance. Just need a new carpet and we're all set! On to our next project!
Built from Plan(s)
Comments
Ana White Admin
Sat, 09/11/2021 - 09:38
Gorgeous!
WOW, that is amazing, thank you for sharing!