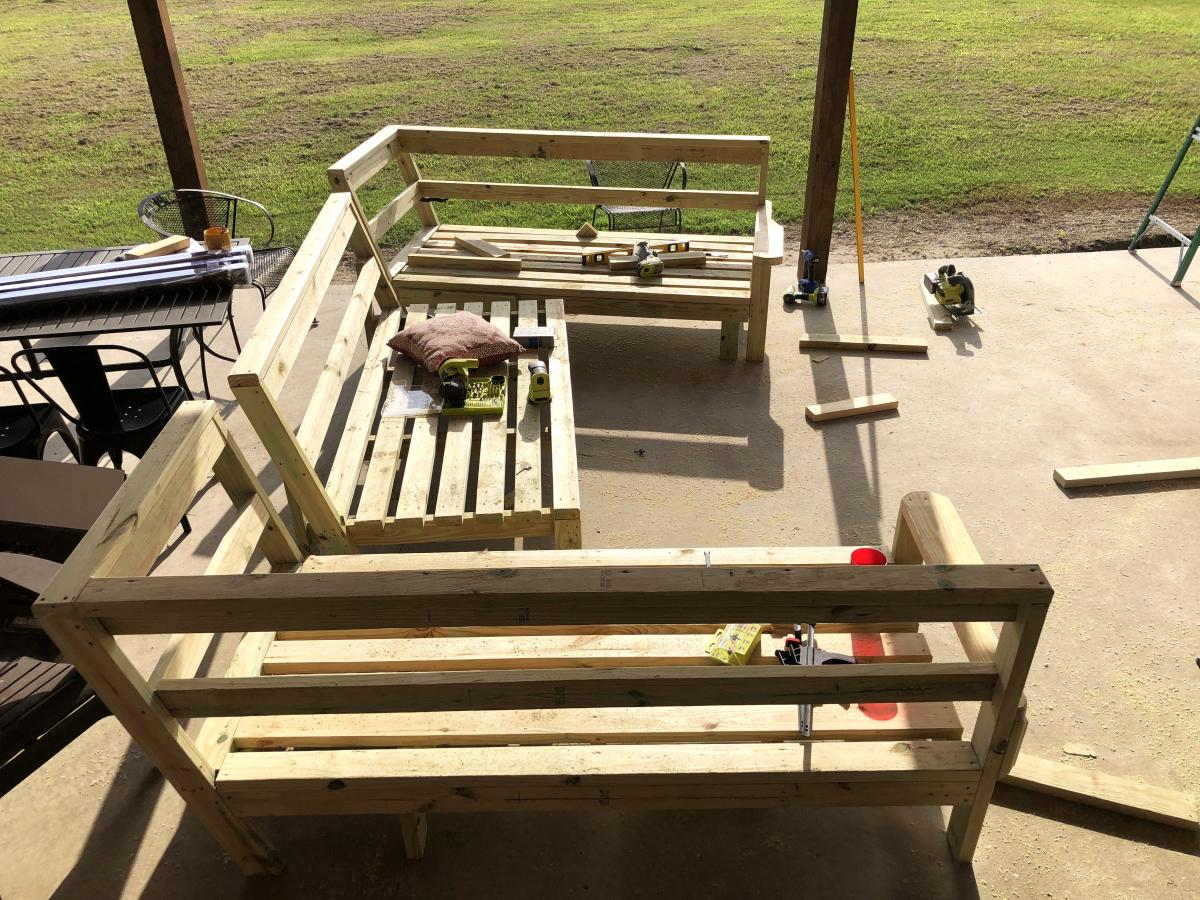
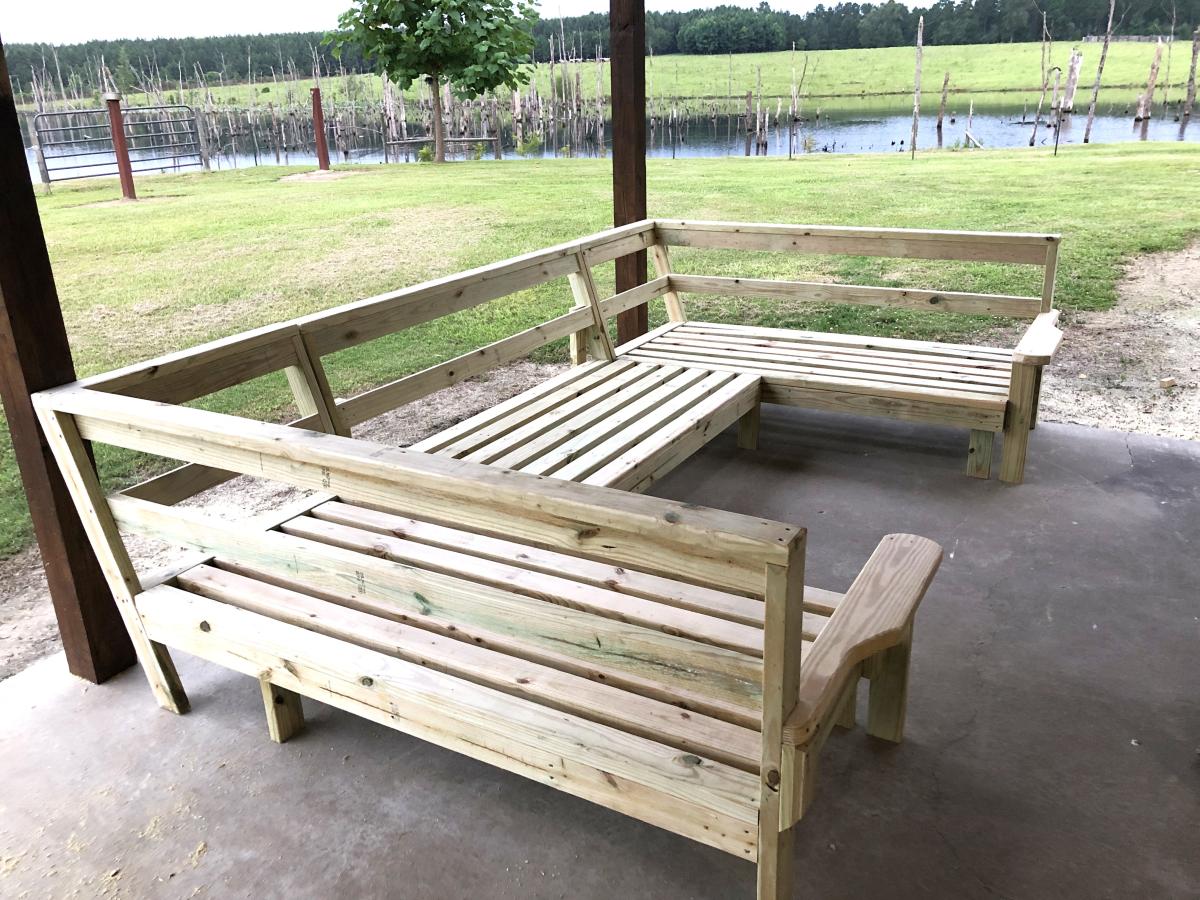
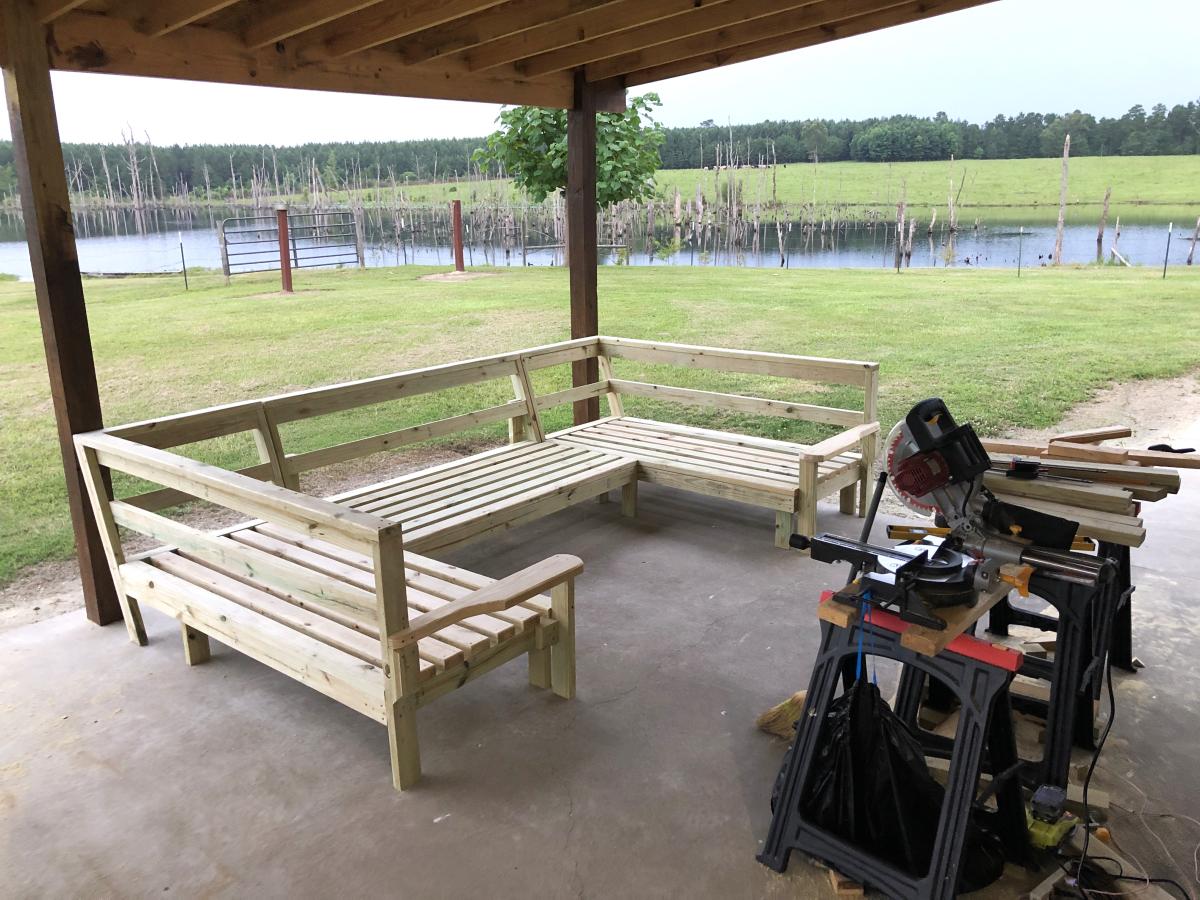
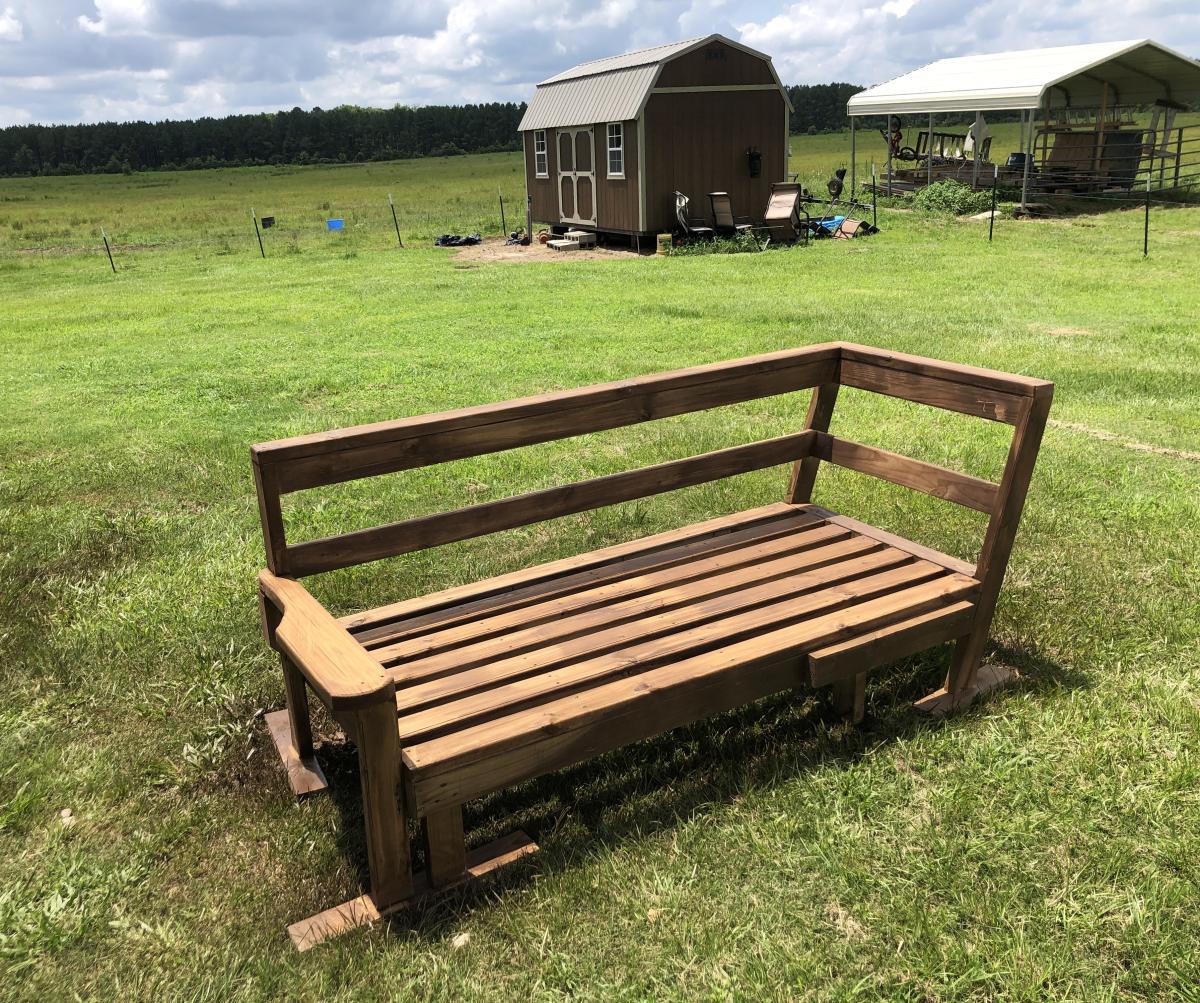
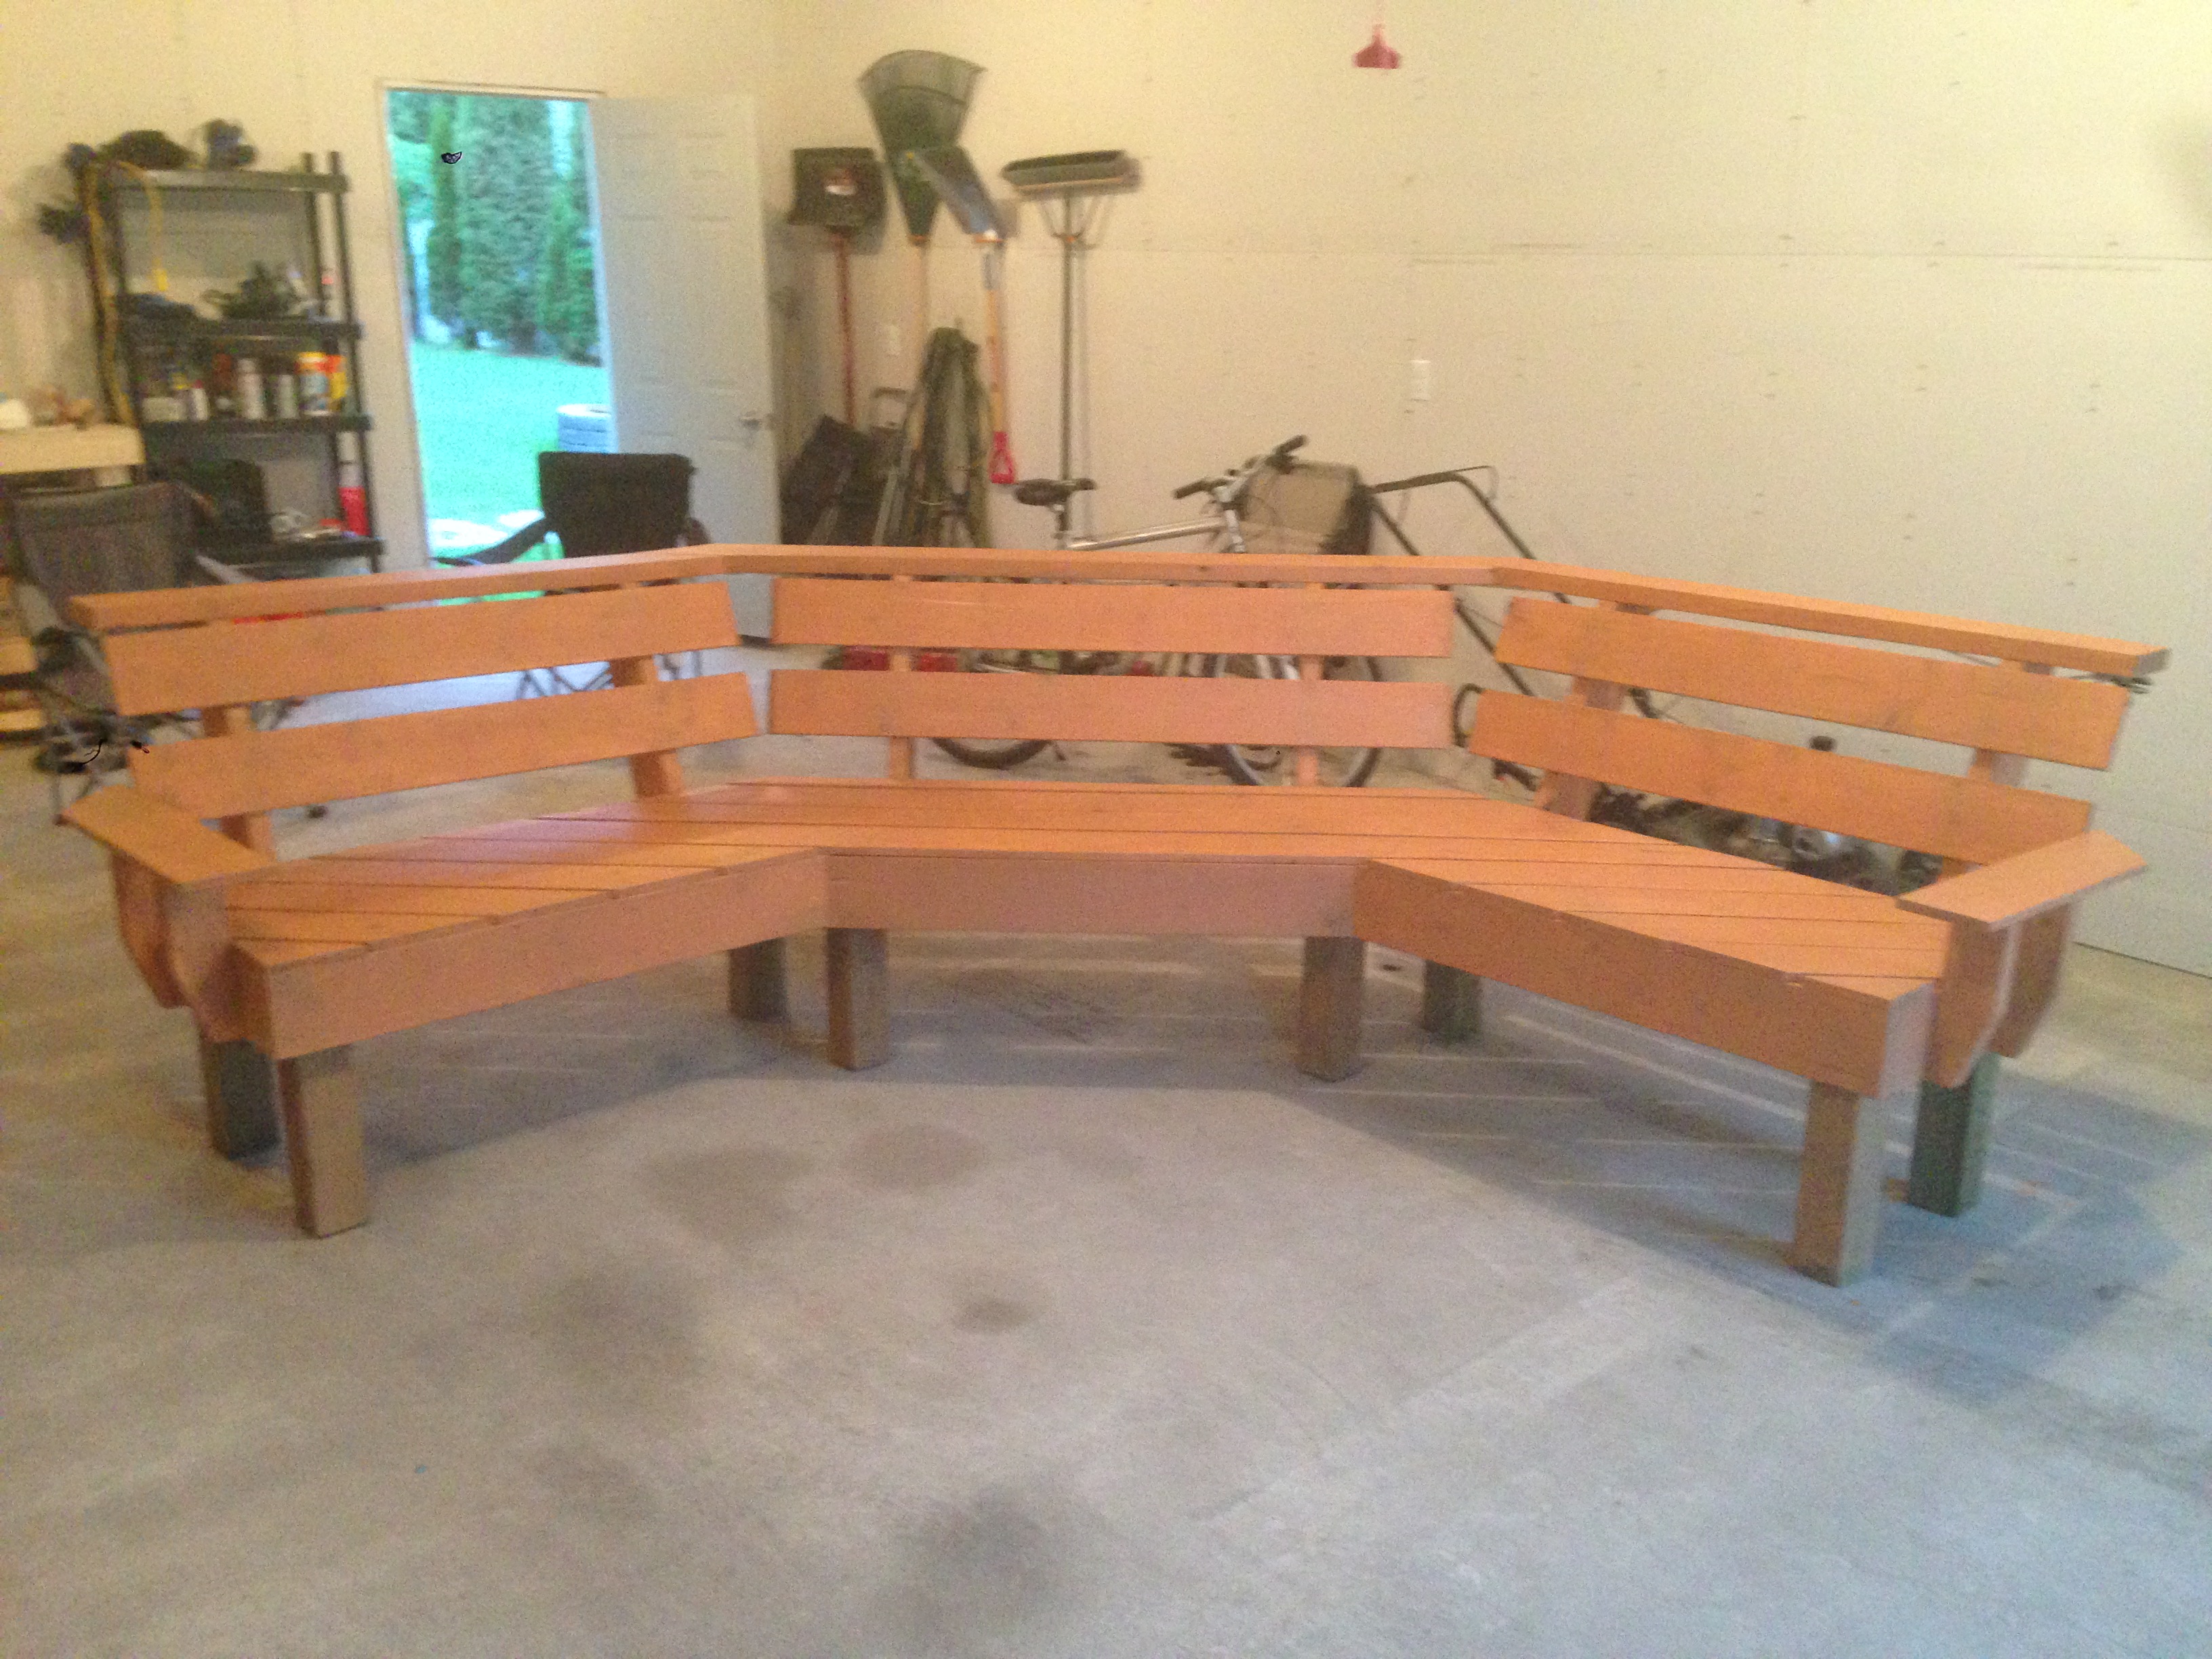
Angled Back Outdoor Sectional
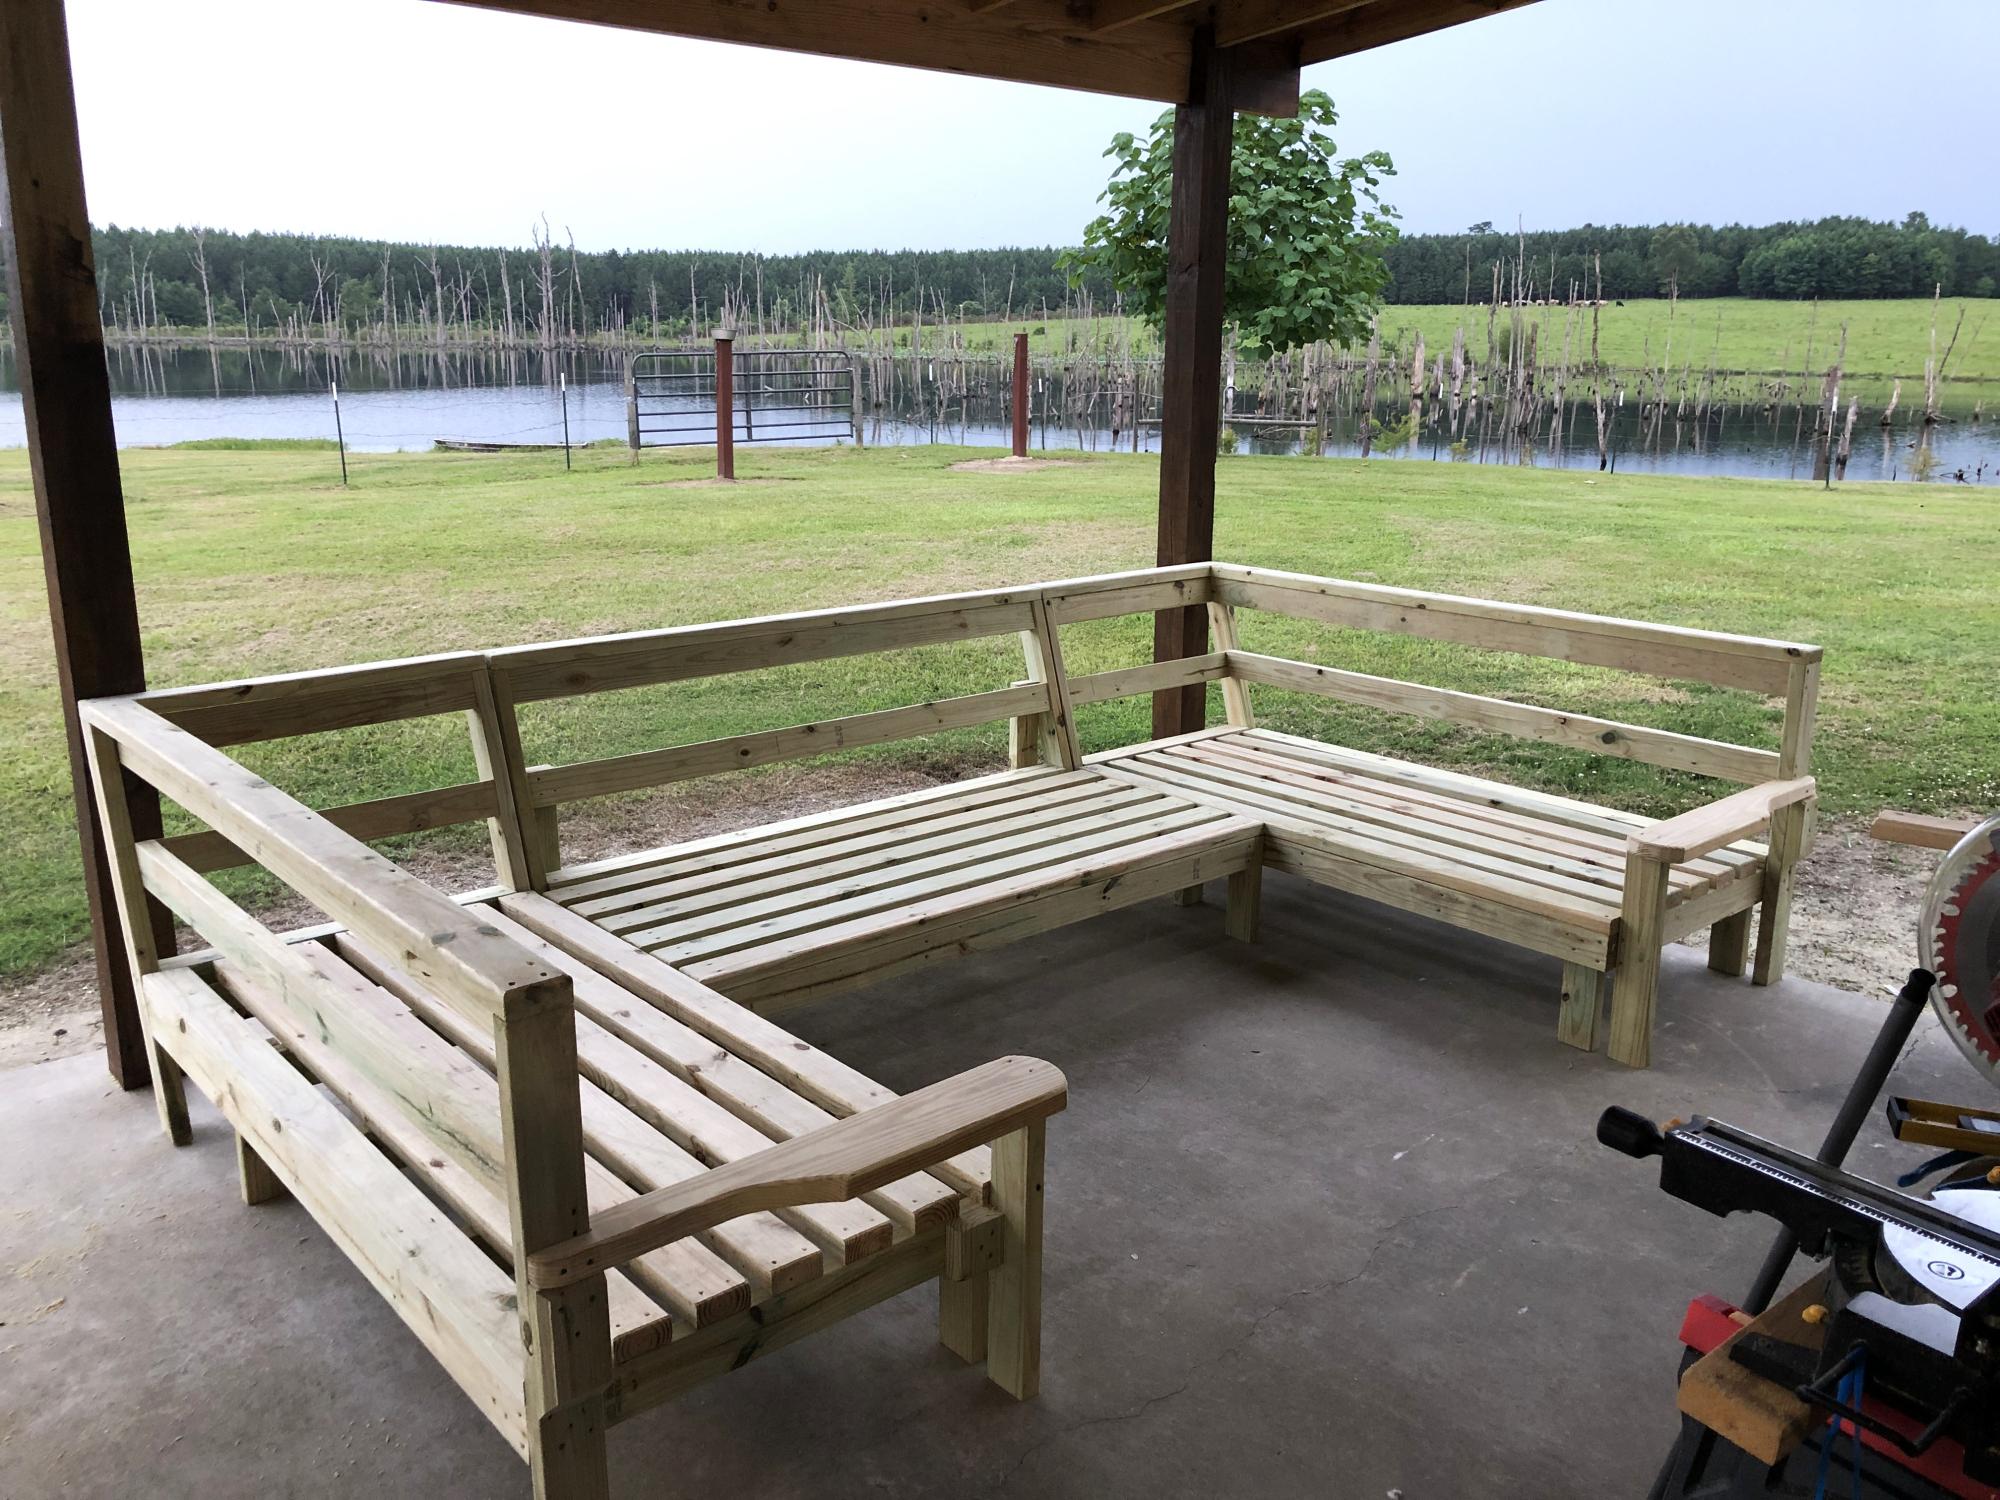
I did your same couch but made the back lean in the middle parts 15 degrees. Love your website. I'm 3 years sober and to try to sell this on facebook marketplace.
Built from Plan(s)
I did your same couch but made the back lean in the middle parts 15 degrees. Love your website. I'm 3 years sober and to try to sell this on facebook marketplace.
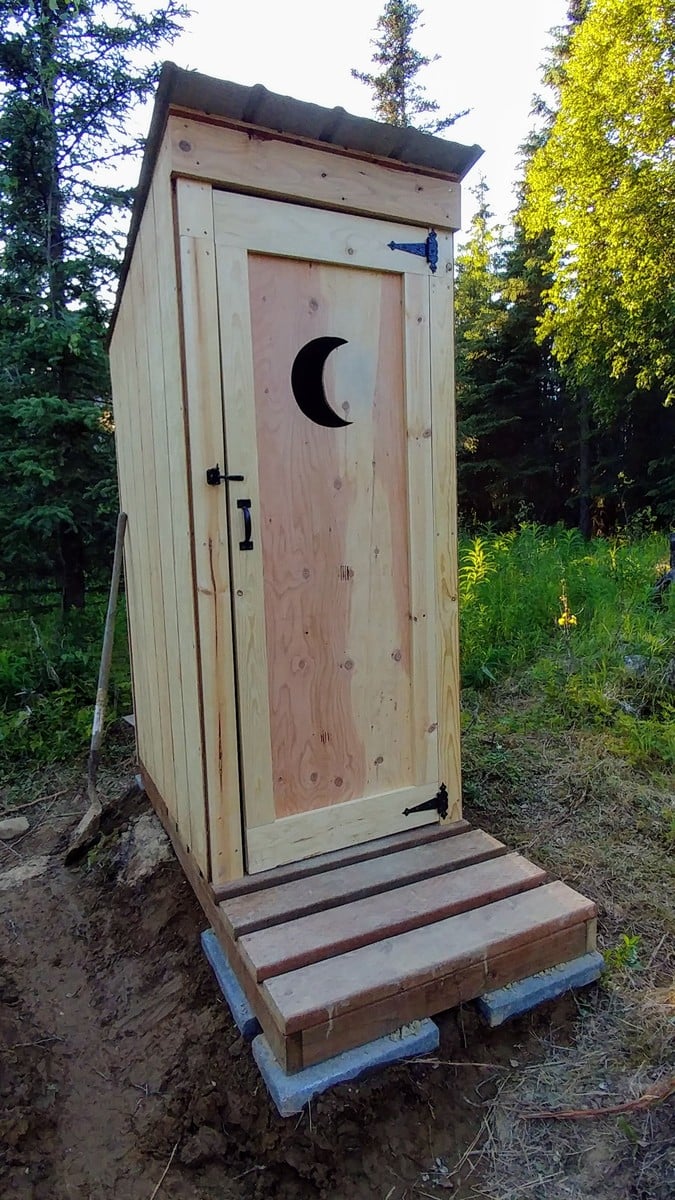
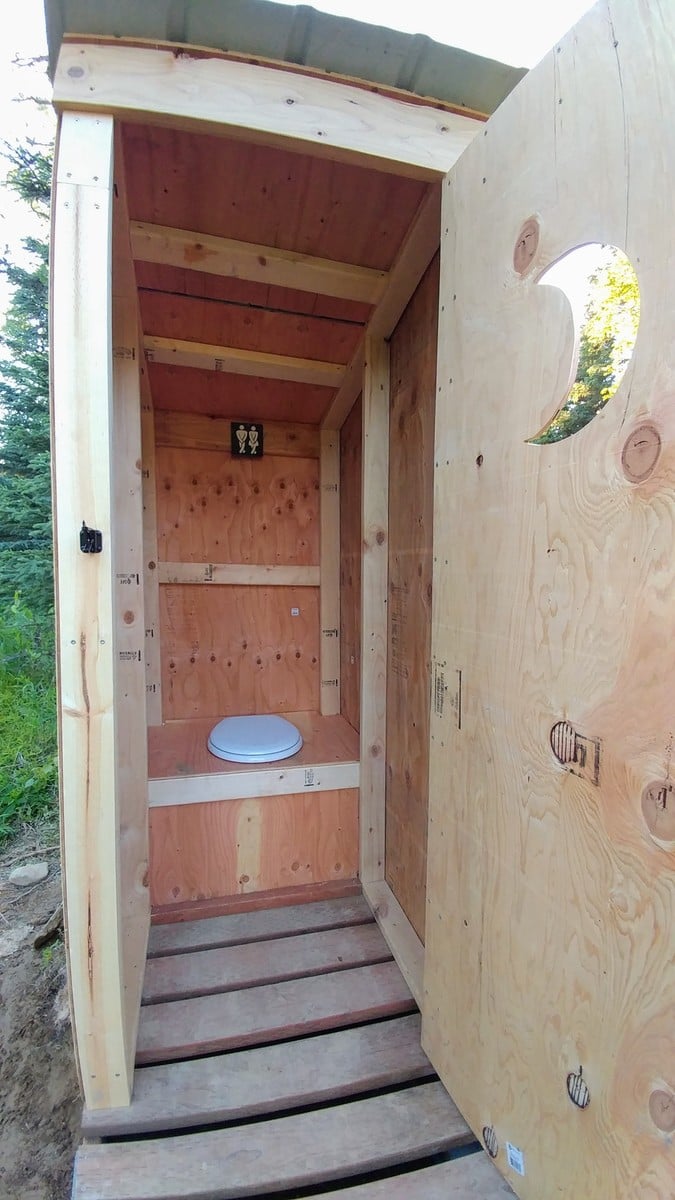
I built this outhouse to go with a dry cabin I'm working on, and also as an emergency backup for my house. I used treated lumber on the base/deck and splurged on T-111 for the siding. I wanted to use greenhouse polycarbonate for the roof, but found a piece of metal roofing in my shed that was exactly the right size so I used that instead. I thought about doing a fancy cutout on the door but ended up going with a half moon because it was easy. I'm thinking about cutting out stars of different sizes all over the rest of the door to let in more light. I'll trim and stain it next summer.
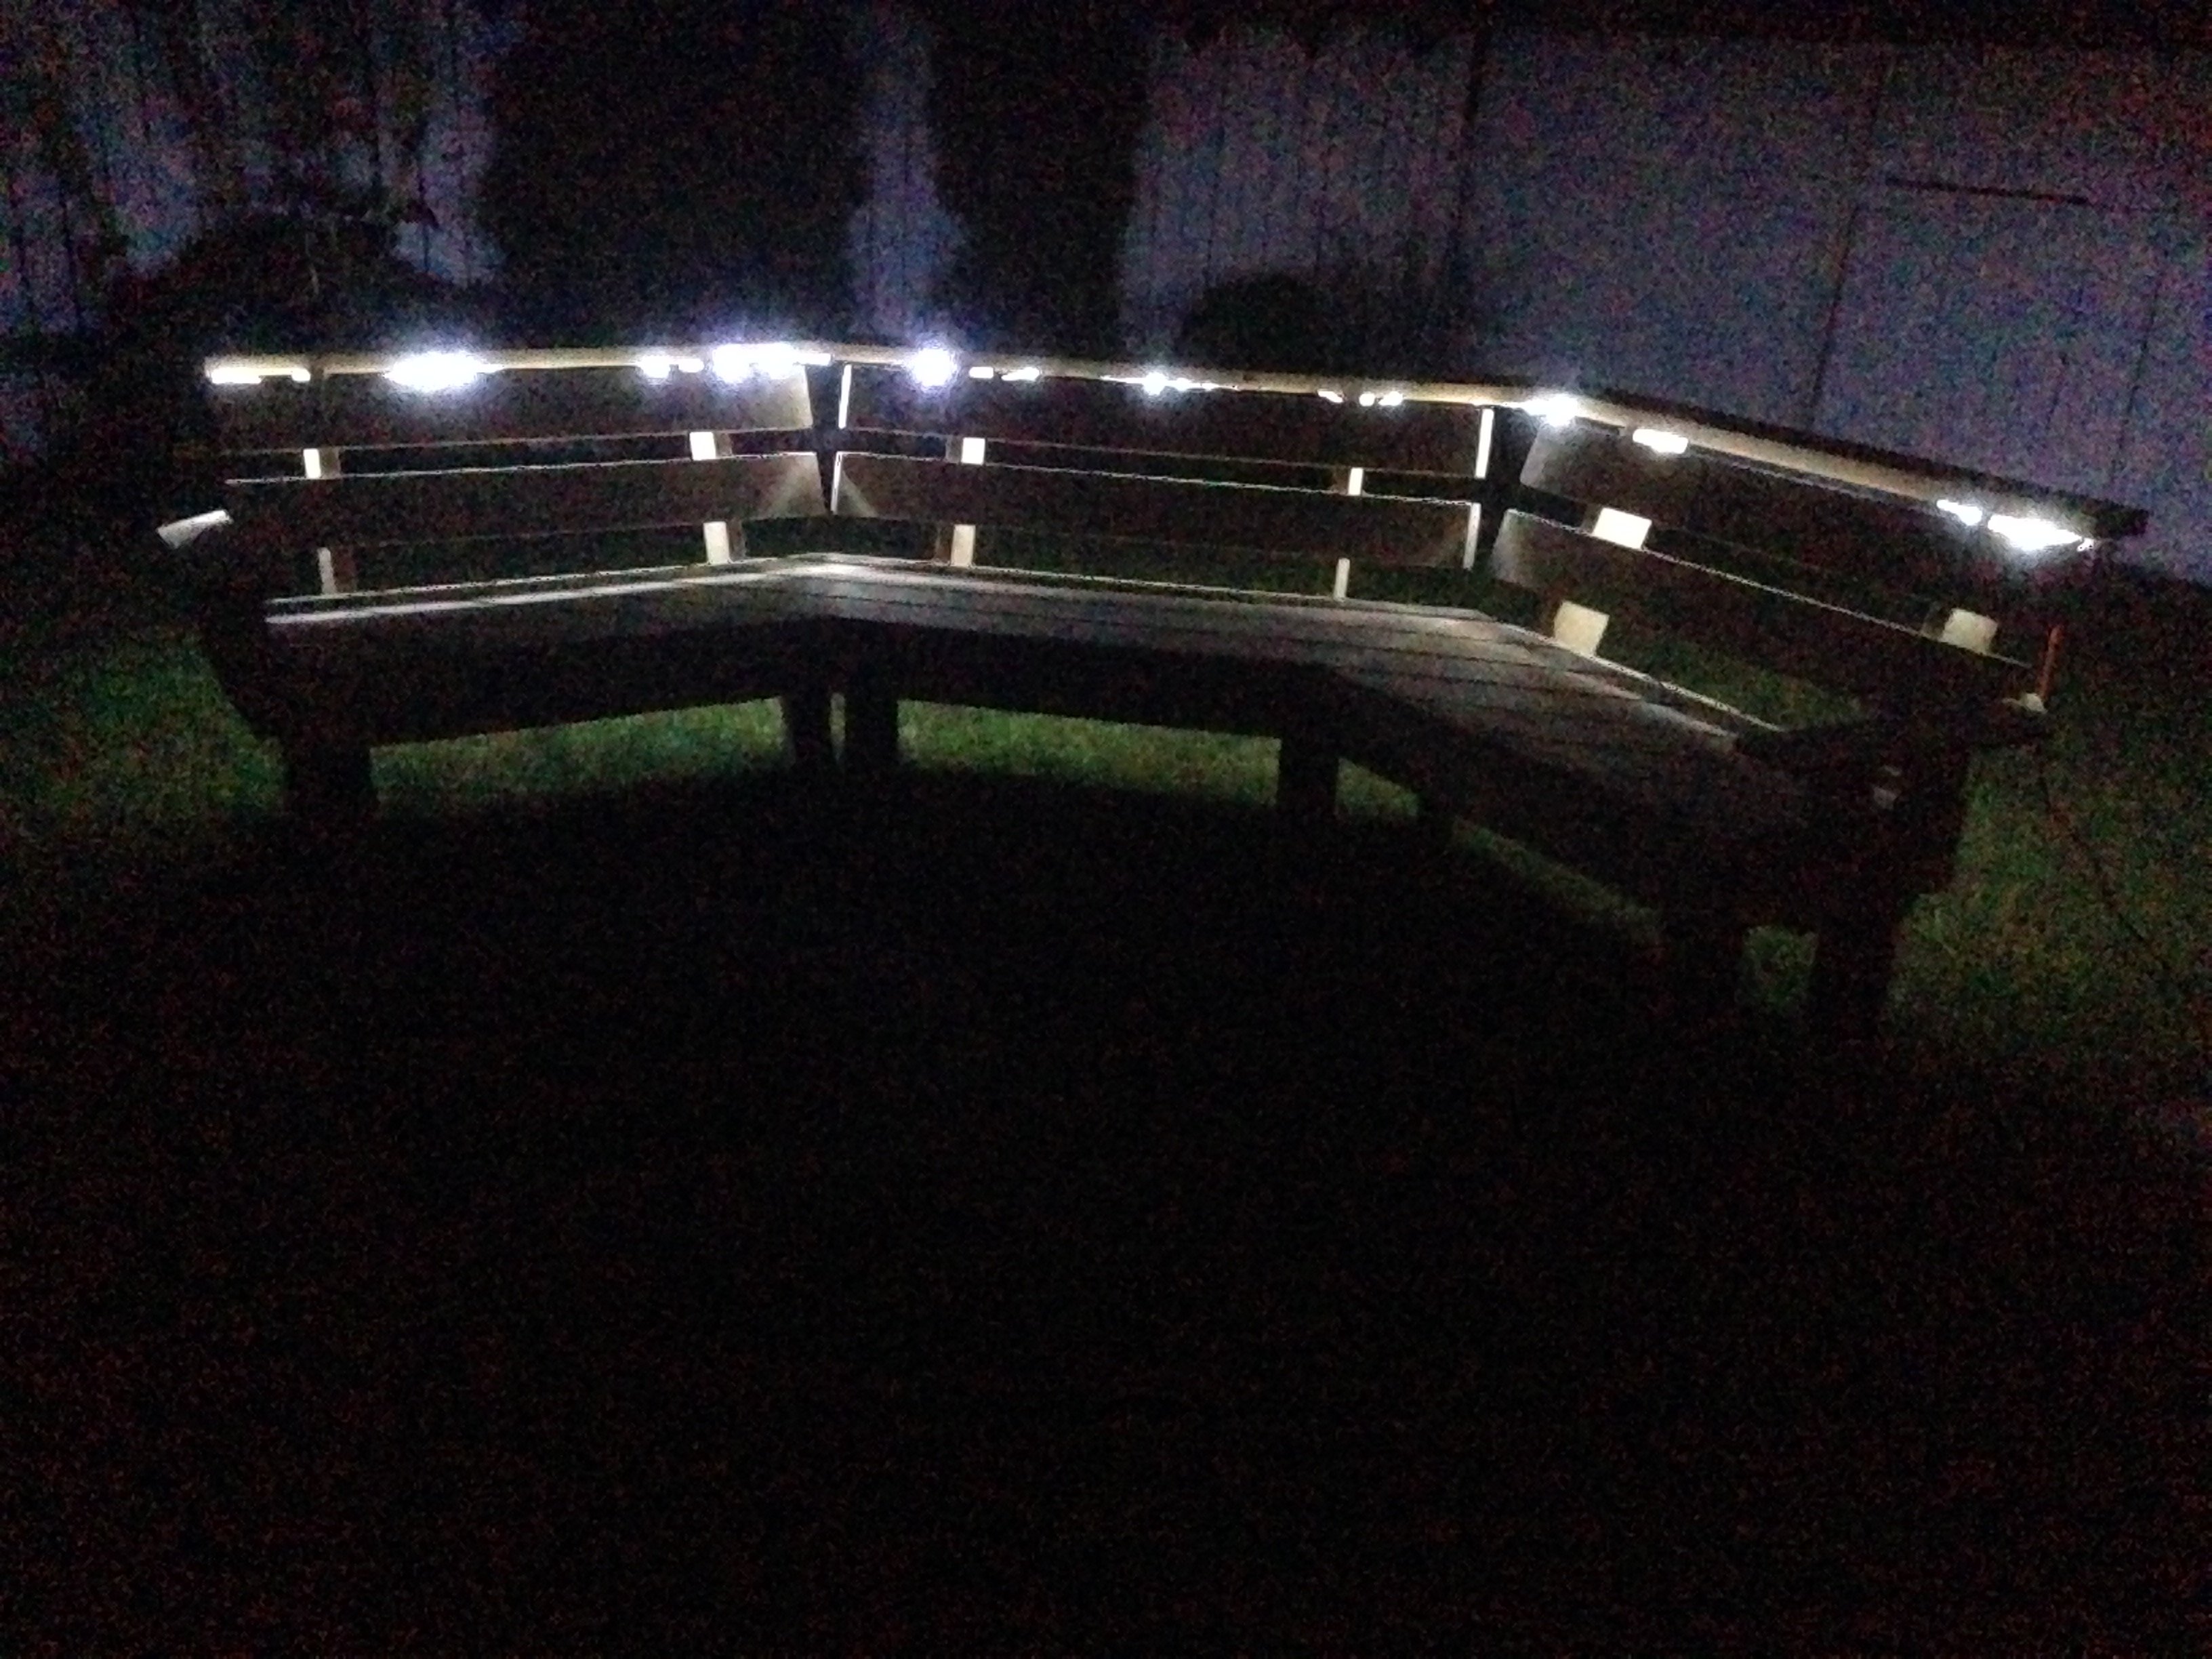
I followed your idea but i think my bench is a touch smaller. I decided to add arm rests on each end, I kept the top beverage ledge or "Bever-ledge" as I call it and ofcourse I added rope lighting along the underside. This was my first ever DIY project.

Had a blast with this project and am getting more confident with drawer slides. I built a matching dresser that is much shorter and wider. It can be found here: http://www.ana-white.com/2018/08/DIY_furniture/bedroom-dresser

Mon, 08/03/2020 - 18:44
I must be missing the link to the plans for the dresser. Sorry, could you help me find the plans?
Wed, 09/30/2020 - 17:13
I would also like the plans?? Any help finding the link?
Mon, 12/28/2020 - 11:12
Are the plans available for this piece? Its beautiful! If so, please let me know.
Thu, 08/12/2021 - 15:35
Any way to get a copy of these plans? I really like the look and want to give it a shot. Have to make a few of these if all goes well for all my boys.
Thanks
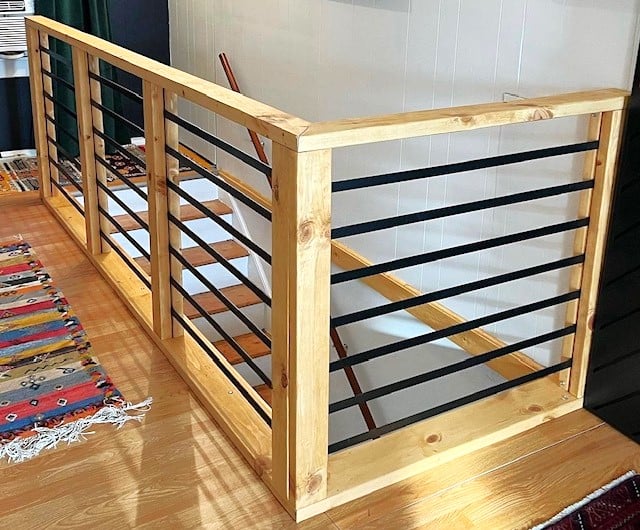
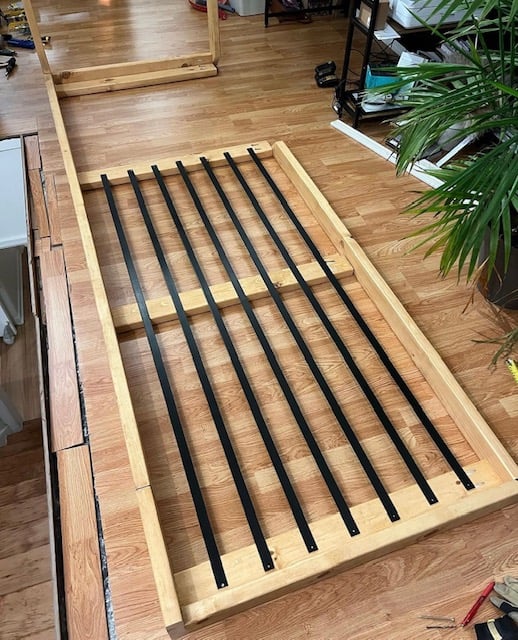
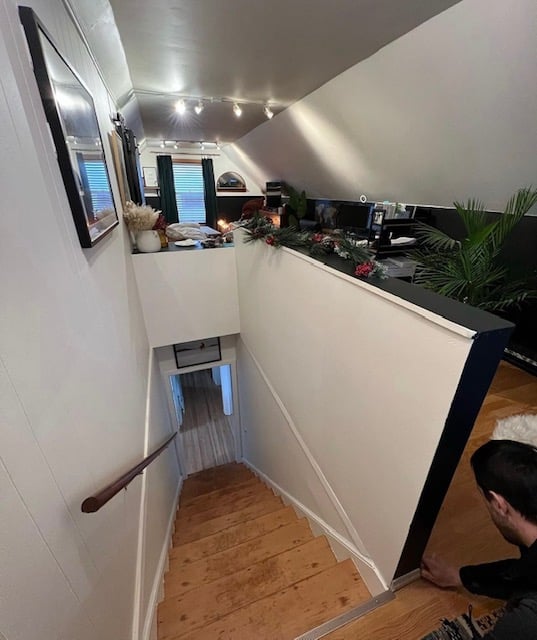
Amazing stair railing upgrade shared by Sara and Chris!
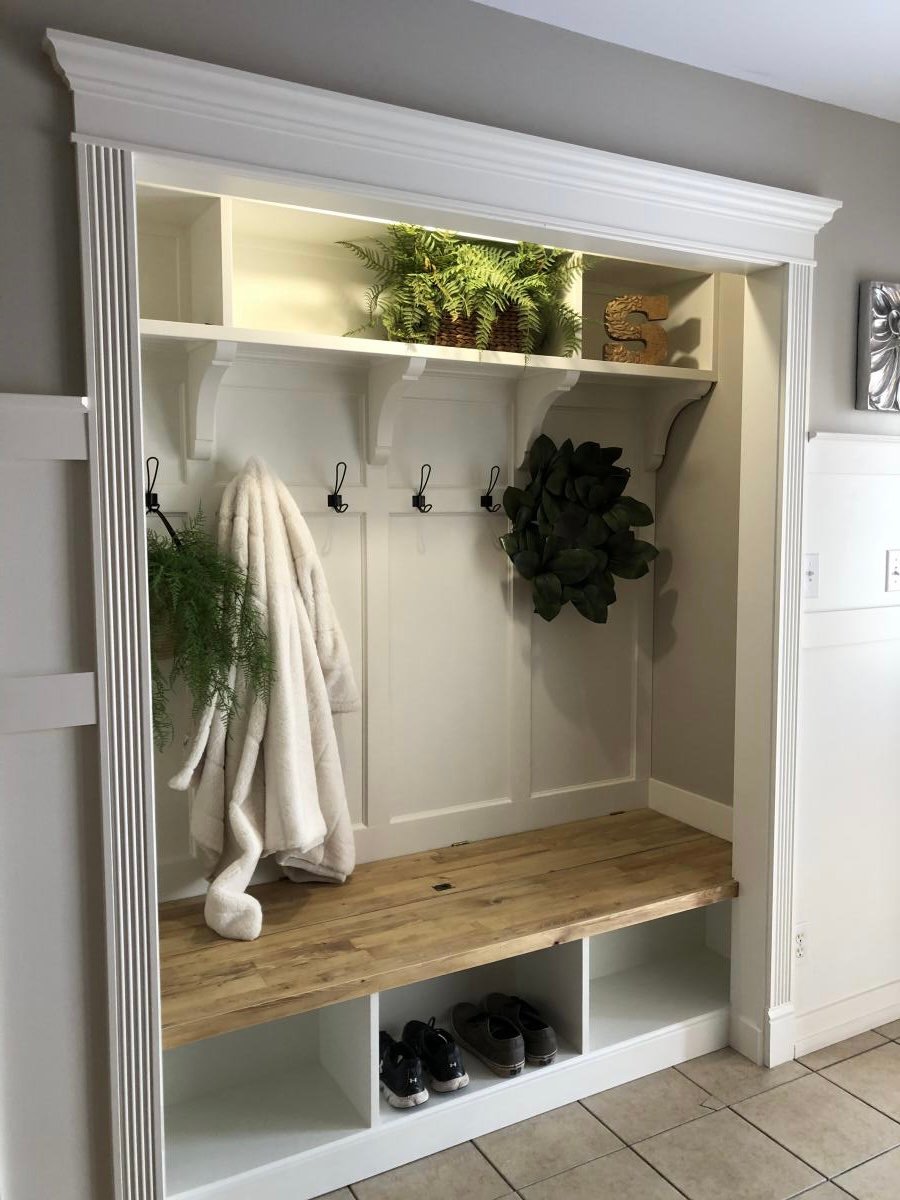
The concept of hidden boot storage at the back is genius!!! I knew as soon as I saw your plan that I needed that in this space! Thank you so much for what you do!

Fri, 01/22/2021 - 11:42
May I ask how you would assemble if you wanted the hinge in the back as in this picture?
Thank you.
Wed, 08/25/2021 - 04:51
Hello, can you tell me how to find the plans for the Mudroom Closet makeover? I’m interested in doing the one pictured on this page.
Thank you
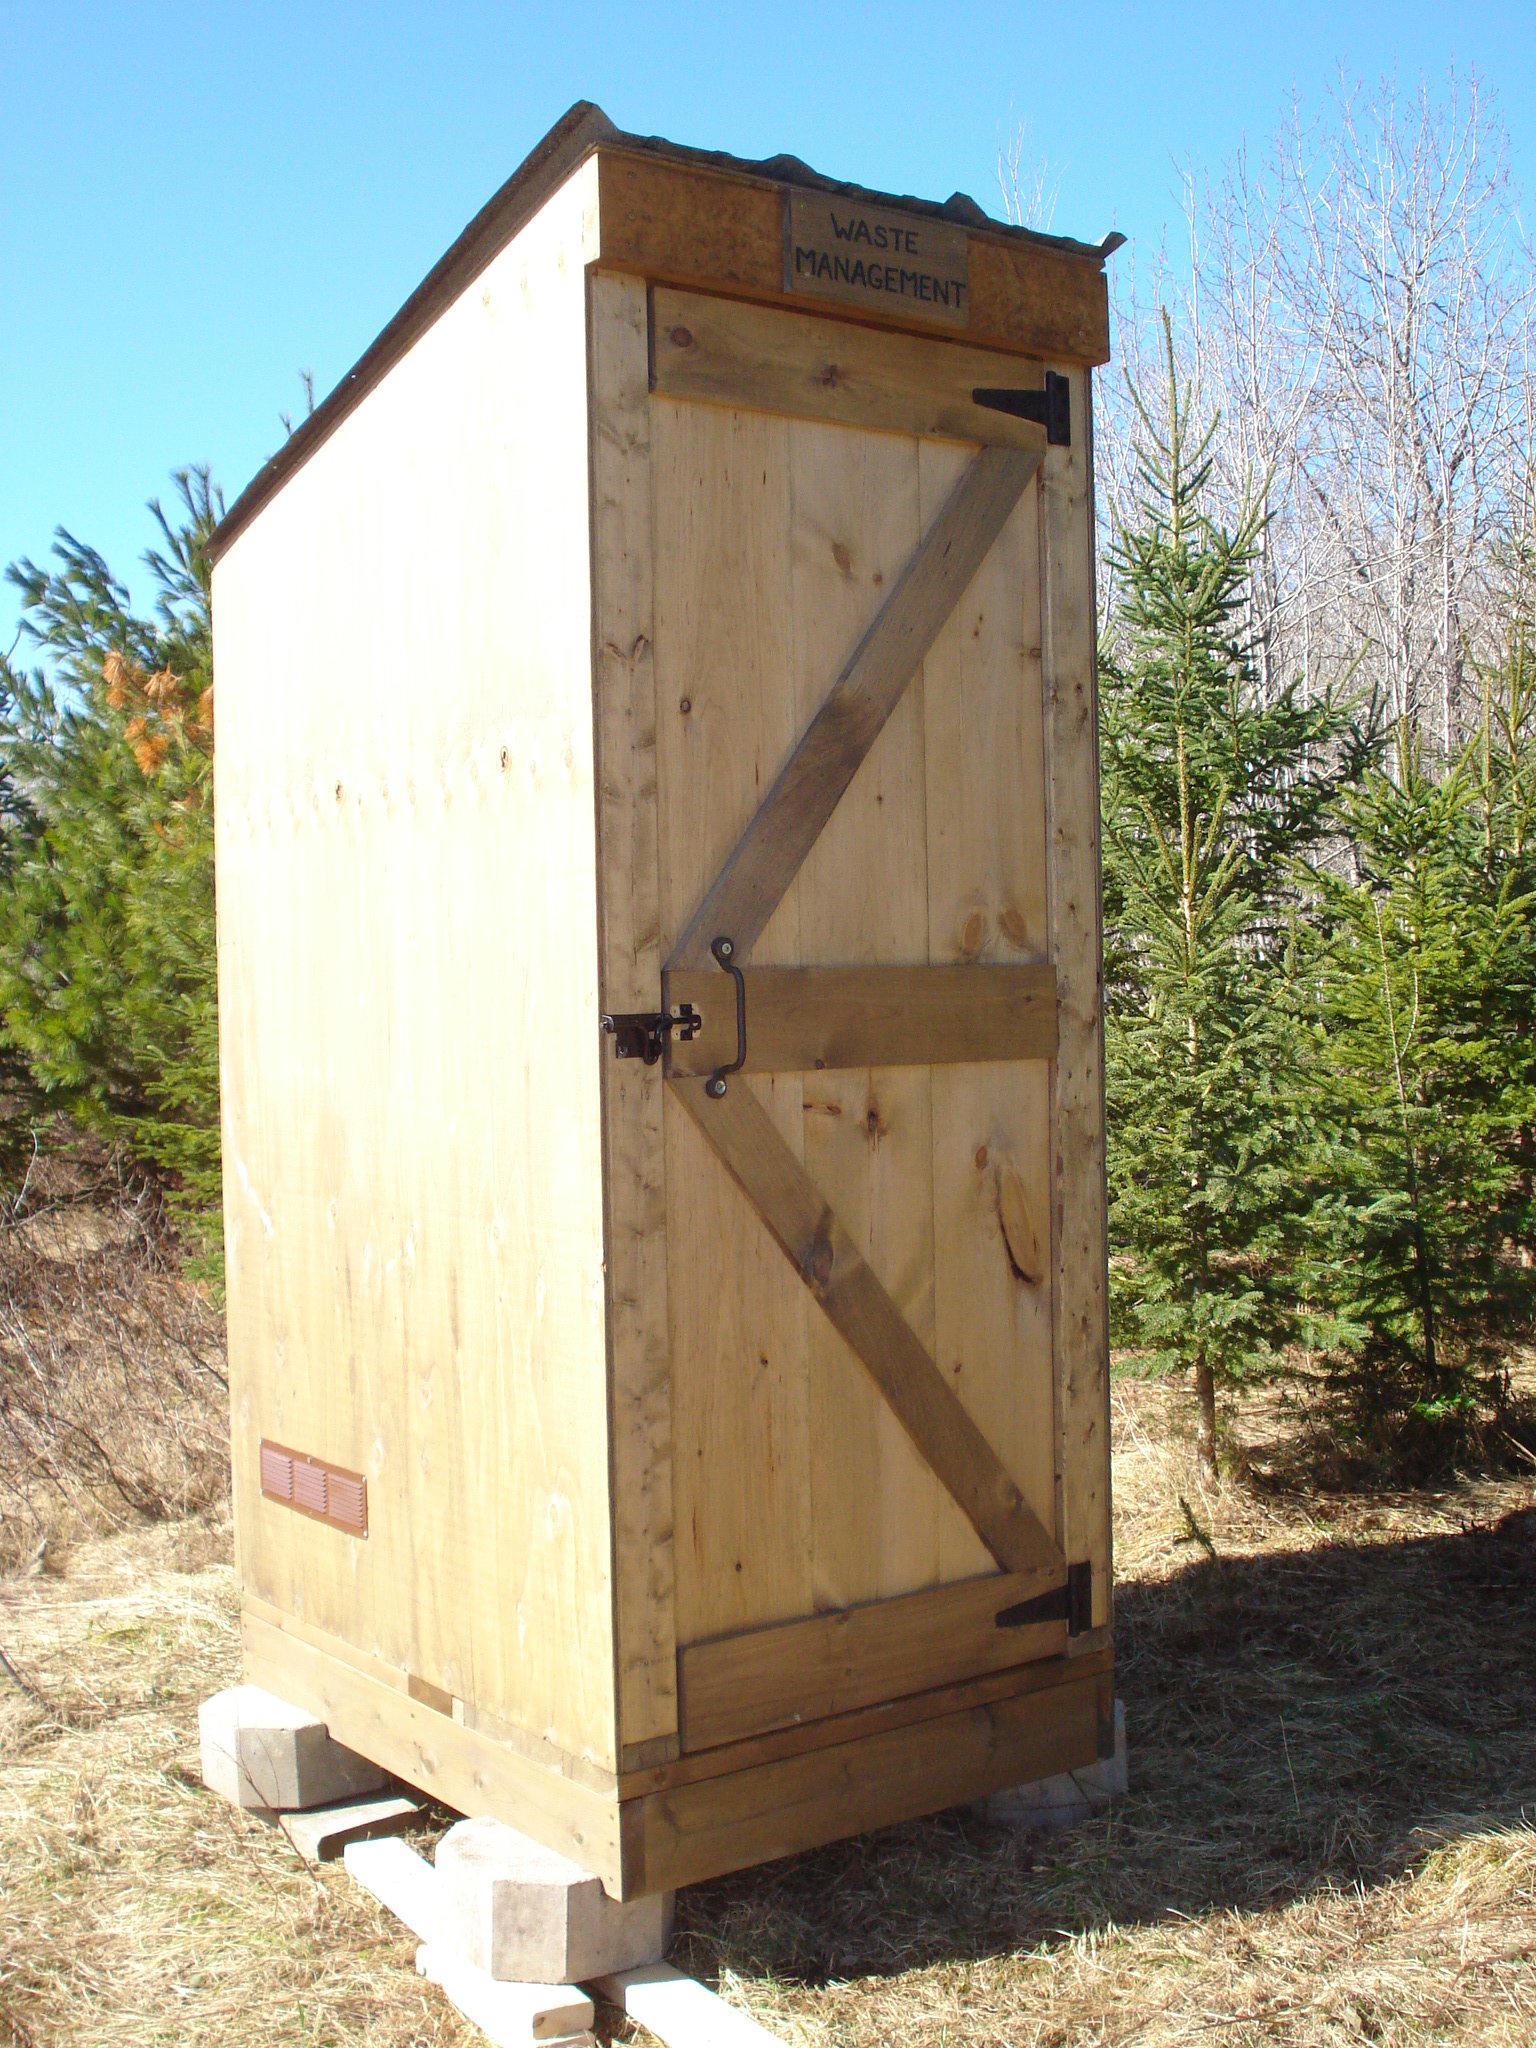
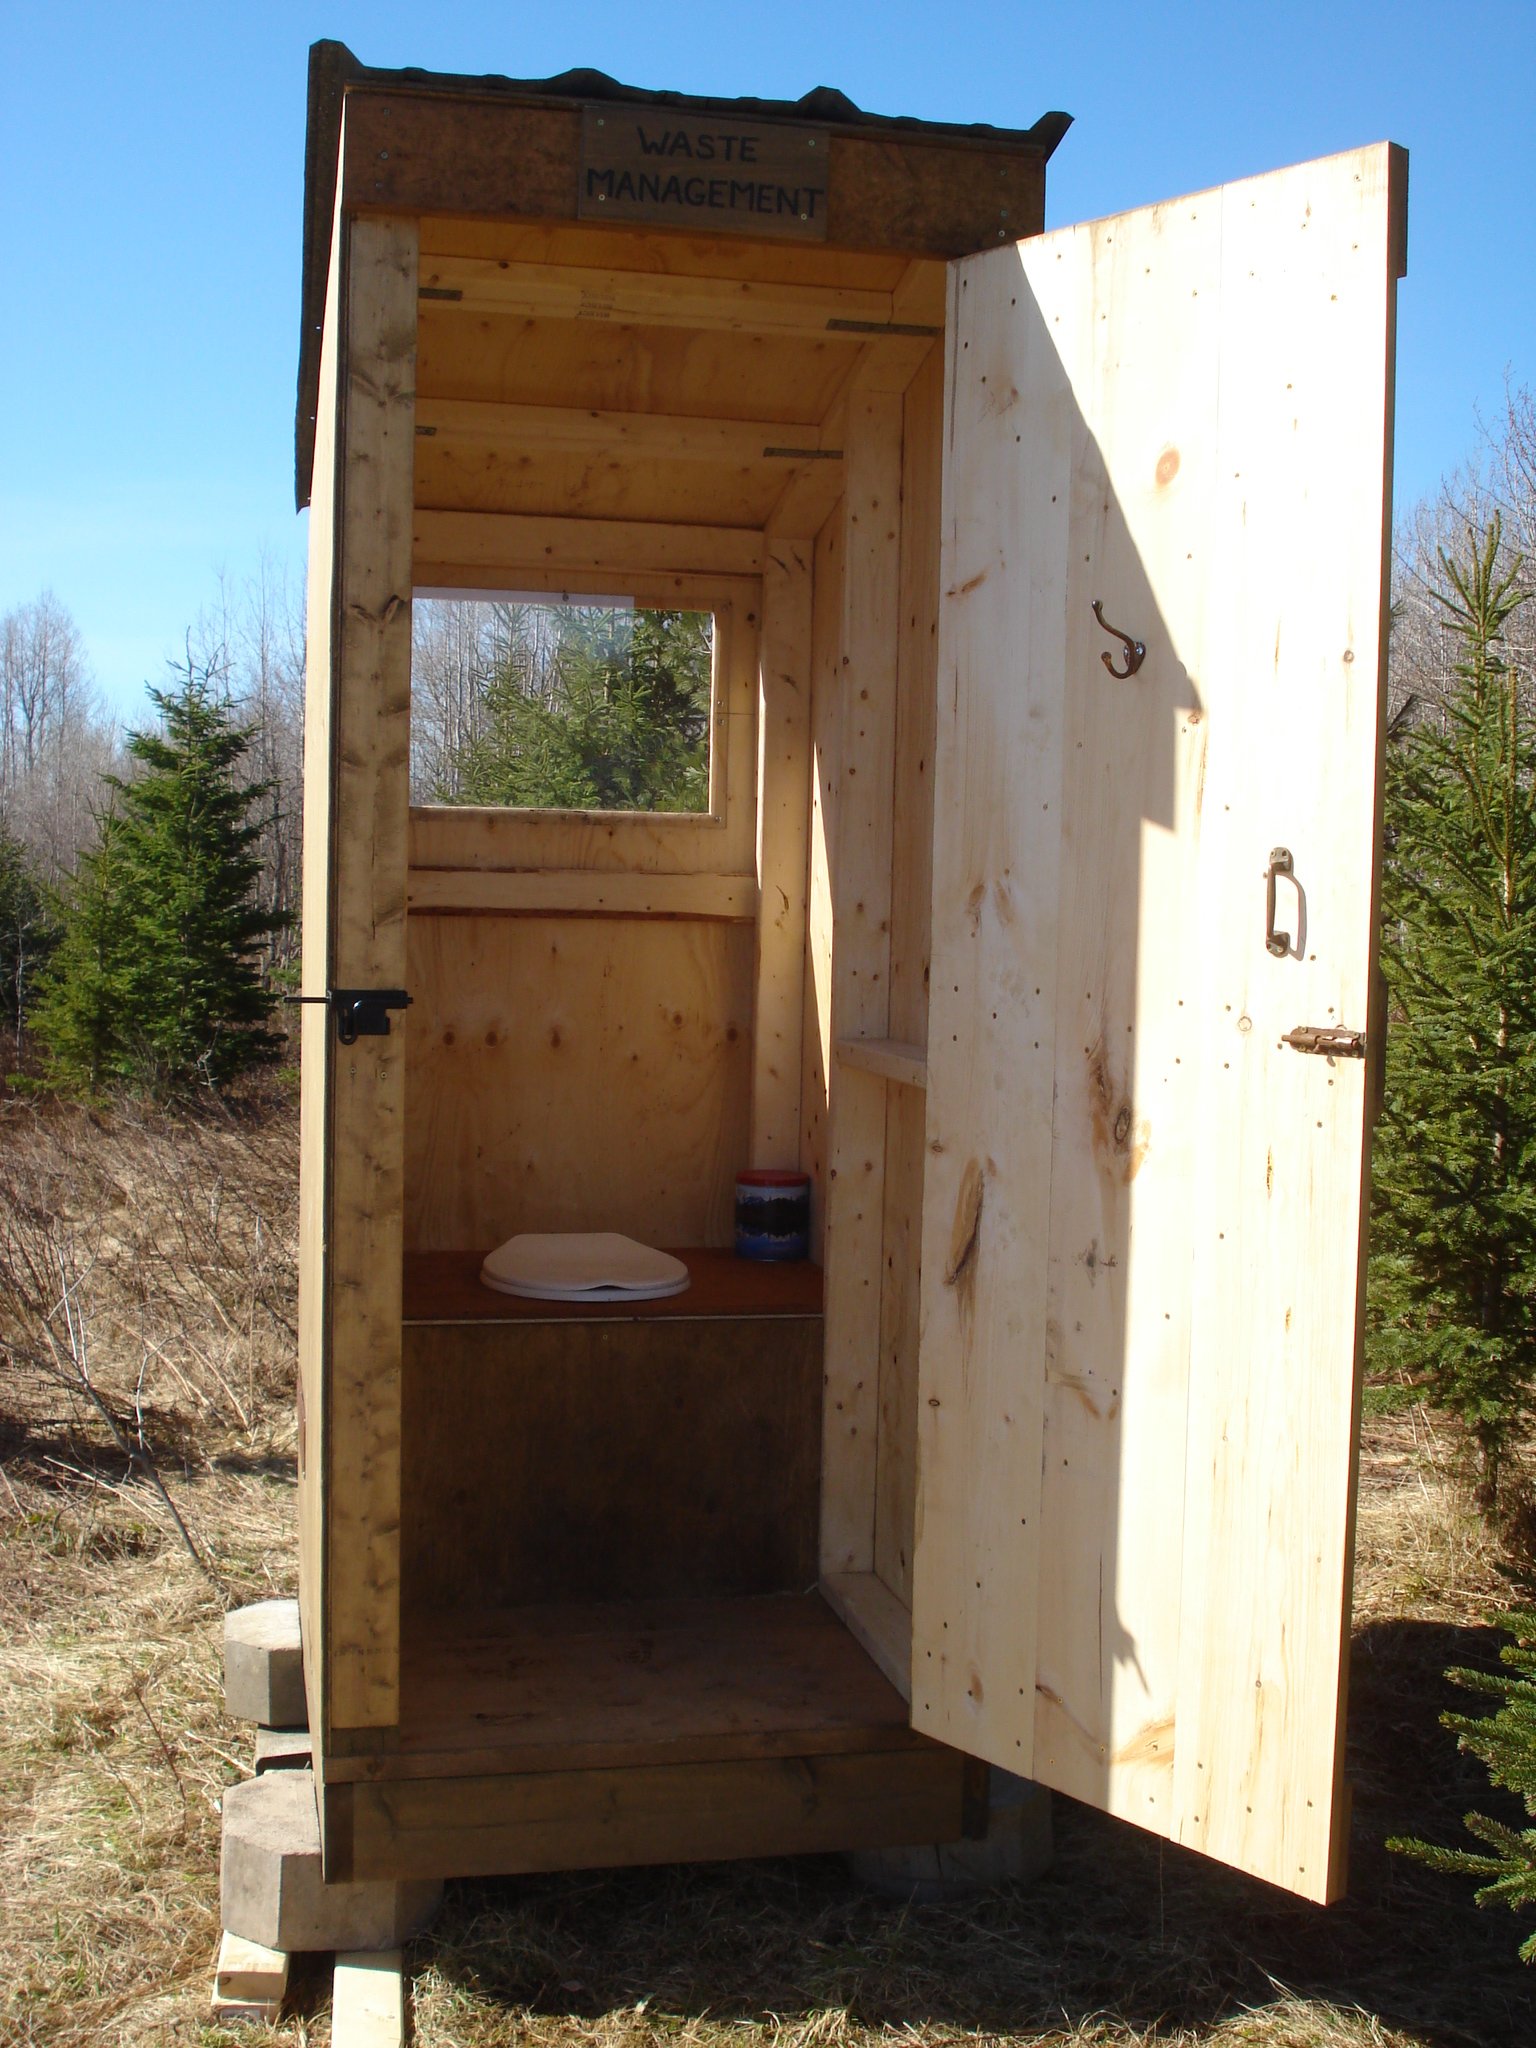
I had my nephew build this outhouse for our new 70 acre lot - no neighbours in sight so I had him put in an acrylic window (with a view). I left off the deck and had him put the boards tight together so 'critters' didn't get in as easily. I made a sign for above the door - 'Waste Management' for a touch of humour. The plans were easy to follow and I love it. Thanks, Ana.

Thu, 04/20/2017 - 16:45
So excited to see this one built! Your nephew did a great job, love the window in the back!
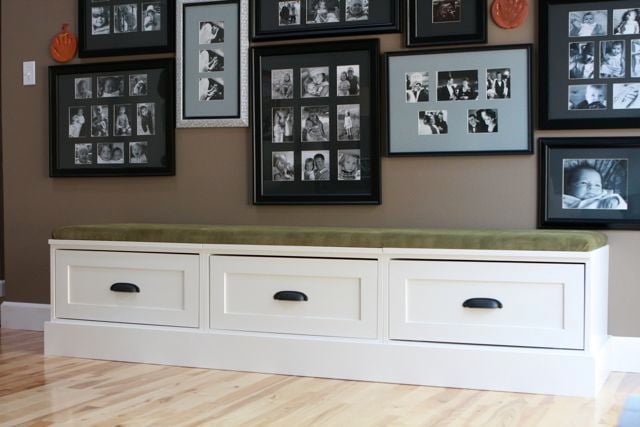
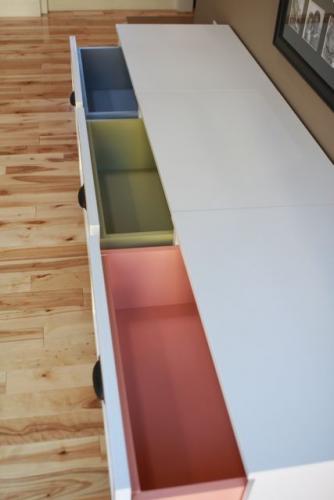
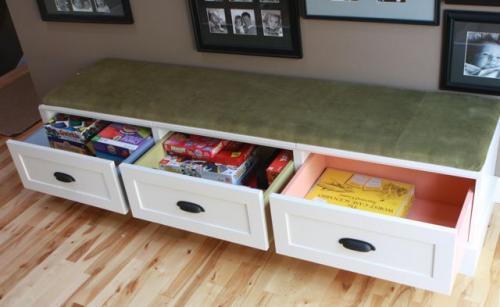
I took Ana's open base and drawer plans, added a few inches to the height (so that the base trim on the storage units would clear the base trim on our walls), and put them together to create a banquette-style bench with tons of storage underneath. We use the drawers for our family board games and photo albums.

I had so much fun building this! I got a little creative with the corner section and decided to make it a table. I built a small hatch so that I could put in a container for ice and cold beer. When the hatch is not in use, the container can be removed and the hatch can be closed to provide more table space. I also added drink holders!


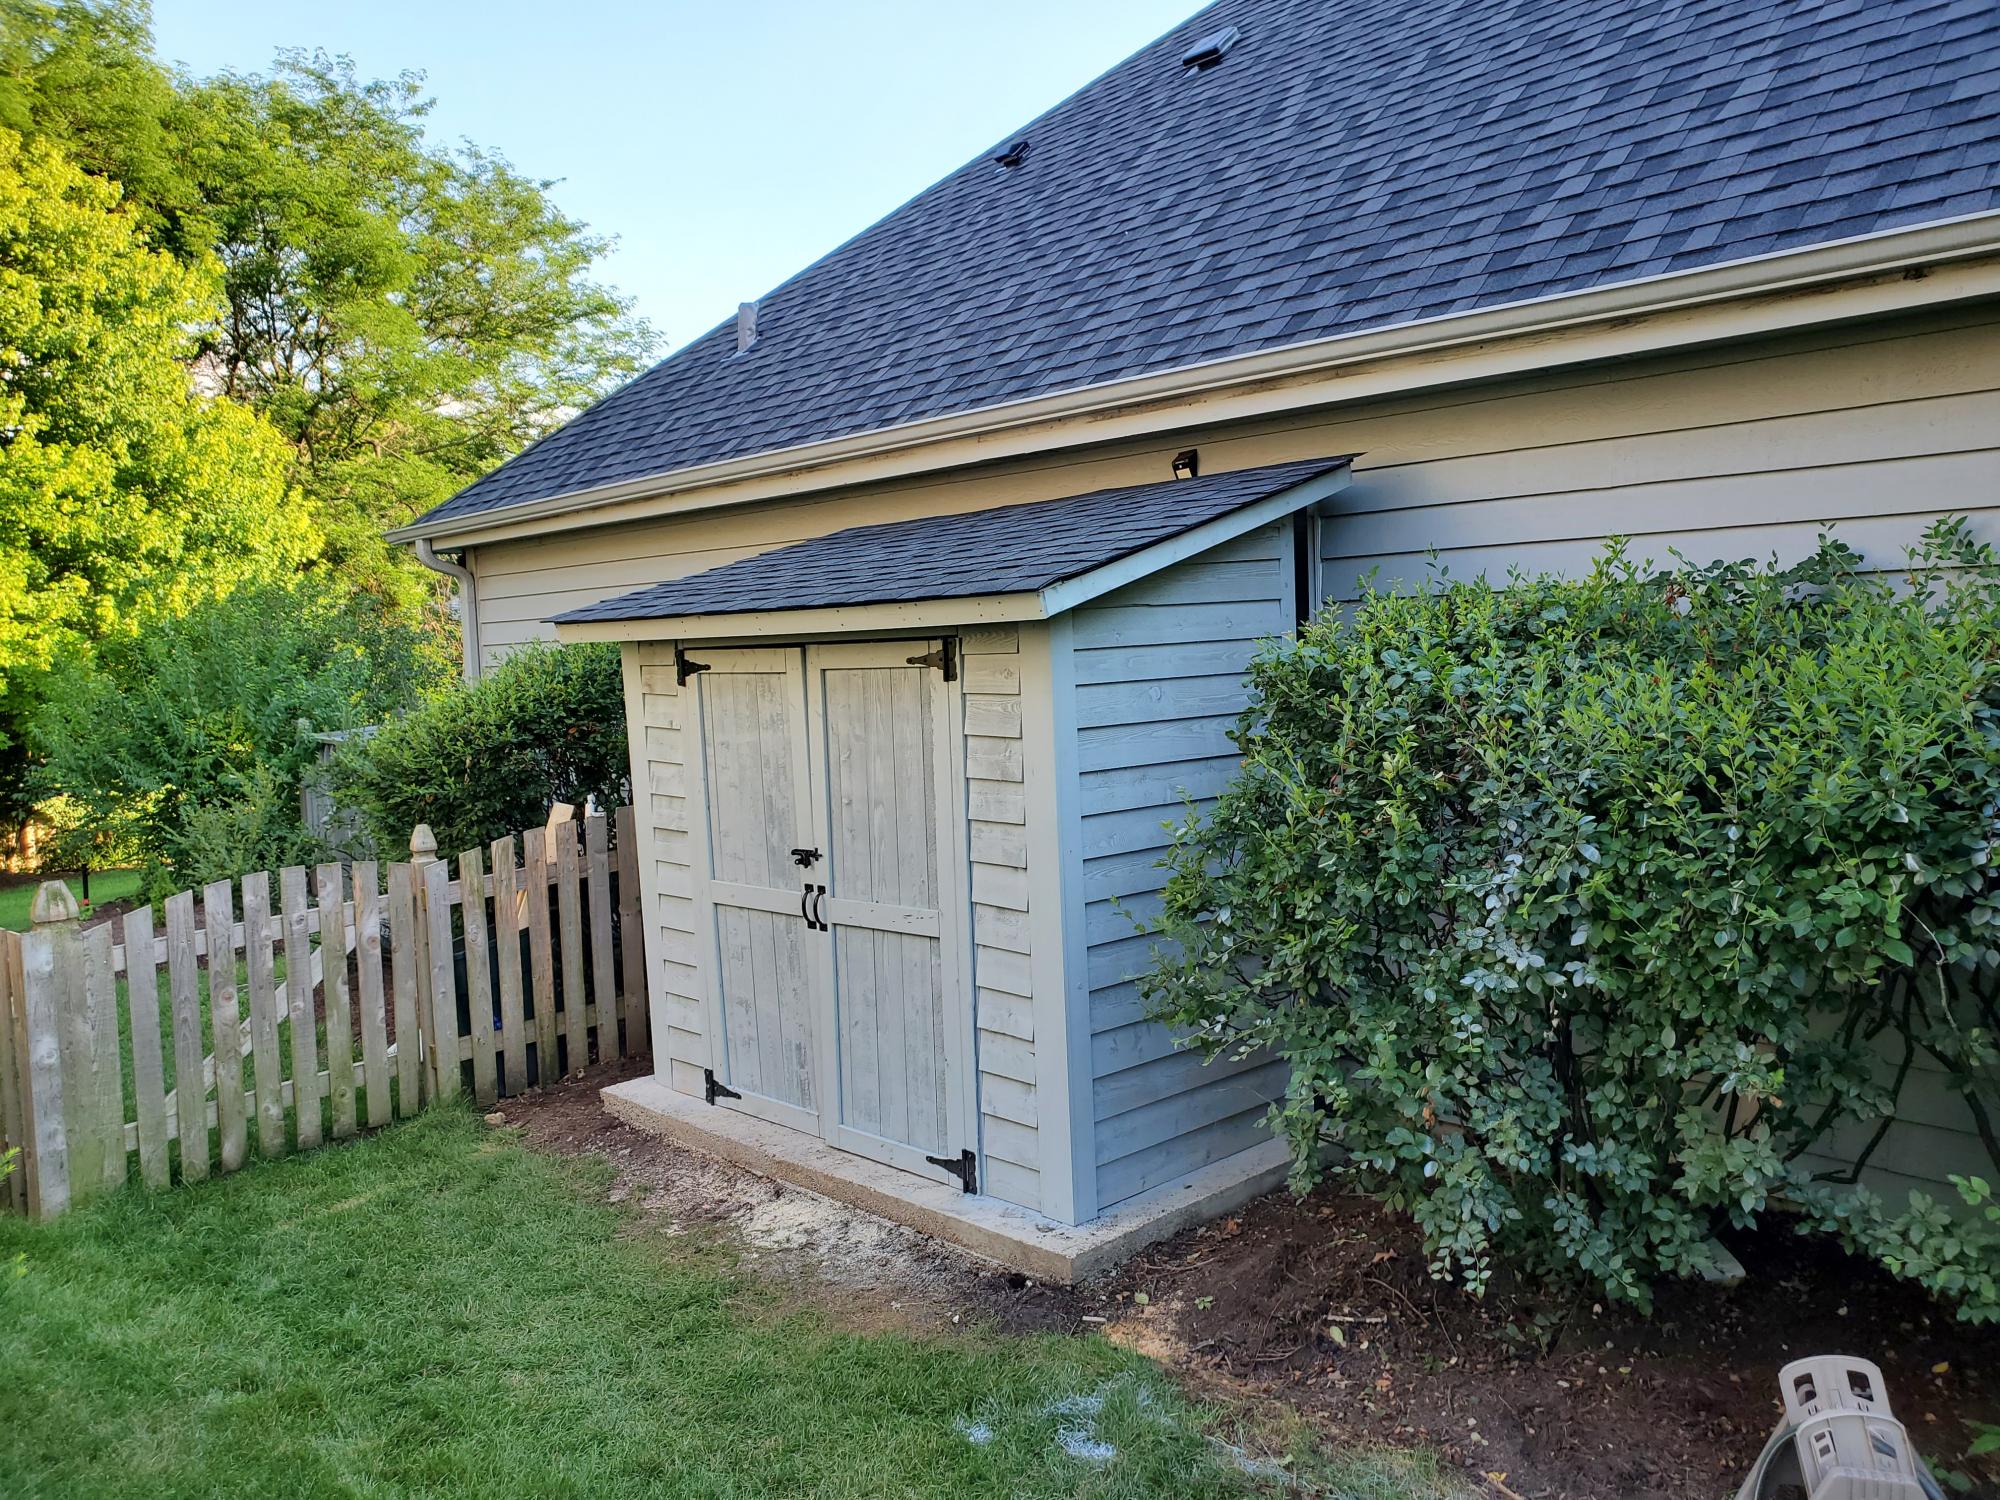
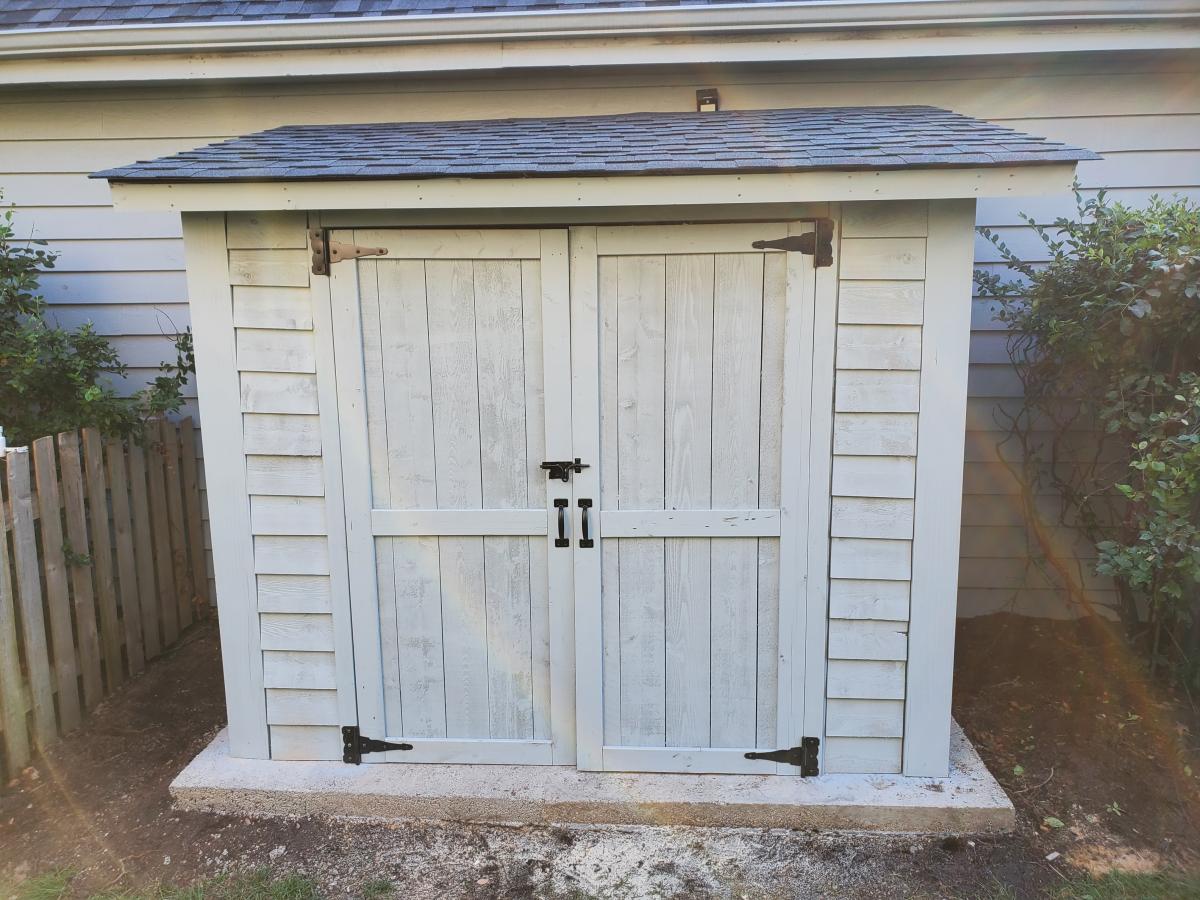
Thank you for the plans, shed turned out great! My association required me to match the siding color, roof color, and anchor to a concrete slab. So I poured 25 bags of 80lbs concrete to make a 9x5 slab. Redid the plans for an 8x4 shed, built the frame with 2x4s and not 2x2's, installed flashing, ice/water shield + felt + matching shingles since I'm near Chicago, and used a flexio finishing sprayer to paint the shed. Saved some $ by using 2 Redwood Grain Fiber siding panels for $22 each at HD.
All in all very happy with my shed and all my dangerous yard tools and woodworking tools can be put away from my toddler.
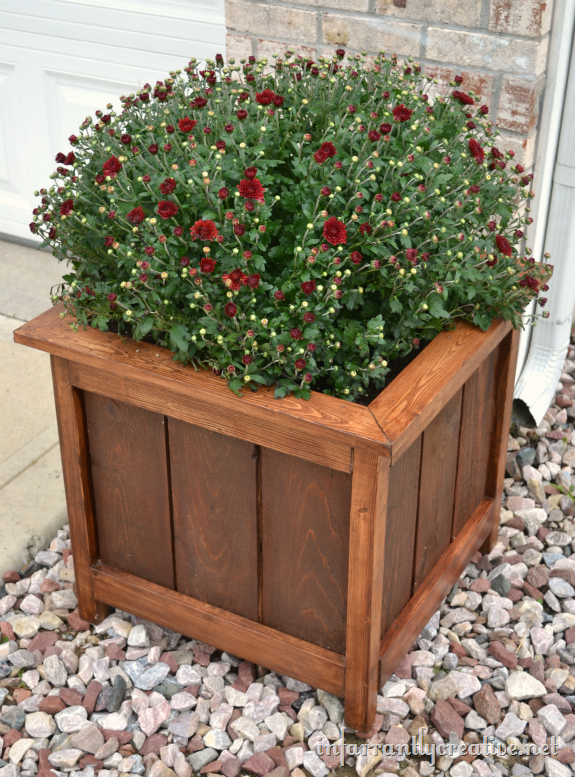
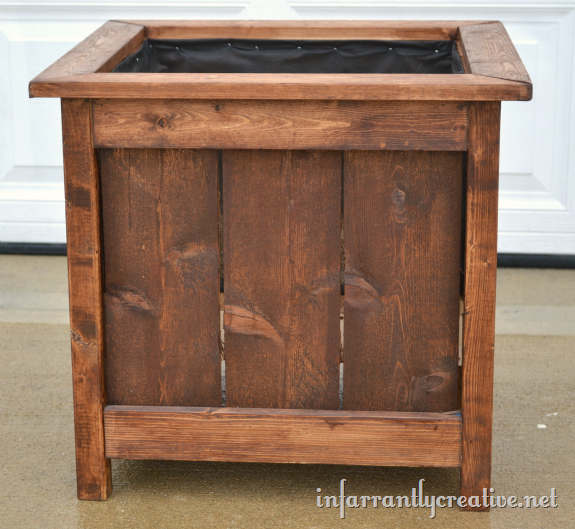
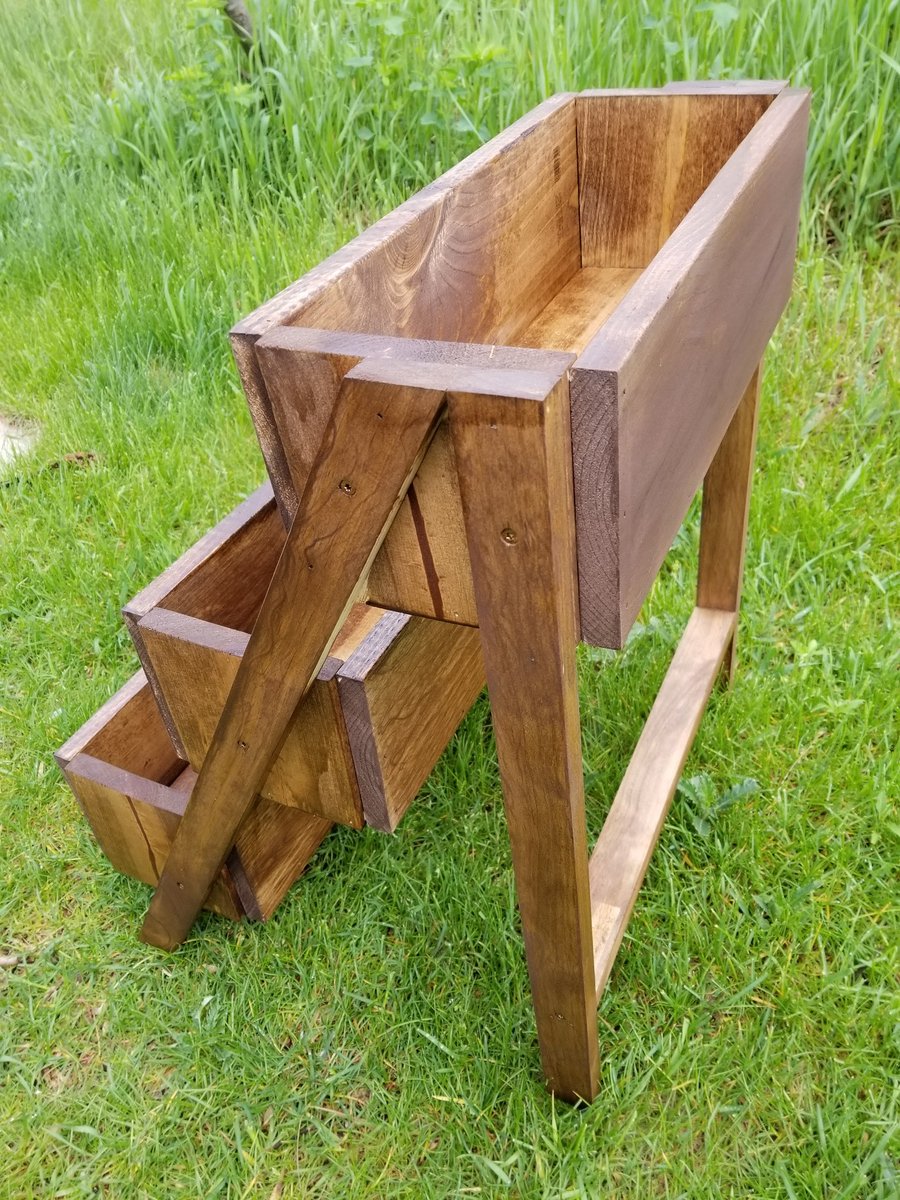
This was by far the easiest project. This planter is HUGE as well and makes a great focal point for your curb appeal. I didn't extend the sides but rather created a mitered edge for the top creating a nice clean finish.
Mon, 10/29/2012 - 23:02
This looks beautiful! I just made one too, I will have to do the top like yours it's pretty that way. I love how the stain too!
:) Valerie
Sun, 09/22/2013 - 20:25
how exactly did you attach the mitered top?? Finish nails or is there a way to use the kreg jig to hide joinery? These are beautiful, BTW. Thanks :)
Love this planter. Used quality pine. Perfect size for the balcony! I use it for fresh herbs... i have have other people wanting one too!
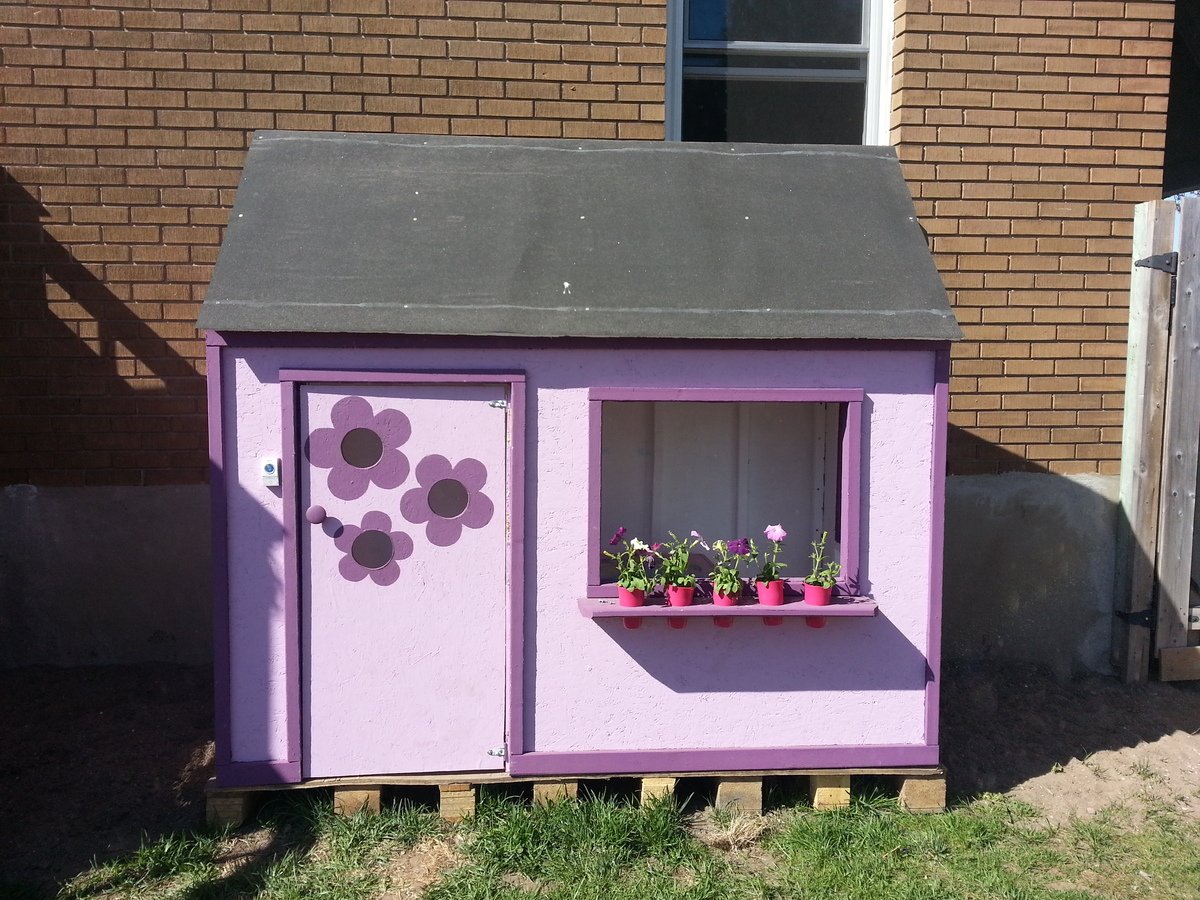
This was the first thing I have ever built, and I loved making the playhouse! I took pictures of every step I did! It was very rewarding to see the look on my girls faces with it was done!! They absolutely love it!!! Thank you for posting the plans.
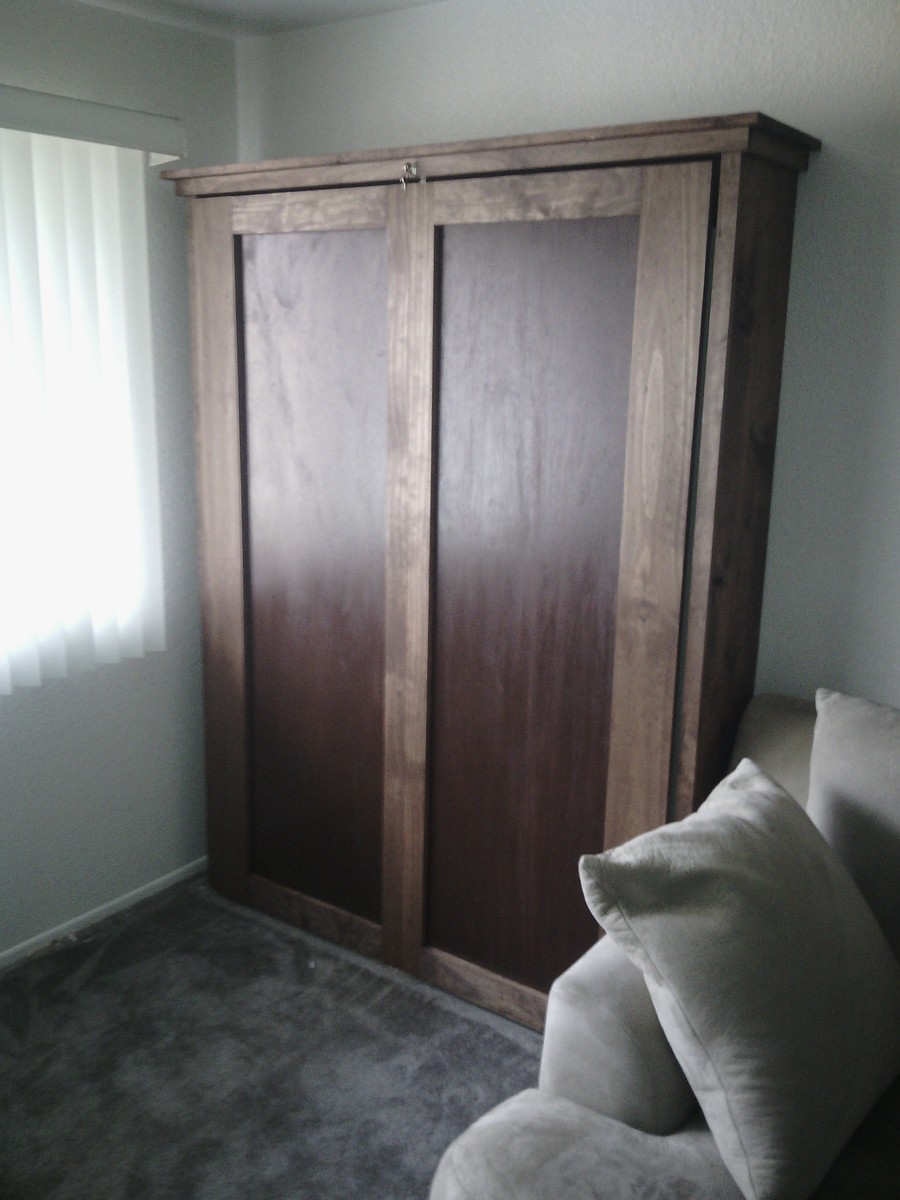
Used the plans for the twin bed, just added the difference in mattress size to the measurements. Pretty simple really. Used a cam lock centered above the door and a sawtooth picture hanger on the inside as a locking mechanism.
Tue, 09/30/2014 - 14:16
Hello,
I have been scowering the internet... I too would like to have my murphy bed raised off of the ground and be a full size murphy bed. But everytime I try to do "adjustments" and get "creative" it ends in disaster. I am better at following instructions. Is there anyway that you could give me the exact measurements for your fullsize bed and let me know how it is that you propped the bed up at the end?
Thank you.
Thu, 06/18/2020 - 20:22
I would also love the exact measurements for a double...is there a copy of the plan for that?
thank you
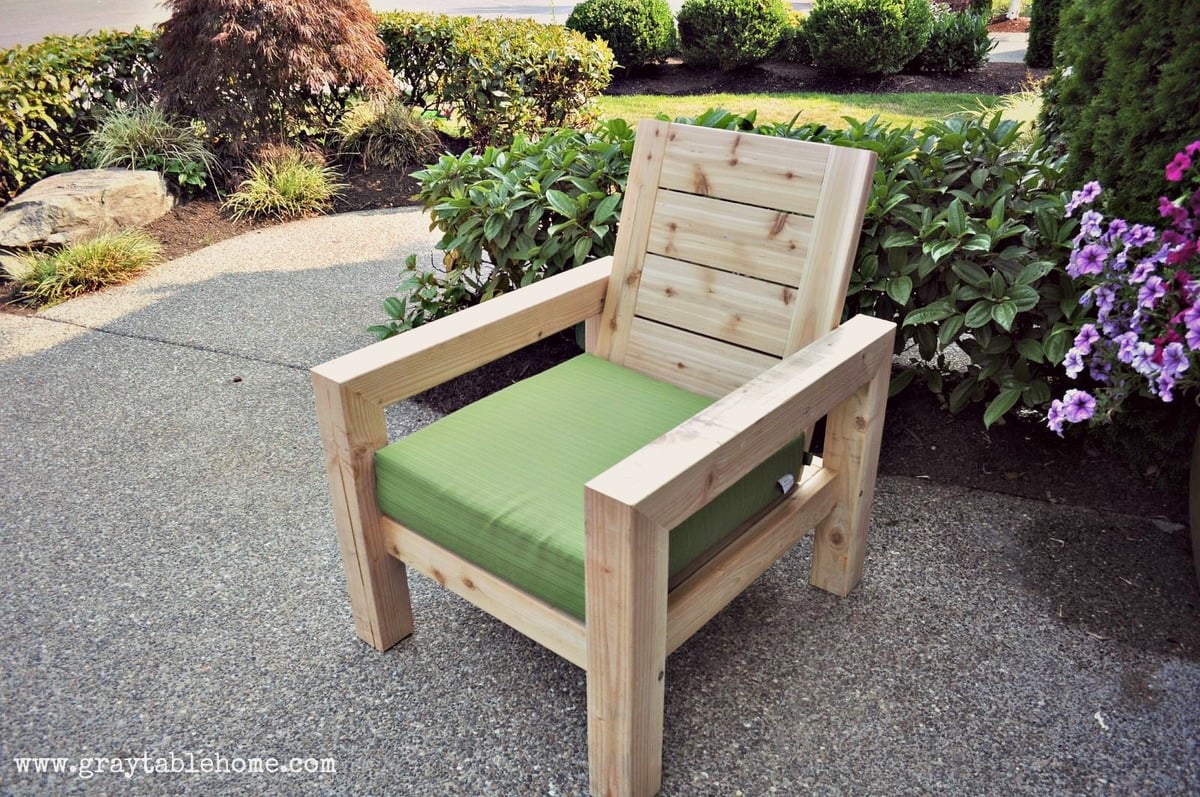
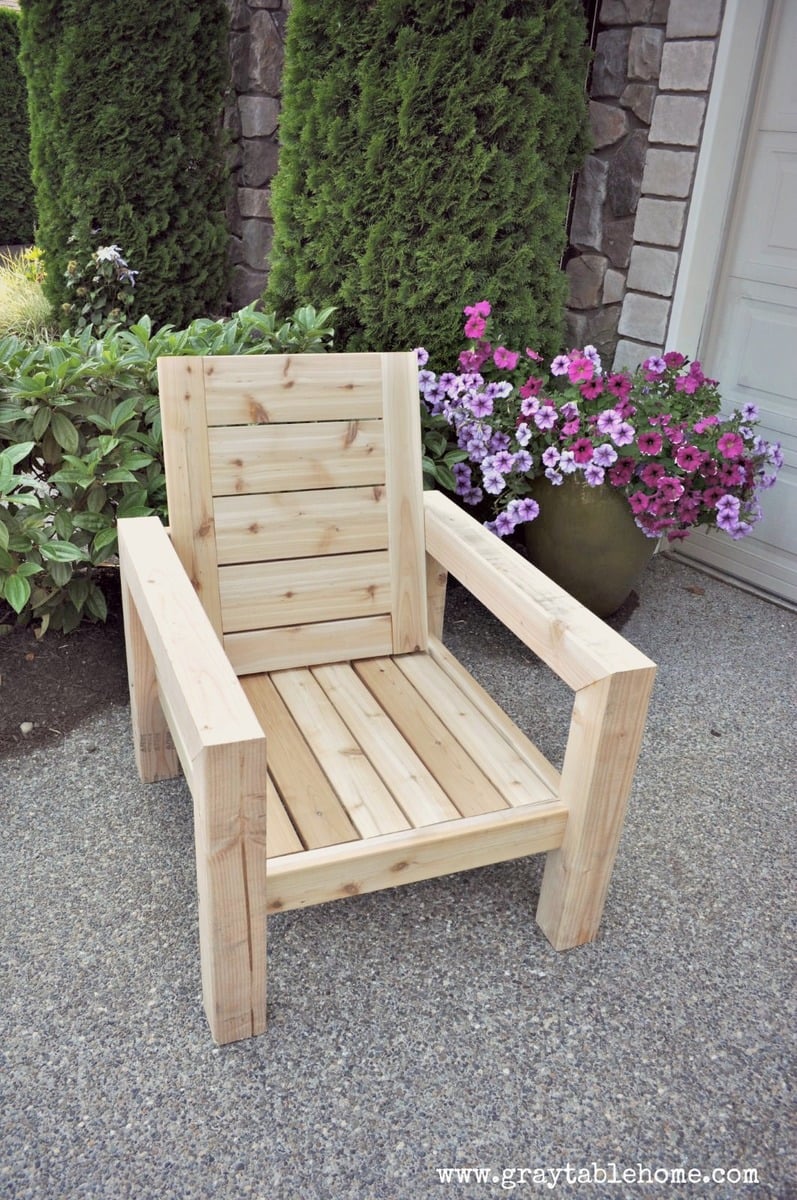
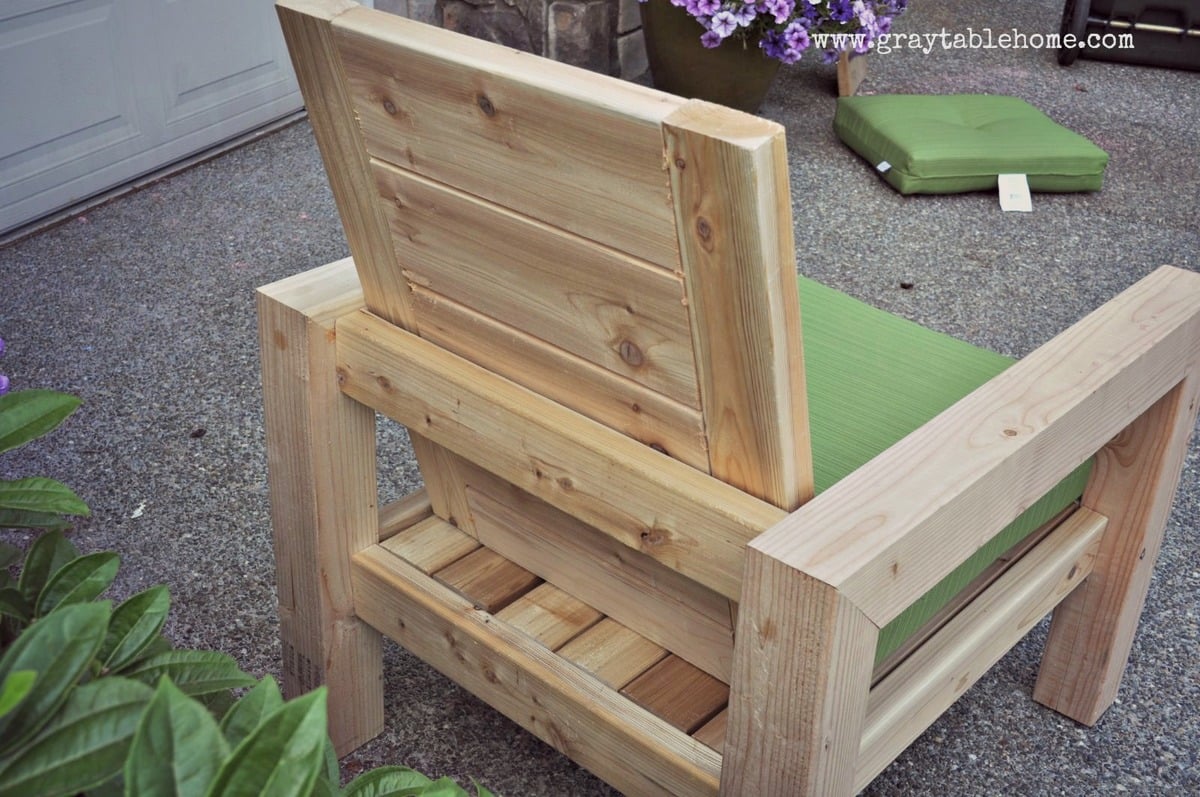
I made this outdoor chair by looking at a variety of plans and designs from Restoration Hardware and other stores. Check out more info on the project on my blog link. Thanks for looking!


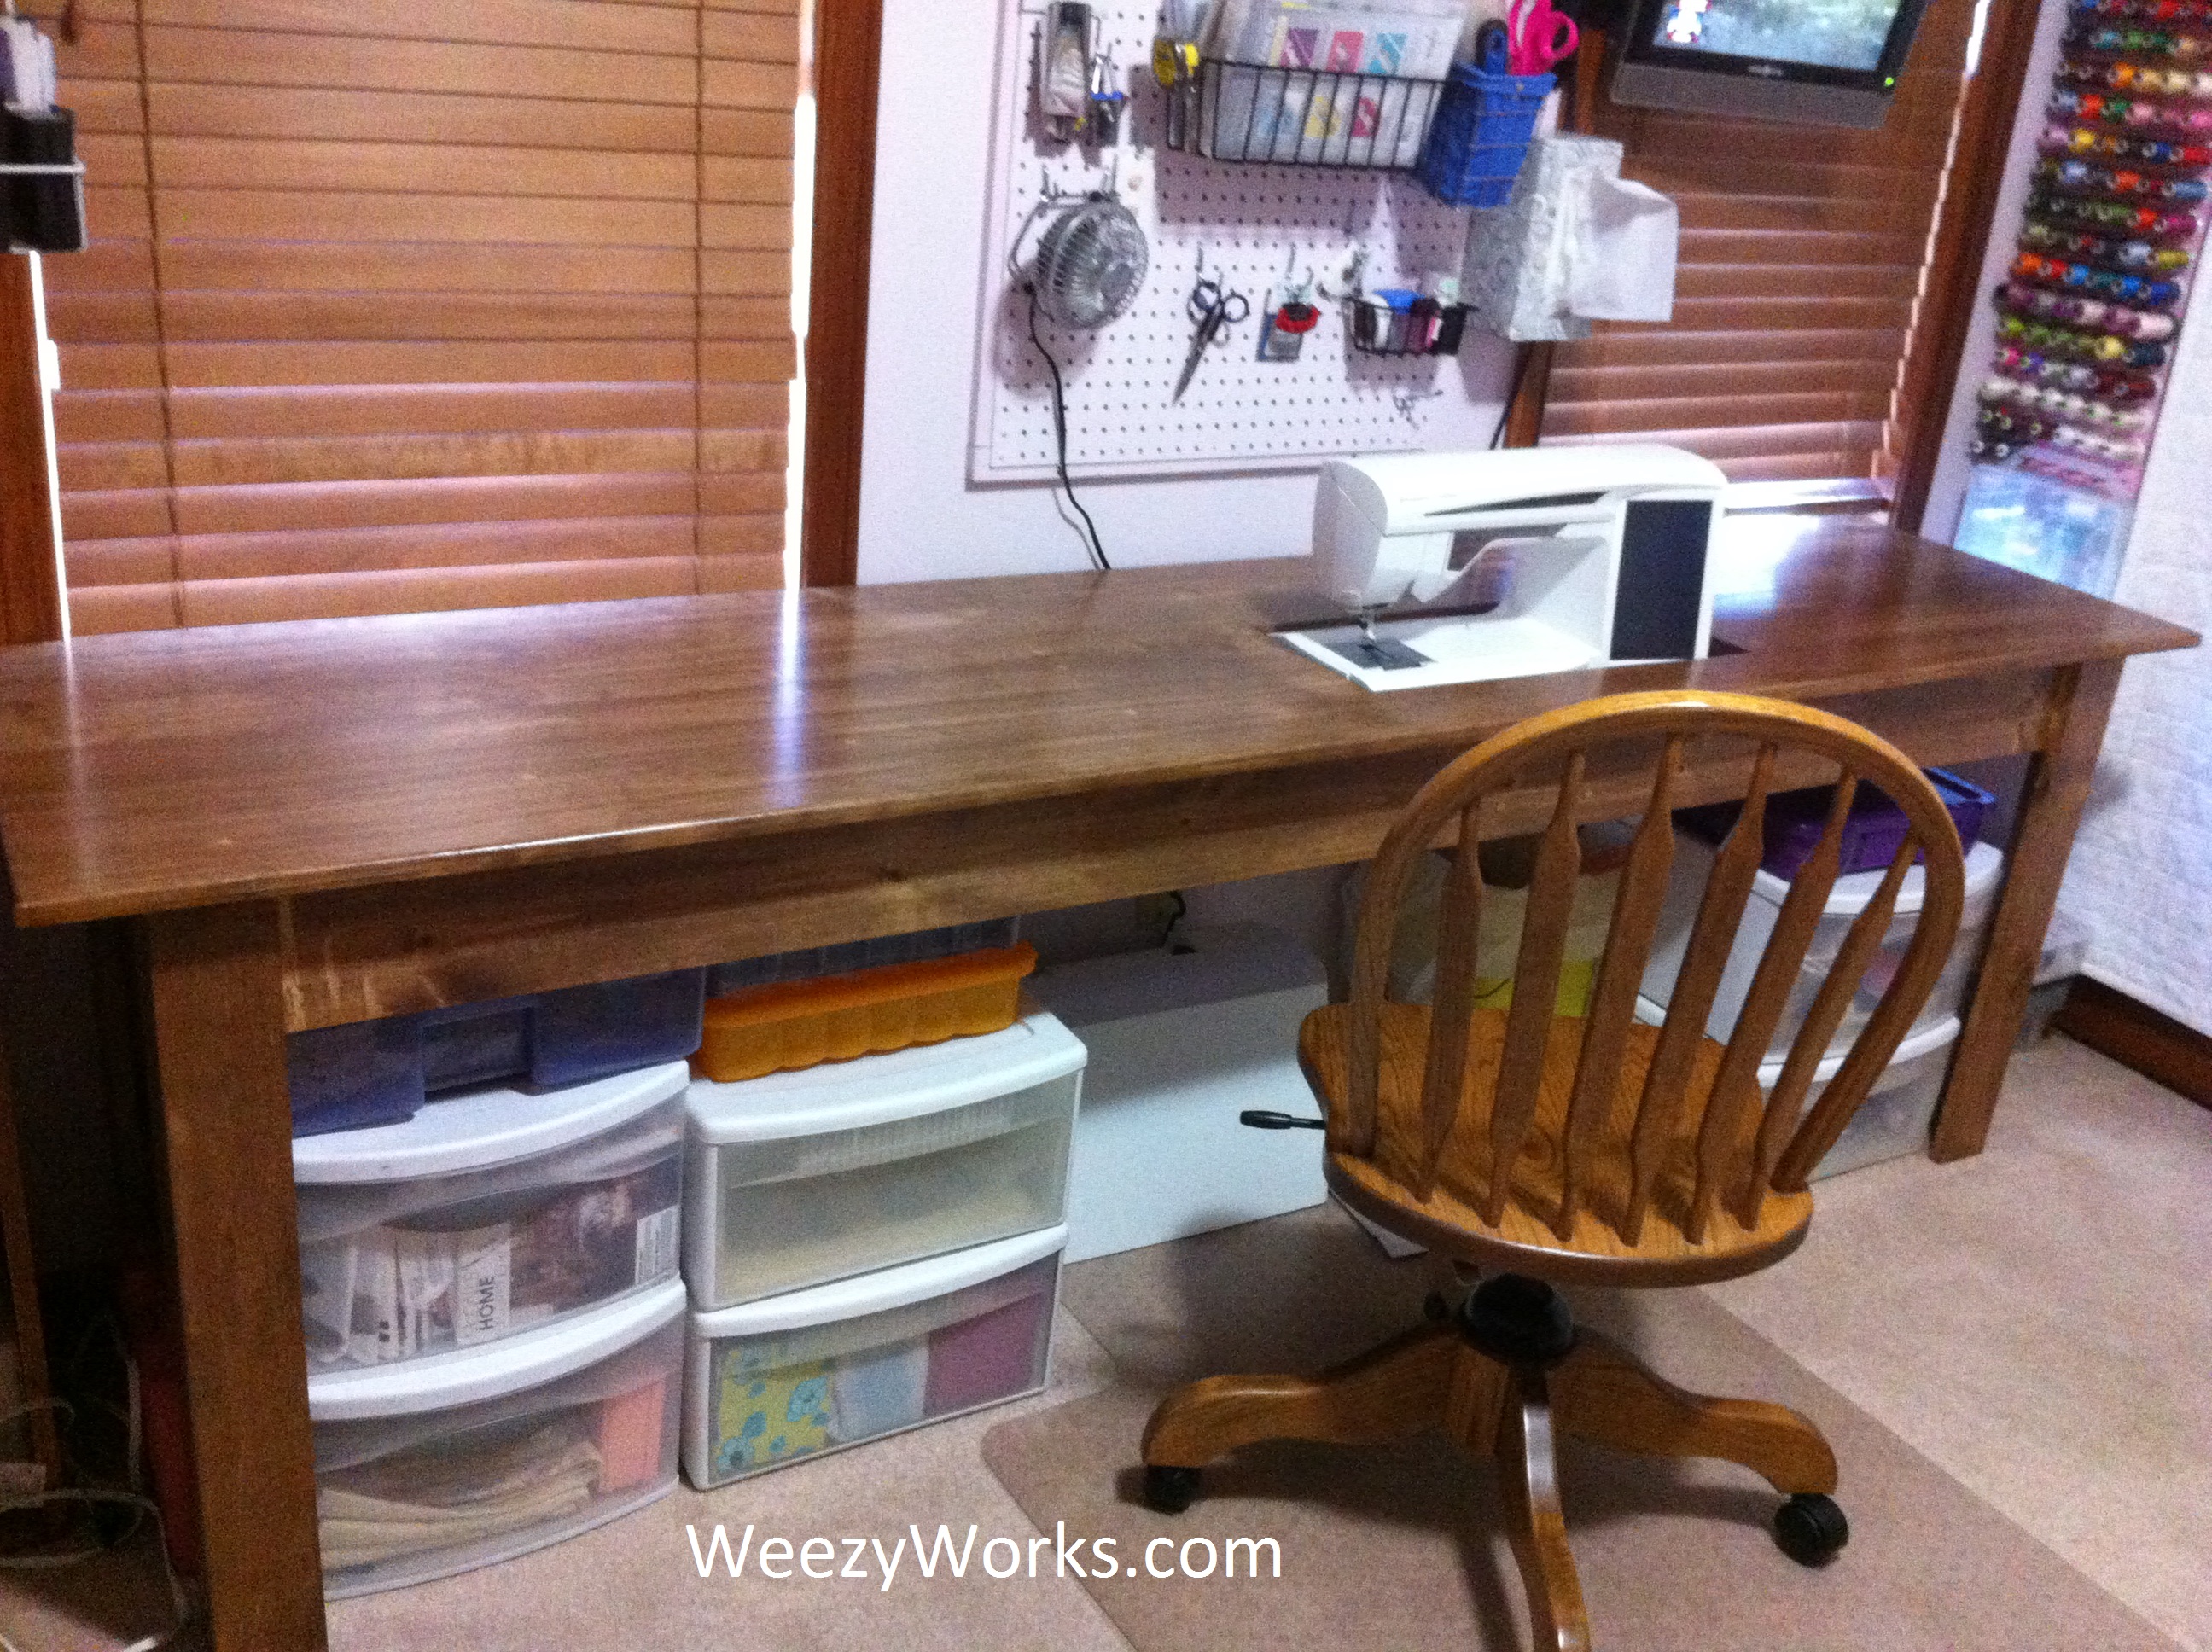
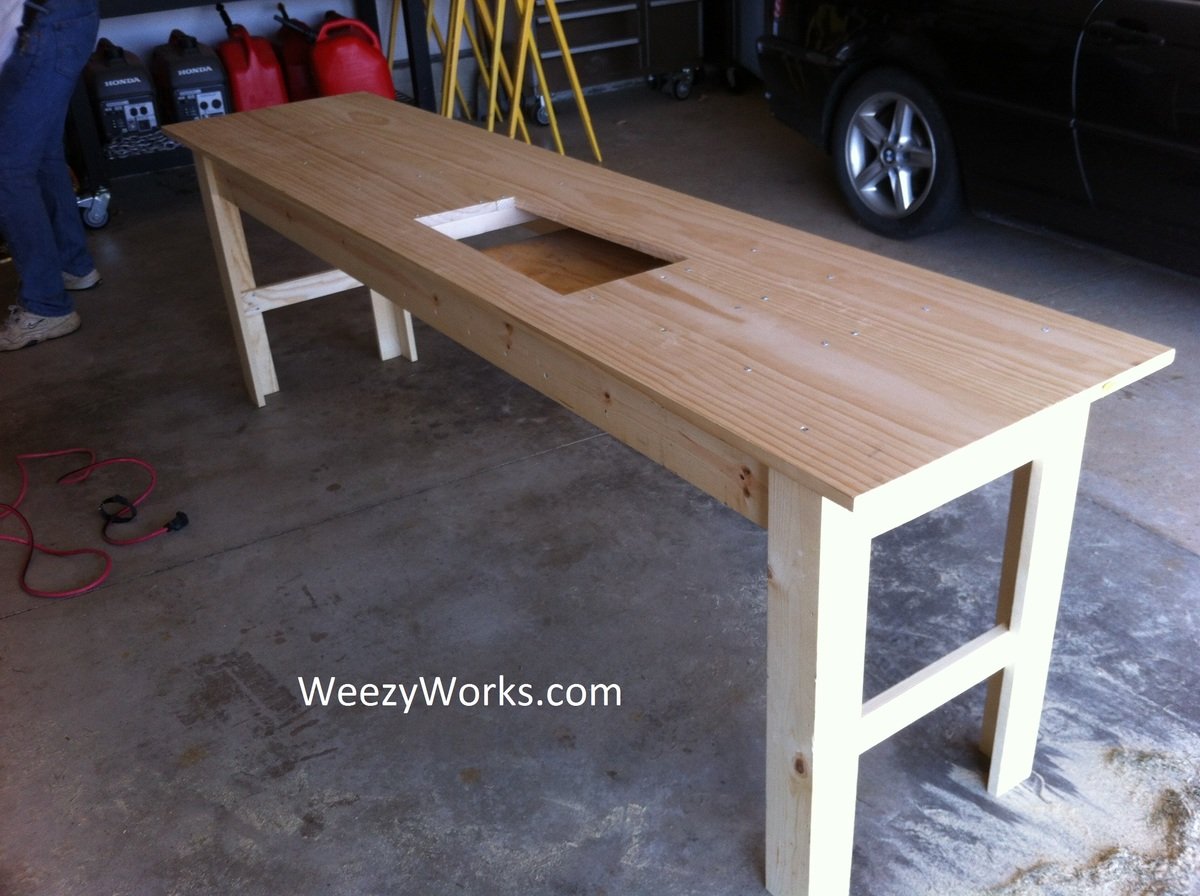
Ive been looking for a sewing table to fit my space. but found none for less than $500 and they were quite small. I found a post at quiltedcupcake.com that linked me to another blog, linking me here. I modified the plan to be about 2 feet wide and cut a hole to fit my sewing machine. There is a support in the bottom to hold my machine level with the tabletop. When I make this in the future, I will splurge on a fine hardwood. This plan was easy to build and looks great! Just what I was looking for :D
Sat, 09/15/2012 - 16:38
Thank you! This project was very easy to build and would be very easy to make in a smaller size. I'm so glad I did it, free motion quilting is so much easier with this table.
Wed, 08/26/2020 - 07:13
Good morning Ana,
Where can i get the plans for this table.
Sun, 09/16/2012 - 10:11
Now, I've just got to make it! I love to free motion quilt and that would make it easier. With each baby I've had my quilting space has diminished (of course it's worth it) but now I think I will reclaim some space ;)
Tue, 02/26/2013 - 14:14
Cannot seem to find the plans for this project. Please post them.
In reply to Plans Please by SinKitty71
Tue, 02/26/2013 - 17:40
I used the plans for the narrow farmhouse table (search in the plans tab) and made a few modifications for my sewing machine.
Thu, 06/20/2013 - 12:27
What size boards did you use for the top of the table?
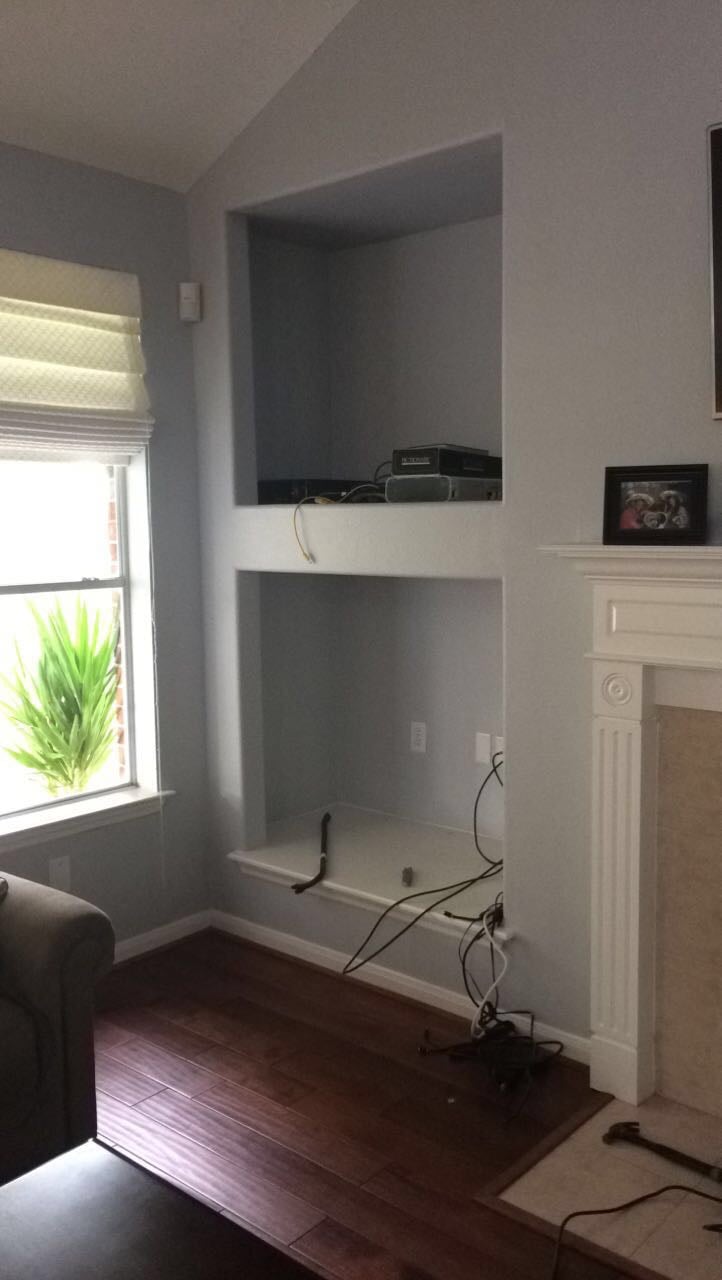
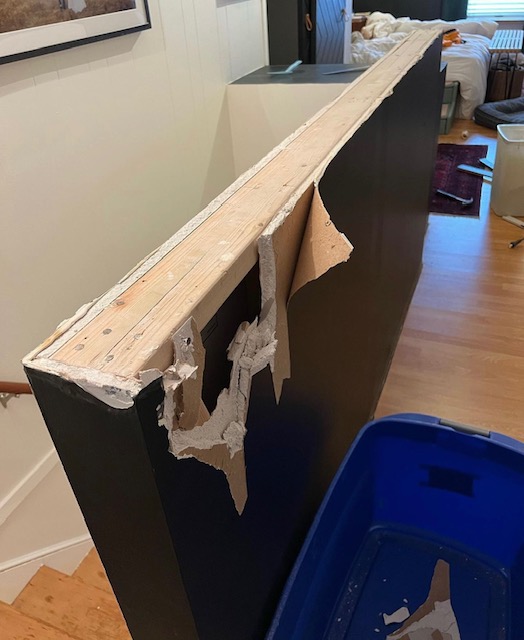
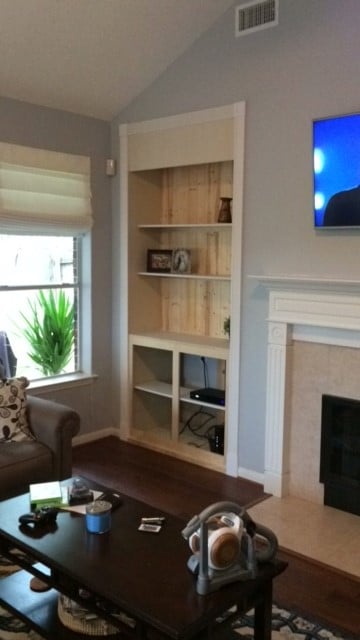
We bought this house about a year ago and we finally got around to removing this pointless niche! The center divider and bottom were removed. The cabinet and hutch were assembled seperately.
This is still a work of progress. I am looking for a nice decorative molding face for the top. If anyone has any suggestions please let me know! We will most likely paint it white to match the fireplace mantle.

Inspired by Finn's Dad's table, we decided to copy it since we wanted to build a table that would seat 8 comfortably. The most difficult part of this project was finding clear cedar for the top. It had to be ordered through our local lumber yard and we were not able to match boards. We built the frame out of treated pine and the 4 x 4 legs from average greade cedar found at Lowe's. We finished it with four coats of polyurethane.
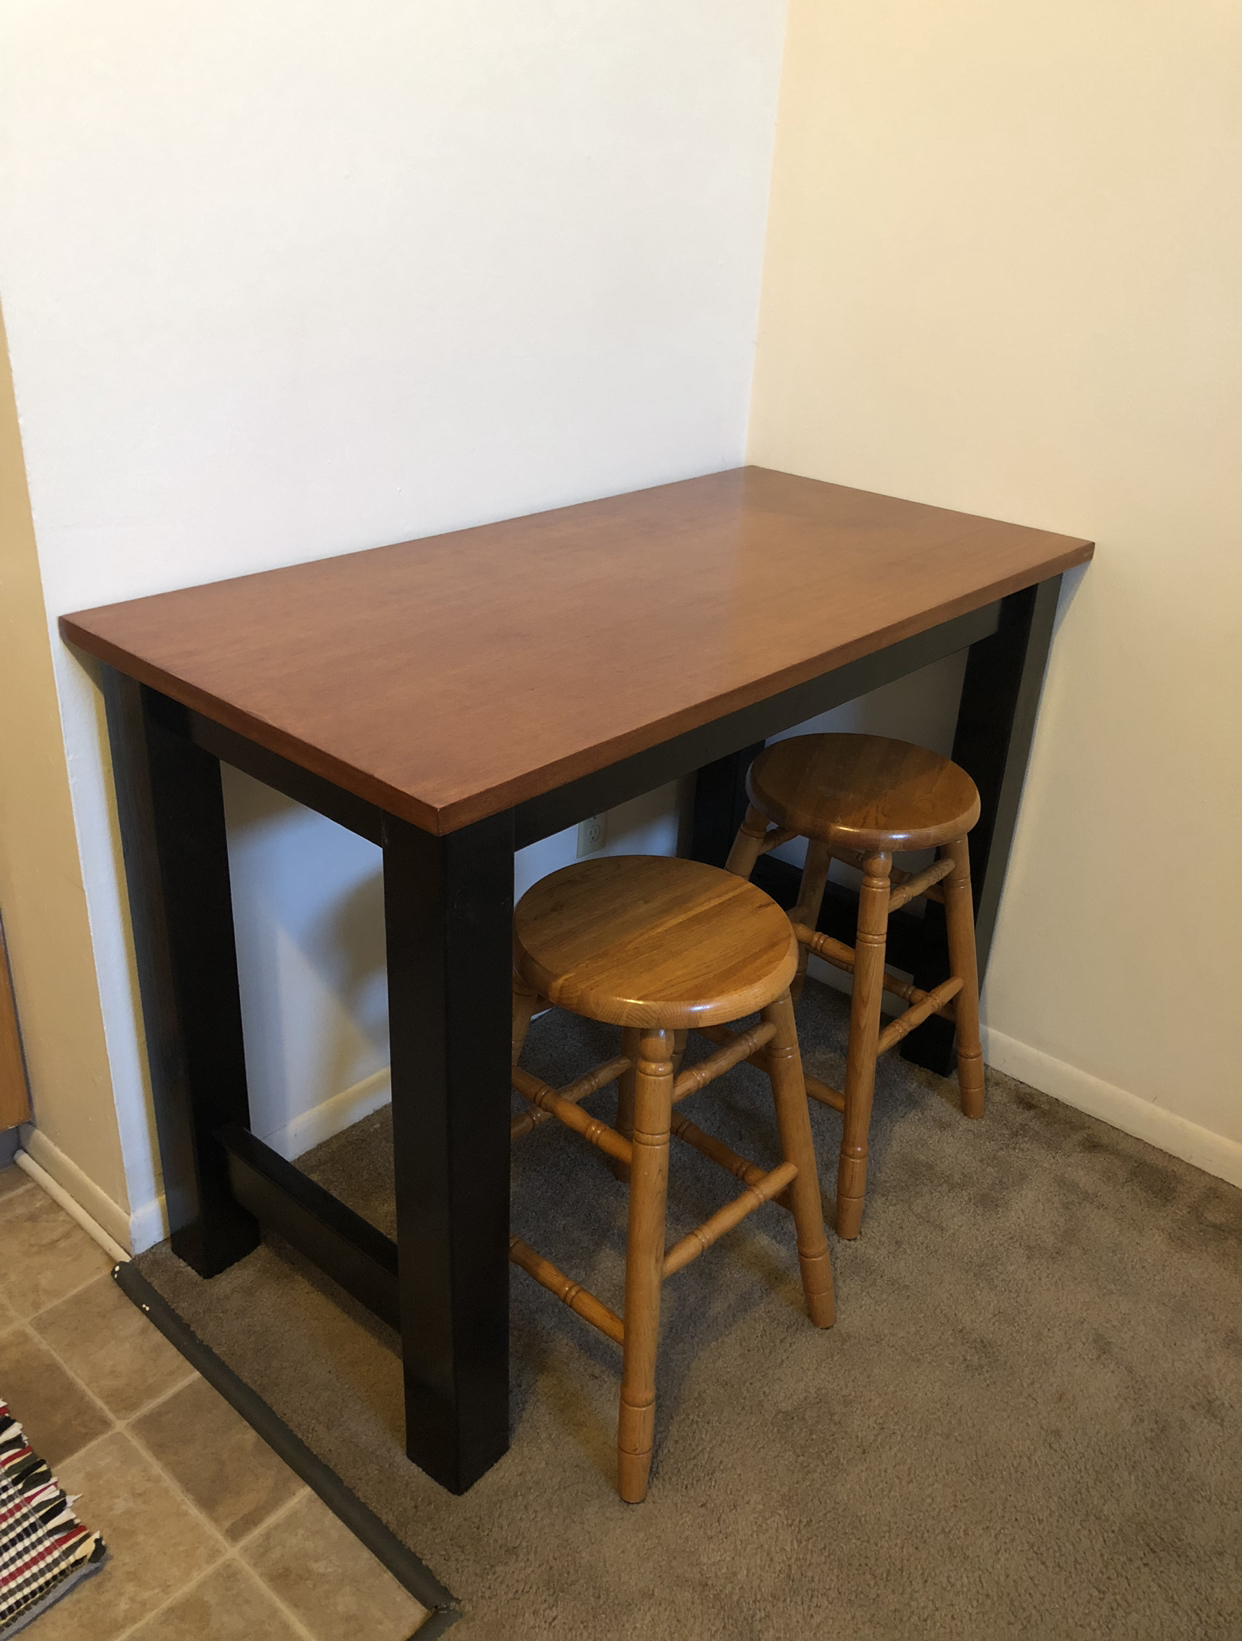
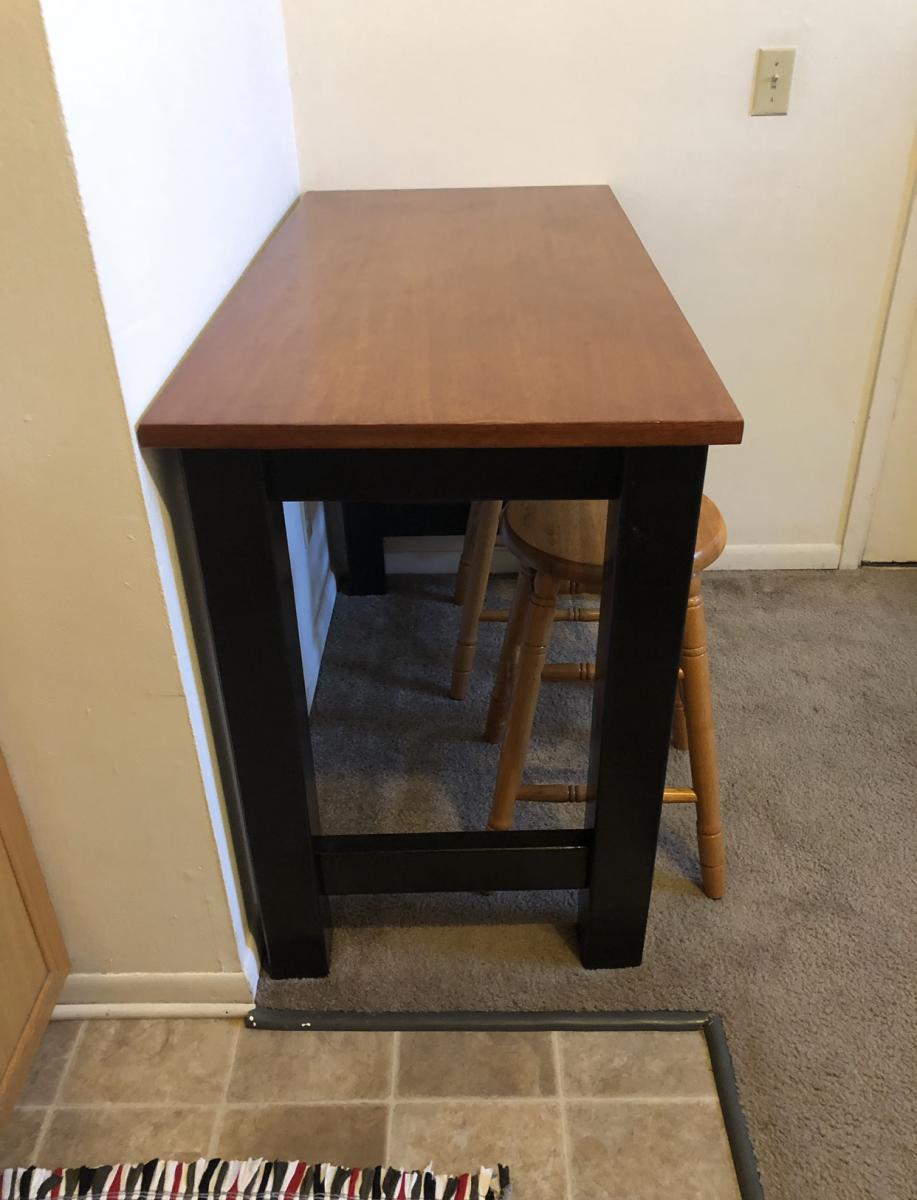
Our son was moving into his first college apartment. The dining area is small and he thought a breakfast bar would be perfect in this spot. We built the base using Ana’s Counter Height Farmhouse Table for Four plans. We modified the plans to to fit the table top - which was originally the top of a desk. We purchased the desk at our local Habitat Restore. We planed to use the base of the desk for another project- so using the top for this breakfast bar was perfect! The breakfast bar was a perfect fit!

My first Ana White project. Built Ana’s awesome small cedar shed as an outhouse for our many cats. The have access to it from inside the house. Great way to keep litter boxes and the mess out of the house. It is stand alone, and attached to the house, in front of a bedroom window. There are two ‘entrances’ as well as two, one-way, escape hatches, if a cat in the outhouse is interrupted by another cat (I.e. a male cat comes in and the female feels trapped) they can exit to the outside (one way so no critters can come inside!). Ana has easy to build plans, great site! I plan on making the square table just posted today for my newly refurbished deck. Keep in mind, my estimated costs and time reflect a LOT of additional features on the inside. The shed itself, very easy, simple, inexpensive. Very little waste with Ana’s projects as well.

Thu, 04/29/2021 - 09:06
Thank you for sharing, what a cool project!
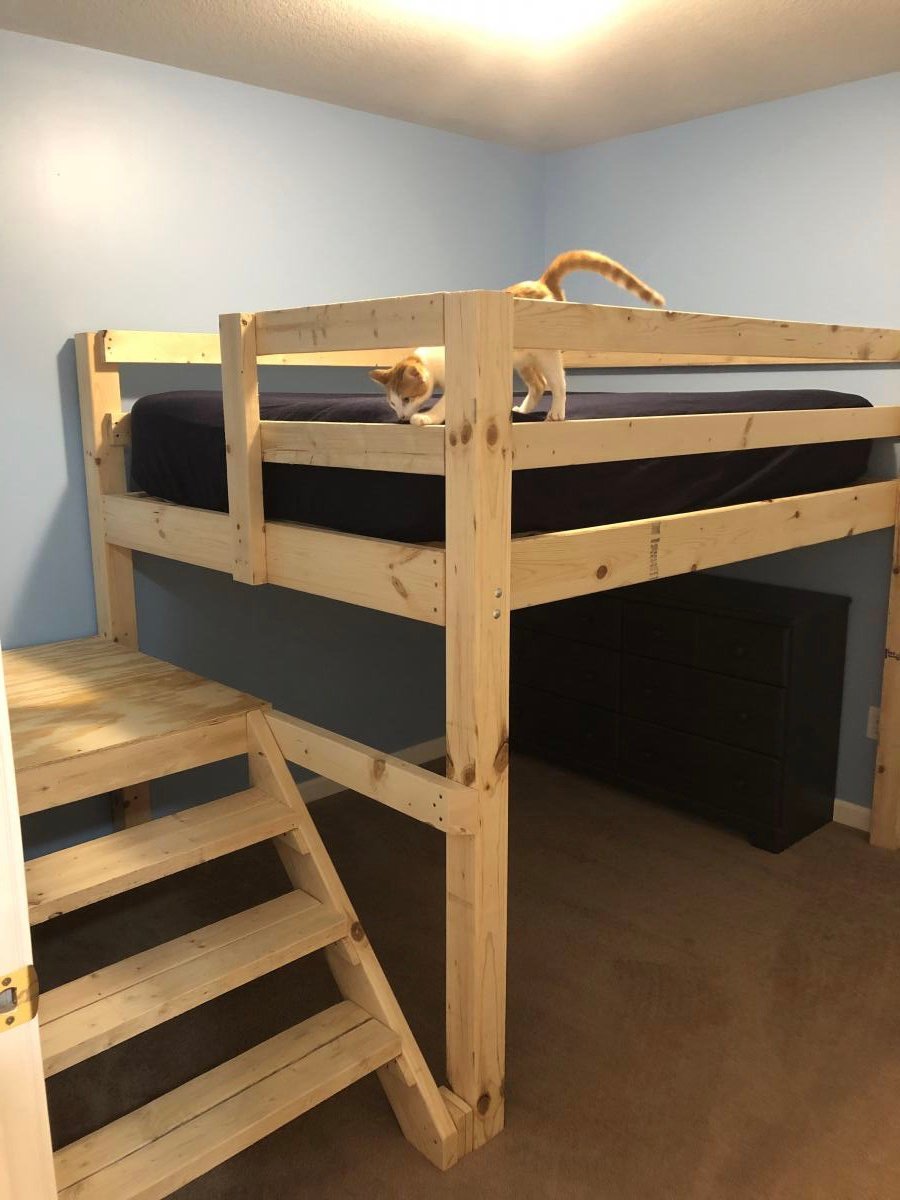
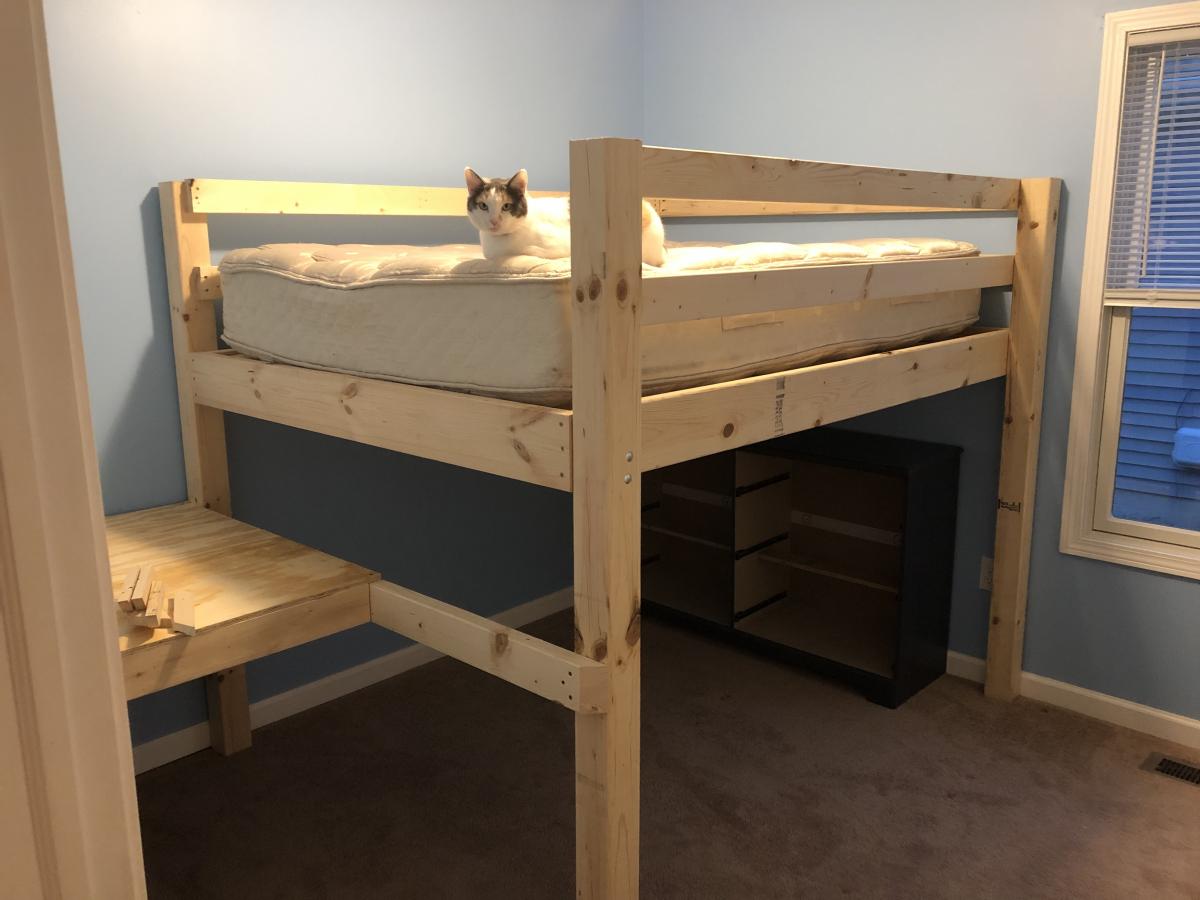
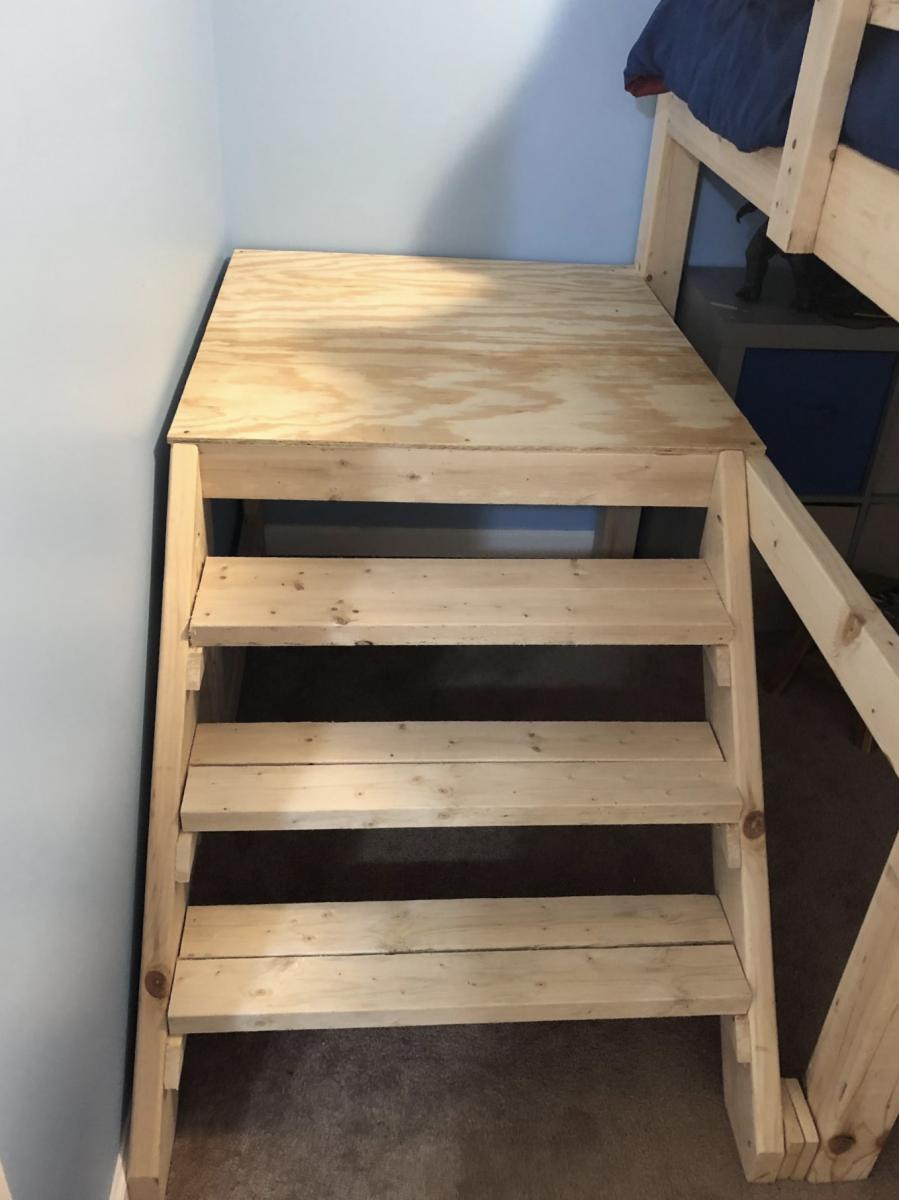
Built a full size loft bed for my kids but wanted something safer than having them climb up and down a ladder so used the Camp Loft Bed plans to add the platform and stairs. It is much easier for the kids. Going to finish by covering the platform and stairs with carpet.
Wed, 10/02/2019 - 09:51
I really like how the platform is only half way so the stairs are inset, this is very smart and good use of space.
