Reclaimed Wood Round Coffee Table
Rustic Round Wood Coffee Table by Three Tulips Woodshop on Instagram
Built from Plan(s)
Rustic Round Wood Coffee Table by Three Tulips Woodshop on Instagram
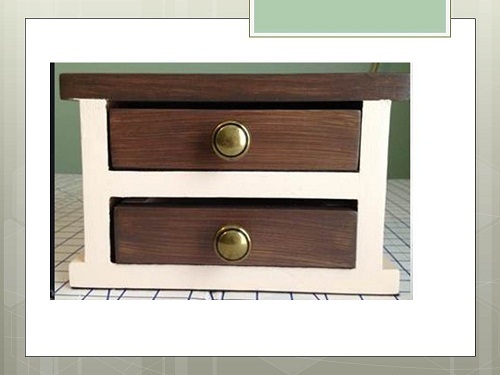
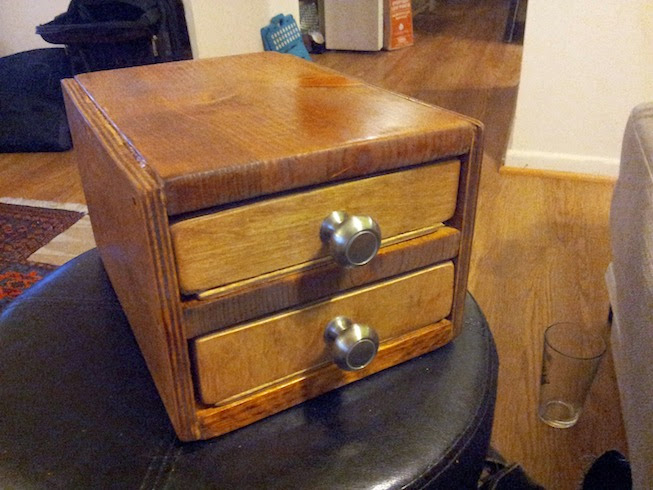
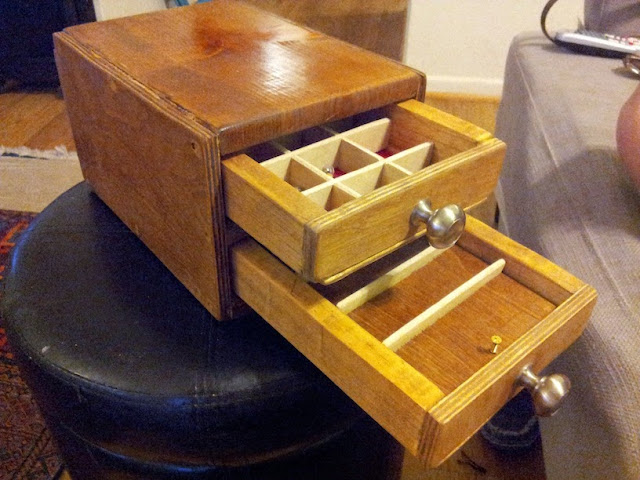
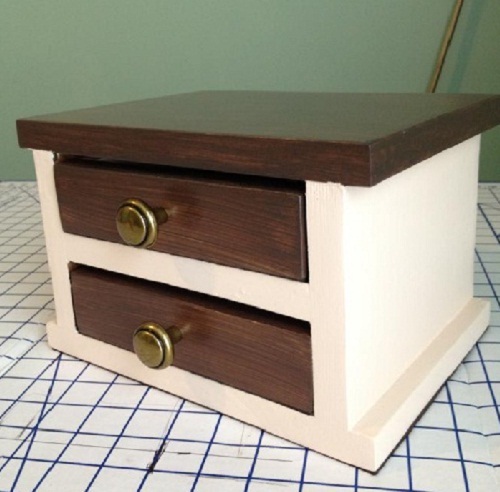
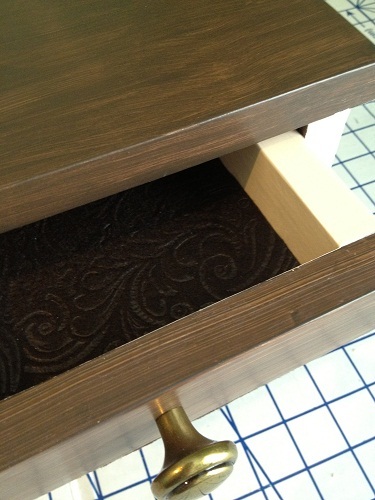
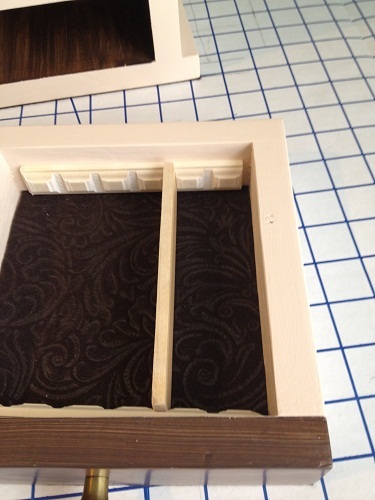
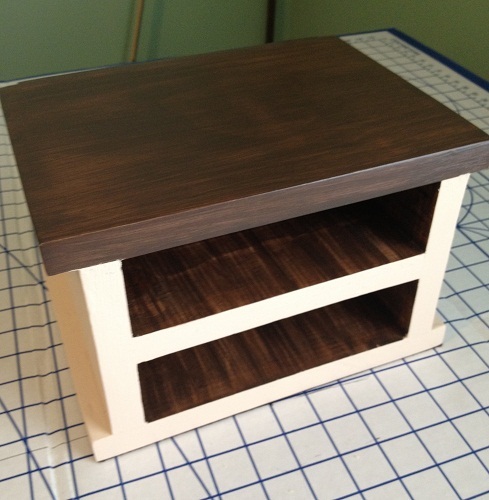
I built this jewelry box out of scraps as a prototype to test out my Easy Jewelry Box plan, which is inspired by the Willy Bookcase and Master Closet System drawers. When Mom saw it unfinished, she liked it and called dibs on the first one! Well, since this one is now for Mom (and the lumber was free), I went ahead and spent some extra $ for hers – used the self-adhesive felt for the drawer and box bottoms, some embossed felt to line the drawers, added adjustable drawer dividers, and solid antique brass knobs – ‘glammed’ it up a bit. It is painted and stained to match her bedroom furniture. For Mom, I even stained the inside of the drawer box. :)
The build was easy, and took less than 2 hrs. I did both stain and paint for the finish on this one, and it took about 2 hrs to do that. I’m planning to make several more of these in different finishes, and give them as gifts.


Tue, 08/28/2012 - 16:15
“Shop” your scrap bin before buying your lumber for this project, you may have enough left overs already on hand. Probably would cost about $20 for whitewood boards, birch ¼” ply, regular felt and unpainted wooden knobs, and you’d still have some left overs. One sample size paint (~4 oz.) was more than enough for one box. The 7/8” unpainted knobs are great, and they only cost $1.49 for 2 (found these at Ace). These solid brass mini knobs ran about $4 each. The 2 sticks of moulding for the optional drawer dividers cost me about $12, but these pieces are more than enough for 4 boxes. For the ¼” plywood – one 2’ x 2’ piece is enough for 3 boxes. I’ll be making several. :)
Wed, 06/19/2013 - 16:46
Great job on your first jewelry box! Love the way you did the dividers too - I'm going to have to copy that! :)
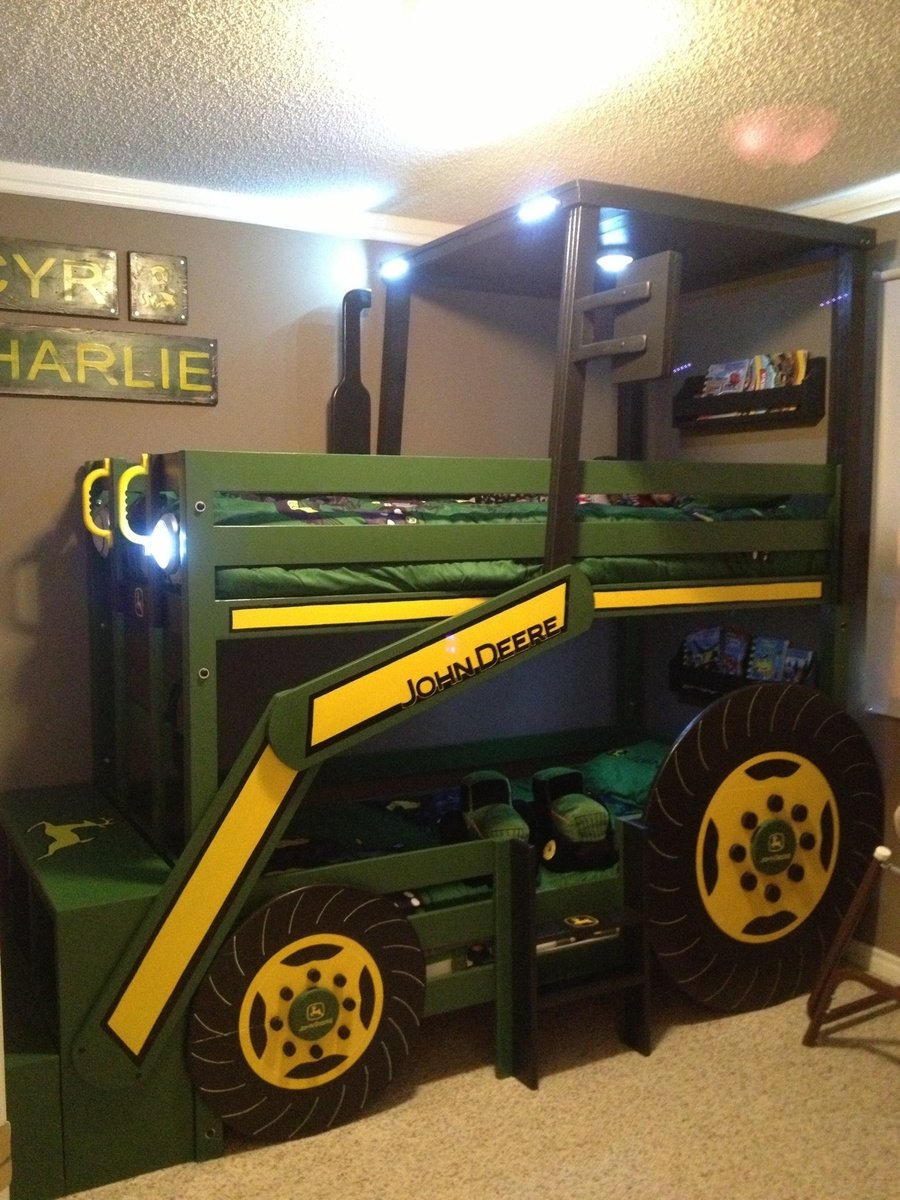
With another baby boy arriving in August, my one and three year olds are moving to a "big boy" room. My oldest decided he wanted a bunk bed and as they both are obsessed with tractors, when I saw the "John Deere Tractor Bunk Bed" plan, I was sold.
We would be needing a twin sized bunk bed though not a toddler. I used the classic bunk bed plans and simply modified them to suit our needs. I moved the ladder to the front, added a rail on the bottom bunk and added a small ladder to the side for my one year old to climb into the bottom bunk.
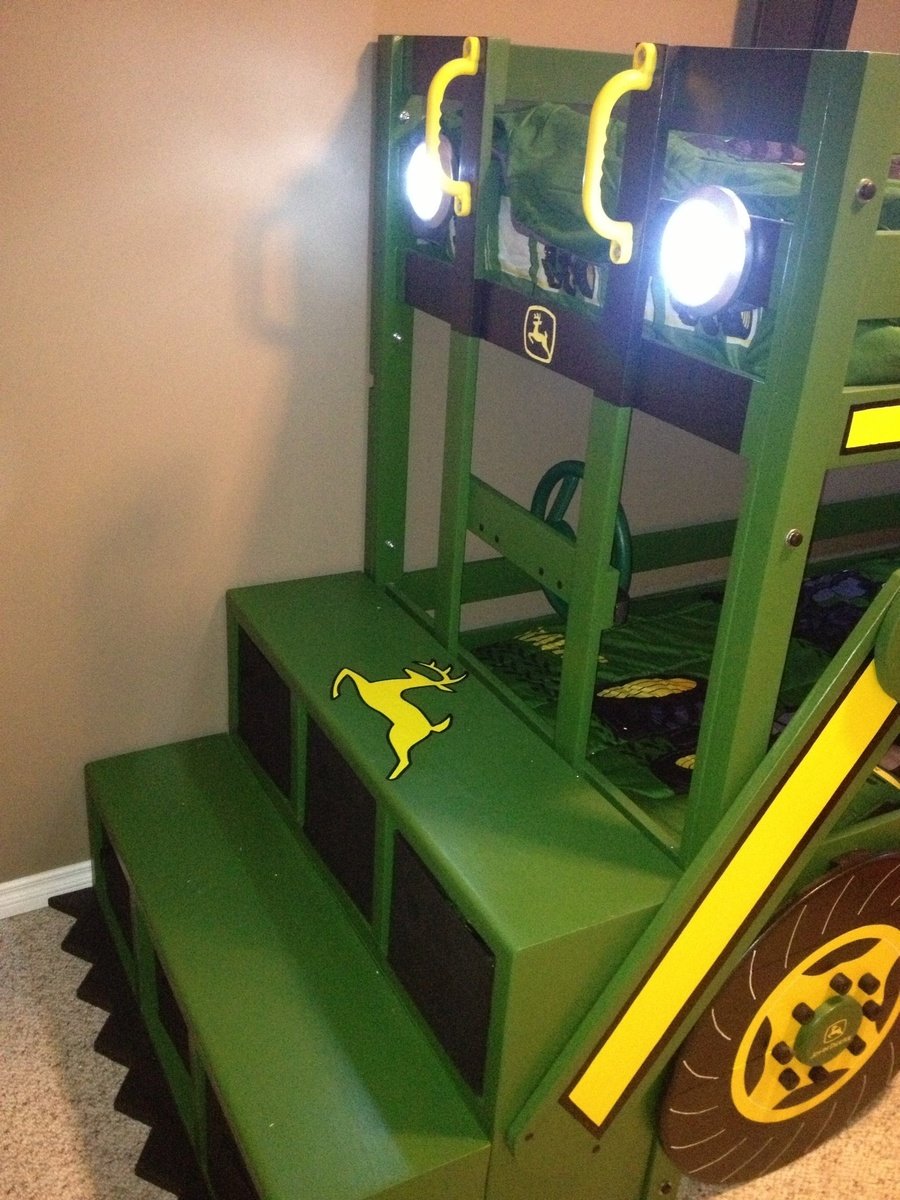
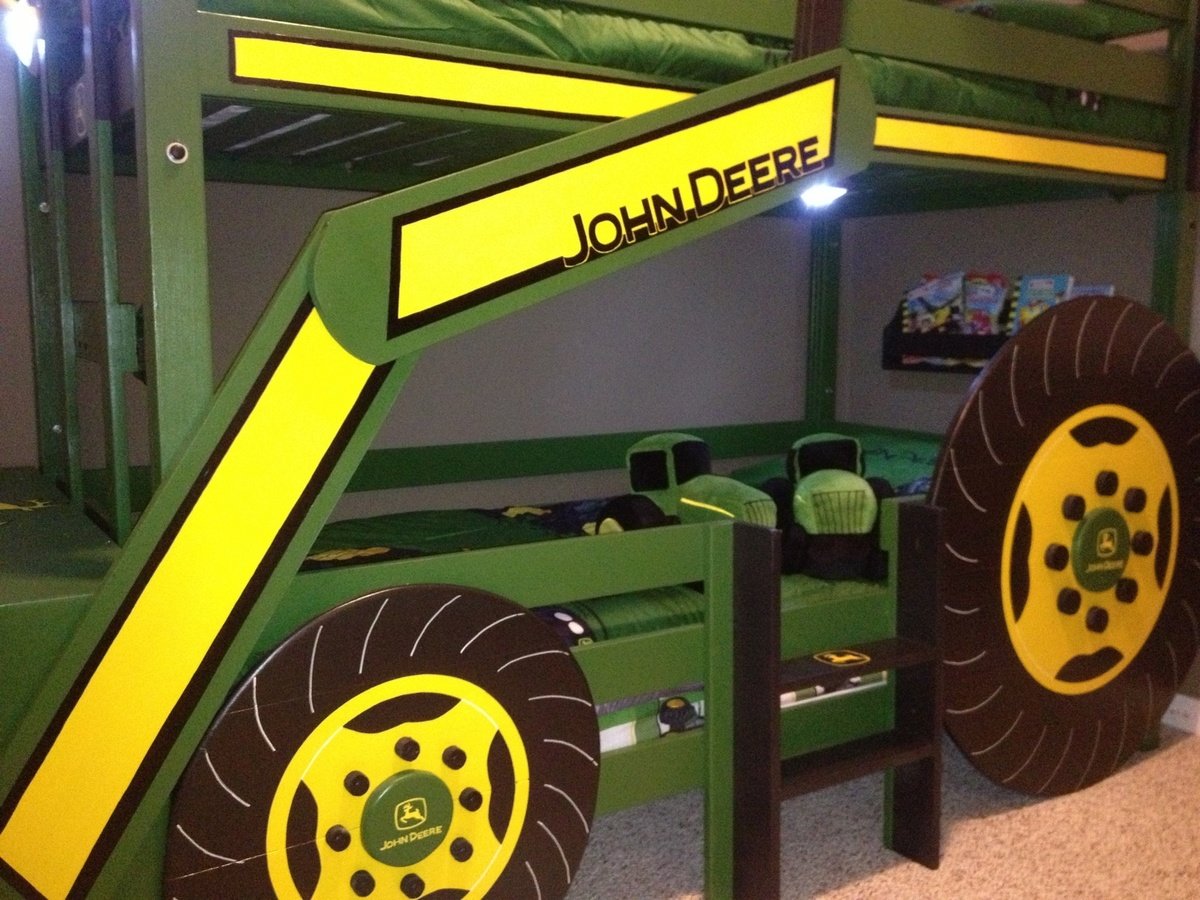
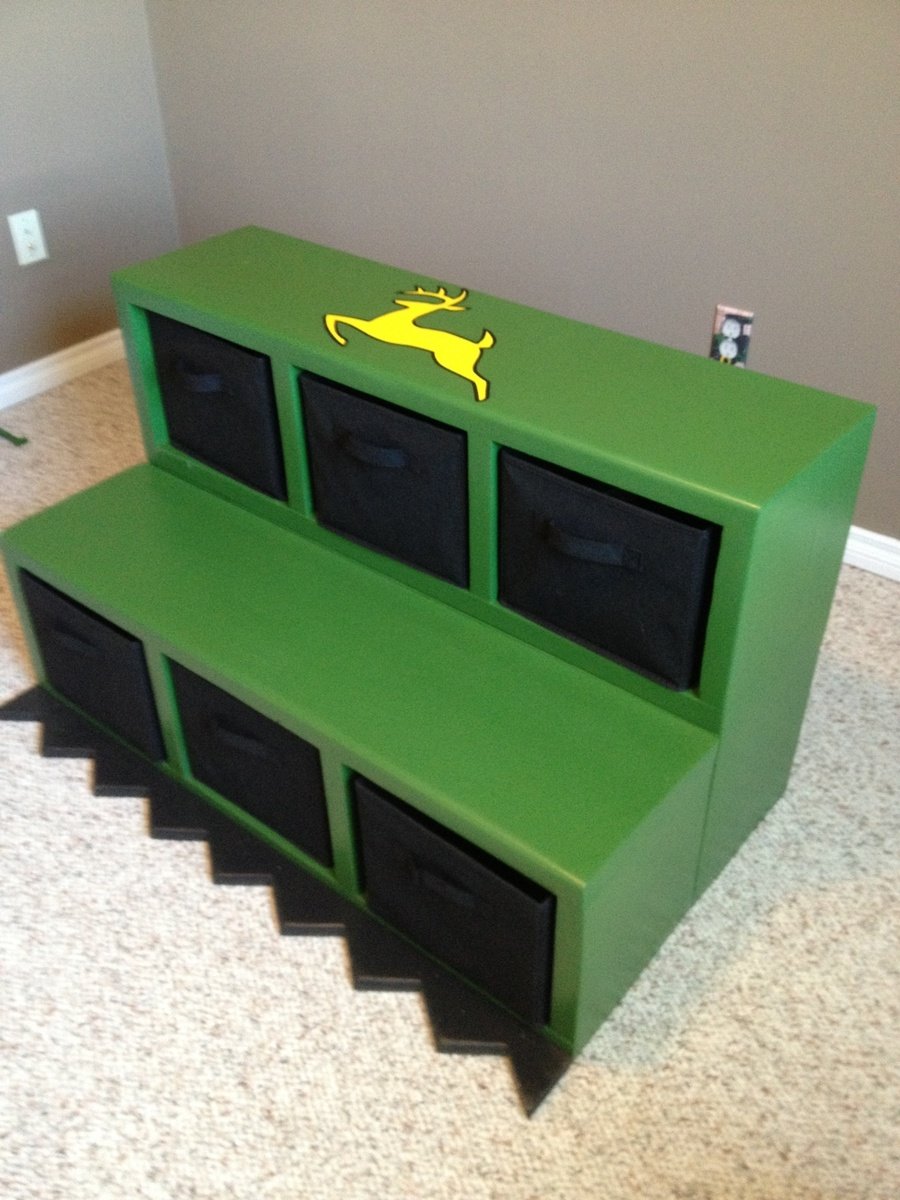
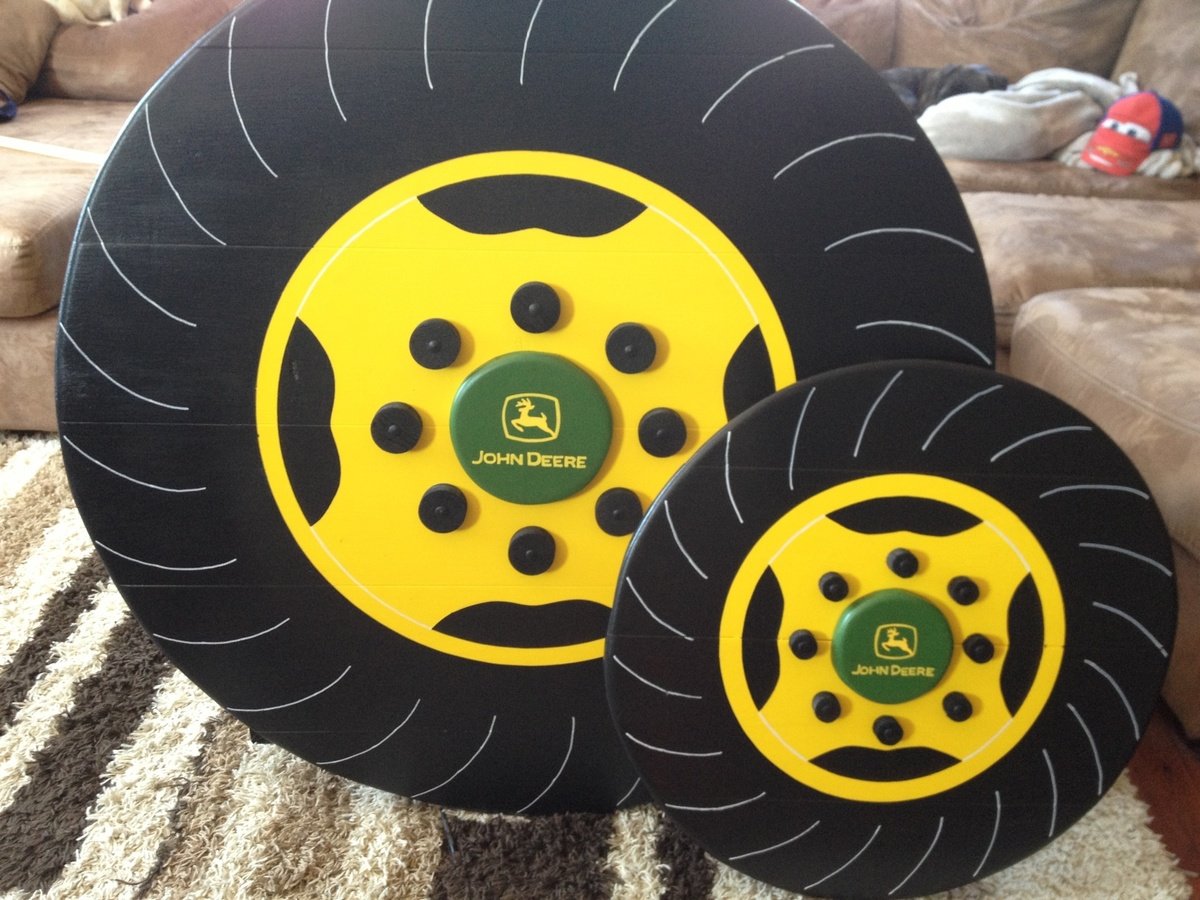
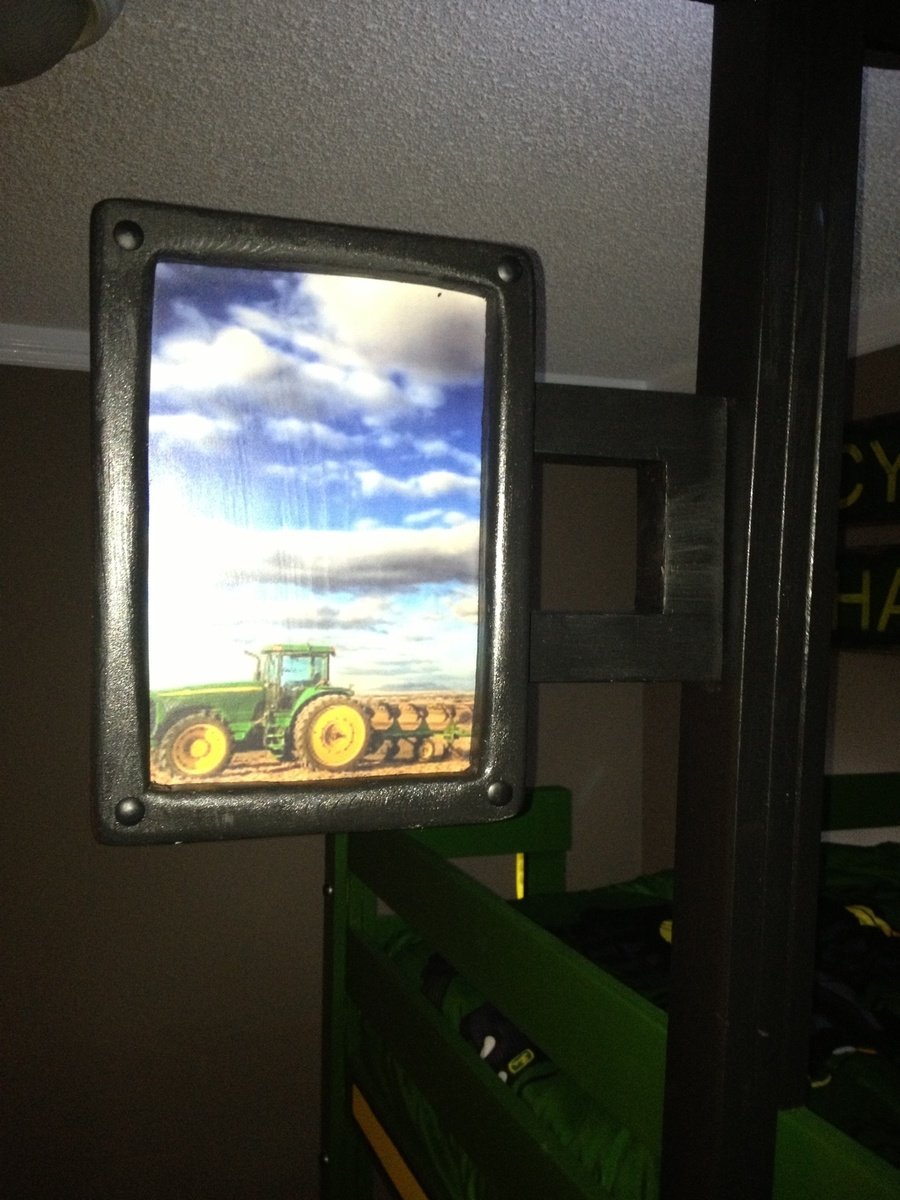
Once the the frame of the bed was complete, I added the tractor accessories. A couple of storage cubby shelves with fabric baskets for toy tractors which act as stairs up to the ladder and make the tractor bucket at the front. Also, the wheels which are made from joined 1x6s as I find plywood hard to sand and paint to the quality of finish I like. A cab & roof from 1x4s framed together. A side mirror that I decoupaged a picture of another tractor on. I used push lights for the headlights as well as a reading light above each bed (they're on timers so they'll turn themselves off). A steering wheel (play equipment access from toys r us). Also, I built and mounted by the head of both beds a "flat wall book holder" so they would have somewhere to store a few books.
My boys and I are fairly new to building so I spent a lot of time planning and measuring to ensure it would all come together in the end. It paid off because it all went smoothly (even with "help" from my boys). It's not perfect but they're very happy with the result. We also built a John Deere themed "Just my size closet" and even finished with over a month to spare before the new baby arrives! :)
Just want to say a quick thank you to Ana both for the amazing plans and also the inspiration to take on these projects. The time spent with my boys building as well as the resulting treasures are priceless and I would have never realized what we were capable of had I not stumbled upon your website and been so inspired by you and everything you've accomplished. Thank you!
Thu, 10/09/2014 - 14:12
I am new to this and I was wondering were to find the measurements for the twin size bed? I would love to make this for my boys!!
Mon, 10/20/2014 - 13:10
HI! You did an amazing job with this! Is there any way you can post the plans or send them to me? Thanks in advance.
Mon, 11/03/2014 - 07:48
Sorry for the slow response to those requesting plans. For main structure of the bunk bed, I used Ana's "Classic Bunk Bed" plans. For all of the add-ons, I made up my own plans. I'm pretty low tech so unfortunately they're just pencil & paper plans but I'd be happy to scan and email them to you if you're interested. Just message me and I'll send them your way. :)
Fri, 11/21/2014 - 13:26
Can you please email me your plans? [email protected]. Thanks!
Thu, 07/09/2015 - 19:48
I was just wondering if you by chance got three bunk bed plans?? If so would you be willing too send them my way??? [email protected] thanks so much
Thu, 05/26/2016 - 14:54
I know that it has been a while, but did you ever get plans for this bed? If so, will you please forward them to me at [email protected]? Thank you!

In reply to Plans please! by kerrihicken
Sun, 02/12/2017 - 07:36
if you recieved plans for this can you please forward them to me [email protected]
Fri, 01/02/2015 - 12:36
If you wouldn't mind sharing with me also I would love a copy. Email ... [email protected] This is by far the BEST tractor bed I have seen online! You did an awesome job!!!!! Hopefully I can recreate!!!!
Mon, 01/05/2015 - 08:44
I love this! You did an amazing job! Could you please send the plans to [email protected]
Thank you so much!!
Wed, 01/28/2015 - 14:08
Hi Veronica, Well done fantastic job! Two little men who want to move in together because of a new addition on the way. Their request though is a John Deere Bunk Bed! would be grateful if you could forward on your plans if you have time, Kindest regards.
In reply to Plan Request by Veronica P
Thu, 01/29/2015 - 07:18
Hi, I would love to get a copy of the plans used to make this bunk bed for my grand kids. Have two grandkids and a third one due the middle of February so got to get a bed made quickly for them to have a great bed to sleep in when staying with nana and pa. Plans can be emailed to me at [email protected] 731-415-9666. Thanks Diana
Mon, 02/02/2015 - 07:31
This looks so great. Could I get a copy of your plans? Thanks [email protected]
Mon, 02/09/2015 - 21:06
I would love to receive a copy of of the Plans for the John Deere bunk bed. My email is [email protected]
Tue, 03/03/2015 - 10:43
Can you please email me the plans. I have a 4yr old that is obsessed with John Deere. We would like to make this for his birthday. [email protected]
Thu, 03/05/2015 - 22:31
Just love the whole thing very beautiful & I was wondering if you could send me the plans for the whole set up. My email is [email protected] thanks
Mon, 04/06/2015 - 21:04
Hi Veronica, like everyone else i love your plans, could you possibly email them to me? Thanks in advance.
Thu, 05/28/2015 - 10:35
Please send me the plans for the John Deere Bunk Bed. I love it.
Fri, 05/29/2015 - 09:06
Please send me your plans for the John Deere Bunk Bed in the twin size. [email protected]
Sun, 05/31/2015 - 23:36
Will you please email me the plans for the John Deere tractor bunk bed? Thank you. You did awesome
Tue, 06/09/2015 - 08:06
Hi! Can you please forward me your plans for the john deere tractor bed to [email protected]?
Thank you so much and awesome idea!

In reply to Plan Request by Veronica P
Fri, 06/12/2015 - 19:31
Please, please email these plans to me! My son will love this!!!! Email is [email protected]. Thank you!!!
Thu, 06/18/2015 - 14:04
Thanks for being willing to share your plans. Your tractor bed is amazing. I have 2 boys who would LOVE a bed like this. Could you please send your plans to [email protected]?
Thank you so much
Sun, 09/06/2015 - 10:06
Dear Veronica,
Our grandson, 6 years old, will absolutely adore this bed. He loved riding on Grandpa's real JD tractor. Please send me your plans for the attachments. They are just darling and I could not do any better. Thanks for your generosity!
Fri, 01/15/2016 - 10:52
Can you please send me your plans? i am stumped on the arms of the tractor
Wed, 07/13/2016 - 12:12
Veronica P this bunk bed is amazing! Could you email me your low tech paper and pencil plans please? :) [email protected]
Fri, 09/13/2019 - 21:11
Hi Veronica. My 3 year old just loves the tractor bunk bed. I was wondering if you would mind sending me the plans you have. It would be greatly appreciated. My email is [email protected]
Thanks in advance
Wed, 10/16/2019 - 17:56
If you're still sharing, we would love a copy of your add-ons plans.
Thanks,
MyMaw and PawPaw
Sun, 08/23/2020 - 11:32
What an awesome build! We would love a copy of your plans if you could please share. Thanks!
[email protected]
Mon, 12/15/2014 - 20:19
Would you please email me these plans for your bunk bed? Thanks A lot!!! email to [email protected]
Thu, 05/26/2016 - 15:00
Hi! I know that it has been a while, but I see a message where Veronica says she emailed you the plans. If you still have them, will you please send them to [email protected]. Thank you!
Tue, 12/16/2014 - 19:22
Is there any way I could have email plans? [email protected] . Thank you.
Sun, 12/21/2014 - 00:35
Please email the plans for this to [email protected]
Thank you in advance!
Tue, 12/23/2014 - 07:33
Hi Veronica! I would love an email of the plans to make this bed. My sons thinks it is out of this world!!! Thanks for all you effort and wonderful job.
Sat, 12/27/2014 - 15:12
Would you please consider emailing the plans to me? We have started this for my son today and would love your insight on some measurements. Such a wonderful idea, thank you for sharing! [email protected]
Tue, 01/06/2015 - 08:21
Hello all. I've tried emailing plans to all those who've requested them. I had some trouble attaching the files as they were large so if you didn't receive them, please let me know and I can resend. Thanks
Tue, 01/06/2015 - 11:53
Hi Veronica. I did not receive an email. Woul you have time to try again? If you email me your address I can send you my fax number if that's easier too. Thank you so much! I can not tell you how much I appreciate your dedication to this! [email protected]
Sun, 11/01/2015 - 16:58
Hi
I didnt receive any plans. couldyou send methem please
Thanks
Jason
Next time, I will cut the 1x2 and 1x3 at the 5 degree angle to match the top and bottom planes...
Thanks for the idea! It is great
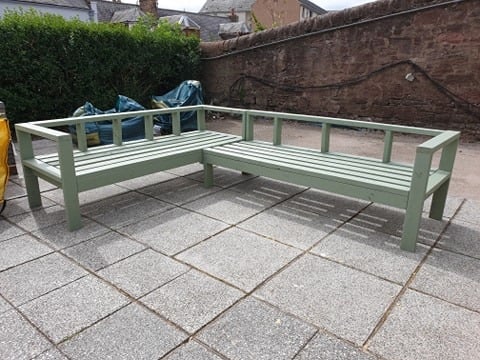
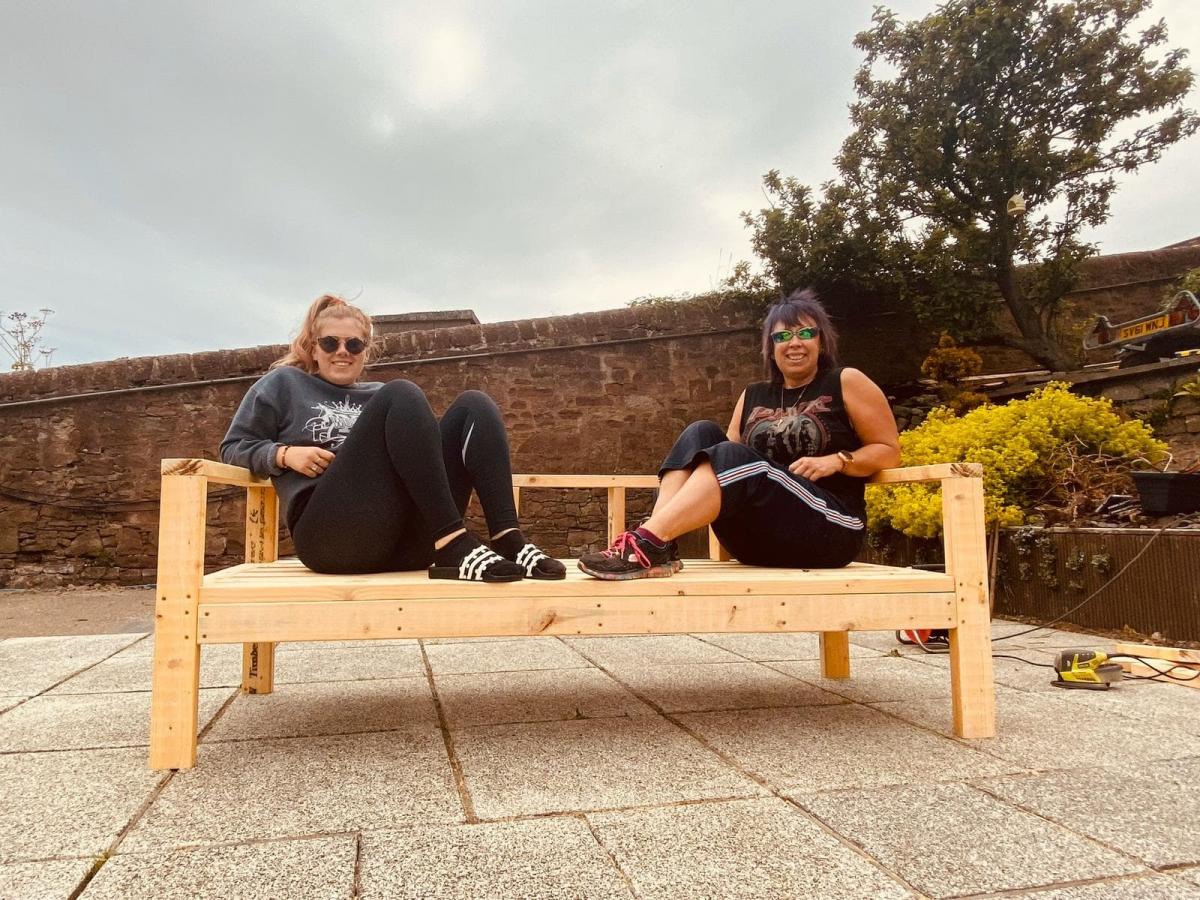
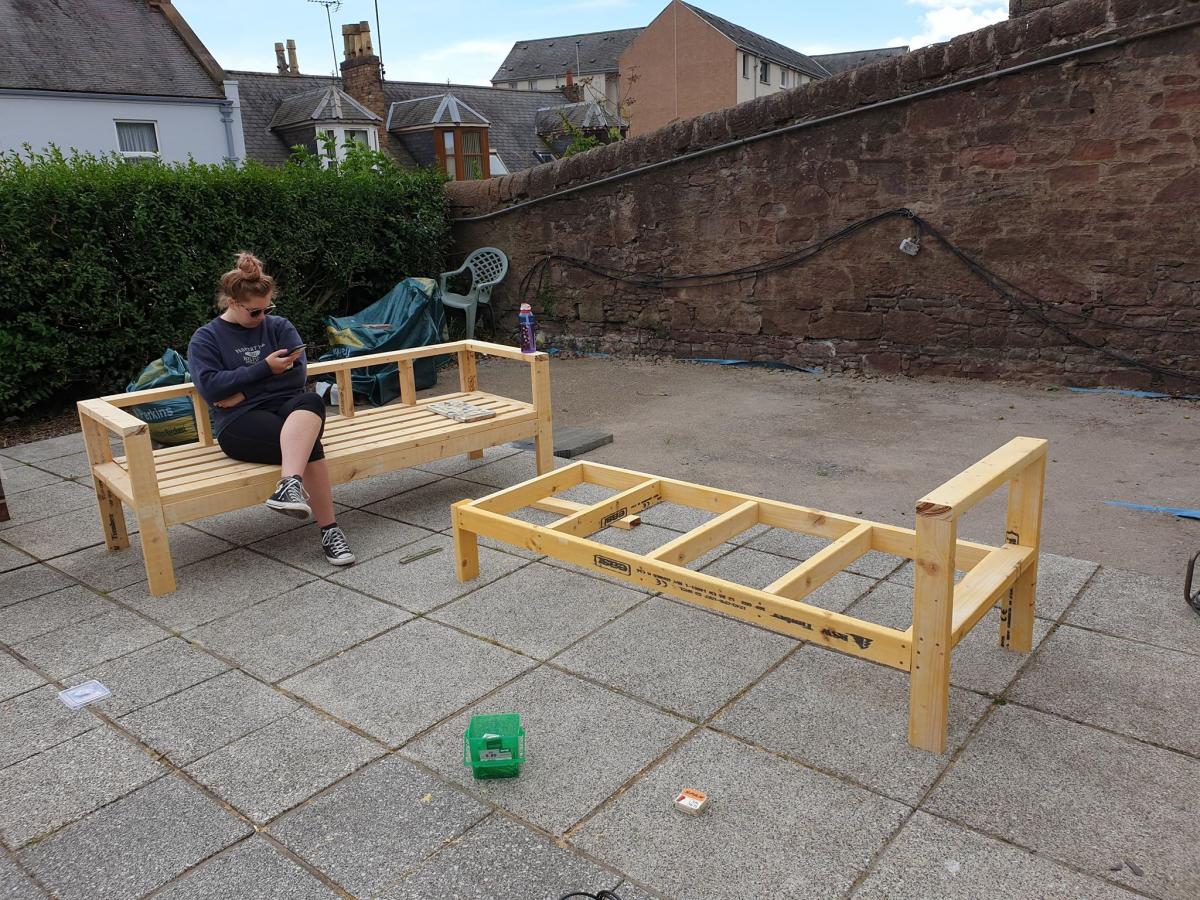
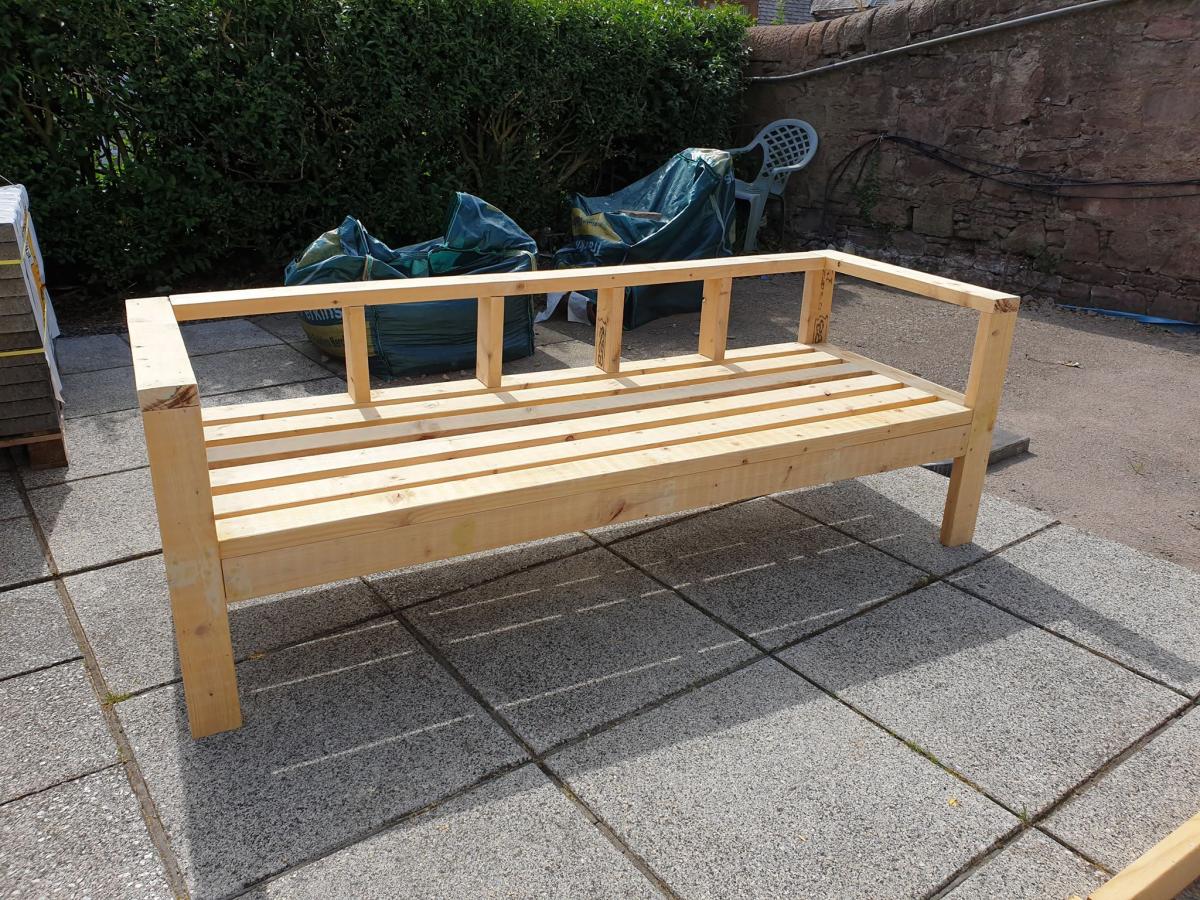
Ana, First time I have every attempted any kind of woodwork/building furniture other than building Ikea stuff. The plans were very easy to follow and now I want a chop saw for xmas. I roped my daughter in to help me and we completed the project in 2 days. Husband was totally blow away by our achievement. I love it and feel accomplished. Away to work on the table and further benches/seating over the next few weeks. Pauline
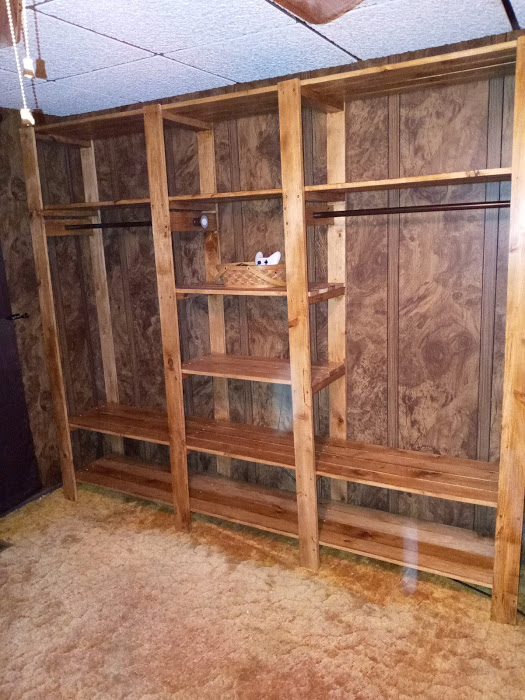
So I was complaining to my wife that our one closet in our bedroom was becoming too cluttered. She asked me to build her one. I told her that if she found the one she wanted me to build, then I would build it. She found this one and so I built it for her. Let me just say that she is very happy with it and it came out very great. I did find a couple of shower curtain rods that were brown to used instead of the iron pipe. It made the whole project cost around $80.
Sat, 11/07/2020 - 11:42
So happy that worked out for you and your wife, thanks for sharing:)
Birthday present for the fiancée. I think it was a hit! :)
Thanks for the plans!
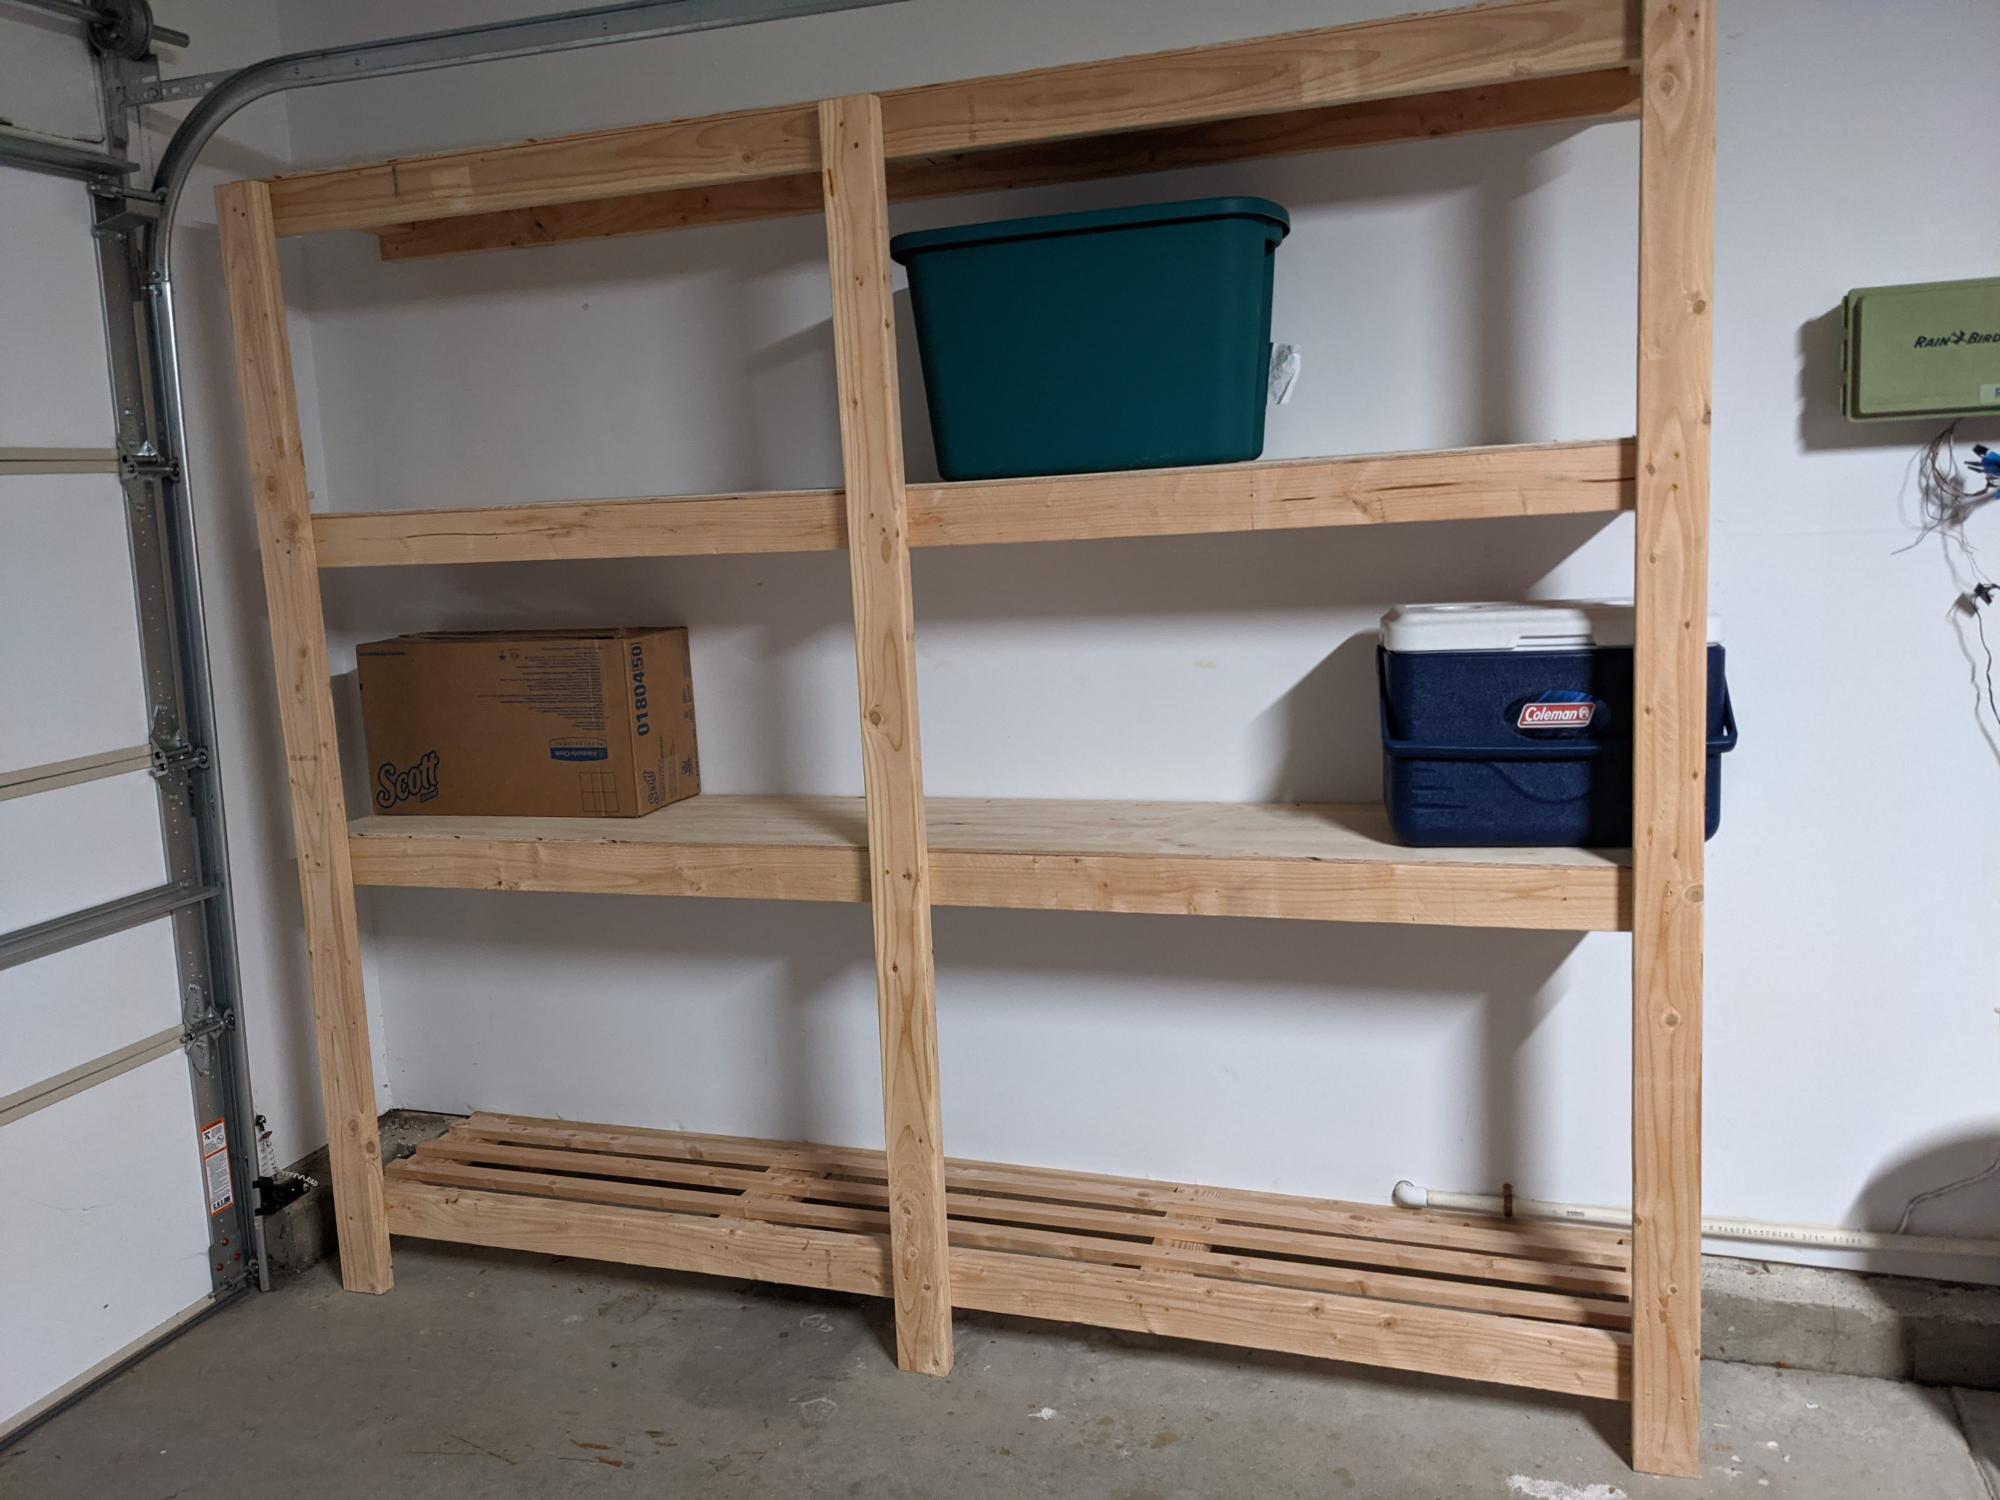
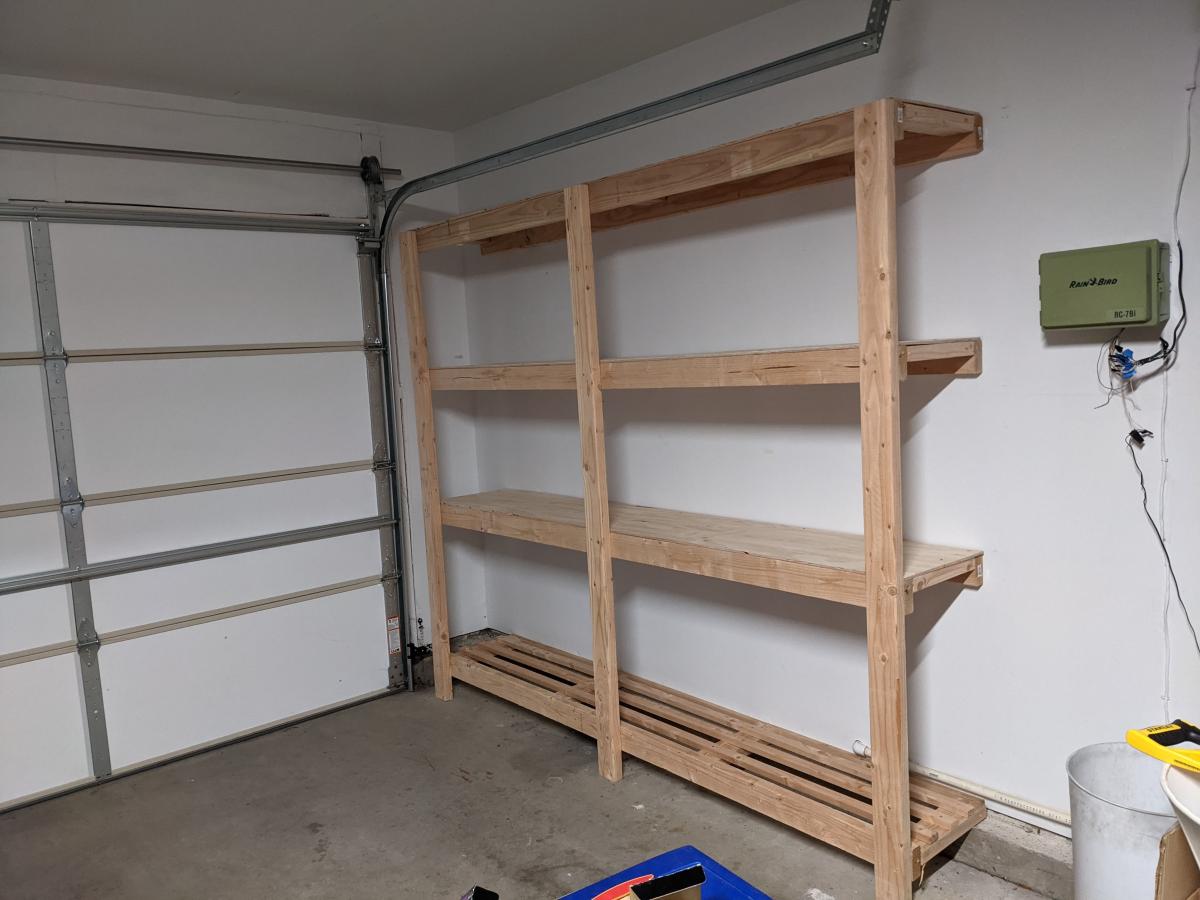
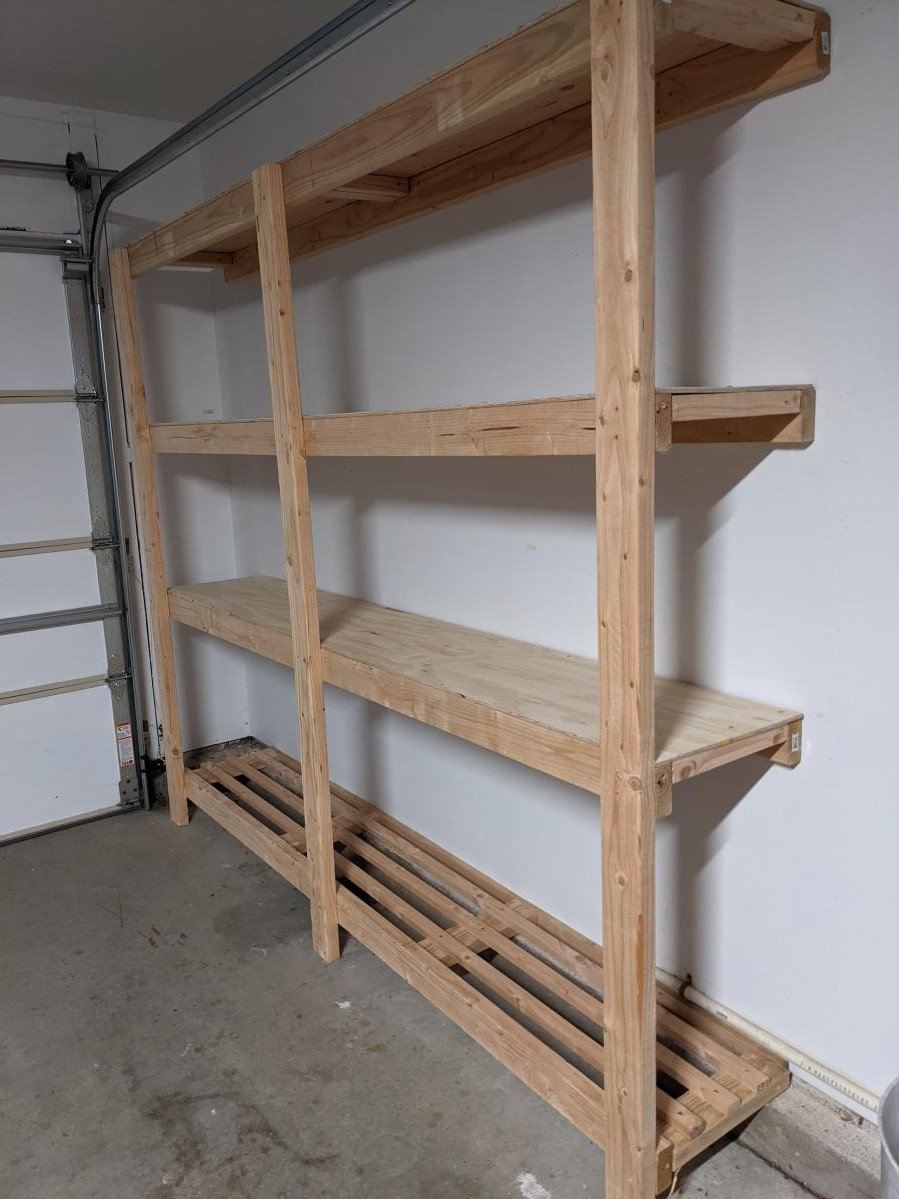
I just made this shelf using 2x4s 8 ft long wood. It is very strong and looks great. My garage size required the shelf to be max 16 in deep, so I used a 1 plywood sheet divided by 3 equal parts for the upper 3 shelfs. Since I made a 4th shelf, I used 3 1x2s for the 4th bottom shelf instead of a new plywood sheet and avoided having extra 2/3 of the sheet around and also saved like 30$ since the 2x1s were only 2$ea. That touch makes it look a bit stylish too so a win win. If you do that, here's a tip: use the outer 2x4s as rails - make sure that the cleats on the lower shelf are placed a bit lower ~ 1in. In such way, you can place the three 1x2 rails at the same level as the outer 2x4s and this you end up having 5 rails total in the shelf. Do use the wooden screws with star head if you can, they were muuuuuch easier to use compared with the regular ones. Note, this shelf is very strong, probably too strong for my needs. For a 8ft long, and my storage needs (camping, Christmas stuff, other lighter things), I'd probably use 2x2s instead of 2x4s. That would save costs, specially since wood isn't cheap these days( I spent ~$150 in materials Jan 2022).
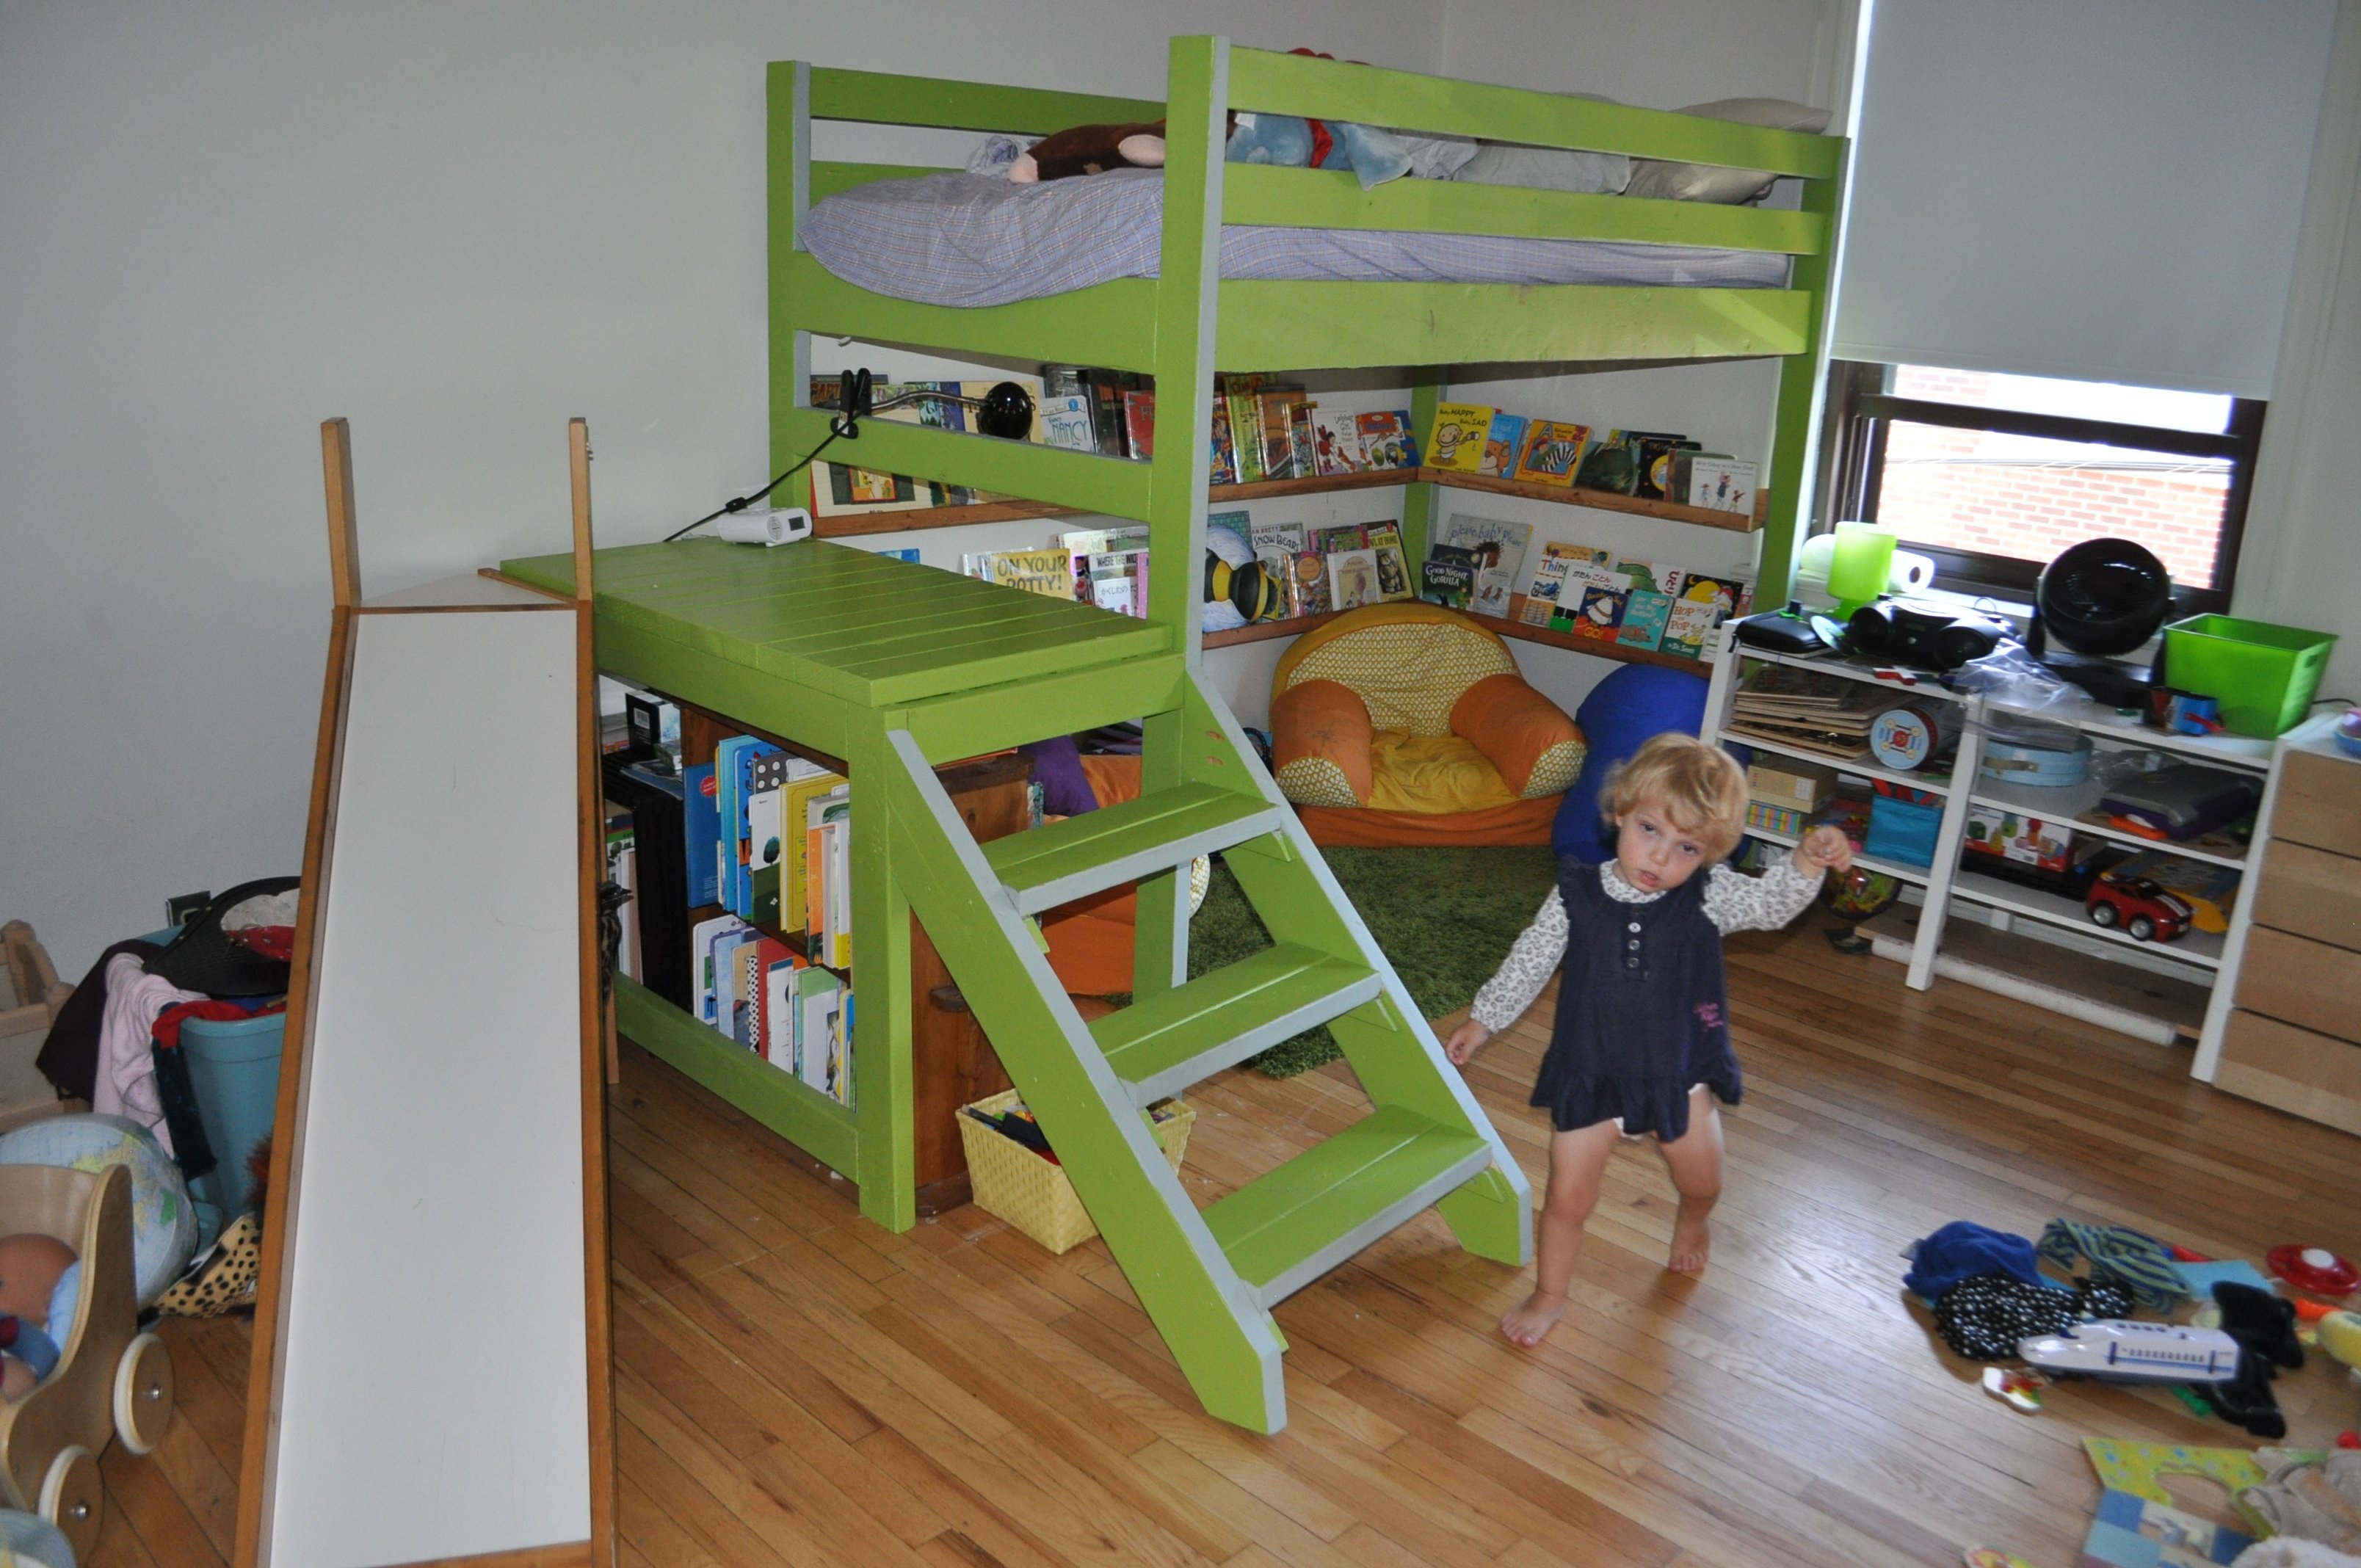
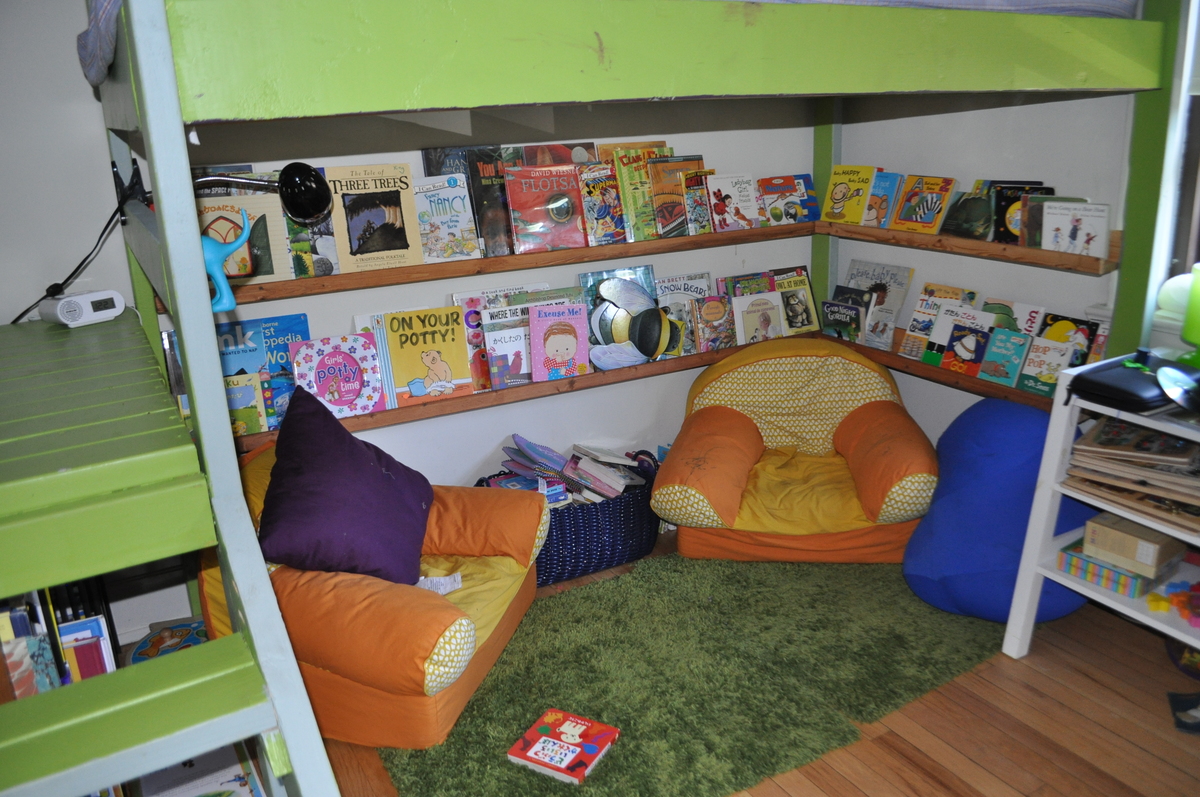
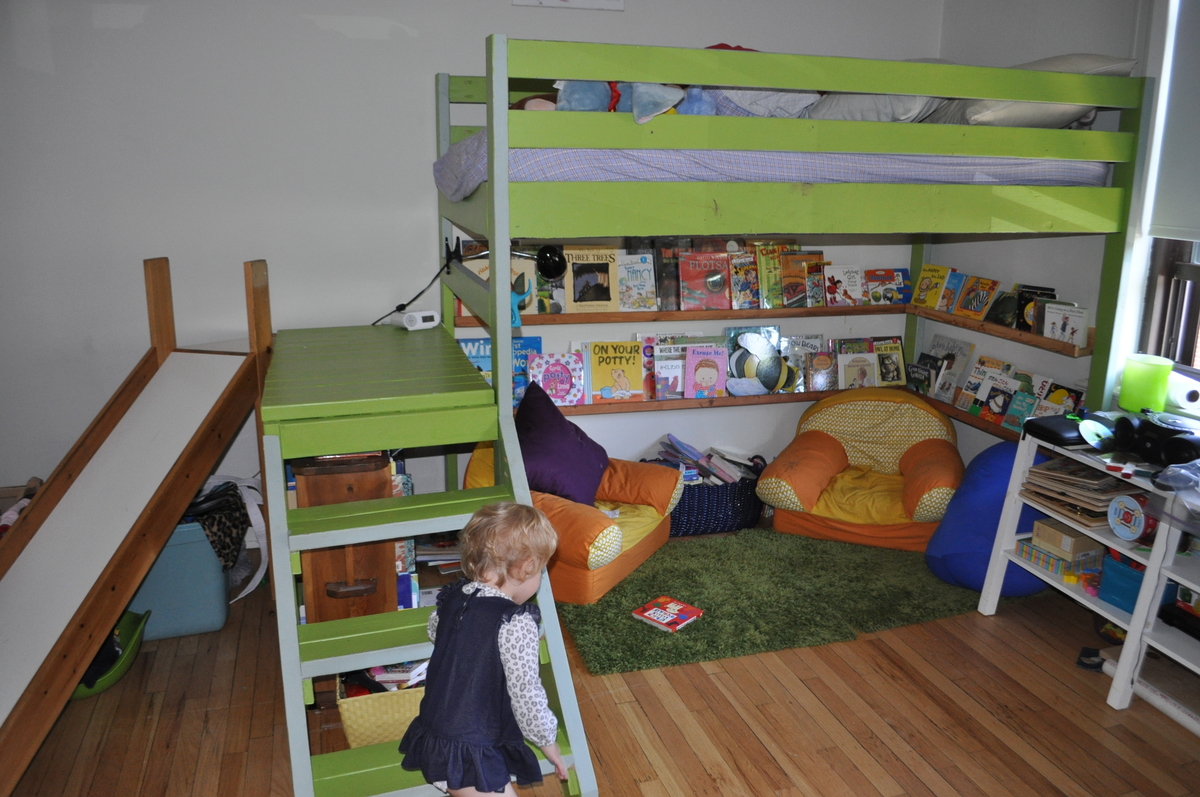
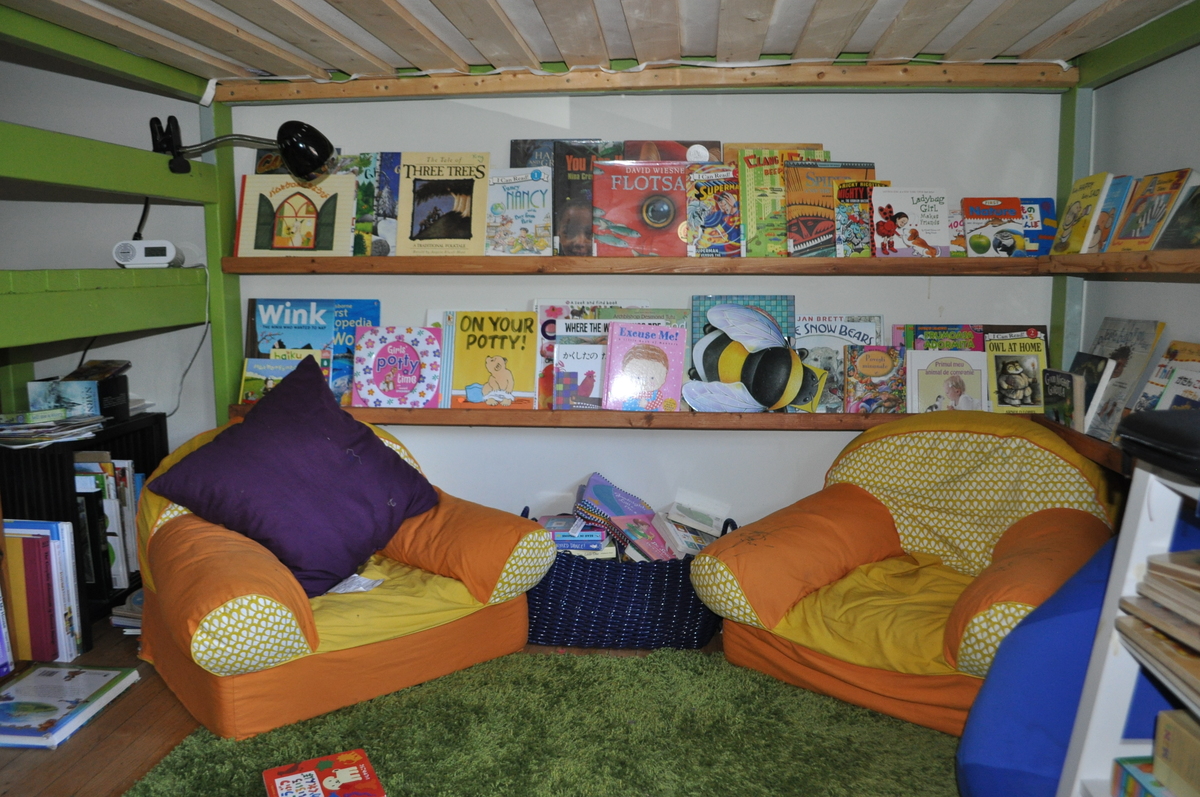
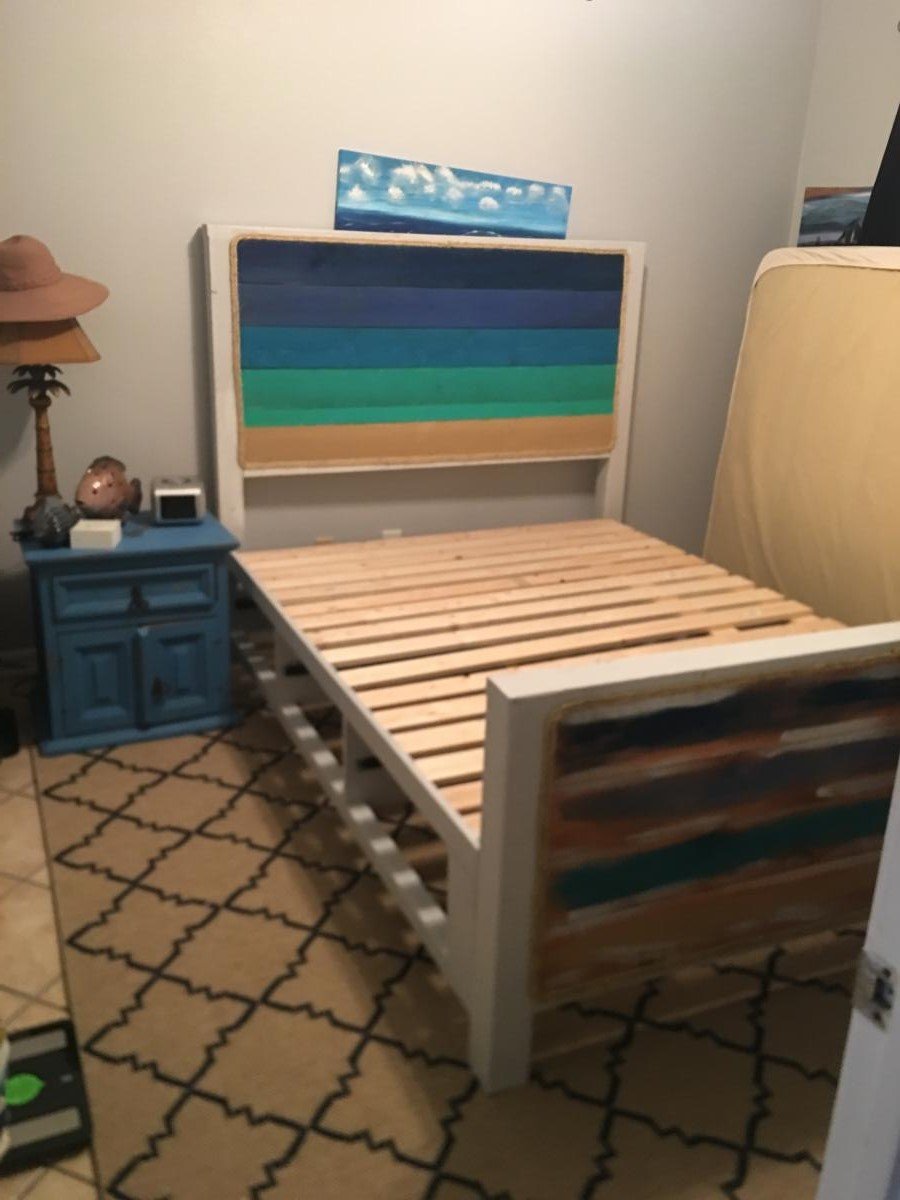
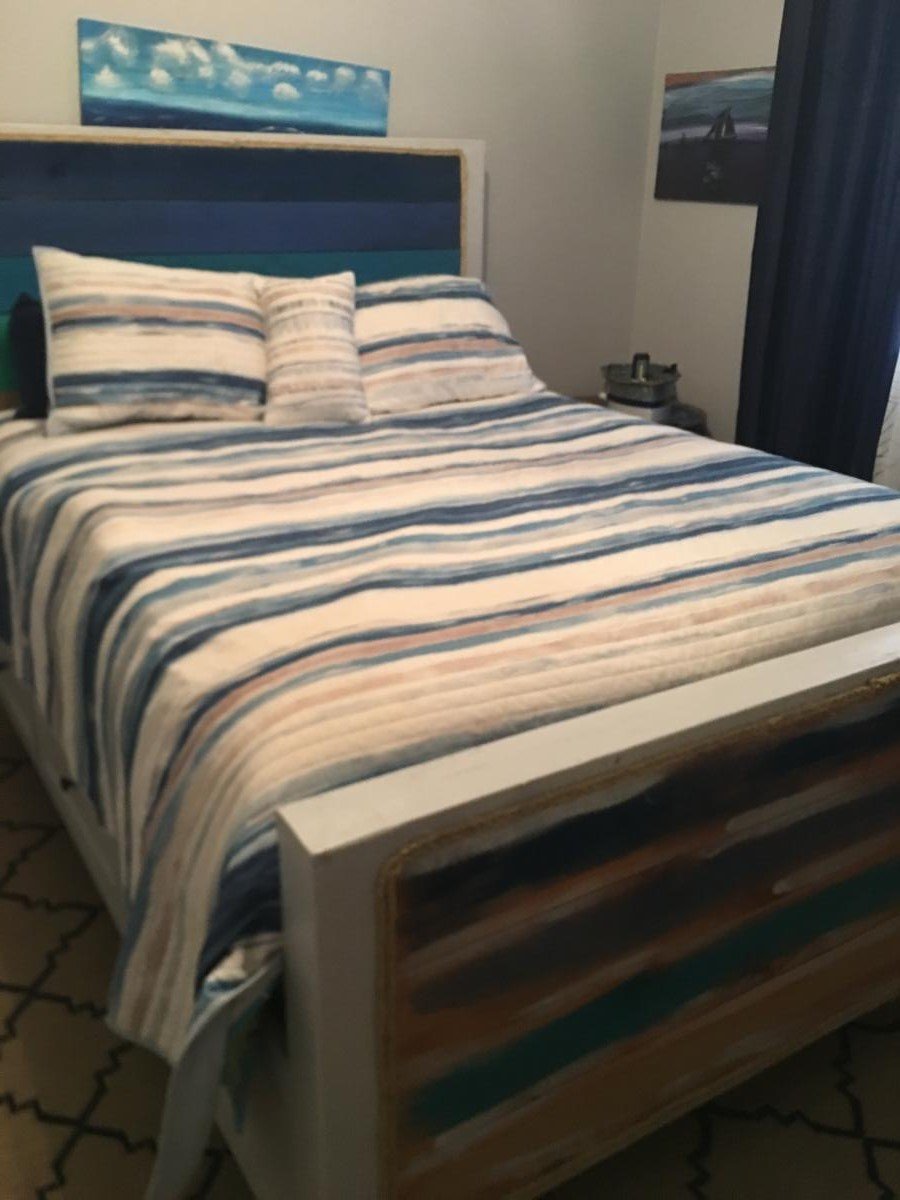
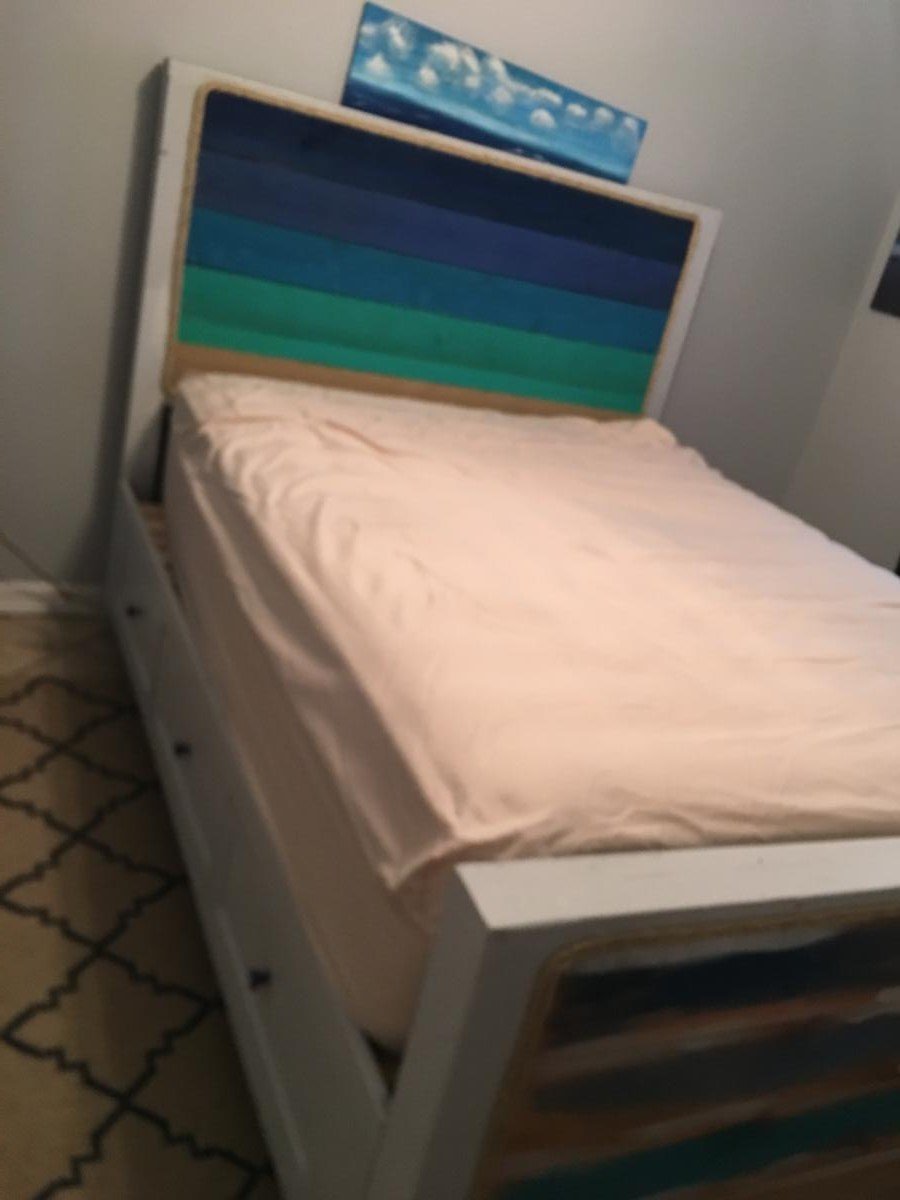
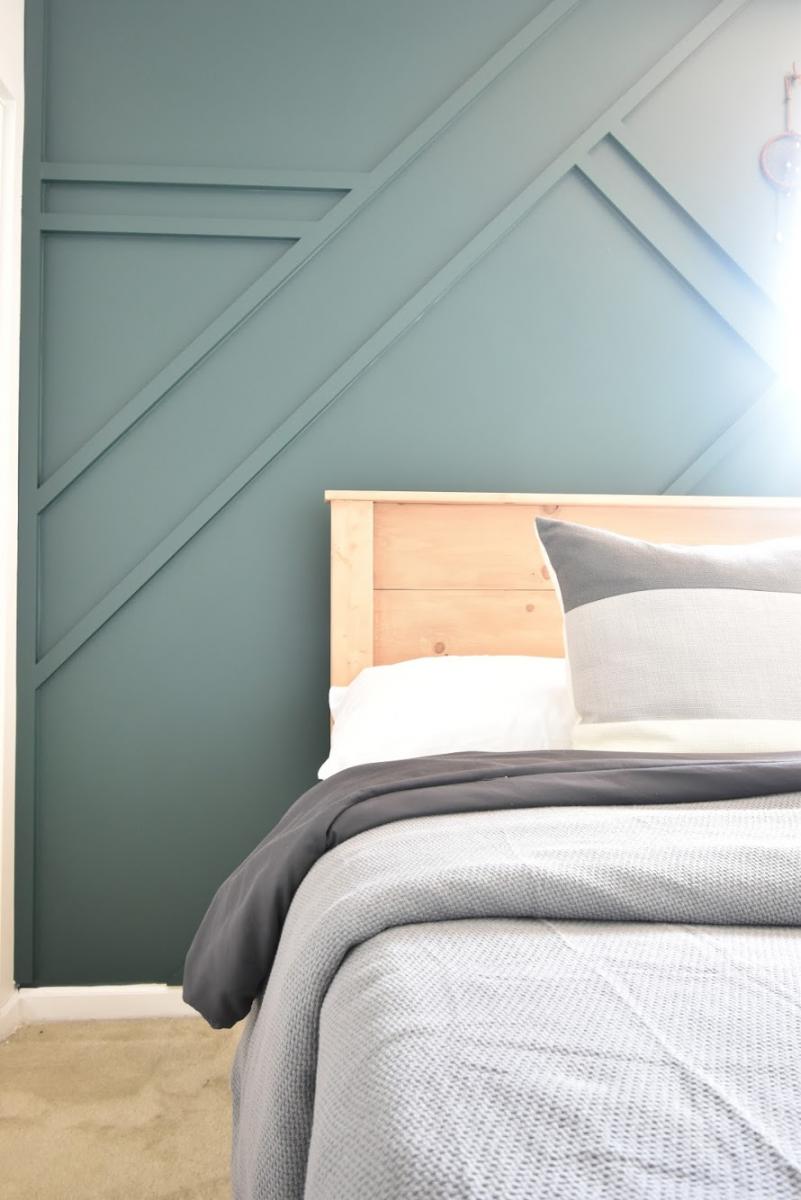
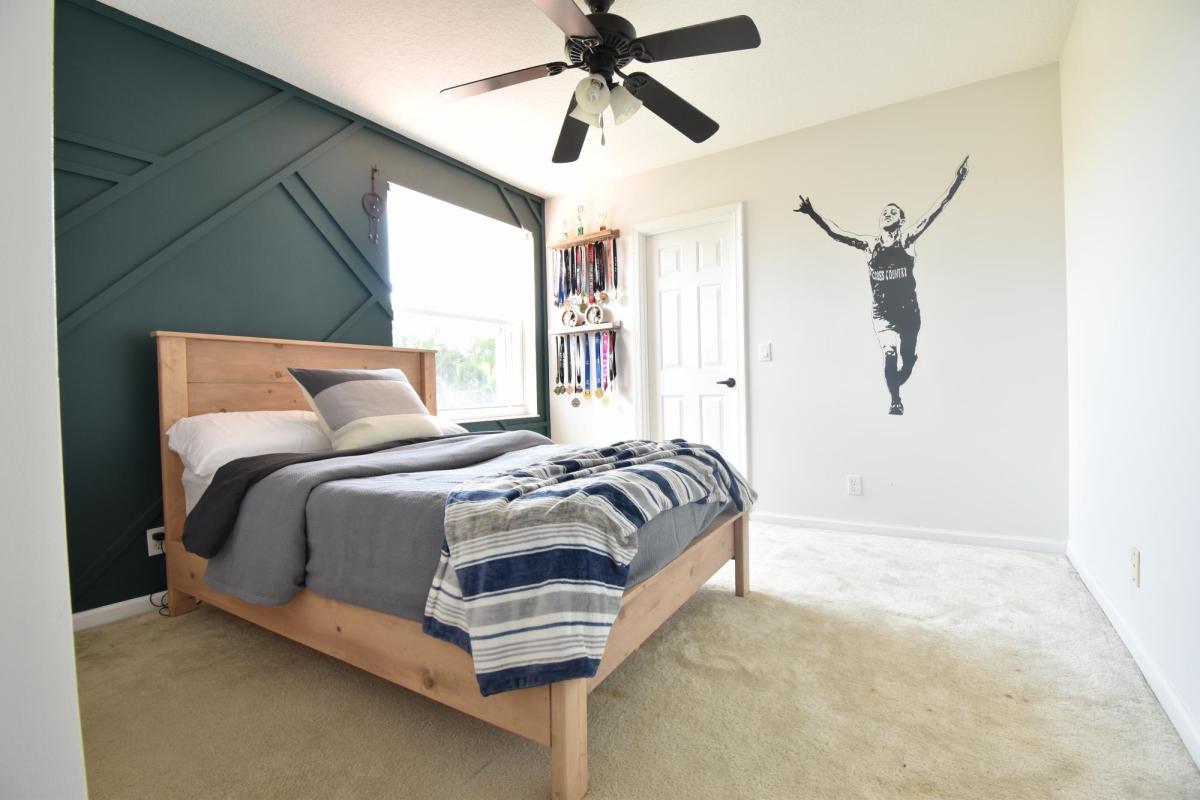
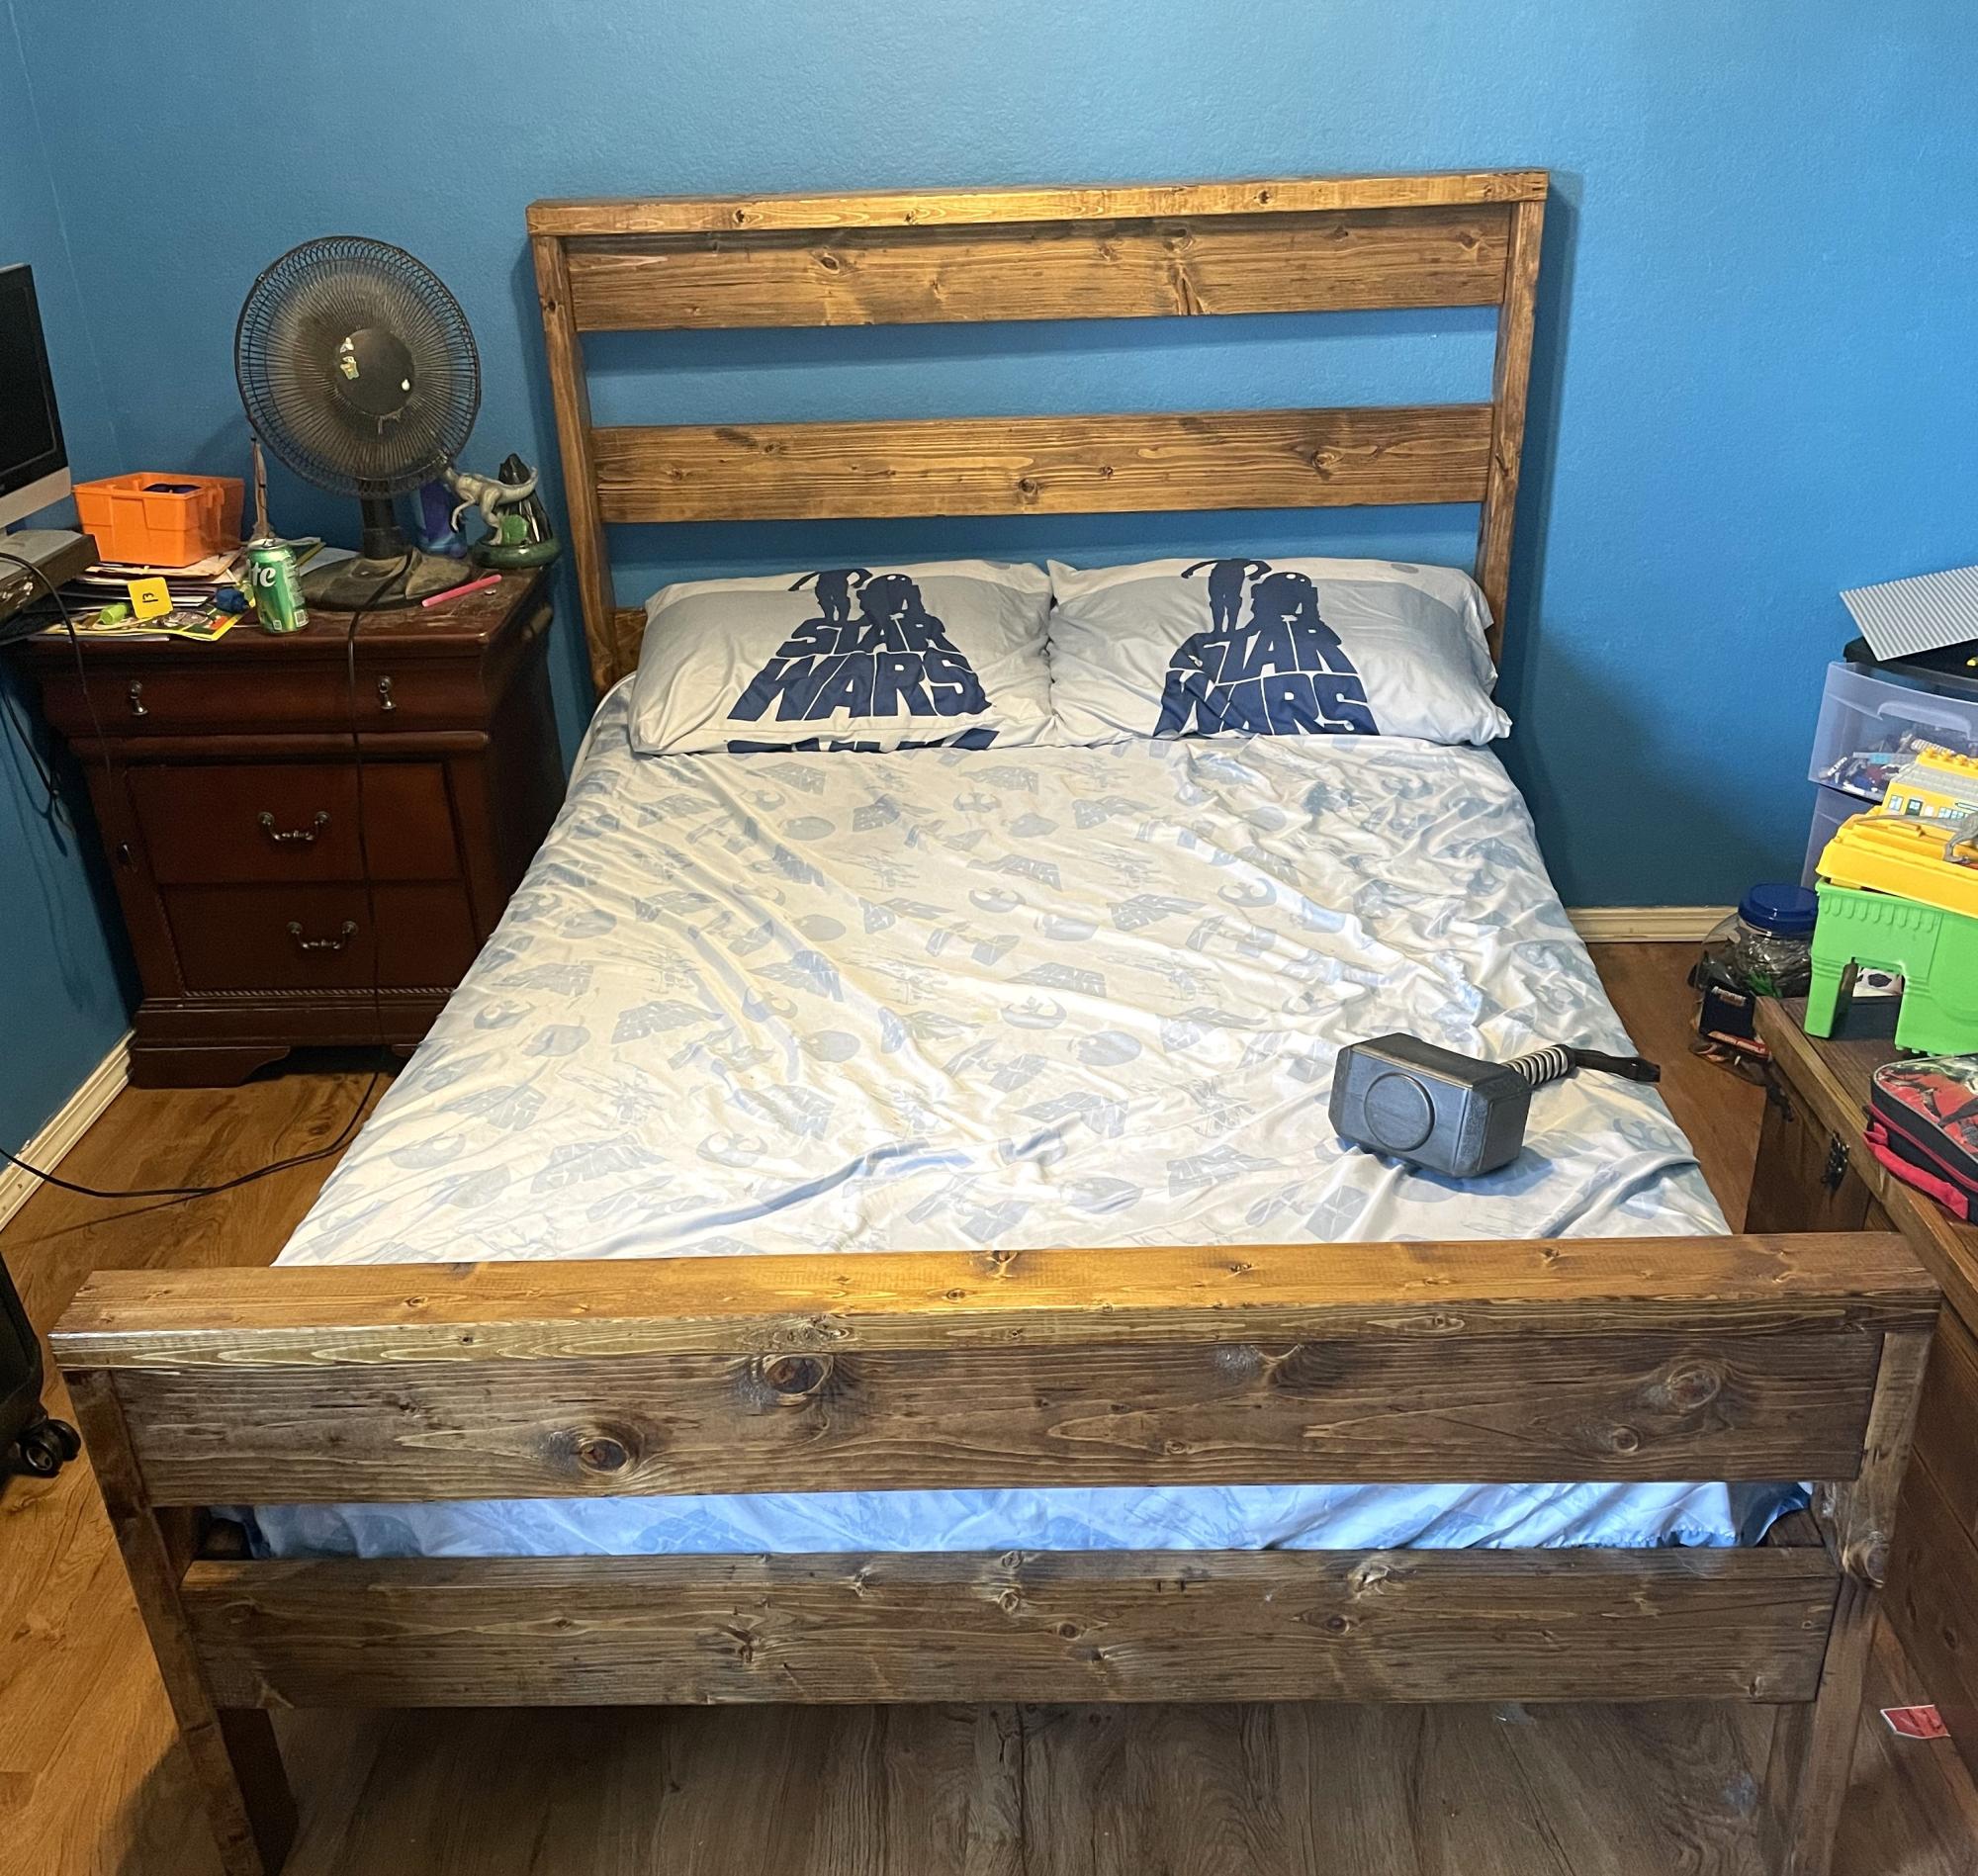
I built this bed in July in anticipation of my two children sharing a room for the first time. They love it. In August, I thought to add the $10 ledges to the frame of the bed when I realized our walls wouldn't support their weight and we're in a rental. I used 1x3s instead of 1x4s those plans called for so the shelves would sit at the same depth as the 2x4s on the frame of the bed.
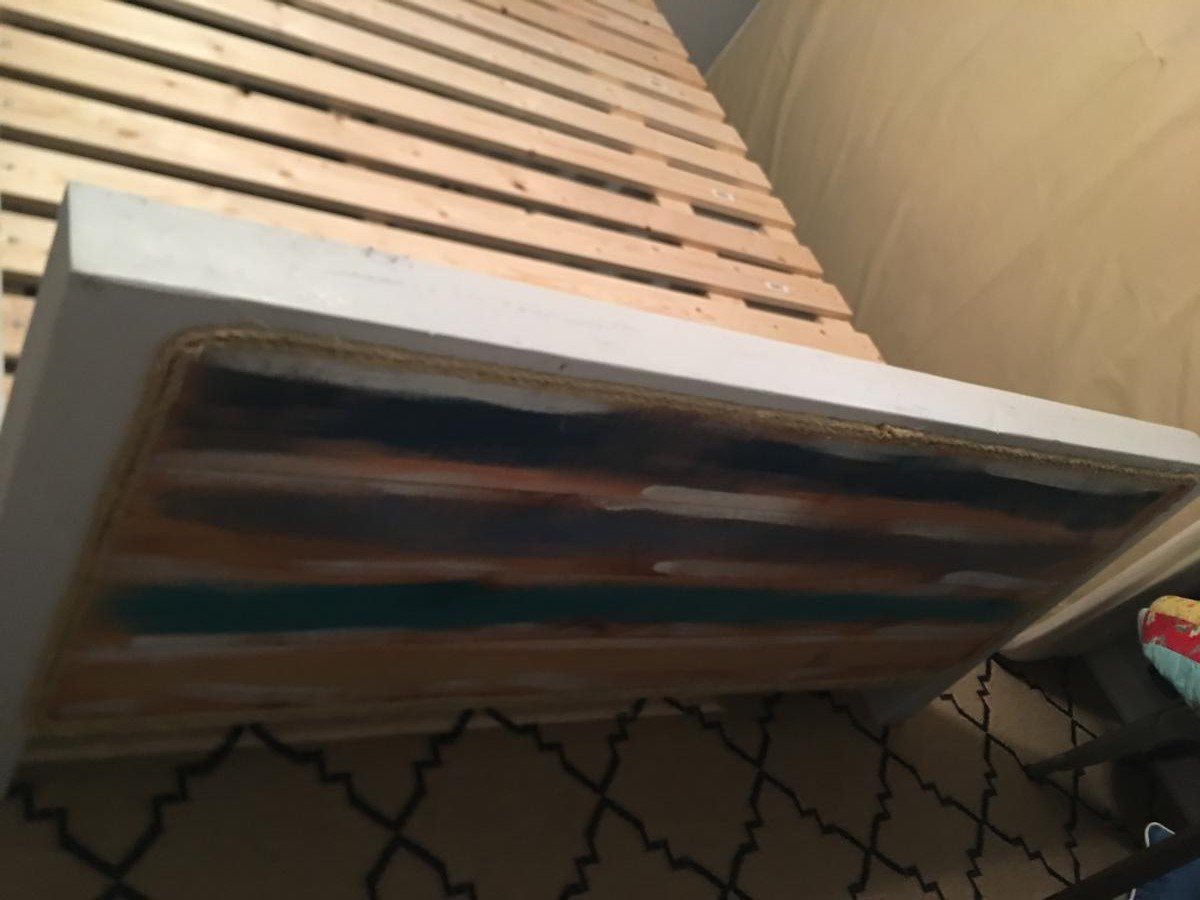
I wish I knew more about painting soft wood because I don't love how the paint job turned out, though it is green per my son's request. I couldn't deal with more green, hence the ledges are stained.
I love the little alcove this has created. I added curtains and we read stories in there every night. Thank you so much for the inspiration and plans!
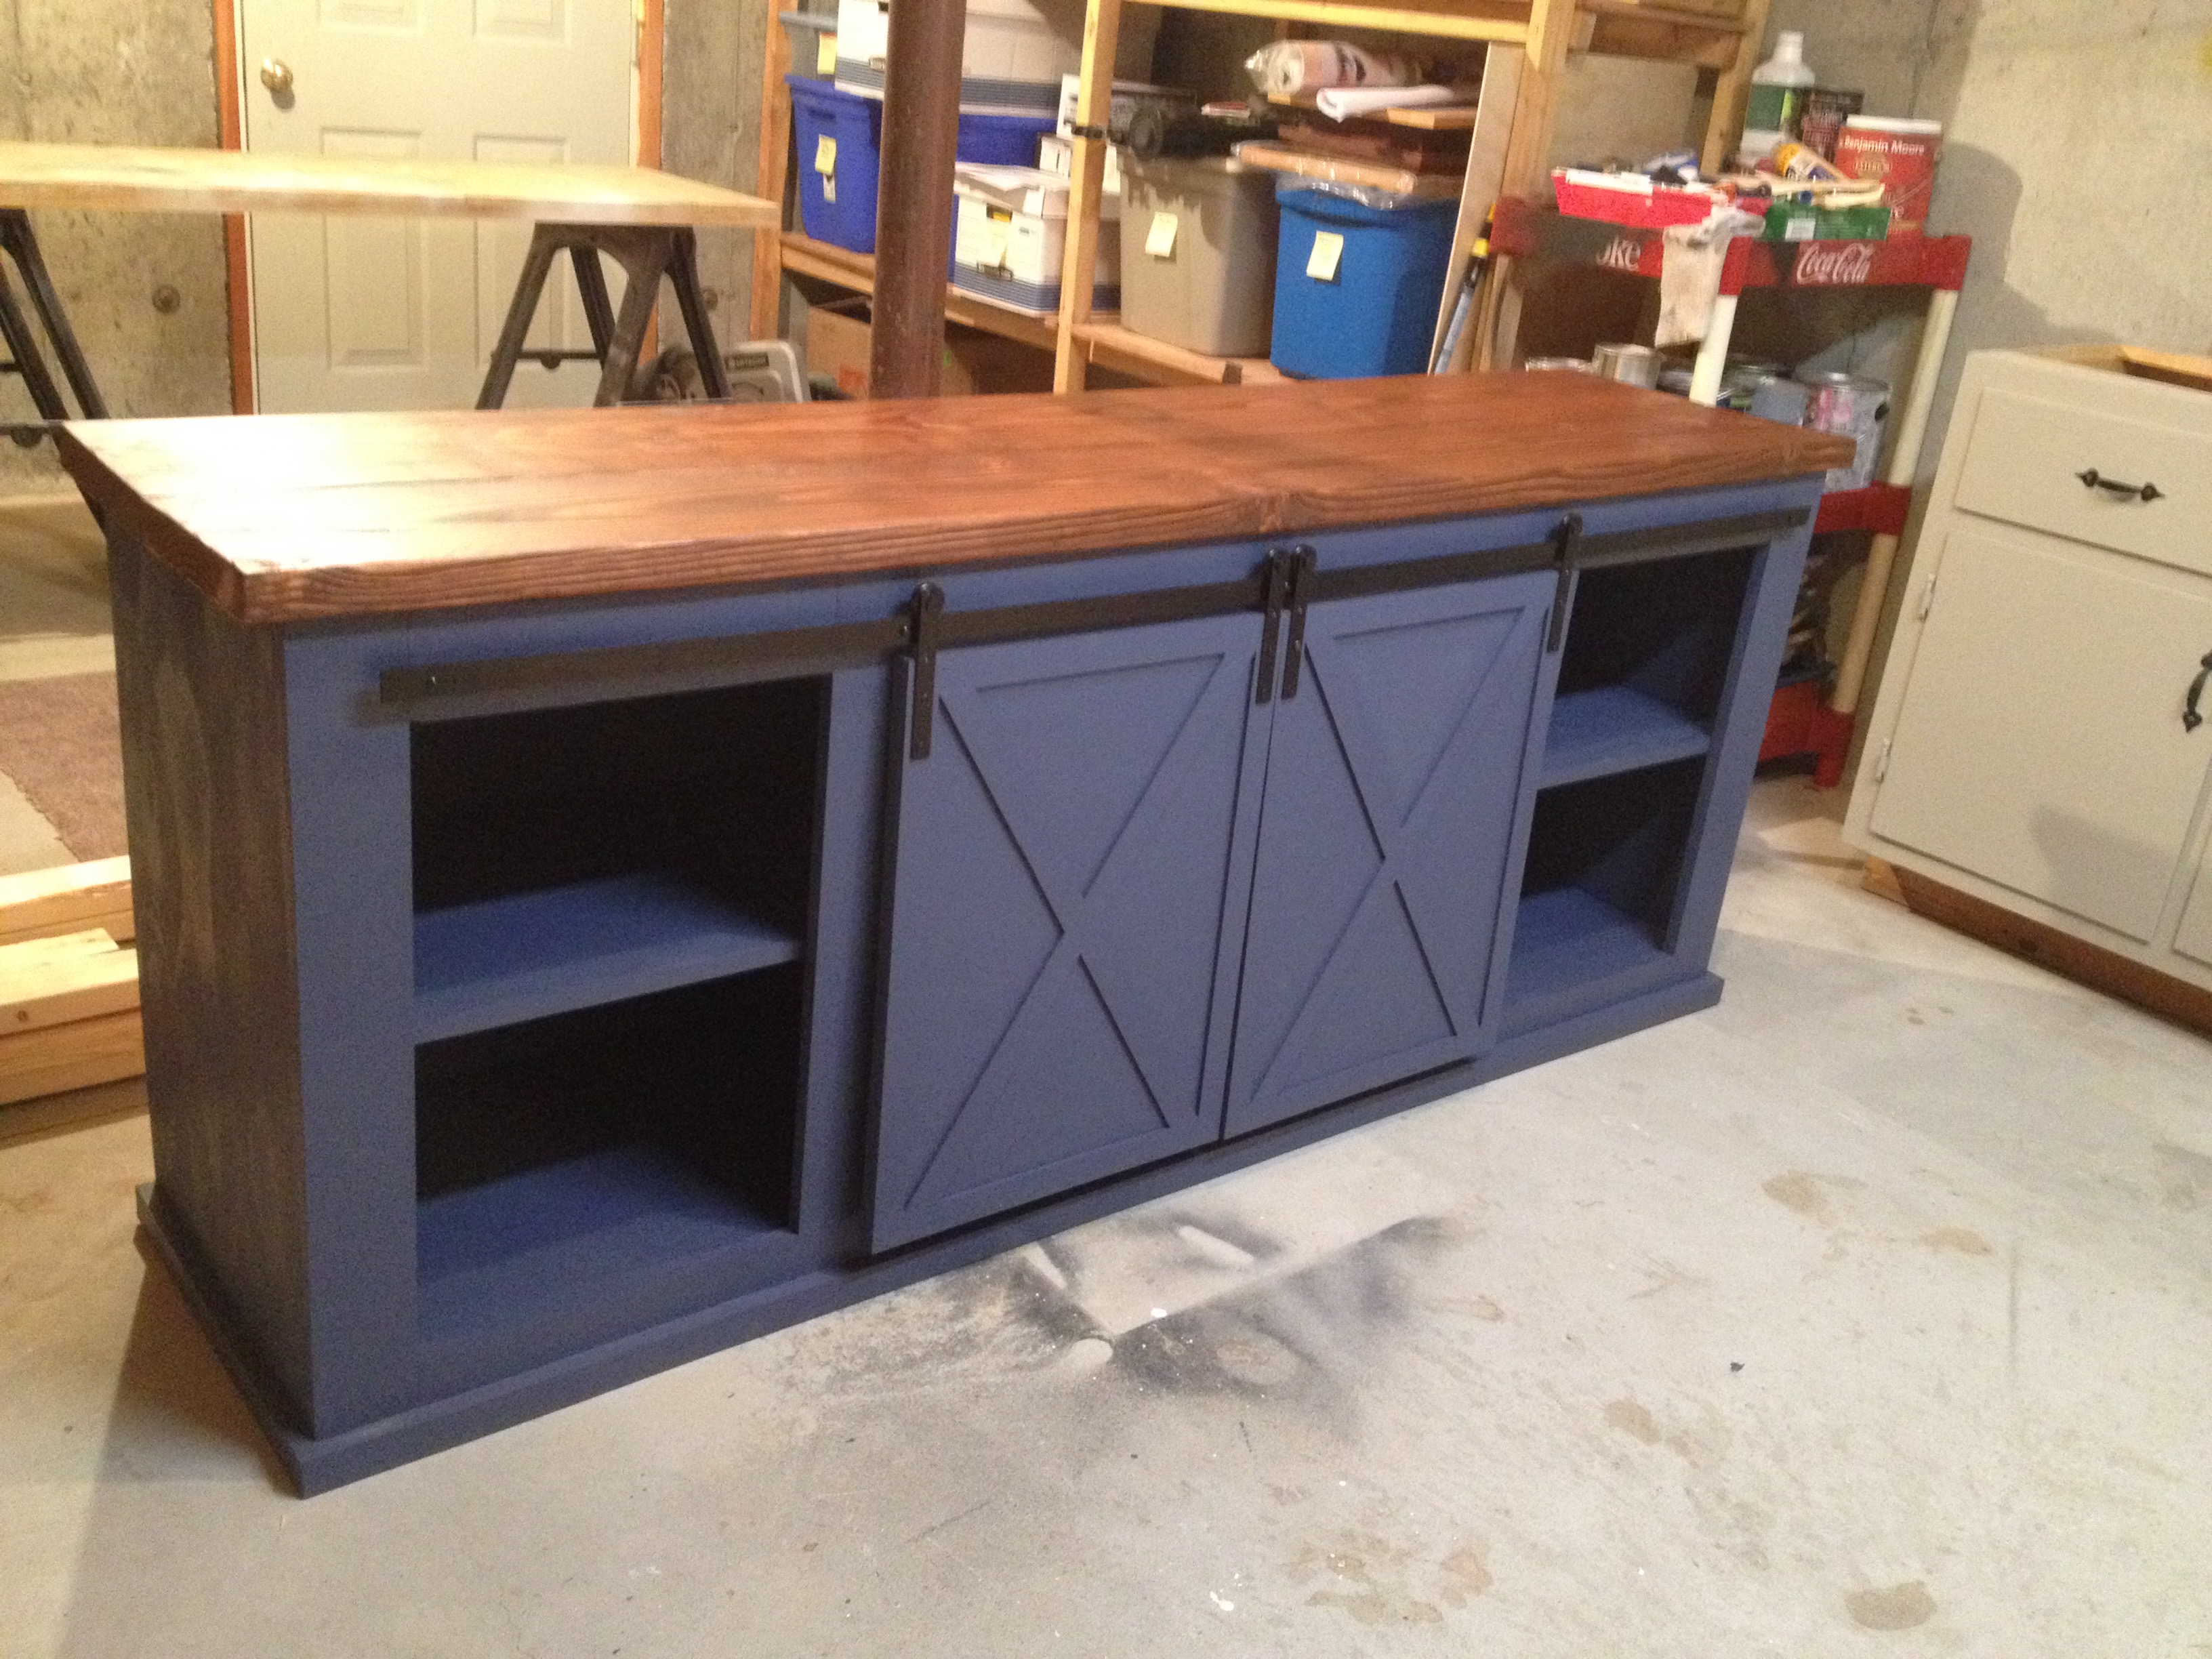
The original size of the unit was too big for our needs so we cut down the size of the unit to 72" long and 30" high. Used patio rollers for the doors.
This bed is very heavy and it was a much bigger project than I had envisioned at the beginning overall I am happy the results
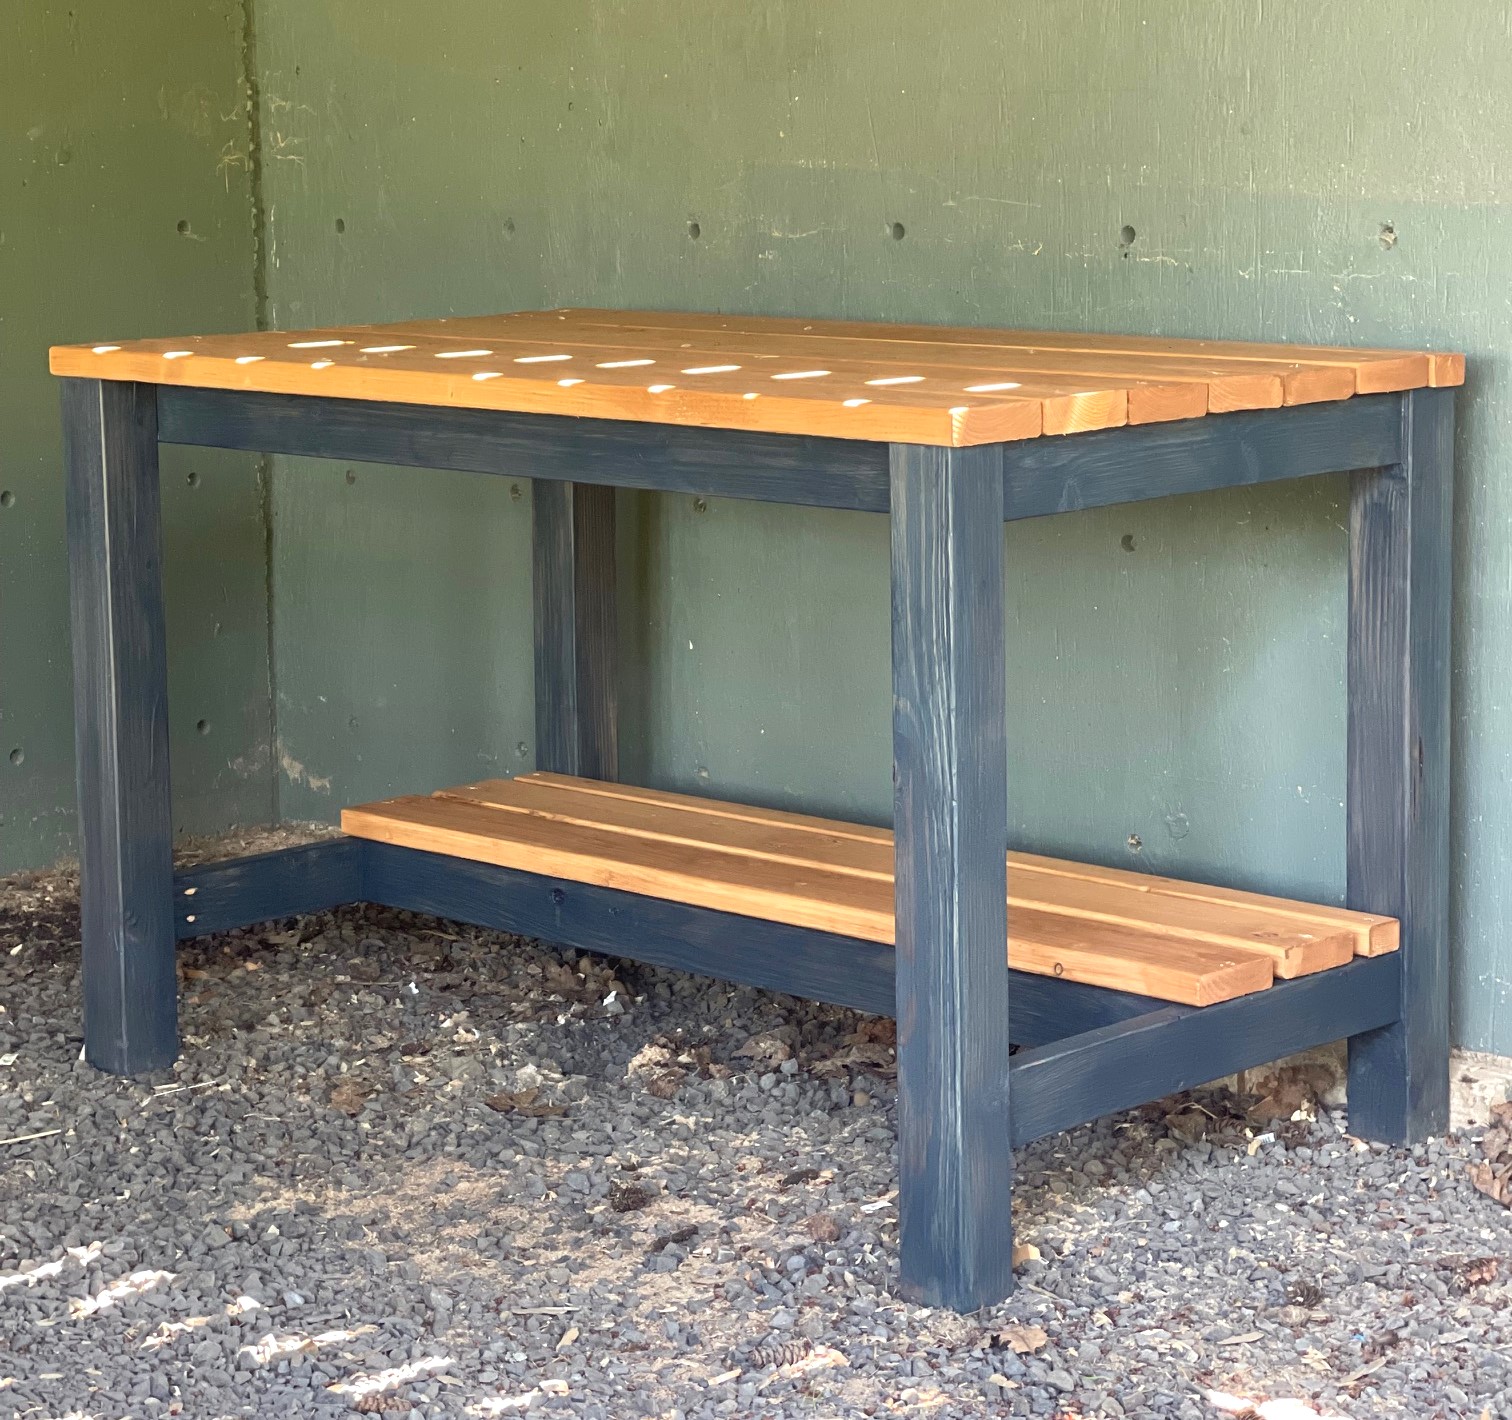
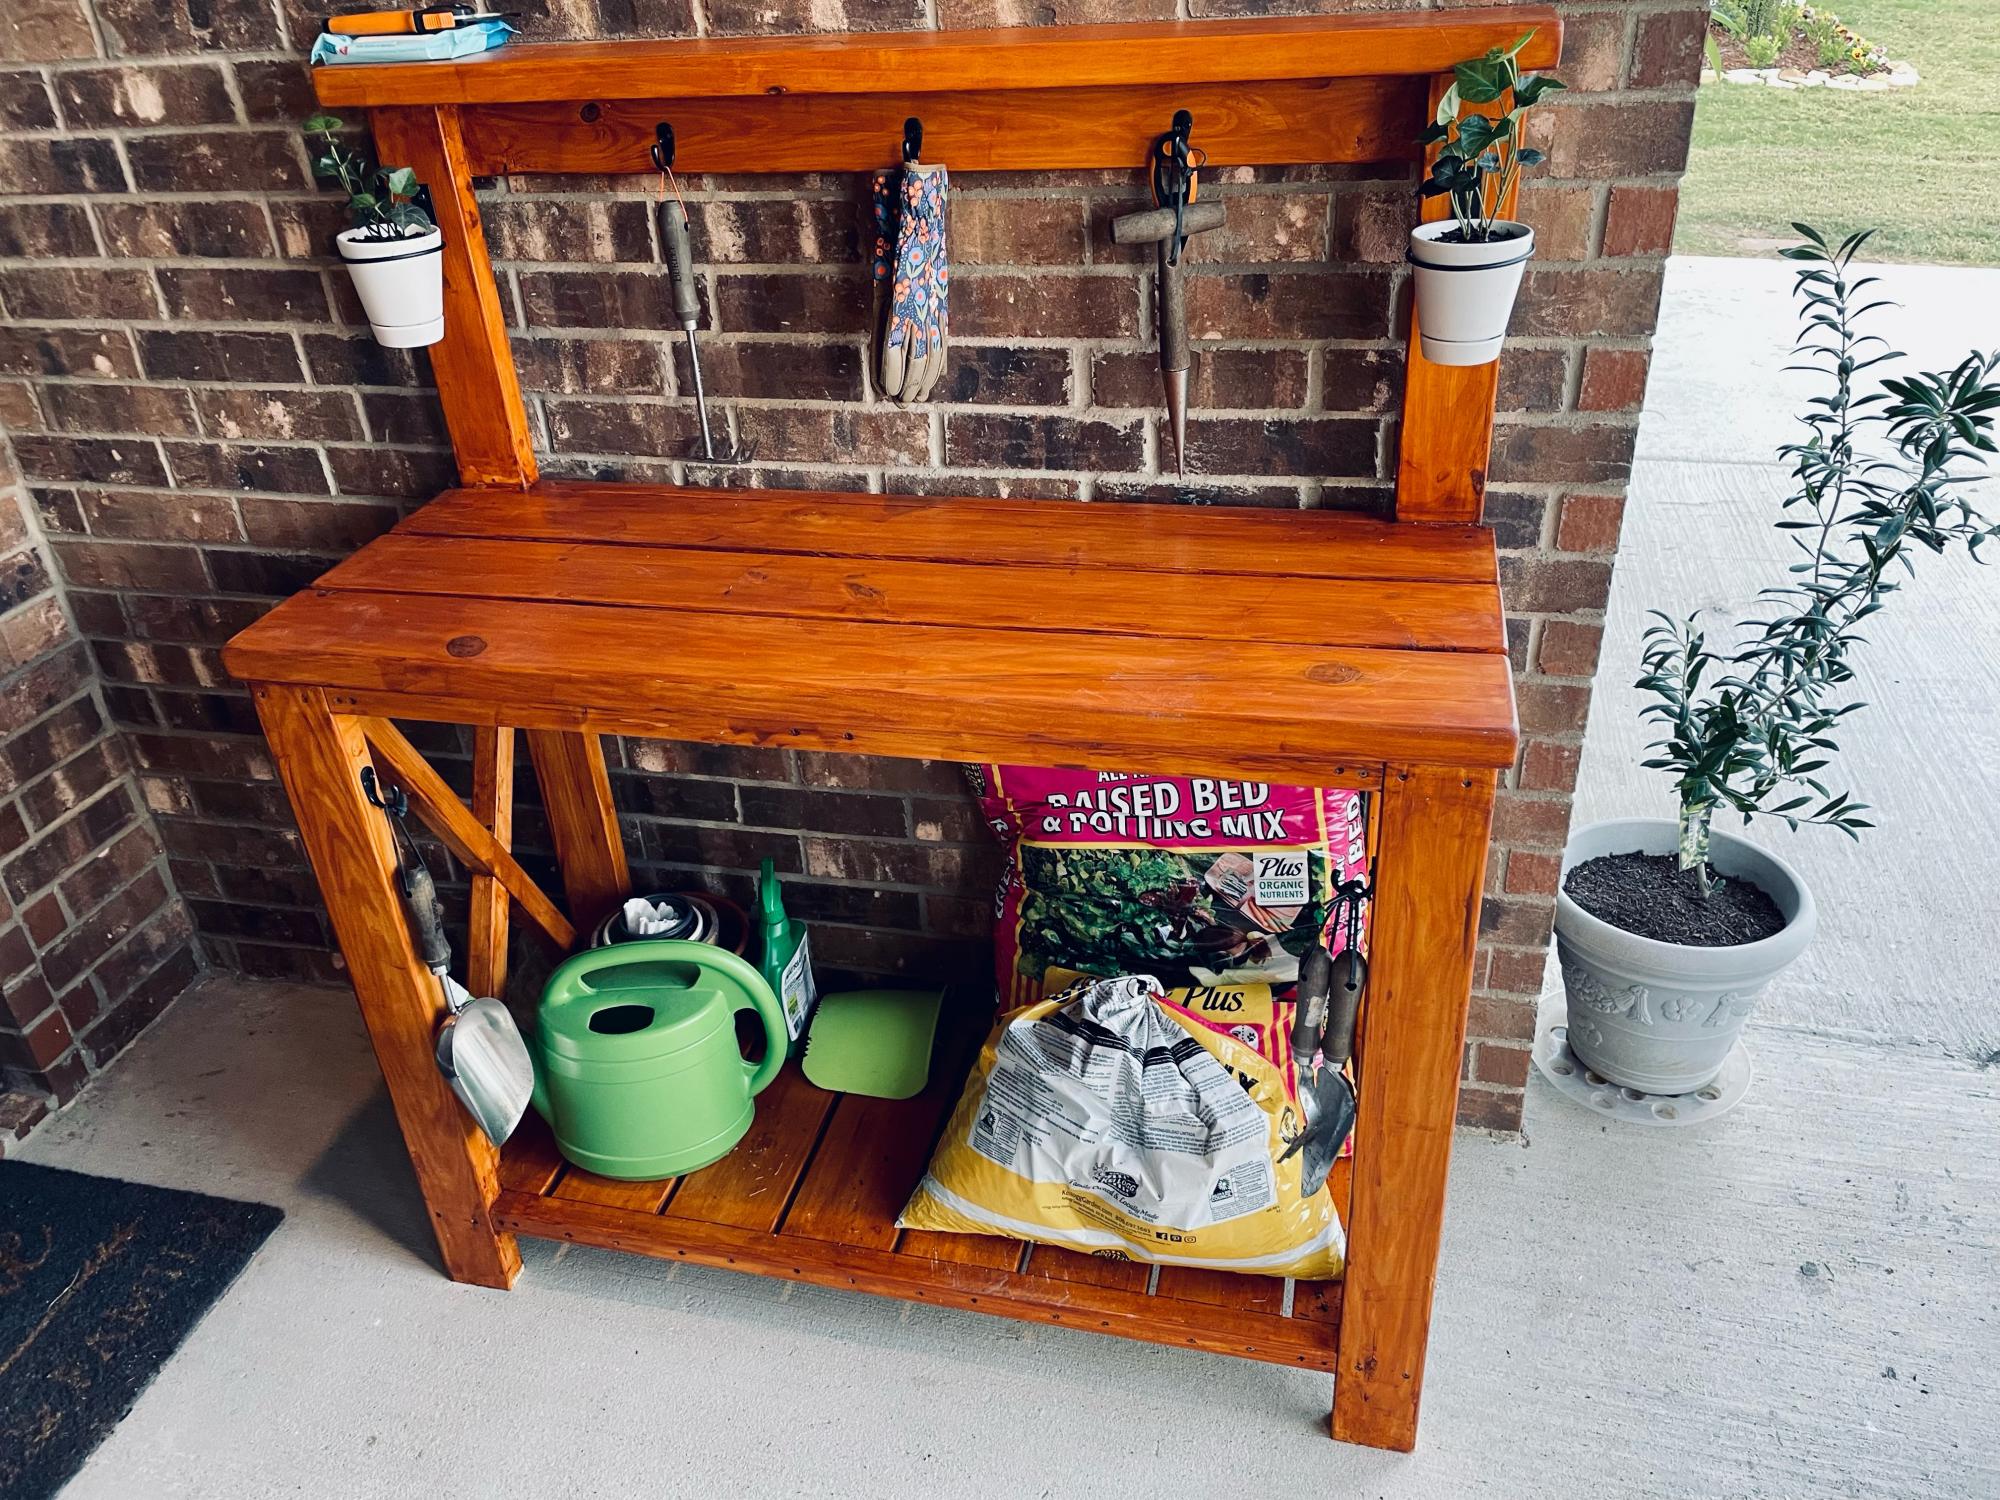
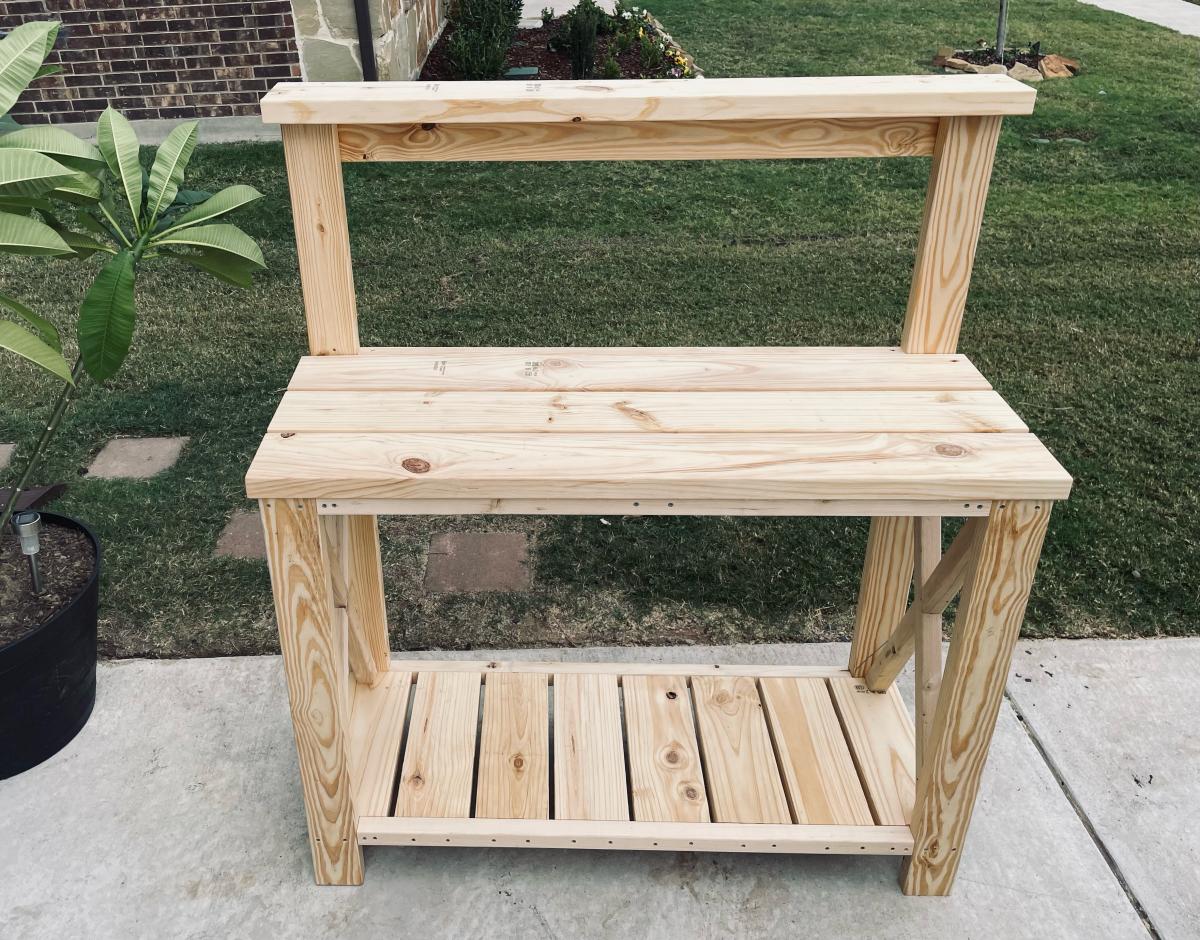
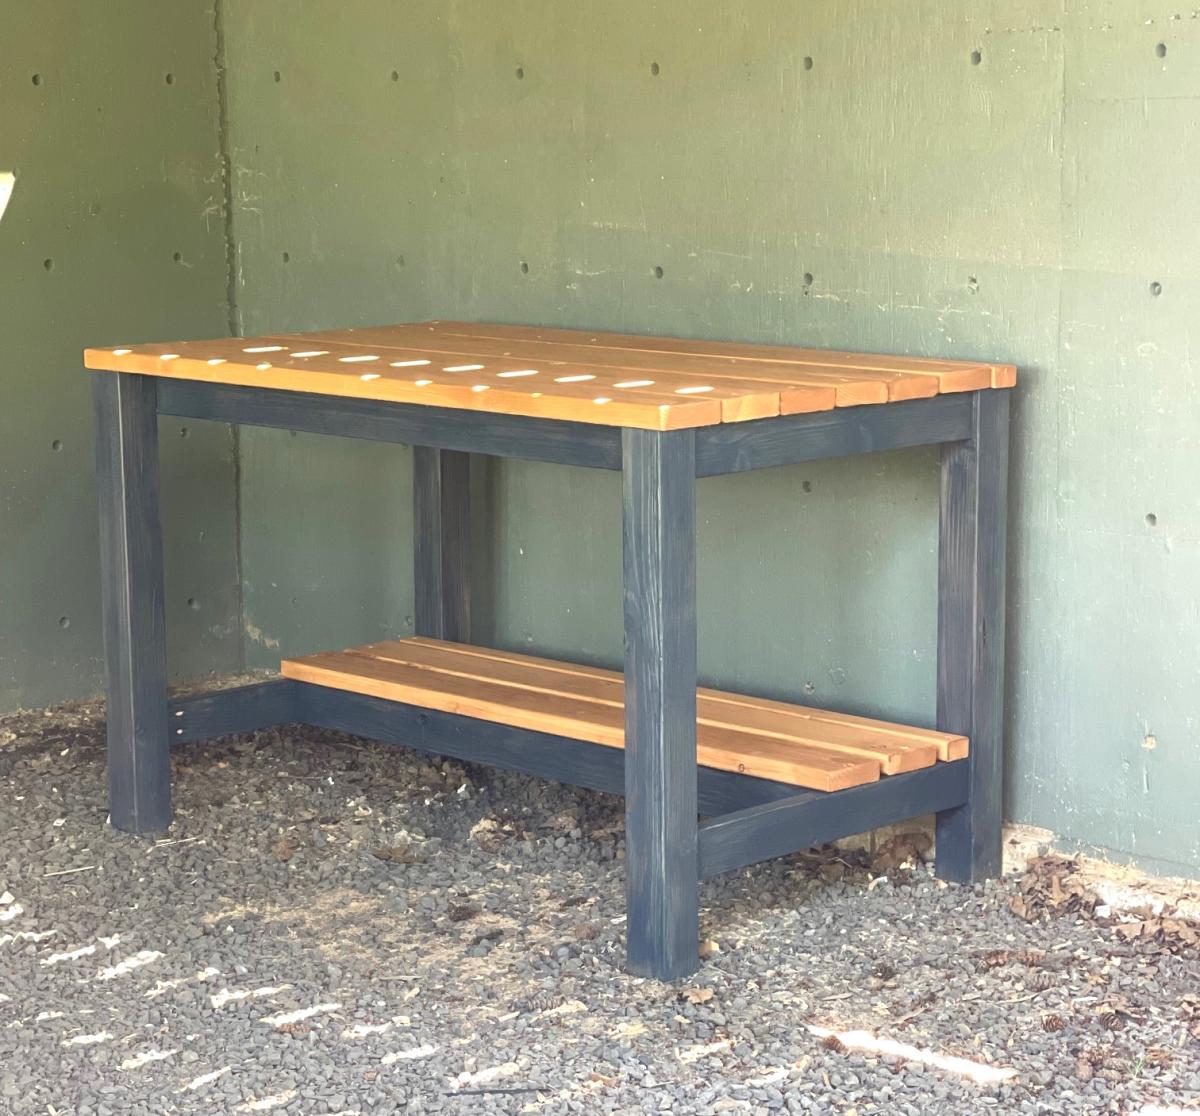
Wanted to build a sturdy workbench with 4x4 legs, so I used Ana's plans linked below with a few mods!
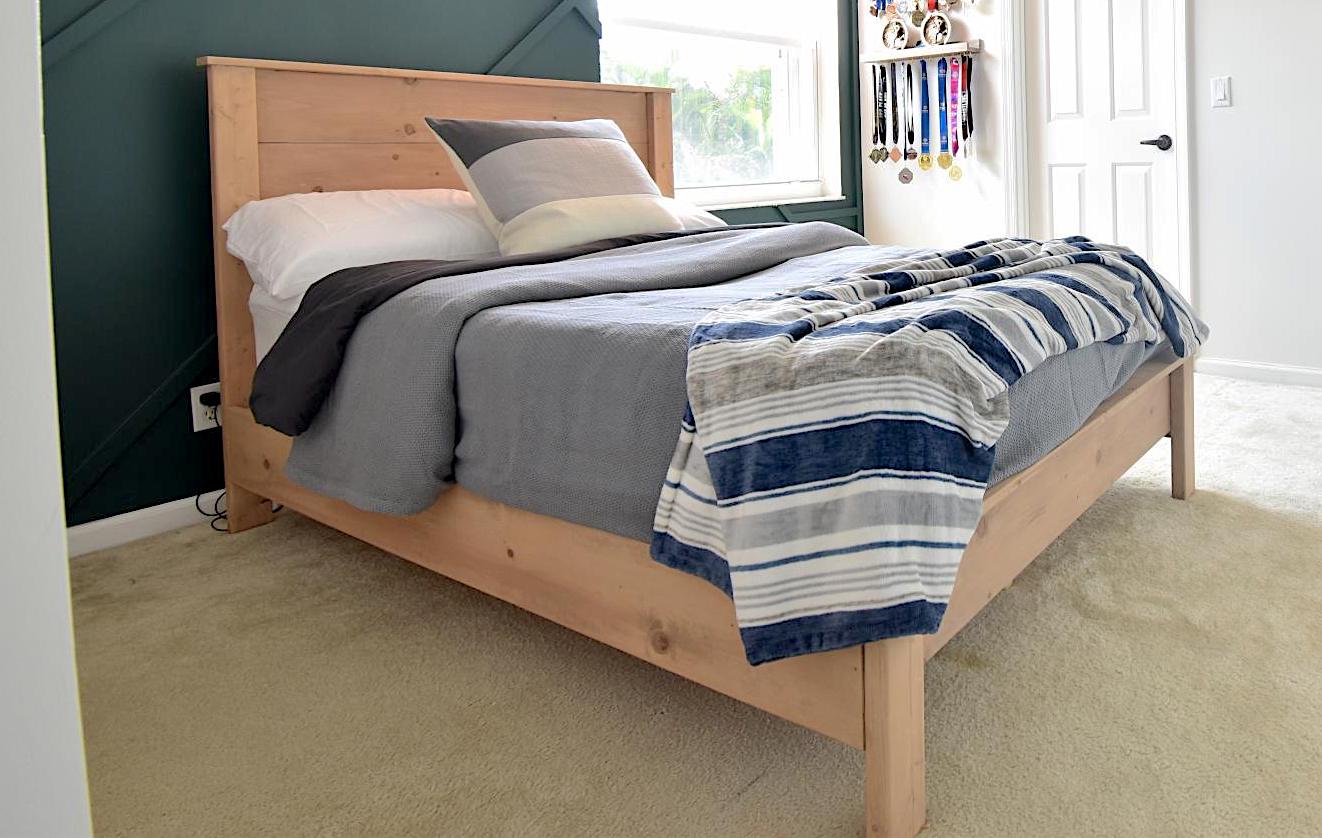
I made this bed over a weekend while I “room crashed” my oldest’s bedroom.
I’m so happy with the result. I experimented with stains mixing two, well layering colors.
That was a lot of fun!
I hope to write a blog post about it one day. I will add it to my ever-growing To Do List.
Let me know if you have questions. I love talking about building and all things DIY!

Sun, 10/06/2019 - 15:57
You are amazing! Thank you so much for adding a brag post!
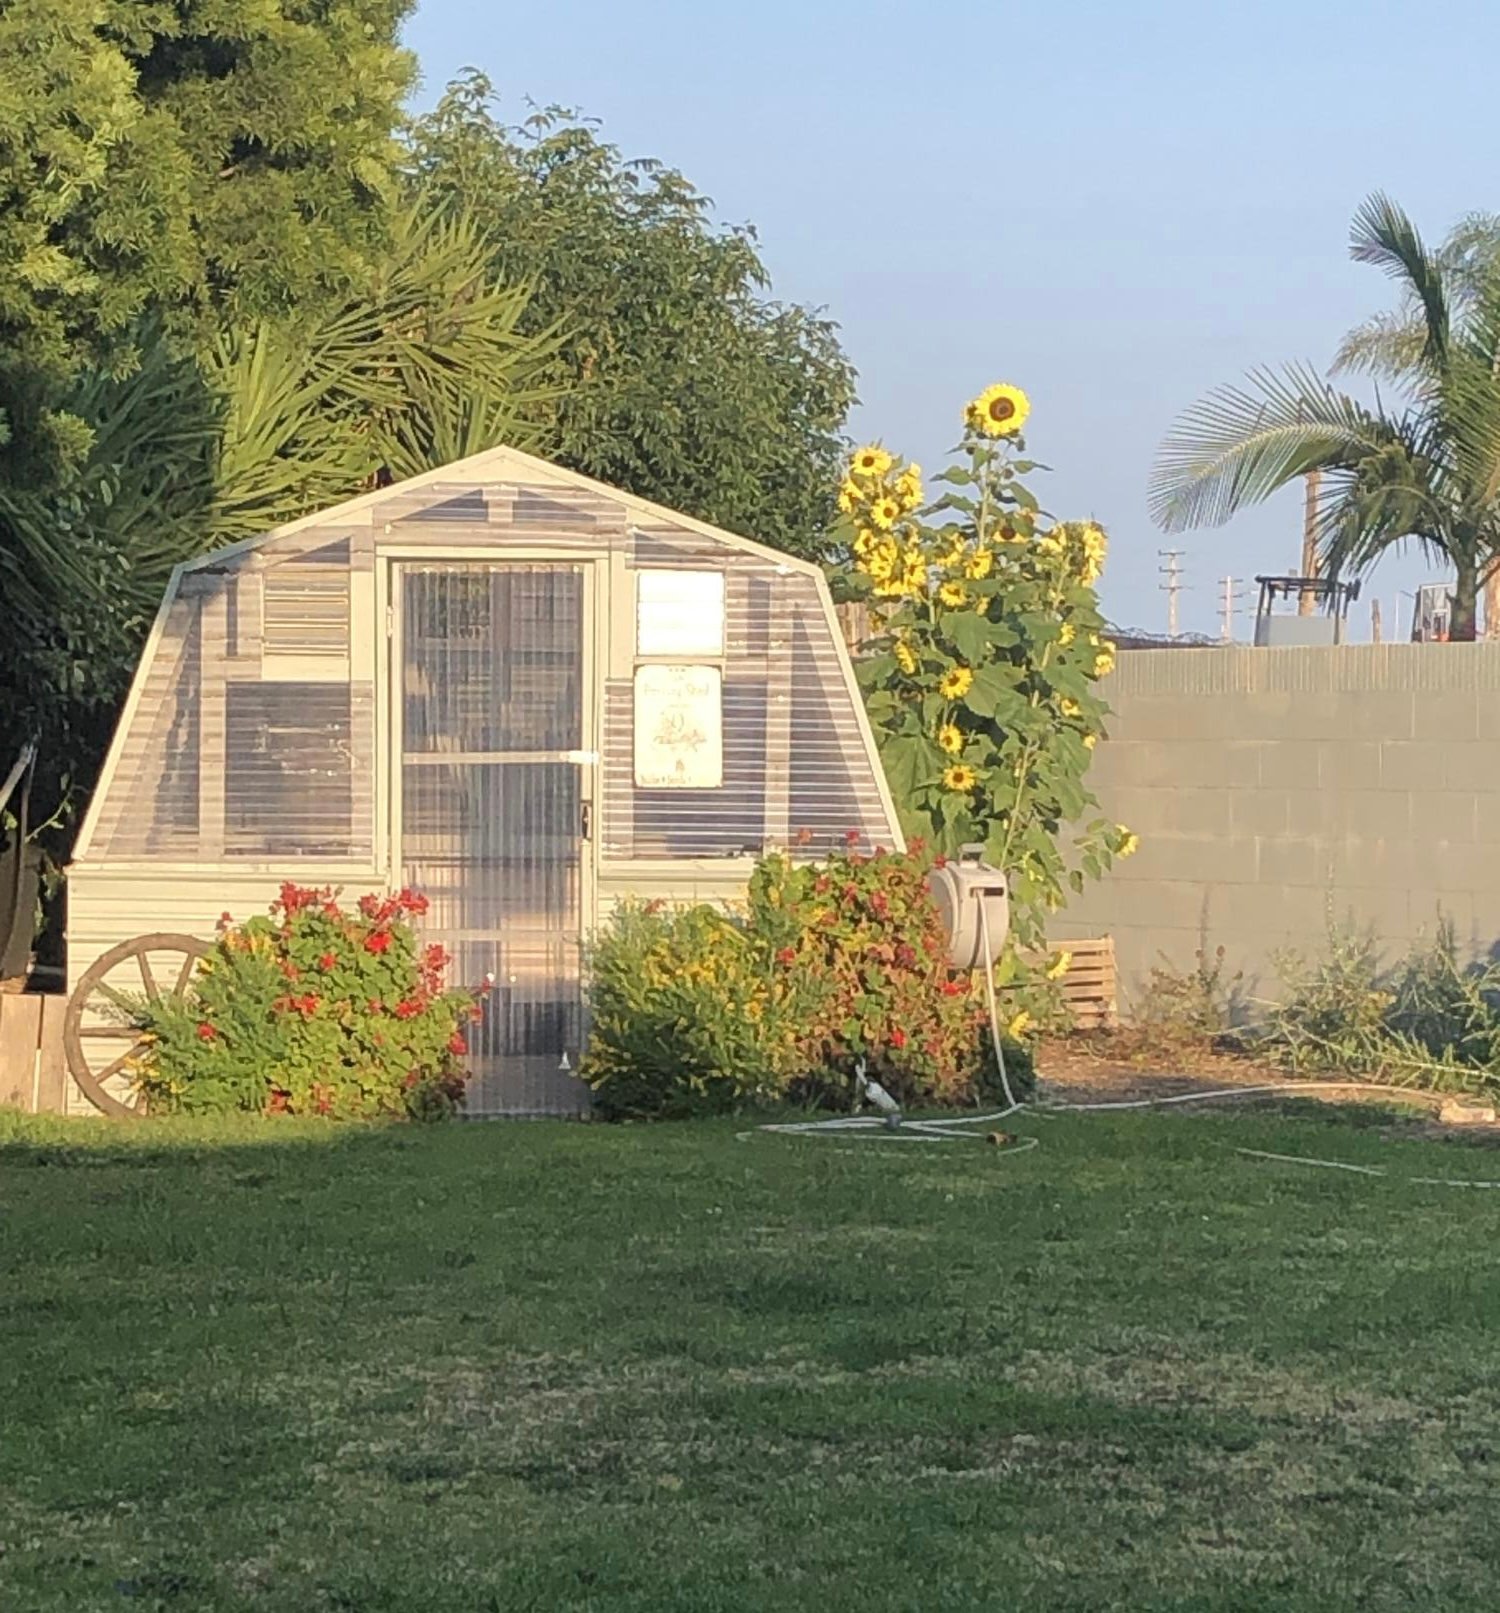
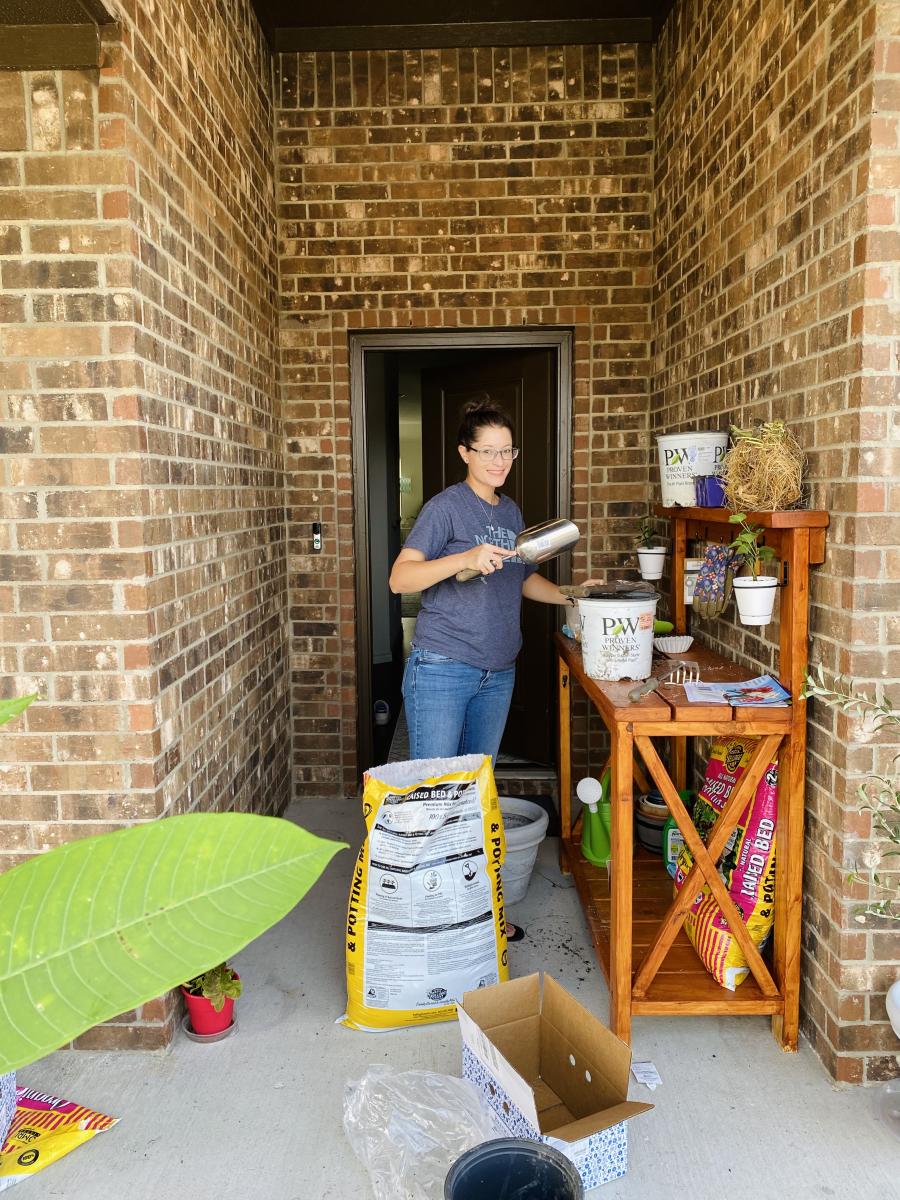
I saw this greenhouse built on the Justin Rhodes YouTube channel and immediately wanted my own. My husband was a champ at making my dream come true!
Tue, 04/09/2024 - 01:43
What a great idea! Building your own greenhouse can be a rewarding and cost-effective project. With the right planning and choice of materials, you can create a sturdy structure that will last you for years to come. In fact, a greenhouse is a great way to take care of your health because the crops grown there are undoubtedly of higher quality and healthier for you. Speaking of health, if you want to improve your health, consider using natural supplements such as mullein. Mullein supplements are known for their potential respiratory benefits and can promote overall well-being. You can find organic mullein supplements https://www.amazon.com/USDA-Organic-Mullein-Drops-Lungs/dp/B0CKBPTPRL on Amazon. Adding them to your daily diet can complement the peaceful environment of your greenhouse. So, whether you are a gardening enthusiast or just starting out, remember to take care of both your plants and your health!
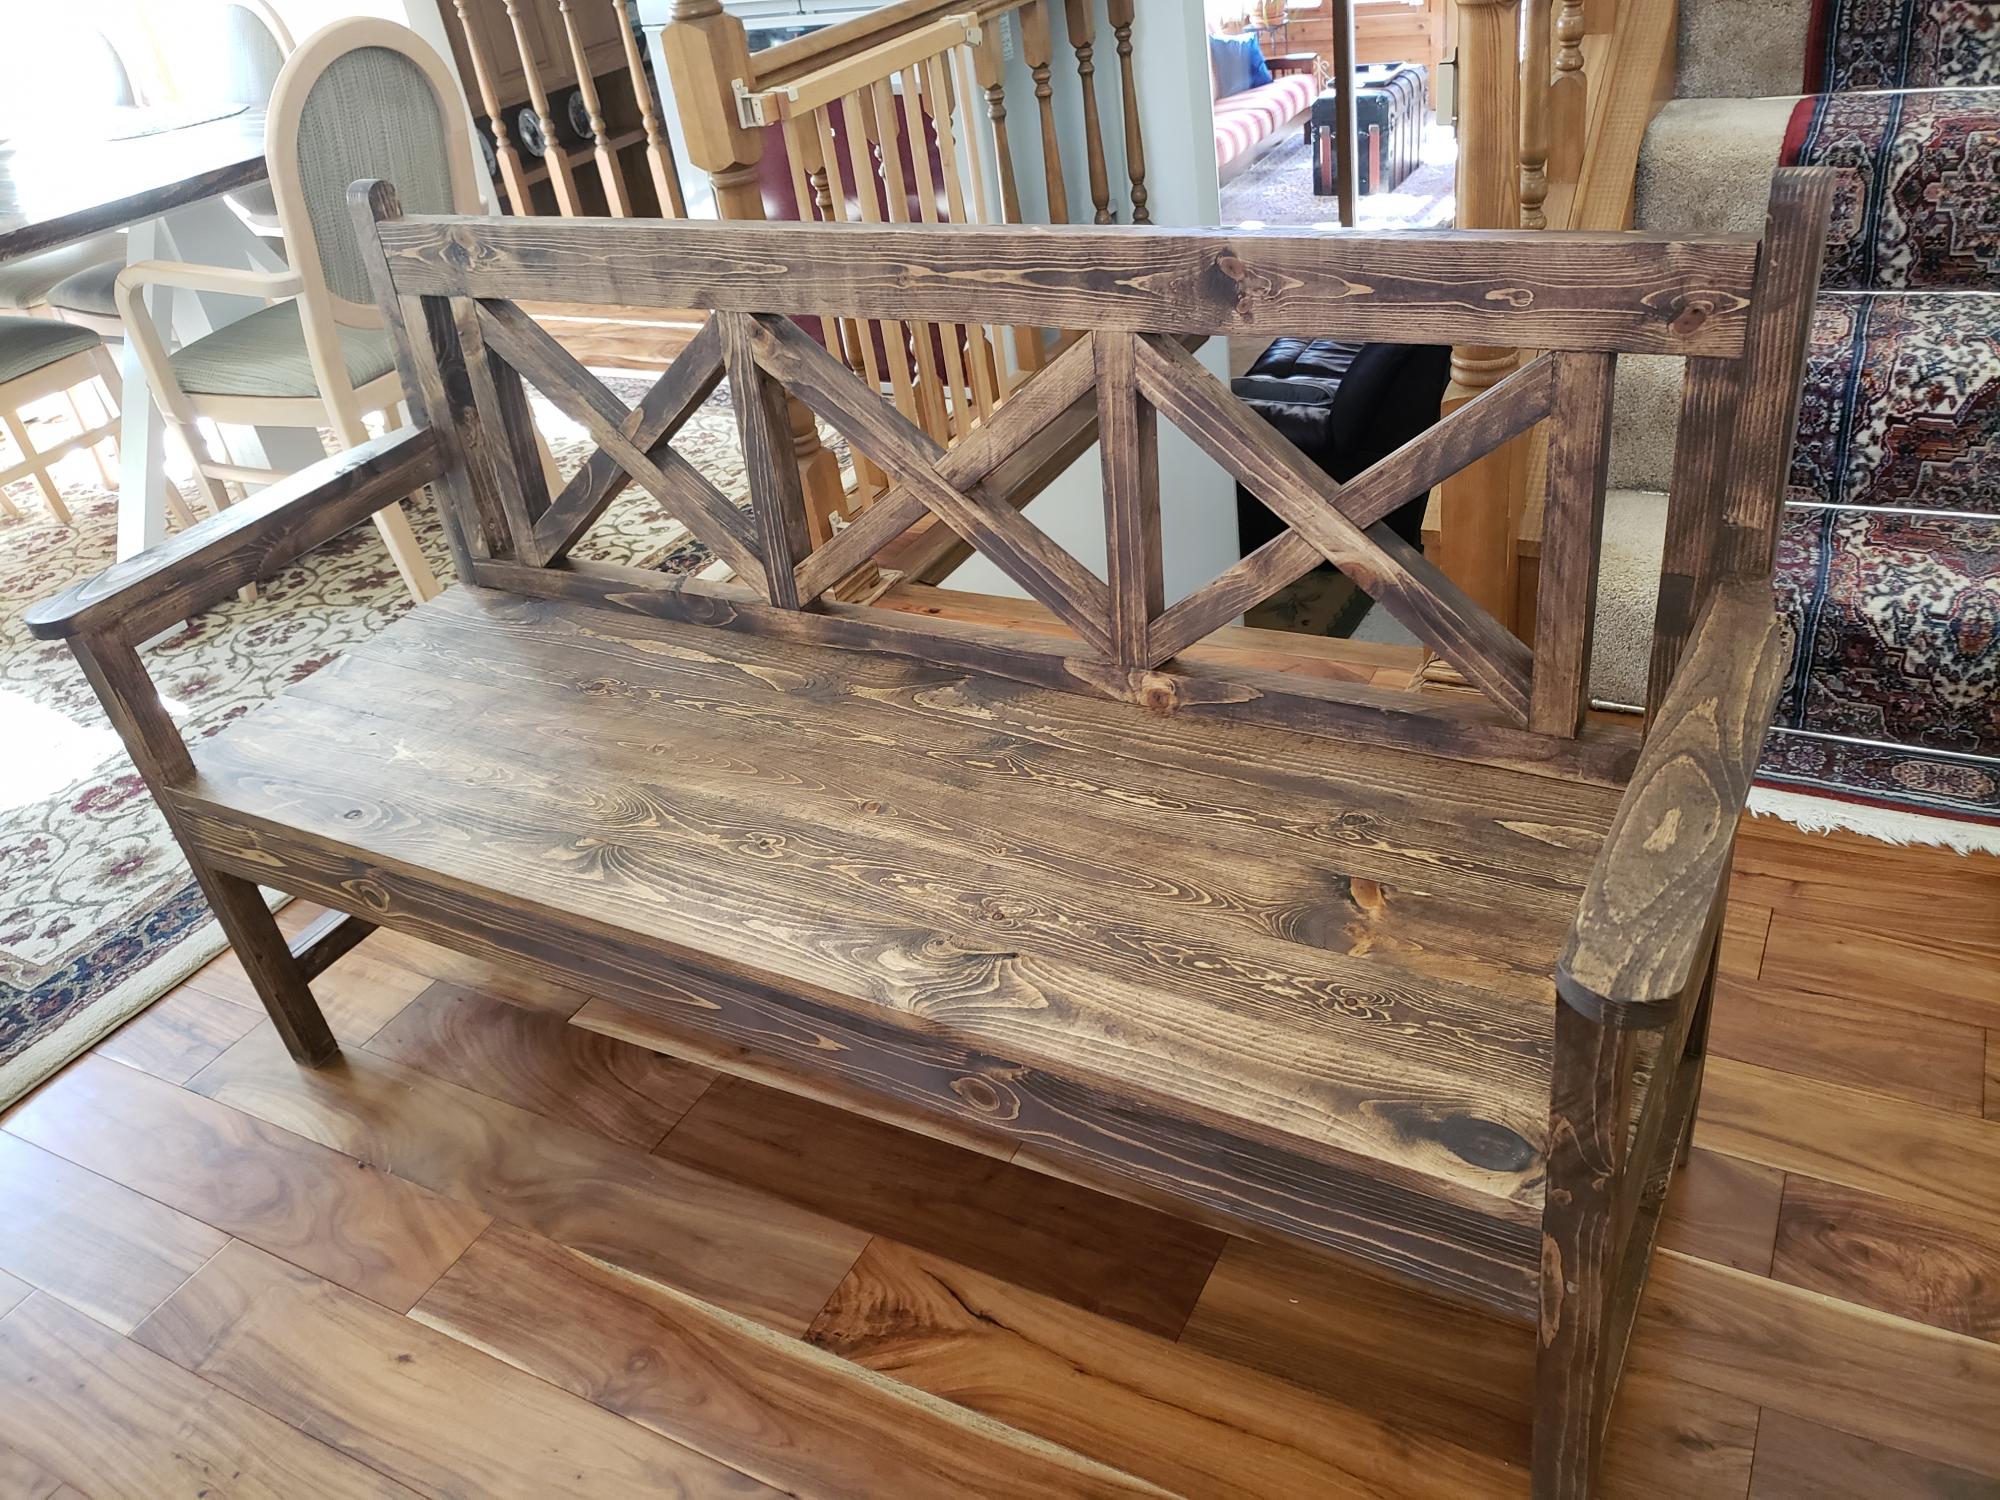
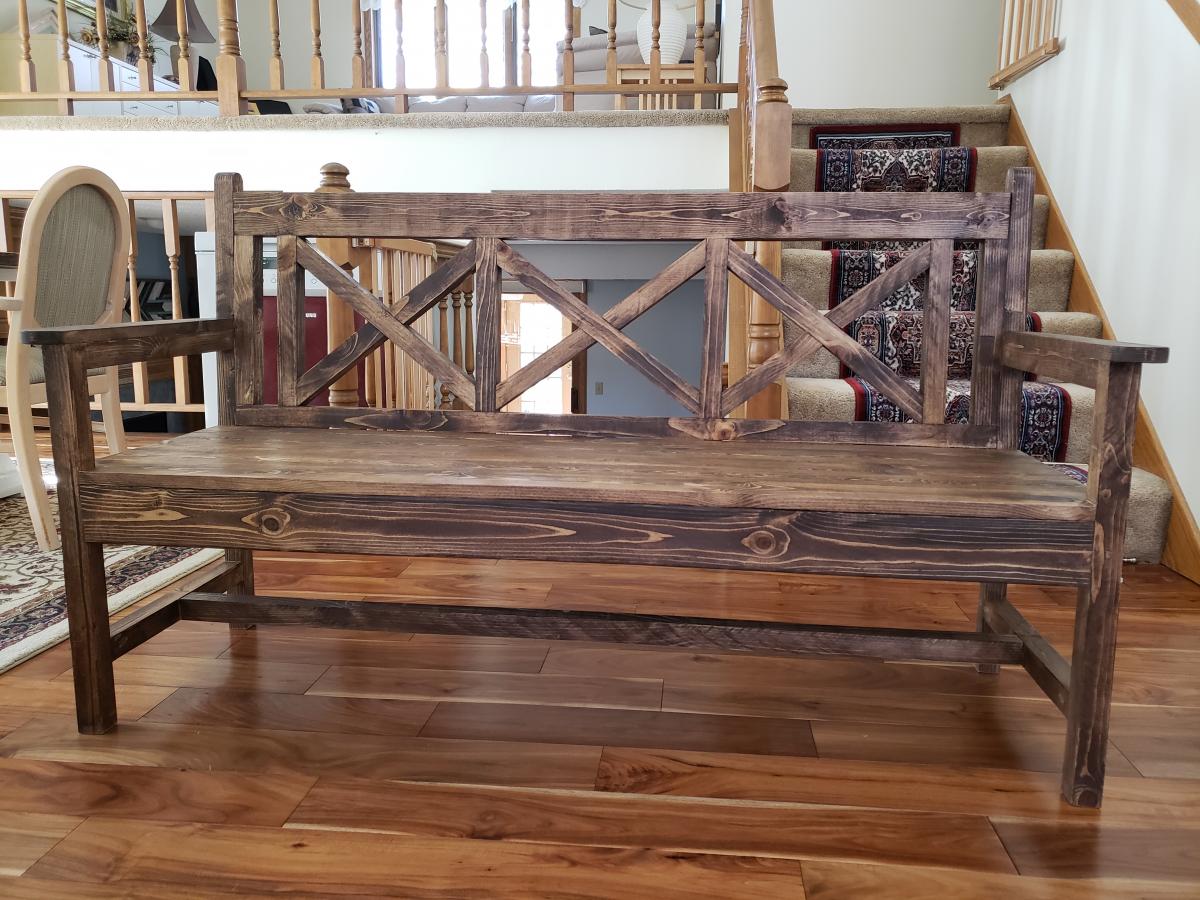
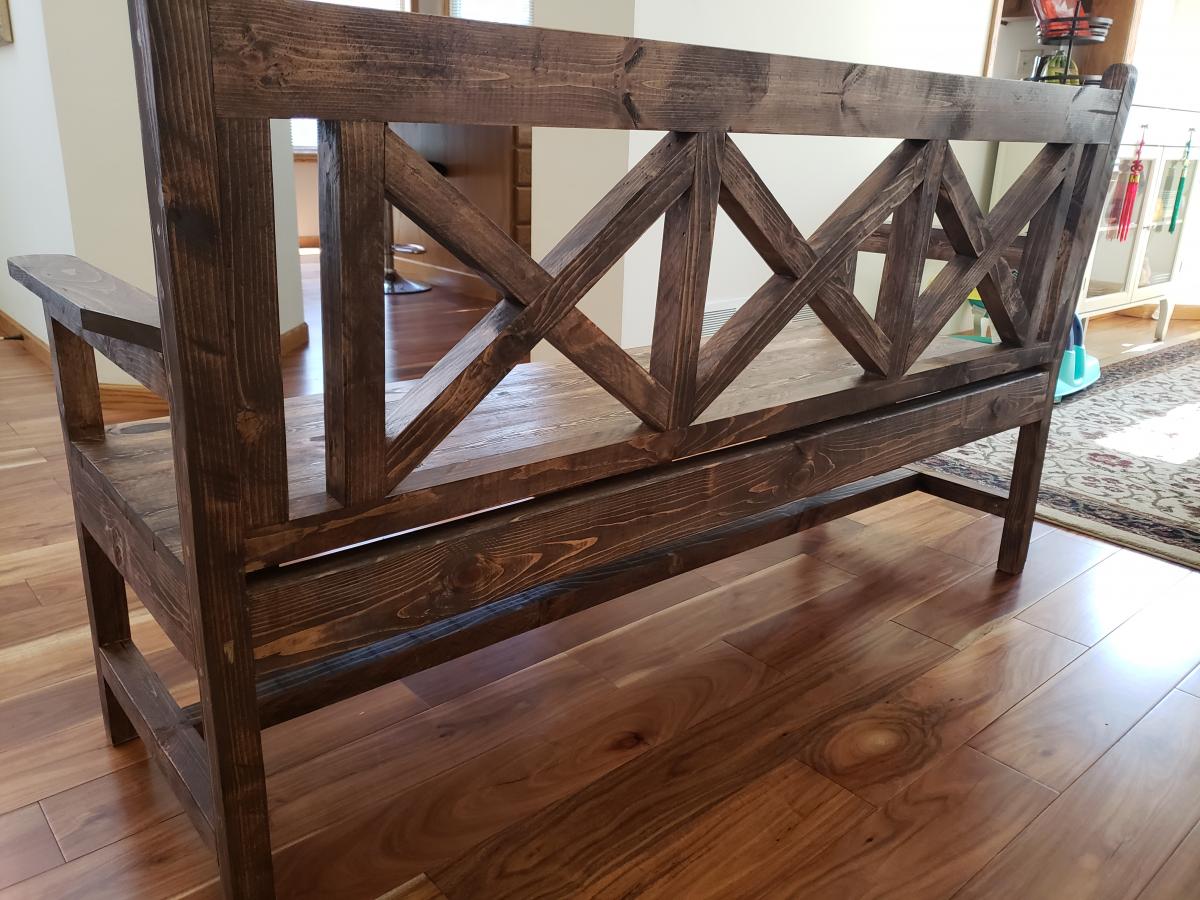
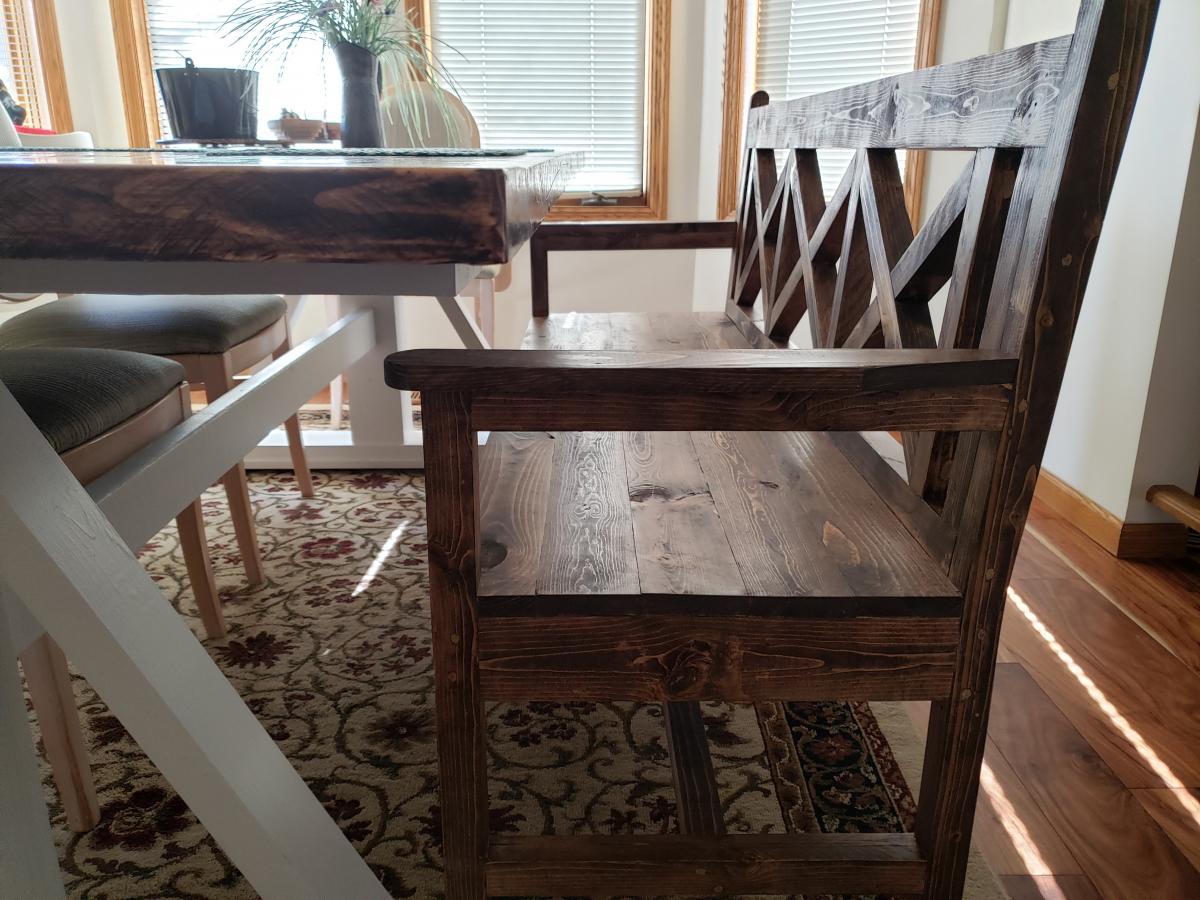
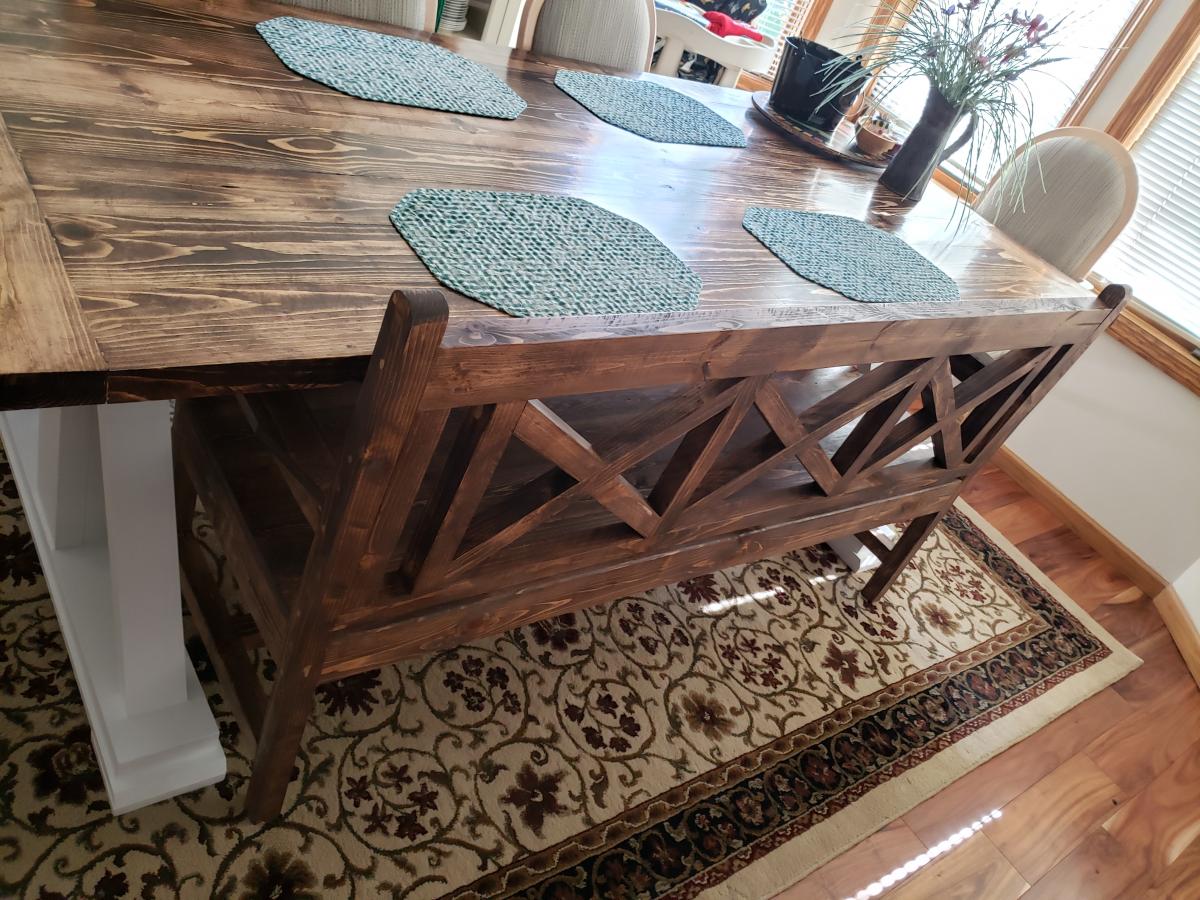
I made this bench for my Farmhouse dining table, modified for 3 seats.
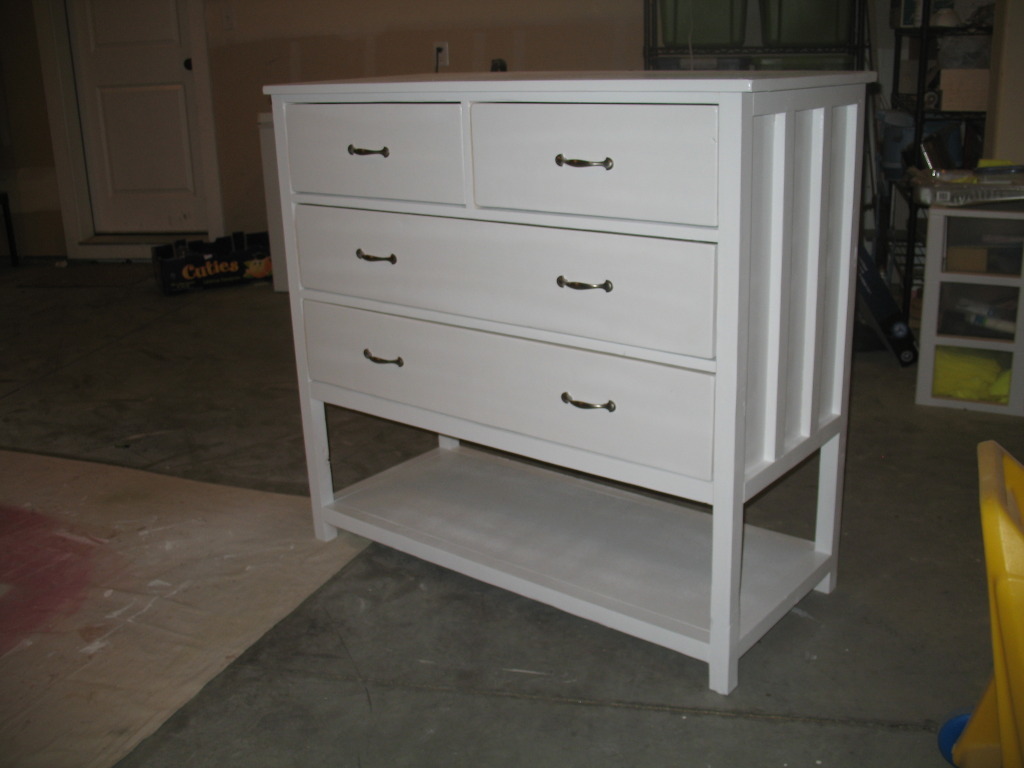
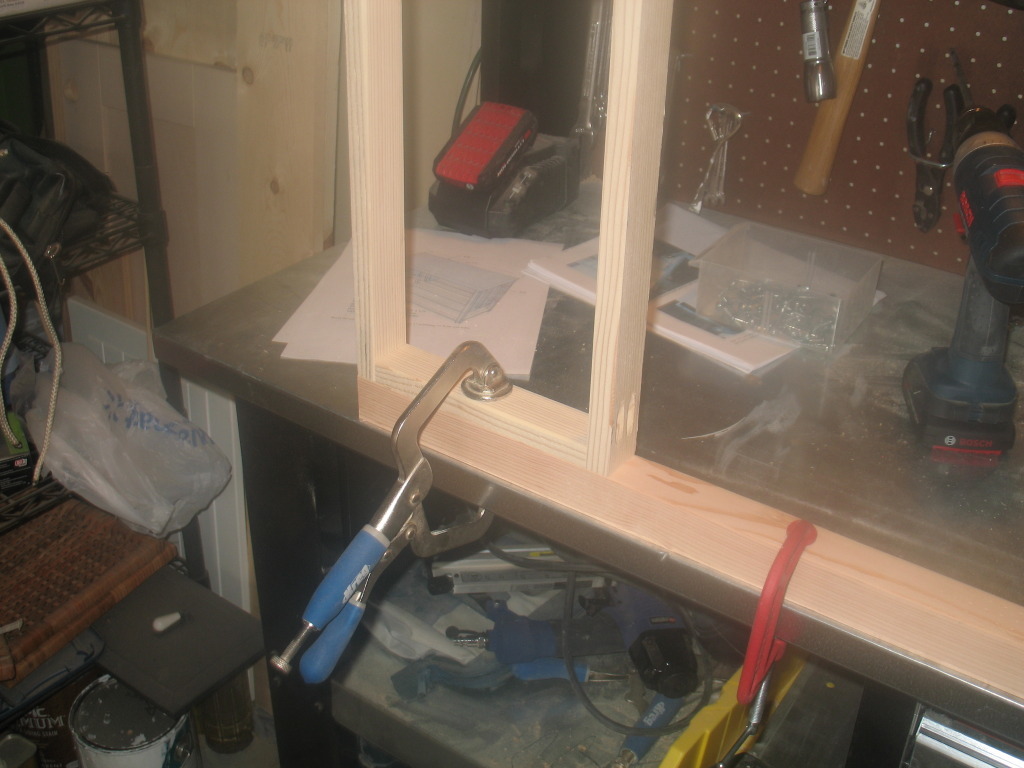
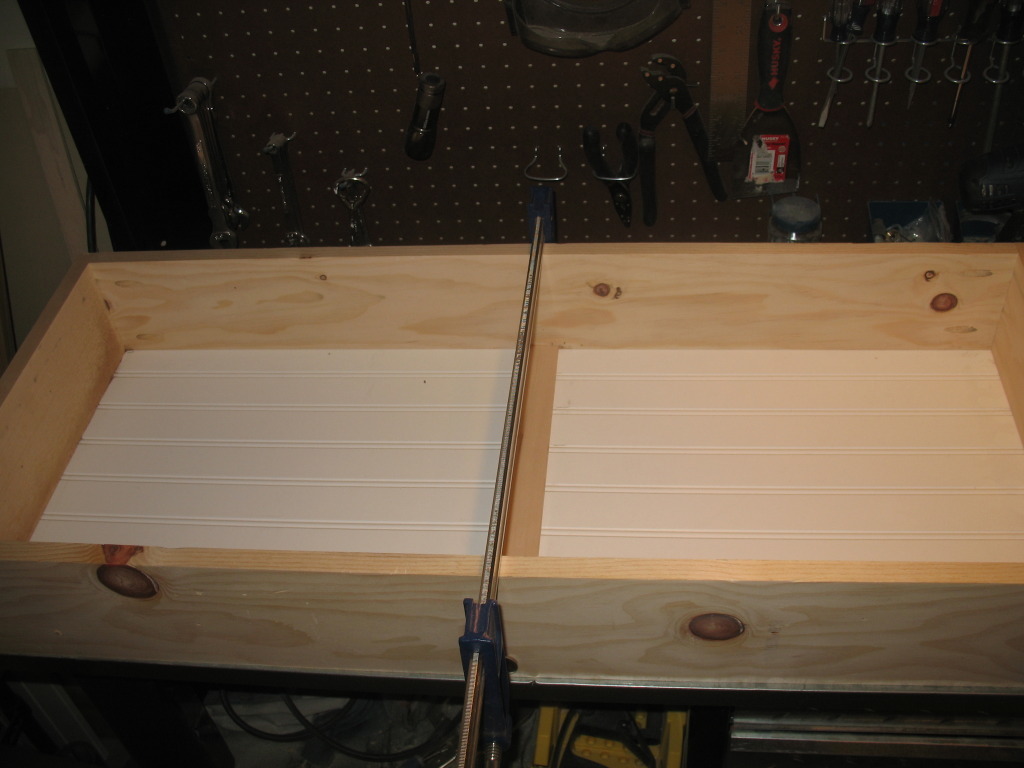
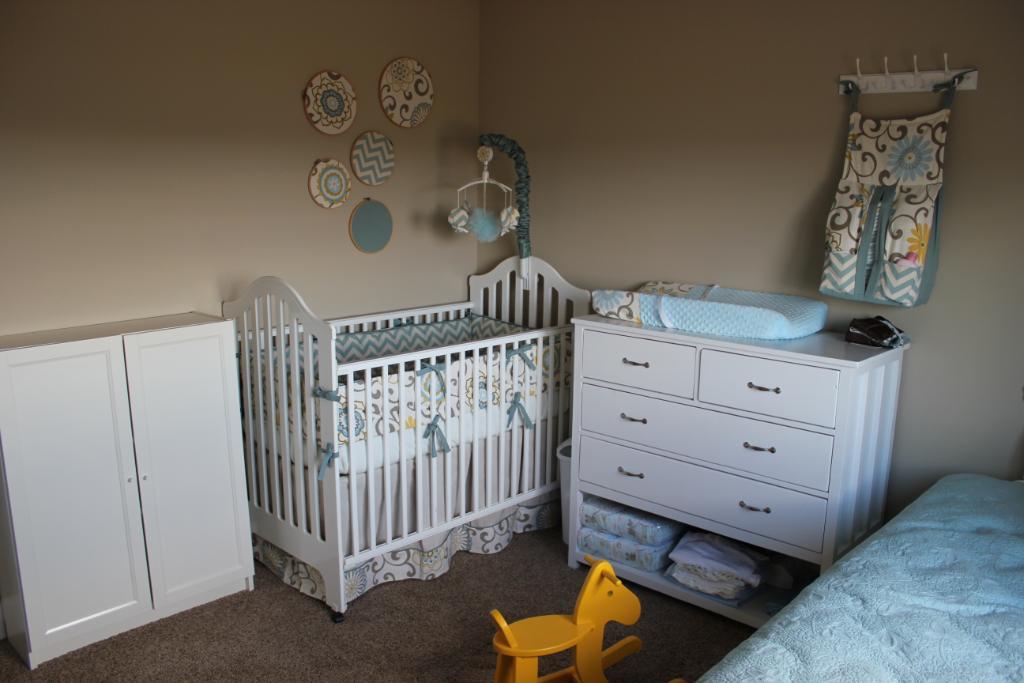
Saw this on Ana's site just in time to make it for a changing table for baby number 4. This was our most difficult plan to take on so far, but it turned out to be pretty straight forward. The details on the plan were a great help - using the spacers to make the drawer openings perfectly spaced, and attaching the drawer fronts on after attaching the rails were great tips. We also used dowel drawer slides for the top 2 drawers, which we really ended up liking.
Sat, 03/17/2012 - 01:15
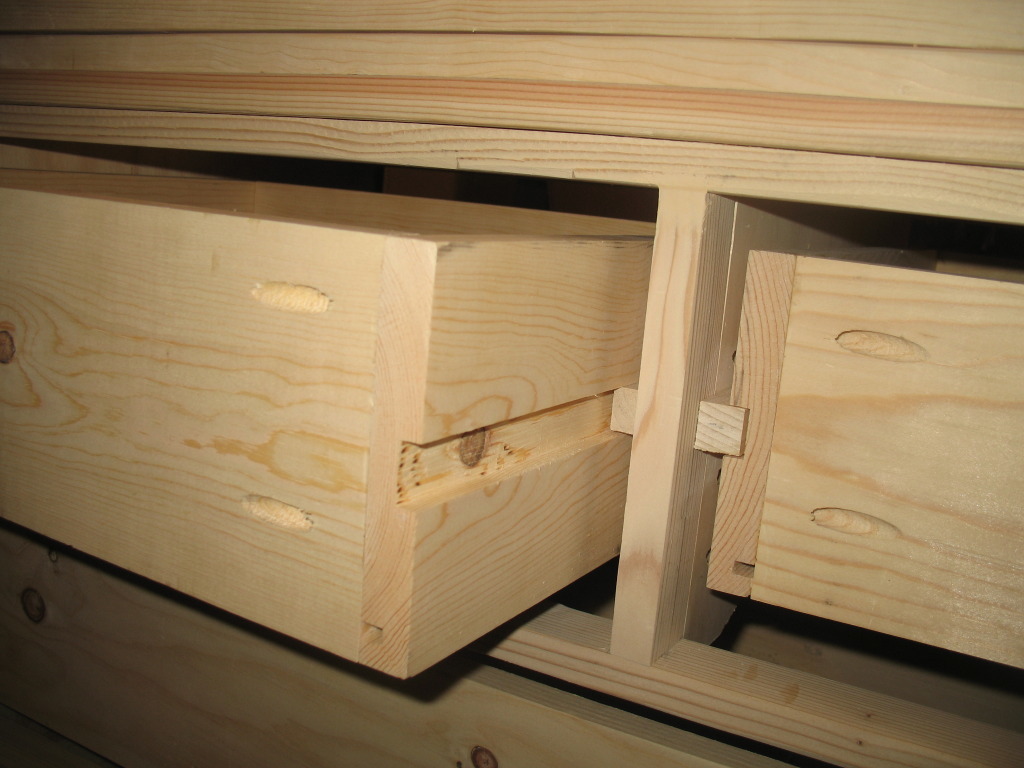
Did you just use a router for the channels in the top drawers? If yes, what bit? If no, how did you do them?
Beautiful work! Your baby is very lucky! :)

Sat, 03/17/2012 - 03:04
Those grooves are probably made with a dado stack on a table saw, but your could easily do it with a router and a guide. Table saw is easier though.
If you don't own a dado set already, don't buy the cheapest one you can find. I made that mistake, and wasn't overly happy with the results of the cut. When I bought a better dado blade set, I was a lot happier with the quality of my cuts.
That turns out to be generally true: I'm always more happy with the result of a better blade. I also needed to tune up my saw to make sure the blade was properly aligned with the guide slots, and that my fence was parallel to the blade. If you don't do that then the best blade in the world won't help. Also, buy full-kerf blades, not the thin kerf blades they sell at the home improvement store. The full kerf blades wobble less and give you cleaner cuts.
Sat, 03/17/2012 - 05:04
clay,
kathy asked mollie a question, why don't you let her answer it?

In reply to clay, kathy asked mollie a by rob (not verified)
Sat, 03/17/2012 - 06:33
This is a community, there's no need to be rude. Sometimes the authors don't know there are comments, and it's nice to hear more than one solution to a problem. So let's please just appreciate the contribution from all the members, yes?
Sat, 03/17/2012 - 14:56
Brookifer86,
I can appreciate where you are coming from, and I appreciate your kind suggestions.
I can also identify with Rob's comment directed at Clay. Which I did not find rude.
Clay tends to comment on nearly almost every post on Ana's site with a dismissive and know-it-all attitude, giving outdated advice and rude corrections. It has gotten pretty old. Obviously I am not the only one who sees this.
Remember, one person's authoritarian advice on how to do things isn't the only way or even the best way to approach a project. It is simply their experience and their own personal way of doing things.

Sun, 03/18/2012 - 12:16
I'm grateful for all the help on this blog! When it comes to woodworking, there always seems to be more than one way to do things, and I want to hear EVERYBODY'S ideas; it makes me a more knowledgeable woodworker and helps me overcome planning obstacles I would otherwise not get passed.
Clay, I've read many of you posts and appreciate the wisdom you share. And to the complainers: sometimes our thoughts are not always conveyed on Internet discussions. Some personalities can come across as abrasive/arrogant unbeknownst to the author simply because of their writing style. I've seen it time and again on blogs and forums. I know what I want to say, but it doesn't always come across *quite right* when I'm typing it out.
Either way, I want to hear more about these drawer glides! Clay, you posted a great link on the original plan that suggest always using hardwood for drawer glides or at least a hard/softwood combo. Makes sense, any other want to chime in?
Sun, 03/18/2012 - 12:39
Just because I asked him to let Mollie answer the question doesn't mean I was calling him rude. I just think it's common courtesy to let someone who is asked a question to speak first. I definitely appreciate Clay's wisdom and I agree that there are many ways to do something.
What if it were in person though? What if someone kept asking you a question but someone standing off to the side kept answering it before you? Sure they answer correctly every time and give credible insight but after getting cut off over and over, don't you think it might get annoying?
Don't you think the teacher gets a little piffed when that one kid in the back raises his hand and belts out the answer every time and doesn't let any of the other kids answer the question? Sorry for the rant...
anyway the issue isn't about good or bad insight. The issue is just manners. I'm sorry if that comes off brash, but let the person who actually built it answer first.
Sun, 03/18/2012 - 13:18
Lucky for us, we're not in person and we can just "scroll down," lol. I remember recently, one of the blogs I regularly read posted about just this. Her article was spot-on and amusing at the same time...partly because she describes these notorious commenters, and because I know I've been guilty of "thread dumping " myself. There are personalities that clash online and in the real world too. It's worth a glance for a little perspective-and a laugh. http://www.homestoriesatoz.com/2012/02/how-deal-negative-comments.html
Sun, 03/18/2012 - 16:30
I seem to have stepped on some toes, and for that I'm sorry. I'll certainly take your points in mind in the future. I'm afraid that's distracted from the main point: this is a really amazing piece of furniture. Molly, your house must be pretty amazing if you're building furniture like this. I'll bet your children grow up to be pretty amazing if they've got a mom who builds their furniture.
Mon, 03/19/2012 - 12:44
Beautiful changing table! I have only been building a little over a year and I always appreciate the advice on this site. Thanks for sharing so much Clay:-)
Sun, 07/29/2012 - 21:13
I just saw there were comments here on my brag post. So, Clay, thanks for answering for me.
We used our table saw - although we don't have a fancy blade. We should probably get one. My husband just ran it through the table saw several times to get it the exact right width. The blade was lowered so that it would only cut 1/4 inch into the wood. And the slides were hardwood - square dowels you get get at a home improvement store.
Wed, 08/08/2012 - 08:08
I love the plans for this piece, to begin with. Great job on your build. I LOVE this in white! Especially for a baby room or a little girl's room. Thank you so much for sharing your pics and ideas!
Mon, 01/21/2013 - 20:45
Fantastic job on this piece! I think this would be perfect in an adult's bedroom also, with the bottom shelf for a blanket or quilt. I would love to make this.
Sun, 03/31/2013 - 16:01
Hi,
I was wanting to do the same thing...make this for using as a changing table. What are the dimensions of your dresser? Did you change the size of the drawers (did you use something different than a 1x8)? At what measurement did you place the lower shelf relative to the ground and how much space is there between the top of that lower shelf and the bottom of the 1x2 that frames the bottom drawer?
Any help / details that you can give would be so appreciated!
Thanks!
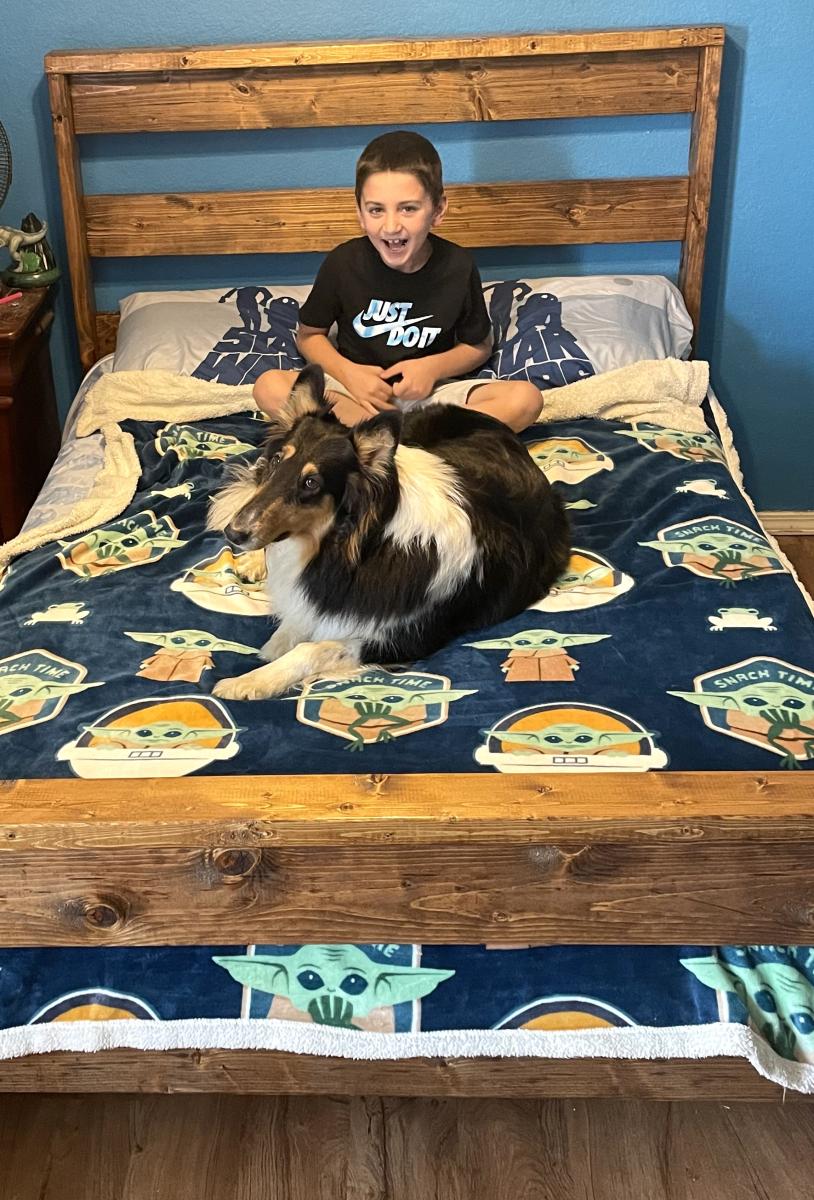
New bed for my boy. Great plan and not expensive.
Sean Hight on Facebook
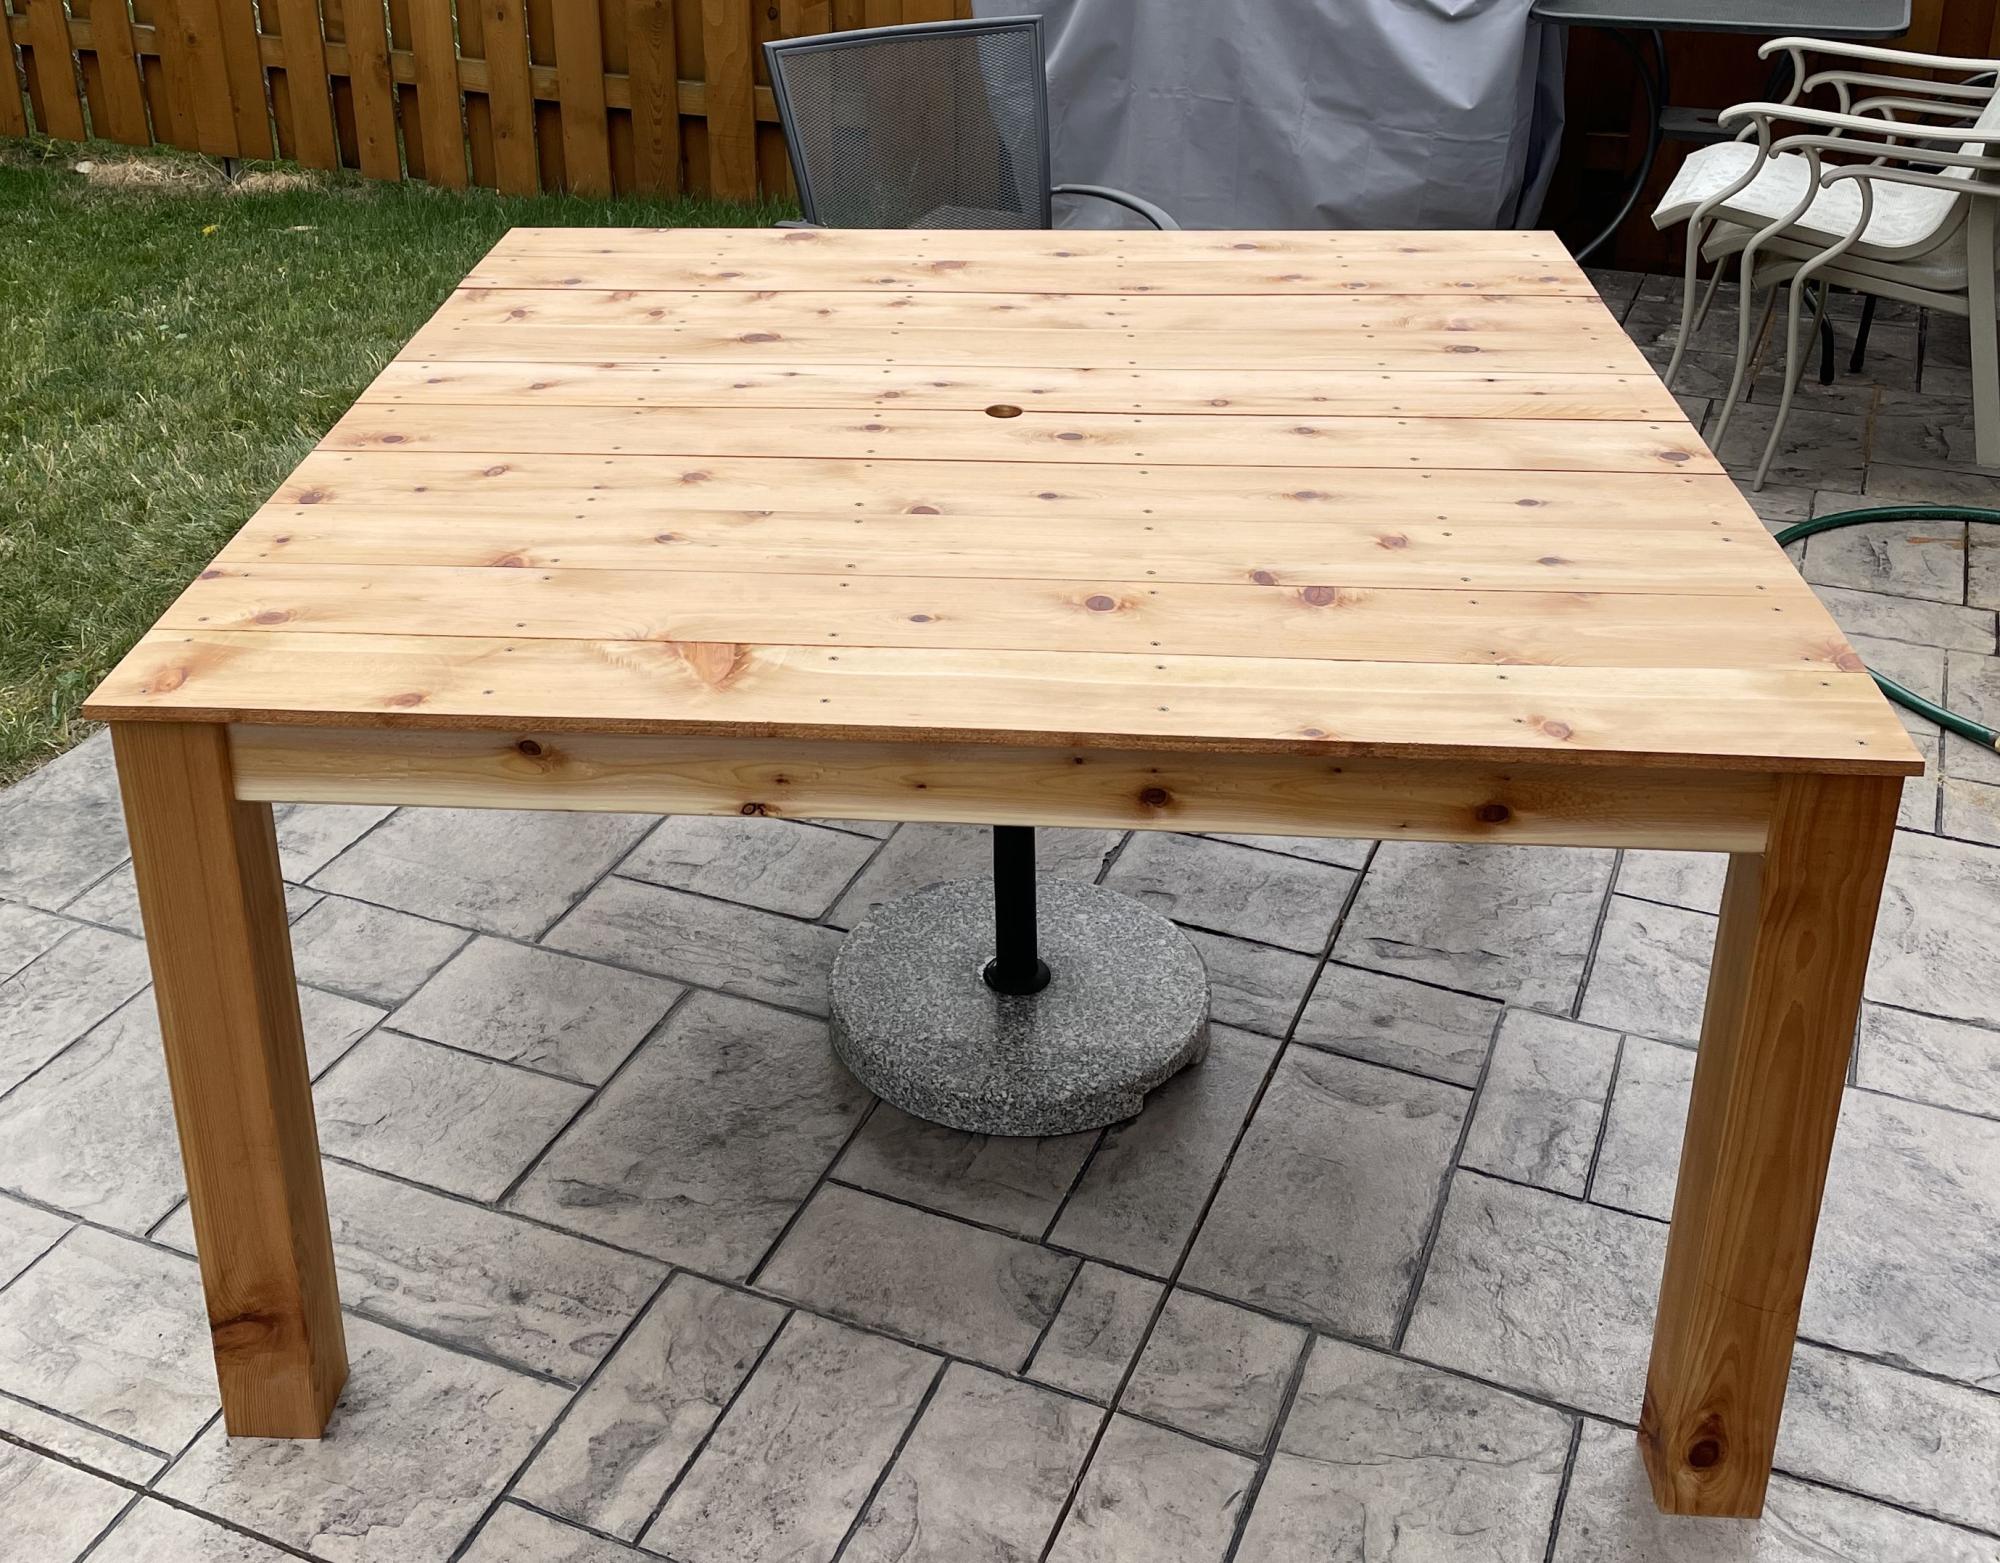
Square Outdoor Table
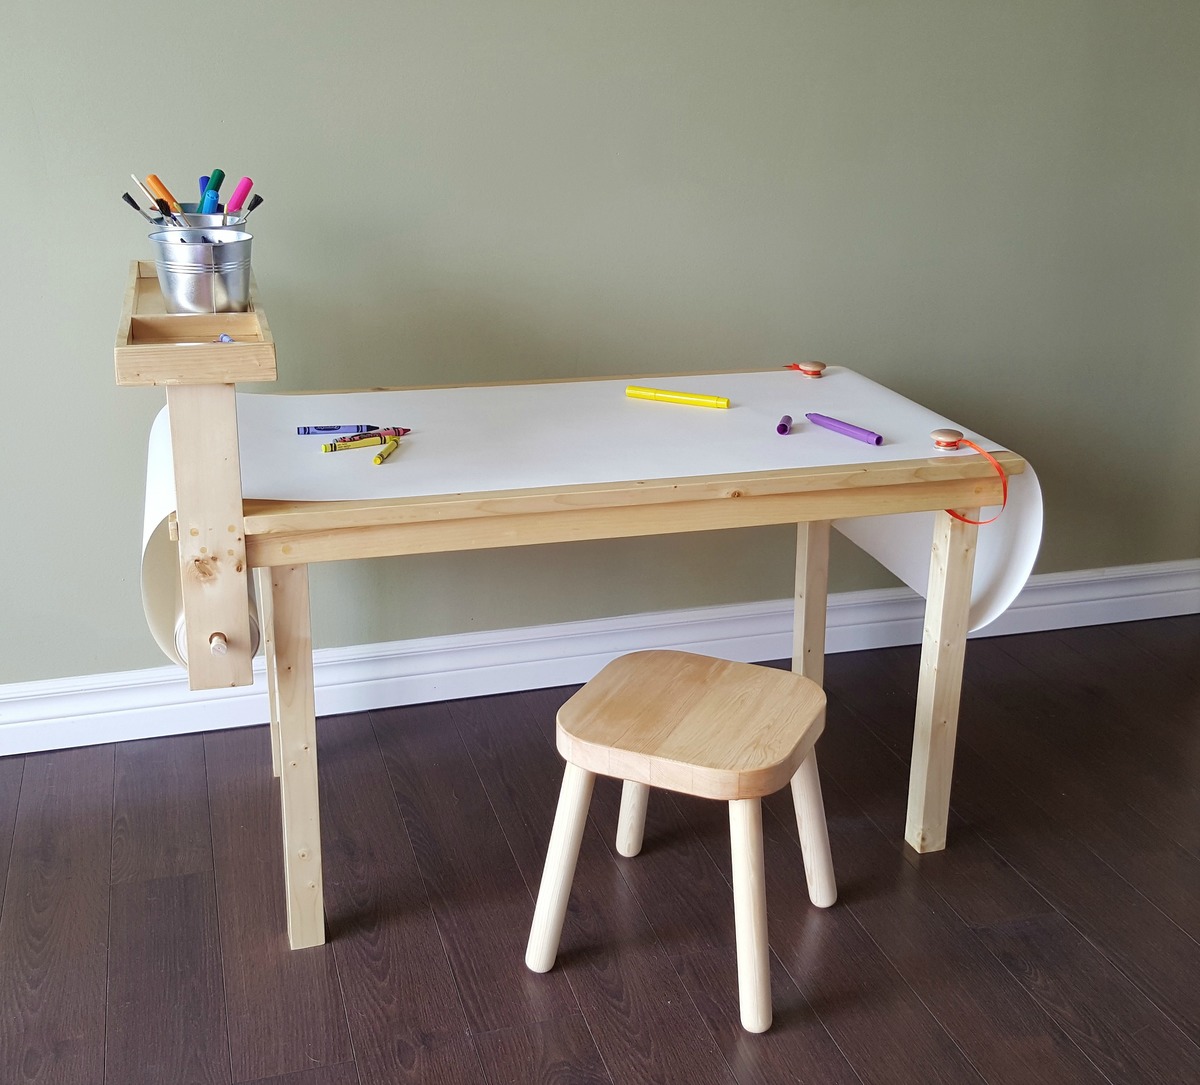
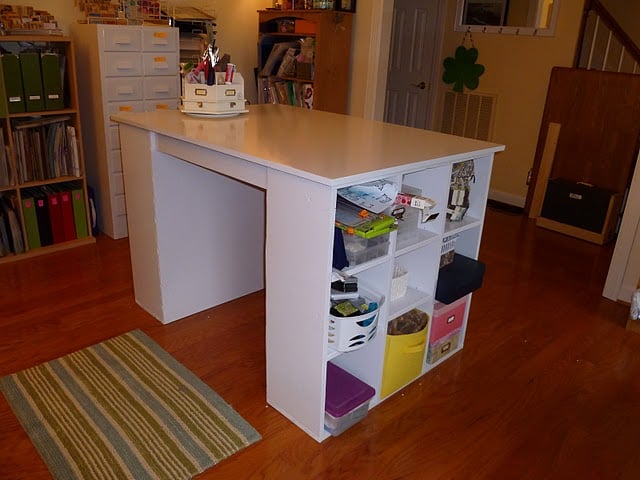
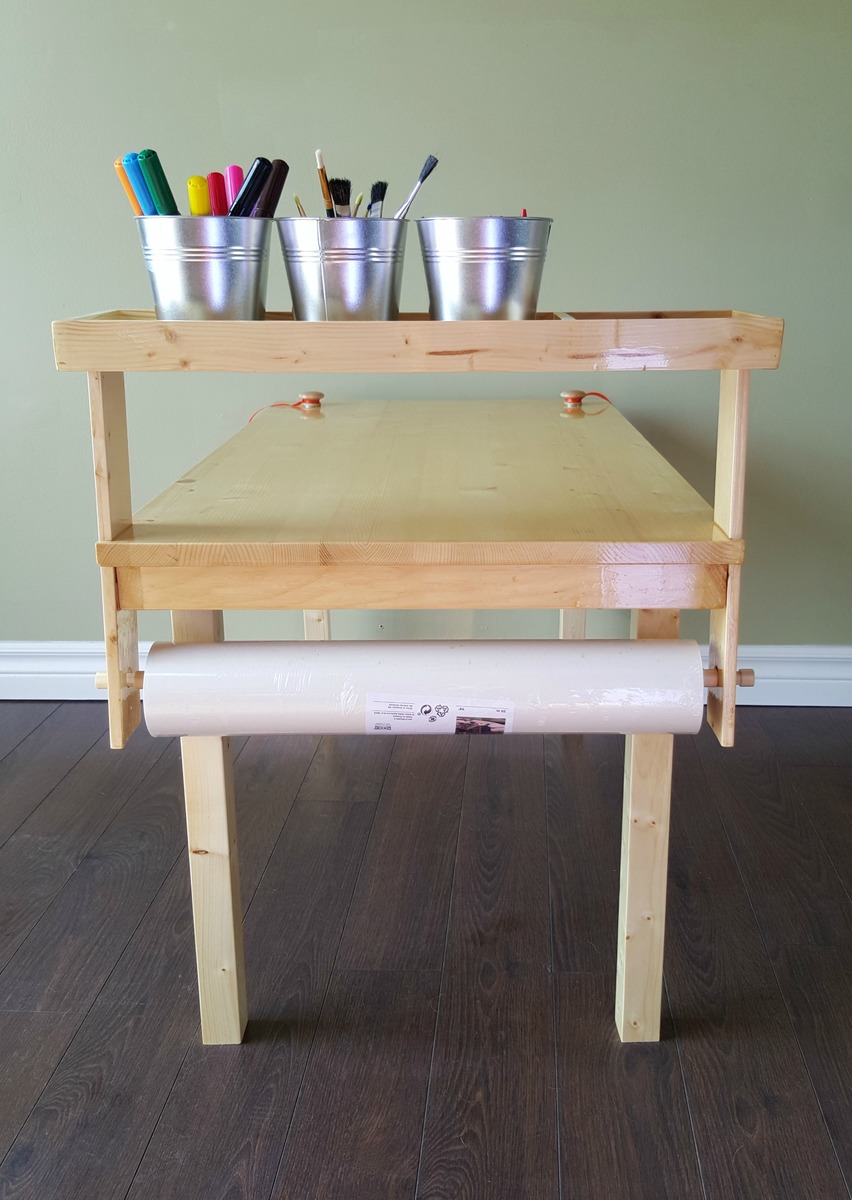
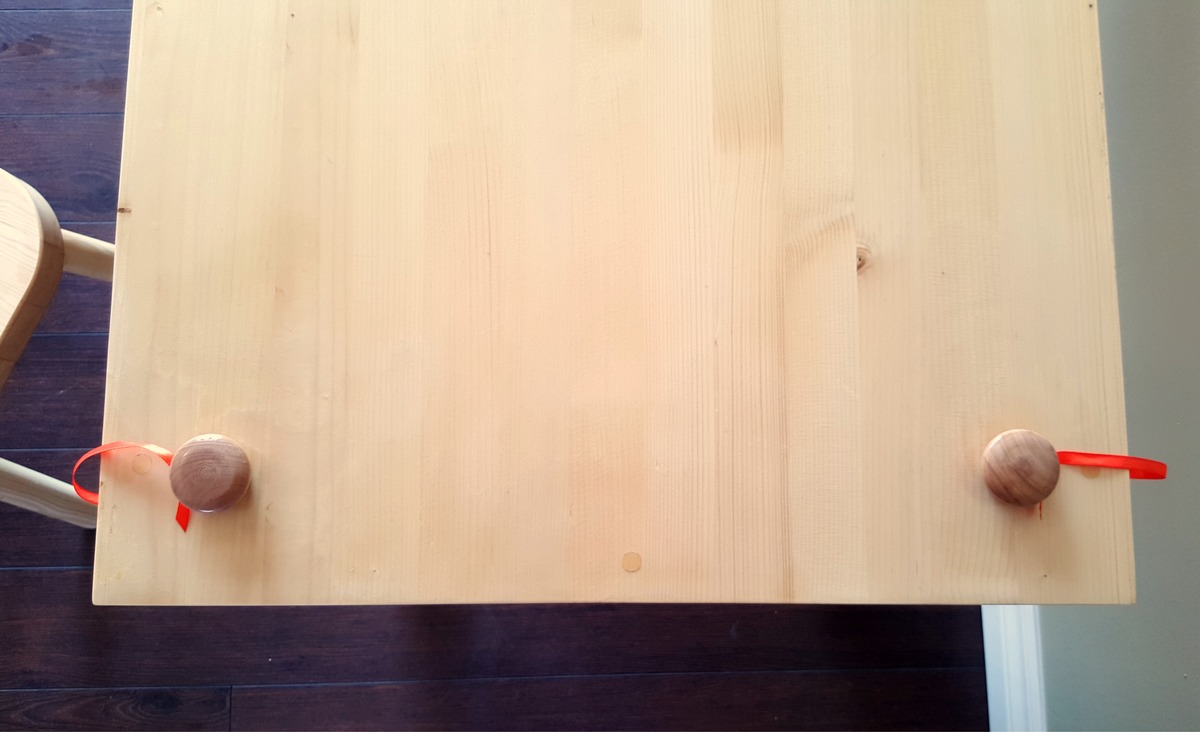
This table was a birthday gift for my 3-year old cousin. It was fun to brainstorm ideas to get it exactly the way we wanted it instead of buying one pre-made. Once we had our plans it was an easy build, done over a weekend. A full list of materials as well as step-by-step instructions can be found in the blog post linked. The top is a 20x36 pine shelf board with a 1x2 pine apron attached underneath. There are vertical support boards to hold a raised tray for supplies, and to hold the paper roll under the table. Note that the table legs are inset at one end to accommodate the paper roll. We added two magnets to the face of the table and tied two knobs (with metal washers glued on) to the underside. The paper can then be sandwiched between the magnet and the metal and won't move around while the artist is at work. It's our favorite feature! There are also magnets glued to the inside bottom of the tray to hold the buckets in place and keep them from being knocked over easily. This project was so much fun! I love having the chance to share it with you all!


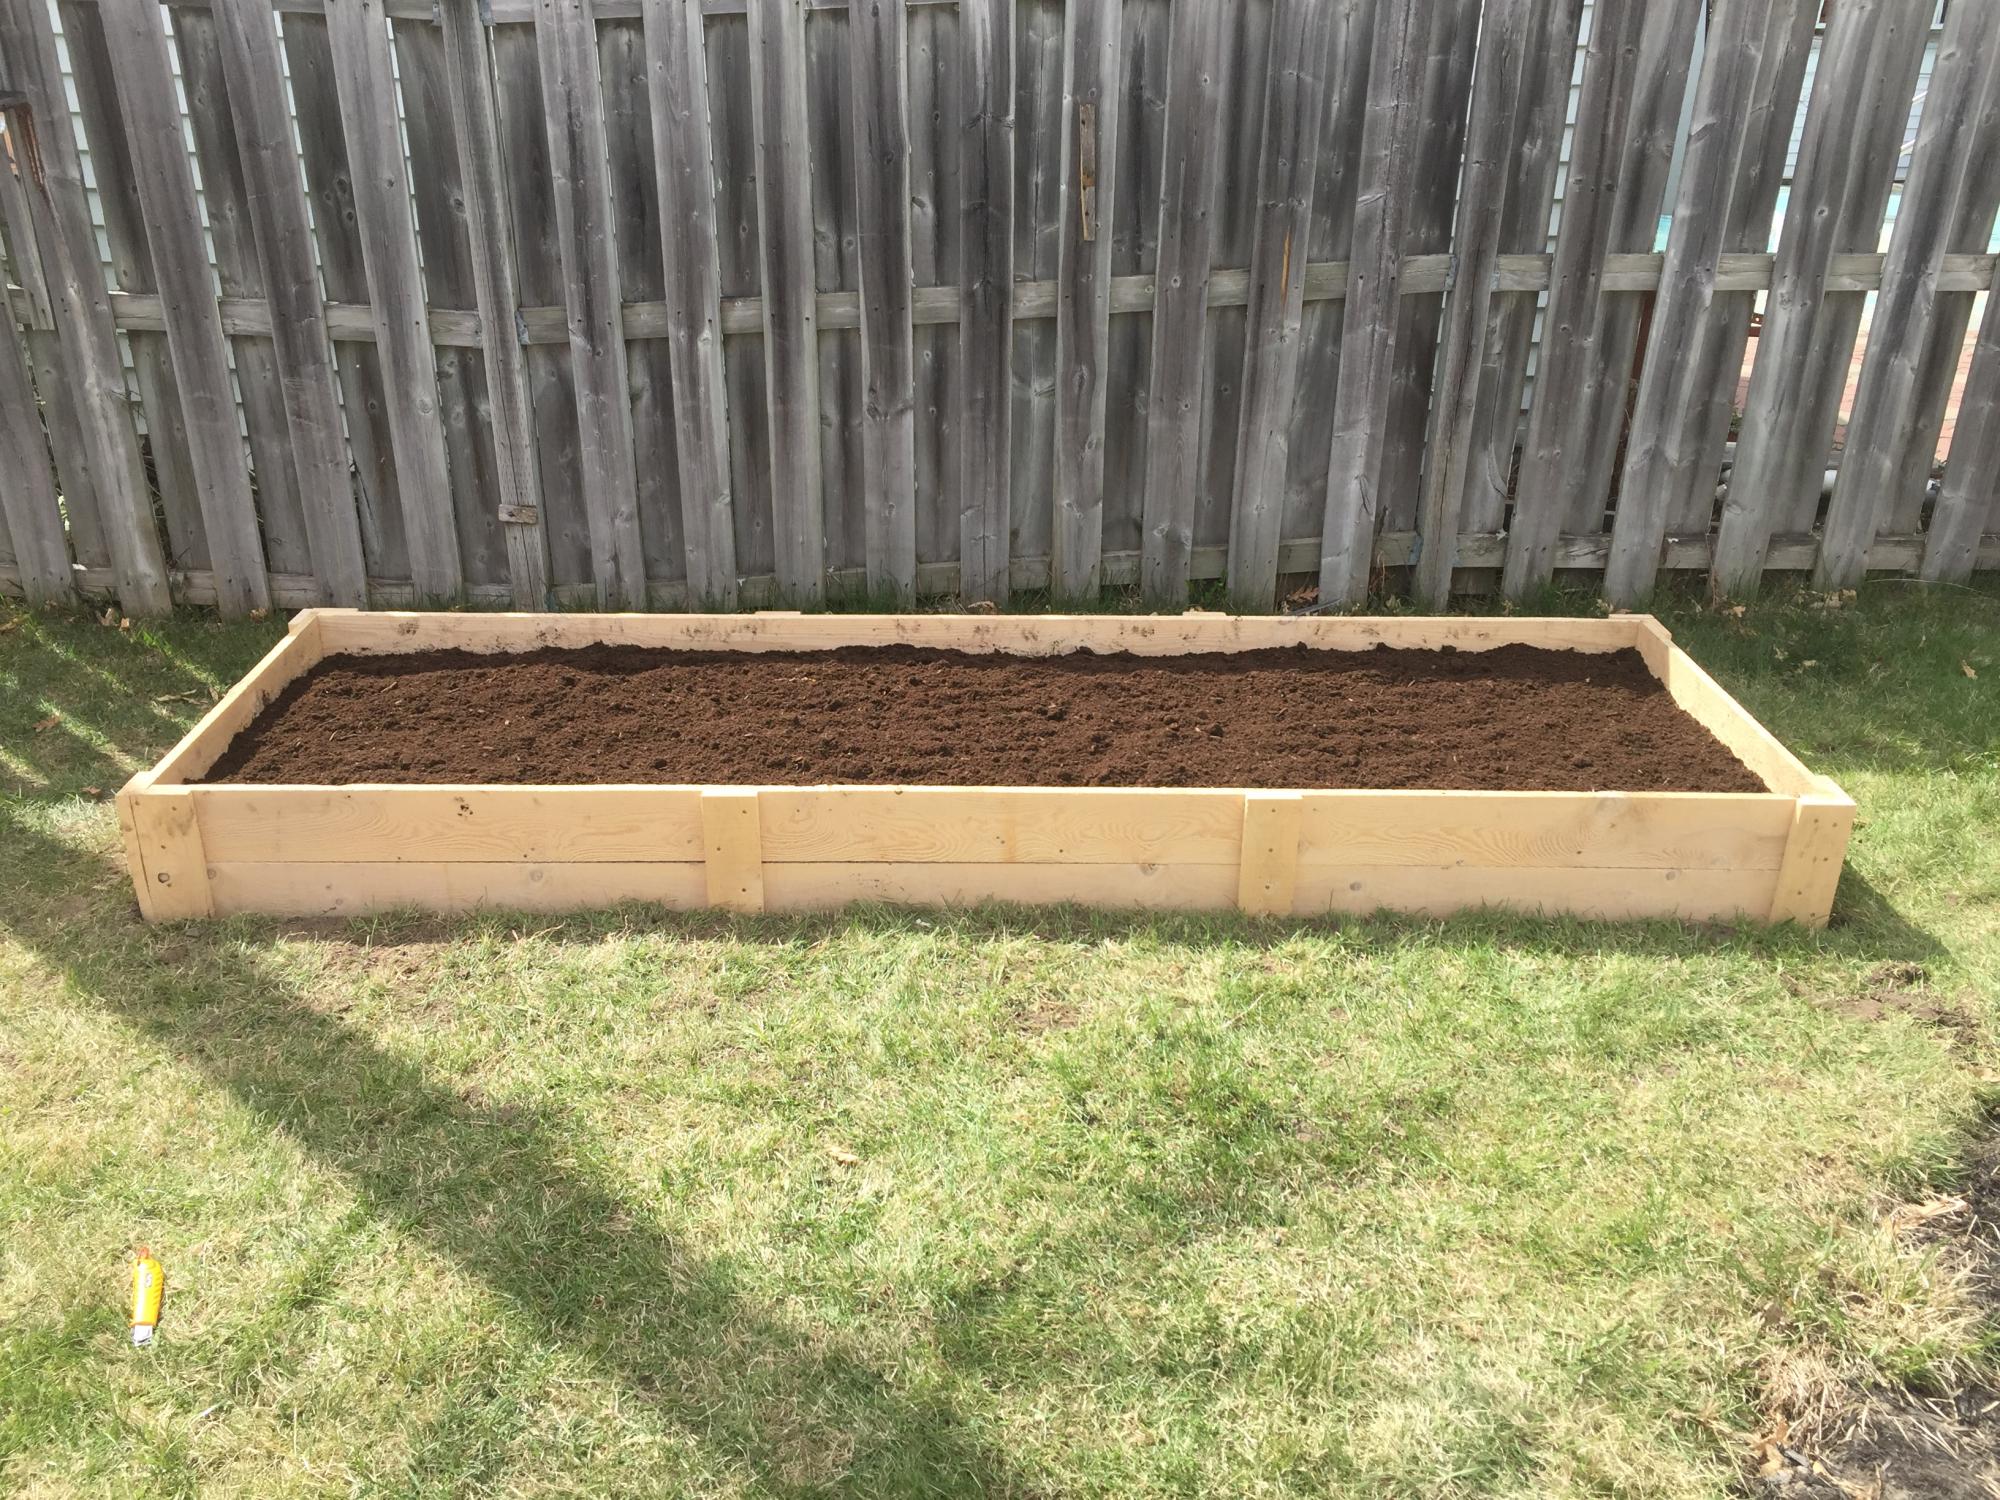
We built this 3x10 feet raised garden bed.
The Flickr gallery for this project is at https://www.flickr.com/gp/akutz/86502i/.
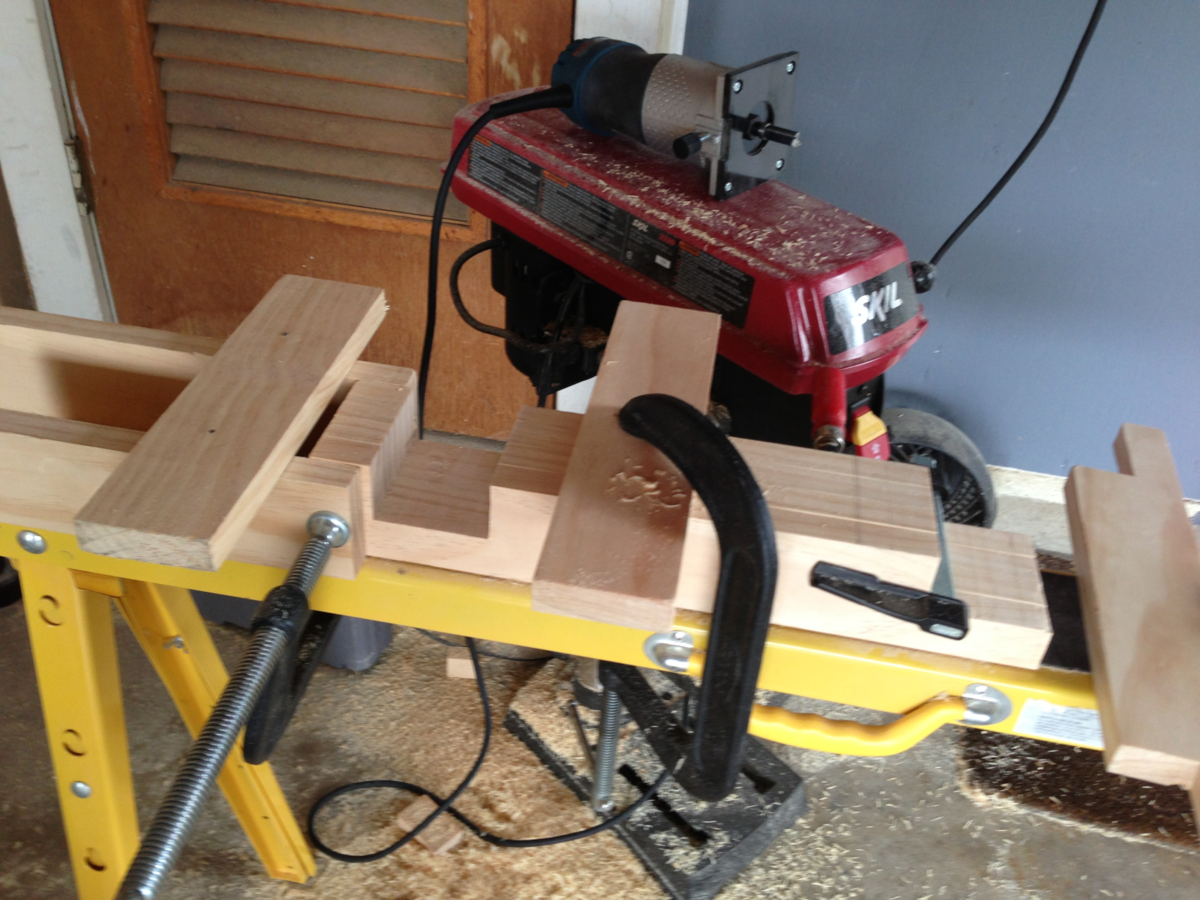
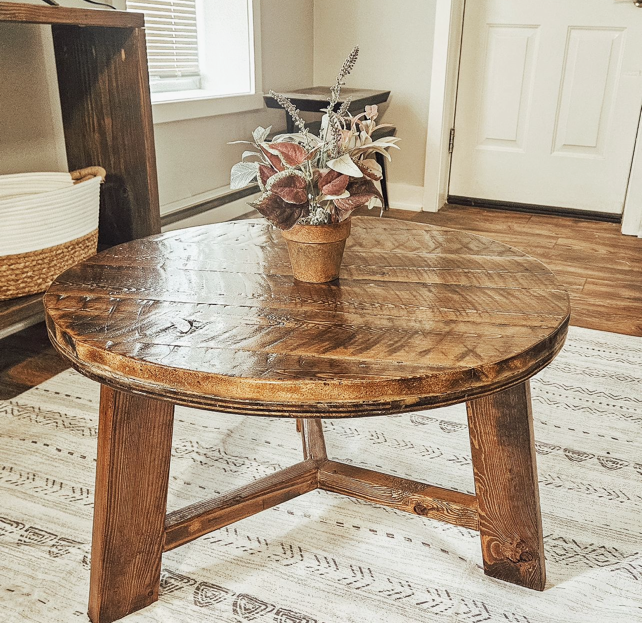
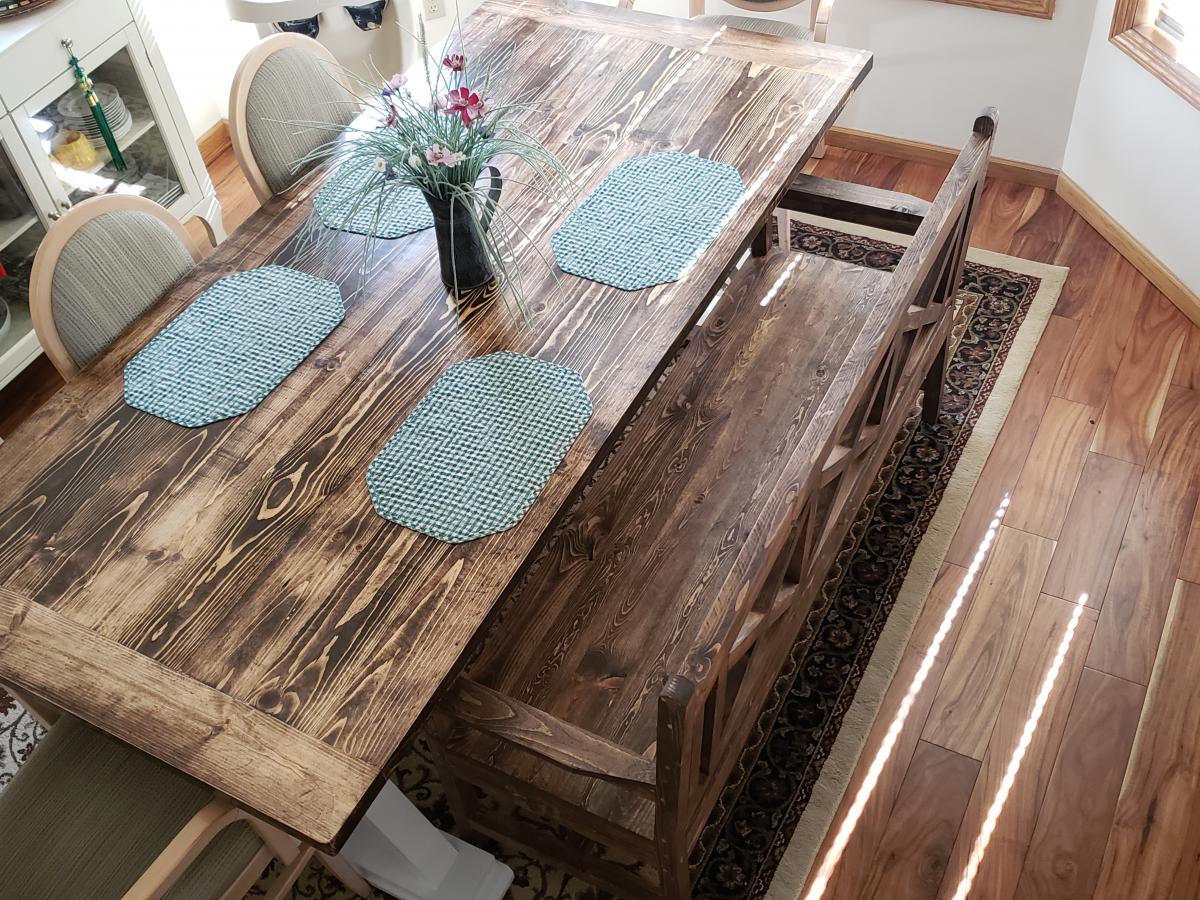
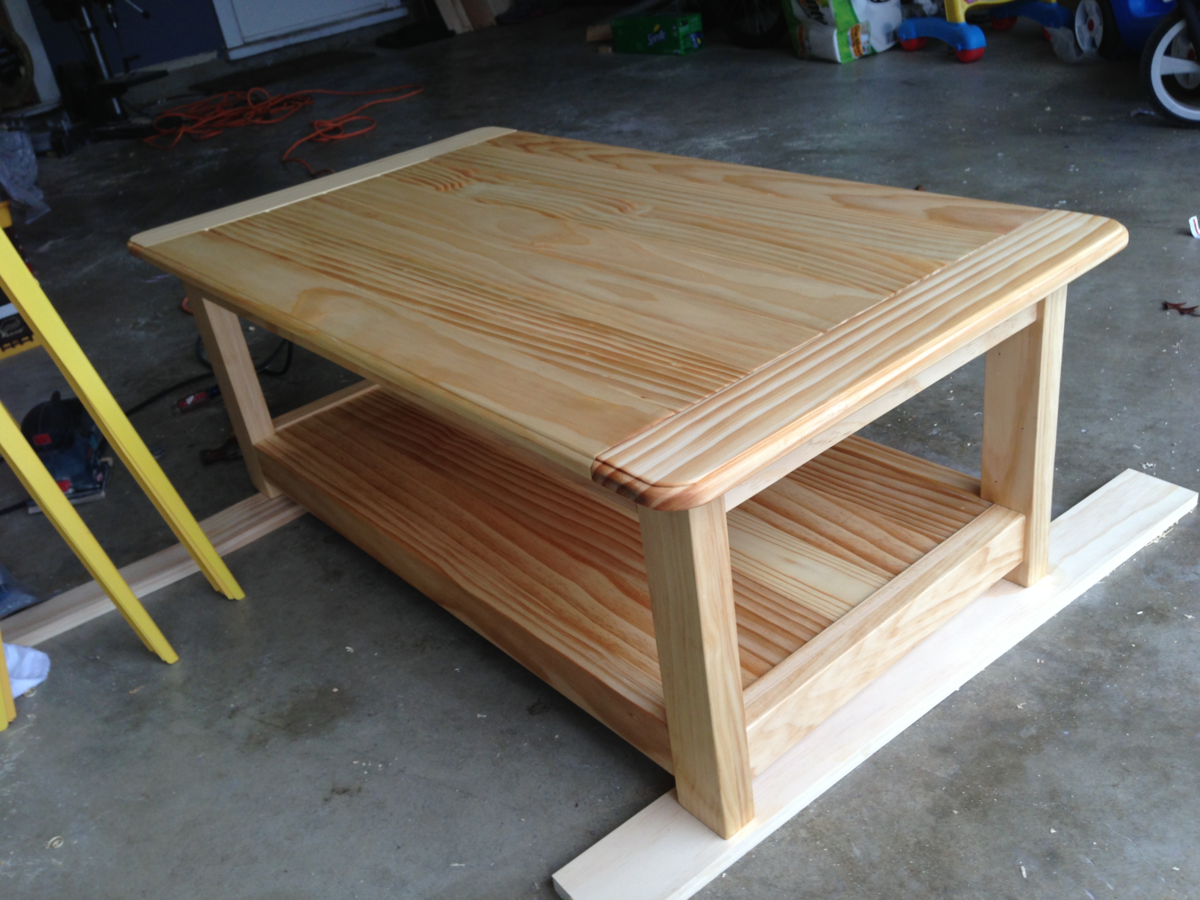
A friend of mine asked me if I'd build her a farmhouse table per the plans at http://ana-white.com/2009/12/plans-farmhouse-table-knock-off-of.html. Sadly I still haven't gotten around to building her one (sorry Jennifer!), and that's partly because even after practicing my skills on smaller projects, a full-sized table still seemed like a big job. Around the same time my two year old daughter was walking all over the house, and our coffee table presented a constant threat of head-banging and side-hurting danger. Then I realized I could build a miniature version of the farmhouse table as a coffee table, and in the process round the corners to make it baby-safe!
Unfortunately I'm not disciplined enough to write down the exact measurements, or at least not keep them since I never think anyone will be interested in these things later. I take pictures just to show friends and family. However, since these plans came directly from the aforementioned link of the farmhouse table, it should be easy to figure this out. The only differences were that I created the outer dimensions based on the space the unit would be taking up in my living room. And with a couch with a chéz, it was important to stick to those.
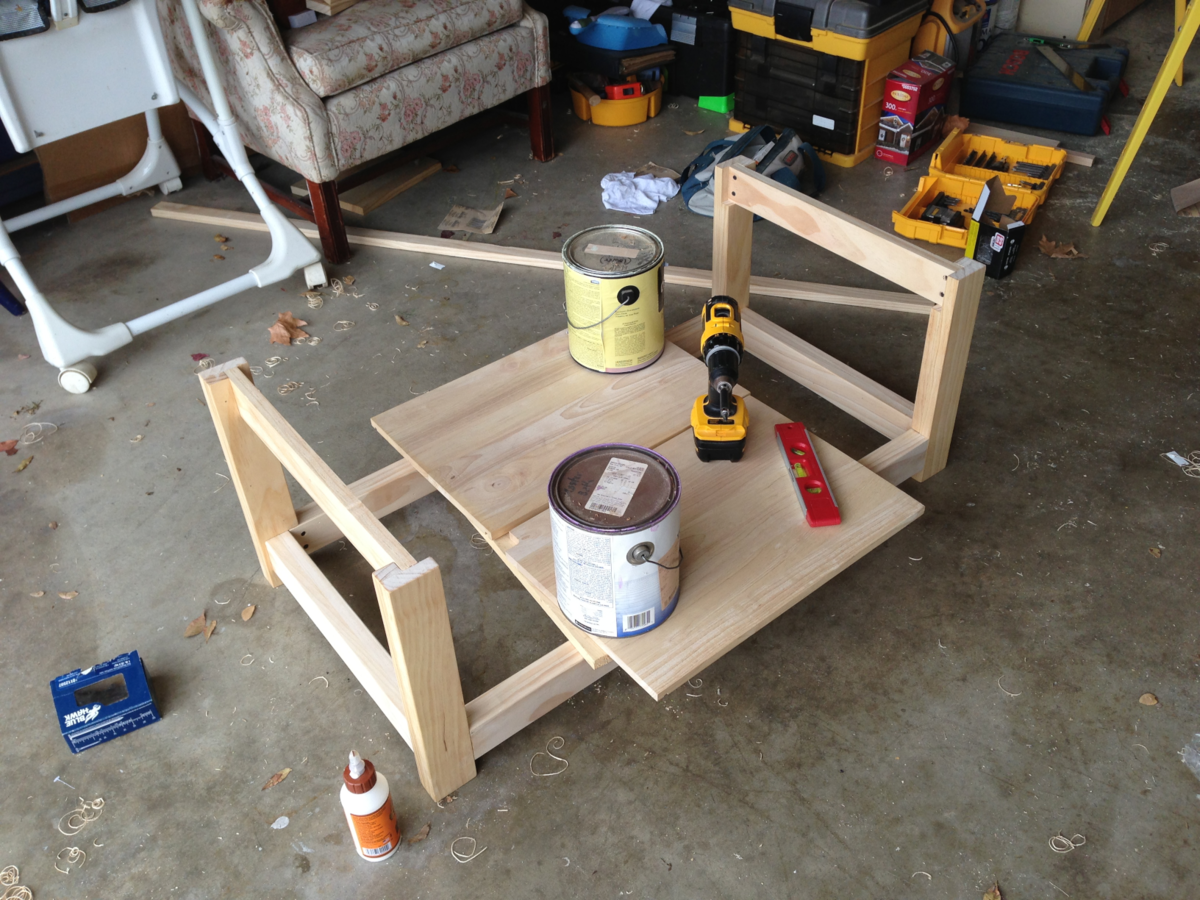
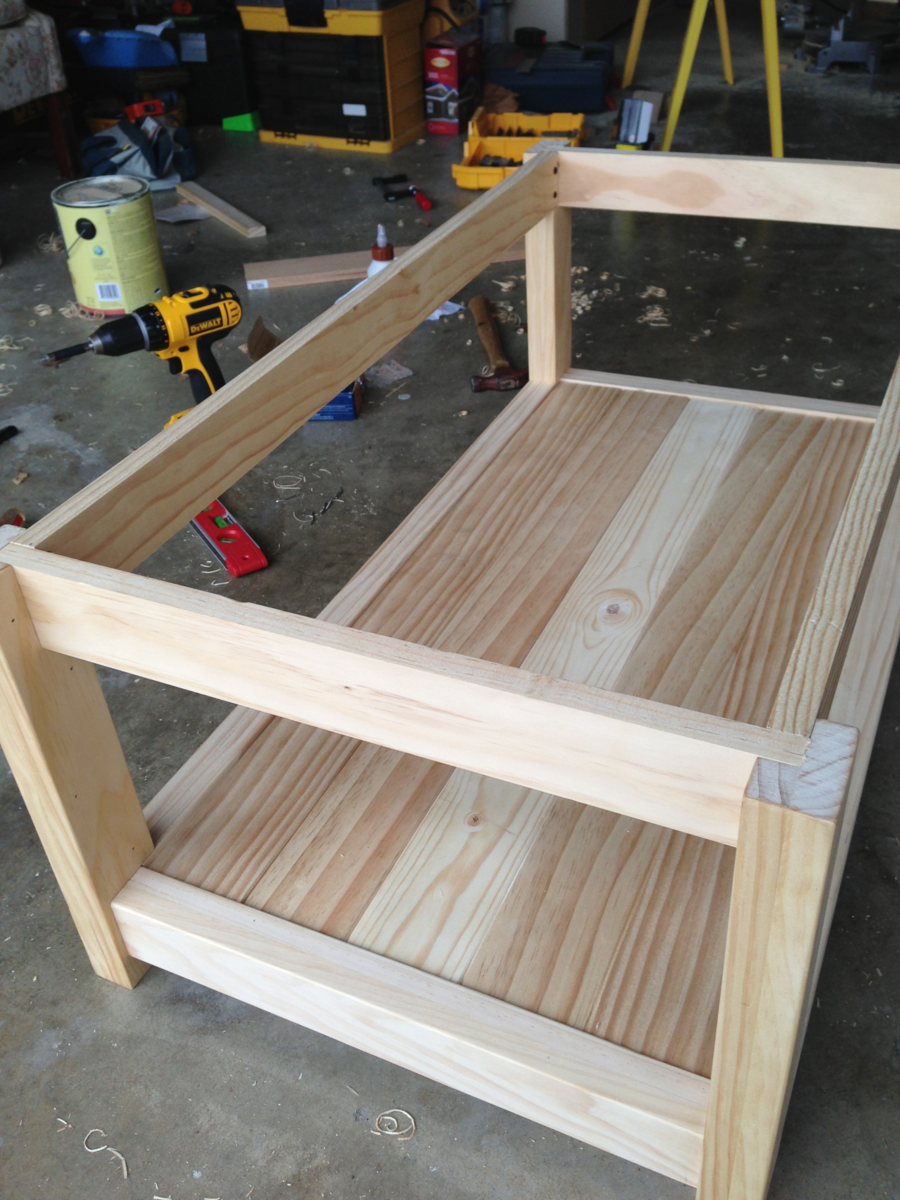
Also, as you can see, I added a second level to the table so that we could place things on it, but also for stability. This was not difficult to do since I just created an internal shelf to place the planks across the bottom.
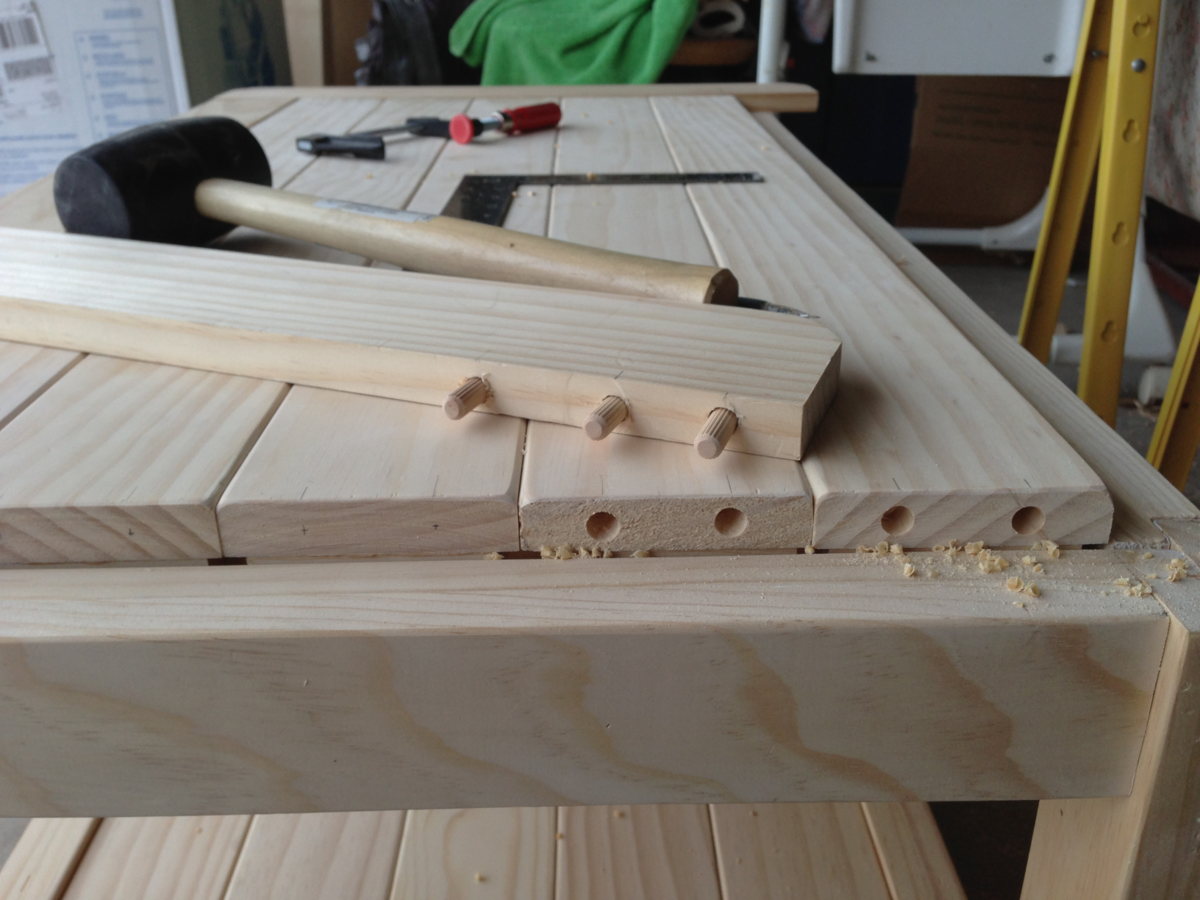
Since my father is a master carpenter, and I explained to him what I was doing, he also recommended that I not fasten the upper or lower planks to the outside with any single piece. He said that due to weather-caused expansion and contraction throughout the year, if I fastened the planks together at the ends with the bread boards, there would be much cracking. That's why you see the bottom supports fastened to the underside of each plank with an individual block of wood, and not with one long piece. That way the planks can move independently of one another. that's also why they're not fastened together long-ways.
One last note. I built those legs several times. The only way I was ever able to get them correct is when my father told me to buy a long router bit, clamp the legs together, and route them all with guides. He said getting cuts in four separate posts even like that is one of the hardest thing to do if you don't make the cuts at the same time. He was right, and with his approach the table was perfectly level!