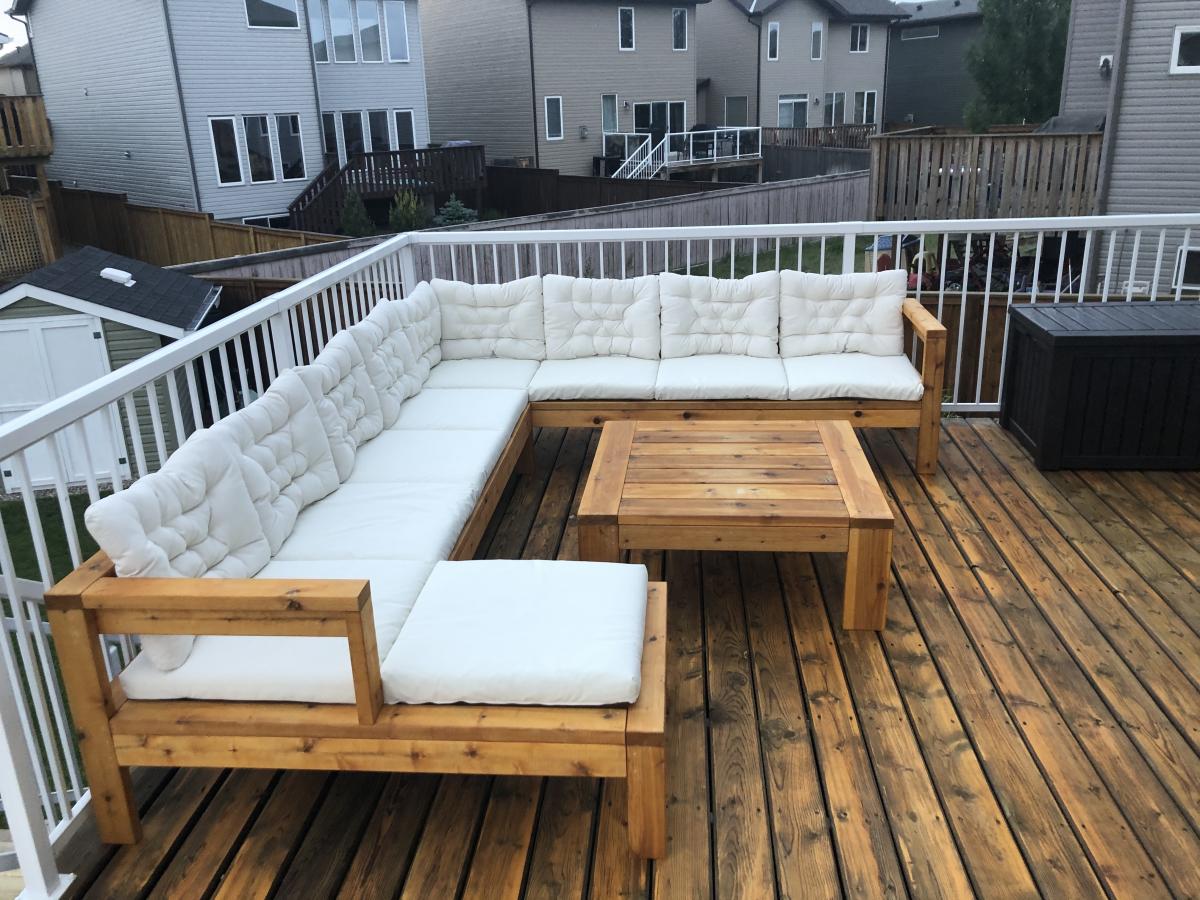
Outdoor Sectional
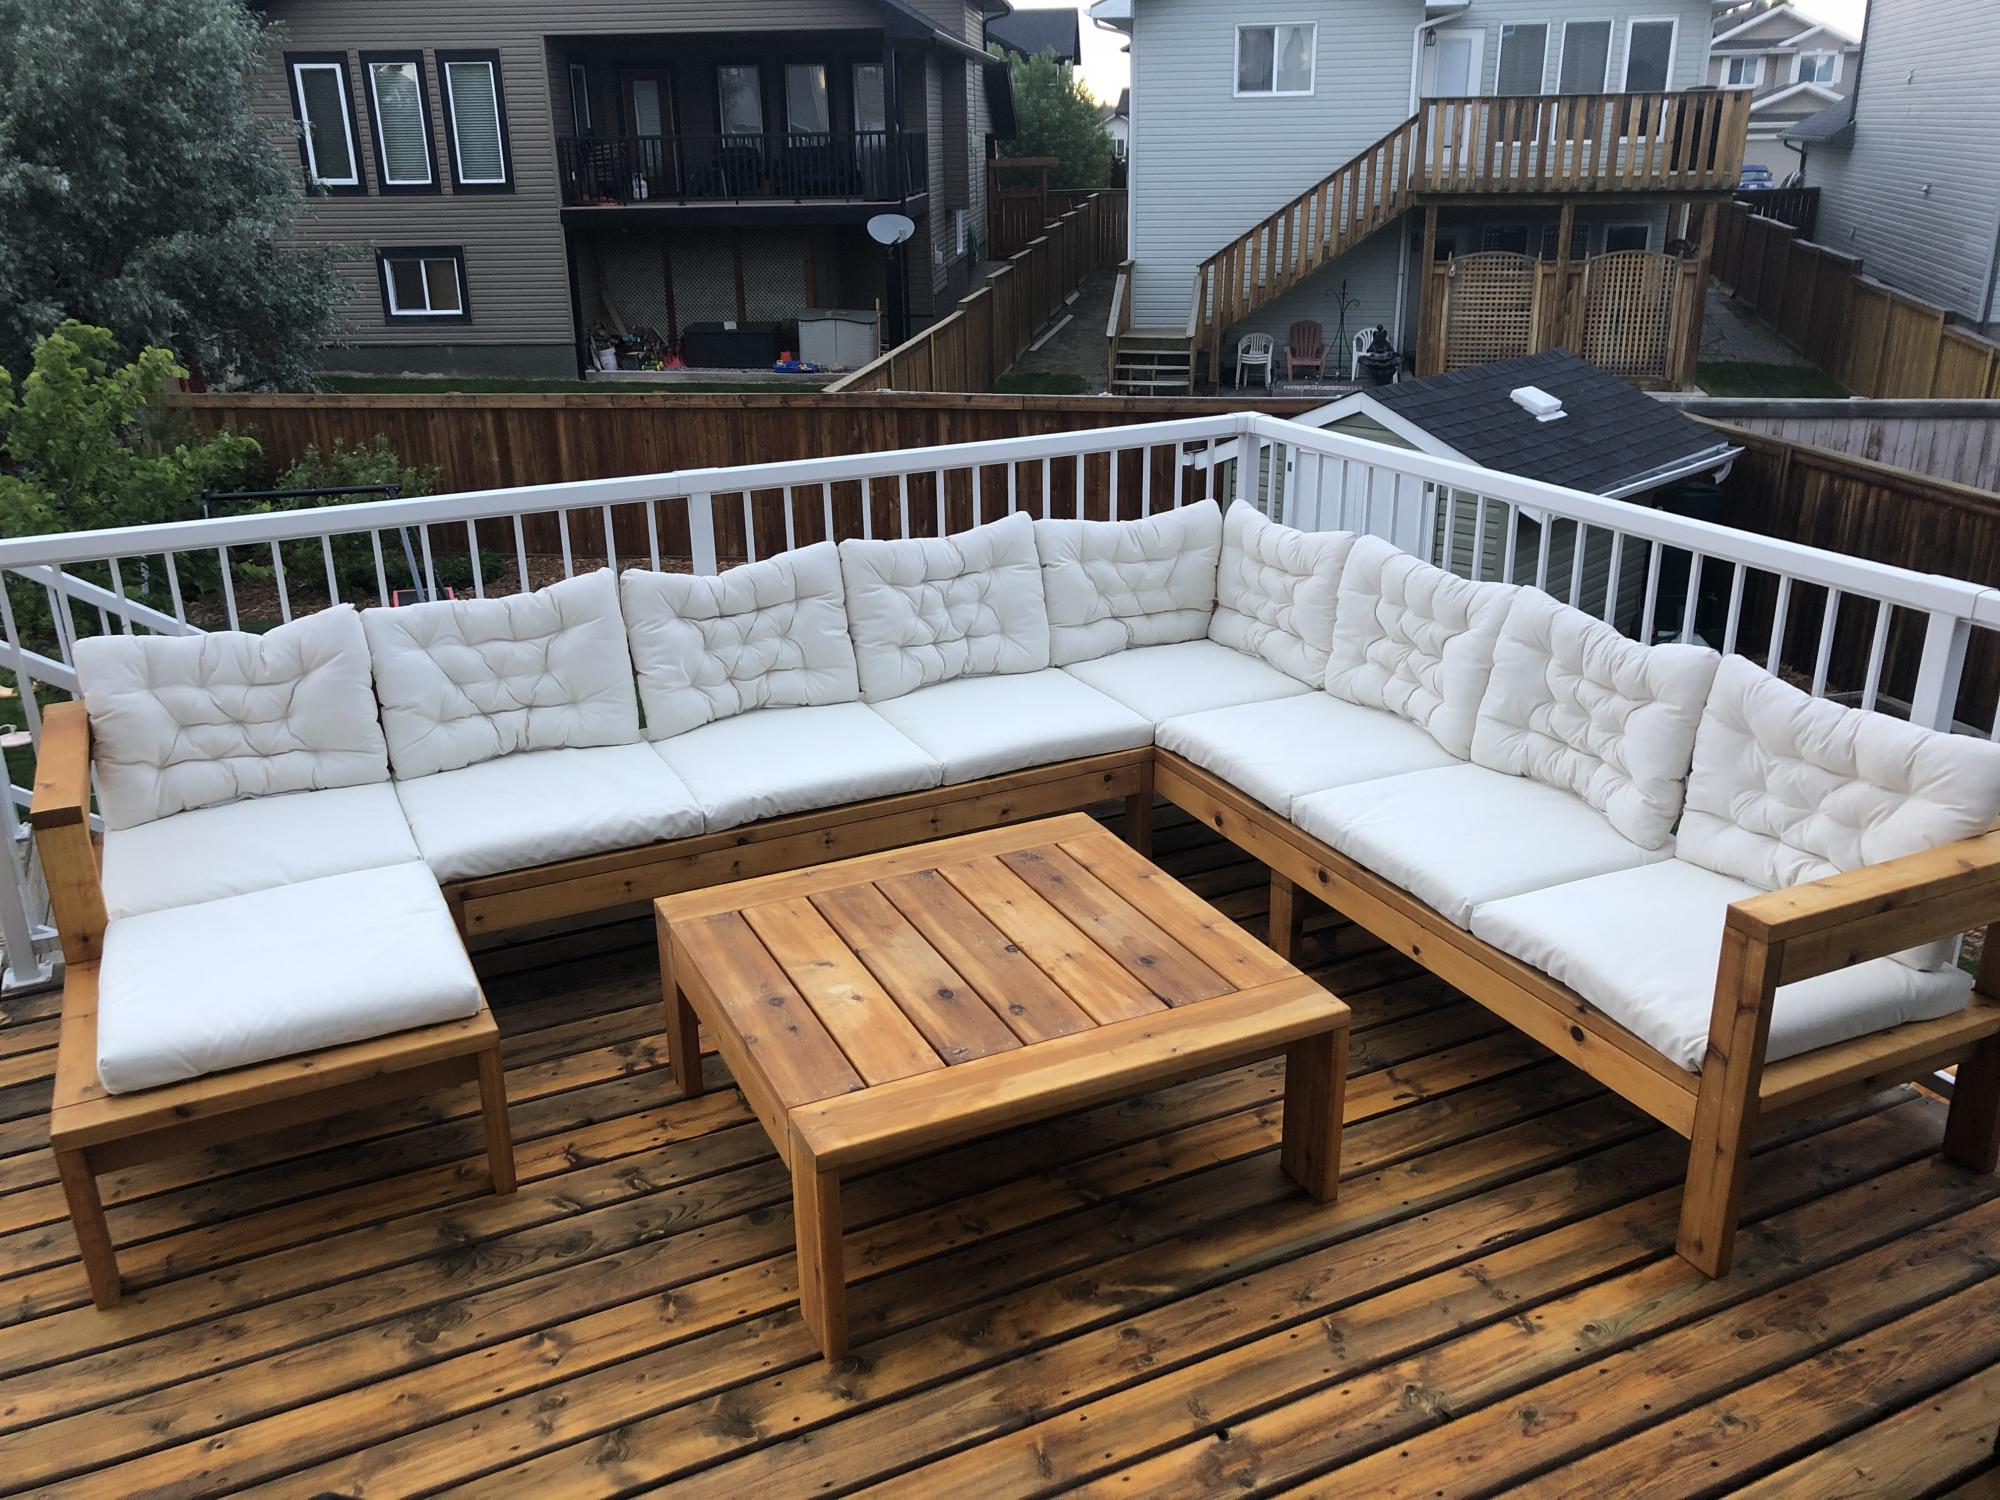
Modified the plans of the outdoor sofa and sectional piece to create this set, then added cushions from IKEA.
Built from Plan(s)
Finish Used
SuperDeck Cedar Tone Natural
Modified the plans of the outdoor sofa and sectional piece to create this set, then added cushions from IKEA.
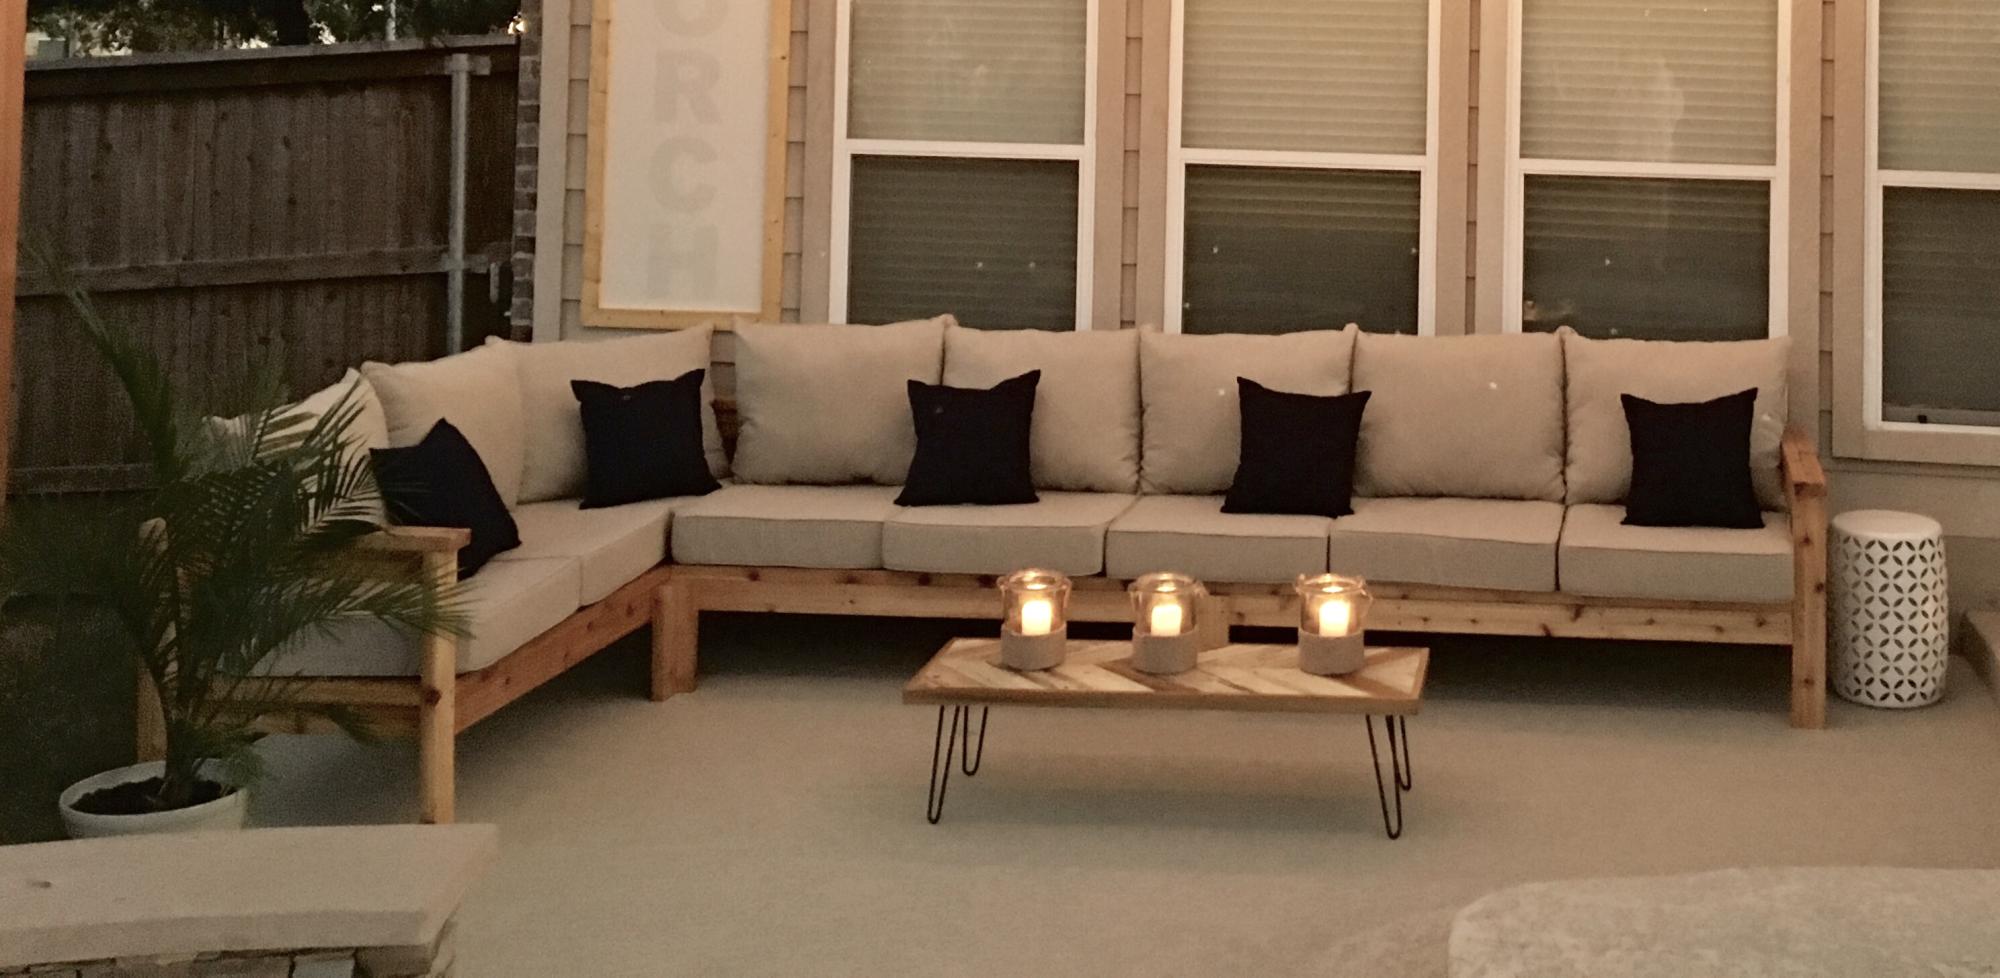
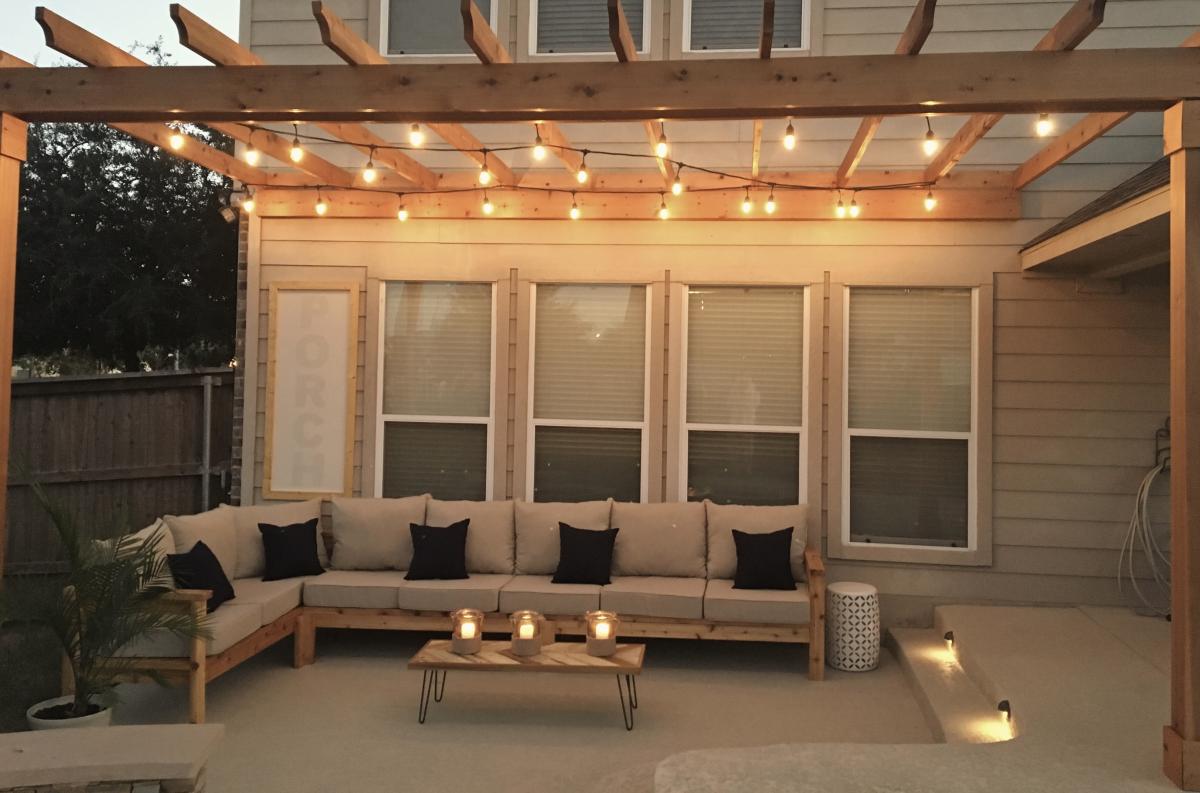
Hi Ana!
My husband used your plans to build the 2x4 outdoor cedar sectional :) He did it in 1 day and it couldn't have been easier! He even tried first time working with pallets to make a small table and it came out perfectly too! Can't wait to enjoy family time on our new back porch.
Thanks Again & Love From Austin ❤️
Kathleen
Thu, 10/24/2019 - 16:35
Hi, your furniture is beautiful. May I ask: Where did you find your cushions? And what color/ brand stain did you use? Lovely job.
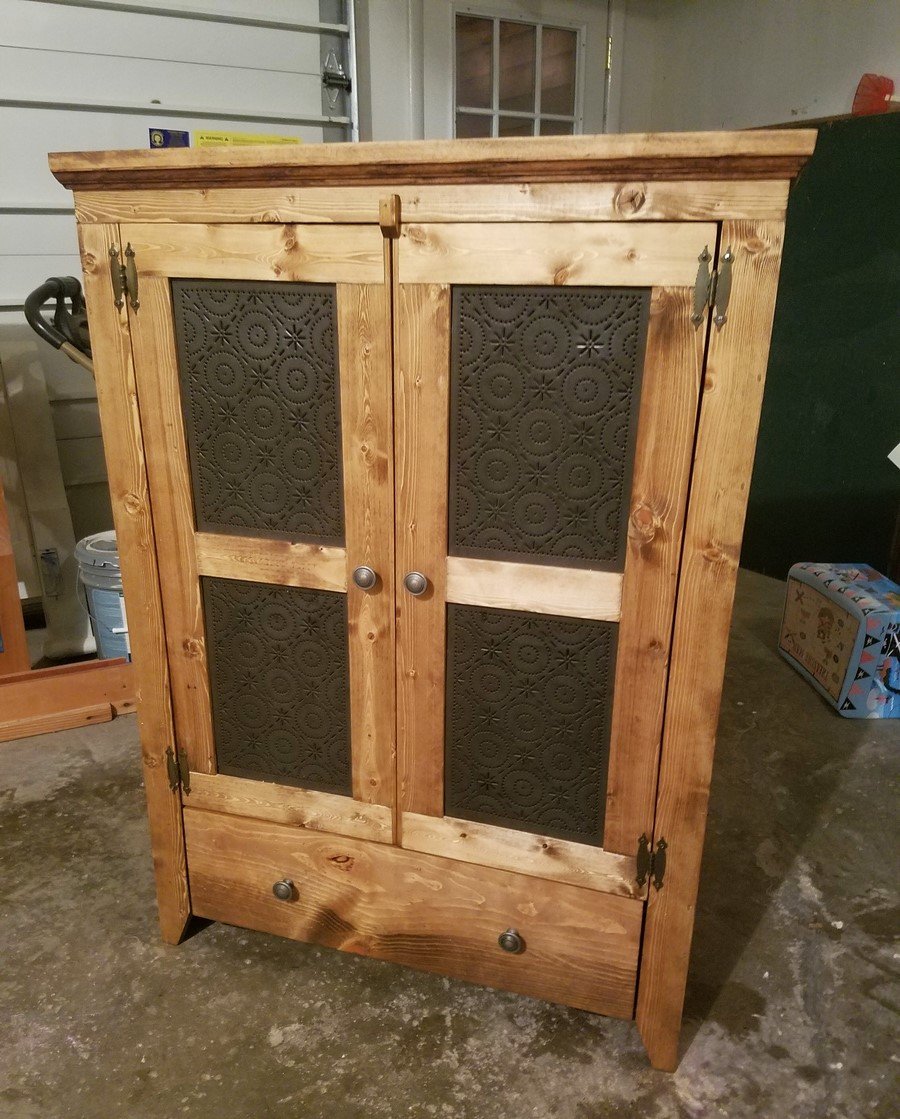
This project was built for my mother as christmas gift. Very easy to do, I based it off of Patrick's jelly cupboard plans and ana whites pie Chest idea. I modified mine to allow for a drawer/door at the bottom.
http://www.ana-white.com/2015/10/DIY_furniture/pie-safe
http://www.ana-white.com/2011/12/plans/patrick039s-jelly-cupbard
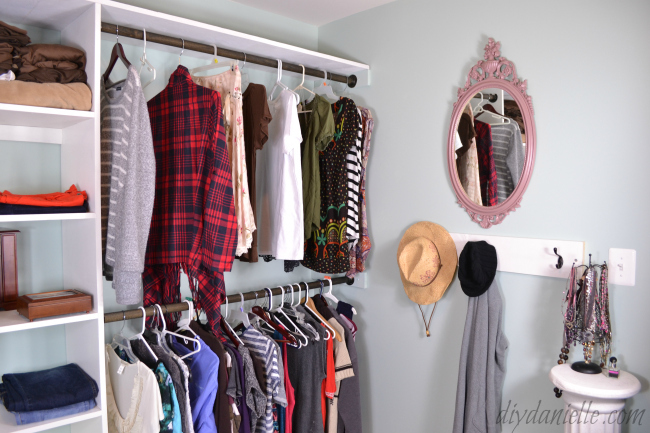
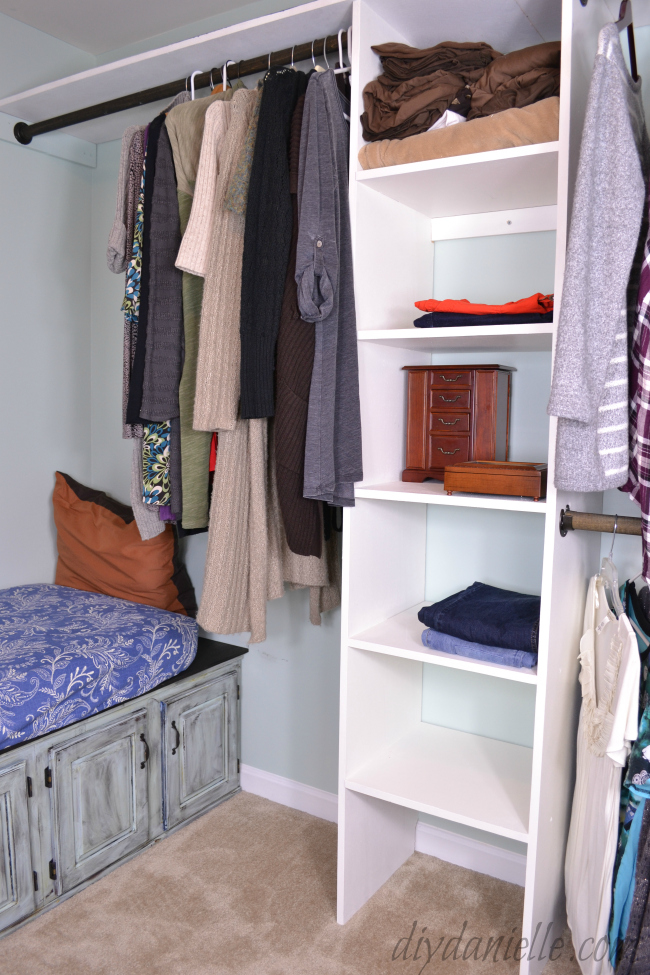
We used the plan about using one sheet of plywood to make a closet organizer (http://www.ana-white.com/2013/03/plans/closet-organizer-one-sheet-plywo…) to make several shelves for our master closet.
We added a seating area with hidden storage, using an upcycled crib mattress for the seat (instead of buying new materials to make a seat cushion).
We added multiple wood dowels for the rods across. There is wood across the top of the whole closet system so we can store things up above.
This project added a lot of extra storage for us and we're so happy with how it came out. The shelves were pretty reasonable to build.
Read more: http://www.diydanielle.com/2017/01/how-to-build-walk-in-closet.html
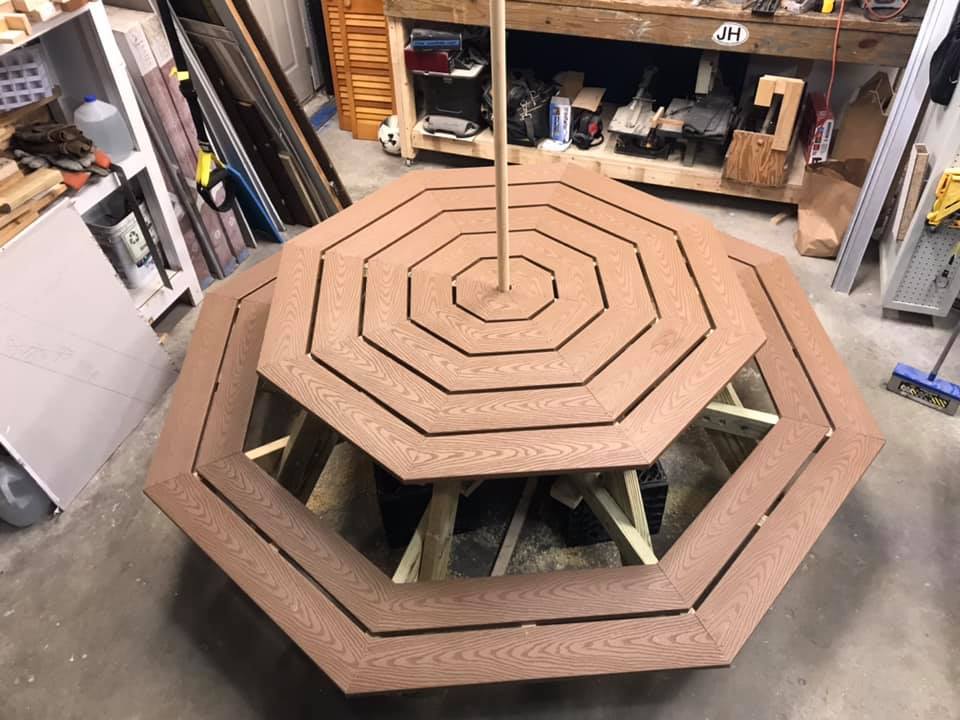
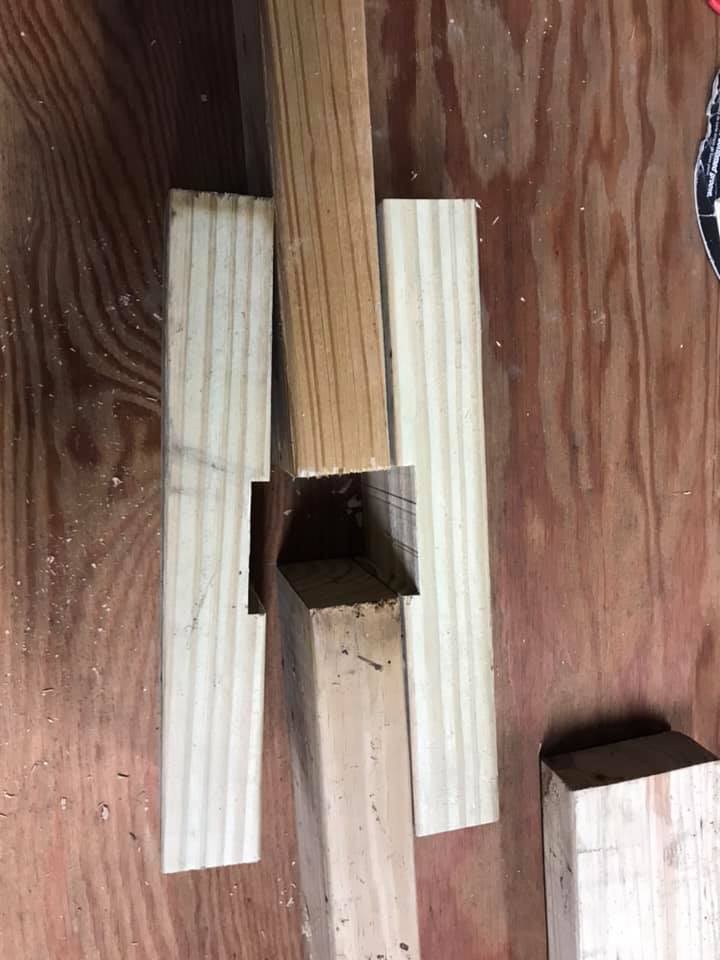
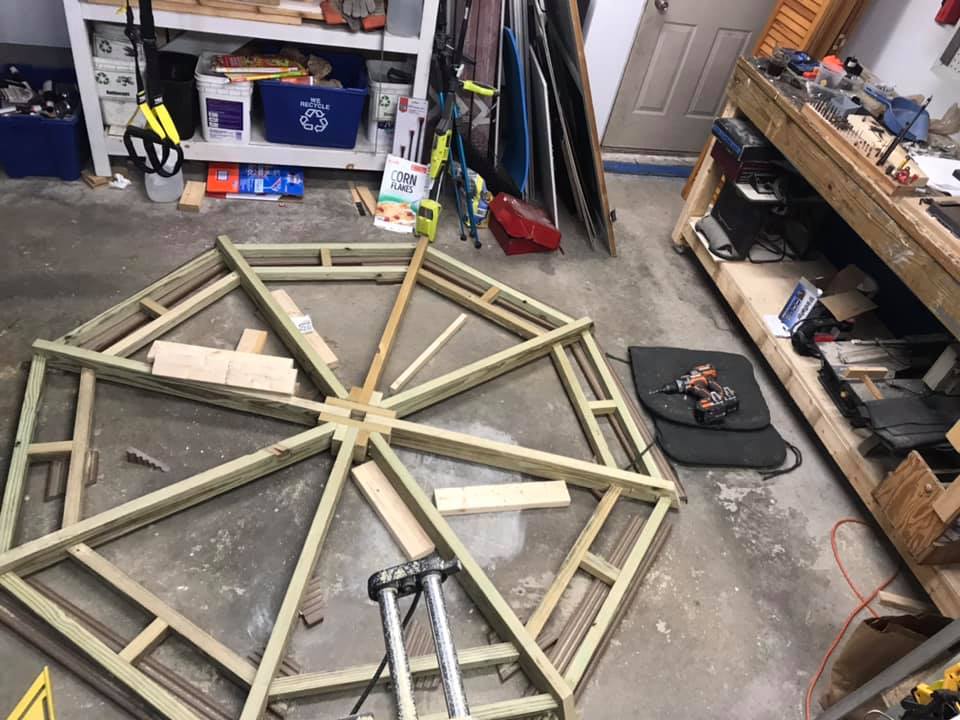
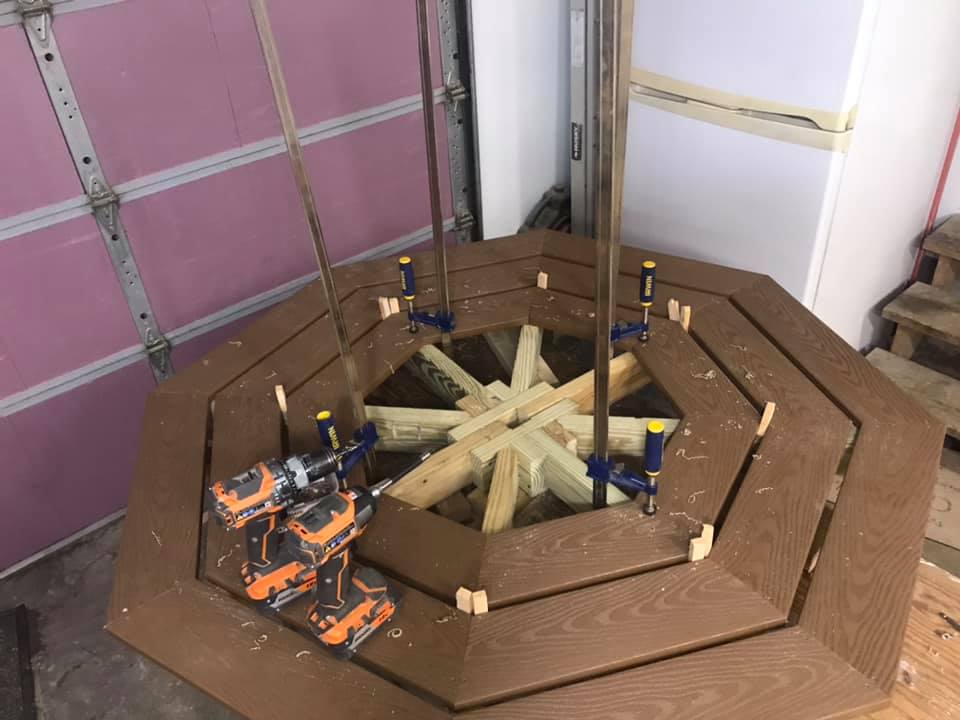
I built the octagon picnic table, and modified in a couple of ways.
1) Due to project deadline (Christmas) (and cost) I opted for composite decking for a finished top and bench, and pressure-treated 2x framing stock. Builder beware! Composite decking can be 5 1/4" wide, which impacts the spacing between the pieces, which means re-calculating most of the table-top pieces. Also, I added lateral structure underneath the benches (more weight!)
2) I really wanted that hole in the center, and hope that my solution (which slightly weakens the overall structural integrity) withstands the test of time.
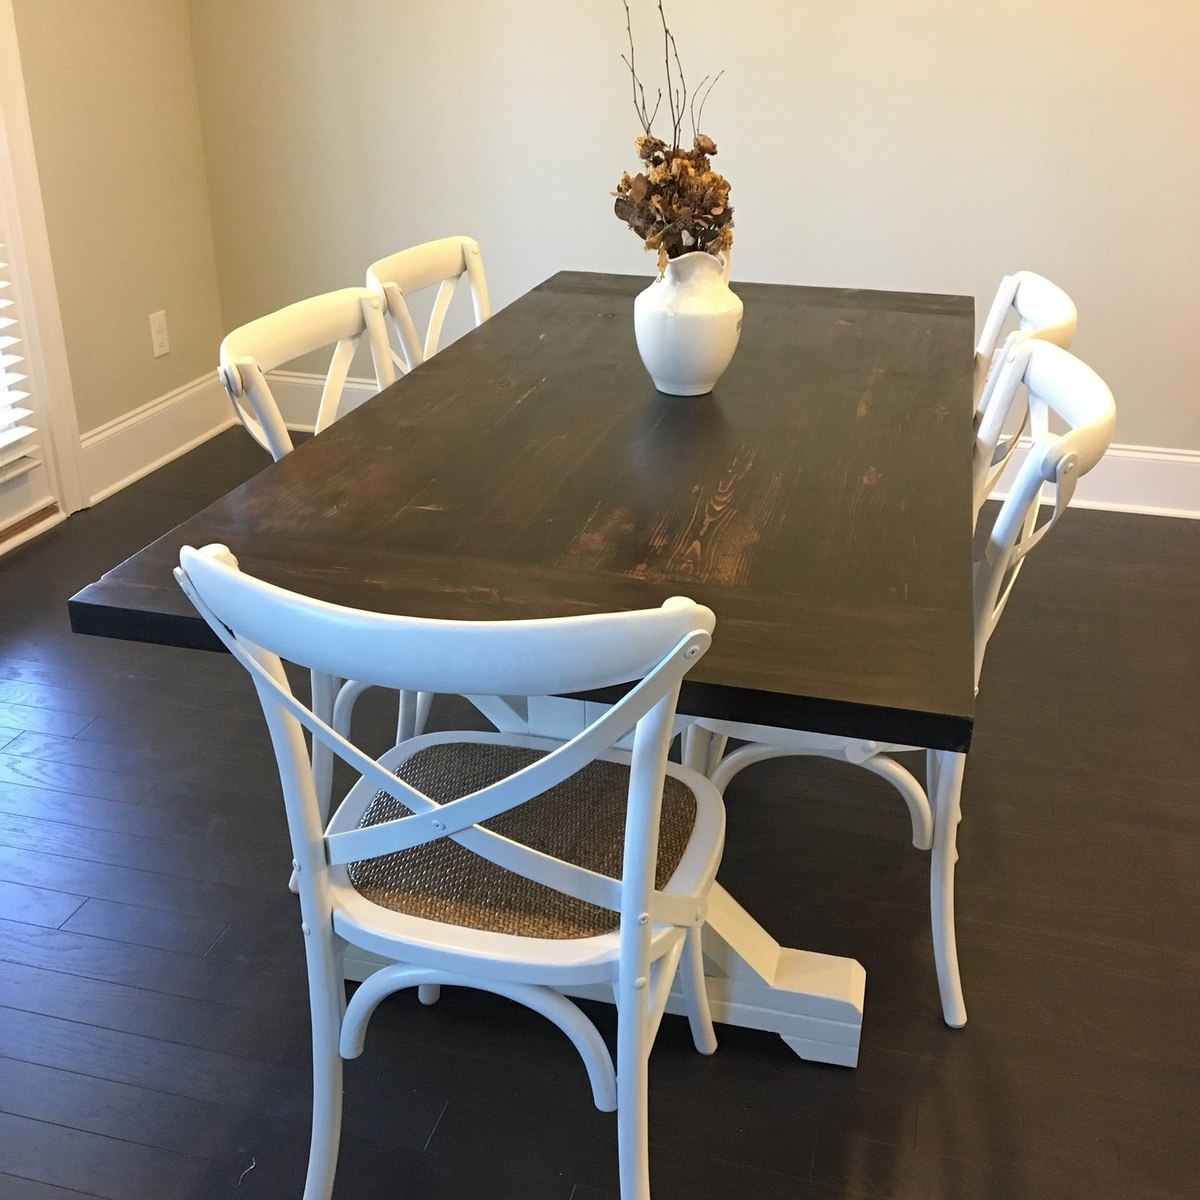
Farmhouse Trestle Table
6' Table
Check my work at https://www.facebook.com/Custom-Patio-Retreats-1764656797122875/
I built this for my niece and she loves it. I followed the plans with very few tweaks, but used custom pink stain as an accent.
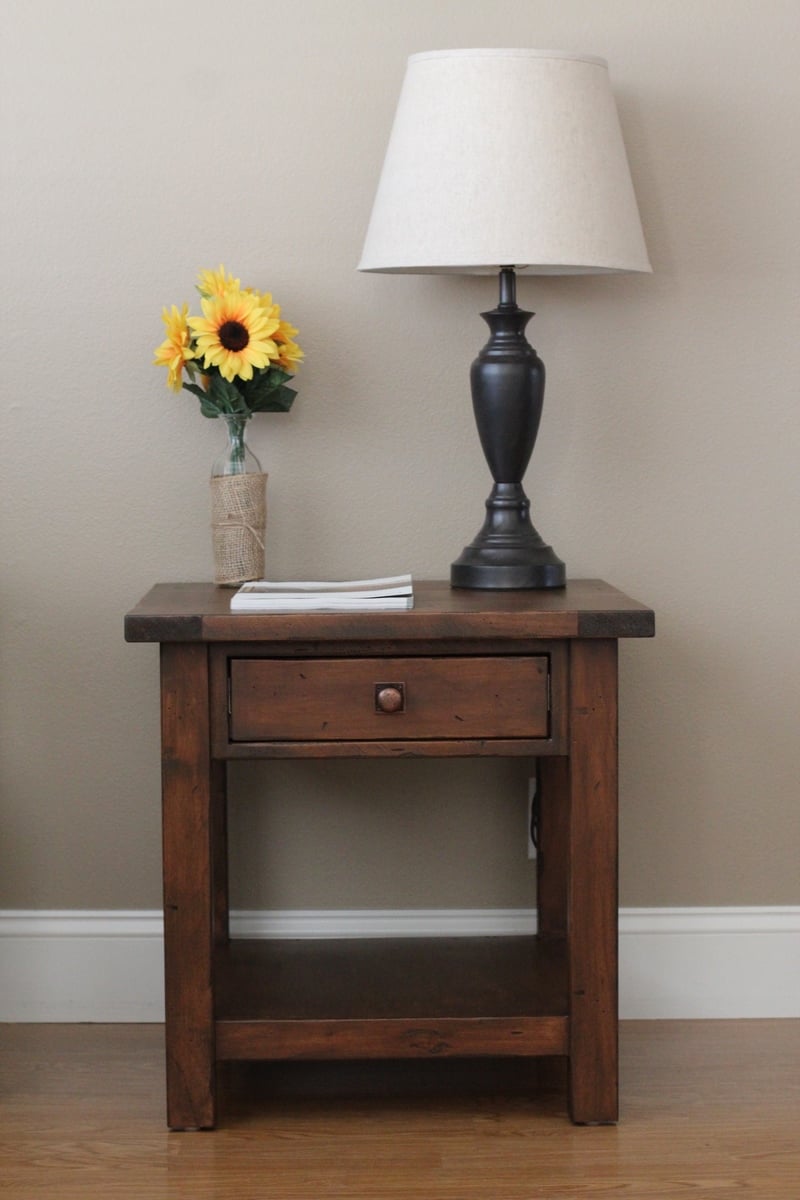
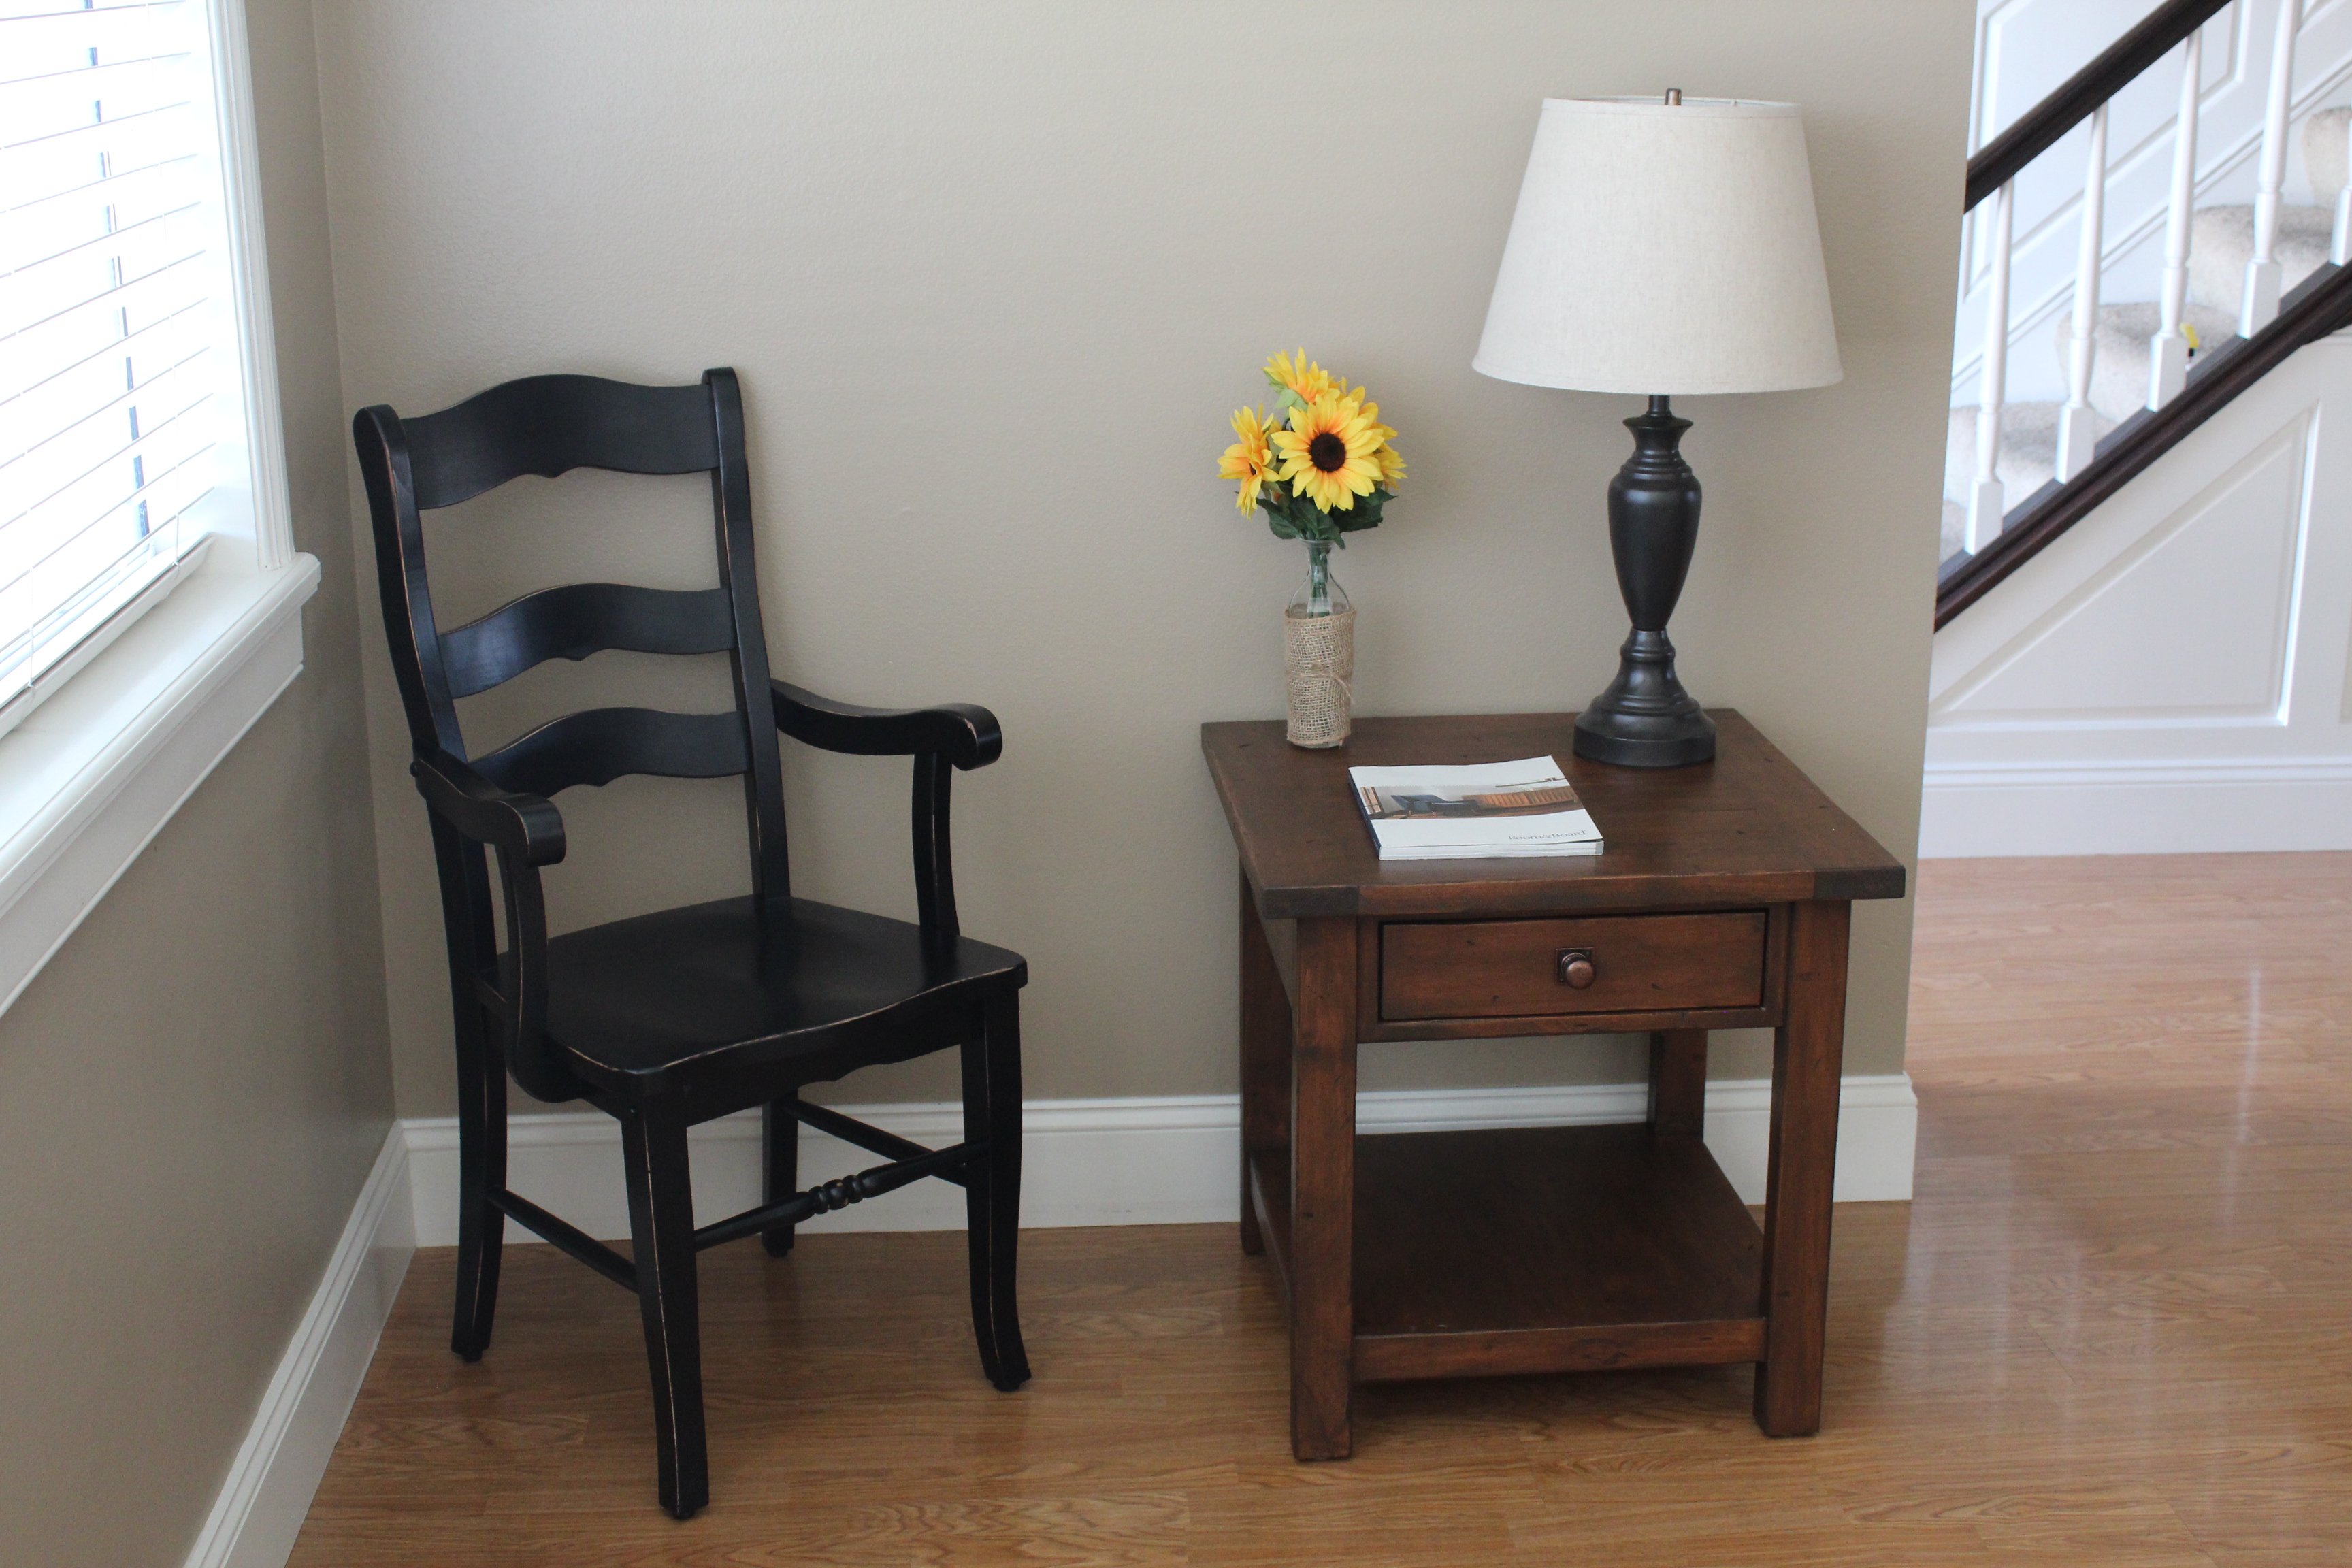
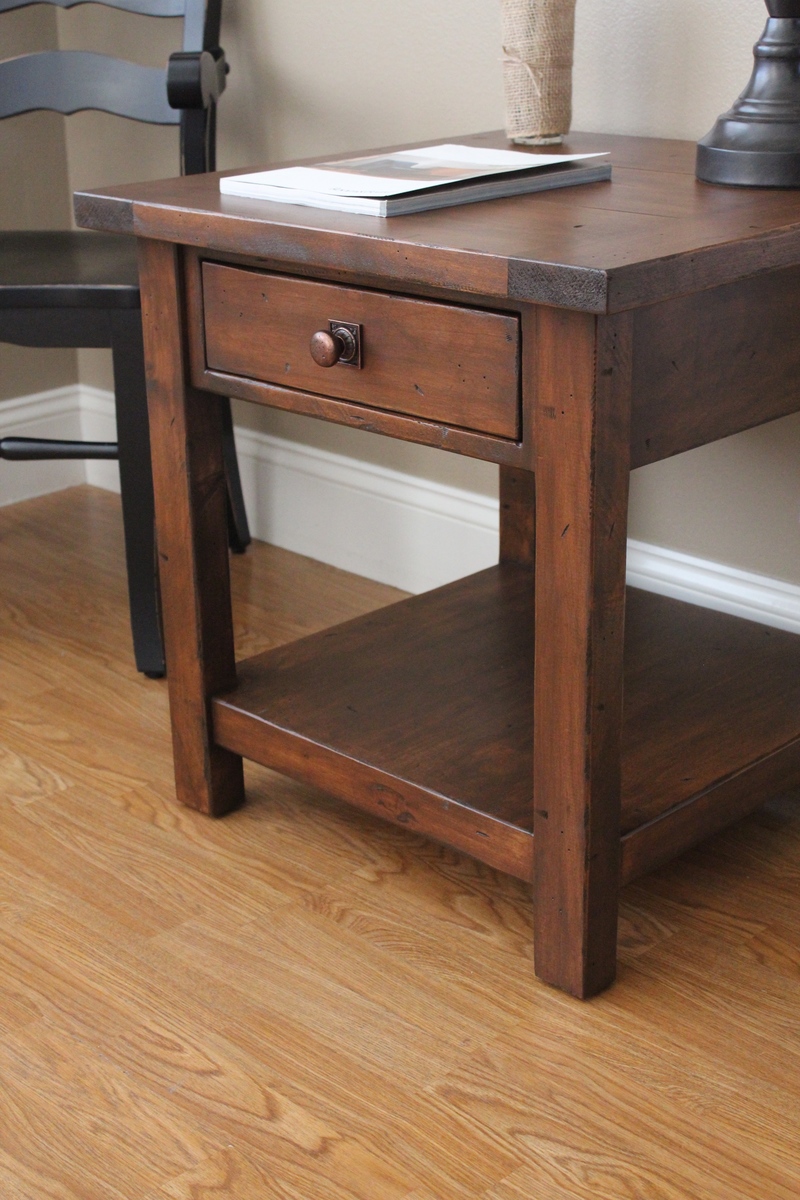
I took the plans for ana white's benchwright coffee table and created this end table. This is an exact replica of the Pottery Barn benchwright end table. The wood was distressed by hand and finished with dye, dark walnut gel stain and three coats of satin poly.
- Brad
Mon, 02/09/2015 - 14:33
Your finish work is phenomenal. Closest I've seen to pulling of the PB finish. What color transtint do you use? Any other finishing tips? I've build a couple of knock off PB pieces, but haven't nailed the finish yet.
In reply to Great finish! by marenras
Mon, 03/09/2015 - 22:10
Hi. Thank you for the compliments. First of all, using Alder vs douglas fir or pine plays a big difference in the finish look, but start with pine and see where you get using this process. I first mix de-waxed shellac with a few drops of medium brown transtint dye. It MUST be de-waxed shellac. Experiment with the amount of dye added. I spray one coat of that shellac and dye mixture on the wood. The shellac seals the wood allowing for even stain absorption and a non-blotchy finish. The dye obviously darkens the wood. Then I apply one to two coats of gel stain. I like general finishes antique walnut color. At the next step I sometimes add a glaze, and sometimes I don't, it just depends on what I am seeing. Lastly I seal the wood with a water based poly. Good luck!

Tue, 03/31/2015 - 10:04
I love the finish you've done on these, and like someone else said it is the closest to PB I've seen yet! I am trying to fix a horrible stain job I did on a project and had a quick question. When you said you sprayed the shellac and dye, do you mean with a spray bottle? Also what kind of de-waxed shellac did you use? I've never used shellac and I see they have flakes and premixed stuff. Thanks!
In reply to Wow! Awesome job! by colleenps
Thu, 04/09/2015 - 15:25
Hi There. Sorry for the late response. The spray the shellac with the dye using a HVLP sprayer. Google HVLP sprayers. They are very cheap and will help out tremendously. I don't recommend using shellac flakes, they can be challenging for a beginner. I use premixed shellac. I use de-waxed shellac because you can apply polyurethane over it. If you plan on applying shellac as a top coat instead of poly you don't have to worry about de-waxed.
Thu, 03/24/2016 - 11:41
This is absolutely beautiful and what I've been looking for to match my Benchwright coffee table!! Do you remember the dimensions you used?
Fri, 01/21/2022 - 09:26
I really like your take on this PB table. It looks like you changed it significantly from the console table plans from which you derived it, and I have a couple questions. First, the legs do not look like 2x4s; what are the dimensions you used? Second, the bottom shelf is much thicker than the 1x12 from the plans; what lumber did you use? And how is this bottom shelf attached to the legs? Square-notched to fit around the corners of the legs?

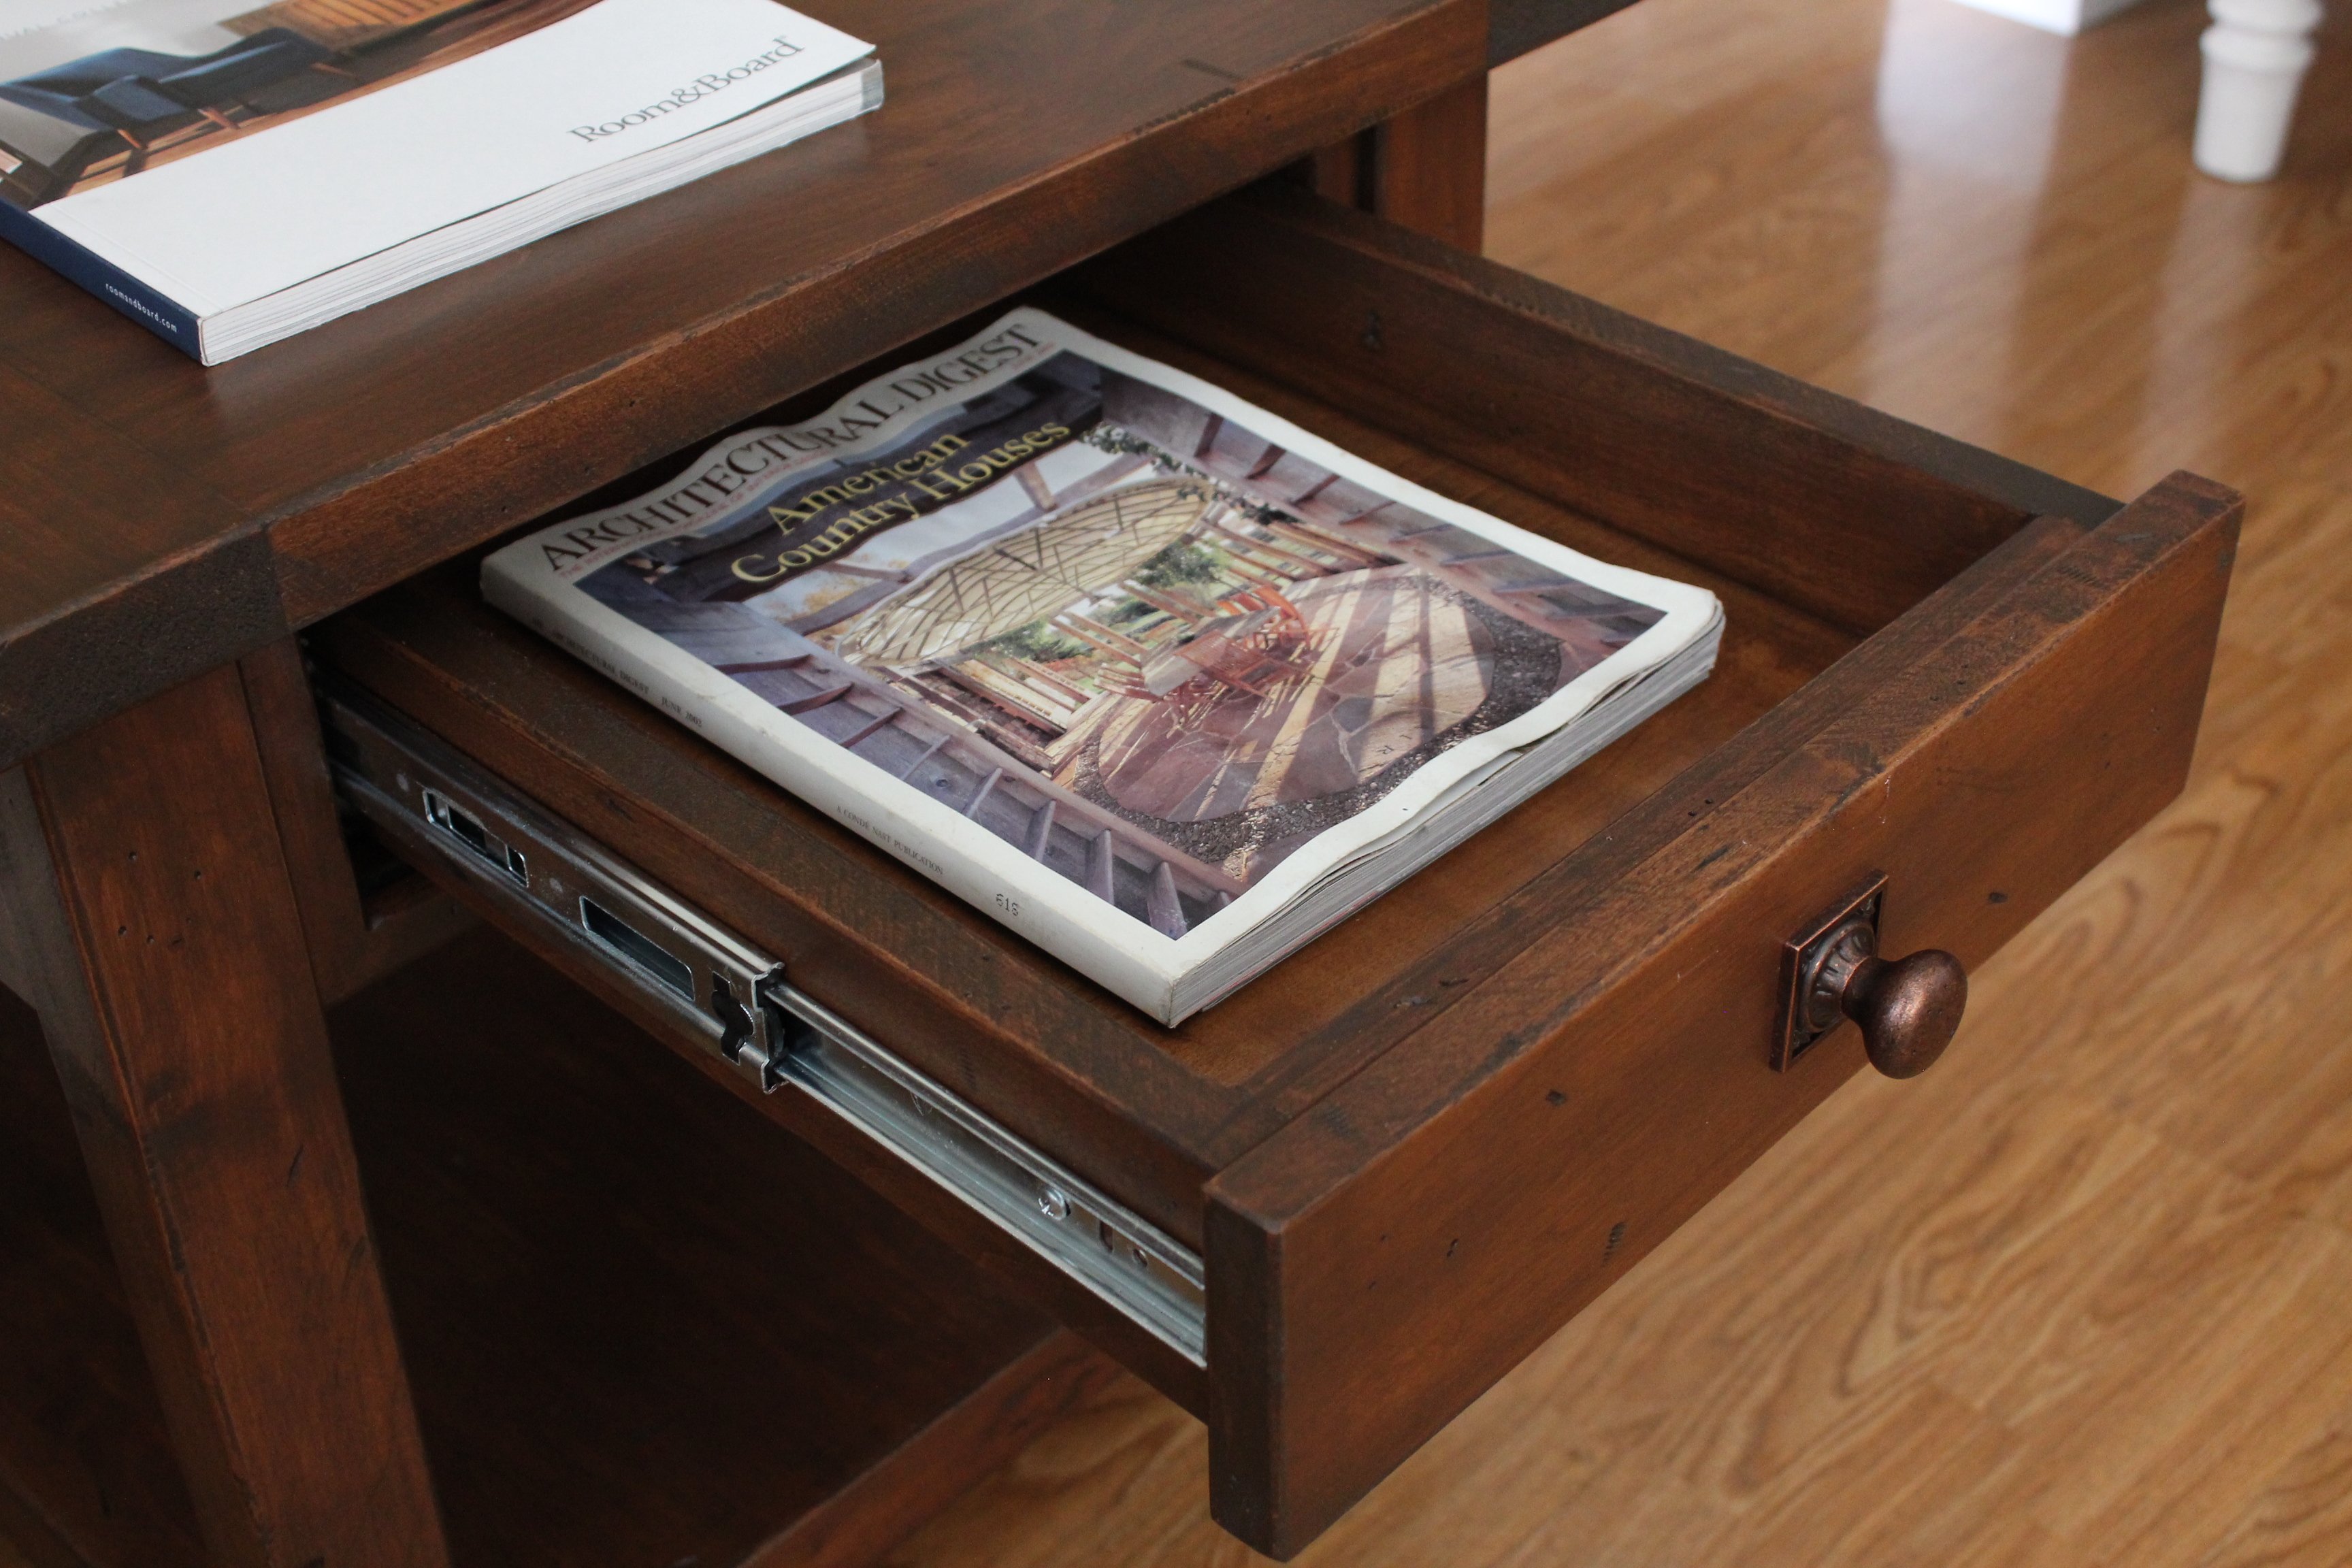
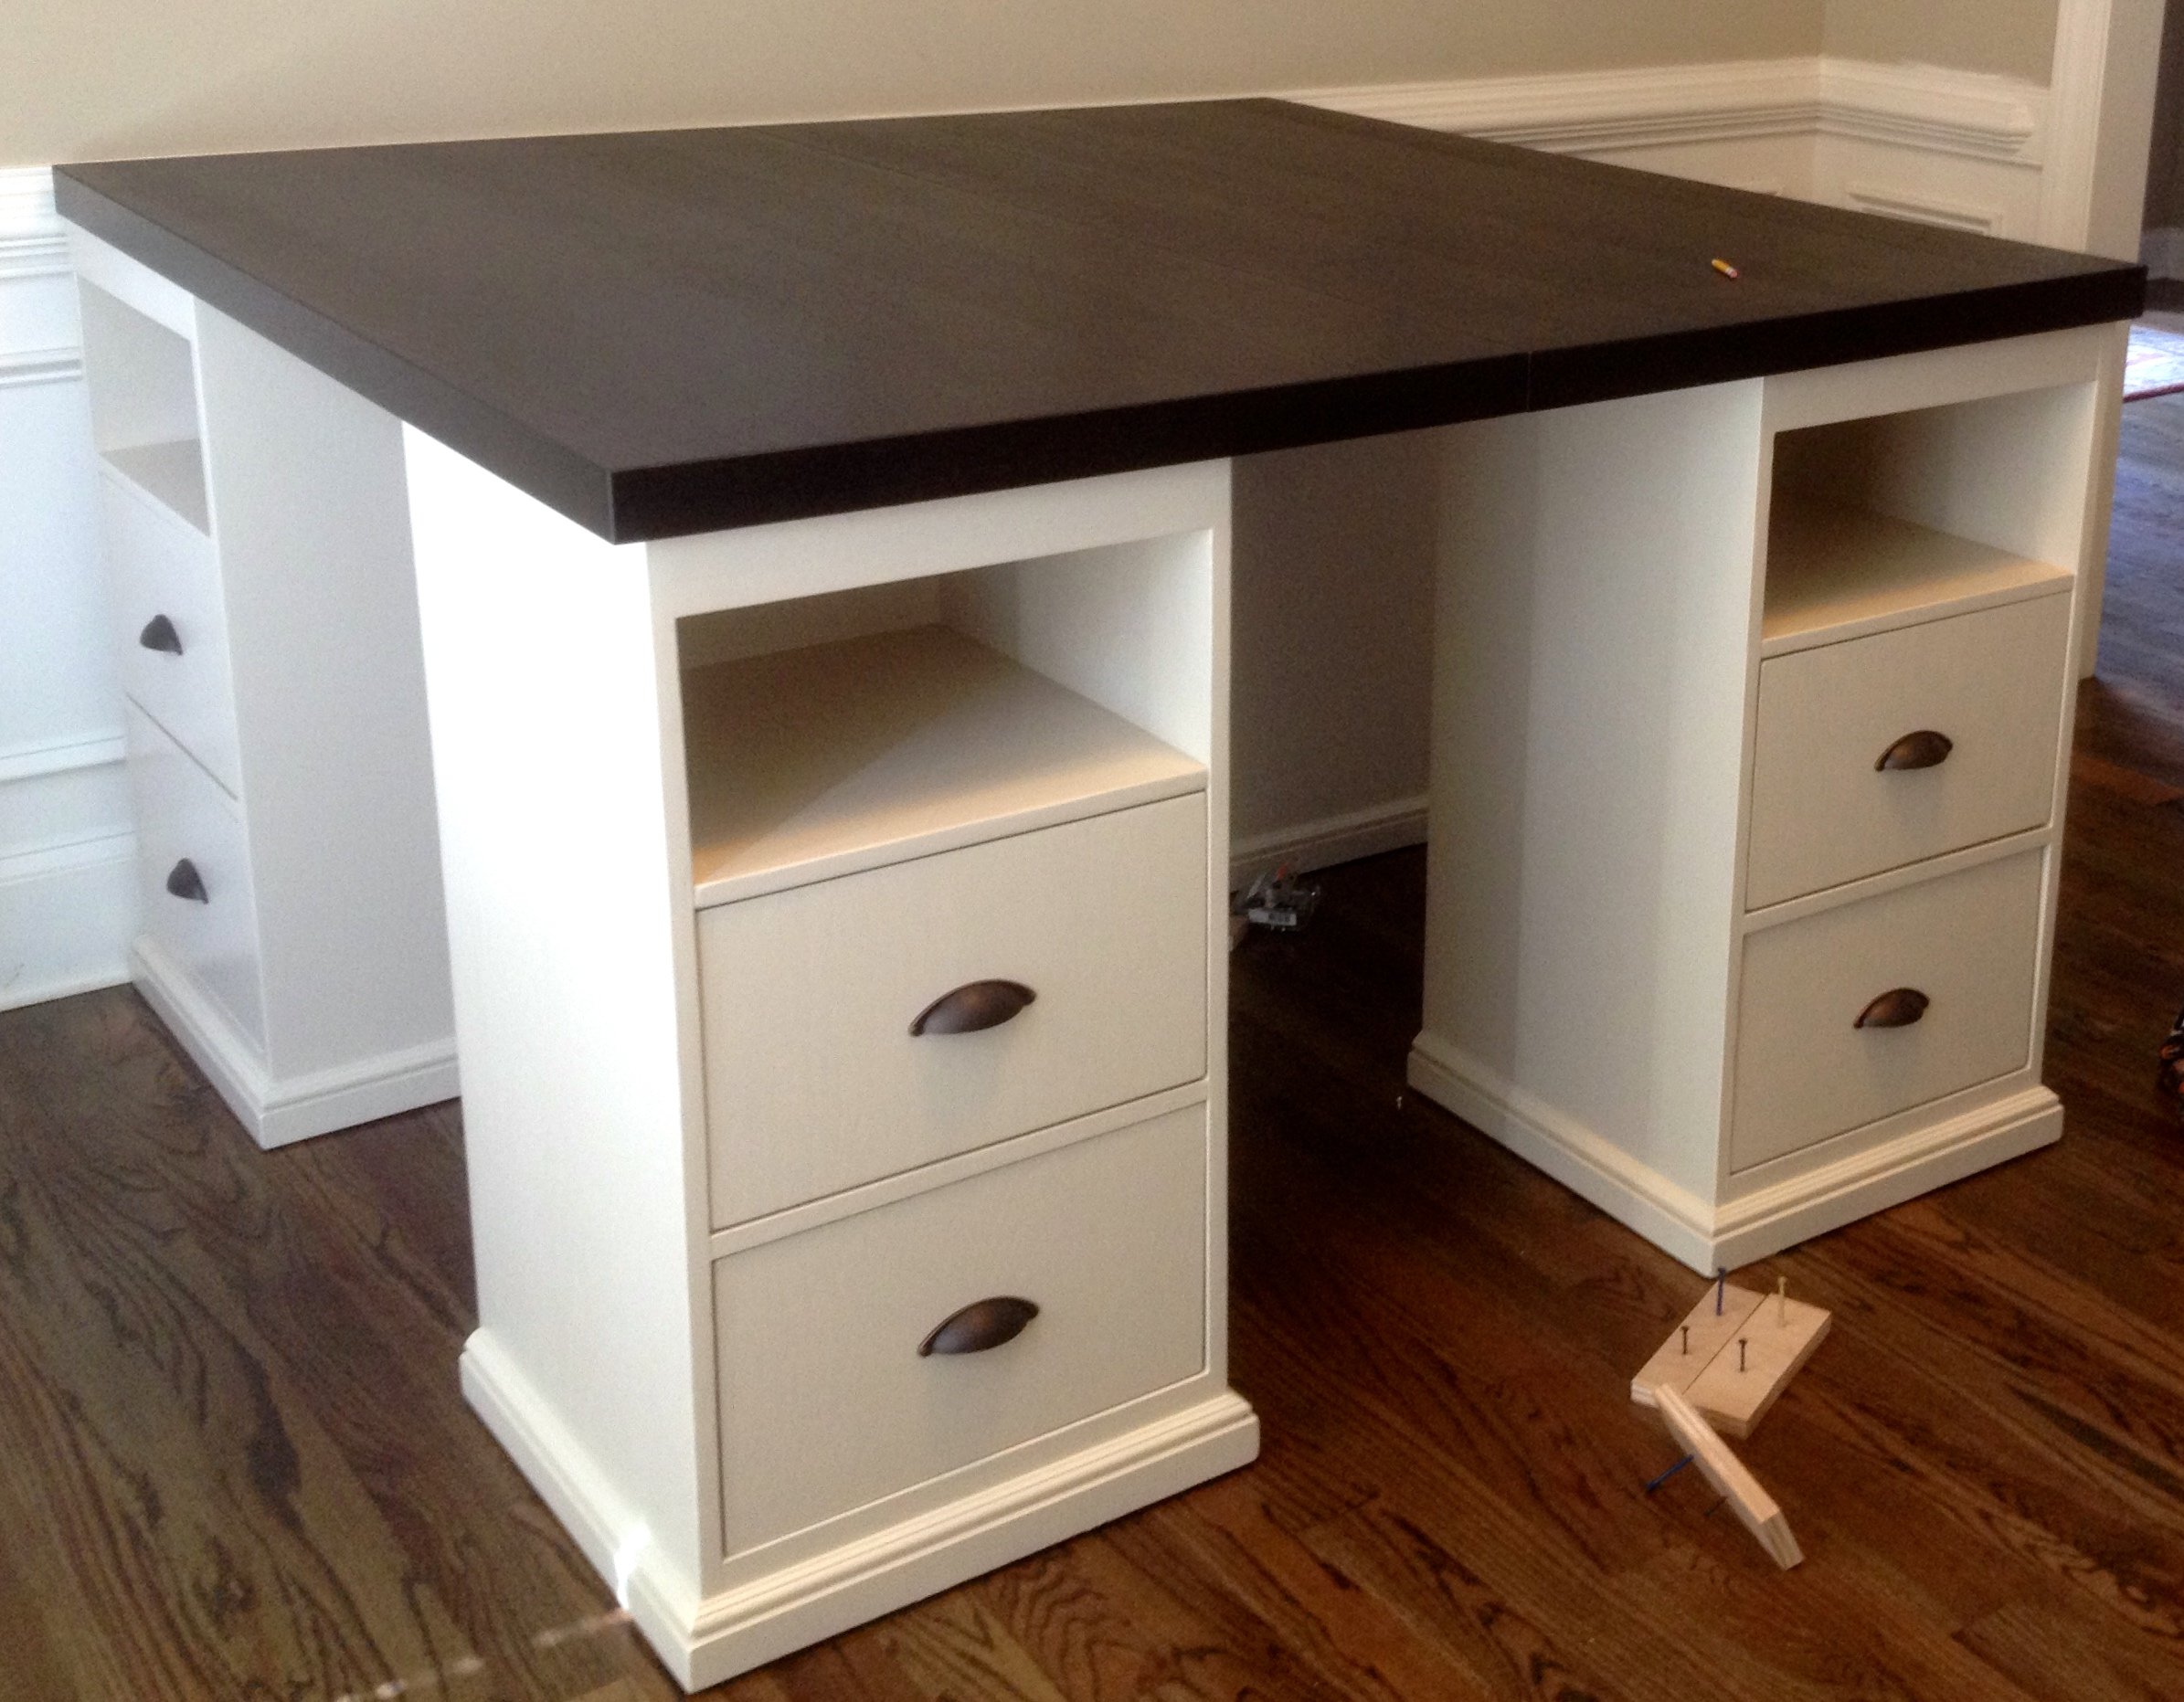
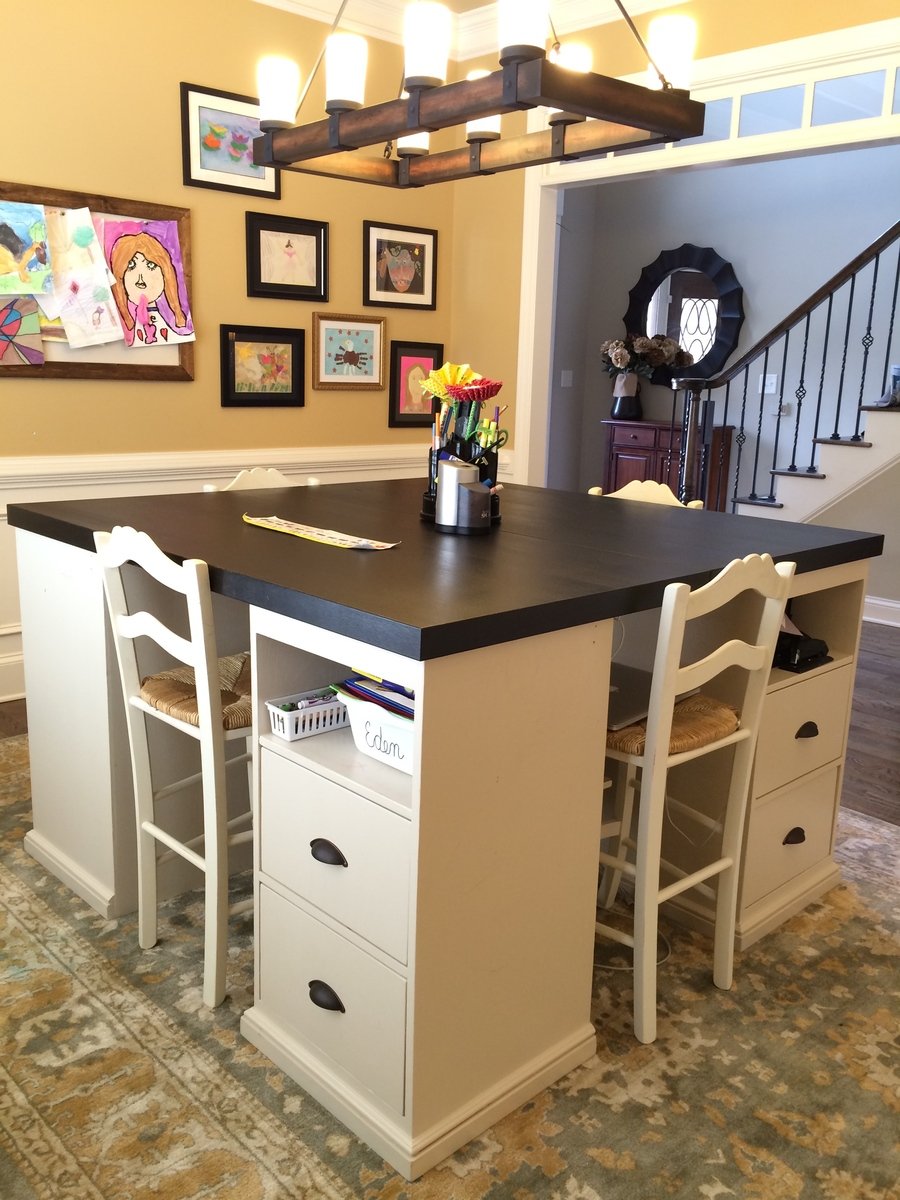
I really liked the PB mega desk, but I didn't want to spend $1600 on it. After seeing someone's post here (a couple years ago...) asking for plans on that desk, I decided to do it myself. I took these two plans and made 4 base units. They are 18" square at the top and 34" tall. I used 2 IKEA table tops connected underneath for the top, to make a total height of 36" - counter stool height. I constructed them a little differently than the plans, but no matter how you make them, the idea is the same. The plan is to take them apart and make 2 desks once everyone is too old and cool to do homework/artwork together.

Mon, 03/16/2015 - 20:39
this is really awesome! What a cool work area :)

Sun, 08/02/2015 - 11:39
Where did you get the chairs to complete your project? And how much were they?
Sat, 08/15/2015 - 04:33
Just seeing your comment...sorry for the delay! I got the stools and the light fixture at a Ballard Backroom (outlet) store near me. 3 of the stools ended up being about $40 each with the sale they had at the time, and the 4th was $60? - bought at a later time than the first 3.
Sun, 08/30/2015 - 13:54
Could we get more detail on how this was built? The base units, for instance.
Thanks!
Wed, 11/04/2015 - 07:40
How did you connect the table tops from the bottom so that the tables were secure together? I'm curious what's the best way to do this. Since two of the four seats will be where the seam is, I want to make sure I secure it properly so it's not wobbly. Thanks so much.
Sat, 01/09/2016 - 05:06
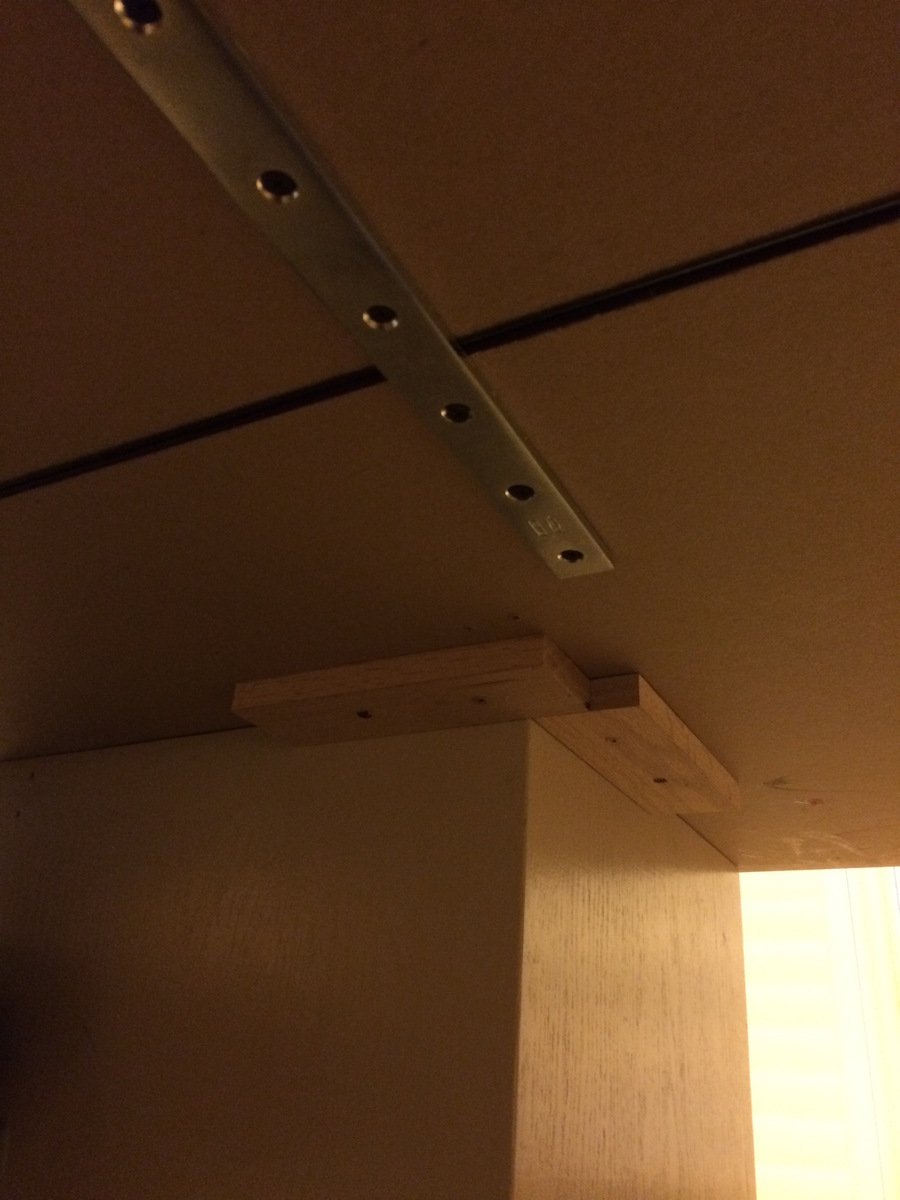
I'm just seeing these latest comments for the first time, so you may have long finished this project already! The tops were surprisingly sturdy but I did reinforce them. I placed the tops on the floor upside down and screwed some metal brackets (about 12" long each) across the joint in four places. I just screwed them in through holes already in the brackets. This wasn't the most stable because those tops are particle board and don't hold screws very well... But since it was already pretty sturdy, I figured it would do. It has been fine, even with standing on the top (kids who get up there and me hanging the light fixture above).
Once the tops were joined, I placed the bases so there was about a 1" overhang on the top. To hold the top in place, I used small pieces of wood screwed to the underside of the top at the inside corner to act as a placement stop. The top is pretty big and heavy even though they are IKEA tops, so they don't have a tendency to move or slide at all anyway. I'm going to try to figure out how to post another picture of the braces and corner stops...we'll see if I can do it! Let me know if you have any more questions...again, sorry I didn't see this in a more timely manner!
Sat, 01/02/2016 - 05:55
Is the photo above the Pottery Barn version or your product result? I'm trying to figure out the dimensions for the drawer and shelf configurations. Thanks! BTW, I'm totally addicted to your style and personality...my husband loves the productivity inspiration I've received. :-)
Sat, 01/09/2016 - 10:17
Hi!
I'm glad you like the desk! The one in the picture is the one I built, not the pottery barn one! My dimensions were a good bit different than the PB desk - square bases instead of rectangular and counter stool height instead of desk/table height. So, I have no idea if I have my plans for this anymore, so I went and measured it again for you!
So each base is 18" x 18" square and 34" high so that with the 2" top the total height is 36".
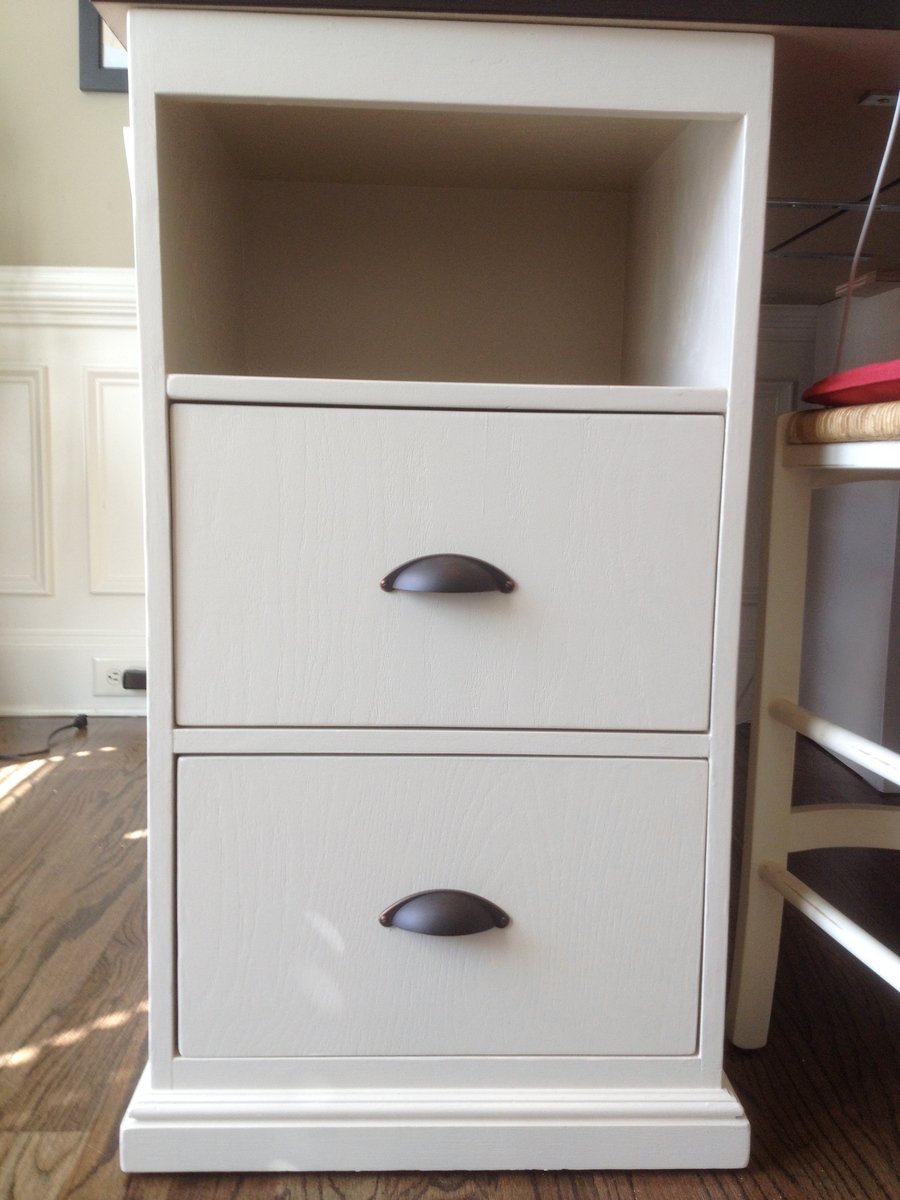
Each base was made of oak plywood that made with 3 sides, a top and a bottom. All edges were rabbit joints (3/8" deep in thickness of boards and probably 3/8" wide - not 100% on width of rabbits). It's kind of a pain to do rabbit joints if you don't have a dado blade for your table saw, so you could use pocket hole screws instead. I glued and nailed these joints with a finish nailer, I believe.
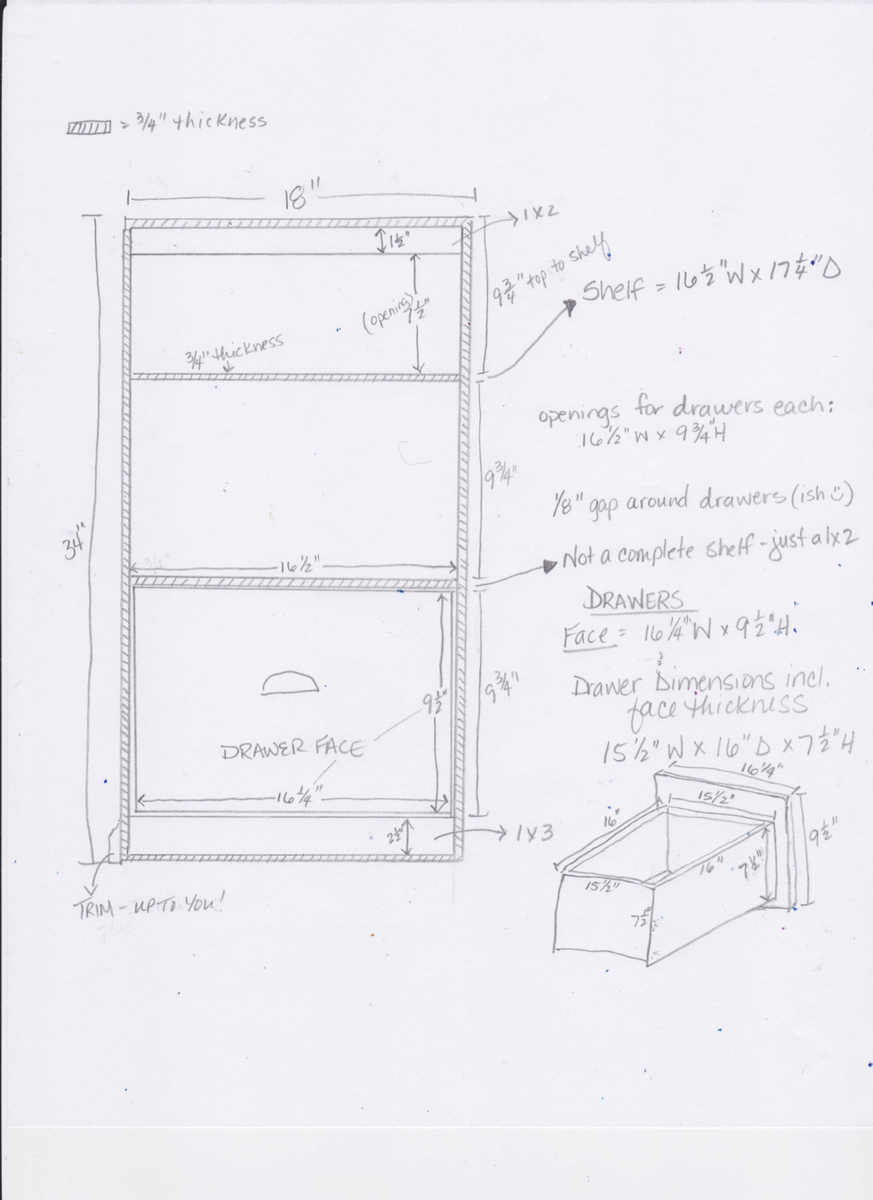
I figured a diagram with measurements would be easier than trying to write descriptions...so I'm adding another pic with the dimensions outlined. Drawing is NOT to scale, so sorry about that! I really need to learn to use SketchUp. Let me know if you have any questions!
Sat, 01/09/2016 - 07:57
Hi!
I'm glad you like the desk! The one in the picture is the one I built, not the pottery barn one! My dimensions were a good bit different than the PB desk - square bases instead of rectangular and counter stool height instead of desk/table height. So, I have no idea if I have my plans for this anymore, so I went and measured it again for you!
So each base is 18" x 18" square and 34" high so that with the 2" top the total height is 36".
Each base was made of oak plywood that made with 3 sides, a top and a bottom. All edges were rabbit joints (3/8" deep in thickness of boards and probably 3/8" wide - not 100% on width of rabbits). It's kind of a pain to do rabbit joints if you don't have a dado blade for your table saw, so you could use pocket hole screws instead. I glued and nailed these joints with a finish nailer, I believe.
I figured a diagram with measurements would be easier than trying to write descriptions...so I'm adding another pic with the dimensions outlined. Drawing is NOT to scale, so sorry about that! I really need to learn to use SketchUp. Let me know if you have any questions!
Wed, 06/22/2016 - 15:26
Can you buy the bases from ikea? or did you build them from scratch?
Thu, 07/28/2016 - 14:13
No you can't buy them from Ikea. I bought the table tops from Ikea, but I built the bases. The dimensions for the bases are in one of the additional pictures with the post if you want to see them!
Mon, 10/10/2016 - 07:41
What are the total dimensions of the table top? Thinking of building something like this, but want to make sure it will fit in my space.
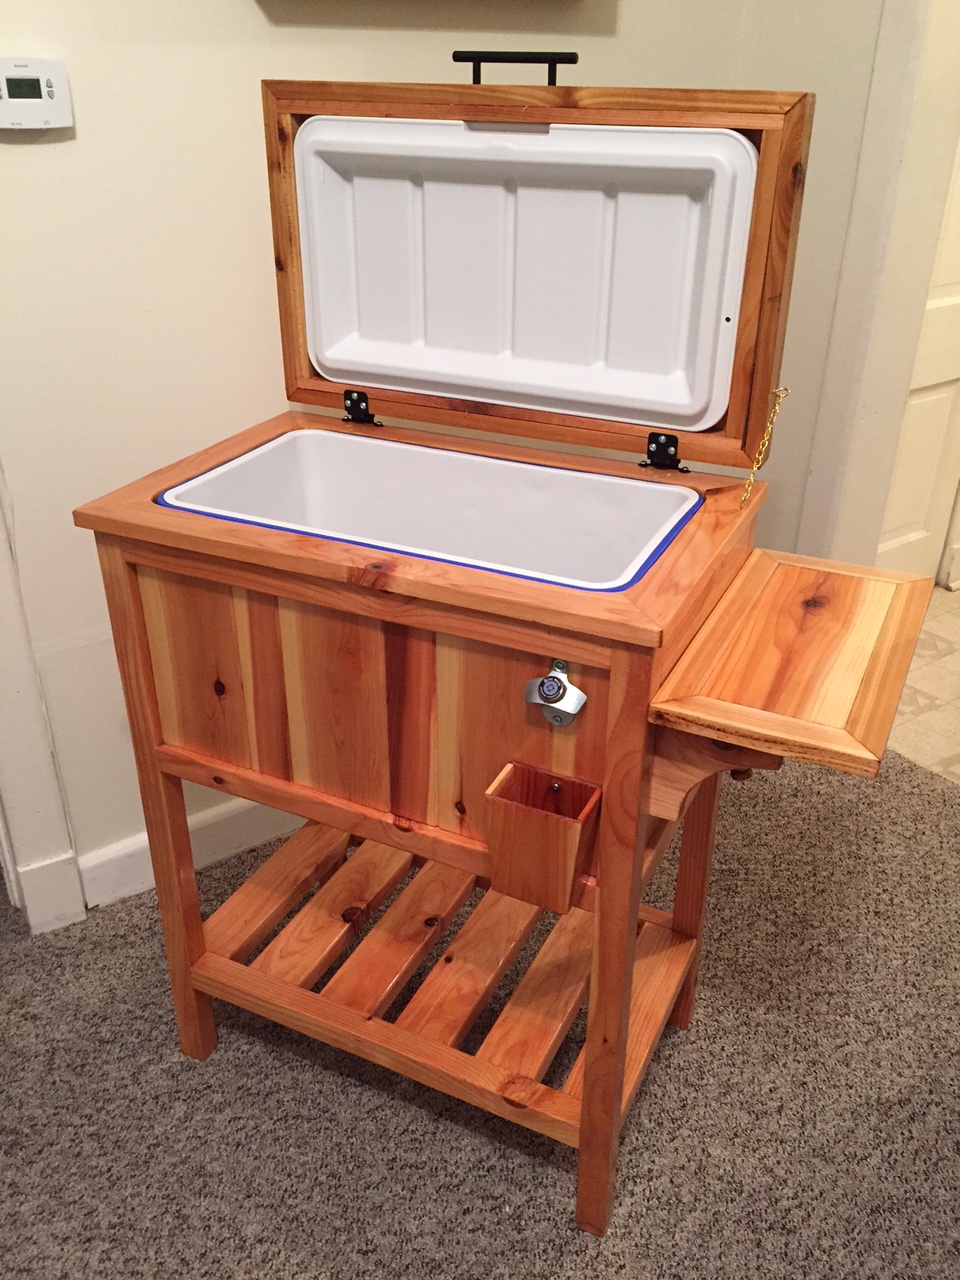
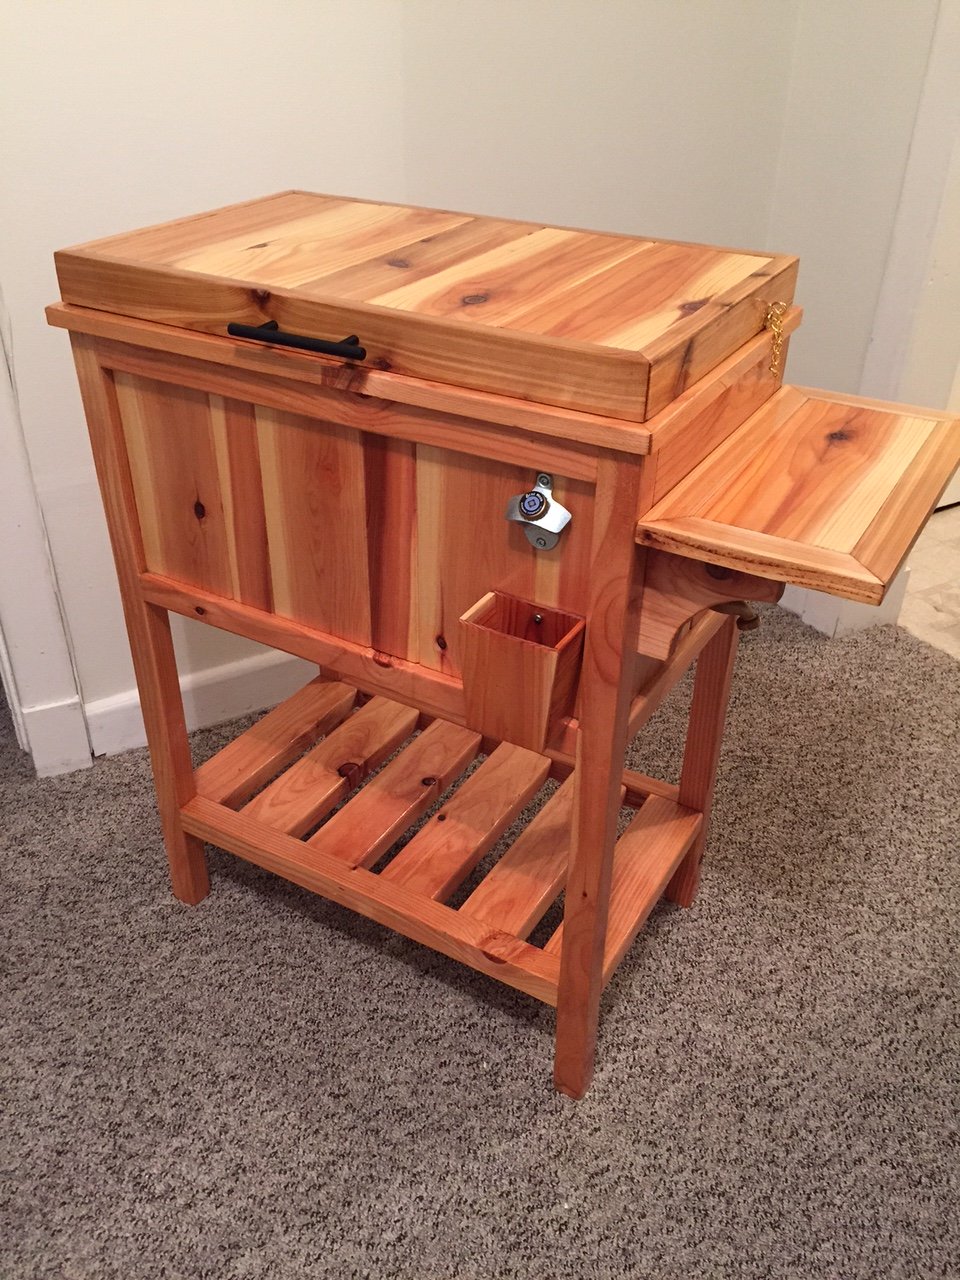
This is the cooler stand presented by Jenny from Birdsandsaoap. Very easy to build and always ends up with someone asking to buy it or have you make them one.
Wed, 06/10/2015 - 11:34
The plans for this can be found at the following web adress: http://ana-white.com/2013/06/plans/wood-cooler-birds-and-soap
Hope this helps
Wed, 09/21/2016 - 08:07
New to this site. How do I get the plans for the Wooden Cooler Stand?
Thank you!
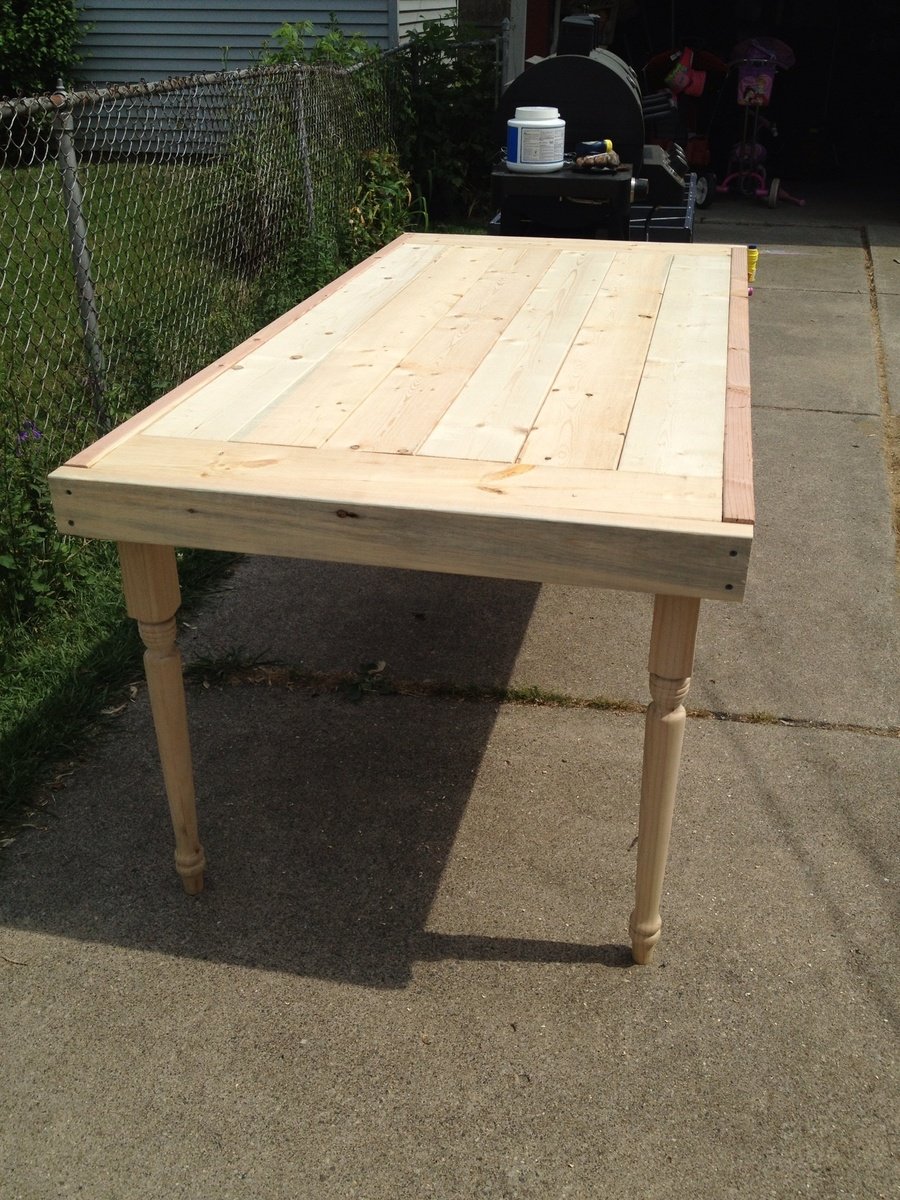
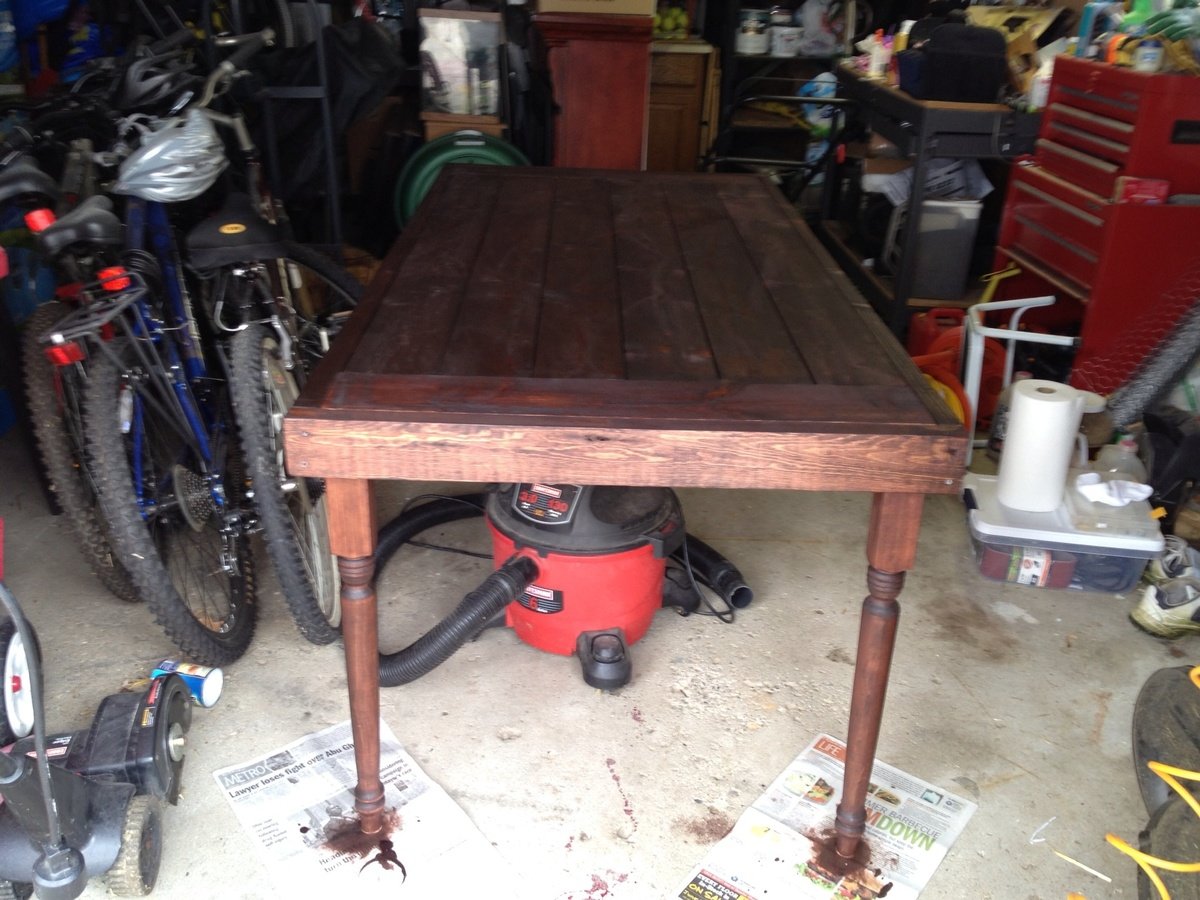
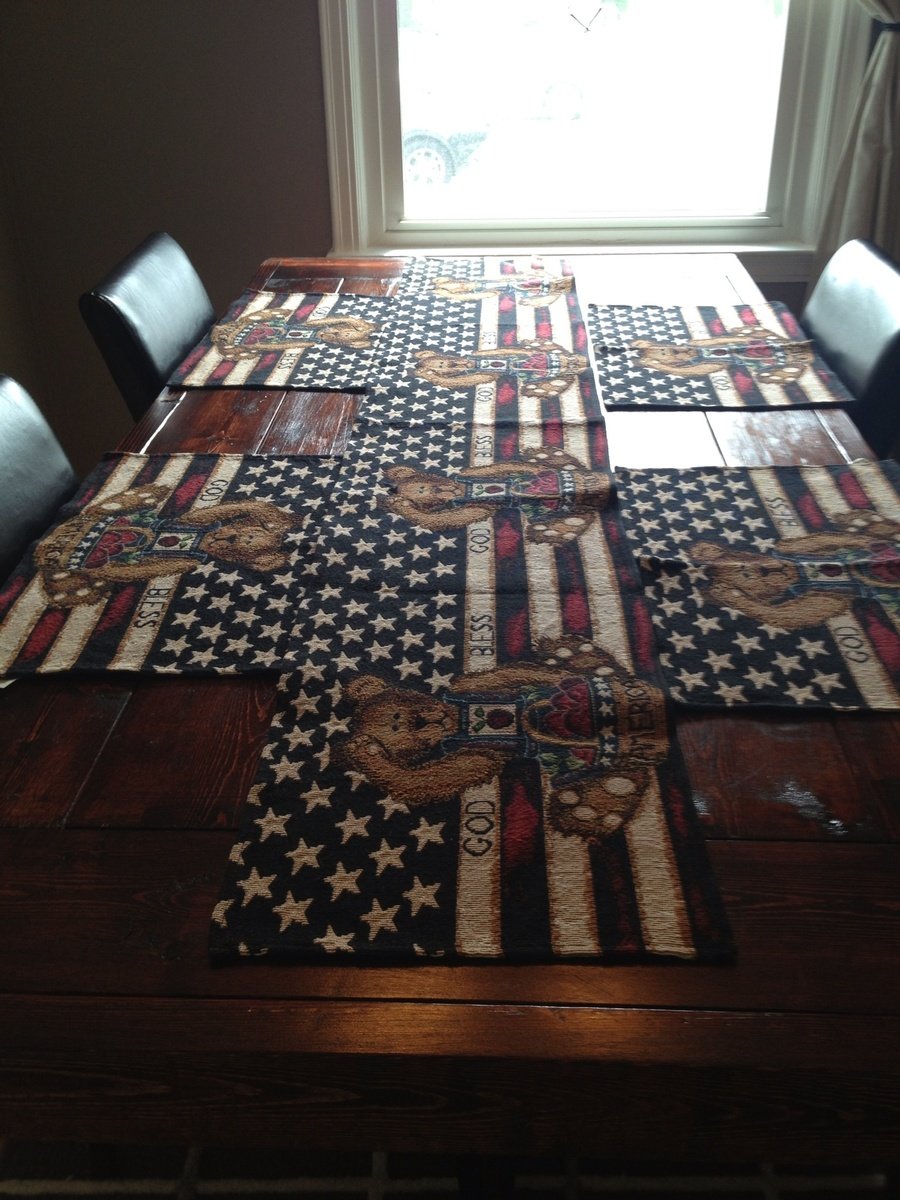
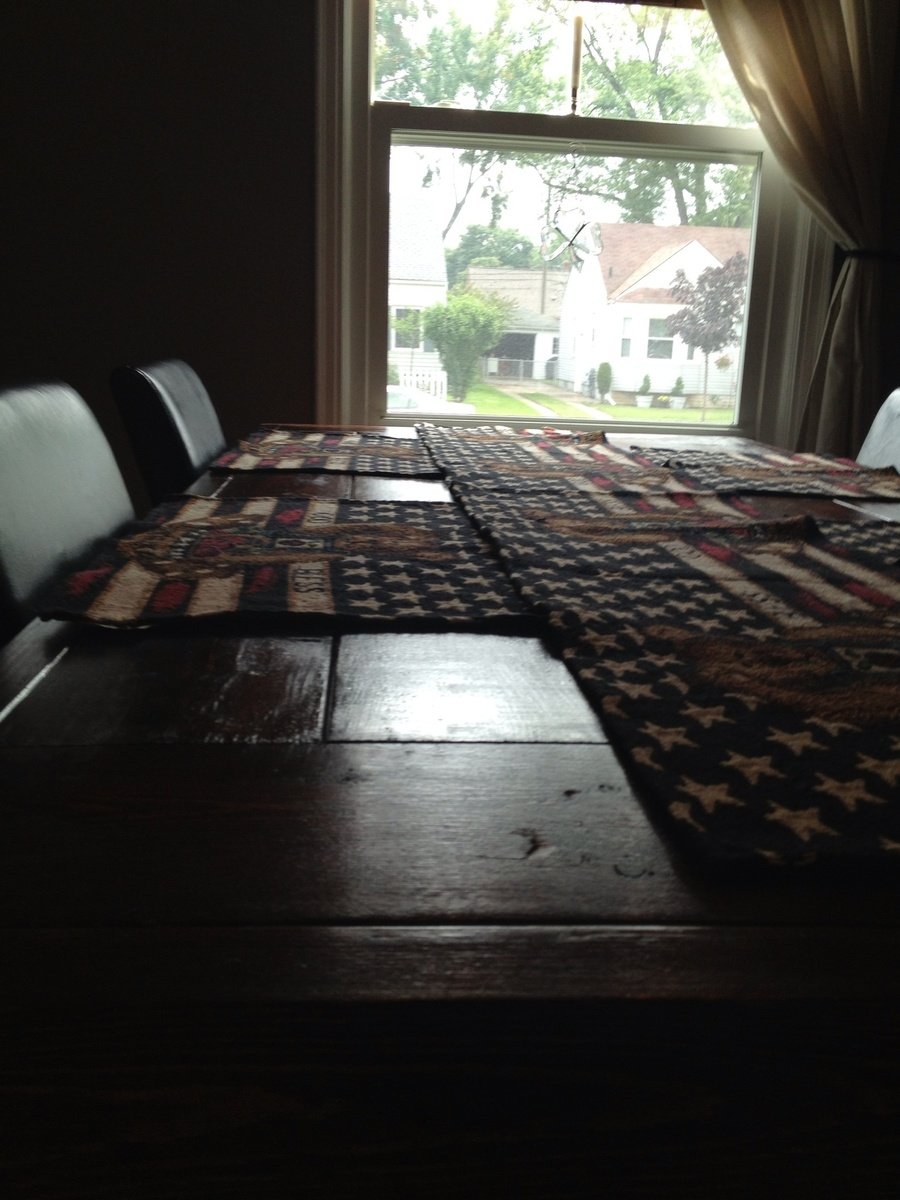
I wanted to attempt making a dining room table. This is my very first woodworking project. I did use store bought legs from one of the big box stores. Your site completely inspired me to just go for it. It's not quite finished. I've got to do all the sanding and staining. I plan to use a mahogany tone stain to coordinate with my brown/black parsons chairs and hutch in my dining room. Finally finished and I think it looks great! It took a lot of sanding to get all the wood pieces even, but so worth the effort. I love the rustic country look.
This was my first project from Ana's website and I'm hooked! I'm a beginner, but thank goodness for my Dad's help because I have a lot of learning to do!
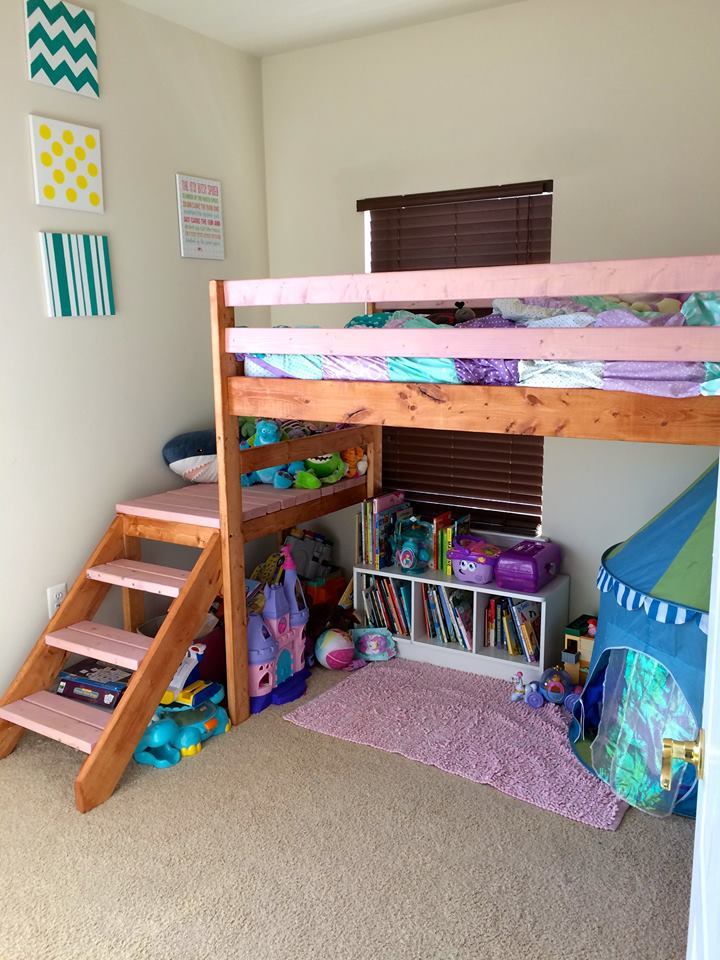
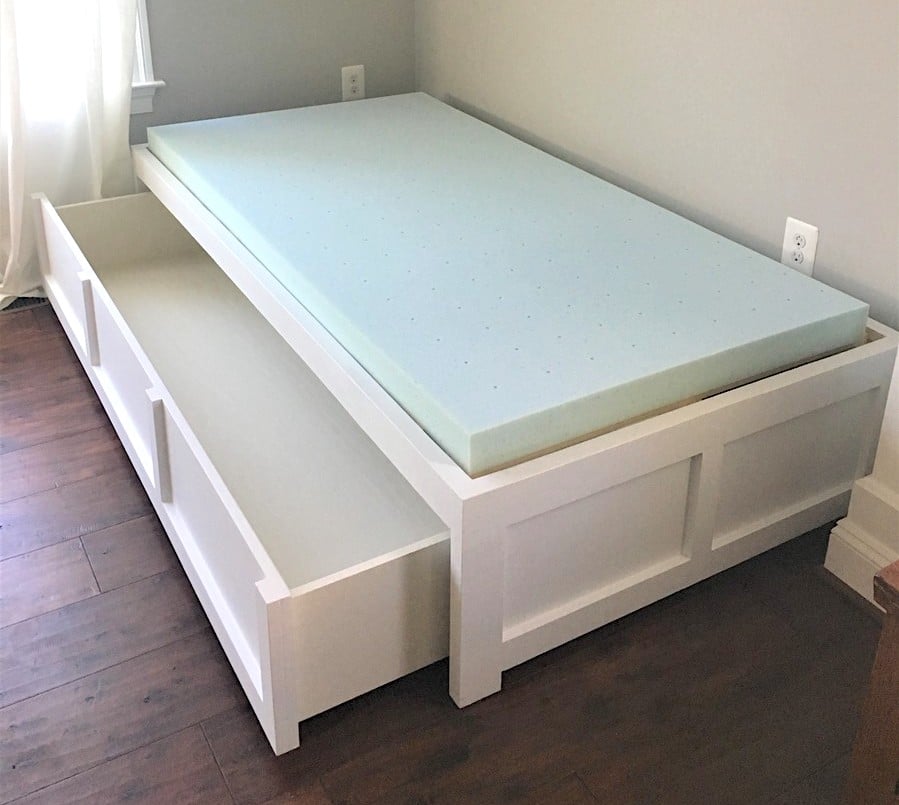
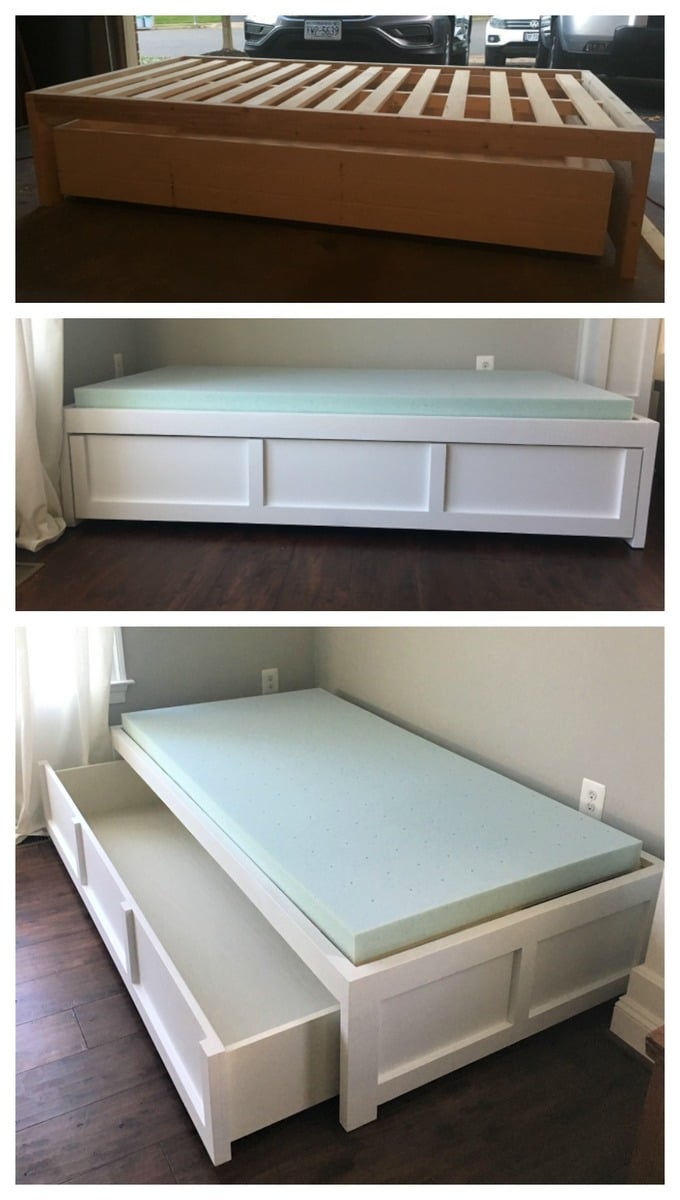
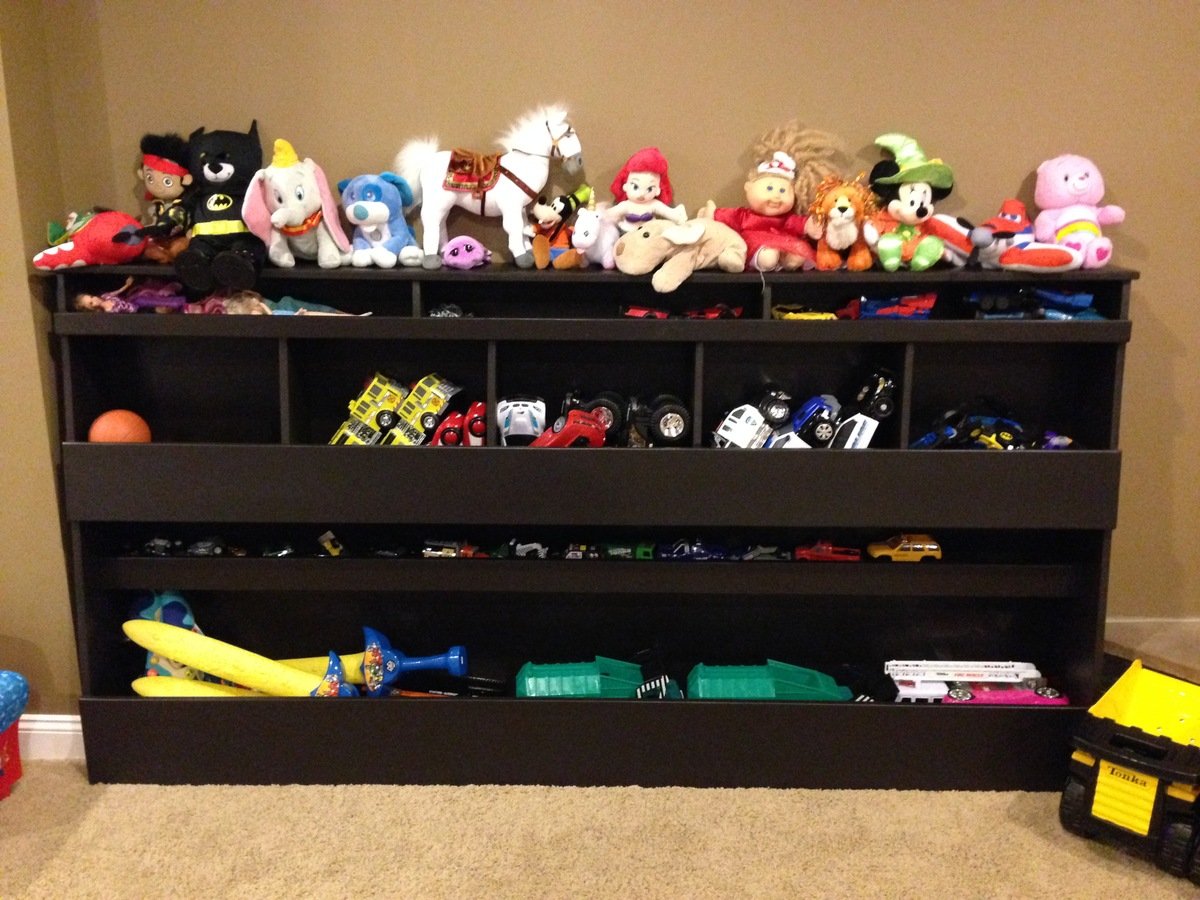
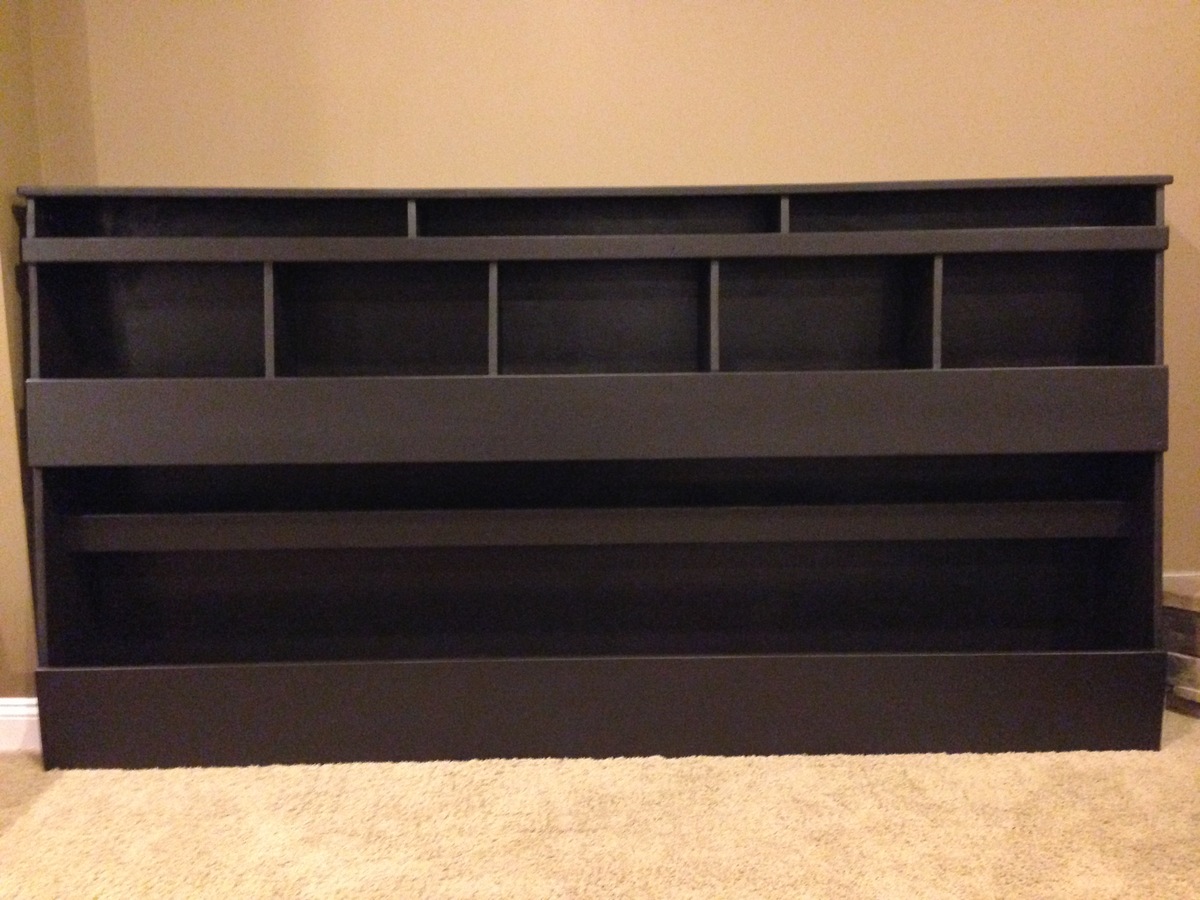
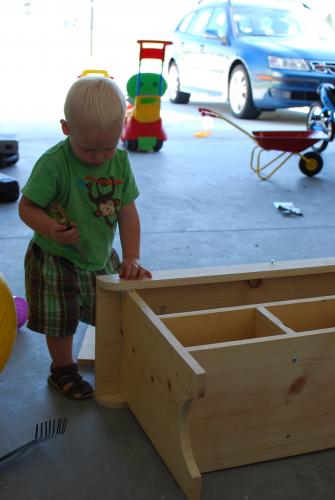
I wanted the drawer to be 1 drawer instead of 3. I feel like it looks cleaner (without having to adjust 3 drawers constantly to make it look good when you push them in). I was thinking the bed could actually be used as a trundle bed in the future too! I use this to store toys right now and it is Awesome!
I increased the bed size to fit a twin mattress and increased the height of the bed slightly so that the drawer would be a little bit deeper. We also added a back to the bed and carried around the trim to make all sides look the same. We added a bumper to the back and sides of the inside of the bed so the drawer is easy to push in and fits in snug. Finally we reinforced the bottom of the drawer with more 1x4 boards so that if a child does sleep in it, it would be more sturdy. I now have kids come over and jump into the drawer (literally) and I'm glad we reinforced it.
The changes we made did add to the cost and our time (as well as being newbies), but I think it's worth it and the bed turned out beautiful!


Sat, 01/15/2022 - 08:02
Any chance you have your cut list for this? Will the trundle storage drawer fit a twin mattress in it? Also, you say you increased the bed size to a twin, was the original not a twin too?

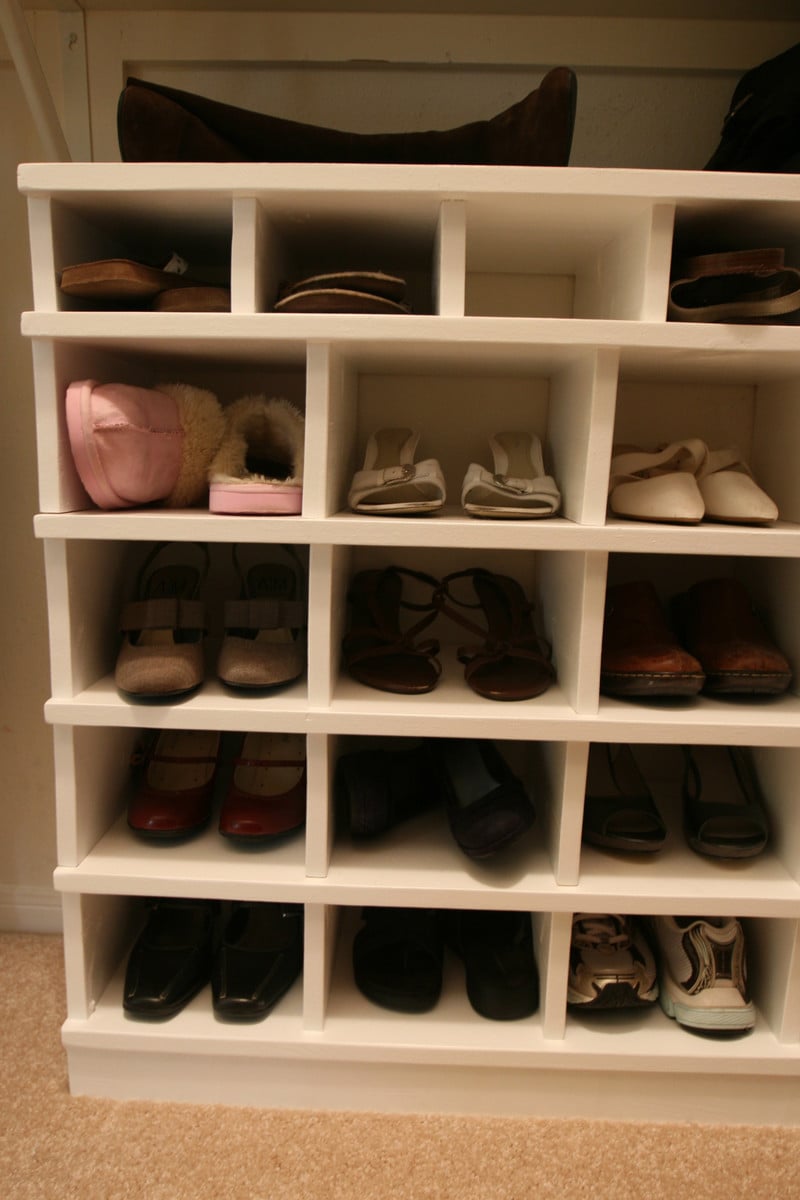
I took the 25 cubbies plan and changed the dimensions to fit shoes. I made a simpler version for my husband too. This project went together quickly and was so fun to build.

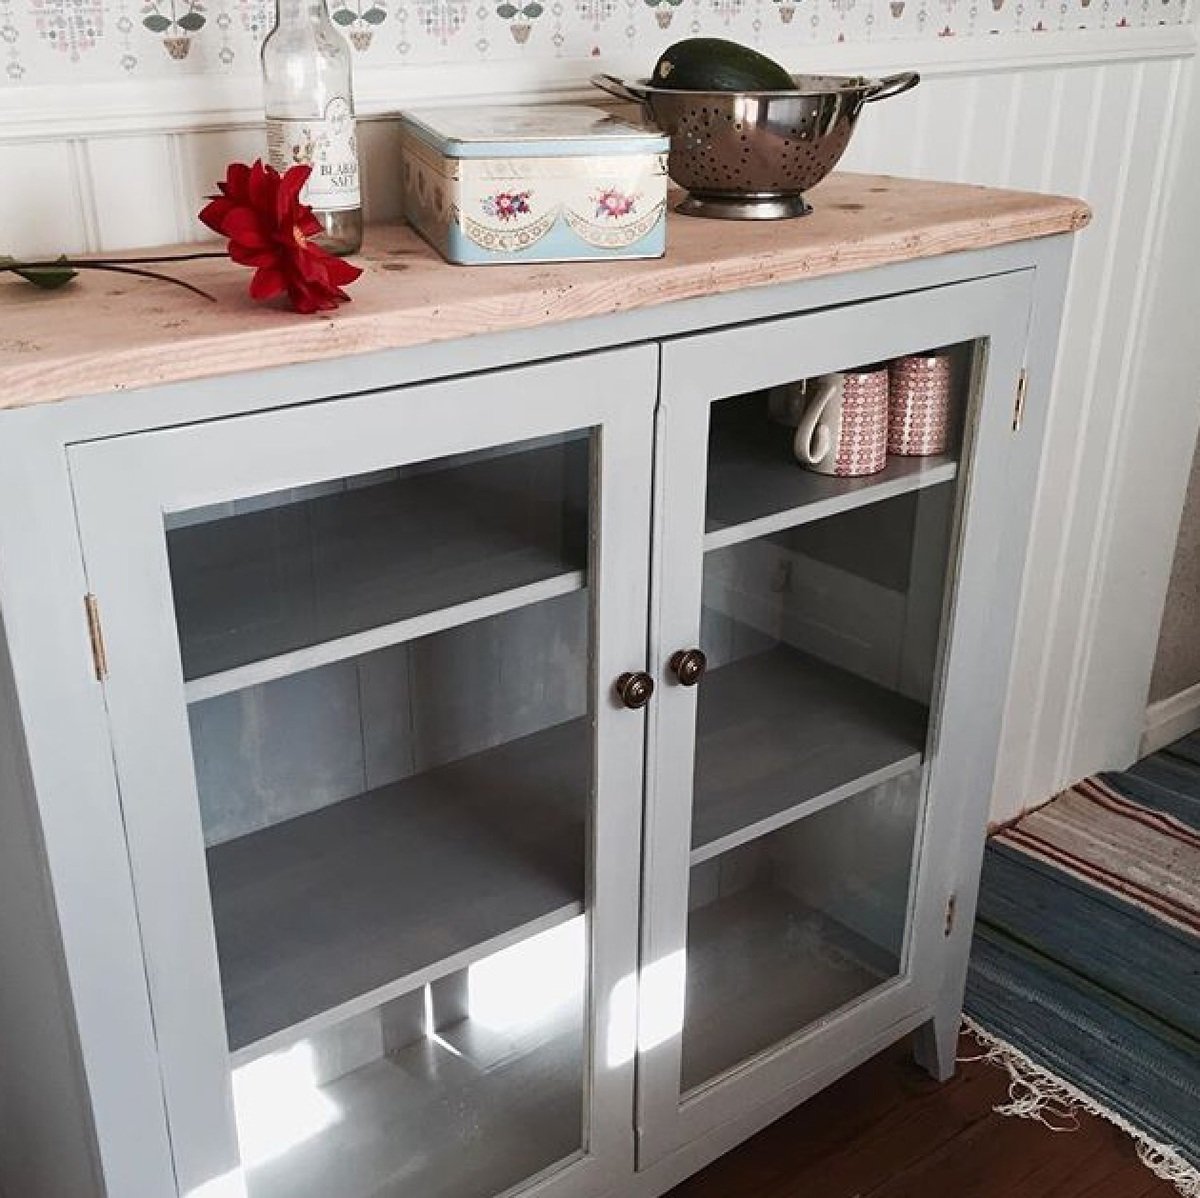
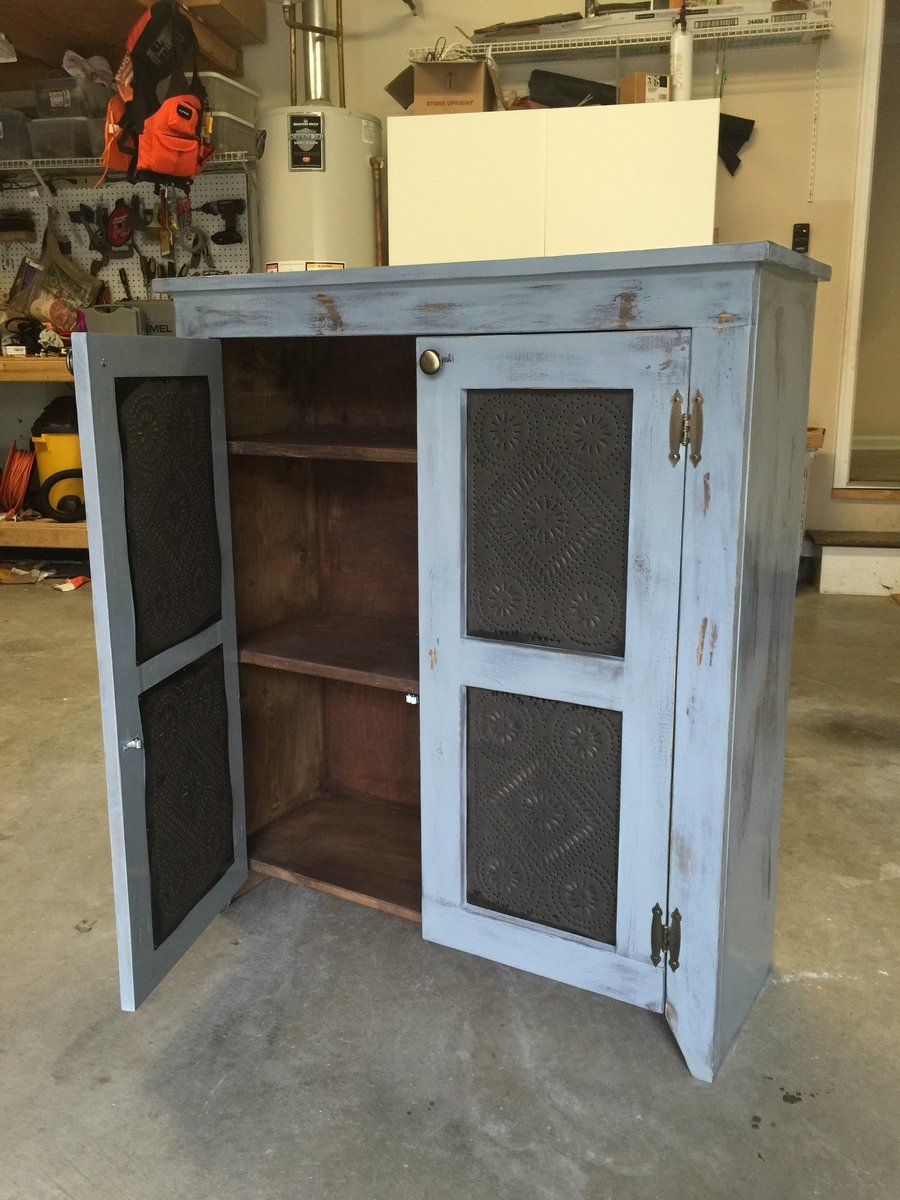
Spend some time on pintrest and made this nice Cupboard hard to find the right plan but its my first furniture so freebasing and a few misstake later.

Thu, 03/11/2021 - 06:08
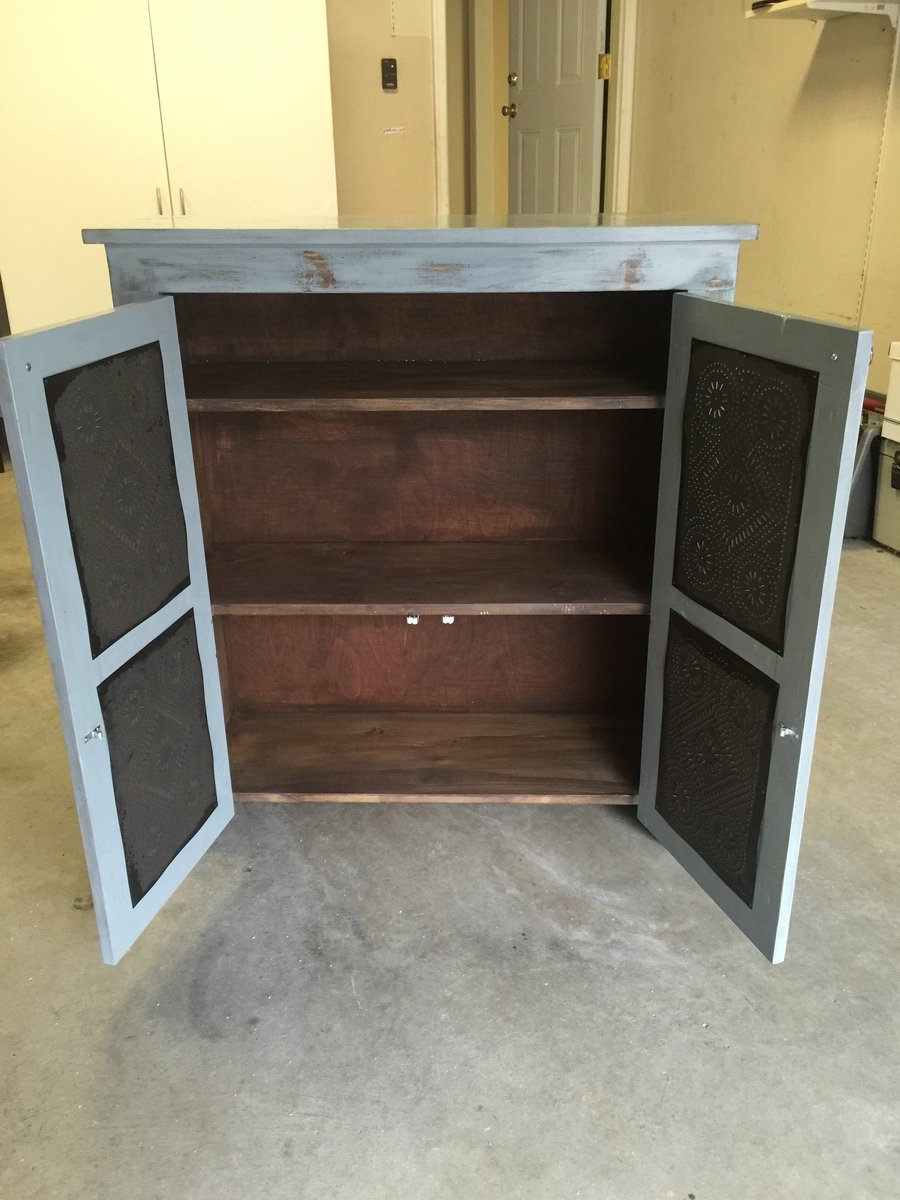
No glass, replace with barn door look. Fix the bottom to look like dresser bottom.
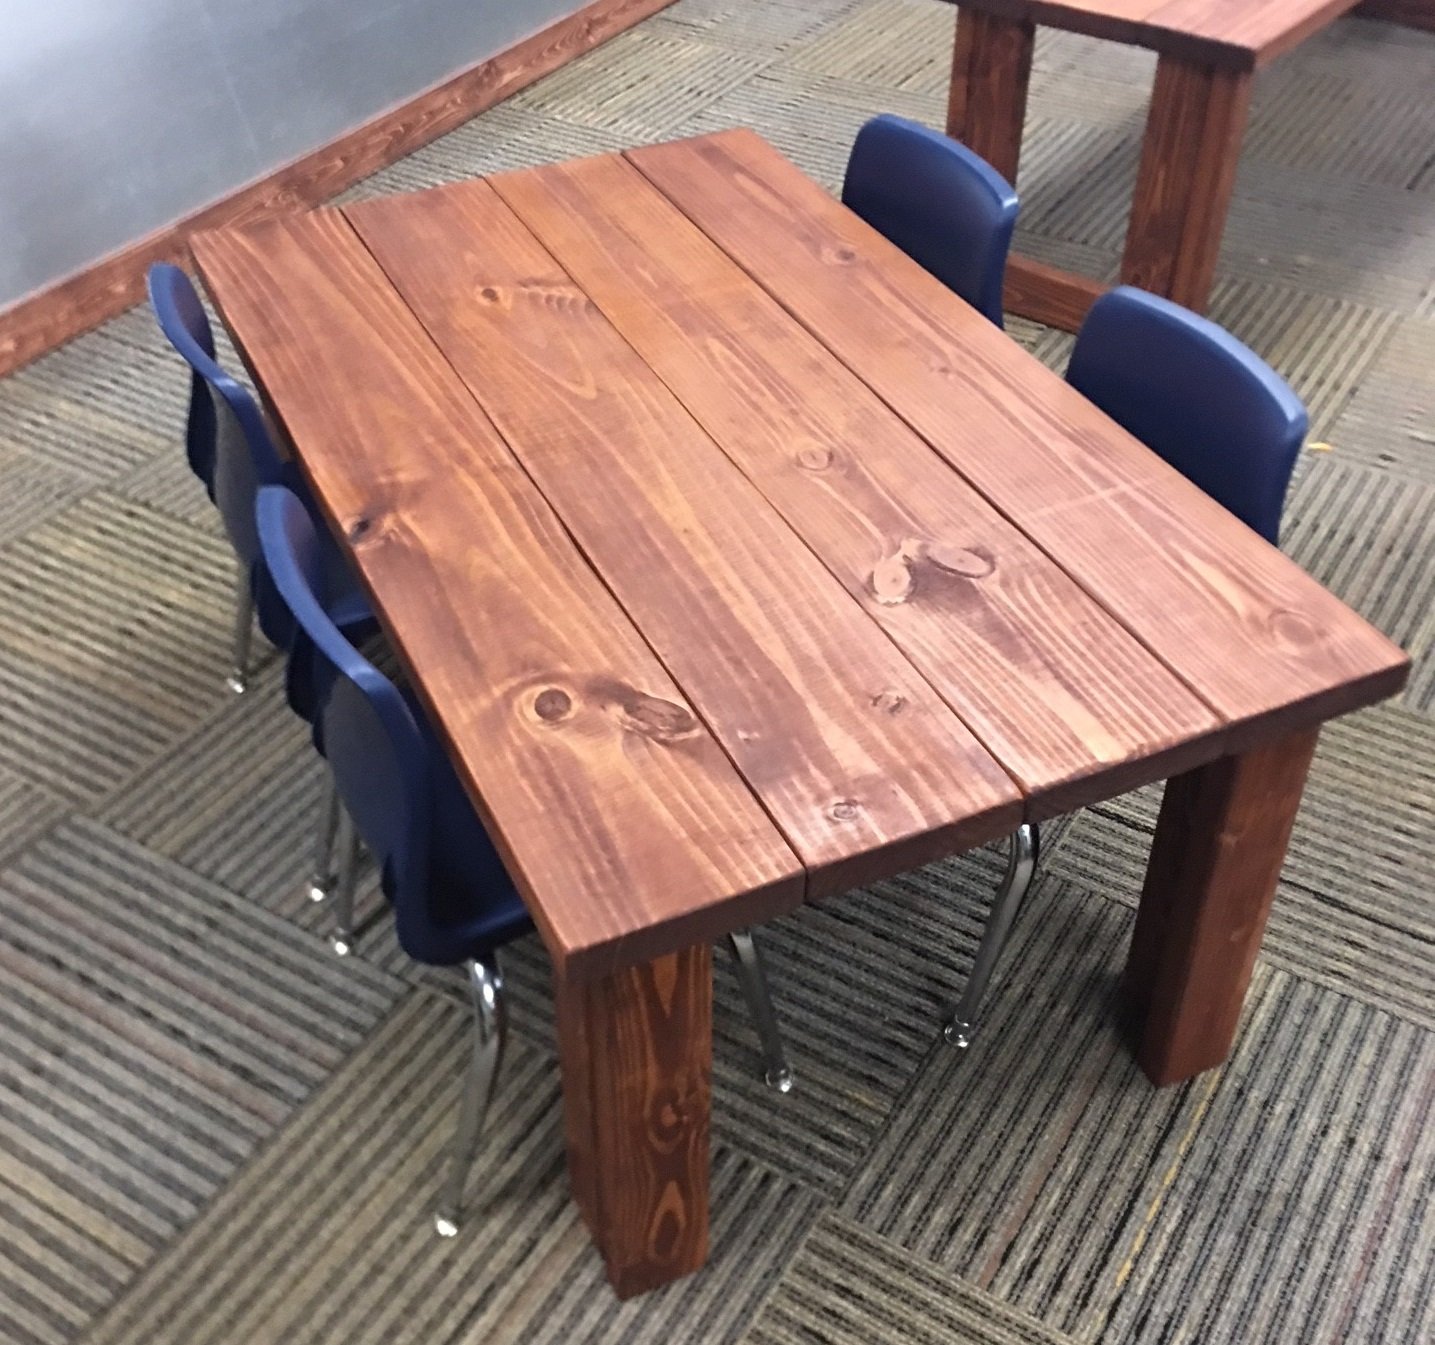
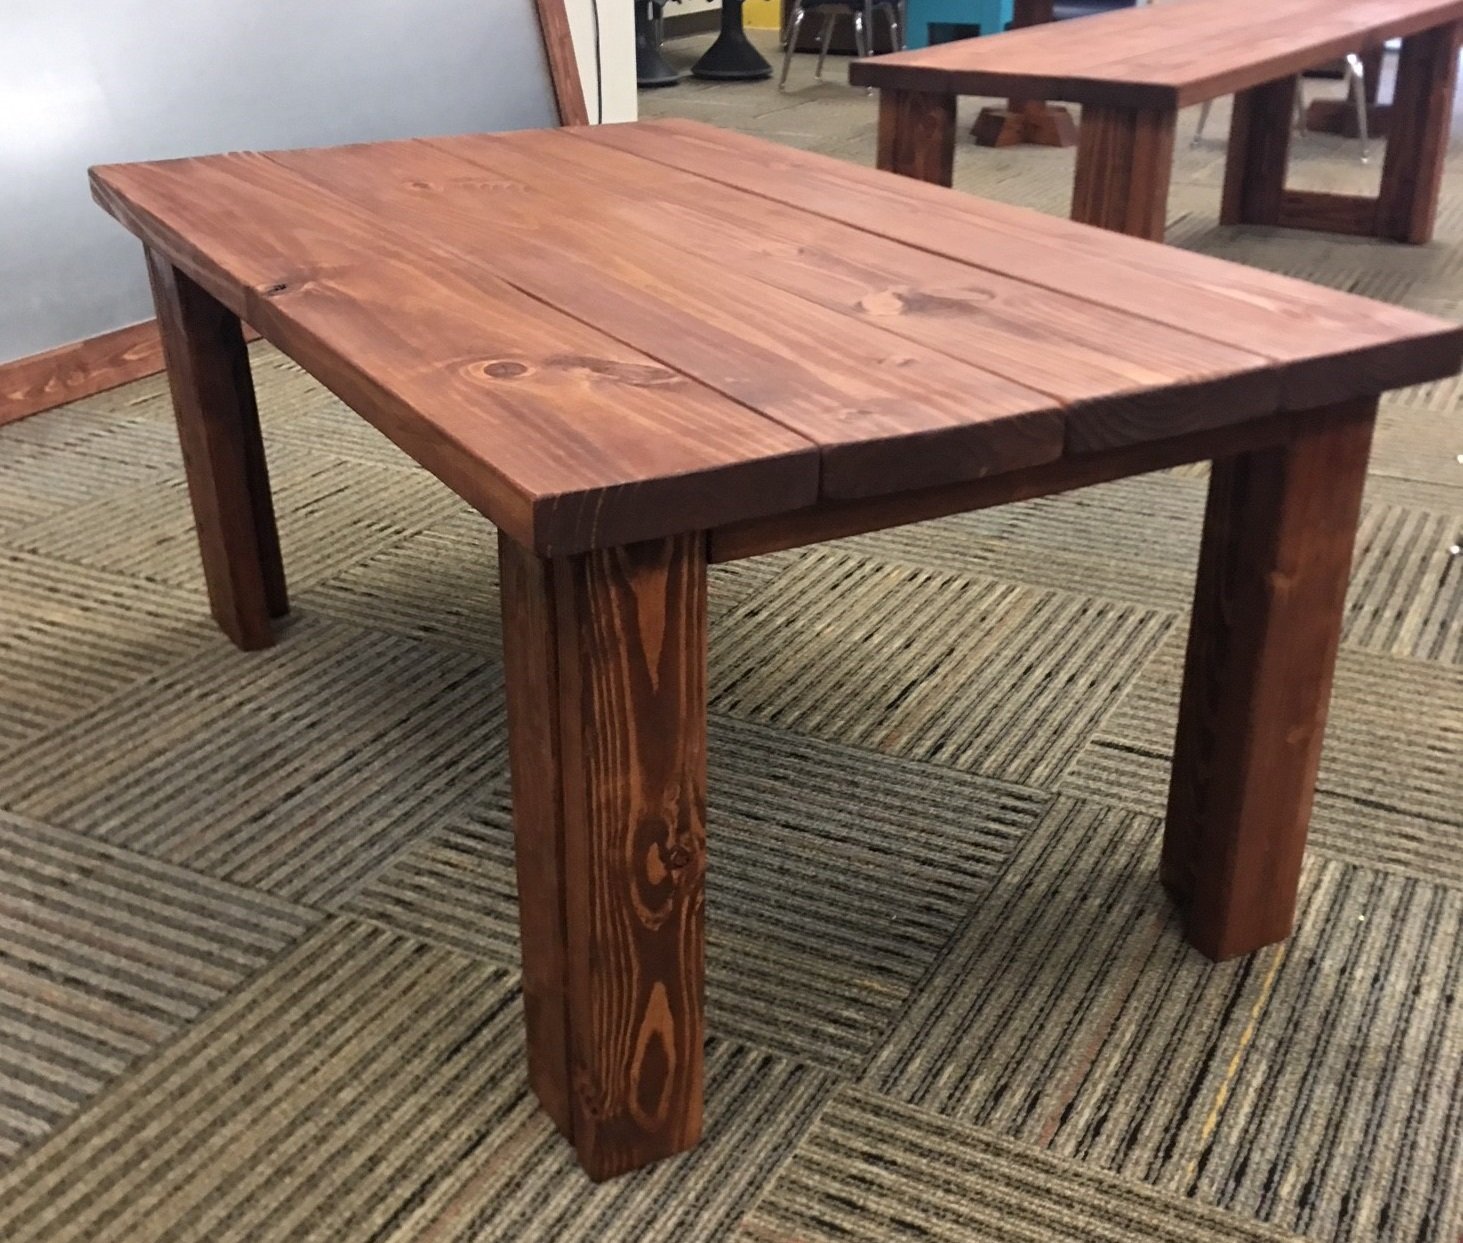
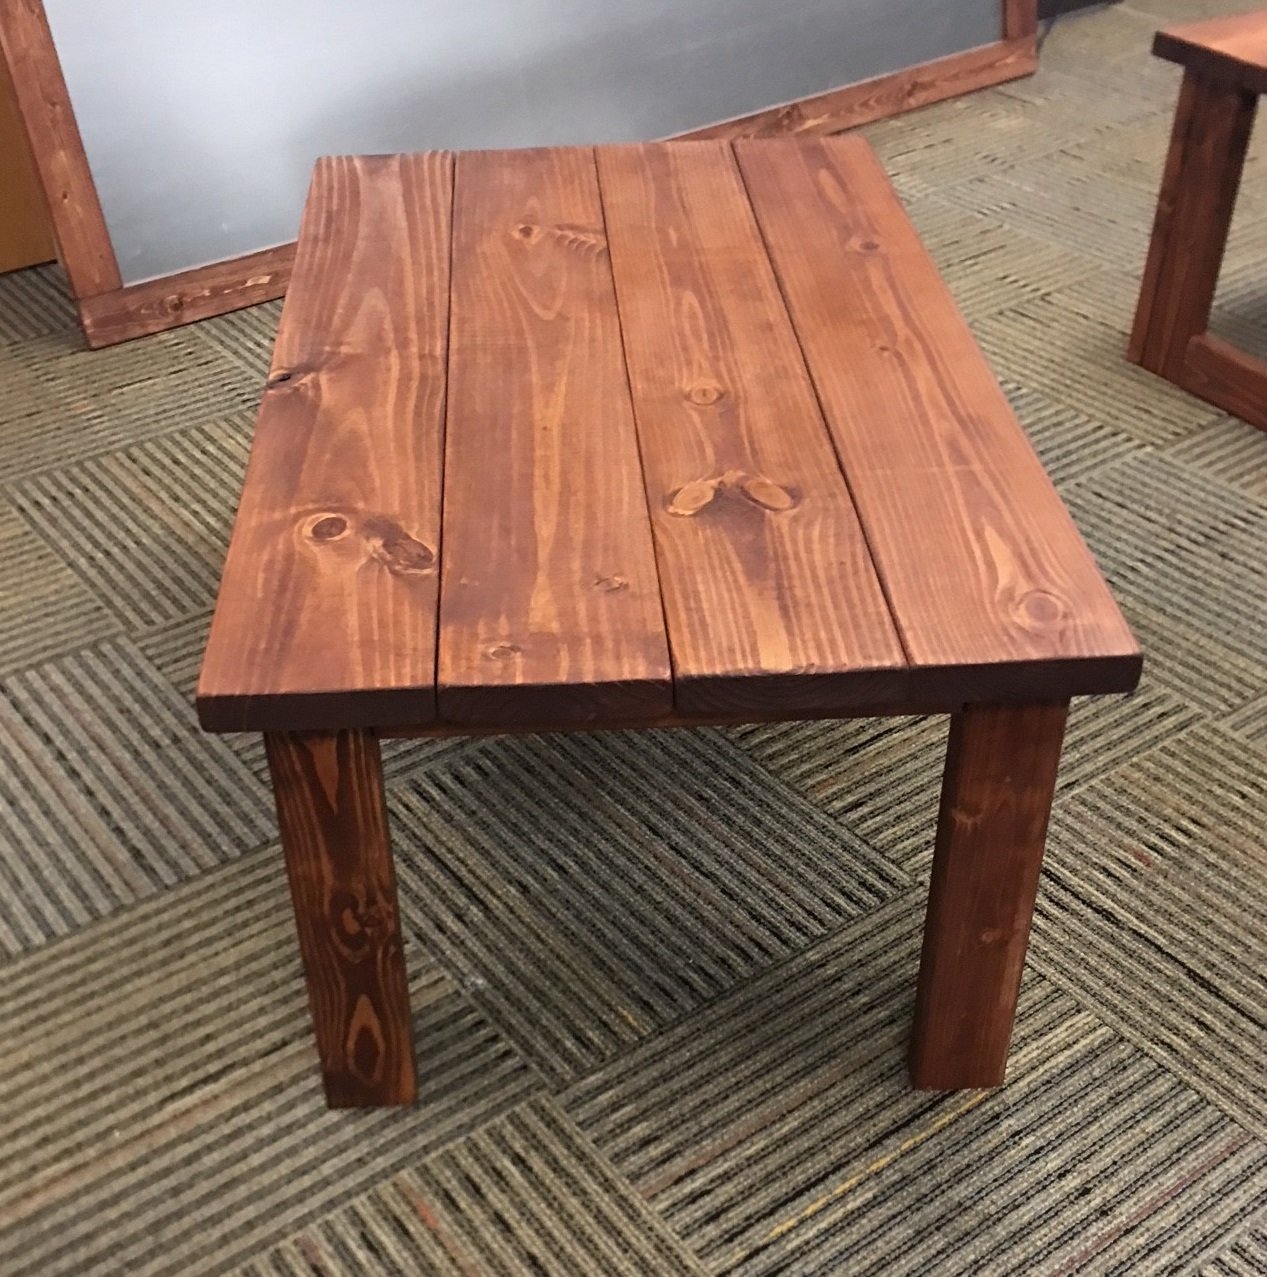
Been a while since I had time to actually build anything worth posting about! My wife wanted some items for her Kindergarten classroom this year, so built several items, most inspired by the Farmhouse family.

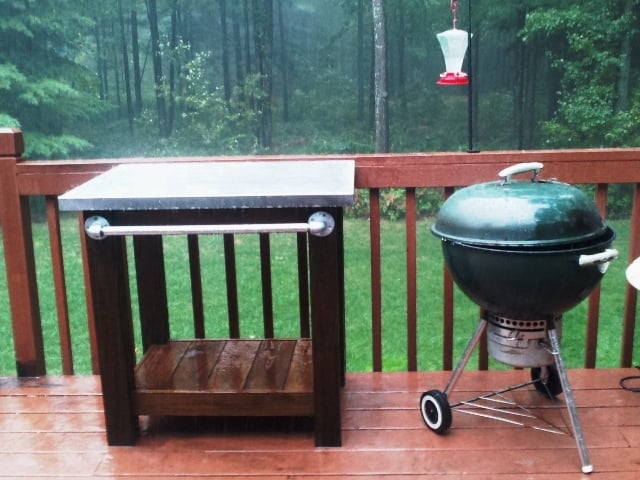
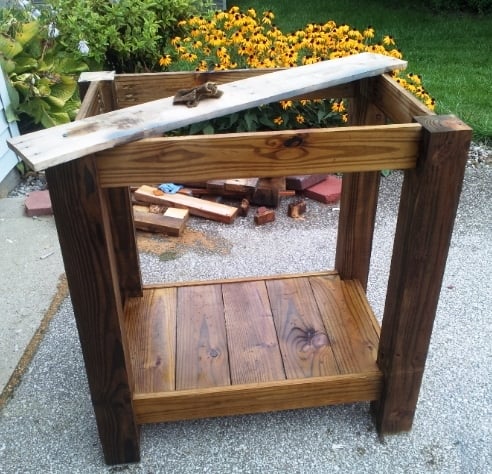
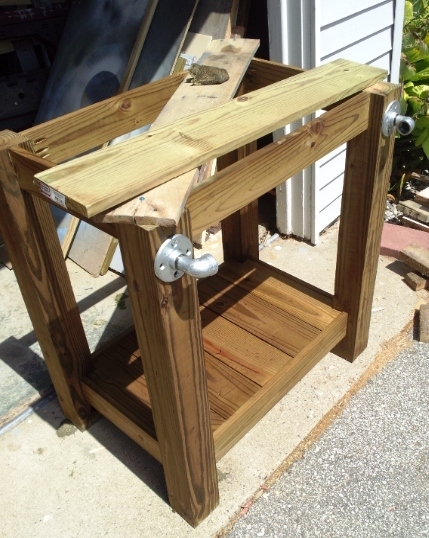
I made this table to go next to an outdoor grill to be used as a food prep area or just a surface for holding ingredients (instead of using the deck railing!). The top is stainless steel which fits tightly over 2 3/4" pieces of plywood laminated together. The bar/handle in front is made out of galvanized pipe. All wood was treated.
Legs - 4x4 posts
Bottom shelf - 1x6's
Sides - 1x4's
Top - 2 pieces of 3/4" plywood laminated together with a stainless steel top (custom fit) over top
Towel bar - galvanized pipe (cut and threaded to size at Lowe's), floor flanges and 90 degree elbows
Thu, 05/15/2014 - 10:33
Sorry about the late reply! Yes, I just gave my dimensions to a local steel supplier and they made the top. I think I have about $40 into the stainless. They didn't weld the corners but I've never had an issue with them.

Sat, 04/26/2014 - 15:41
I too would like to know your source for the sheet metal.

In reply to Stainless steel sheet metal by Pursuit of Handyness
Thu, 05/15/2014 - 10:35
I just found a local steel supplier, told them what I need and they formed the top. It cost me around $40 (without welding of the corners). I took a fine grit sandpaper to it afterward to scuff it up so it didn't look so bright.
Wed, 04/30/2014 - 12:55
I would like to know are there any plans available to make this table? I am very impressed of its design.
In reply to Grill table with stainless steel top by AMR4412
Thu, 05/15/2014 - 10:46
No...I didn't have any plans when I built it but it's a very simple concept. I chose to use all treated wood since I knew it would be sitting outside unprotected. However, my 4x4 posts weren't square so this caused a lot of problems and everything was built to fit. I believe I just used 4x4's, 1X6s (for the bottom shelf) and 1x4s for the sides (top and bottom). For the top, I just laminated 2 pieces of 3/4" plywood together to bulk it up and then had the stainless top built to fit. It fit perfectly so I didn't glue it to the plywood. This makes it easy to remove and clean, if necessary. For the galvanized pipe (towel bar), I bought it at Lowe's and had them cut/thread it to fit my dimensions.
Large version of the toy box for the basement. Added a half shelf in the bottom row for small items (cars).
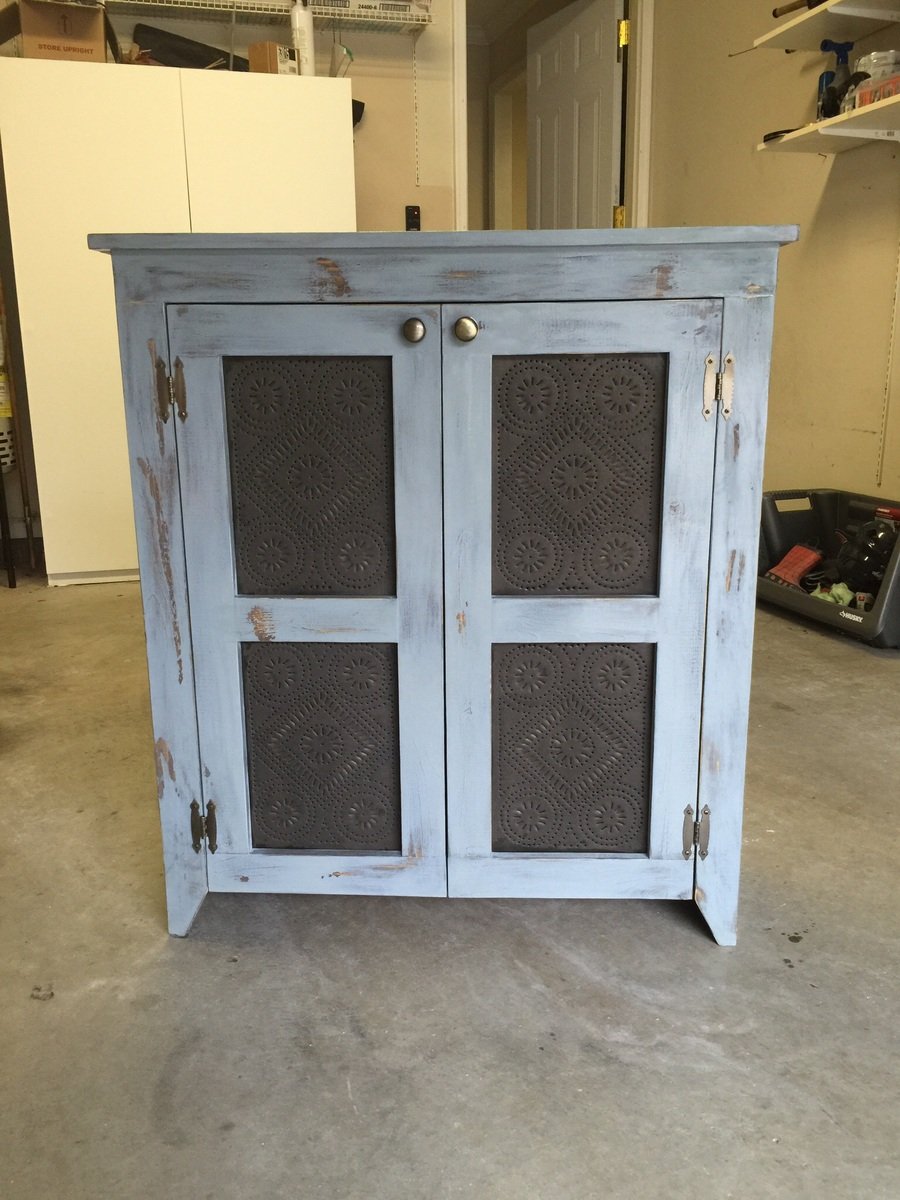
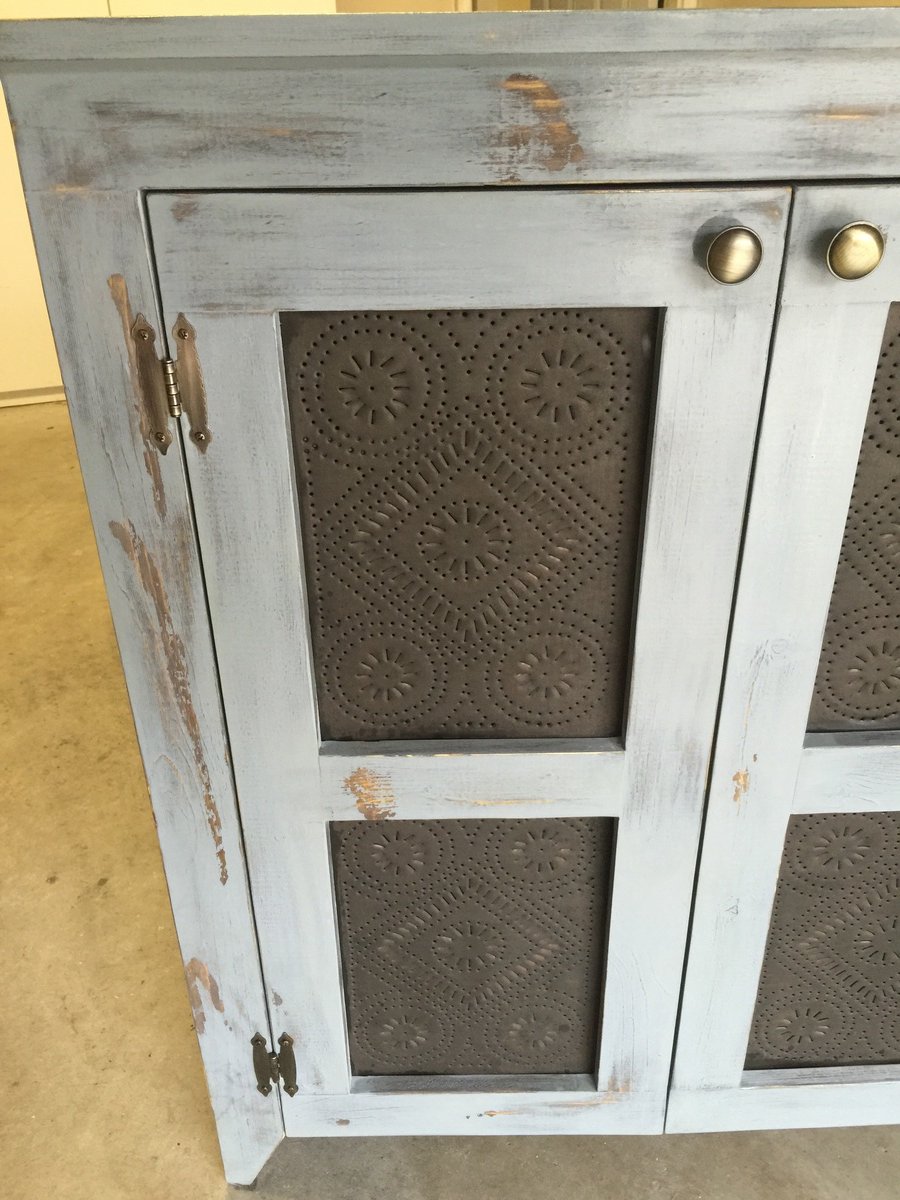
This is my first, of hopefully many projects to come. I modified Patrick's Jelly Cupboard plans to be 40" tall and added the tins to the doors. I used spruce and pine board from a local lumber yard. The finish is Miss Mustard Seed milk paint inside and out. With kids in the house I didn't want to use stain with the heavy chemical smell so I mixed the milk paint with a lot of water to look like a stain. That product is so easy to use and looks great. Needless to say my wife loves her pie safe. Thanks Ana for this site and the inspiration to give this a try. I'm hooked!

Sat, 10/31/2015 - 09:36
This is really beautiful! Might I ask where you got your tin inserts? Thanks!
Tue, 12/01/2015 - 11:13
Thank you for the comments. I ordered the tins from Irvin's online. They were quick to ship and were packaged well. Here's the link
https://www.irvins.com/category/Kitchen-Cabinet-Punched-Tin-Panels/08_2…
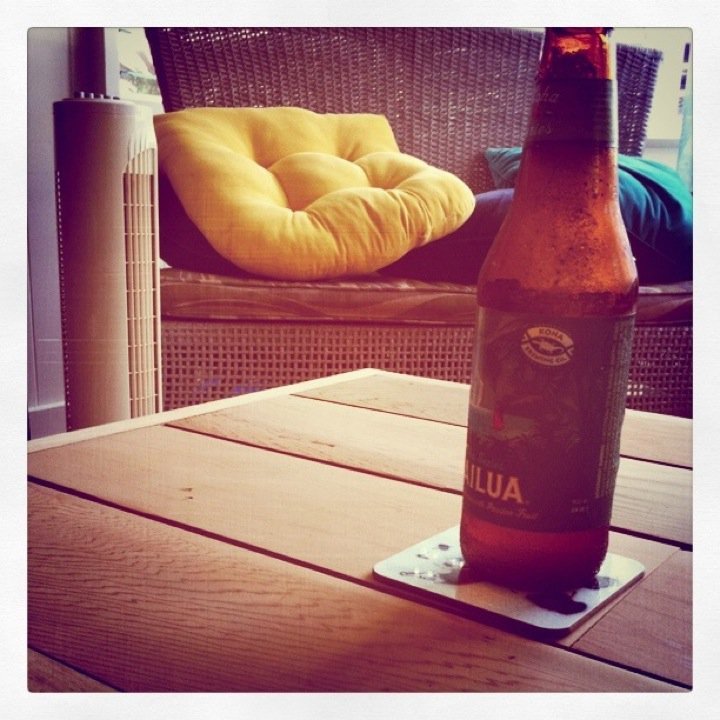
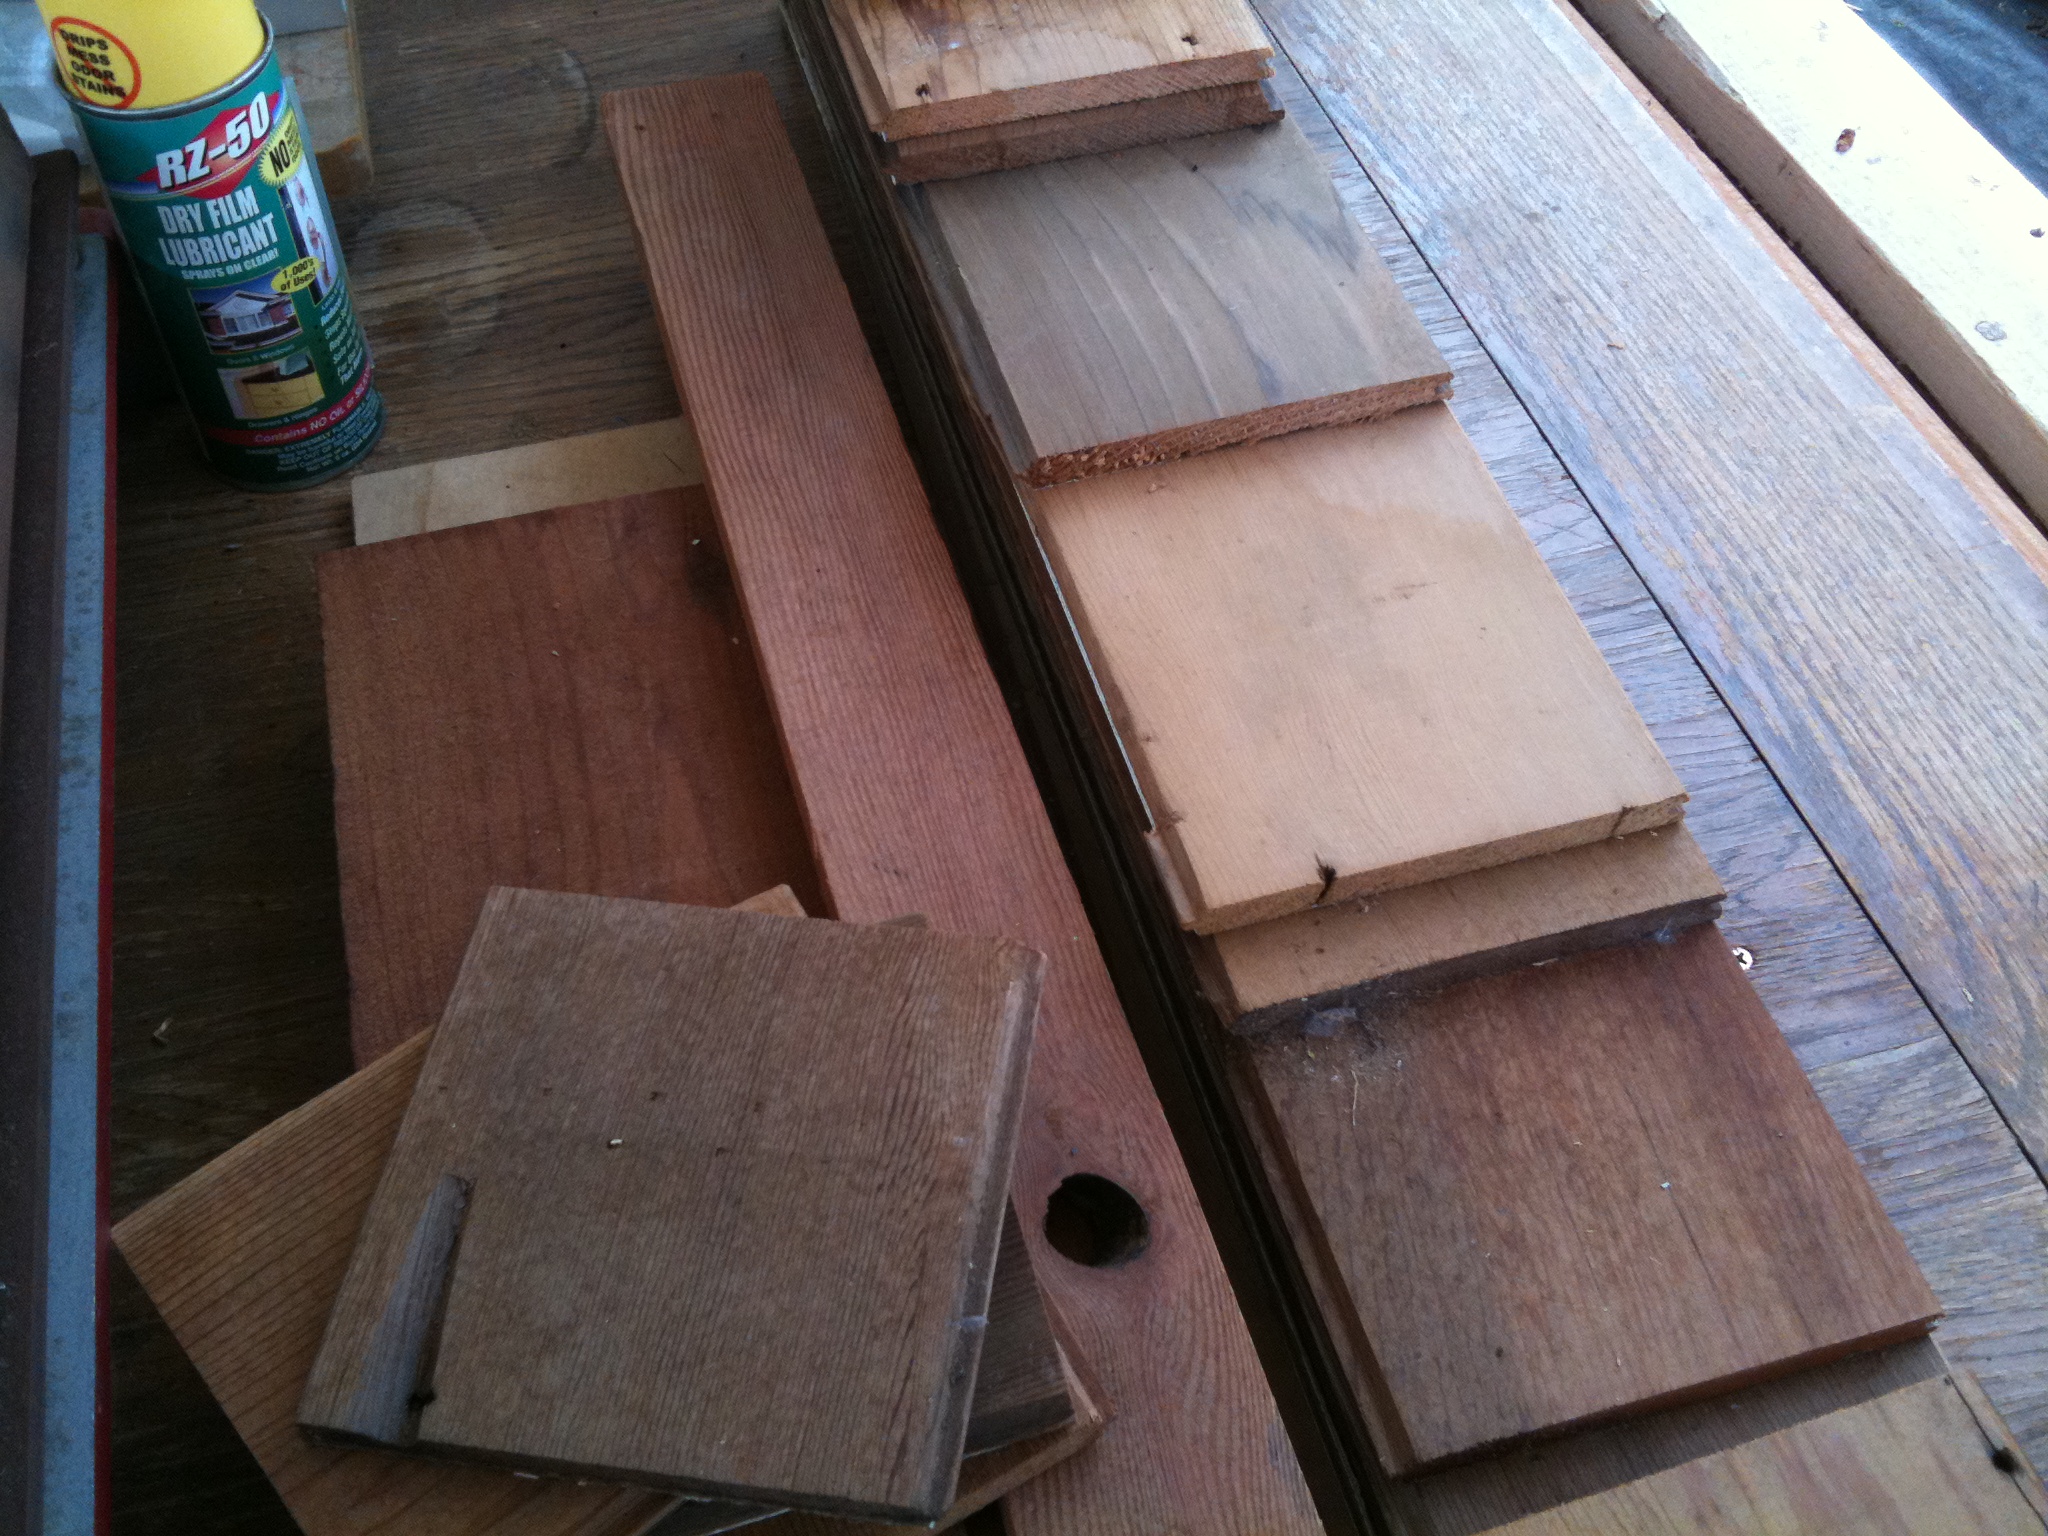
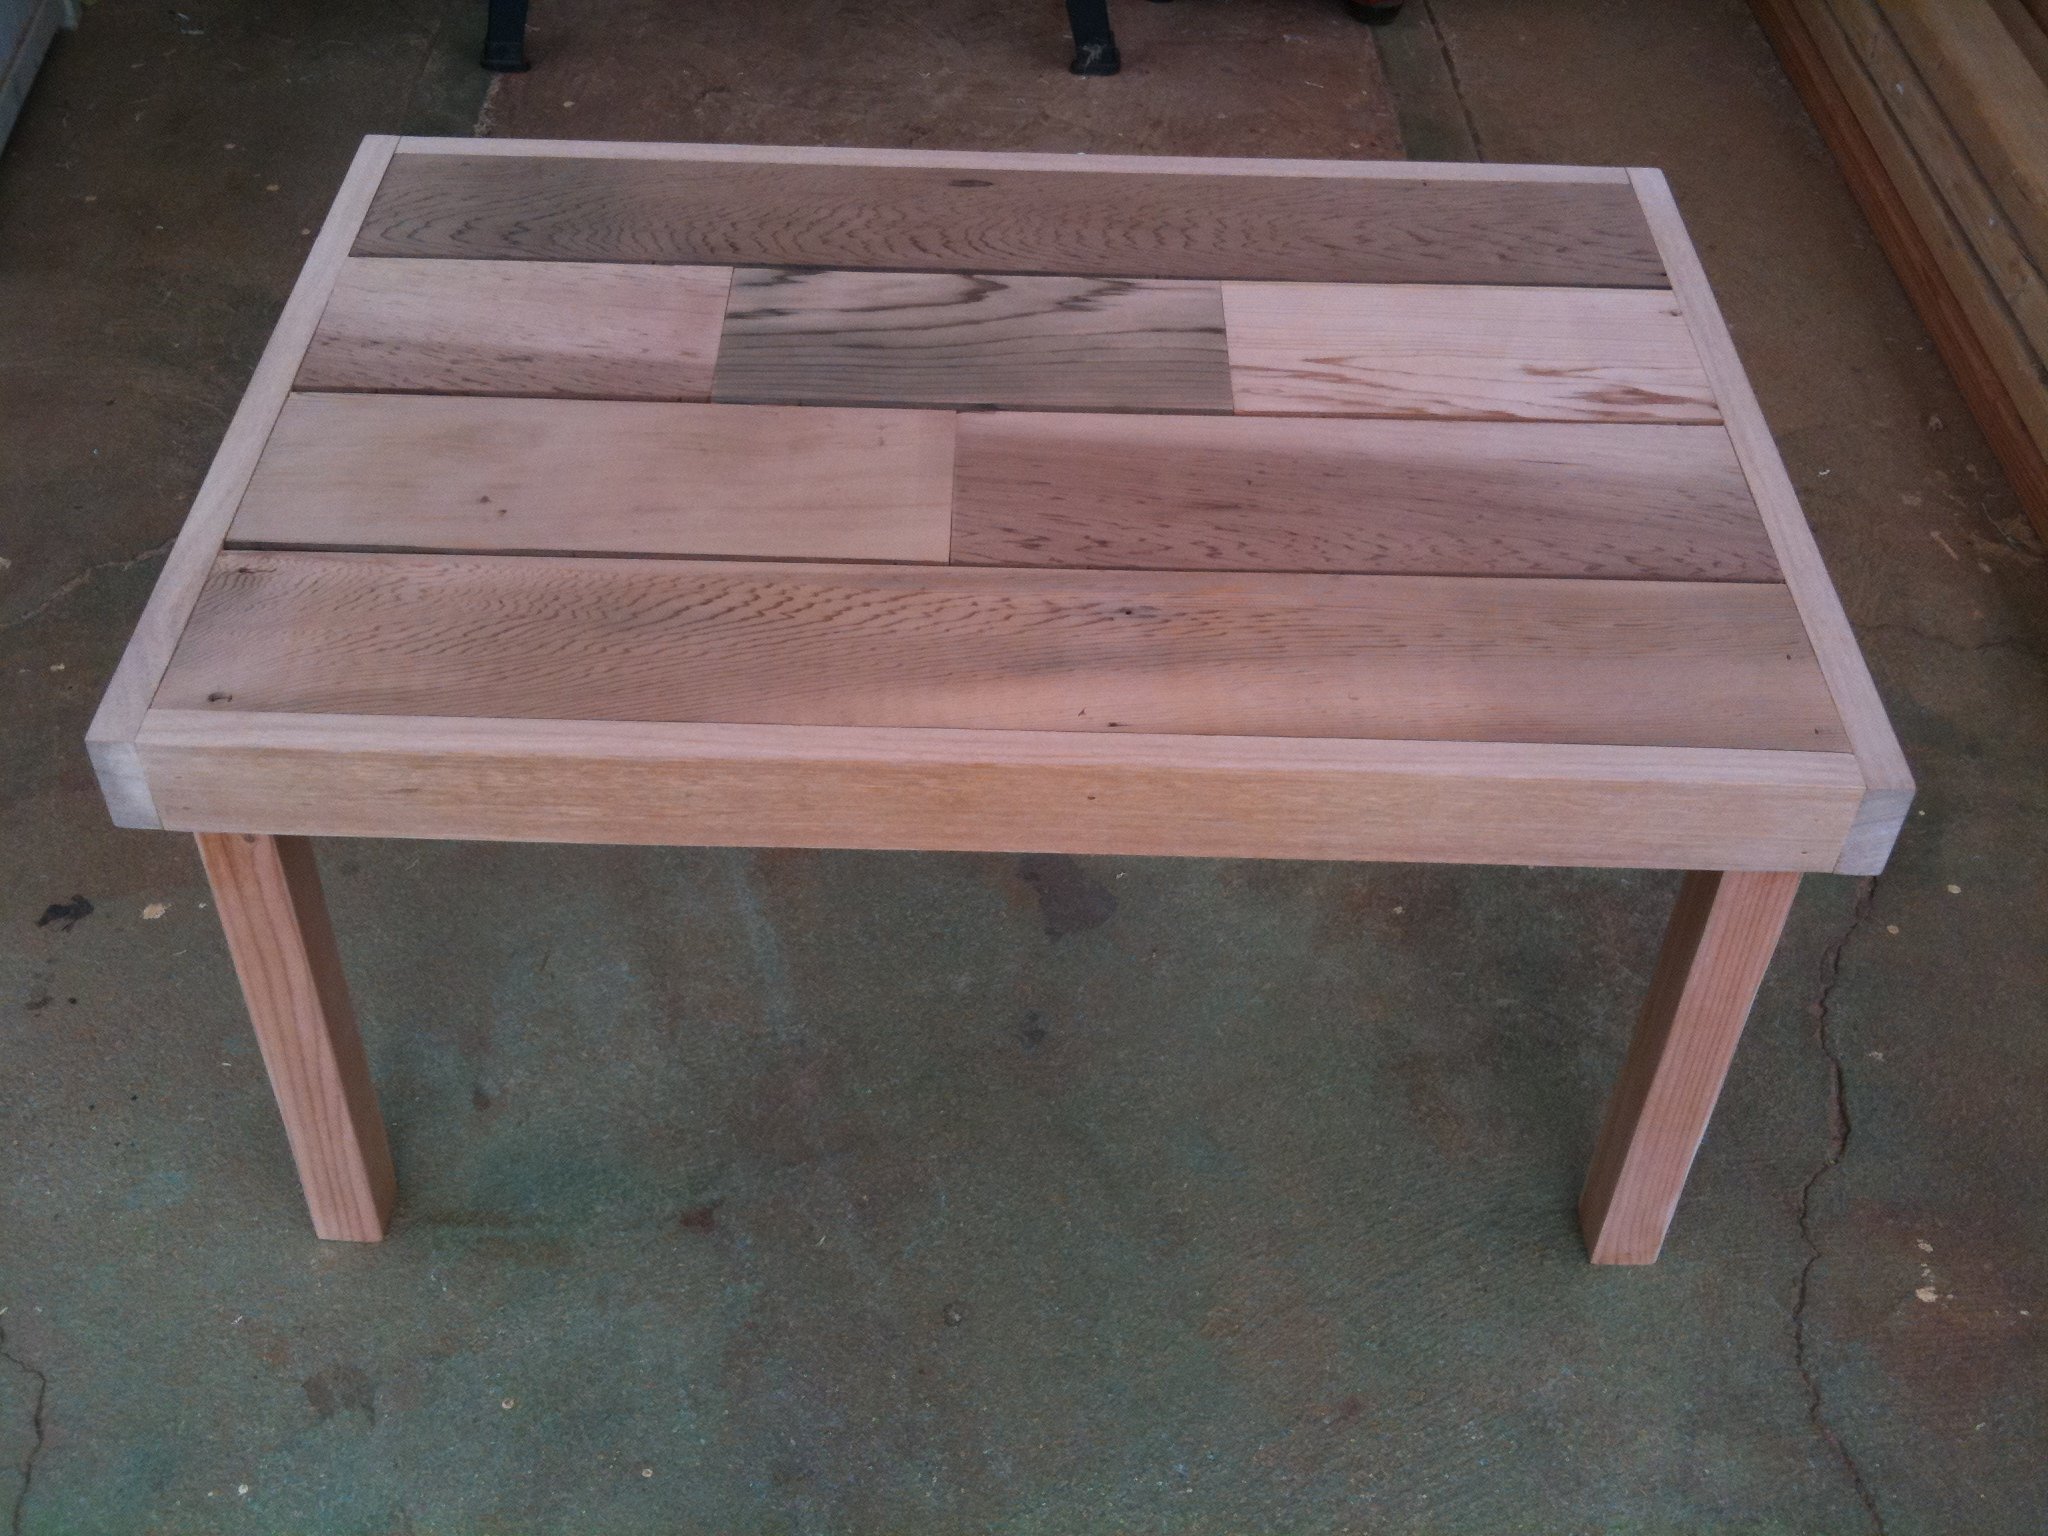
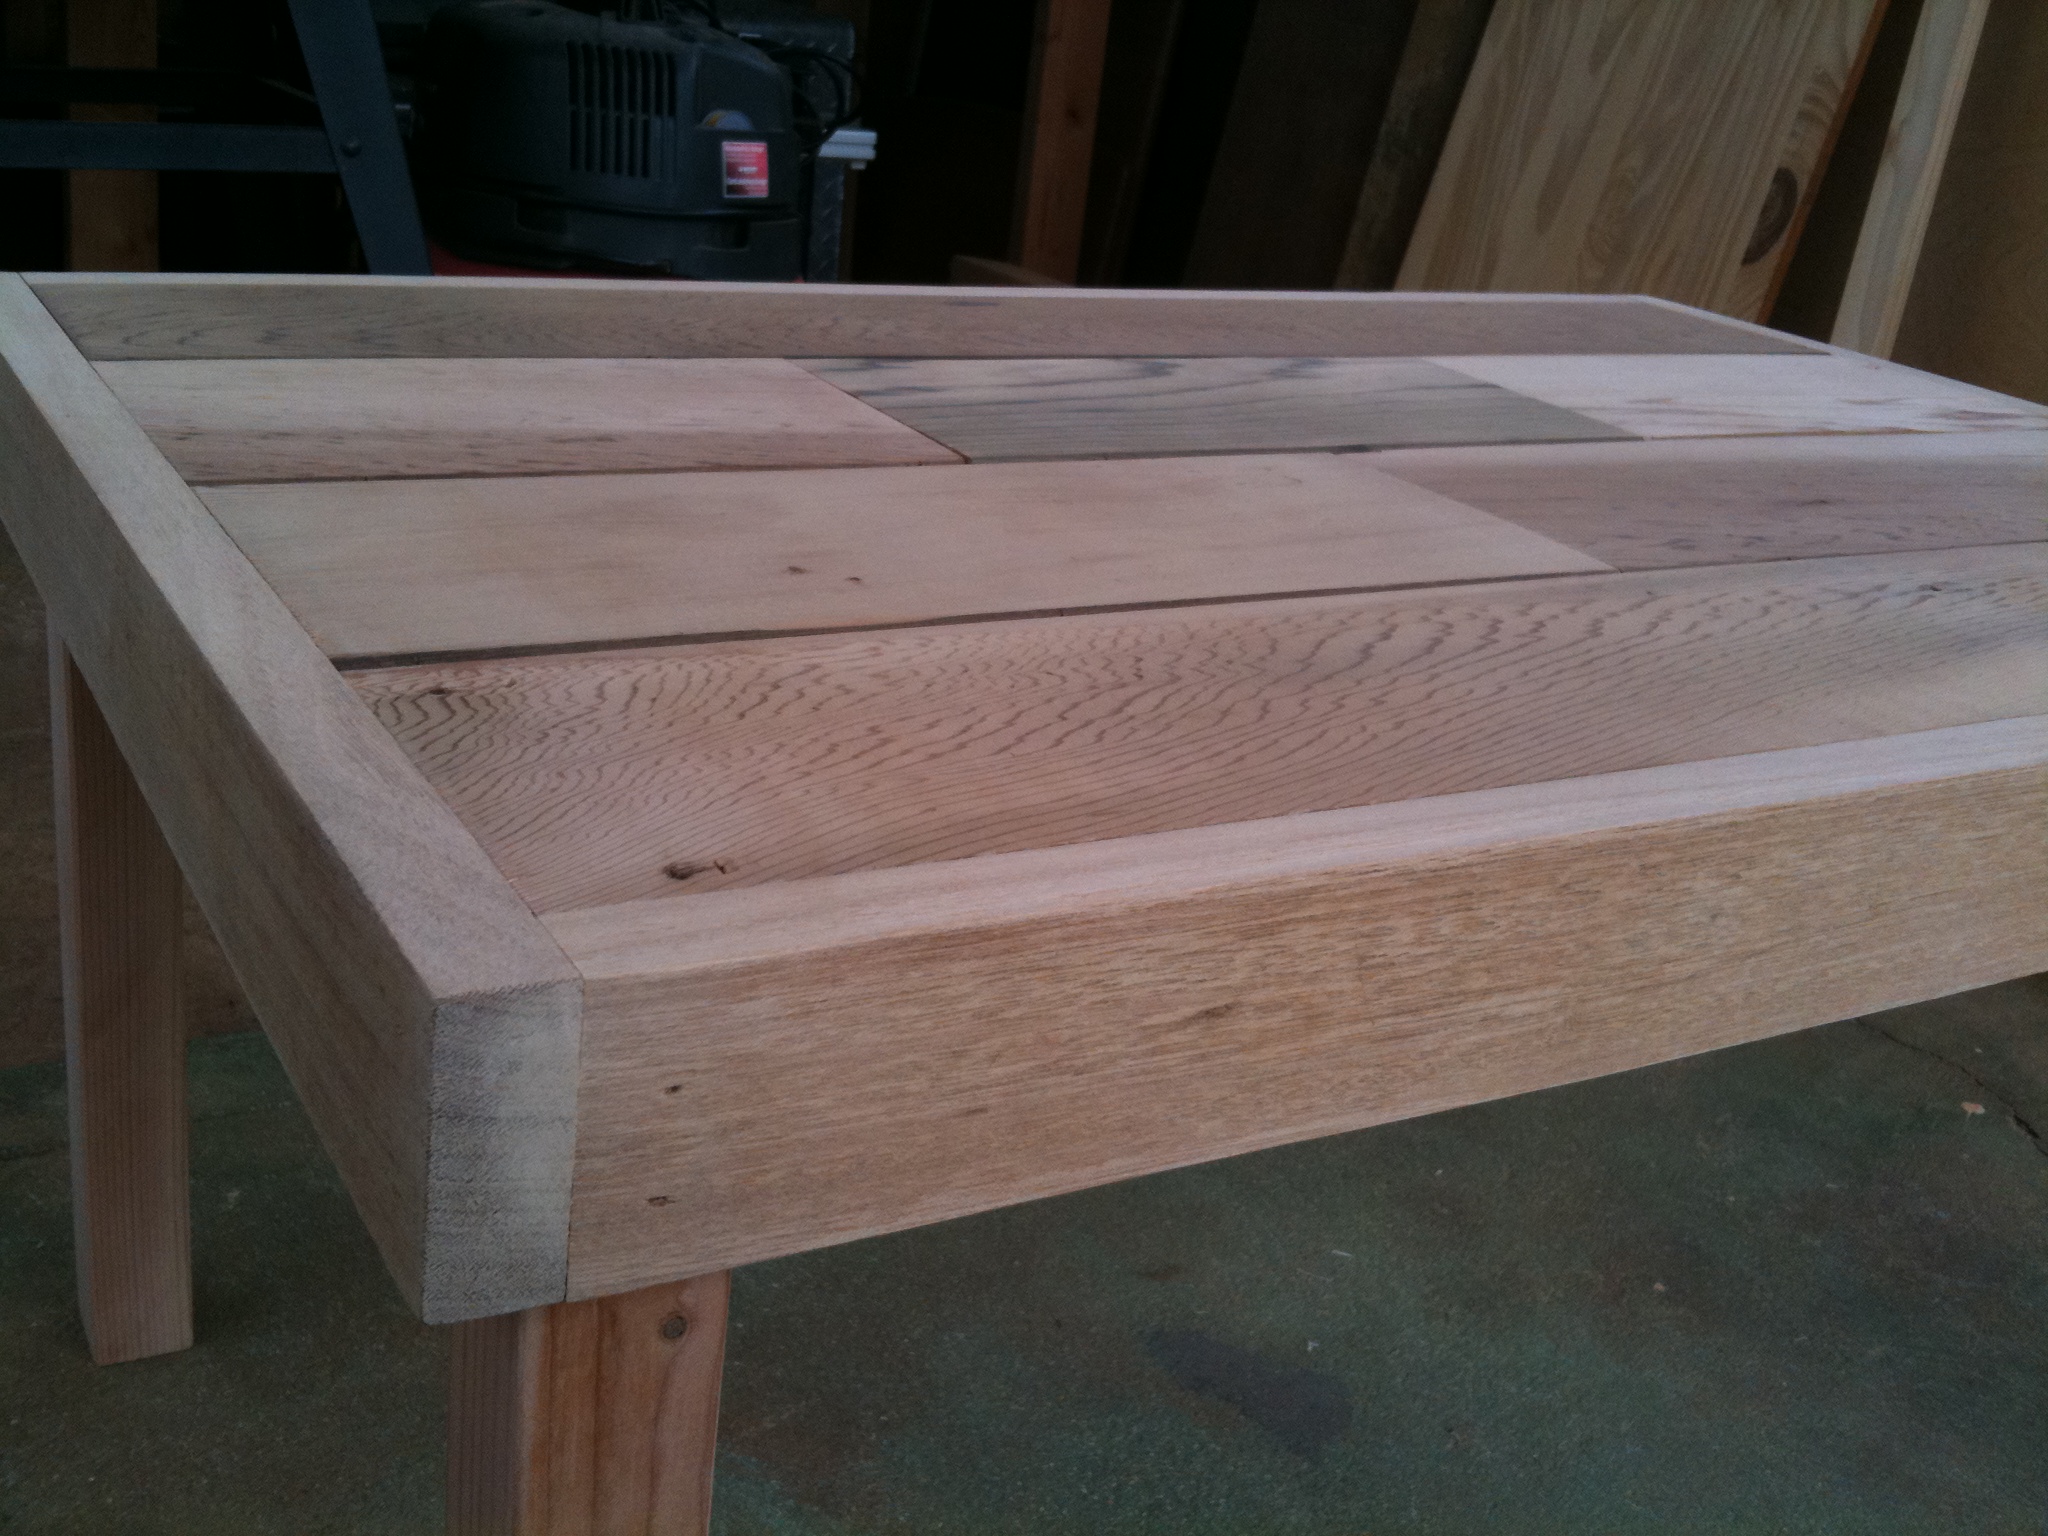
Built this coffee table as a housewarming present for my buddy who got me hooked on woodworking as a hobby! Made from reclaimed wood.
You want to see more? Check out my blog and follow me.
my twitter is: me_go_eco
Reduce, Reuse, Recycle, RECLAIM! Thanks!
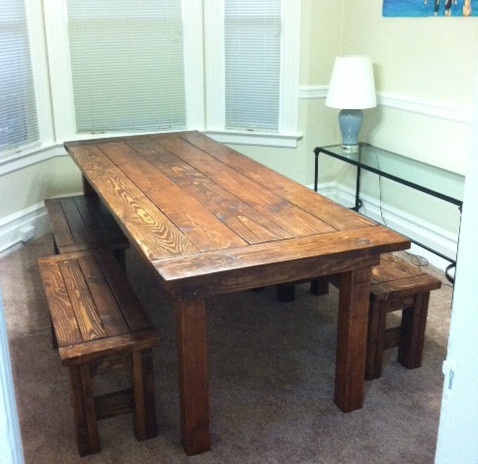
I wanted a big rustic farm table, didn't want to drop thousands on one from a store, so I decided to make my own!
I built it in the (formerly empty) dining room, with tarp on the floor and plastic to seal the doorways.
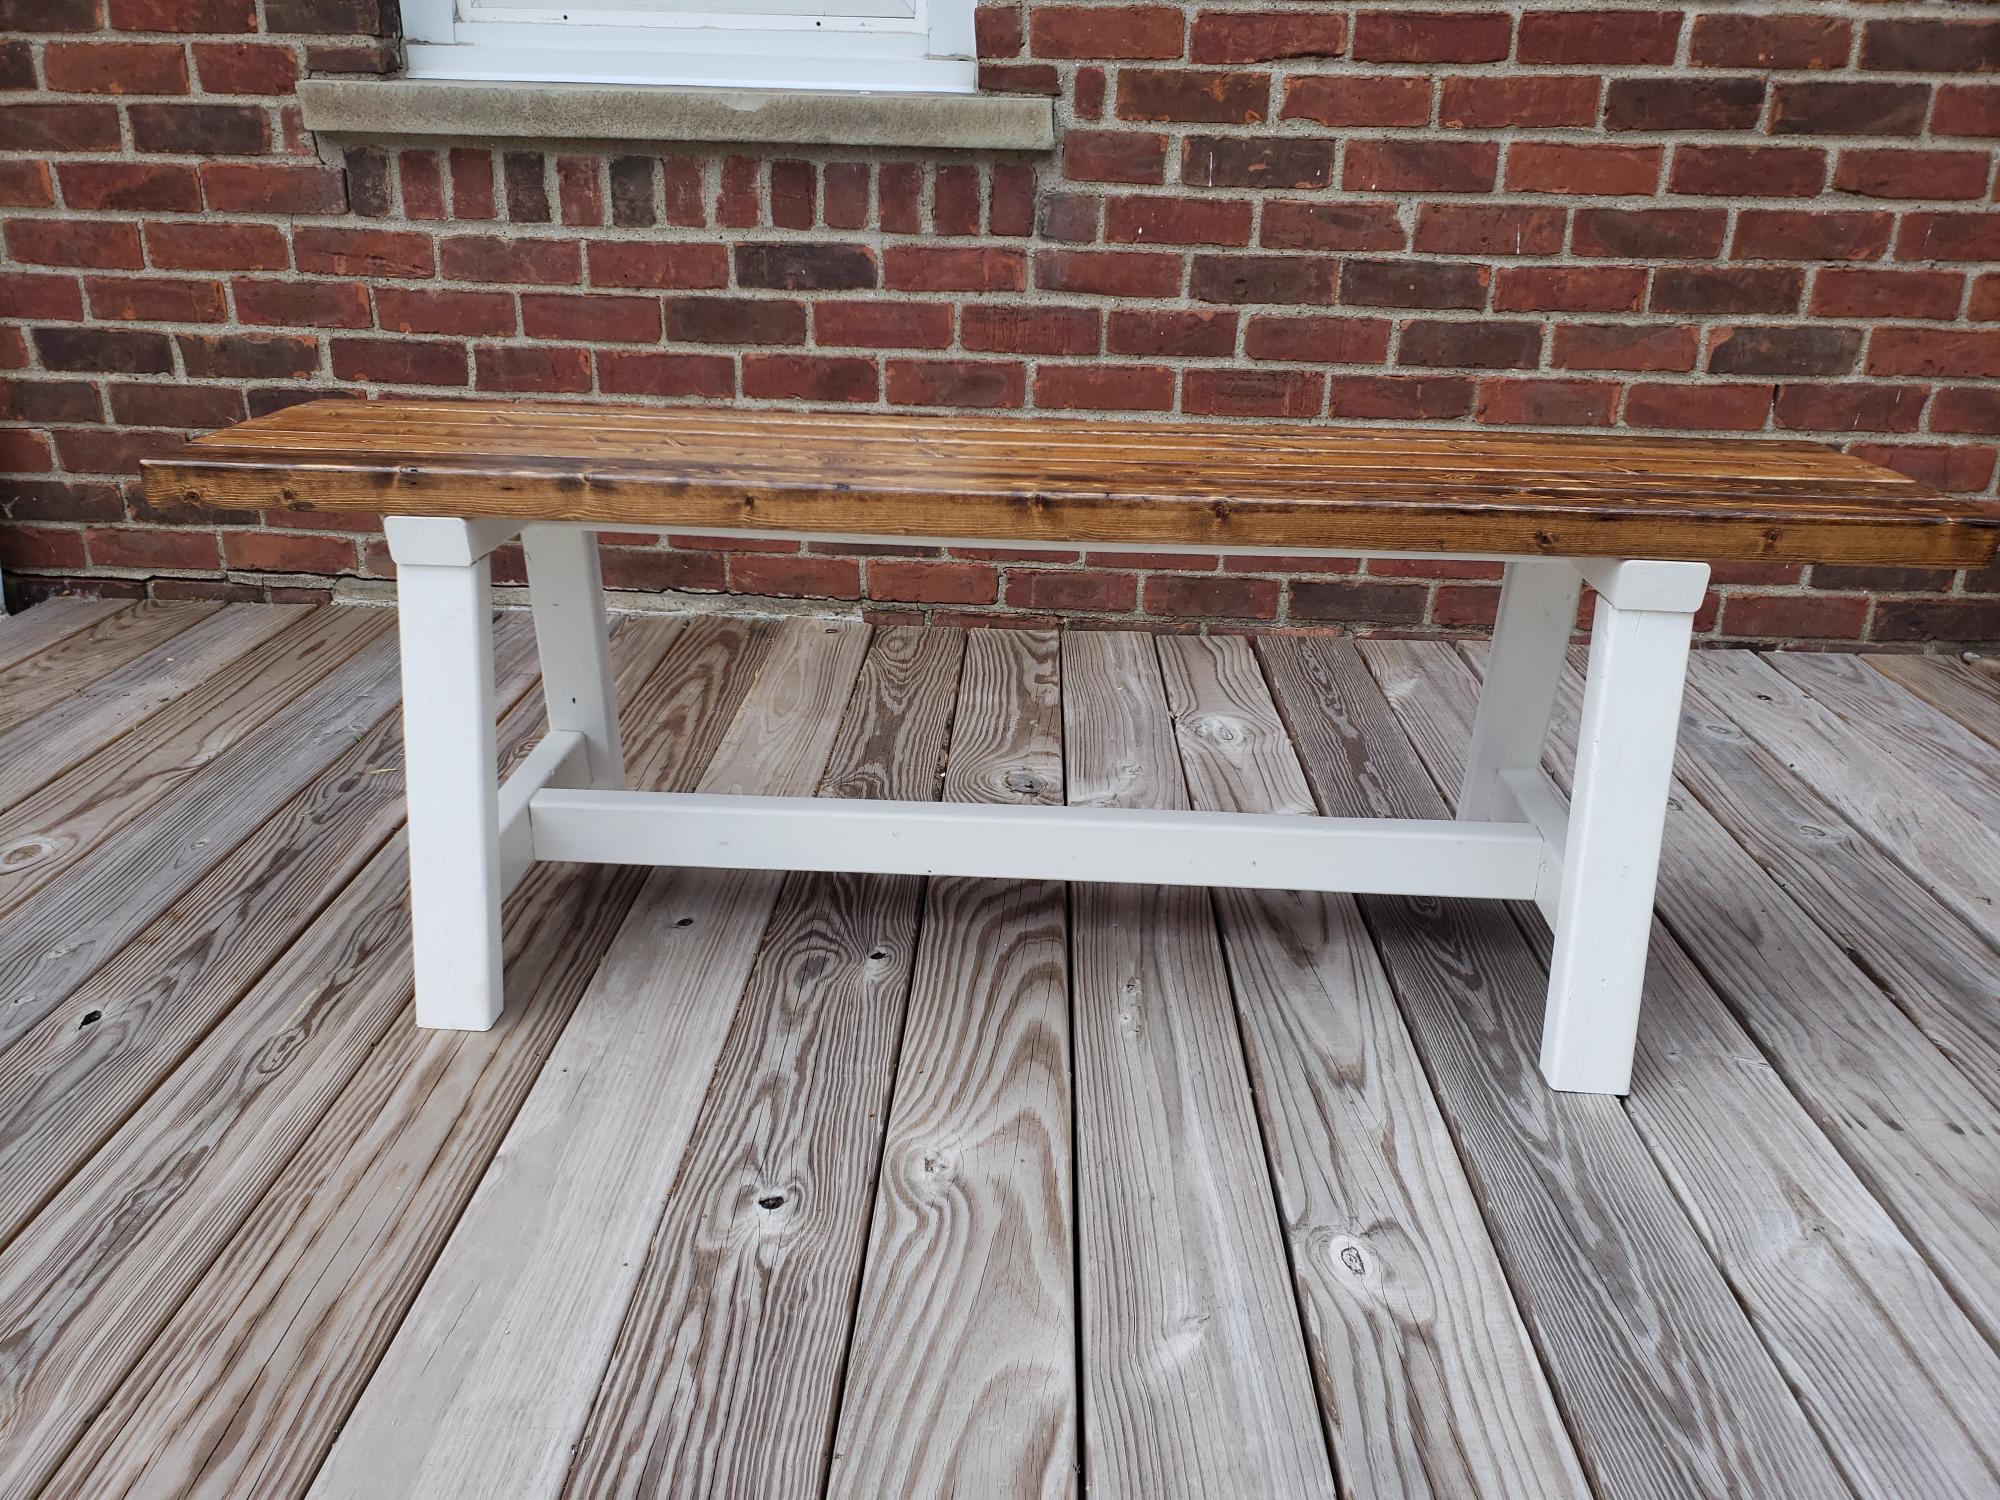
Was a big project and my first project so I started with the benches as this site and users recommended.
I used the farm house bench plan - just shortened the dimensions so that I could have two benches on either side of the table. Then I merged the two table plans so that I could have the top with the bread boards but legs that attached underneath (like the rustic table) so that they could be removed when we move. I'll work to upload my plans too.
Used Minwax Wood Stain in "english chestnut" and Deft Satin Wood Brushing Lacquer (instead of a Polyurethane).

Sun, 09/25/2011 - 12:18
Your use of short benches makes the set more family and guest friendly. I usually hand rub my finish, I think i want to build this and probably use 0ak 2X12's (know it will be heavy).
Suggestions?
I will use it on a Florida roofed concrete deck for an outdoor dining area. Typically more formal dinners. Deck overlooks beautiful cove.
Thu, 10/13/2011 - 11:00
Can you explain how you merged the plans to add the bread boards? I would love to do the same!
Tue, 03/06/2012 - 01:30
Would love to see the plans for this!
Looks amazing!!
Are the table legs 4"x4"?
Fri, 06/01/2012 - 09:09
This is exactly what I am looking for in a table to build. We want bread boards on the end and we don't want stretchers on the bottom. How did you combine the two to do this. Can you send me a copy of your plan? [email protected]
Fri, 06/08/2012 - 12:59
i would the plans for that table my daughter loves and wants me to build her one
send to [email protected]
Mon, 06/11/2012 - 13:19
We love this table! Could you please send plans to [email protected]
Thanks so much!
Mon, 06/11/2012 - 13:21
We love this table. Please send plans to [email protected]
Thanks!
Fri, 06/15/2012 - 10:00
Your table turned out awesome!
I already have old boards waiting on plans to be turned into a table. Any chance you could send the plans for your table to [email protected]?
Sat, 08/04/2012 - 13:35
Could you please send me the plans for this table? I love it and would love to attempy making it. Thanks so much!
Sun, 09/23/2012 - 14:37
Hi, Can you please send me the plans to make this table?
Thanks!!
Alex ([email protected])
Sun, 09/30/2012 - 18:34
I love this table. Can you please send the plans to [email protected]
Sun, 11/04/2012 - 11:07
I would love to attempt this!Would you please share your plans?
[email protected]
Thanks so much
Sun, 11/04/2012 - 17:17
This table is exactly what I've been looking for!! Could you please share your plans? [email protected] Thank you.
Sun, 11/04/2012 - 17:25
This table is exactly what I have been looking for! Could you please share your plans? [email protected]
Tue, 01/01/2013 - 06:09
Can you send plans for this table build to [email protected] thanks.
Wed, 01/02/2013 - 15:53
Your farm table and benches were exactly what I was looking for. Please send me the plans if they are available. Thanks
Wed, 01/02/2013 - 19:18
I would love your table plan. This is absolutely gorgeous!! Please forward table plans to [email protected]
Wed, 01/02/2013 - 19:23
I would love a copy of the plans for this gorgeous table you made. I am inspired.
Fri, 01/18/2013 - 18:01
Could you please send plans? I love the look of your table!
[email protected]
Sat, 03/16/2013 - 20:12
Can I please please please have the plans? I have a very narrow dining area and this table is PERFECT. Thanks
Sun, 05/12/2013 - 14:30
I would REALLY like the plans for his version as well. I am going to combine them. Can someone ask him to post or his he sending via email? If so, [email protected]
Thank you SO much!!!
Wed, 06/26/2013 - 13:09
Thu, 06/27/2013 - 13:34
Fri, 06/28/2013 - 10:49
Great table! I too would like plans - please send to [email protected]
Thanks!!
Mon, 07/15/2013 - 09:48
just bought a cabin and need all sorts of furniture. I love what you did and would sure love to have your plans and how you merged the two----both for the table and especially for the benches. Trying to do a 10' table for huge family gatherings. Thanks so much! You rock!
Tue, 07/23/2013 - 14:28
This table and bench set is exactly what I am looking for. You did such a great job!
Do you have plans that you wouldnt mind sending to my email? [email protected]
Mon, 08/26/2013 - 13:09
Hi! I noticed MANY requests for the merged plans. Did you post them somewhere or can you please email the plans to me at [email protected]?
BIG THANK YOU! Tina
Fri, 09/06/2013 - 13:49
I would love the plans for this table... could you please email them to [email protected]?
Thank you so much!
Beth :D
Fri, 01/09/2015 - 19:54
Hi everyone,
Well I didn't see all these comments! Sorry to have ignored your requests for plans!
This is the bench I made (I did four of these, and adjusted the measurements so they were each about 40" long)
http://ana-white.com/2011/01/farmhouse-bench
I was going to do this table, because it matches the benches, but decided I wanted a table with removable legs so it would be more maneuverable when we move!
http://ana-white.com/2009/12/plans-farmhouse-table-knock-off-of.html
I ended up using more of this plan in terms of how I assembled it, but adjusted the plans to have the tabletop include breadboards (the plank on top perpendicular to the long tabletop planks) and I used 4x4s for legs, plus the top was from 2x8s not 1x10s. I put in the optional cross supports too, and additional supports under the breadboard to connect it to the table frame and table top slats.. this is more info than you need, all to say, plans are flexible and you can do what you want!
http://ana-white.com/2010/03/plans-very-rustic-table-and-cool.html
Sorry I don't have detailed notes. I was very picky about the dimensions (based on space) and how high I wanted the table (about 1.5" taller than a normal table). I also measure the distance between the underside of the table and the tops of the benches so I could cross my legs under the table (an odd requirement).
Happy Building!
Sat, 03/21/2015 - 17:34
could you send me the plan for this rustic table that was made from the farm house and rustic table if they are available? Email to [email protected]
Sat, 03/28/2015 - 12:45
can you please send me the plans [email protected]
i love it!!!
Wed, 04/01/2015 - 15:10
I like the english chestnut stain. That works so well with this type of lumber. Great job. I plan to use the same stain on the Tryde coffee table I am building. Thanks for sharing your work!!!
Sat, 08/08/2015 - 12:30
Thu, 08/13/2015 - 19:17
Sorry! I accidentally hit the spam button but I really would like the plans for the table. Sorry for the confusion!
Thu, 08/13/2015 - 19:23
Ok, now I feel really silly. Obviously, this is my first time leaving a comment. I love the table. It is exactly what I've been looking for. Could you email the plans to [email protected]?
Thanks!
Fri, 01/08/2016 - 17:38
Fri, 01/08/2016 - 17:40


Comments
Juan Butler
Wed, 02/21/2024 - 10:27
I'm building the sectional…
I'm building the sectional this weekend, and saw your addition to the end piece and am going to steal your idea. Very nice.