Community Brag Posts

Wood Crate Keurig K Cup Holder with Mini Drawer

As Ana mentioned in her video, this project could be made with scraps. That’s just what I used.  I used a lot of scraps and cut offs for this project.

I needed to make a K cup holder but also space to hold tea in addition to other coffee "toppings" if you well. In the pictures you can see mini creamers.

This modification was made by adding a small drawer in addition to the holes that would hold the K cups. The small drawer was made with 1/2” plywood (even more scraps) ripped just shy of 1-1/2”. I did this to make sure we did not see the plys of the drawer as I planned to add 1/4” plywood to the top all around. I wanted this to make it all uniform with the K cup area. 

I added little rubber feet’s to the bottom as this will be on a granite countertop which could results in slipping and sliding. 
Estimated Cost
$15 perhaps. But as I mentioned it was mostly scraps
Finish Used
minwax provencial and wipe on poly
Recommended Skill Level
Beginner

Comments

lolalove77

Thu, 06/25/2020 - 06:53

Made this for my mother in law. She loves it, thank you for the plans. I cant figure out how to add the pics of the one I did for her hit it was awesome and my very first wooden build EVER

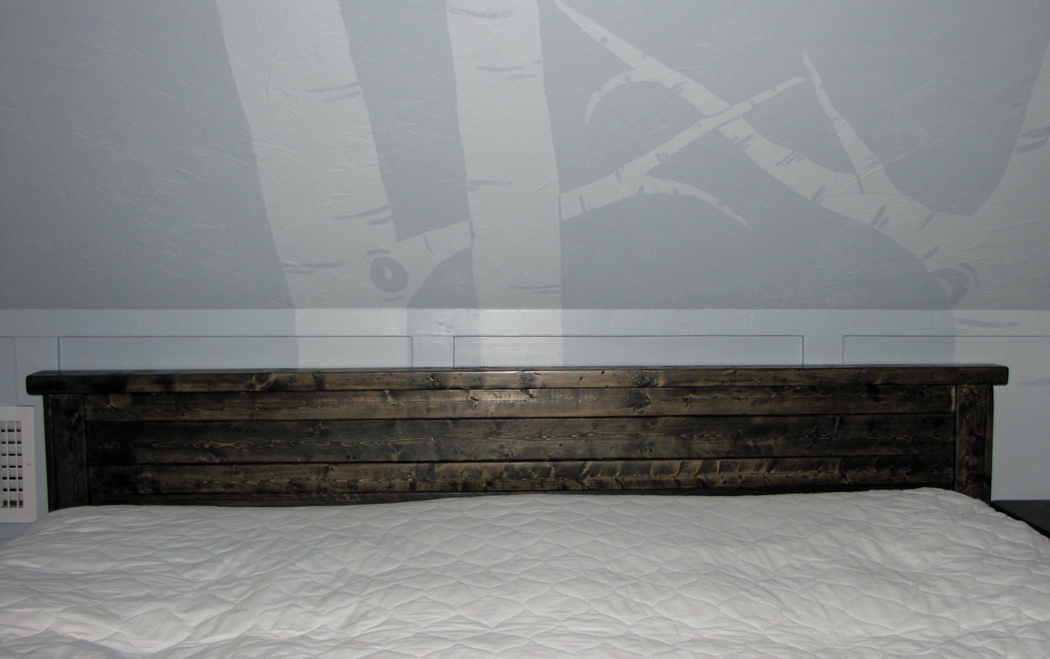
Furring strips for a headboard

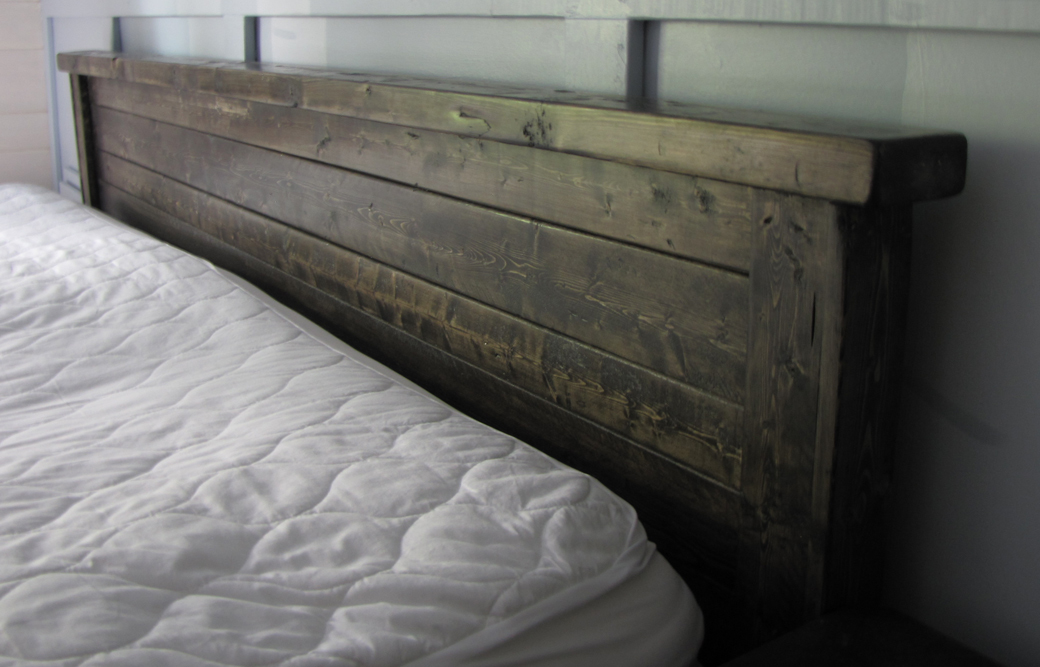
I loved that I used strapping, or furring strips, for this bead. The topper wood is a 2X4, but every other 8" piece of wood cost between $1.25 and $1.99 each. Yeah! Of course, for that price, you have to know you will be sanding the heck out of it. We had a metal frame for this bed but I wanted a headboard. Because it was going against a wall with a 45 degree angle, I had to make it a lot shorter than I wanted. I made it just tall enough so both pillows, when stacked on top of each other, did not fall off the back. I just love it.

Estimated Cost
$25
Estimated Time Investment
An Hour or Two (0-2 Hours)
Finish Used
I think I used Minwax Ebony stain. Just one coat was enough as I wanted the wood grains to come through. Then I finished it off with my favorite closer, the Finishing Paste. One swipe and it feels great.
Recommended Skill Level
Starter Project

Comments

GUEST (not verified)

Fri, 04/13/2012 - 15:33

I am intrigued by this finishing paste you speak of. Could you tell me more?

debandtom25

Wed, 04/25/2012 - 14:53

I'm not at home right now, but I think it was minwax finishing wax. I love using wax on mt pieces.

claydowling

Wed, 04/25/2012 - 17:51

If you can't find the minwax that debandtom25 used, you can also get a nice paste wax from Johnson Wax. I know that's what's on my finishing shelf, and like deb, I love it.

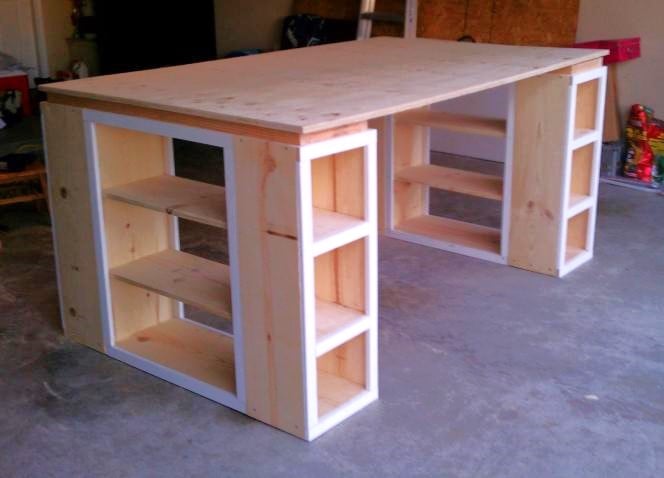
Modern Craft Table *tweaked*

Completed Modern Craft Table! We tweaked the plans a bit because I was looking for a larger table top. The top now measures 48" x 76". We simply did this by adding an extra set of cubbies to the other side of the shelves. Absolutely LOVE how this turned out! All I need now is 4 counter height stools built and lots of shelves to complete my craft room! Will be sure to post those once they are completed!

Built from Plan(s)
Estimated Time Investment
Weekend Project (10-20 Hours)
Finish Used
Ultra White Latex Paint
Recommended Skill Level
Beginner

Comments

Ana White

Thu, 11/17/2011 - 01:10

Darn I was so excited to see you craft table! I apologize that your brag post did not show images. If you can send me images at knockoffwood(at)gmail.com I'd be happy to post. Thanks so much for submitting a brag post. Ana

Guest (not verified)

Sun, 03/04/2012 - 07:31

I LOVE LOVE LOVE your craft table. I want one! Looks like my husband wil have to get busy! Thanks for sharing!
Kristina
Houston, TX

Kimmy (not verified)

Tue, 03/20/2012 - 17:51

Is this the pic of the one you did ?? I am wanting a bigger table top too. I have waited years for just the right table and this is it.

Kimmy (not verified)

Tue, 03/20/2012 - 17:51

Is this the pic of the one you did ?? I am wanting a bigger table top too. I have waited years for just the right table and this is it.

Kimmy (not verified)

Tue, 03/20/2012 - 17:54

Is this the one you made ? I want a bigger table top as well. But I don't see the extra cubbies.

Kimmy (not verified)

Tue, 03/20/2012 - 17:54

Is this the one you made ? I want a bigger table top as well. But I don't see the extra cubbies.

naildoctors

Tue, 05/29/2012 - 00:05

This is great!! I am planning something similar, but what is your idea or the plan you used for the middle support to keep it from sagging over time? My idea is to run another cubby in the middle from side to side. What do you think?

Laura Mulholland (not verified)

Mon, 01/21/2013 - 09:54

I love the modern craft table, just what I have been looking for, do you share instructions, dimensions, etc.? thanks, Laura

HapETexanGal

Thu, 05/12/2016 - 15:14

I'm loving this and would love to have FIL build it for me but the plans look like its for the regular modern craft table but not the tweaked?  Also is there support for the middle?  Can you send me a link for the tweaked supply list please, can't seem to find it.  Love what you do!

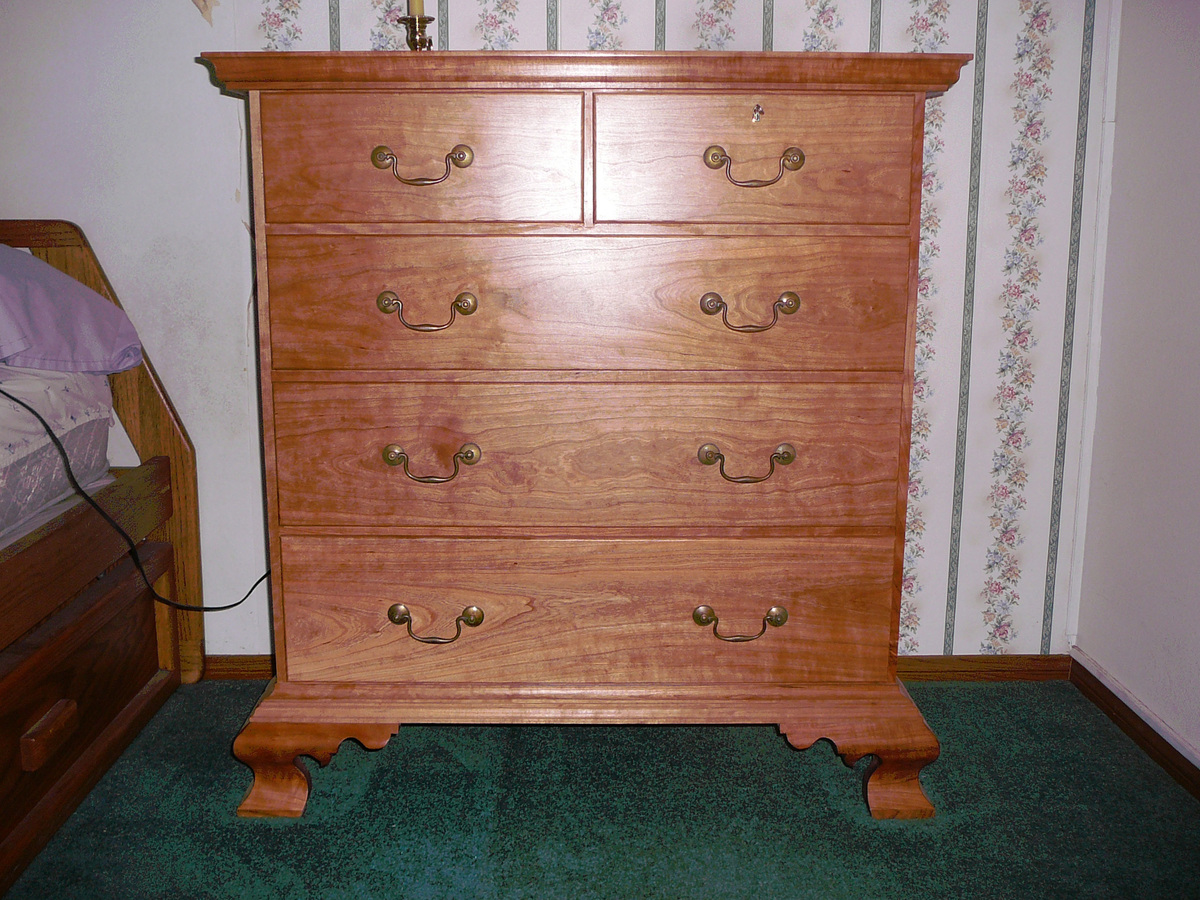
Chippendale Chest of Drawers

This is a Chippendale Chest of Drawers in Cherry. I did it a couple of years ago and it is still holding up very well. It was my first experience with ogee bracket feet and I was very happy with the way the feet turned out. It is a lot easier than it looks. There is no secondary wood, it is wholly out of American Black Cherry (prunus seritina). It took about four months to build and it has exposed dovetails on the top as the carcass is dovetailed together. Brasses are from bail pull type brasses.

Estimated Cost
$400.00
Estimated Time Investment
Week Long Project (20 Hours or More)
Finish Used
Minwax Antique Oil Finish
Recommended Skill Level
Advanced

Comments

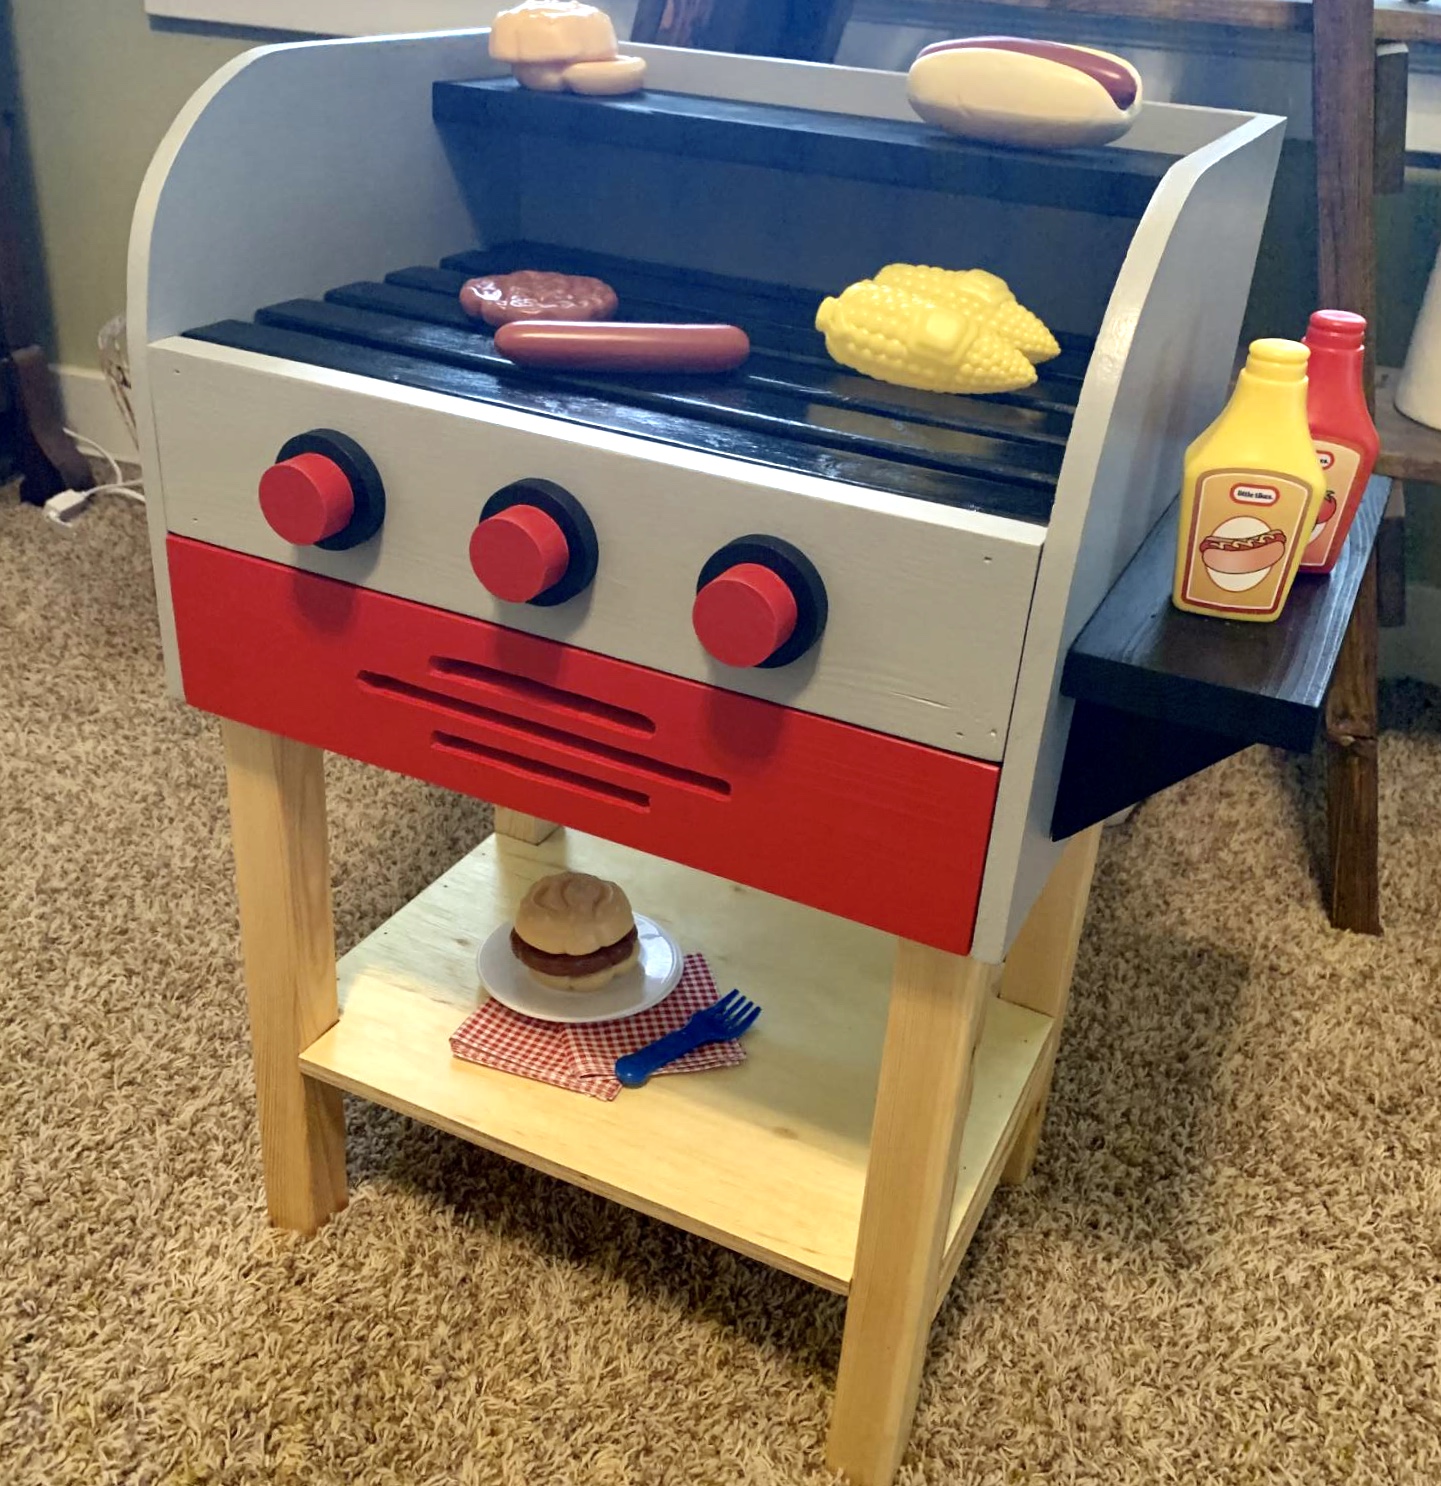
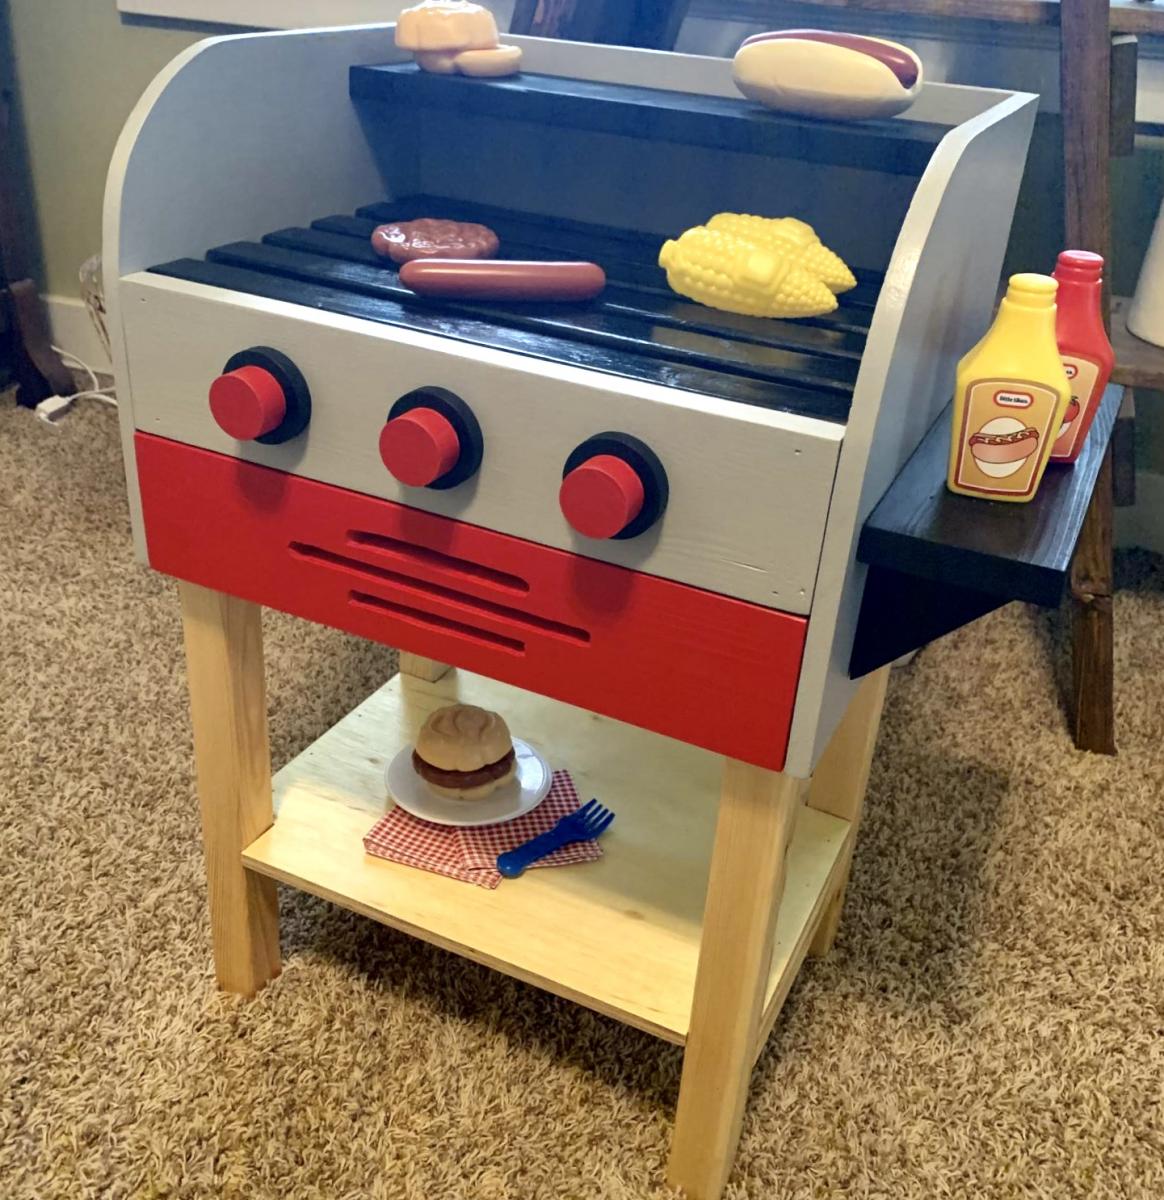
Kids Wooden Play Grill

Submitted by Anonymous (not verified) on Sun, 11/03/2019 - 17:10

Built this toy grill for my nephews first birthday. Went together without many hiccups. I will say these plans seemed less detailed than other Ana White plans I have worked on...but for the better I guess, as it forced me to figure somethings out on my own. I opted to add the drawer behind the grill plate, like the blogger who also made this grill did. Kept the same color scheme as well. Pretty proud of how it turned out.

Built from Plan(s)
Estimated Cost
$40
Estimated Time Investment
Day Project (6-9 Hours)
Recommended Skill Level
Intermediate

Jelly Cupboard

Submitted by emilyr on Mon, 04/02/2012 - 18:15

Ever since I saw this cupboard, I wanted it. So when I got a free day I jumped at the chance to build it. I love it! The only problem is trying to figure out where I want to put it.

Built from Plan(s)
Estimated Cost
$30-40
Estimated Time Investment
Afternoon Project (3-6 Hours)
Finish Used
Porter's Prussian Blue and black spray paint
Recommended Skill Level
Beginner

Comments

tommyc325

Thu, 02/19/2015 - 19:11

Hi Ana - I dont mean any disrespect but how do you figure this project costs $30-40. I bought just the boards no hardware or plywood and its cost me $60. Pine #2.

Please let me know your thoughts and where you buy your wood from.

Bander

Fri, 02/20/2015 - 12:00

The cost estimate is from emilyr, posted almost three years ago. Lumber prices fluctuate, but $30-40 is still quite low. I estimate about $100 to buy the lumber (pine) on the shopping list from Ana's plan at current prices in my area.

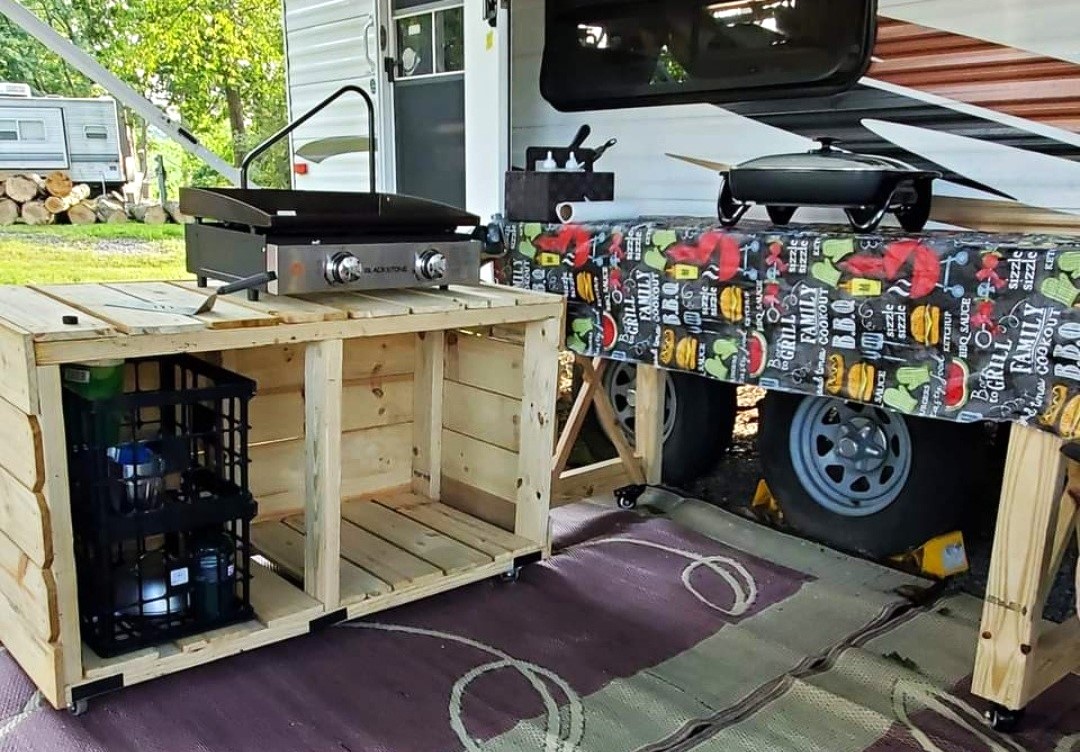
DIY Campsite Outdoor Storage and Grill Station

Submitted by Anonymous (not verified) on Thu, 08/31/2023 - 11:28

We made the grilling station to keep at our seasonal campsite and it's absolutely fantastic! We have since added some L brackets and 2 shelves, and this is where we store our extra cases of water, soft drinks, outdoor cooking utensils plus an air fryer! Super easy plans, with well written instructions for even the novice (me and hubs) diy builders!

Ali W.

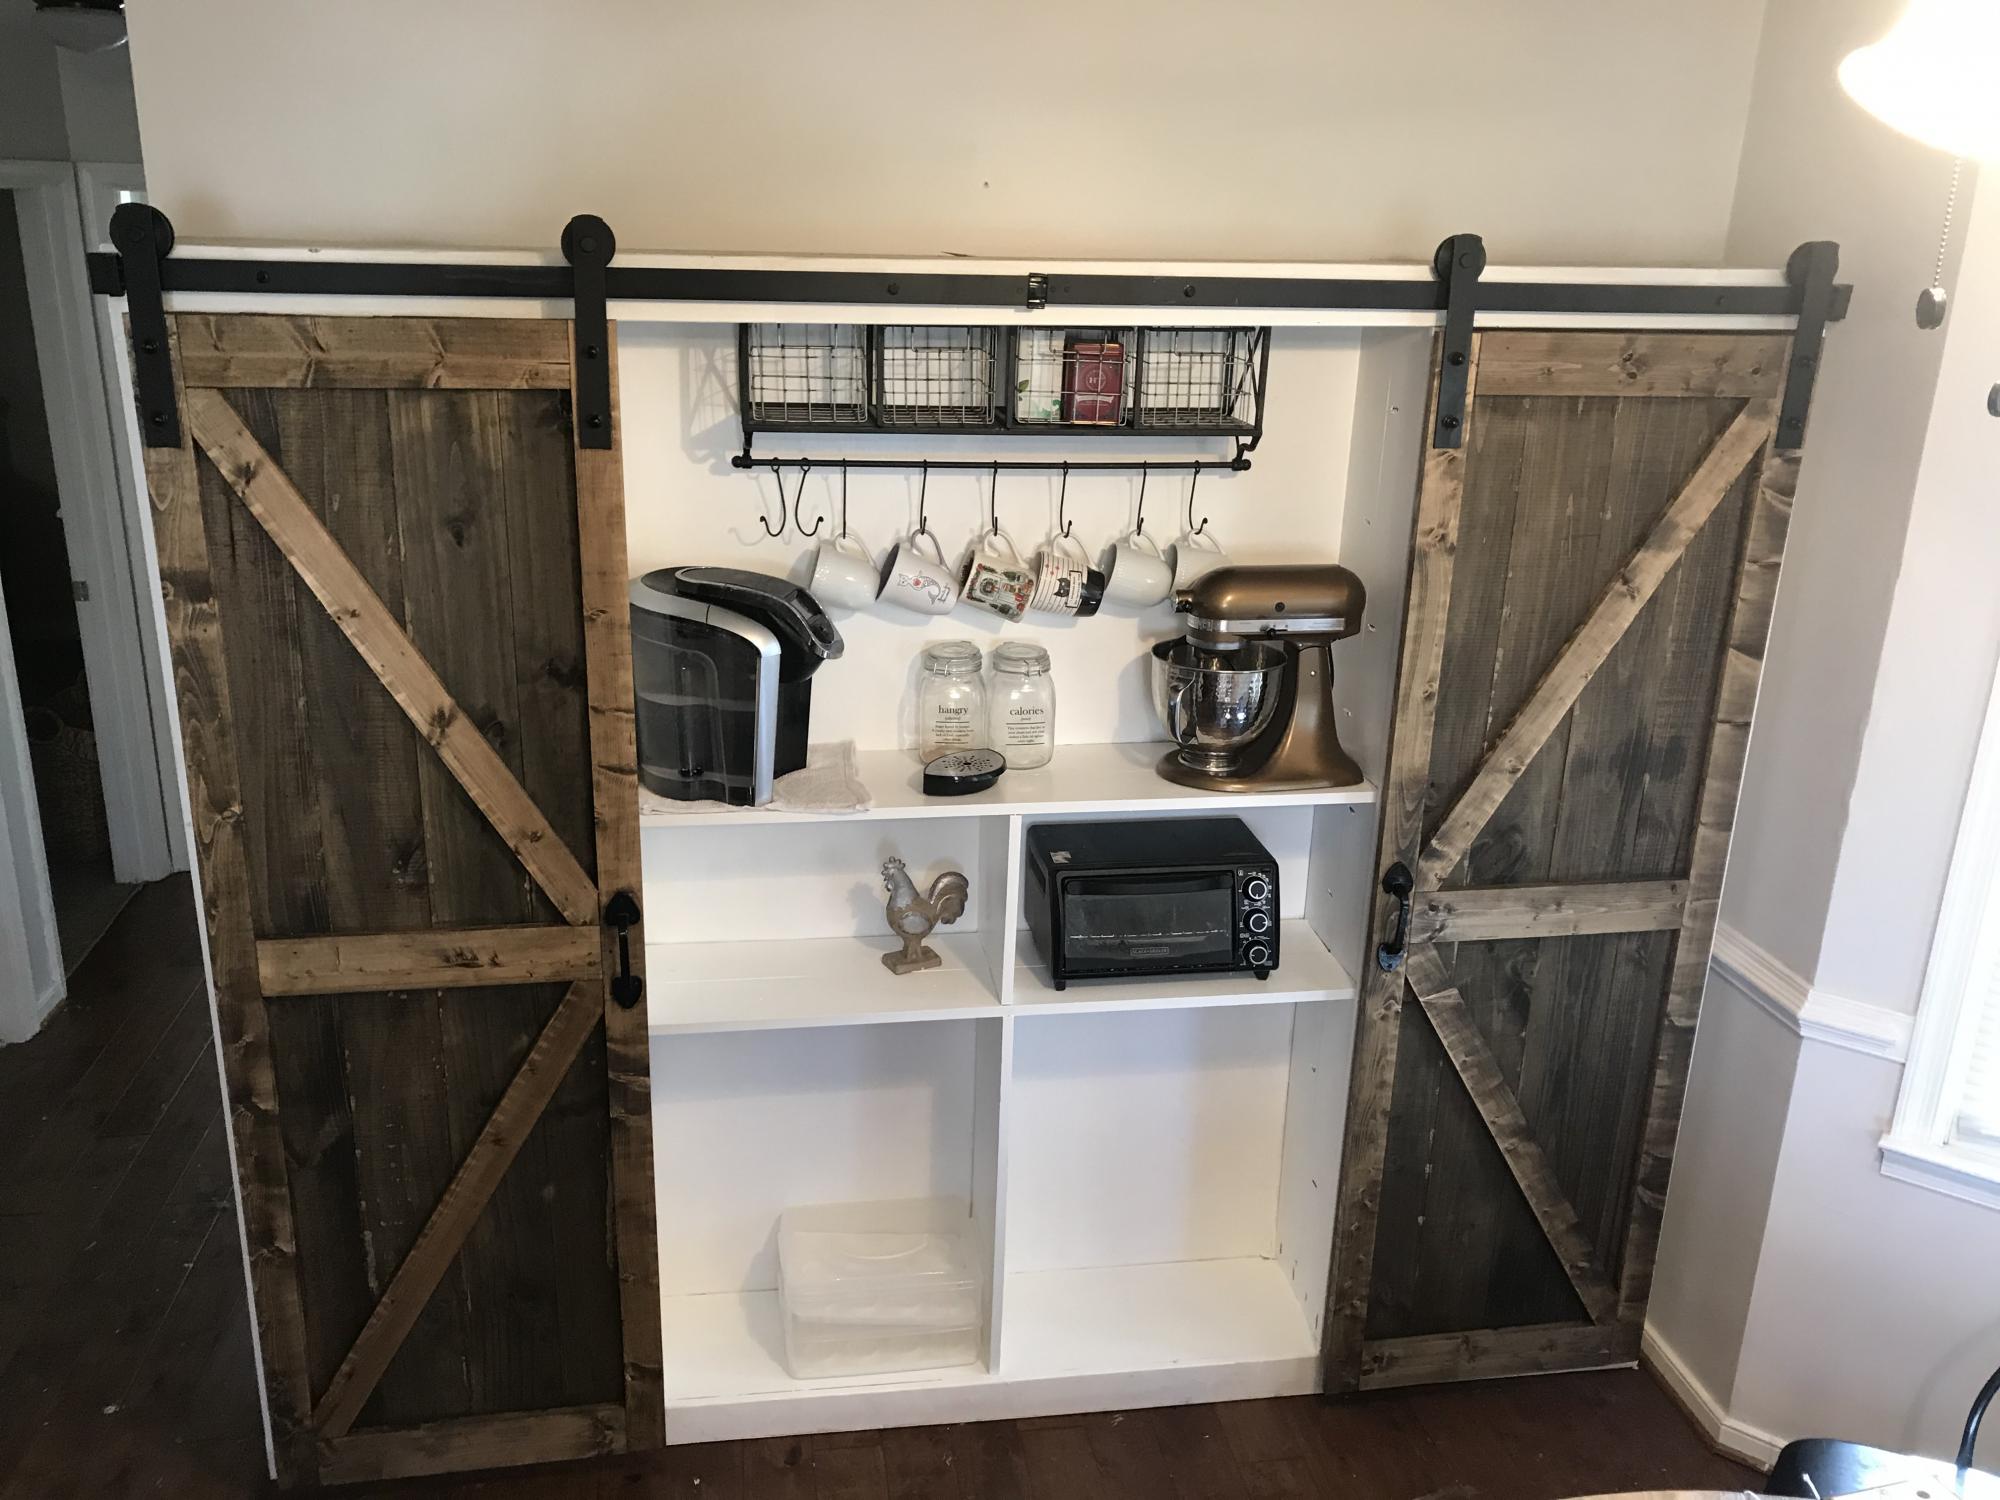
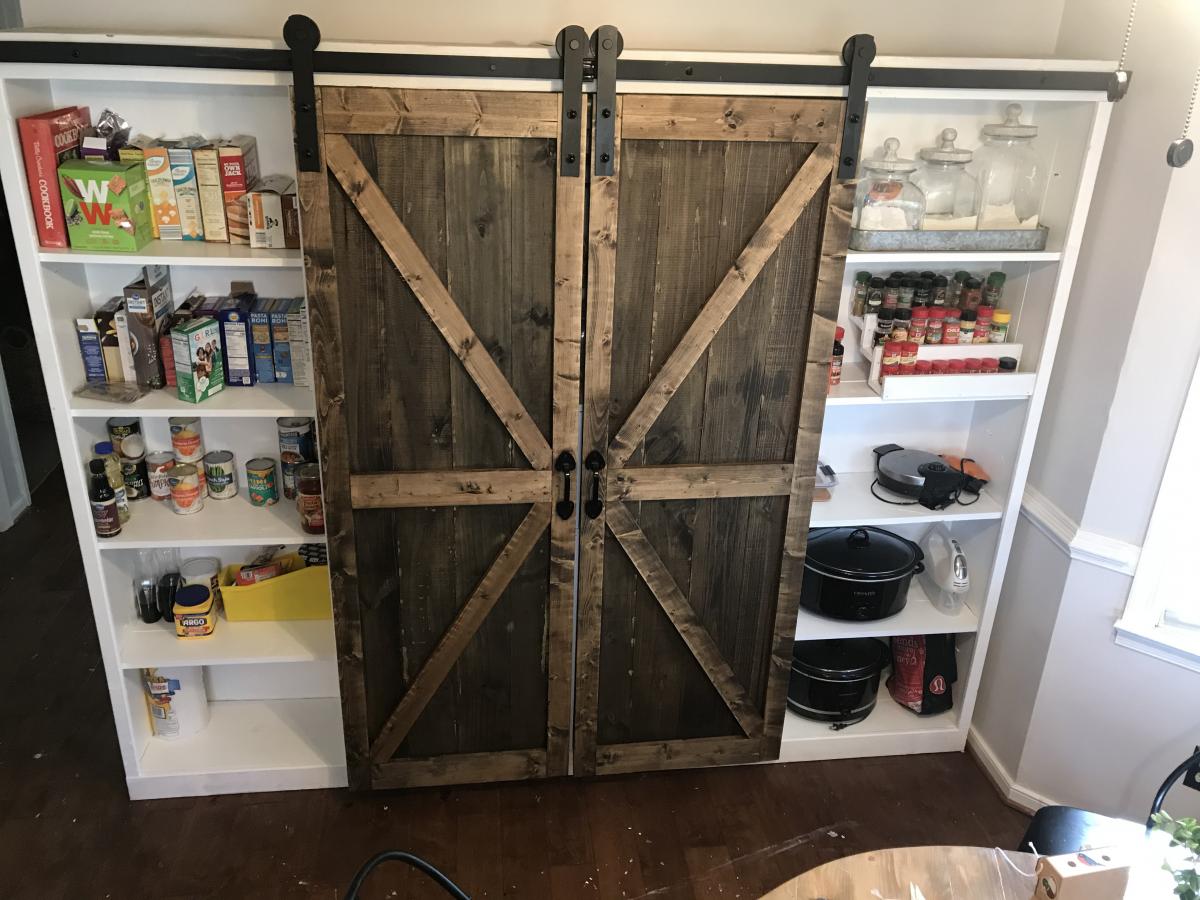
DIY Barn door Pantry/Coffee station

Submitted by tcossins1 on Mon, 03/09/2020 - 08:19

My wife has been asking me to build her a pantry since we bought our house last year and I finally got around to doing it. I used the Barn Door Entertainment center plans as inspiration but Instead of using the 1x12x8ft lumber suggested I used 1x6x8ft boards connected with pocket holes to save on costs. The Barn door hardware is the SMARTSTANDARD 8ft heavy duty (double door) which I purchased on Amazon for 73$.

Built from Plan(s)
Estimated Cost
$350-$450
Estimated Time Investment
Weekend Project (10-20 Hours)
Finish Used
Paint: Behr Plain White paint and primer
stain: Varathane classic dark walnut.
Recommended Skill Level
Intermediate

Dog/Baby Gate

Submitted by advanlente on Sat, 03/28/2020 - 11:53

Inspired by Ana White's $25 Wood Baby Gate (https://www.youtube.com/watch?v=cPV6XfheqgA), I needed a gate for my miniature schnauzers. They loved going into the basement unattended ... and well ... potty accidents happen without me being the wiser. So, I modified the hardware used, and so far so good! The puppies and my little nieces and nephews are protected. 

Fireplace Mantle with Drawers and Hidden Storage

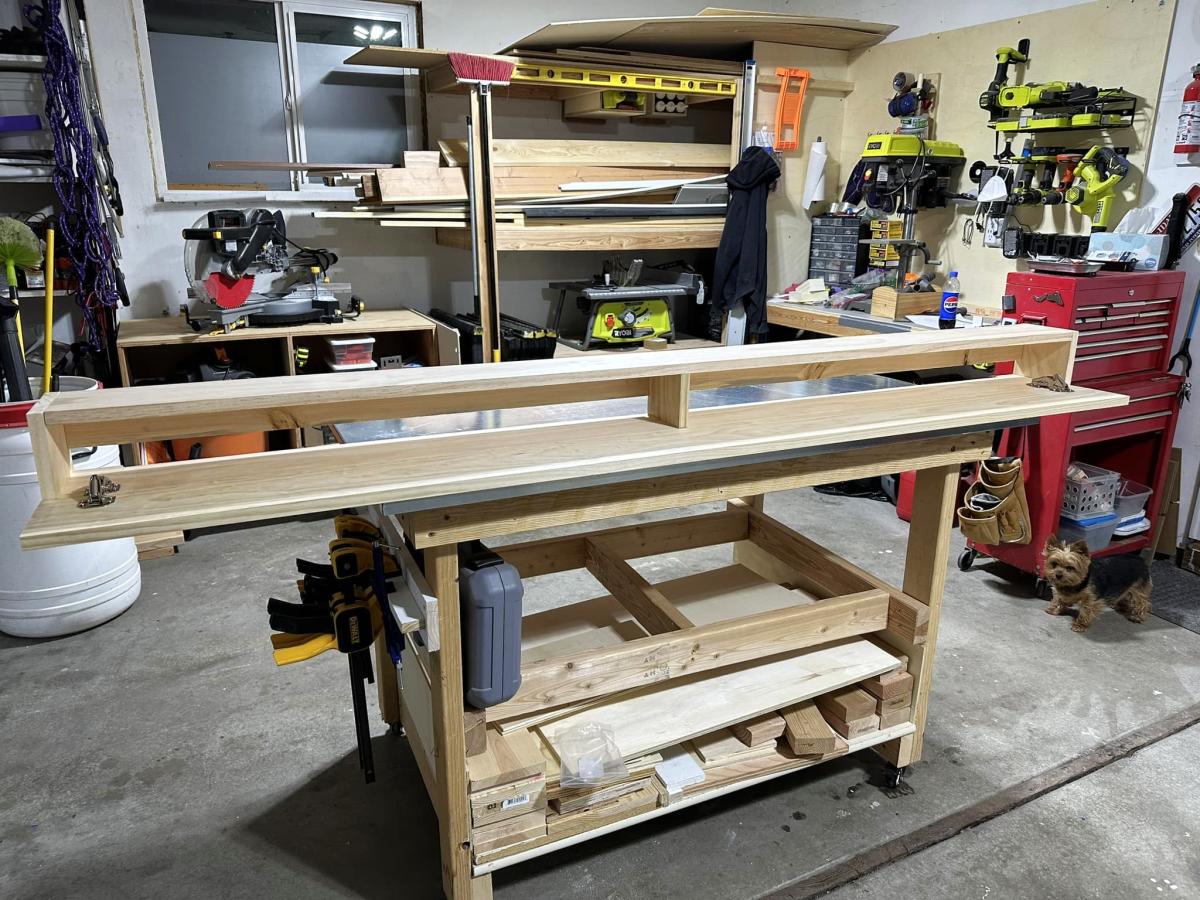
Modified plans to include game storage drawers, a flip open mantle for DVD player and hidden charging port, and hidden cupboards on both sides for DVD storage. I scoured the Internet for months before drawing this up to fit my space and tackling all on my own! I love it and all of my other Ana White inspired projects!

Casey O.

Seasonal And Holiday

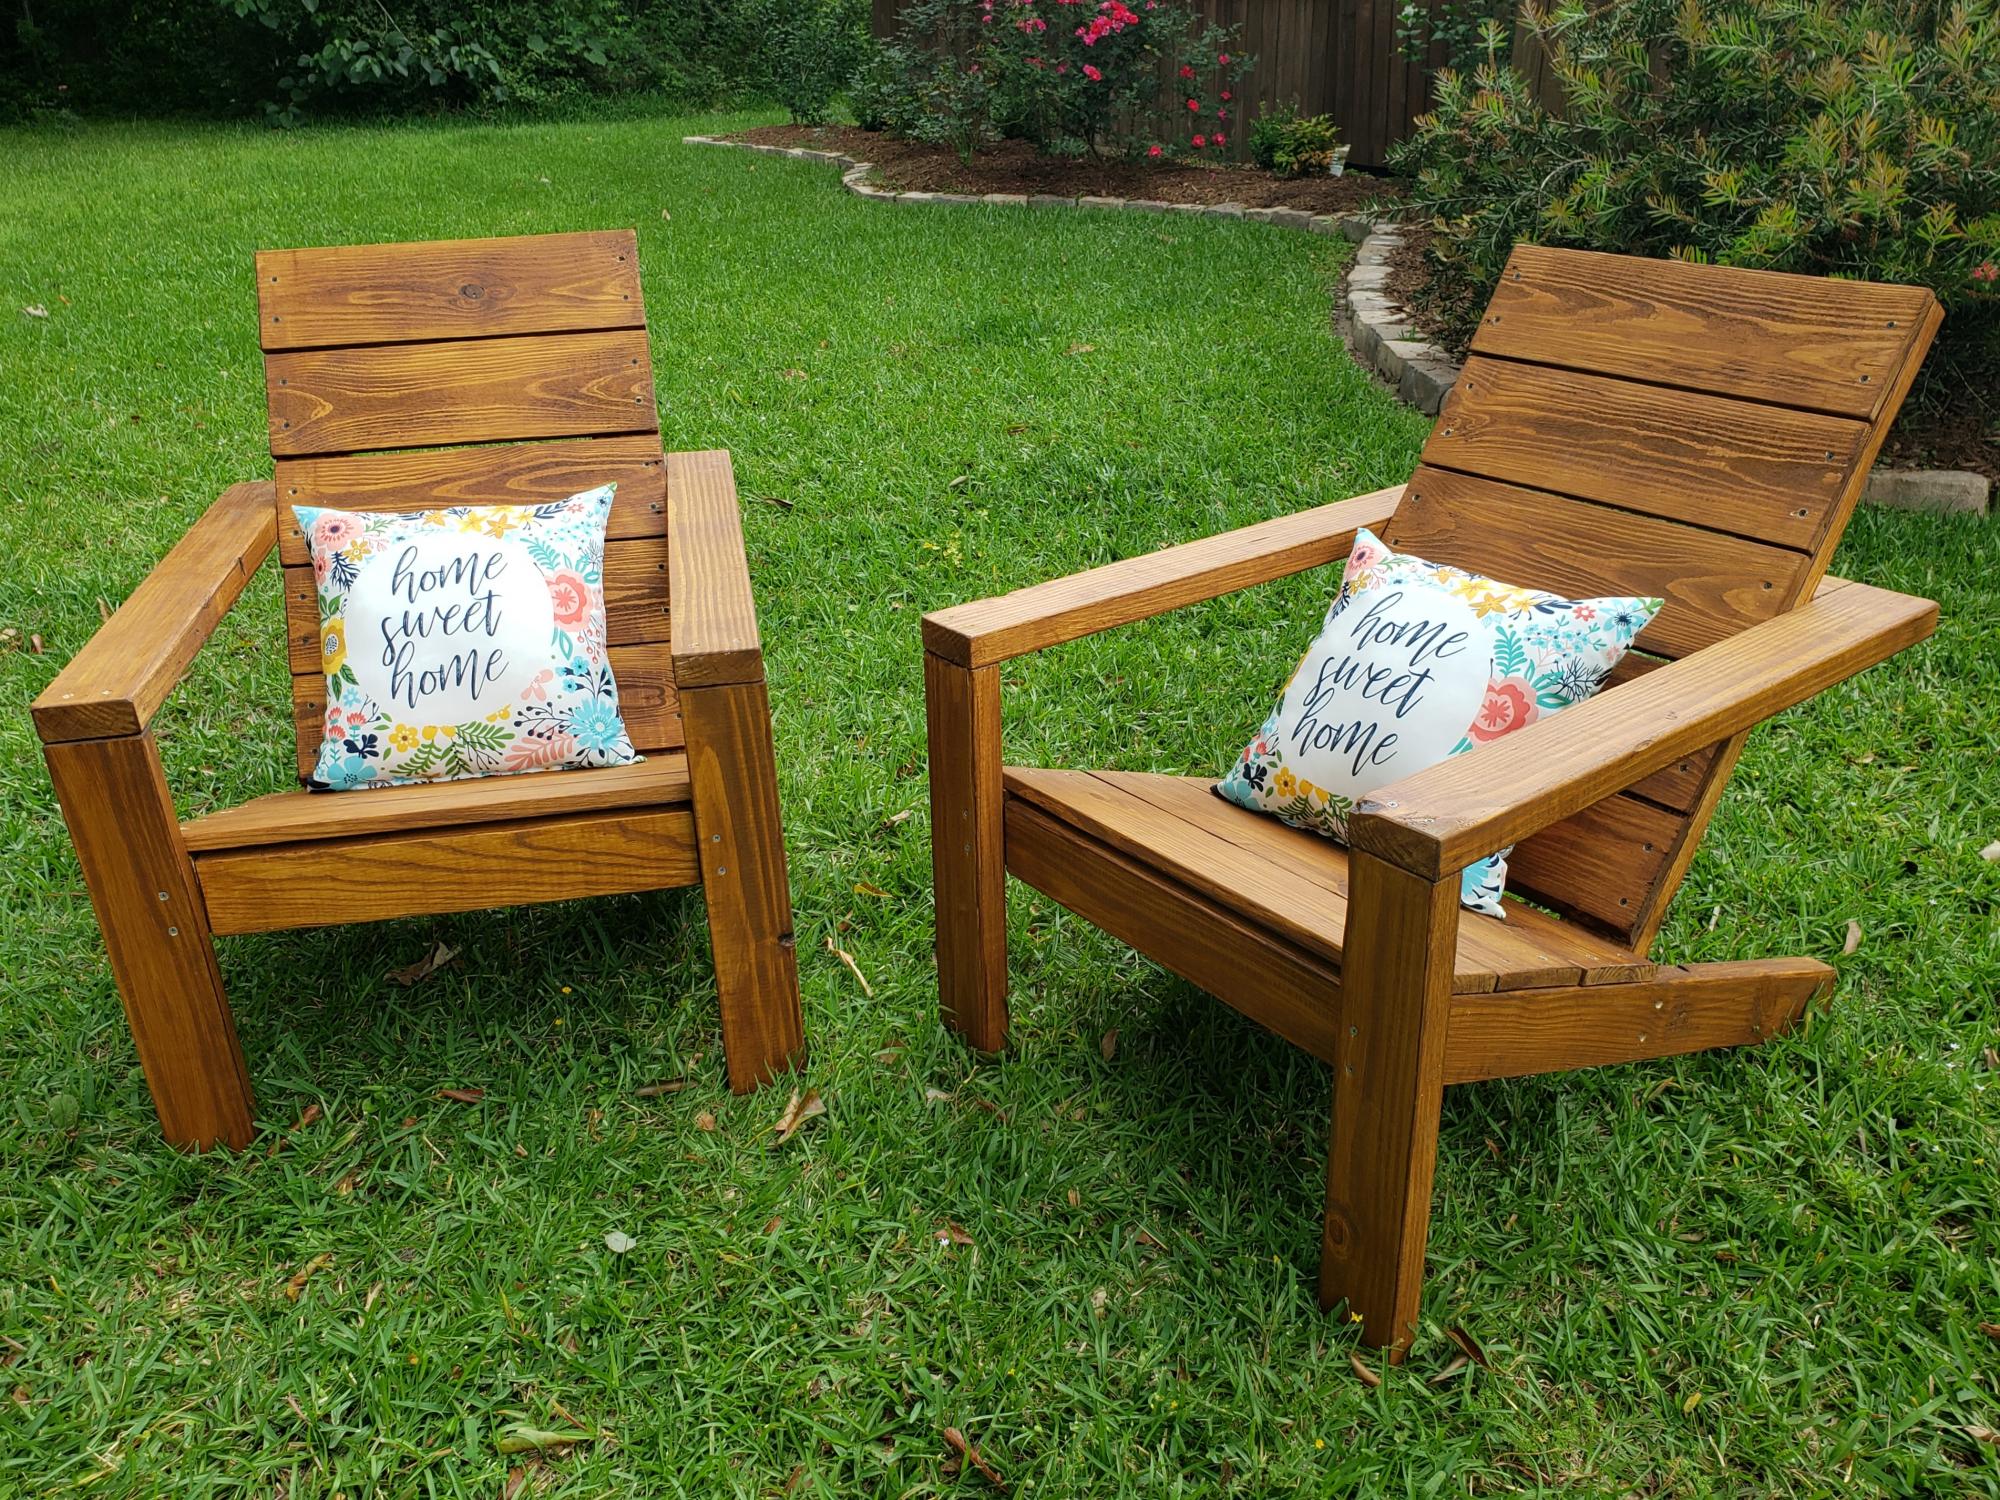
Modern Adirondack Chairs using reclaimed pallet wood

Submitted by Anonymous (not verified) on Wed, 05/06/2020 - 06:20

The plans were easy to follow and the finished result was perfect! We subbed 1x6s for the 1x10s, because we were using some reclaimed pallet wood. We cut, sanded, and stained/weatherproofed all pieces before assembly, which I would also recommend.

Estimated Cost
$20 per chair (we used some reclaimed pallet wood)
Estimated Time Investment
An Hour or Two (0-2 Hours)
Finish Used
Valspar Canyon Brown Transparent Exterior Stain
Recommended Skill Level
Intermediate

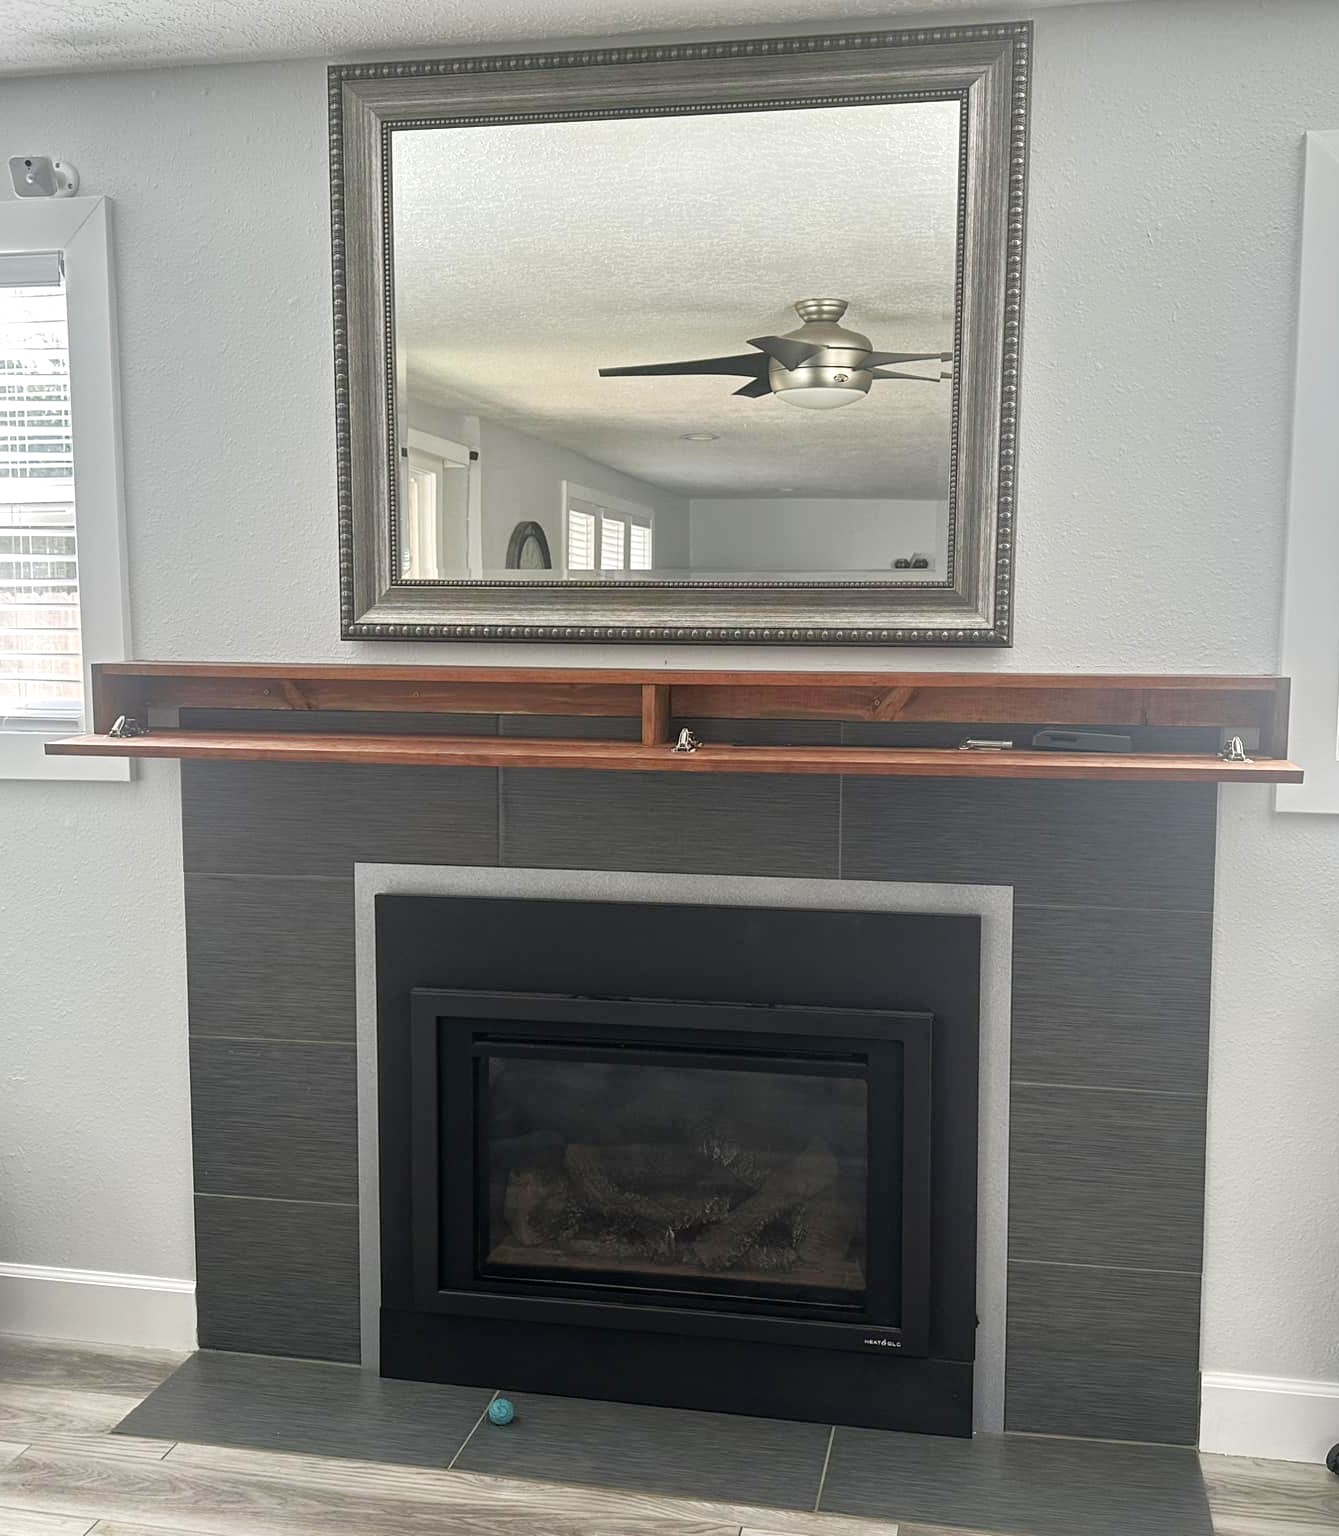
Wood Storage Mantle

Submitted by Anonymous (not verified) on Fri, 02/23/2024 - 10:26

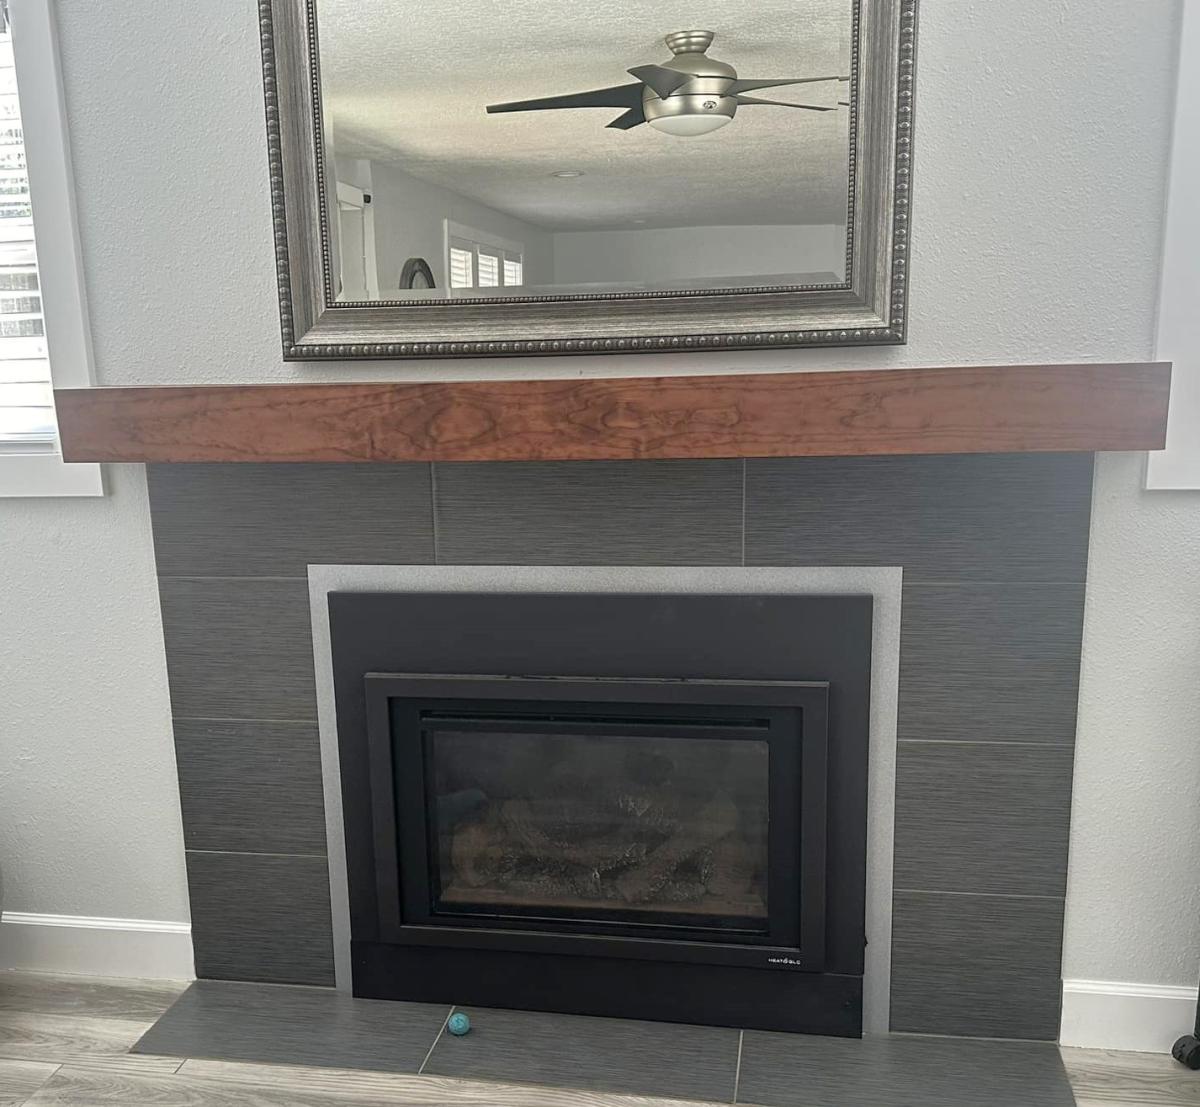
I had been wanting to build a mantle for quite a while but couldn't decide what I wanted it to look like, then I saw the wood mantle with hidden storage plans on Ana's website. I used a steel wool\vinegar mixture as a stain, 3 coats making sure it dried completely before applying the next coat. I finished it off with a beeswax & orange oil wood polish & conditioner. So far I'm storing the remote for the fireplace, the key to the gas for the fireplace and the tool that helps remove the front of the fireplace in there. I'm not sure what else will find it's way in there. I'm very happy with how it turned out.

Julie V.

Built from Plan(s)

King Farmhouse Bed

Submitted by jhavinga on Thu, 05/22/2014 - 16:31

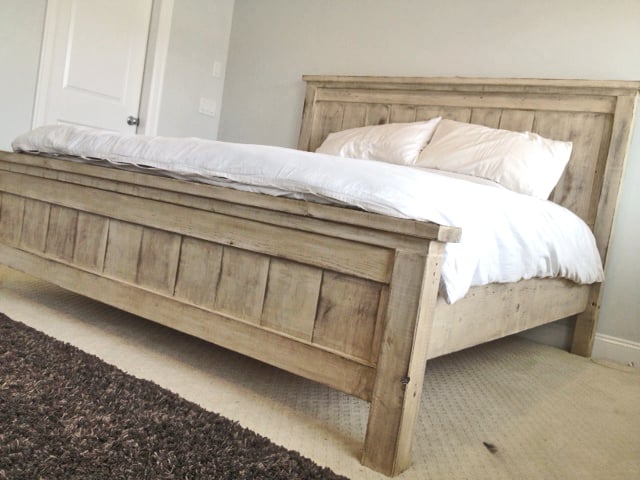
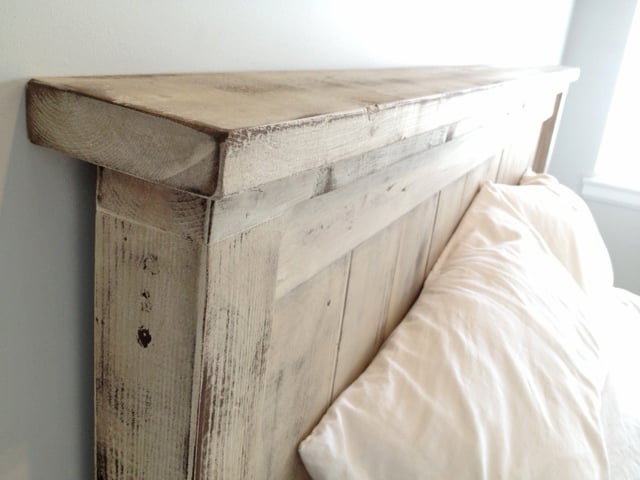
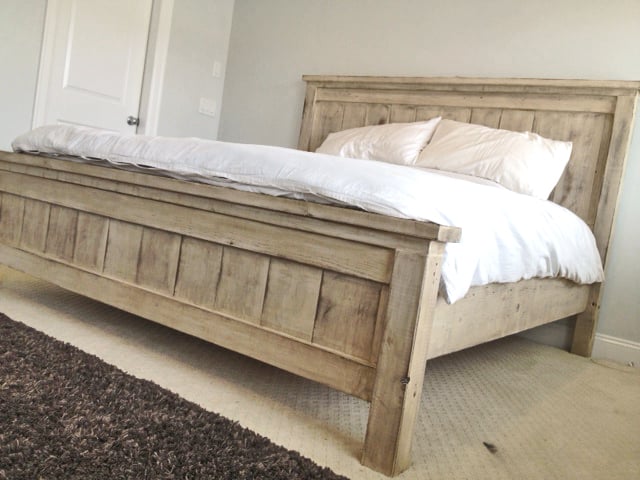
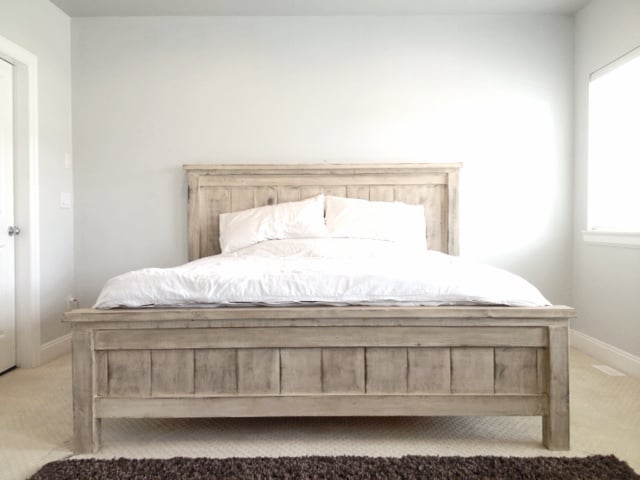
Second project ive completed from Ana White, and I am very happy with how this bed turned out! The only thing I would fix would be the finish, I wanted it a bit whiter. not so creamy. Otherwise very quick and easy fun project to do. =)

Estimated Cost
$300
Estimated Time Investment
Day Project (6-9 Hours)
Finish Used
1 coat of a basic latex white paint.
Then I sanded down just so raised grains would become exposed.
1 coat of dark walnut stain (wipe on with cloth)
Done.
Recommended Skill Level
Starter Project

Comments

jhavinga

Thu, 05/22/2014 - 16:34

Thank you for sharing all of these awesome projects. I was always hesitant when it came to wood, but now I cant seem to stop!

jhavinga

Wed, 06/11/2014 - 13:43

(You can do all this before or after your project is put together or not.)
Be sure to do a test piece before hand so you can see exactly what your getting :)

The first step I did once the head board and foot board were put together, was to sand any sharp edges or corners. I liked mine rounded and worn looking. I did not sand anything else.
Second step is to paint 1 even coat of a basic white latex paint.

Third step is to sand away some white paint. because we didnt sand it before hand the grains in the wood will be very bumpy. so the paint on the grains will sand off while the paint lower than the grain will remain. makes sense? hopefully i explained that right!

Fourth step is to now wipe on the stain of your choice. I went with Dark walnut. It stains the paint a bit bringing the white to a gray/brown tone. and stains the wood dark walnut so the grain patterns show up dark.

Let me know if you have any other questions and good luck!

jbogan15

Thu, 01/29/2015 - 07:49

What grit of sand paper did you use to sand off the white paint? and did you sand it by hand? Also, for the dark walnut stain, did you wipe off immediately or leave it on for a bit before wiping? Beautiful bed, I want to achieve this look!

In reply to by jbogan15

jhavinga

Fri, 02/06/2015 - 09:15

Hi jbogan15, thank you!
For sanding I used a palm sander with 120 grit to get the job done a bit quicker, than went over lightly with 220. When staining I actually just dipped a rag in the stain and would wipe the stain on. =)

Good luck!
Justin

kosborn

Fri, 01/27/2017 - 11:05

Love this look! Exactly what I am trying to achieve...A few questions about the side rails. How high did you connect them to the 4x4 posts and exactly how did you connect them? Did you use brackets or screw right into the posts? Thank You!

barkleyl

Thu, 09/05/2019 - 15:07

I have seen several beds from Anna White. I was wondering if the frame require a box spring mattress or not. If not, are the beds lower than what a traditional mattress and box springs are. Thanks ! 

Neighbors

Submitted by Pebcat on Tue, 05/27/2014 - 20:22

I found Ana's website in my search for the desk plans, and in the process found many other wonderful plans I want to try. My goal is to make a sawhorse desk for my new home office. I need to learn all proper woodworking skills, however.

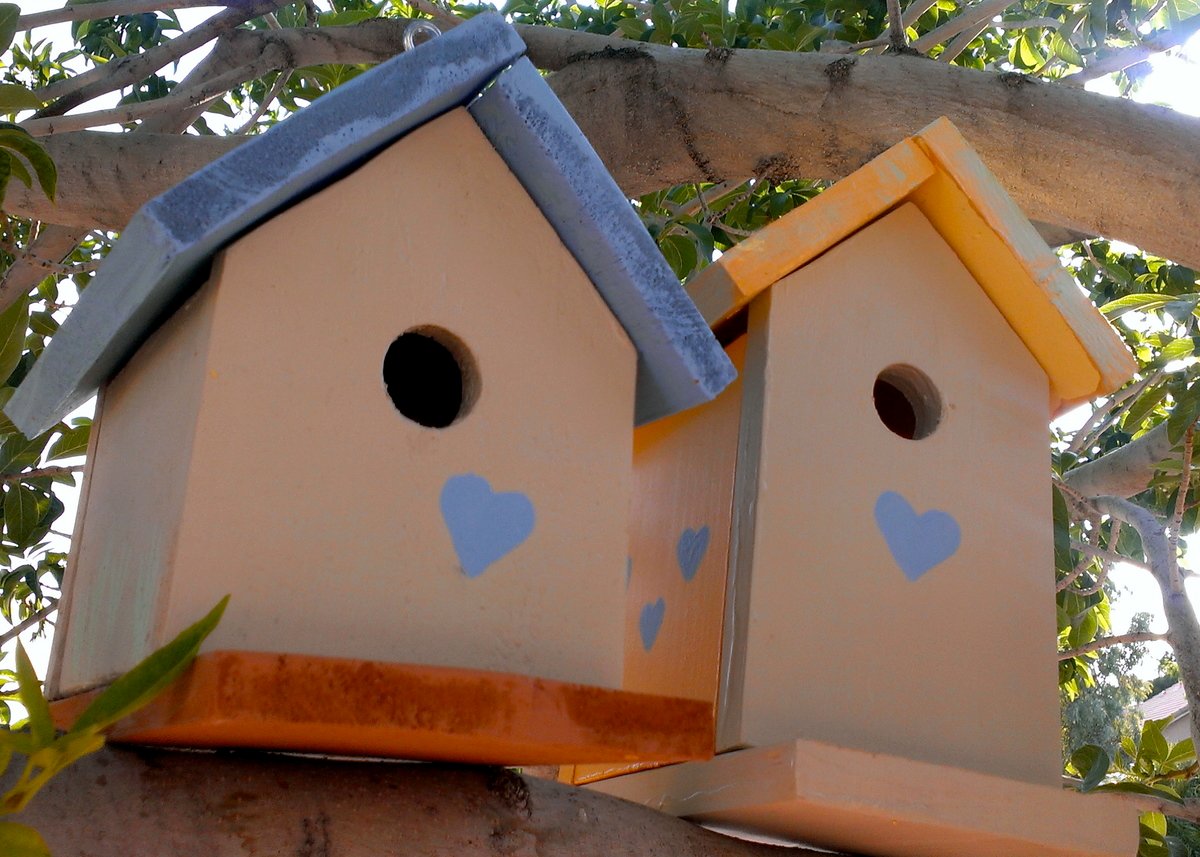
Therefore, I decided to start with this birdhouse project, which was a joy for me since I have a fascination with photographing birdhouses wherever I go. I also have fond memories of making birdhouses with my mother when I was a little girl. She did all the cutting and nailing, and I sanded and painted.

This project brought back happy memories, and my mom got a kick out of seeing photos of the finished results.

In addition, today I had the wonderful opportunity to photograph my own birdhouses!

Estimated Cost
$3 per house for the wood
Estimated Time Investment
Afternoon Project (3-6 Hours)
Finish Used
I used a combination of paint I had on-hand, all Valspar. Most of the paints were Valspar Ultra Paint & Primer.

Paint colors for the birdhouse on the left are called: Country Heather (blue), Bittersweet Stem (beige), brandywine (terracotta), and Pistachio Ice (green) for accents.

The colors of the house on the right also included Country Heather, Bittersweet Stem, and Pistachio Ice (again for accents). In addition, Buttered Hazelnut was used for the walls and roof.

I completed most of the painting prior to assembly, adding only accents such as hearts and windows post-assembly.
Recommended Skill Level
Starter Project

Loft bed with Staircase

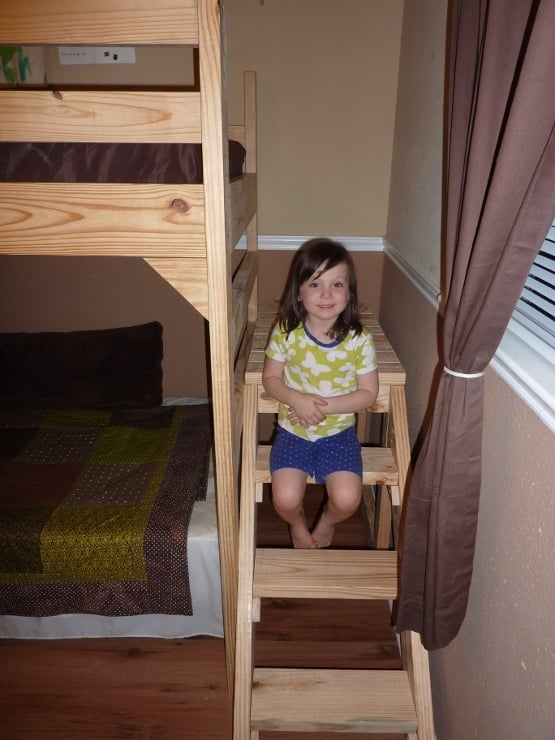
This plan was perfect for our second bedroom. We are adopting soon and are not sure what ages, genders, or sibling combinations we will be accomidating. We wanted to make the most of the space we had with the option for an additional bed if needed. This loft bed is the perfect solution. I like the stairs (instead of the usual ladder rungs) and it was pretty easy to build. Now the kids can play under it...or we can add a bed (in the photo we have a box spring set up on a bed frame, but no mattress yet) if we need to. THANK YOU, ANA!
We made a few alterations to Ana's plan:

1. We moved the staircase to the right side to better fit our bedroom set up
2. We narrowed down the platform and staircase by 4 inches....still plenty wide!
3. We brought the staircase platform in about 7 inches, so the stairs don't stick out so far.
4. We added an additional 2x4 at the base for stability (attached to the back two vertical legs).
5. We added 4 corner braces (just left over 2x6's cut at 45 degree angles to make little triangle brackets.

It's very sturdy. My husband even got up there to test it out. We haven't finished it yet, but we plan to stain and seal it.

Estimated Cost
$75 plus a Kreg Jig kit (totally worth it!)
Estimated Time Investment
Day Project (6-9 Hours)
Finish Used
We haven't done a finish on it yet.
Recommended Skill Level
Beginner

Comments

Aisha_ (not verified)

Mon, 09/24/2012 - 11:16

I love that you brought the stairs in! Hope you post pics when you finally get it stained can't wait to see it!

Beginner farm table bench/outdoor seating

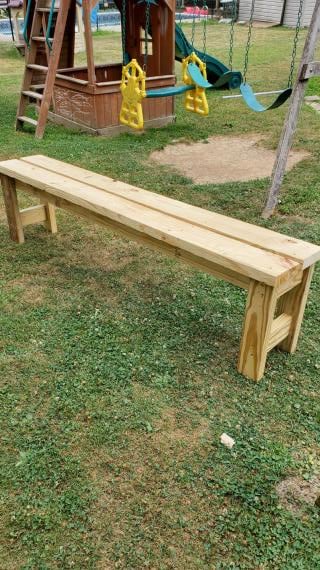
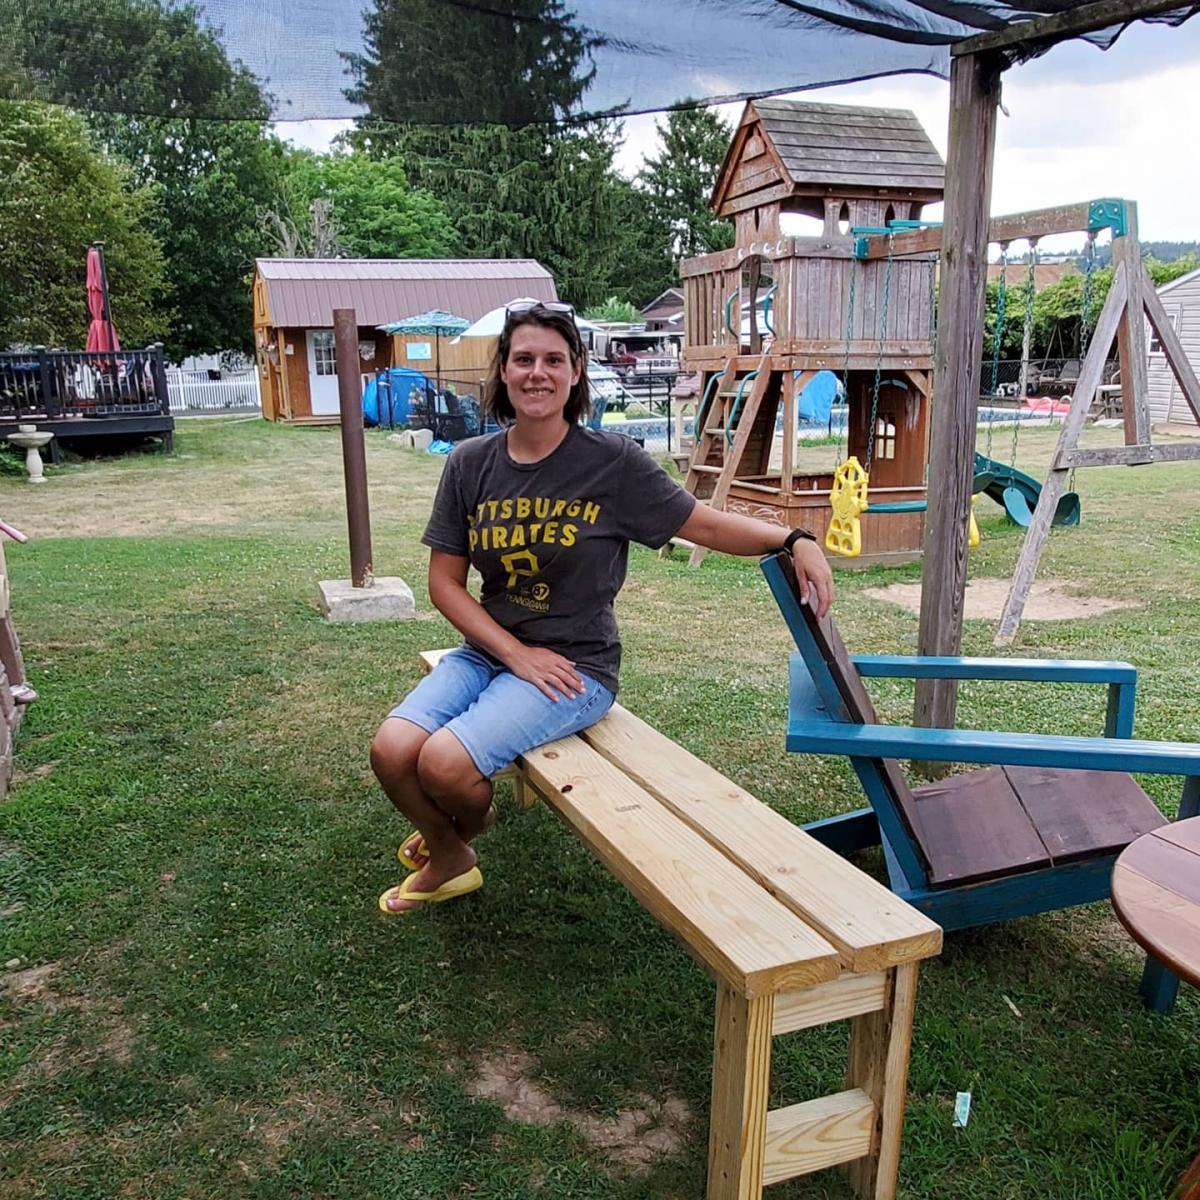
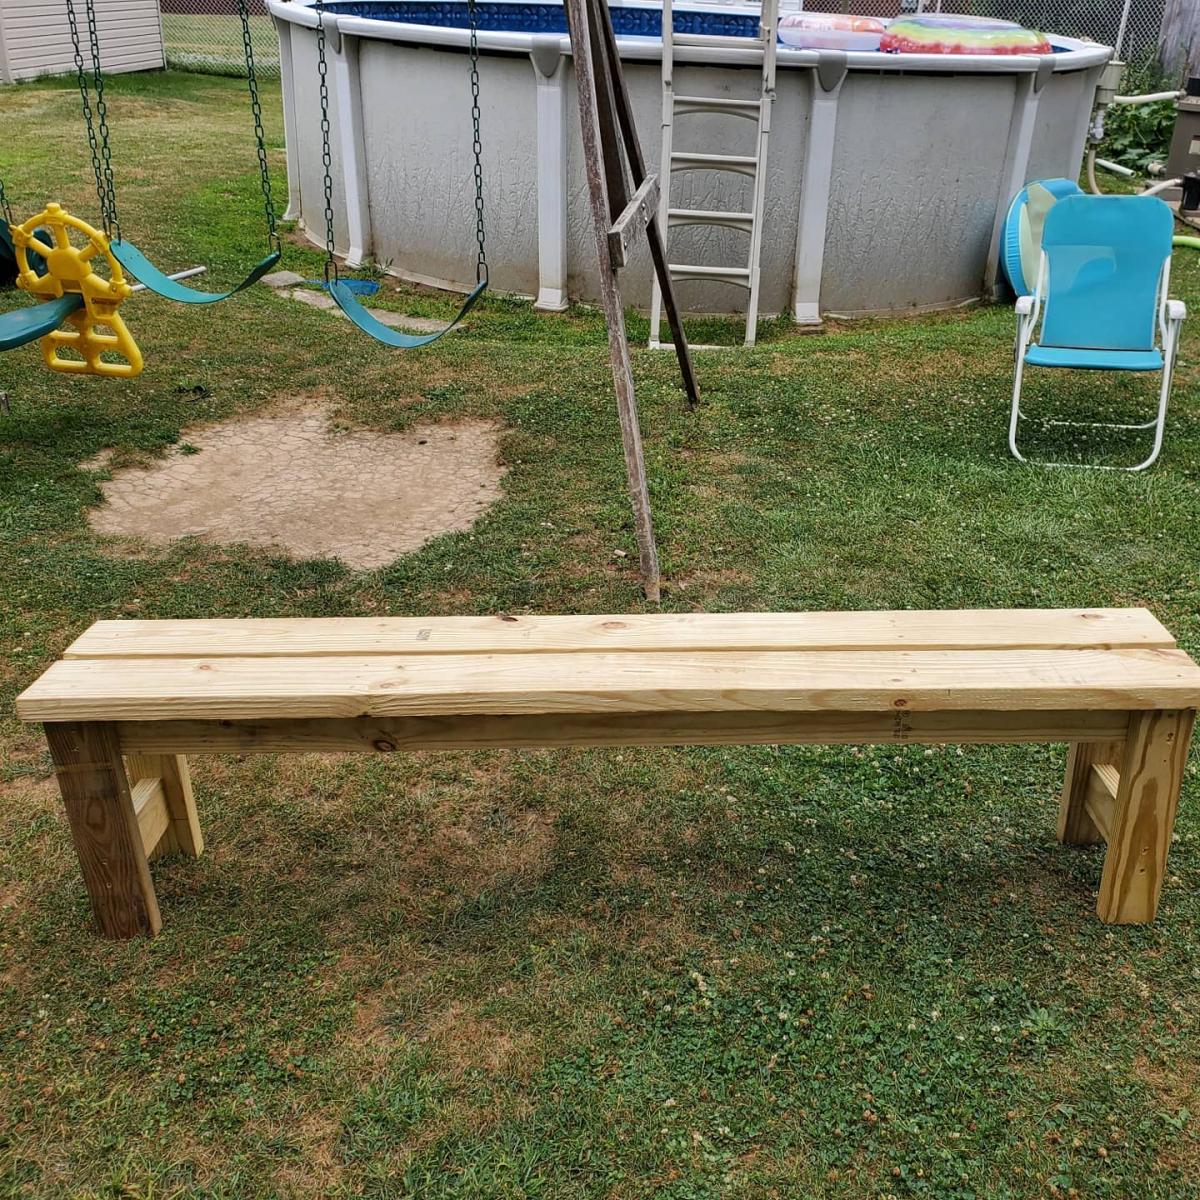
Great, sturdy, easy build!!! Looks amazing and will be my new picnic outdoor seating. I cannot wait to build the next bench and table to go along with it. Thank you for the plans!!!!

Estimated Time Investment
An Hour or Two (0-2 Hours)
Finish Used
I have not finished it yet, but will stain then use an outdoor poly.
Recommended Skill Level
Beginner

Providence Bench for my Front Porch

Submitted by kerrbear on Wed, 09/26/2012 - 10:30

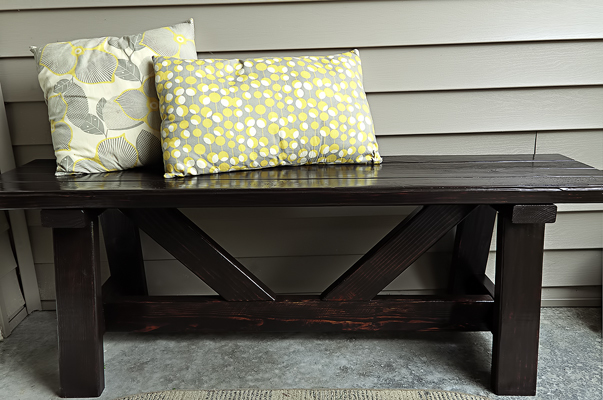
This project was quick and simple. Just keep in mind and pay attention to the plans where they state "bevel" or "miter". There is a difference!

This project was free to me as we have a huge amount of 2x4 studs left over in our garage from a previous project so I should be able to do the table and another bench for free as well.

It went together within a few hours as the cuts are easy.

Working on the camp loft bed now with some mods to add a stationary bed beneath and more height for my girls room.

Overall great build.

I stained it with one coat of Kona. I did let the stain sit and barely wiped it off that is why it ended up being very dark which is the look I was going for. I then finished it off with 4 coats of polycrylic clear in high gloss which dries very fast and does not yellow.

Estimated Cost
$10.00 - 2x4's here are about $1.54 each
Estimated Time Investment
Afternoon Project (3-6 Hours)
Finish Used
1 coat of Rustoleum Ultimate wood stain in Kona. This is the best stain ever for dry time (its not clean like gel stain though so it is runny and can get messy just an fyi)
It dries within an hour! And only needs one coat!

Finished it with 4 coats of Minwax polycrylic clear gloss. Its ultra fast drying and water based for easy clean up. Comes in matte, satin, and gloss.
Recommended Skill Level
Beginner

Comments

Jamie Hynes (not verified)

Sun, 11/04/2012 - 14:15

Hi - would it be possible to get these plans also? Thx so much, it looks like a fun project with fast results. jamie

Vicki G. (not verified)

Fri, 11/23/2012 - 10:49

There is a clickable link above where it says "Blog Link: Build a Providence Bench"

Back