Community Brag Posts

Four station desk (PB inspired)

Submitted by monty742 on Sun, 03/15/2015 - 08:58

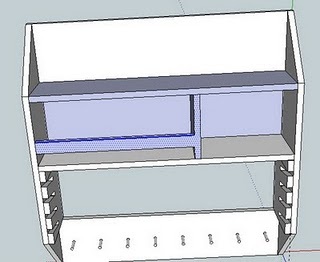
I really liked the PB mega desk, but I didn't want to spend $1600 on it.  After seeing someone's post here (a couple years ago...) asking for plans on that desk, I decided to do it myself.  I took these two plans and made 4 base units.  They are 18" square at the top and 34" tall.  I used 2 IKEA table tops connected underneath for the top, to make a total height of 36" - counter stool height.  I constructed them a little differently than the plans, but no matter how you make them, the idea is the same.  The plan is to take them apart and make 2 desks once everyone is too old and cool to do homework/artwork together.

Estimated Cost
$500
Estimated Time Investment
Week Long Project (20 Hours or More)
Finish Used
Kitchen and Bath finish paint (2 coats) - it's a little shinier than eggshell (I only used it because I had 2 or 3 gallons extra at home :) then 2 coats acrylic top coat matte finish.
Recommended Skill Level
Intermediate

Comments

monty742

Sat, 08/15/2015 - 04:33

Just seeing your comment...sorry for the delay!  I got the stools and the light fixture at a Ballard Backroom (outlet) store near me.  3 of the stools ended up being about $40 each with the sale they had at the time, and the 4th was $60? - bought at a later time than the first 3.

AlisaH

Wed, 11/04/2015 - 07:40

How did you connect the table tops from the bottom so that the tables were secure together? I'm curious what's the best way to do this. Since two of the four seats will be where the seam is, I want to make sure I secure it properly so it's not wobbly. Thanks so much.


monty742

Sat, 01/09/2016 - 05:06

I'm just seeing these latest comments for the first time, so you may have long finished this project already!  The tops were surprisingly sturdy but I did reinforce them.  I placed the tops on the floor upside down and screwed some metal brackets (about 12" long each) across the joint in four places.  I just screwed them in through holes already in the brackets.  This wasn't the most stable because those tops are particle board and don't hold screws very well...  But since it was already pretty sturdy, I figured it would do.  It has been fine, even with standing on the top (kids who get up there and me hanging the light fixture above).

Once the tops were joined, I placed the bases so there was about a 1" overhang on the top.  To hold the top in place, I used small pieces of wood screwed to the underside of the top at the inside corner to act as a placement stop.  The top is pretty big and heavy even though they are IKEA tops, so they don't have a tendency to move or slide at all anyway.  I'm going to try to figure out how to post another picture of the braces and corner stops...we'll see if I can do it!  Let me know if you have any more questions...again, sorry I didn't see this in a more timely manner!

Pmprdwife

Sat, 01/02/2016 - 05:55

Is the photo above the Pottery Barn version or your product result?  I'm trying to figure out the dimensions for the drawer and shelf configurations.  Thanks!  BTW, I'm totally addicted to your style and personality...my husband loves the productivity inspiration I've received. :-)


monty742

Sat, 01/09/2016 - 10:17

Hi!

I'm glad you like the desk!  The one in the picture is the one I built, not the pottery barn one!  My dimensions were a good bit different than the PB desk - square bases instead of rectangular and counter stool height instead of desk/table height.  So, I have no idea if I have my plans for this anymore, so I went and measured it again for you!  

So each base is 18" x 18" square and 34" high so that with the 2" top the total height is 36".


Each base was made of oak plywood that made with 3 sides, a top and a bottom.  All edges were rabbit joints (3/8" deep in thickness of boards and probably 3/8" wide - not 100% on width of rabbits).  It's kind of a pain to do rabbit joints if you don't have a dado blade for your table saw, so you could use pocket hole screws instead.  I glued and nailed these joints with a finish nailer, I believe.  

I figured a diagram with measurements would be easier than trying to write descriptions...so I'm adding another pic with the dimensions outlined.  Drawing is NOT to scale, so sorry about that!  I really need to learn to use SketchUp.  Let me know if you have any questions!  

Monty742

monty742

Sat, 01/09/2016 - 07:57

Hi!

I'm glad you like the desk!  The one in the picture is the one I built, not the pottery barn one!  My dimensions were a good bit different than the PB desk - square bases instead of rectangular and counter stool height instead of desk/table height.  So, I have no idea if I have my plans for this anymore, so I went and measured it again for you!  

So each base is 18" x 18" square and 34" high so that with the 2" top the total height is 36".


Each base was made of oak plywood that made with 3 sides, a top and a bottom.  All edges were rabbit joints (3/8" deep in thickness of boards and probably 3/8" wide - not 100% on width of rabbits).  It's kind of a pain to do rabbit joints if you don't have a dado blade for your table saw, so you could use pocket hole screws instead.  I glued and nailed these joints with a finish nailer, I believe.  

I figured a diagram with measurements would be easier than trying to write descriptions...so I'm adding another pic with the dimensions outlined.  Drawing is NOT to scale, so sorry about that!  I really need to learn to use SketchUp.  Let me know if you have any questions!  

monty742

Thu, 07/28/2016 - 14:13

No you can't buy them from Ikea.  I bought the table tops from Ikea, but I built the bases.  The dimensions for the bases are in one of the additional pictures with the post if you want to see them!

treverandamber

Mon, 10/10/2016 - 07:41

What are the total dimensions of the table top? Thinking of building something like this, but want to make sure it will fit in my space.

Simgre81

Thu, 12/28/2017 - 07:00

Are these just slide in drawers, or did you use some sort of hardware to have them slide in and out?

wooden cooler stand

Submitted by stealth517 on Sat, 04/18/2015 - 20:48

This is the cooler stand presented by Jenny from Birdsandsaoap. Very easy to build and always ends up with someone asking to buy it or have you make them one.

Built from Plan(s)
Estimated Cost
$120.00
Estimated Time Investment
Week Long Project (20 Hours or More)
Finish Used
Minwax gloss polyurethane.
Recommended Skill Level
Intermediate

Comments

Dining room table, inspired by turned leg table and modern farmhouse table

Submitted by jbaibak on Sat, 06/22/2013 - 11:18

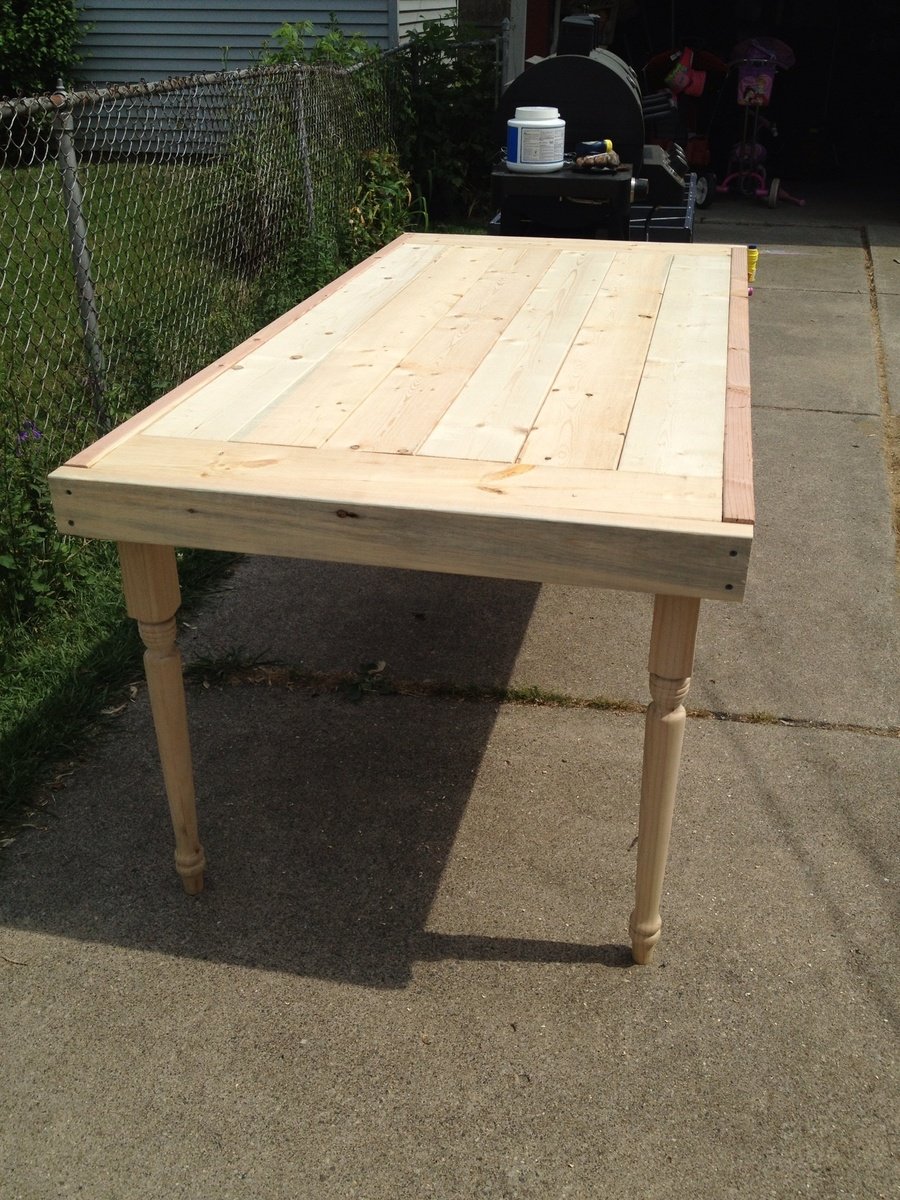
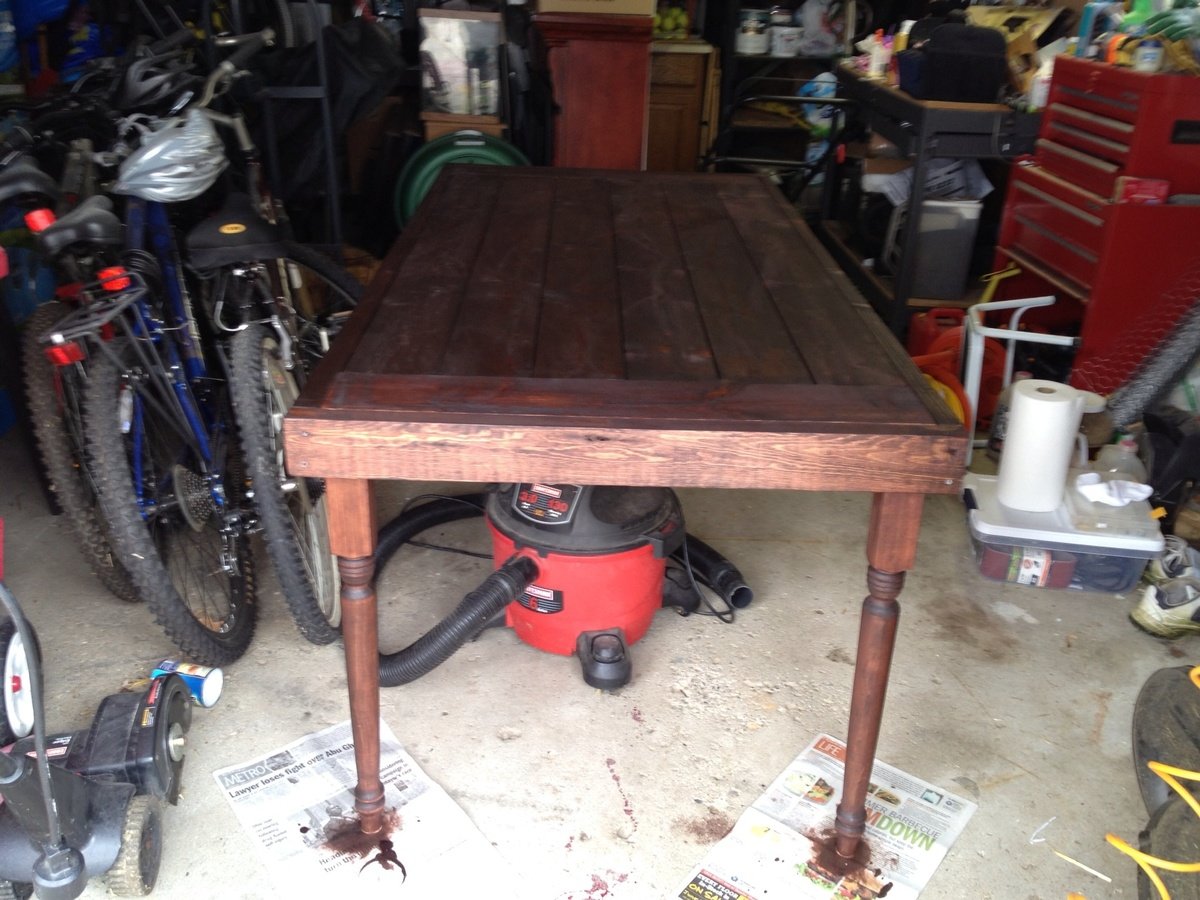
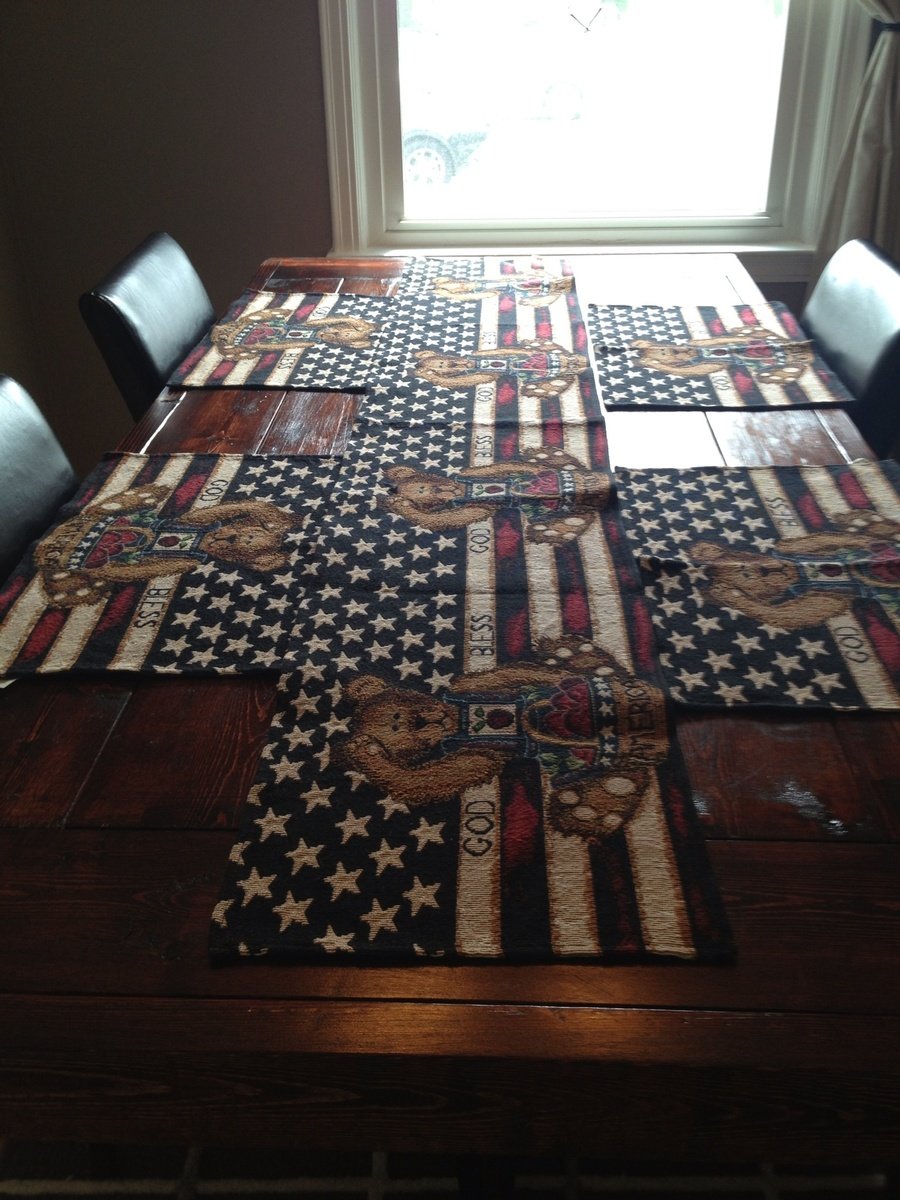
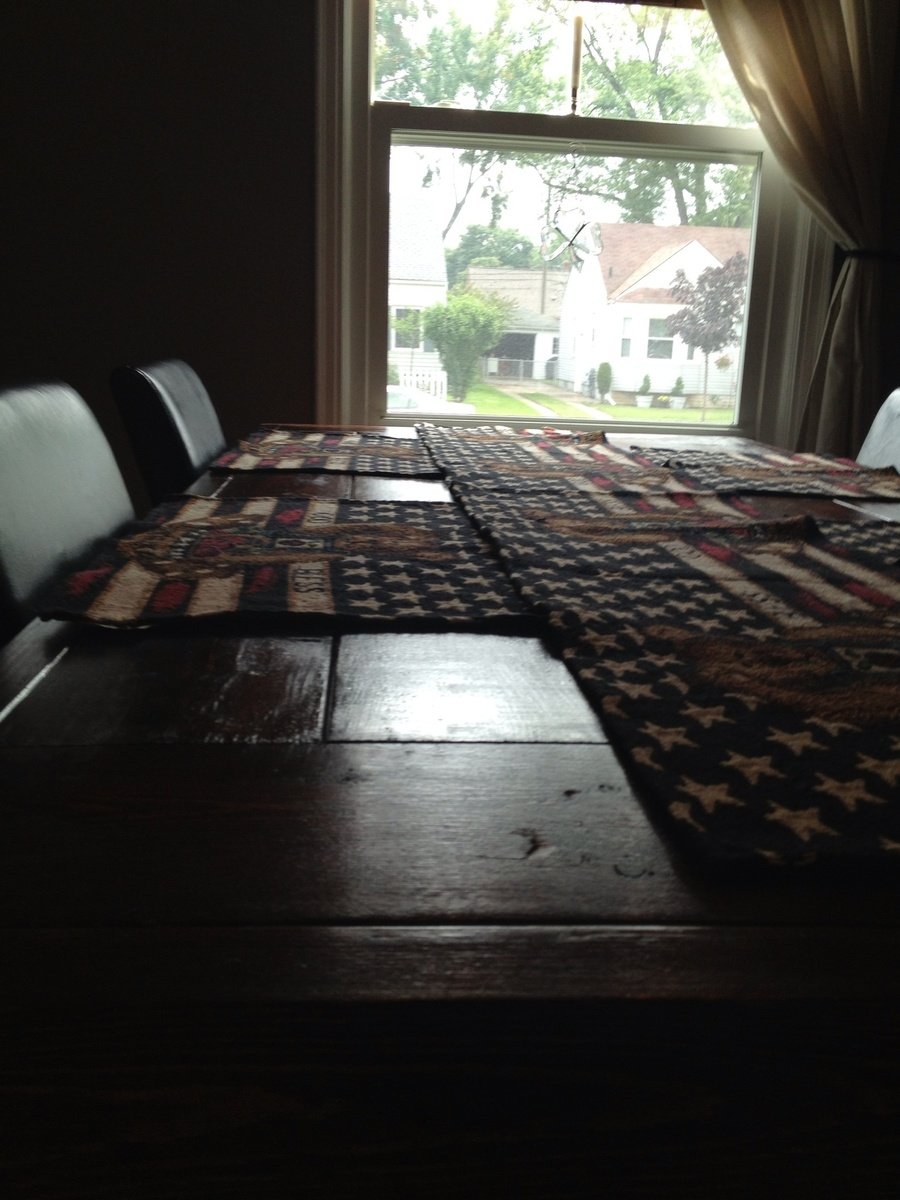
I wanted to attempt making a dining room table. This is my very first woodworking project. I did use store bought legs from one of the big box stores. Your site completely inspired me to just go for it. It's not quite finished. I've got to do all the sanding and staining. I plan to use a mahogany tone stain to coordinate with my brown/black parsons chairs and hutch in my dining room. Finally finished and I think it looks great! It took a lot of sanding to get all the wood pieces even, but so worth the effort. I love the rustic country look.

Estimated Time Investment
Week Long Project (20 Hours or More)
Finish Used
Minwax Red Mahogany and 3 coats of Minwax semi-gloss polyurethane
Recommended Skill Level
Beginner

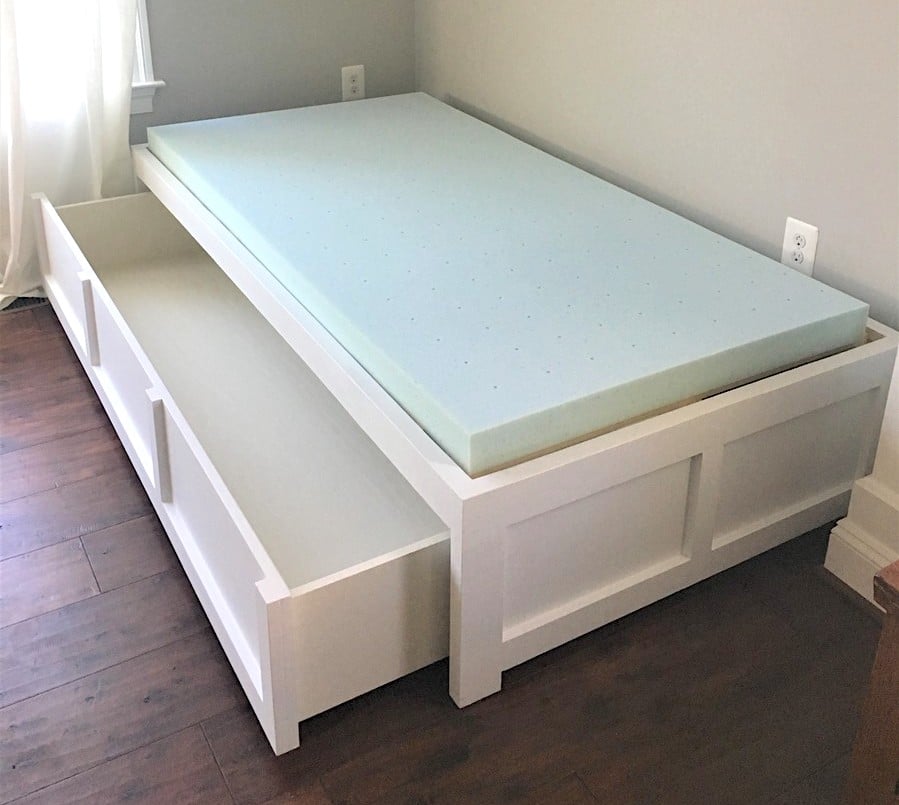
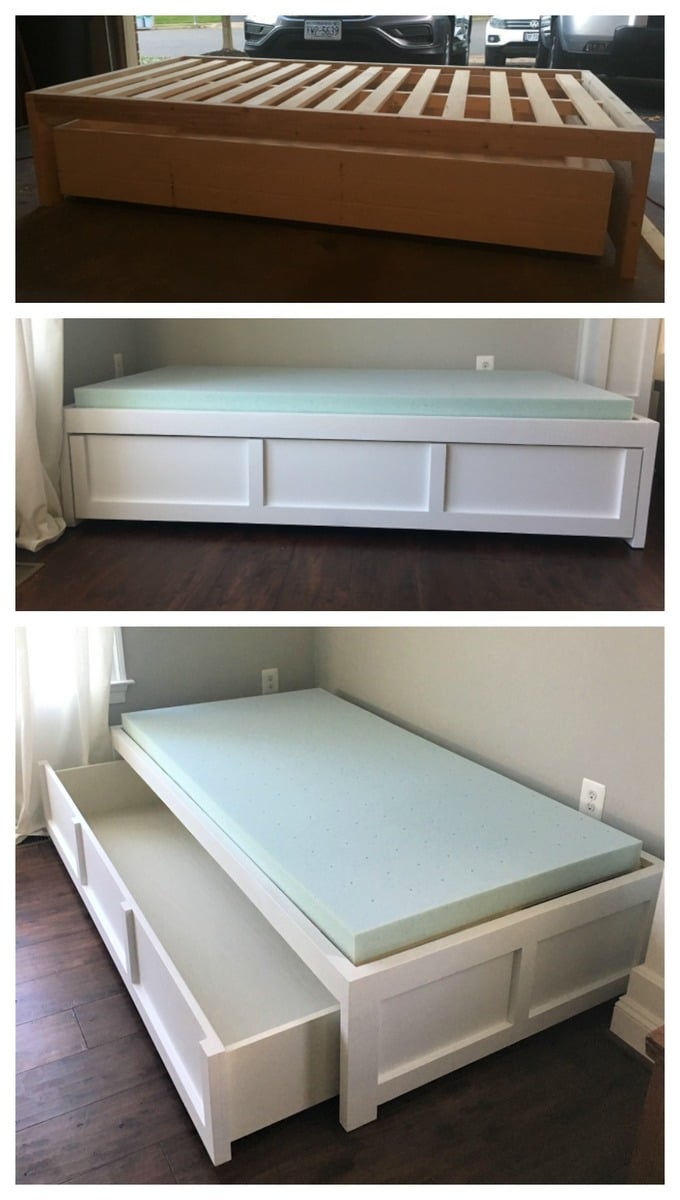
Daybed with Storage Trundle

Submitted by Crafty-Mom on Sat, 01/27/2018 - 10:38

This was my first project from Ana's website and I'm hooked! I'm a beginner, but thank goodness for my Dad's help because I have a lot of learning to do!

I wanted the drawer to be 1 drawer instead of 3. I feel like it looks cleaner (without having to adjust 3 drawers constantly to make it look good when you push them in). I was thinking the bed could actually be used as a trundle bed in the future too! I use this to store toys right now and it is Awesome!

I increased the bed size to fit a twin mattress and increased the height of the bed slightly so that the drawer would be a little bit deeper. We also added a back to the bed and carried around the trim to make all sides look the same. We added a bumper to the back and sides of the inside of the bed so the drawer is easy to push in and fits in snug. Finally we reinforced the bottom of the drawer with more 1x4 boards so that if a child does sleep in it, it would be more sturdy. I now have kids come over and jump into the drawer (literally) and I'm glad we reinforced it.

The changes we made did add to the cost and our time (as well as being newbies), but I think it's worth it and the bed turned out beautiful!

Estimated Cost
$180
Estimated Time Investment
Weekend Project (10-20 Hours)
Finish Used
Behr Marquee (I'll have to find the name of the white color we used). We almost went with chalk paint, but after talking to the HD guy, he talked me into this paint and I'm glad we used it! So much cheaper and turned out beautiful.
Recommended Skill Level
Beginner

Comments

Nisssc

Mon, 10/12/2020 - 07:51

This looks great! Any suggestion if I want cubbies instead of a trundle? Also, cubbies only on side as bed would be against the wall. Thanks for the inspiration!
Sandy

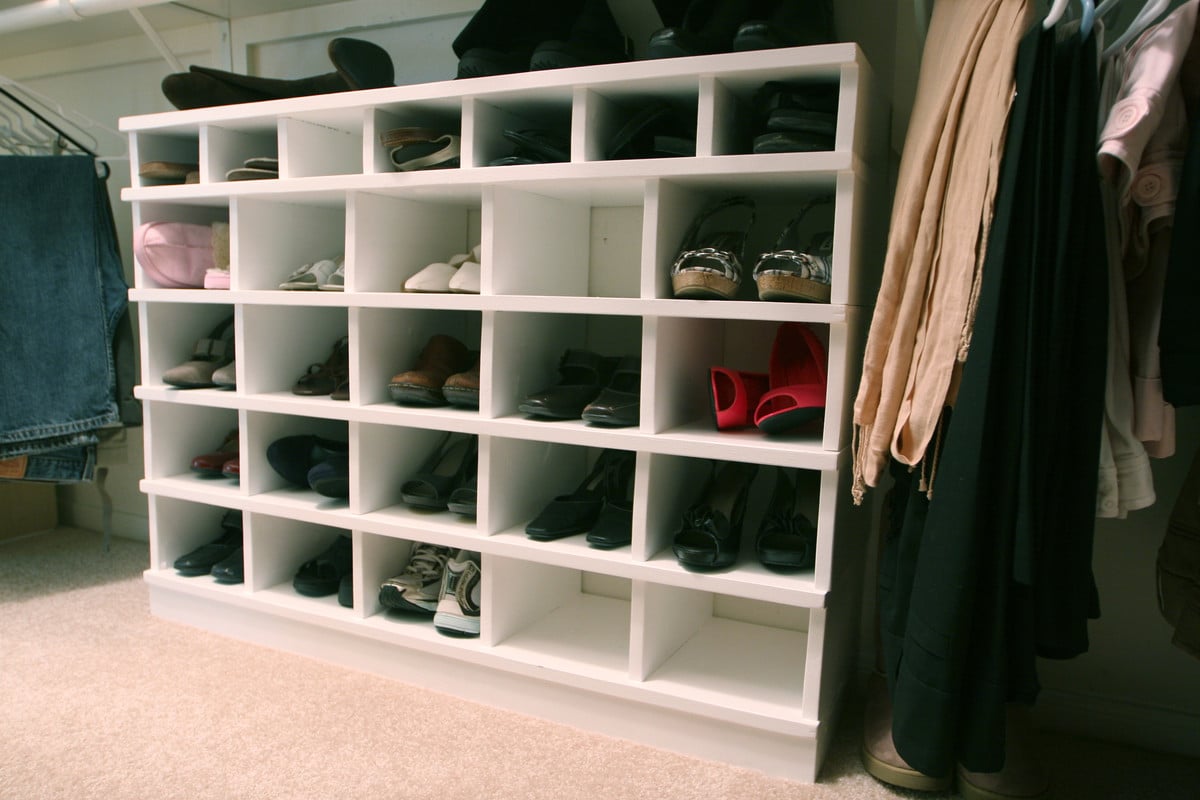
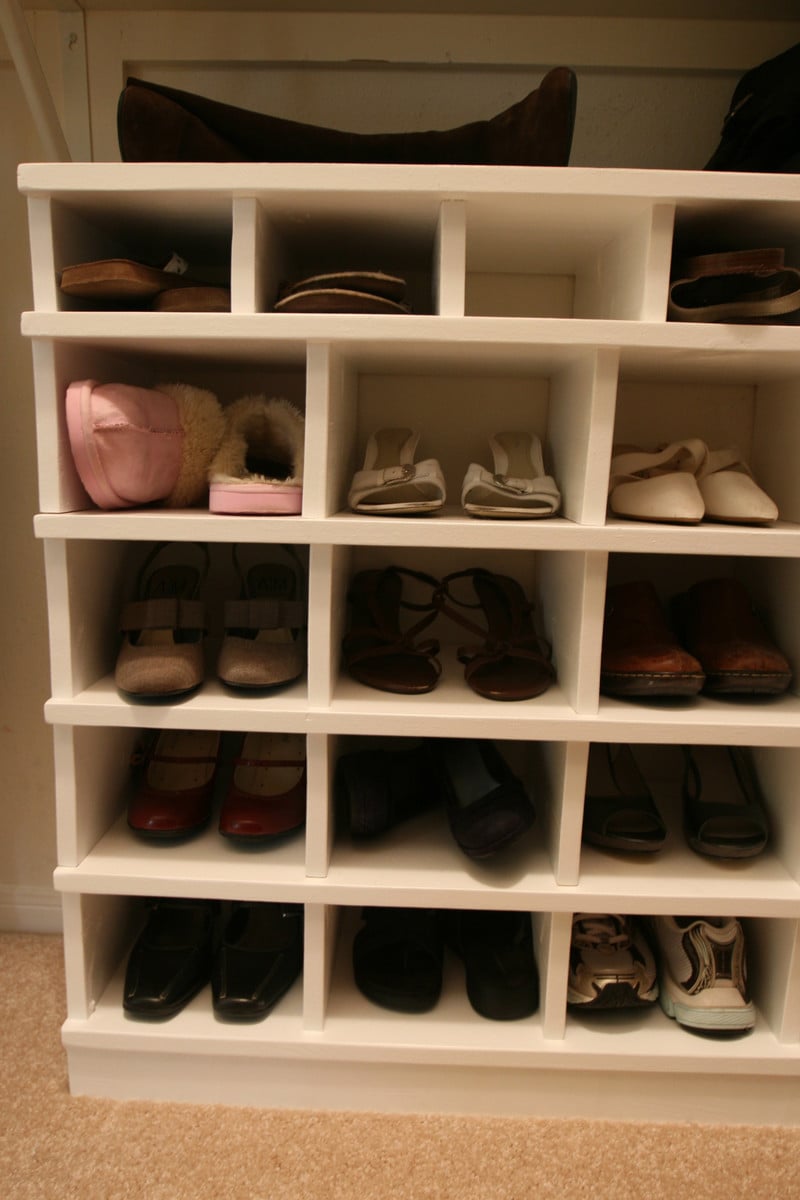
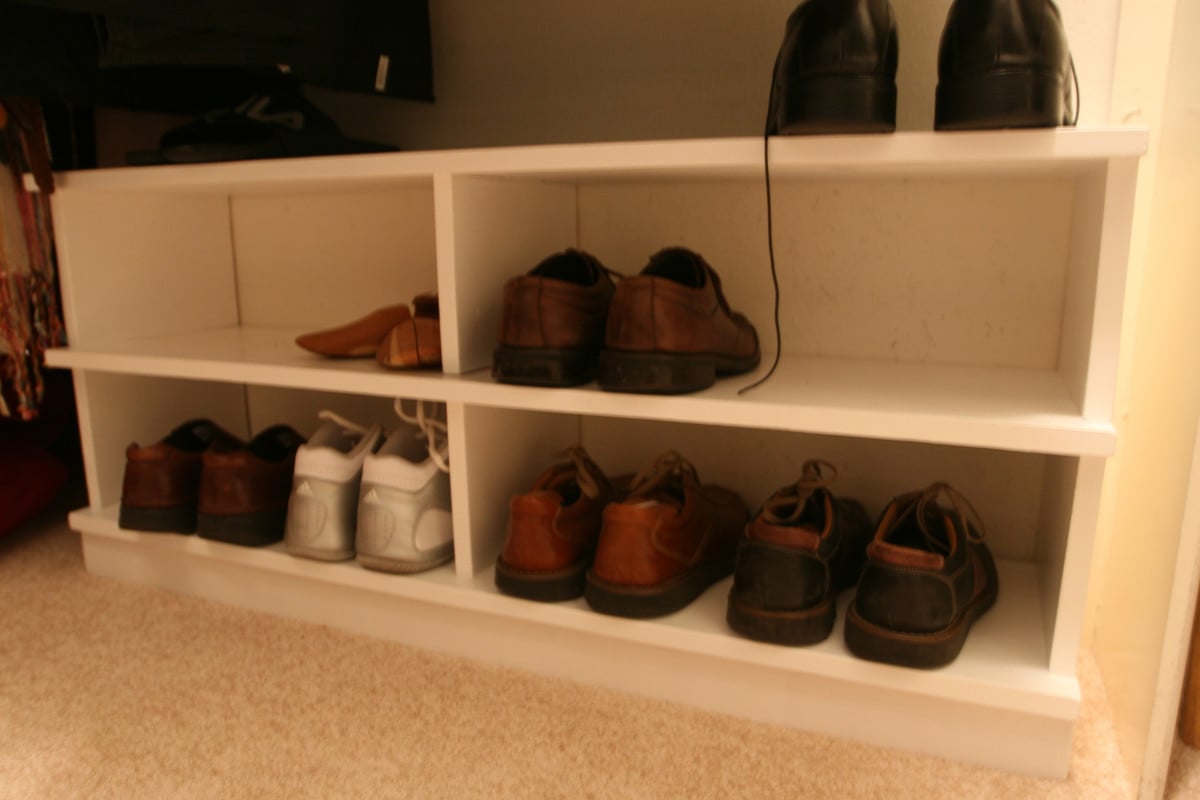
Shoe organizer

Submitted by Liz H. on Wed, 06/01/2011 - 21:26

I took the 25 cubbies plan and changed the dimensions to fit shoes. I made a simpler version for my husband too. This project went together quickly and was so fun to build.

Estimated Cost
$10
Estimated Time Investment
An Hour or Two (0-2 Hours)
Finish Used
White paint
Recommended Skill Level
Starter Project

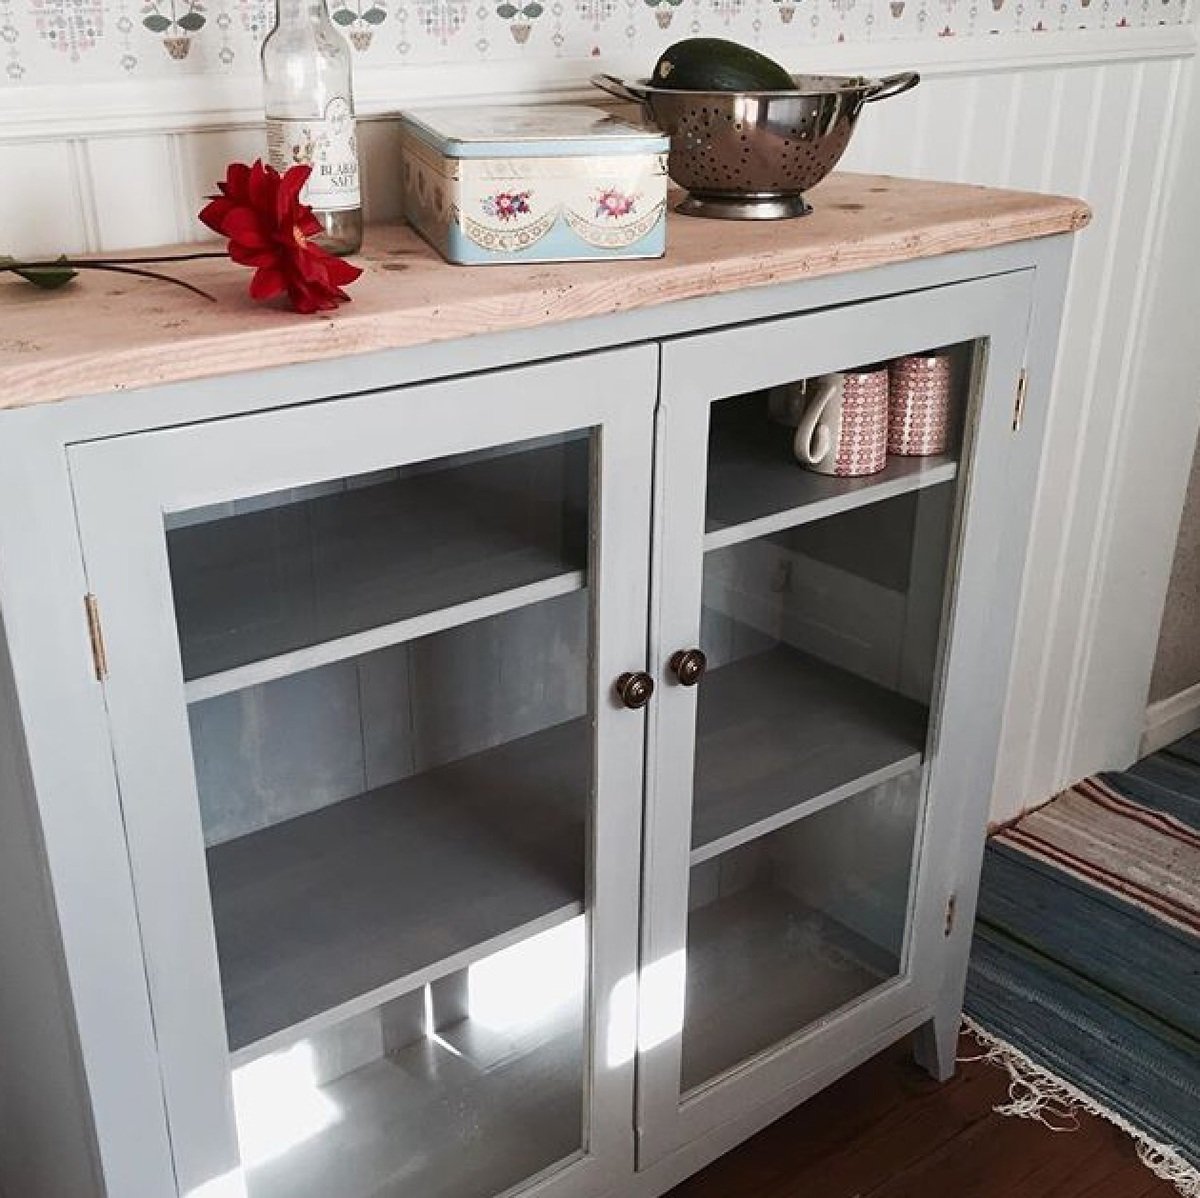
Cupboard

Submitted by Olof on Thu, 08/13/2015 - 22:01

Spend some time on pintrest and made this nice Cupboard hard to find the right plan but its my first furniture so freebasing and a few misstake later.

Built from Plan(s)
Estimated Cost
150$
Estimated Time Investment
Week Long Project (20 Hours or More)
Recommended Skill Level
Intermediate

Comments

Wife's Kindergarten Classroom

Been a while since I had time to actually build anything worth posting about! My wife wanted some items for her Kindergarten classroom this year, so built several items, most inspired by the Farmhouse family.

Estimated Time Investment
Day Project (6-9 Hours)
Recommended Skill Level
Beginner

Comments

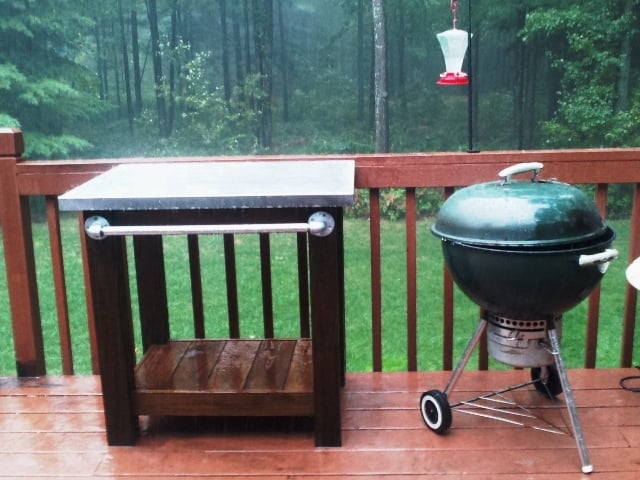
Grill table with stainless steel top

Submitted by krochelle on Tue, 08/20/2013 - 08:00

I made this table to go next to an outdoor grill to be used as a food prep area or just a surface for holding ingredients (instead of using the deck railing!). The top is stainless steel which fits tightly over 2 3/4" pieces of plywood laminated together. The bar/handle in front is made out of galvanized pipe. All wood was treated.

Legs - 4x4 posts
Bottom shelf - 1x6's
Sides - 1x4's
Top - 2 pieces of 3/4" plywood laminated together with a stainless steel top (custom fit) over top
Towel bar - galvanized pipe (cut and threaded to size at Lowe's), floor flanges and 90 degree elbows

Estimated Cost
$120
Estimated Time Investment
Day Project (6-9 Hours)
Finish Used
I used Kona stain but since it was over treated wood the stain did not take as dark as it should have. I will have to restain this piece after it has completely dried out.
Recommended Skill Level
Intermediate

Comments

spiceylg

Tue, 08/20/2013 - 09:07

Love this. Where did you get the stainless steel top? Did you have to special order to fit?

In reply to by spiceylg

krochelle

Thu, 05/15/2014 - 10:33

Sorry about the late reply! Yes, I just gave my dimensions to a local steel supplier and they made the top. I think I have about $40 into the stainless. They didn't weld the corners but I've never had an issue with them.

krochelle

Thu, 05/15/2014 - 10:46

No...I didn't have any plans when I built it but it's a very simple concept. I chose to use all treated wood since I knew it would be sitting outside unprotected. However, my 4x4 posts weren't square so this caused a lot of problems and everything was built to fit. I believe I just used 4x4's, 1X6s (for the bottom shelf) and 1x4s for the sides (top and bottom). For the top, I just laminated 2 pieces of 3/4" plywood together to bulk it up and then had the stainless top built to fit. It fit perfectly so I didn't glue it to the plywood. This makes it easy to remove and clean, if necessary. For the galvanized pipe (towel bar), I bought it at Lowe's and had them cut/thread it to fit my dimensions.

Pie Safe

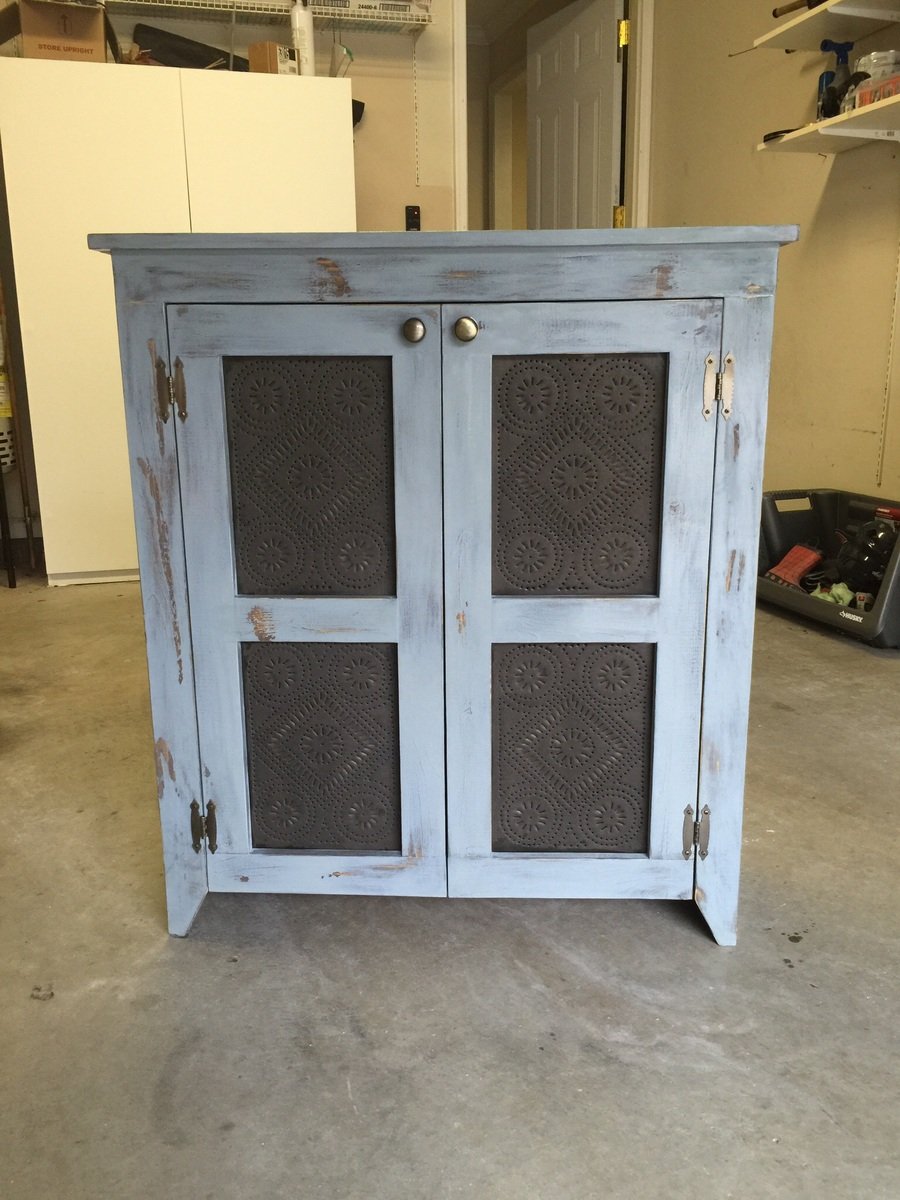
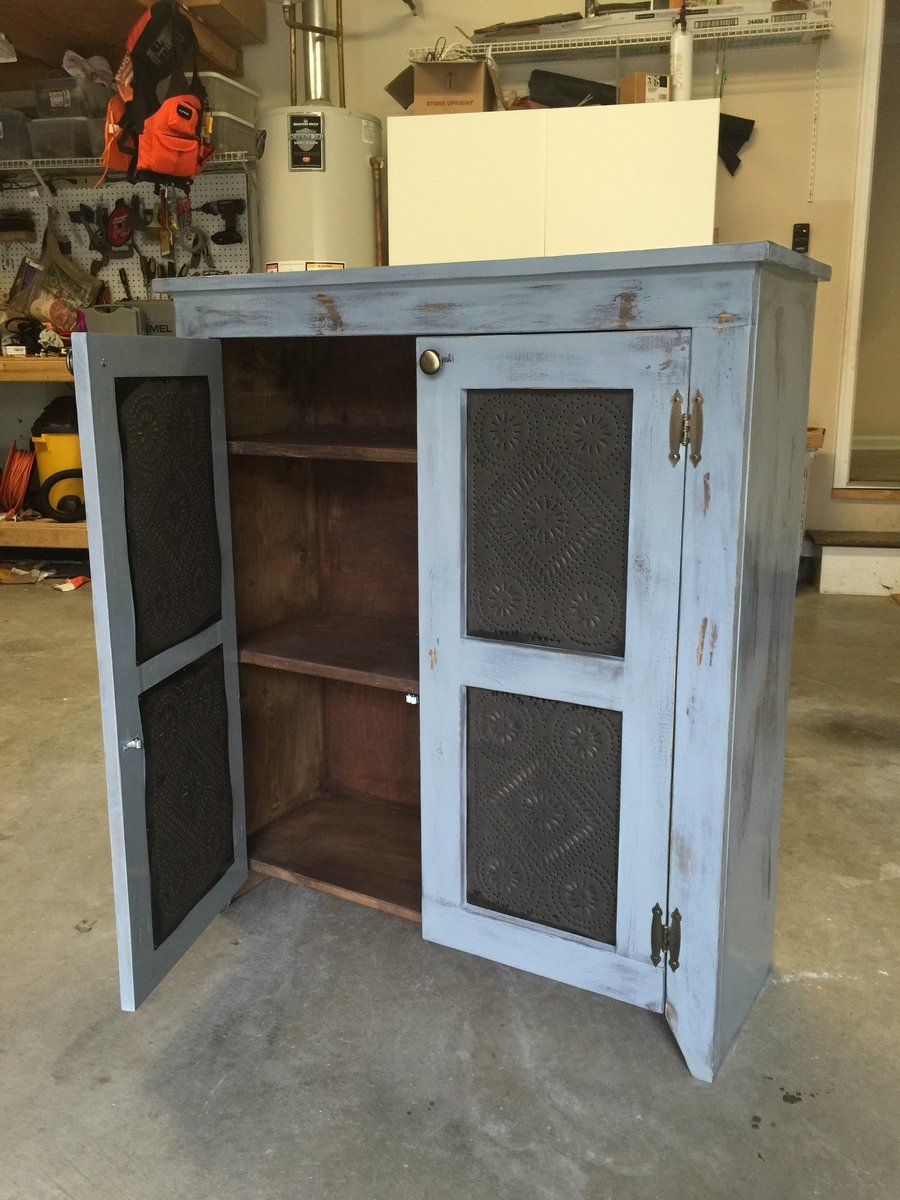
Submitted by Duckhook18 on Wed, 10/28/2015 - 18:56

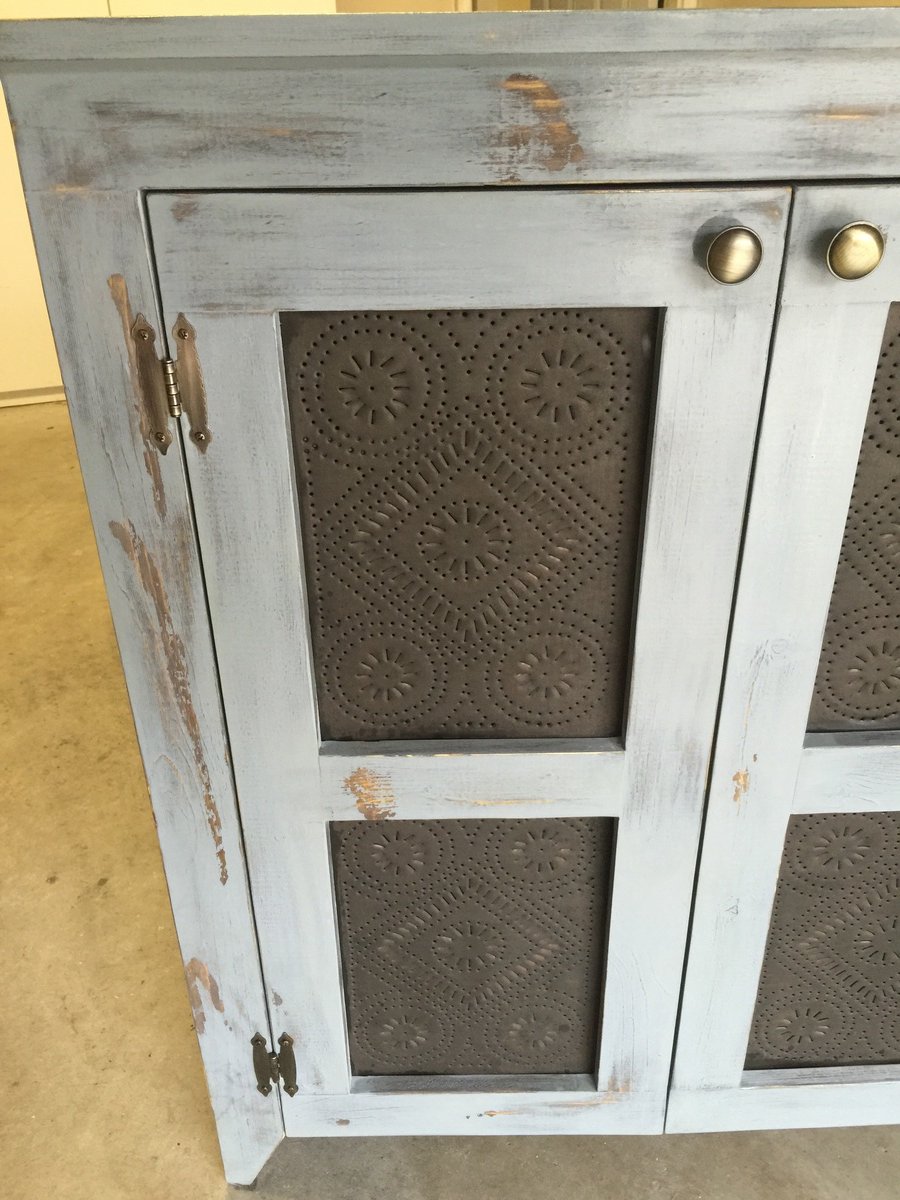
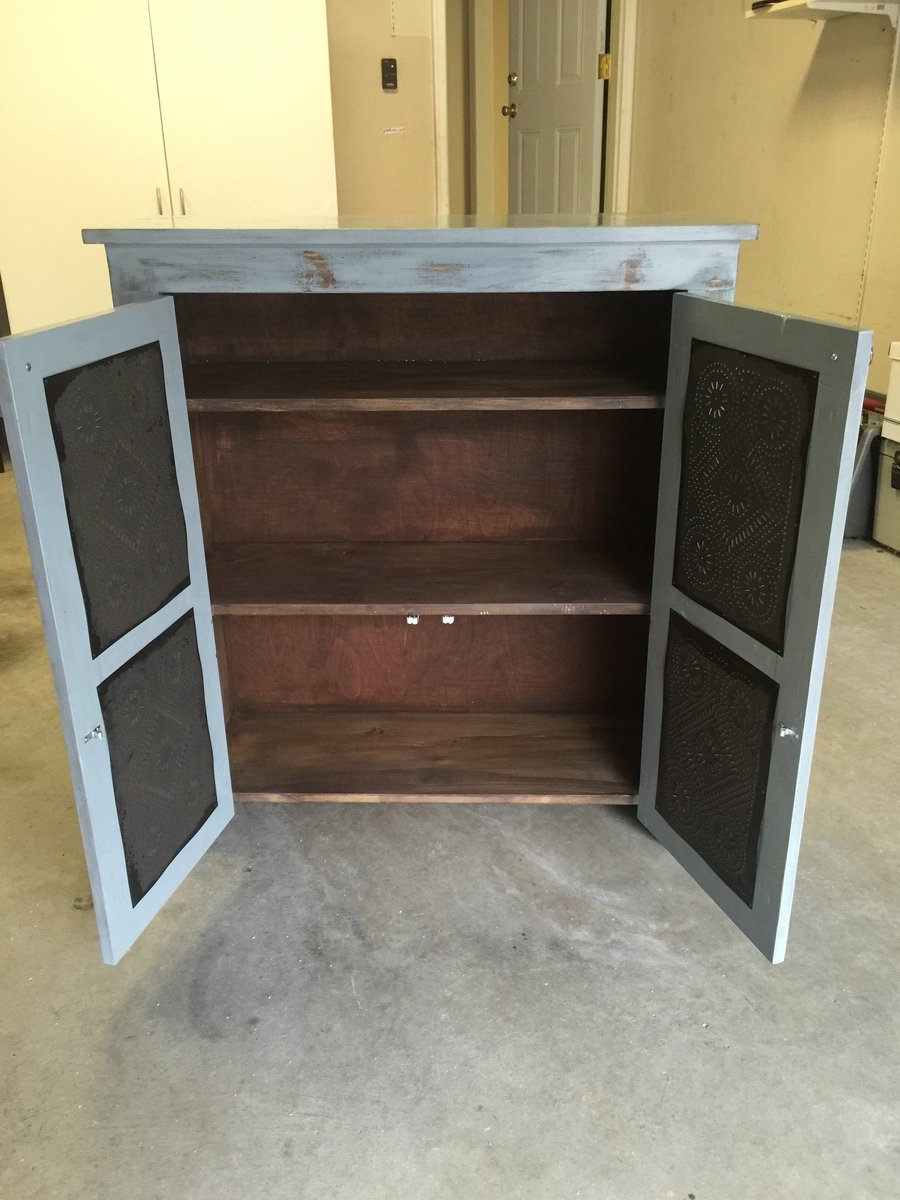
This is my first, of hopefully many projects to come. I modified Patrick's Jelly Cupboard plans to be 40" tall and added the tins to the doors. I used spruce and pine board from a local lumber yard. The finish is Miss Mustard Seed milk paint inside and out. With kids in the house I didn't want to use stain with the heavy chemical smell so I mixed the milk paint with a lot of water to look like a stain. That product is so easy to use and looks great. Needless to say my wife loves her pie safe. Thanks Ana for this site and the inspiration to give this a try. I'm hooked!

Built from Plan(s)
Estimated Cost
$140 including the tins, paint and lumber
Estimated Time Investment
Weekend Project (10-20 Hours)
Finish Used
Miss Mustard Seed Milk Paint - Shutter Gray (exterior), Curio (interior mixed 1 part paint to 3 parts water)
Topcoat - 2 coats of hemp oil
Painted entire piece in Curio first to get the layered look on the distressed finish. 2 coats of Shutter Gray over the Curio.
Recommended Skill Level
Starter Project

Comments

Joni

Sat, 10/31/2015 - 09:36

This is really beautiful!  Might I ask where you got your tin inserts?  Thanks!

Reclaimed Wood Coffee Table

Submitted by Me-go-Eco on Fri, 08/19/2011 - 10:42

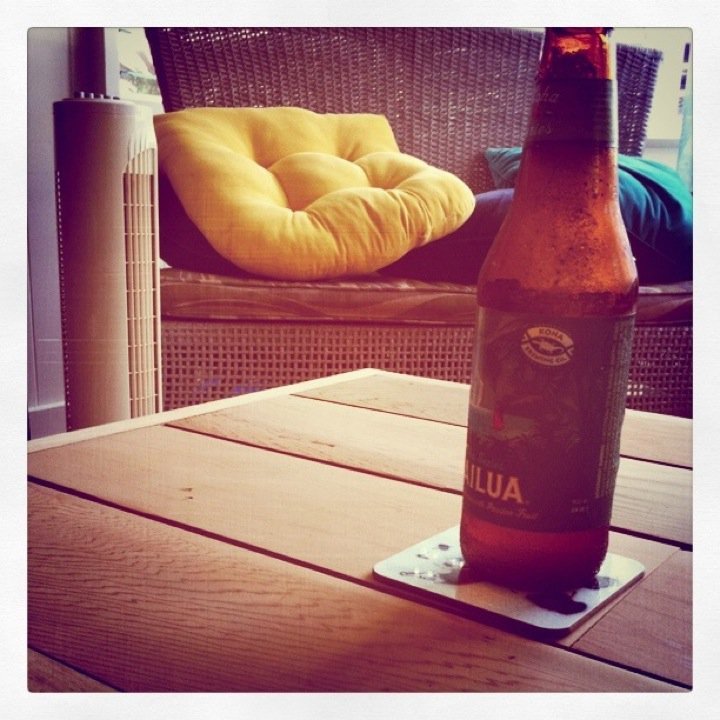
Built this coffee table as a housewarming present for my buddy who got me hooked on woodworking as a hobby! Made from reclaimed wood.

You want to see more? Check out my blog and follow me.

http://me-go-eco.blogspot.com

my twitter is: me_go_eco

Reduce, Reuse, Recycle, RECLAIM! Thanks!

Estimated Cost
$10 thrownout wood and leftovers from old projects from Re-use Hawaii.
Estimated Time Investment
Afternoon Project (3-6 Hours)
Finish Used
None
Recommended Skill Level
Beginner

Comments

Farm House Table and Benches

Submitted by markelll on Mon, 09/12/2011 - 09:28

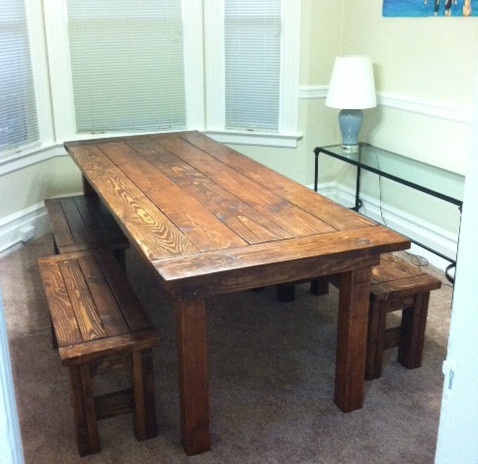
I wanted a big rustic farm table, didn't want to drop thousands on one from a store, so I decided to make my own!

I built it in the (formerly empty) dining room, with tarp on the floor and plastic to seal the doorways.

Was a big project and my first project so I started with the benches as this site and users recommended.

I used the farm house bench plan - just shortened the dimensions so that I could have two benches on either side of the table. Then I merged the two table plans so that I could have the top with the bread boards but legs that attached underneath (like the rustic table) so that they could be removed when we move. I'll work to upload my plans too.

Used Minwax Wood Stain in "english chestnut" and Deft Satin Wood Brushing Lacquer (instead of a Polyurethane).

Estimated Cost
approximately $300 (for wood, finish, sand paper, stain, screws..)
Estimated Time Investment
Week Long Project (20 Hours or More)
Finish Used
Minwax "English Chestnut" and
Deft Satin Wood Brushing Lacquer to finish.

I prepped the wood by sanding it down to 220 (could have done an even better job sanding, and sanded the table and bench tops even finer).
Used a sponge brush to apply the wood stain, wiped off rather quickly (only a few minutes on the wood).
Used brush to apply Deft Sating Wood Brushing Lacquer. Used spray can of Deft when I ran out of liquid. Didn't go on as thick. Although using a brush is more of a hassle, it had a better coat.
Recommended Skill Level
Beginner

Comments

Guest (not verified)

Sun, 09/25/2011 - 12:18

Your use of short benches makes the set more family and guest friendly. I usually hand rub my finish, I think i want to build this and probably use 0ak 2X12's (know it will be heavy).

Suggestions?

I will use it on a Florida roofed concrete deck for an outdoor dining area. Typically more formal dinners. Deck overlooks beautiful cove.

Guest (not verified)

Thu, 10/13/2011 - 11:00

Can you explain how you merged the plans to add the bread boards? I would love to do the same!

Jeff (not verified)

Fri, 06/01/2012 - 09:09

This is exactly what I am looking for in a table to build. We want bread boards on the end and we don't want stretchers on the bottom. How did you combine the two to do this. Can you send me a copy of your plan? [email protected]

Kimberly Dassel (not verified)

Sat, 08/04/2012 - 13:35

Could you please send me the plans for this table? I love it and would love to attempy making it. Thanks so much!

Joe (not verified)

Wed, 01/02/2013 - 15:53

Your farm table and benches were exactly what I was looking for. Please send me the plans if they are available. Thanks

Faye Sawatzky (not verified)

Wed, 01/02/2013 - 19:23

I would love a copy of the plans for this gorgeous table you made. I am inspired.

Kelly Lucas (not verified)

Tue, 01/22/2013 - 15:26

Would love, love the plans for this project if you are willing to share. Many thanks! :)

danno2084

Fri, 01/25/2013 - 20:57

I'm sure you've heard this a hundred times already, but we've been looking for a very long time for a table like this. We would also love the plans if you're sharing. Thanks for the great blog!

jsh2001

Tue, 01/29/2013 - 07:47

Getting ready to build my own and now you have me thinking I prefer this design with no stretchers on the bottom. Looks great!!!

Mammavof3

Sat, 03/16/2013 - 20:12

Can I please please please have the plans? I have a very narrow dining area and this table is PERFECT. Thanks

PorkyPok

Wed, 05/08/2013 - 13:30

I too would really love/need these plans. PLEASE. Thanks :)

Cbreck21

Sun, 05/12/2013 - 14:30

I would REALLY like the plans for his version as well. I am going to combine them. Can someone ask him to post or his he sending via email? If so, [email protected]

Thank you SO much!!!

wendykeeler

Mon, 07/15/2013 - 09:48

just bought a cabin and need all sorts of furniture. I love what you did and would sure love to have your plans and how you merged the two----both for the table and especially for the benches. Trying to do a 10' table for huge family gatherings. Thanks so much! You rock!

Sarina88

Tue, 07/23/2013 - 14:28

This table and bench set is exactly what I am looking for. You did such a great job!

Do you have plans that you wouldnt mind sending to my email? [email protected]

KailuaGirl

Fri, 09/06/2013 - 14:25

Hi There!
It seems like there are no replies to the many requests for the merged plans.
I'm guessing he used the top of one set of plans and the bottom portion of the other set of plans?? I will attempt to tweak myself..
Good Luck!

markelll

Fri, 01/09/2015 - 19:54

Hi everyone,
Well I didn't see all these comments! Sorry to have ignored your requests for plans!

This is the bench I made (I did four of these, and adjusted the measurements so they were each about 40" long)
http://ana-white.com/2011/01/farmhouse-bench

I was going to do this table, because it matches the benches, but decided I wanted a table with removable legs so it would be more maneuverable when we move!
http://ana-white.com/2009/12/plans-farmhouse-table-knock-off-of.html

I ended up using more of this plan in terms of how I assembled it, but adjusted the plans to have the tabletop include breadboards (the plank on top perpendicular to the long tabletop planks) and I used 4x4s for legs, plus the top was from 2x8s not 1x10s. I put in the optional cross supports too, and additional supports under the breadboard to connect it to the table frame and table top slats.. this is more info than you need, all to say, plans are flexible and you can do what you want!
http://ana-white.com/2010/03/plans-very-rustic-table-and-cool.html

Sorry I don't have detailed notes. I was very picky about the dimensions (based on space) and how high I wanted the table (about 1.5" taller than a normal table). I also measure the distance between the underside of the table and the tops of the benches so I could cross my legs under the table (an odd requirement).

Happy Building!

brentlbg

Wed, 04/01/2015 - 15:10

I like the english chestnut stain. That works so well with this type of lumber. Great job. I plan to use the same stain on the Tryde coffee table I am building. Thanks for sharing your work!!!

Shanty Open Shelf Console

Submitted by debodle on Sat, 01/02/2016 - 04:19

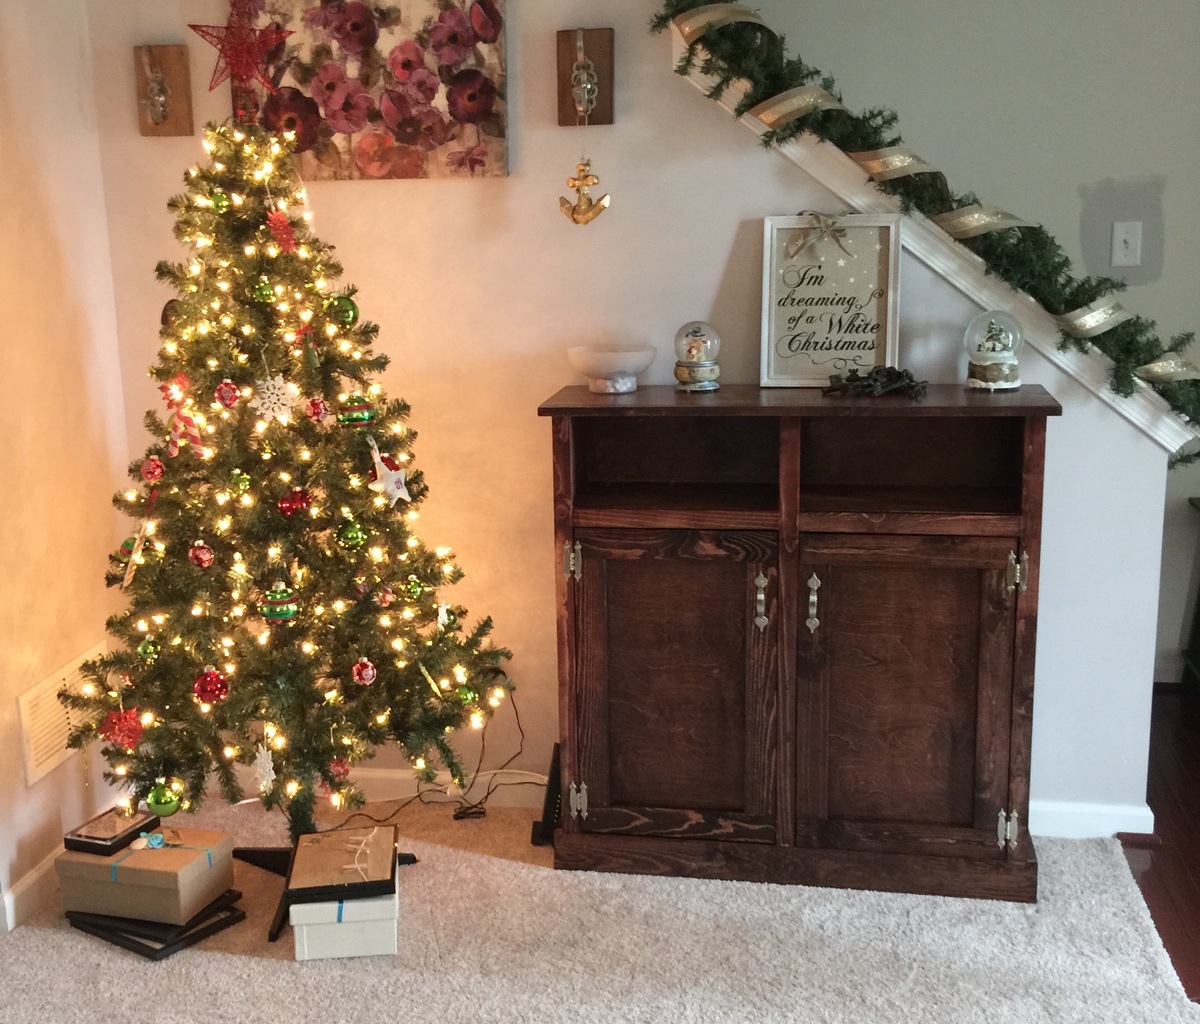
This was my first project with doors. I made it for my daughter's new house and she just loves it! I had a little trouble with the doors wanting to swing inside the console, so I added very small wood blocks on each inside top corner to stop them.

Built from Plan(s)
Estimated Cost
$120
Estimated Time Investment
Weekend Project (10-20 Hours)
Finish Used
Minwax Red Mahogany stain, Minwax Polycrylic polyurethane
Recommended Skill Level
Beginner

Double Tilt-out trash bin

Submitted by lindy19 on Wed, 10/23/2013 - 17:47

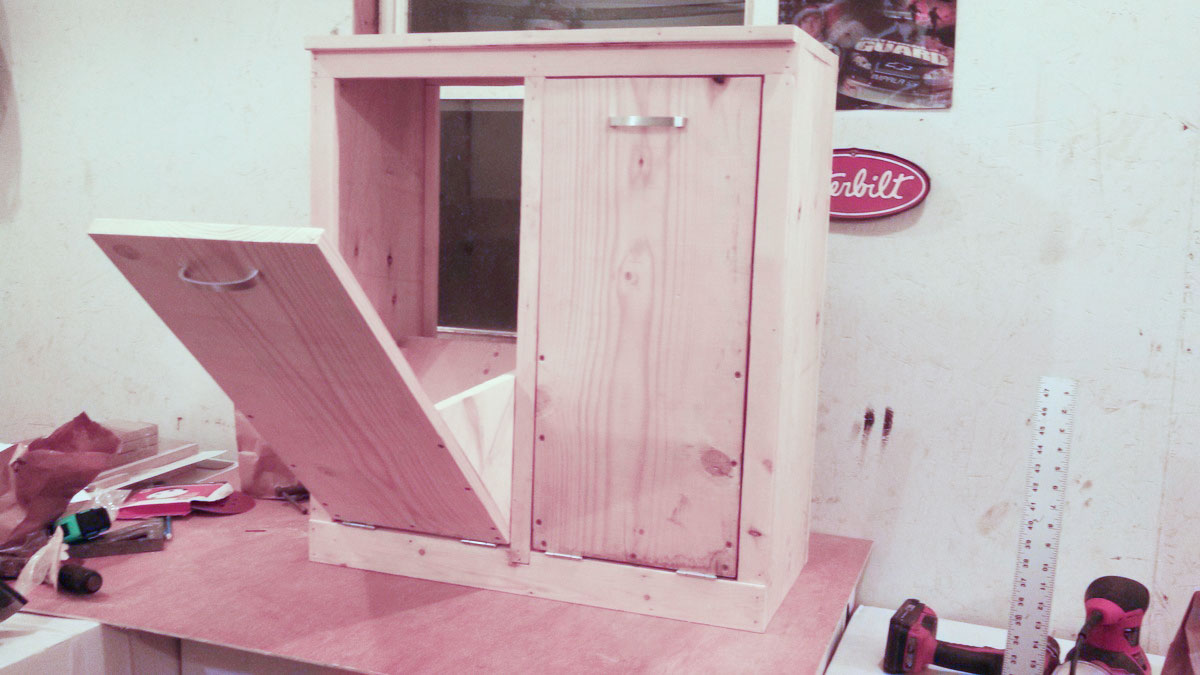
Really wanted one of these but everything I found was way too expensive so I found these plans, tweaked em a bit to fit the space I had and voila, double tilt-out trash bin. Thanks for the wonderful plans!

Estimated Cost
$50-75
Estimated Time Investment
Day Project (6-9 Hours)
Recommended Skill Level
Beginner

Comments

ADeboer

Sat, 05/02/2020 - 14:36

This is the exact Style I've been looking for!! I see that you made this ages ago - any chance you still have the dimension modifications you made somewhere?

Pedestal Farmhouse Table

Submitted by Anonymous (not verified) on Thu, 03/10/2016 - 17:25

I modified the plans for only 2 pedestals, and a solid 100 inch walnut top.  I used auto body filler to fill the gaps of the legs, sanded and distressed.  It appears to be solid barn board wood, and there is NO way to tell that it's stock 2 x 4 and 2 x 6.

Estimated Cost
The table and bench tops were approx $1,000.....the rest was about $100
Estimated Time Investment
Week Long Project (20 Hours or More)
Finish Used
I used white paint on the legs, then a brown gel, wiped down, and a light white over that. Clear lacquer top.
Recommended Skill Level
Beginner

Comments

LJT

Fri, 03/11/2016 - 05:01

I LOVE your table....how much extra time did you spend to acheive the solid block look for the legs?

Display/Picture Shelves

Submitted by Anonymous (not verified) on Mon, 10/21/2019 - 07:41

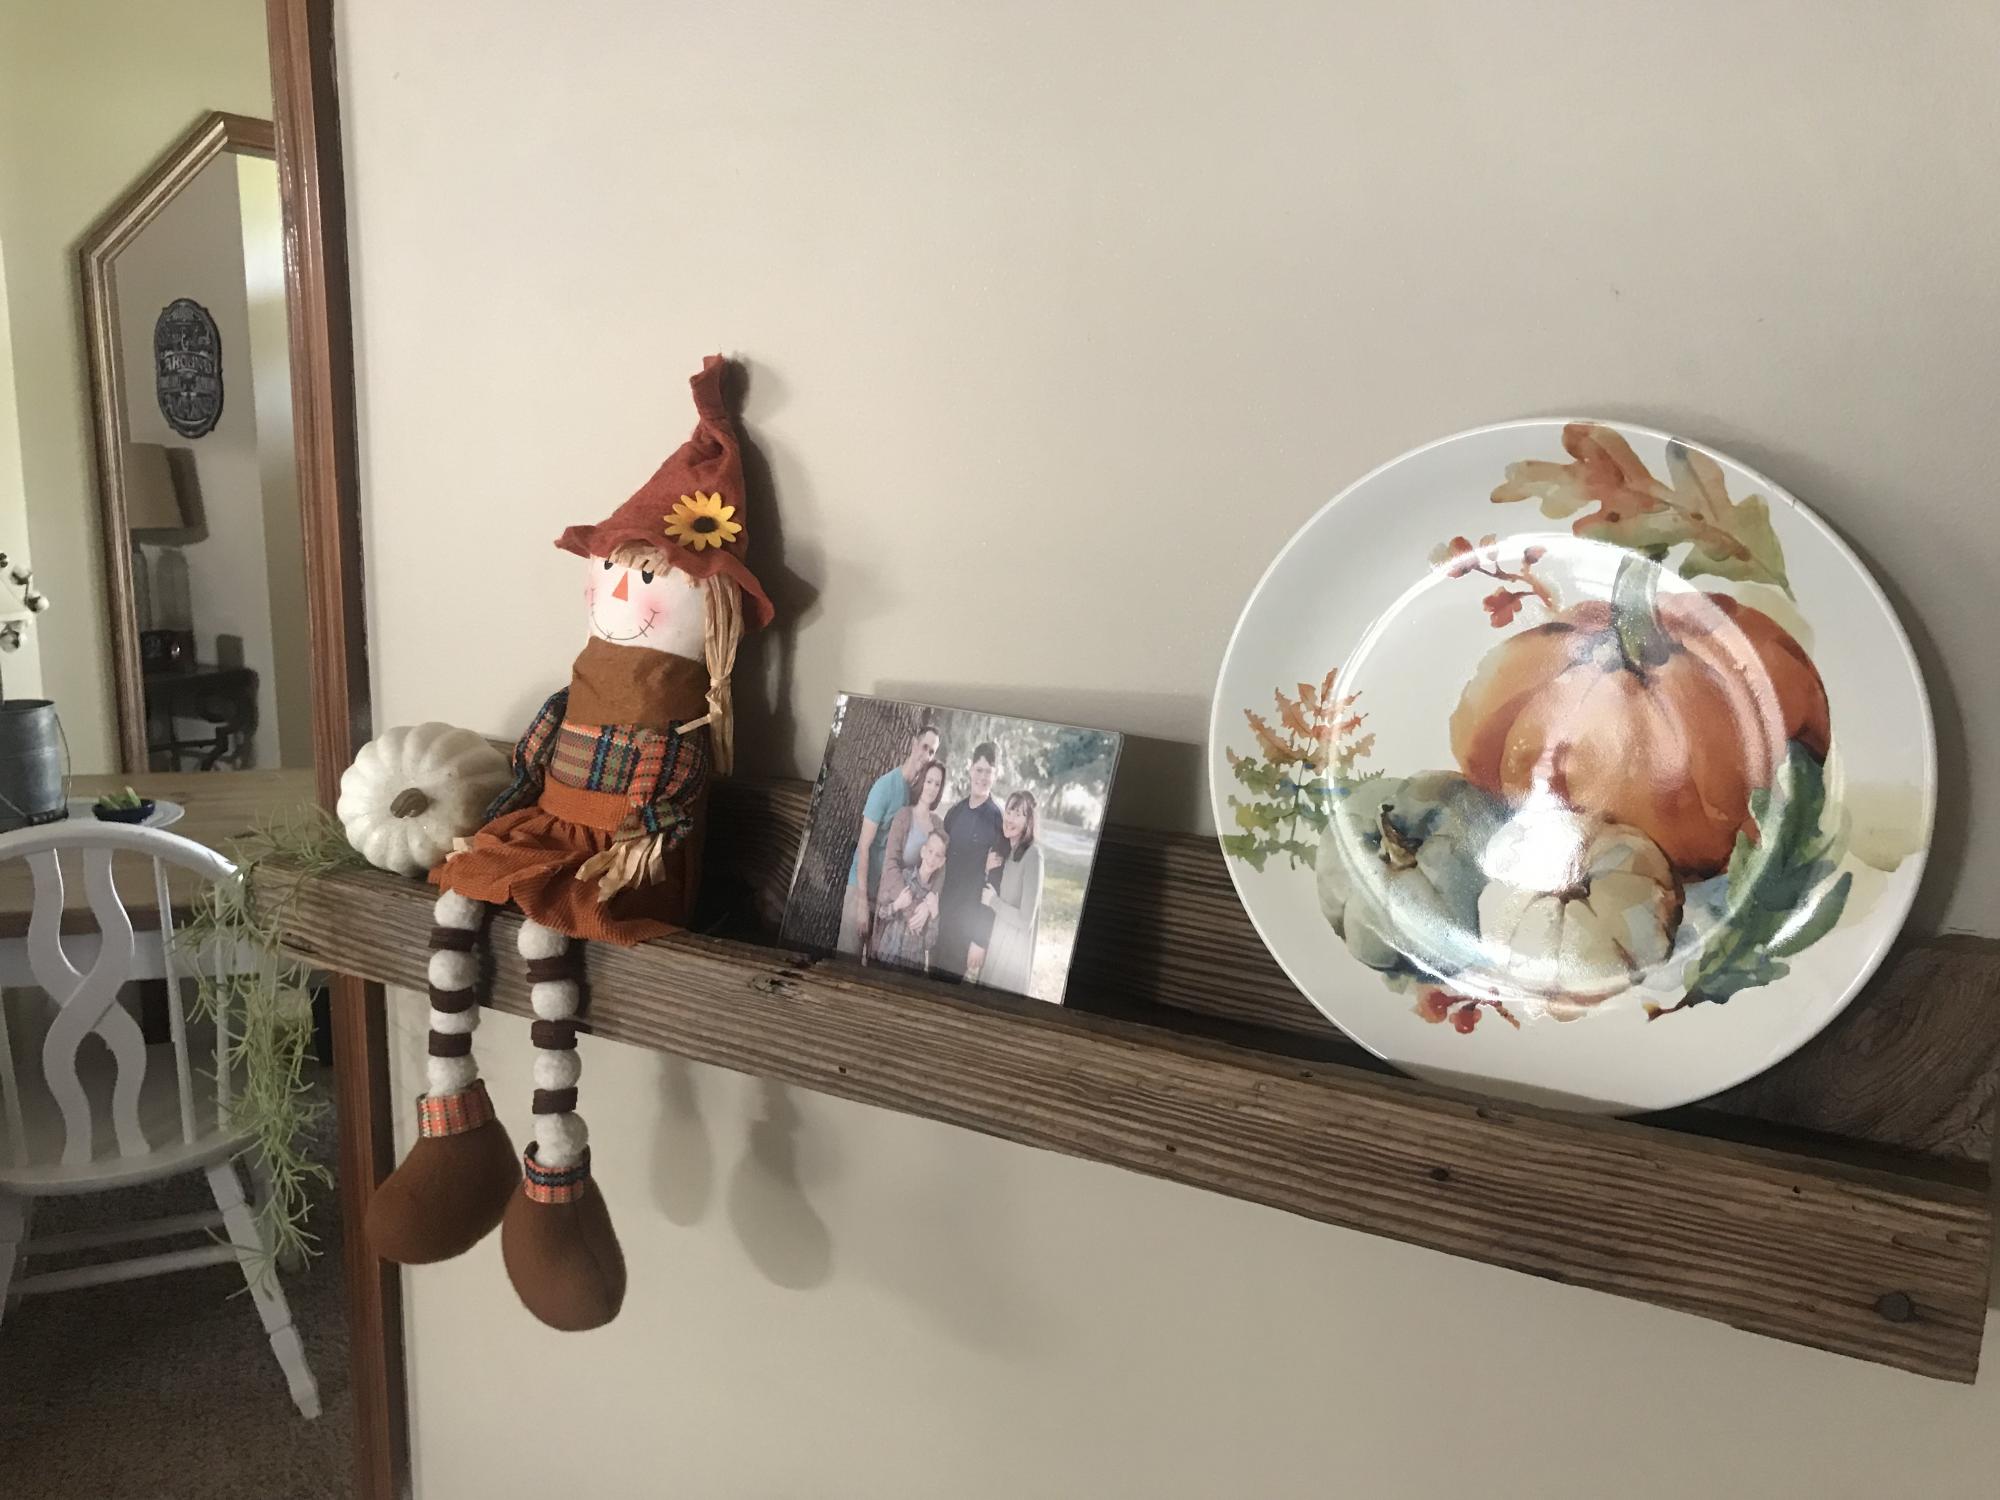
These were made from 50+ year old pine that we had from my husband’s late father’s shed. We used one coat of the dead flat poly. In total we made 6 shelves. 3 are 48” long and 3 are 32” long. This was a fun project and a great way to use my photos.

Built from Plan(s)
Estimated Cost
$20
Estimated Time Investment
Day Project (6-9 Hours)
Finish Used
Dead flat poly
Recommended Skill Level
Starter Project

Outdoor Sofa and Chair with Slanted Back

Submitted by Anonymous (not verified) on Sun, 07/16/2023 - 10:22

OK, I think this build may be my biggest project yet! It is definitely the heaviest. With the strong winds we can get here in Florida we needed substantial outdoor furniture.
I did make some modifications along the way measurement-wise so the sofa would fit my front porch better. All in all, this took 2 full days. I built the sofa first, stained it the next day and then decided (due to trying to get stain in all the nooks and crannies) to stain the chair pieces first before putting it together.
I am so happy with the results and so far, almost a year later, this furniture looks great and hasn't moved an inch in any of the thunderstorms we've had! Thank you Ana!!

My Bookshelf Dollhouse

Submitted by wmaughan on Wed, 04/11/2012 - 22:26

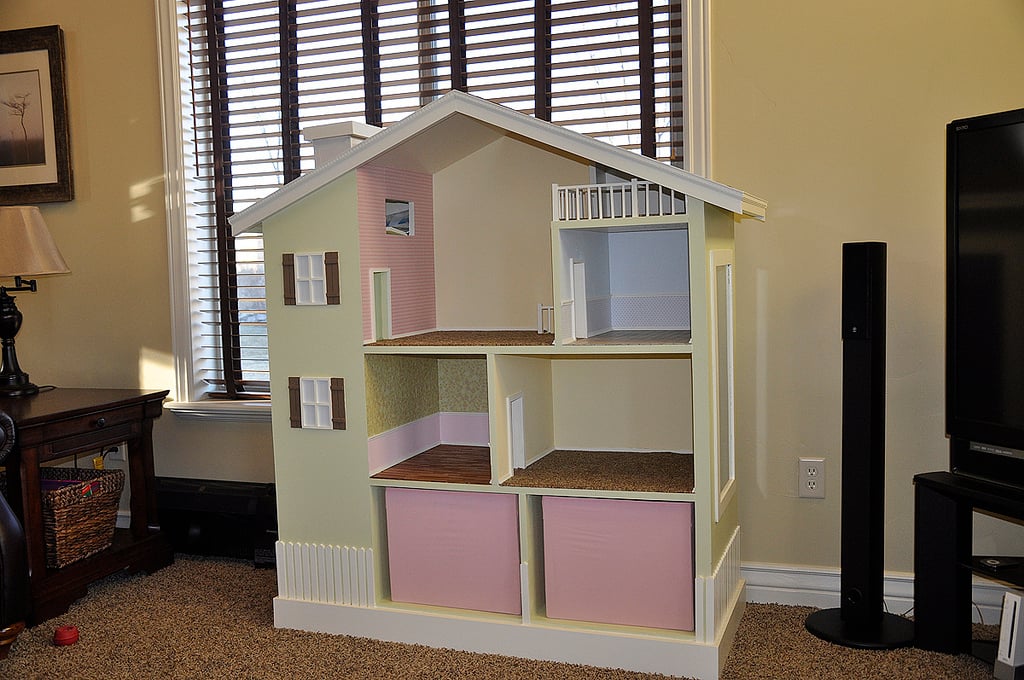
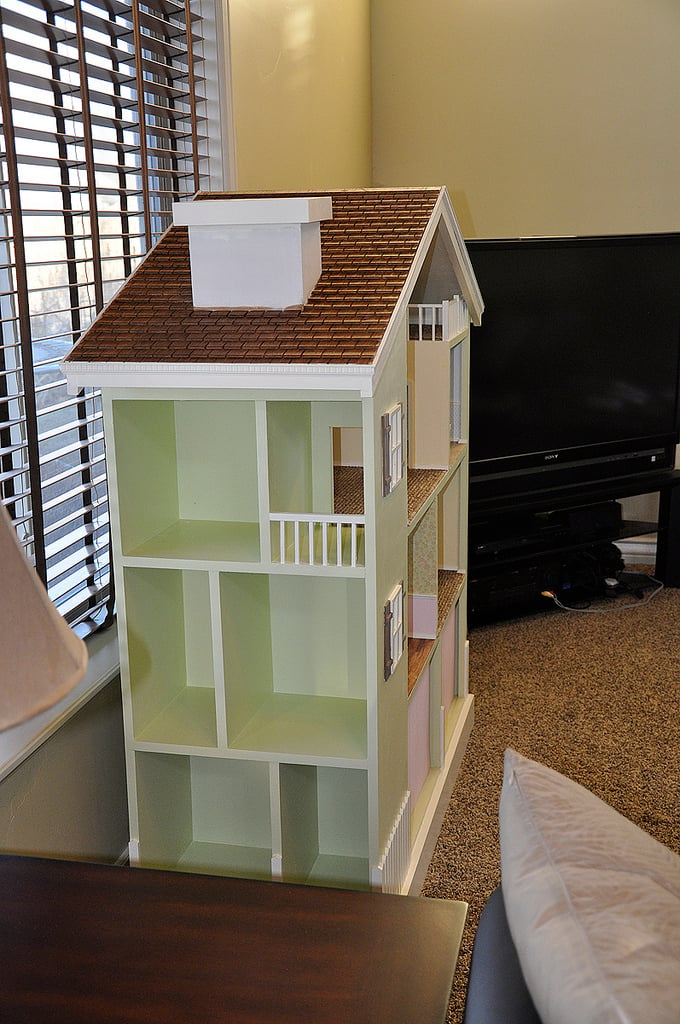
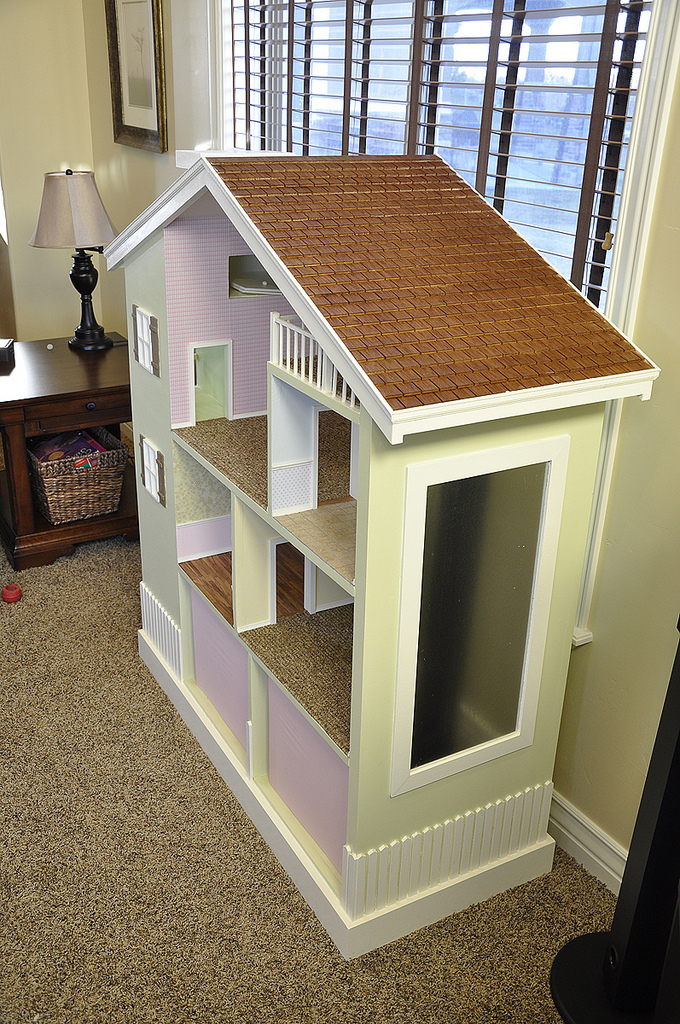
After much deliberation, I decided to make a dollhouse for my daughters Christmas gift. The aesthetics of the bookshelf-style dollhouse appealed to me over the more intricate and fancy designs. I took the literal meaning of the style and incorporated an actual bookshelf/DVD rack into the dollhouse. On the apposing side I built a magnet board for my daughters given that my refrigerator is not magnetic. About the project: I knew my design would end up being heavy so I started by building a basic frame out of construction grade 2x4's. The frame is placed on four casters and is concealed by the baseboard. When on carpet, the casters are not visible and have come in handy. Working upward, the majority of the construction consists of 3/4" cabinet grade plywood which you can find at Home Depot. The "carpet" I chose was an inexpensive bathroom rug that I purchased at Walmart. The scale & thickness of the berber seemed appropriate for the dollhouse and I attached it using carpet glue. For added security I tacked the perimeter with some staples. For the bathroom tiles, I cut some groutable adhesive tiles into squares on the table saw (use a cross cut sled if you have one) and attached them to the bathroom floor. Make sure your surface is free of dust, and a heat gun or a propane heater will accelerate the drying process and create a better bond. Make sure to use unsanded grout for the joints. To make the shingles, I cut a 4'x8' (used about 2/3 of the sheet) piece of 1/4" mahogany veneer into 2.5"x4' strips. The cuts were made perpendicular to the wood grain to give the desired aesthetic. This gave me a robust shingle construction with the look of shake shingles. I then cut about 3/4 of the way through the strips with approximately 1 1/4" separation between each shingle. Attaching the shingles was easy. I didn't want to wait for glue to dry so in addition to some wood glue, I also tacked the row of shingles in place with 3/8" brad nails. When placing the shingles, make sure to start at the bottom and work your way up to the pitch of the roof. This will allow you to overlap the shingles about 3/4" to cover the uncut portion to give it the appearance of individual shingles. You will also want to offset your rows to change the vertical alignment of the shingle spaces. I marked each row with a pencil prior to cutting the final width. You may also consider which side of the shingles you want facing up. I opted for the rough side to give it a more weathered look. With some of the extra shingle material I made hardwood floors for the kitchen.The veneer I purchased was mahogany on one side, and oak on the other which allowed me to alternated sides and give it a unique look. Attach the floor using wood glue and allow 24hrs before sanding. Place weights on the floor to secure it while drying. I applied both a stain (Minwax Golden Oak) and some wipe-op polyurethane for the finish. The storage bins are Ikea boxes that can be easily removed to allow for additional play areas. The piece of sheet metal I used for the magnet board was already cut to the desired size at Home Depot. I attached it using some 3M spray adhesive, then secured it with some poplar strips. I also used the 3M construction adhesive to attach the craft paper/wallpaper. With all of the chaos surrounding Christmas I wasn't able to quite finish it. Here is still what's in progress: - Painted white ladder to loft - Stained mahogany stairs to family room - Kitchen cabinets - Cobblestone chimney - Closet doors

Built from Plan(s)
Estimated Cost
120
Estimated Time Investment
Week Long Project (20 Hours or More)
Finish Used
Stain for shingles & wood floor was Minwax Golden Oak. Wipe-on poly for wood floors. Paint was Behr paint.
Recommended Skill Level
Intermediate

Comments

ferbit

Thu, 04/12/2012 - 08:29

Oh WOW!!! This turned out amazing! So jealous my kids are too old for a bookcase like this! You did a fantastic job!

jeff womack (not verified)

Fri, 04/13/2012 - 15:18

How did you make the railing? It looks great, but wouldn't it be fragile? What did you use for trim and molding throughout the house? Did you use a dremel to work with the small details? This is an amazing looking doll house that my daughter would love. I just may need to do this sometime before Christmas.

birdsandsoap

Fri, 04/13/2012 - 20:38

Looks like an intricate design, and whoa! All of those little shingles by hand? Good job. I love how you incorporated the bin storage into the bottom.

wmaughan

Mon, 04/16/2012 - 17:32

It gives the appearance of individual shingles, but I actually just cut strips with grooves in them. I have seen several dollhouses with shingles that have fallen off so I wanted to avoid that :)

Milca (not verified)

Fri, 06/08/2012 - 20:32

Super duper good job on it :) Wish I had time to make one like that for my 4 yo. She's so particular, can't let her see the pictures ah ah. Lucky girls! Talented mama!

DIY Bar Cabinet

Submitted by Anonymous (not verified) on Mon, 02/24/2020 - 16:27

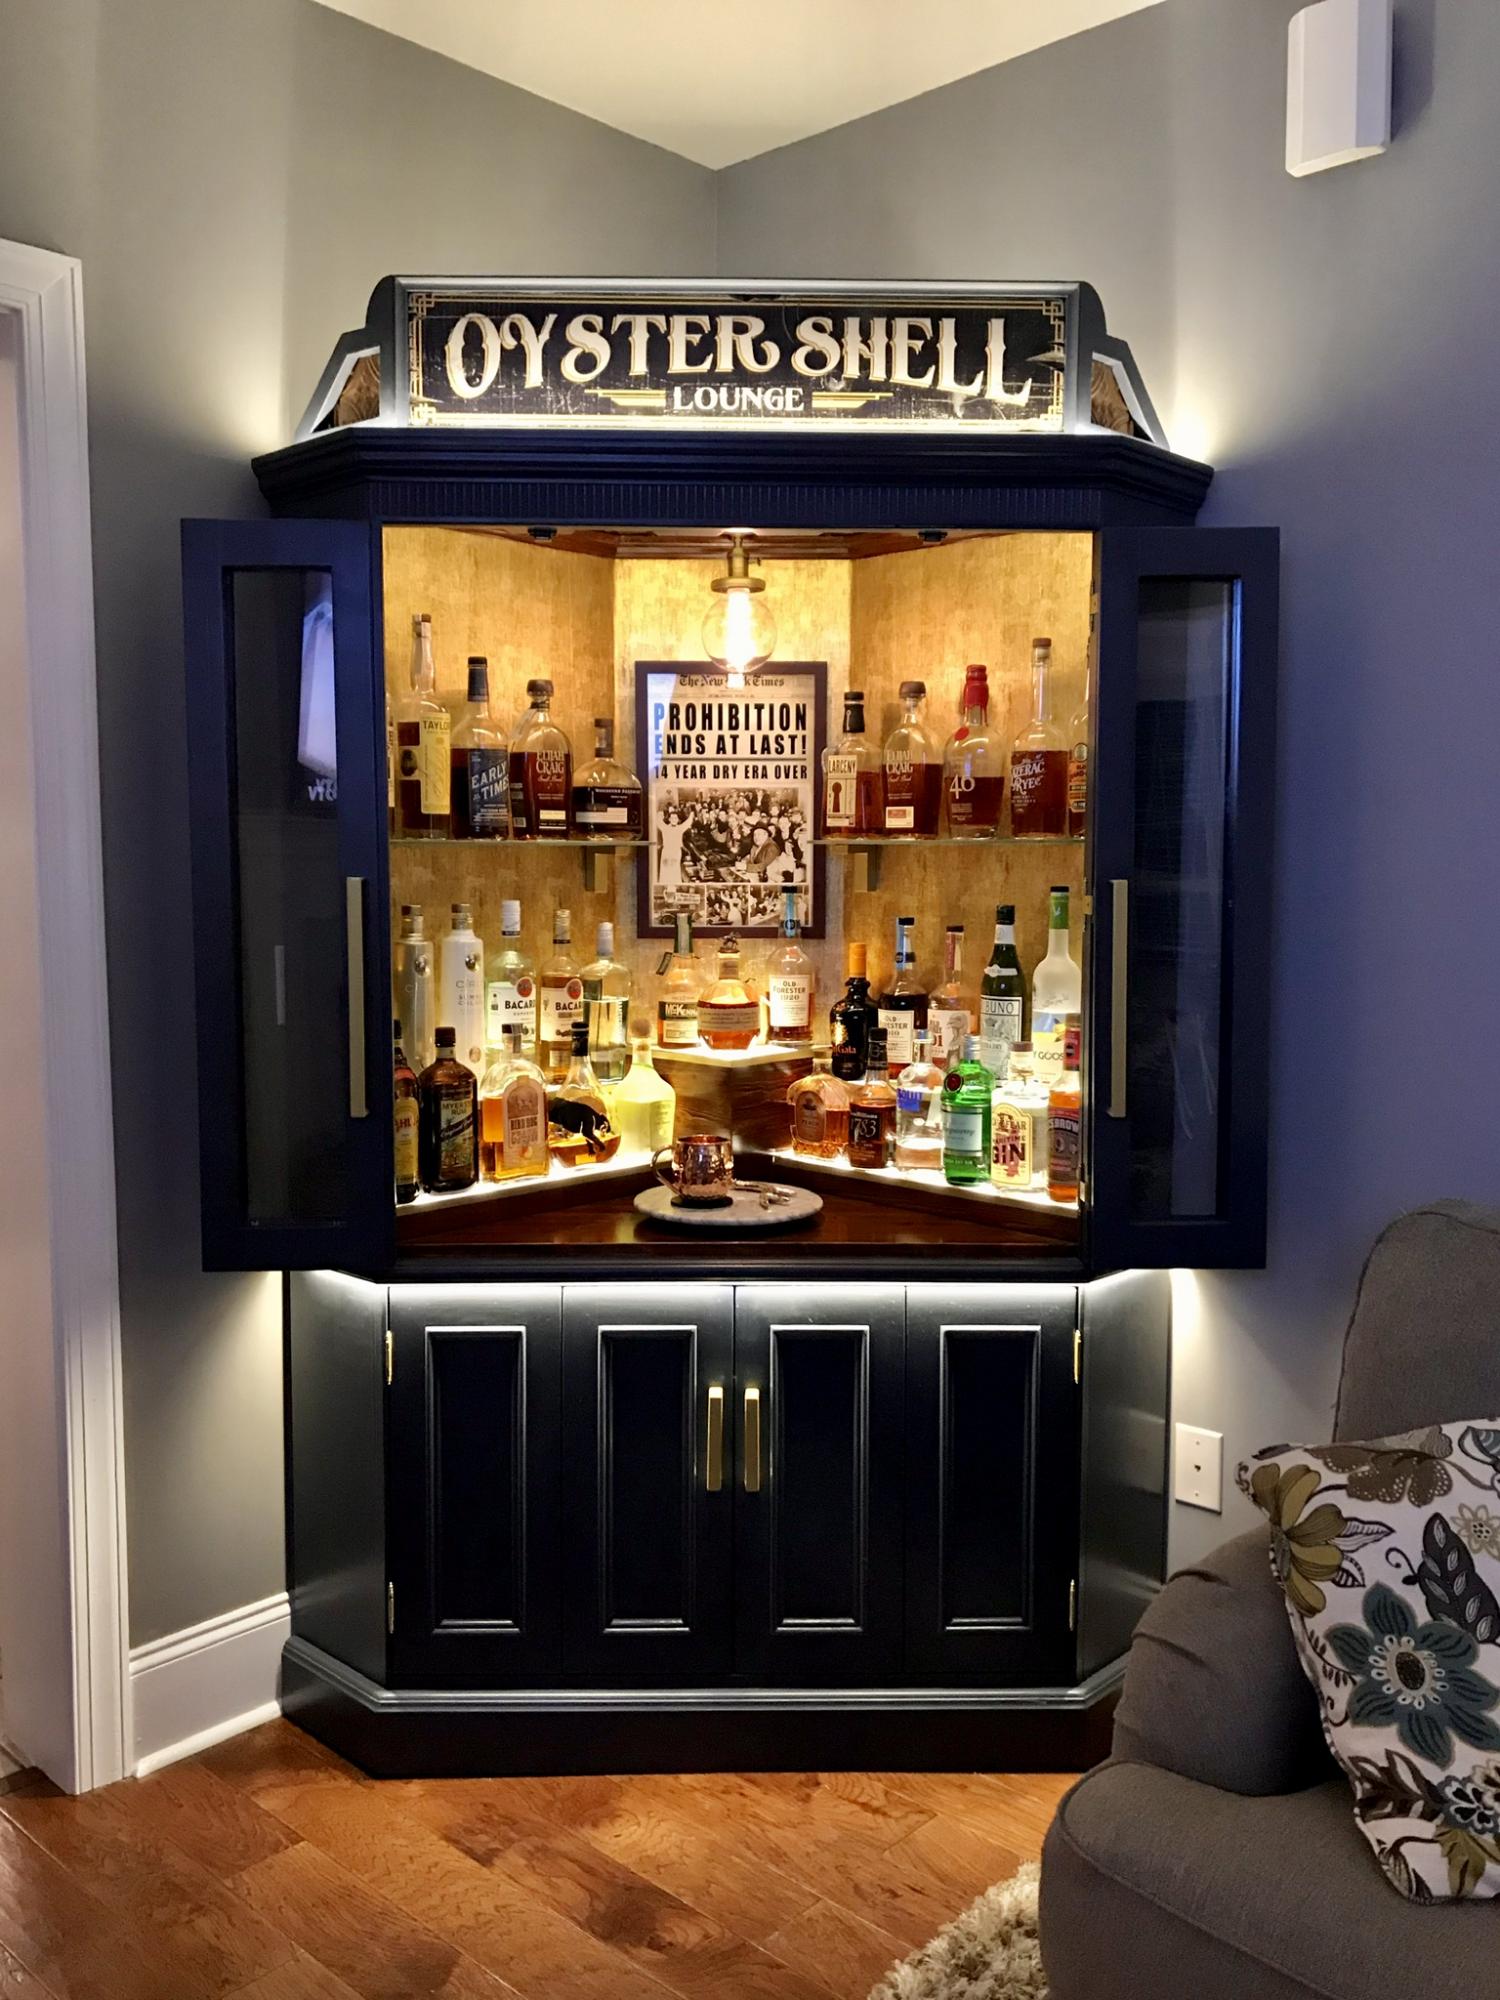
I bought this tv corner cabinet for $40. I spent many hours turning into my perfect bar cabinet. I built a custom lighted liquor display. I have posted photos of the transformation.

Estimated Cost
$1000
Estimated Time Investment
Week Long Project (20 Hours or More)
Finish Used
Benjamin Moore- hale navy
Recommended Skill Level
Intermediate

Comments

frendlygrl

Tue, 07/06/2021 - 19:04

So this is not your project? Because there isn't much information or a before and after picture. This gave me an idea for our home.