Community Brag Posts

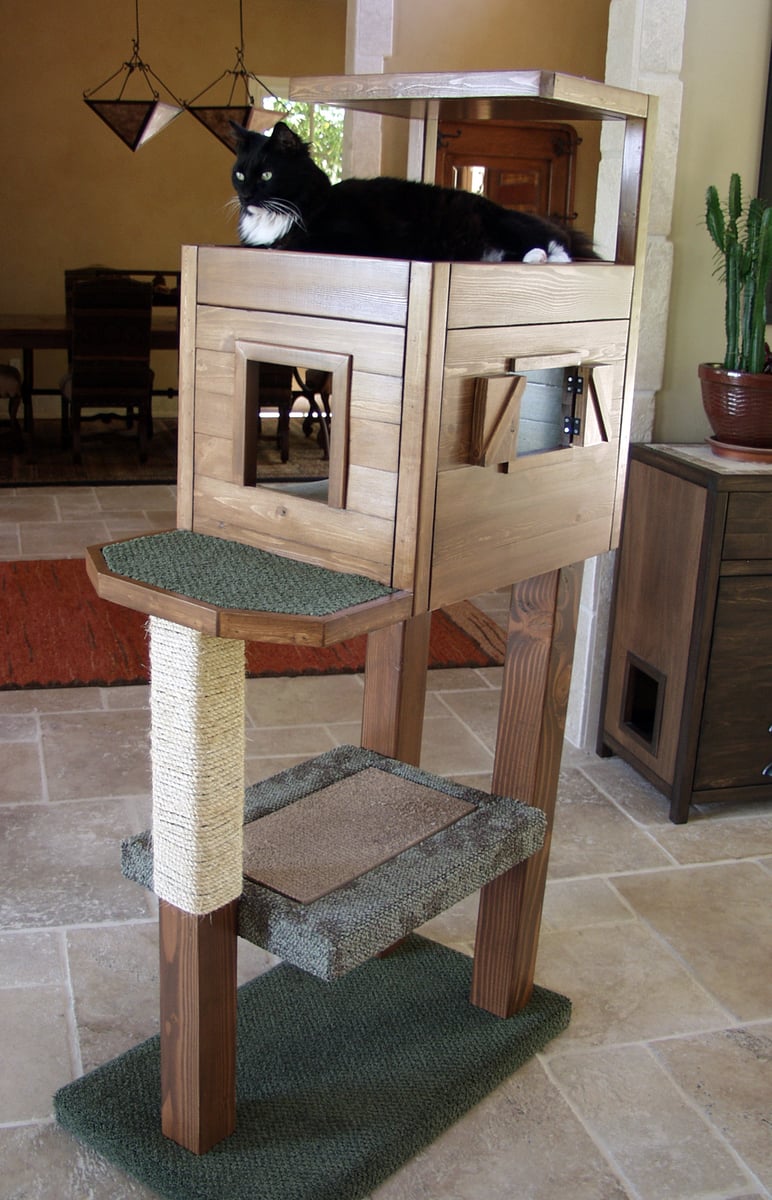
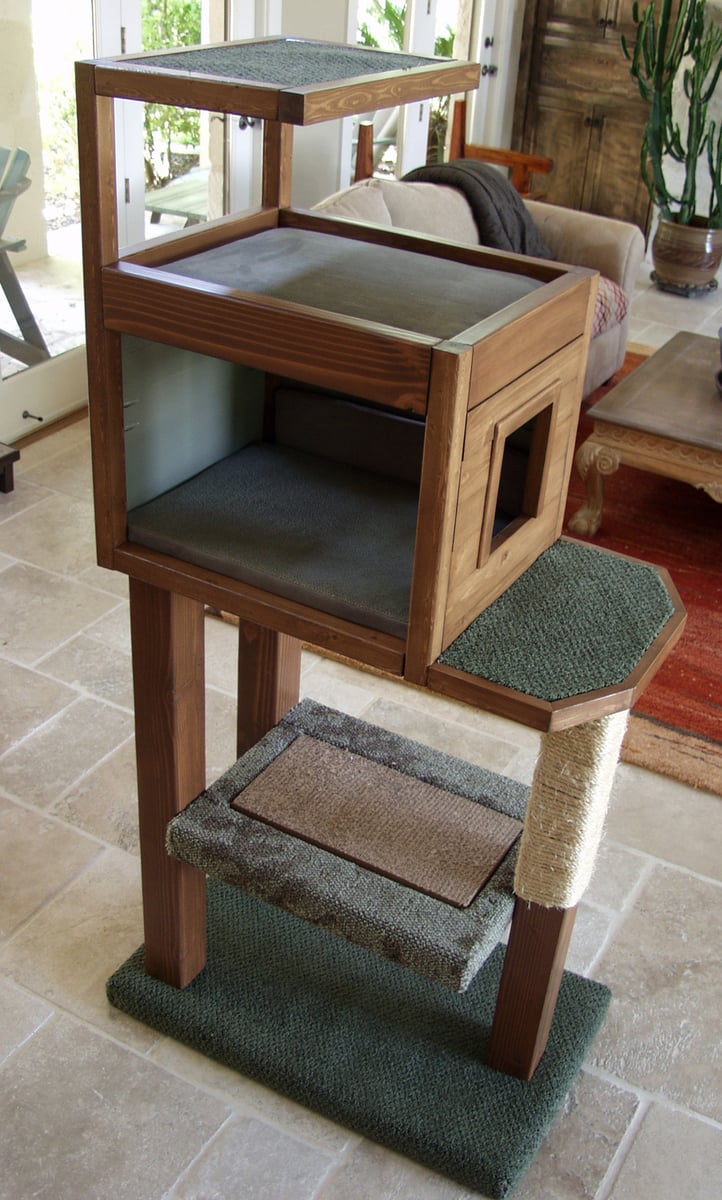
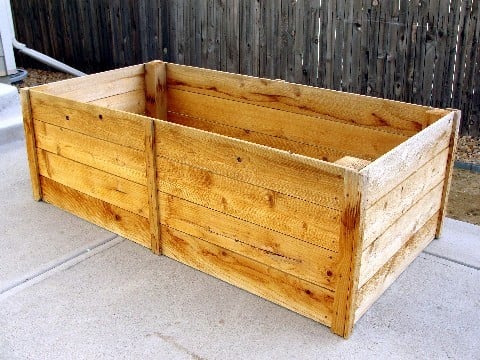
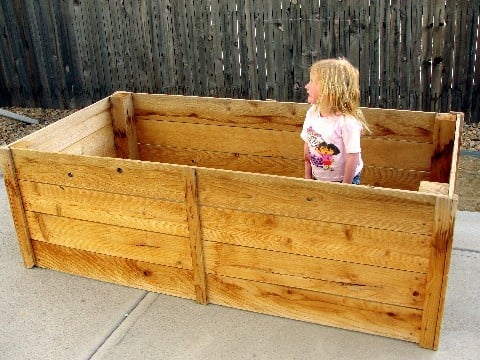
Rabbit Hutch for Indoor and Outdoor

Submitted by thediyplan on Fri, 03/26/2021 - 15:34

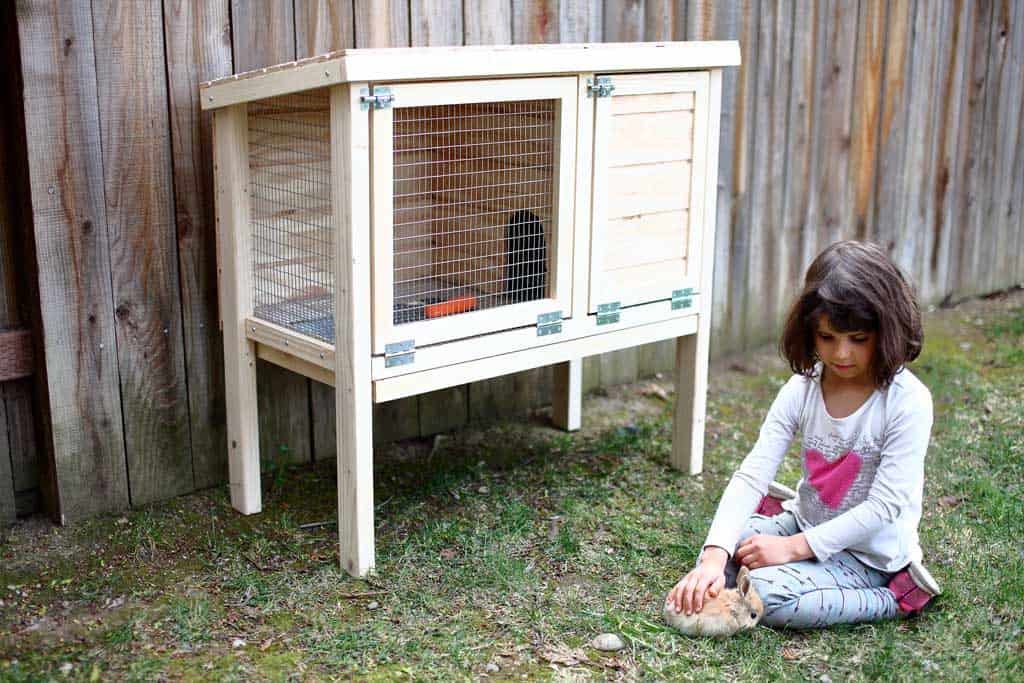
Looking for a cute, interactive pet to add to your home. What about bunnies? These creatures make great indoor pets. But before getting the rabbits, they will need a hutch to live in. To solve this problem, I’ve made detailed plans on how to build a DIY rabbit hutch that could be used indoor and outdoor.

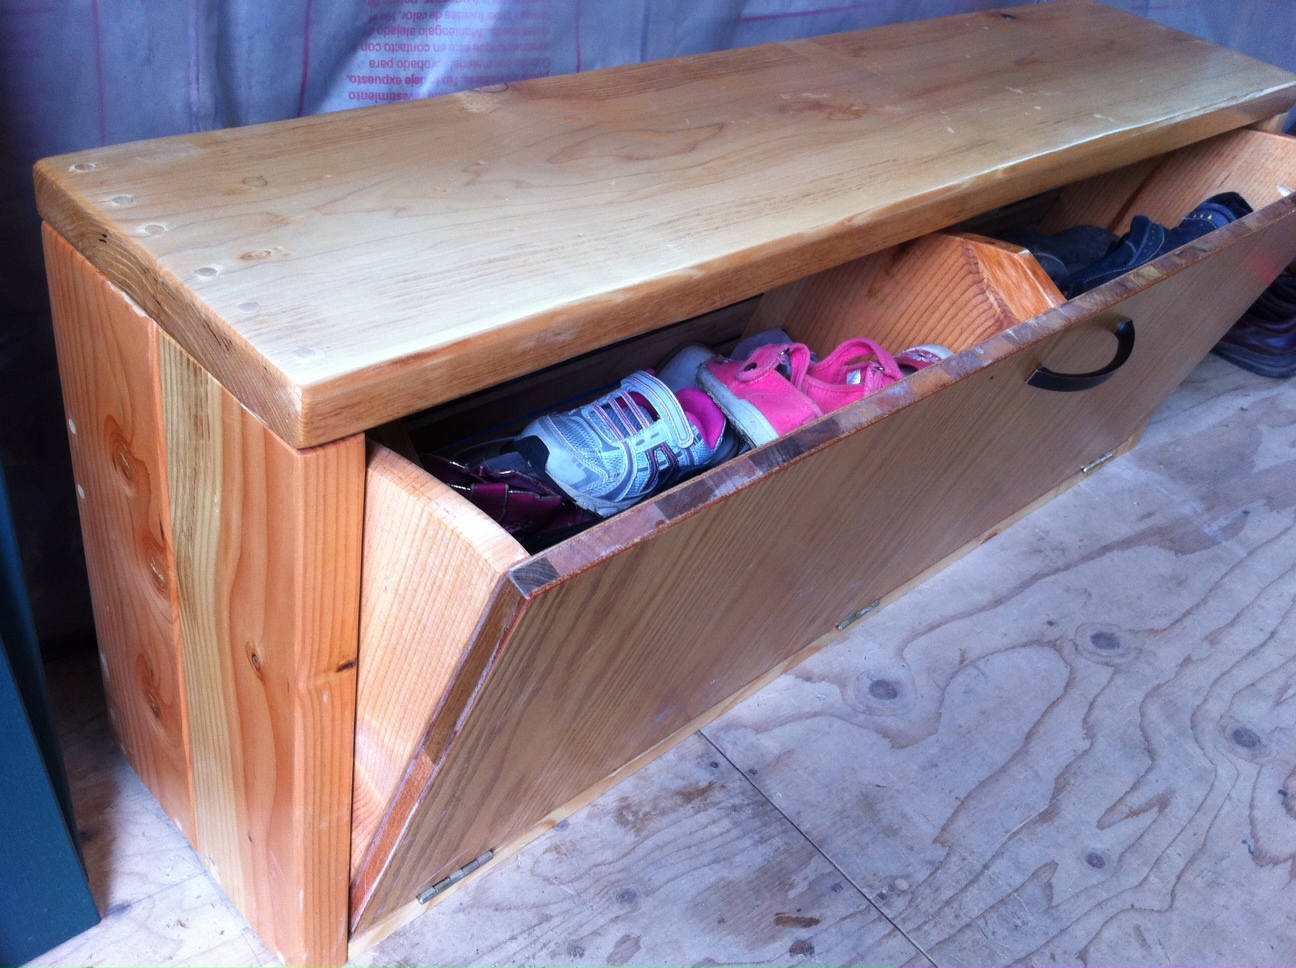
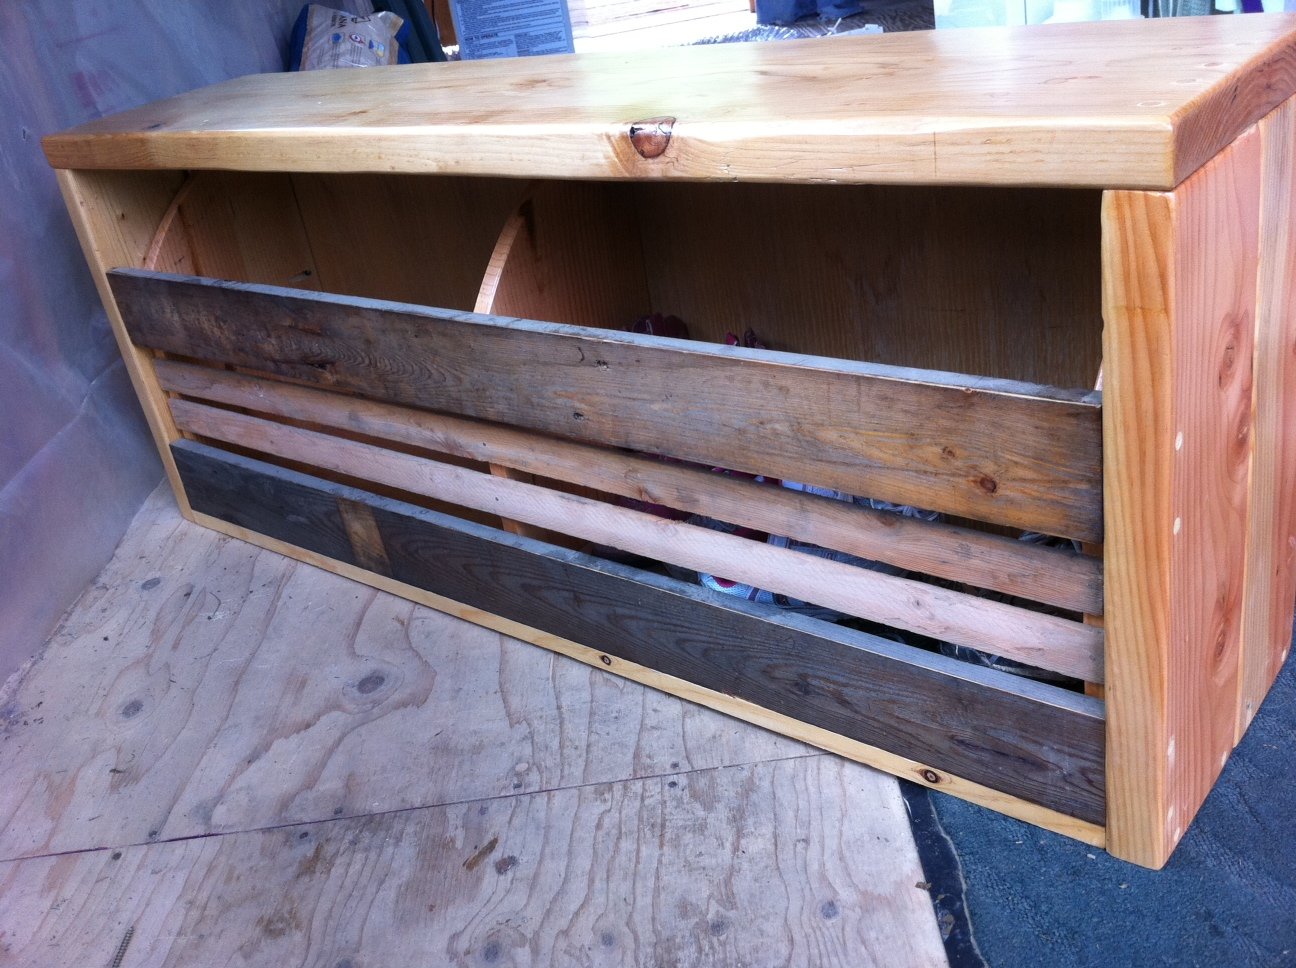
The hutch has a litter pan under the floor that could be removed for cleaning. Since the hutch is only 3 feet wide, it could be easily moved around.

See my website for additional pictures and how I've built it, TheDIYPlan.com

Estimated Cost
$140
Estimated Time Investment
Day Project (6-9 Hours)
Recommended Skill Level
Intermediate

A-Frame Chicken Coop - Easy to Clean

Submitted by Anonymous (not verified) on Mon, 04/24/2017 - 14:25

Thanks for the free plans. I did have to make modifications for the doors. i hid the hinges to give it a clean look. i used cedar for the trim and Plywood Siding Panel T1-11 4 IN OC (Common: 19/32 in. x 4 ft. x 8 ft.; Actual: 0.563 in. x 48 in. x 96 in.) for the doors.  i used a metal flashing for the roof so it will vent.

Built from Plan(s)
Estimated Cost
$250
Estimated Time Investment
Week Long Project (20 Hours or More)
Finish Used
BEHR Transparent waterproofing finish (Cedar Natural Tone) NO 501
Recommended Skill Level
Intermediate
Seasonal And Holiday

Beginner farmhouse coffee table

This is my 2nd project (first was the open shelves), but my first "bigger" project. Lovethe plans, the X crosses were tricky with just a circular saw. I am investing in a miter and looking to get into some tougher projects as I just purchased a home.

We just did a little stain to keep that natural wood look.

Estimated Cost
$65
Recommended Skill Level
Beginner

Comments

Octagon picnic table

Submitted by Anonymous (not verified) on Wed, 05/24/2017 - 20:34

I love our new table. 

Built from Plan(s)
Estimated Cost
$150
Estimated Time Investment
Week Long Project (20 Hours or More)
Finish Used
Thompson deck stain (cedar) and black Laytex paint.

Recommended Skill Level
Intermediate
Seasonal And Holiday

My first big woodworking project - a farmhouse table!

Submitted by jfleming on Wed, 06/30/2021 - 12:02

I used the no pocket hole plans and as per someone's great recommendation - I moved the stretcher supports to the inside of the legs to give a little more room when the chair is pulled out and someone is sitting on an end. I also made a planer tool for my table saw so I could square off the edges of the table top boards and the bench seat boards. The boards then sat closer to each other so I don't have places for crumbs to fall down between the boards. I did have a couple of sections that didn't quite match up and used resin to fill those areas after staining the boards. I then used a lacquer finish (Watco clear satin lacquer). The stain is Minwax English Chestnut but I did use the Minwax wood conditioner prior to the stain for a more even uptake of the stain. All great recommendations from folks on this site!

Comments

X-Frame Farm Table

Submitted by whittlevin on Fri, 03/13/2015 - 12:48

This was my first attempt at a farm table. I found the fancy x plan for inspiration. The length is 6ft. I had to modify all of the measurements. All of the boards came off my grandad's old barn. The posts are laminated together from guide posts from his corral. There is a lot of history and character to the table. I did have to make the bench to match it. I'll post pictures of that soon. Most importatnly, my wife loves it!!!! Happy wife, happy life!!!

Built from Plan(s)
Estimated Time Investment
Week Long Project (20 Hours or More)
Recommended Skill Level
Intermediate

Comments

DBoggs56

Mon, 05/18/2015 - 12:00

Hello, awesome job on the table. Was wondering if you would mind sharing the table top dimensions. I have a smaller space and was thinking of modifying to make something in the 6ft range as well. Thanks

Pallet wood painter's ladder shelf

Submitted by Anonymous (not verified) on Sun, 06/25/2017 - 18:50

Made this one with shelf edges/trim just on the sides. Somehow my top shelf didn't span the width so had to add a little shim on each side but it all worked out! We had all the pallets and used 1x3s for the frame because some of my pallet wood was heavy hardwood. It was not without frustration because I was working with uneven/warped pallet wood but it hits the rustic look.  I am happy with how it turned out. 

Built from Plan(s)
Estimated Time Investment
Day Project (6-9 Hours)
Finish Used
English chestnut minwax stain and matte interior sealant
Recommended Skill Level
Beginner

Gardening Shelf

Submitted by MMTruncale on Thu, 05/09/2013 - 08:23

I wanted a gift for my mom. Something special and unique I think she would really like. Once on a guest post Ana posted a jewelry holder using a board, and some mismatched knobs.

My mom likes to garden. She works so hard on her back yard, and spends a lot of her time there. How could I make this outside proof? A few Pinterest finds later I found my answer: Water Spigots.

Voila! This is what we came up with.

** It's not going to hang by a string. It will be attached to her fence. This is just for picture purposes.

http://www.countryliving.com/homes/makeovers/fast-makeover-projects?src…

Estimated Cost
$20
Estimated Time Investment
An Hour or Two (0-2 Hours)
Finish Used
No finish. We wanted a rustic look. It came out perffect.
Recommended Skill Level
Starter Project

Cat Tree/Condo

Submitted by Joni on Sat, 05/11/2013 - 07:22

I always wanted a cabin-type cat tree where my cats could crawl in and feel safe, but still have a great view of the birds out of a window. I tried to draw my vision on paper, but that had a hideous result. Learning Google SketchUp (at least the basics) was an absolute necessity. I could never have built this without drawing it in 3D first, and seeing how the boards would connect, etc.

For the scratch pad, I built a frame out of 2x4s on top of plywood, covered it with carpet, and dropped the standard size scratch pad in place. This is the cat's favorite feature. I put barn doors on the window with tiny hinges so that I can close for added privacy. The tree sits against a window so that the back side is totally open. I made cozy zippered cushions for the platforms (that can be taken off and washed). I covered the carpeted areas with spare carpeting.

Estimated Cost
Approx. $30 for can of paint, varnish and a 4x4 (all other was scrap material)
Estimated Time Investment
Weekend Project (10-20 Hours)
Finish Used
Combination of Minwax Water-based stains: 6 parts Colonial Pine: 1 part American Walnut, followed 3-4 coats Minwax Polycrylic
Recommended Skill Level
Intermediate

Comments

bhoppy

Fri, 07/12/2013 - 09:36

Would you mind sharing your dimensions for this? It is absolutely beautiful!

Jodi W

Sun, 08/25/2013 - 08:10

Do you have the plans somewhere? I really want to build this (even got the okay from the hubby!) but I don't think I could do it without some serious guidelines...

Joni

Fri, 08/30/2013 - 15:55

First, sorry for the late notice; I just happened to look and saw the comments/questions.

I don't have plans...all I have is a google sketchup diagram that I created as a guideline for my construction (which is included in the photos), which is not to scale. Actual measurements are:

* Base (green carpeted base): 33.5" x 19"
* 4x4 legs: 35" tall
* 'Mezzanine' scratch pad level: 22" x 17.5"
* Mid-level base: 18" x 32"
* Enclosed cabin: 18.25" x 22.5" x 17" high
* Highest point: 56"

This has turned out to be a fantastic hit with the cats. They use all 5 levels, but the scratch pad and cabin are their favorite spots. If you need anything else or additional pics, please contact me.

Jodi W

Fri, 08/30/2013 - 18:15

Thanks for the dimensions, Joni! I'm trying to learn SketchUp so I can draw up my own plans, also. If I can't figure it out, I'll hand it off to my 12 year old, who is a pro at it (go figure). I know my cats will love it if I can manage to get it built!

Joni

Thu, 10/31/2013 - 14:30

Bhoppy -- I looked at your cat tree on facebook. It's awesome! The sturdiness of it shocked me too. And I was initially worried that my cats might knock it down!!

The worst part of building it was getting that lower scratch pad level on straight with the 3 posts. I'd never want to do that again!
Thanks for sharing, Joni

gregmasciola

Fri, 01/02/2015 - 01:18

Funny, almost every time I'm looking for ideas or inspiration when I want to build something, I end up back on this site. I was searching for pictures of cat trees and this was the only one that made me say "Holy crap, that's EXACTLY what I want!" My cat will love it!

M0710NM4N

Mon, 04/27/2020 - 20:41

Not sure if anyone is still around to see this, but I fell in love with this tree the second I saw it. Wondering if anyone created a detailed plan and might have it handy or possibly a detailed sketchup and wouldn't mind sharing the save file?

In the event nobody has either... I'm planning on having someone else build this for me as I don't have the tools nor skill to do it myself. I have a few questions:

1. The tree base/platform, what's a good recommended thickness?
2. The platform for the scratchpad... is there any certain reason it's so much thicker compared to the other platforms?

Thanks.

whiteroses9

Sun, 09/12/2021 - 11:51

Reverse engineering this project, using just 2x4s. None of the photos show the undersides. How are the plywood pillow bases attached for the top and bottom of the cabin? and the base of the top viewing platform?

2x4 sofa and chairs

Submitted by Anonymous (not verified) on Mon, 10/04/2021 - 15:08

Well, I had just bought a house. We had no furniture for our sunroom, so I took it upon myself to build some while materials were still cheap.
Hindsight, the chairs rear end should have been a level seat instead of trying to build an Adirondack style club chair. I modified the ends to match the modern style so they would match the chairs.
The sofa turned out great, all are solid and built with pocket screws. Sealed with redwood deck sealer, should last forever!
For the covers, we had them made from covers and all, and went to the local Joann and bought 4" thick foam.and wrapped it with with polyfill. Can't tell that they were made in a backyard, but they've been great for 18 months so far!

Comments

Patio Chairs

Submitted by pblomberg on Sun, 07/23/2017 - 13:13

Chairs turned out nicely!  Adjusted for cushions from home Depot (24x24)

Will also make a little table to set between soon.  Thanks for the plans. 

Estimated Time Investment
Day Project (6-9 Hours)
Finish Used
Behr semi transparent. Chocolate color.
Recommended Skill Level
Beginner

Comments

Seasonal And Holiday

Raised Garden Beds

Submitted by kari on Sat, 03/12/2011 - 09:54

I made these last summer for my sister. And she didn't even use them yet! Very easy to make. She did want them taller, so that is the only modifacation I made. We're hoping the bunnies won't notice all the yummy veggies up this high :) I know, probably wishful thinking. Makes a great kid corral too.

Estimated Cost
it's been a while
Estimated Time Investment
An Hour or Two (0-2 Hours)
Finish Used
none
Recommended Skill Level
Starter Project
Seasonal And Holiday

DIY Potting Bench

I’ve been wanting a potting bench for a while now - something by the back door to display some decor, use as an outdoor work station, and double as a place for UPS to leave packages. After looking around online and at local stores, I couldn’t find anything that I liked that fit the narrow space - so I did what any #woodworkingmom would do, I decided to build it myself. Please see my blog post for additional photos and lessons learned during this project.

Built from Plan(s)

Comments

Seasonal And Holiday

Truck Shelf or Desk Organizer

very easy

Built from Plan(s)
Estimated Time Investment
Afternoon Project (3-6 Hours)
Recommended Skill Level
Beginner

Comments

DIY Planter Box

Submitted by Anonymous (not verified) on Sun, 12/12/2021 - 17:37

My very first project. Was so easy thanks to Ana's instructions. Dark walnut gel stain and Fusion Seaside. Thank you so much Ana.

Comments

Barnwood Frame

As part of a redecorating project using reclaimed barn wood for our guest bedroom, we constructed this window frame to display some photos from one of our siblings of barns found in Iowa.

The dimensions are 44” X 33” with each photographic image being 11” x 16.5”.
Since the wood had so many bore holes, we used ¾” redwood under the visible fascia for added strength.

Cost - $75 / 4.5 hours to build.

http://ana-white.com/2009/12/plans-barnwood-frames-1-and-10-minutes.html

Estimated Cost
$75.00
Estimated Time Investment
Afternoon Project (3-6 Hours)
Finish Used
None
Recommended Skill Level
Intermediate

Simple Daybed/Farmhouse-Bed-Hybrid

Submitted by uli on Mon, 06/06/2011 - 08:05

I needed a bed for my guestroom and decided to build a mixture of the simple daybed and the farmhouse bed. The back and the front rail are attached with bed brackets for easy disassembling.

Estimated Cost
175 $
Estimated Time Investment
Day Project (6-9 Hours)
Finish Used
Acrylic paint in antique white
Recommended Skill Level
Beginner

Comments

Guest (not verified)

Tue, 06/21/2011 - 09:42

Dear Uli, I love the daybed you created and I'm planning to build my own next week for our guest bedroom, which doubles as my project room. Could you tell me what height you made the bed? It looks lower than the average headboard height, but higher than the average footboard height. I'd like to make mine close to your, which I think is just perfect.

Thanks,
Sara

In reply to by Guest (not verified)

uli

Tue, 06/21/2011 - 13:30

Thx :-) I've made the panels 19,5" high, and the legs measure 31,5". On top of the panels I screwed and glued a timber, which is a little bit thicker than a 2x4. So the overall height is 33,5". If you like I could send you my sketchup file.

Uli :-)

Guest (not verified)

Tue, 06/21/2011 - 19:42

Thanks Uli,

Those dimensions will be a big help. I've constructed more than 30 pieces now, thanks to Ana, so it's no big deal for me to design my own plans and dimensions now. I'm hoping to complete this project before my sister comes out for a visit. Wish me luck!

Sara

Miss Martina (not verified)

Fri, 08/19/2011 - 23:58

Hi, Uli! Do you think you could please help me out by sharing your sketchup notes for the "Farmhouse-Daybed-Hybrid"? This would really help me to get a handle on building this project.
Thank you from Martina.
P.S.-Though we now live near Palm Springs, California, we lived in Sachsenhausen for nearly 2 years & office was in Wiesbaden. Though I prefer the climate here, I still miss Germany.

Rockin'Robin

Wed, 06/20/2012 - 21:00

Dear Uli,

I am brand spanking new here on Ana-white and I love, love, love your daybed. I would like to give it a go for my daughters. Is it possible to get your sketch up notes? This will be my first build and I am so nervous about trying something without having a plan in front of me. My email is [email protected]
Blessings, Robin

Guest (not verified)

Wed, 09/14/2011 - 07:56

I would LOVE it if you could send me your sketchup file too. I want to build this for my guest room.

Helleni (not verified)

Wed, 08/31/2011 - 14:27

I would love to make this for my son's room. I am a beginner, can you provide the file for me to look at too?

Guest (not verified)

Fri, 09/23/2011 - 12:39

Uli,

I absolutely love this daybed and have been searching for such a bed, even to buy, but have found nothing. My husband is super handy and loves wood-working, so I think I am going to put him up to the task! :) Could you e-mail me your sketch-up file as well? My e-mail is [email protected].

Also, is there room to put a trundle underneath...this is a must-have for us. Do you happen to have any plans for a trundle? If not, hopefully my husband can come up with something for that!

Thanks so much for sharing your great idea and plans!
Amy

Siobhan (not verified)

Tue, 11/08/2011 - 17:56

Hi Uli,

Would you email me the plans for this bed please? It's perfect and exactly what I have been looking for!

Thanks so much,
Siobhan

kharrel

Wed, 12/28/2011 - 20:50

Hi Siobhan, I was wondering if you could possibly send me the plans for this bed in a Word document or through email. I tried to access the plans you attached above but my computer wouldn't allow me to open it. Also, I saw where someone else asked if a trundle would work with this bed and if you had plans for that, if so I would love to see if we can try to tackle that project as well. My email address is [email protected]. Thank you so much!...you have inspired me!!!!

Cheri (not verified)

Mon, 01/02/2012 - 09:58

I LOVE this bed. Would you mind sending me your sketch up and plans as well? Thanks so much and have a blessed and happy new year!

Jenny Briggs (not verified)

Mon, 01/30/2012 - 06:12

Hi, your bed is beautiful, could you please send me your dimensions, I would like to attempt, making this but kinda do an L, with a twin, and then a toddler mattress, at the head, the smaller mattress, would be like the short side of the L! Very new to this, but I would like to give it a go!

Guest (not verified)

Sat, 02/04/2012 - 09:35

Uli,

I love this so much and as others have said...it is the exact height I think I would need. This is my first solo project (without help from the man in my life) and i would love all the help I can get. Could you send me your plans for the hybrid? email address is [email protected]

Thanks much,
Raven

RachaelA (not verified)

Thu, 04/12/2012 - 10:31

Do you have a mertials list you used to buy the wood, etc for this bed. We are wanting to build a similar bed and add a trundle drawer underneath. Any guidance you can provide would be great!

Rach

RachaelA (not verified)

Fri, 04/27/2012 - 10:54

We figured it out and added one more layer to the project. We are combining the simple daybed, farmhouse daybed and trundle. So far so good.

Kris Frye

Wed, 02/25/2015 - 20:15

That's exactly what I want to do. I cannot download Google SketchUp, (It requires Windows 7 or newer. I am still running XP.) so I cannot access the plans provided. Could you please share yours? I also need the bed to accommodate XL twin mattresses (upper and lower beds). I could make those adjustments to your plans if need be.

Judith (not verified)

Wed, 05/09/2012 - 01:39

Hi Uli, I just love your bed, I'm new to building your own furniture but since I saw your bed I wanted to build it so I'm doing it. So far I have made the laterals and the back panels and now I'm putting it all together. I have some questions and maybe you can help me... you used bed brackets for the back panel, how did you put these so that they won't be seen? did you put them in the top and bottom of the panel?

Thank you very much

Judith

kad050209 (not verified)

Thu, 06/28/2012 - 10:14

Hey! I love the way you used the farmhouse bed for this daybed. It's perfect for what I'm looking for. I wanted to make my daughter the farmhouse bed but, we always wanted a daybed at the same time. This is perfect. Do you have any plans you can share with me so I can start making this? Thanks! [email protected] is my email if needed

SerinaDee (not verified)

Tue, 07/17/2012 - 10:26

I absolutely LOVE this bed and it is exactly what I want. I know many people have asked for the sketches, sooooo if anyone has received them, could they please forward them on to me??? (of Uli, if you see this and you have them) I would greatly appreciate it. You should definitely post this as a plan post because I'm sure many others would love it!

my email is [email protected]

THanks so much in advance!!! :) :) :)

Jason Lebo (not verified)

Thu, 07/19/2012 - 12:58

Hi Uli,

Outstanding work. I am going t make this for my 2 year old son. Quick Question.

I am confused about how to attach the posts to the panels for the head board. I assume you drill in from the far left and right of the posts? Do you use wood putty to hide the holes later? Could you use pocket holes? Or would that not be as structurally sound. Any advise would be appreciated.

From the instructions:

Now attatch the 4x4 posts to the panels. Make sure you pre drill half way through the post and use the 4 1/2" screws. Line the top edges of the panel and the post, keeping everything square as shown. Screw into the panel where it is sandwich 3 boards thick. Put at least 6 screws in each post.

Renee Glaze (not verified)

Fri, 10/12/2012 - 20:37

Can you send me a copy of the plans for the daybed. Does it have a regular mattress or just covered foam. Thank you

Val Manchuk

Sun, 04/07/2013 - 10:27

This is a great idea for a spare bed in our home office. Under bed drawers would be a good place for oir storage, too.

josie.a.richard

Sun, 09/28/2014 - 06:43

I LOVE this. Could i please get a copy of your sketch/plan? I am very new to this, and I don't think I could recreate one myself just yet!

Thanks

J

Shoe Bench

Submitted by jkp3897 on Tue, 08/02/2011 - 16:22

I saw the shoe dresser plans and liked the idea of getting the shoes out of sight! Then I decided to modify that plan and turn it into a bench that you could sit on while putting on your shoes! So this is what I came up with using a 2x12 for the top and 2x6's for the legs. The drawer part is pretty much the same as in the shoe dresser plans. It's 4 feet long and 19 inches high. It's already been in use and we love it! With 4 kids, the number of shoes can add up quickly! I have a second bench sanded and ready for assembly!

Built from Plan(s)
Estimated Time Investment
Day Project (6-9 Hours)
Finish Used
Polyurethane - 3 coats
Recommended Skill Level
Starter Project

Comments