Breakfast Bench with Storage
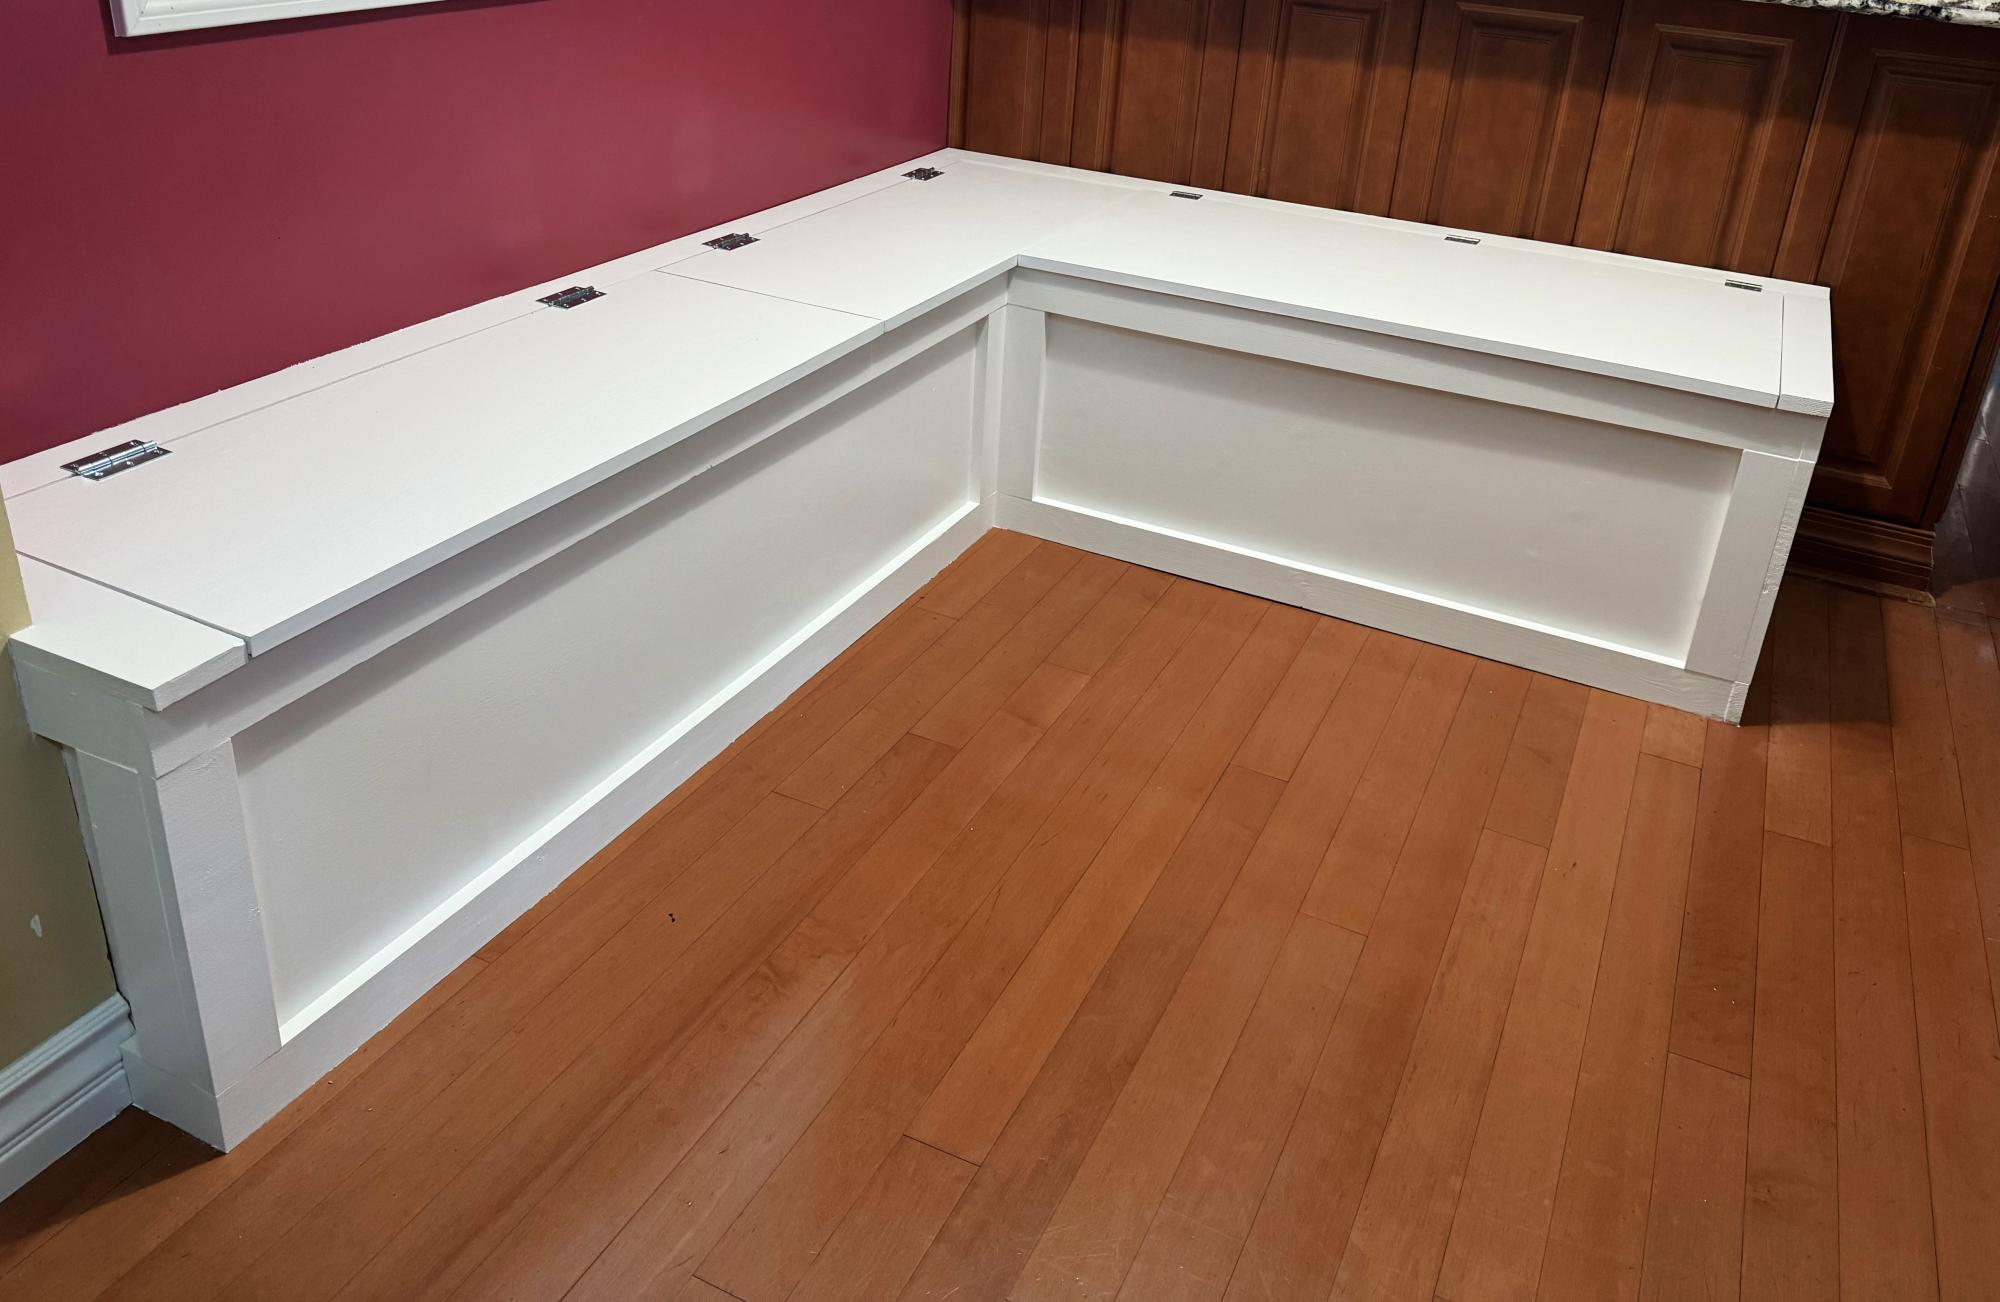
Made this built in breakfast bench. Came out really well.
Built from Plan(s)
Made this built in breakfast bench. Came out really well.
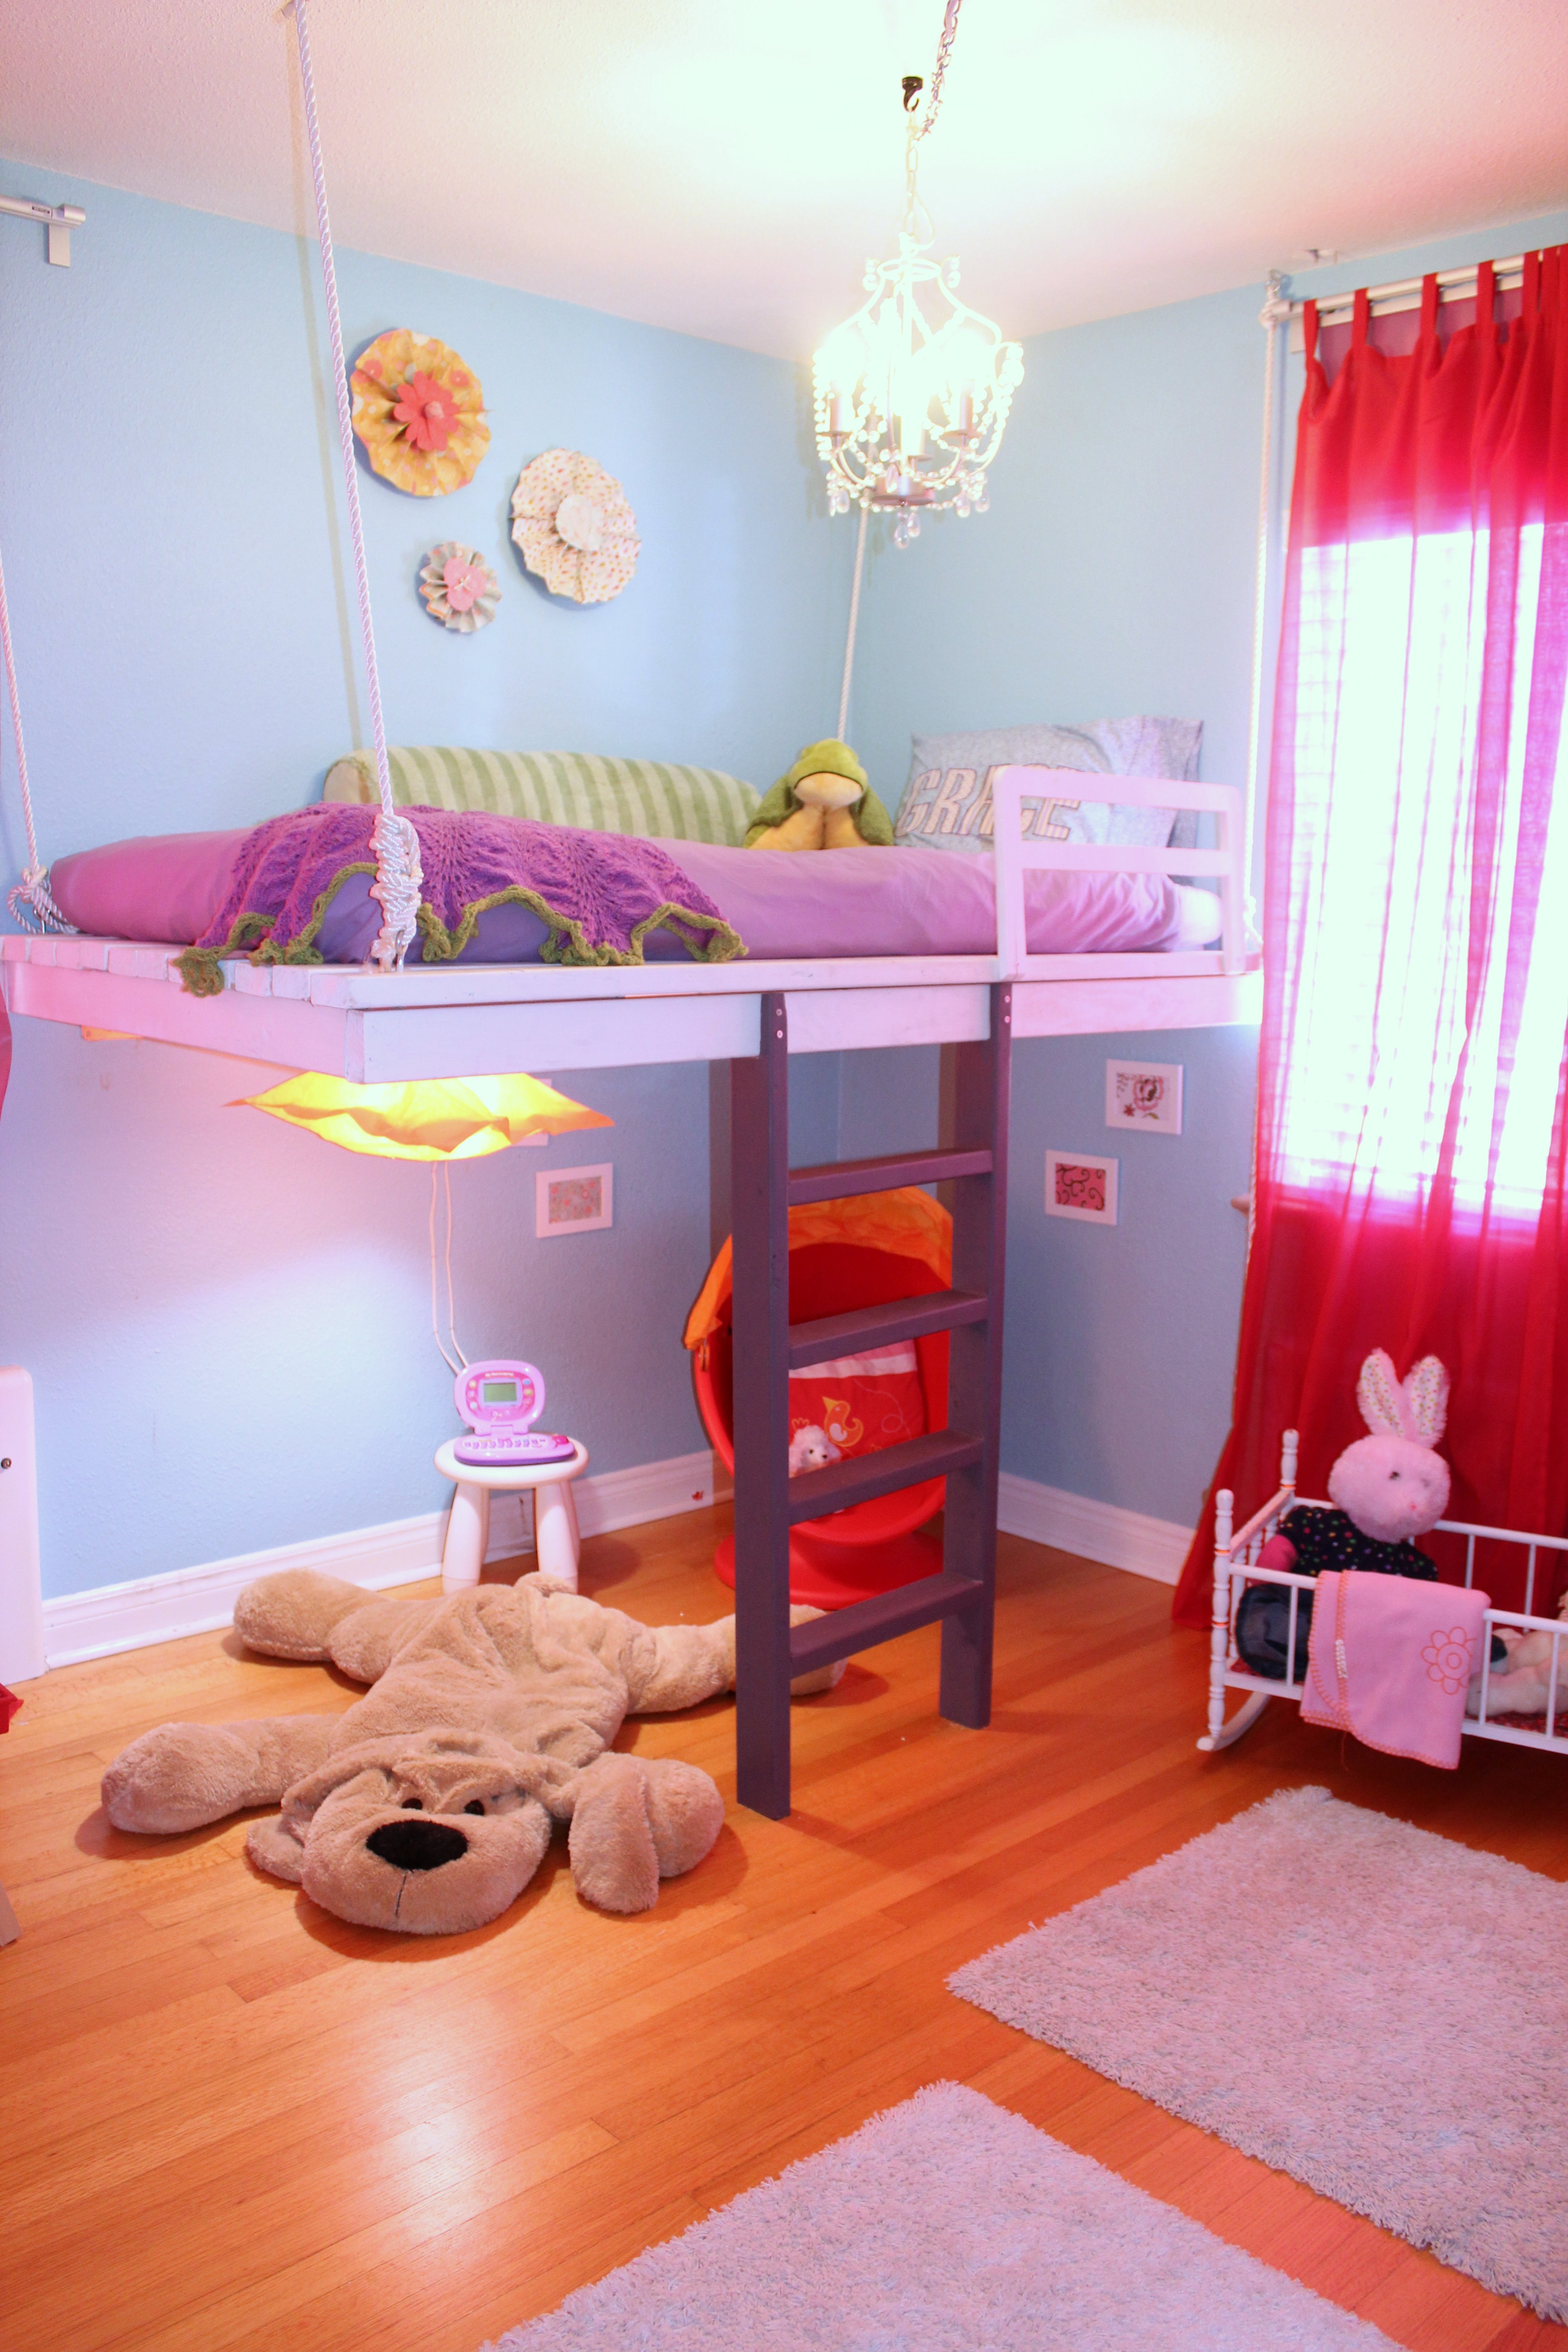
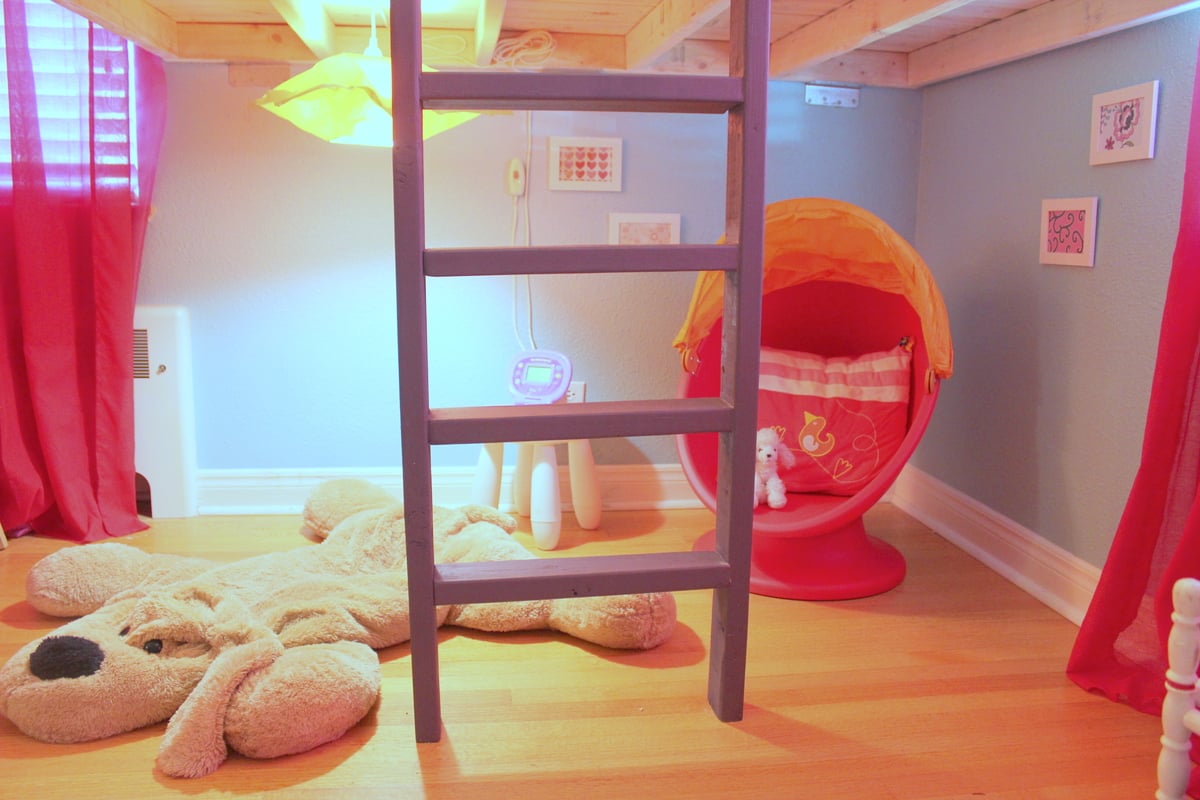
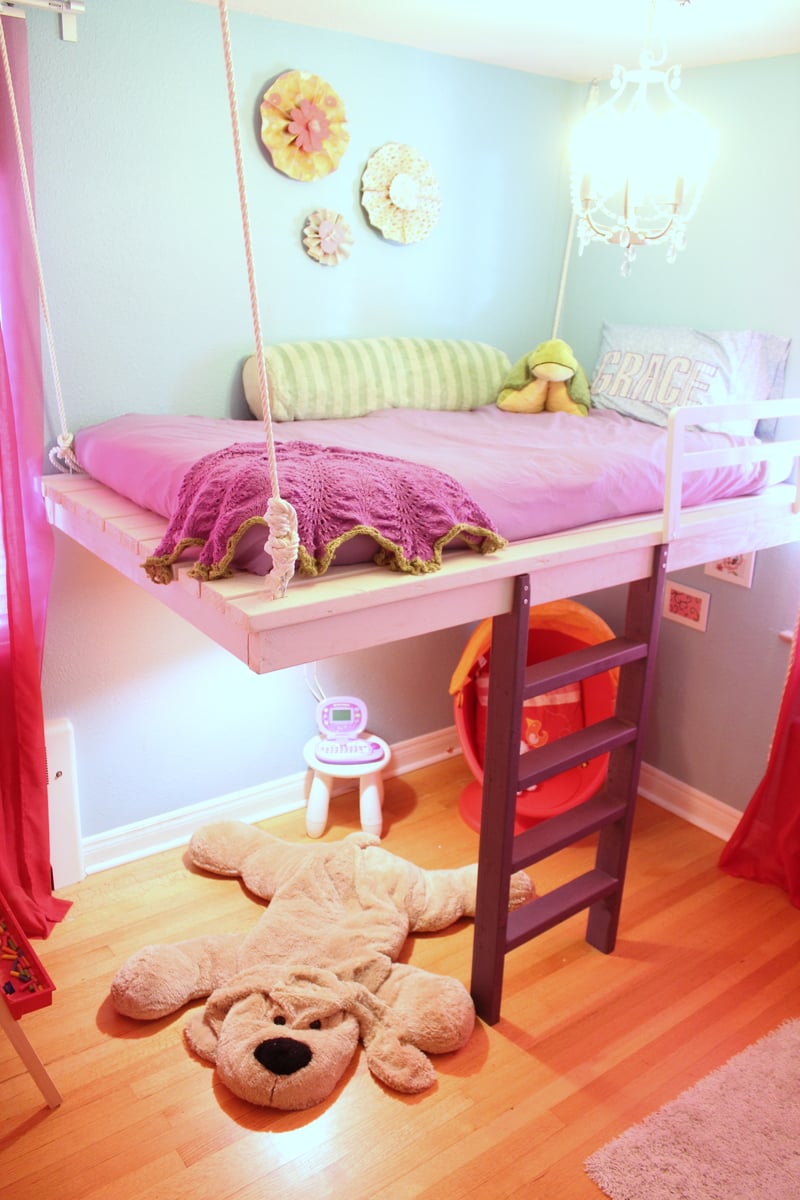
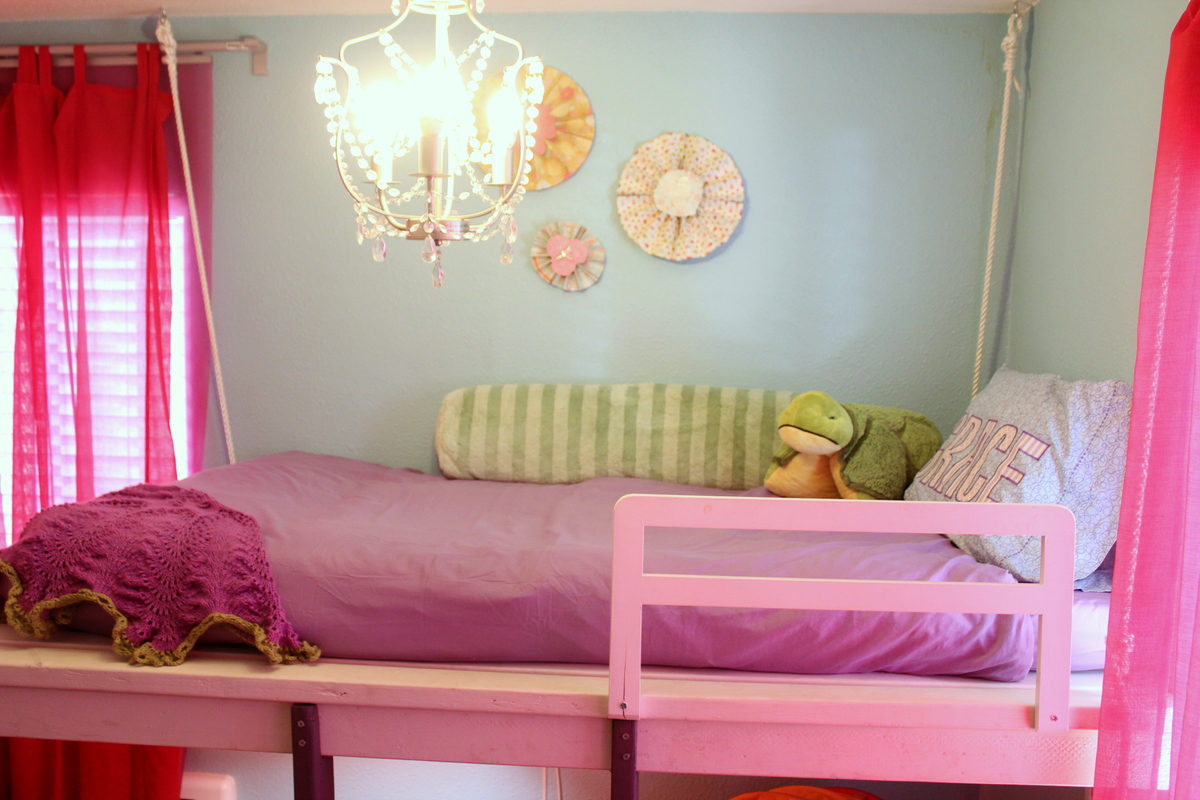
When it was time for a big girl bed for my daughter I was so excited because I had been WANTING to make the Hanging Loft Bed since first spying it on The Bumper Crop and Ana White. I'm a novice so this was the perfect first project for me and my daughter LOVES it. If you have unique space challenges in any of your bedrooms this is the bed for you.
Wed, 09/12/2012 - 23:10
That turned out great! Very well done first project.
Tue, 12/18/2012 - 17:17
What a great idea! I can't wait to make one for my little girl next weekend. Can I ask a few questions? How did you affix it to the ceiling? I will not be able to get on top of the ceiling so I will be finding he joists with a stud-finder. I assume you screwed in eye-bolts?
How did you make the rail and ladder? Any help is GREATLY appreciated. Thanks so much for the idea, my Daughter is going to love it!
Thanks,
Rob
Tue, 12/18/2012 - 20:48
Thanks Rob!
I replied to you on the blog...
Jennifer
Thu, 08/01/2013 - 06:03
I just wanted to say that I just came across this and absolutely love it! My daughter and our new baby will be sharing a room and now I have inspiration on how to make it work! Can't wait to try this out! Love the ladder...how did you make the ladder?
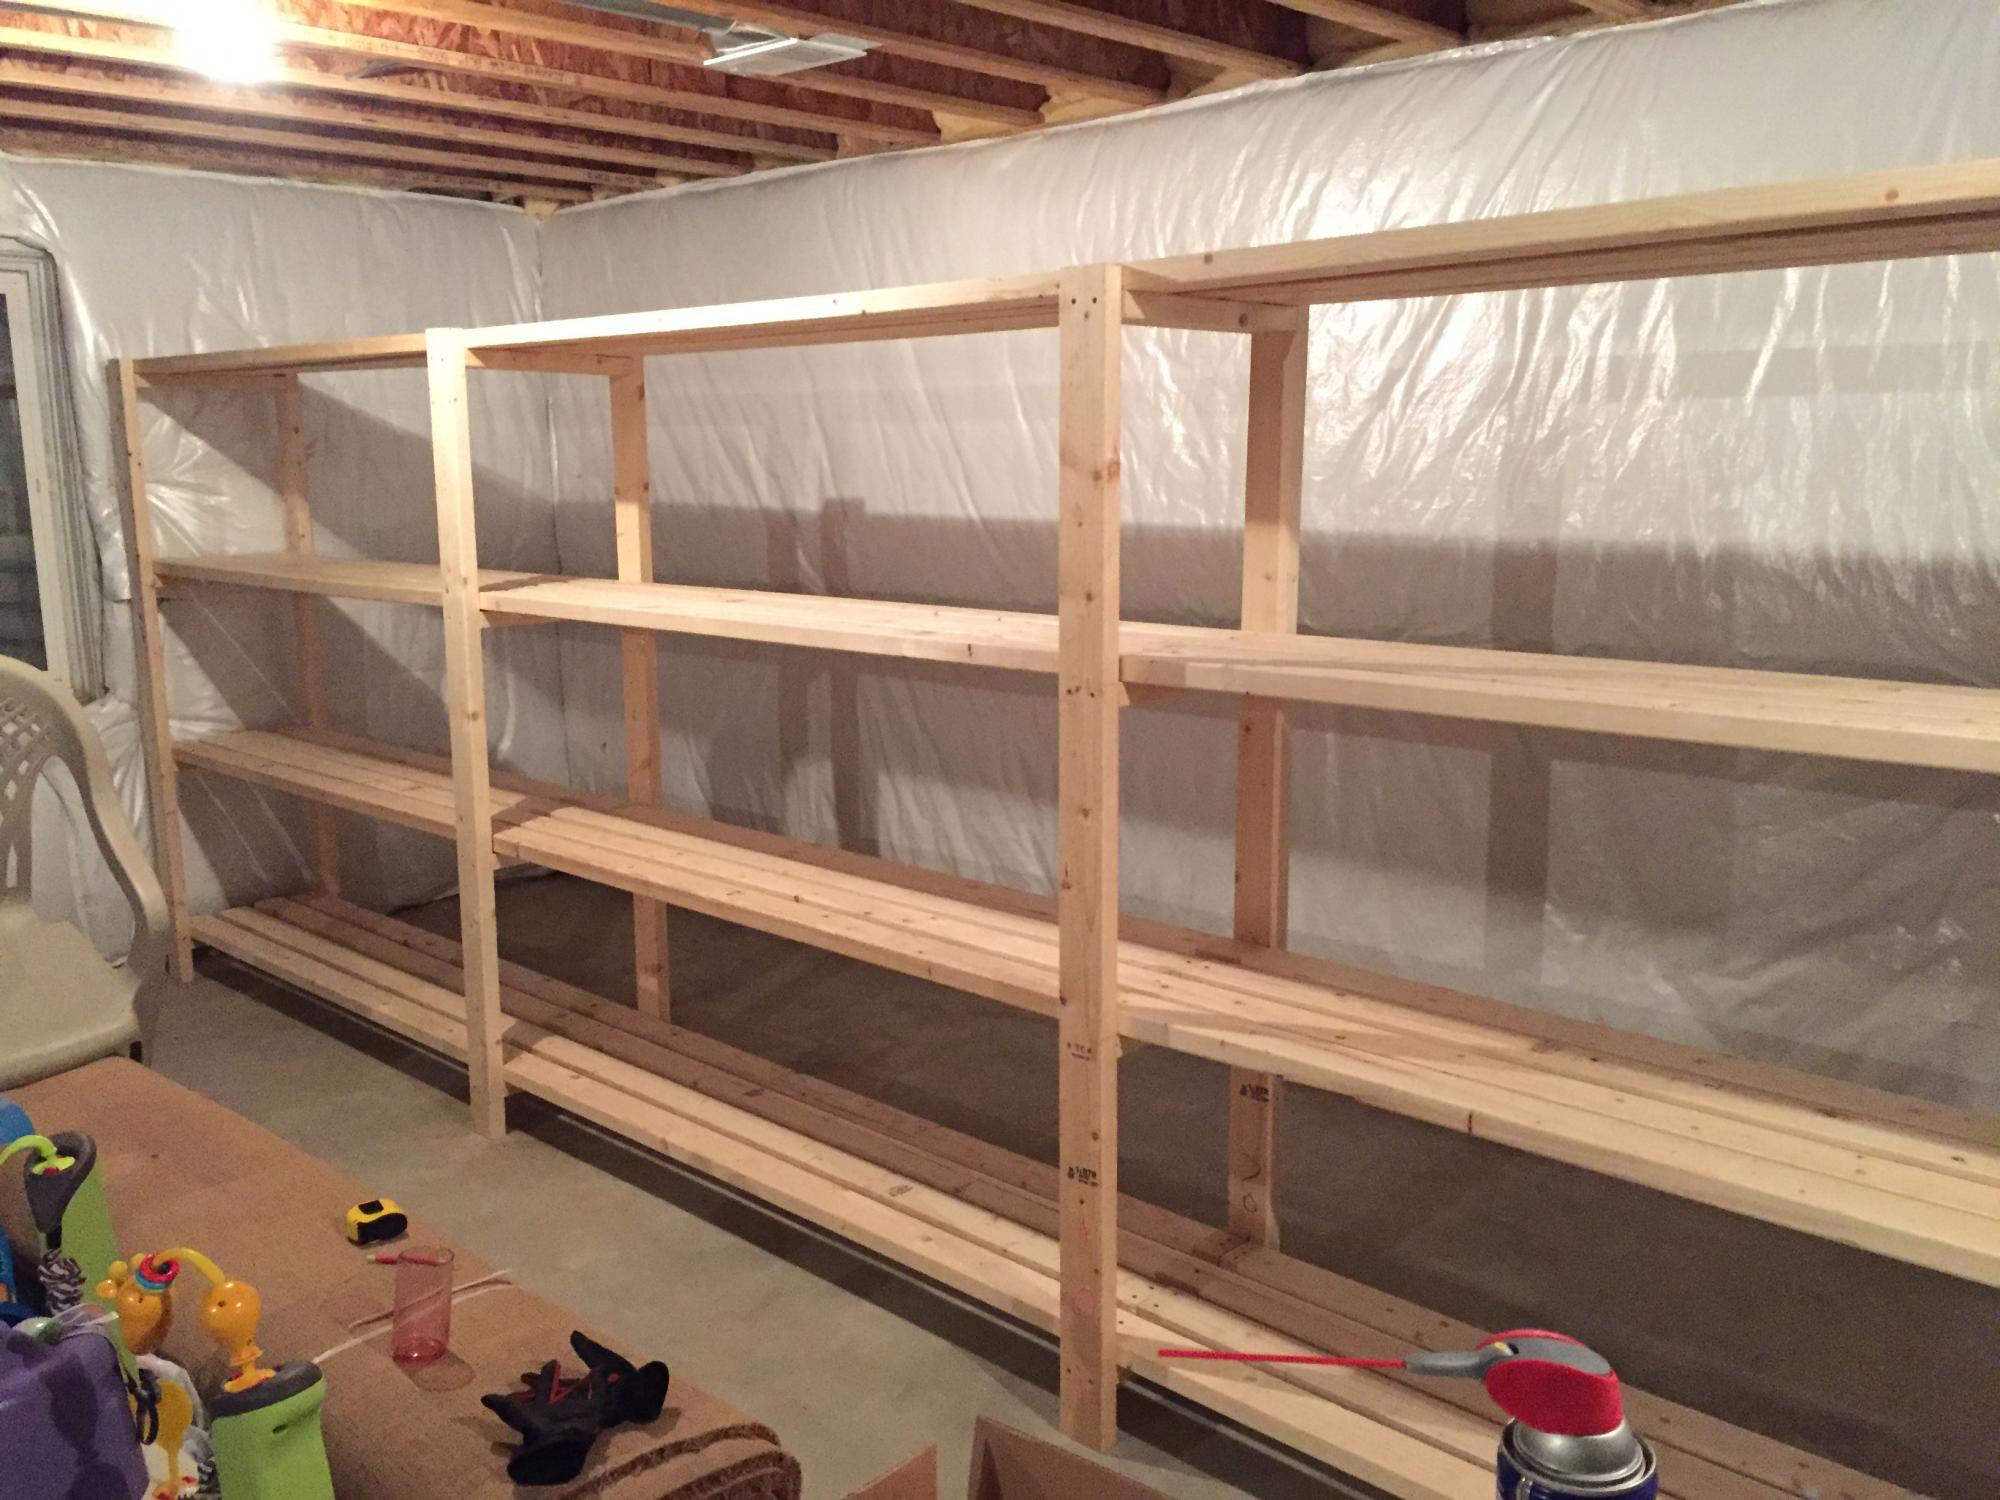
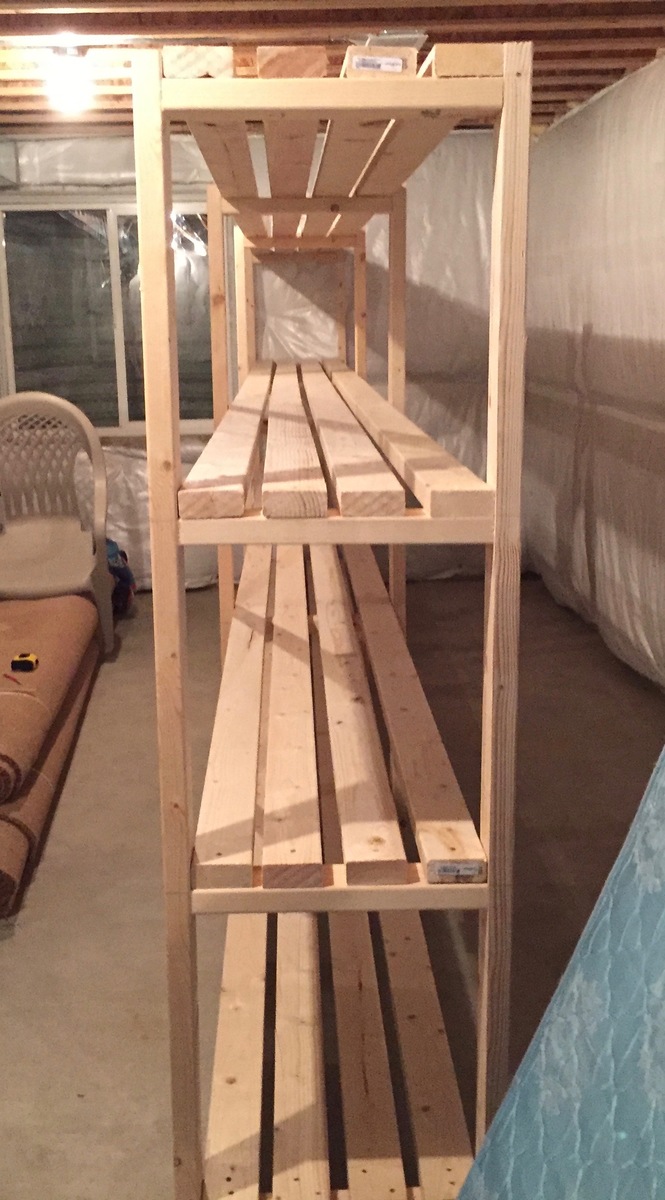
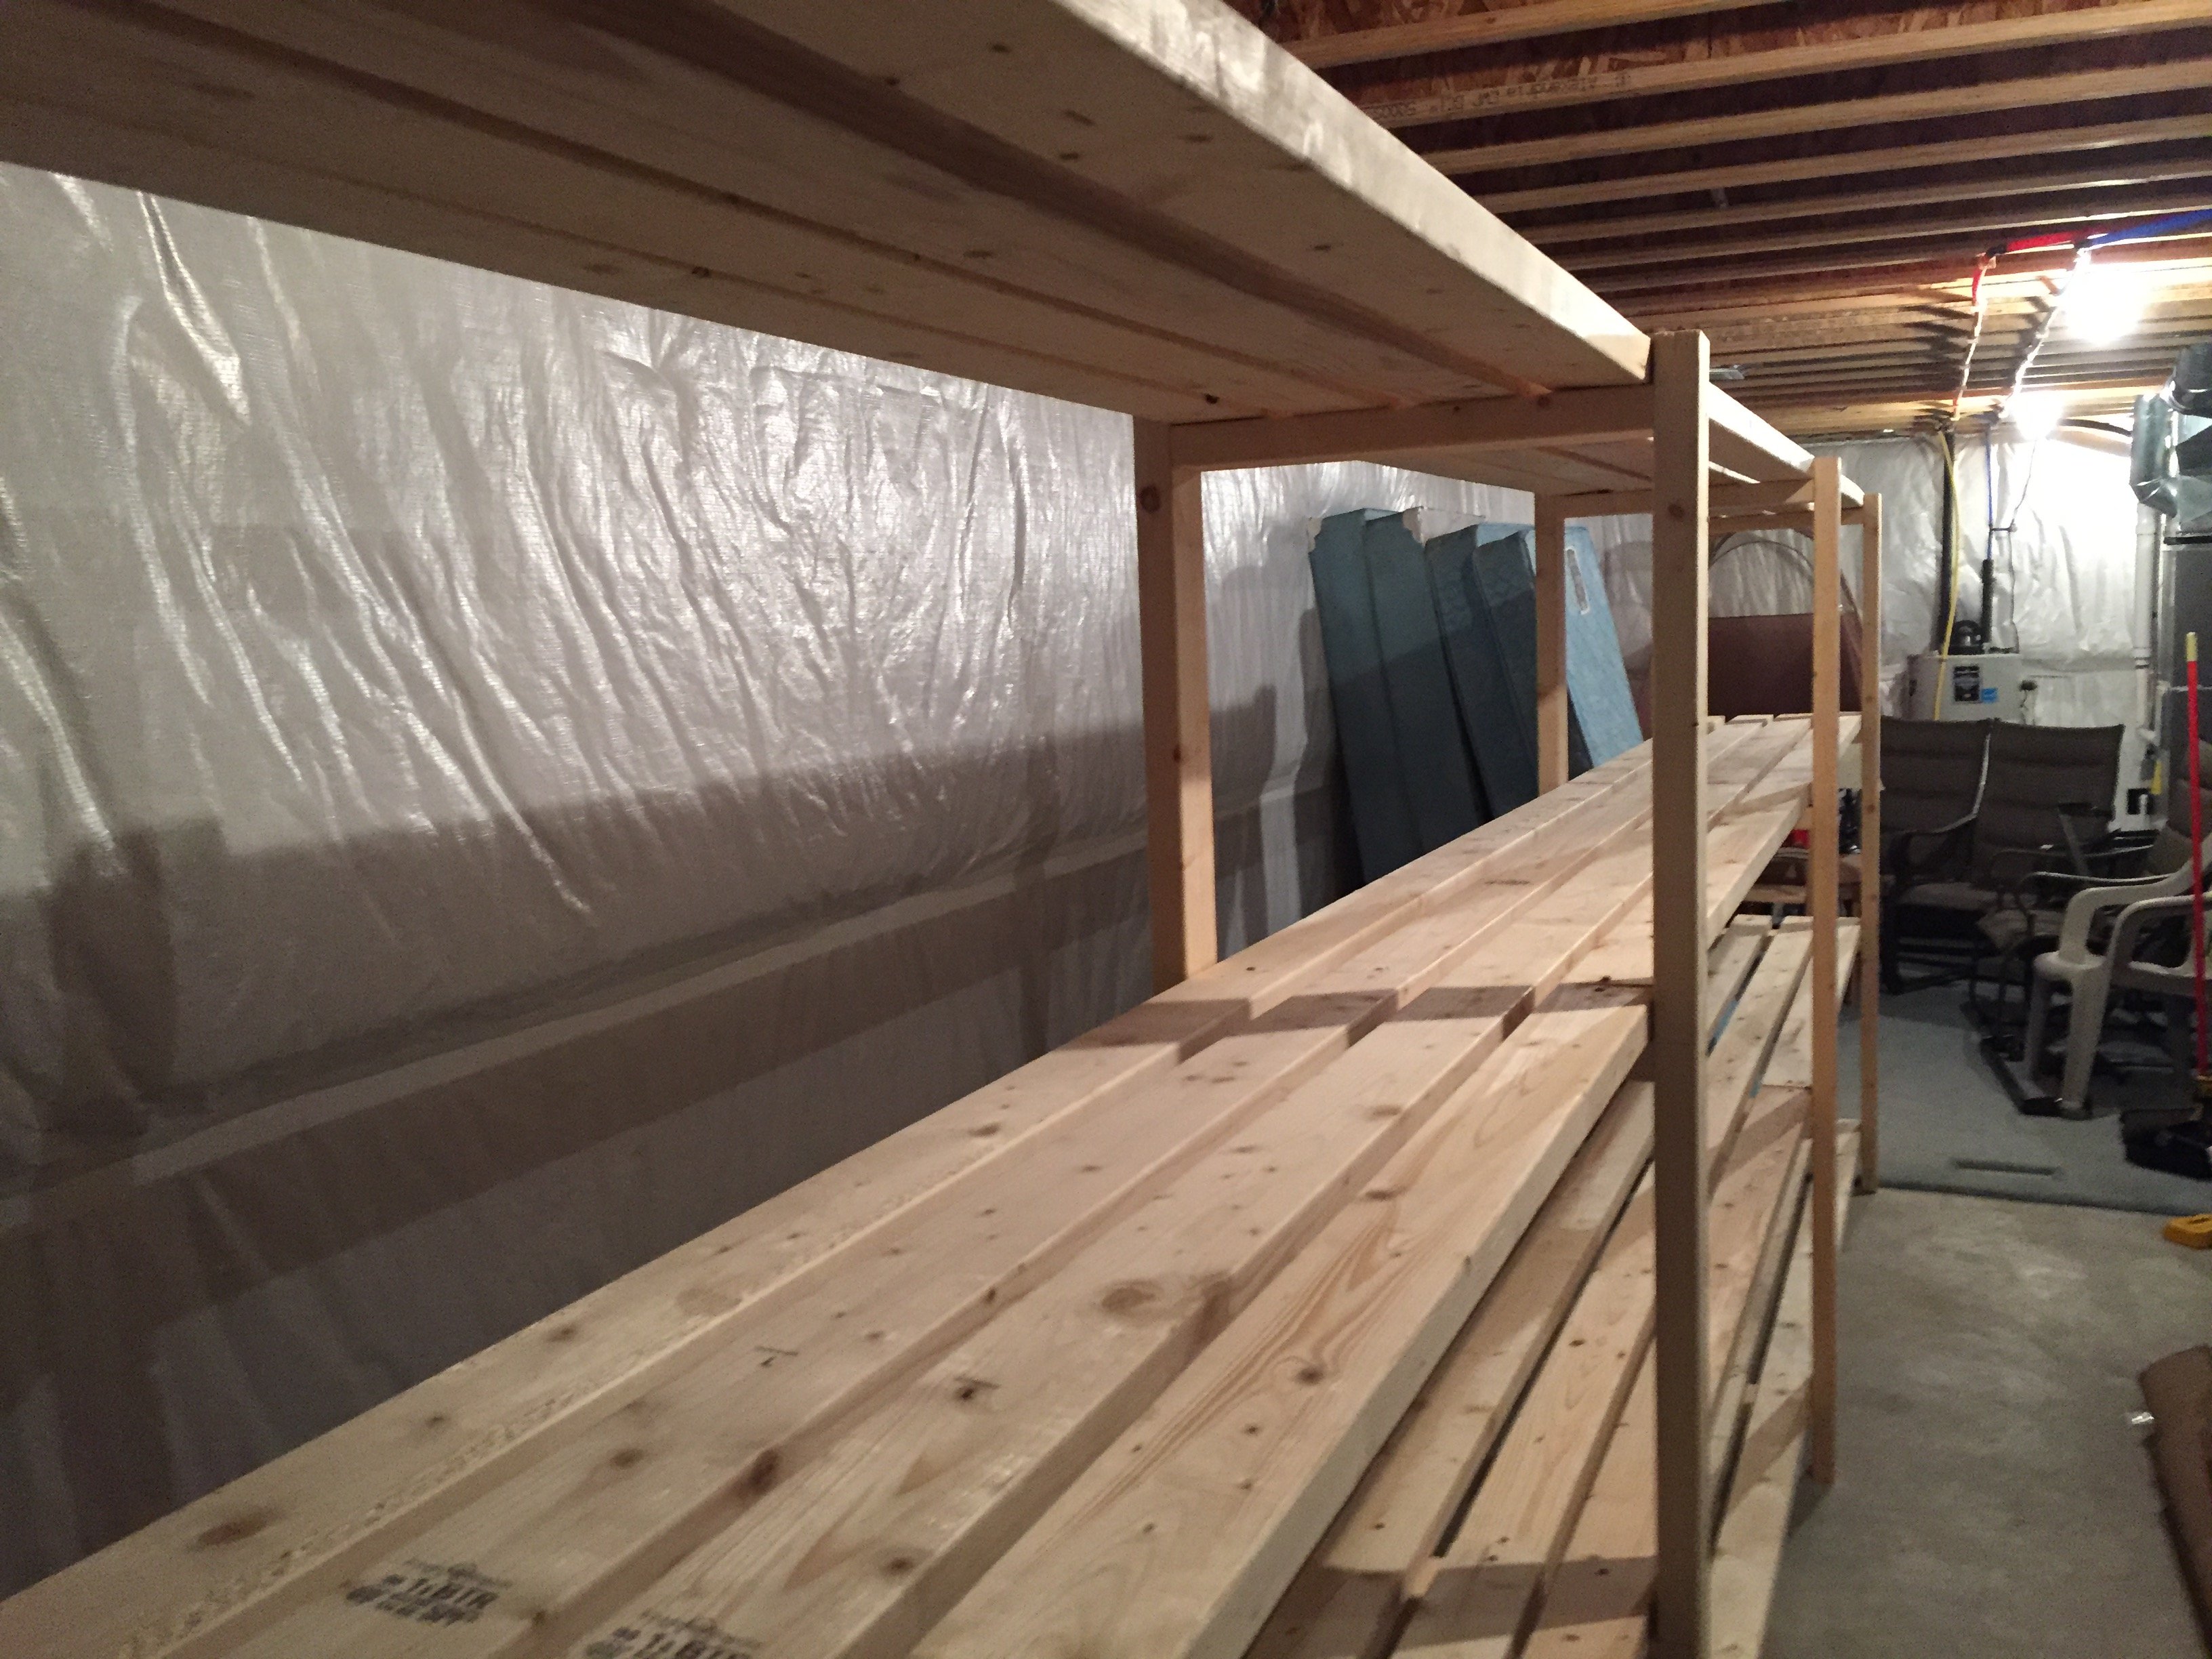
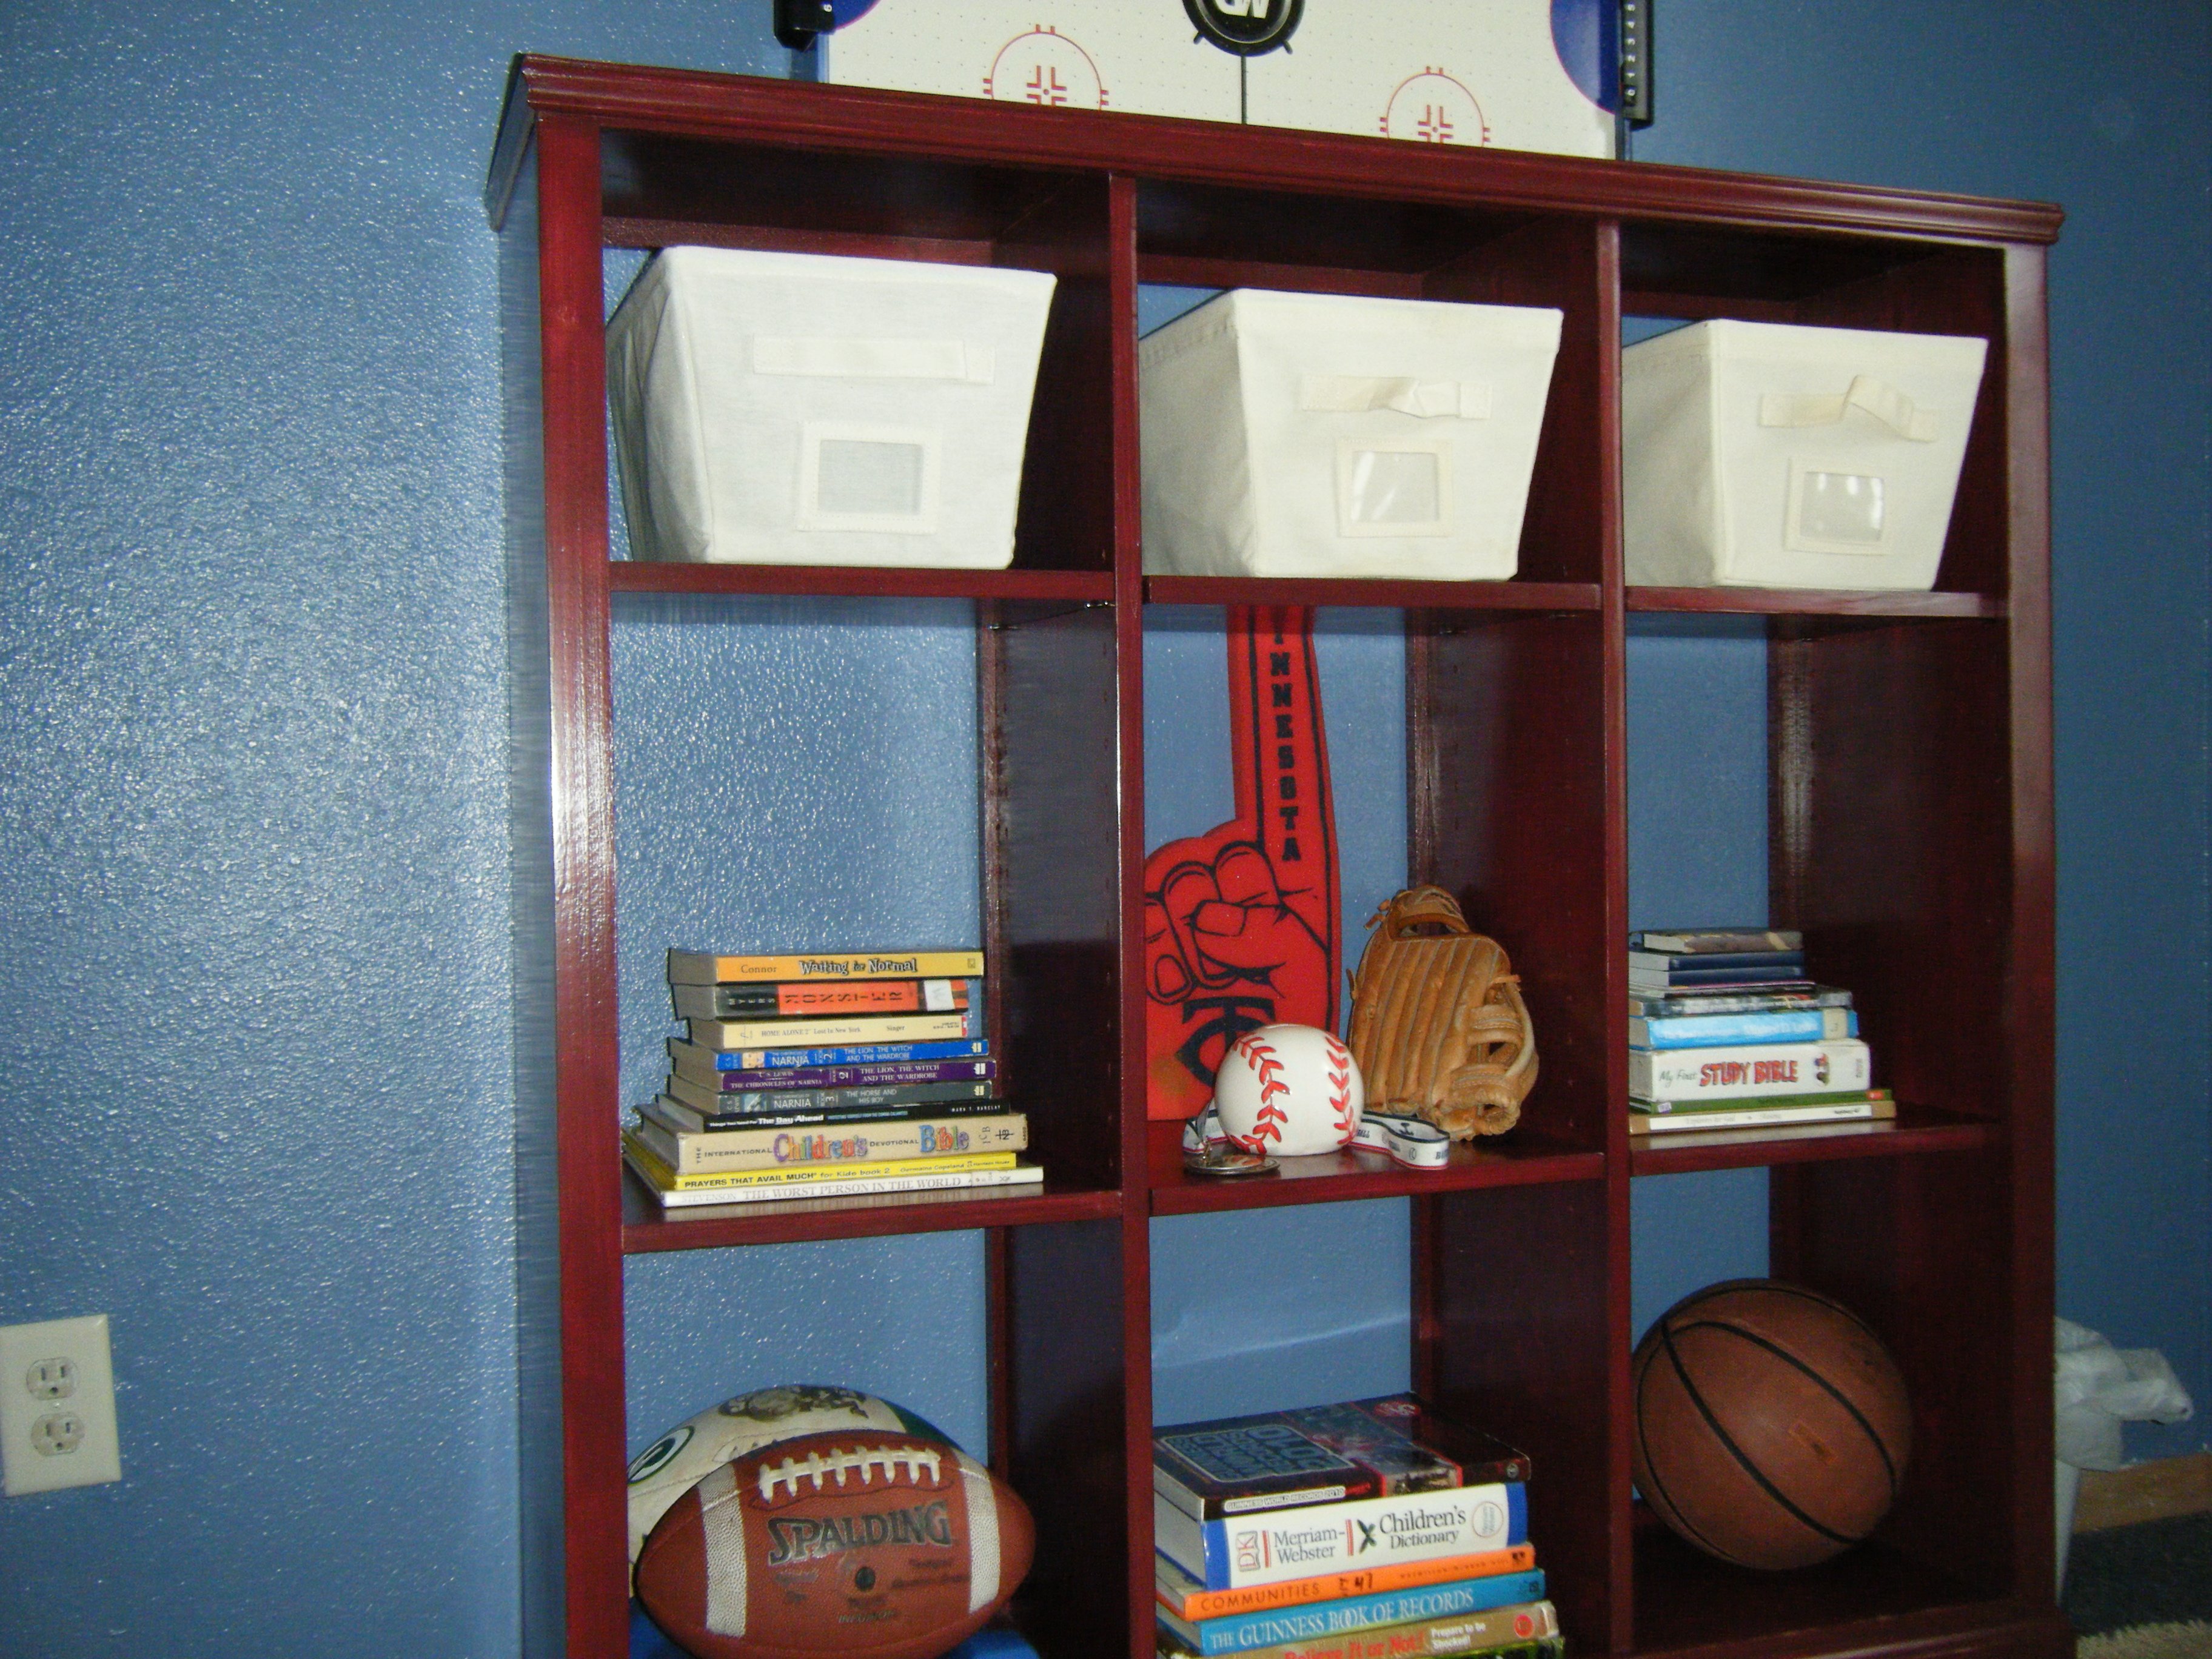
Thanks for the instructions! Here's my version. I haven't built much of anything before, but I needed it in my basement to handle kids' stuff. My version is 18 feet long. I combined a 12-foot and 6-foot 2x4 to get that length, which meant less cutting, which I had done at Lowe's (for free). I used the 6-foot 2x4s throughout the shelf to ensure it was strong (in other words, I didn't want a 12-foot "section" and a weaker 6-foot "section" added on).
I was able to get everything in my car but the ride home was slow. I also had to use my egress window to get the 12-foot boards in the basement.
Total cost for me was about $170 including a couple boxes of screws and wood glue. I could've easily spent double the cost on store-bought shelving. Thanks for the plans!

We started with the basic chicken shed coop plans and modified it some. We wanted the peak to be in the front for ease of access and to allow leaves from tree overhead and rain and snow to fall to the back away from the entrance. The windows raise from the inside using 1/8" wire secured on the inside with a rope cleat hook.
We added Dutch doors. We added latches for the pop door to keep it iopen or closed as needed. Dutch doors also have decorative latches and eyehook latches to secure them when they are fully open. I rested the shed on 12 in. x 8 in. x 12 in. concrete patio pier blocks to allow drainage. we extended the roof about 6 " to allow for extra protection and avoid dripping whe it rains.
On the inside I have a roost and a poop deck. Hanging from the poopdeck I have their feed to keep it off the floor and keep shavings, etc. from getting into the food. The poop deck and the floor are covered with comercial grade tile to facilitate easier cleaning.

Sat, 03/14/2015 - 02:50
Hi!
I love your coop and the modifications you made - I was planning on doing the same thing with the placement of the door. I was wondering if you could post a couple of photo of the inside of the coop? I'm especially interested in where you placed the roost.
Thank you so much for sharing!
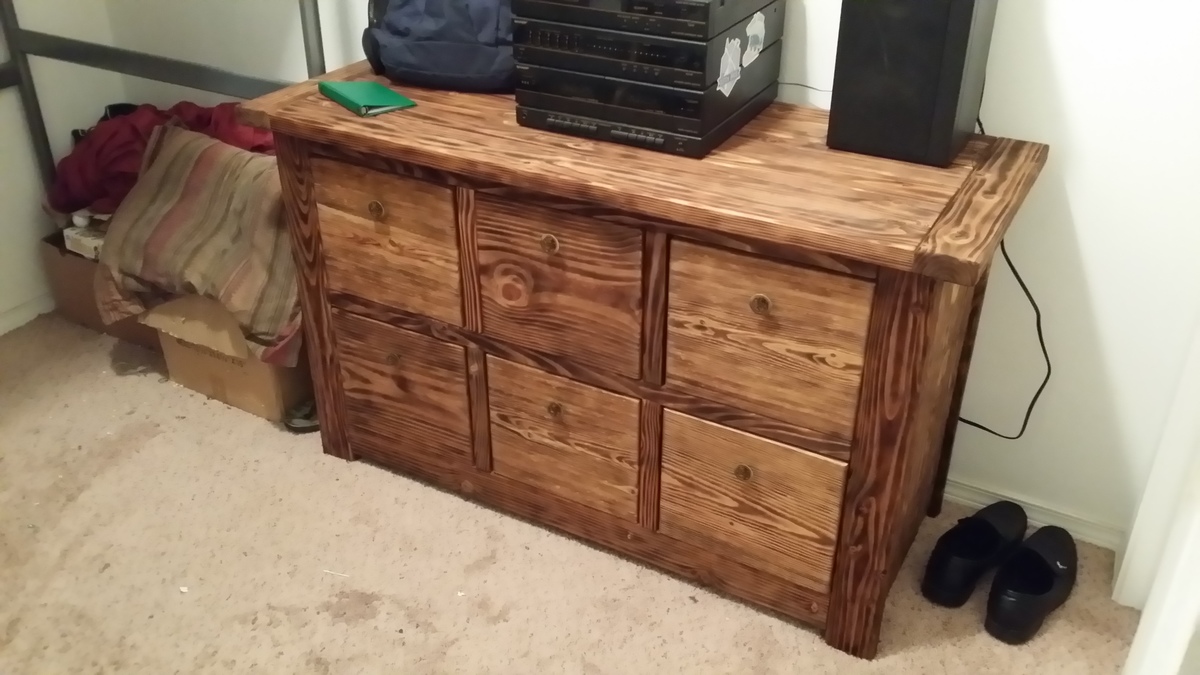
A few years back, I built a twin version of Ana's Farmhouse Storage Bed for my step-daughter. After she moved out, I converted it to a huge toychest for my three-year-old.
I would have left it as a bed, but with a quality mattress it was so high I was afraid he could get hurt if he fell out.
The conversion is simple. Remove 24 screws, reconfigure, add back the screws in different places. The support blocks become feet for the chest, and the slats become spacers under the top part.
He loves being able to get his toys out himself, and I love that he can put them away by himself. A big upgrade over plastic storage boxes on high clost shelves!
Once he's a bit older, I'll probably turn it into a bad again.
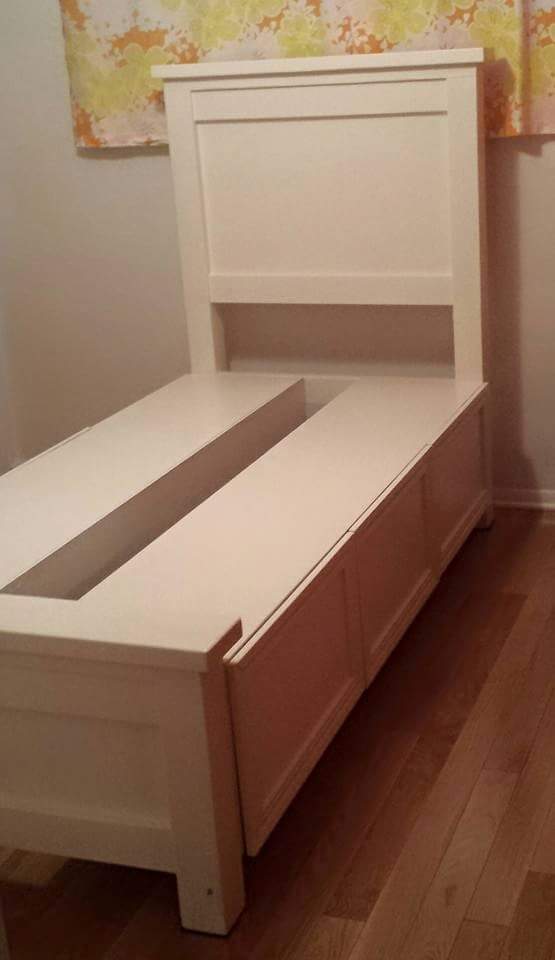

This was my second project that I completed to go along with the Daybed With Three Trundle Drawers For Storage that I made for my son.
The original plans for this bed state that you need three 1 x 12 x 8's, but you actually need 4. The two middle 42 3/4" boards on the inside are missing from the cut list, but you can see them in the diagram.
I am so happy with the way this turned out! It was a little more challenging with the wider width boards--I had to force them on the line because they weren't perfectly straight. But overall, I am very happy with this.
When I drilled the holes for the shelf pins using the Kreg shelf pin jig, I used the 1" inset on the outside 2 columns, and the 2" inset on the center column. This way I avoided have holes that were drilled all the way through the board.
Between this and the storage daybed, I have really freed up so much space in my son's small bedroom! Happy building!
Tue, 01/01/2013 - 18:13
Your first two projects are very professionally done. KUDOS for such a great job. Keep it up and your kids will soon be in the shop with you and it will become a family affair.
Honestly think it needs a new name, because when all said and done works and looks great.
Going to be making another one at some point, and make some alterations to it to fit a need, and suggestions.
It took me longer then it probably would for some, but then again I am disabled and can only work for short bursts.
Hard to see in the photos, but i used brass knobs on the drawers. I also used briwax on the parts that slide, (the rail, and bottom of drawer edges.. works nicely..
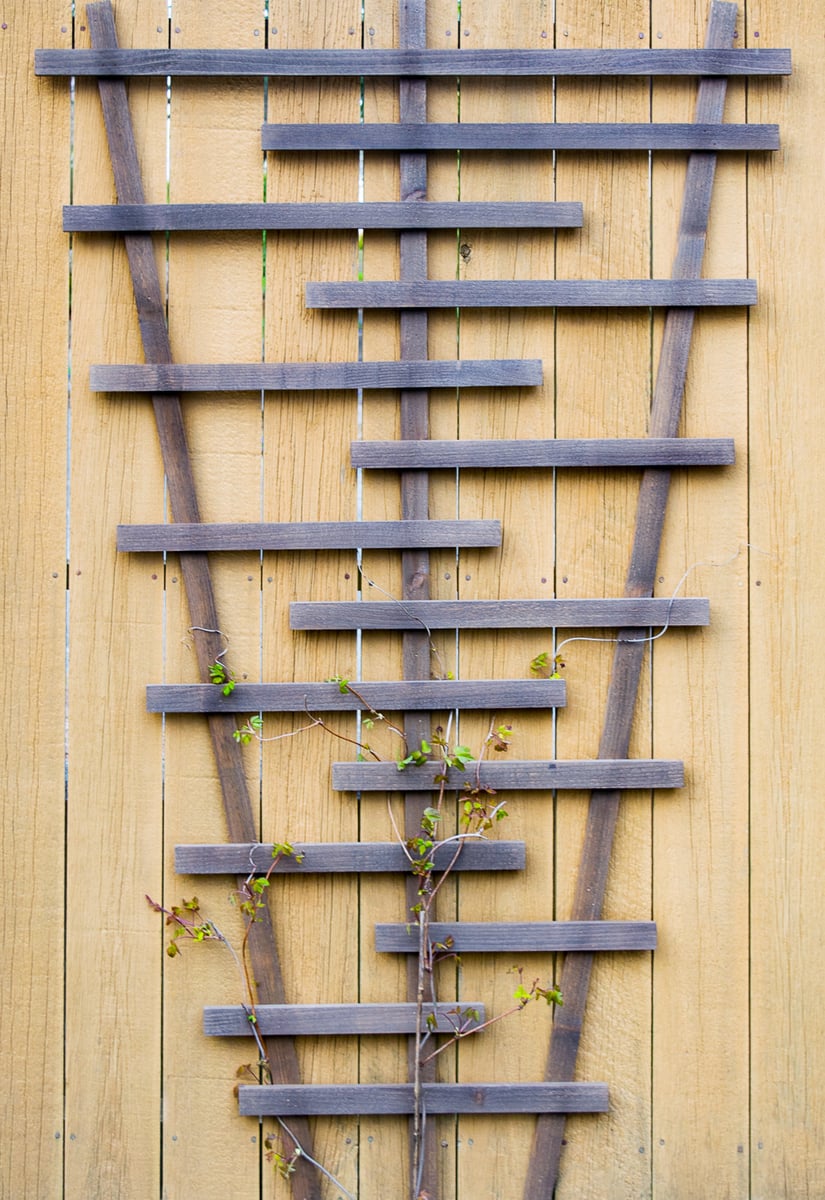
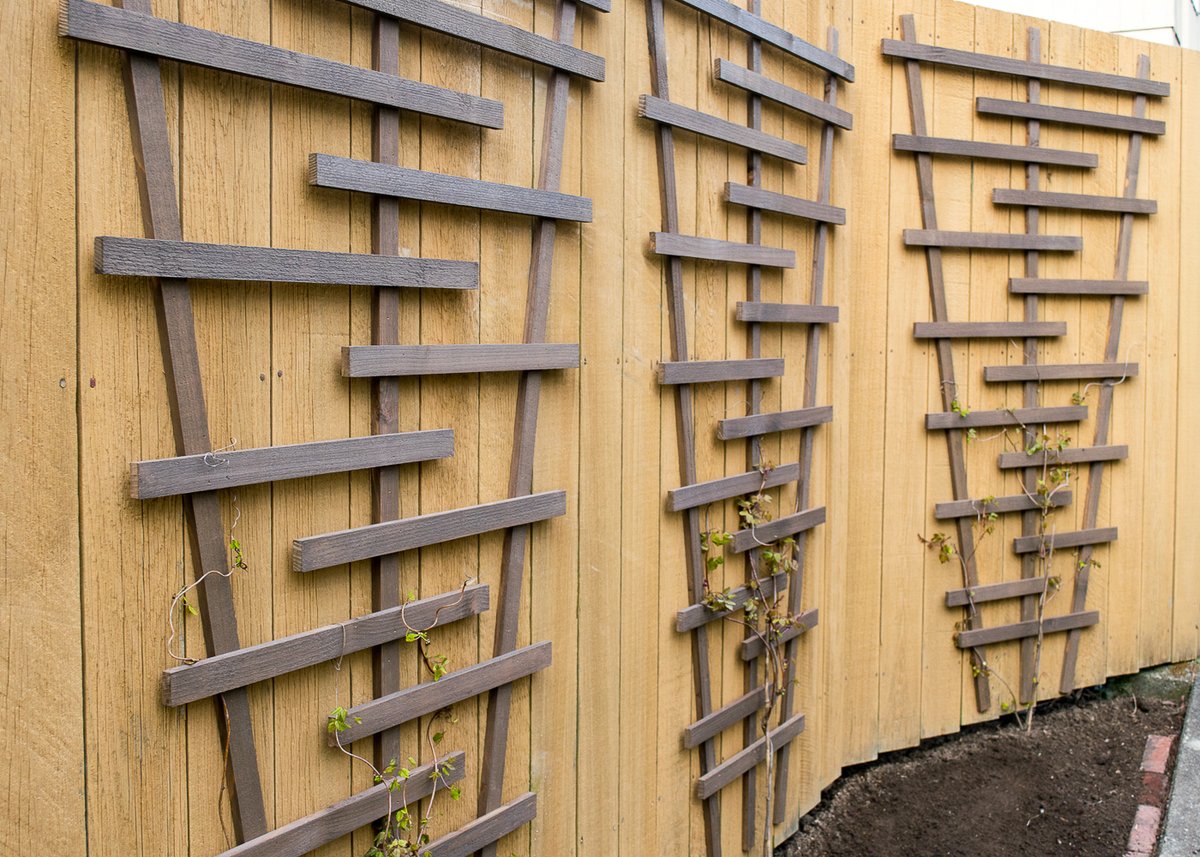
I made this garden trellis with cheap 6' cedar fence pickets ripped down to 1 1/2" strips. Get the free plans and tutorial at The Handyman's Daughter!
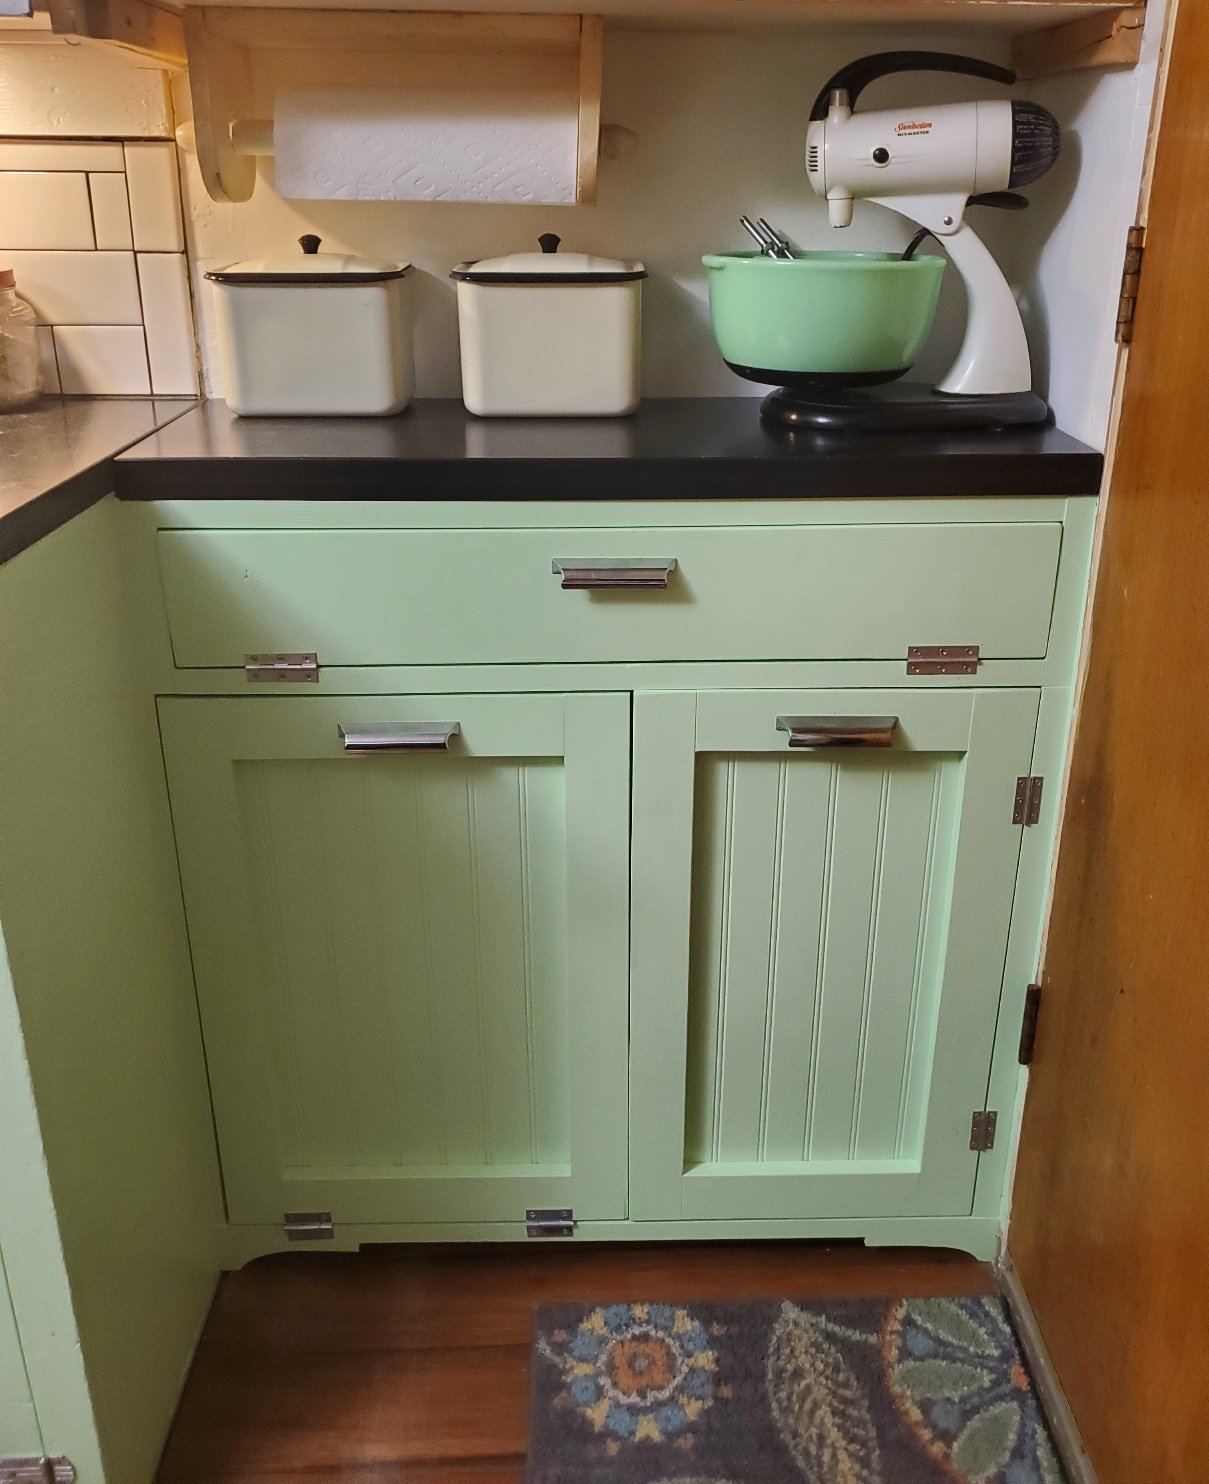
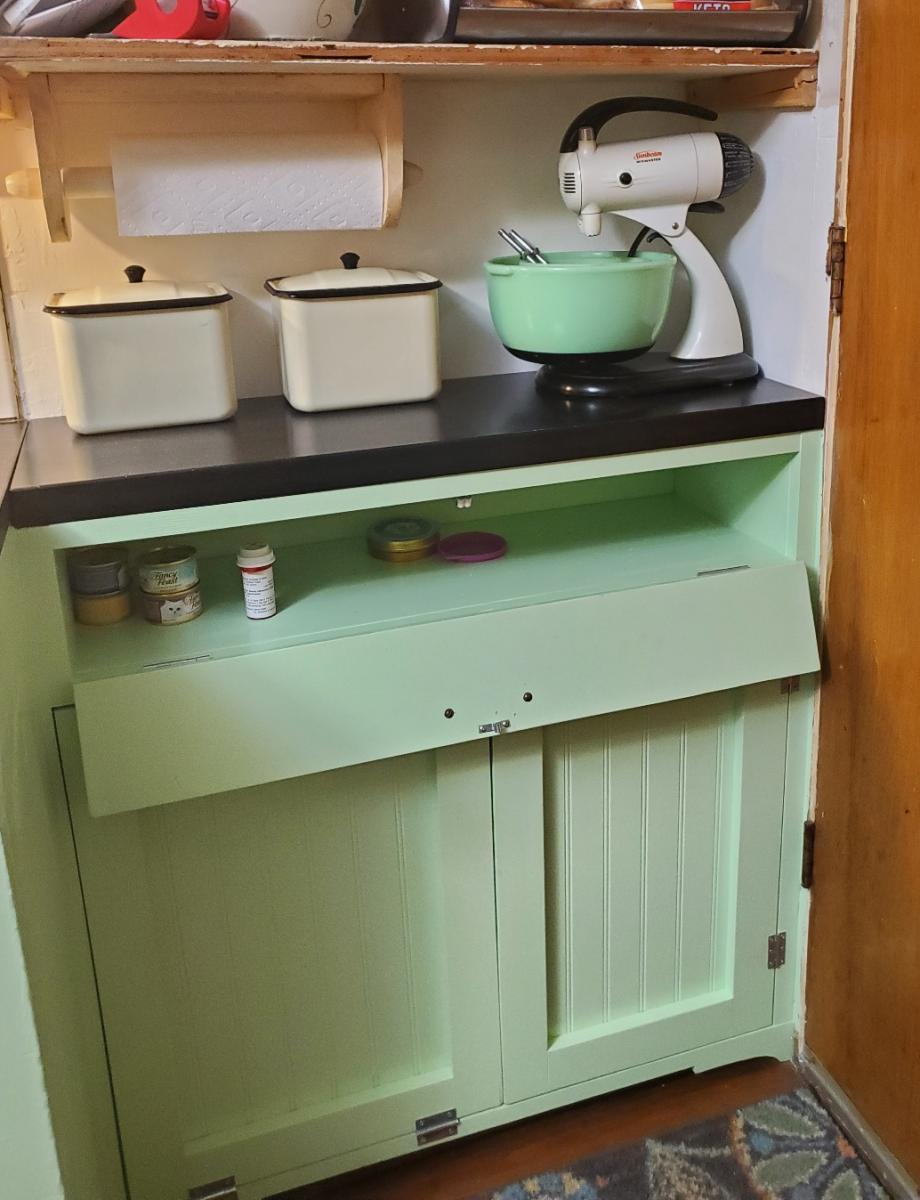
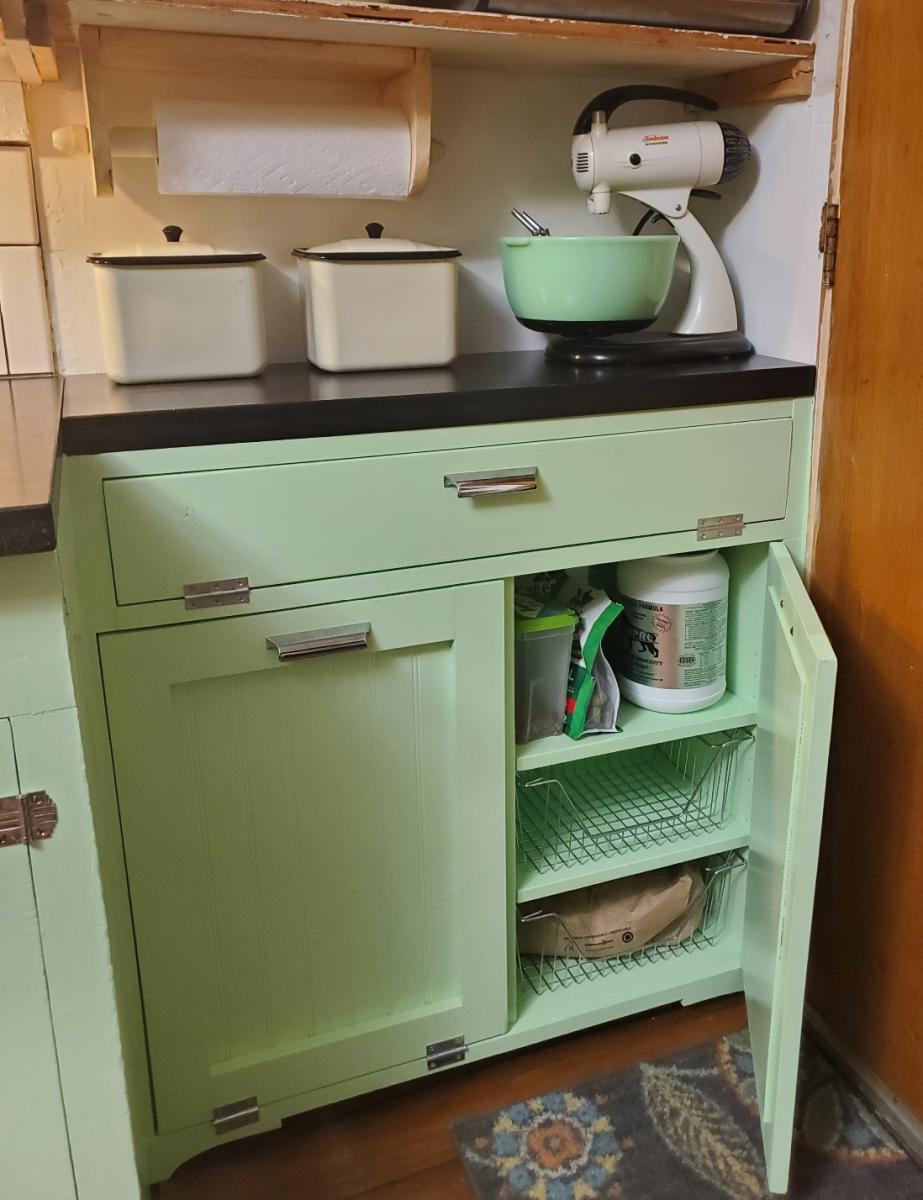
This little space by the back door has always made the kitchen look messy. We put the garbage can there, and other random stuff we didn't have a place for. I got the idea to build Ana's Tilt Out Trashbin cabinet, but I also wanted a place we could put things like pet treats, etc. to get them out of sight. I made the upper horizontal space to house cans of dog and cat food, and bring the cabinet up to the same height as the countertop. The right hand side has adjustable shelves with bins for things like onions and potatoes. Left side is the tilt out trashbin. Top is butcher block stained black to match my countertops.

Sun, 05/09/2021 - 08:33
Thanks for sharing, that is so functional and looks fabulous!

In reply to Wonderful solution! by Ana White Admin
Mon, 05/10/2021 - 22:53
Thank you! And thanks for wonderful plans! It was easy to follow and adjust to my needs. I'm currently working on the upper cabinet that I ordered from ShelfHelpNow. I had the carcass built in an afternoon! So great!
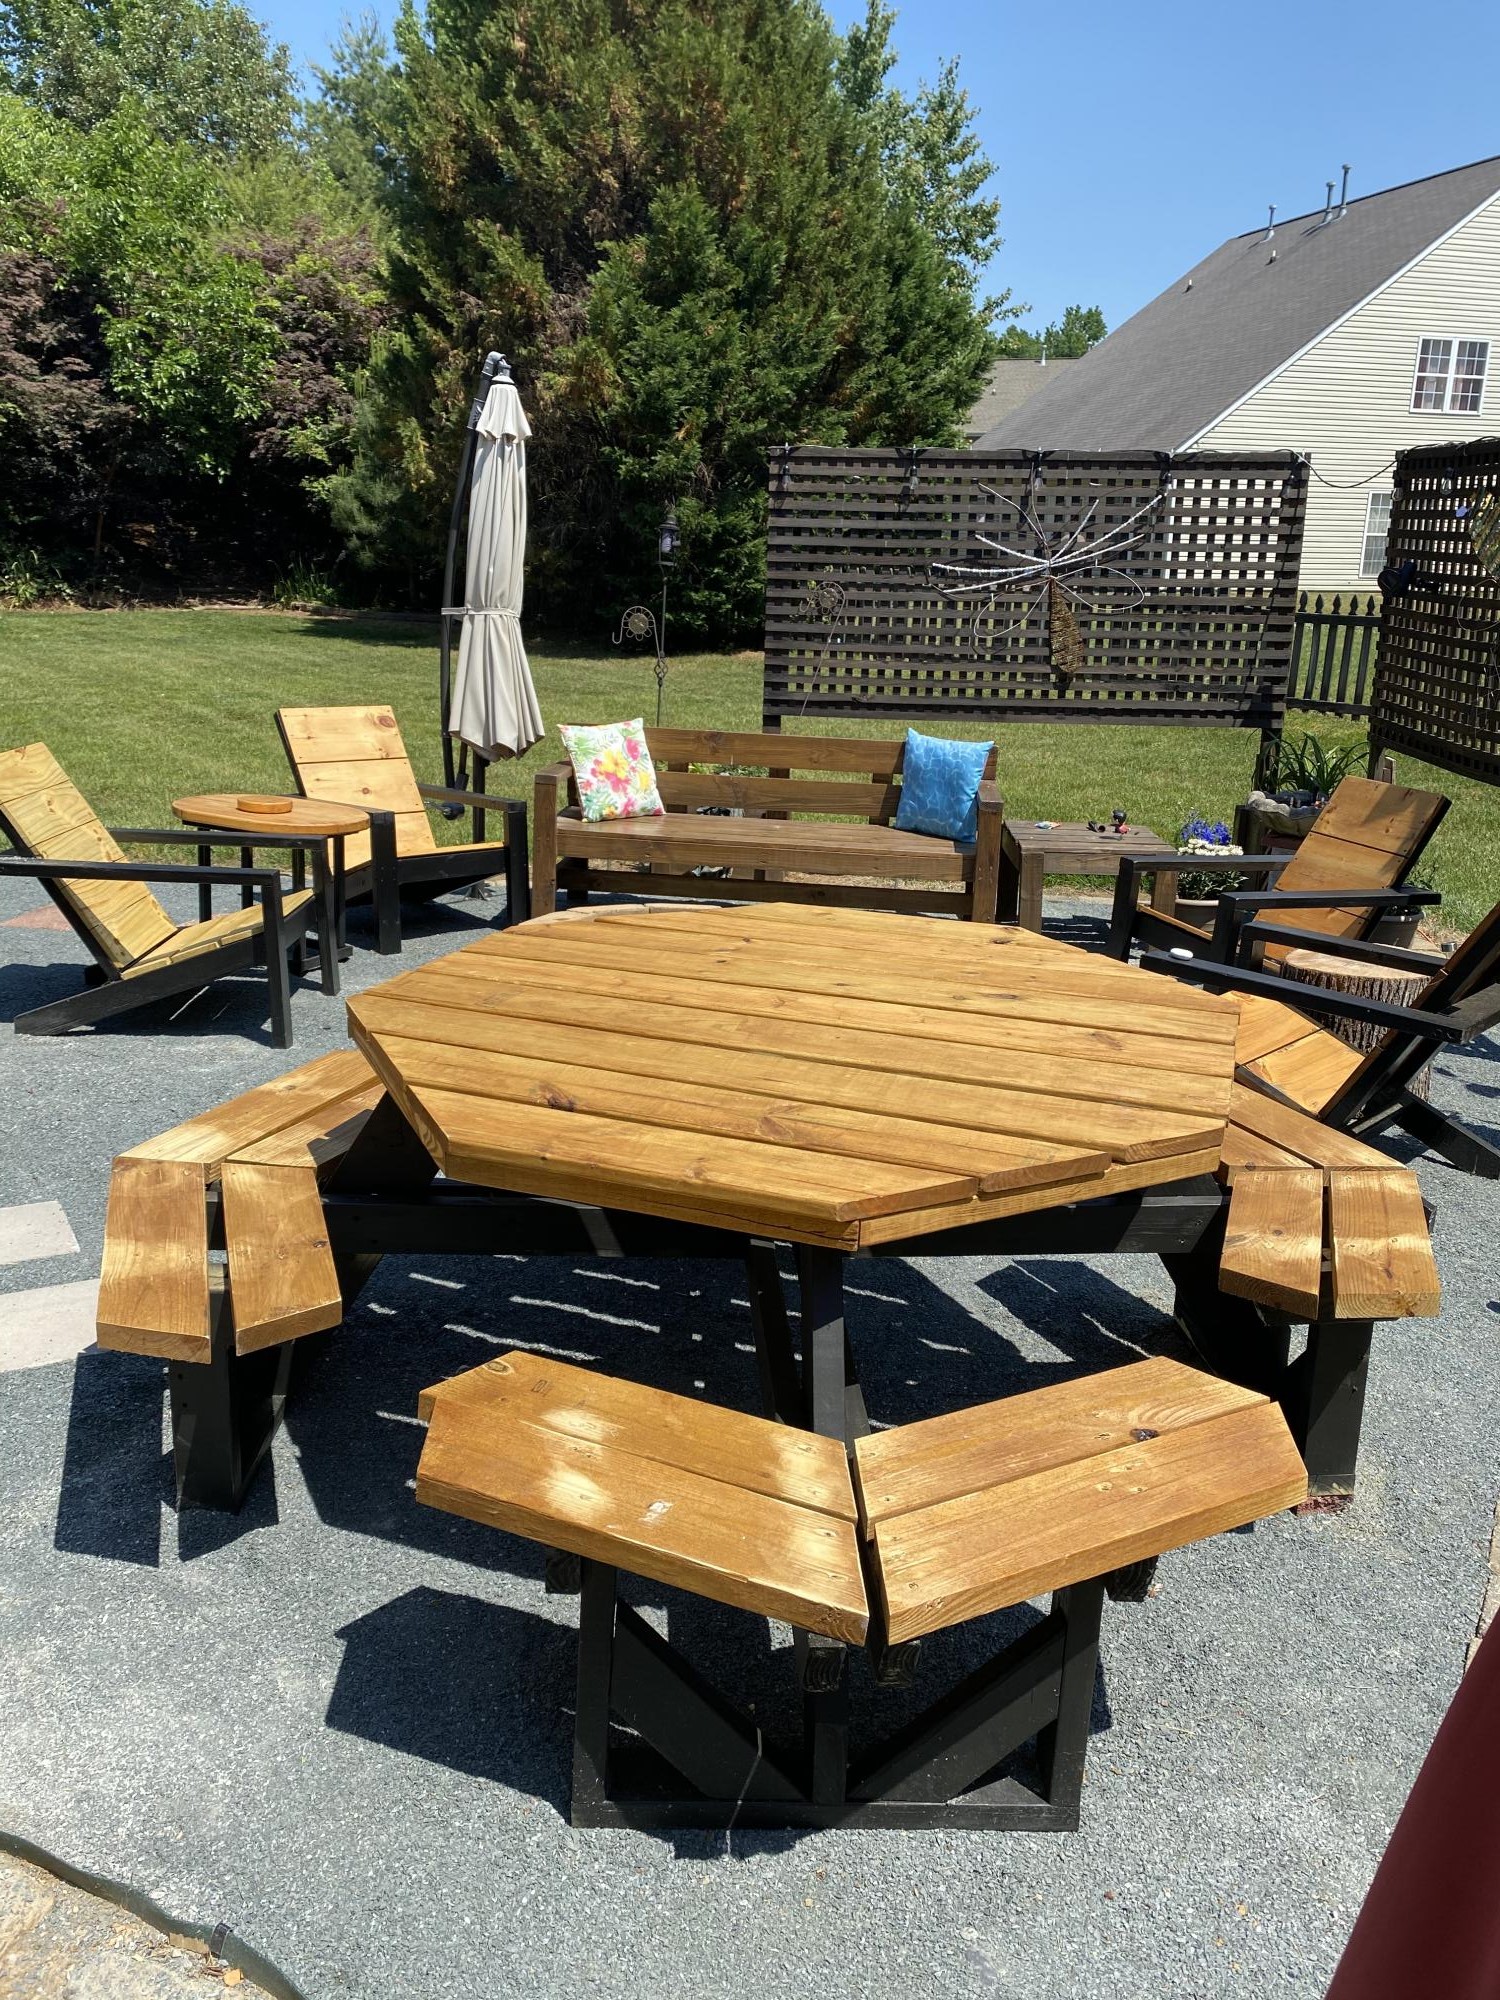
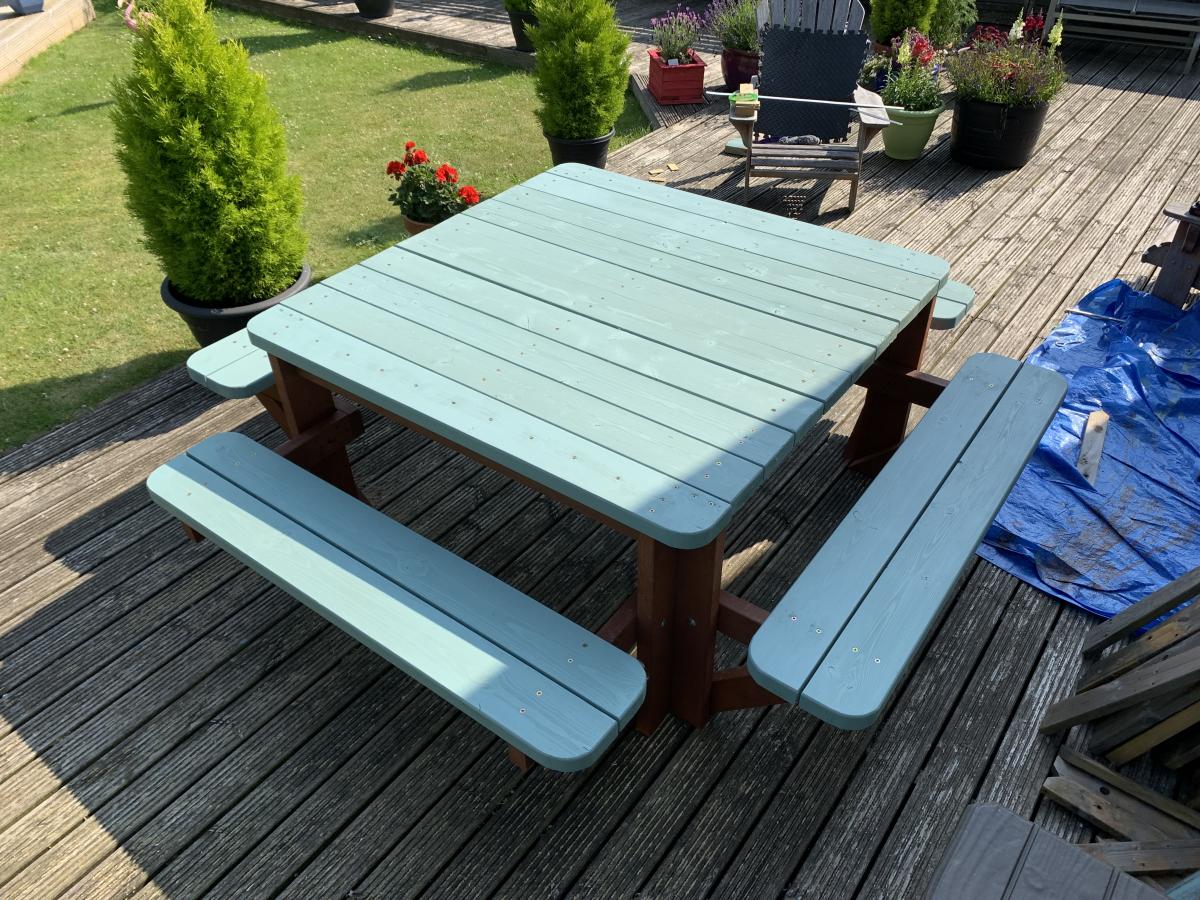
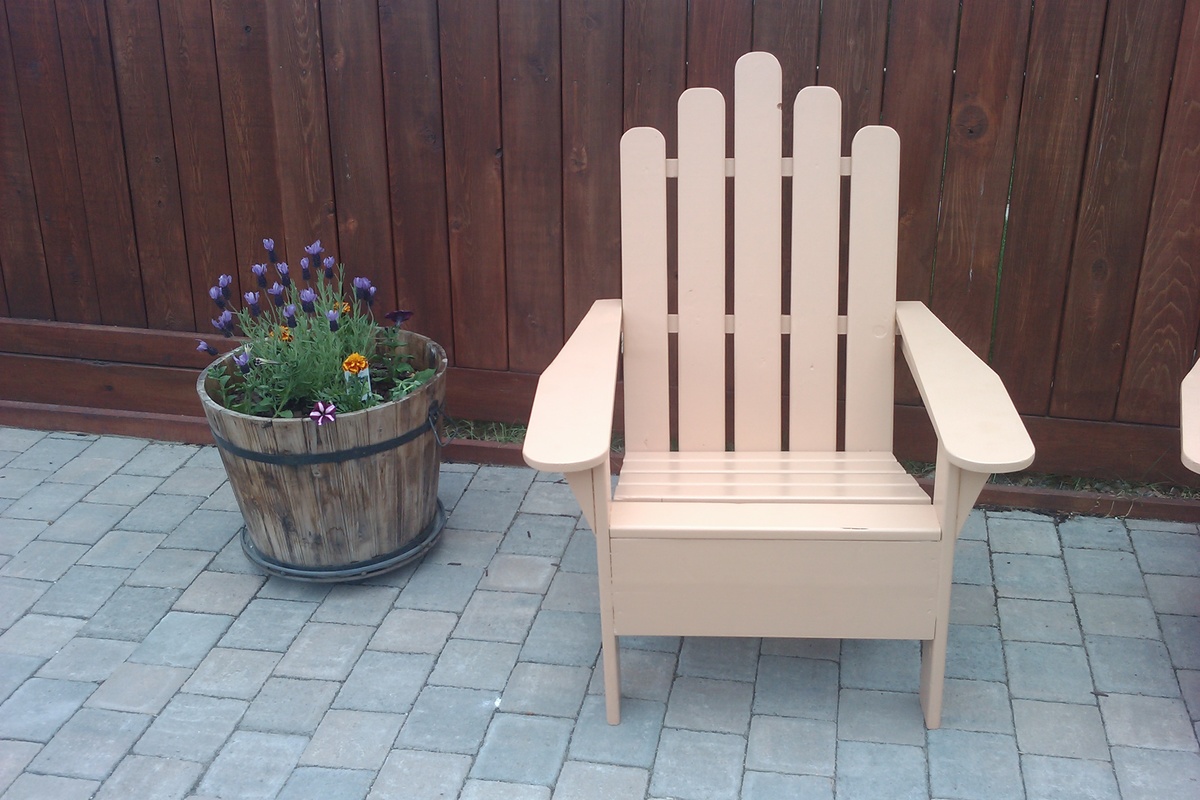
I started this backyard project at the beginning of the Pandemic. I used Ana’s plans for the Adirondacks and the picnic table and the bench.
Thanks for your ideas ams inspiration!!!!
Sincerely
Spencer Friedlander
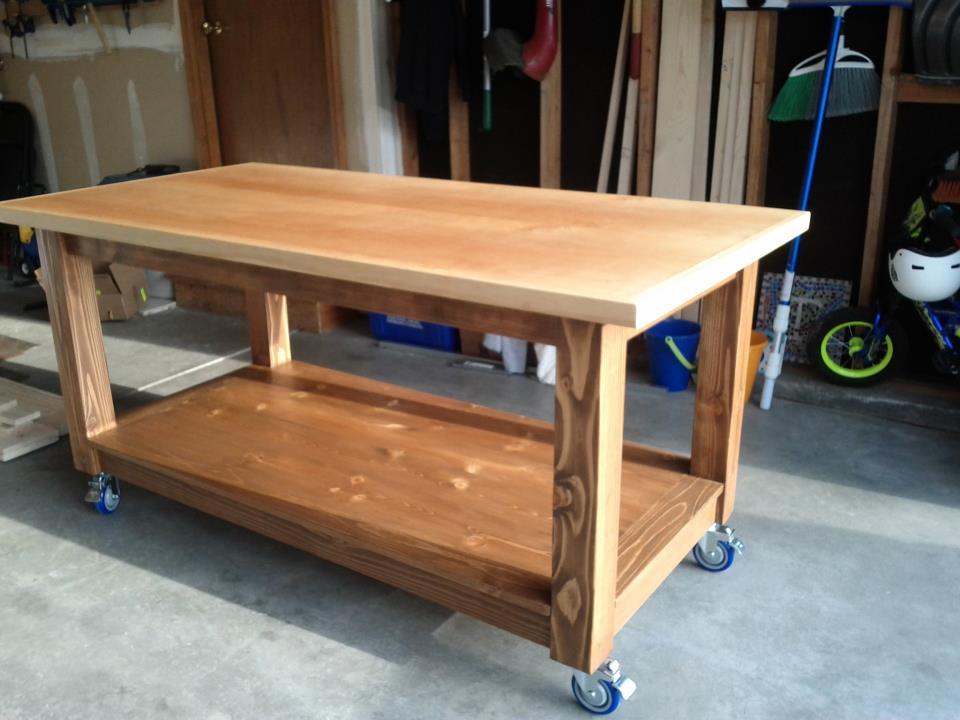
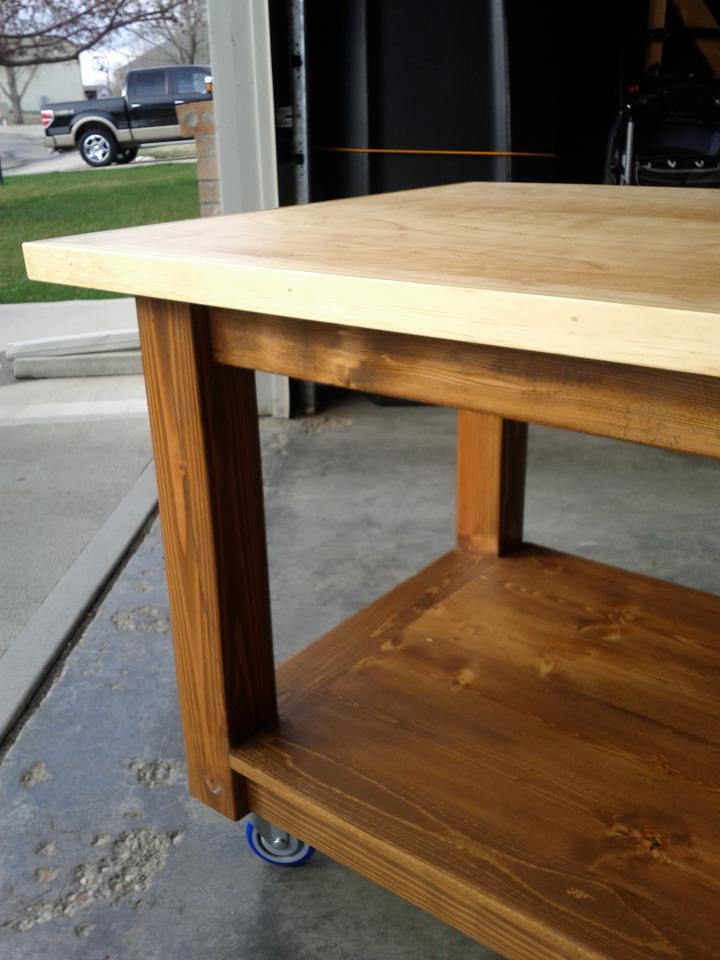
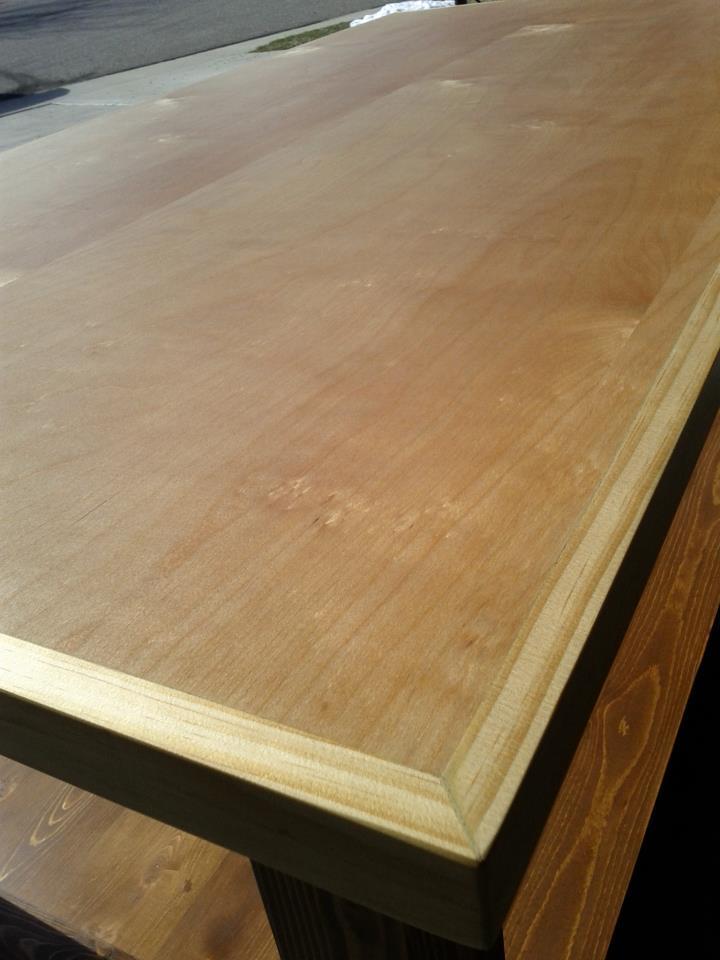
I needed a workbench to be able to create all of these wonderful plans. I used one of Ana's table plans and modified a little. I followed exactly, then I added a second top made out of birch pure bond plywood. I then put 1x2 edging to hide the edges. I used some pretty heavy duty casters with the double locking feature, I had to buy this off the internet.
This was my second build, the first being a 10 dollar ledge.
The plan is from Ana's book, the kitchen island. I can't seem to find it online.
This took me a long time due to limited time, because of work and kids. About 4-6 hours per week, for 2 1/2 months.
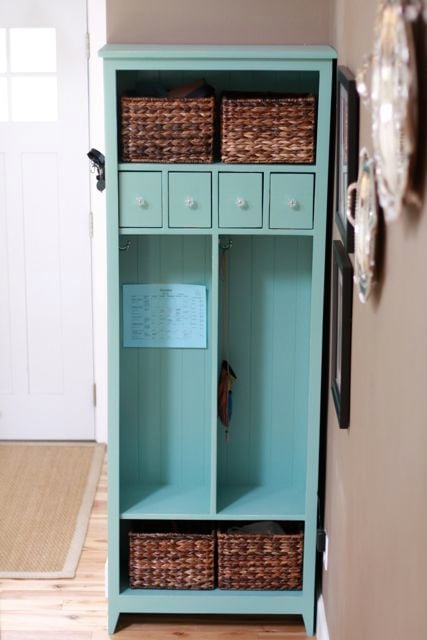
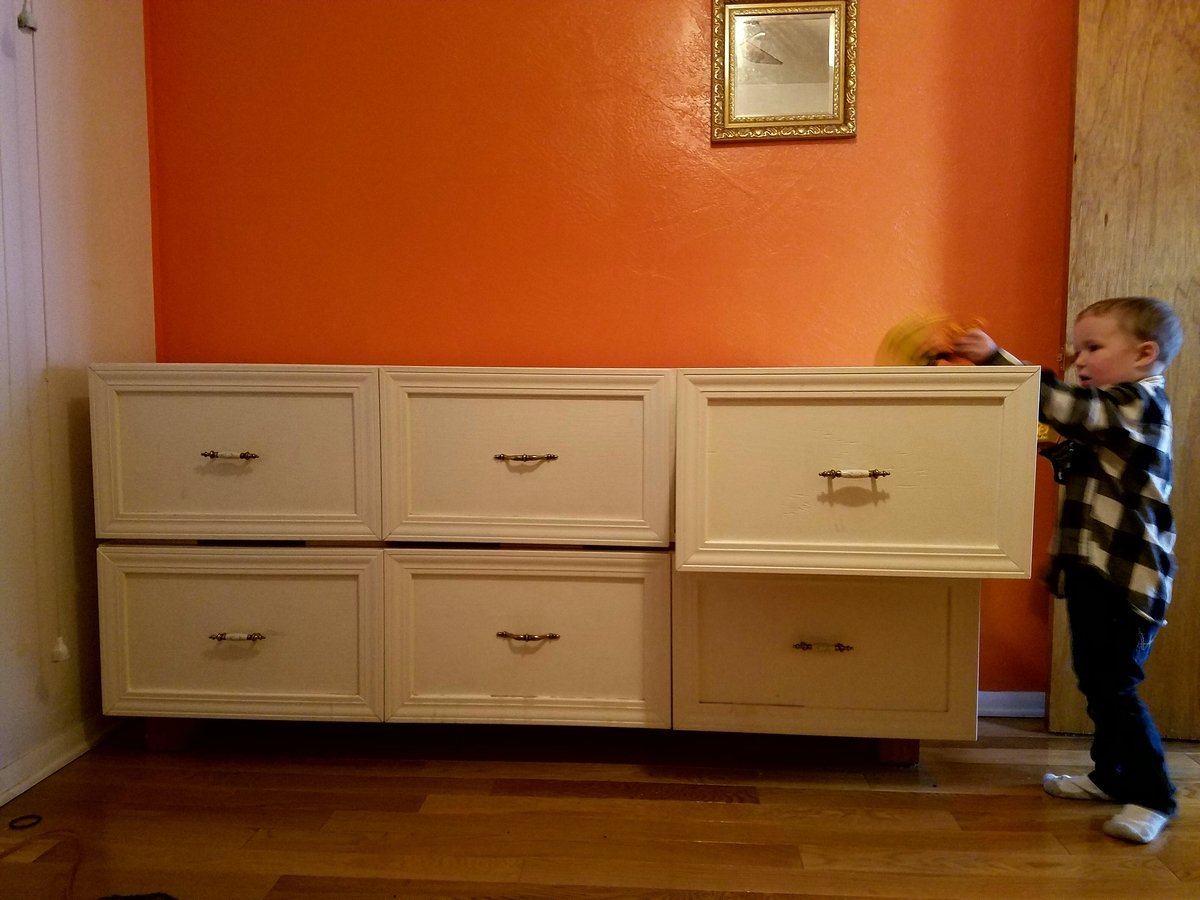
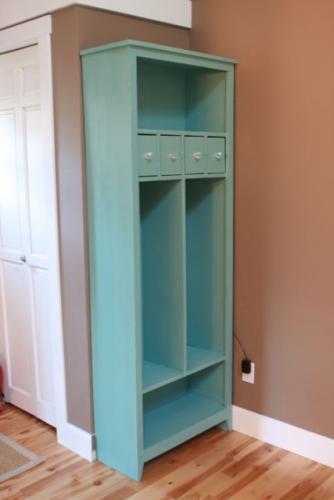
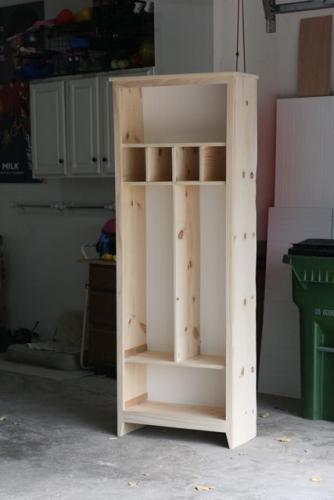
This locker cabinet was my first build and I learned a ton. For example:
1. Use the Kreg face clamps while drilling into the Kreg Jr.
2. Buy straight wood.
3. Buy wood that is not warped.
4. Do not try to buy wood with grouchy kids in tow.
Are you seeing a theme? Yep, your project will only be as square and perfect as the wood you buy.
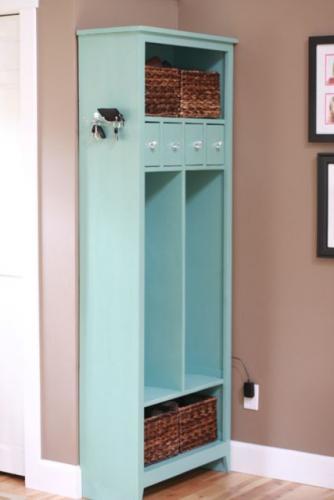
I modified the locker plan to include apothecary-style drawers for our cell phones, sunglasses and chapstick. I also drilled through the back of one of the drawers to turn it into a charging station for our cell phones.
The locker has been super useful so far and is such a great way to keep my kids' backpacks and lunchboxes organized. The baskets are designated for my purse, stuff I need to return to stores, the dog's leashes, and library books. It's so nice to have all this stuff near the front door and never wonder where any of it is!
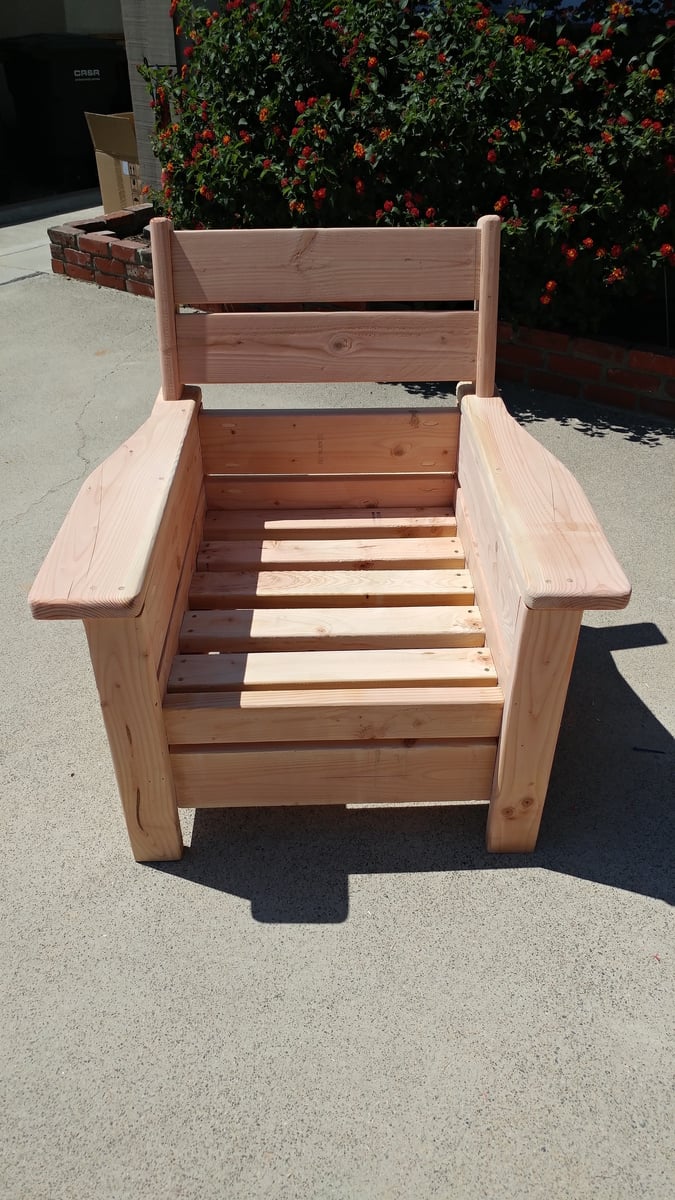
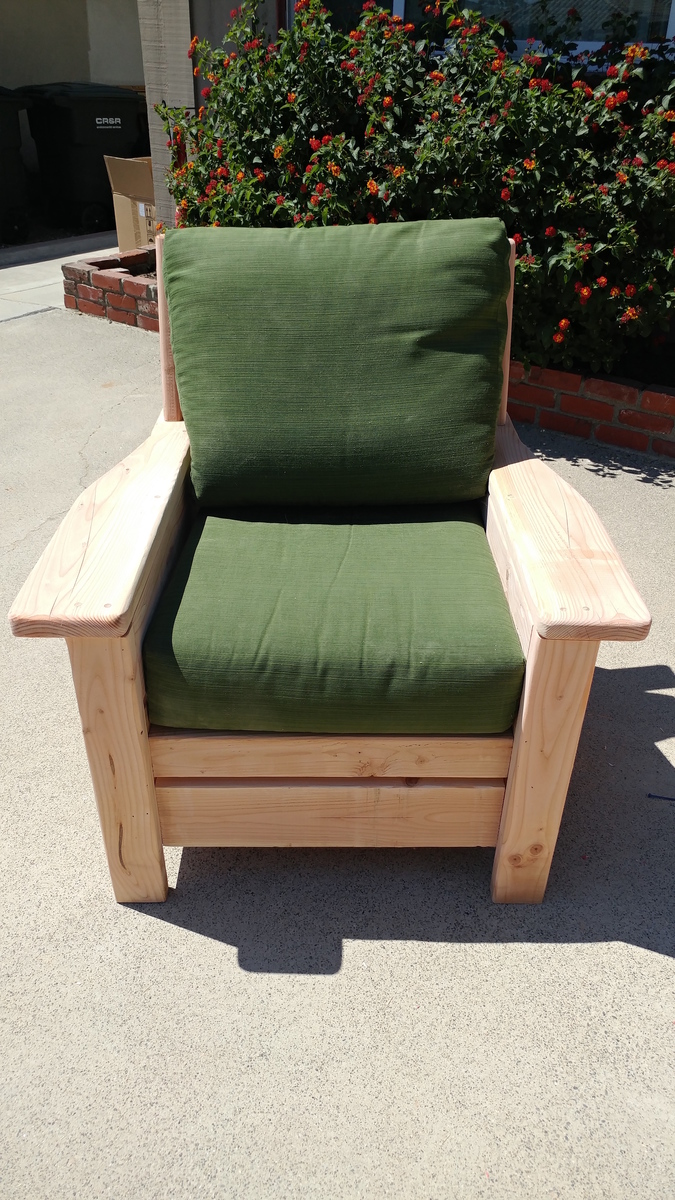
Taken from the Modern Outdoor chair project and added a back. Then decided that I love the andorak style chair arms and thus the Andrmodern chair was born..
Mon, 08/03/2020 - 09:02
I’d love to know how you made the changes, love it!

Thu, 03/18/2021 - 09:20
Could you please share how you added the back and arms to the modern chair plans.
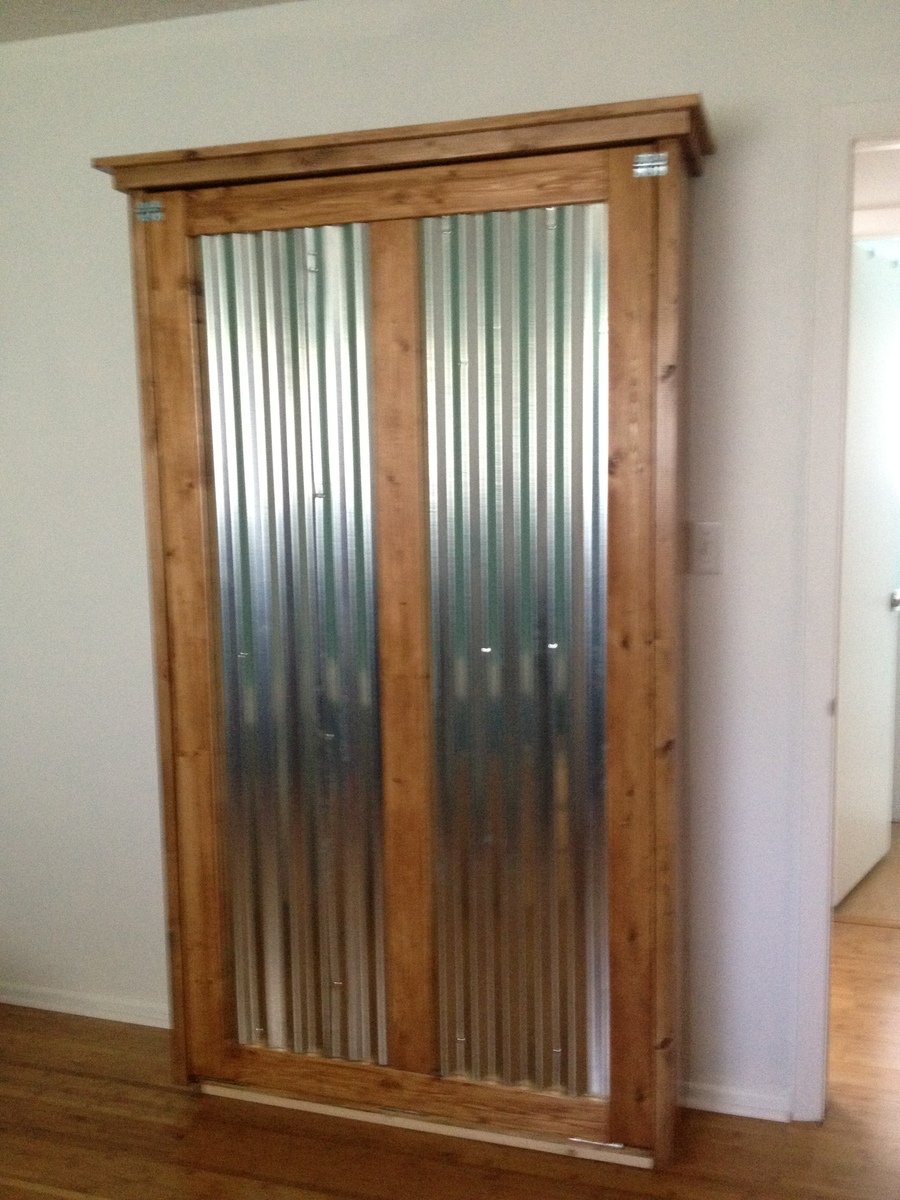
I'm turning my messy sewing room into an organized craft/guest room, so I made a murphy bed to conserve space. I used corrugated tin on the the face of the bed so that I can use it as a magnet board while not in use as a bed.
Fri, 05/17/2013 - 09:54
The estimated cost is $100, but the hardware linked from the original plan was over $300. Do you have an alternate method of mounting this?
Fri, 05/17/2013 - 11:23
I think that link was a suggestion if you want an assisted lift/lowering system, and that hardware is part of what makes regular Murphy beds so expensive. I just used door hinges--3 for $8. It's not that heavy to lift and lower the bed, in my opinion.
Fri, 05/17/2013 - 11:40
Thank you for your reply! If I make this project, I think I'll try the door hinges. It won't be frequently used (a few times a year) and I'm pretty sure we can handle the minimal weight for those few occasions.
P.S. I really like the styling with the wood and corrugated metal, it looks sharp!
Fri, 06/28/2013 - 20:02
thanks for sharing the murphy bed. have been looking for a space solution for my daughter's bedroom. the corrugated tin look sharp in this project--my daughter would like the corrugatged tin as well--except for hot pink stain on the cabinet.
anyone know where to get hot pink stain?
Sun, 09/08/2013 - 20:58
Does anyone have any suggestions on how to bring it up off the floor some?
Wed, 02/10/2016 - 04:24
Paint tin with dry erase or chalkboard on one side for daily notes?
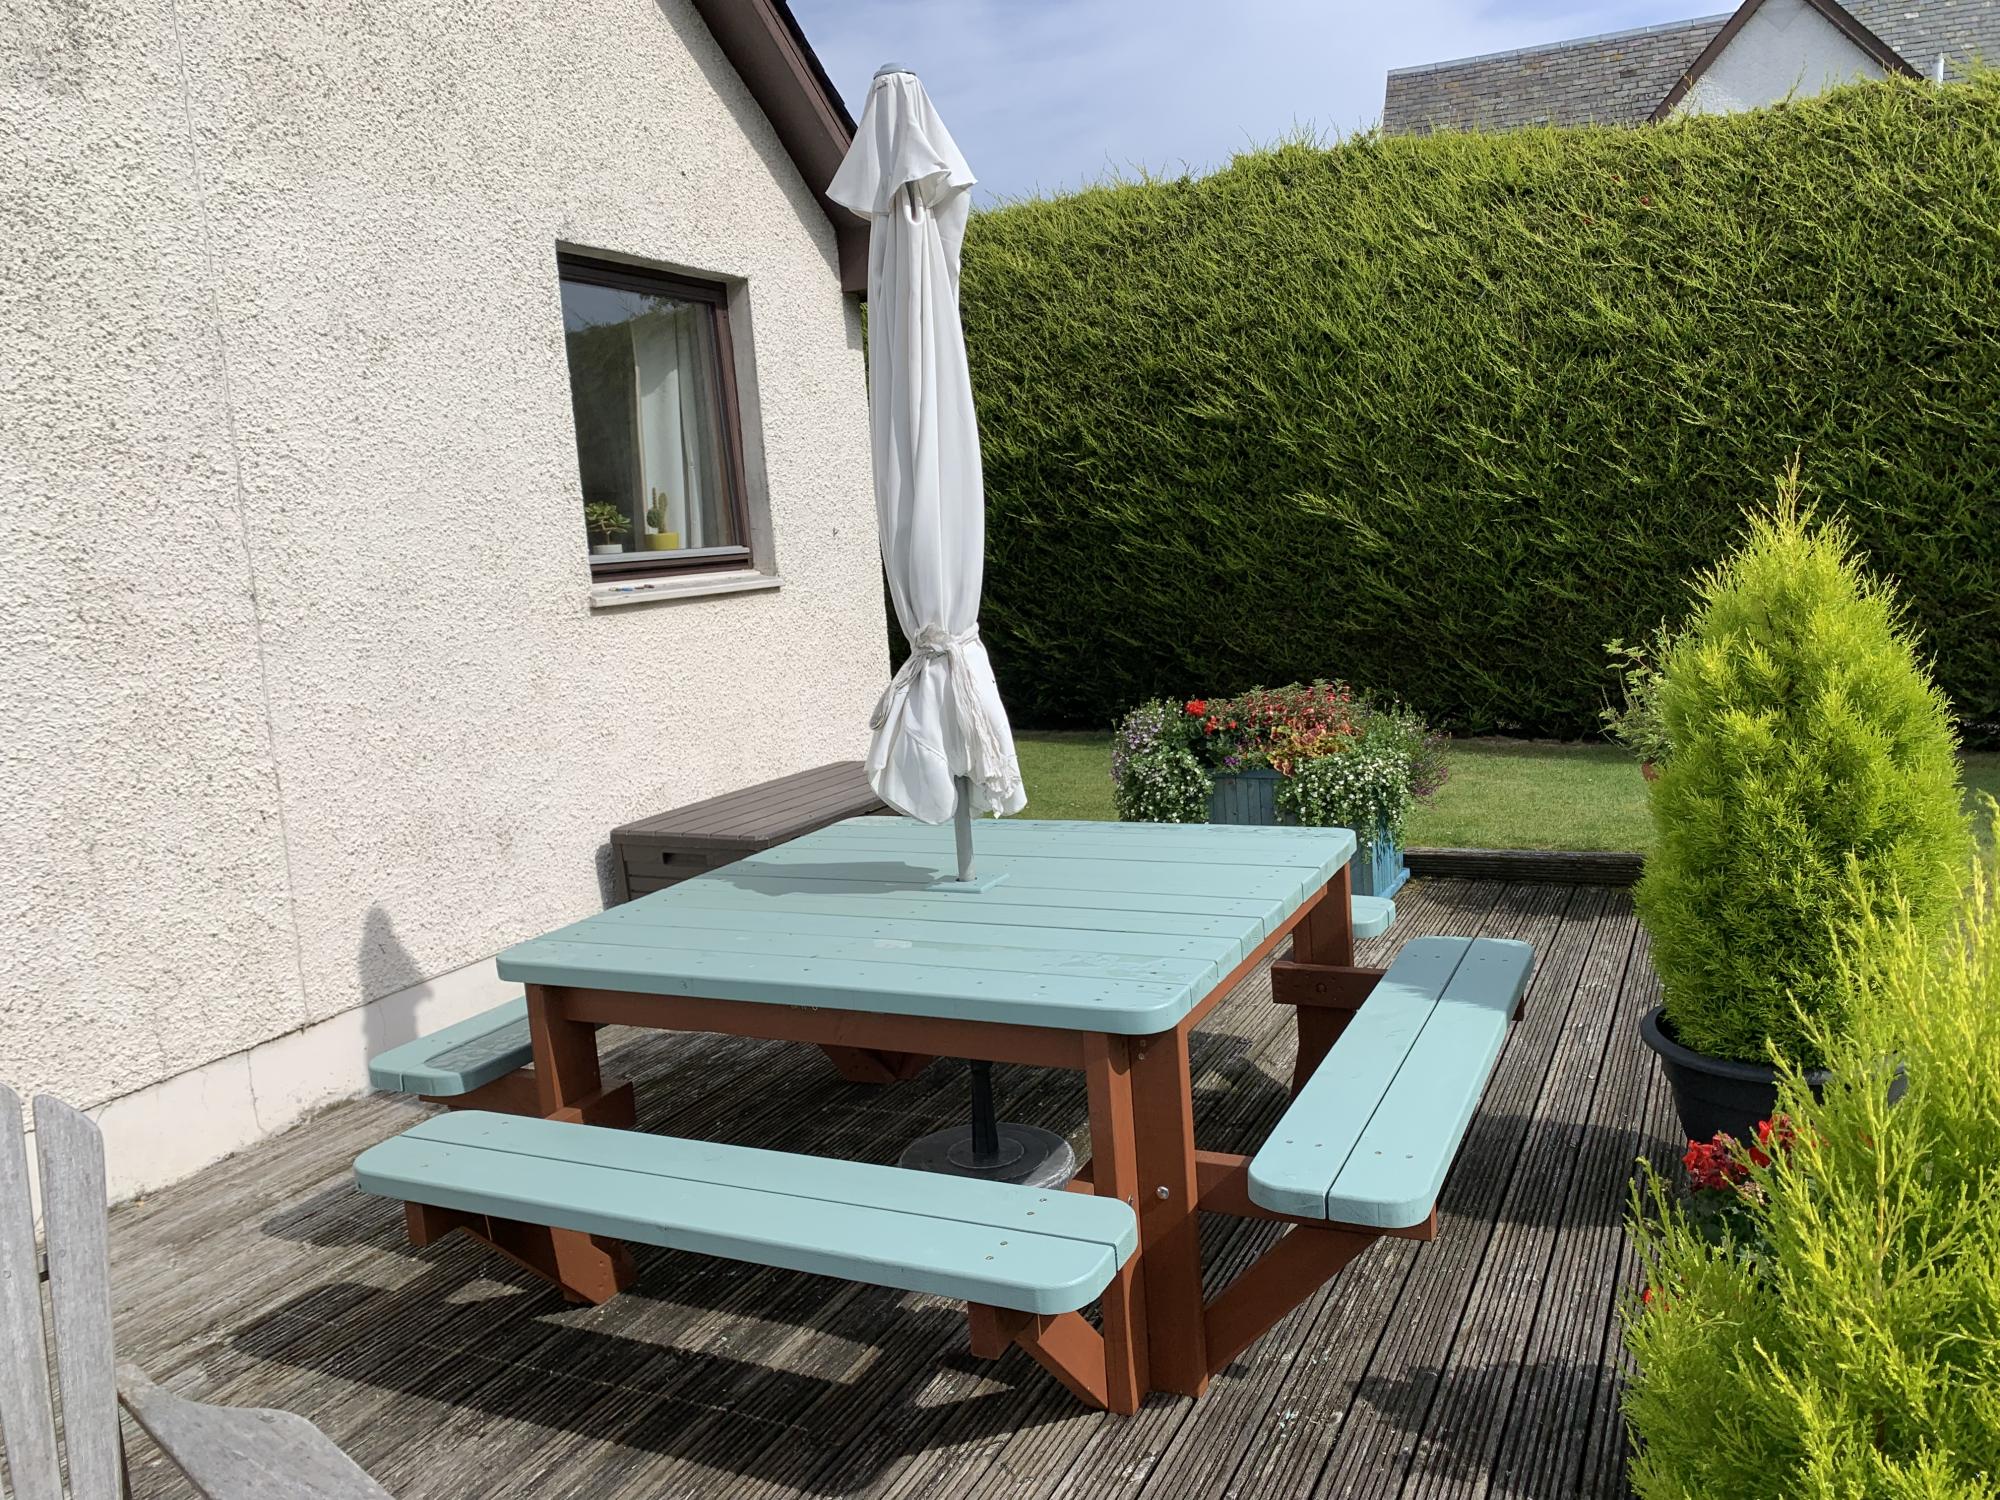
This is a bit larger than Ana’s plan. I added additional support to the table top and added a braced opening for the umbrella. I also went for a more rounded finish by rounding all the corners of the table and benches with my jigsaw and then sanding to create smooth curves.
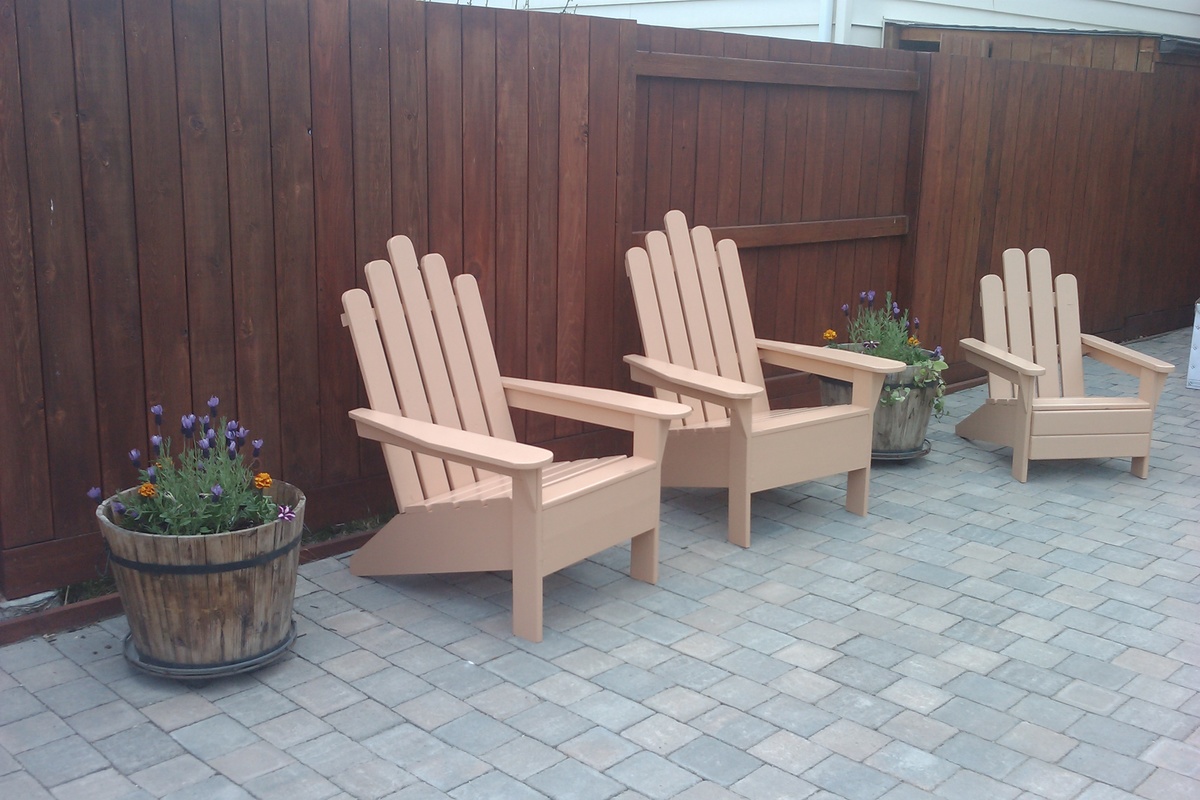
Built three Adirondack Chair, got the dimensions from Ana's Adirondack Chair and modify dimensions for the smaller chair for my daughter. Used ceder and pine. Cost about CDN 40 per chair. Specially I would like to thanks Ana giving information about simple but beautiful furniture designs.
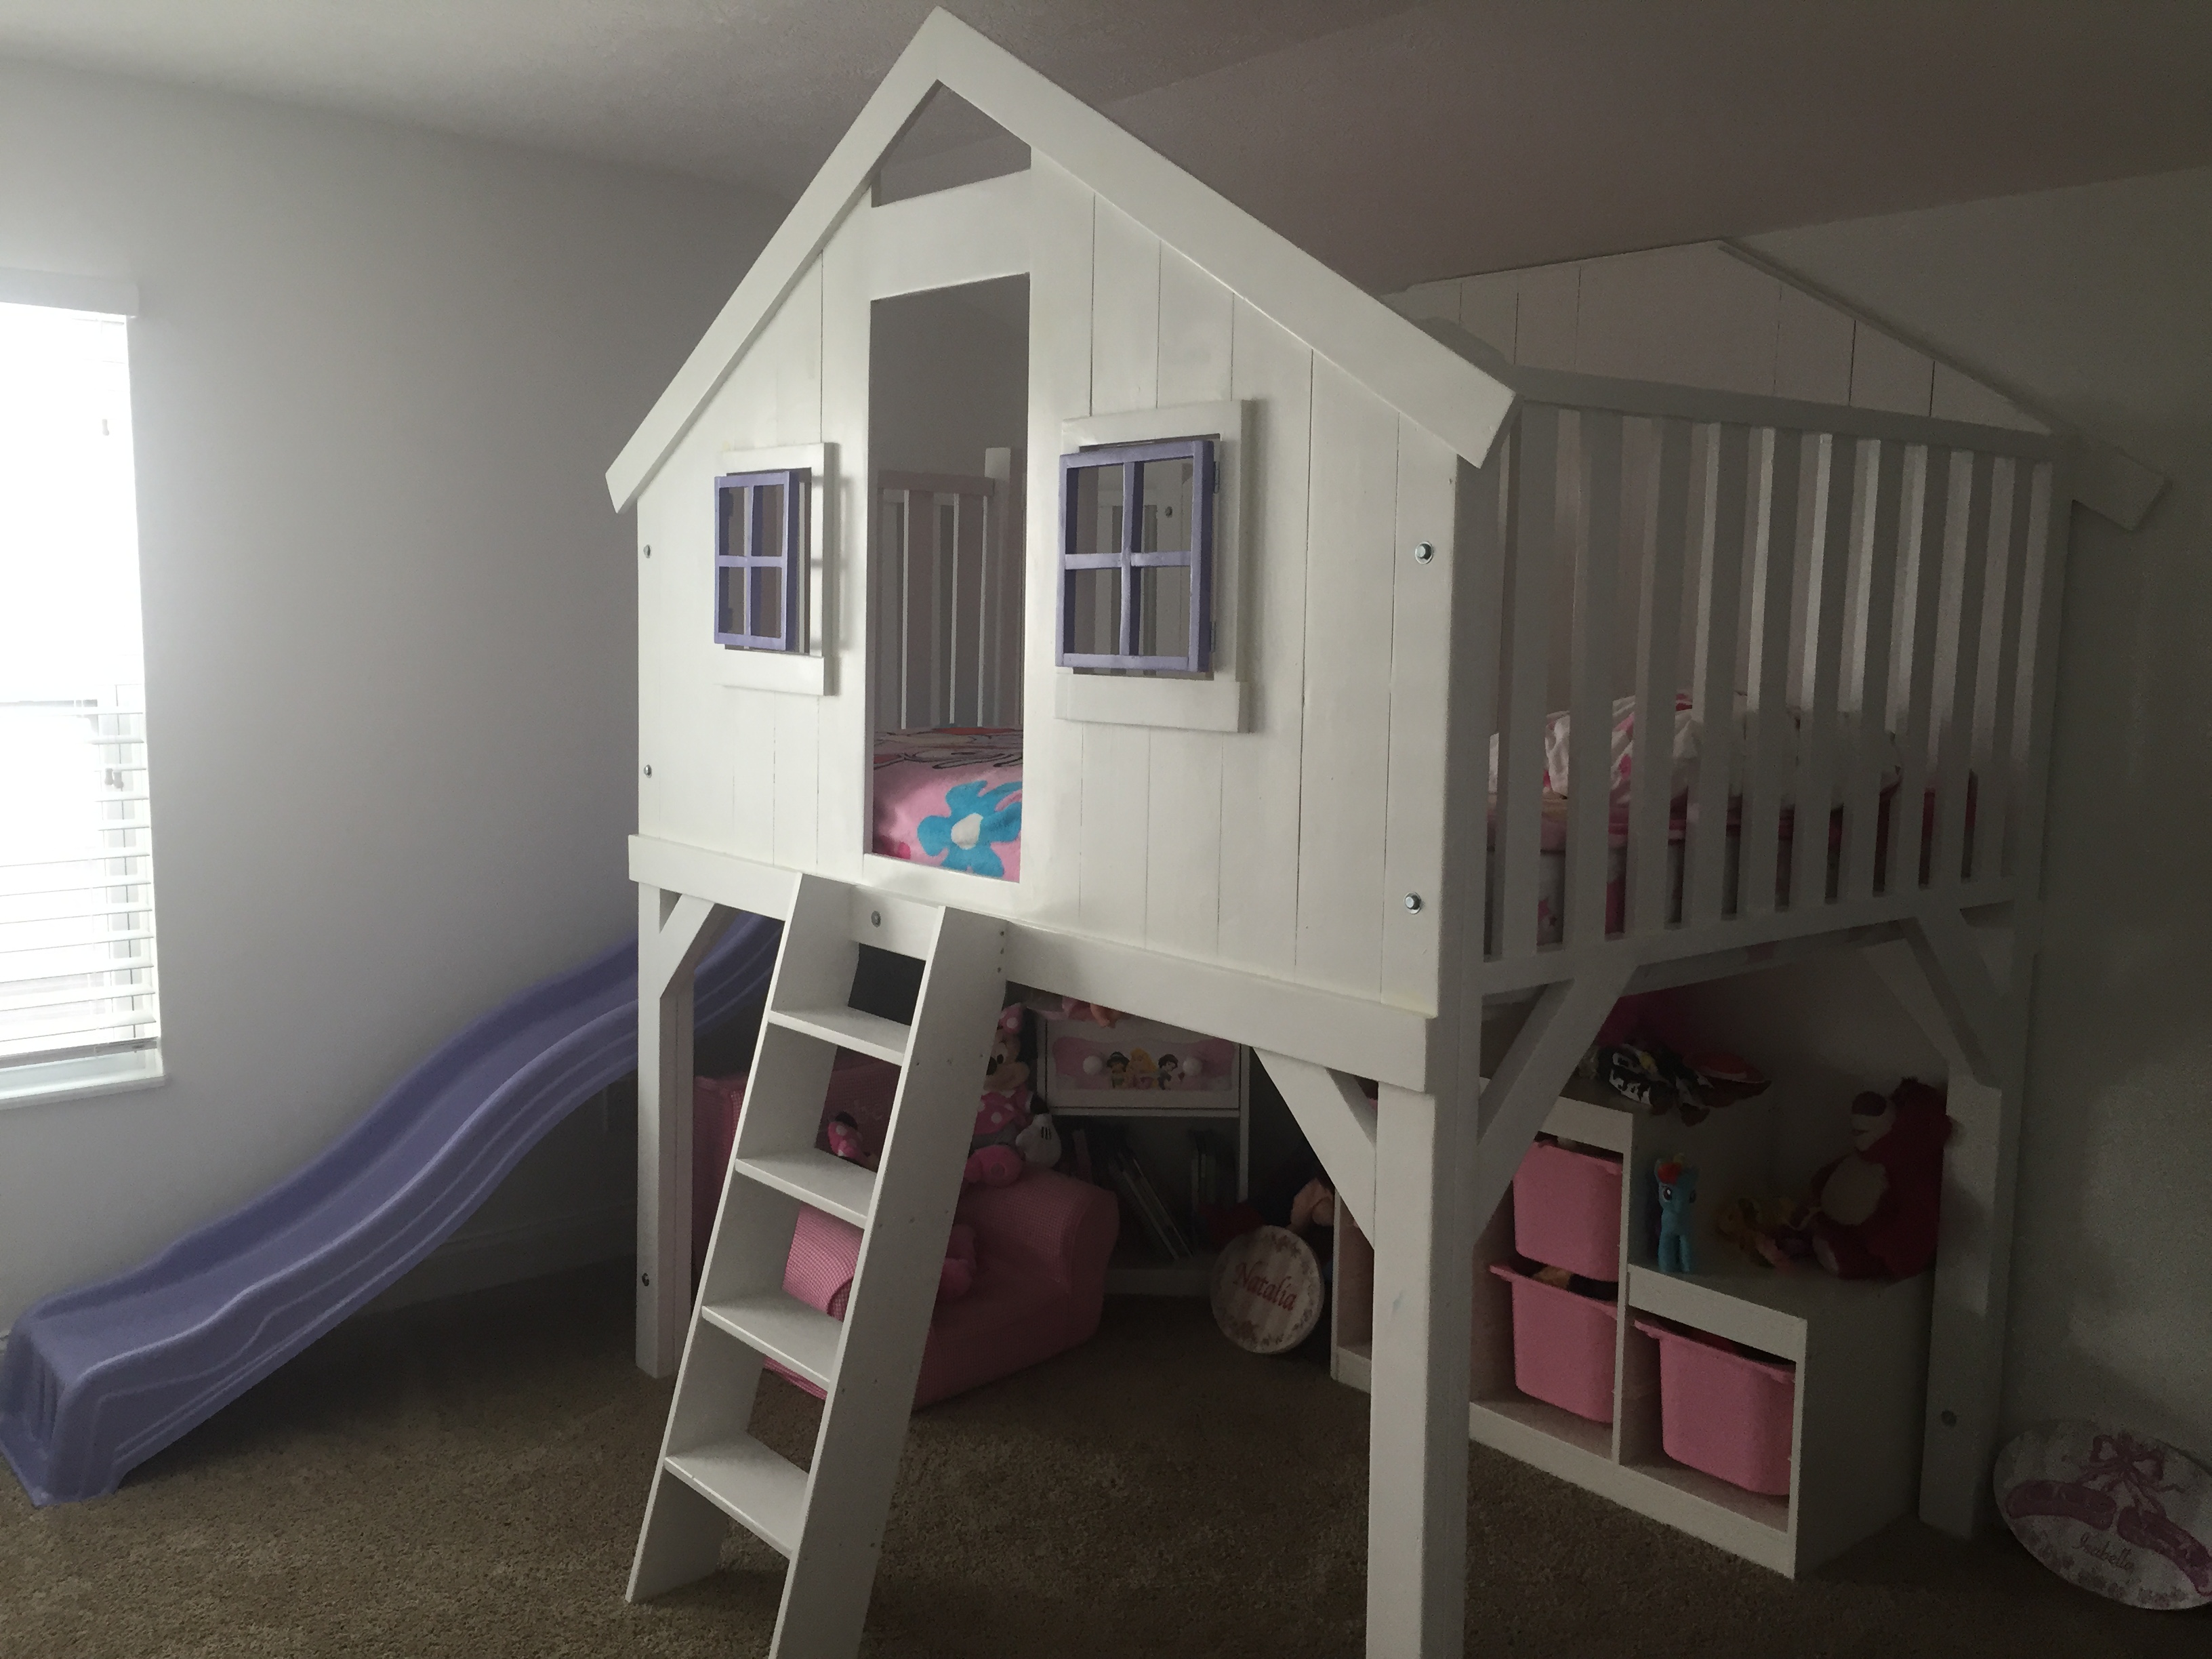
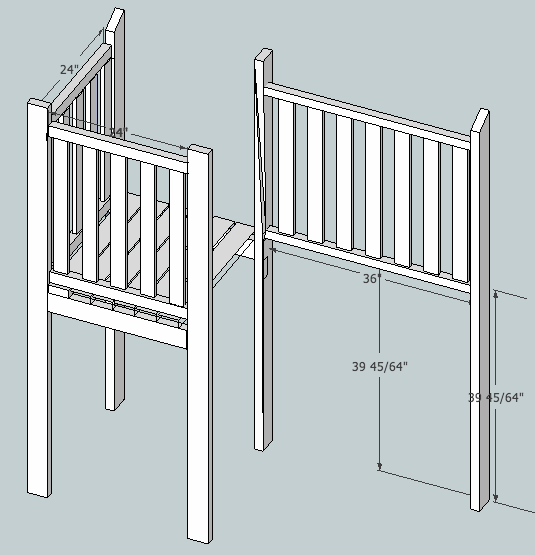
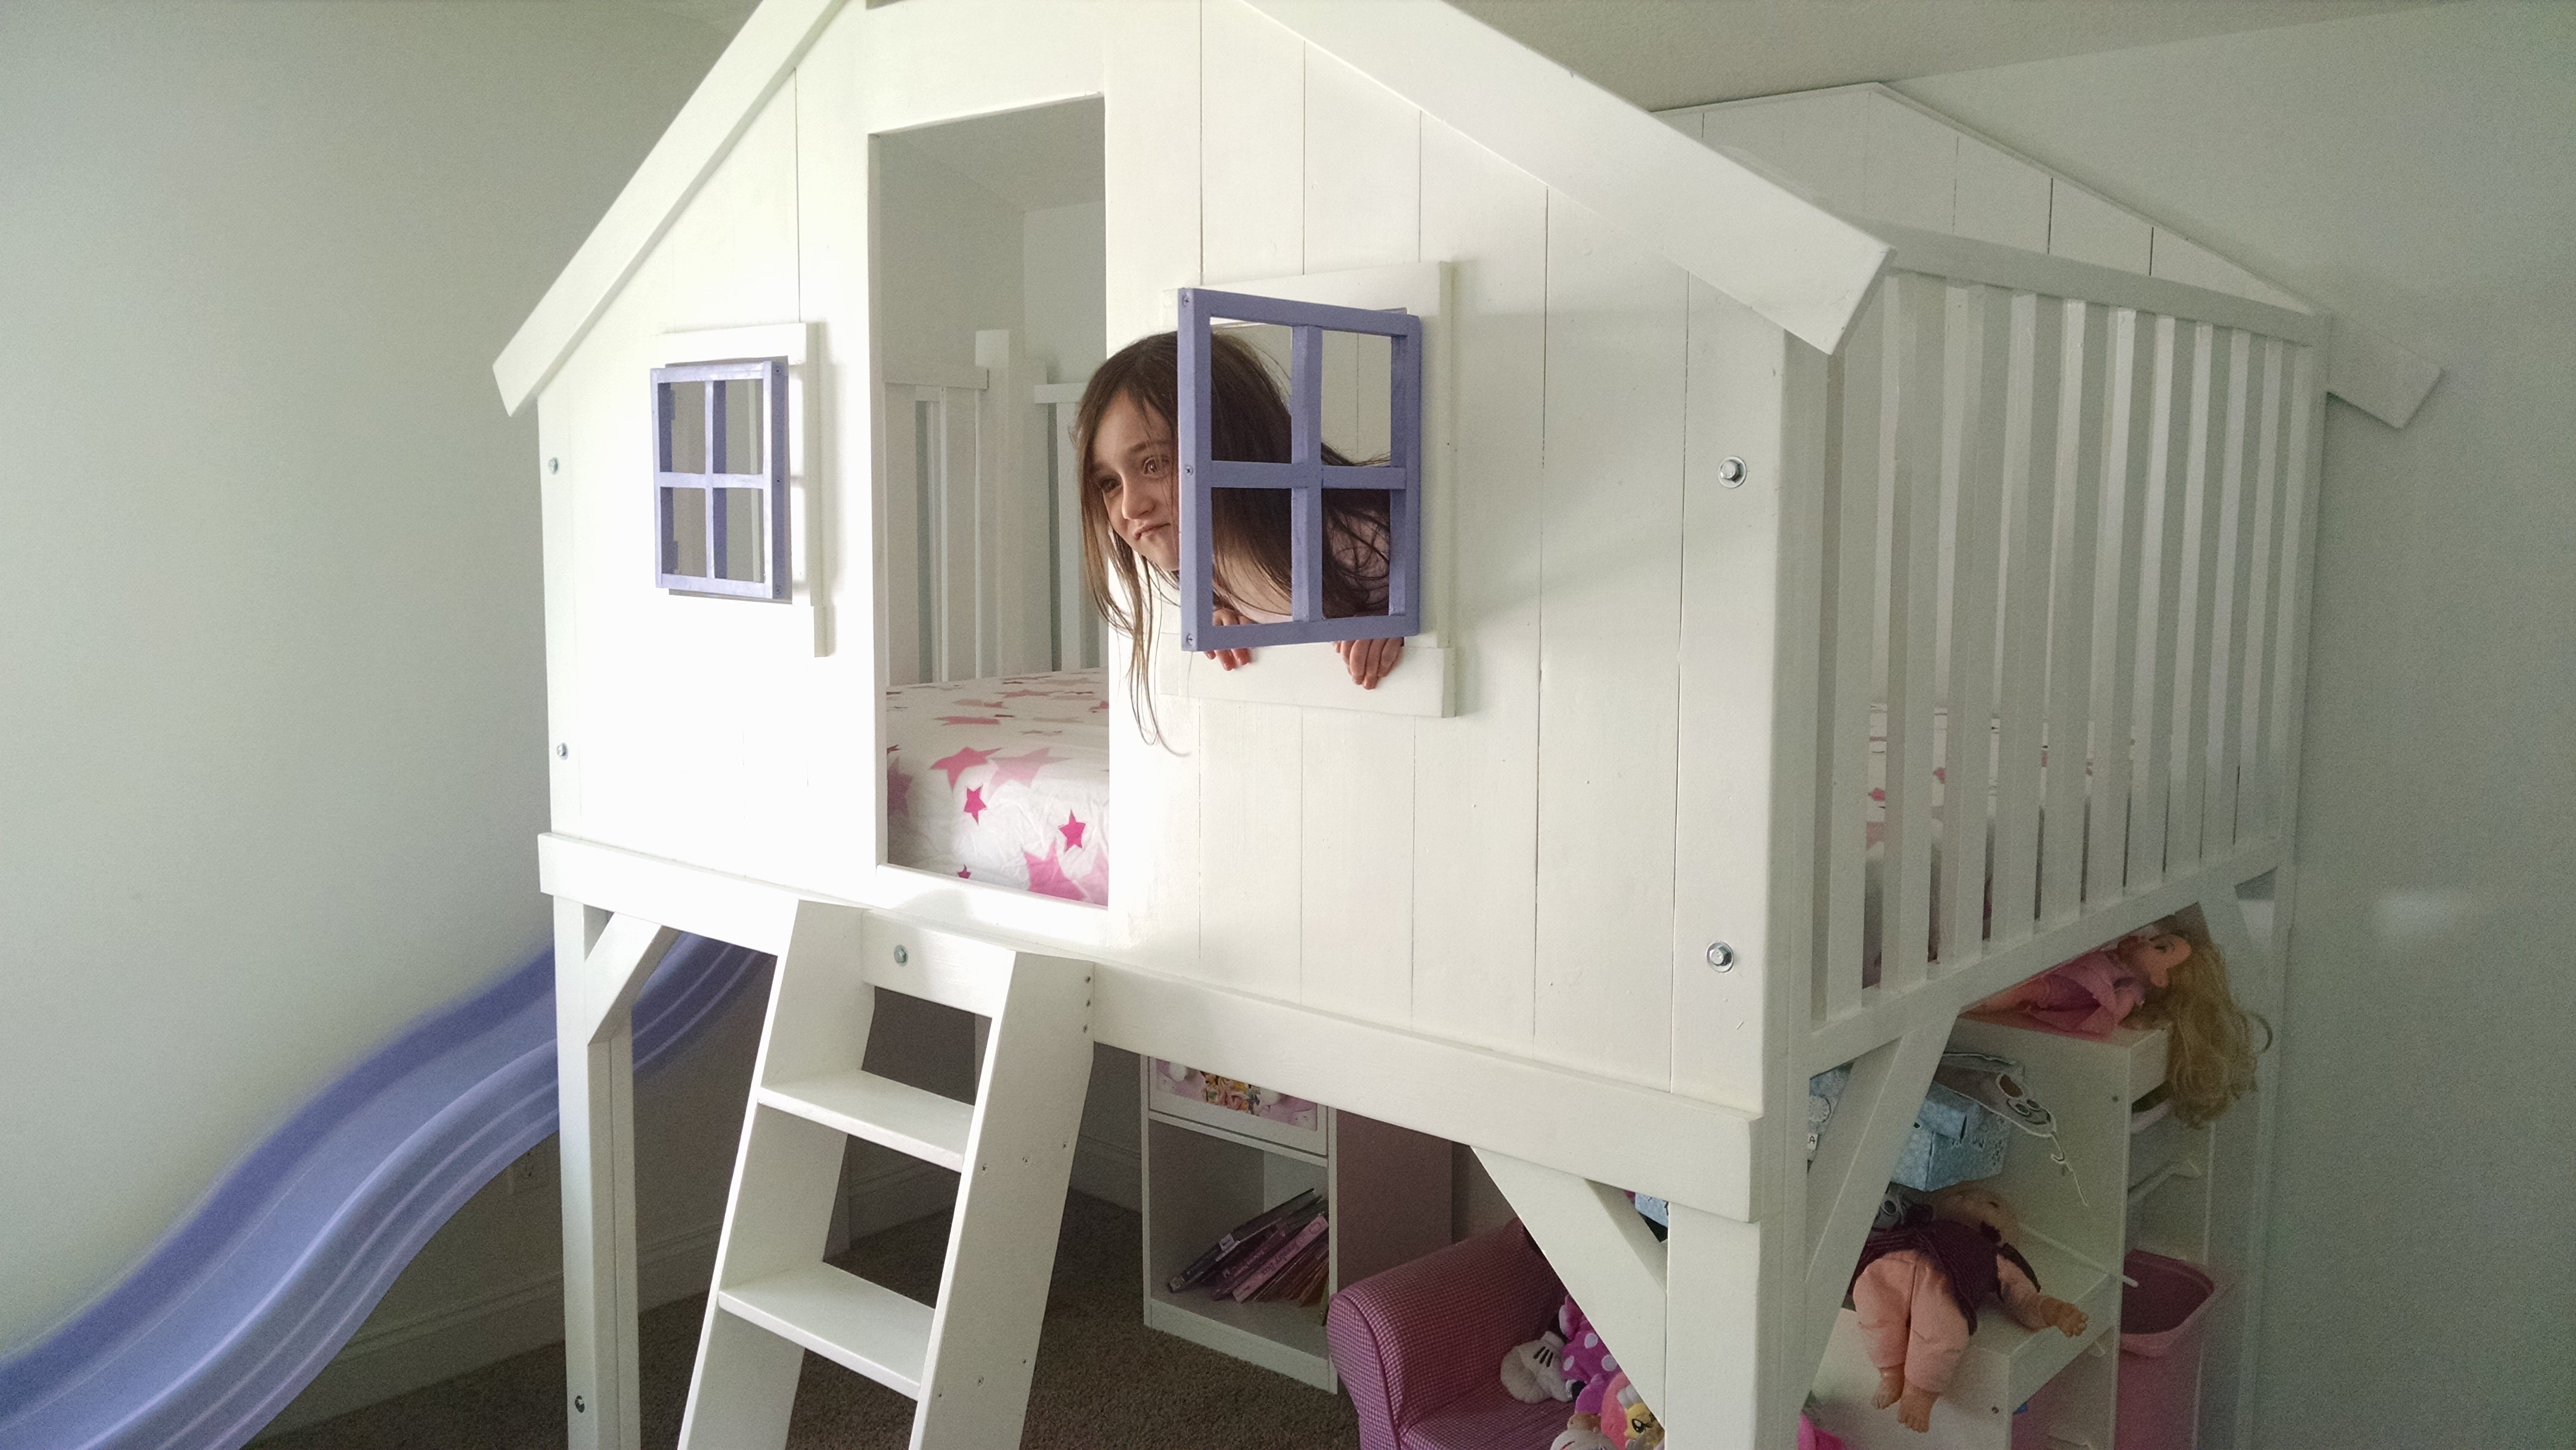
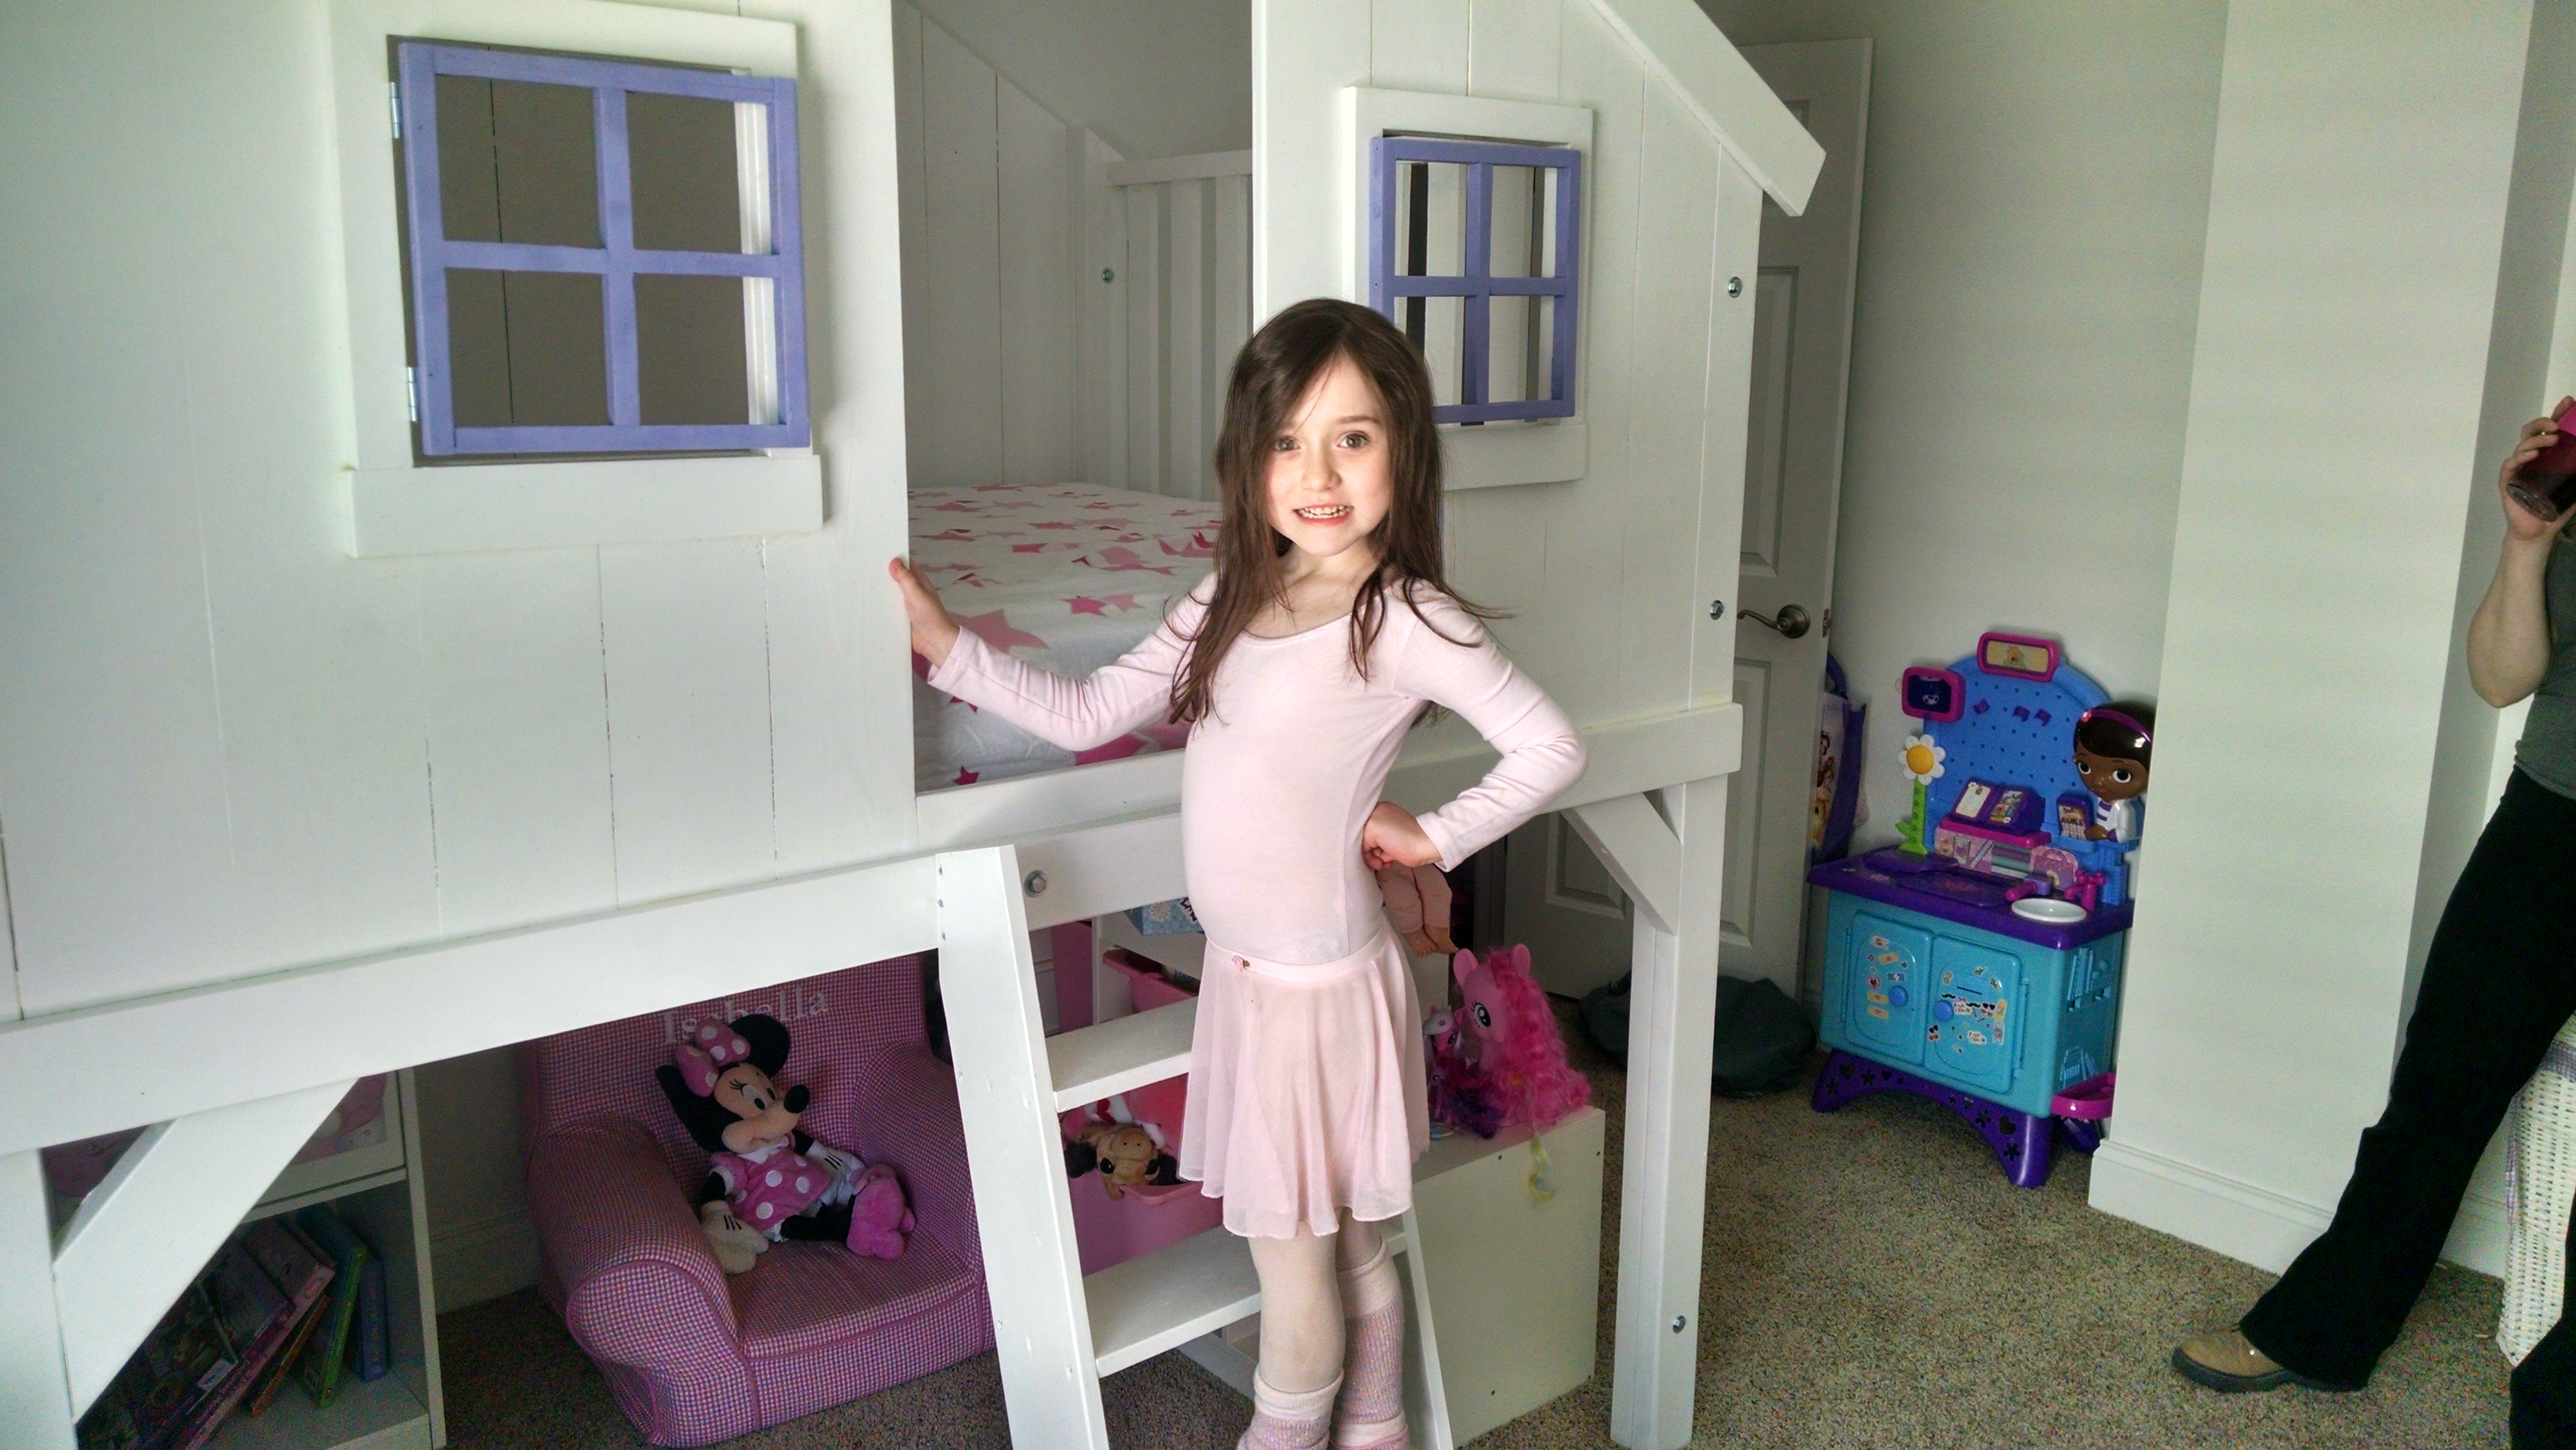
Thank you Ana for the clubhouse bed plans! I added 15" to the width of the rails to accommodate a full size mattress. On the other side I made a slide platform! I chose a standard plastic slide because I couldn't find a way to make a wooden slide at home with the swoop at the bottom to keep the kids from hitting the carpet hard :). We couldn't have a green outdoor-looking slide, am I right? I used Rustoleum spray paint made for plastic in French Lilac color. After the paint I used a top a coat of Minwax 3x polyurethane. I also used the Rustoleum spray paint for the window grids.
To accommodate the slide specs I needed to raise this bed 5". I just made each leg 5" longer. Also, the ceiling in my daughter's room slopes down so I cut the point off the back of the bed. Totally not noticeable. I needed to do this even if I hadn't raised the bed :)
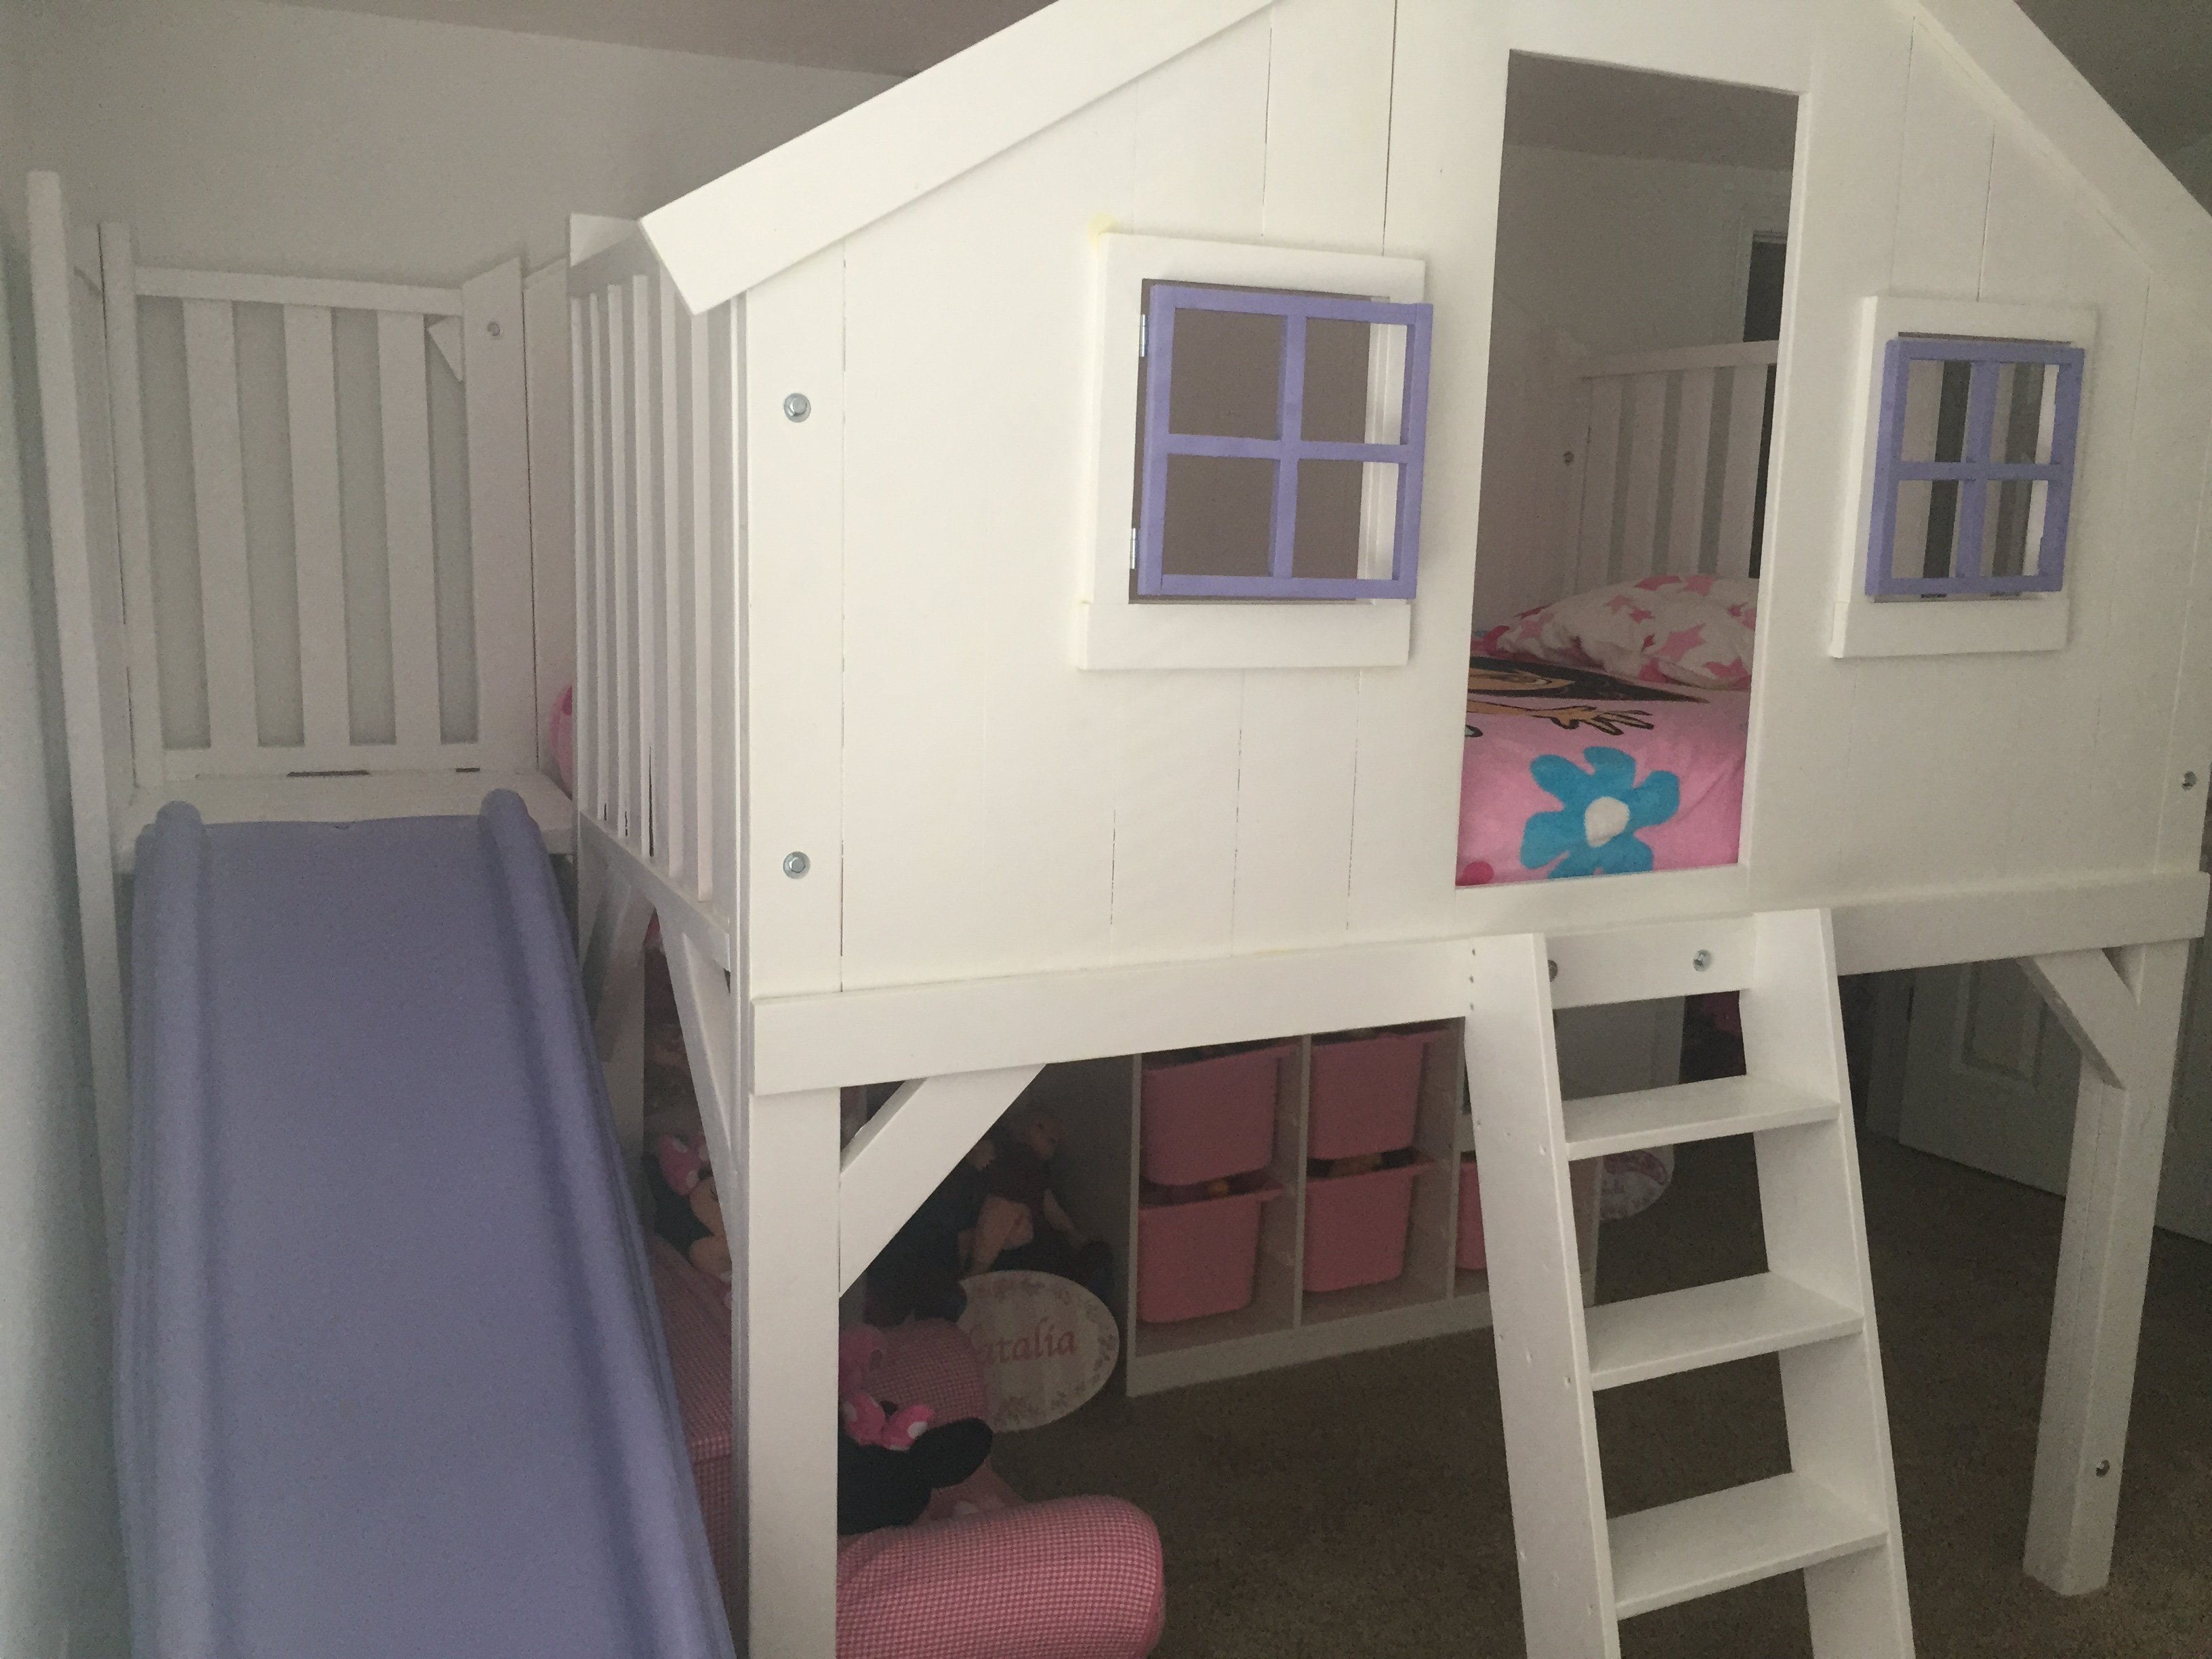
I also added full window frames around the window to make the bed a little more girly! One unexpected result is that the bedroom looks BIGGER with this bed in it. She had a twin size step 2 plastic castle bed before but now there is so much more room to play. Win! Changing the sheets isn't too bad but you need to get in the bed to do it.
I built this bed by myself. Don't be afraid, you can do this! Once the panels are assembled they get a bit heavy so you have to be sort of creative to drag them across the garage floor :)
Next up: mailbox for the bed, shelves under the slide and window boxes!


Sun, 05/03/2015 - 07:37
This looks amazing! What an awesome job! I love the slide!

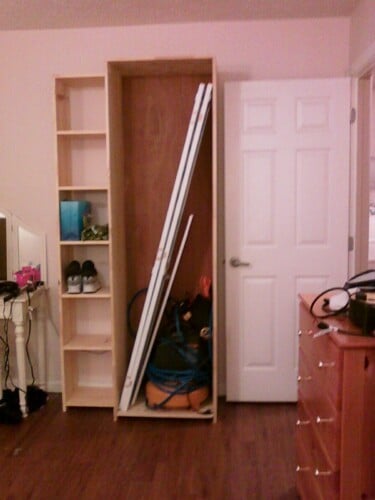
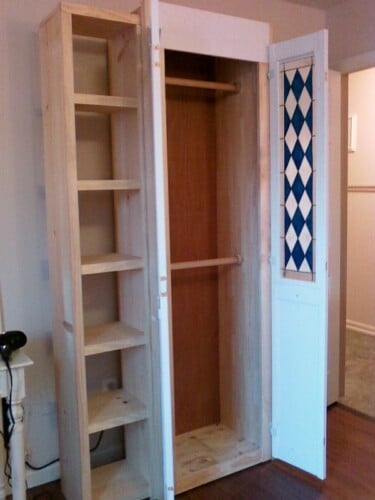
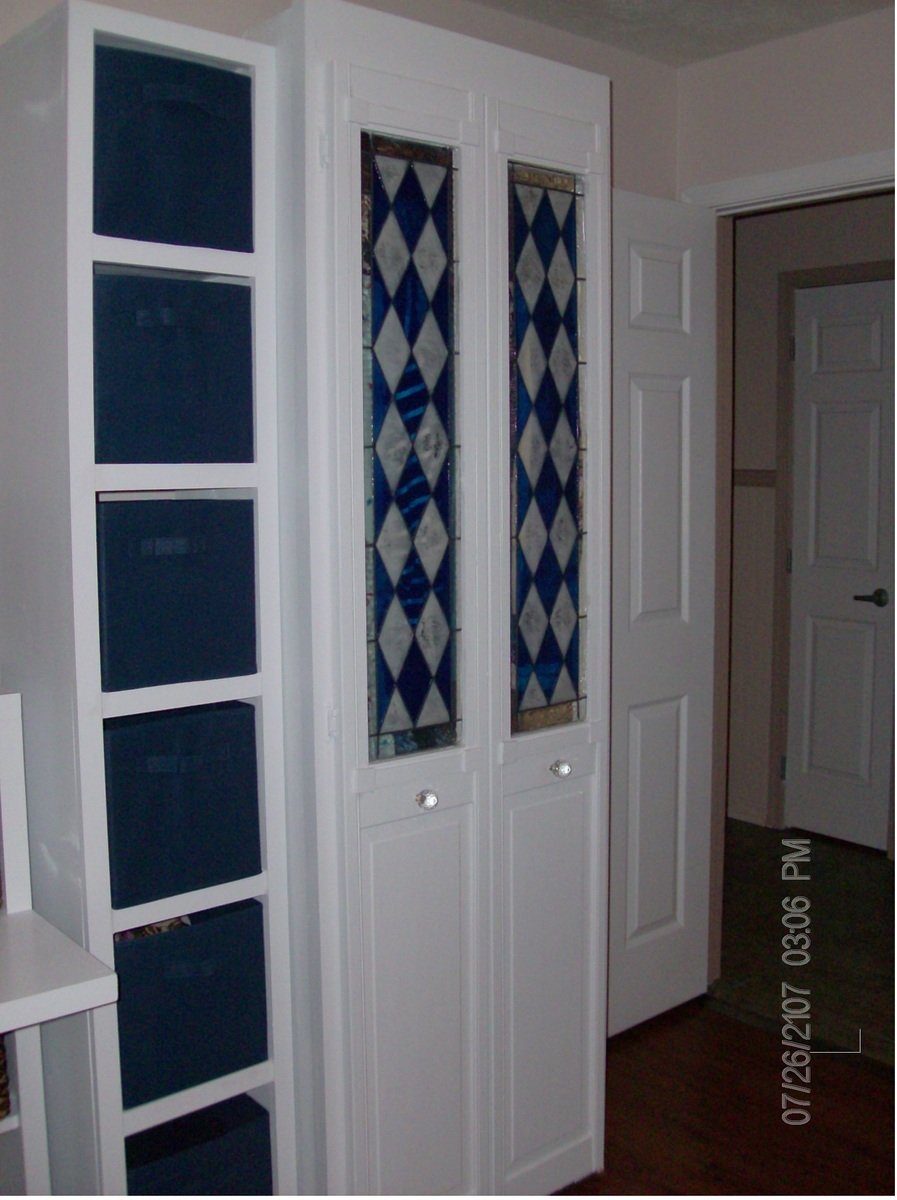
This is modified from Ana's Simplest Armoire plan, re-sized to fit the door (already had this, from another project -- I couldn't part with it when that room was remodeled- that gallery glass insert took me so long to make) and deep enough to hang clothes. Used my favorite new toy, the Kreg jig for this.
Such a fun project, now we're hooked! We've made a bedroom full of pieces to go with this one, and still making more.
Ana, thanks for the inspiration!

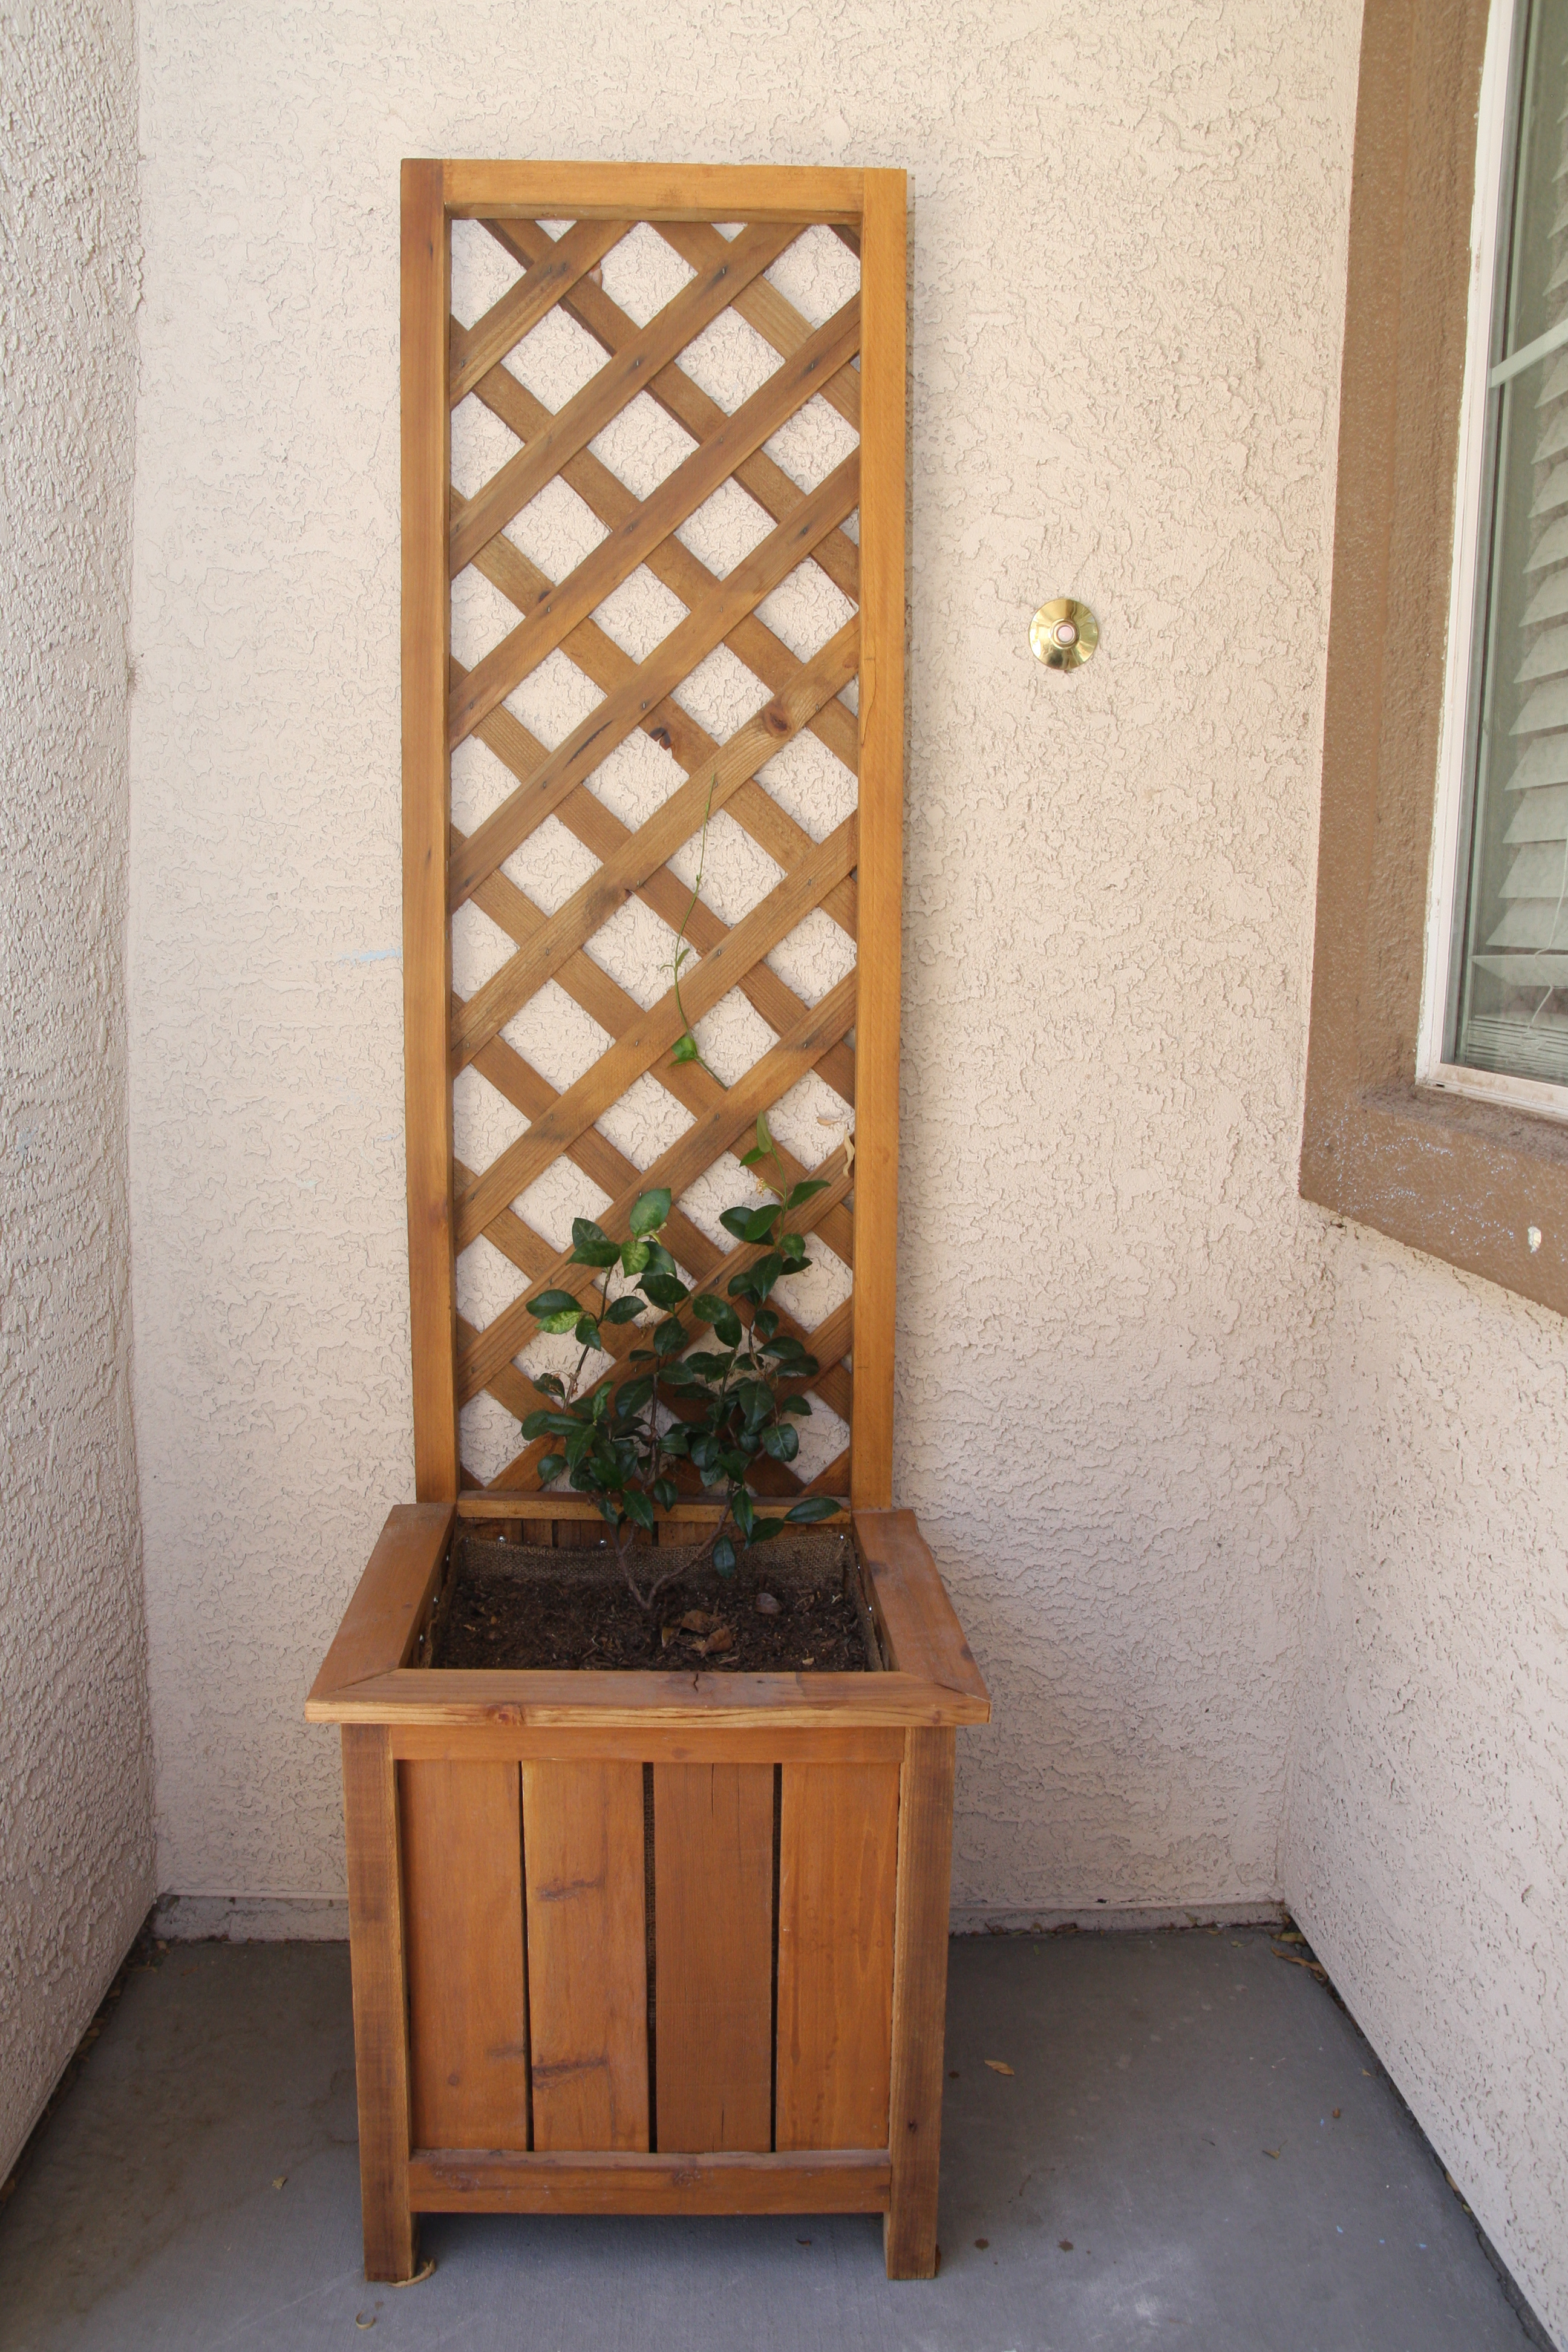
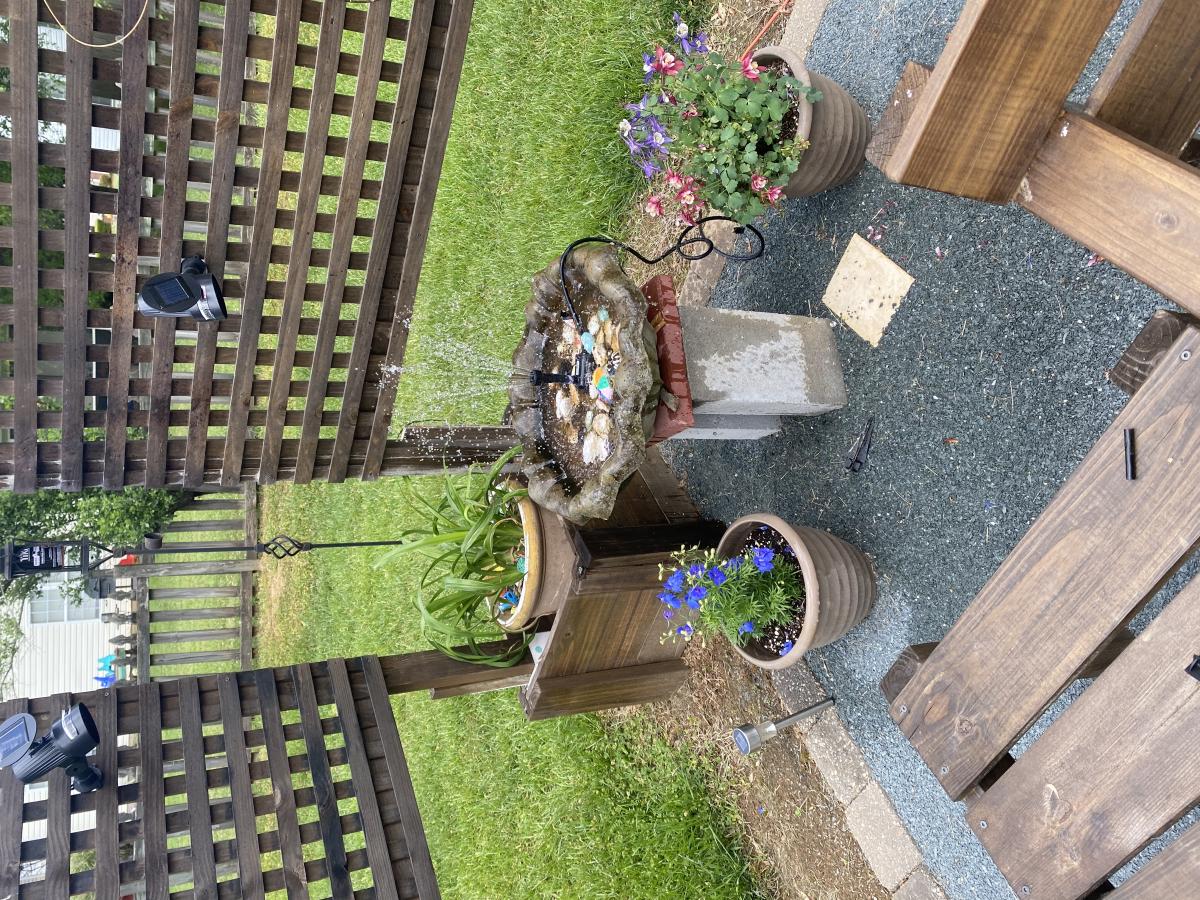
I put the two planter boxes on this site together to get a perfect little lattice box for the space by my door. I get lots of compliments and hopefully soon I will have yummy jasmine welcoming my guests.
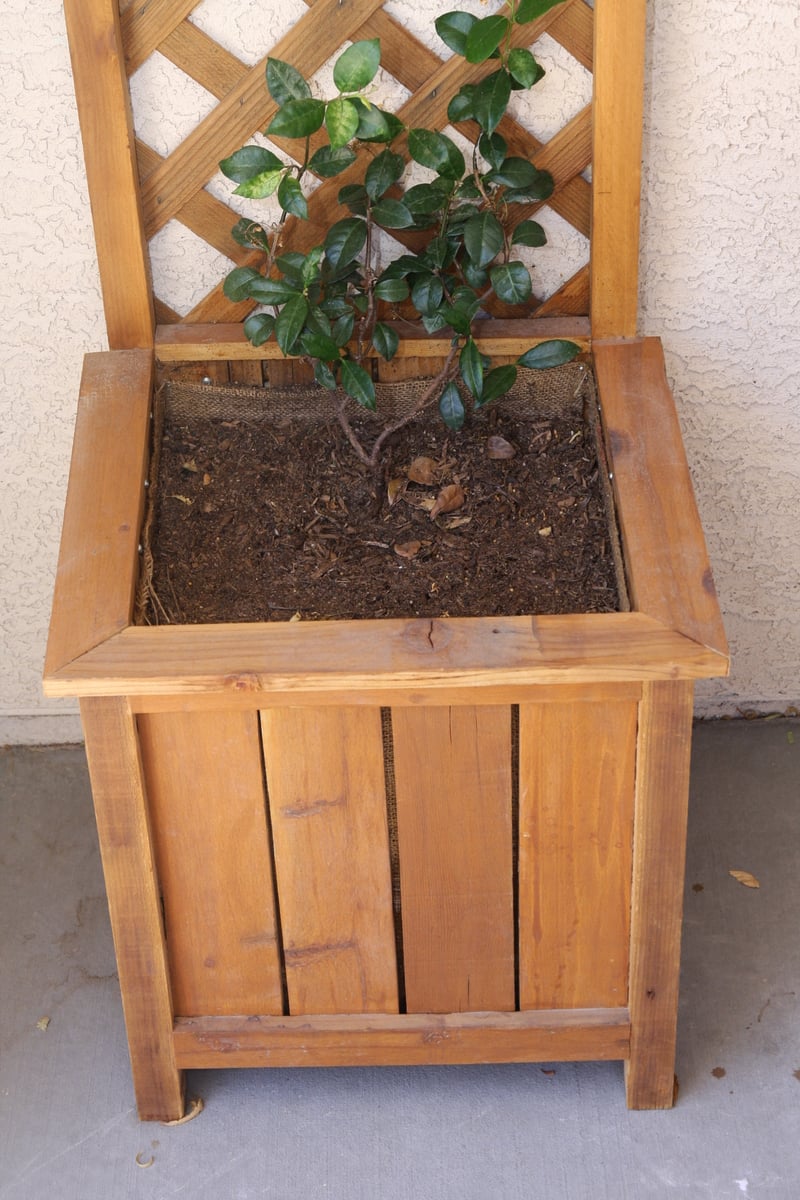
Made with western red cedar from Lowes. So pretty!
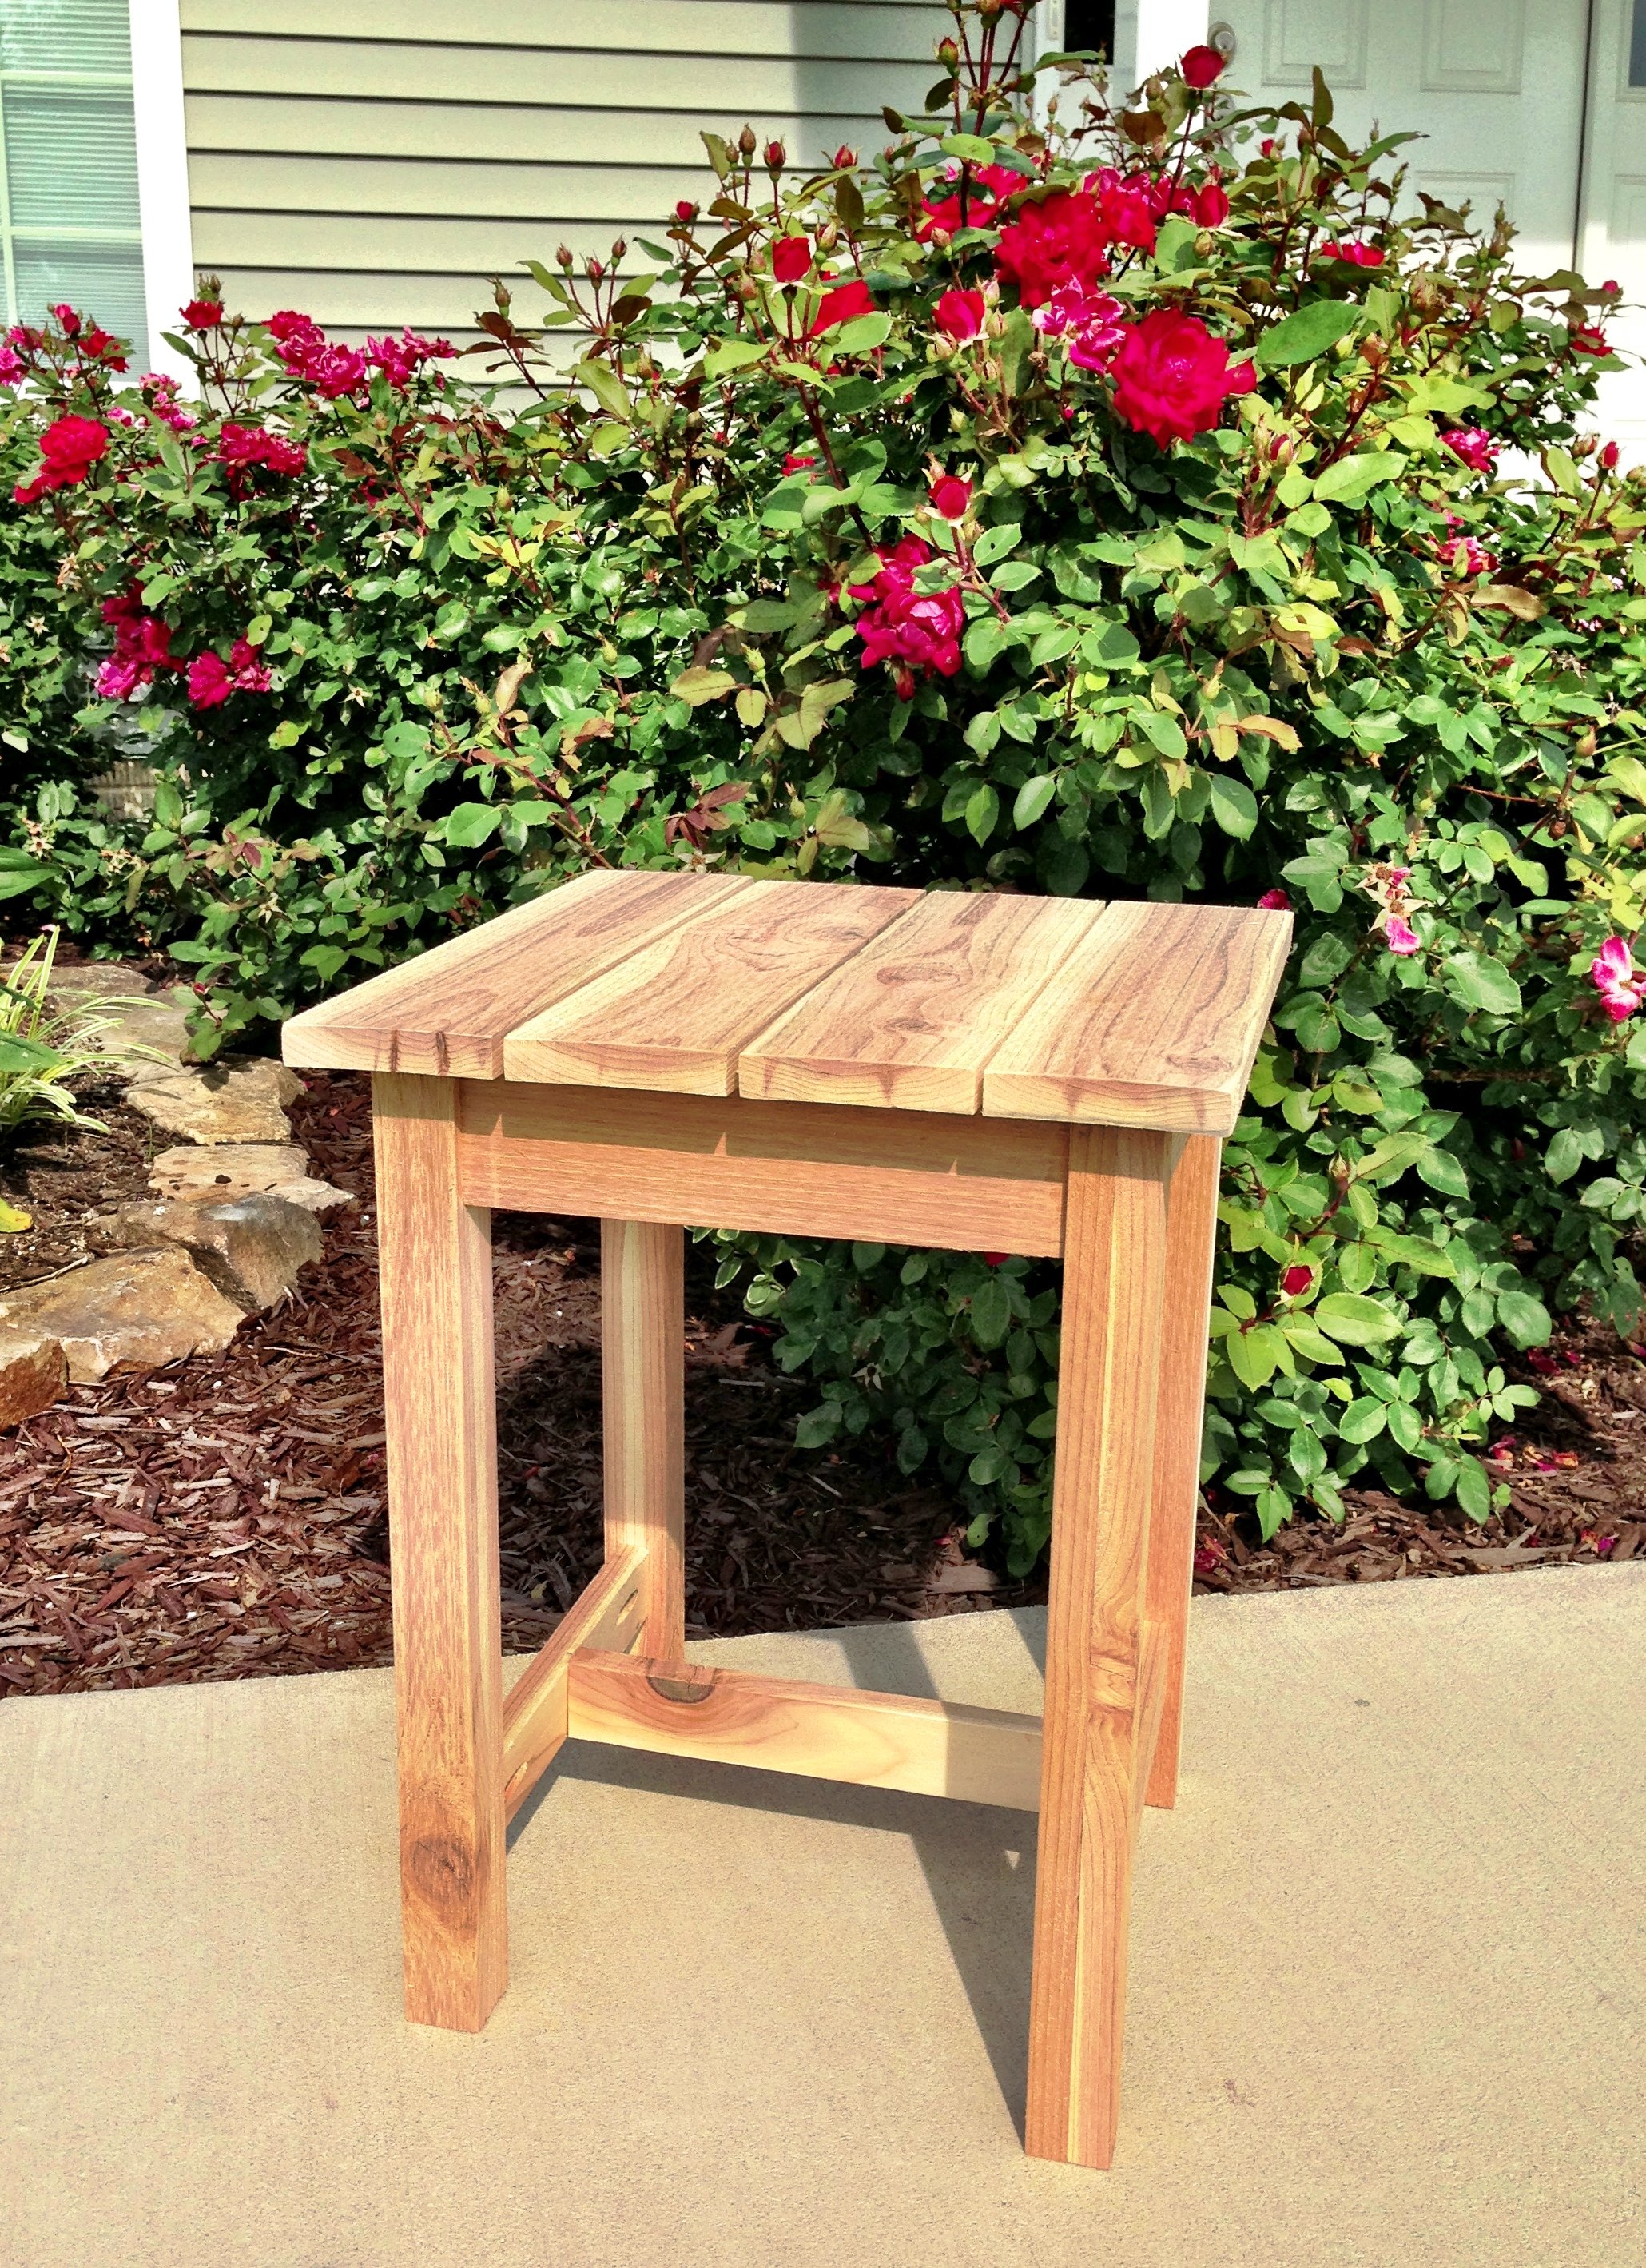
Wed, 08/21/2019 - 09:00
Did you use any kind of finish on the cedar? I’m making one as an indoor end table.
What grit sand paper did you use?
Looks great by the way. Excellent job!
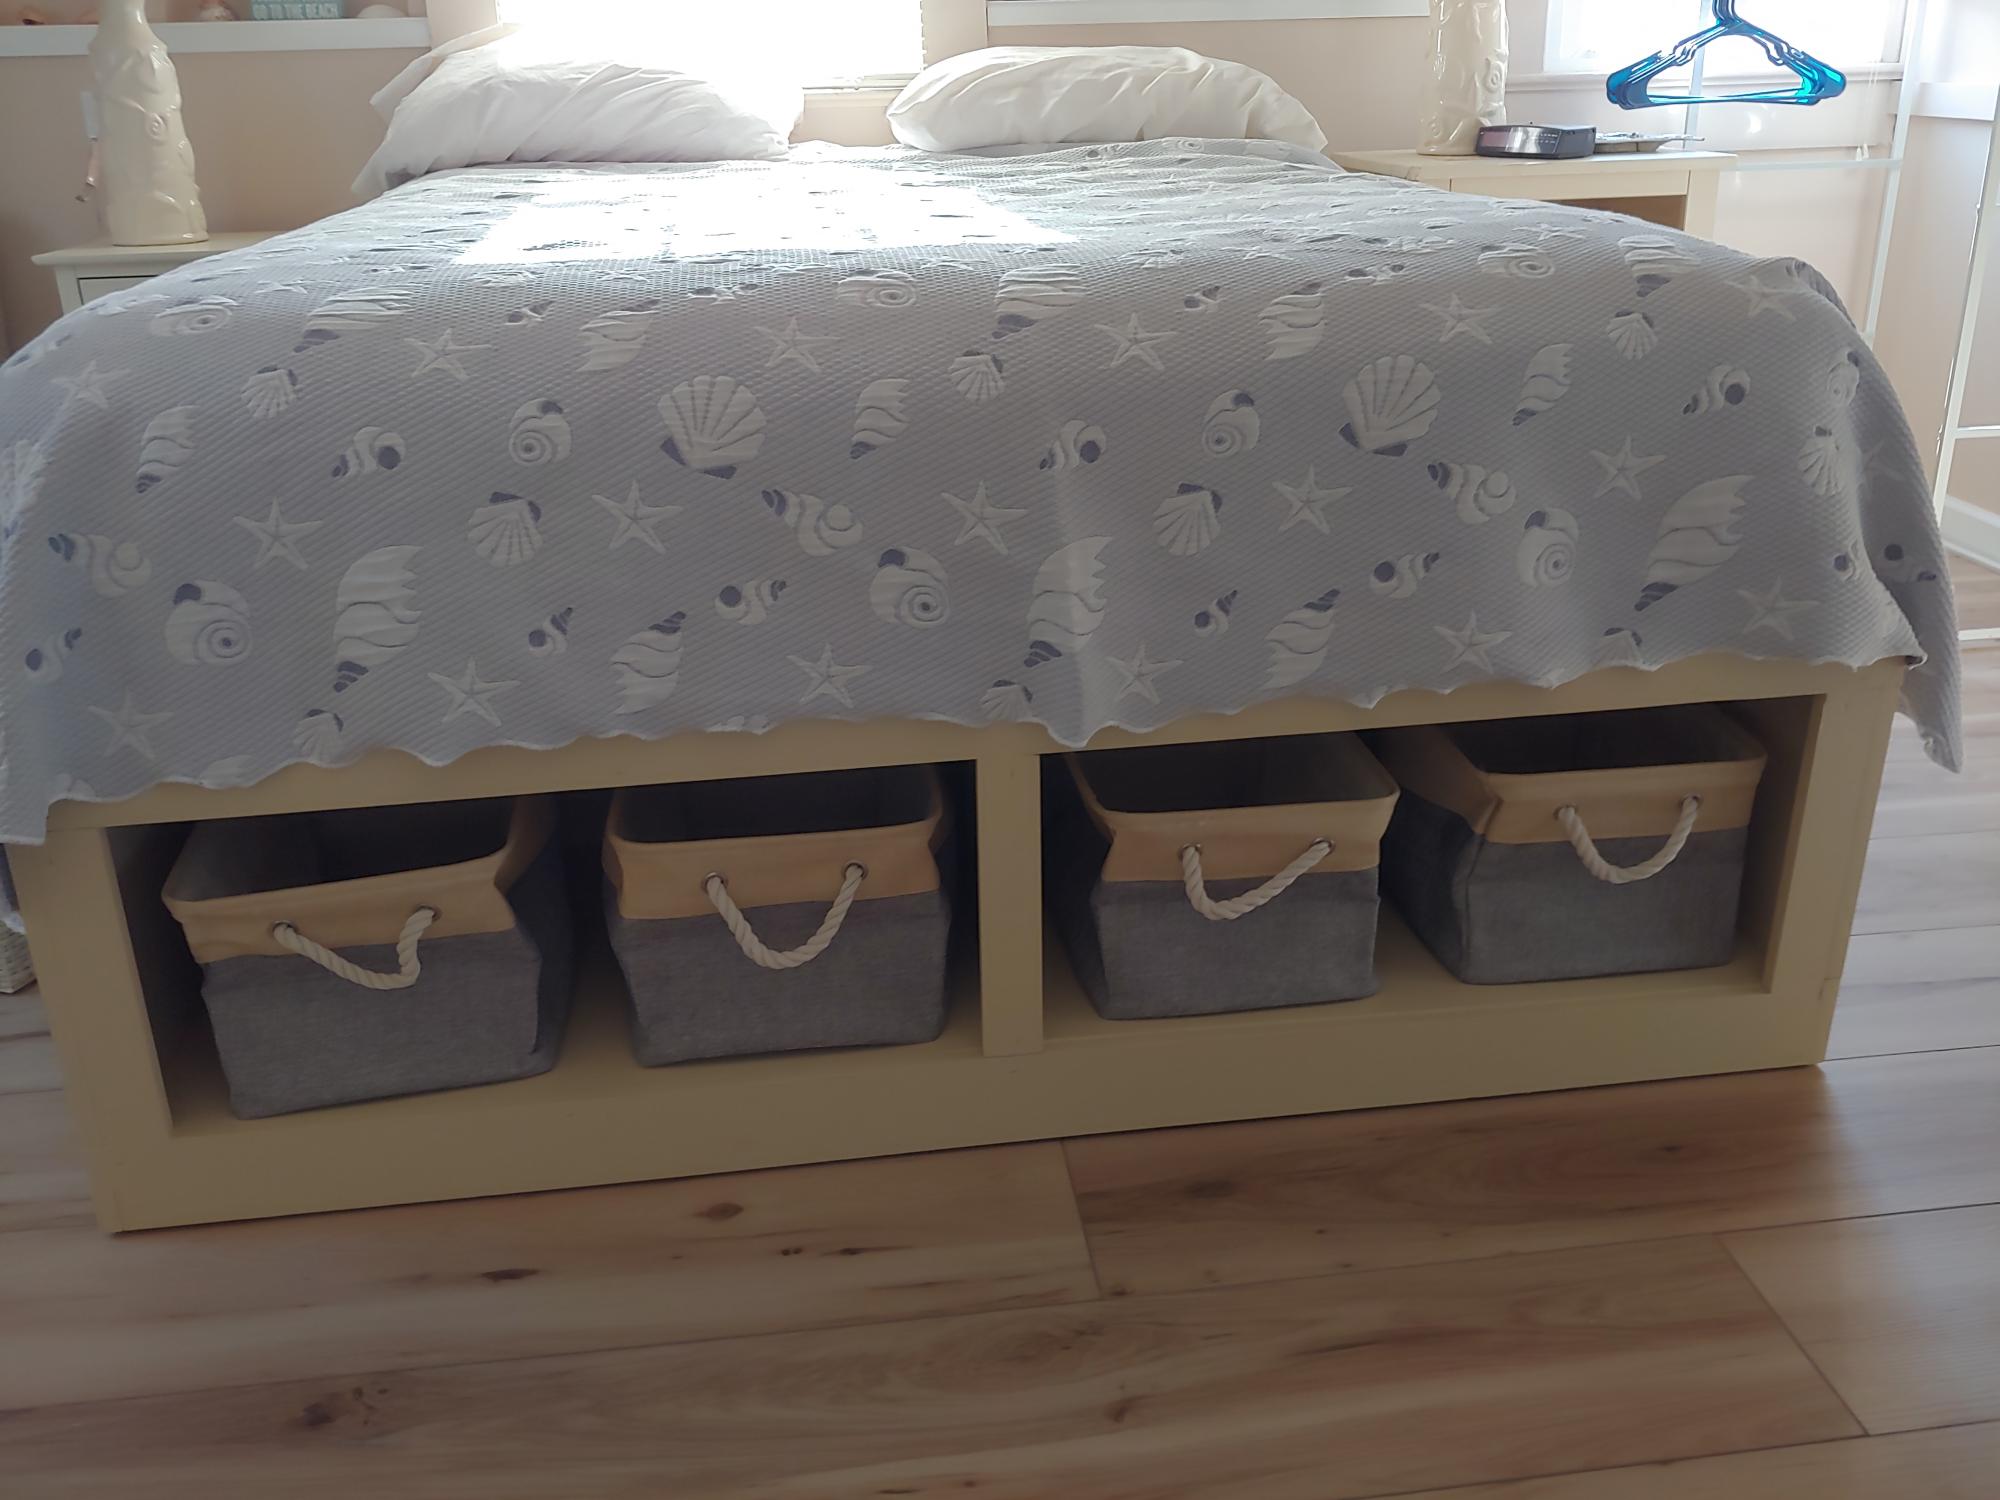
My husband and I made two Queen Platform Storage Beds for our "Carriage House" apartment. They are a beautiful and functional upgrade! Thank you Ana for sharing your plans!
