Floating Shelves
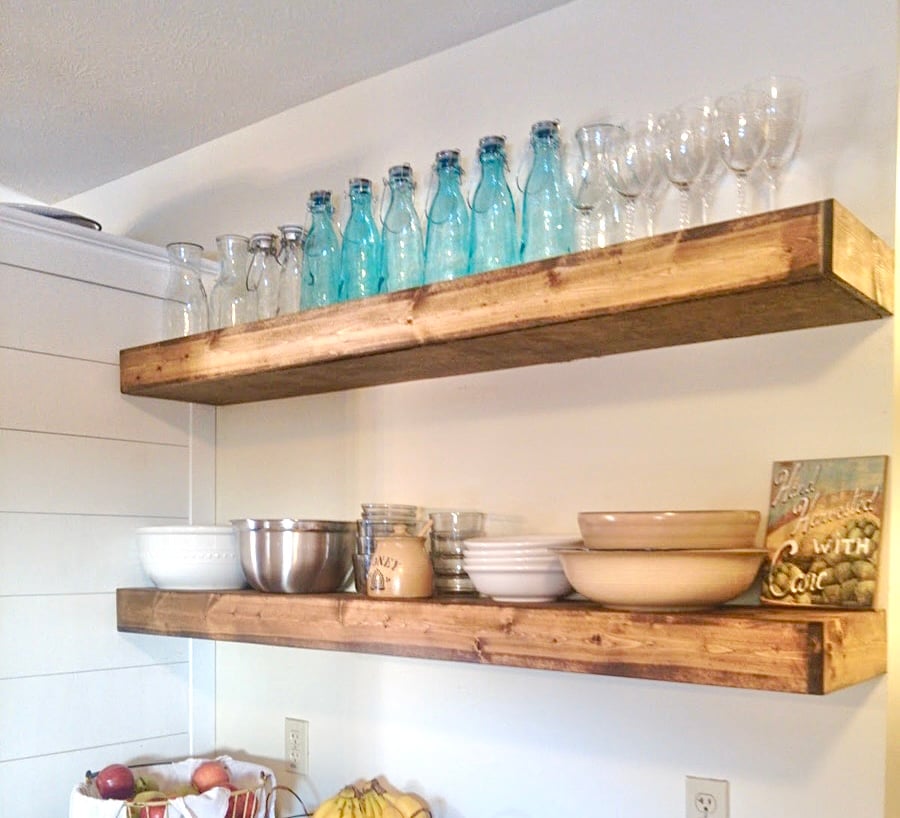
I built these shelves in an afternoon and they were really simple. I'm fairly new to building and using powertools so these are quite an accomplishement!
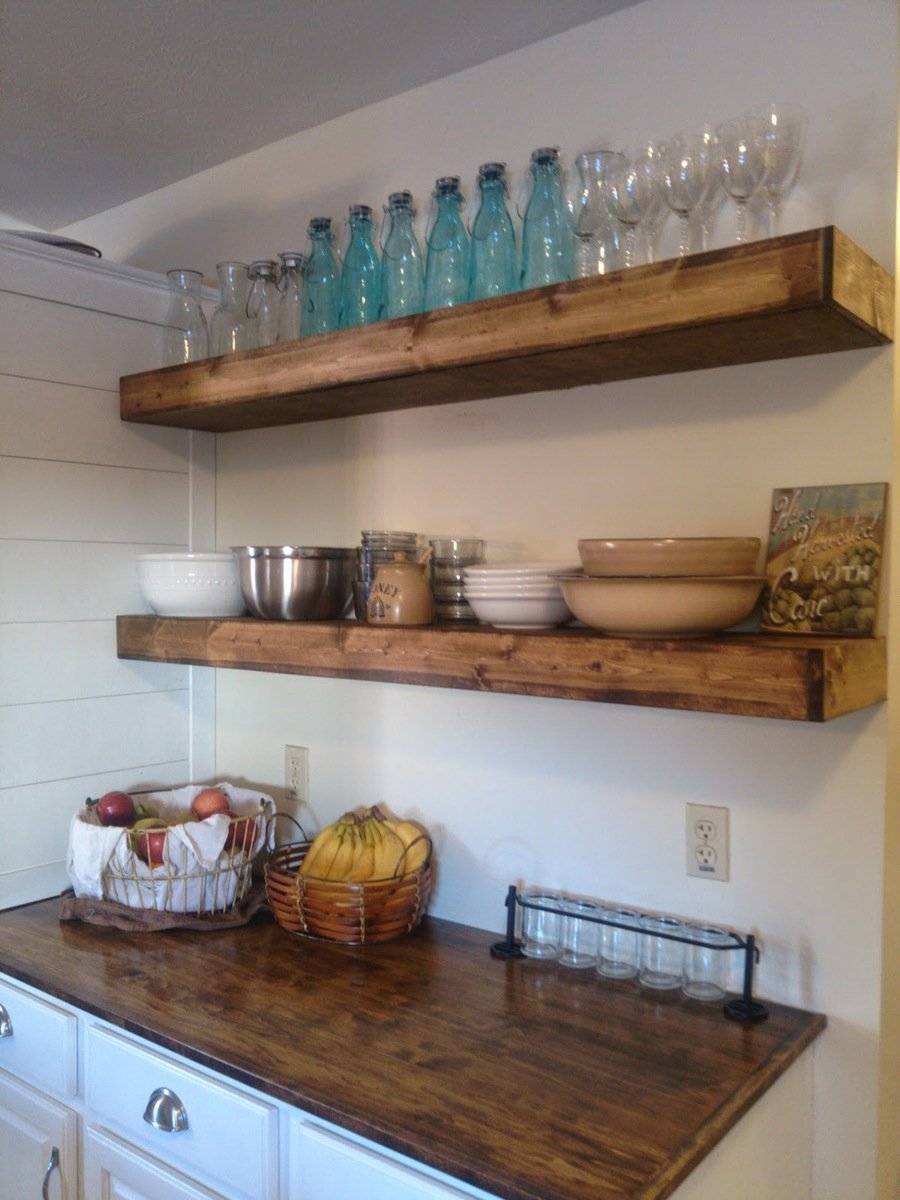

I built these shelves in an afternoon and they were really simple. I'm fairly new to building and using powertools so these are quite an accomplishement!

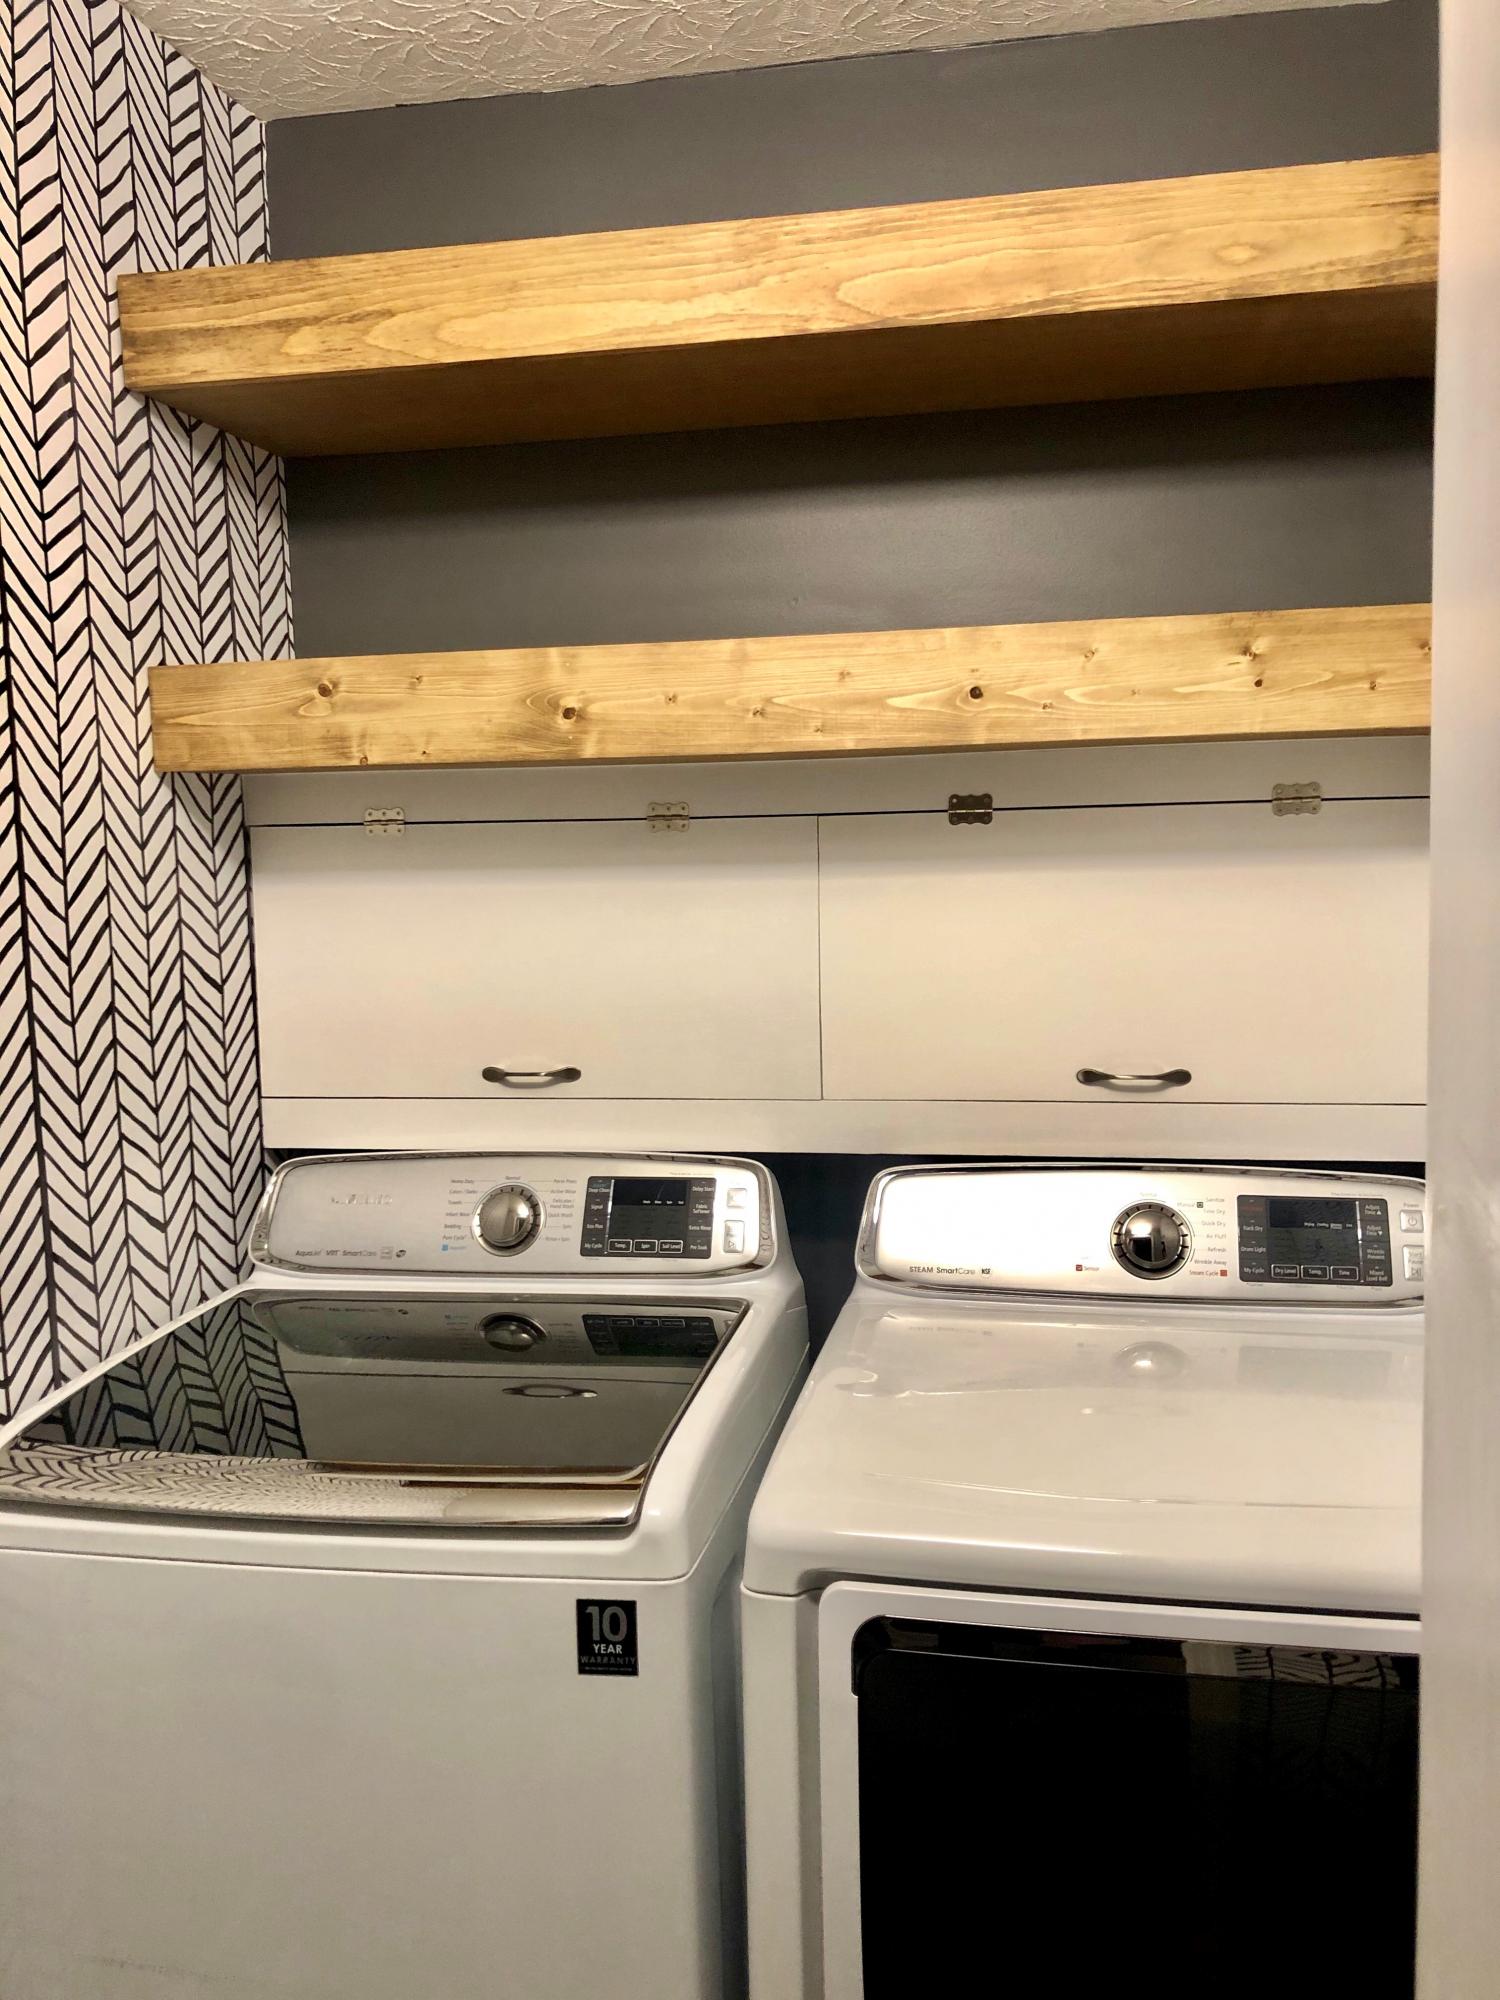
I have a tiny laundry room closet, but this remodel made a world of difference. The shelves were too high to reach routinely, so I didn't add Ana's hidden pull outs. But the cubby is a lifesaver and hides all the unsightly cleaning supplies perfectly. Now to decorate!
Tue, 12/05/2023 - 19:58
These look great! I'm thinking of doing something like this, although I might add a louvered panel on one of the doors since I plan to use an AAV. There is an atmospheric vent not too far away but trying to route a pipe would be too much of a pita. The doors could hide the water supply lines & hose as well as keep stuff from falling behind the machines. I do have to be mindful that I need to be able to open them and not have them obstructed though.
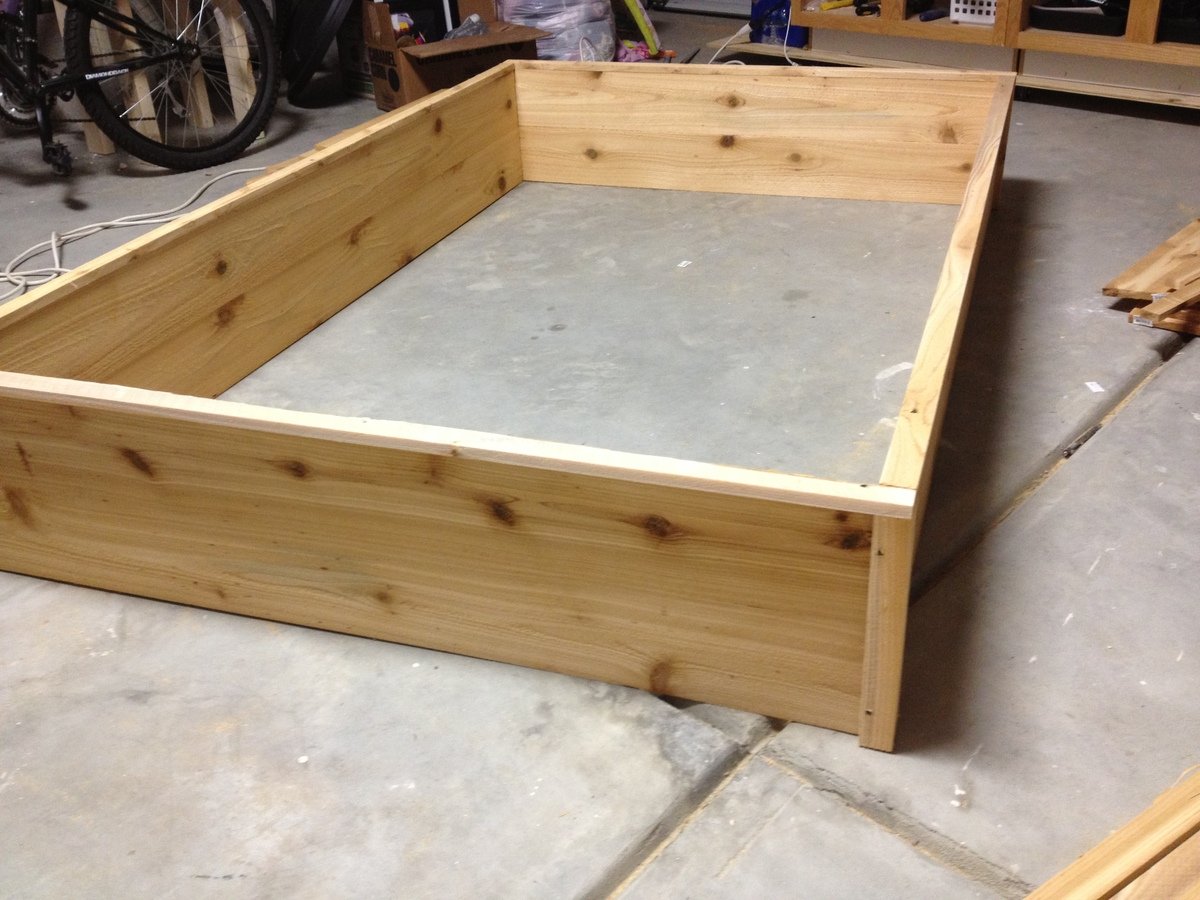
I used the plans for the $10 garden boxes, except I made my boxes 4' by 8'. It was very easy (only my third project) and came out perfectly!

I built this new workbench for my garage to accomodate my table and miter saw and to add some stowaway storage and I cant tell you how much I love it, especially with being able to pull the tables out to make an outfeed for the tablesaw. I altered theplans a bit to shorten the entire length by nearly 1.5 feet and instead of the board mounted tool space I added my bench vise to this gap and use shelved underneath for storage. The plan was simple to follow and allowed me to build a bench that all of my neighbors talk about now! Thanks so much Ana!

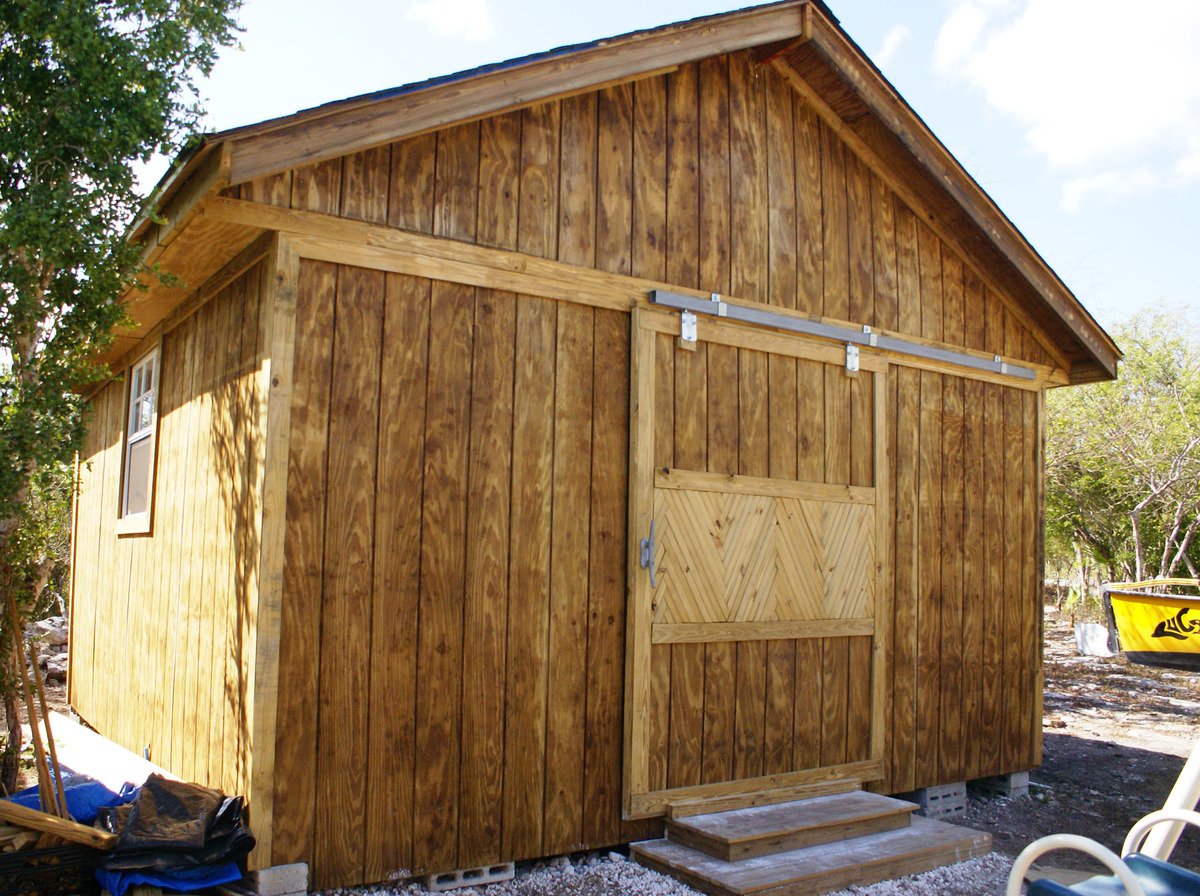
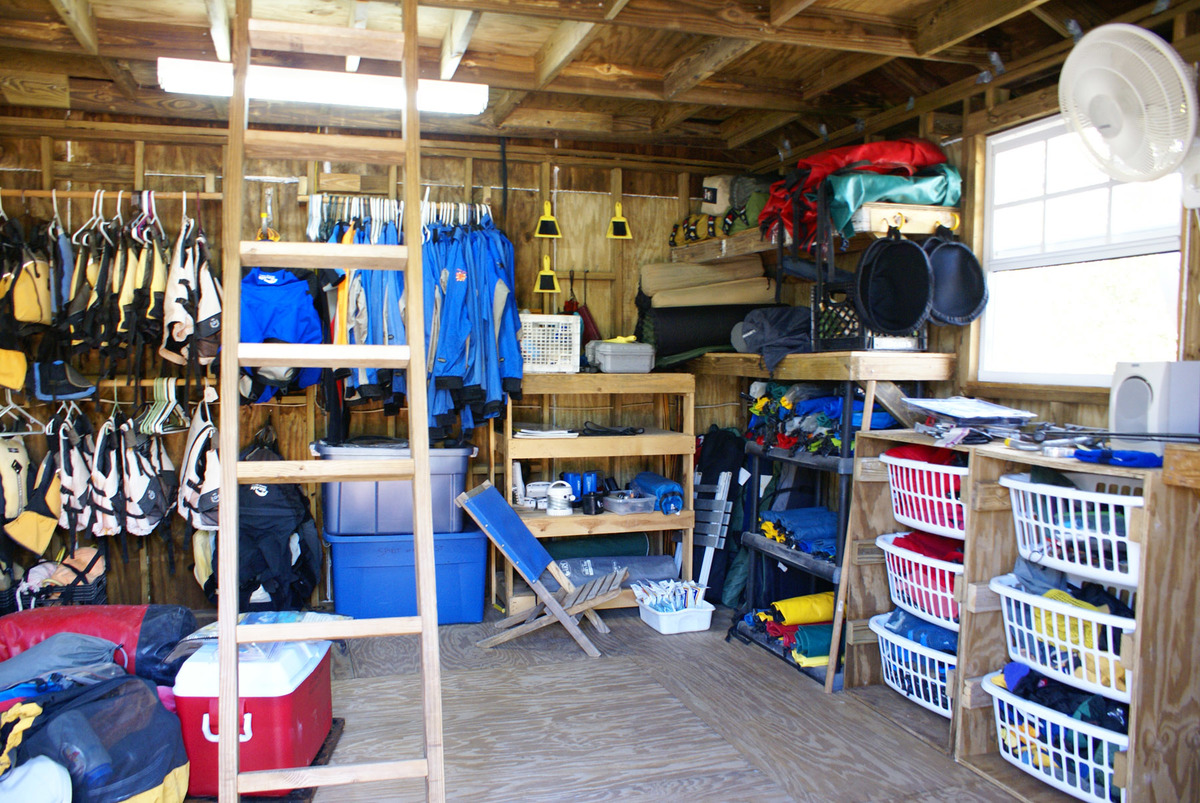
Thanks to the tips and tricks we picked up from Ana here, we were able to build our very own storage shed. We use it for storing our kayaking, sailing and camping gear for our company down here in the Bahamas (which is still a bit unorganized in the photo). It works so much better than what we had before in multiple kit sheds. We even have a loft up top for extra storage, electricity in there with a fan, fridge and lights... MAJOR UPGRADE :) We still need to paint it and finish a few things, but we are very thankful to have it up and being used.
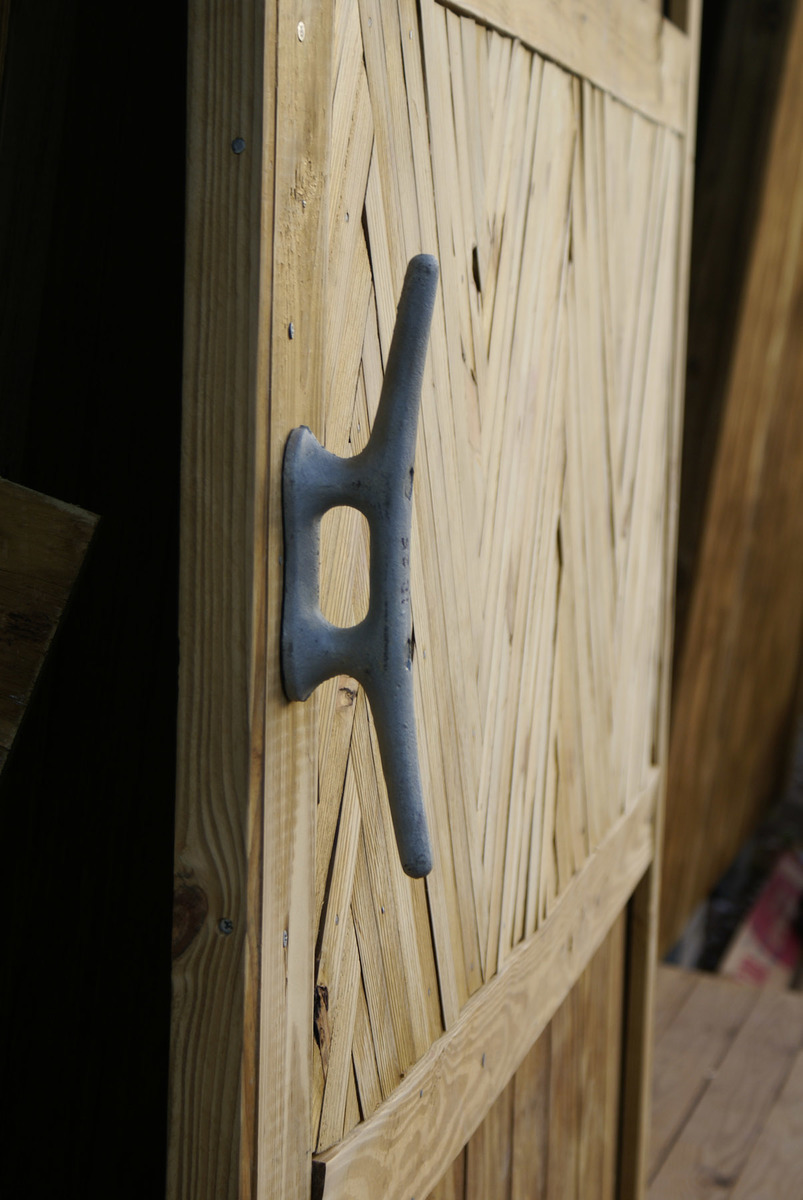
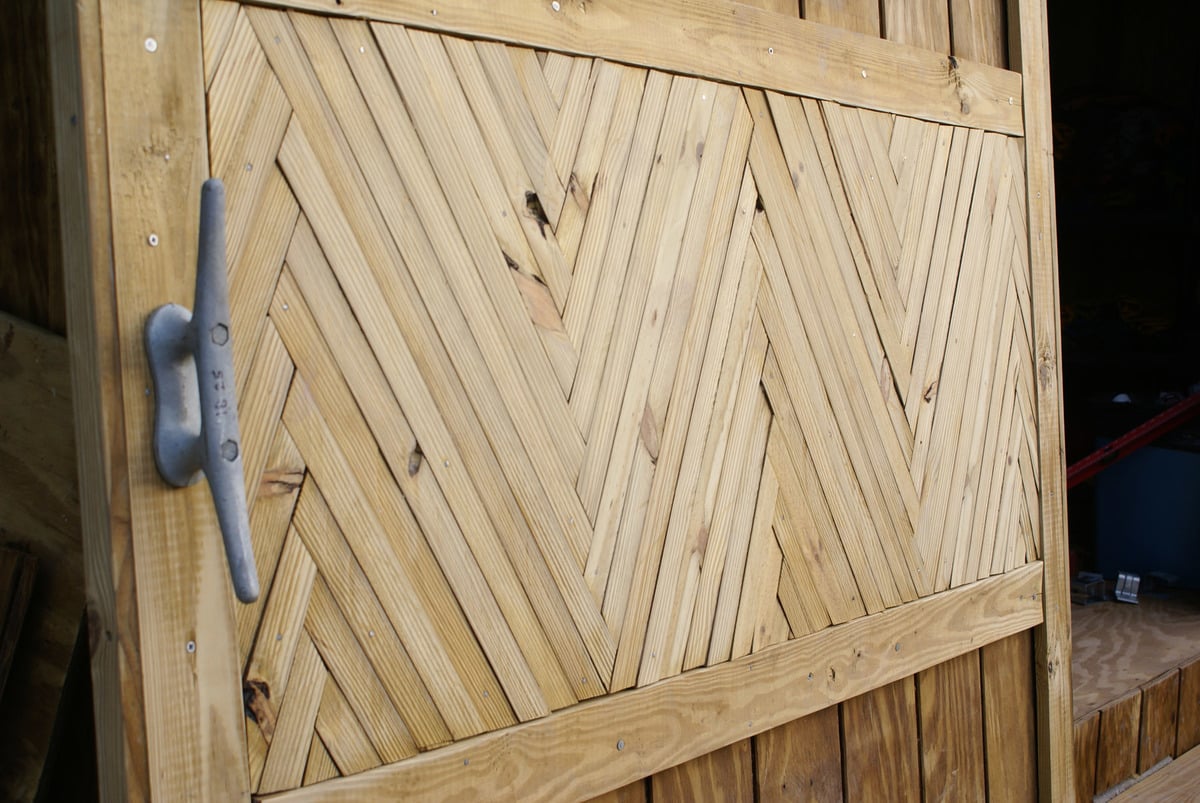
My favorite thing is the door handle (a boat cleat) sliding barn door and the herringbone design for 'eye candy' :)
Thanks go out to Ana and her wonderful site! I would have never attempted this without the foundation I built here!
Sun, 04/14/2013 - 20:37
What did you use to make the sliding door? Can you upload pics? I really want to make one for my bathroom but all the hardware I find is really expensive.
In reply to Sliding door by jbayer80
Mon, 04/15/2013 - 11:29
I've read on some blogs people have found theirs at Lowes or Tractor Supply.
Mon, 04/15/2013 - 06:05
We built the door out of some T1-11 Siding, 1x4's and various scrap pieces. The hardware we used is this Stanley set here: http://www.stanleyhardware.com/default.asp?CATEGORY=HDW+BARN+BOX+TRACK&… Then we bought the steel track separately. This door is super heavy, but it rolls like a charm on the track. Does this help any? Good luck!
Mon, 04/15/2013 - 11:42
And they work perfectly for our camping gear and kayaking gear too :)
Sun, 05/05/2013 - 13:58
Not really any plans that would help. We just drew some rough sketches up some paper and kind of went from there. Between Ana's site here and this book: http://www.amazon.co.uk/Building-Shed-Build-Like-Pro/dp/1561586196 we just pieced things together with the space and money we had. The book just helped me a lot to plan it out, and then all of the building techniques Ana has taught me on here came in handy. It's a group effort :) Hope this helps!
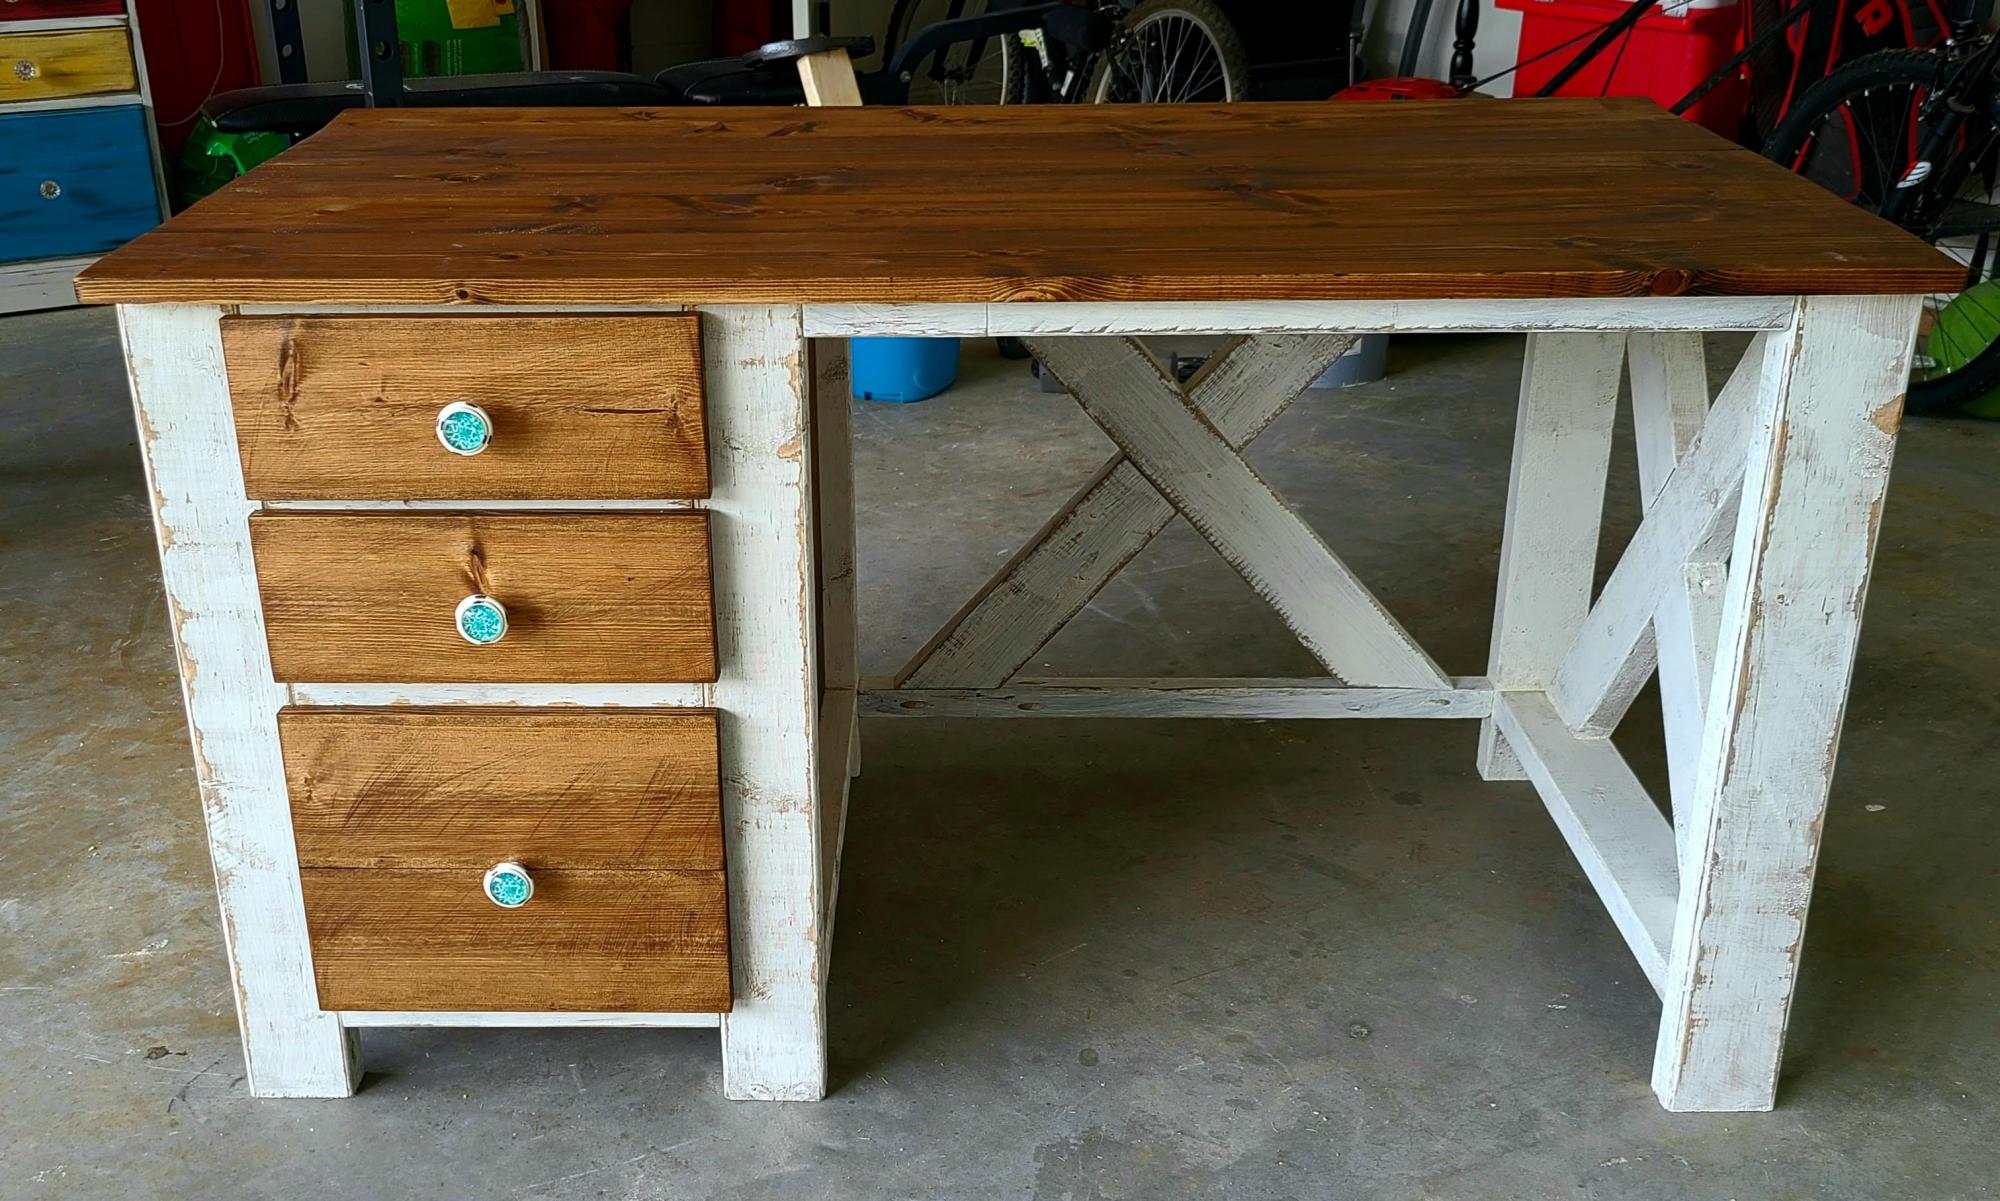
My spin on the Ructic X Desk. My wife is a school teacher. This is going in her class room. Stained whole piece, then painted over stain on some pieces and sanded for distress look. I also added 3 drawers.
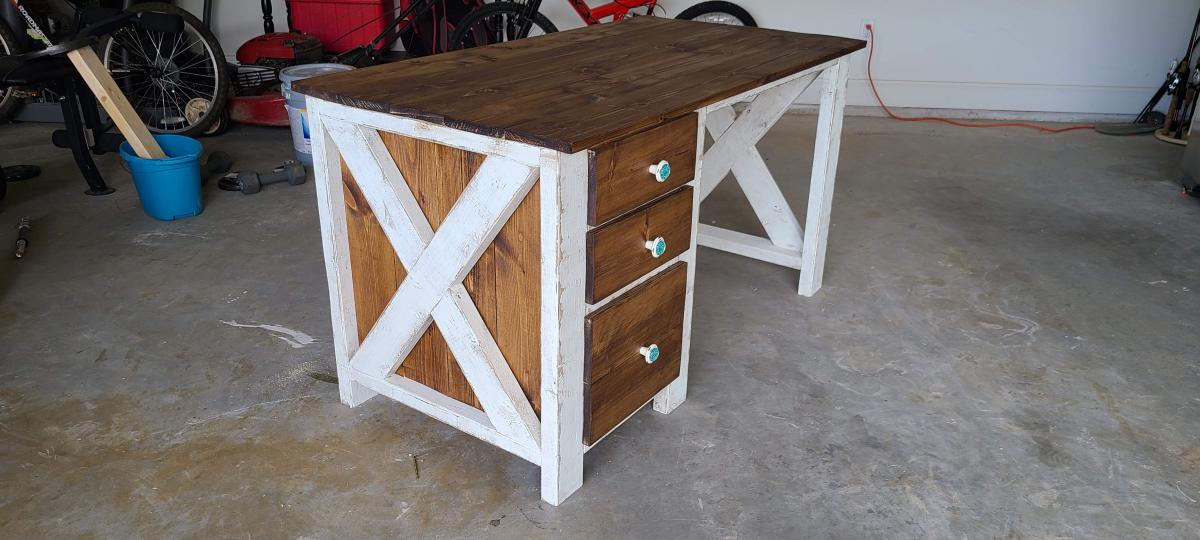
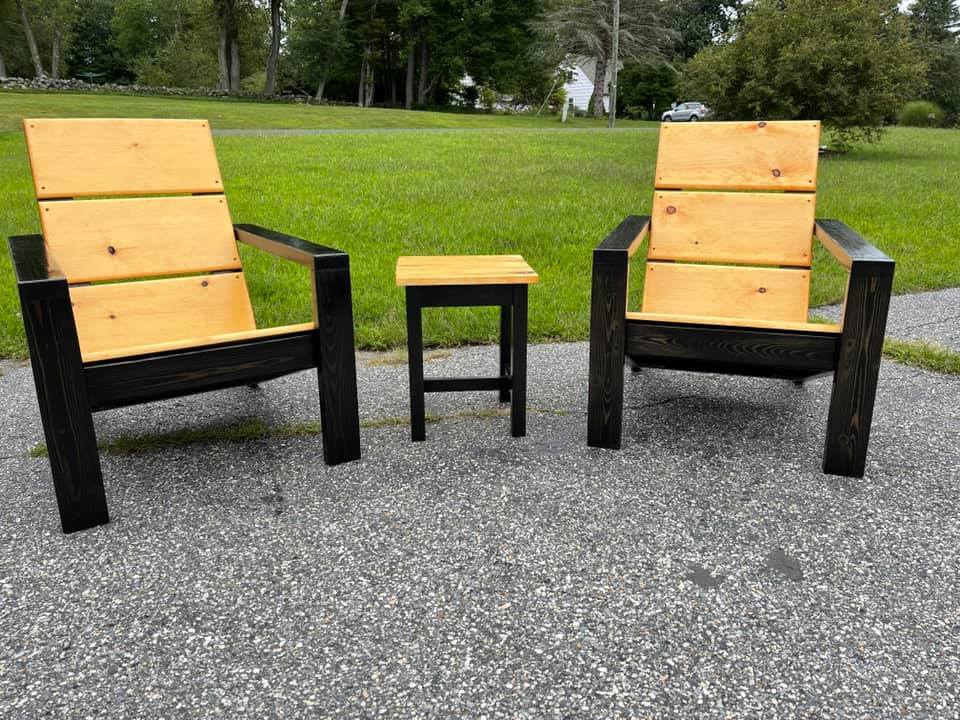
This is one of my first wood working projects I have accomplished and these two plans were some that I really enjoyed making.
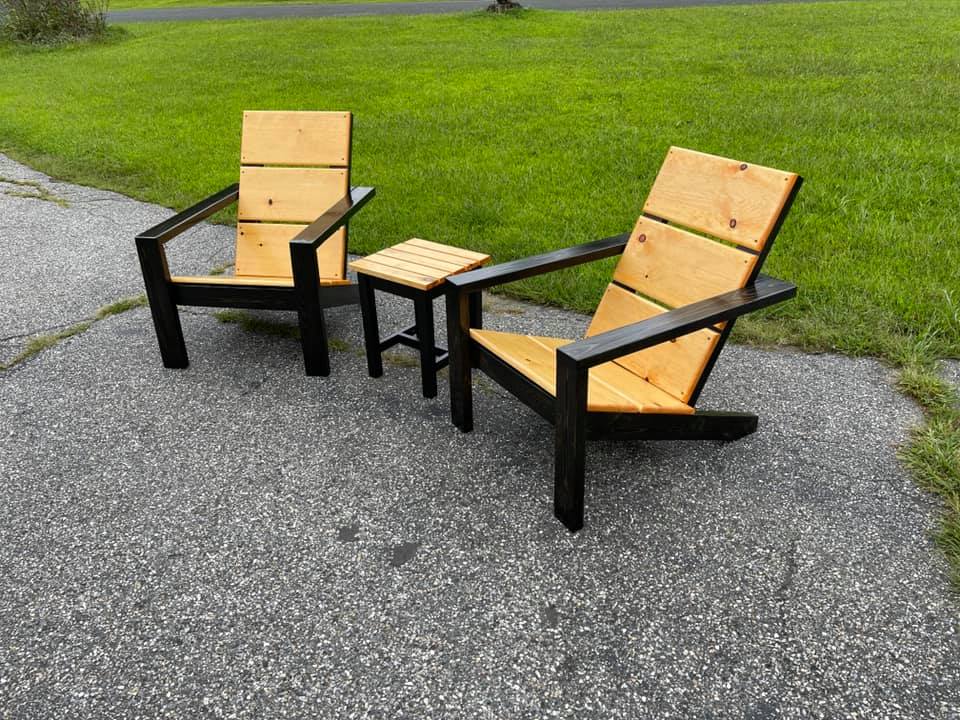
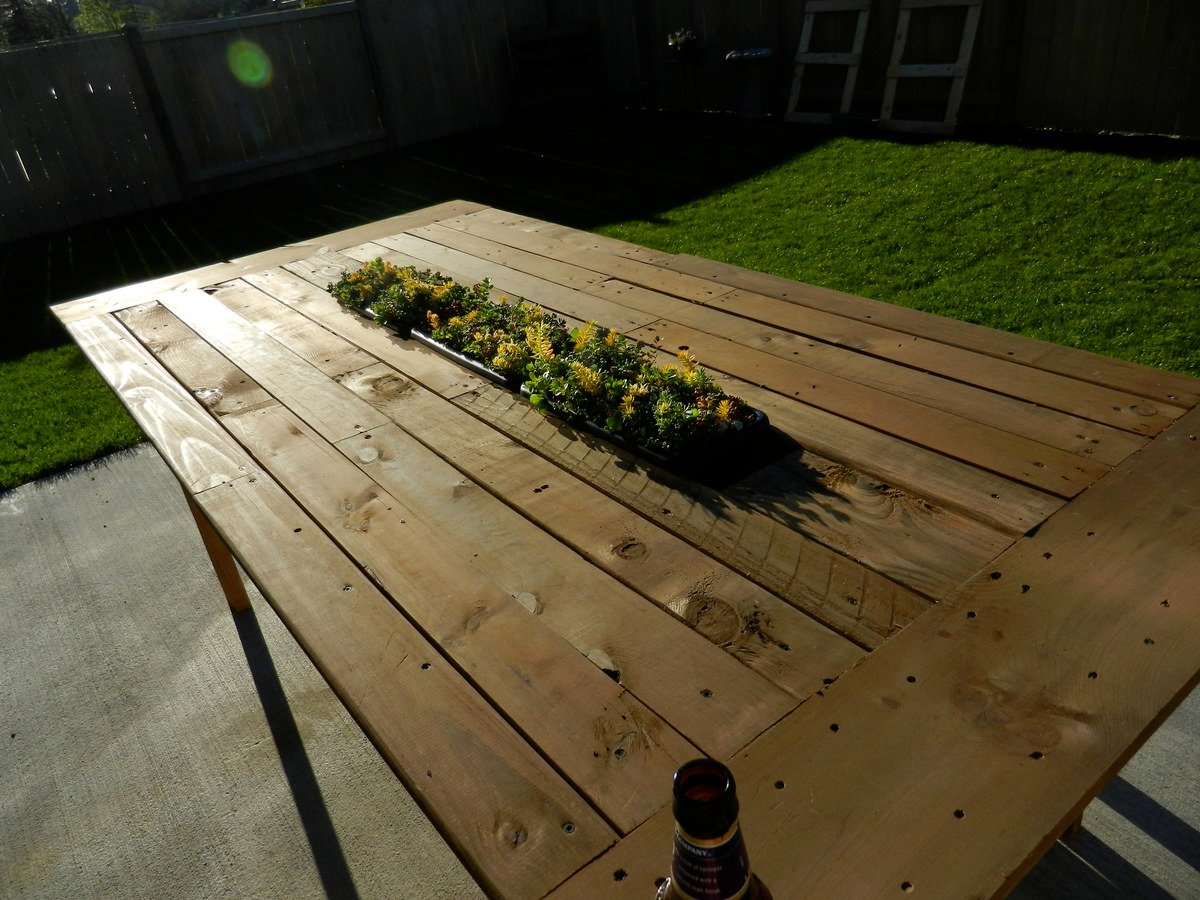
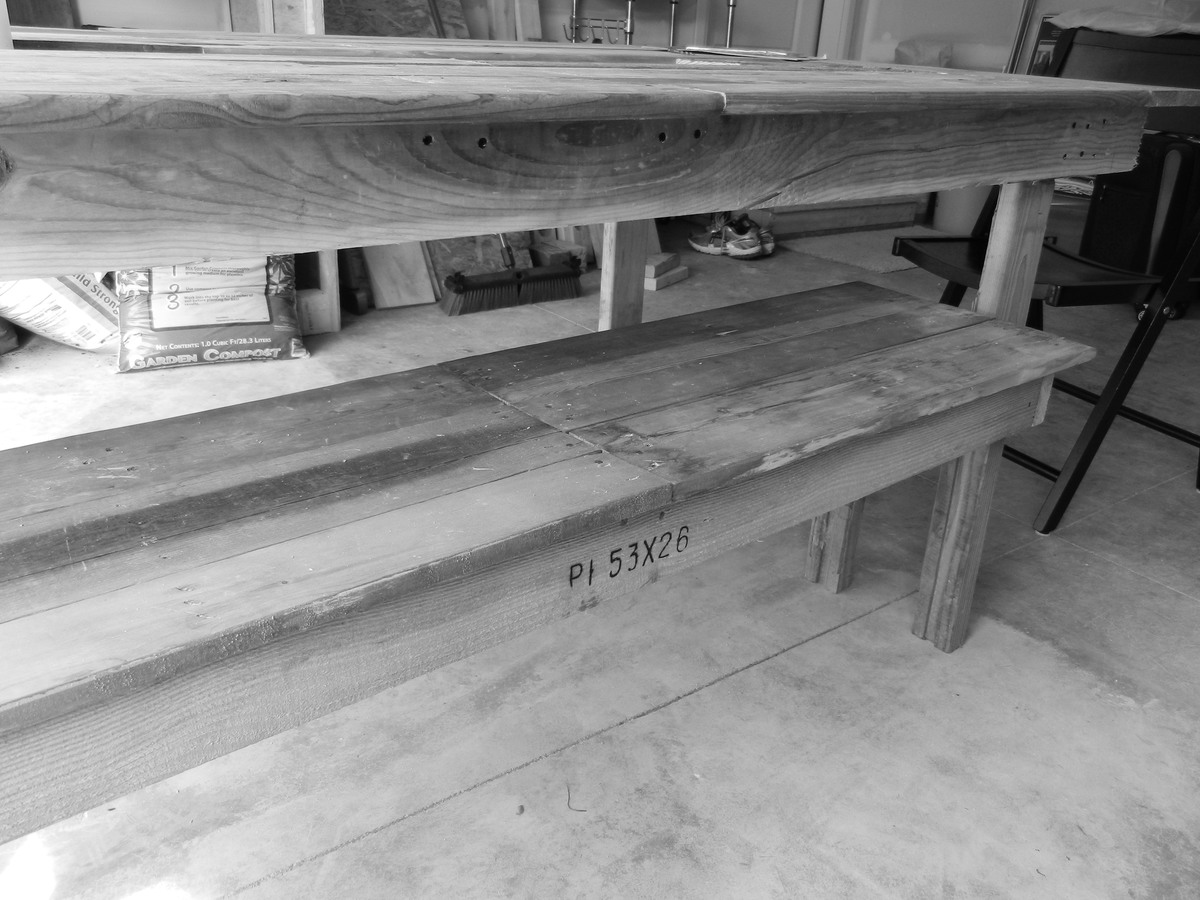
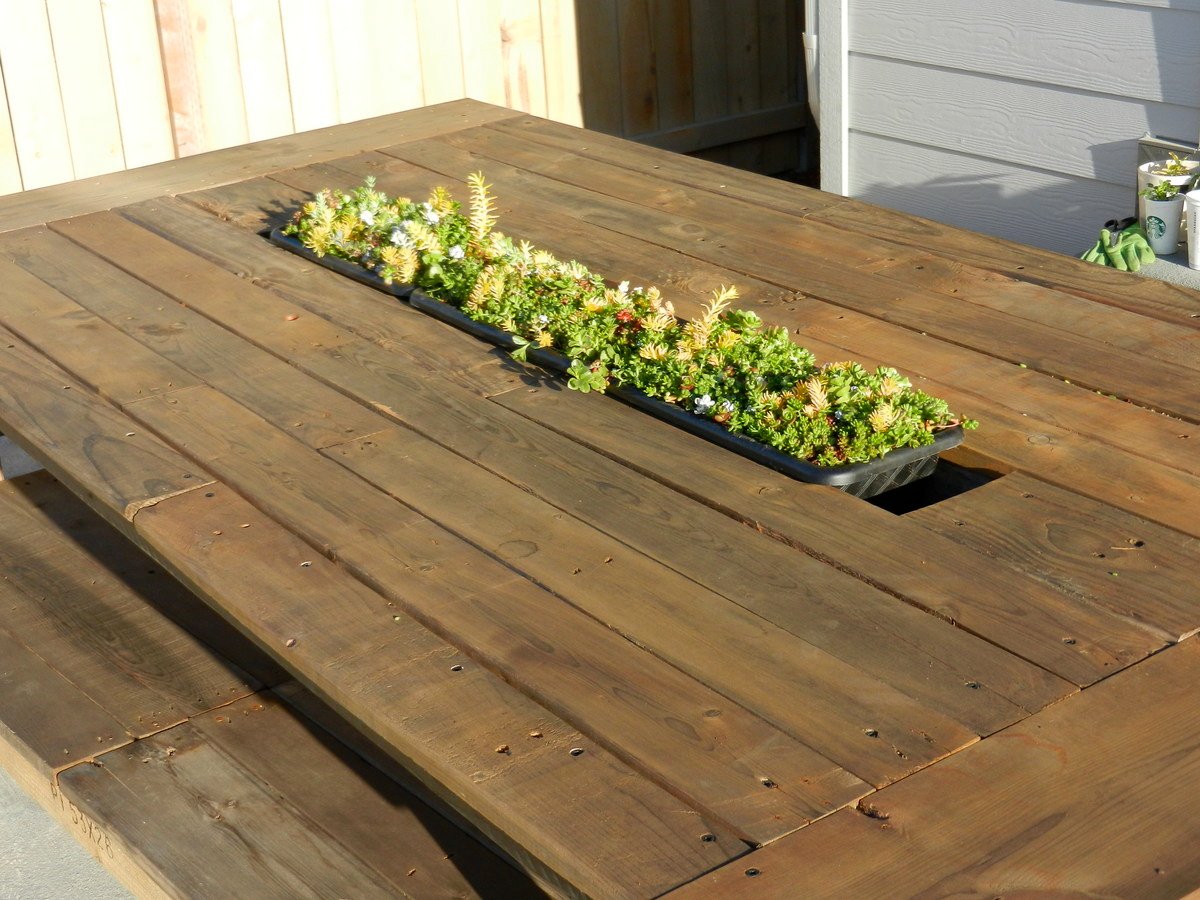
I bought a house and couldn't stomach buying something I could probably build myself. This is my first project and first furniture build. Besides buying the drill and screws the table was free. Didn't even buy a skill saw, just used a hand saw. The dimensions were dictated by the length of the pallet boards and width by the two end caps, so there were very few cuts to make.
Found plastic planter boxes for succulents (3 in picture) @ dollar store. I wanted to be able to switch out the center pieces and plan to rotate in herbs, ice, other flowers.
This project was totally made possible and inspired by others posting projects so I thought I should say thanks and post my own creation.
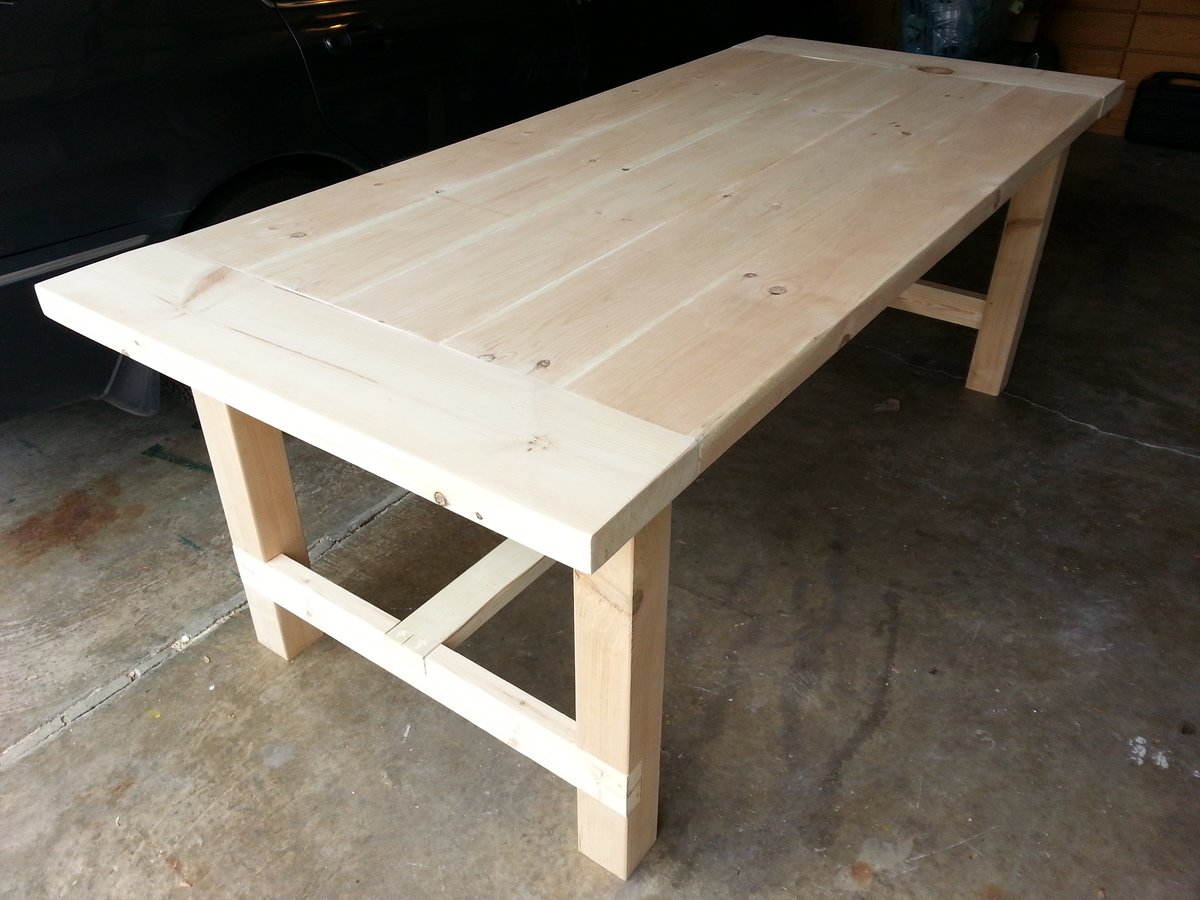
Farmhouse dining room table built for my mom. Unstained.
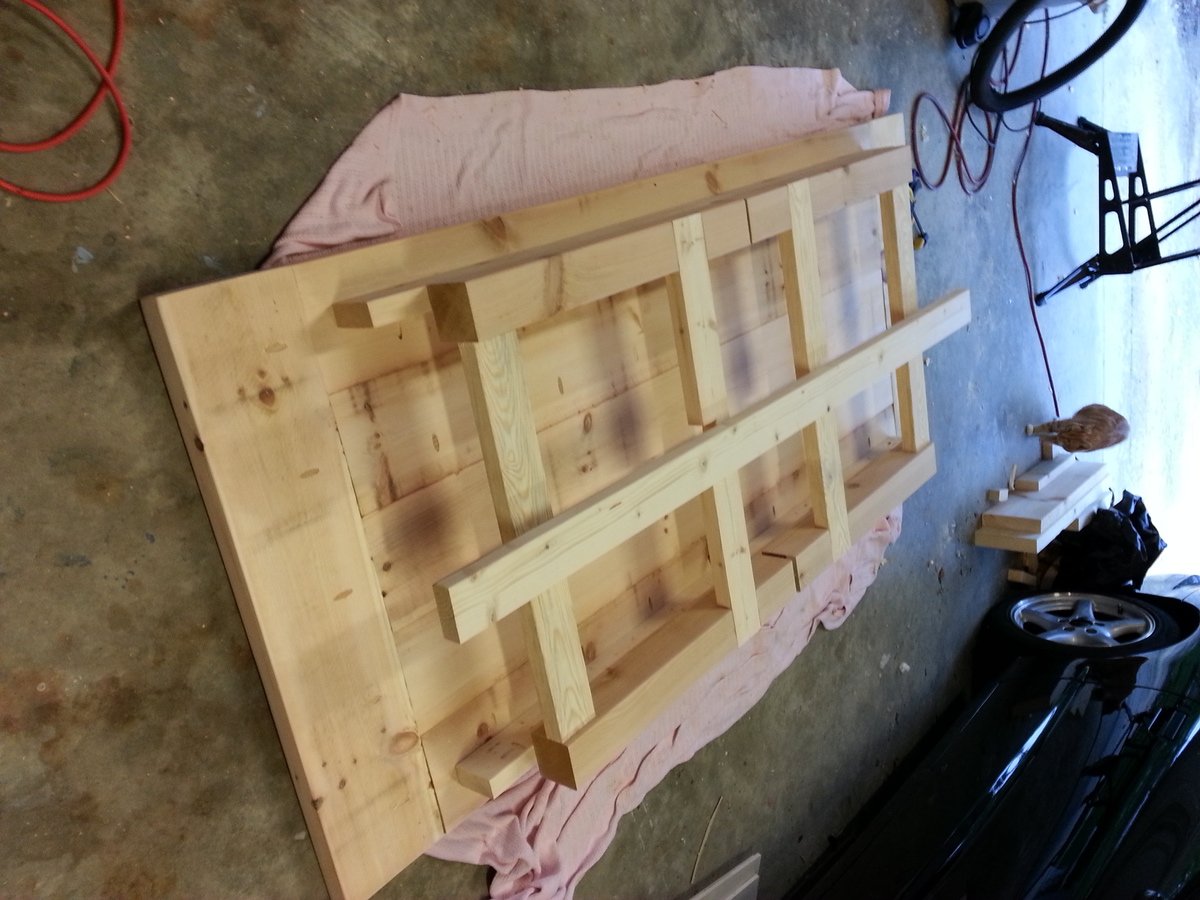
Table top is 2" White Pine Boards, legs are cedar, and everything else is whitewood studs. Left the leg assemblies and stretcher board unattached for the two hour transport to Charlotte. Attached them with screws and some glue upon arrival. Loved the plan and finished in two days!
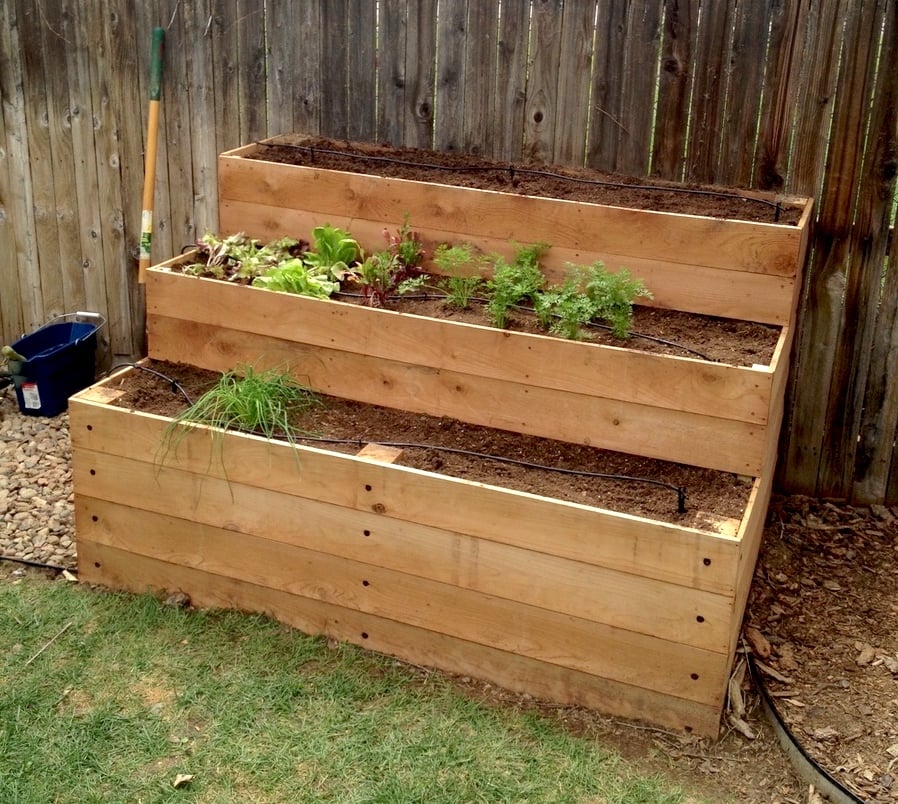
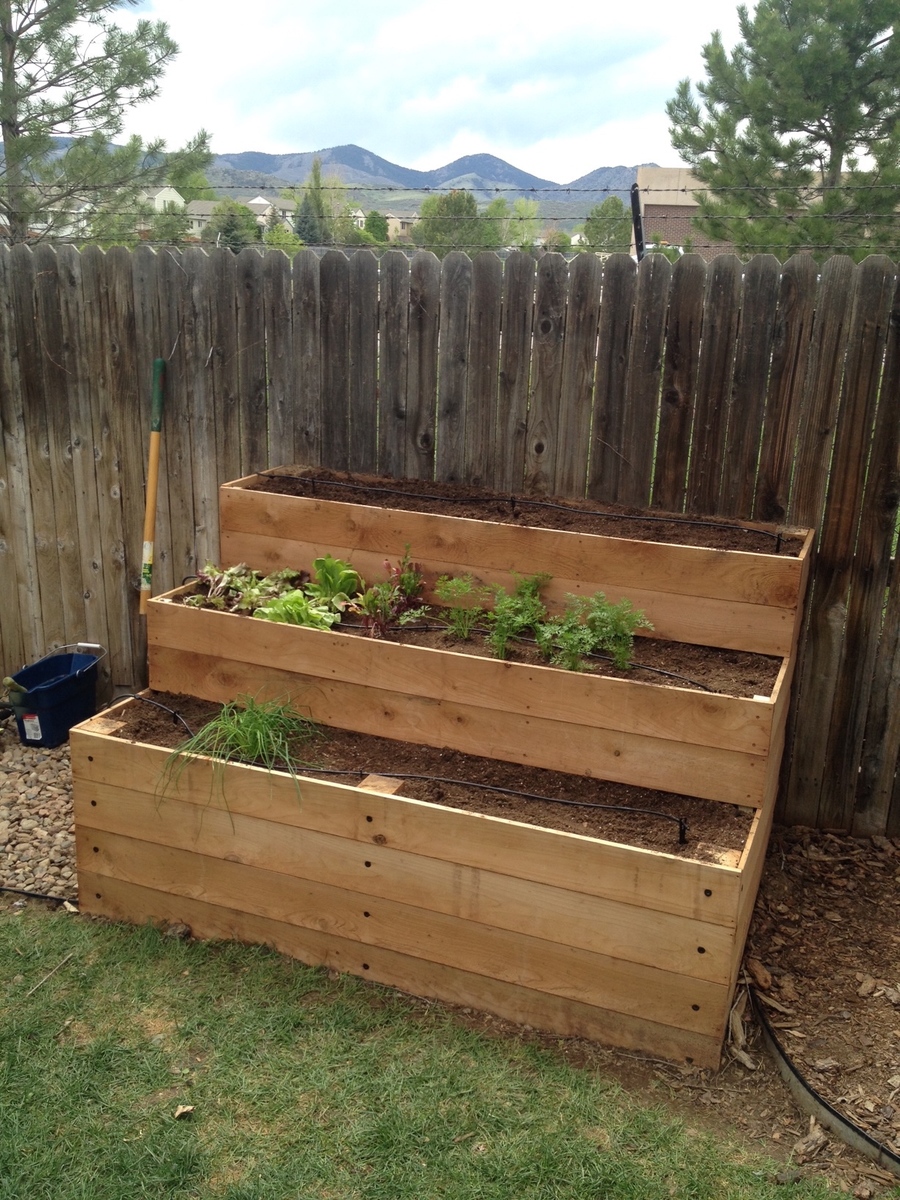
Steps:
1) Cut the boards to the specs below or adjust to your space
2) Kreg Jig the cut boards along each of the sides (length wise and on the ends) for attaching and making a box.
3) Make 3 separate boxes, don't assemble until you move to location. I used 4x4 cedar posts in the corners of the base box to add stability. I used 2x2 pine in the front corners of boxes 2 and 3 for stability. Install these after the dirt has been added so you can hammer in as a stake, attach with screws on front and sides. I created 2 stakes for boxes 2 and 3 and added to the front to prevent bowing when the dirt is added.
Box Dimensions:
1) (base) 70.5" L x 46 W x 4 cedar boards high
2) 70.5" L x 32 W x 2 cedar boards high
3) 70.5" L x 16 W x 2 cedar boards high

I wanted to make a footbridge for my mom so she wouldn't get muddy when she crosses a small drainage ditch when goes walking on the trails behind her house. I didn't have a plan and this was my first build and I loved it! I just wanted to give everyone an idea of something to build. Can't wait to build more.

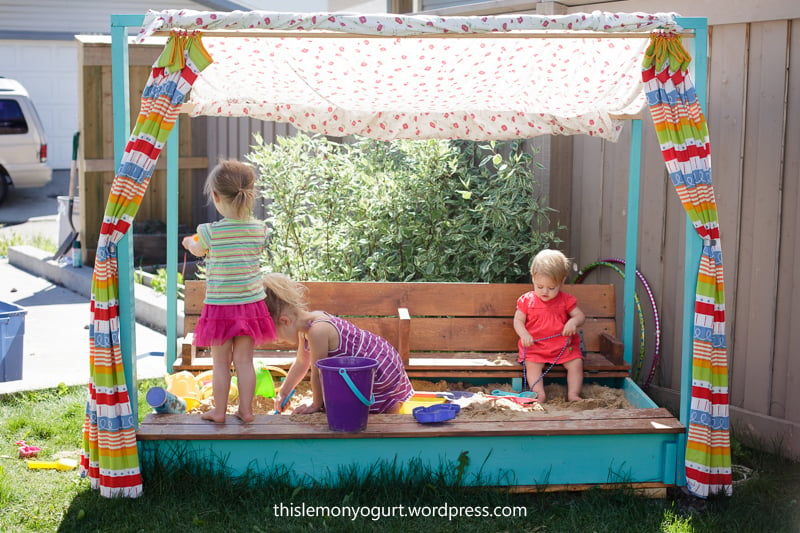
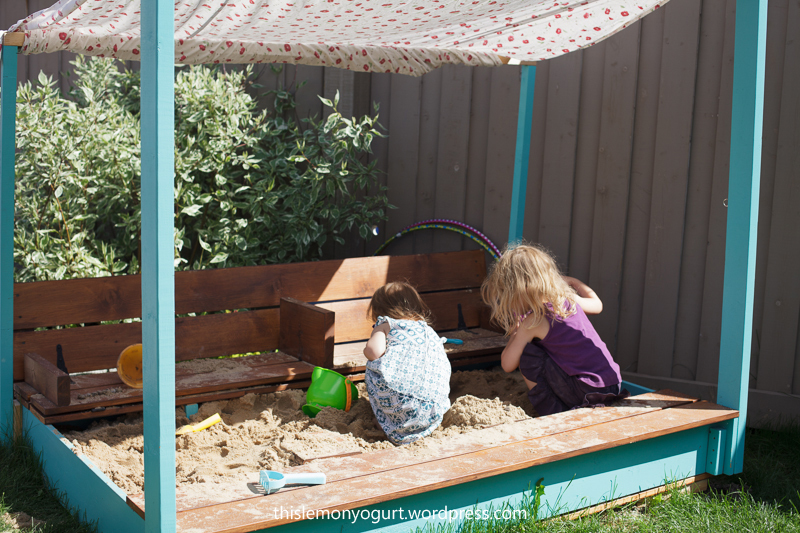
I started with the original plans for the sandbox with the benches, and then just sort of took off with the modifications.
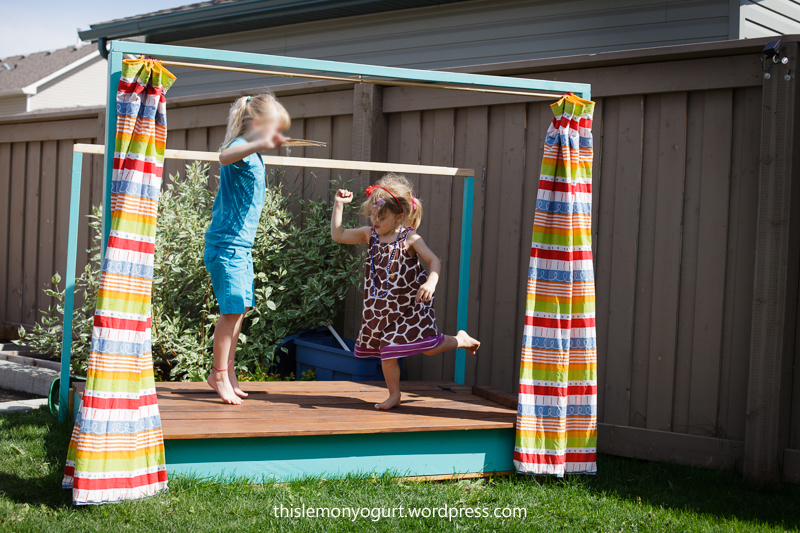
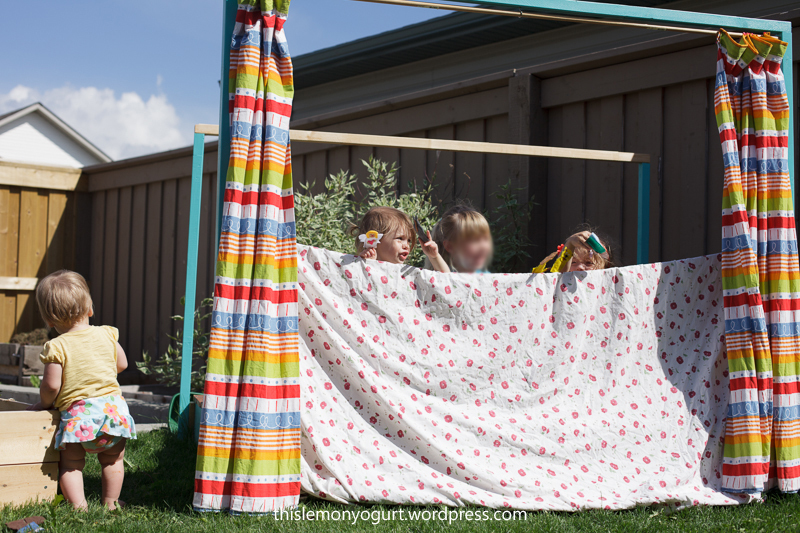
When it's open, it's a 4'x6' sandbox with a bench on one side and a canopy overhead. When it's closed, it's a stage complete with curtains, or can also convert into a puppet theatre.
I had to make several adjustments to the original plan to allow for enough support for the stage to be walked (and danced) on, including an extra armrest in the bench, and a few blocks built up from the base of the sand area. I also used 1x6 boards for the top instead of 1x4, to cover the entire 4' with only the one bench.
Thanks so much for the plans, my girls love it! (and thanks to KnittingEmily for posting the plans for the 6' sandbox, which gave me a jumping off point for the sizing I used.)
The story of how I built it can be found here:
http://www.thislemonyogurt.com/a-box-of-sand/

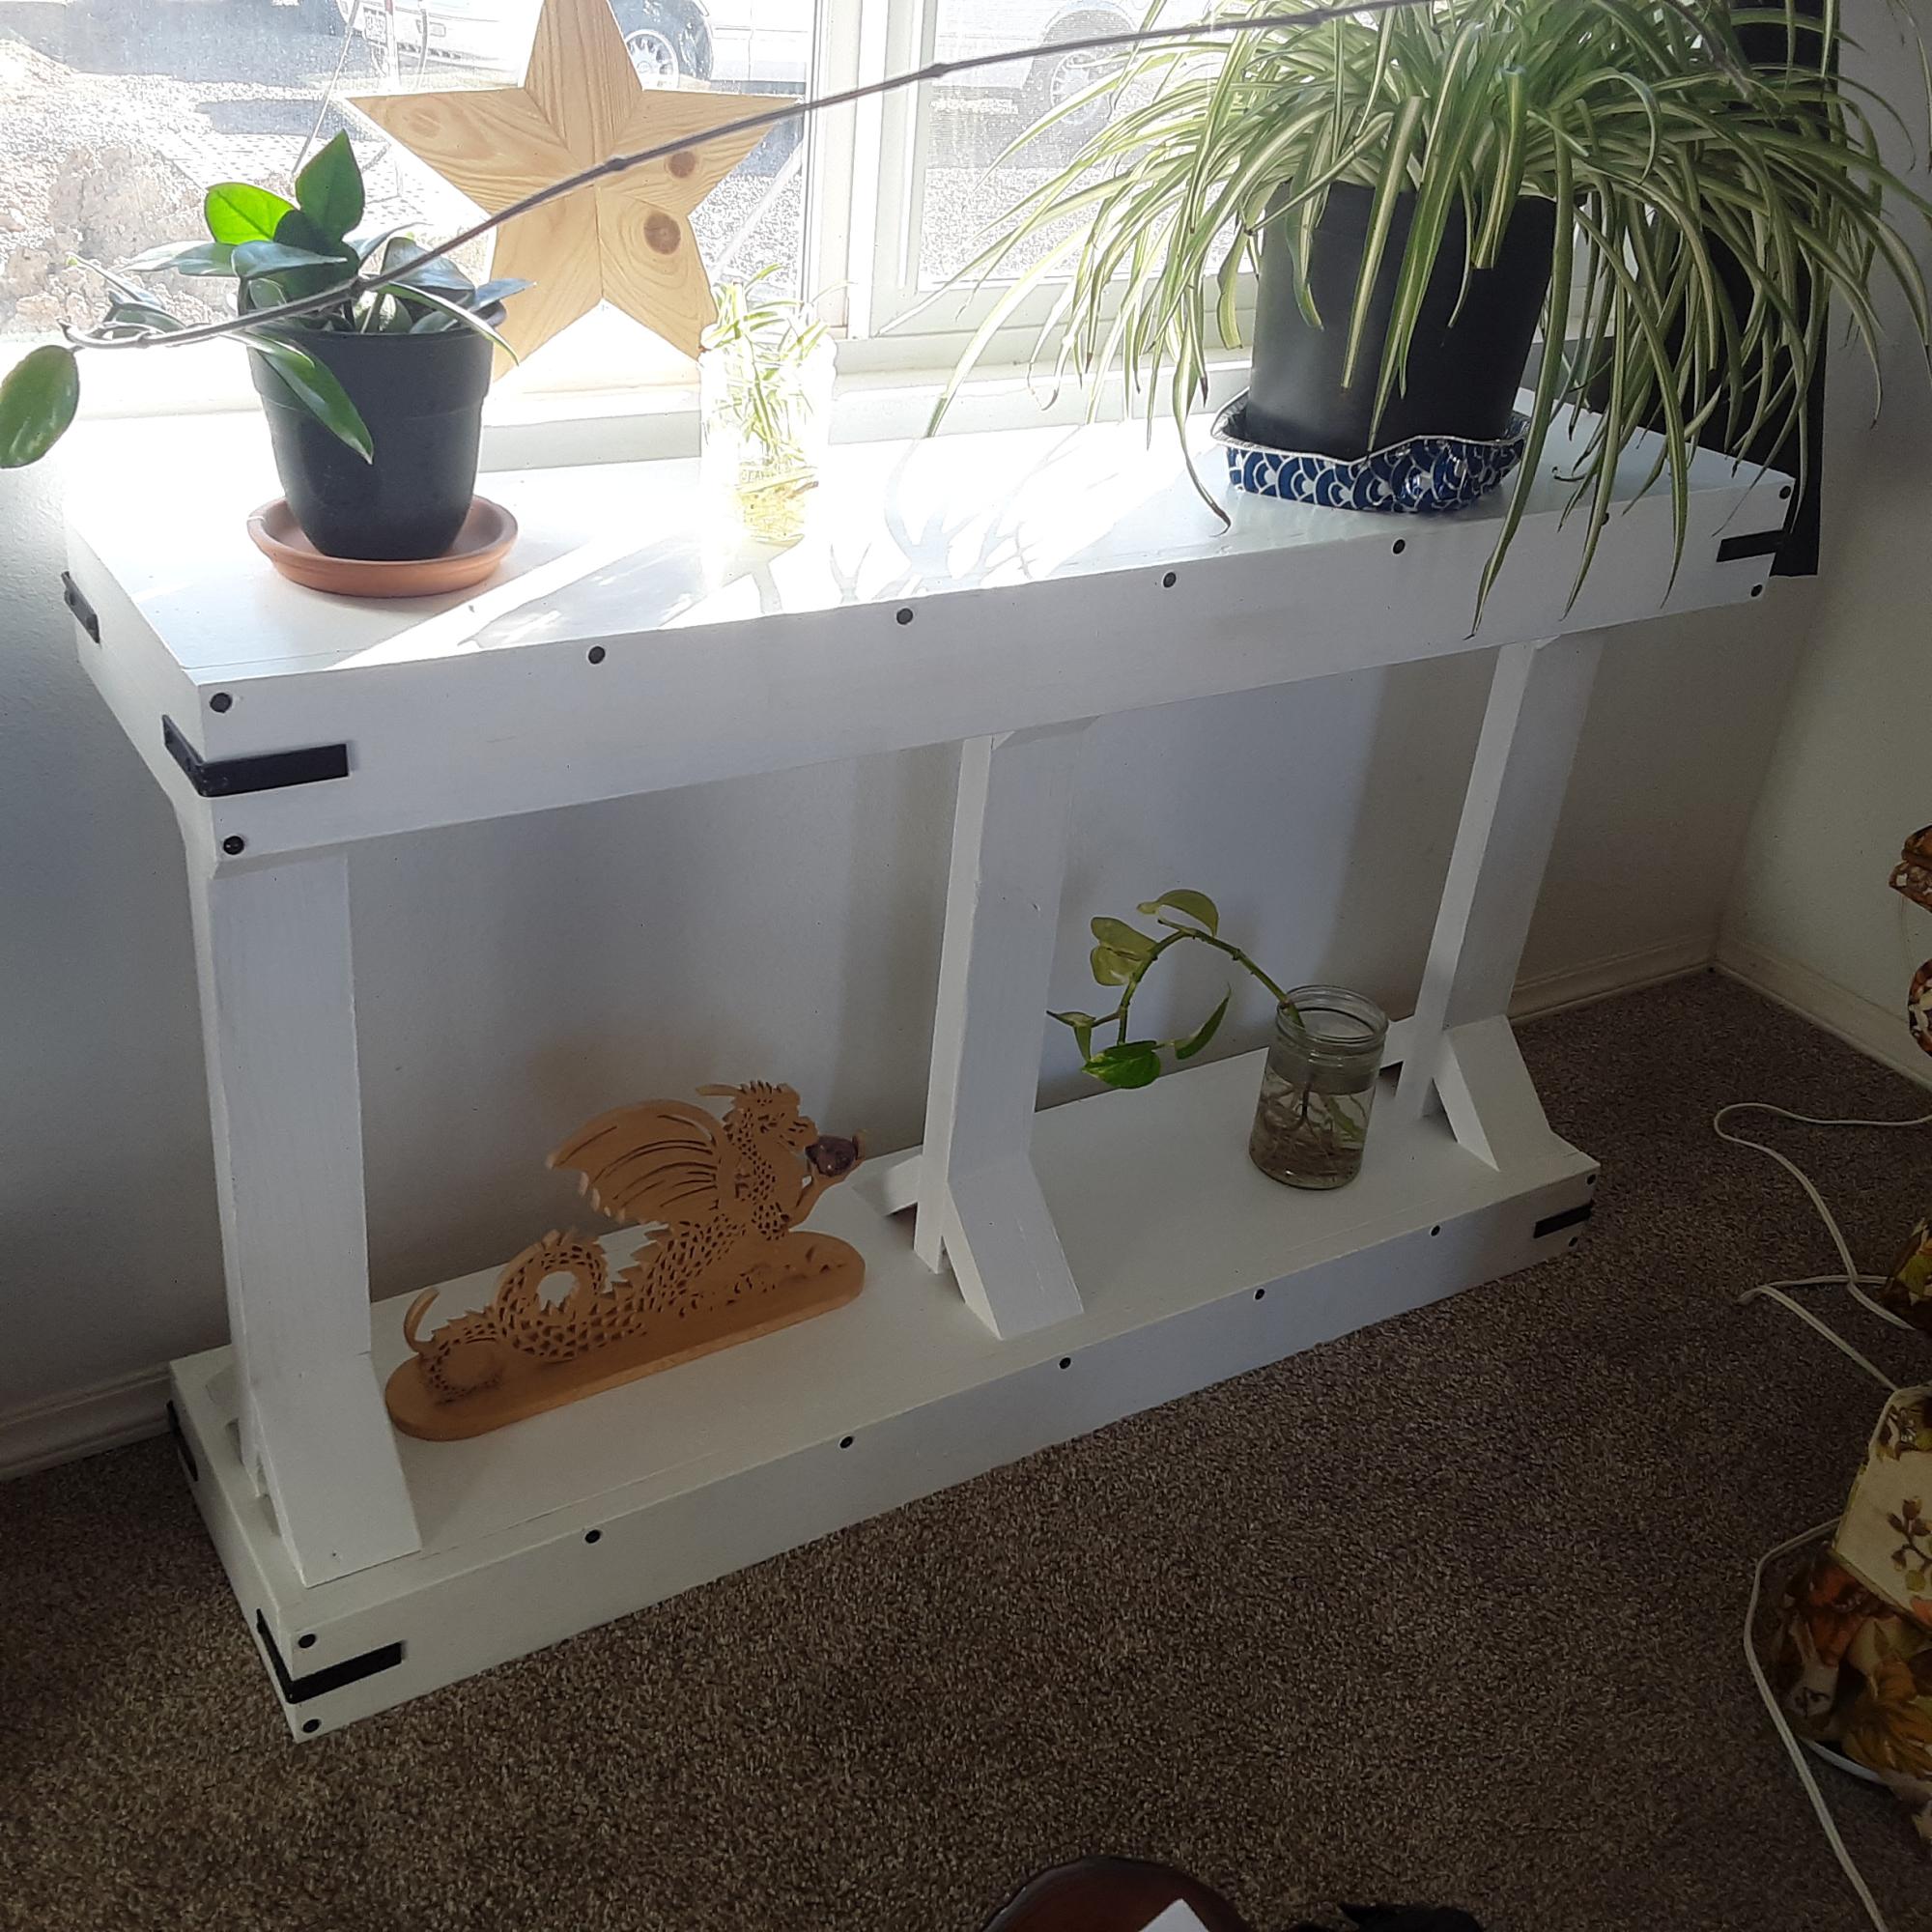
I loved this project. Since I can't buy wood, I have to use wood from pallets, or where ever I can find free wood. In this case I used 2x4's from pallets, 1x4 oak slats from an old bed frame I acquired and 1x4's from a large solid maple dog crate I acquired. The top was made from cabinet grade plywood we had left over from cabinets my husband made two years ago when we remodeled the kitchen (so I have to say that was purchased). The maple dog crate had some awesome wood, even tho it had been broken in a couple places. Just had to plane down the reddish finish on it. Since it was going to be painted, I didn't care what kind of wood I used. The only thing I had to buy were the corner brackets. Even the screws were from pallets we acquired, just had to paint the heads black.
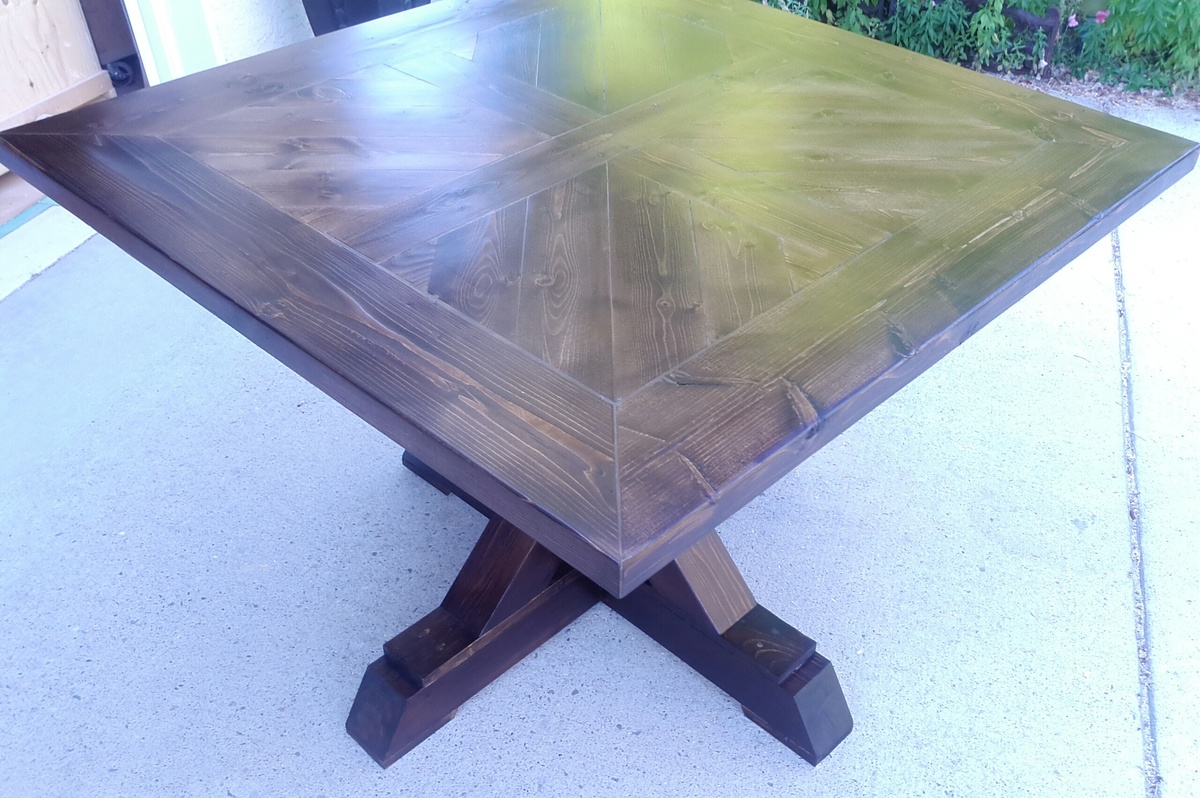
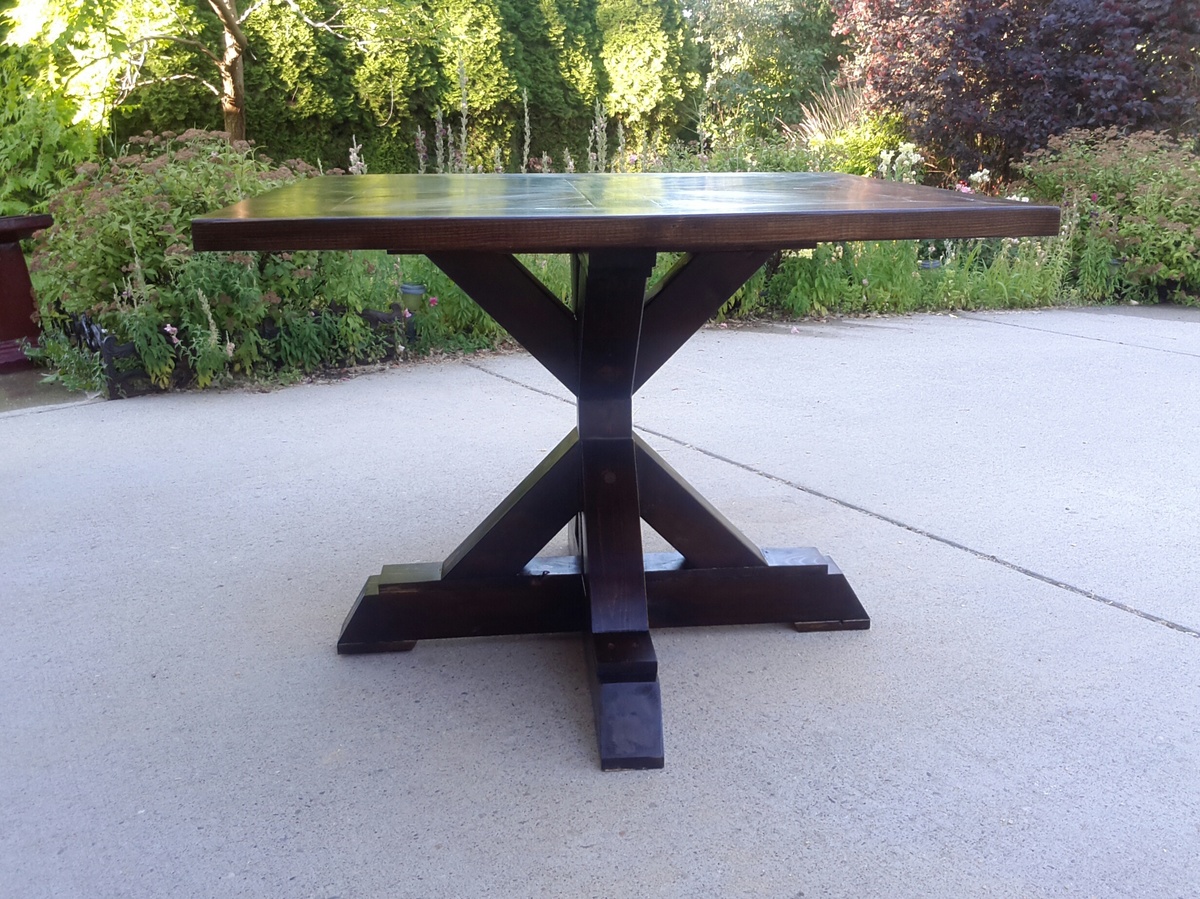
Needed a small table for our new house so I decided to build one, I followed the design fairly close. The only creative difference and I'm going to pretend I meant to do it was that I rotated the squares 90 degrees.
A few tips / things to look out for:
- The angled legs are tricky to line up/attach but you can use alot of woodfiller there to fill in the gaps and you can barely notice it once it is all together.
- When attaching the slats to create the squares for the top, add 5 pocket hole screws to each side, when you go to attach them you will thank me, 3 on each side of them doesn't hold as tight as you need it too.
- on the underside of the top I also added some scrap squares of 1x4 under the small triangles to stop them flexing, attached to the 2x6 with pockethole screws.
- Palm Sander - should be listed as required tool, to level out the top after assembly I went through a pack of 120 grit discs.
- There is not much room for error if you only have 2 8 foot 2x6's so cut them a couple blade widths bigger than you measure and sand them down to exact size.
as I used SPF for the table top I think I am going to get a piece of tempered glass cut for the top to protect the soft wood and give me an easy surface to clean.
Thu, 07/25/2013 - 11:15
I am definitely bookmarking this! Very nice job. It's beautiful.
Thu, 07/25/2013 - 16:04
I have a hard time getting a finish that is that dark and rich looking. Good job!
Wed, 10/09/2013 - 08:25
NICKFMC
On the table top did you fill in the seems where the boards meet with wood filler? It looks like there may be something between them and it has a very smooth appearance. I don't really want the gaps to show on mine and was wondering how you got yours to look so smooth.
Great job on the table! and thanks for any help you can give me!
Paul
Wed, 01/29/2014 - 11:57
I really liked how the inner squares are turned 90 degrees. The table looks less rustic, a bit more polished. I believe your extensive sanding contributed to the finished look.
One bit of advice. You may want to start with a more aggressive sandpaper to make edges flush. You can start with a 60 or 80 grit and then work your way up to 120 or 150.
Sun, 11/20/2016 - 16:42
Hi all,
I made a table almost identical to this with the top being more farmhouse style. My problem is that a friend of mine offered to buy one of these if I make one for him. I never know what to price things at when asked to make for friends. I always let my feelings of friendship cheapen the cost. I would greatly appreciate some help in what price point to set a table like this at. Thank you in advance for any help.
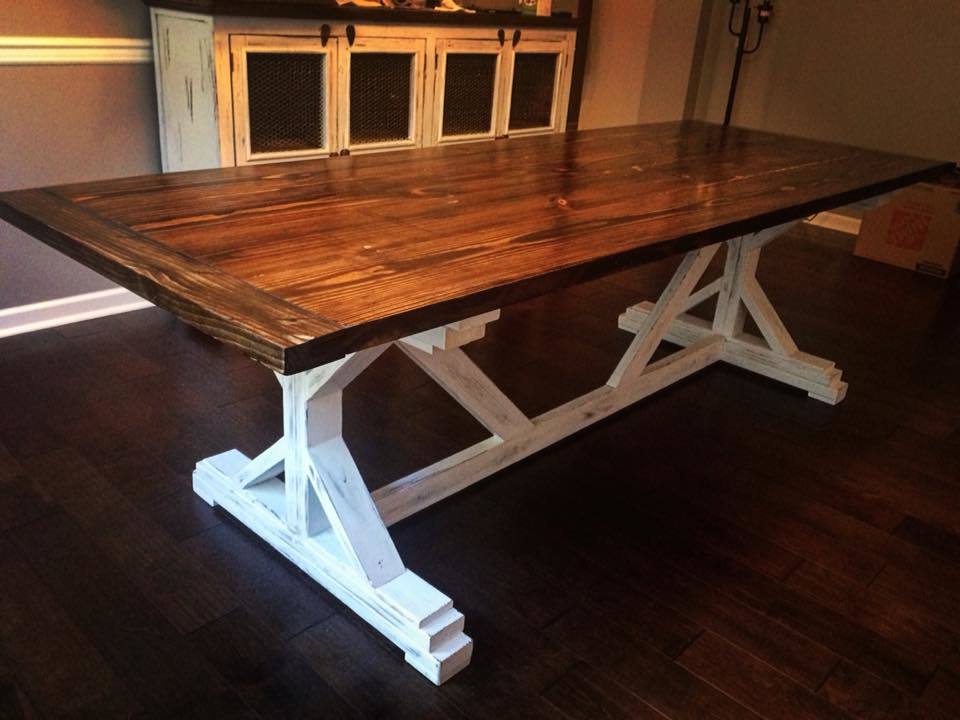
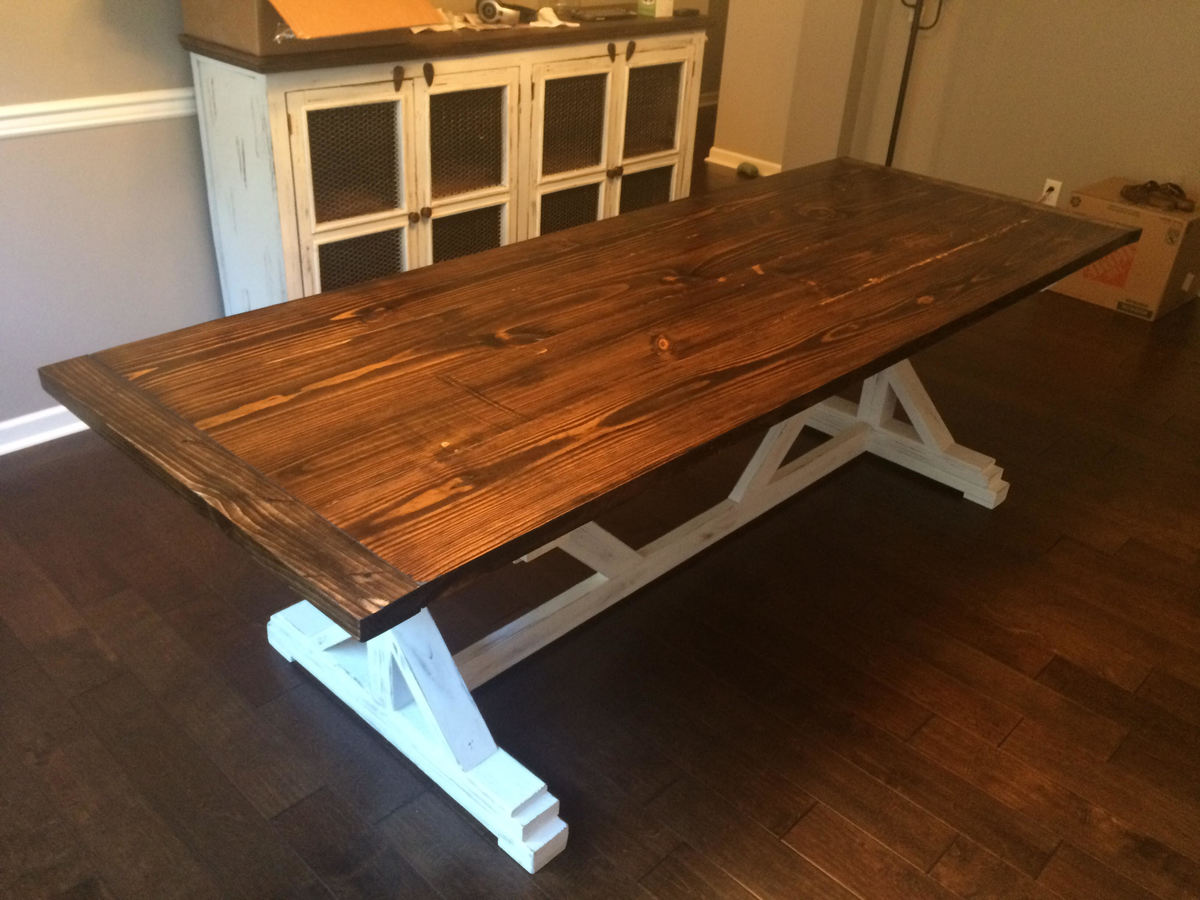
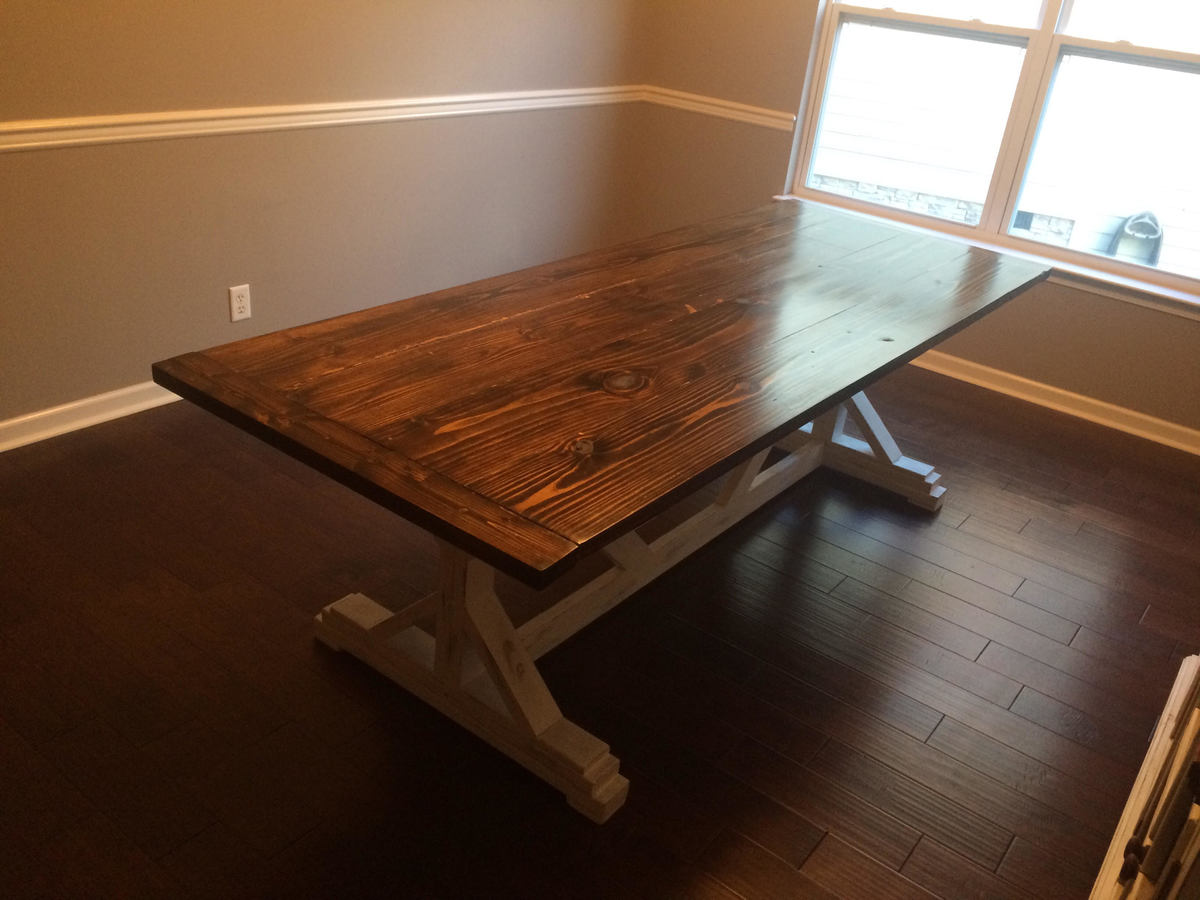
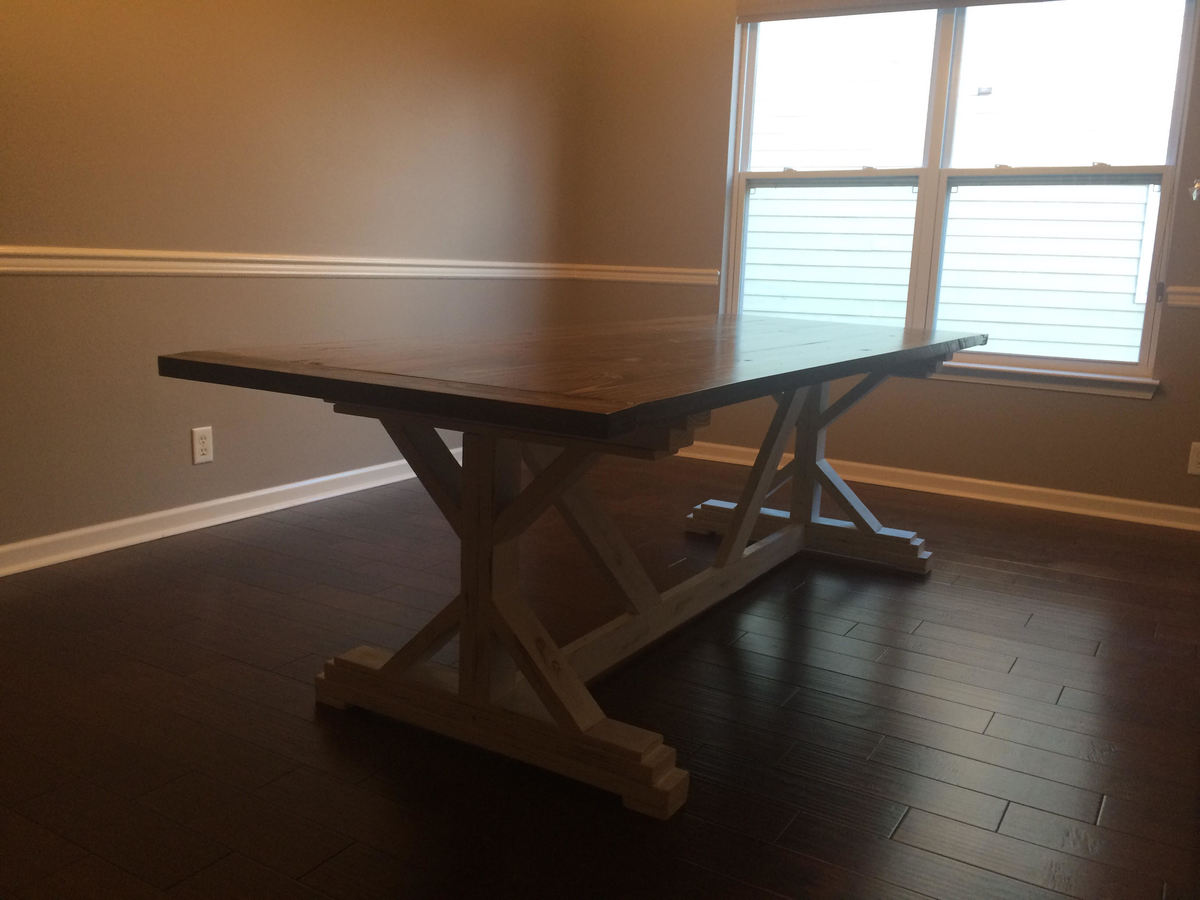
I modified these plans a little. I added some tongue and groove breadboard ends, and used Rockler table top fasteners to attach the top. I worked on it in my spare time after work a couple days a week for about a month. I'm happy with the overall outcome!
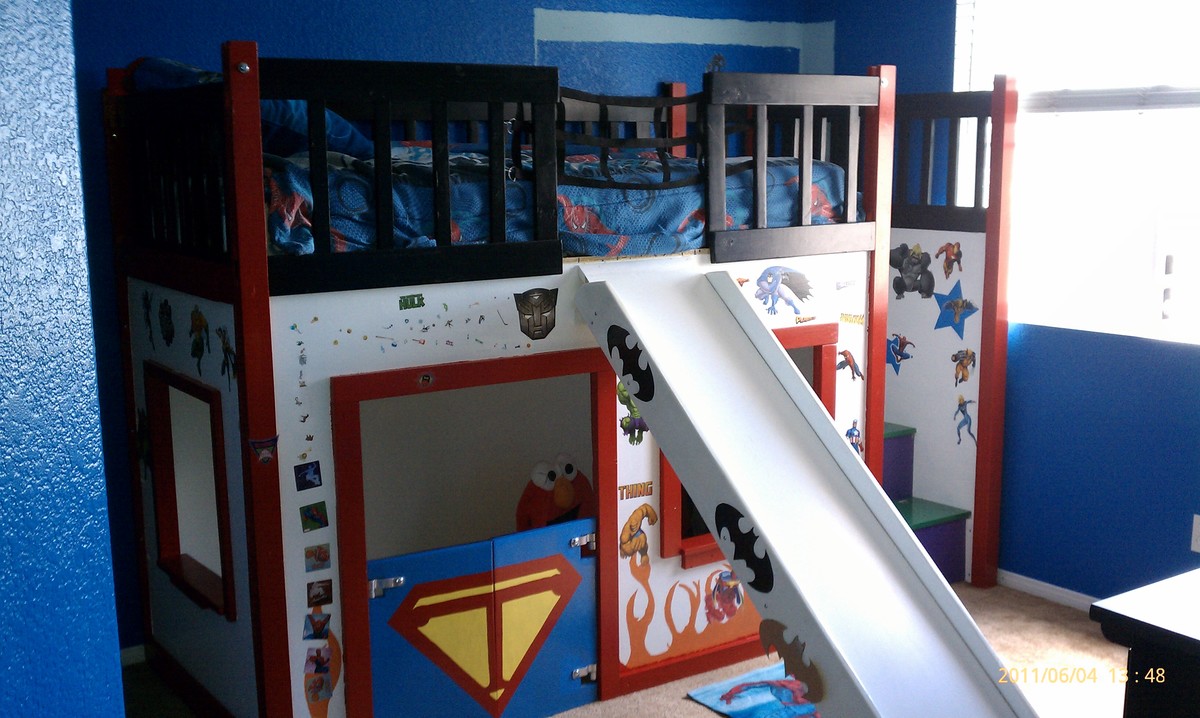
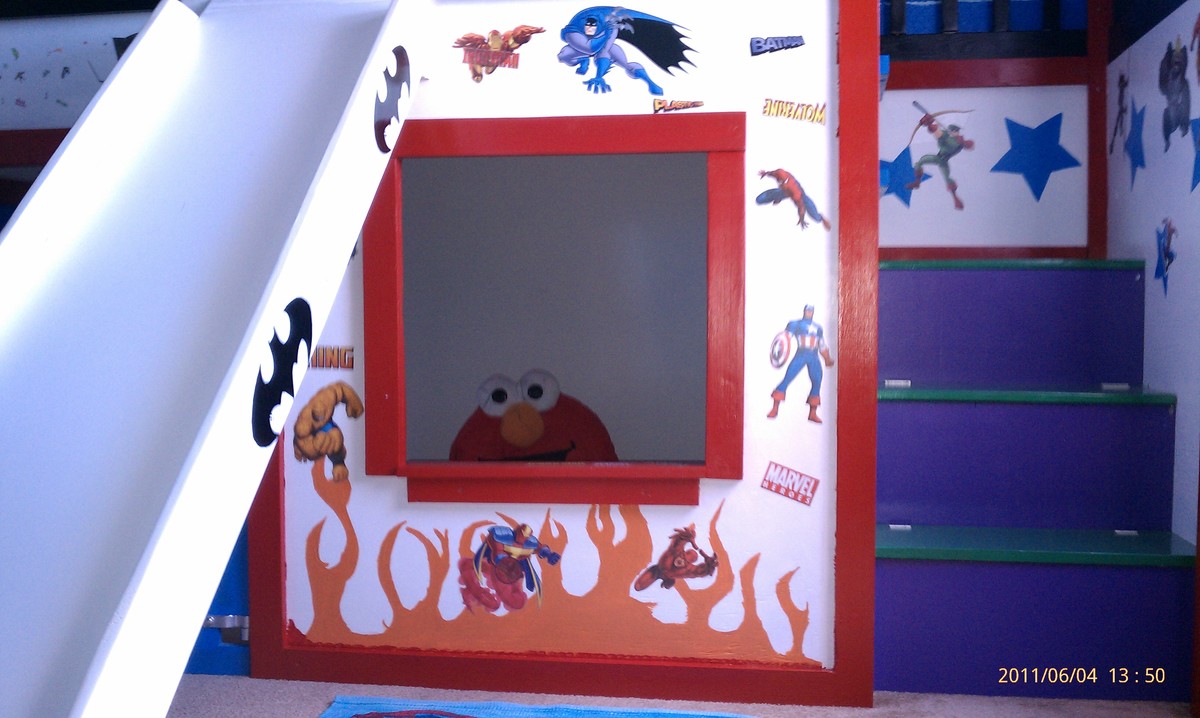
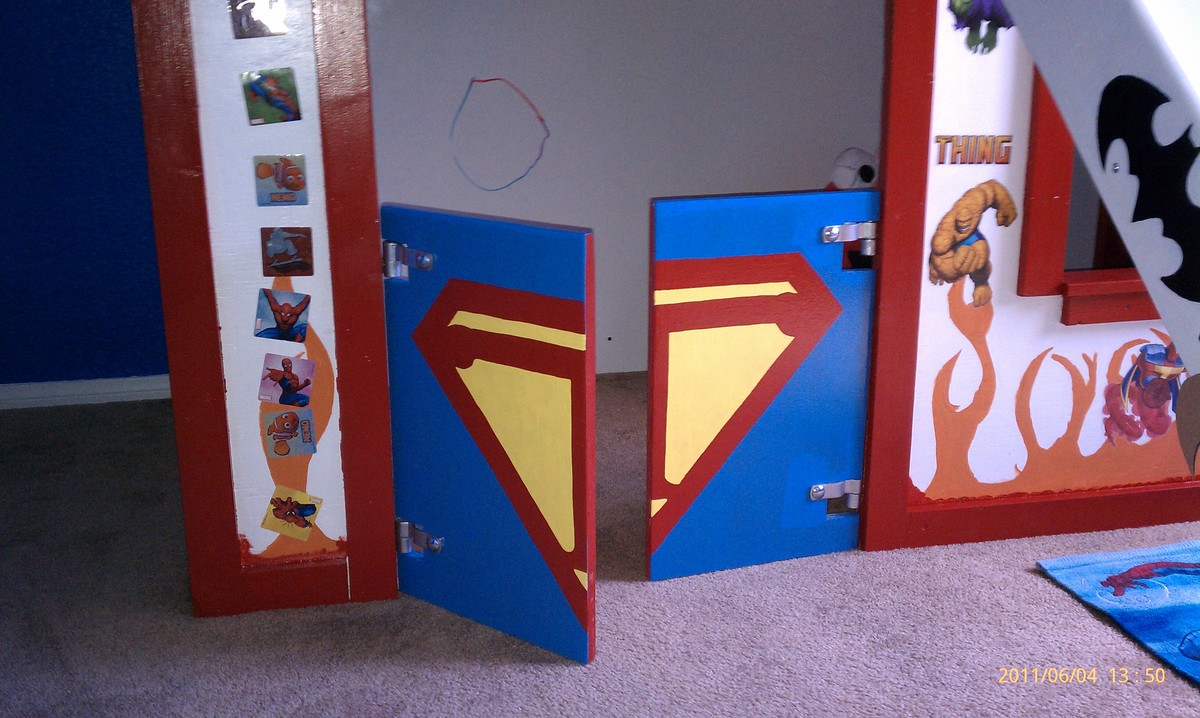
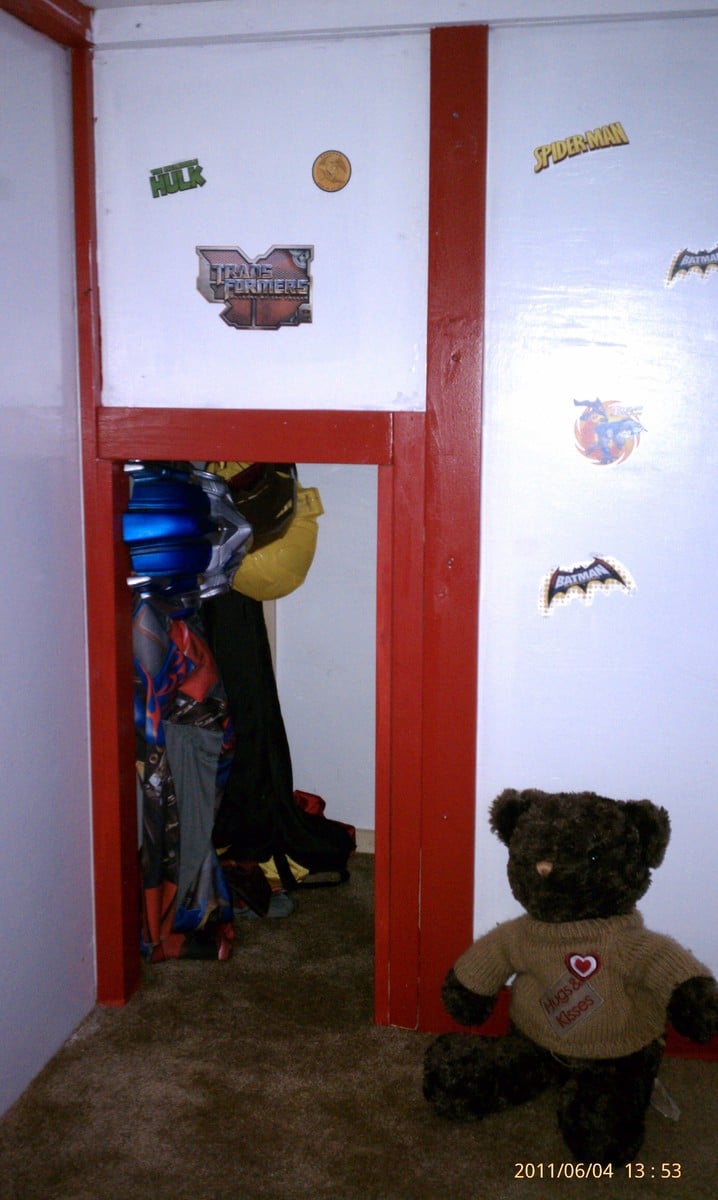
My 4yr old son had been asking me to build him a Super Hero Clubhouse. He thought it was going to be outside! I added the slide and door and the back inside wall is a whiteboard. He absolutley loves it!! It took about 9 weekends, the painting was the longest task.
Sun, 07/03/2011 - 15:26
How did you make the slide? What materials did you use to make it "slidey?"
Thanks
Tue, 09/27/2011 - 12:40
Hi there, sorry for the delay, I didn't know anyone had commented!
The slide is simply a piece of laminated utility shelving. The laminated surface makes it slippery like a slide and eliminates the worry of splinters. Its 3/4" thick particle board and cut to match the correct angle from the bed to the floor. I then added 1x3's to make the hand rails and there are 2- 2x4's running the length of the slide underneath to support it. The slide itself is nailed to the supports underneath and the supports are cut at an angle on both ends and screwed to the bed from the inside. Its very solid!
Thanks!
Wed, 11/02/2011 - 11:25
Super cute....nice to see it decorated for a little boy..my son turns 4 in December and I'll be redoing his room. My only concern would be how much additional space the slide would take up? About how far from the base of the house front is the bottom of the slide.
Wed, 11/23/2011 - 09:06
From someone that has done a modified playhouse loft bed, I know how tiring and time consuming it can be! Looks great and can't show my son or he will decided he wants this one instead!
Jeff
Wed, 11/23/2011 - 14:10
I agree with the above comment: I can't let my sons see this! :)
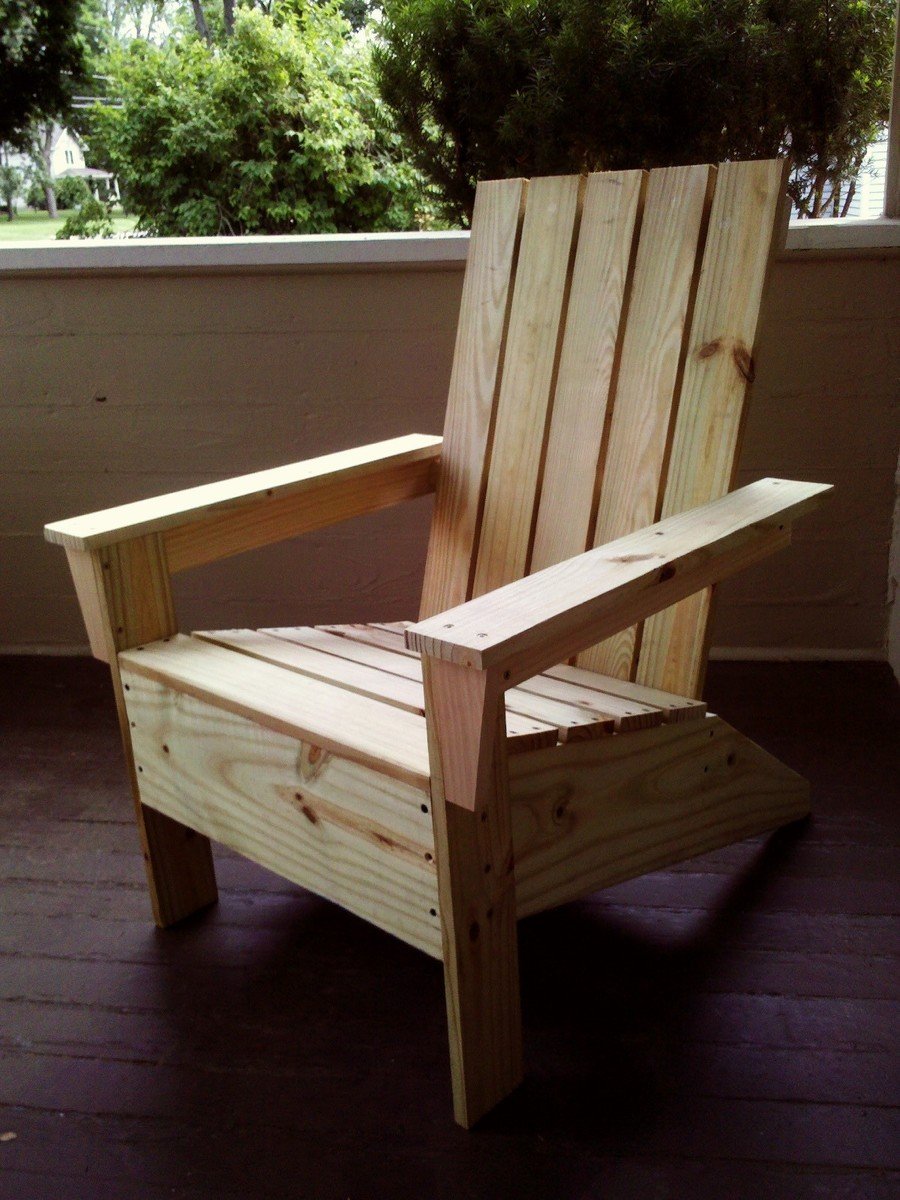
Got a chance this weekend to do our first (good!) woodworking project. Love the chair, gotta head back to Menard's to get some more lumber for chair #2!
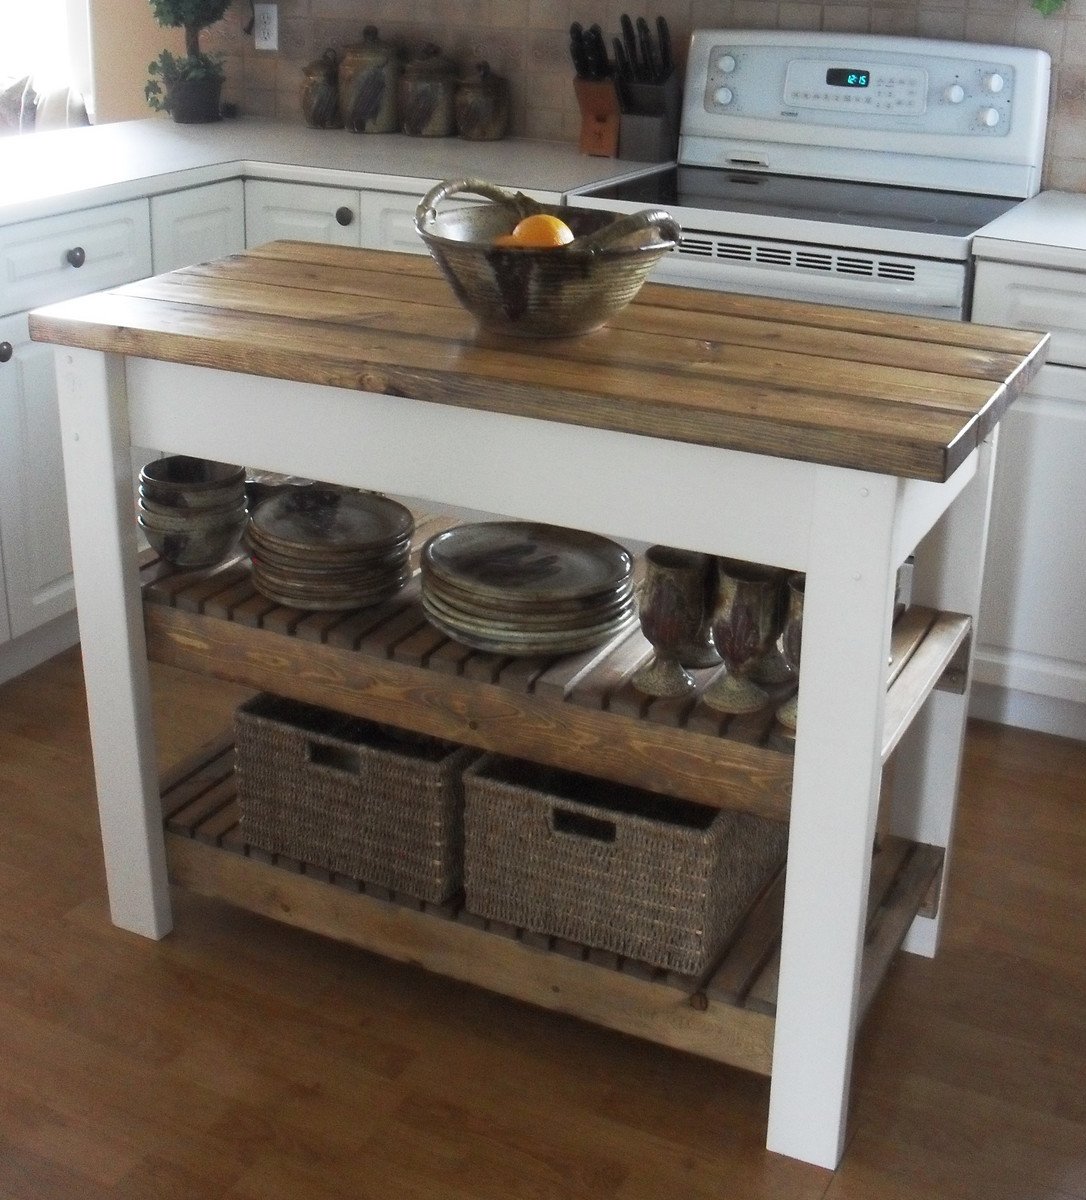
The plans were easy to follow. I modified my island to fit my space and cut it down to 44 inches in length.
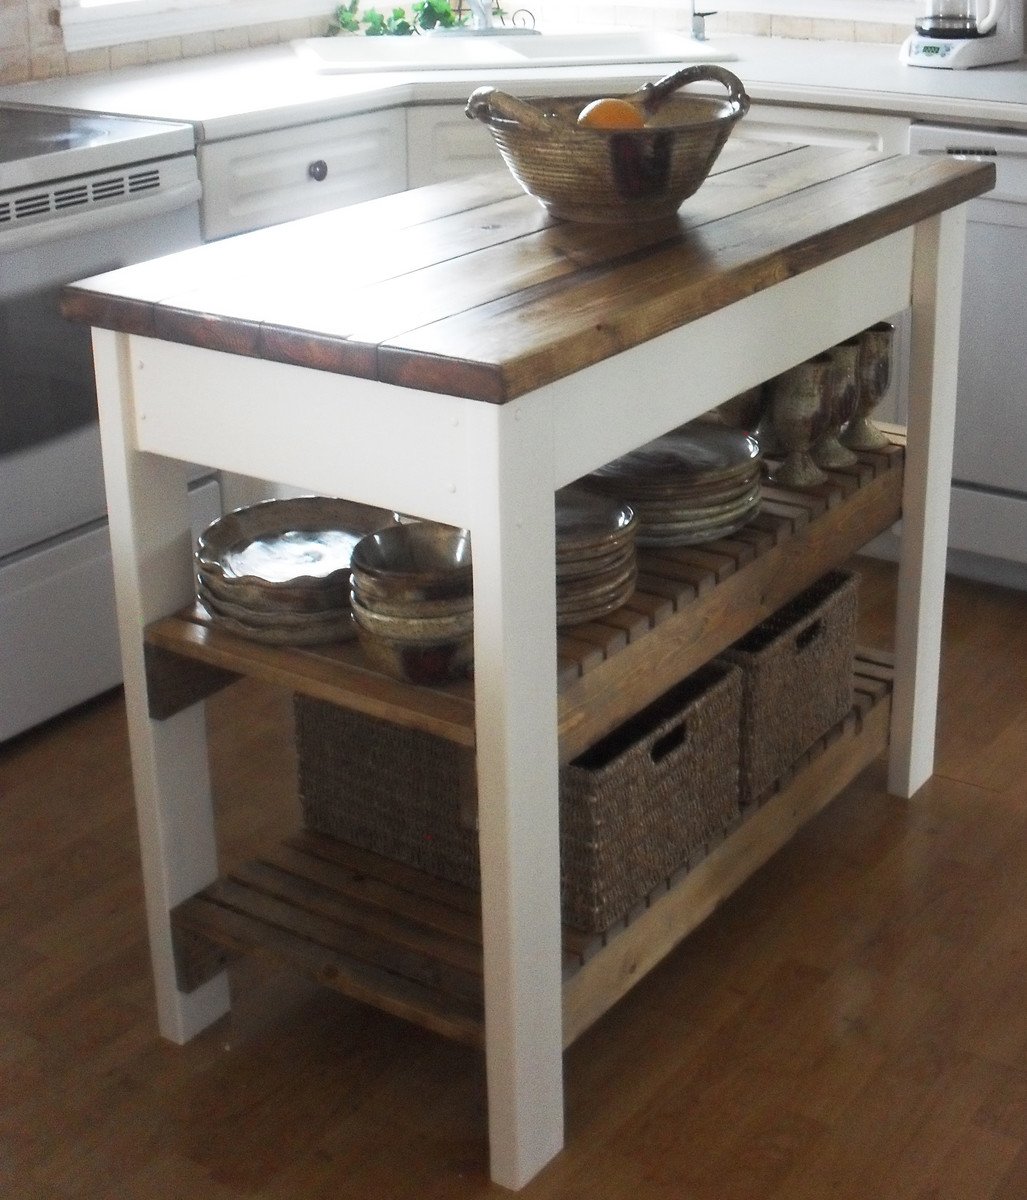
Fri, 07/22/2011 - 14:13
i was looking for THE PERFECT ISLAND.. thank you so much for posting this. love it and can't wait to start building it. where did you find the shelves?
Mon, 10/31/2011 - 15:33
Your island is gorgeous, and I love the modification you made to the original plans on the shelving support! I would like to know what size the boards are that you used so that I can duplicate. Thank you!
Tue, 02/07/2012 - 19:43
I would think it would be basically the same build, just add brackets to support the extra wood.
Mon, 03/05/2012 - 15:20
I want to make this Kitchen Island but if can't find the Supply List. Would you mind posting it or emailing me please! This will work perfect in my Kitchen
Mon, 03/05/2012 - 17:46
Wow! Just a wonderfully simple project! I can figure it out by looking at it. I have a piece of Rock Maple Counter Top 24"x6'that needs legs. I'll probably use 4x4' for legs, six of them. But the shelves will be just like this. Thank you!
Mon, 03/05/2012 - 17:50
Wow! Just a wonderfully simple project! I can figure it out by looking at it. I have a piece of Rock Maple Counter Top, 24in.x6ft., that needs legs. I'll probably use 4x4s for legs, six of them. But the shelves will be just like this. Thank you!
Mon, 03/05/2012 - 18:59
I have enjoyed what I have seen so far. You are an awesome designer.
Mon, 03/19/2012 - 11:57
Do you have instructions on how to build this? It's awesome!
Wed, 04/04/2012 - 11:58
Just click on the link for the instructions. It's under the heading 'About This Project' titled as 'From Plan: Easy Kitchen Island Plans'.
Click where it says 'Easy Kitchen Island Plans'. When you hover your cursor over the words, you will see that is a hyperlink.
Sun, 05/20/2012 - 06:48
I love your island and I also have a small kitchen...would you happen to know the sizes of the boards you used? Thanks
Wed, 07/25/2012 - 14:31
Yours looks so different and so much better then the one that show how to make it, how did you do it? I really would love to build it but have no idea how...
Thanks so much!
Wed, 08/15/2012 - 13:08
This island is perfect. I love the shelves and the size. Any chance you could send me the dimensions of this island and details on how you did the shelves? Great job!
Wed, 12/31/2014 - 07:37
Hi, this is my first time building anything. I really like the modification made to the original plans. I like the legs facing the other way. I can't figure out how to modify the cuts on the sides and front and back supports for the top to adjust for turning the legs the other way. Are there modified plans. LOL I need instructions, I’m not quite there yet on doing it myself. Thank you
Sat, 06/06/2015 - 18:33
Hello, i love this island but maybe i missed it. What kind of wood is everyone using? Frosting said $47 but that could only be for pine right? Are people using pine to build this? I would like it to look just like the picture. Any help would be appreciated! thanks!
Fri, 08/14/2015 - 14:34
I wnat to kow how much wood and what size I need ans the saws i need to build this project
Fri, 08/14/2015 - 14:35
I need to know how much wood and what size wood and also what kind of saws do I need for this job
Fri, 08/14/2015 - 14:35
I need to know how much wood and what size wood and also what kind of saws do I need for this job
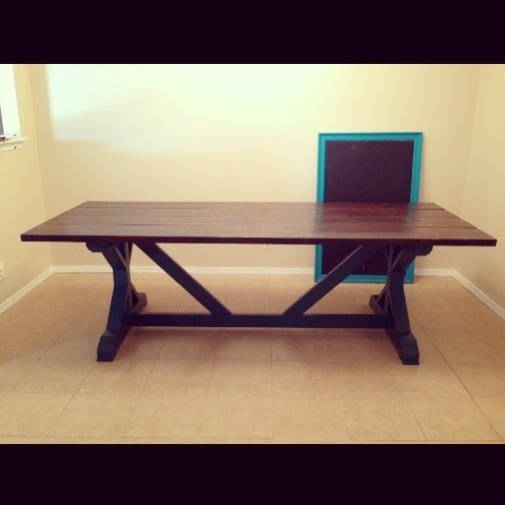
My husband tackled the Fancy Farmhouse Table and finished it in 1 weekend and it looks amazing! I could not be more thrilled with the outcome.
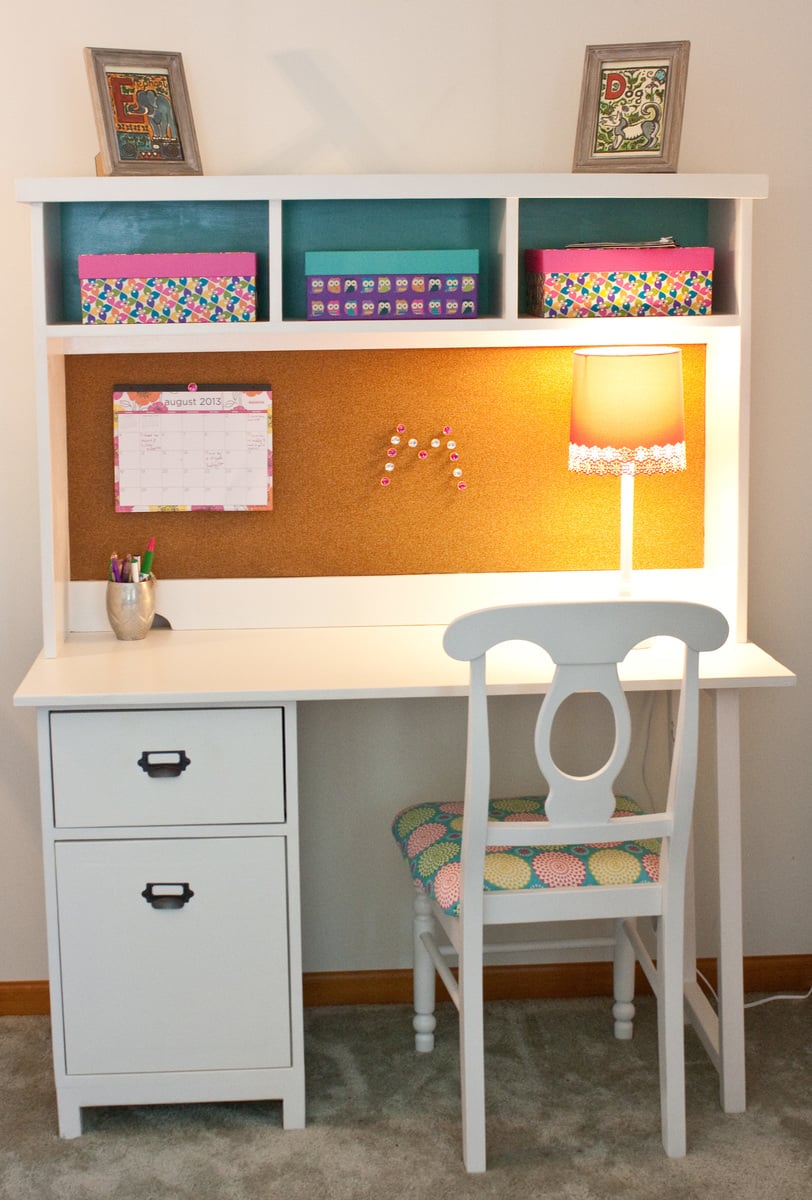
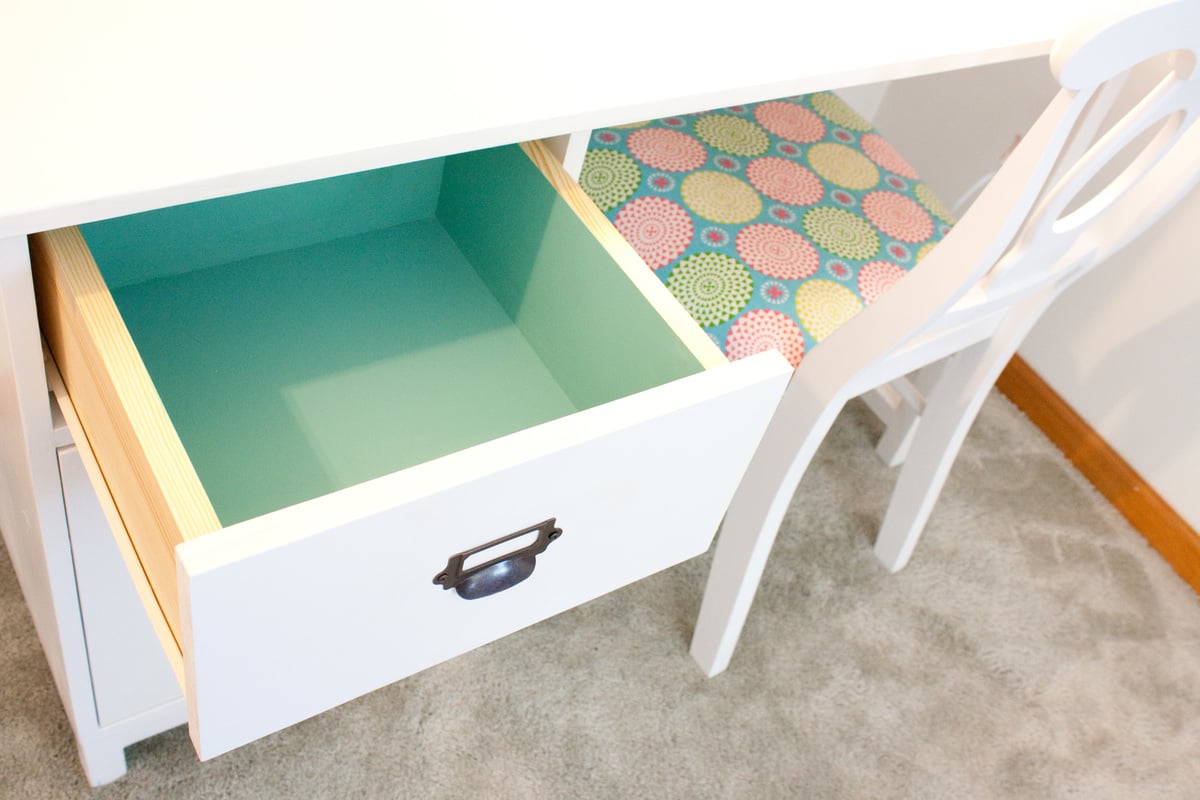
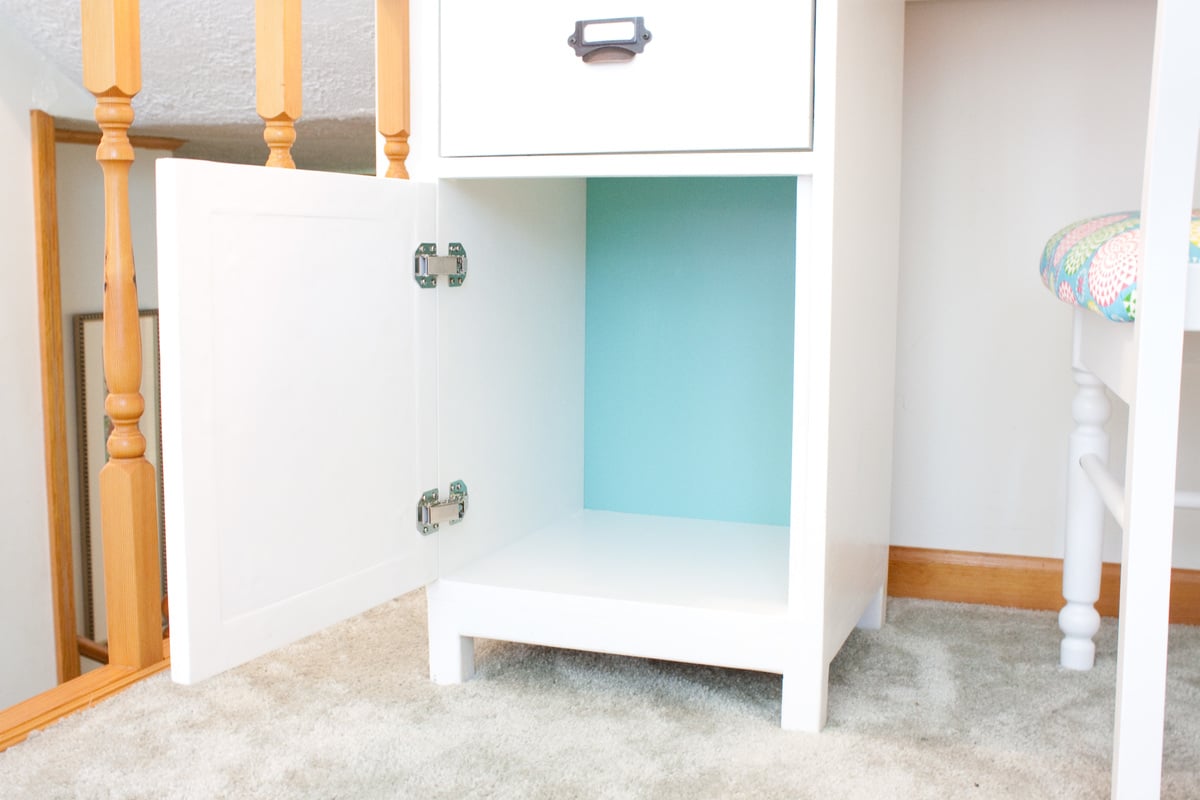
I made this for my 6 year old who just started the first grade. The only modification I made to the plans was to make a couple cutouts in the hutch for cords. I also added cork which comes in a 24 by 48 inch roll.. I ordered all the hardware from the same place that Jaime from That's my Letter suggested in her build post. This was my first drawer and it was intimidating but it was fairly easy and cute as it can be:-) The plans were very easy to follow! I got the idea for the peg board organizer from the Shanty 2 Chic website. It's just 1x4 frame around the pegboard. The chair was a craigslist find I painted and made a cushion for with some foam and cute fabric. I'm really happy with how it turned out and look forward to the day when my daughter will actually use it. LOL
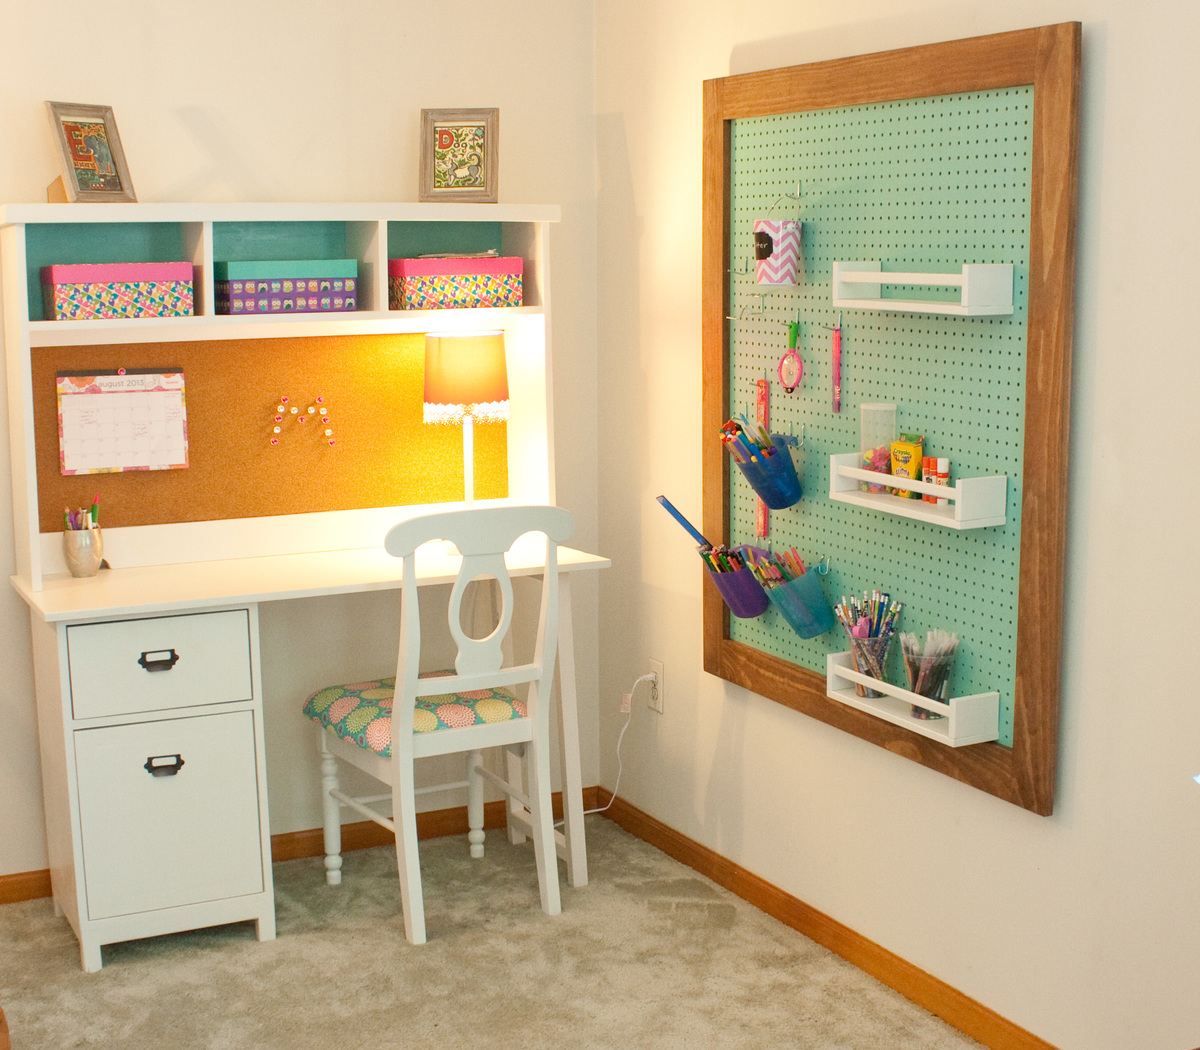
Mon, 08/26/2013 - 07:39
Absolutely adorable! I love all your finishing details as well.
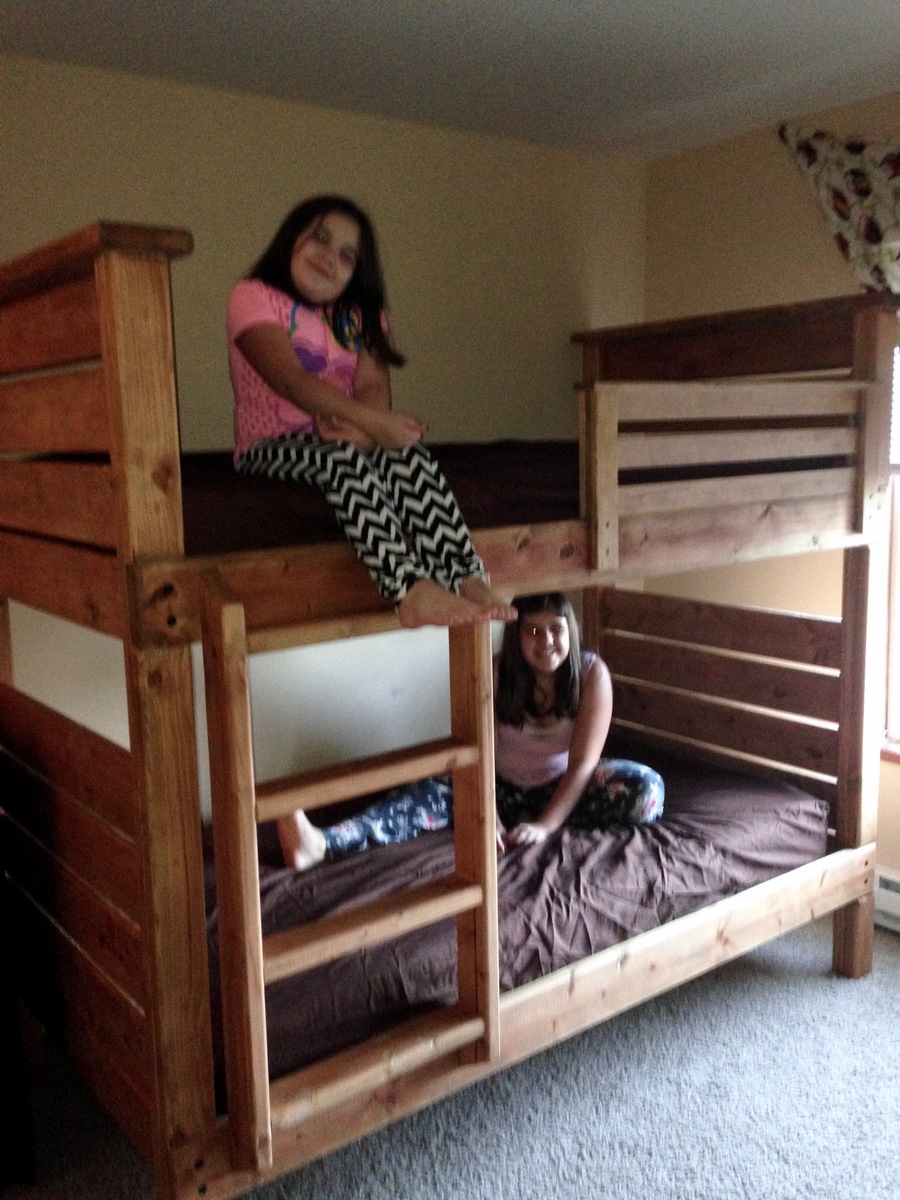
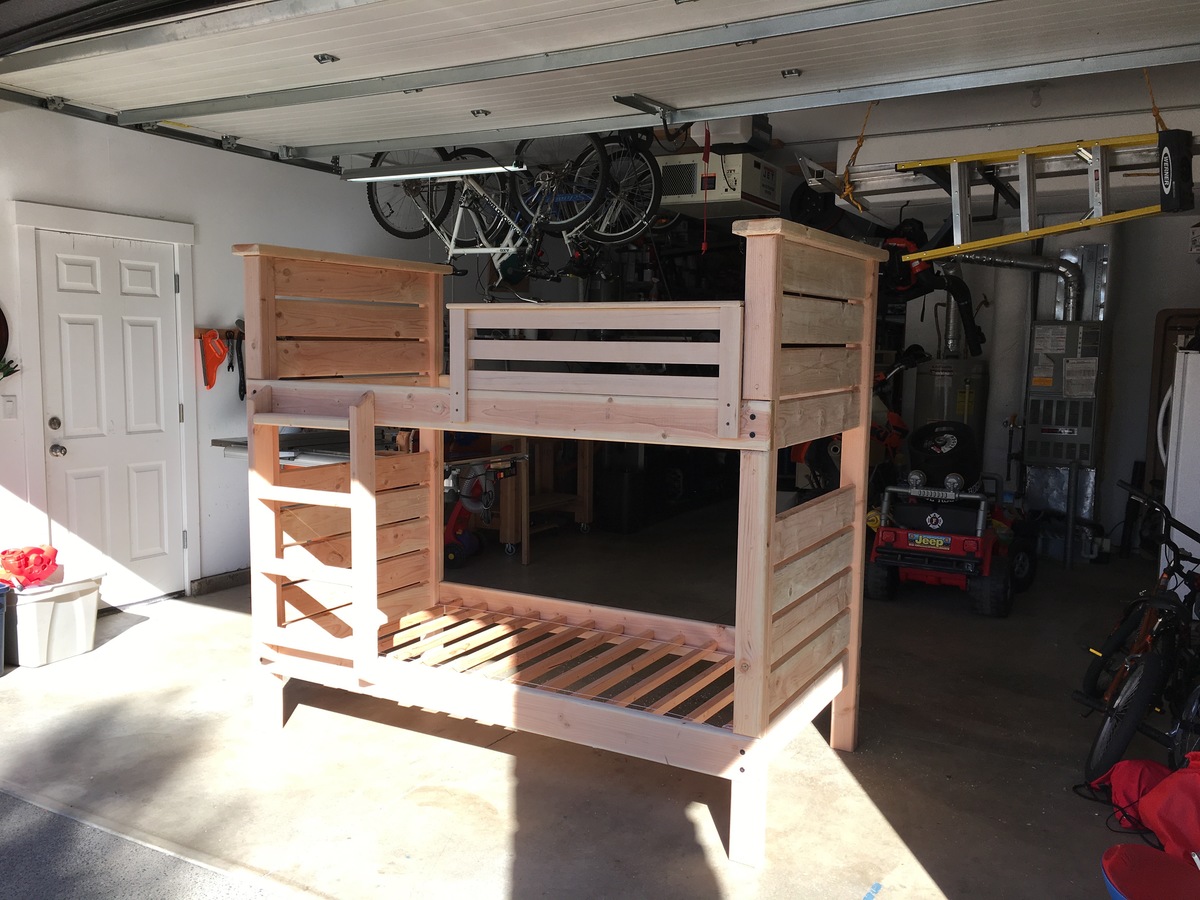
I made another one of these bunk beds for a family near my community. This time I made all cuts from longer boards 16' + The boards had less nknots, which required less sanding and came out better!
Comments
Ana White
Mon, 01/19/2015 - 17:13
Gorgeous! I love the stain!
Gorgeous! I love the stain! This is a beautiful project!
In reply to Gorgeous! I love the stain! by Ana White
OnBlissStreet
Wed, 01/21/2015 - 06:04
Thank you!
Thanks so much! The hard part is picking the next project!
skyusafb52
Tue, 03/01/2016 - 10:49
floating shelves
These would be perfect for J room.