Community Brag Posts

Love this coop!

Submitted by ladybug7 on Sun, 11/30/2014 - 06:03

The plans are so easy to follow! They are a great jumping off point for customizing the coop for your own needs! We added a run door, ladder support, insulated floor and wall, removable window, and a loft door. The girls LOVE it!

Built from Plan(s)
Estimated Cost
After modifications, $250
Estimated Time Investment
Week Long Project (20 Hours or More)
Recommended Skill Level
Beginner

Comments

Planked Wood Sideboard

Submitted by JessB. on Tue, 12/09/2014 - 12:20

I was looking for something to hold my scrapbooking supplies.  I want to use my formal dining room as my craft room but have the illusion it's still a dining room. This plan was perfect.  This was my first time building anything from Ana's site.  I added feet to the bottom to change up the look just a little.  I also used a more detailed base molding.  I also added some support to the bottom to have somewhere to attach the feet and distribute the weight of all my scrapbooking supplies.  The best advice was to leave the top off until the end.  I also waited to attach the back till the very end also.  I thought I'd have the most trouble with the drawers but the doors ended up being the hardest part for me. Overall I'm very happy with the buffet!  I haven't decided how I'd like to satin it yet. I'll eventually get that done!  On to the next project. :)

Built from Plan(s)
Estimated Time Investment
Weekend Project (10-20 Hours)
Finish Used
none yet
Recommended Skill Level
Beginner

Comments

spiceylg

Thu, 12/11/2014 - 07:45

First build?! Beautifully done and love the mods. Impressed!

My Mudroom Lockers

Turned an entryway closet into these lockers for my kids.  I used the basic ideas in Ana's Smiling Mudroom for my plans. Lockers are just inside the entrance from the garage.   

Built from Plan(s)
Estimated Cost
$200.00
Estimated Time Investment
Week Long Project (20 Hours or More)
Finish Used
Valspar White Interior Satin
Recommended Skill Level
Intermediate

Mudroom Bench

Submitted by BeingHome on Sat, 02/23/2013 - 22:26

With much needed seating in the mudroom, an unused space (nook) was used to build a mudroom bench and shelf. No plans were used. I basically looked on-line and mentally drew up an idea of how I wanted the final product to look.  


There were some setbacks such as not like the knock down textured walls (after partially painting the bench). I ended up covering the textured walls with hardboard and repainted.


A bench cushion was made for added comfort and style.


Complete tutorial for the bench is here and the bench cushion tutorial is here.


Thank you.


Julie

Estimated Time Investment
Weekend Project (10-20 Hours)
Finish Used
Behr Ultra (paint and primer in one) in ultra white finish.
Recommended Skill Level
Beginner

Comments

Cleverly6

Thu, 05/16/2013 - 13:48

Thank you so much for the idea and plan. I used it to turn an extra laundry room that we have off of our garage into a much needed mudroom. The most challenging project I have ever done before is hanging blinds. But with your help and some from the Home Depot employees, I did it! Our family is more than happy with it. Thanks!!!

BeingHome

Sun, 08/25/2013 - 22:28

Thank YOU so much! I would love to see a picture of your new mudroom area. :) I am happy the plans helped and of course Home Depot. ;)

Sorry for my delayed response. :(

BeingHome

Sun, 08/25/2013 - 22:28

Thank YOU so much! I would love to see a picture of your new mudroom area. :) I am happy the plans helped and of course Home Depot. ;)

Sorry for my delayed response. :(

side street bunk bed

Submitted by zfinlayb on Fri, 03/15/2013 - 00:19

I chose to modify one end to incorporate the ladder using The 2 x 6s. I made a template and used a jigsaw to cut out the u shapes. A lot of work! Mostly sanding I made the bottom sides removable for guests an when they eventually are not needed.

Built from Plan(s)
Estimated Cost
450.00
Estimated Time Investment
Week Long Project (20 Hours or More)
Finish Used
None yet. Intend to use a light stain and sealer
Recommended Skill Level
Beginner

Comments

Potting Bench Project

Submitted by Anonymous (not verified) on Wed, 04/14/2021 - 10:50

Fun project indeed! Just make sure its all square every step of the way.
Thanks, I look forward to perusing some more projects!!

Estimated Cost
$50
Estimated Time Investment
Day Project (6-9 Hours)
Finish Used
Thompson's Clear Wood Sealer, two coats
Recommended Skill Level
Beginner

Comments

Kendal Dresser - upgraded

Submitted by Mobrien07 on Tue, 02/03/2015 - 15:59

I added front drawer trim & a walnut stained top to this already great design  


Built from Plan(s)
Finish Used
Minwax Special Walnut
Varathane clear coat
Sherwin Williams high gloss white
Recommended Skill Level
Intermediate

Comments

kmom721

Sat, 06/22/2019 - 08:44

It looks like they just bought some moulding and attached it


Dog Crate with a twist...

Submitted by AlexO on Mon, 05/08/2017 - 19:08

I really liked the Large Wooden Dog crate but wanted the sides to be lower and wanted to make sure there was no easy chew escape.  Not sure if you can see from the photo but the cats have taken over... Will need to make a larger one for the dog!

I followed the plan pretty much other than lowering the panel on the side and replacing the wooden bars with rebar.  The rebar was a bit of a learning curve getting the holes lined up perfectly but I figured it out and I think it came out pretty good!

Used all pine 1x3 and 1x2s.  Picked up a pine panel for the top and the bottom is a 3/4 plywood. Made our own chalk paint for the finish and sealed it with wax.

Oh, forgot, added tongue and groove pine for the back and finished it and the top with Antiguing wax.

Lots of fun and I think I will make a double one next!

Built from Plan(s)
Estimated Cost
Around $100 if you don't count all the practice pieces for the rebar!
Estimated Time Investment
Week Long Project (20 Hours or More)
Finish Used
Chalk paint and antiquing wax
Recommended Skill Level
Intermediate

Fancy X Farmhouse Table & Bench

Submitted by diegaeb on Fri, 05/14/2021 - 00:55

Last summer we got a new terrace and definitely need new outdoor dining furniture.

Estimated Cost
200 €
Estimated Time Investment
Weekend Project (10-20 Hours)
Finish Used
Mylands Artillery Ground No. 164 Wood & Metal Eggshell & Mylands Cadogan Stone No. 59 Wood & Metal Eggshell

Comments

Custom kids closet

Submitted by Jon Moore on Sun, 04/07/2013 - 19:36

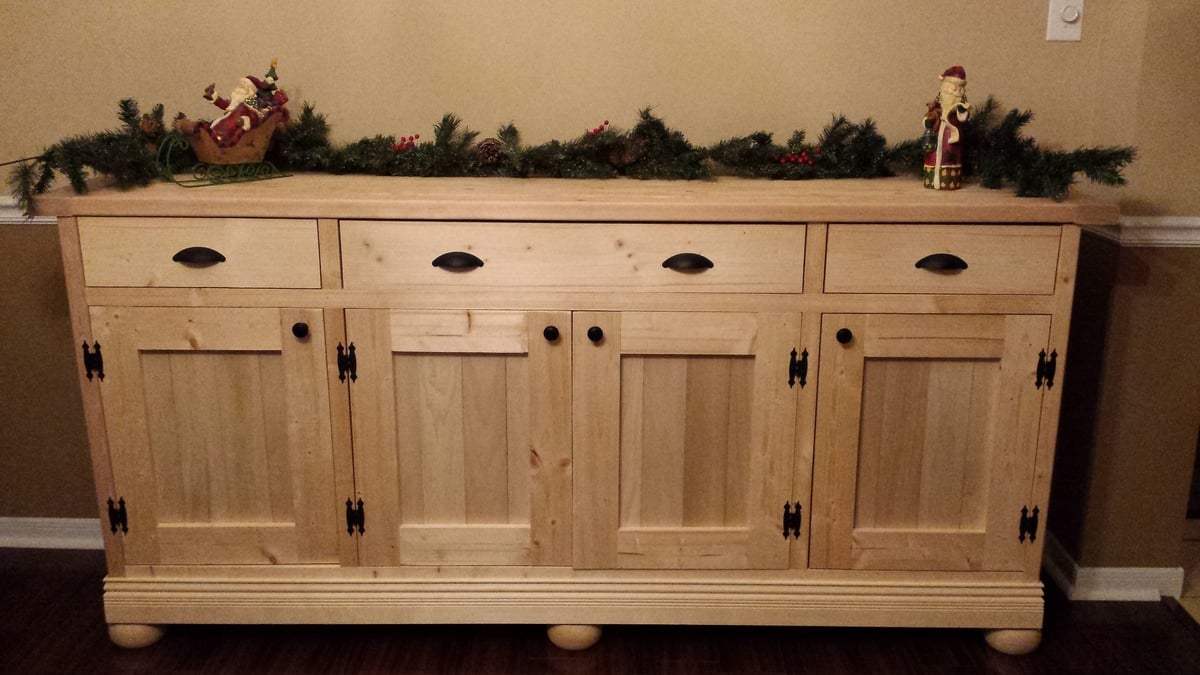
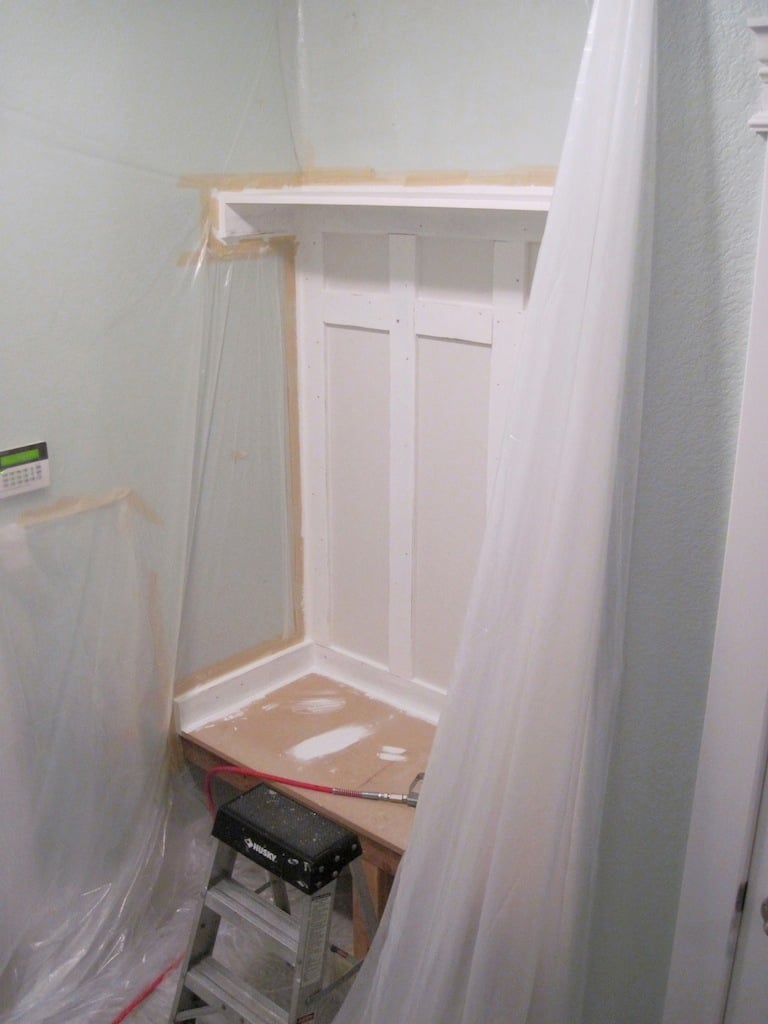
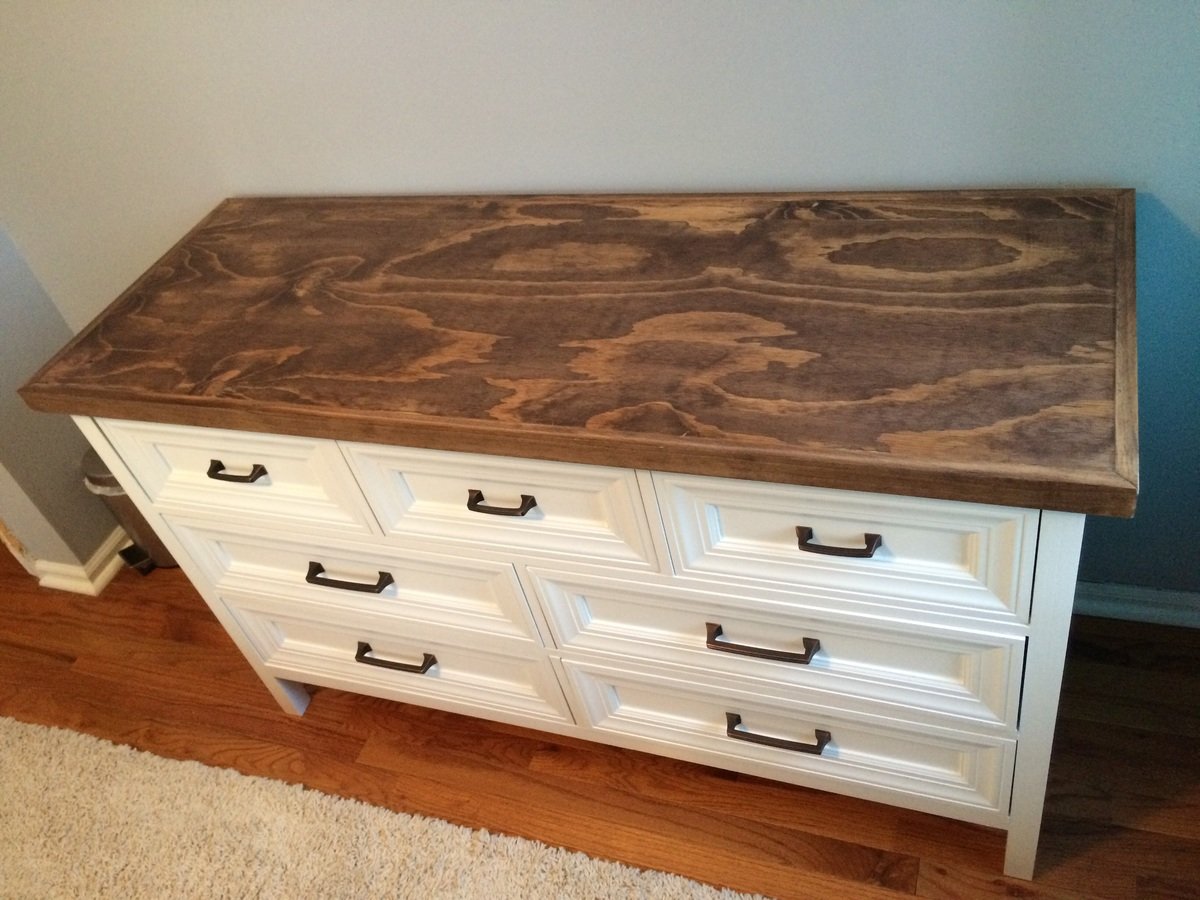
I was inspired by the custom closets on this site and decided to have a go at it. My daughter is in high school, so I wanted something functional with a bit of teenage flair.

Of all the designs I researched, I loved Kristen's design (from Pink Toes & Power Tools here: http://ana-white.com/2012/02/closet-organizer) the most, but wanted to add a substantial shoe section and not lose any rod space in the process. I also needed one rod section to be longer than the other two to hang her dresses.

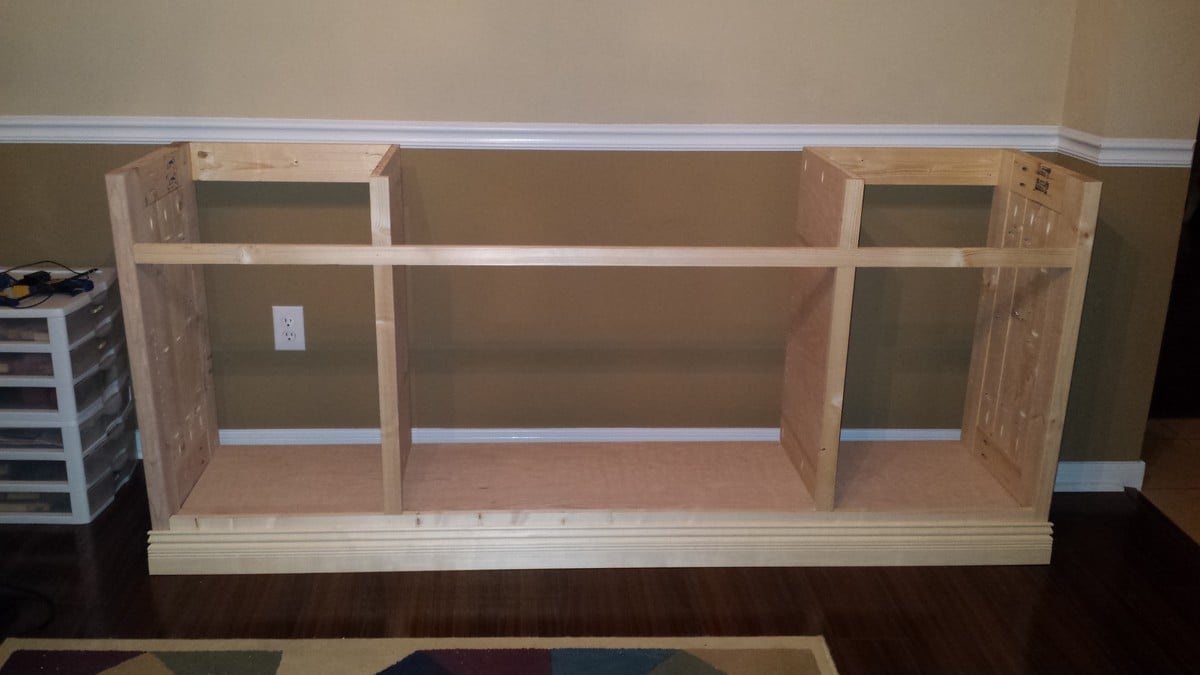
All in all a fun project where I used just about every tool I own:

Circular saw to rough out the plywood shelves and supports.

Table saw with a cross-cut sled (http://wnwoodworkingschool.com/5-cuts-to-a-perfect-cross-cut-sled/) to make the plywood pieces all perfectly square & an extra long rip fence.

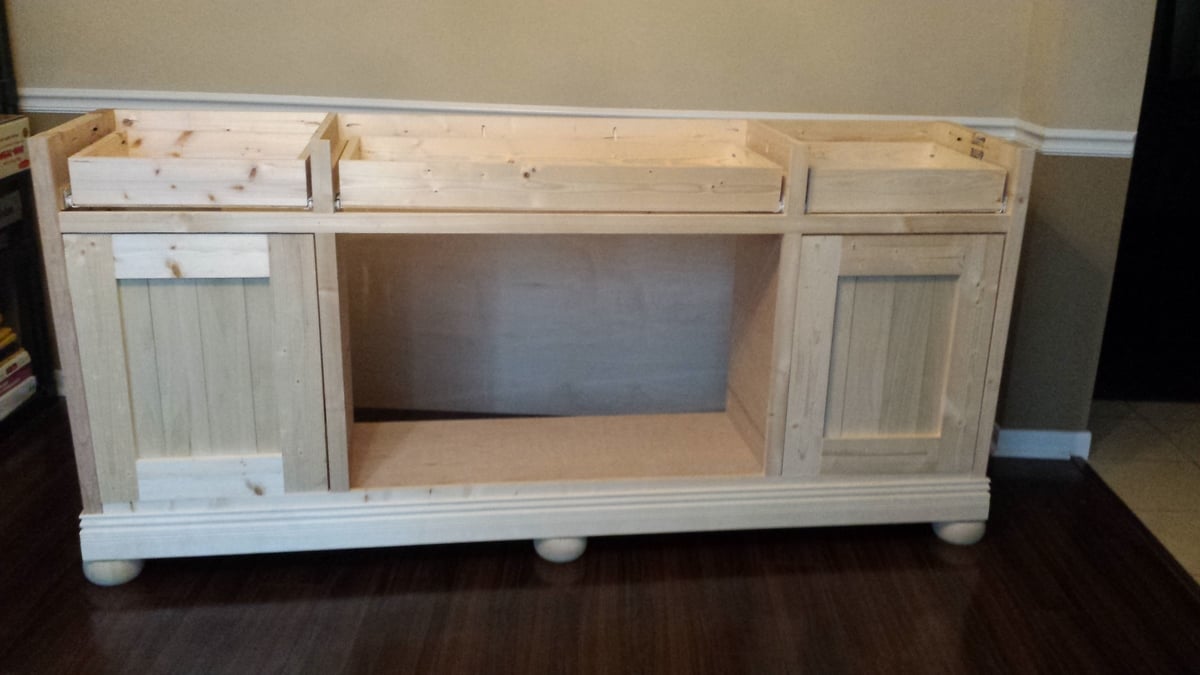
Router (with jig) for the dovetail joints, detailing on the drawer fronts and rounding the leading edges of the shelves.

Power drill for mounting the drawers, drawer fronts and handles

Compound Miter saw for the various face framing pieces and the shoe moulding

Pipe cuter to cut the rods (also made a jig to both hold the rods in place while I mounted the supports and set it at the correct height and distance from the wall--used a planer in making this)

Orbital sander

Brad nailer during assembly (also made a jig here to set the plywood pieces on during the tower assembly to keep the back square while I used 90 deg clamps on the fronts).

Airless paint sprayer (I have learned that my wife does not like brush marks!)

Washers for spacing the drawer fronts (found this trick online and it works like a charm!)

Lots of clamps!!!

Estimated Time Investment
Week Long Project (20 Hours or More)
Finish Used
White paint
Recommended Skill Level
Intermediate

Comments

Lydia Daybed

Submitted by pde00311 on Mon, 03/02/2015 - 07:58

My father in law wanted to remodel an old bedroom to a princess room for our daughters' visits. We came for a weekend with our tools and built it in pieces, which was easy to assemble and finish after the rest of the room's remodel was finished.

Built from Plan(s)
Estimated Cost
$80
Estimated Time Investment
Weekend Project (10-20 Hours)
Finish Used
Behr Gobi Desert with minwax polycrylic
Recommended Skill Level
Beginner

Comments

Ukrainian Sand box with built-in seats

Submitted by Anonymous (not verified) on Tue, 05/30/2017 - 05:28

 I live in Lviv Ukraine and painted it in he national colors of Ukraine.

The wood came from a old pallet.

Built from Plan(s)
Estimated Time Investment
Weekend Project (10-20 Hours)
Finish Used
Outdoor enamel paint
Recommended Skill Level
Intermediate

Adirondack chairs

Submitted by DeGi_DeVa on Mon, 06/21/2021 - 13:13

Built a set of six. First chair wasn't perfect, but with each build it got easier.

Estimated Cost
70
Estimated Time Investment
Afternoon Project (3-6 Hours)
Finish Used
Acrylic paint with polyurethane sealer
Recommended Skill Level
Beginner

Comments

Cedar Planter

Submitted by Anonymous (not verified) on Fri, 06/02/2017 - 08:29

This was a Mothers Day gift for my mom.  She absolutely loves it!  She lives in a retirement complex and neighbors are complimenting her on it all the time! I did decide to go with all cedar instead of using any pine, so that did increase the cost. I also altered the plan like others and added a trim piece on the top. I think that makes the planter! Thanks Ana for the wonderful plans!

Built from Plan(s)
Estimated Cost
$50 because I used all cedar.
Estimated Time Investment
Afternoon Project (3-6 Hours)
Finish Used
None
Recommended Skill Level
Beginner

Bench

Submitted by Anonymous (not verified) on Mon, 06/05/2017 - 13:31

Great bench

Estimated Cost
$100
Estimated Time Investment
Day Project (6-9 Hours)
Recommended Skill Level
Beginner

DIY Vintage Step Stool

Several years ago, the first woodworking project I finished was the Vintage Step Stool built with plans by Ana White.  I use the step stool just about every day.  I had some scrap lumber taking up space in my garage, so I decided to use it to build another step stool.  Check out the blog link for more project details.

Built from Plan(s)
Estimated Time Investment
Day Project (6-9 Hours)
Finish Used
Miss Mustard Seed's Milk Paint in Boxwood and Ironstone, ECOS Paints WoodShield in Special Walnut and their Satin Varnish
Recommended Skill Level
Beginner

Comments

Square Picnic Table

Submitted by frmoody on Tue, 08/10/2021 - 07:05

Enjoyed this project although with the price of lumber it was a little expensive to build. The only modification I made was to put a cross brace in the centre of the table top. That allowed me to attach the top boards a little more securely as some of them were a little bowed. I'll add a better photograph once I get it out of my garage and on to the back deck. It is a little heavy.

Built from Plan(s)
Estimated Cost
$240
Estimated Time Investment
Weekend Project (10-20 Hours)
Finish Used
I stained the dark part of the table with Behr water based English Chestnut and the seat and top with Minwax Ipswich Pine followed by four coats of Varathane Exterior Gloss.
Recommended Skill Level
Intermediate

Comments

Antiqued modified becca trunk

Submitted by dinifam on Thu, 04/25/2013 - 23:29

My best friend has really wanted an antiqued trunk but they were way out of her price range.

I built the becca trunk but planked the top with 1x4's and 1x6's and made the trunk just a tad deeper. Worked perfectly!

For the finish I stained it minwax china red and then added gf java gel stain over the top. distressed it and sanded it until I got the look i wanted.

I cut up an old belt we had and used that for handles, found a window sash lock, nail head trim and black strap hinges at blue. The base molding I bought was only 3 1/2 inch as it was much cheaper (82 cents a foot) than the 4 inch. worked great for me.

It was a super easy and fast build! Now I get to make one for me :)

This trunk is super sturdy and she absolutely loves it!

Price breakdown for me as I had screws and nails, scrap wood for lid and even the java stain...

40.00 for one sheet of 3/4 purebond plywood (will make another trunk with other half)
13.00 for one sheet of 1/4 ply
16.40 for base moldings
2.00 nail head trim
6.00 strap hinges
12.00 minwax china red stain.
4.00 for latch

Built from Plan(s)
Estimated Cost
65.00
Estimated Time Investment
Day Project (6-9 Hours)
Finish Used
2 coats of minwax china red stain sanded between with 220
1 coat of java gel stain
distressed and sanded till i got the look i wanted.
Recommended Skill Level
Starter Project

Comments

goatcheese4me

Thu, 01/30/2014 - 11:06

Hi,

I'm basically doing your modified design. however, I noticed that the black strap hinges that I got at the local hardware store are longer than the base molding on the back side. So either I would have to cut part of the hinges or bend them to contour with the molding. Or, have the strap go underneath the molding, which would look odd. I did do more online searching and saw that there are black strap hinges that have a short end, but I don't think the short end would get past the 3/4" inch of board that is my chest top thickness, or if it does, it would barely make it.

So my question to you is what specific hinge did you use, and how did you lay it out? Did you fasten the hinge to your base molding?

Craft table with Oak Plywood and Chalk Paint

Submitted by Anonymous (not verified) on Sun, 06/18/2017 - 09:29

As a solo and novice woodworker, it took me a while to get used to the pocket hole jig and longer to cut the wood myself but eventually it all came together.   To ensure I could get it out of the house if I move, I used circle 8 desktop fasteners to fasten the plywood top to the risers.  I am proud I finished and love to use the table now for both craft work and breakfast on the weekends.

Built from Plan(s)
Estimated Time Investment
Week Long Project (20 Hours or More)
Finish Used
Top is oak plywood finished with Danish oil.
Shelves are pine with Minwax oak stain
Paint is Valspar chalk paint: Kid Gloves for the outside and Bonnet Ribbon for the interior, all finished with Satin finishing wax.  
Recommended Skill Level
Beginner

Hey! I built a table!

Submitted by Allen Lulu on Thu, 05/02/2013 - 19:53

So, after two years searching and not finding a square coffee table. I decided to see if I could build one. Having never built ANYTHING before I found Ana's plans and proceeded to get to it.
After we framed it, I kind of realized, "hey! I think I can do this."
One would think, since I belonged to a theater company for a while and I majored in theater in college, that I would have learned how to do this. However, I was very very good at walking up to people as they finished something and asking them if they needed help.
The breadboards didn't line up perfectly (the original plans were for a 2' x 4' table and I modified it. But, then i kind of fell in love with the edges.
The stain wasn't as red as I was hoping for. But it works. (Cabot Red Mahogany)
And now we have our coffee table.
I know. I know. Like bazillions of coffee tables haven't been built by humans over the years. But, this one means a lot to me. Cuz, you know, I'm really talented at handing over a credit card and asking someone else to do it for me.

Built from Plan(s)
Estimated Time Investment
Weekend Project (10-20 Hours)
Finish Used
cabot Red mahogany 2 coats
Poly 2 coats.
Recommended Skill Level
Beginner

Farmhouse table

Submitted by Anonymous (not verified) on Mon, 10/04/2021 - 12:33

A pine tree at the cottage was diseased and needed to be cut down. We had a portable saw mill come to slice the tree into 2.5 inch planks which became a couple of tables after about 5 years of drying the wood.

Built from Plan(s)

Comments