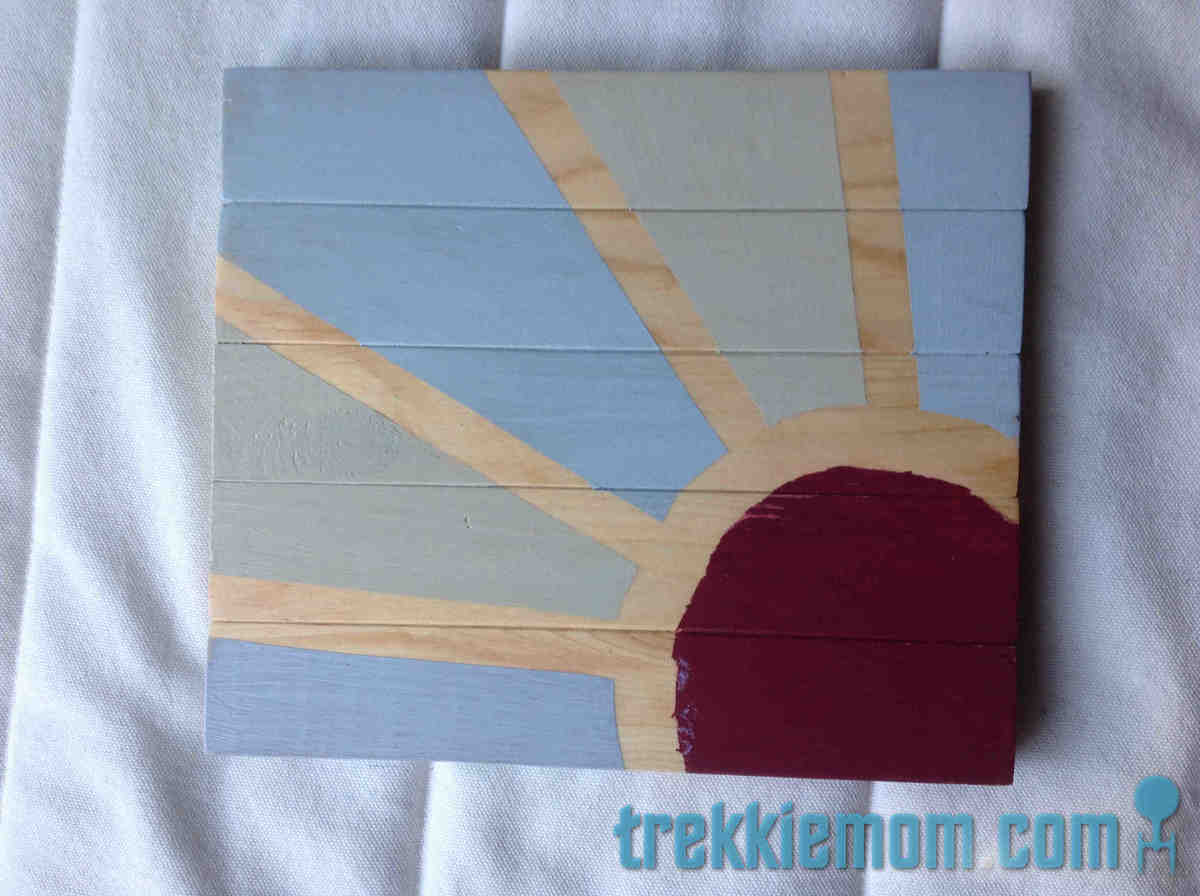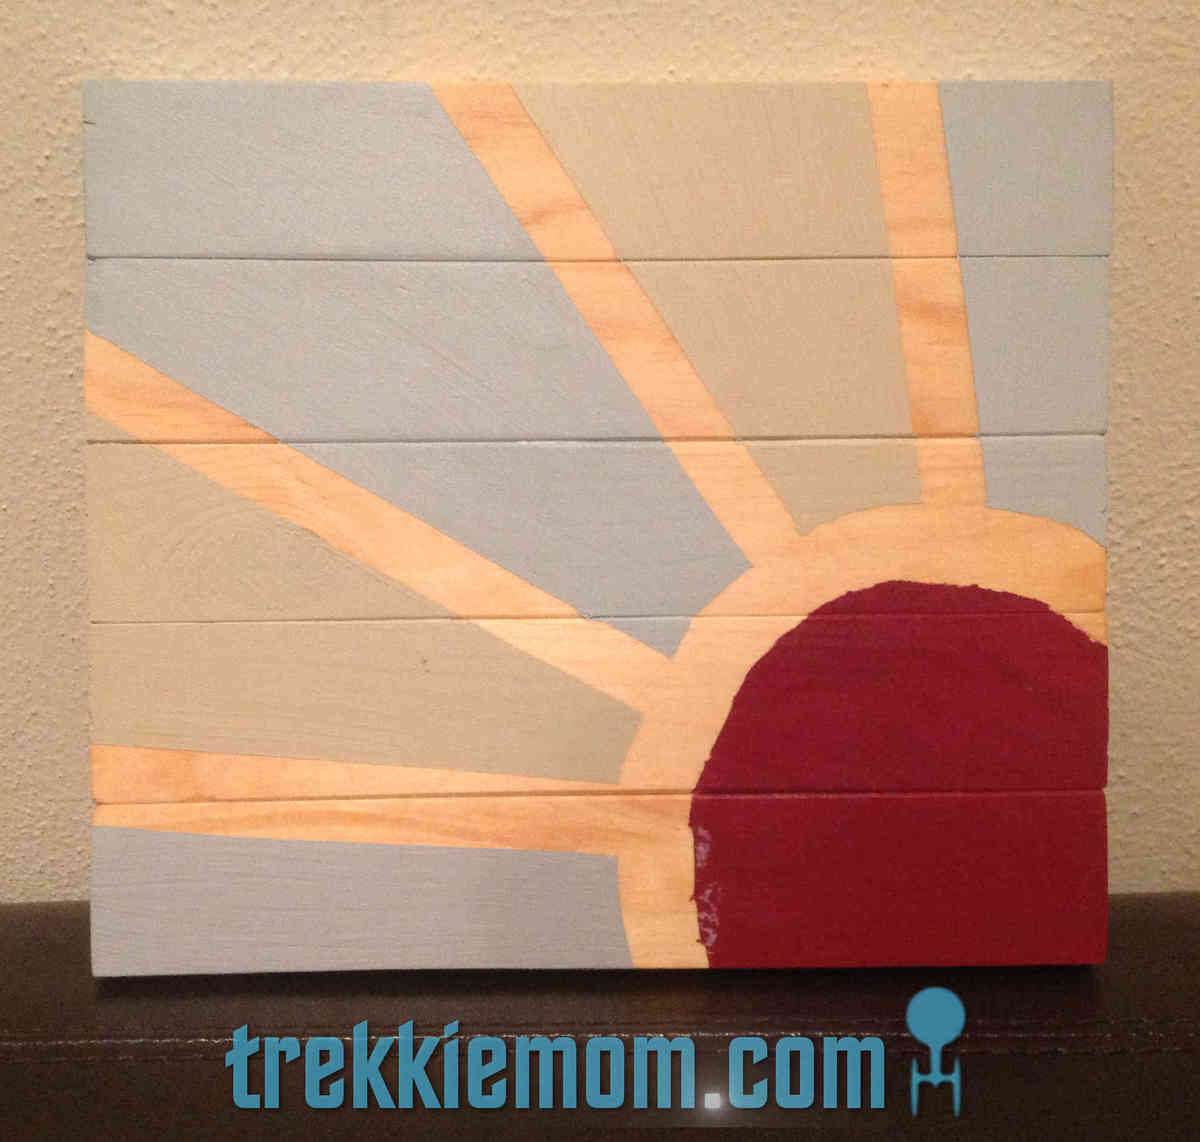
I used wood glue and scrap 1 x 2s (yellow pine). Cutting the 1 x 2s, 9 inches long (there are 5), I sanded them and then glued them together with wood glue, leaving them clamped together overnight. The following evening, I stained the piece with a light wood stain for the rays. The next night, I used painter's tape to create my version of the sun, so that my son, who wanted to paint it, didn't feel pressure to stay in drawn pencil lines with a paint brush. My son picked out the colors and where to paint them from my Lowes oops paint collection. After the paint dried, I sanded very lightly to give it a bit of an aged feel before applying 2 coats of Polyurethane to seal it, lightly sanding between coats. A self leveling picture hanger finished it off. The finished product was not too much bigger than my IPad.
I was inspired by two other bloggers' bigger projects.
http://www.iammommahearmeroar.net/2013/10/how-to-create-giant-art-for-g…
http://www.inspiredbycharm.com/2012/01/from-wood-to-wall-the-making-of-…
I like a bit of the sun on the wall.