

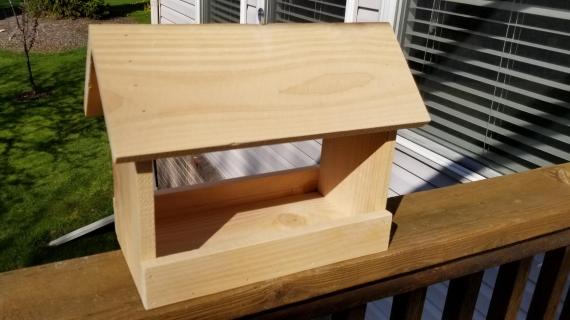
Build this charming cedar bird feeder using just one cedar fence picket! It's an easy and fun woodworking project that's perfect for kids or beginners learning to use tools. This low-cost project (under $5 in materials) makes a great gift or item to sell at farmers markets. Download the free woodworking plans with step-by-step diagrams and a full cut list to get started today!
Build a Beautiful Cedar Bird Feeder for Under $5
Looking for an easy, beginner-friendly woodworking project? This DIY cedar bird feeder is the perfect weekend build! Made from just one cedar fence picket, this project is budget-friendly, eco-conscious, and a great way to teach kids woodworking skills.
Why Build This Cedar Bird Feeder?
-
✅ Perfect for beginners and kids – simple cuts, minimal tools
-
✅ Affordable – costs less than $5 to build
-
✅ Fast to build – complete it in under an hour
-
✅ Teaches essential woodworking skills – measuring, cutting angles, assembling
-
✅ Marketable project – great for selling at craft fairs or farmers markets
-
✅ Eco-friendly – uses durable, natural cedar
-
✅ Beautiful and functional – birds love it, and it looks great in any yard
What's Included in the Free Plans?
Our free downloadable plans include:
-
📐 Cut list to minimize waste
-
🪚 Step-by-step assembly diagrams
-
🛠️ Beginner-friendly instructions
-
🌿 Tips for finishing and hanging the feeder

Great Project for Teaching and Selling
Whether you're working with a child, teaching a class, or just looking for a fun and rewarding weekend build, this cedar bird feeder delivers. It’s also a great small-item project to sell – simple, quick to make, and always in demand.
Download the Free Plans and Start Building!
Grab your one cedar fence picket and basic tools – it's time to build! With detailed instructions and diagrams, you'll gain skills and confidence while creating something beautiful and useful.
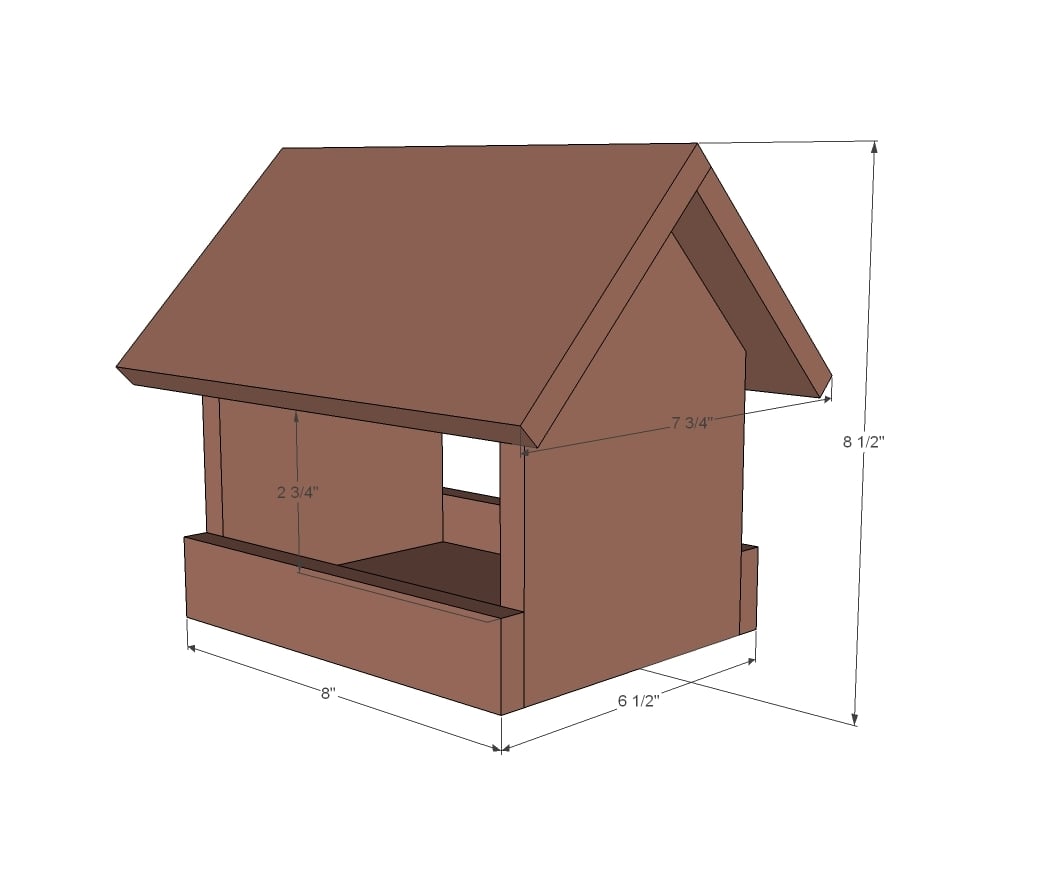
Preparation
- 1 cedar fence picket 5 1/2" wide x 72" long - can be dogeared. Expected thickness is 1/2" - but plan accounts for varying widths exterior wood glue suitable for oily woods
- 1 1/4" finish nails or small screws
- For hanging an eye-hook can be used
Cut the following from the cedar fence picket:
- 2 - 7 3/4" (cut to gable end point at 45 degree angles) - gable walls
- 1 - 7" - floor
- 1 - 10" (rip 1/2" off one edge to make width 5") - shorter roof
- 1 - 10" - longer roof
- 1 - ~8" (Measure and cut to fit as this may vary slightly depending on thickness of wood. Then from this board, cut two strips 1 1/2" wide for finished measurement of ~8" by 1 1/2")
First, cut all the pieces as directed in the cut list.
Then, cut the gable end walls to a 45 degree angle. You can use a miter saw with the blade angled to 45 degrees, or a jigsaw or circular saw.
Then, cut the 1/2" off the roof using a jigsaw, tablesaw, or circular saw (make sure you securely clamp)


Instructions
Step 1
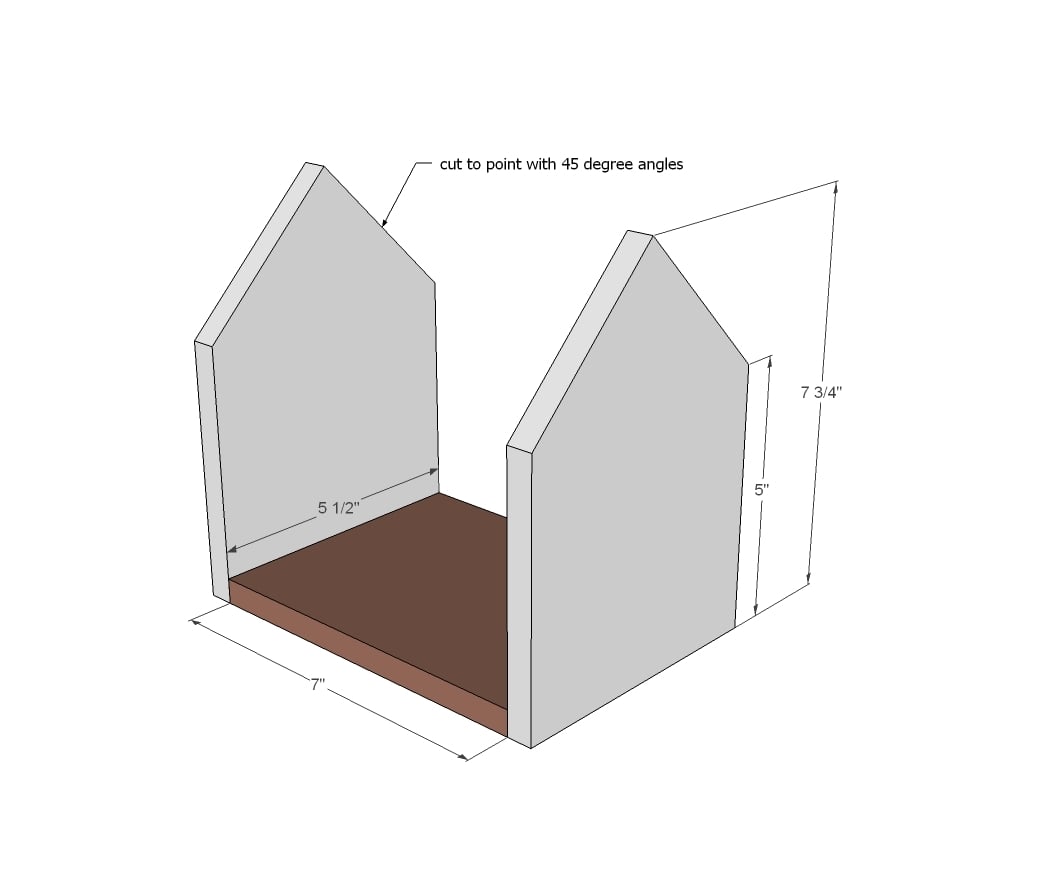
Attach walls to the bottom using 1-1/4" brad nails and wood glue, or screws.
Step 2
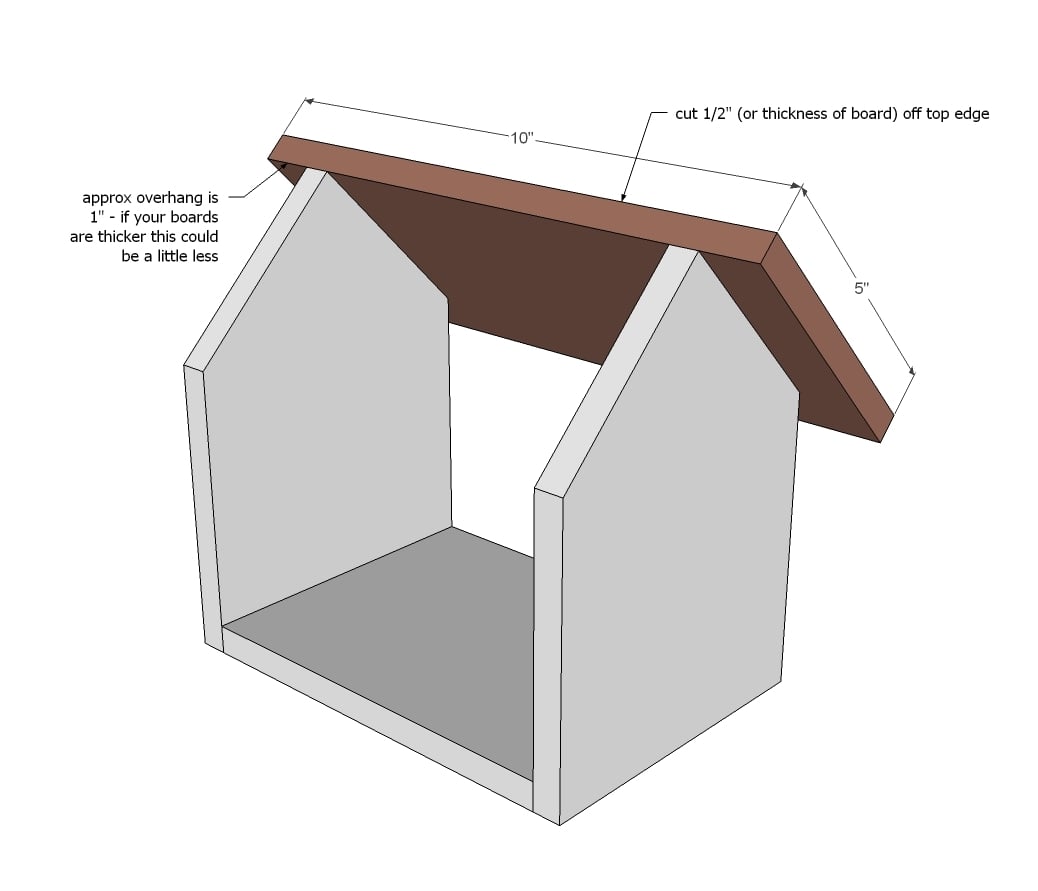
Attach shorter roof to walls.
Step 3
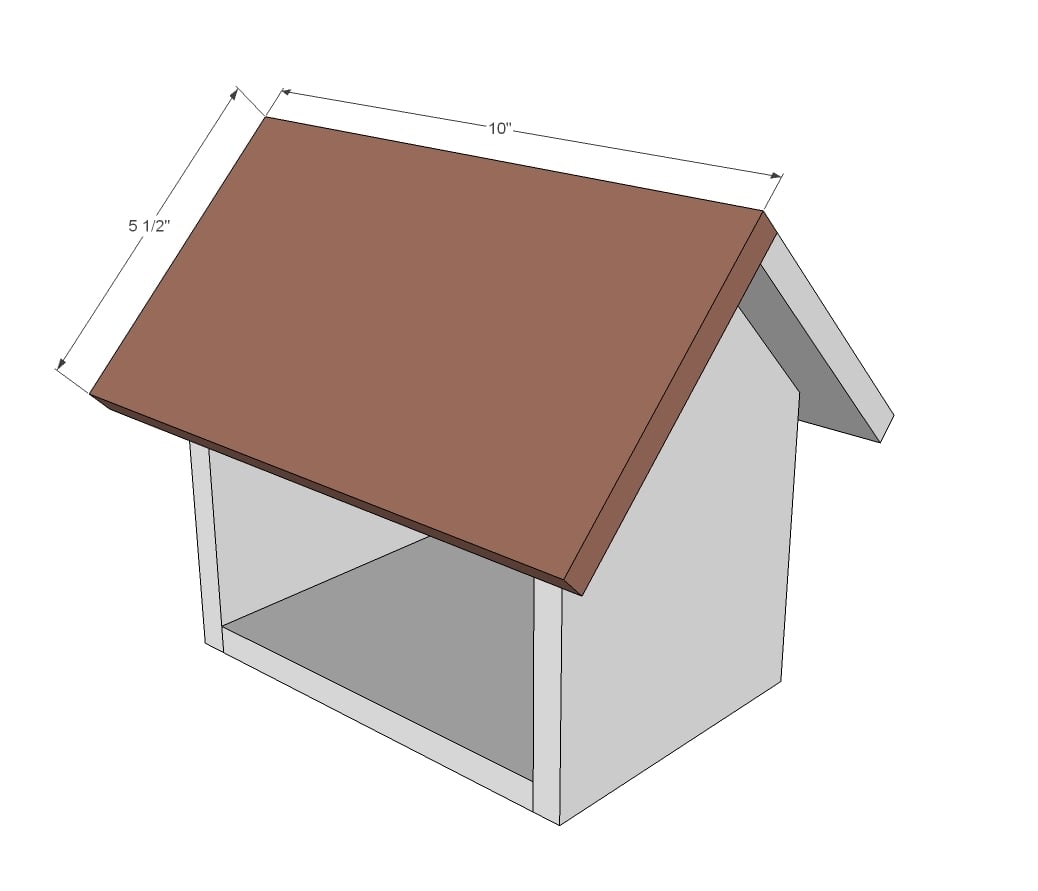
Attach wider roof to walls and shorter roof.
Step 4
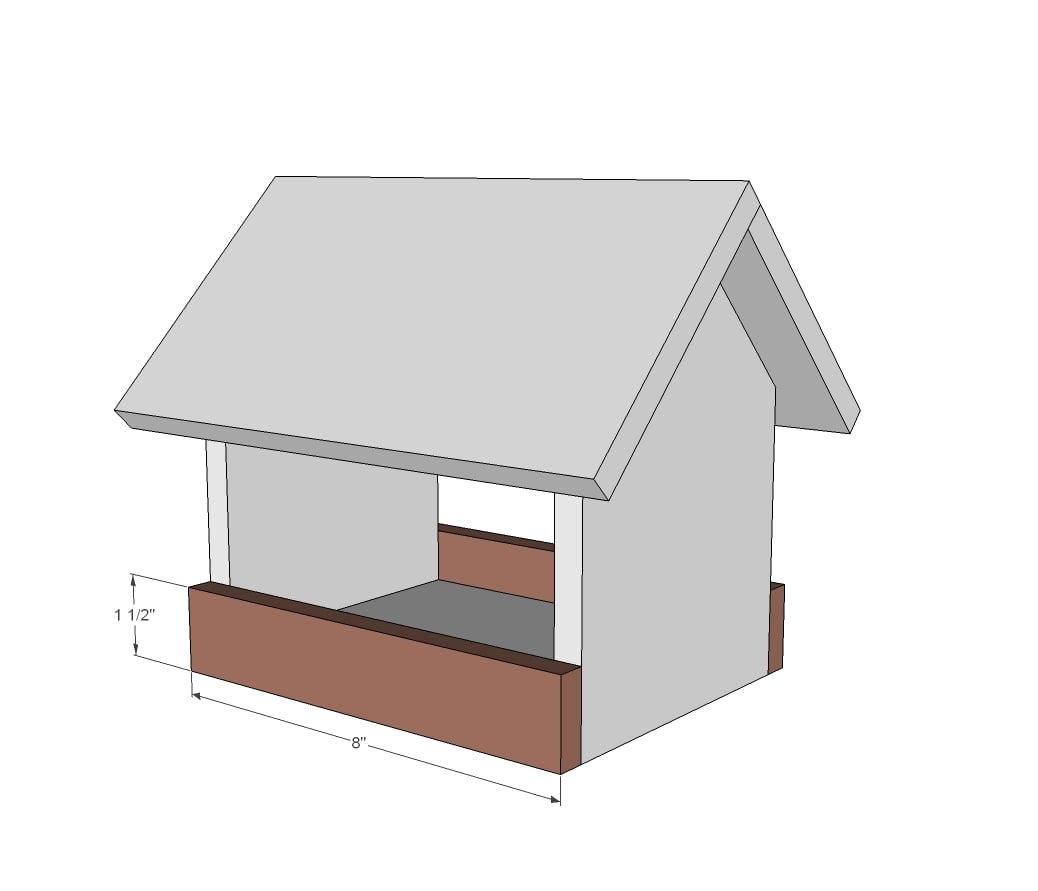
Attach side rails to sides.
It is always recommended to apply a test coat on a hidden area or scrap piece to ensure color evenness and adhesion. Use primer or wood conditioner as needed.
Comments
jaime19861
Sat, 04/13/2013 - 08:35
This is great! I've been
This is great! I've been looking at buying a new feeder. Making one will be even better! Thanks for the plans.
Jacques Remy
Sun, 10/13/2019 - 06:49
thanks
thanks for the plans I'll do this for my mother. :)