

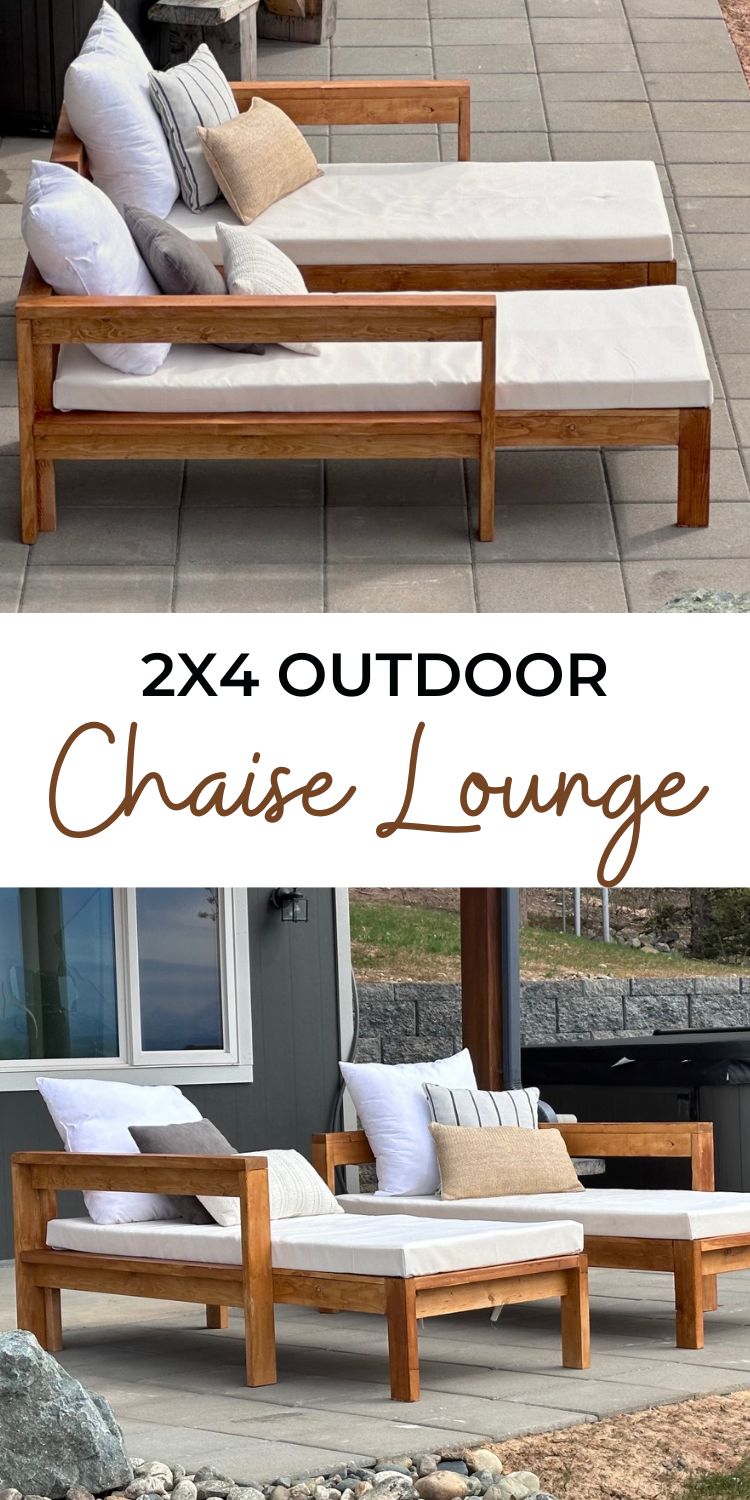
Build your own chaise lounges using 2x4s and foam camp mattresses - free plans from Ana White.com
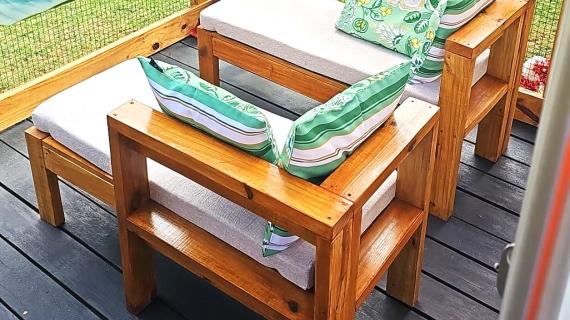
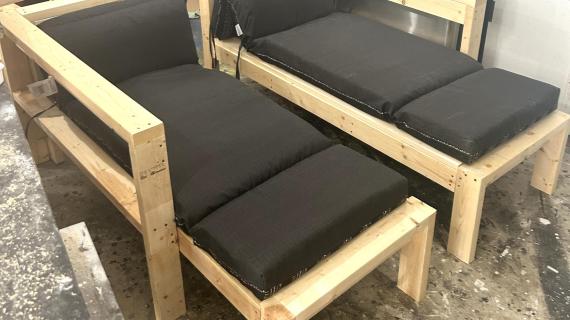
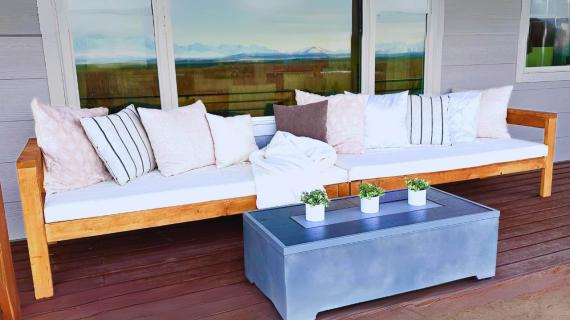
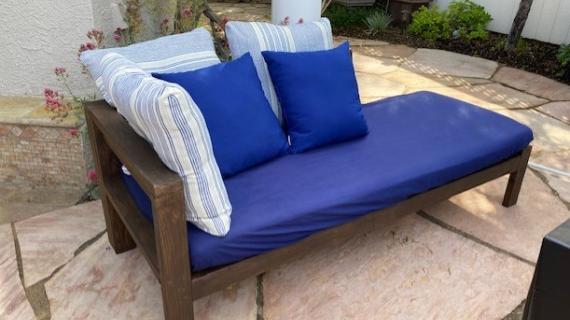
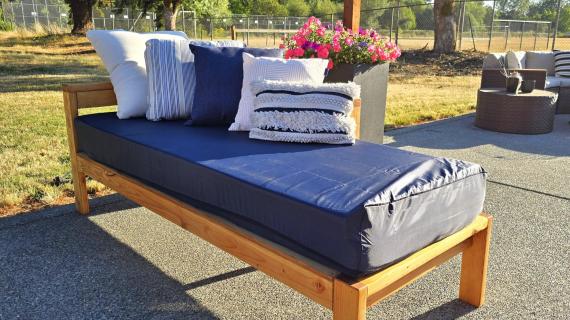
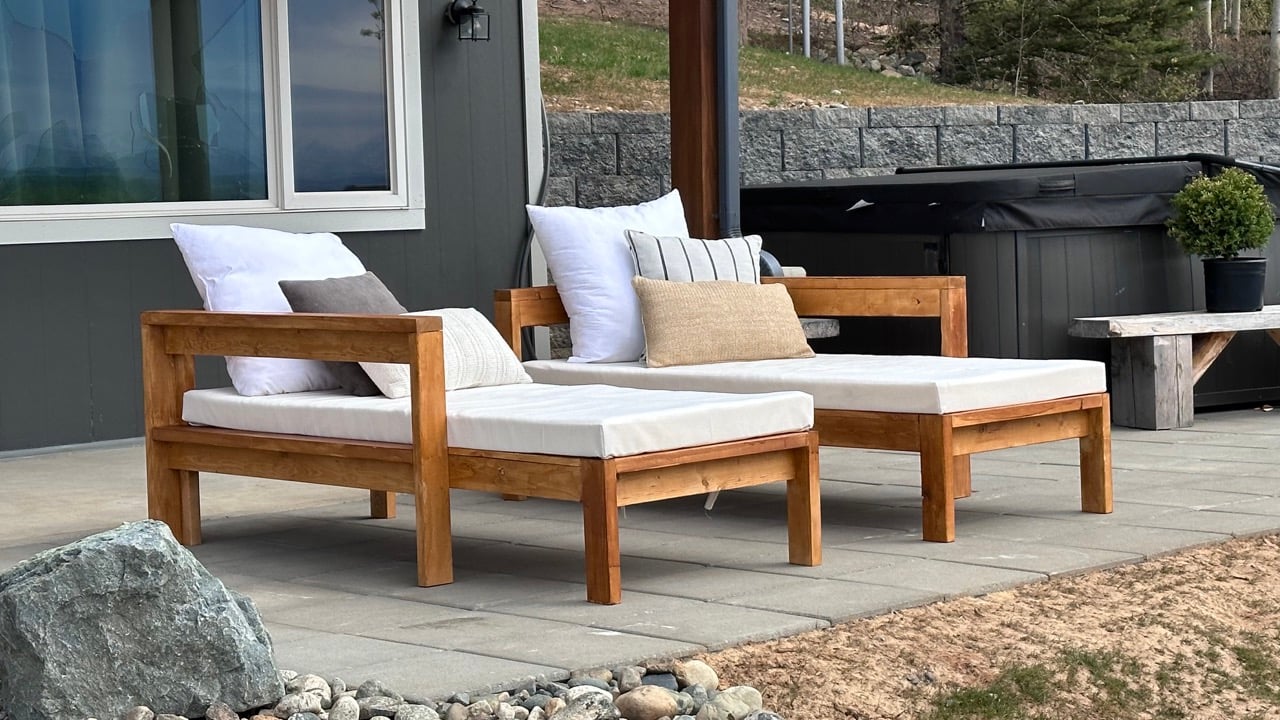
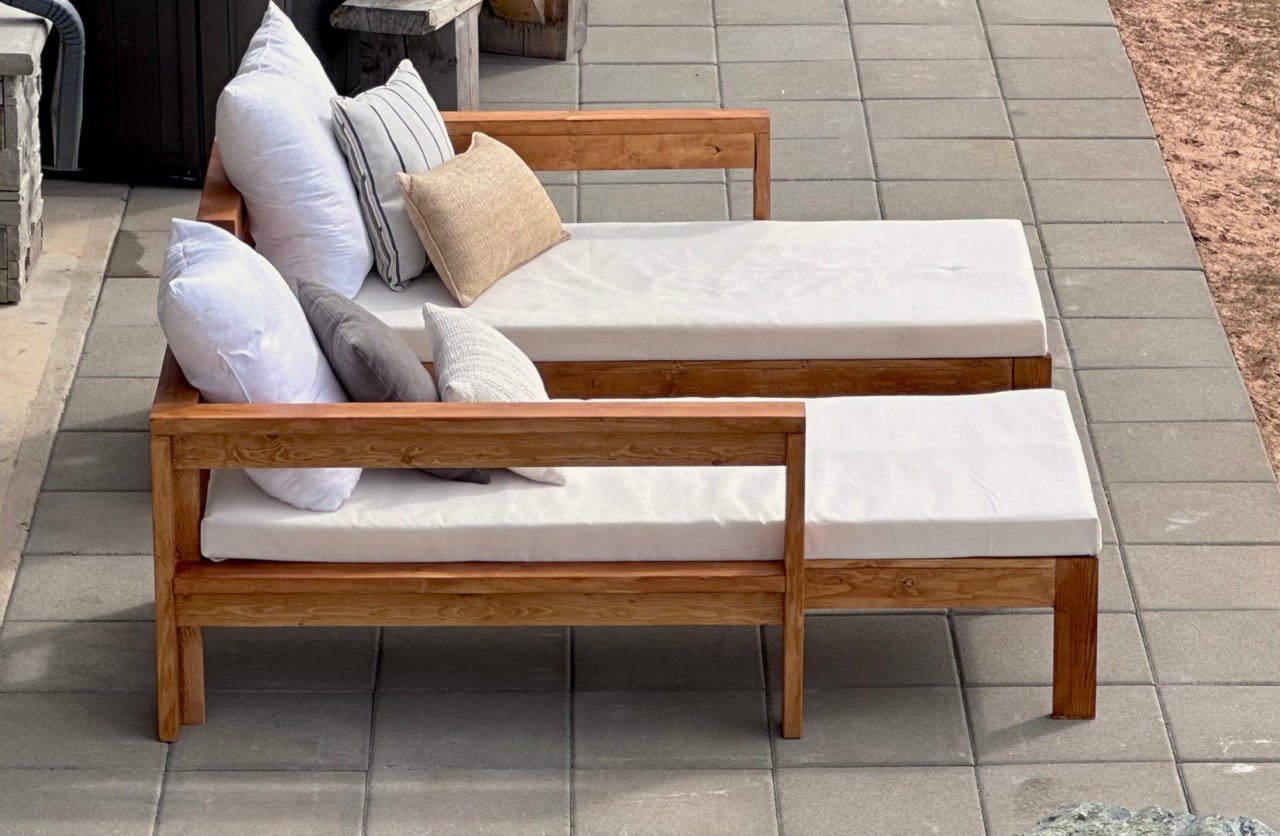
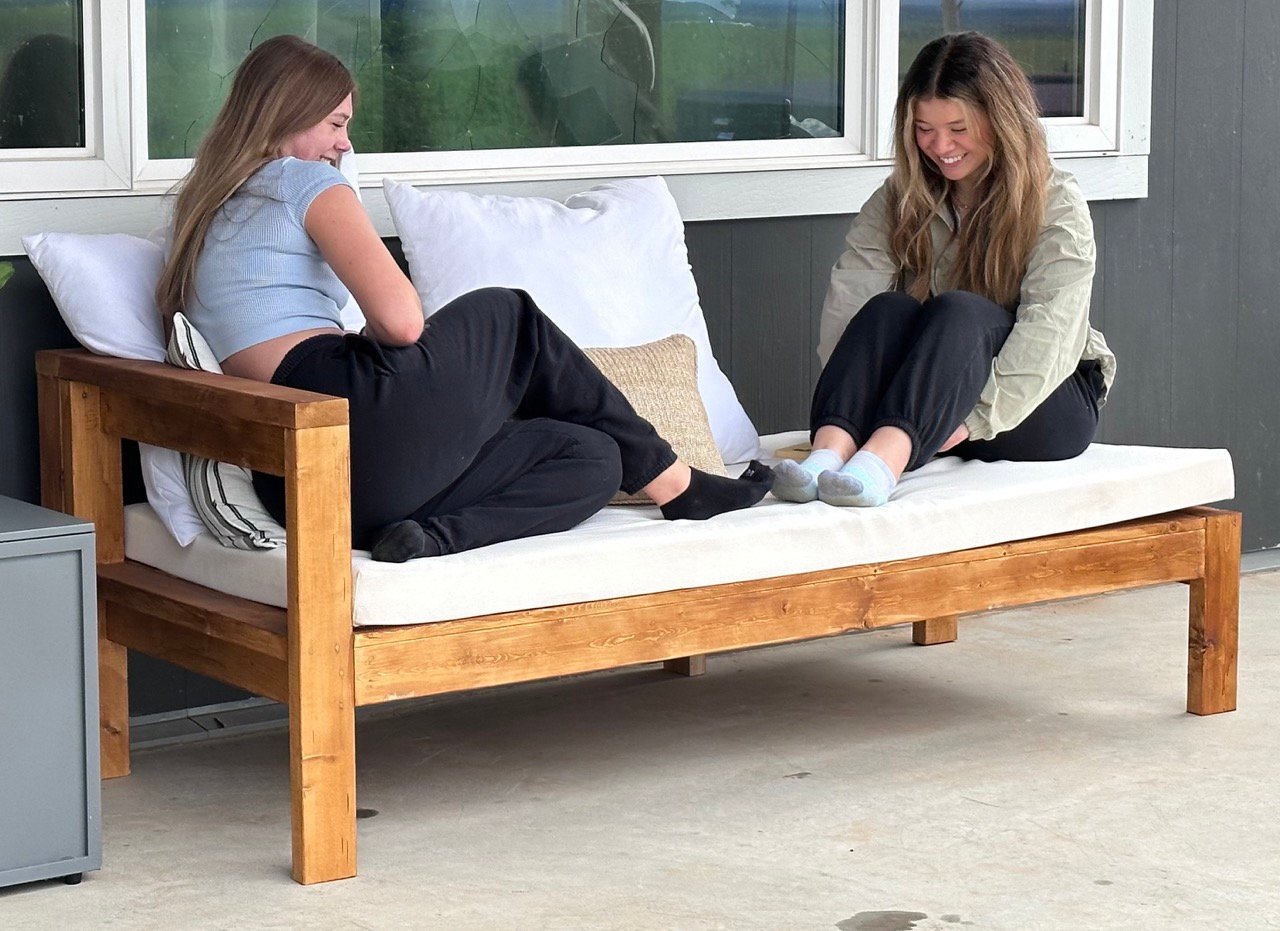
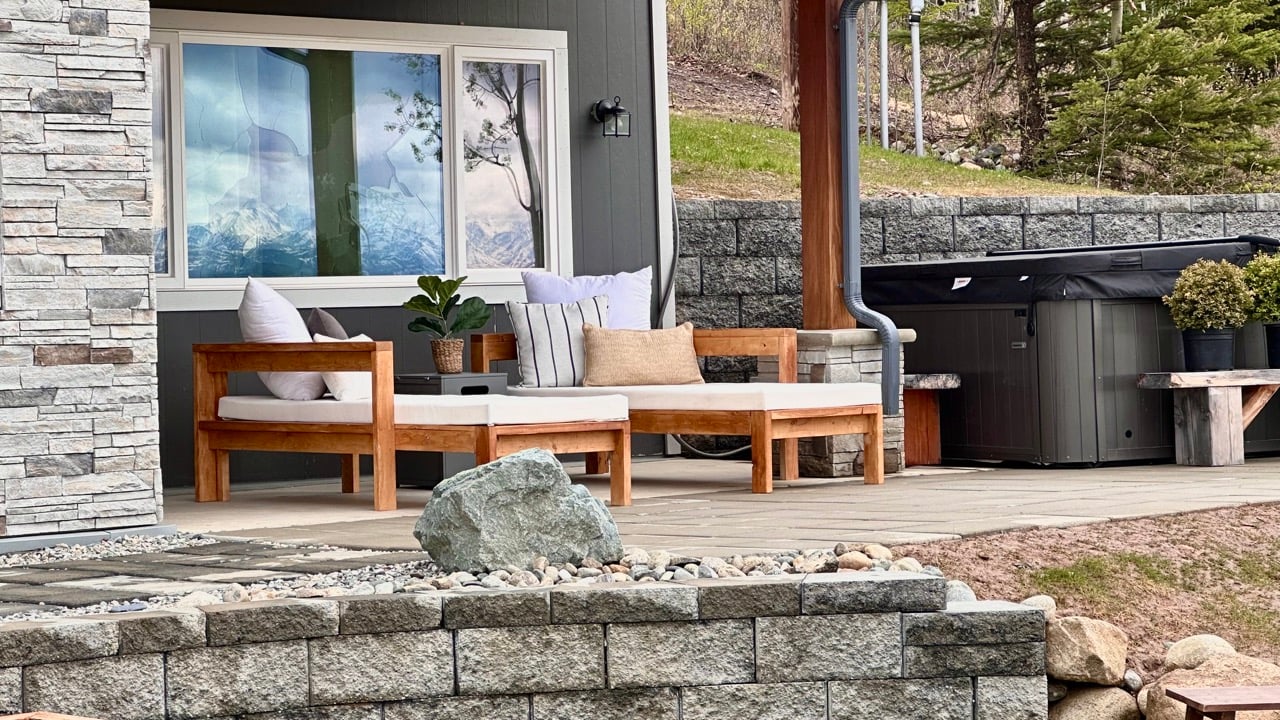
This amazing piece can be used as a chaise lounge, or rearrange the pillows to use as an outdoor sofa. Add a center piece to convert to a sectional. Featuring no folding back for easy construction and longer durability, use pillows to create endless options for lounging and seating.
The step by step plans include a video, detailed drawings, information on the cushion, and size customization.
Why We Love this Outdoor Chaise Lounge
I had originally built this project for a rental property, but it turned out so well, we just had to keep it for ourselves. It's such a versatile piece. Here's why we love it:
- NO moving parts, so it's less things to break and maintain. Instead of a reclining back, the base is long enough to be a bed on it's own. Simply arrange pillows for the perfect back support.
- Versatile - can work as an outdoor sofa or sectional too!
- Easy to build
- Simple style works with most other pieces
- Can be stained or painted a variety of colors
How Much Did it Cost To Build?
The wood frame cost about $75 to build, the cushion cost about $50, and then add in all the pillows, stain etc, I estimate $150-$200 per chaise lounge.
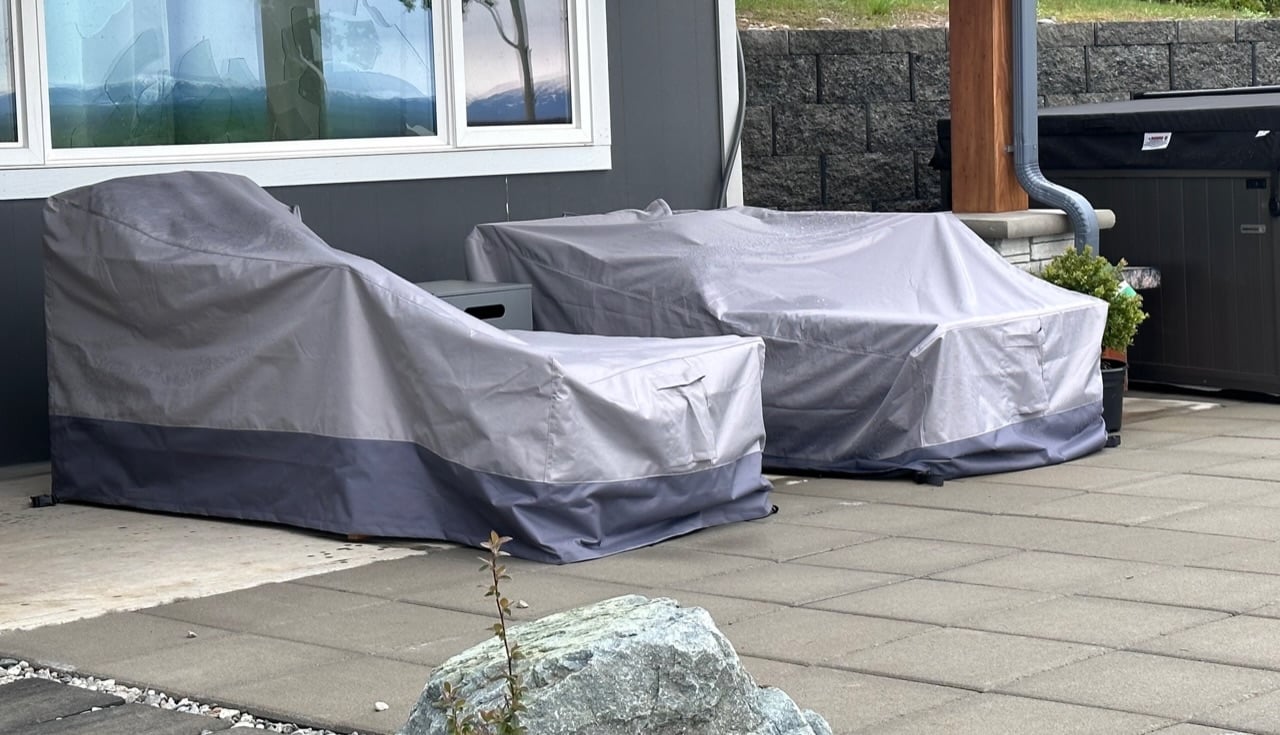
We also ended up LOVING these chaise lounges so much, we spent another $50 on waterproof covers to cover them when not in use.
WATCH: Build Video for these Outdoor Chaise Lounges
What Did You Use for a Cushion?
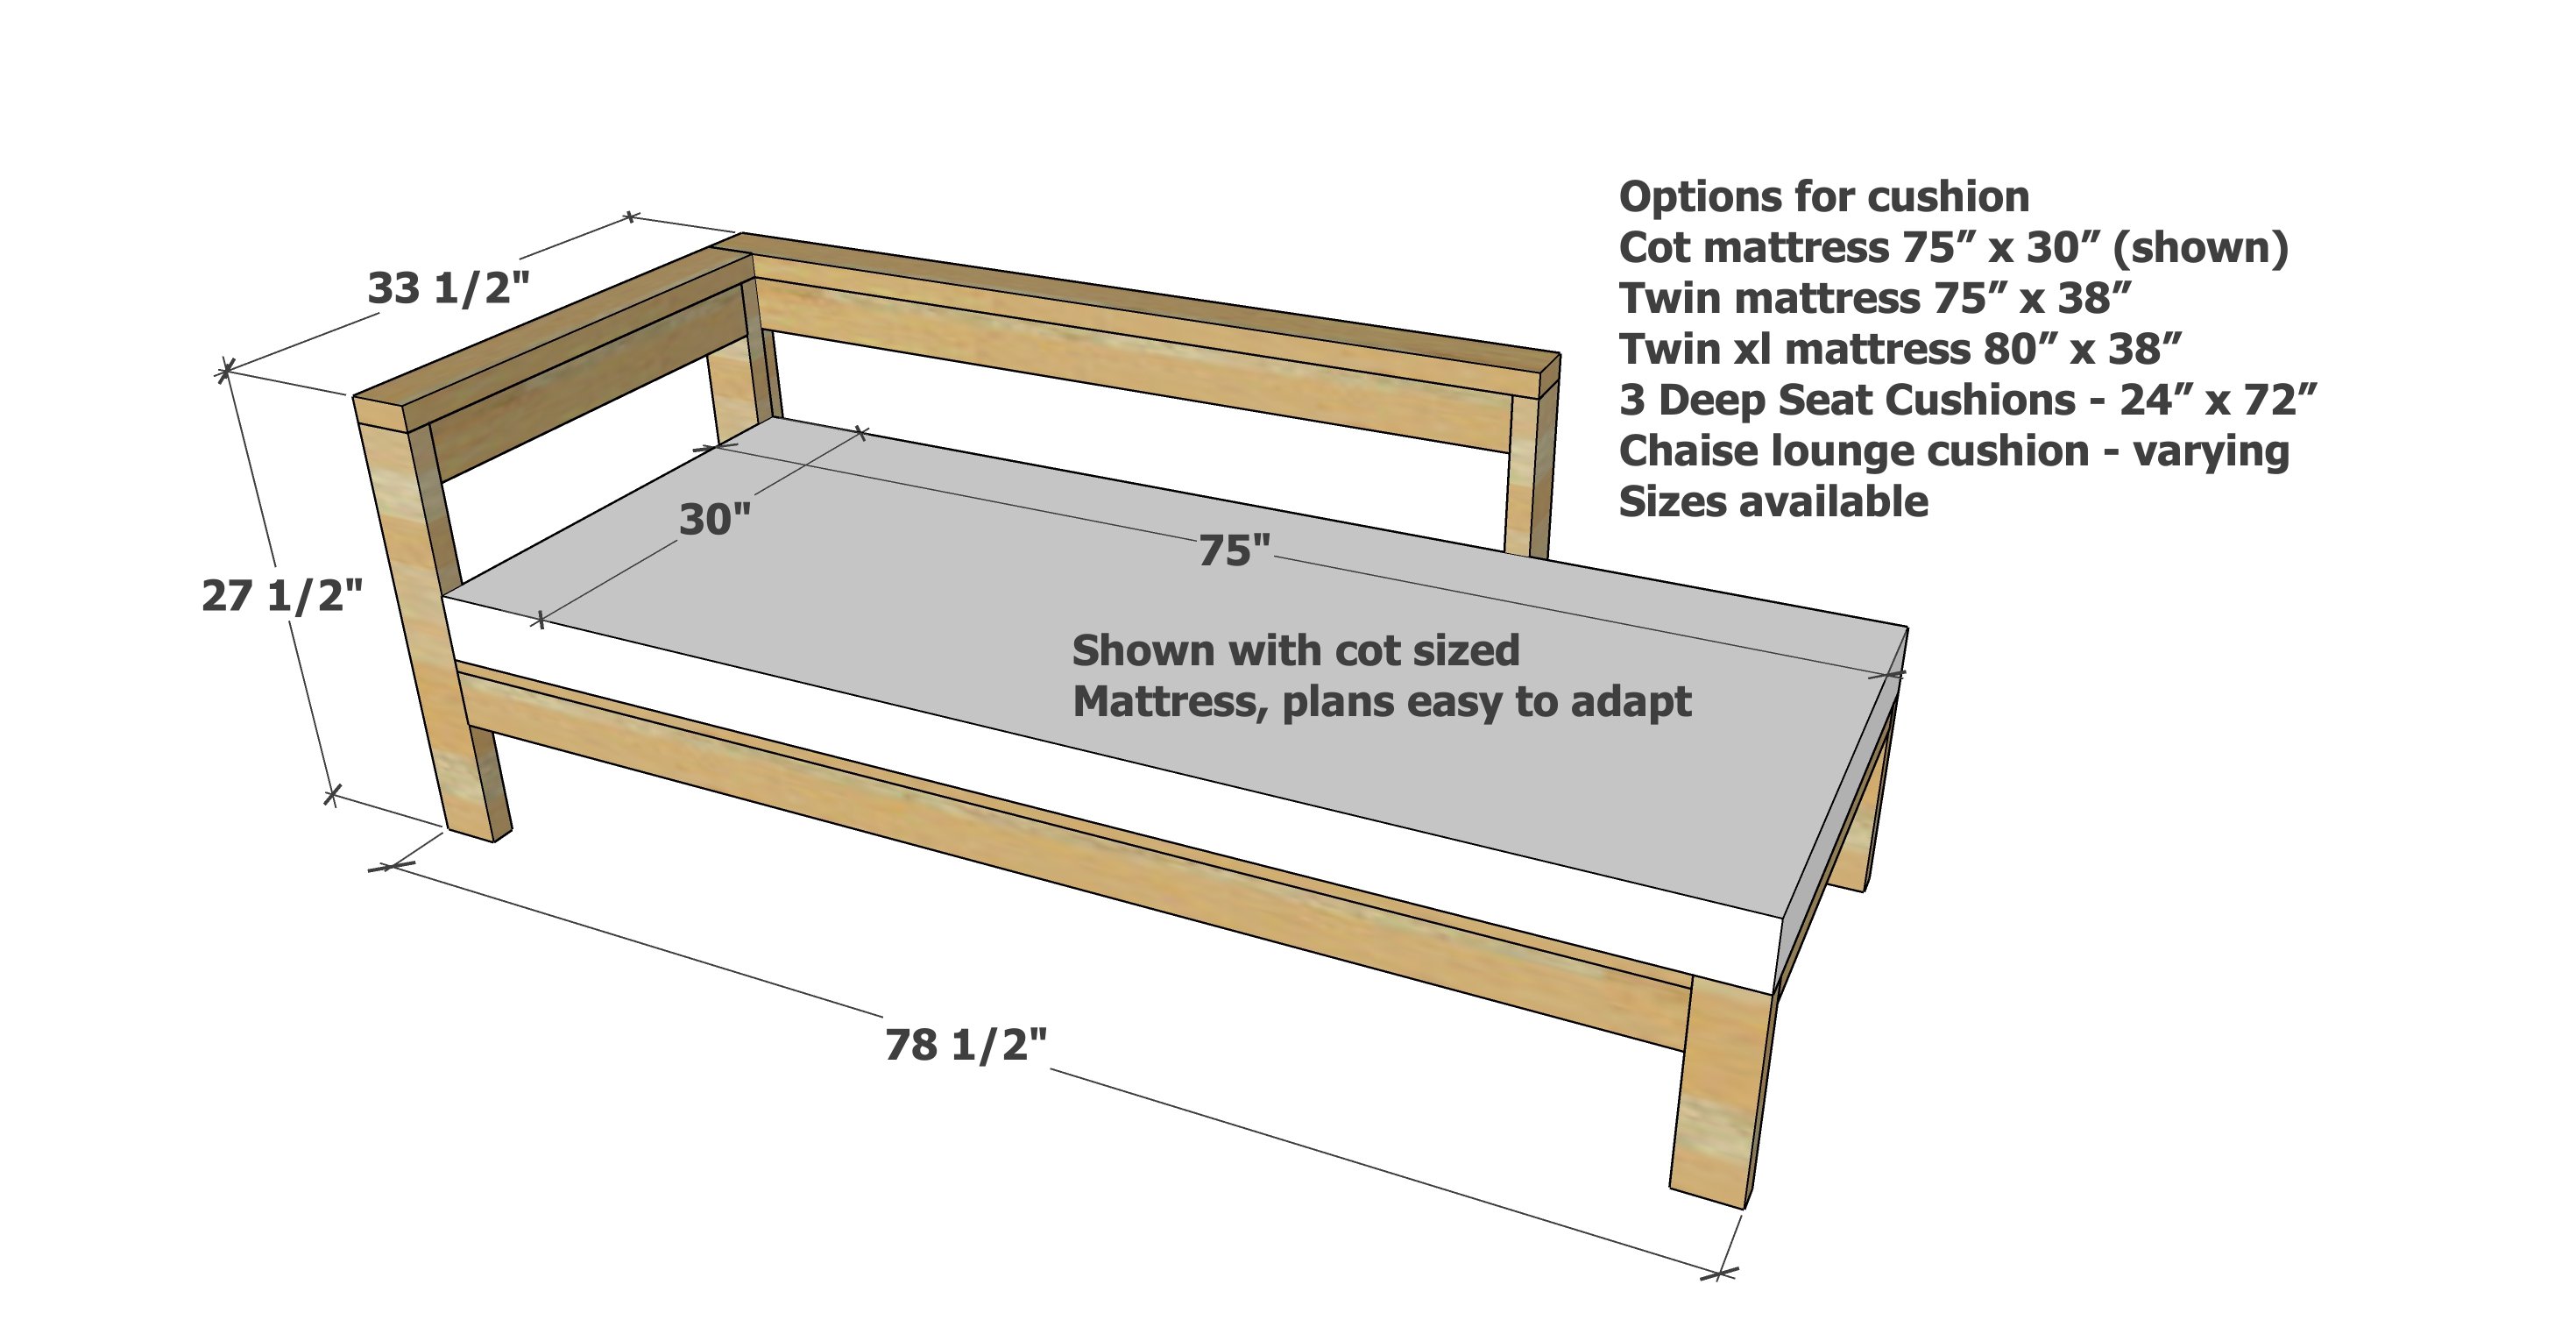
For the cushion I used a foam cot mattress measuring 30" x 75" - I bought mine at Fred Meyer (a Kroger Chain store similar to Walmart).
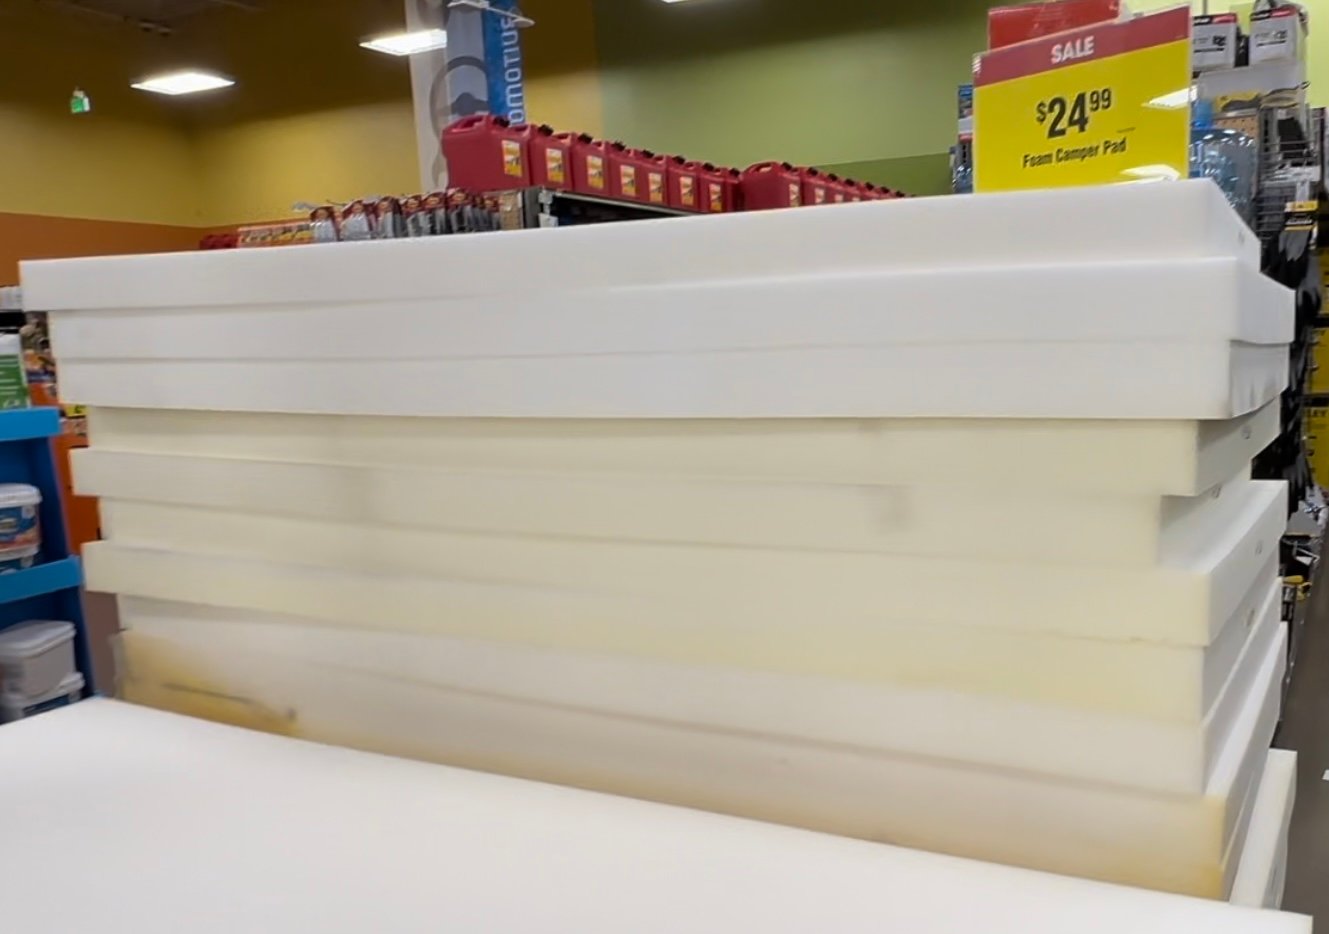
The foam should drain water through. You can drill small holes in the foam to allow water drainage if the foam cells do not allow water drainage. There are lots of options on Amazon to buy a "foam cot sized mattress".
I then added a layer of outdoor batting to the top, so the mattress didn't seem so square and added some softness, and sewed a cushion cover. Here is a good tutorial for sewing a box cushion cover (I am not an expert a sewing, so will defer you to someone who is).
Other Options for Cushions
This plan is easily adaptable to work with different sized cushions. Here's a few options to consider:
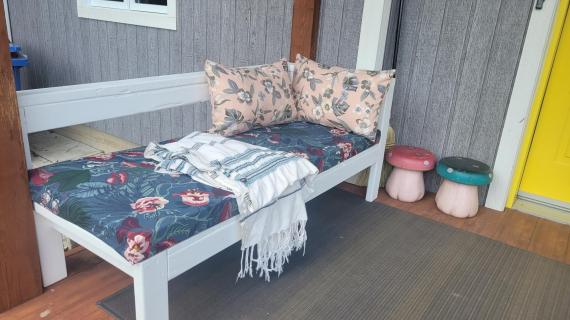
- Twin Mattress - foam, waterproof or use a waterproof cover. Can use a twin daybed cover or twin fitted sheet - spray with waterproofing fabric spray to protect it (Scotchguard).
- Three Deep Seat Cushions - Deep seat cushions are a great choice and will already come covered. Some may even come with pillows. Measure the size of the cushions and adjust the cuts accordingly.
- Chaise Lounge Cushion - yep, you can use this. But do consider since there is no reclining back, there may be an oddly placed break in the cushion.
What Type of Wood To Use for Outdoor Furniture?
The best option for wood is hem fir 2x4 material (the red toned 2x4s). I even prefer fir to cedar, since it is a more dense wood and I see it holding up better over time when finished appropriately.
For the slats, cedar is preferred - yes, you can use fence pickets but do sand well.
You can also use fir or pine, but do keep up with finishing the wood, re-coating as directed on the stain can.
What Type of Finish Should I Use for Outdoor Furniture?
Choose an exterior stain used for decks, siding and fences. For a "paint" look, use an opaque stain in your desired color. Avoid film forming paints or clear poly coats that may crack and peel when the wood expands and contracts with moisture.
Exterior stains are also easy to recoat to keep your projects looking beautiful and protected for years to come.
Consider Ordering Covers
I loved this project so much, I ordered covers on Amazon for $25 each. The covers will protect the cushions and pillows too.
Free Plans to Build Your Own Chaise Lounge
Here's the free plans to build your own chaise lounge. Send in a photo when you are done, we can't wait to see how your project turns out!
Pin For Later!
Preparation
Here's the shopping list for mattress size 30" x 75", per one outdoor chaise lounge
- 60 - linear feet of 2x4 boards, longer lengths are better for conserving material
- 4 - 1x6 @ about 71-1/2" - cedar preferred, can use cedar fence pickets if sanded well
- About 75 - 2-1/2" long self tapping star bit screws, exterior appropriate
- About 64 - 1-1/2" long self tapping star bit screws, exterior appropriate (can be up to 2" long)
- Exterior wood stain - instead of paint, choose an exterior opaque stain
- Exterior wood filler
- Cushions and pillows
Universal Cut List to Modify from Mattress/Cushion Dimensions
Base
- 2 - 2x4 @ mattress length - 3-1/2"
- 4 - 2x4 @ mattress width - 3"
Top and Bottom
- 2 - 2x4 @ 26" - top legs
- 2 - 2x4 @ 14" - bottom legs
- 5 - 2x4 @ mattress width - 3"
- 1 - 2x4 @ mattress width
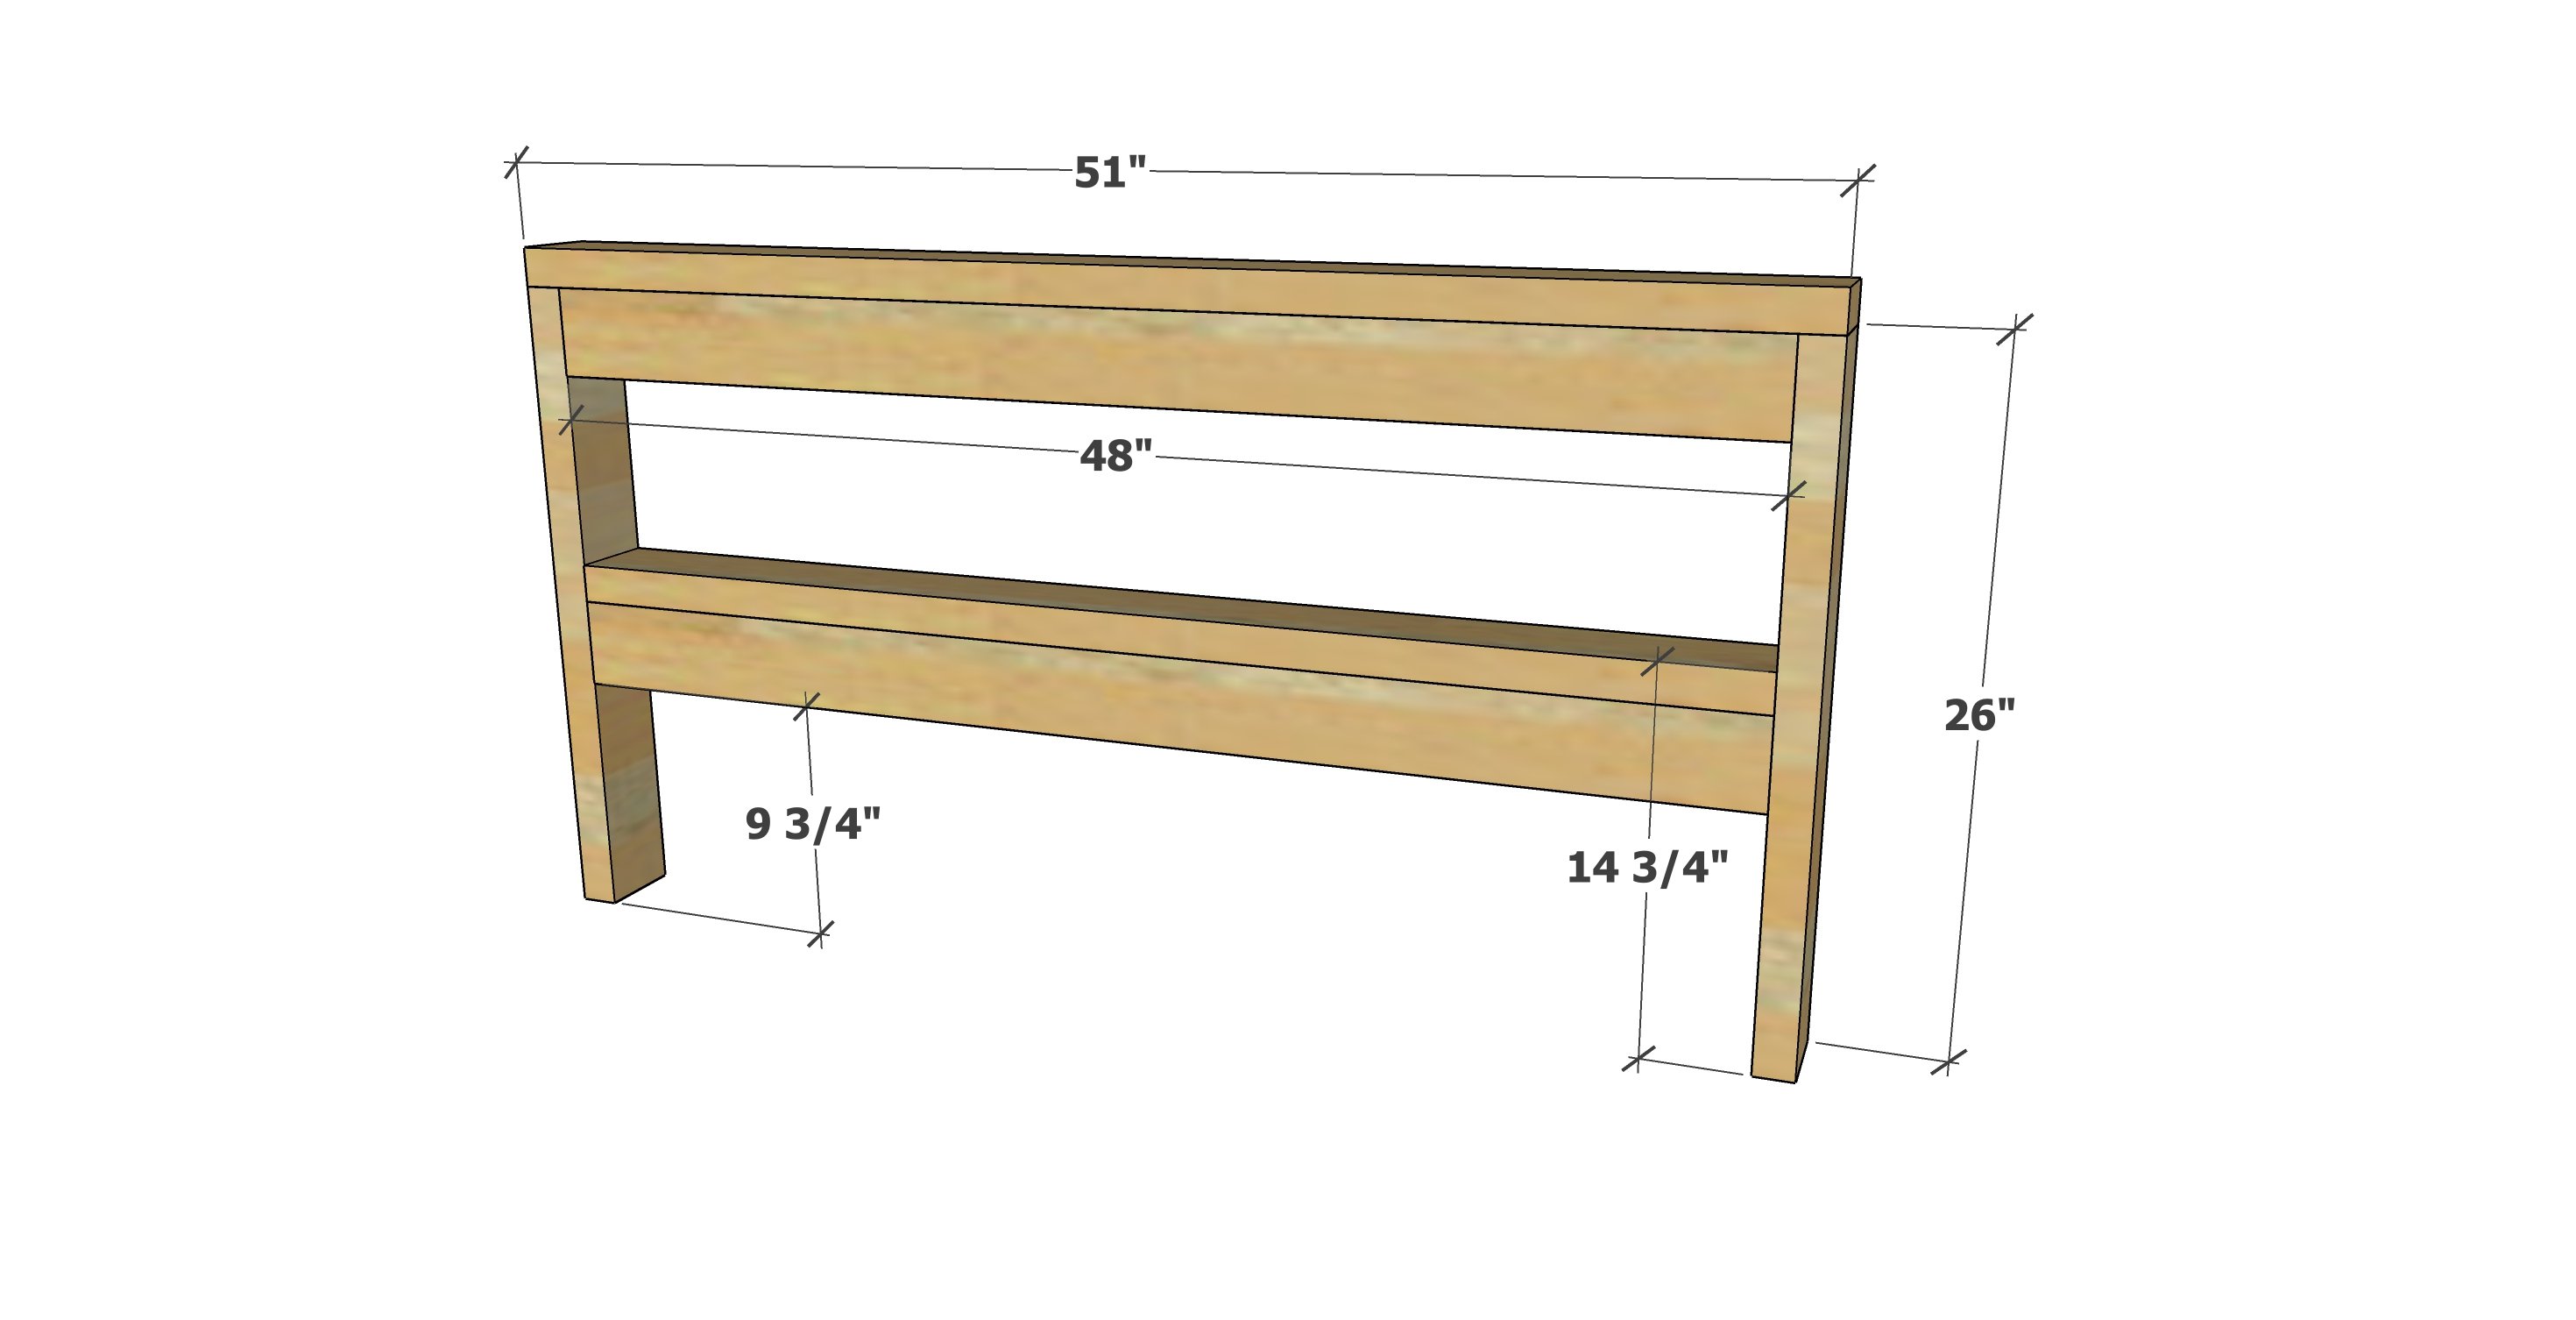
Side
- 2 - 2x4 @ 26" - legs
- 1 - 2x4 @ 51" - top
- 3 - 2x4 @ 48"
Cut List I Used for Mattress Dimensions 30" x 75" x 4" deepth
Base
- 2 - 2x4 @ 71-1/2"
- 4 - 2x4 @ 27"
Top and Bottom
- 2 - 2x4 @ 26" - top legs
- 2 - 2x4 @ 14" - bottom legs
- 5 - 2x4 @ 27"
- 1 - 2x4 @ 30"
Side
- 2 - 2x4 @ 26" - legs
- 1 - 2x4 @ 51" - top
- 3 - 2x4 @ 48"


Instructions
Step 1
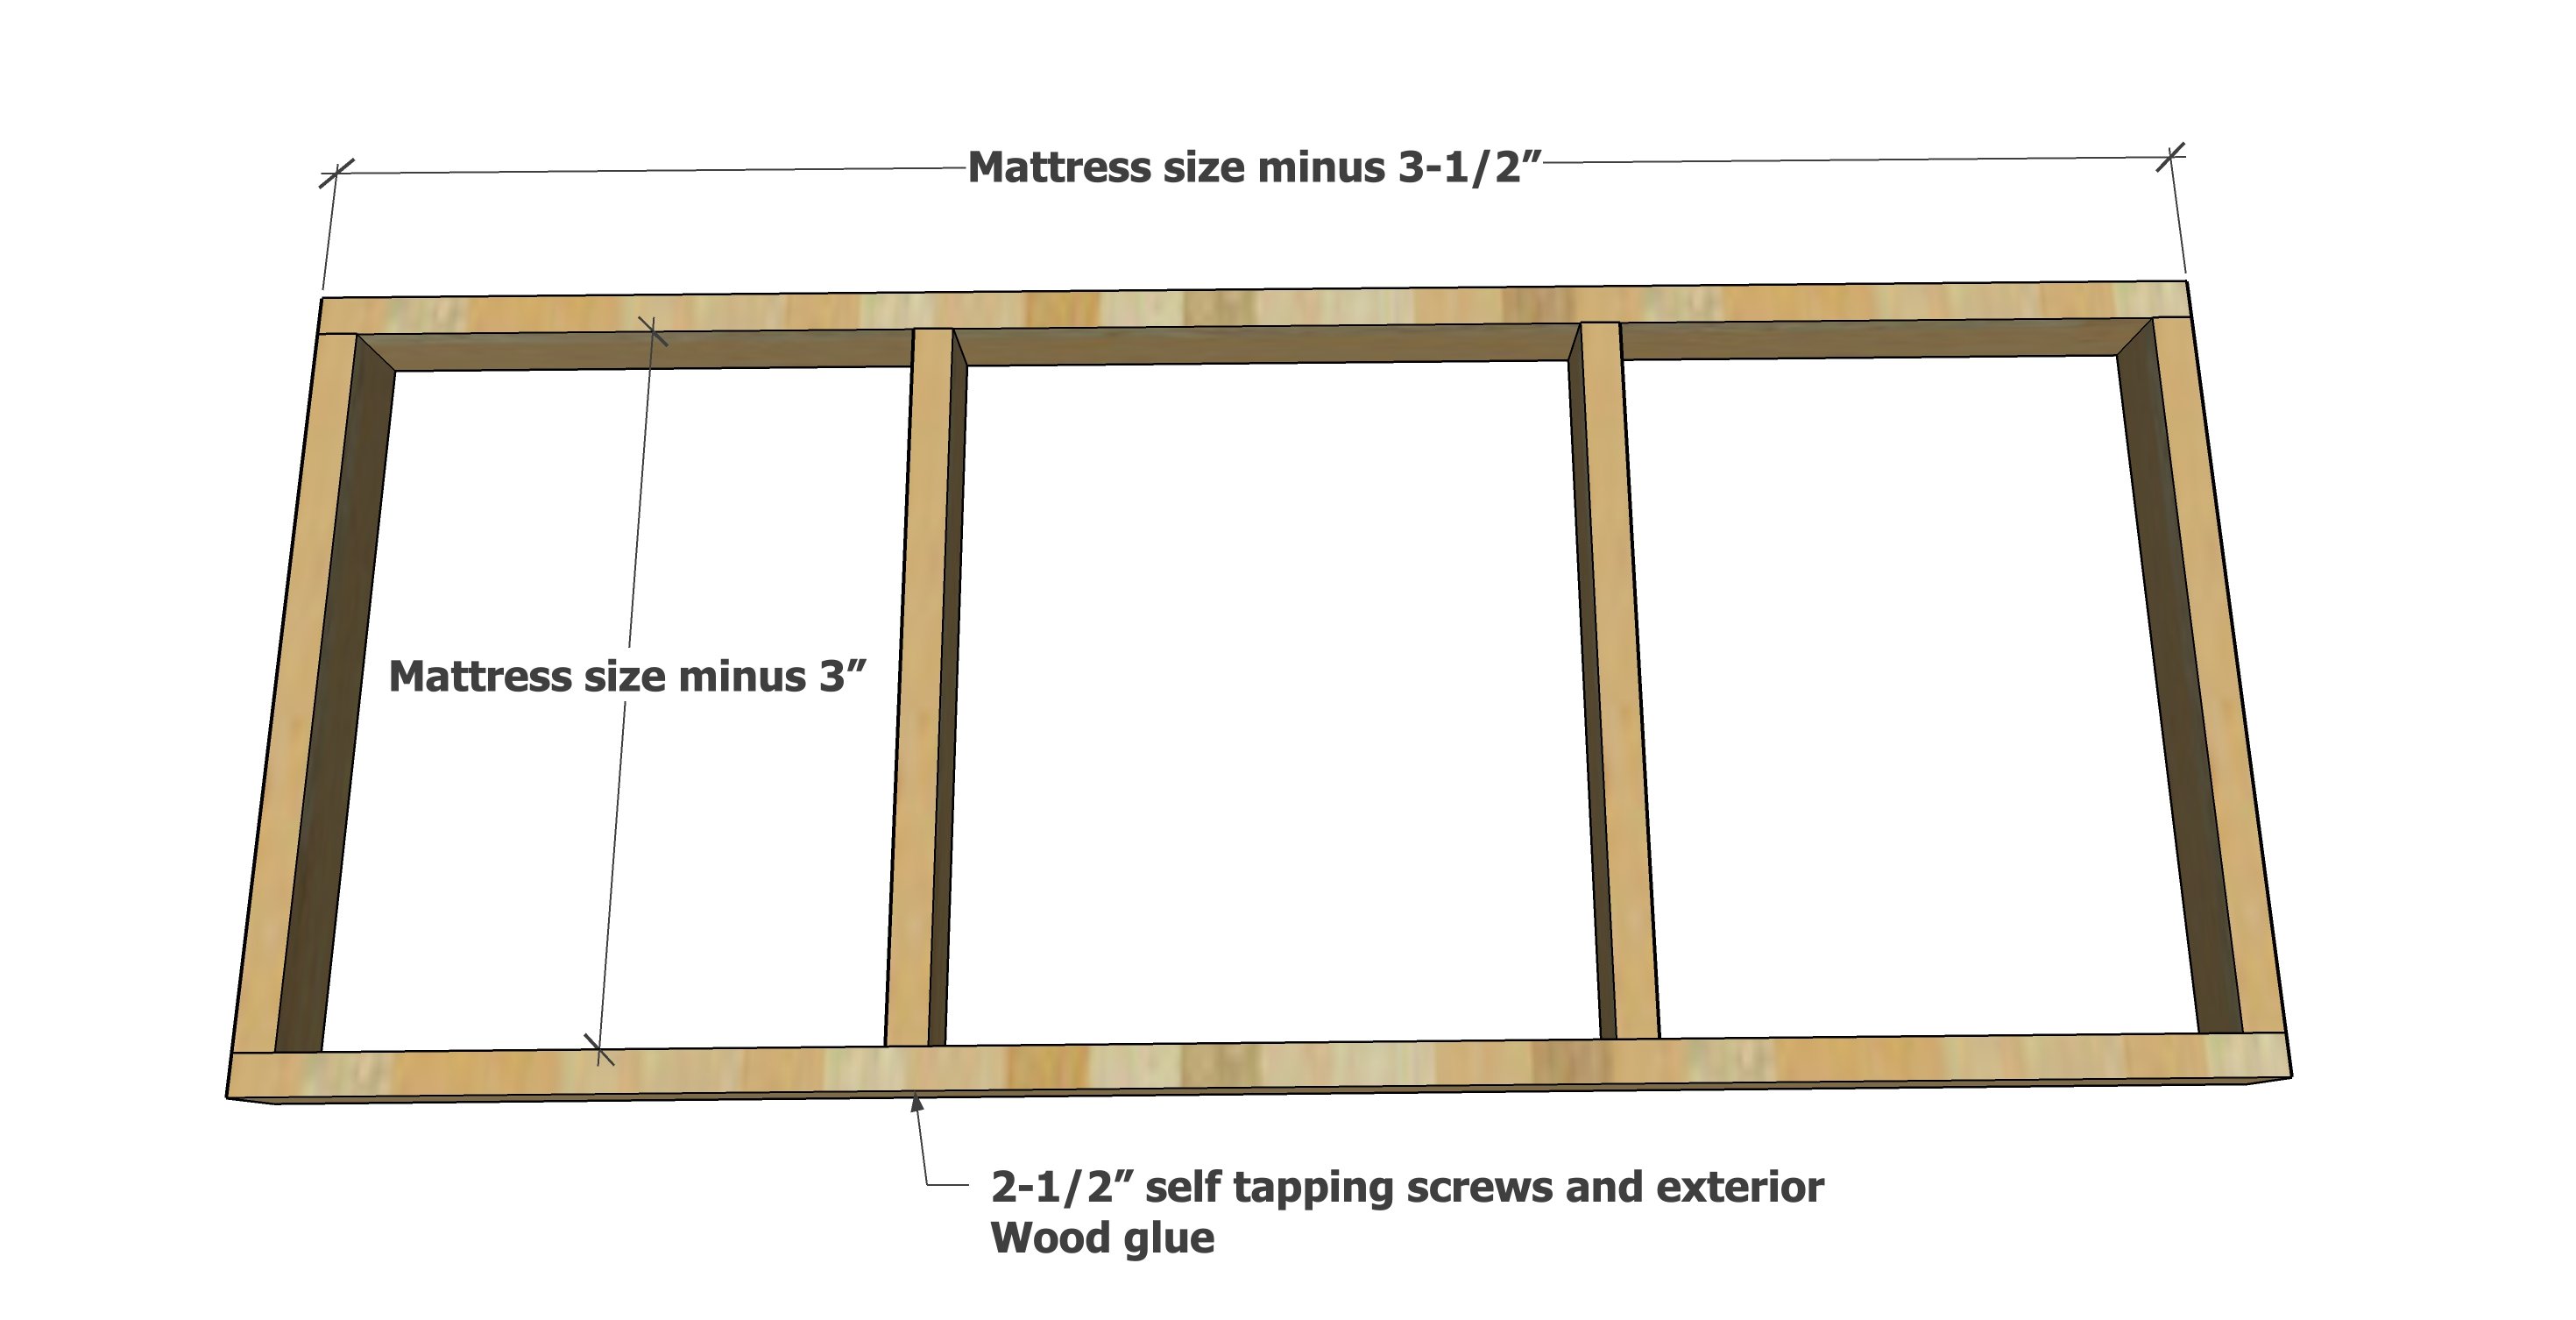
Build the base for the chaise lounge using the longer screws and 2x4s. Apply glue at all joints.
Step 2

Build the top arm with screws and glue as shown in the diagram.
Step 3
Repeat for the back piece.
Step 4
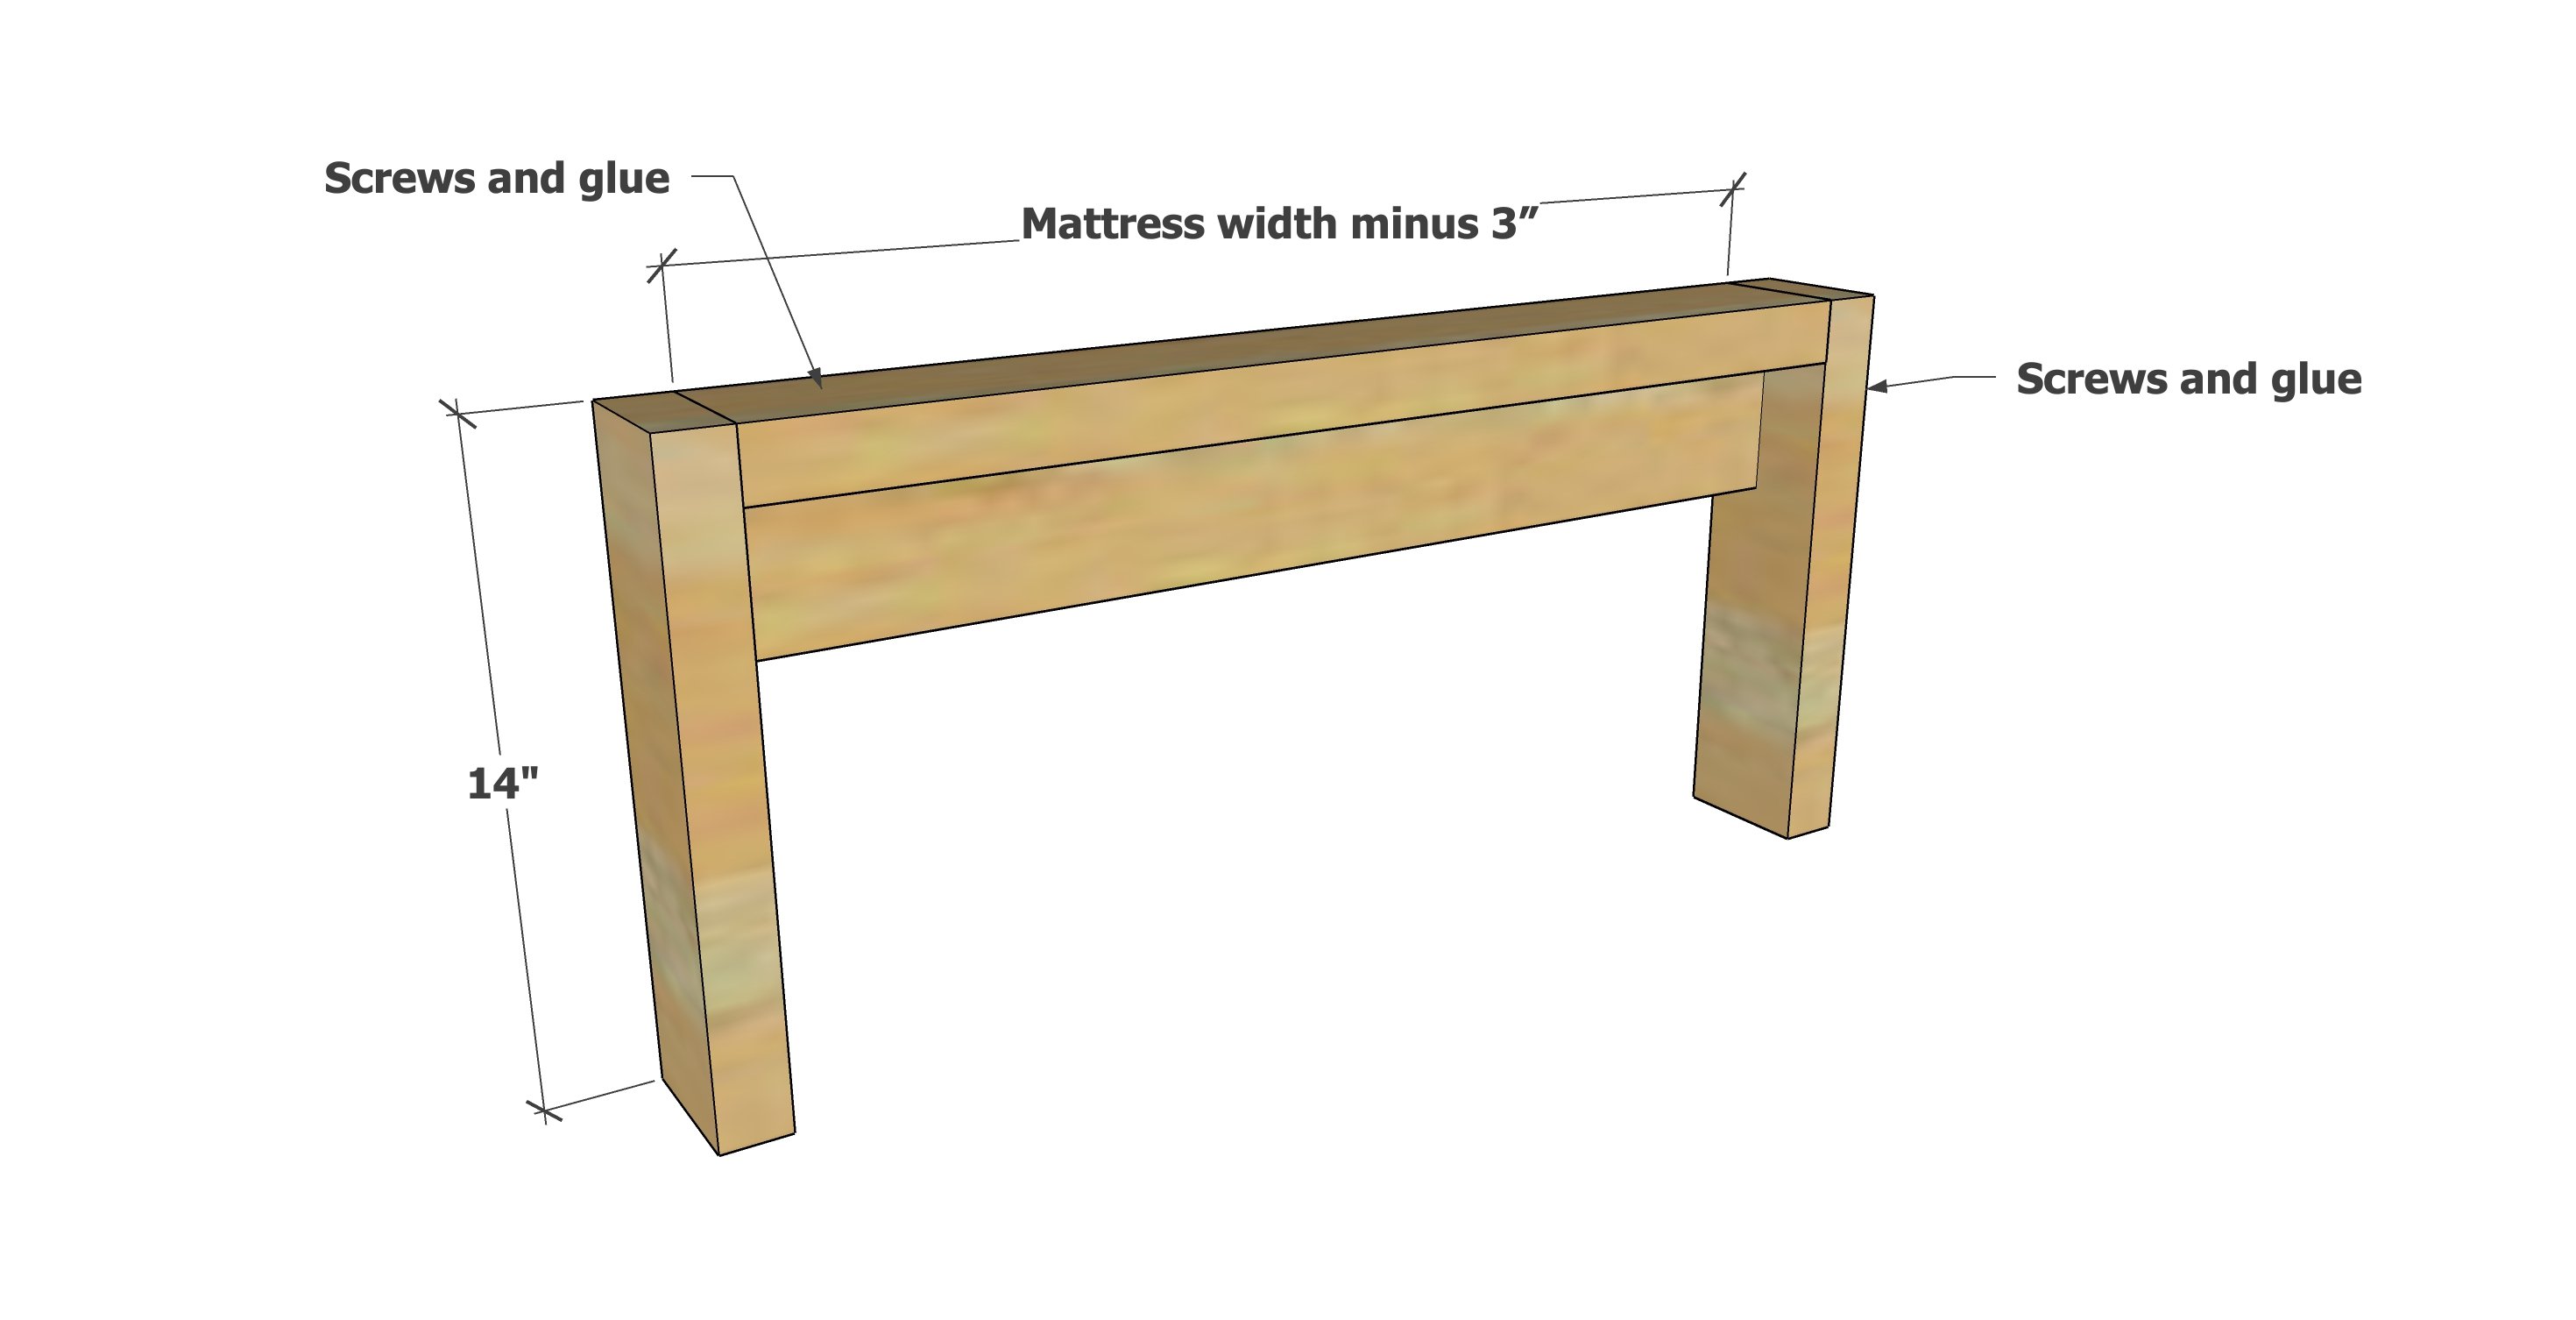
Build the bottom piece.
Step 5
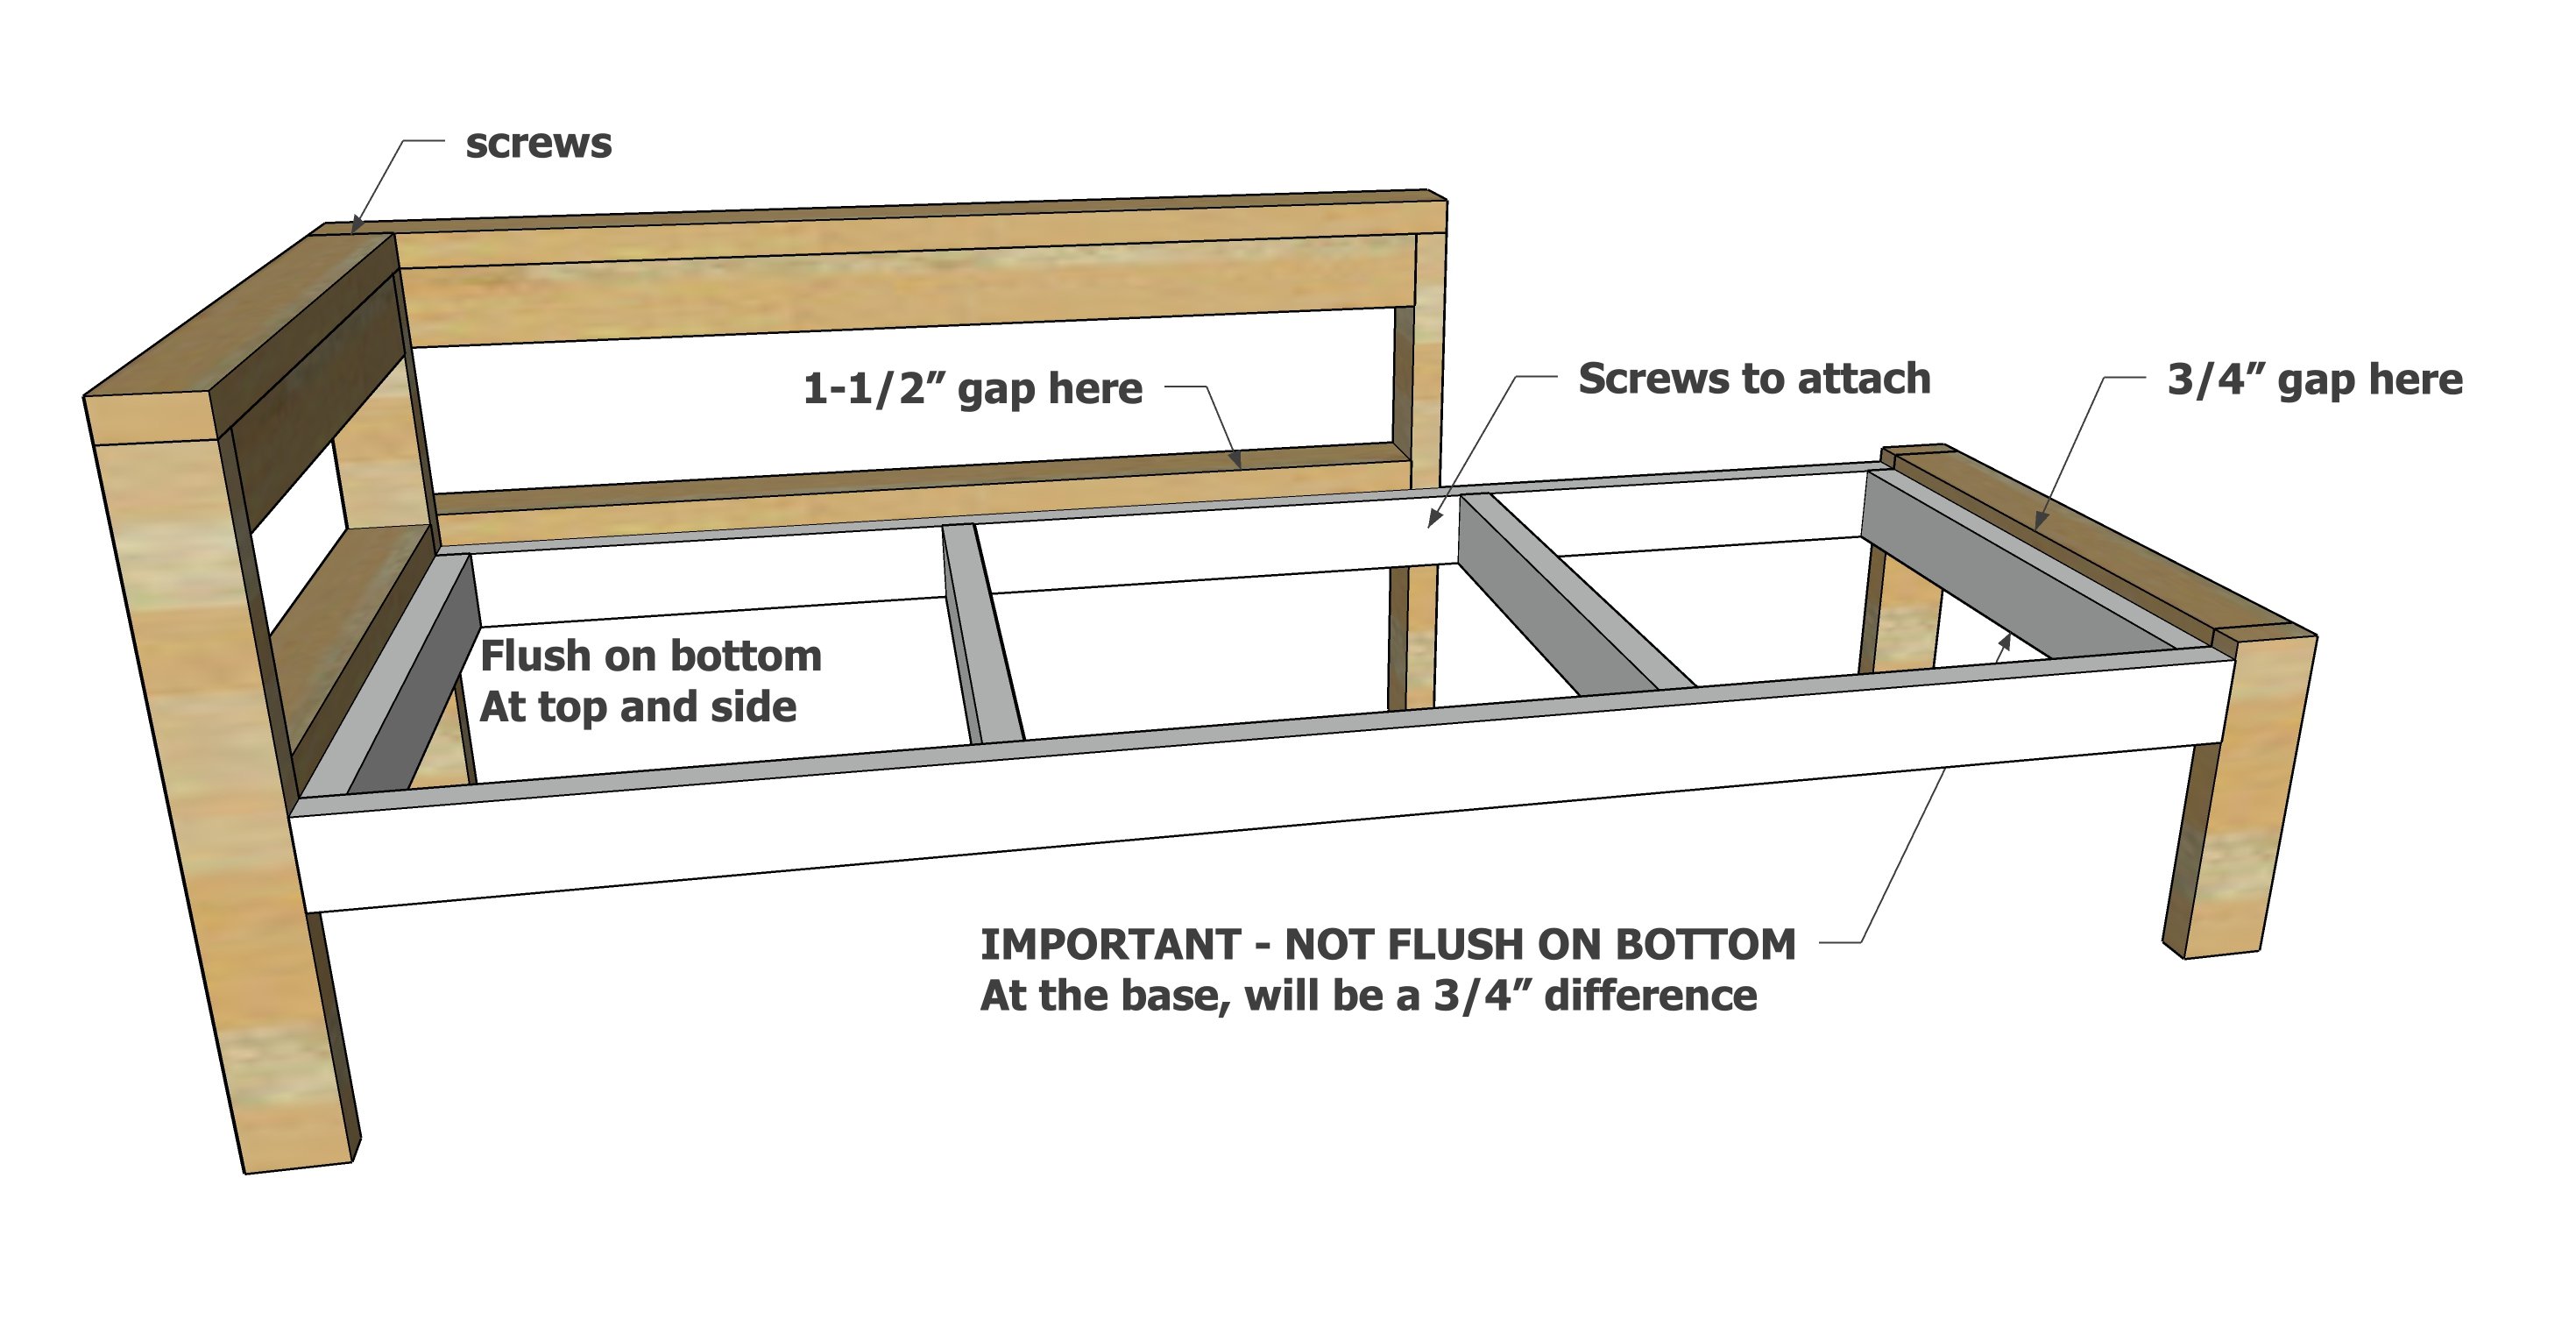
Attach the base to the bottom, top and side pieces with the longer screws.
Step 6
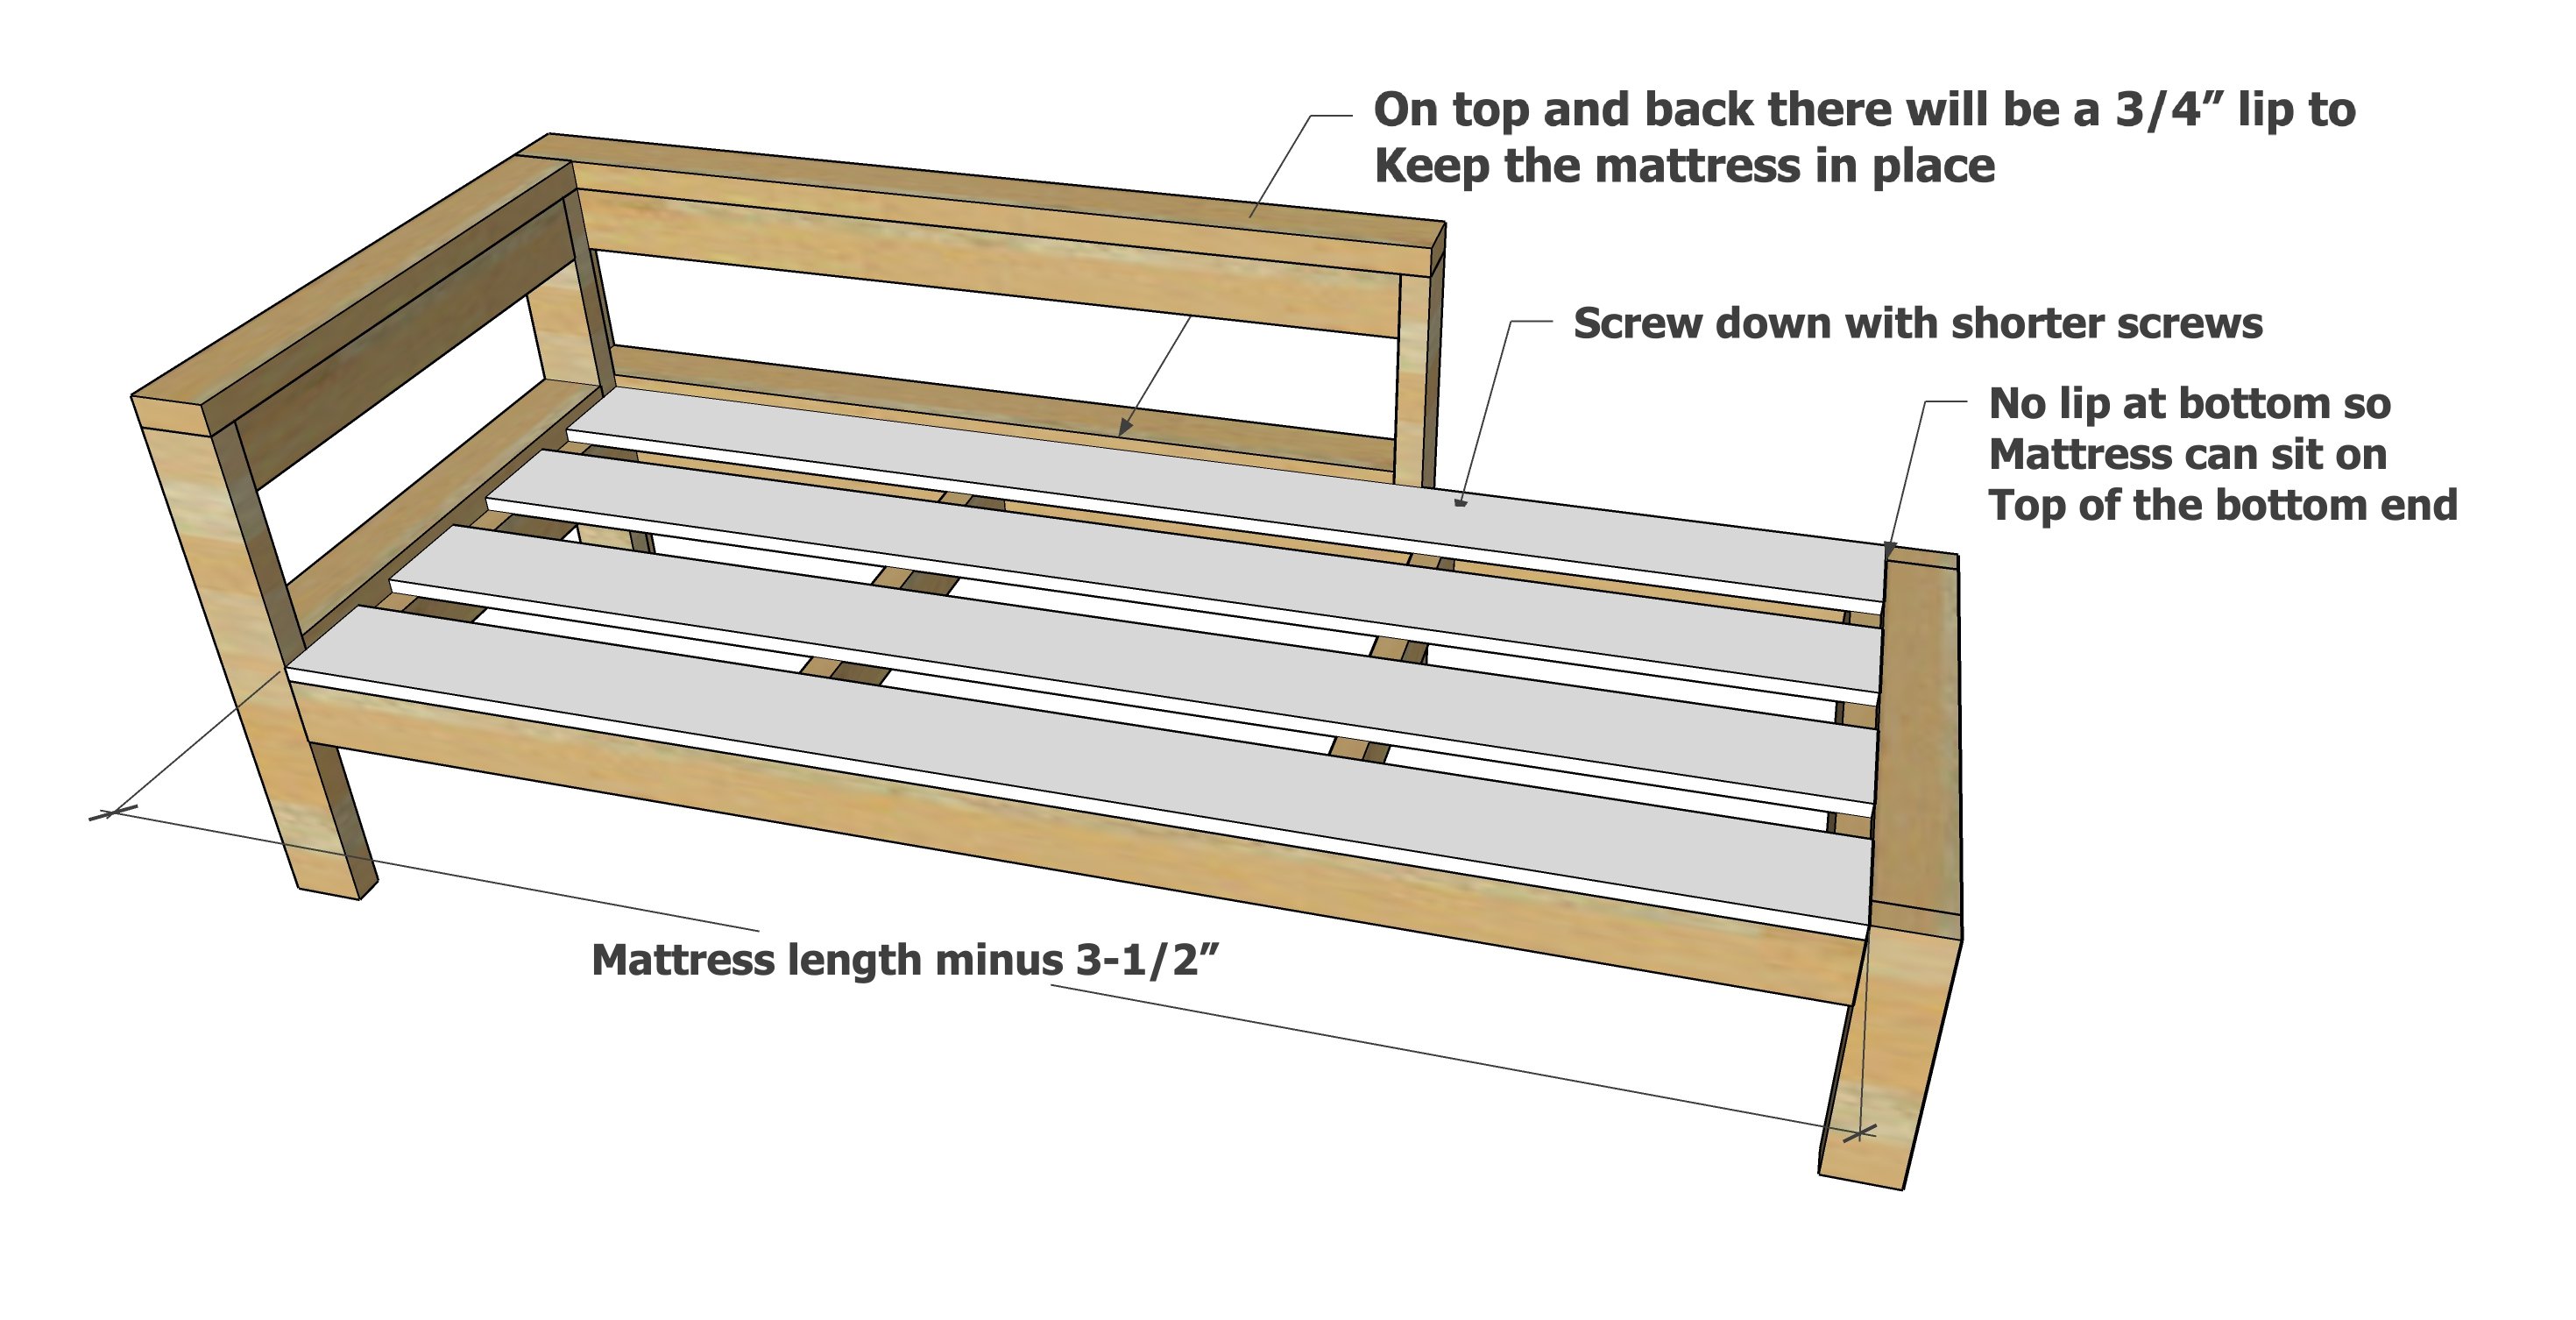
Add the decking to the top.
Remove sanding residue with a vacuum and wipe clean with a damp lint free cloth.