3 Tier Can Organizer

tiered can organizer
Difficulty
Starter Projects
| Print this plan

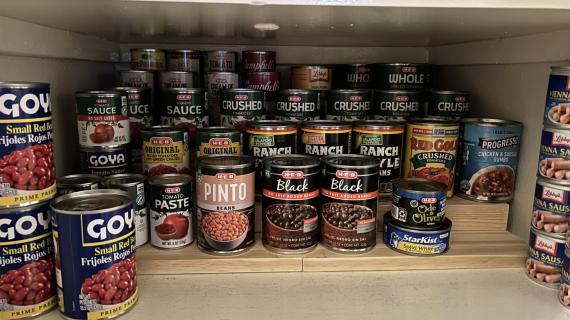
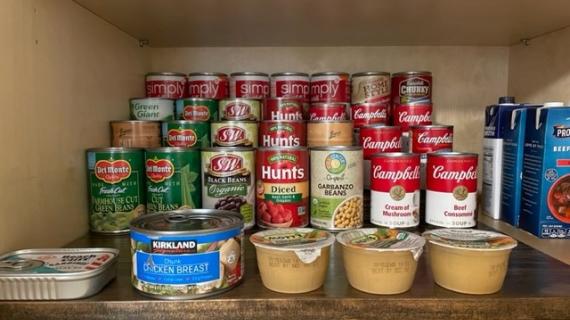
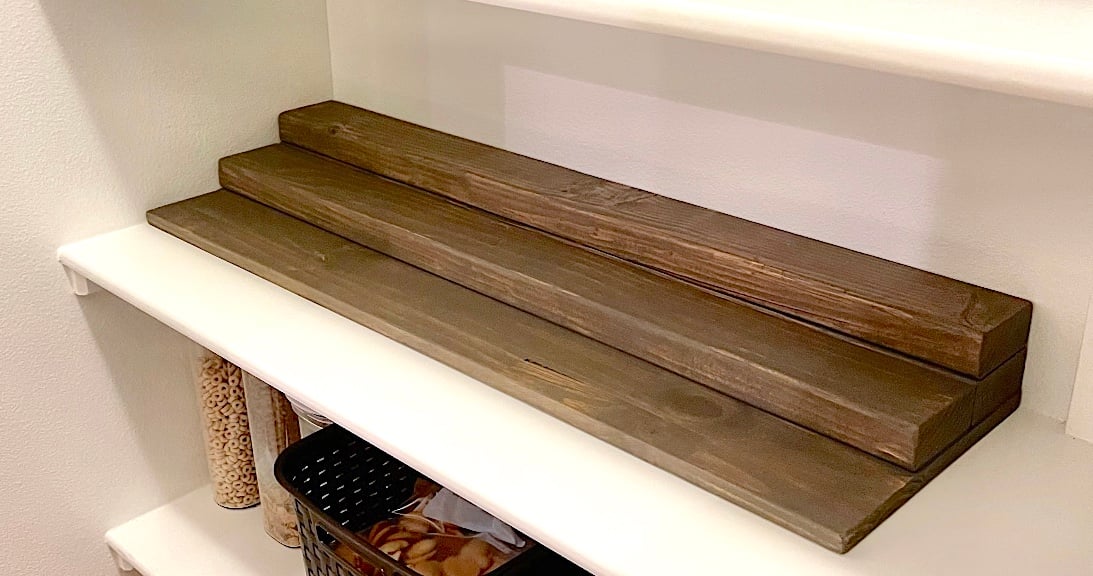
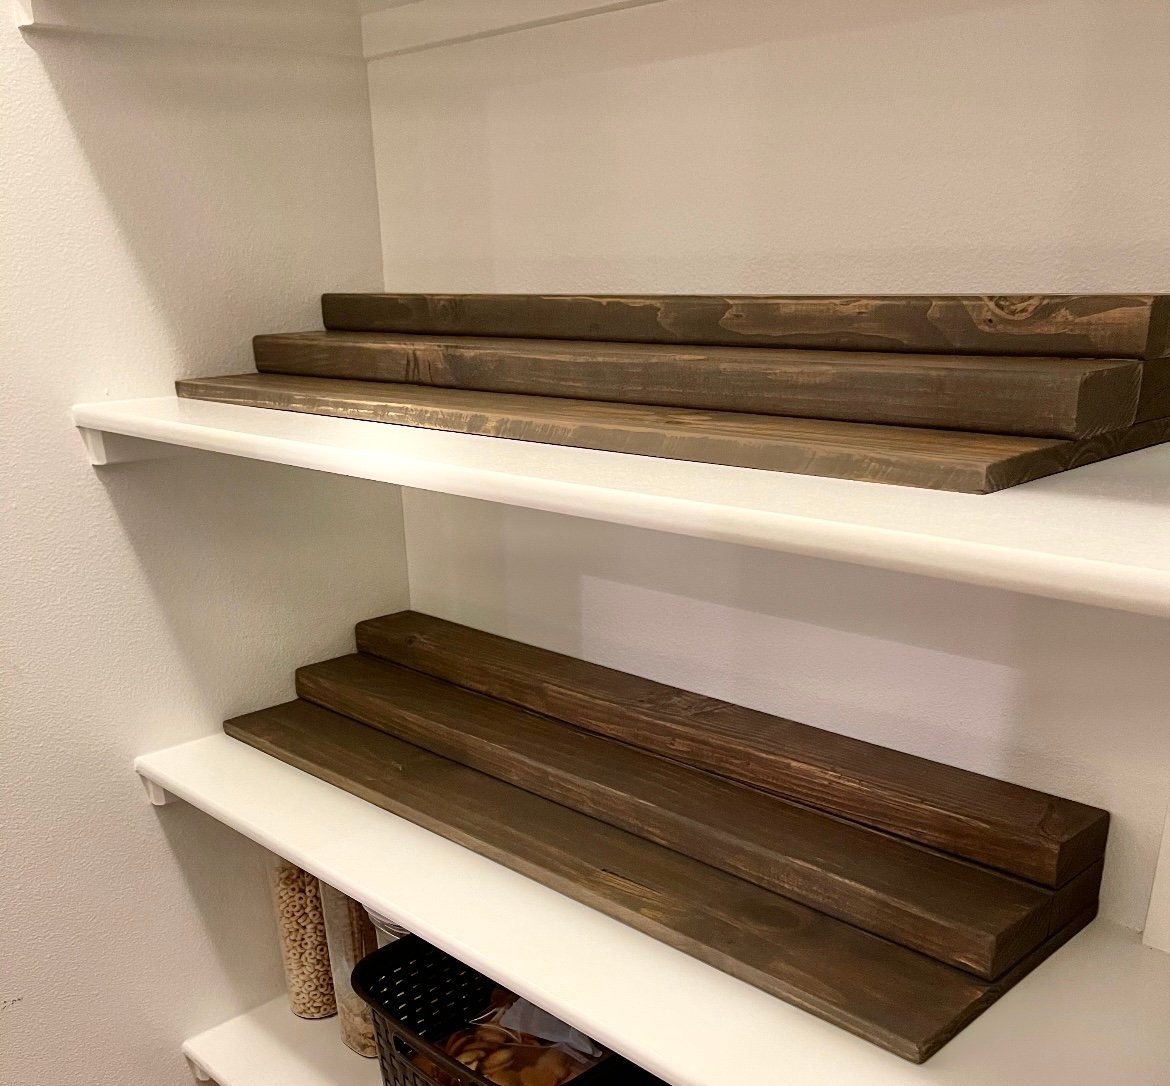
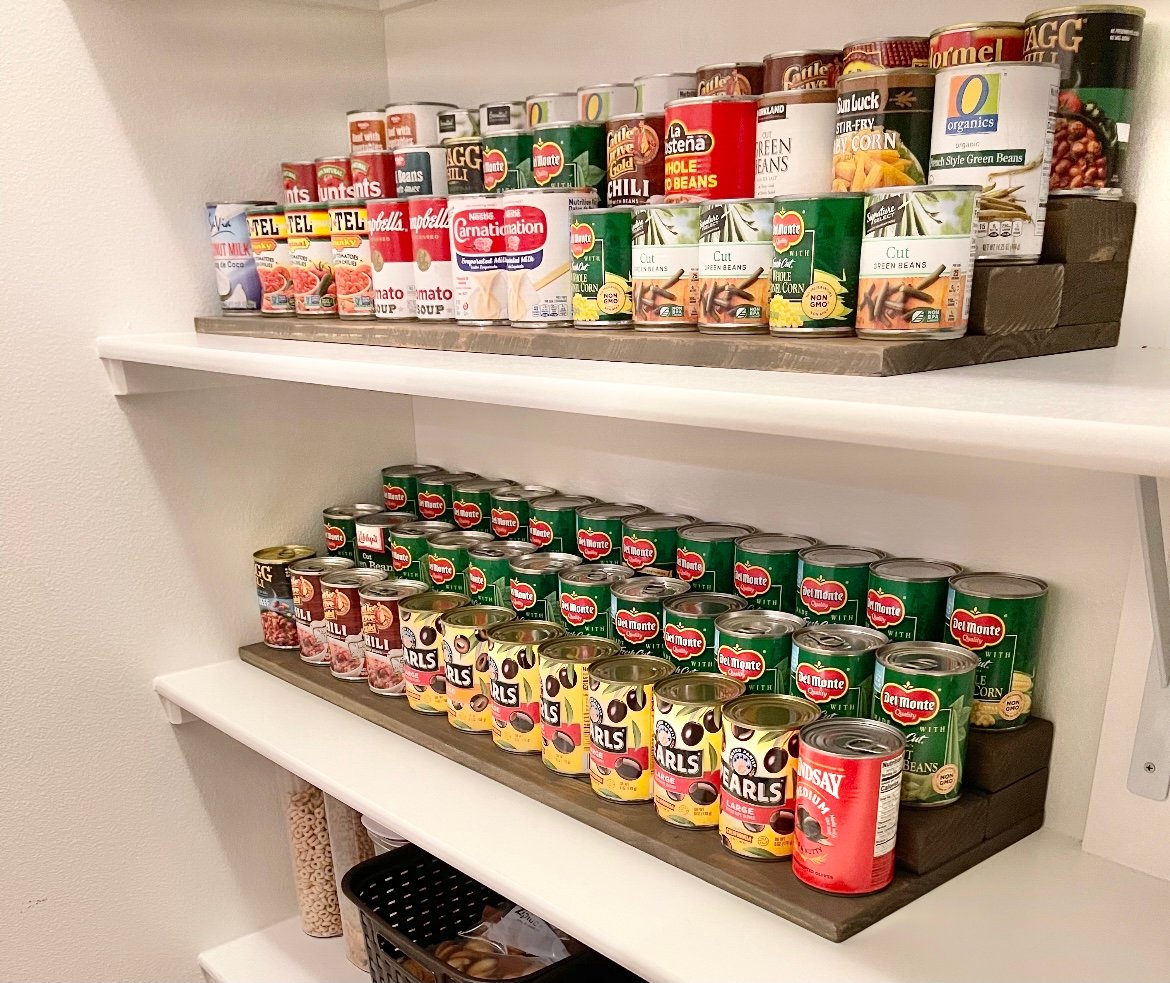
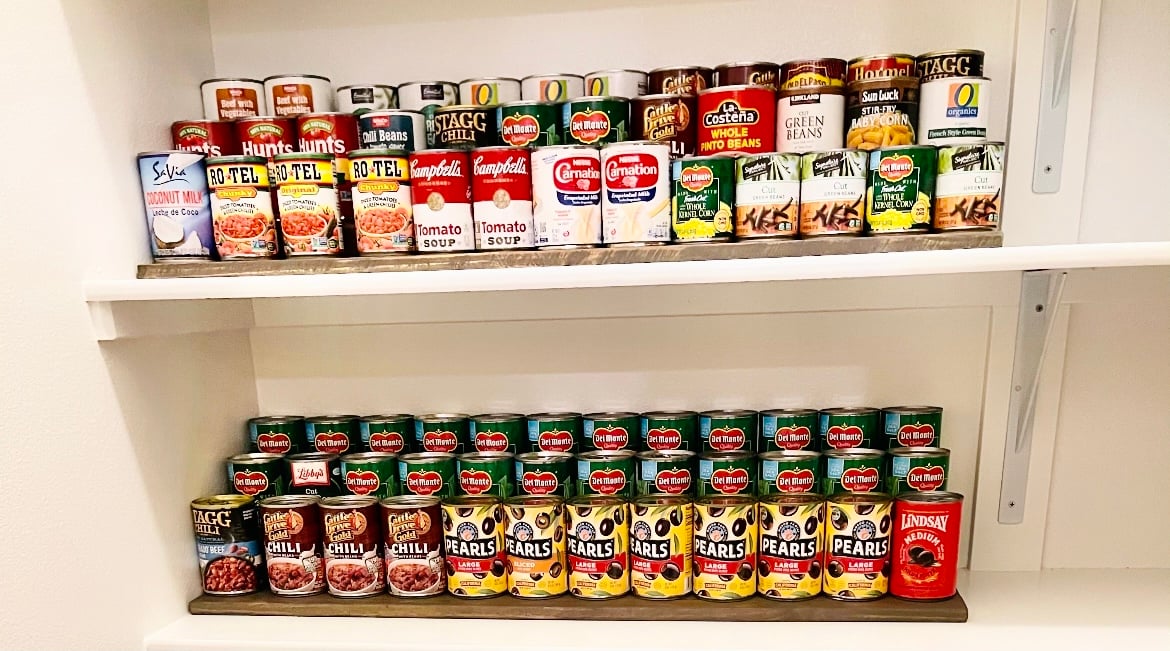
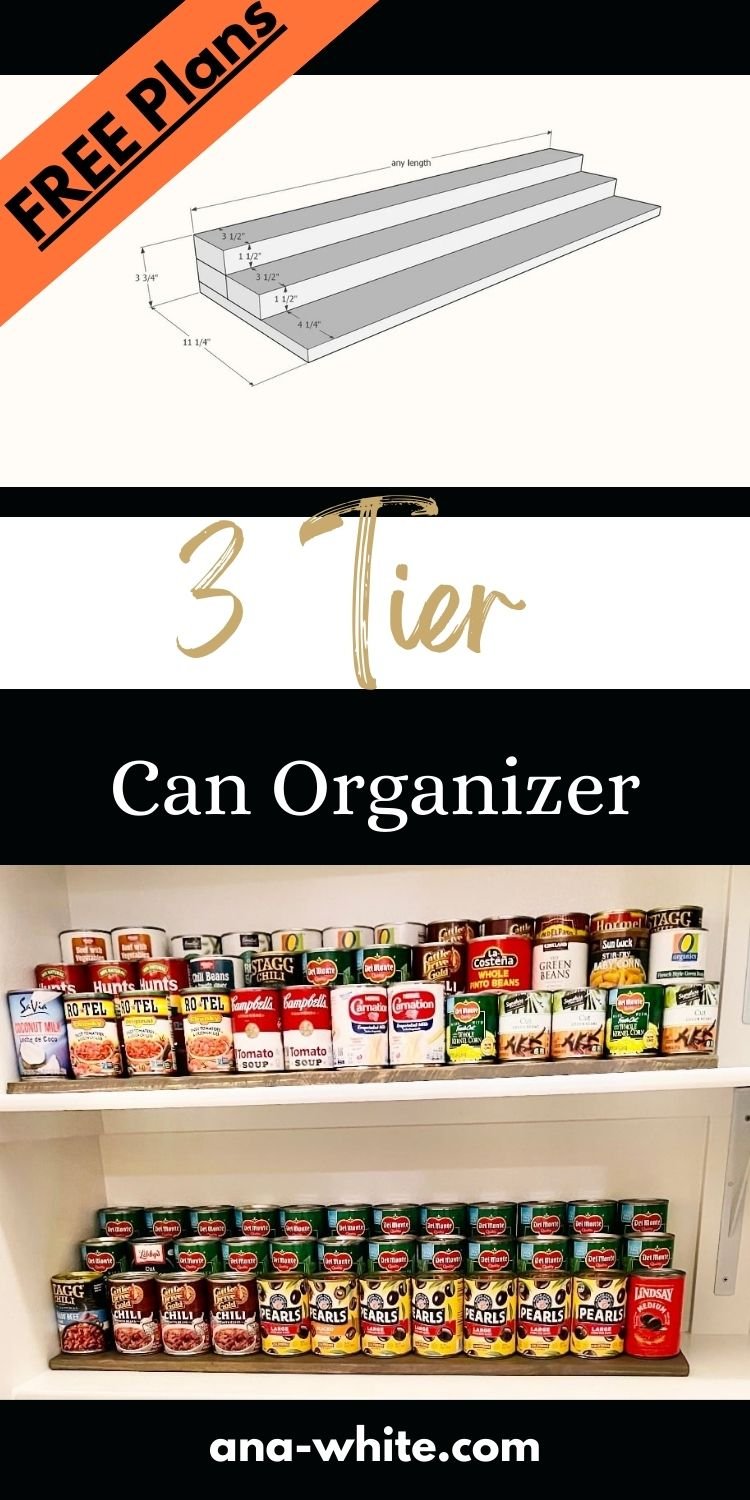
Organize canned food with a custom length DIY 3 tier can organizer.  This is a super simple project that will elevate cans or spices in the back row, so you can easily see your stock.  Build in any length - so no wasted space on the ends!    This is a free project plan from Ana-White.com.

wood 3 tier can organizer
3 tier can organizer with cans
3 tier can organizer front view

This is a DIY tutorial to build your own 3 tier can organizer in ANY LENGTH.

No more poor fitting organizers that consume more space than they save - this perfect cut to fit organizer uses every square inch of your cabinet space.

What Do I Need for Tools?

You'll need a saw to cut wood (miter saw recommended, but a jigsaw or circular saw is fine), and a drill with screws or a brad nailer with brad nails.

If using screws, go for 2" long self tapping star bit wood construction screws.

If using nails, go for 1" long brad nails and wood glue.

What Do I Need for Materials?

You'll need a pine wood 1x12 in the overall length of the can organizer.

And three times that amount in 2x4 boards.

Pin for Later! 

3 Tier Can Organizer

Dimensions
3 tier can organizer dimensions diagram
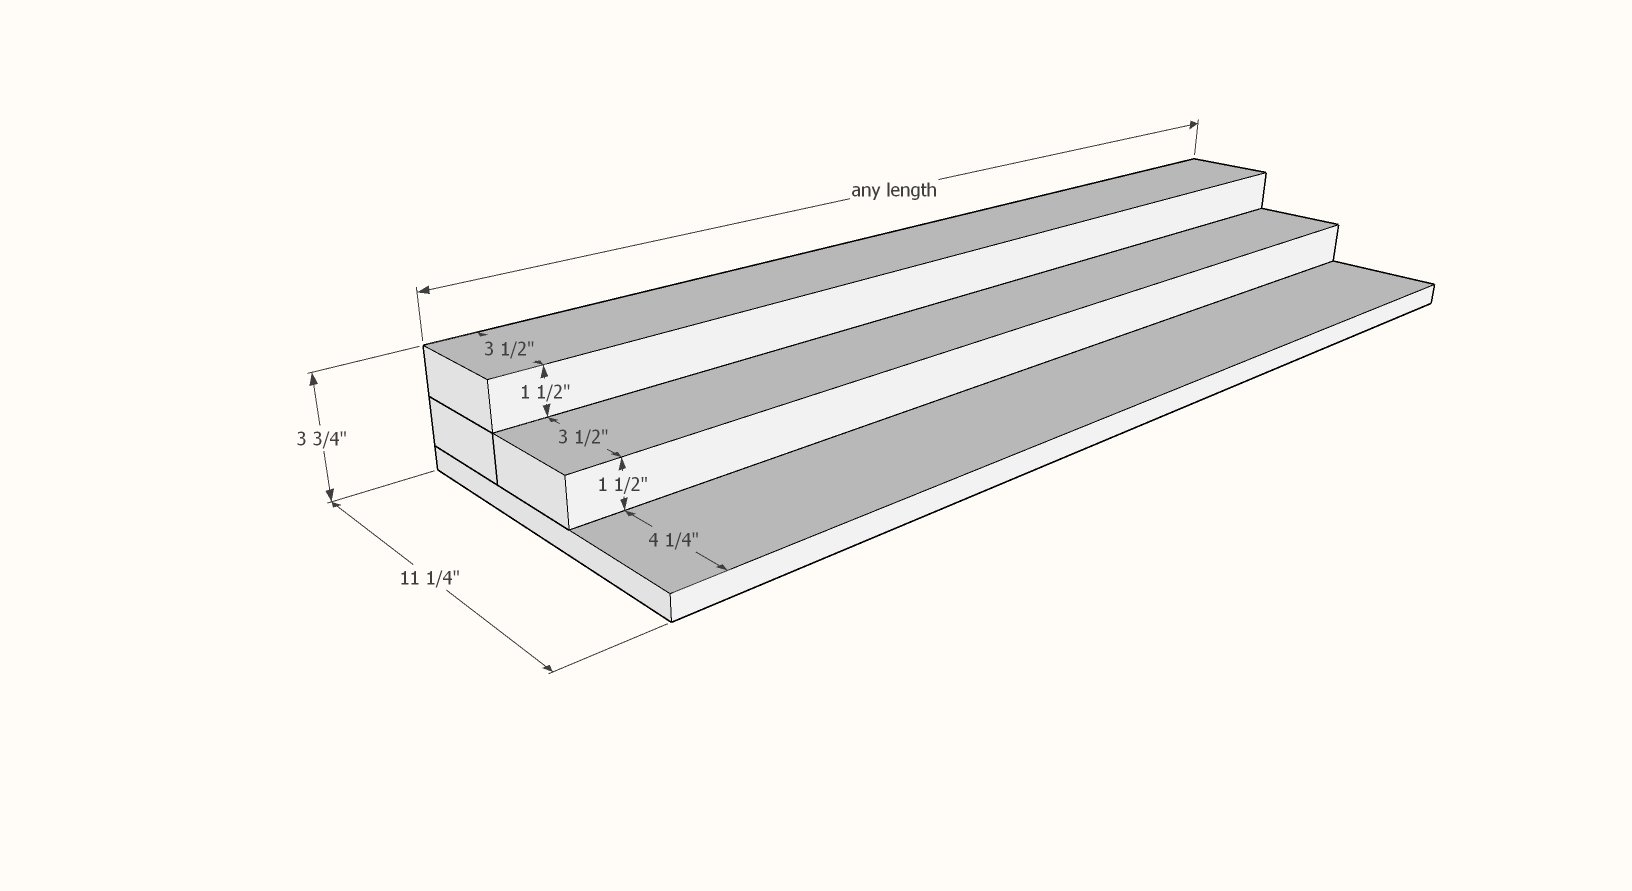
3 tier can organizer dimensions shown in diagram, can be any length

Preparation

Shopping List

1 - 1x12 in desired length of organizer

2x4, three times the length of the 1x12

2" brad nails or self tapping wood screws

Cut List

1 - 1x12 in desired length of can organizer

3 - 2x4 in desired length of can organizer

Instructions

Step 1

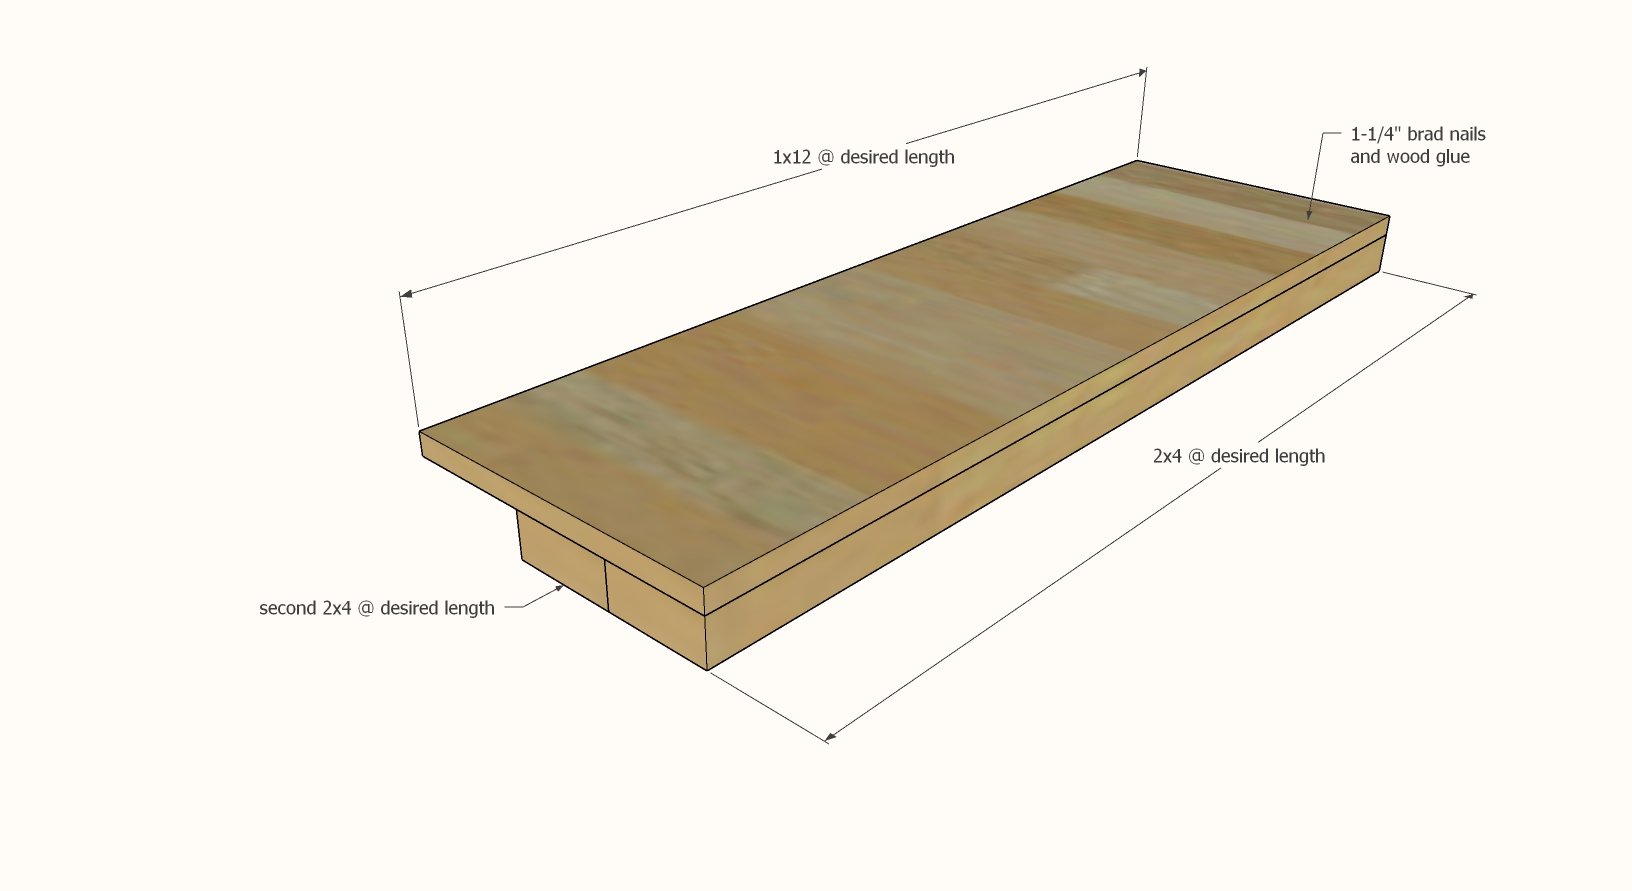
Screw or nail the 1x12 to two of the 2x4s from the underside.

Step 2

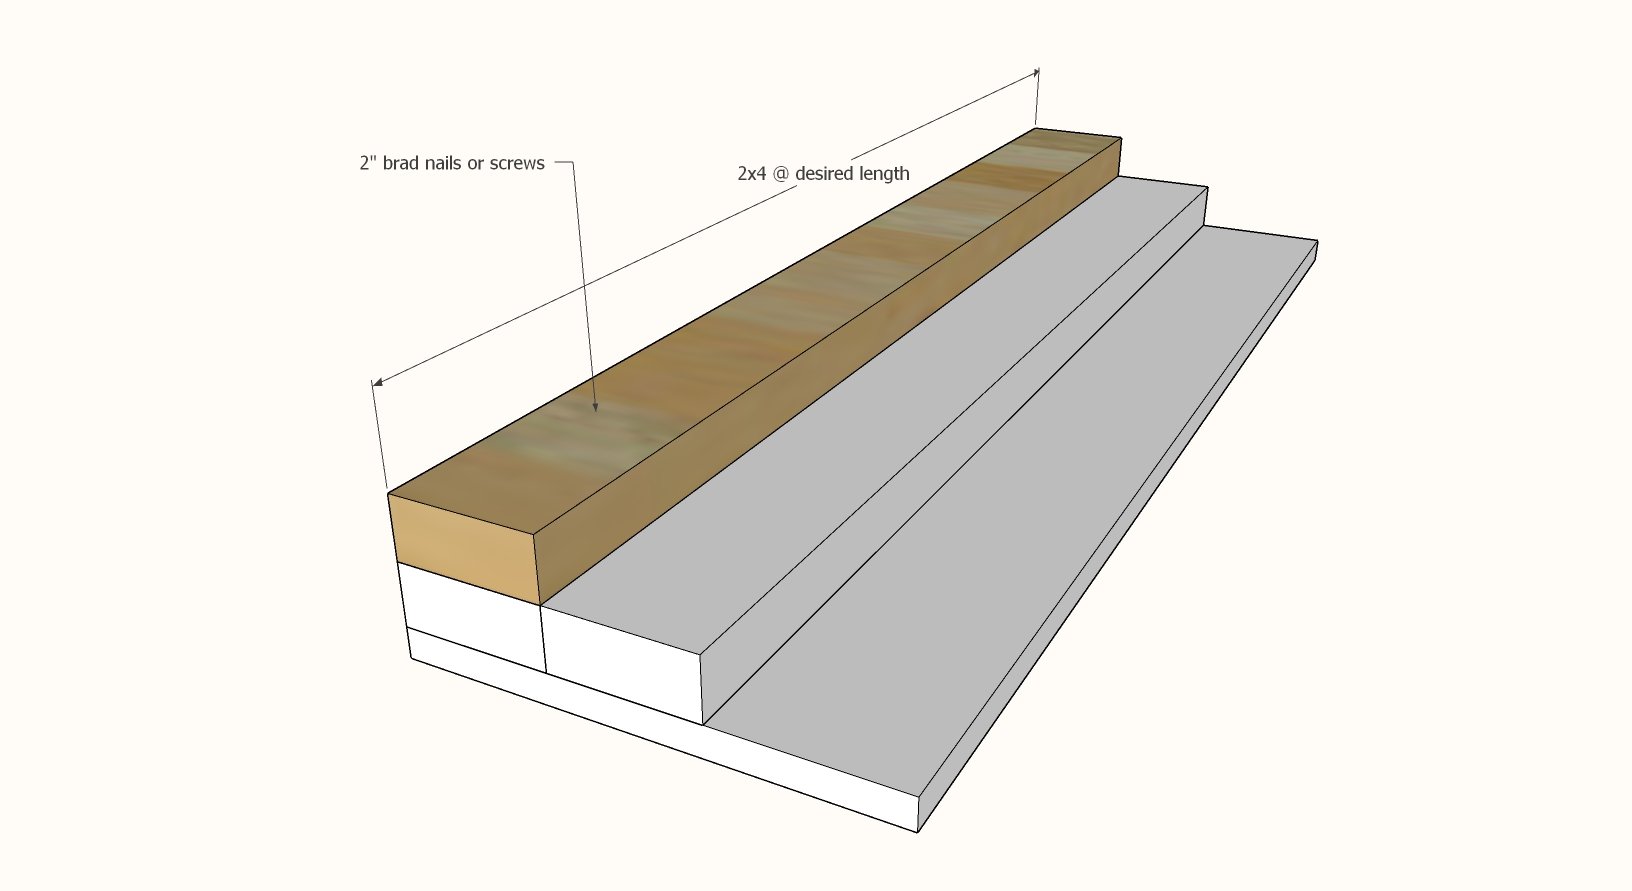
Attach the remaining 2x4 to the back top to create the third tier.