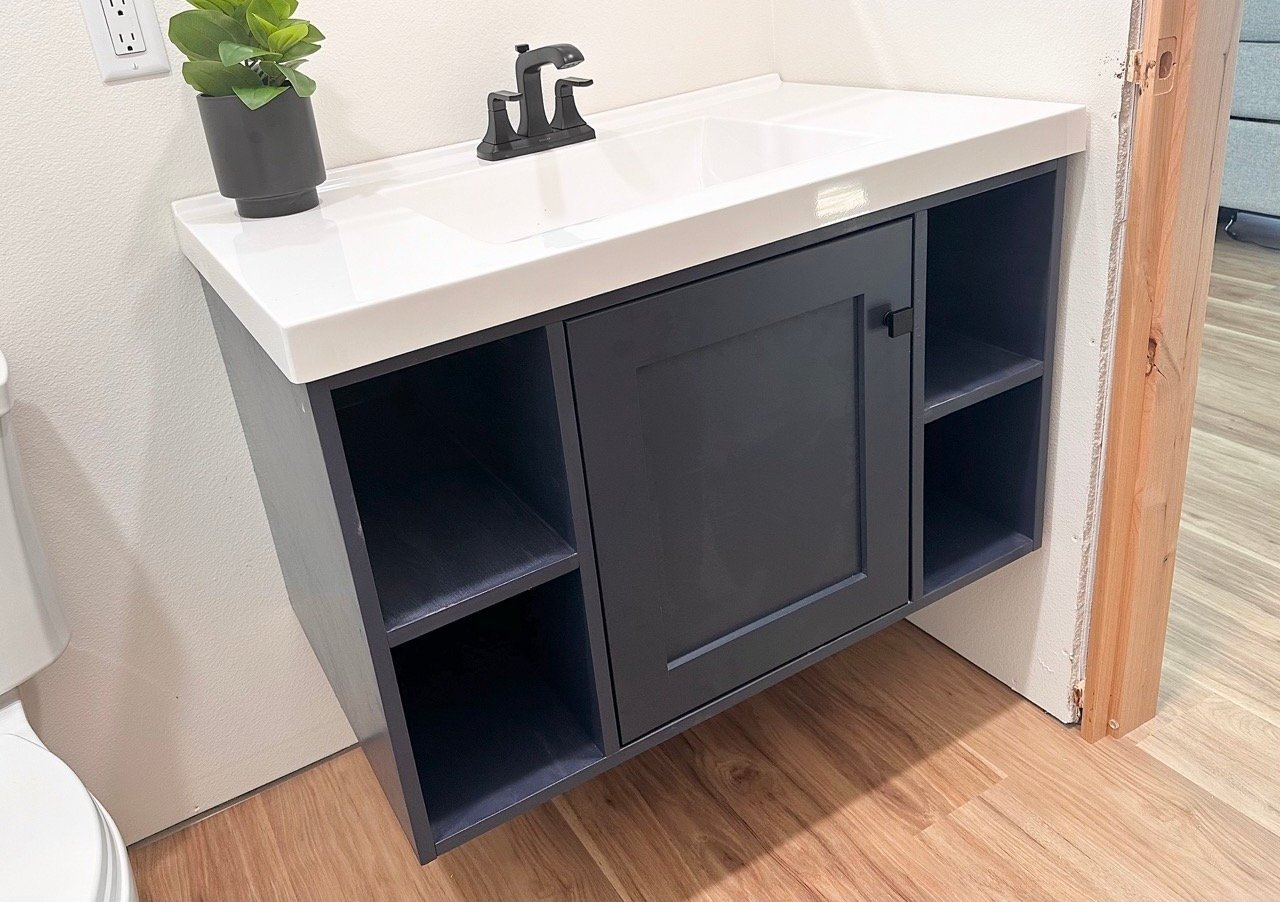


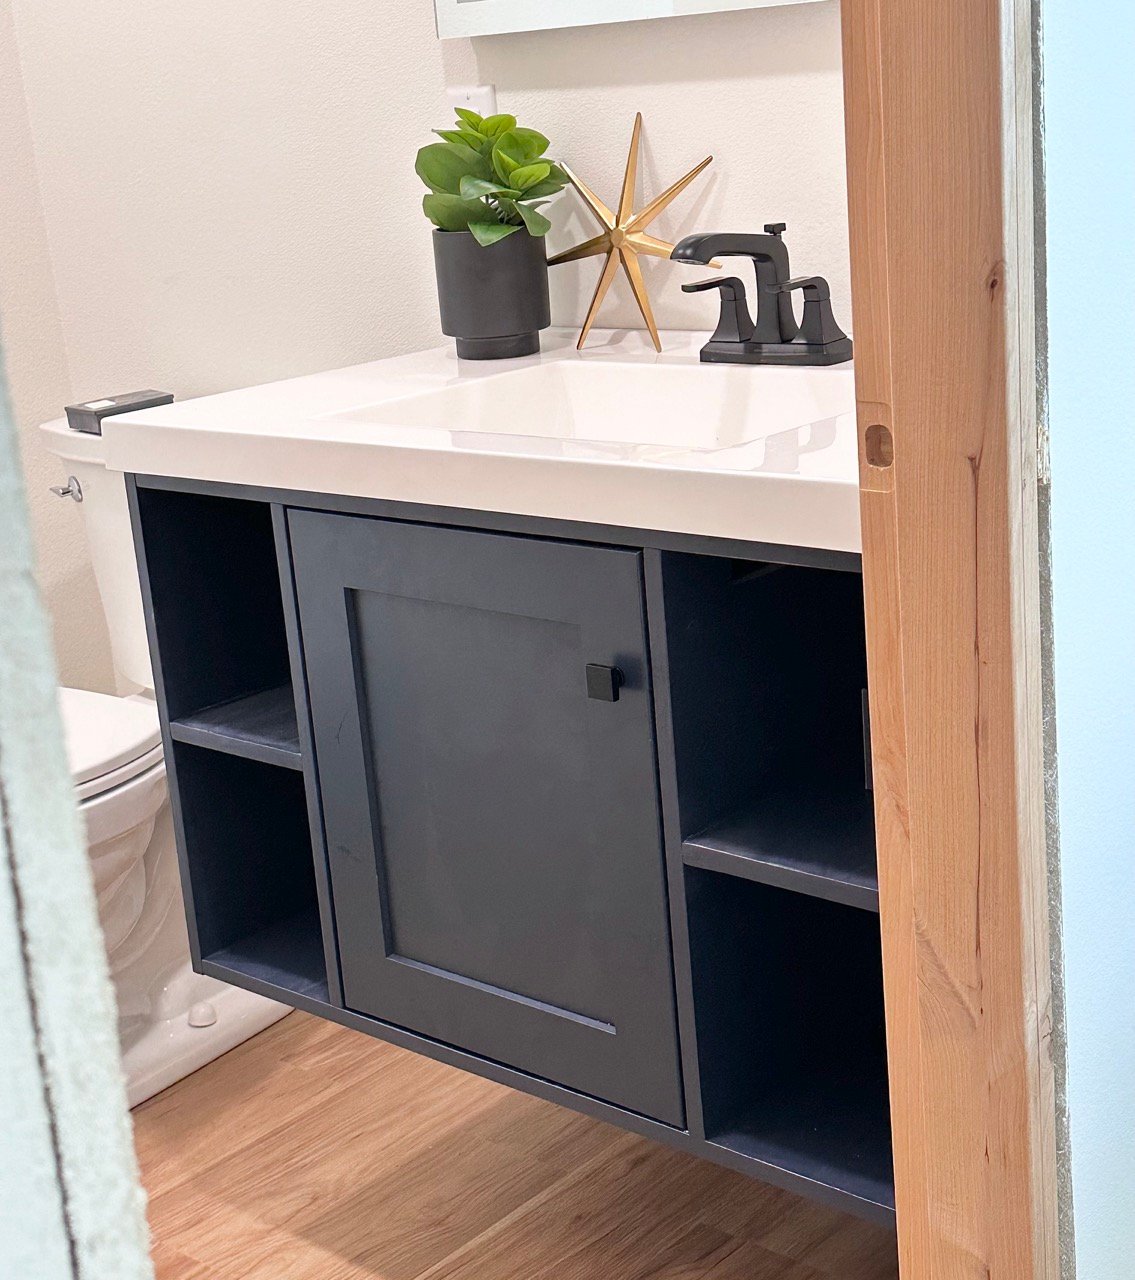
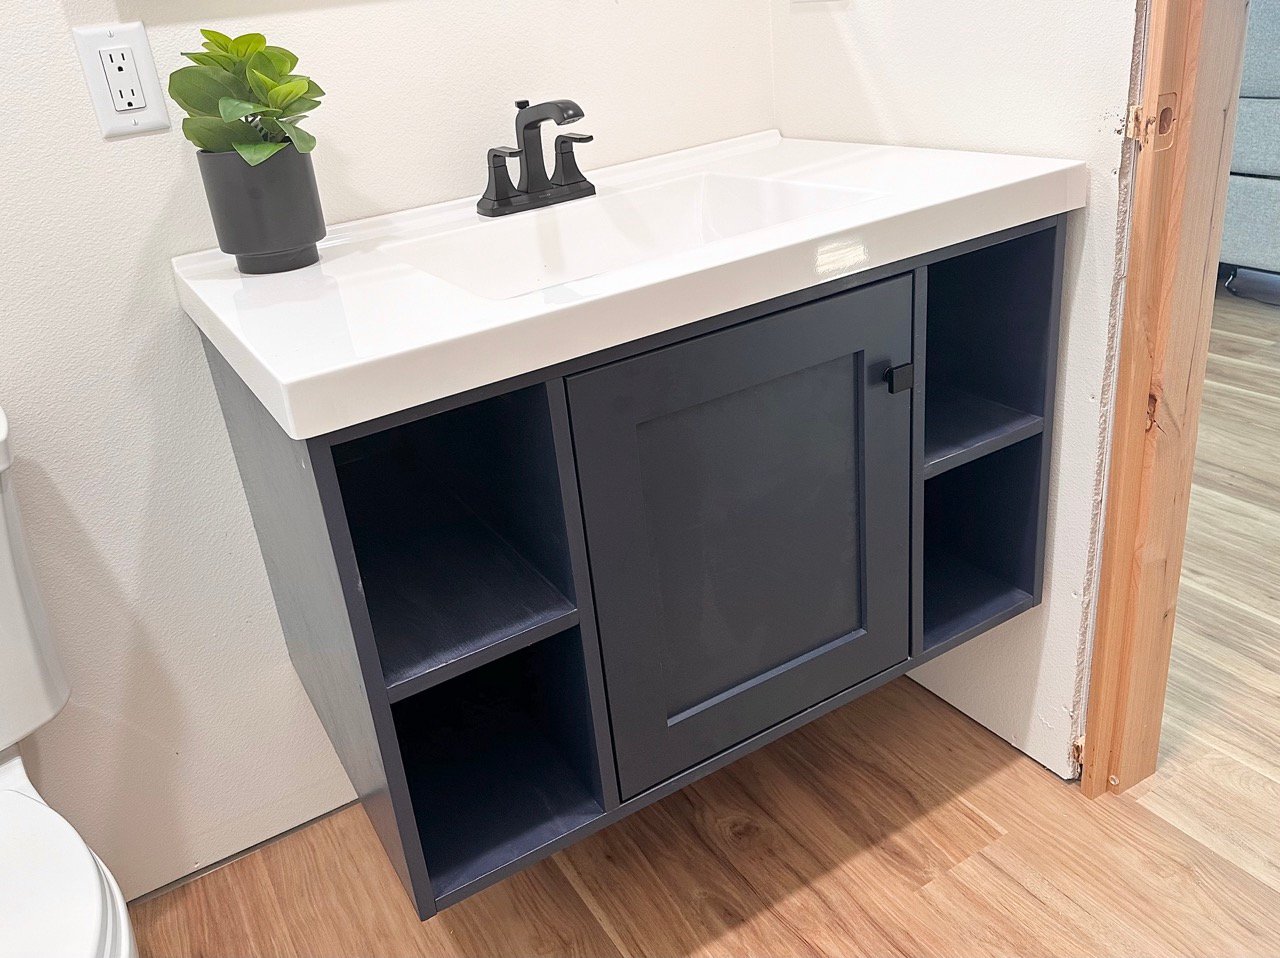
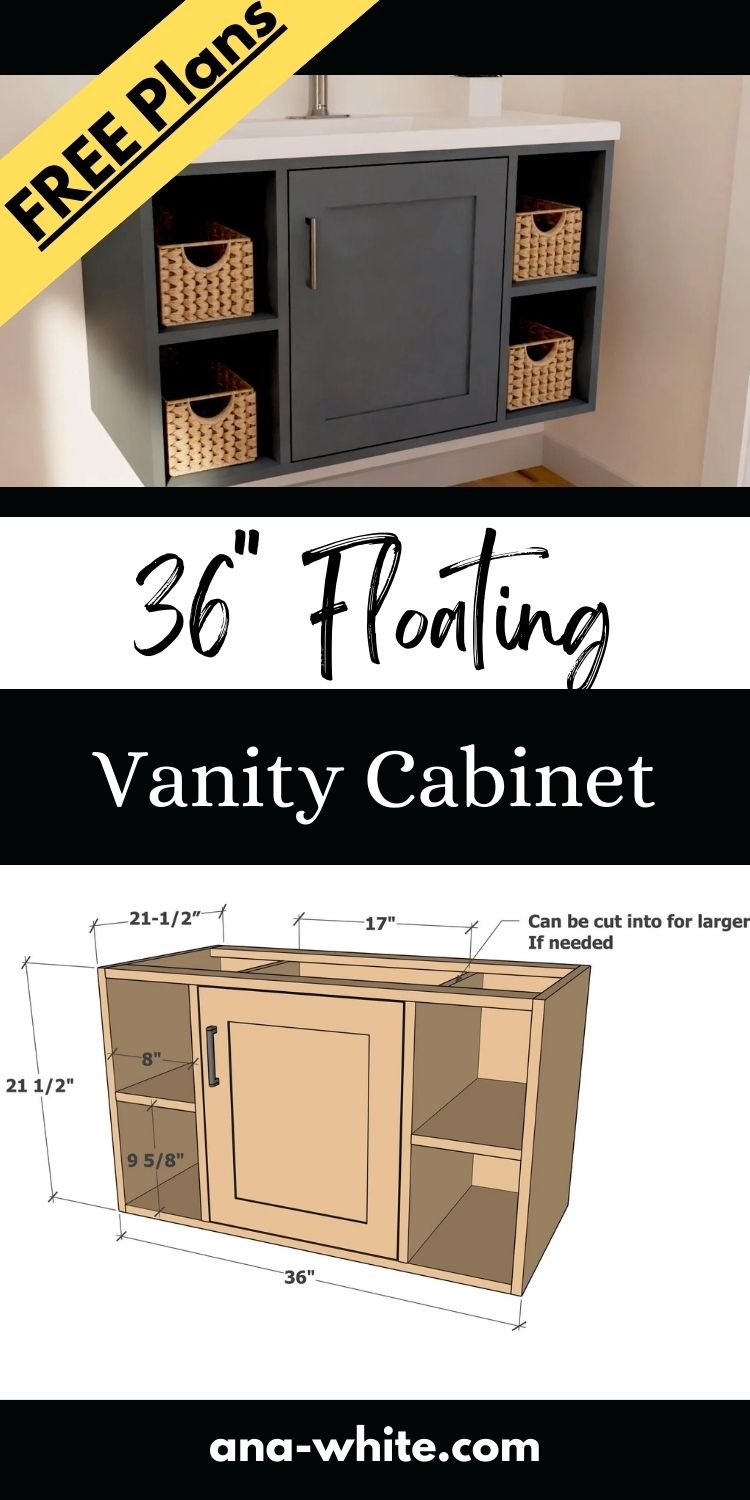
Free plans to build your own floating vanity cabinet! This floating vanity is built using 3/4" plywood. We ordered a door and purchased a vanity top to complete the project. It is very sturdy and was simple to build and super functional and looks amazing.
Step by step plans include shopping list, cut list, detailed diagrams, and photos - everything you need to build your own floating vanity.
Why I Built This Project
My friend is building a custom lakehouse and wanted a floating vanity for their half bath to match their kitchen cabinetry. But a quote from the cabinet shop came in at $900 for just the vanity (no top). Dismayed, she called me.
The design she requested was simple enough, open shelves on the sides and a door in the center to conceal the plumbing. I had her order up a door so it would match her kitchen cabinetry, and got to building.
My job was simply to create a plywood box with some shelves -
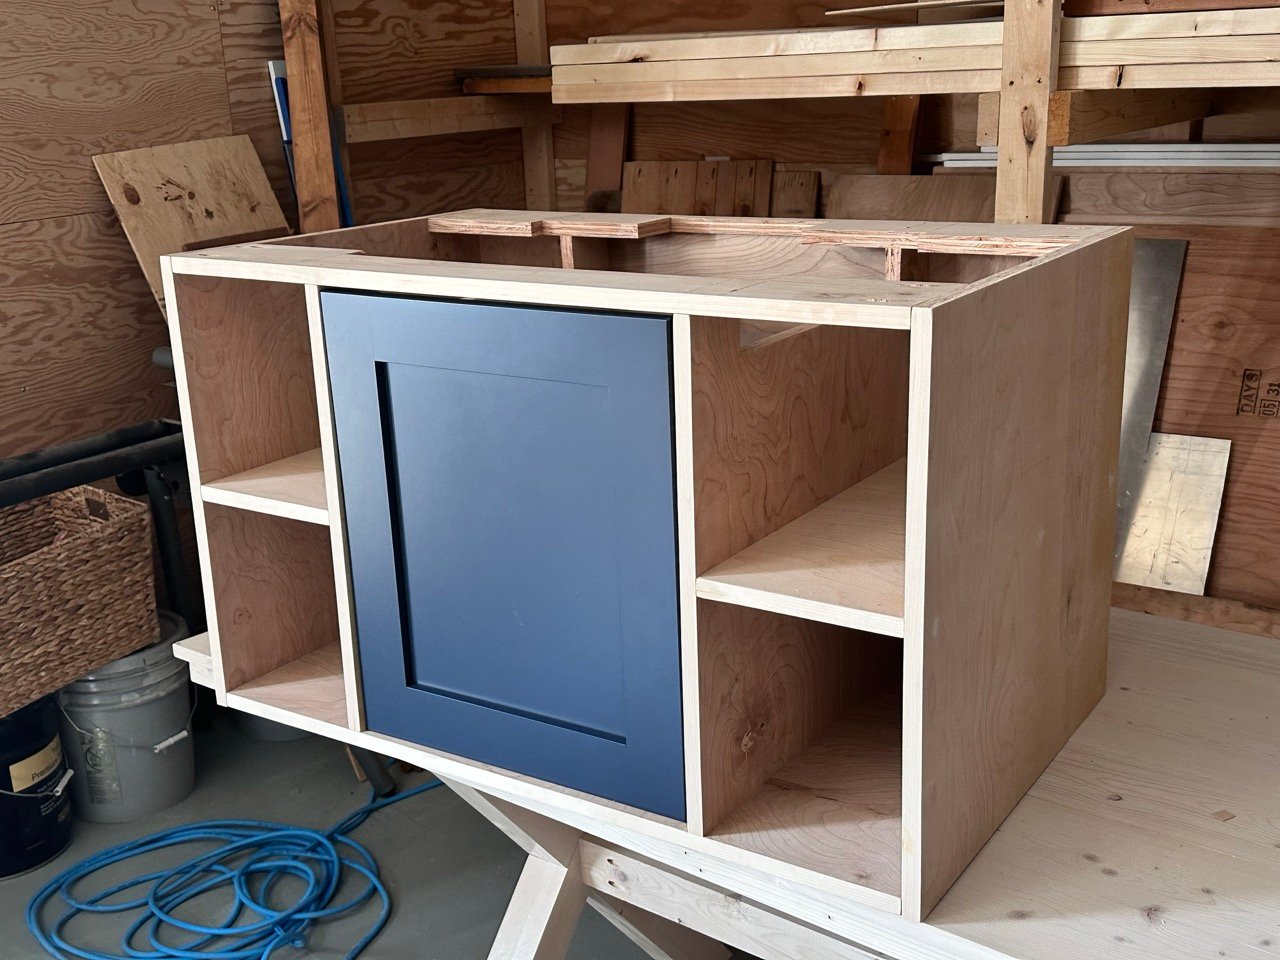
This was an easy enough build, but because of the "floating" part, I did make it extra strong, with even the back made of 3/4" plywood.
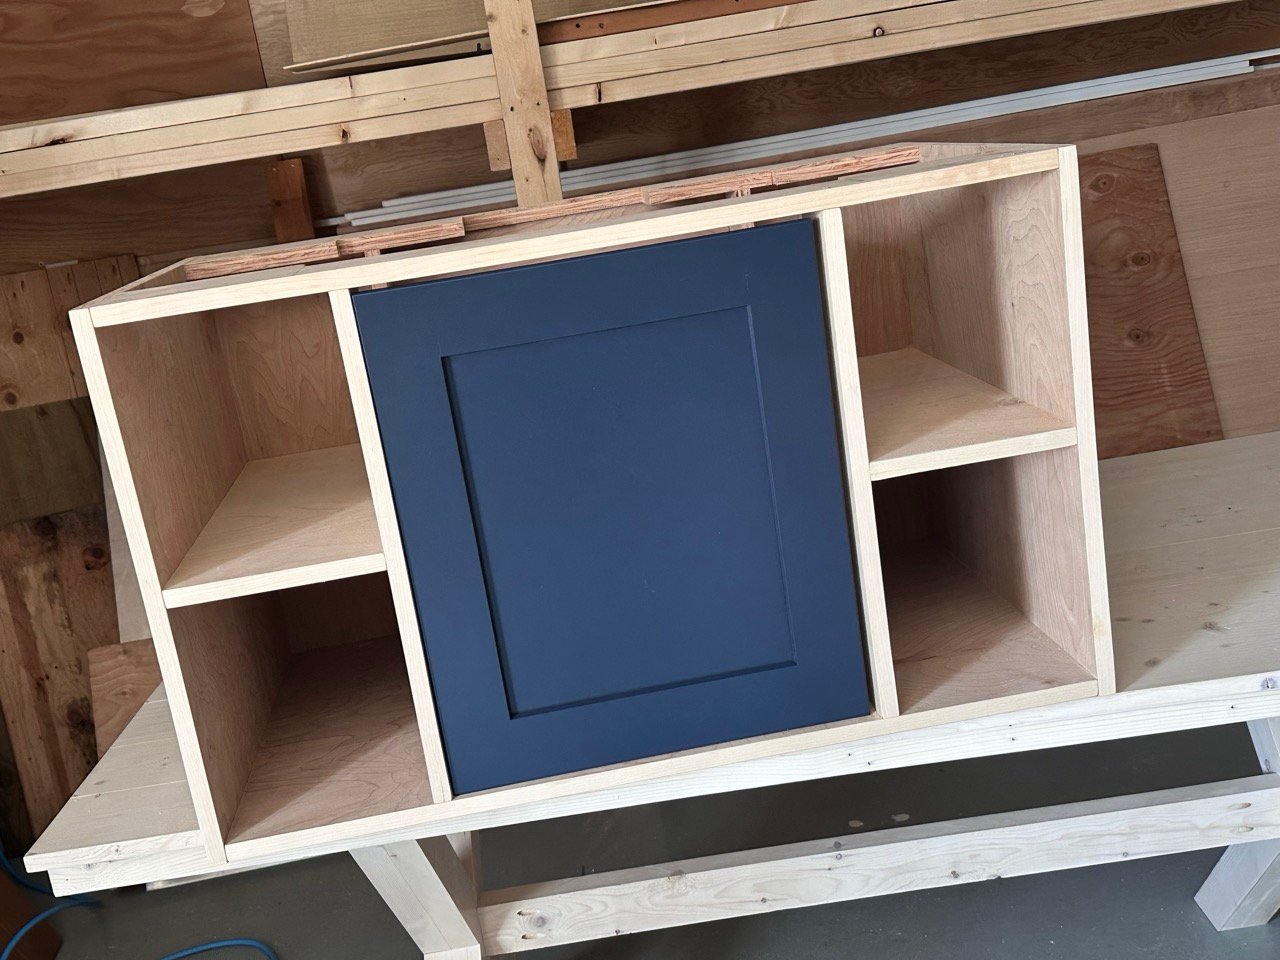
The door is an inset, I just had her order it 1/4" less in height and width than the opening, so that gave me an 1/8" gap all around when finished.
My friend color matched the paint and painted the carcass. I helped install the door, and this is how it turned out:
Not bad for one sheet of plywood, right?
The total cost for the carcass, door, paint and hinge was about $200, so about a $700 savings. It did take me about 2 hours to build, and my friend spent some time painting it.
We love that this vanity is 3/4" plywood, so super strong and should last them as long as they need it to.
I'm thankful I was invited to help with this project, and glad to be able to share my plans with you.
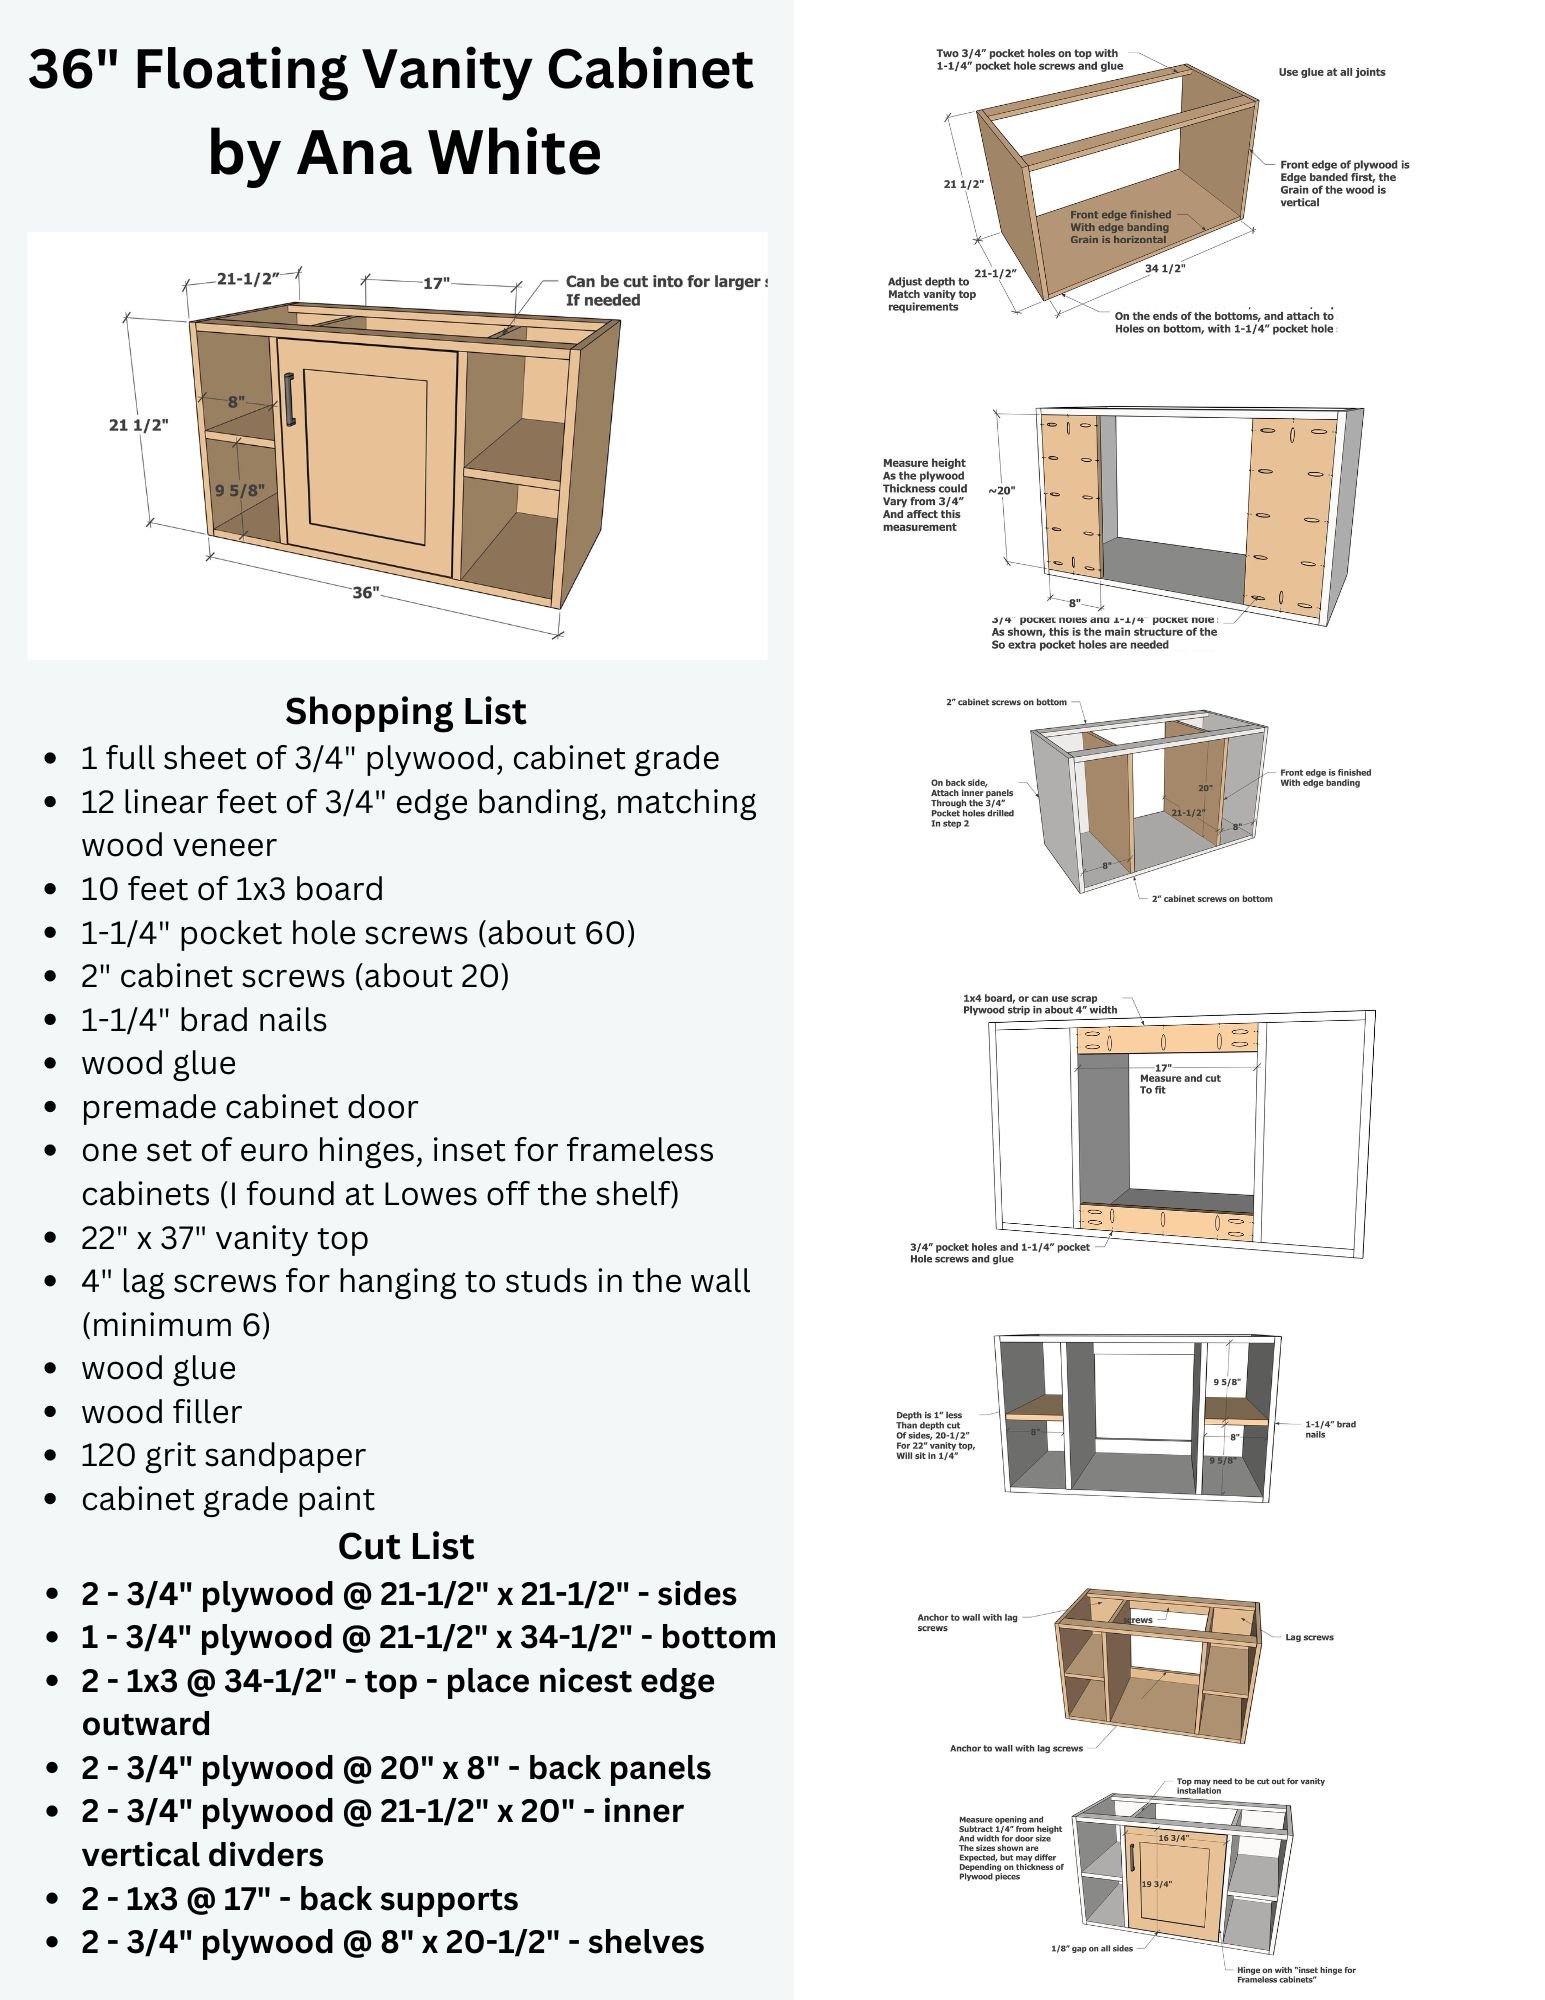
Free Plans to Build Your Own 36" Floating Bath Vanity
Advanced Project: this is an advanced project, and needs a table saw and extra care to keep it square and strong enough to hang on the wall.
TIP: If able to add additional framing in the wall to support the vanity, this will help with strength
Pin For Later!
Preparation
- 1 full sheet of 3/4" plywood, cabinet grade
- 12 linear feet of 3/4" edge banding, matching wood veneer
- 10 feet of 1x3 board
- 1-1/4" pocket hole screws (about 60)
- 2" cabinet screws (about 20)
- 1-1/4" brad nails
- wood glue
- premade cabinet door
- one set of euro hinges, inset for frameless cabinets (I found at Lowes off the shelf)
- 22" x 37" vanity top
- 4" lag screws for hanging to studs in the wall (minimum 6)
- wood glue
- wood filler
- 120 grit sandpaper
- cabinet grade paint
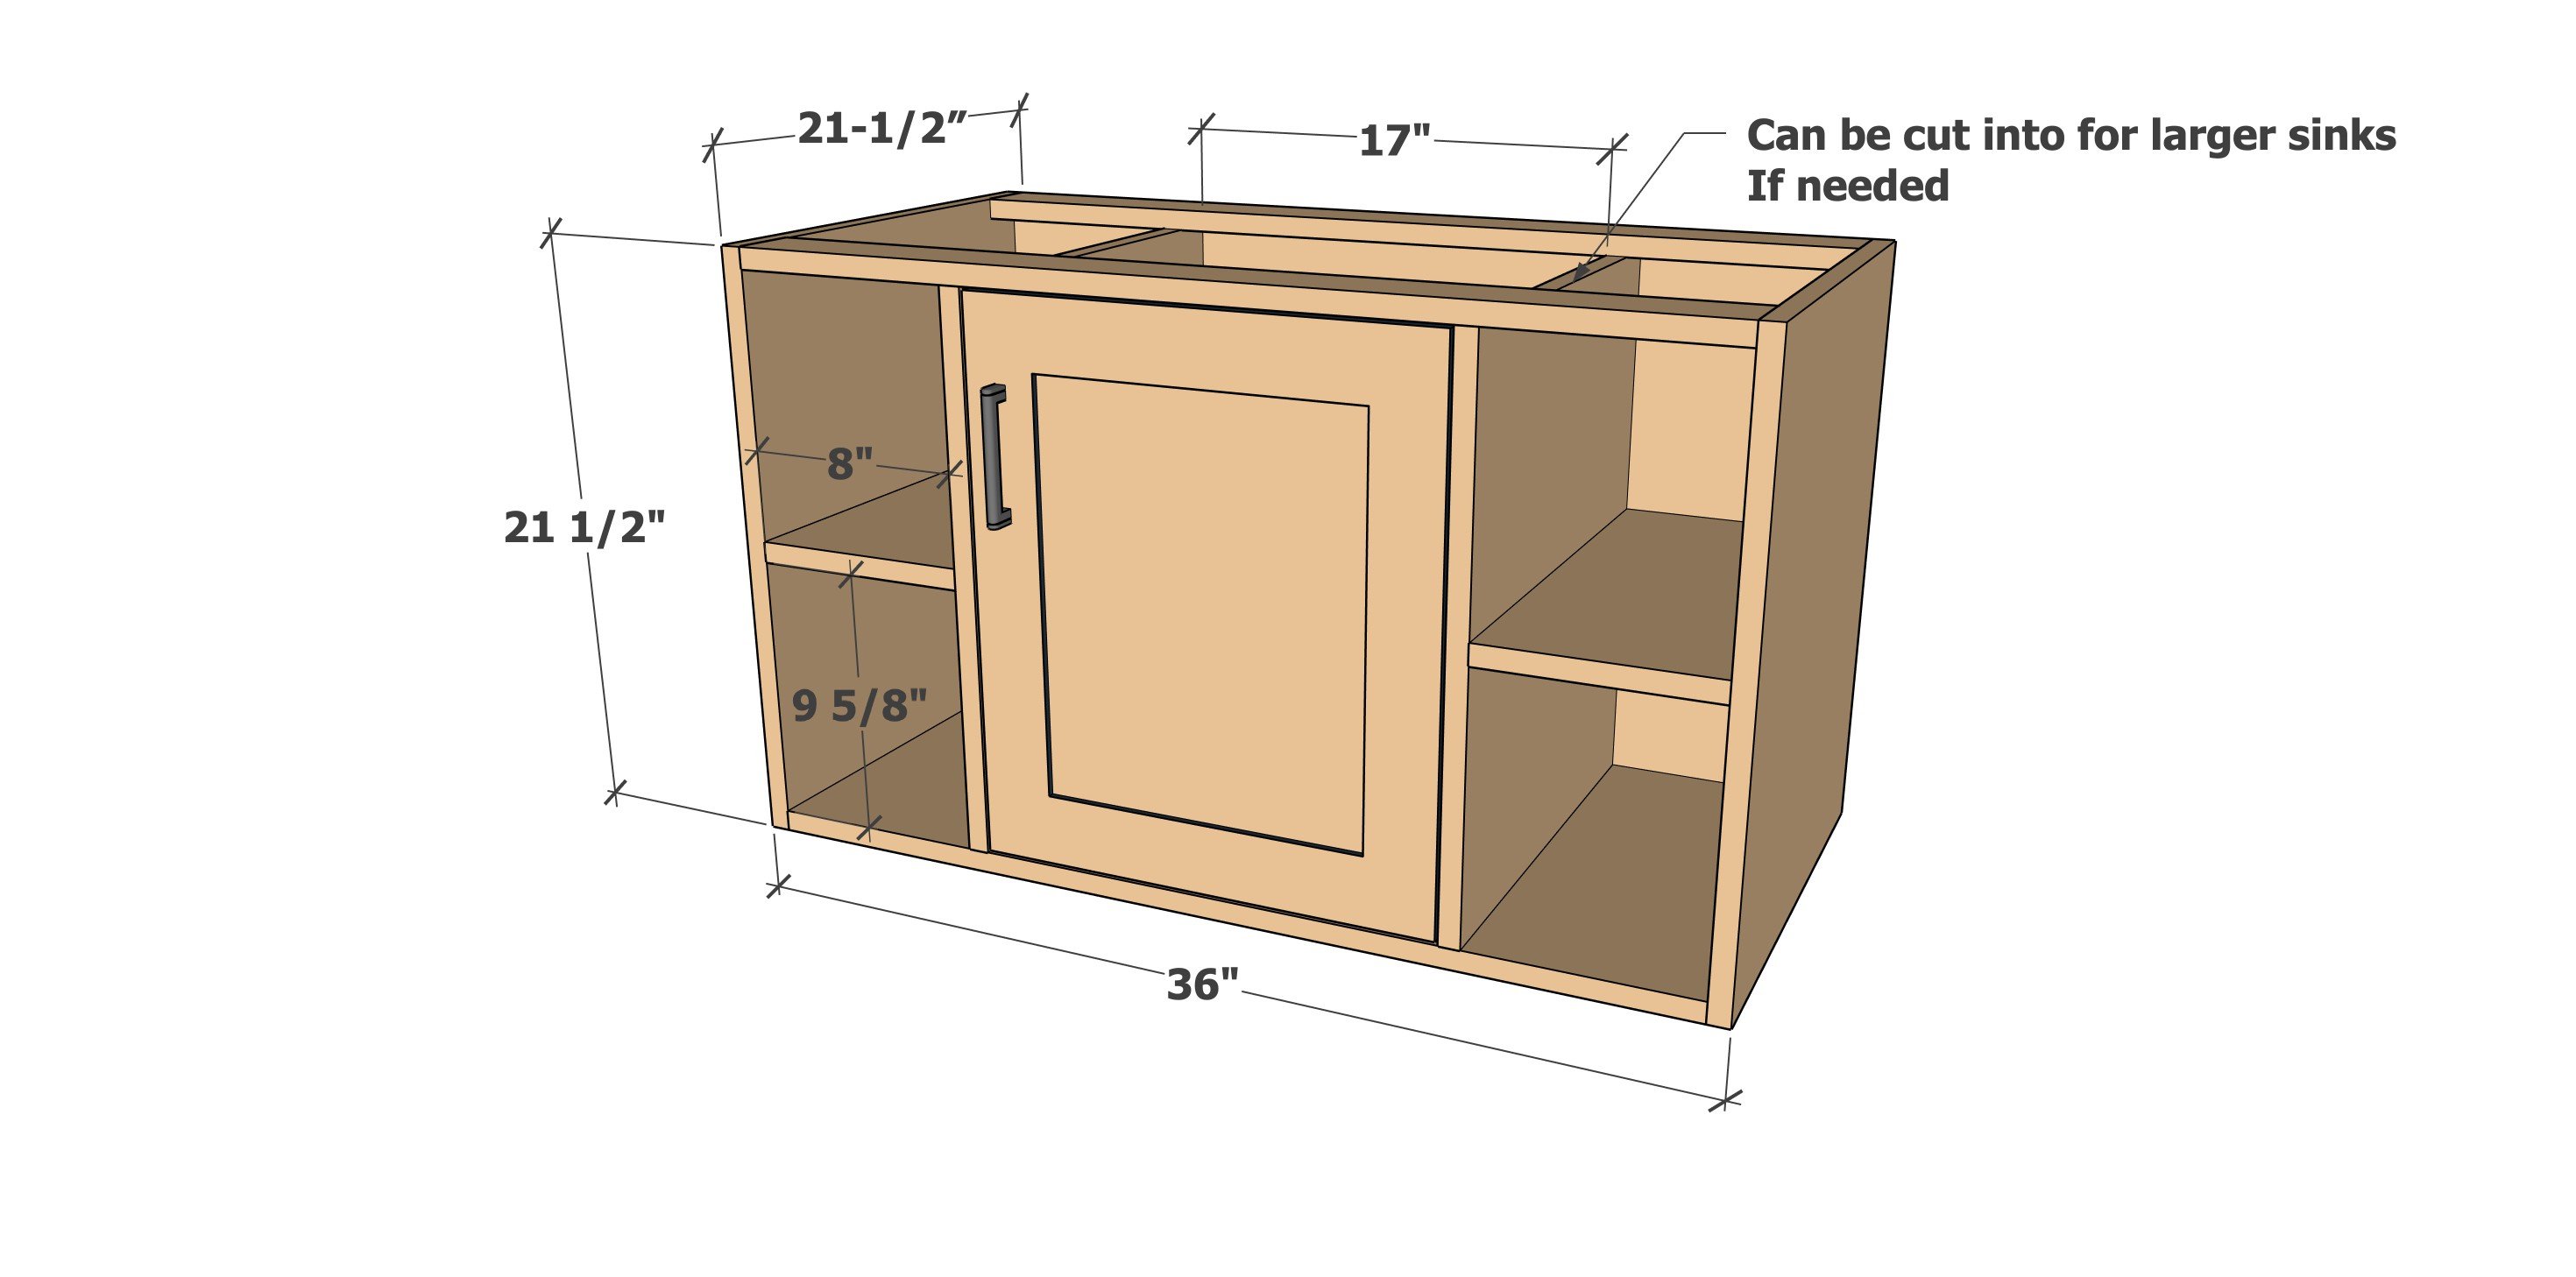
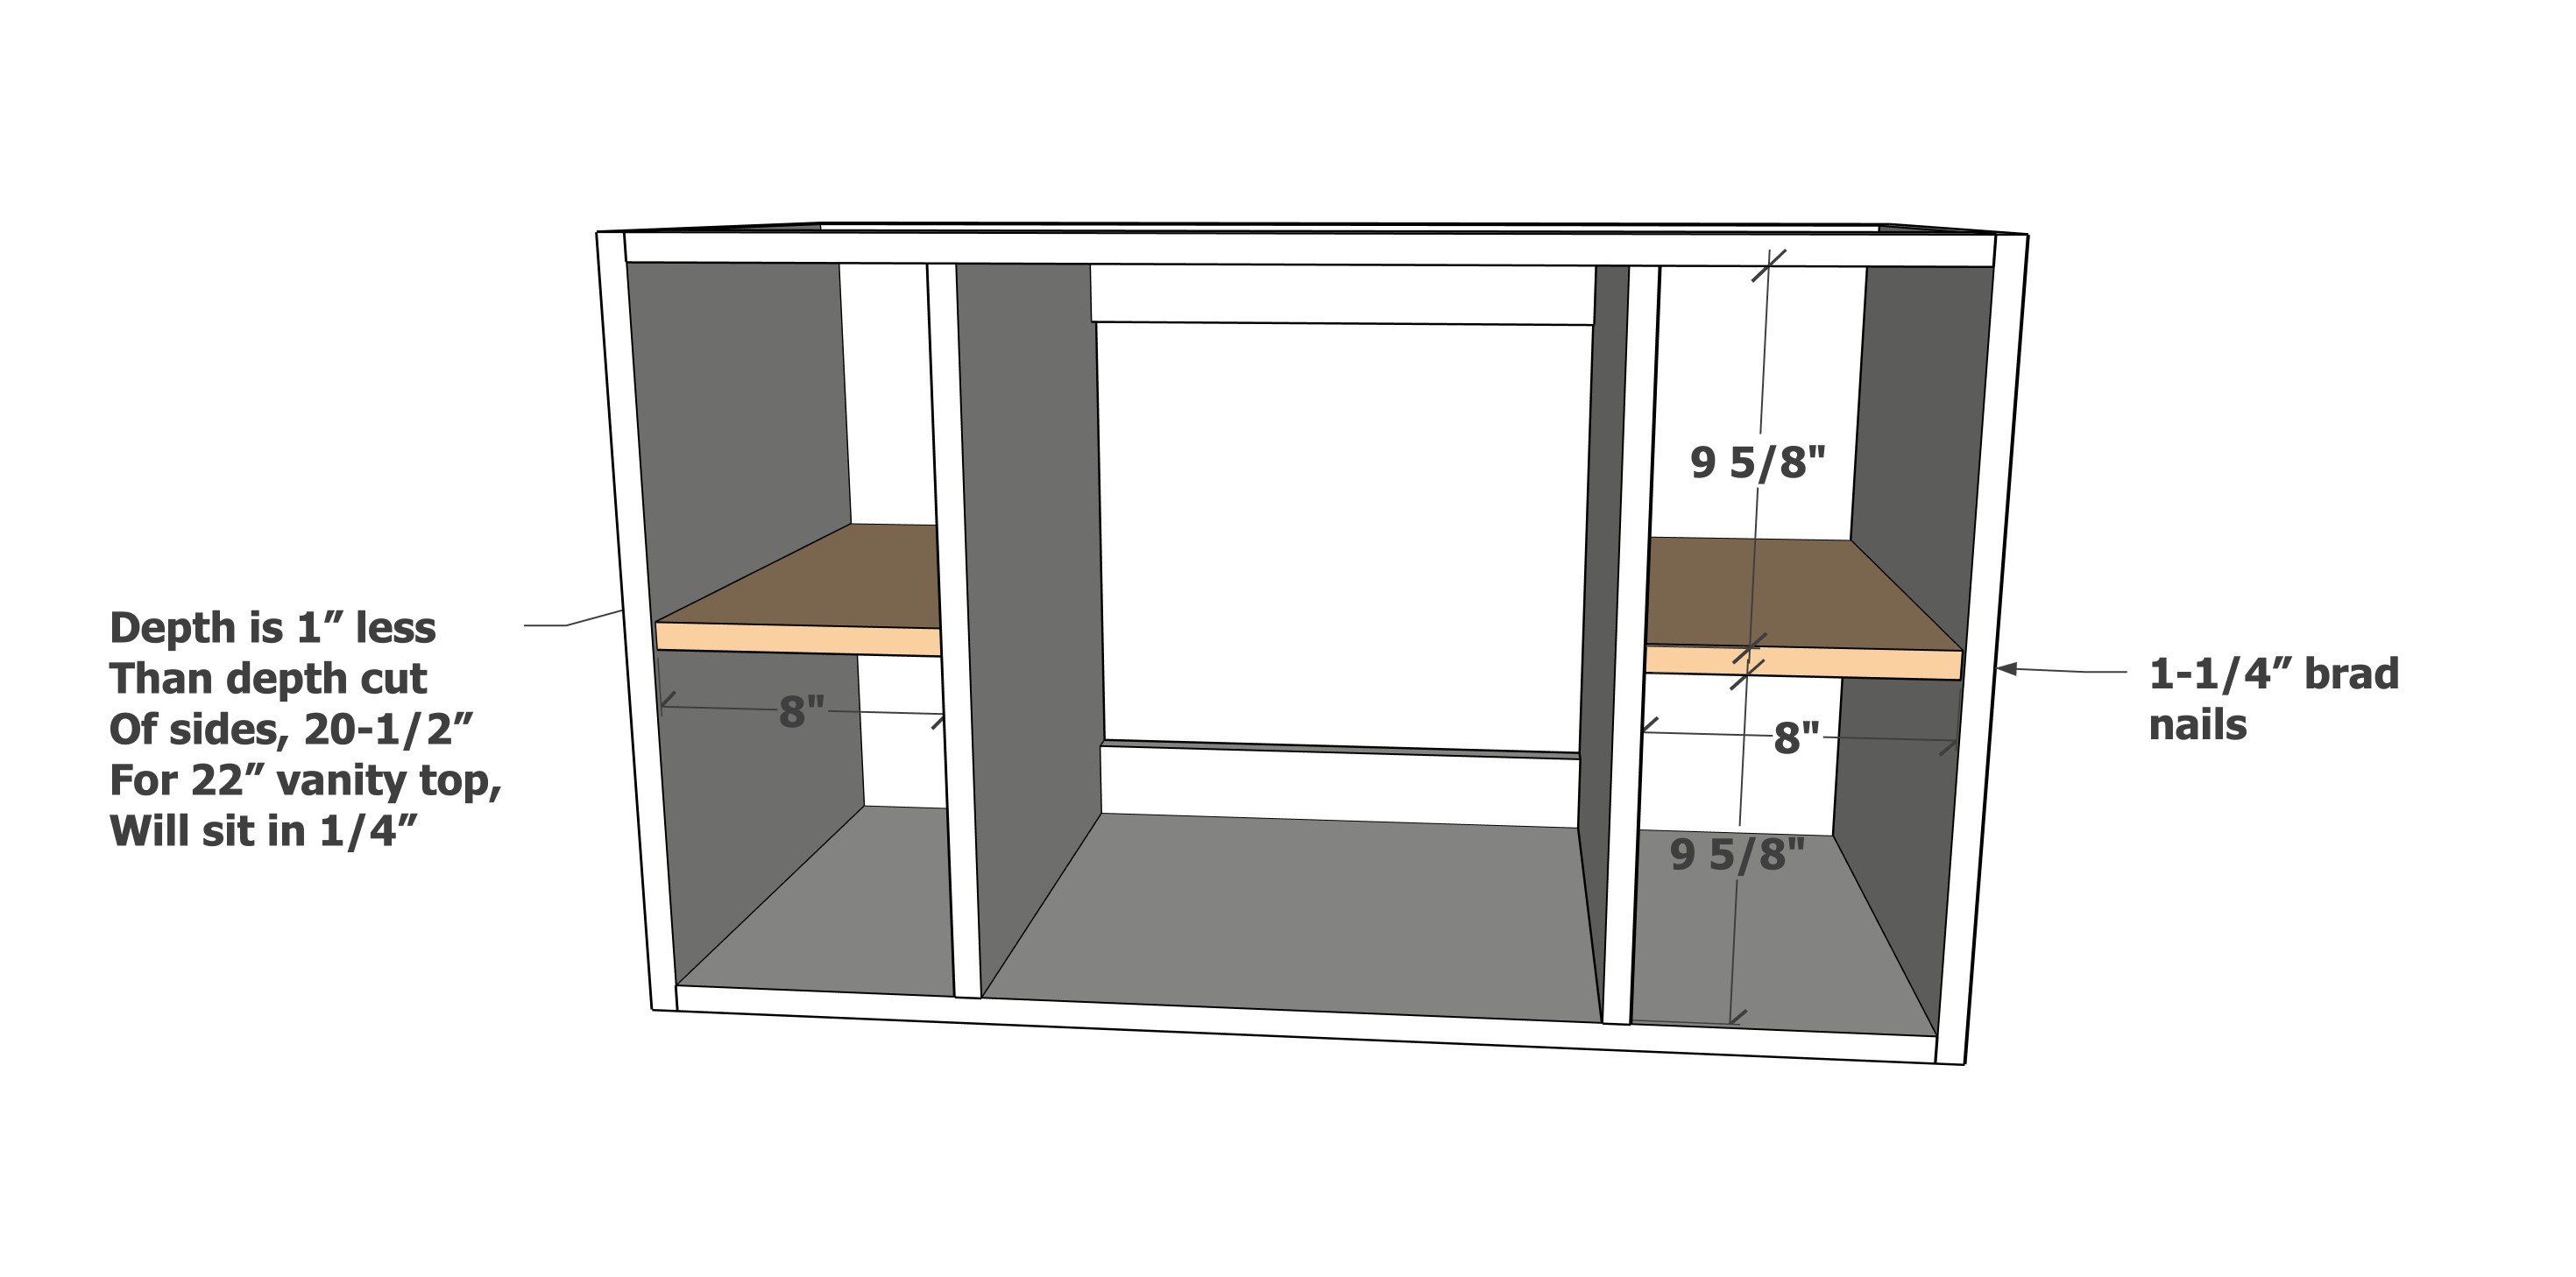
NOTE: Dimensions are designed to fit a 22" deep x 37" wide vanity top - adjust to fit your vanity top
- 2 - 3/4" plywood @ 21-1/2" x 21-1/2" - sides
- 1 - 3/4" plywood @ 21-1/2" x 34-1/2" - bottom
- 2 - 1x3 @ 34-1/2" - top - place nicest edge outward
- 2 - 3/4" plywood @ 20" x 8" - back panels
- 2 - 3/4" plywood @ 21-1/2" x 20" - inner vertical divders
- 2 - 1x3 @ 17" - back supports
- 2 - 3/4" plywood @ 8" x 20-1/2" - shelves
I ripped my plywood into two strips, 8 feet long x 21-1/2" wide.
Then I cross cut to get all the pieces.
For the pieces less than 21-1/2", I then ripped again to get there needed widths.


Pocket Hole Tips
For long term durability and more professional results, I recommend using a pocket hole joinery system for wood joints. Here is a video with tips for using a pocket hole jig:
Finishing Front Edges with Edge Banding
Mark and finish all the front edges with edge banding. Here is a video on how I recommend doing edge banding:
Instructions
Step 1
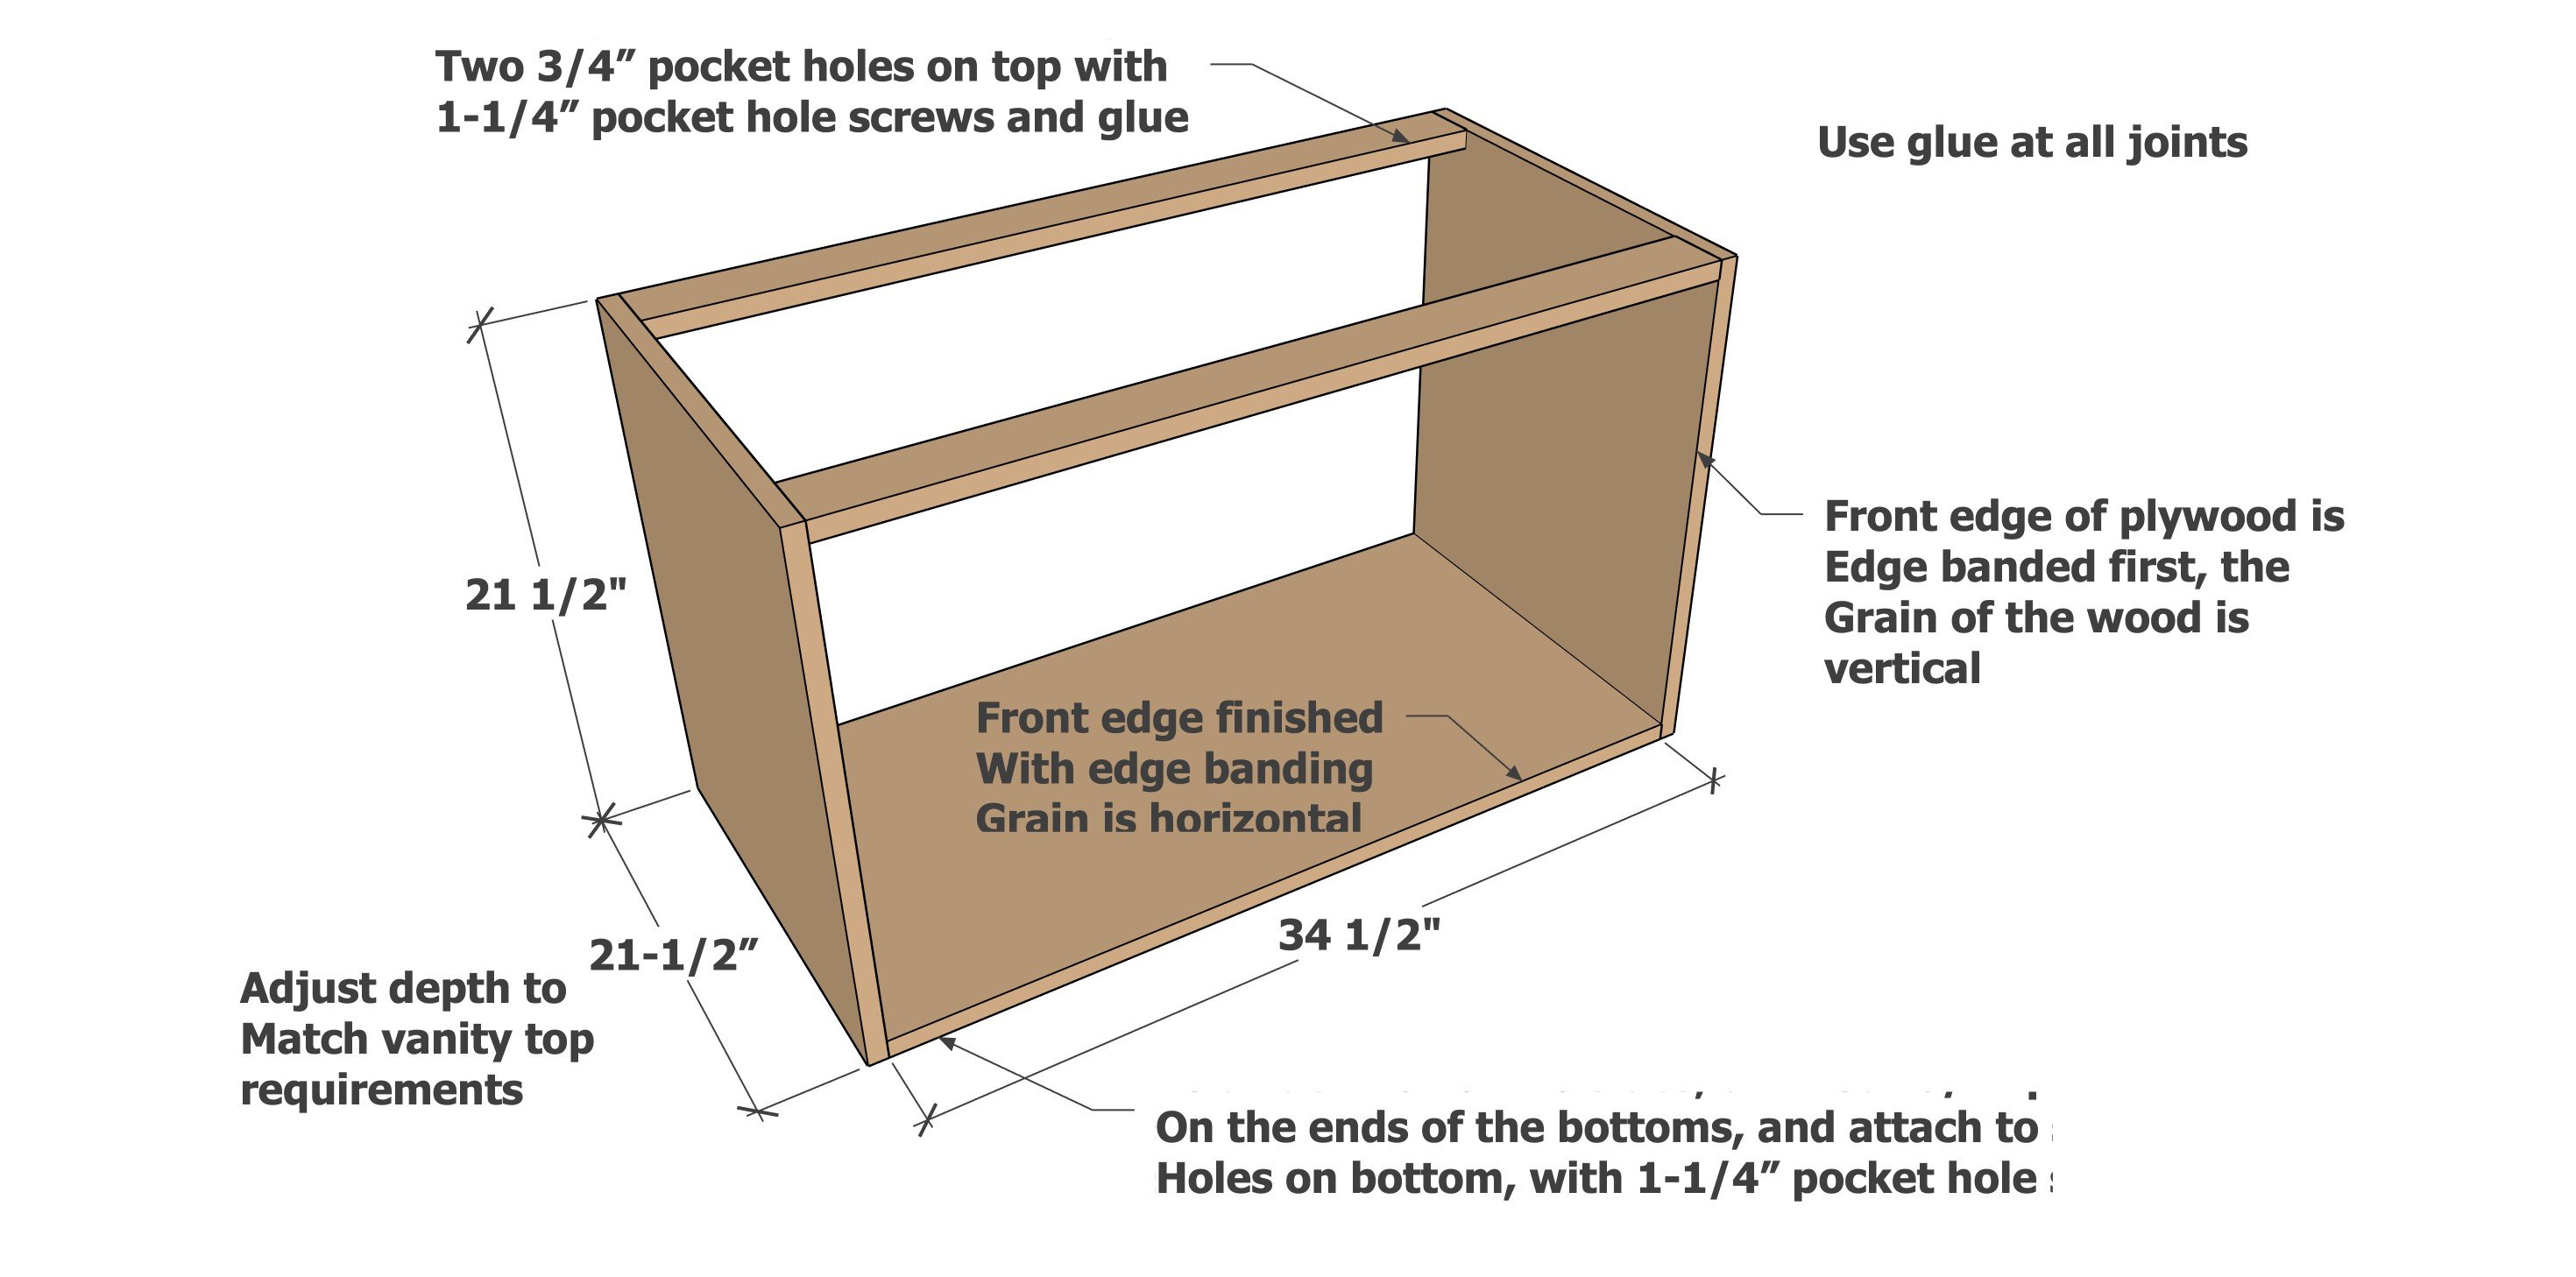
Drill 3/4" pocket holes on the bottom and attach to the sides, with pocket holes hidden on bottom.
Attach the 1x3s to the top, with pocket holes hidden to top (to be covered by vanity top in later steps). NOTE: Choose the nicest edge of the 1x3 to place on the front of the vanity.
Step 2
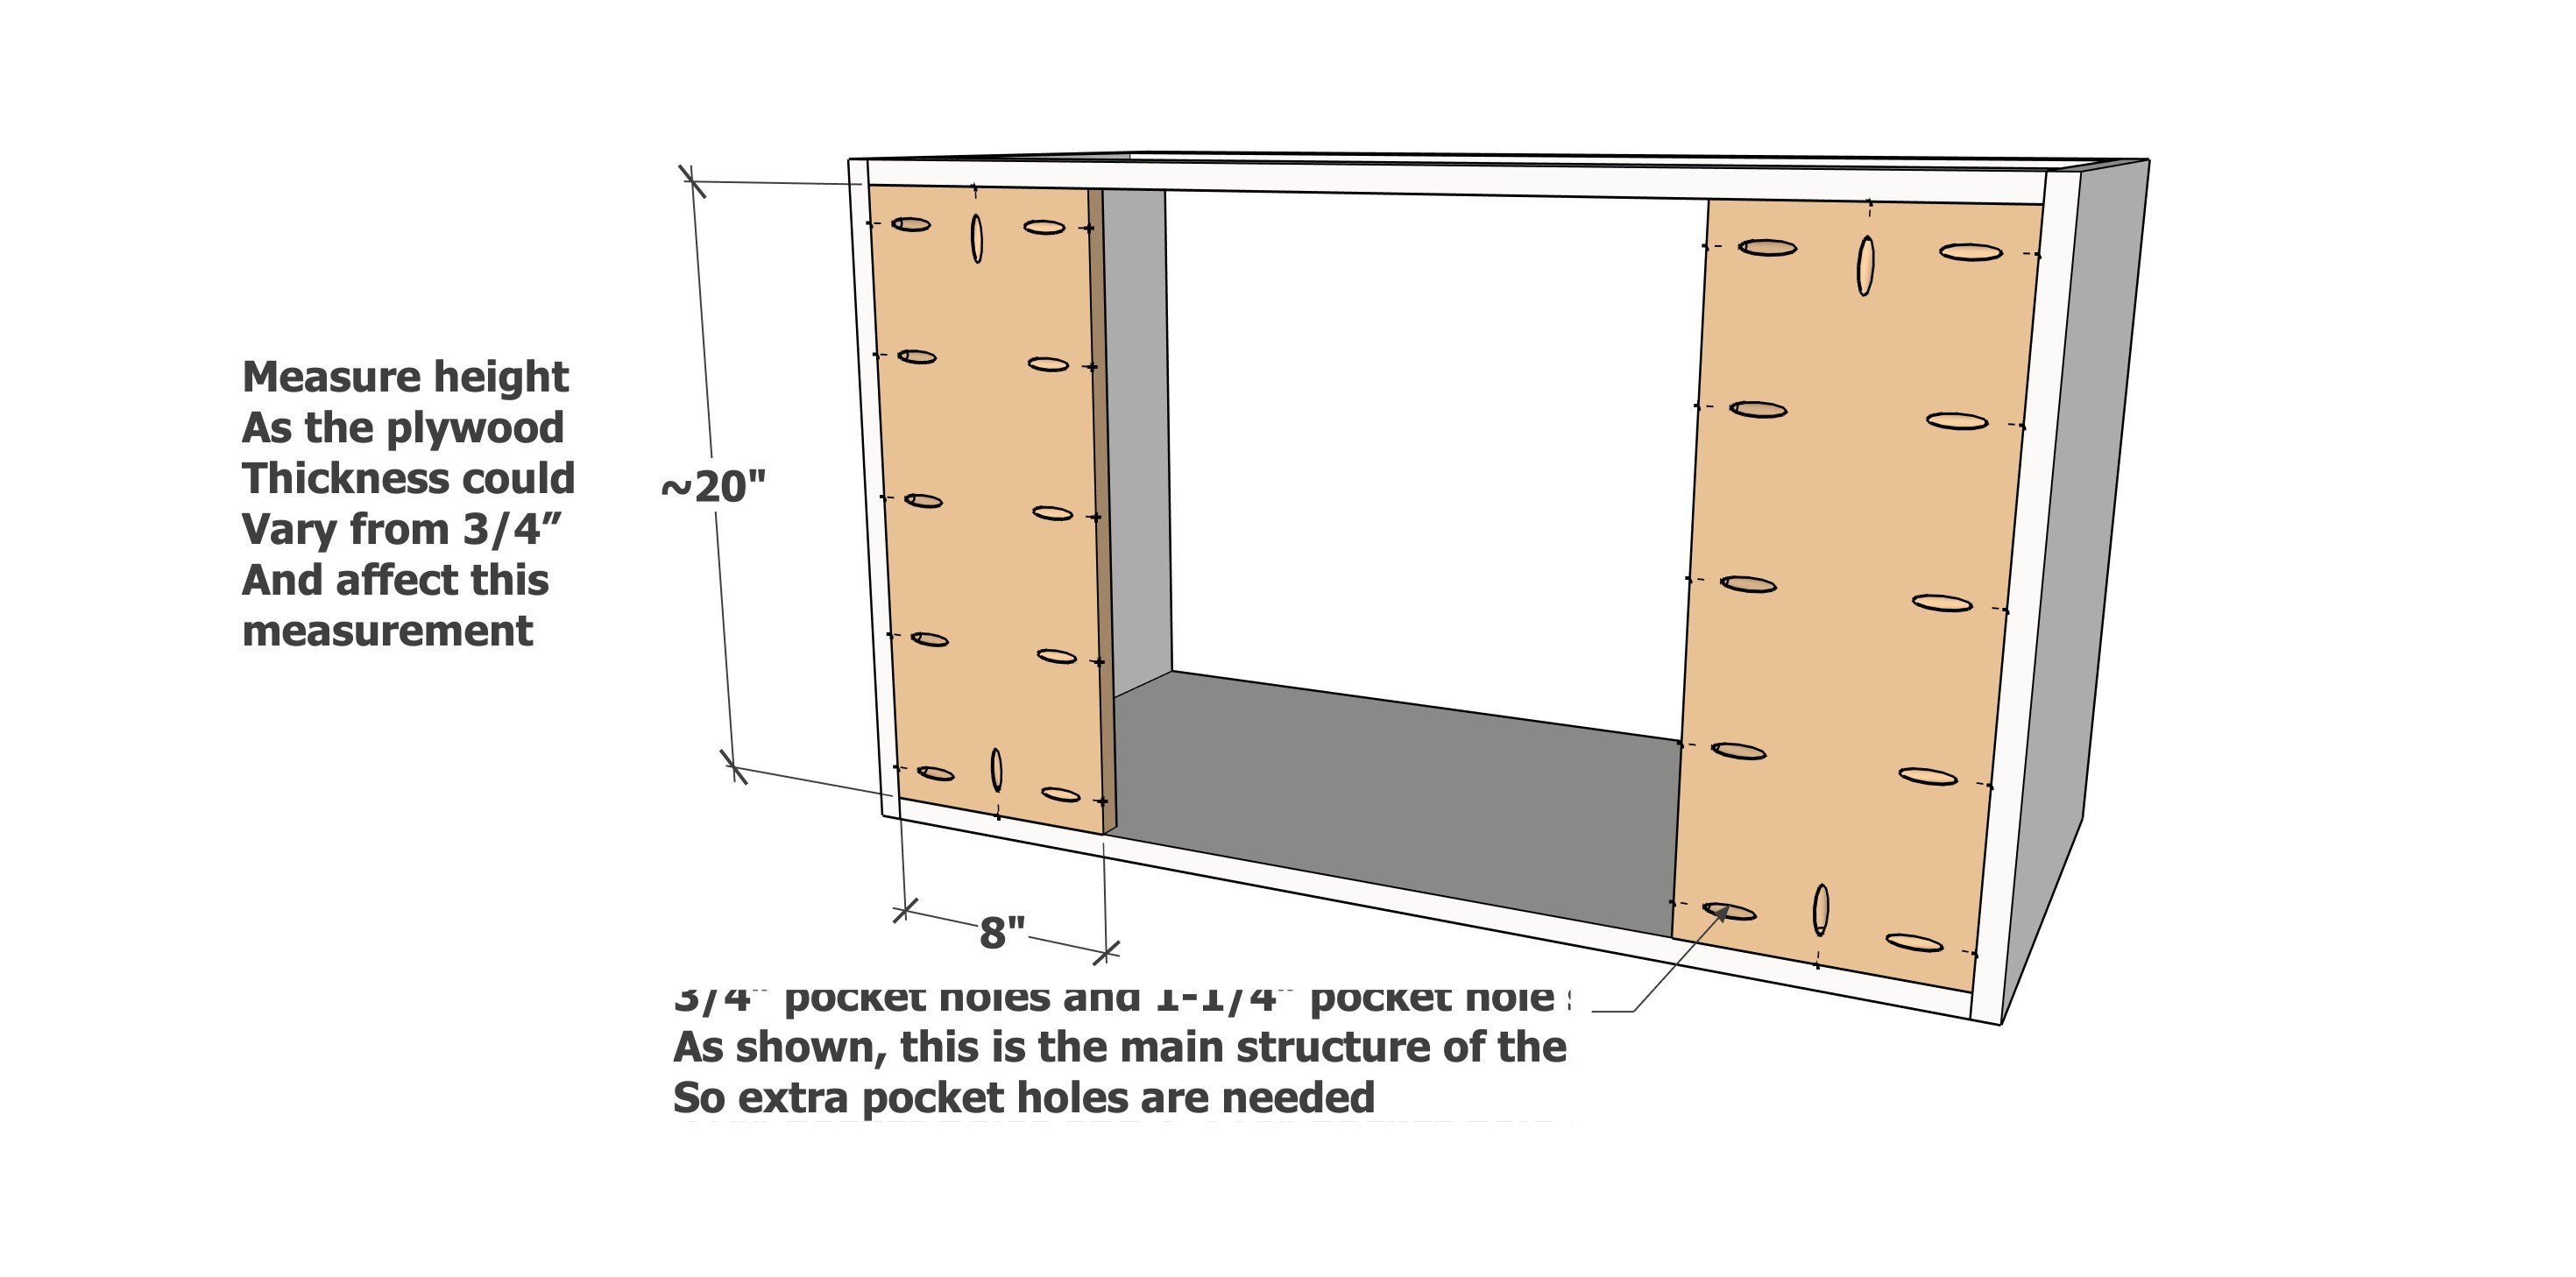
The back pieces work as the main hanging support, use extra pocket holes and glue to attach.
Step 3
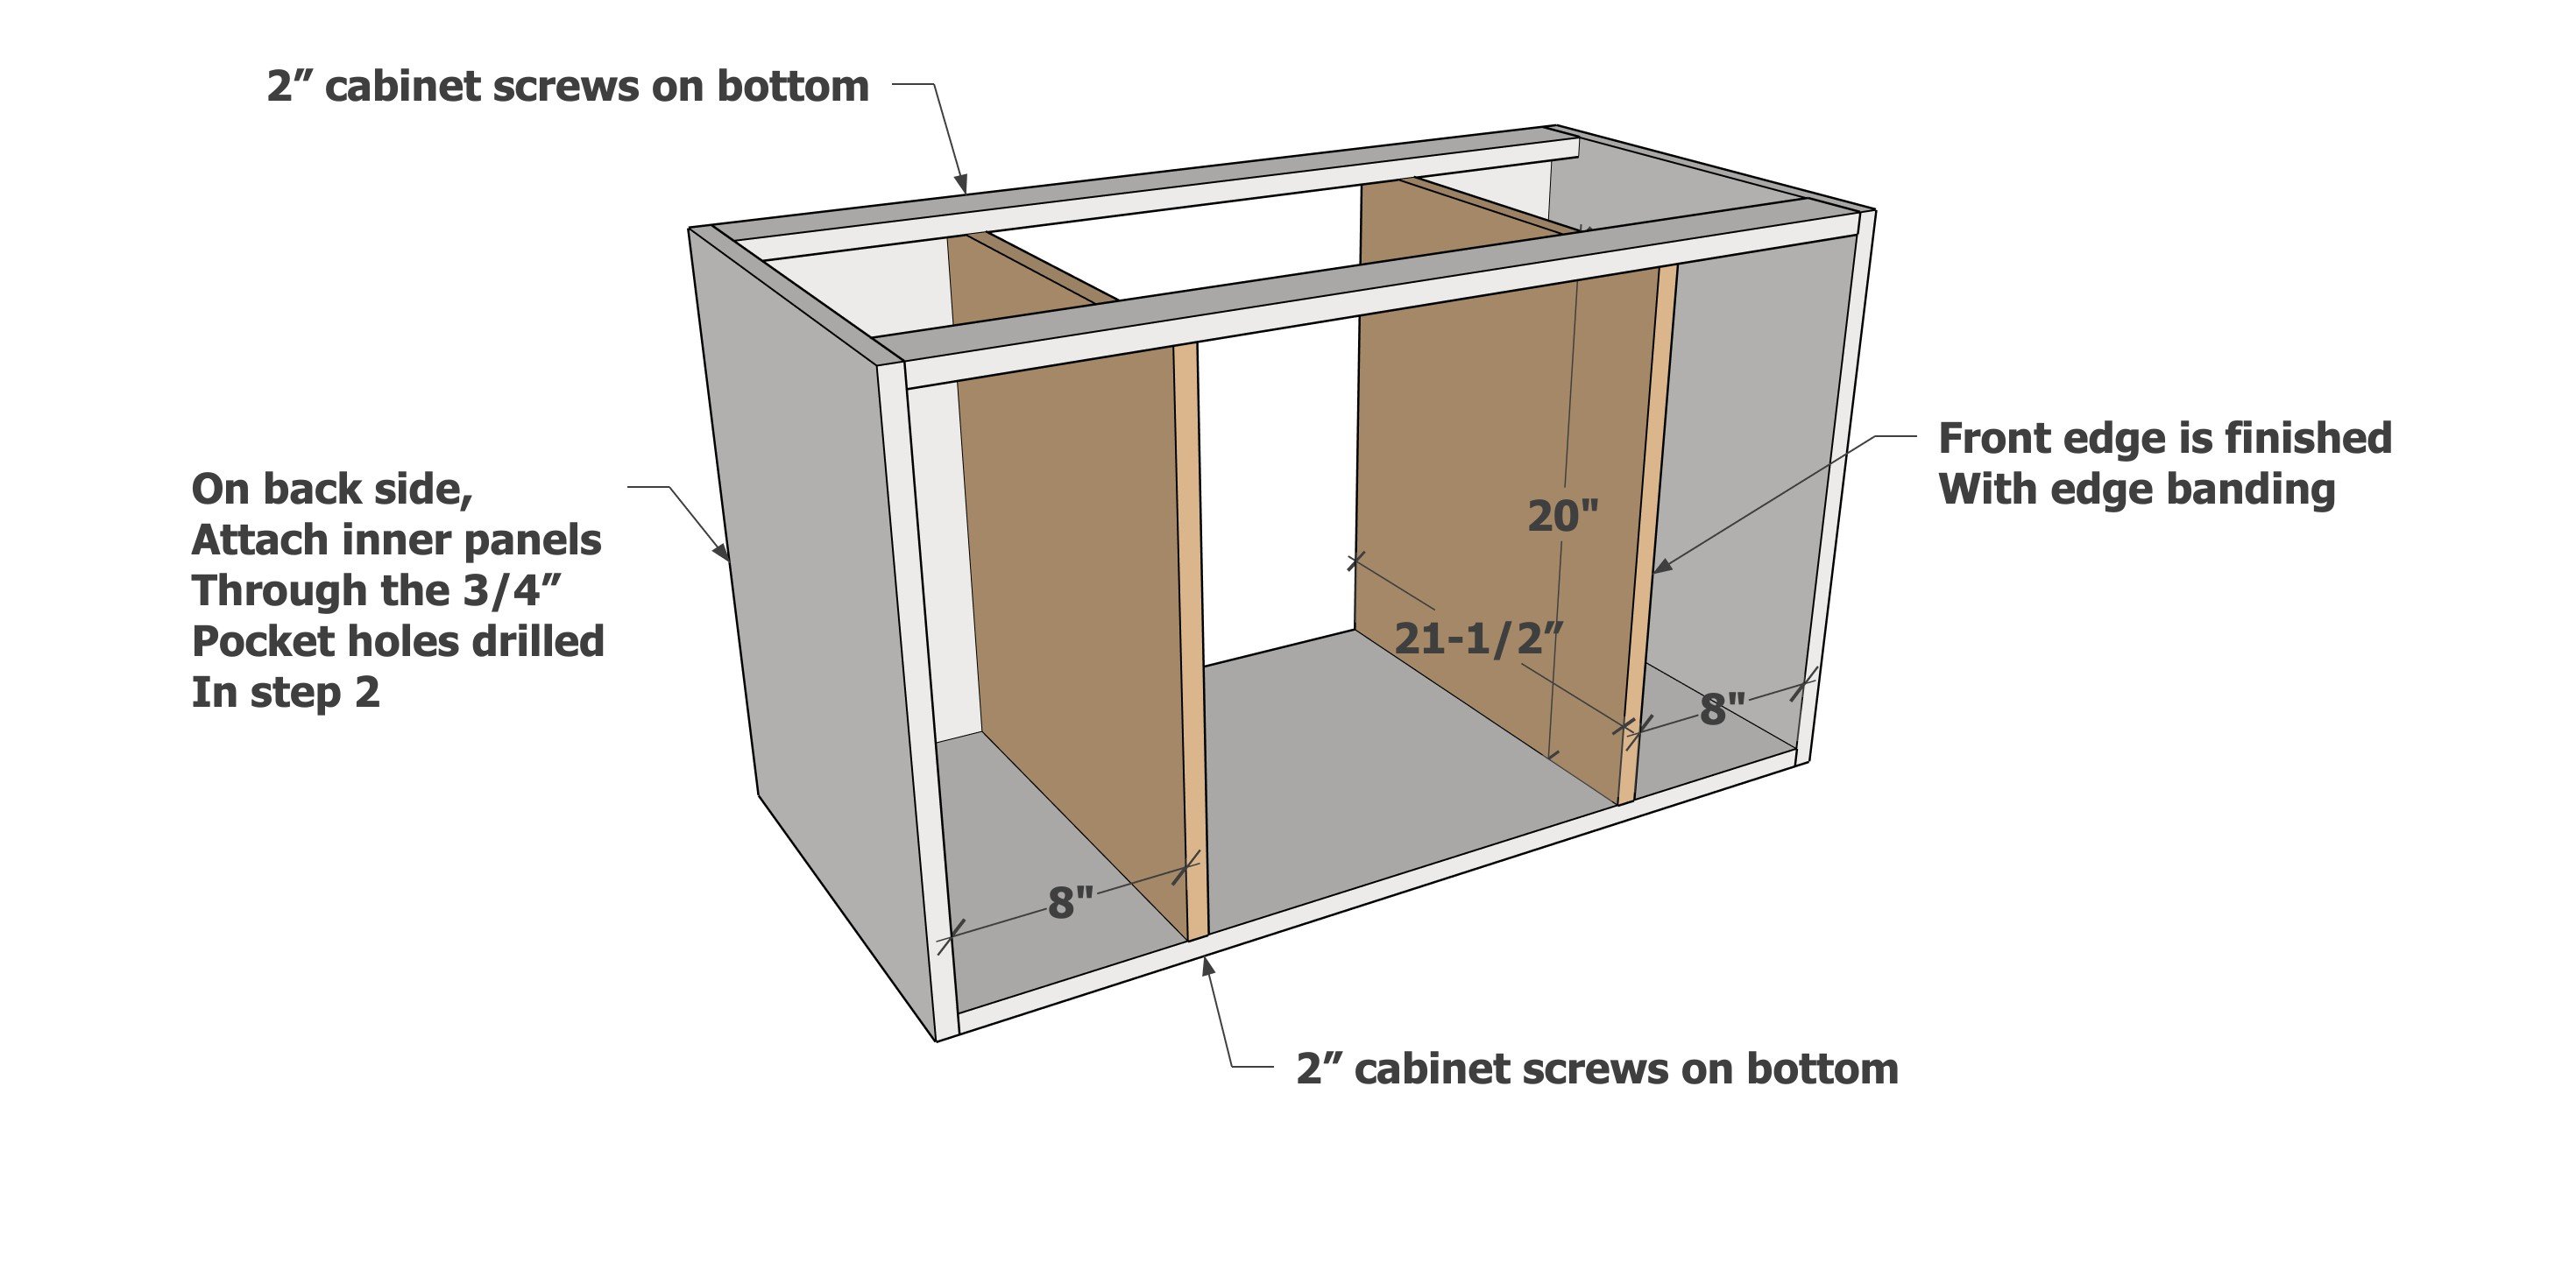
Add the vertical dividers, take care to make sure the front distance is right TIP: Use the 8" shelf piece as a guide.
TEST SINK - Place the vanity top on the vanity at this step, and mark out and cuts as needed.
Step 4
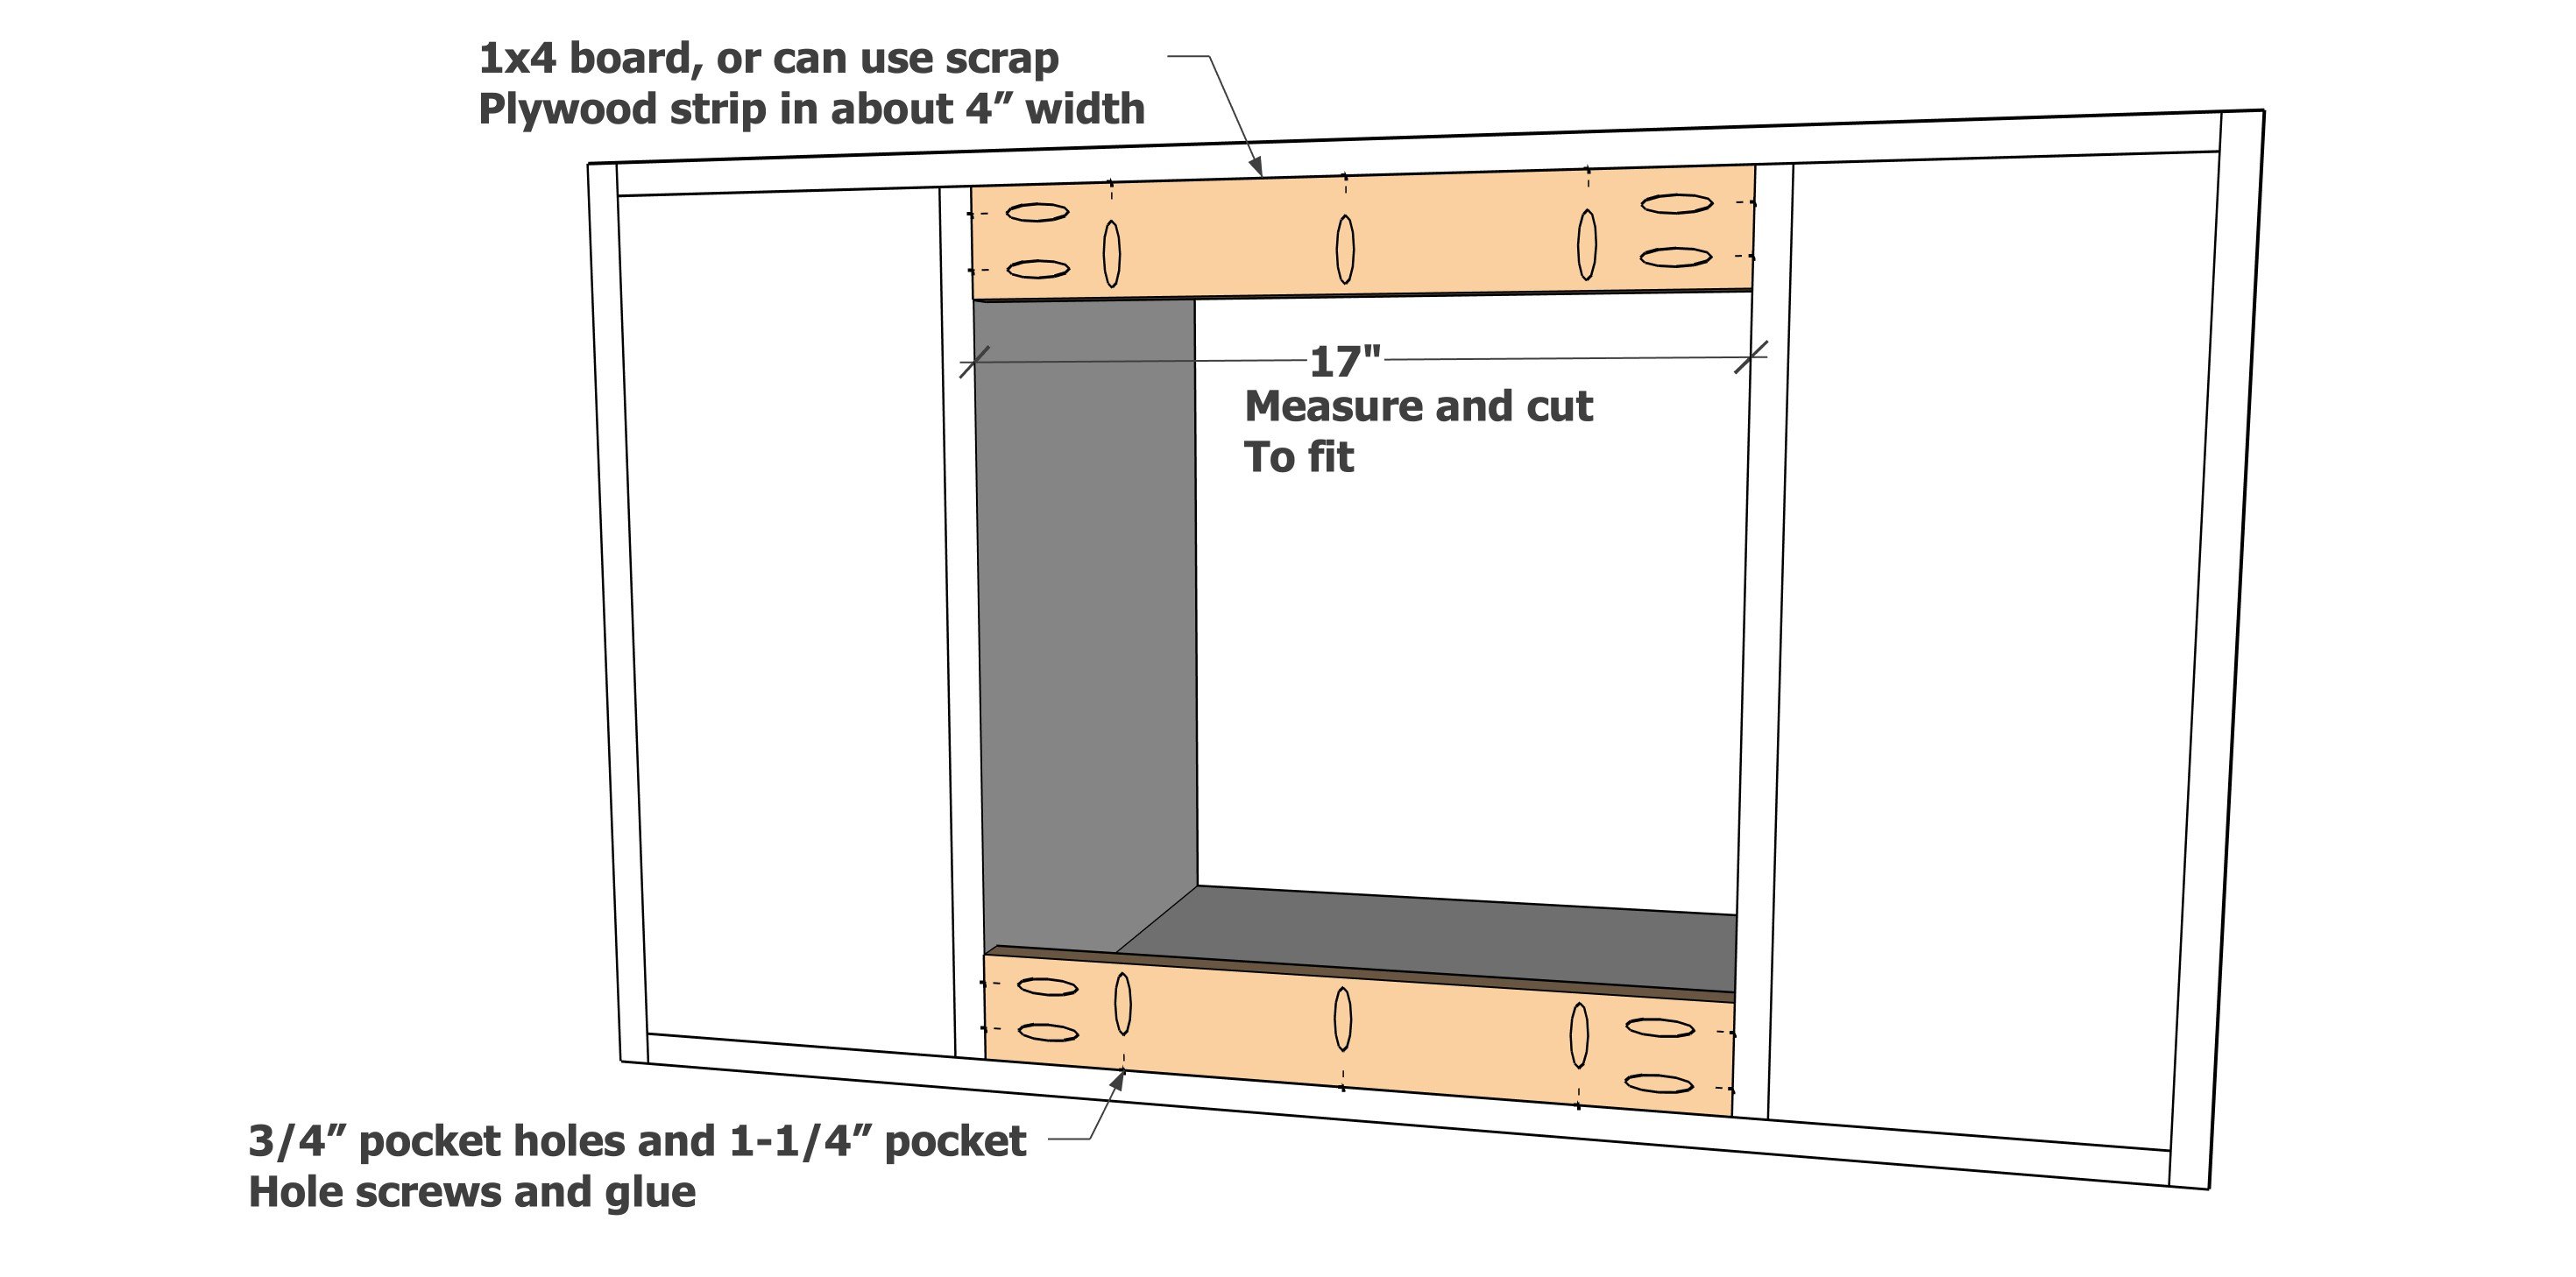
TEST SINK -Before installing the vertical dividers, with the vanity top and sink set in place, position and mark if needed to cut out for the sink. We did have to cut into the tops of the vertical dividers to allow the sink to fit. We used a jigsaw to cut out.
Measure and cut the back pieces, attach in place with 3/4" pocket holes and 1-1/4" pocket hole screws and glue.
Step 5
The shelves are not structural, but I didn't want pocket holes visible or screws showing, so I used glue and nails to attach.
Step 6
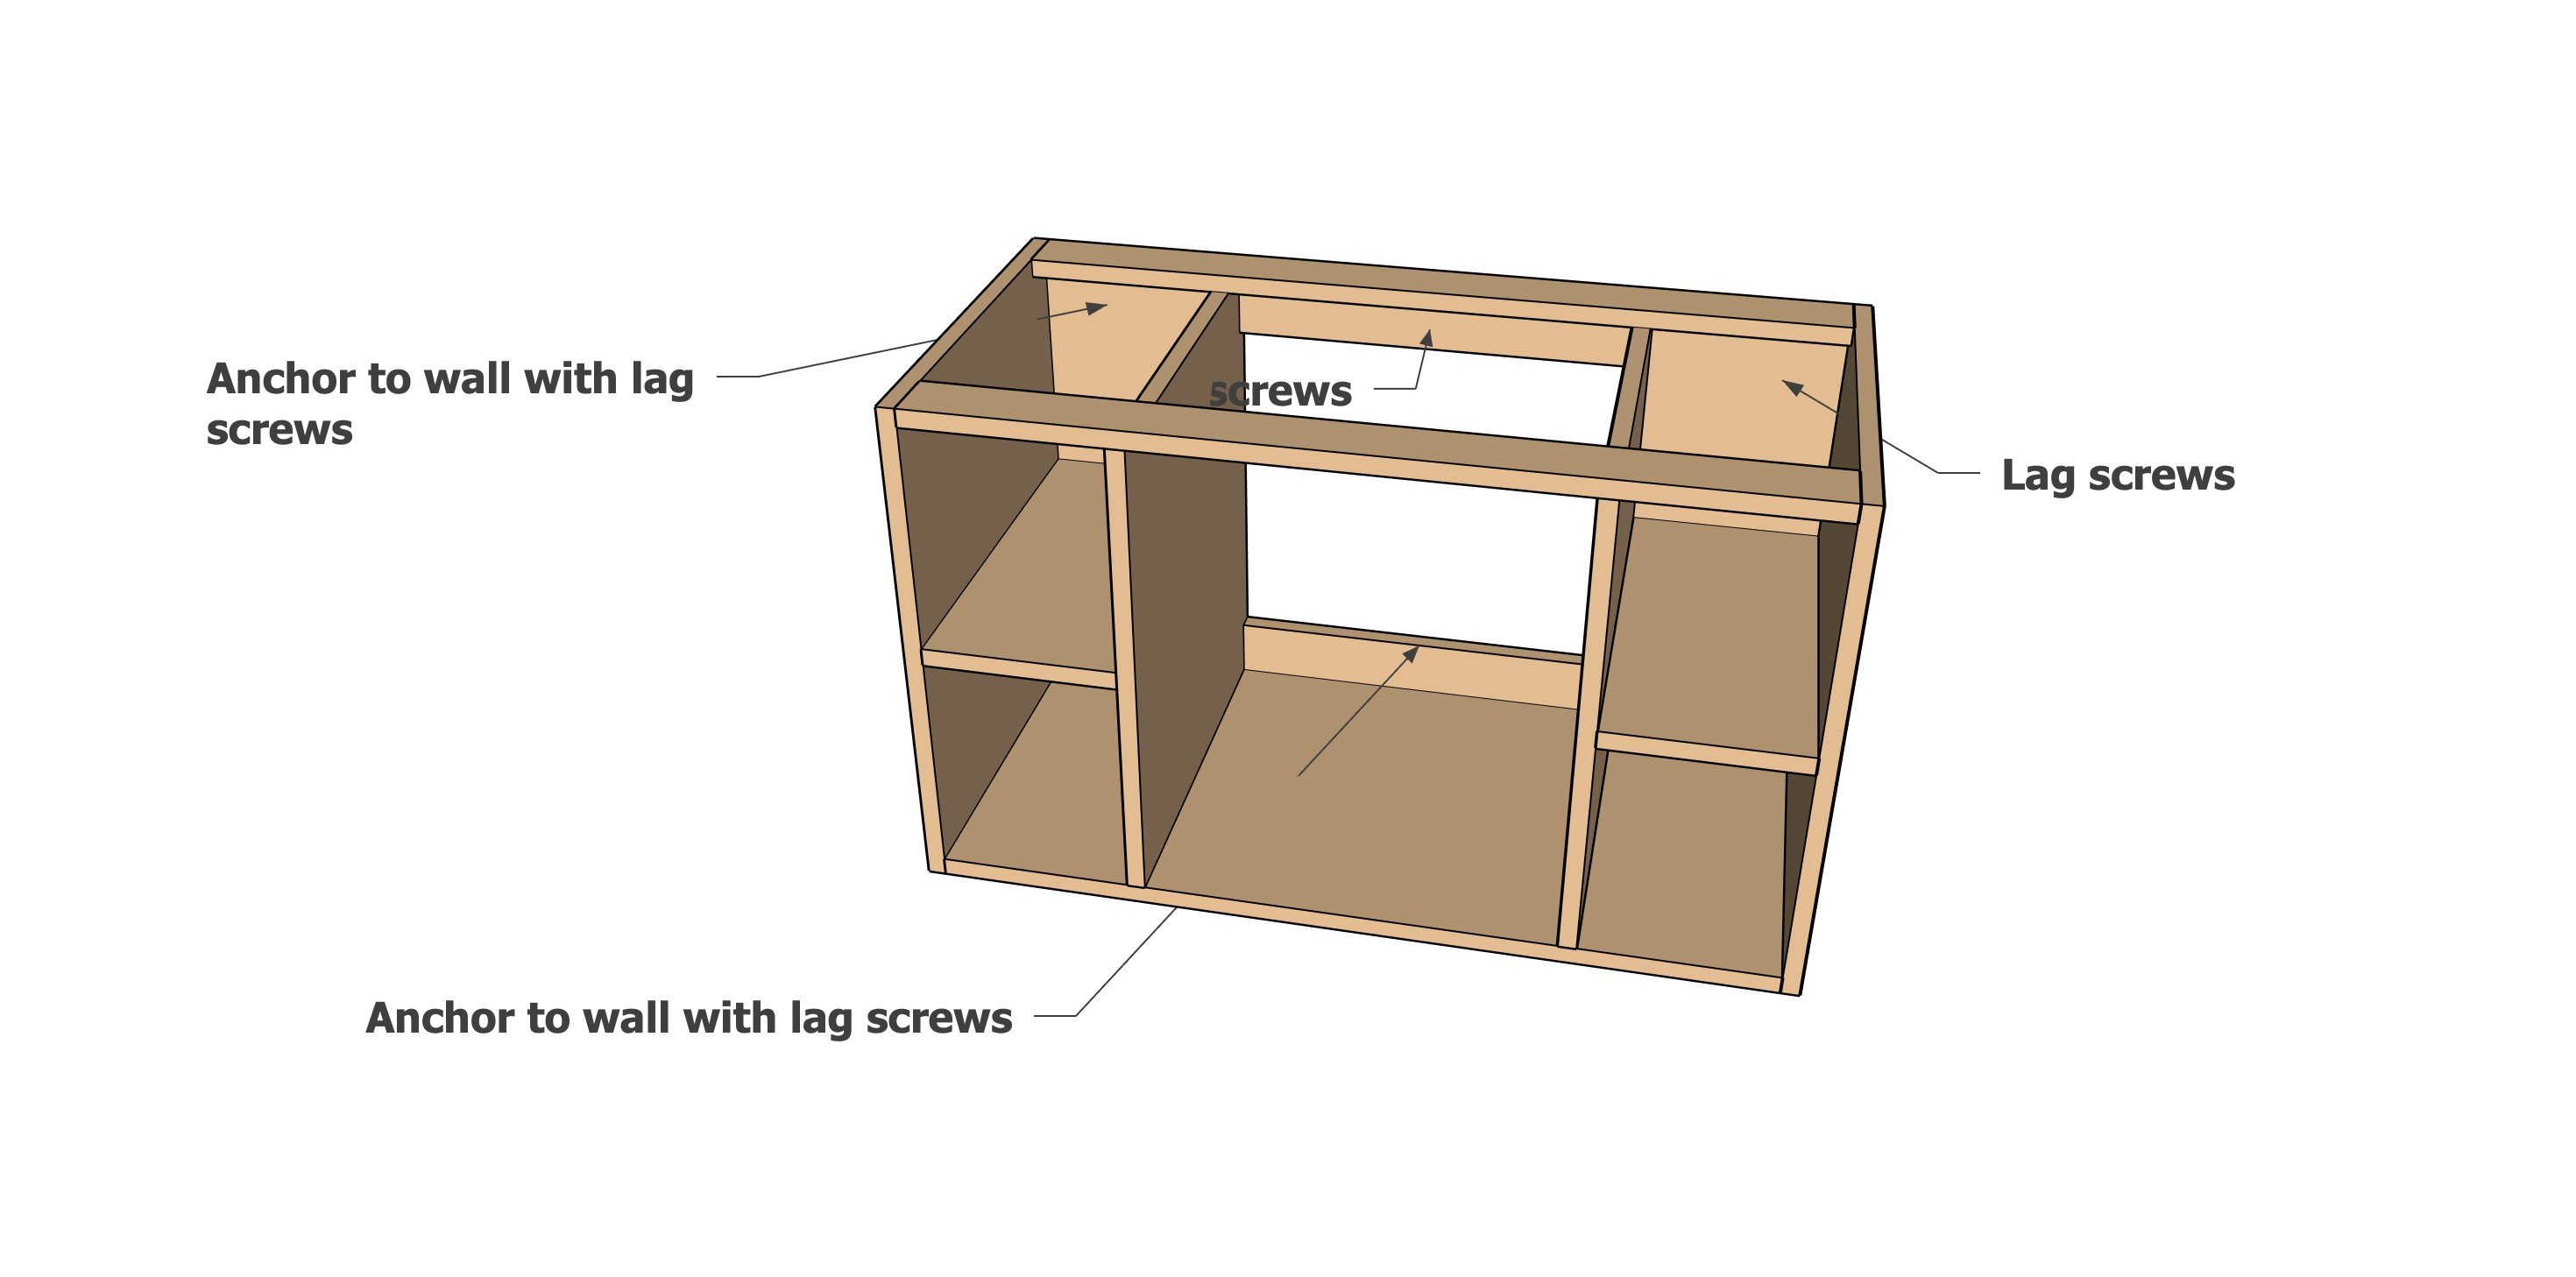
Hang to studs in the walls using the 4" lag screws, space the screws as far apart vertically as possible (one close to top and one close to bottom) for maximum support. Lag screws should support minimum of 100 pounds each.
Step 7
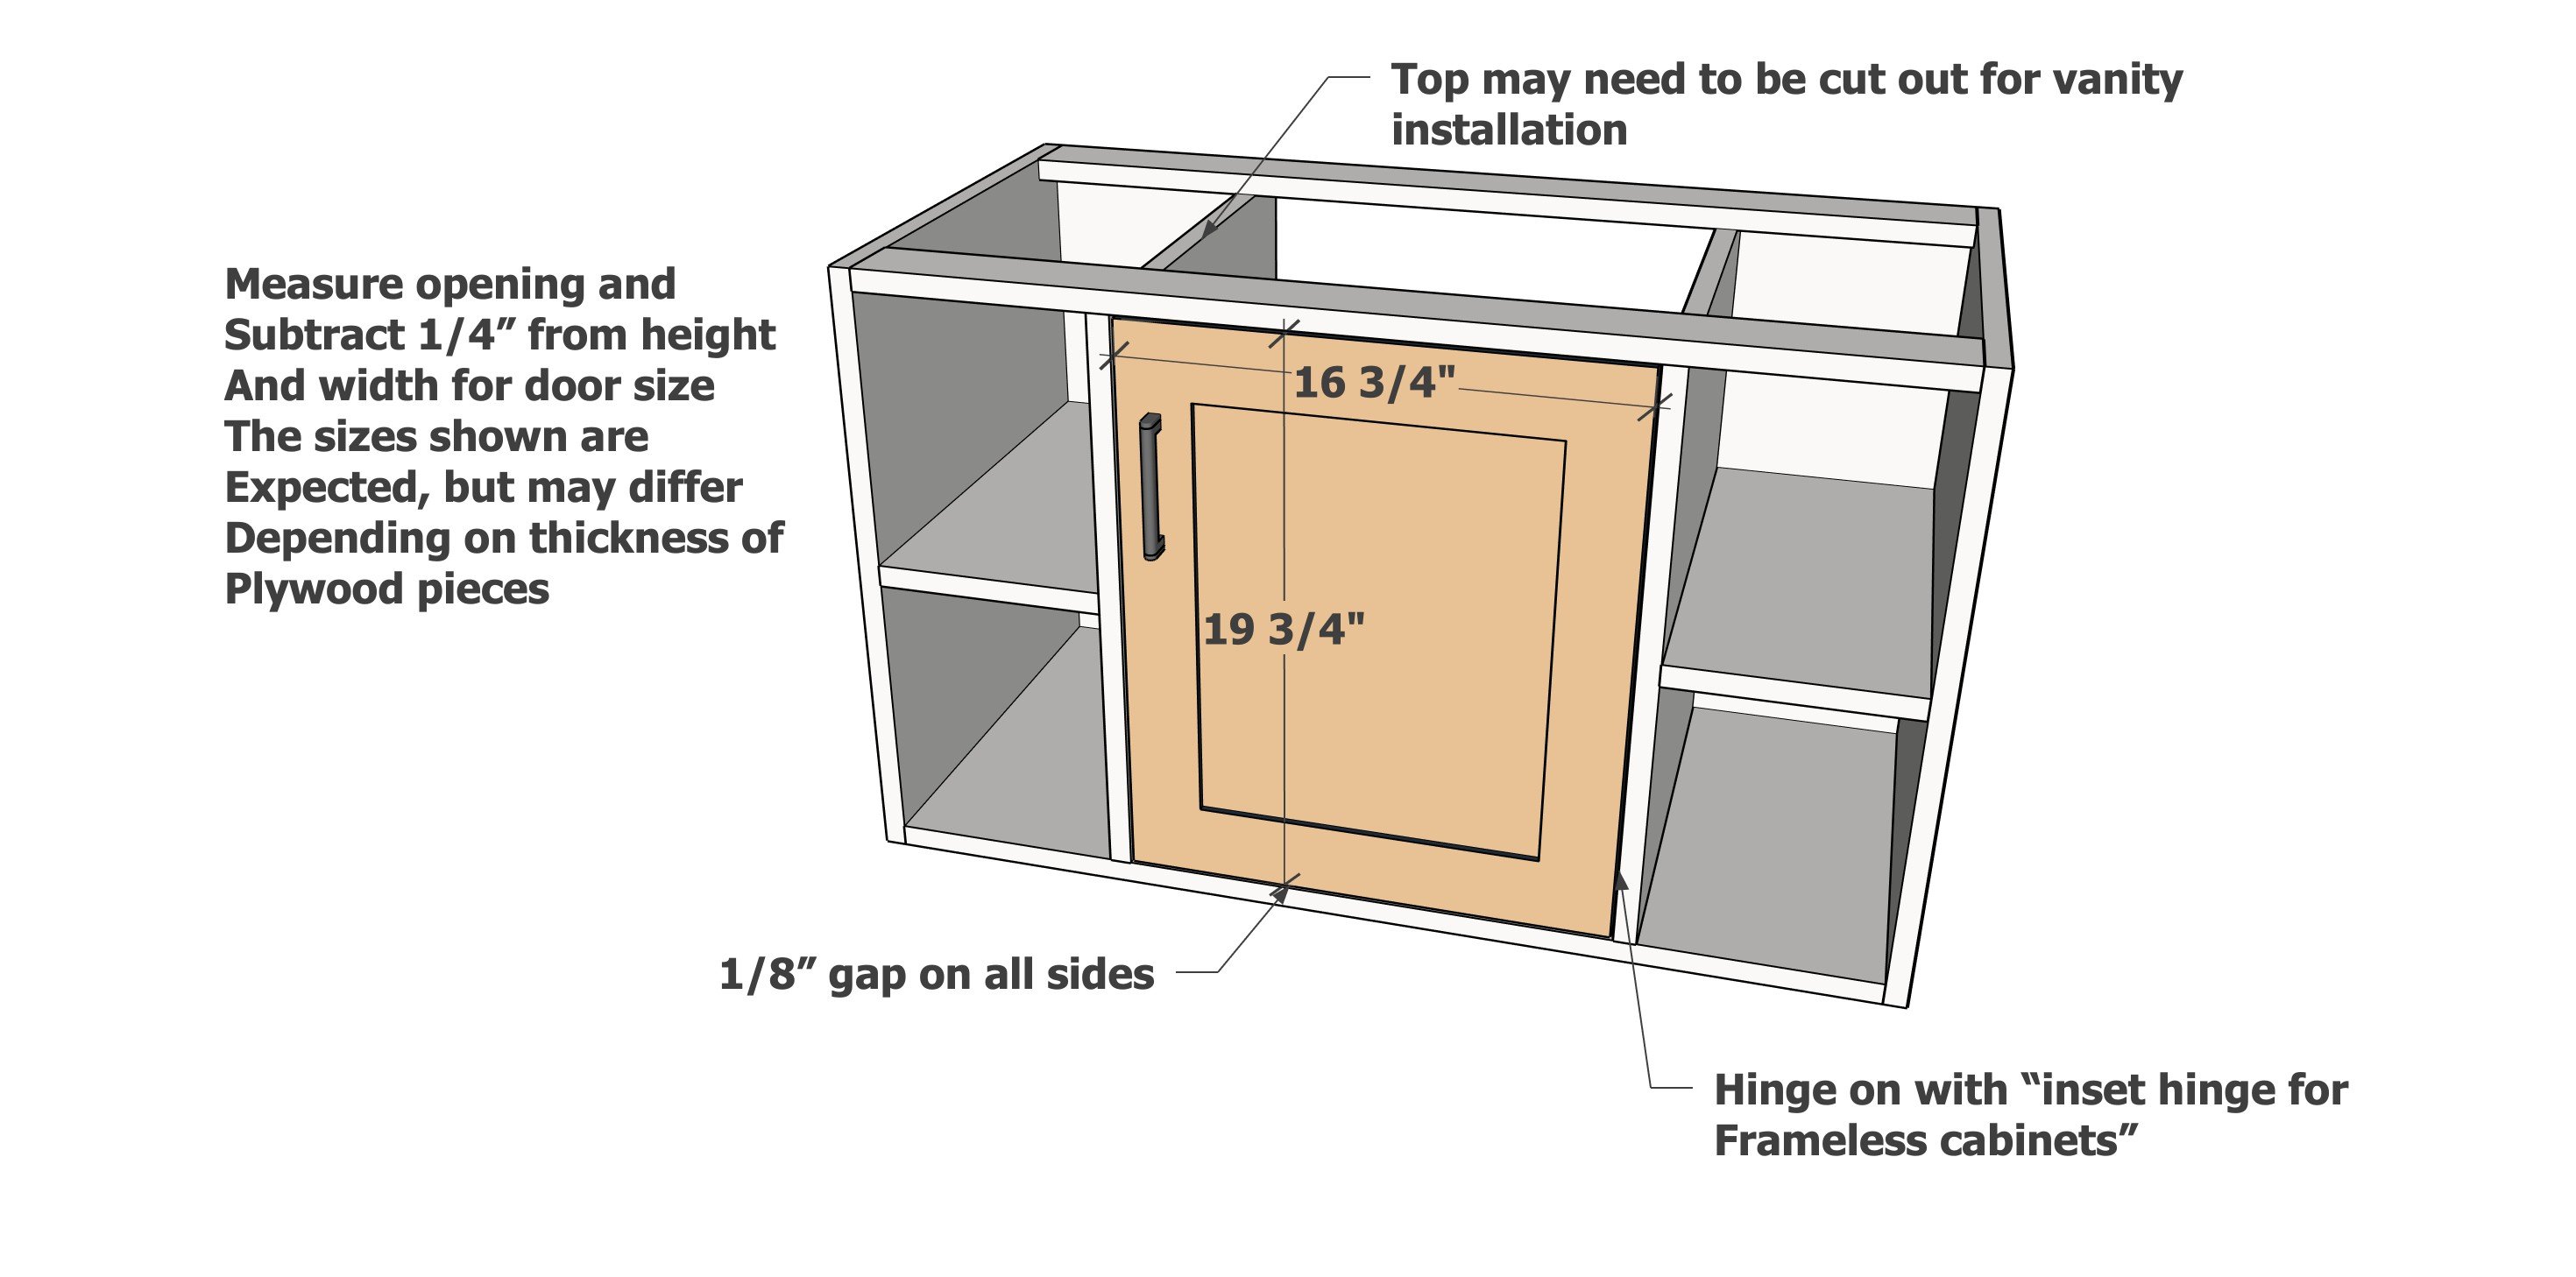
Install the door inside the cabinet.
Here is a video on how I install the hinges:
If rough, use a fine sandpaper to lightly sand in between coats.