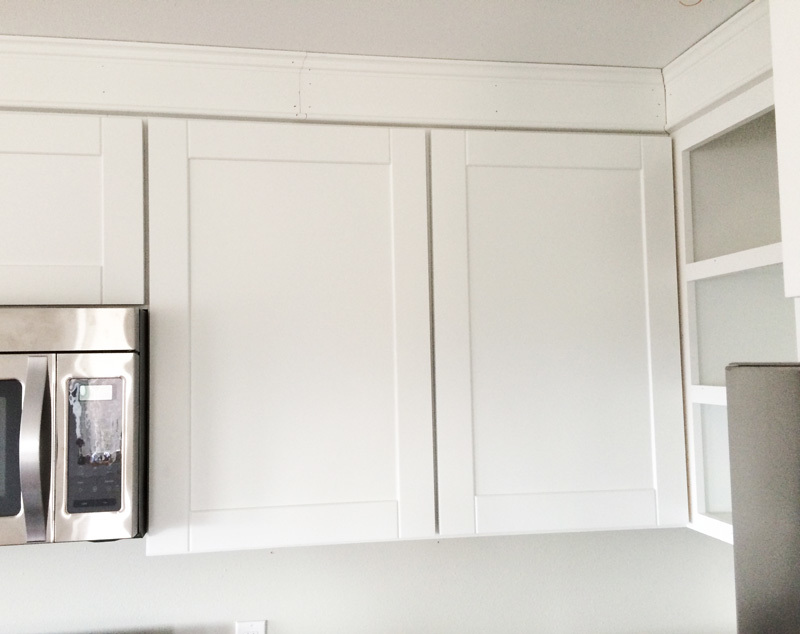
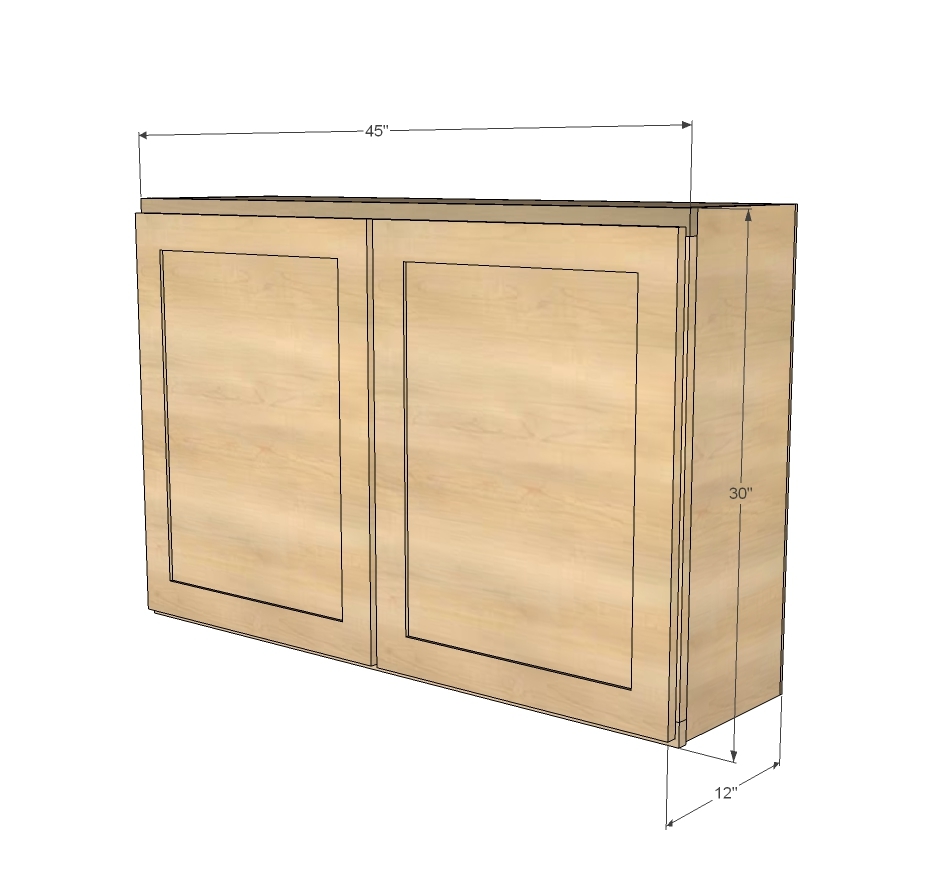
45" wall cabinet plans
Preparation
1 - sheet 3/4" plywood ripped into strips of your cabinet depth (we choose 10-1/4") - you'll use about 3/4 of the plywood for this cabinet* (save scraps for using as supports)
1/2 sheet of 1/4" plywood*
2 - 1x2 @ 6' (to be safe, you may want to purchase one at 8')
1 - 1x3 @ 27"
1-1/4" pocket hole screws
3/4" finish nails(for nailing back on)
*Used prefinished plywood
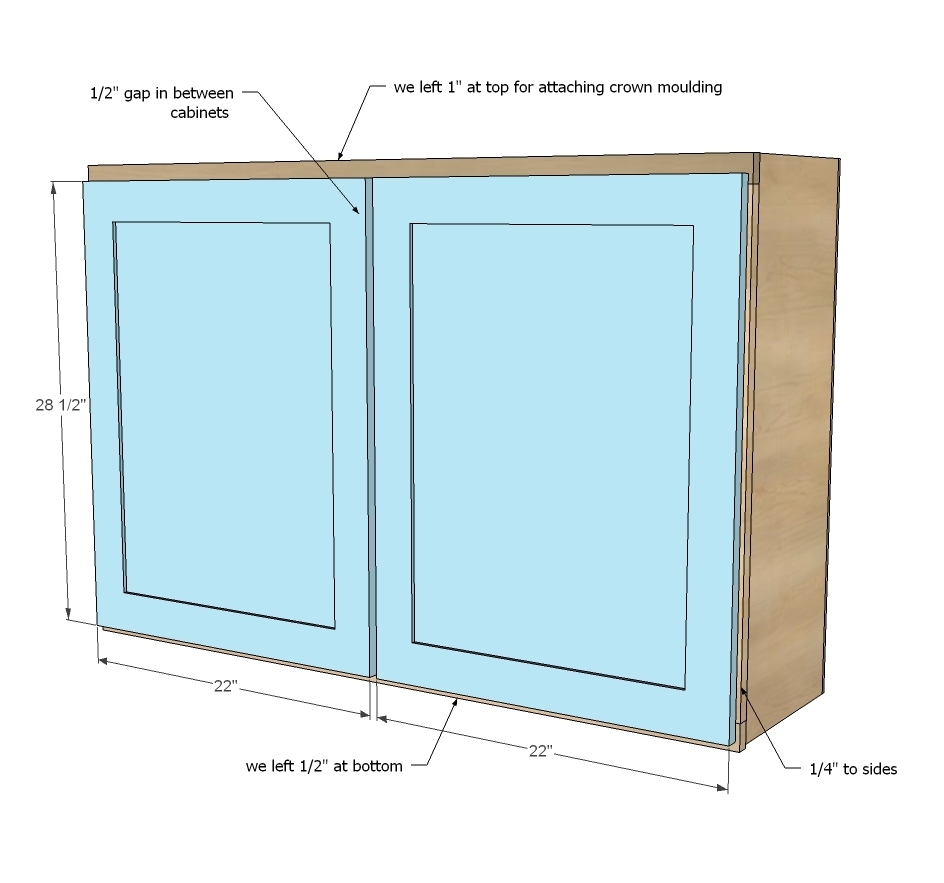
NOTE: We choose a cabinet depth of 12" overall INCLUDING the doors, face frame and backs, so we ripped our plywood to 10-1/4". You can choose a different depth, just make sure you consistently use the same depth from cabinet to cabinet.
CARCASS
2 - 3/4" plywood 10-1/4" x 30" (sides)
2 - 3/4" plywood @ 10-1/4" x 43" (top and bottom)
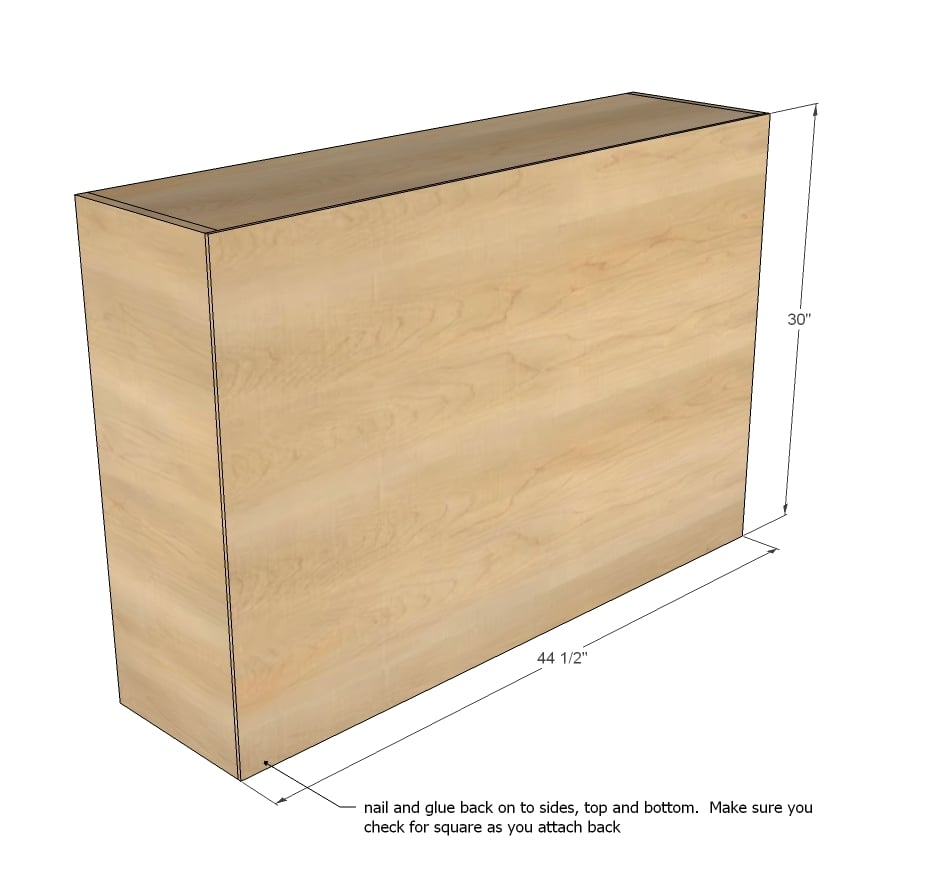
1 - 1/4" plywood @ 44-1/2" x 30" (back)
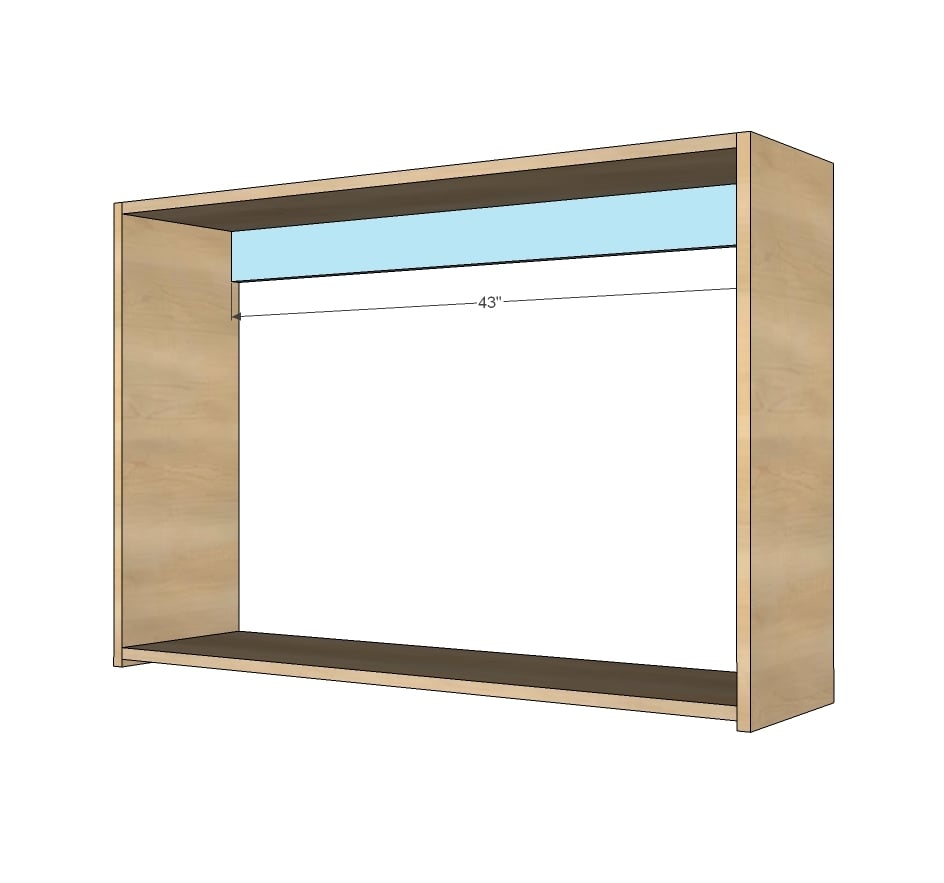
1 - 1x4 or plywood scrap 43" long (inside support)
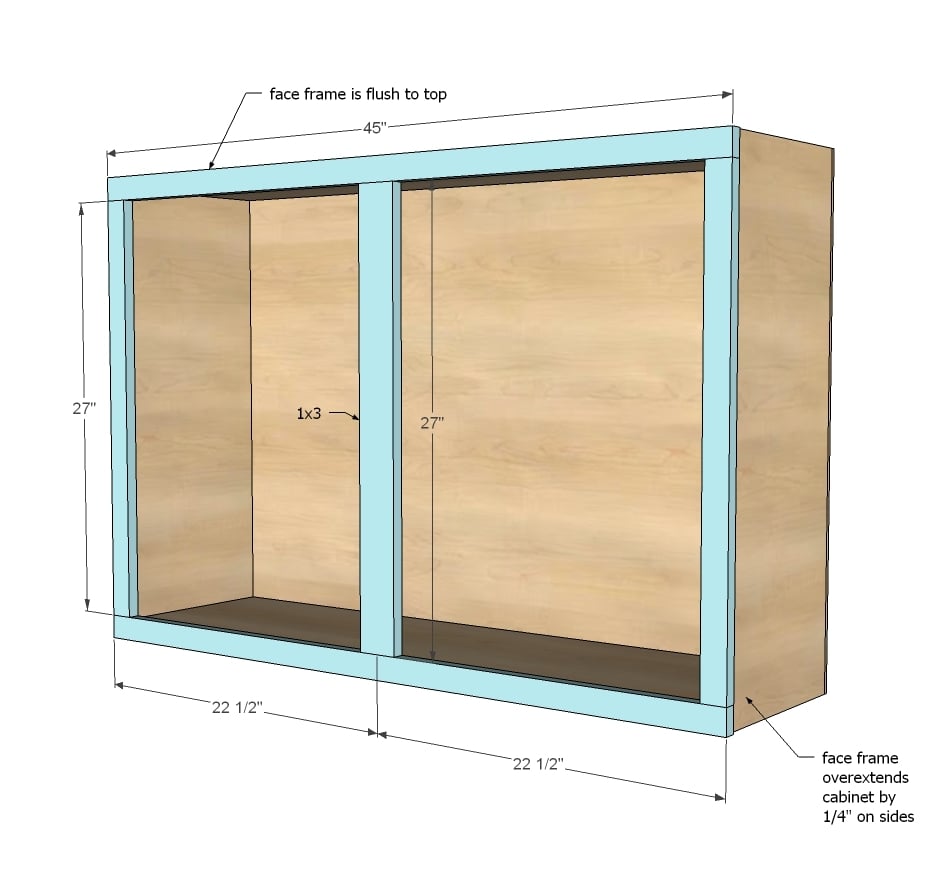
FACE FRAME
2 - 1x2 @ 27"
1 - 1x3 @ 27"
2 - 1x2 @ 45"
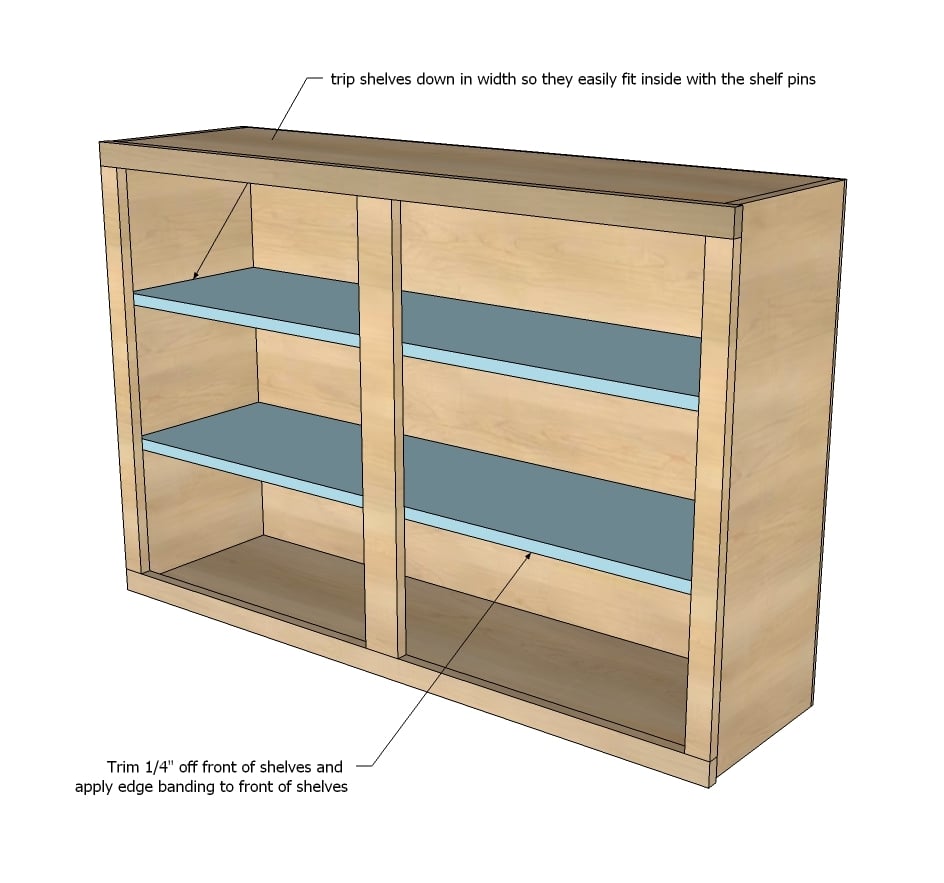
SHELVES
Same as top and bottom, but cut down 1/4" on front and ends to allow for edge banding and shelf pins
Please read through the entire plan and all comments before beginning this project. It is also advisable to review the Getting Started Section. Take all necessary precautions to build safely and smartly. Work on a clean level surface, free of imperfections or debris. Always use straight boards. Check for square after each step. Always predrill holes before attaching with screws. Use glue with finish nails for a stronger hold. Wipe excess glue off bare wood for stained projects, as dried glue will not take stain. Be safe, have fun, and ask for help if you need it. Good luck!
Instructions
Step 1
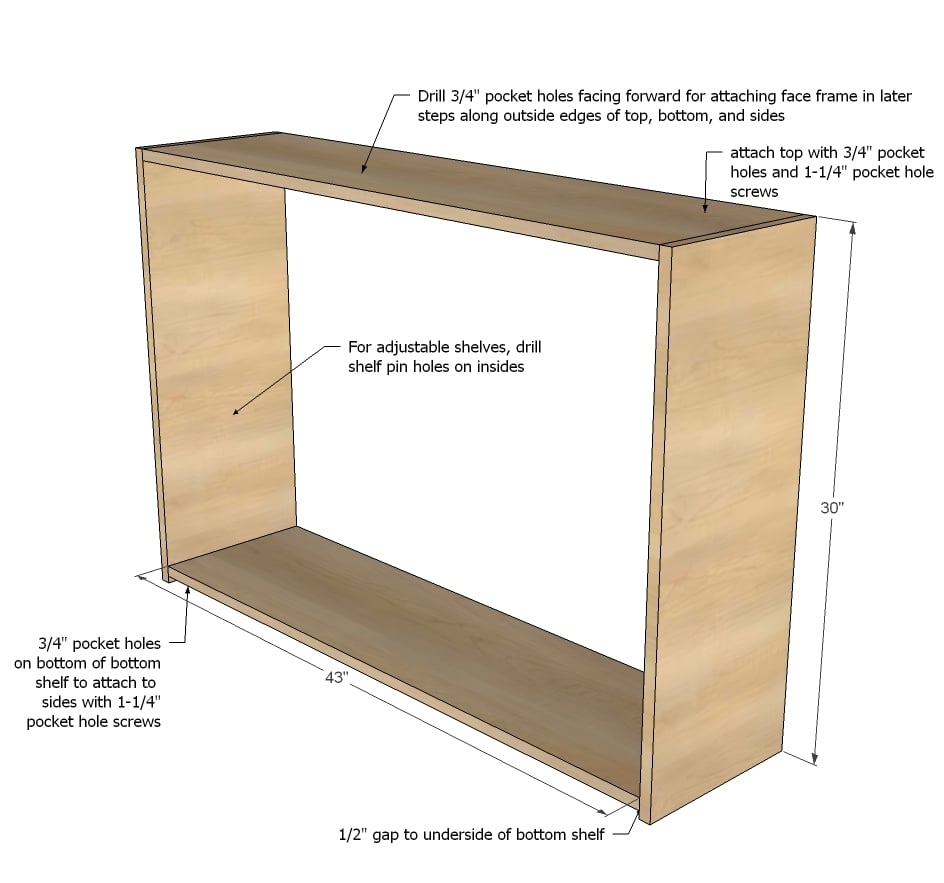
First step is to build the basic box of the cabinet. We do this with 3/4" pocket holes and 1-1/4" pocket hole screws.
We also like to attach our face frames with pocket holes, so we drill 3/4" pocket holes along the outside front edges of the sides, top and bottom. Neighboring cabinets will hide - or for an end cabinet, you add a piece of 1/4" plywood that is finished to match the doors and face frames.
Step 2
Step 3
Step 4
It is always recommended to apply a test coat on a hidden area or scrap piece to ensure color evenness and adhesion. Use primer or wood conditioner as needed.




Comments
DecorSanity
Mon, 04/28/2014 - 13:36
You are soooooo not fired!
As a fellow mom you amaze me with what you get done, seriously. You are super talented AND you have your priorities in order! That baby is so cute, who wouldn't want to stare and play with him all day! Love all of these plans, can't wait to see kitchen #2 all finished. I love love love that you went with the white over gray cabinets. Keep up the great work, and all of the baby loving!
DIY4Love
Mon, 04/28/2014 - 17:29
Staring is the BEST!!!
Ana, I love the way you talk about staring at your son; my littlest one will be three in two weeks and I still find myself staring at her. So, keep on staring and soak up the moments. The projects will always be there (and they don't grow up, though they do seem to multiply.) Hugs to you and your family! May God bless you all!
spiceylg
Mon, 04/28/2014 - 18:37
Adorable!
He is so darn cute; looks just like big sis. You have your priorities straight, no worries! I love how you work with others to keep the posts coming. Loving the looks of the tuxedo kitchen thus far. Can't wait to see it finished, but I'm sure not more than you! You two continue to amaze. Seriously.