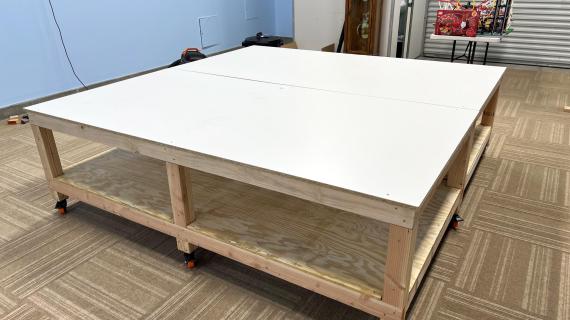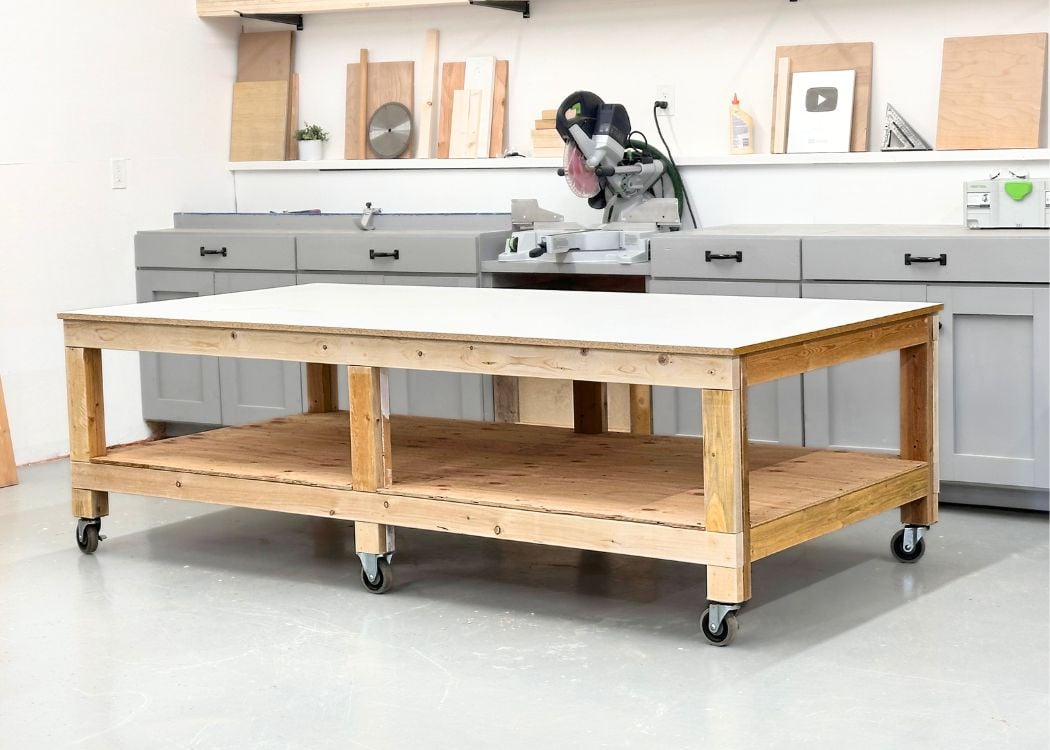

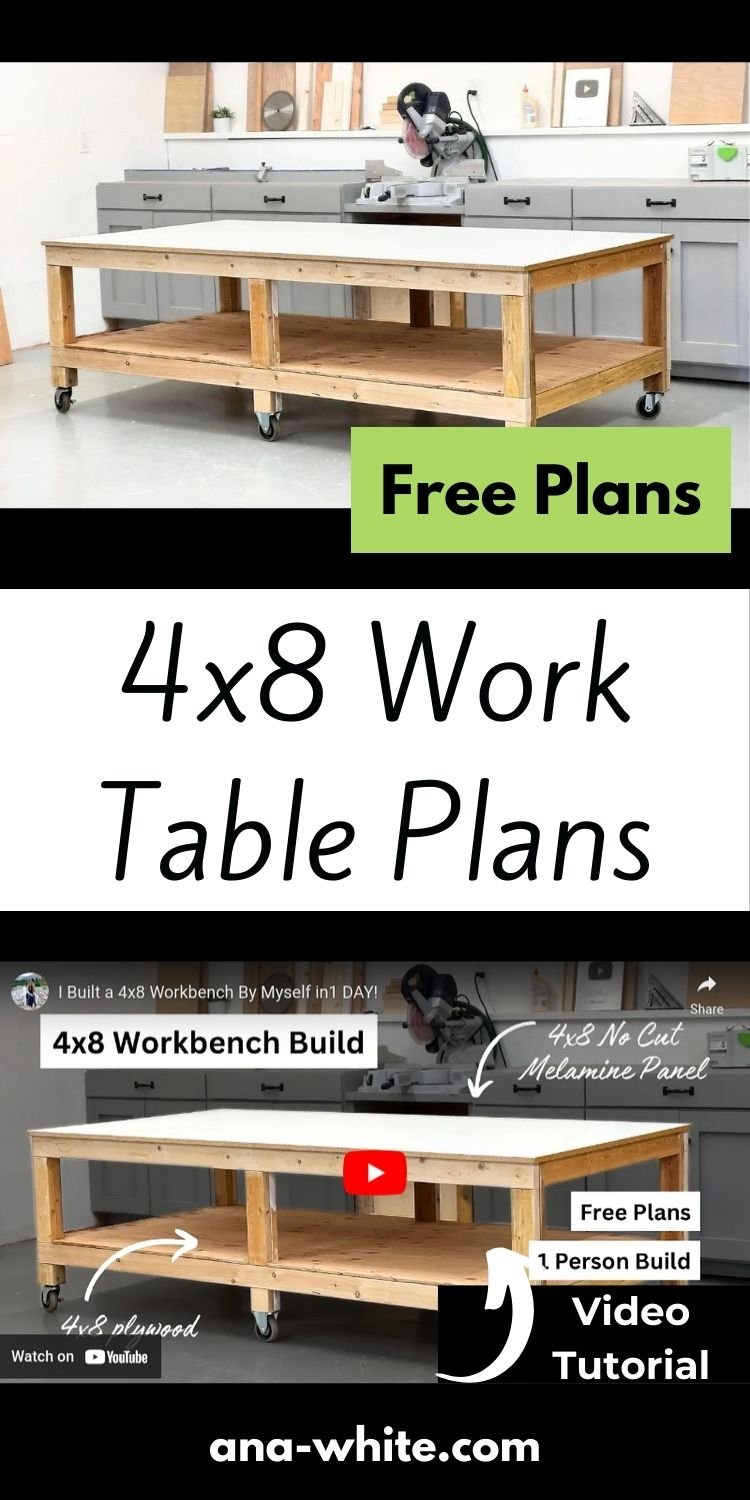
Build a workbench without a shop! This is an easy to build design with minimal cutting and tools, a perfect work table to start with.
Sized to fit a standard 4x8 melamine and plywood panel, designed to be built by one person in one day, this strong, sturdy and minimal work table is the perfect addition to the shop! The lower shelf can be used to store tools or materials.
Free step by step plans with detailed diagrams, video tutorial and cut list - everything you need to build this yourself.
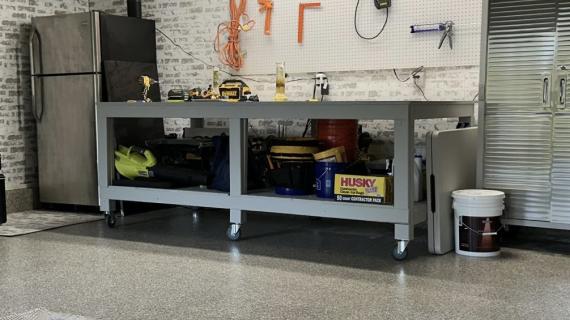
Plans available in table height, counter height, mobile table height and mobile counter height.
Why I Built This Workbench
I needed a big workbench that I can build large cabinet boxes and dressers, vanities, and tabletops on, but did not need anything super complicated or expensive - as I've got plenty of wall cabinetry storage.
I did want some storage though, for wood pieces.
So I designed this 4x8 workbench to be easy to build, based off using a full sheet of plywood and MDF, and a simple 2x4 framing under it.
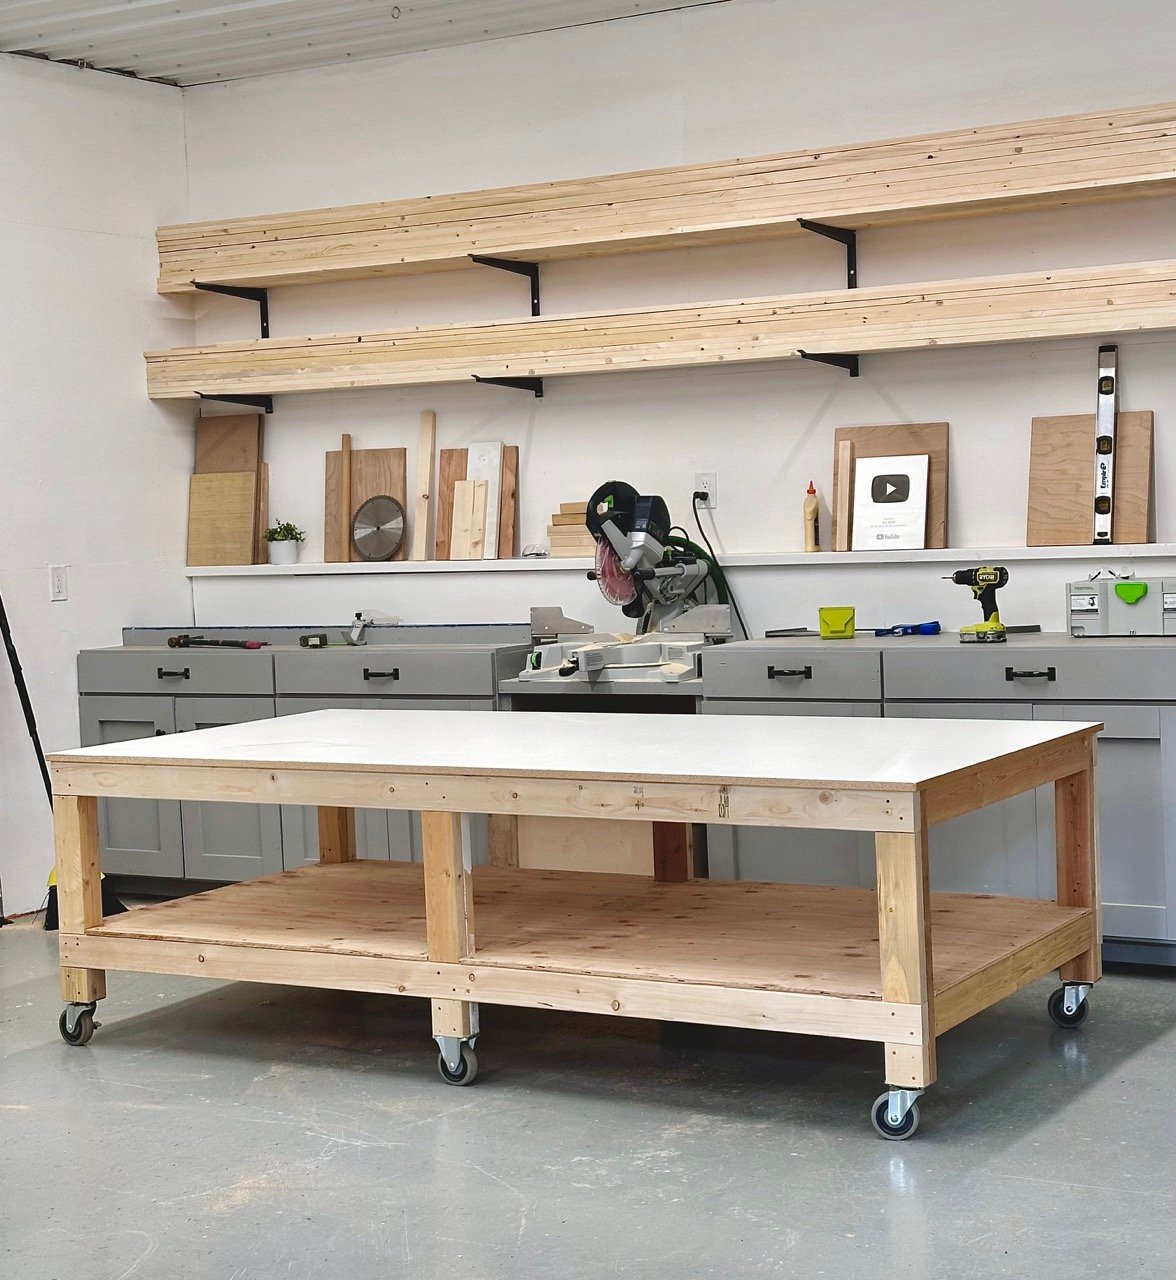
The cool thing about this project is I was able to build it entirely by myself - despite it being a very large and heavy project.
Video - How I Built this 4x8 Workbench
Other Options: Counter Height, Fixed Versions
This is really a great plan and I wanted to make it easy to build different versions, as you may have different uses or needs for your workbench. Here's a few variations, but of course, you can make modifications easily on your own too.
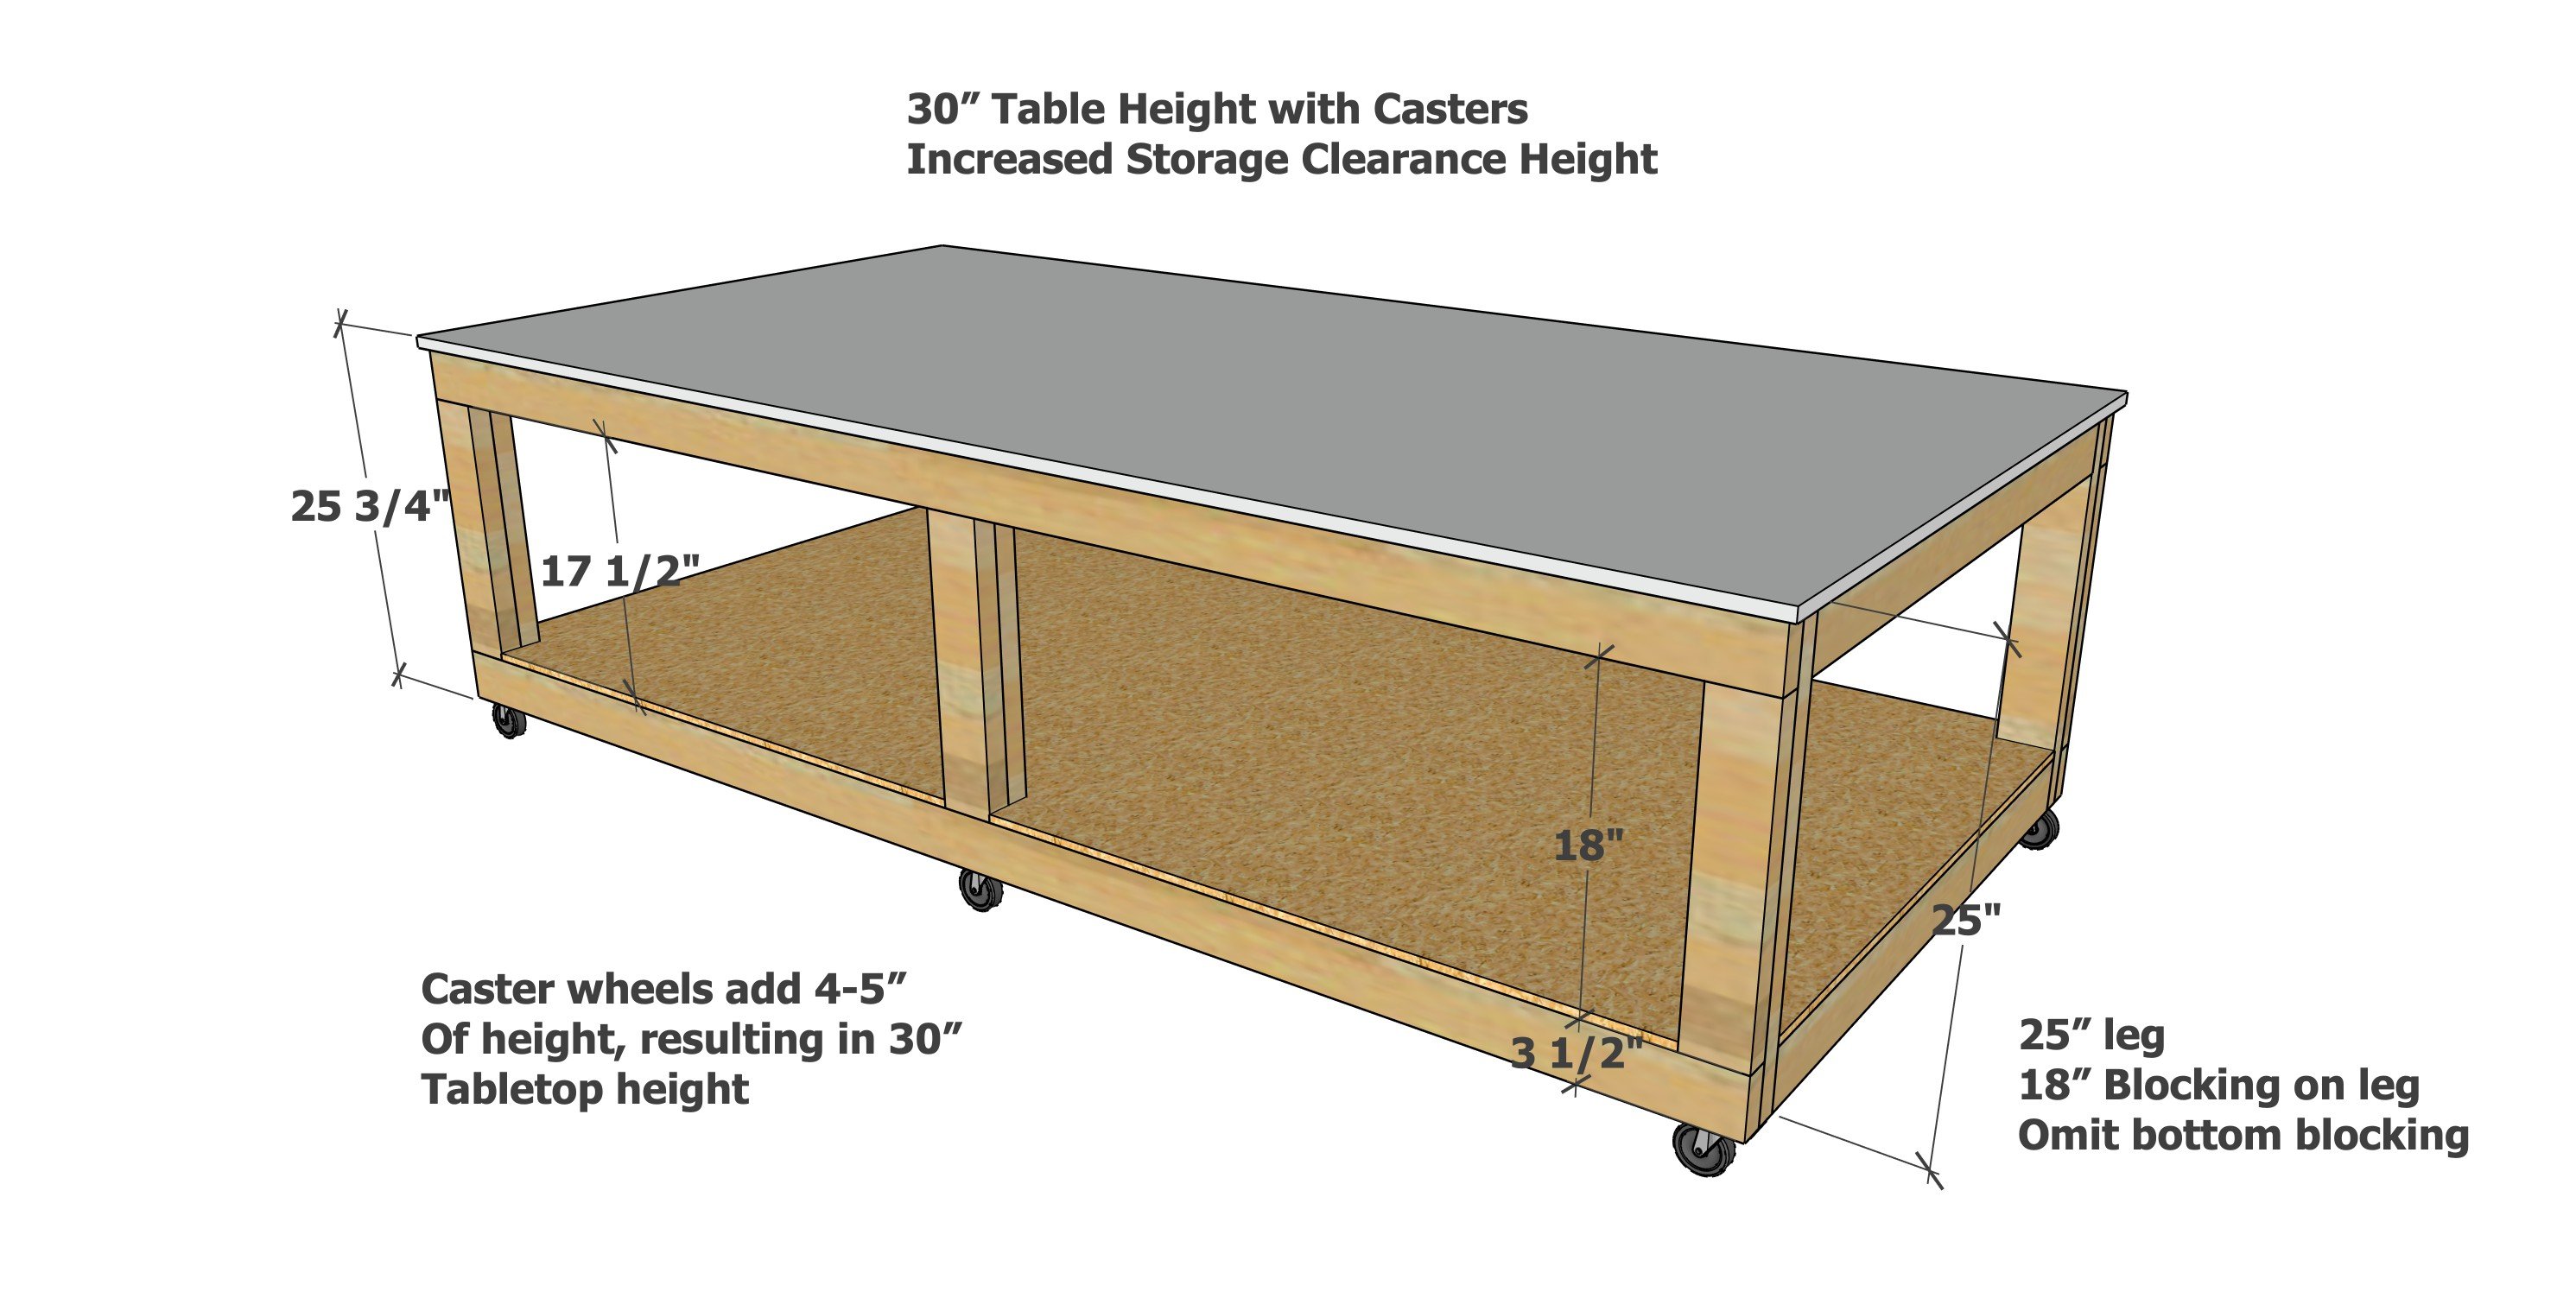
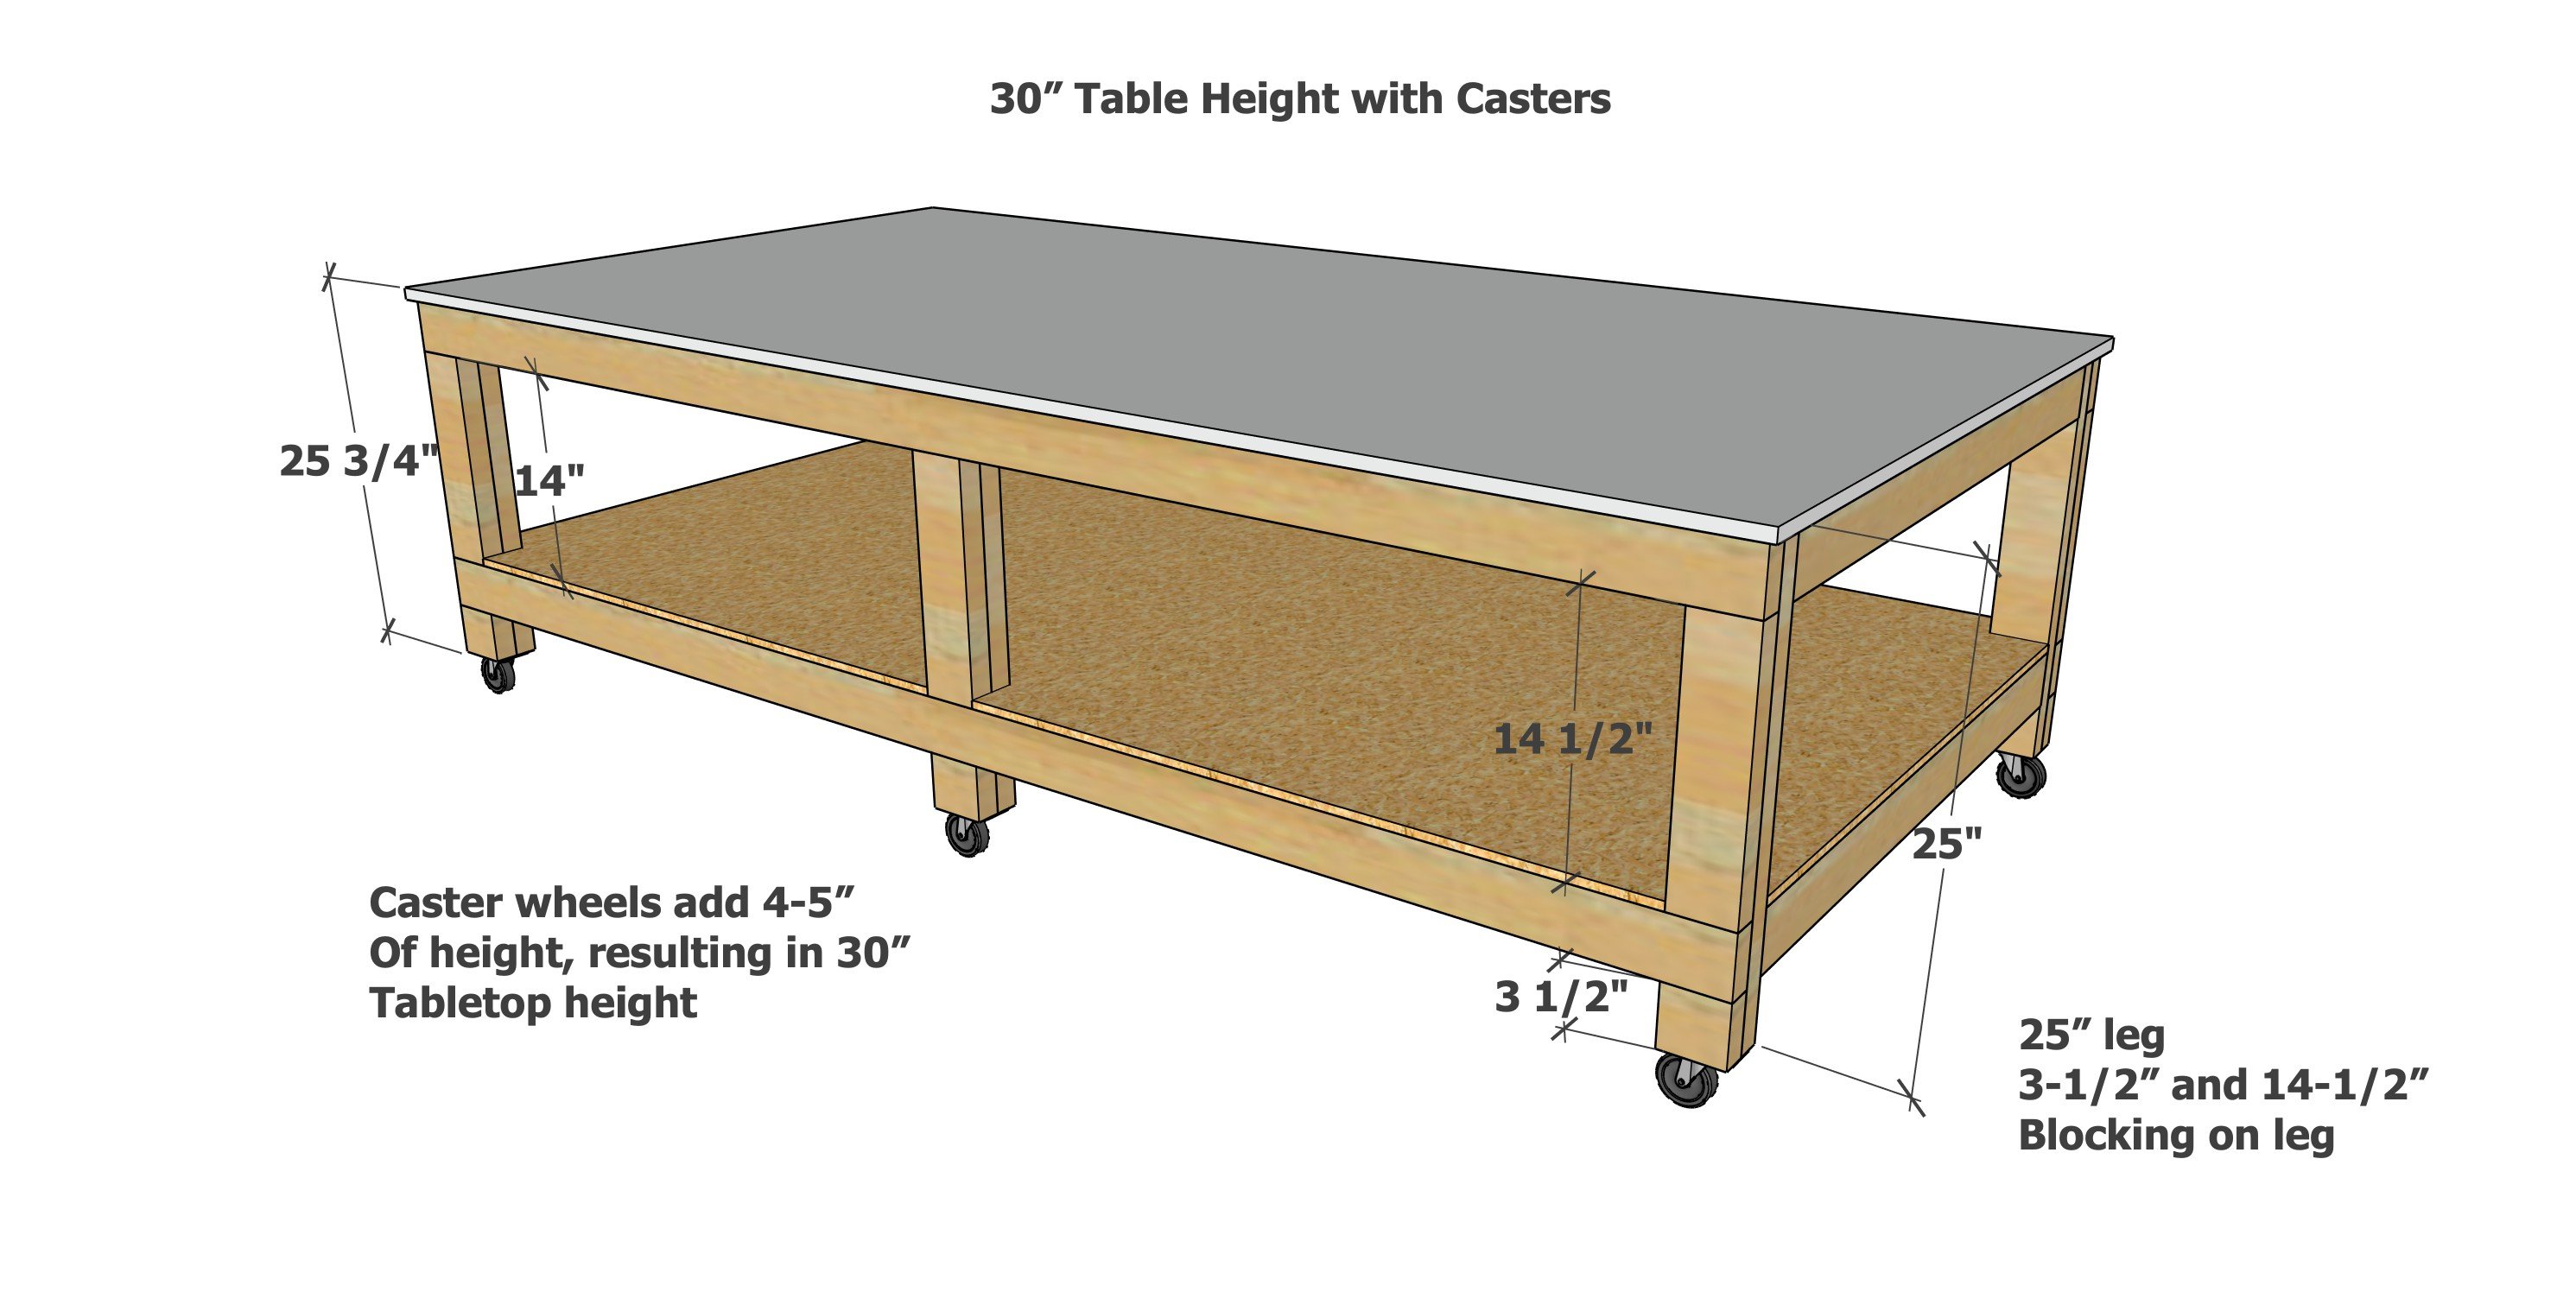
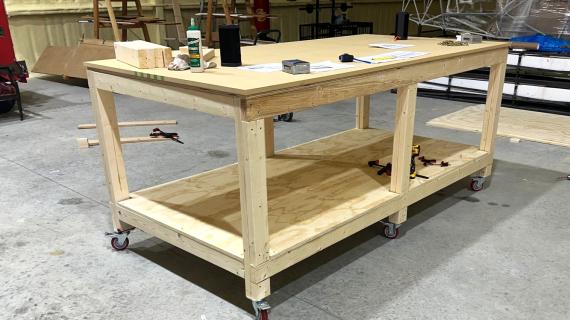
30" Mobile Version - This is the version you see in the photos and video, I liked the 30" (standard table height), as I'm short. I also wanted caster wheels, so I can clean under it easily.
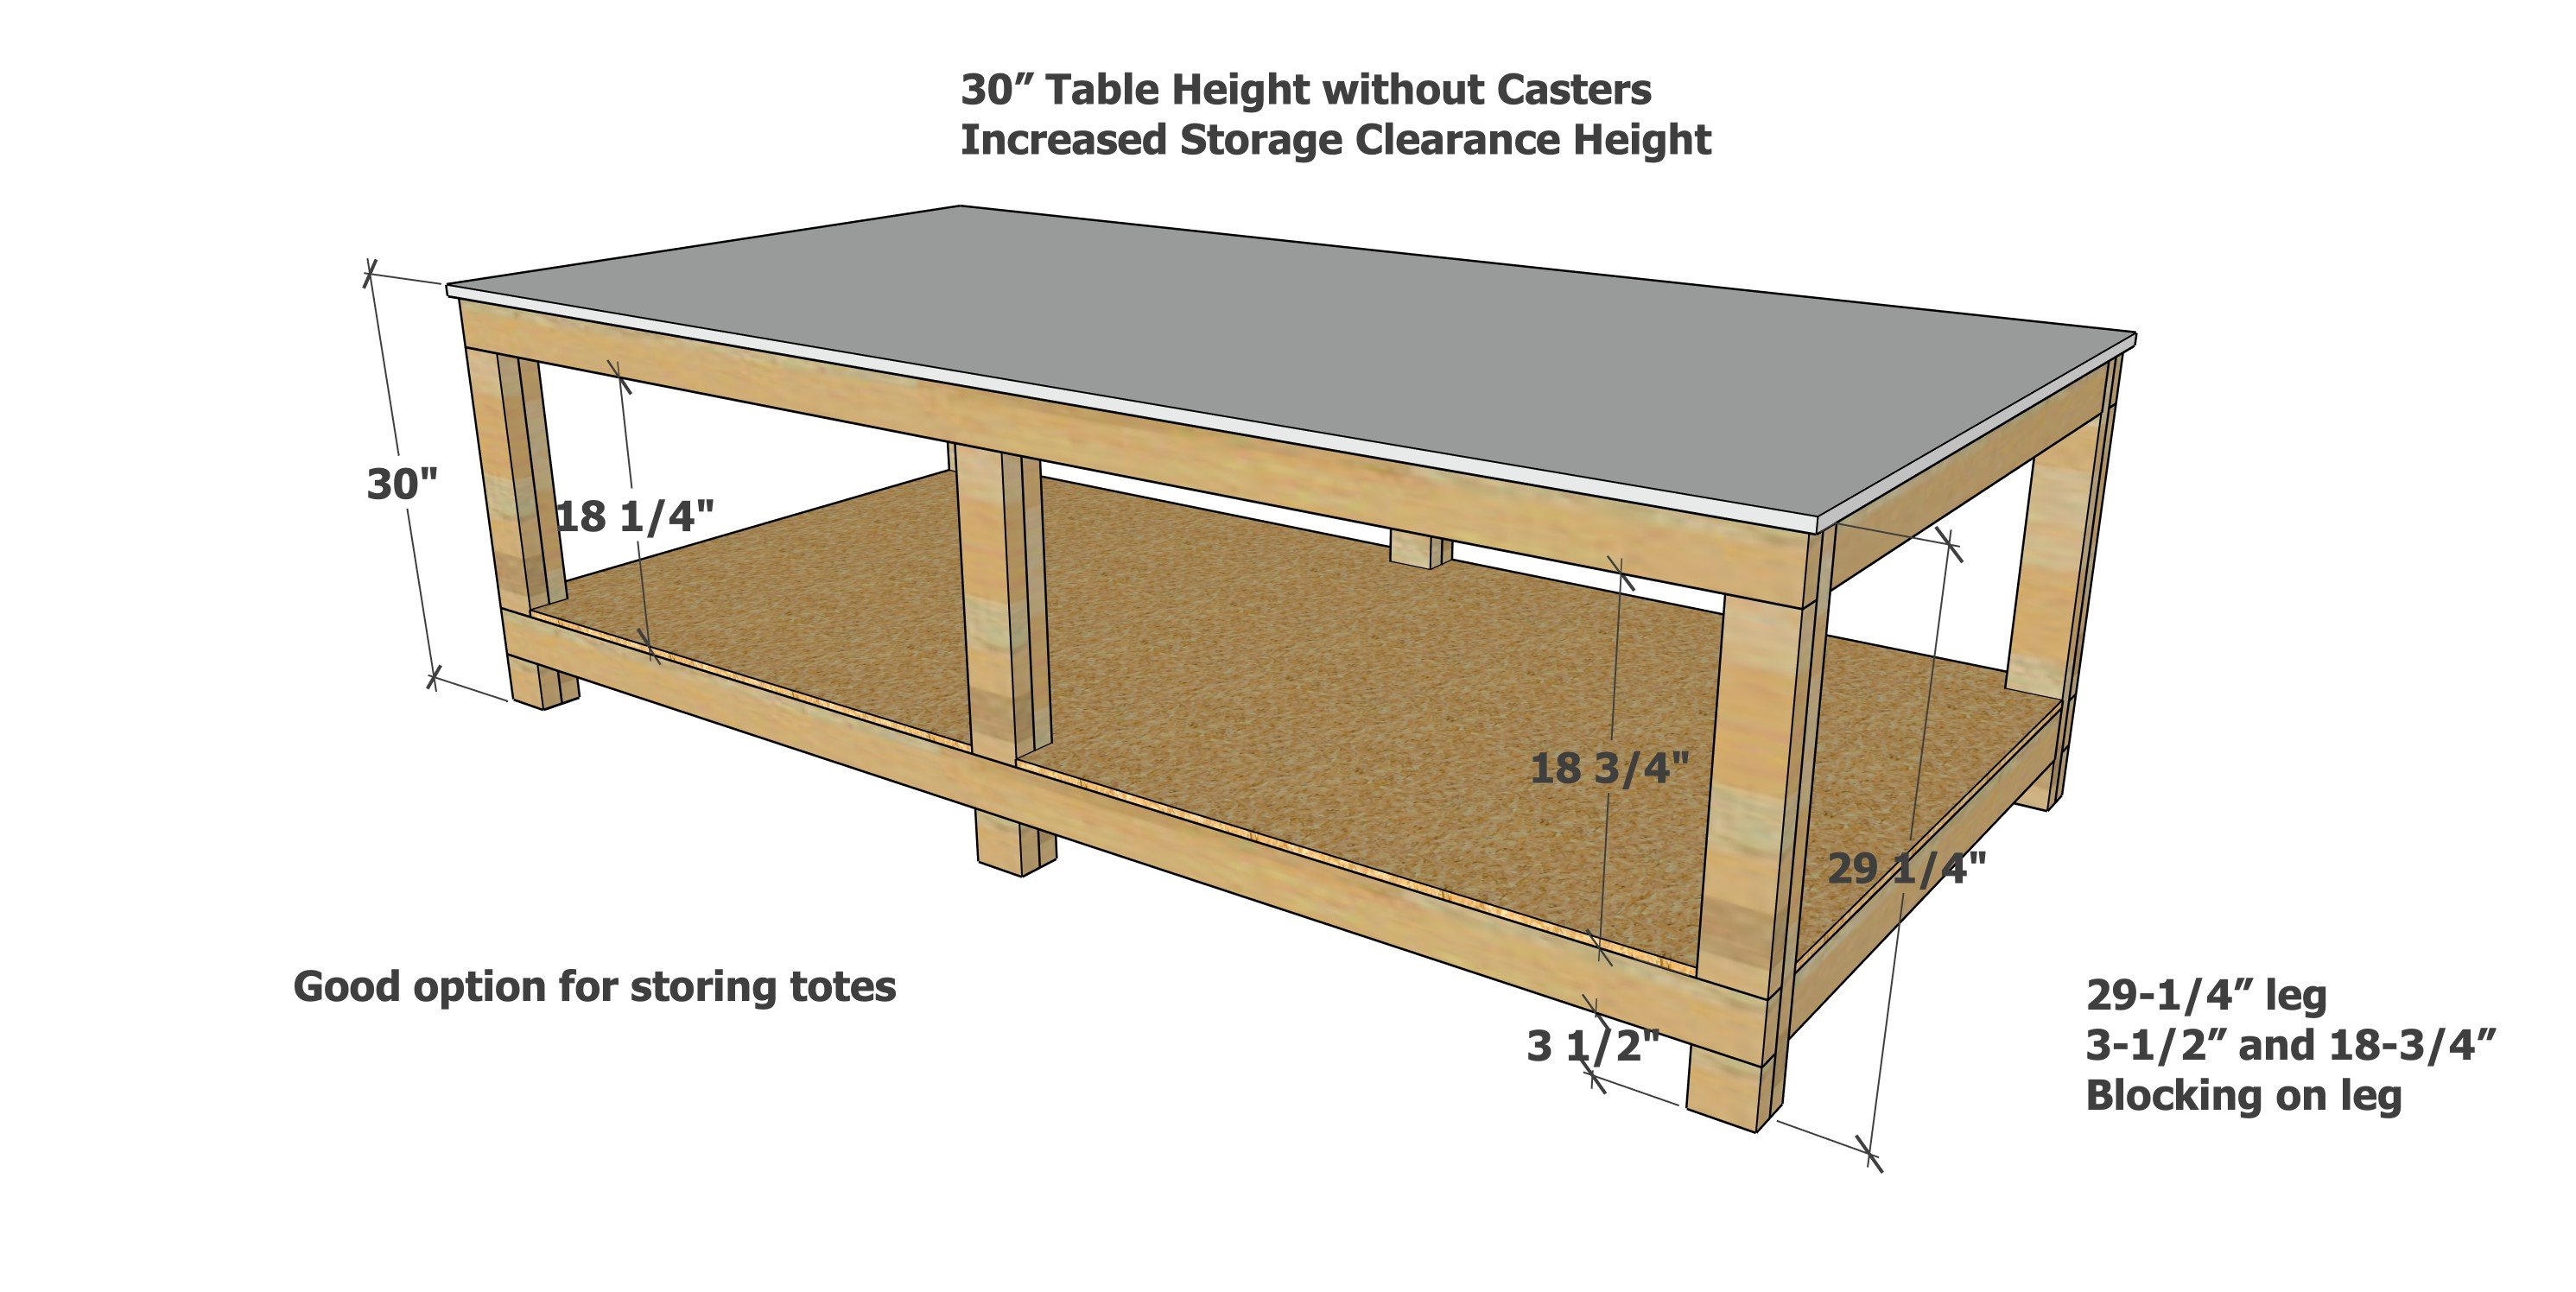
30" Fixed Version - This is the same final height as the version shown in the photos (30" table height), but without the caster wheels. Loosing the caster wheels means increased storage, as I added the extra height to the shelf clearance. You could modify to add the extra height at the bottom of the legs, if that is a better design for you.
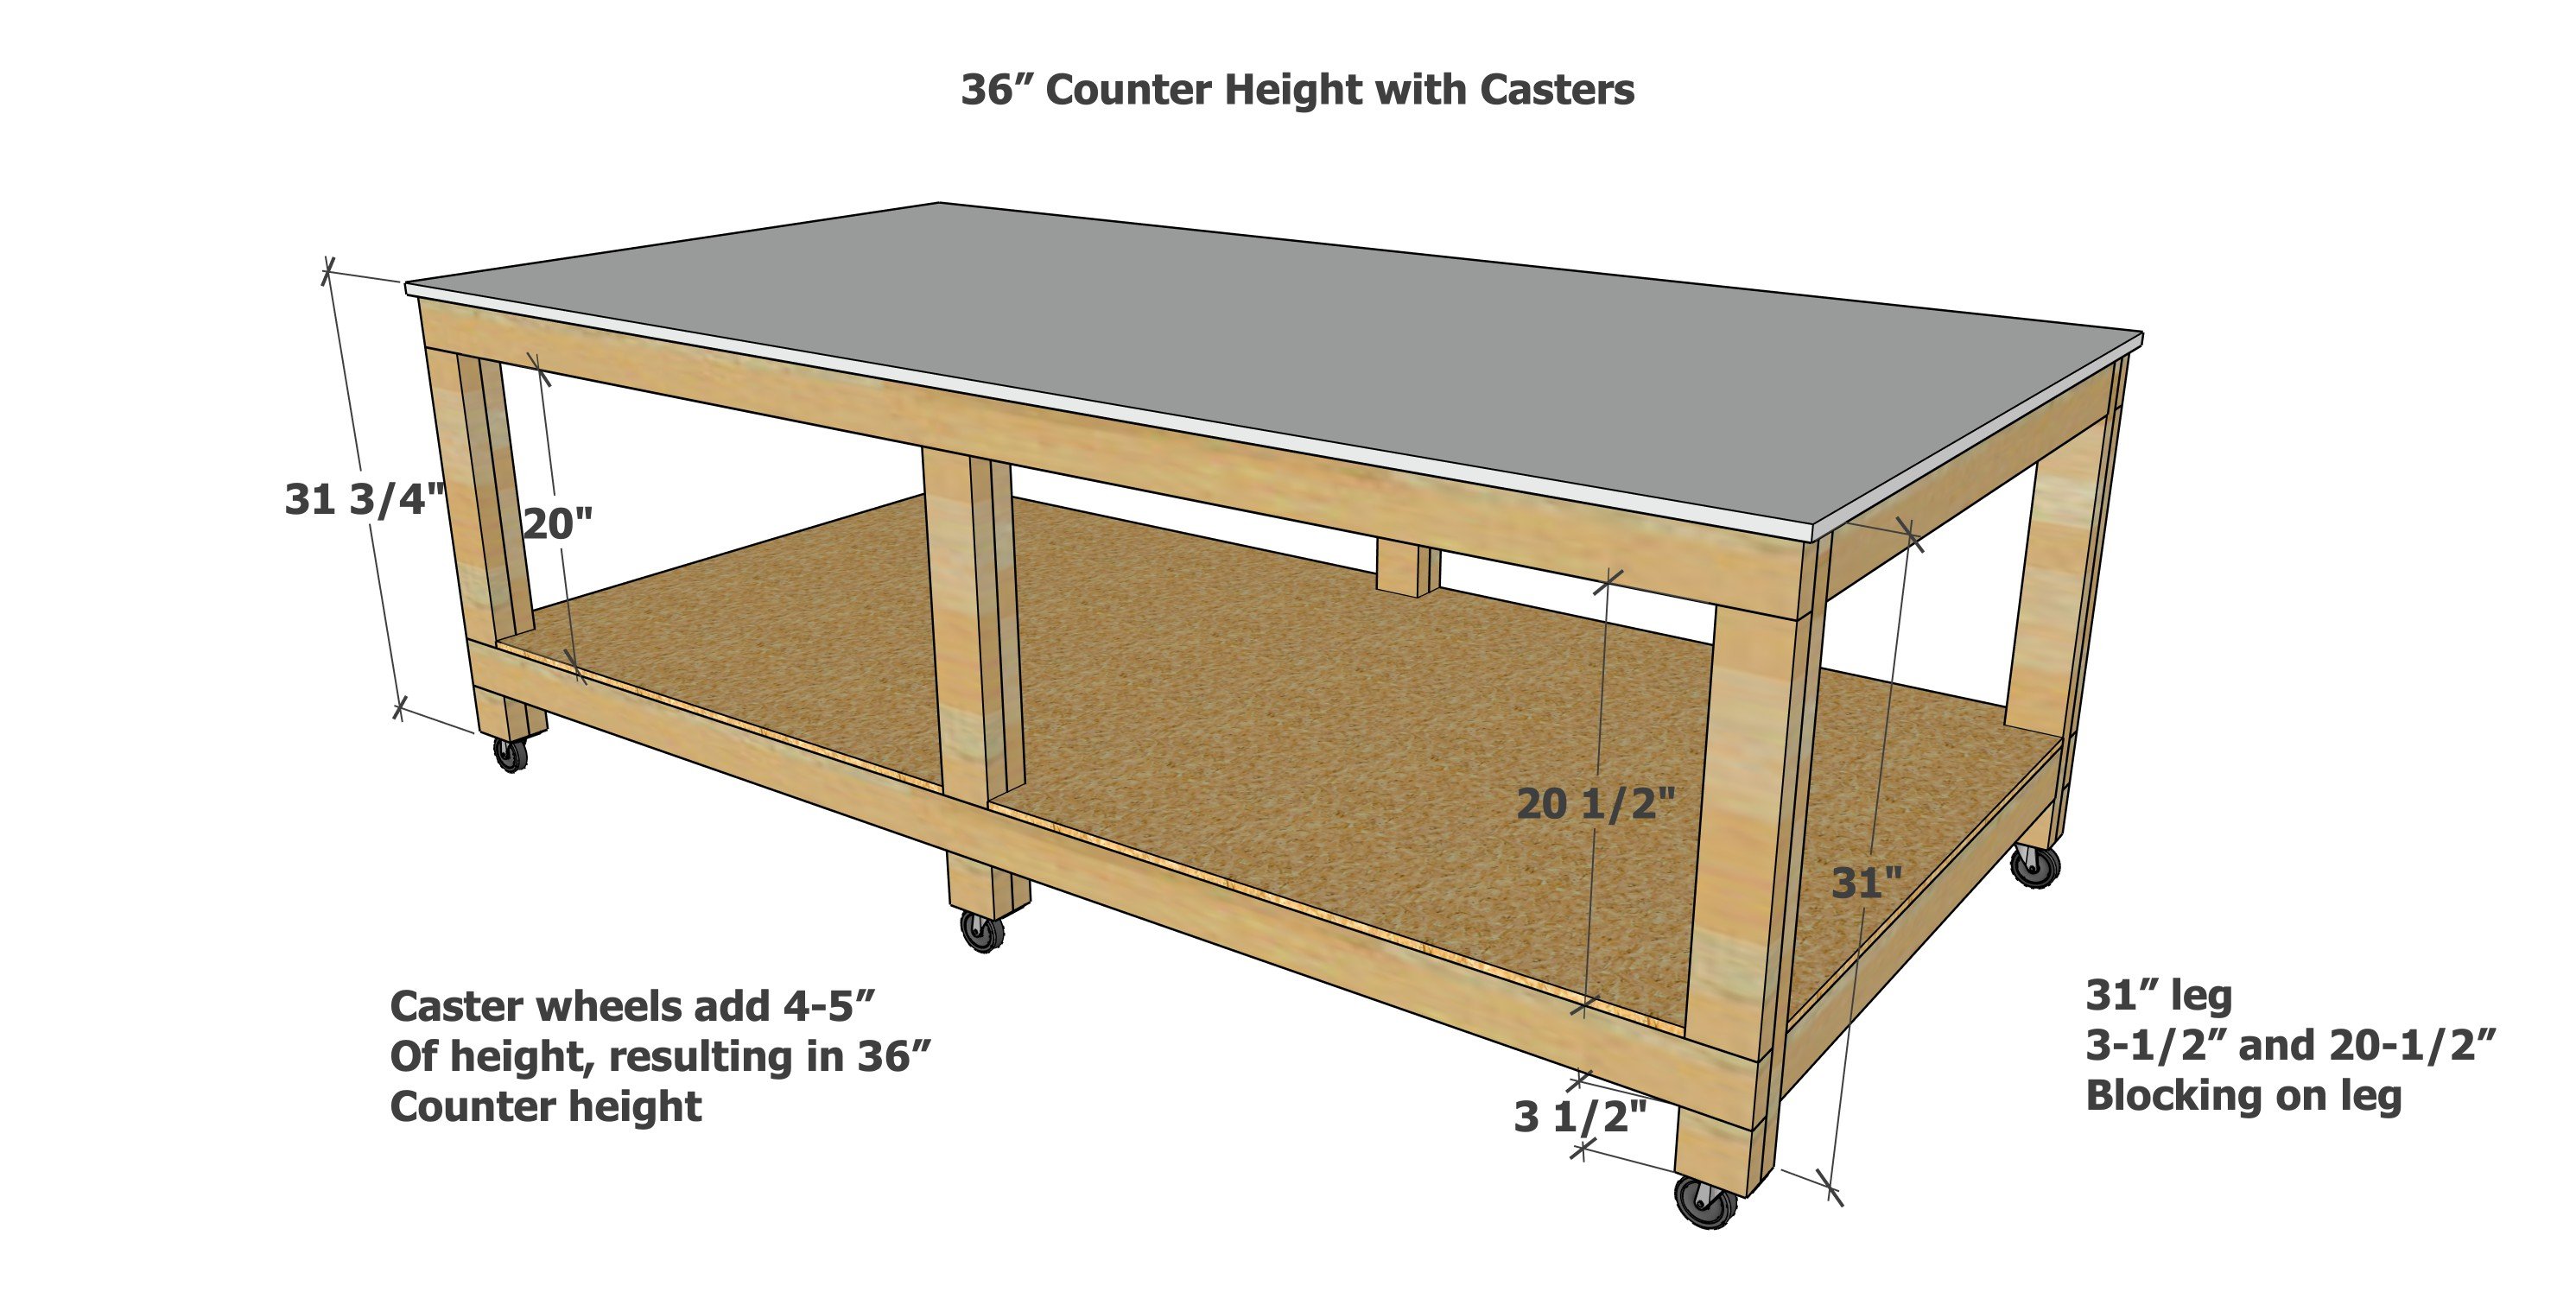
36" Mobile Version - This is a counter height version, with an added 6" of height to the storage shelf clearance.
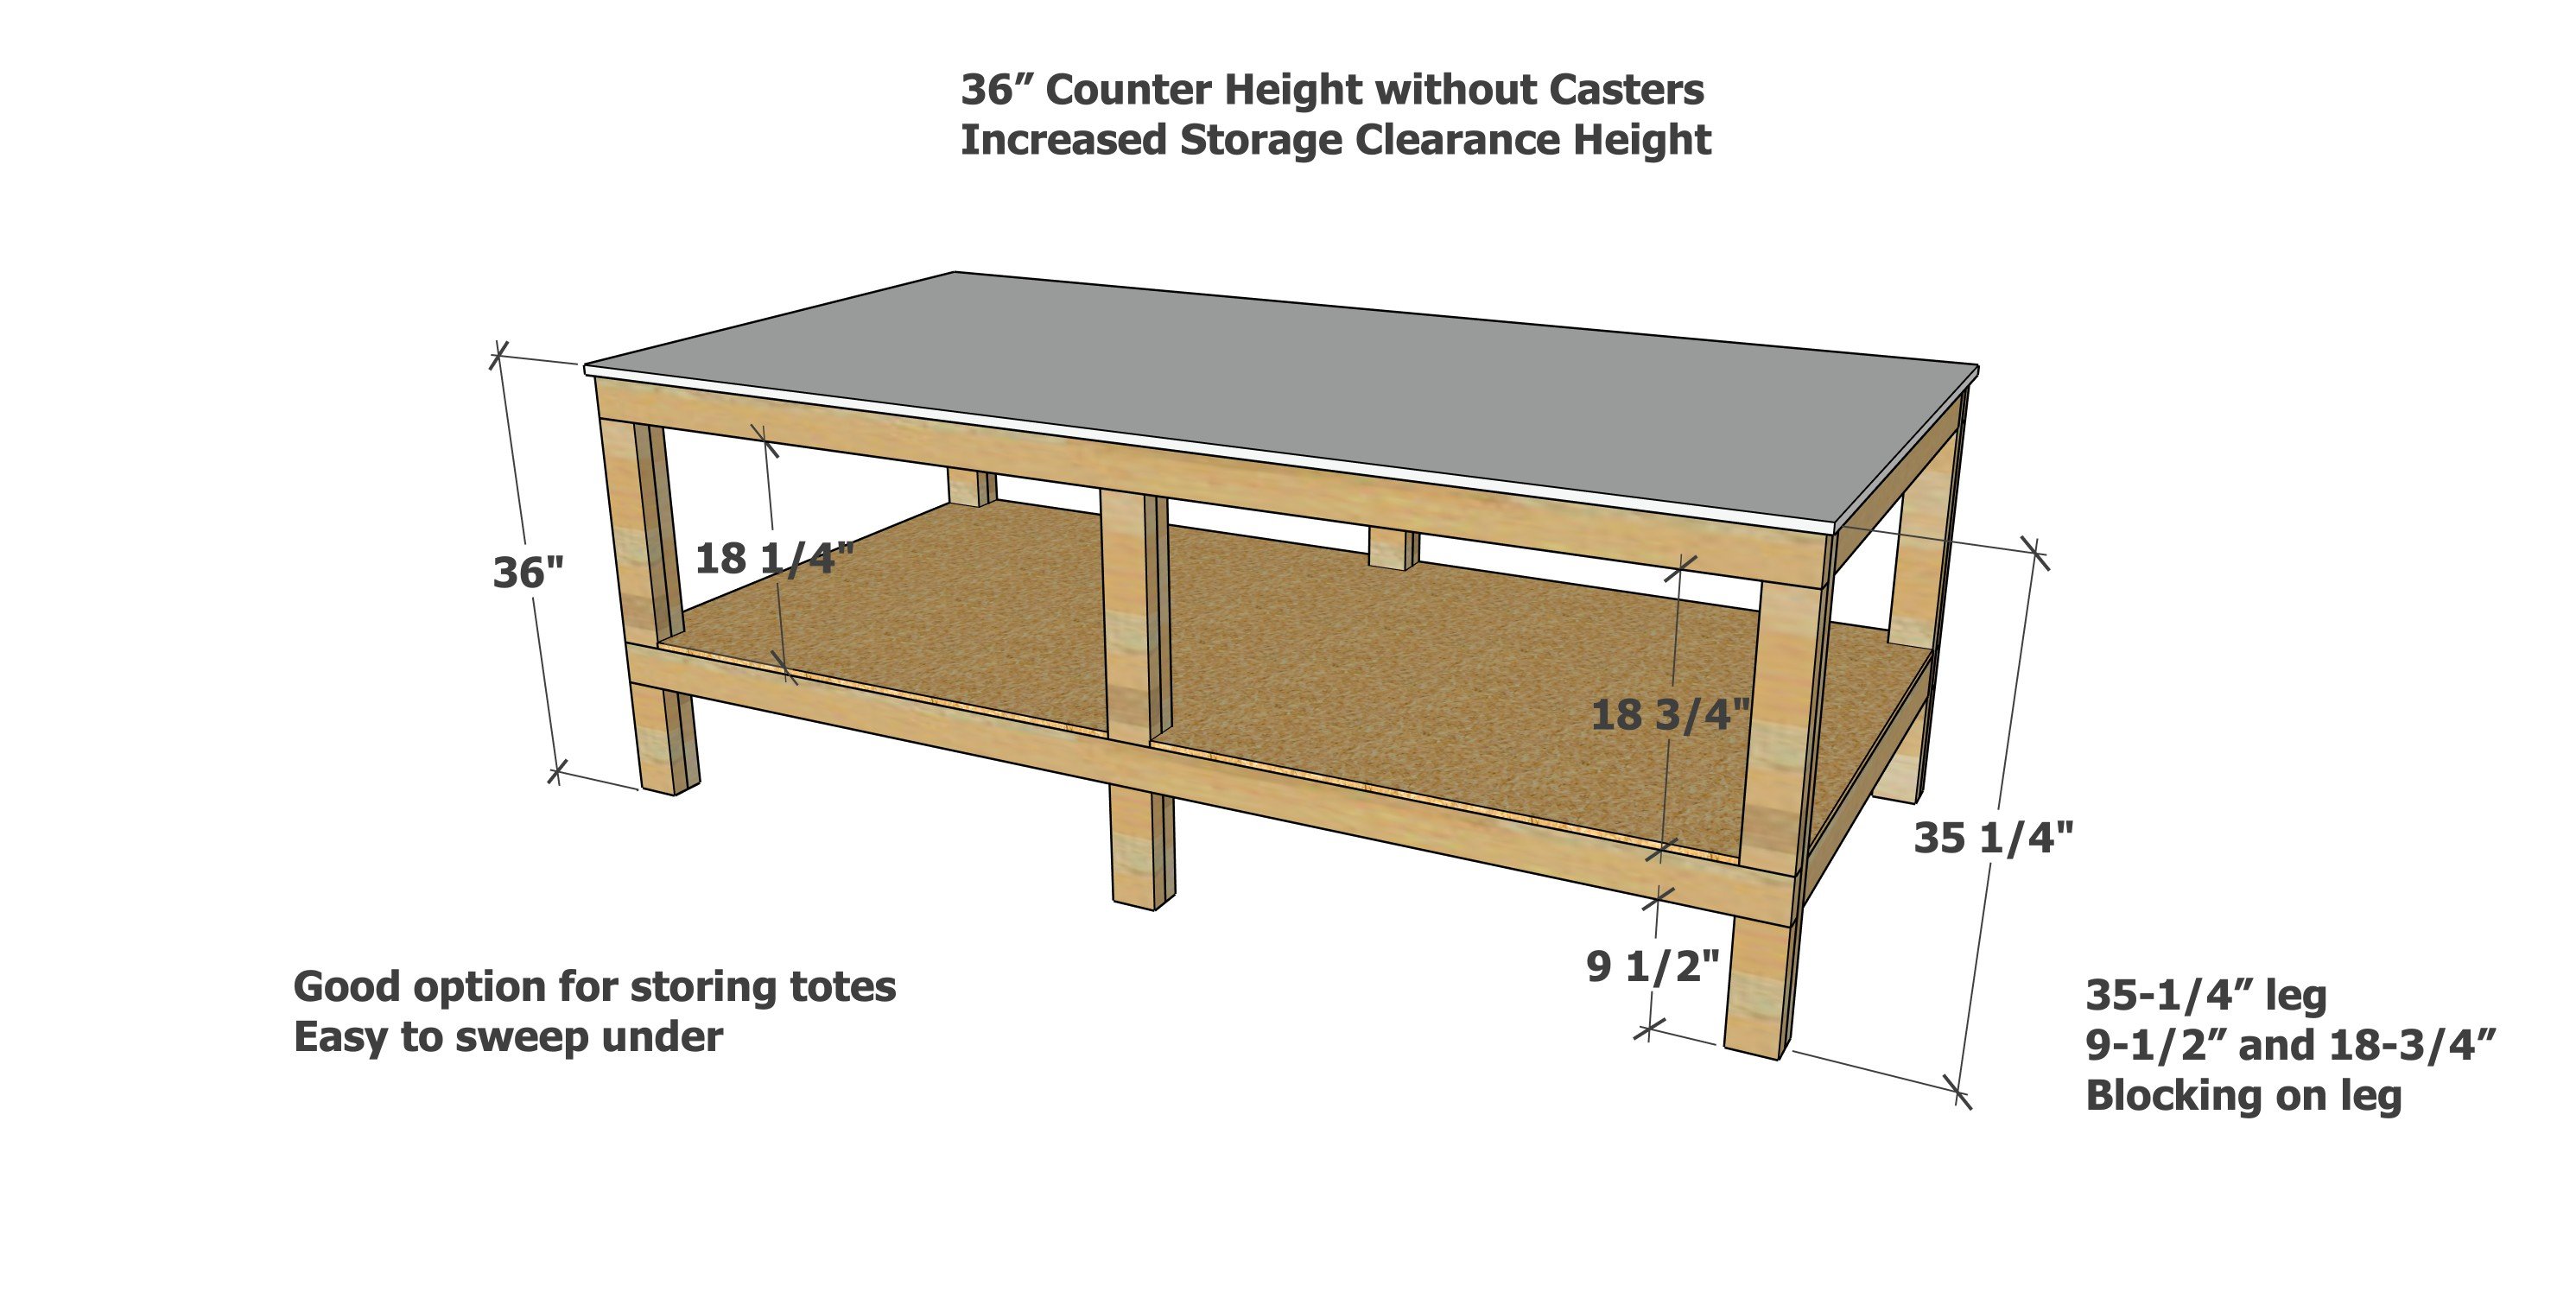
36" Fixed Version - This is a counter height version, with an added 10" of height to the storage shelf clearance, and no caster wheels underneath.
Free Plans to Build Your Own 4x8 Workbench
We are glad to be able to provide the plans for this workbench for free. Please send us a photo if you build!
Pin For Later!
Preparation
30" Table Height Mobile Workbench (4" Caster Wheels) - AS SHOWN IN VIDEO AND PLANS
- 10 - 2x4 @ 8 feet long
- 1 - 5/8" thick AC Plywood, 4x8 sheet
- 1 - 3/4" thick Melamine coated particle board for top, full sheet (97" x 49")
- About 70 2-1/2" long self tapping star bit screws
- About 50 1-1/2" long self tapping star bit screws
- 6 - 4" overall height caster wheels with screws and washers for installing
30" Table Height Fixed Workbench (NO Caster Wheels)
- 10 - 2x4 @ 8 feet long
- 1 - 5/8" thick AC Plywood, 4x8 sheet
- 1 - 3/4" thick Melamine coated particle board for top, full sheet (97" x 49")
- About 70 2-1/2" long self tapping star bit screws
- About 50 1-1/2" long self tapping star bit screws
36" Counter Height Mobile Workbench (4" Caster Wheels)
- 11 - 2x4 @ 8 feet long
- 1 - 5/8" thick AC Plywood, 4x8 sheet
- 1 - 3/4" thick Melamine coated particle board for top, full sheet (97" x 49")
- About 70 2-1/2" long self tapping star bit screws
- About 50 1-1/2" long self tapping star bit screws
- 6 - 4" overall height caster wheels with screws and washers for installing
36" Counter Height Fixed Workbench (NO Caster Wheels)
- 11 - 2x4 @ 8 feet long
- 1 - 5/8" thick AC Plywood, 4x8 sheet
- 1 - 3/4" thick Melamine coated particle board for top, full sheet (97" x 49")
- About 70 2-1/2" long self tapping star bit screws
- About 50 1-1/2" long self tapping star bit screws
30" Table Height Mobile Workbench (4" Caster Wheels)
- 6 - 2x4 @ 25"
- 6 - 2x4 @ 3-1/2"
- 6 - 2x4 @ 42"
- 4 - 2x4 @ 96"
- 6 - 2x4 @ 14-1/2"- cut to fit
- 1 - 5/8" thick AC Plywood, 4x8 sheet
- 1 - 3/4" thick Melamine coated particle board for top, full sheet (97" x 49")
30" Table Height Fixed Workbench (NO Caster Wheels)
- 6 - 2x4 @ 29-1/4"
- 6 - 2x4 @ 3-1/2"
- 6 - 2x4 @ 42"
- 4 - 2x4 @ 96"
- 6 - 2x4 @ 18-3/4" - cut to fit
- 1 - 5/8" thick AC Plywood, 4x8 sheet
- 1 - 3/4" thick Melamine coated particle board for top, full sheet (97" x 49")
36" Counter Height Mobile Workbench (4" Caster Wheels)
- 6 - 2x4 @ 31"
- 6 - 2x4 @ 3-1/2"
- 6 - 2x4 @ 42"
- 4 - 2x4 @ 96"
- 6 - 2x4 @ 20-1/2"- cut to fit
- 1 - 5/8" thick AC Plywood, 4x8 sheet
- 1 - 3/4" thick Melamine coated particle board for top, full sheet (97" x 49")
36" Counter Height Fixed Workbench (NO Caster Wheels)
- 6 - 2x4 @ 35-1/4"
- 6 - 2x4 @ 3-1/2"
- 6 - 2x4 @ 42"
- 4 - 2x4 @ 96"
- 6 - 2x4 @ 24-3/4" - cut to fit
- 1 - 5/8" thick AC Plywood, 4x8 sheet
- 1 - 3/4" thick Melamine coated particle board for top, full sheet (97" x 49")


Because our garage floor is uneven, I did have some challenges with the legs being out of square. So when I went to attach the top 2x4 @ 8 feet long, the tops of the legs were more than 8 feet apart.
Try to find a level spot to work if possible.
As you attach the bottom 2x4s at 8 feet long, use a square to attach so they are perpendicular to the legs.
You can go back and adjust if needed by removing screws and pivoting legs (this is what I had to do).
Instructions
Step 1
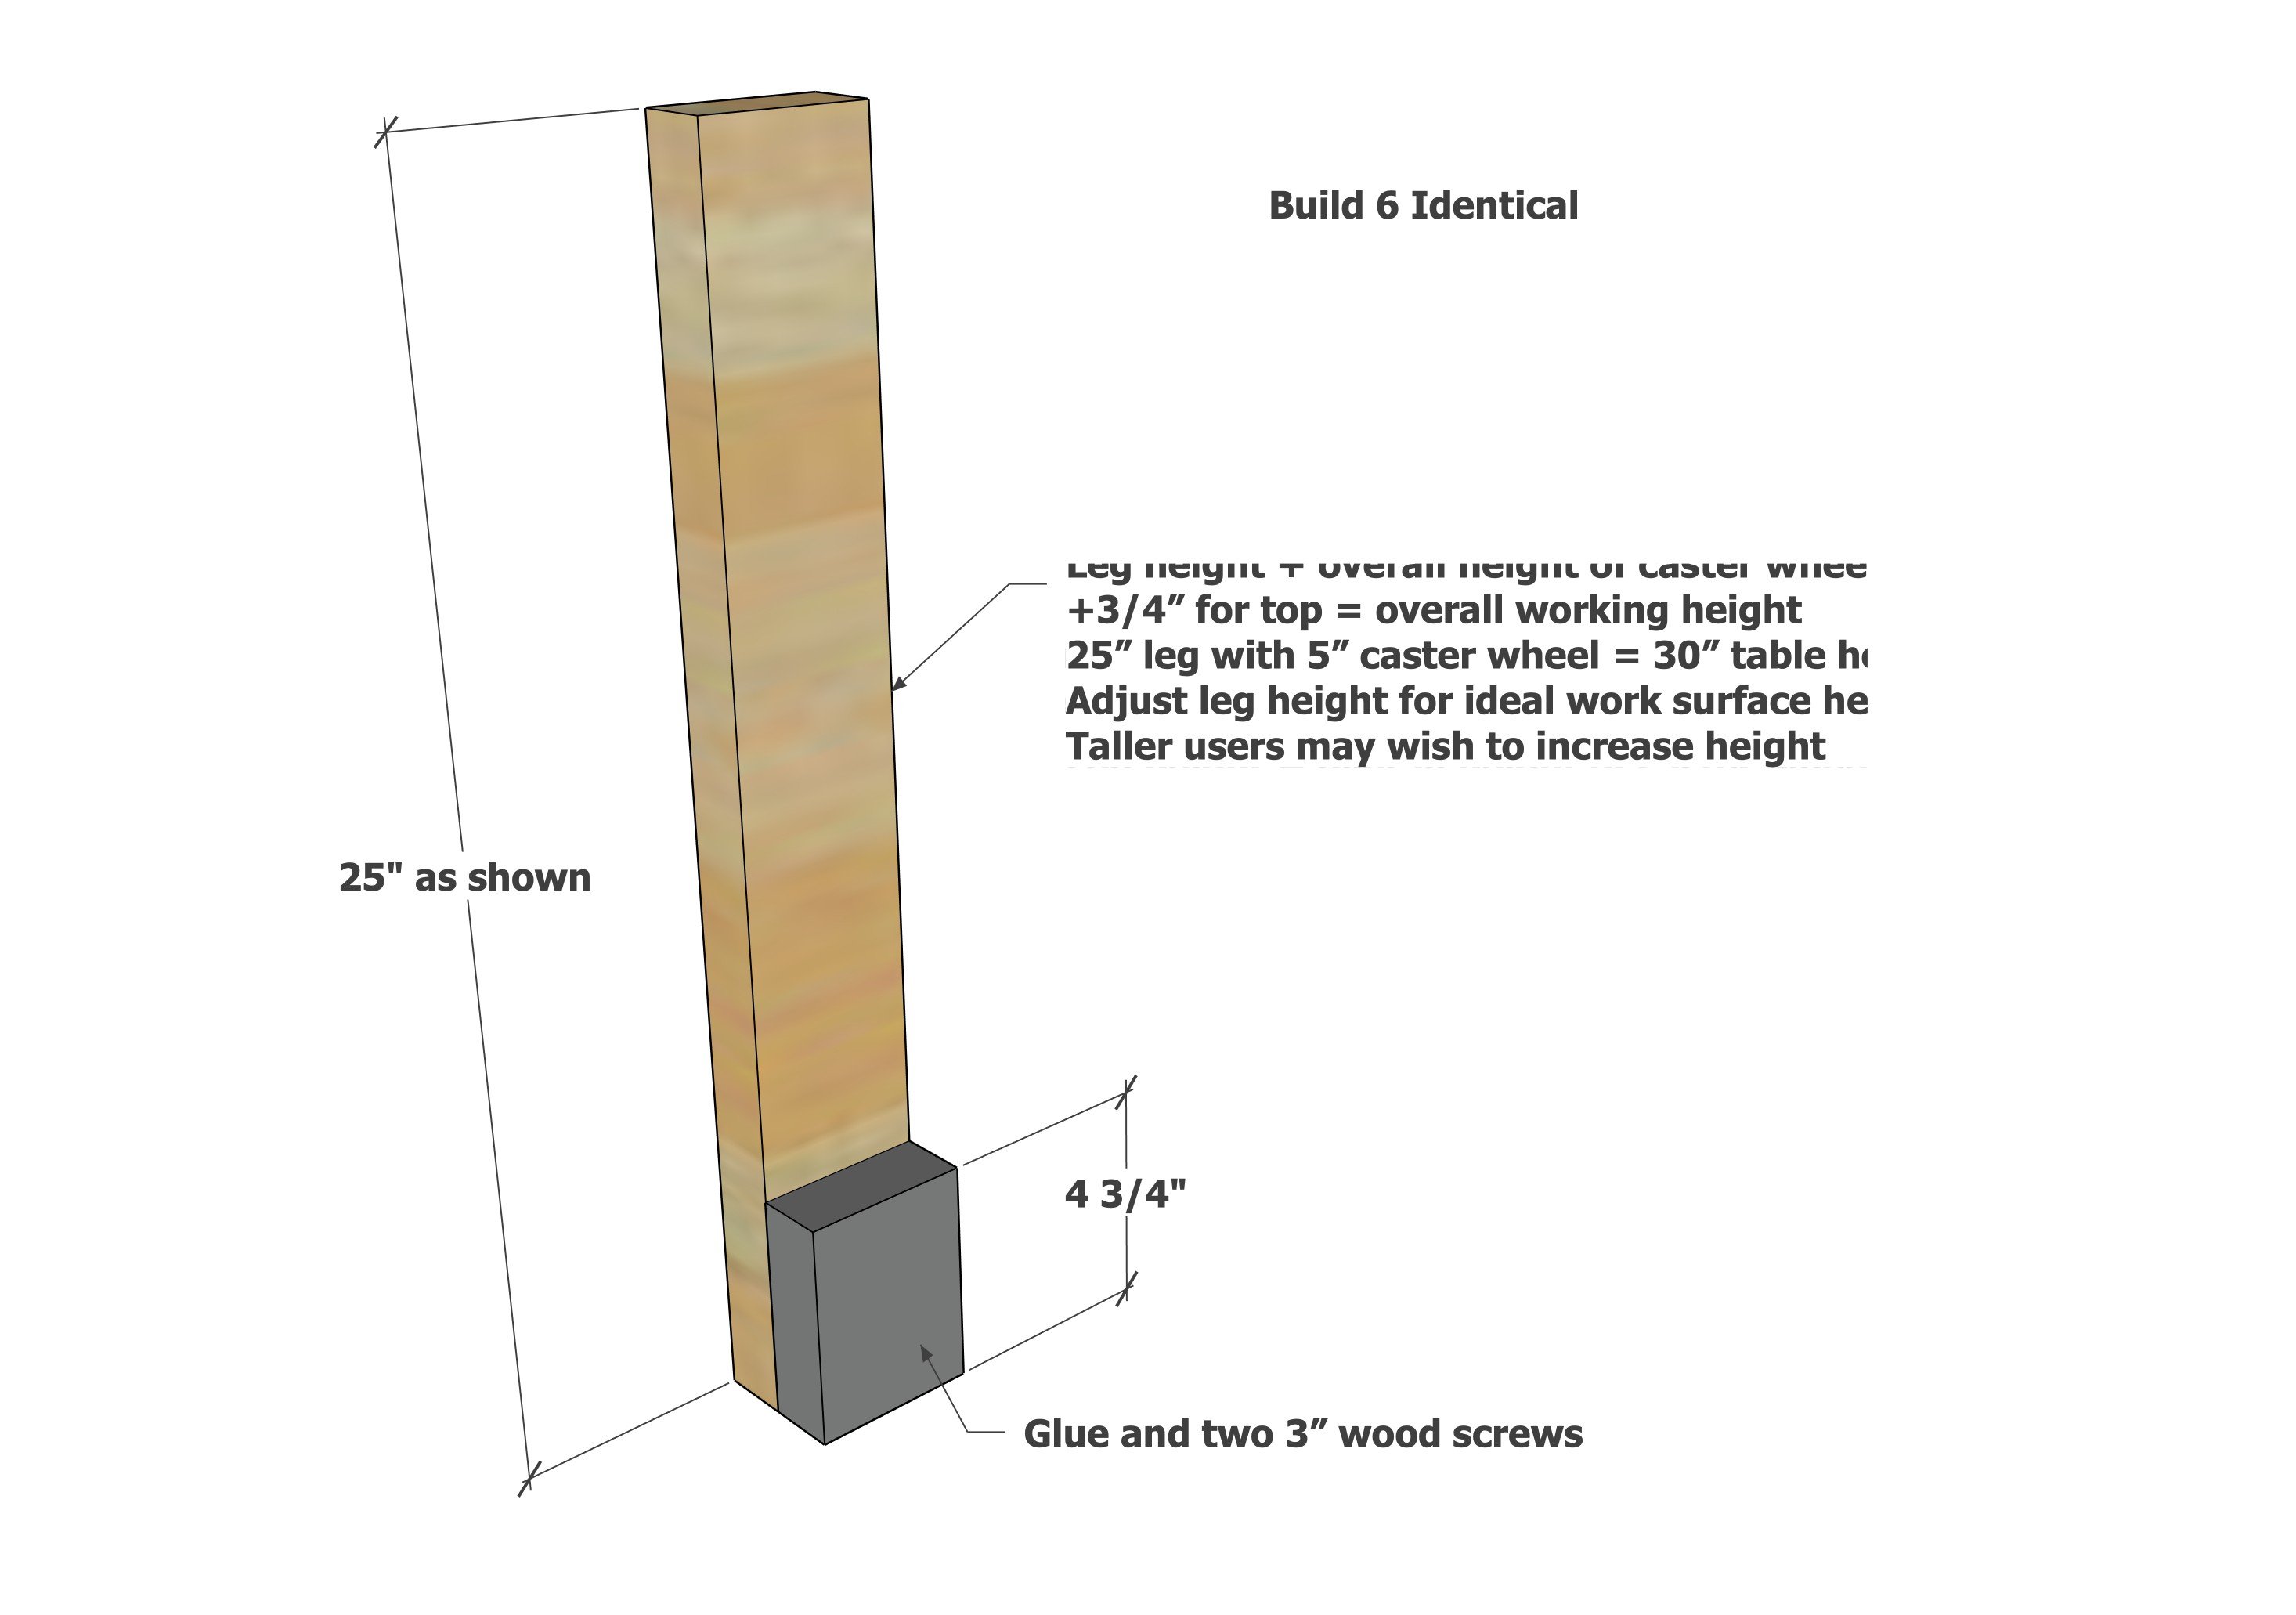
To all the legs, attach the 3-1/2" 2x4 blocking to the bottom with two 2-1/2" screws.
OPTION: To increase the shelf clearance height, the small 2x4 pieces can be omitted entirely, with the bottom shelf placed at the bottom of the leg.
Step 2
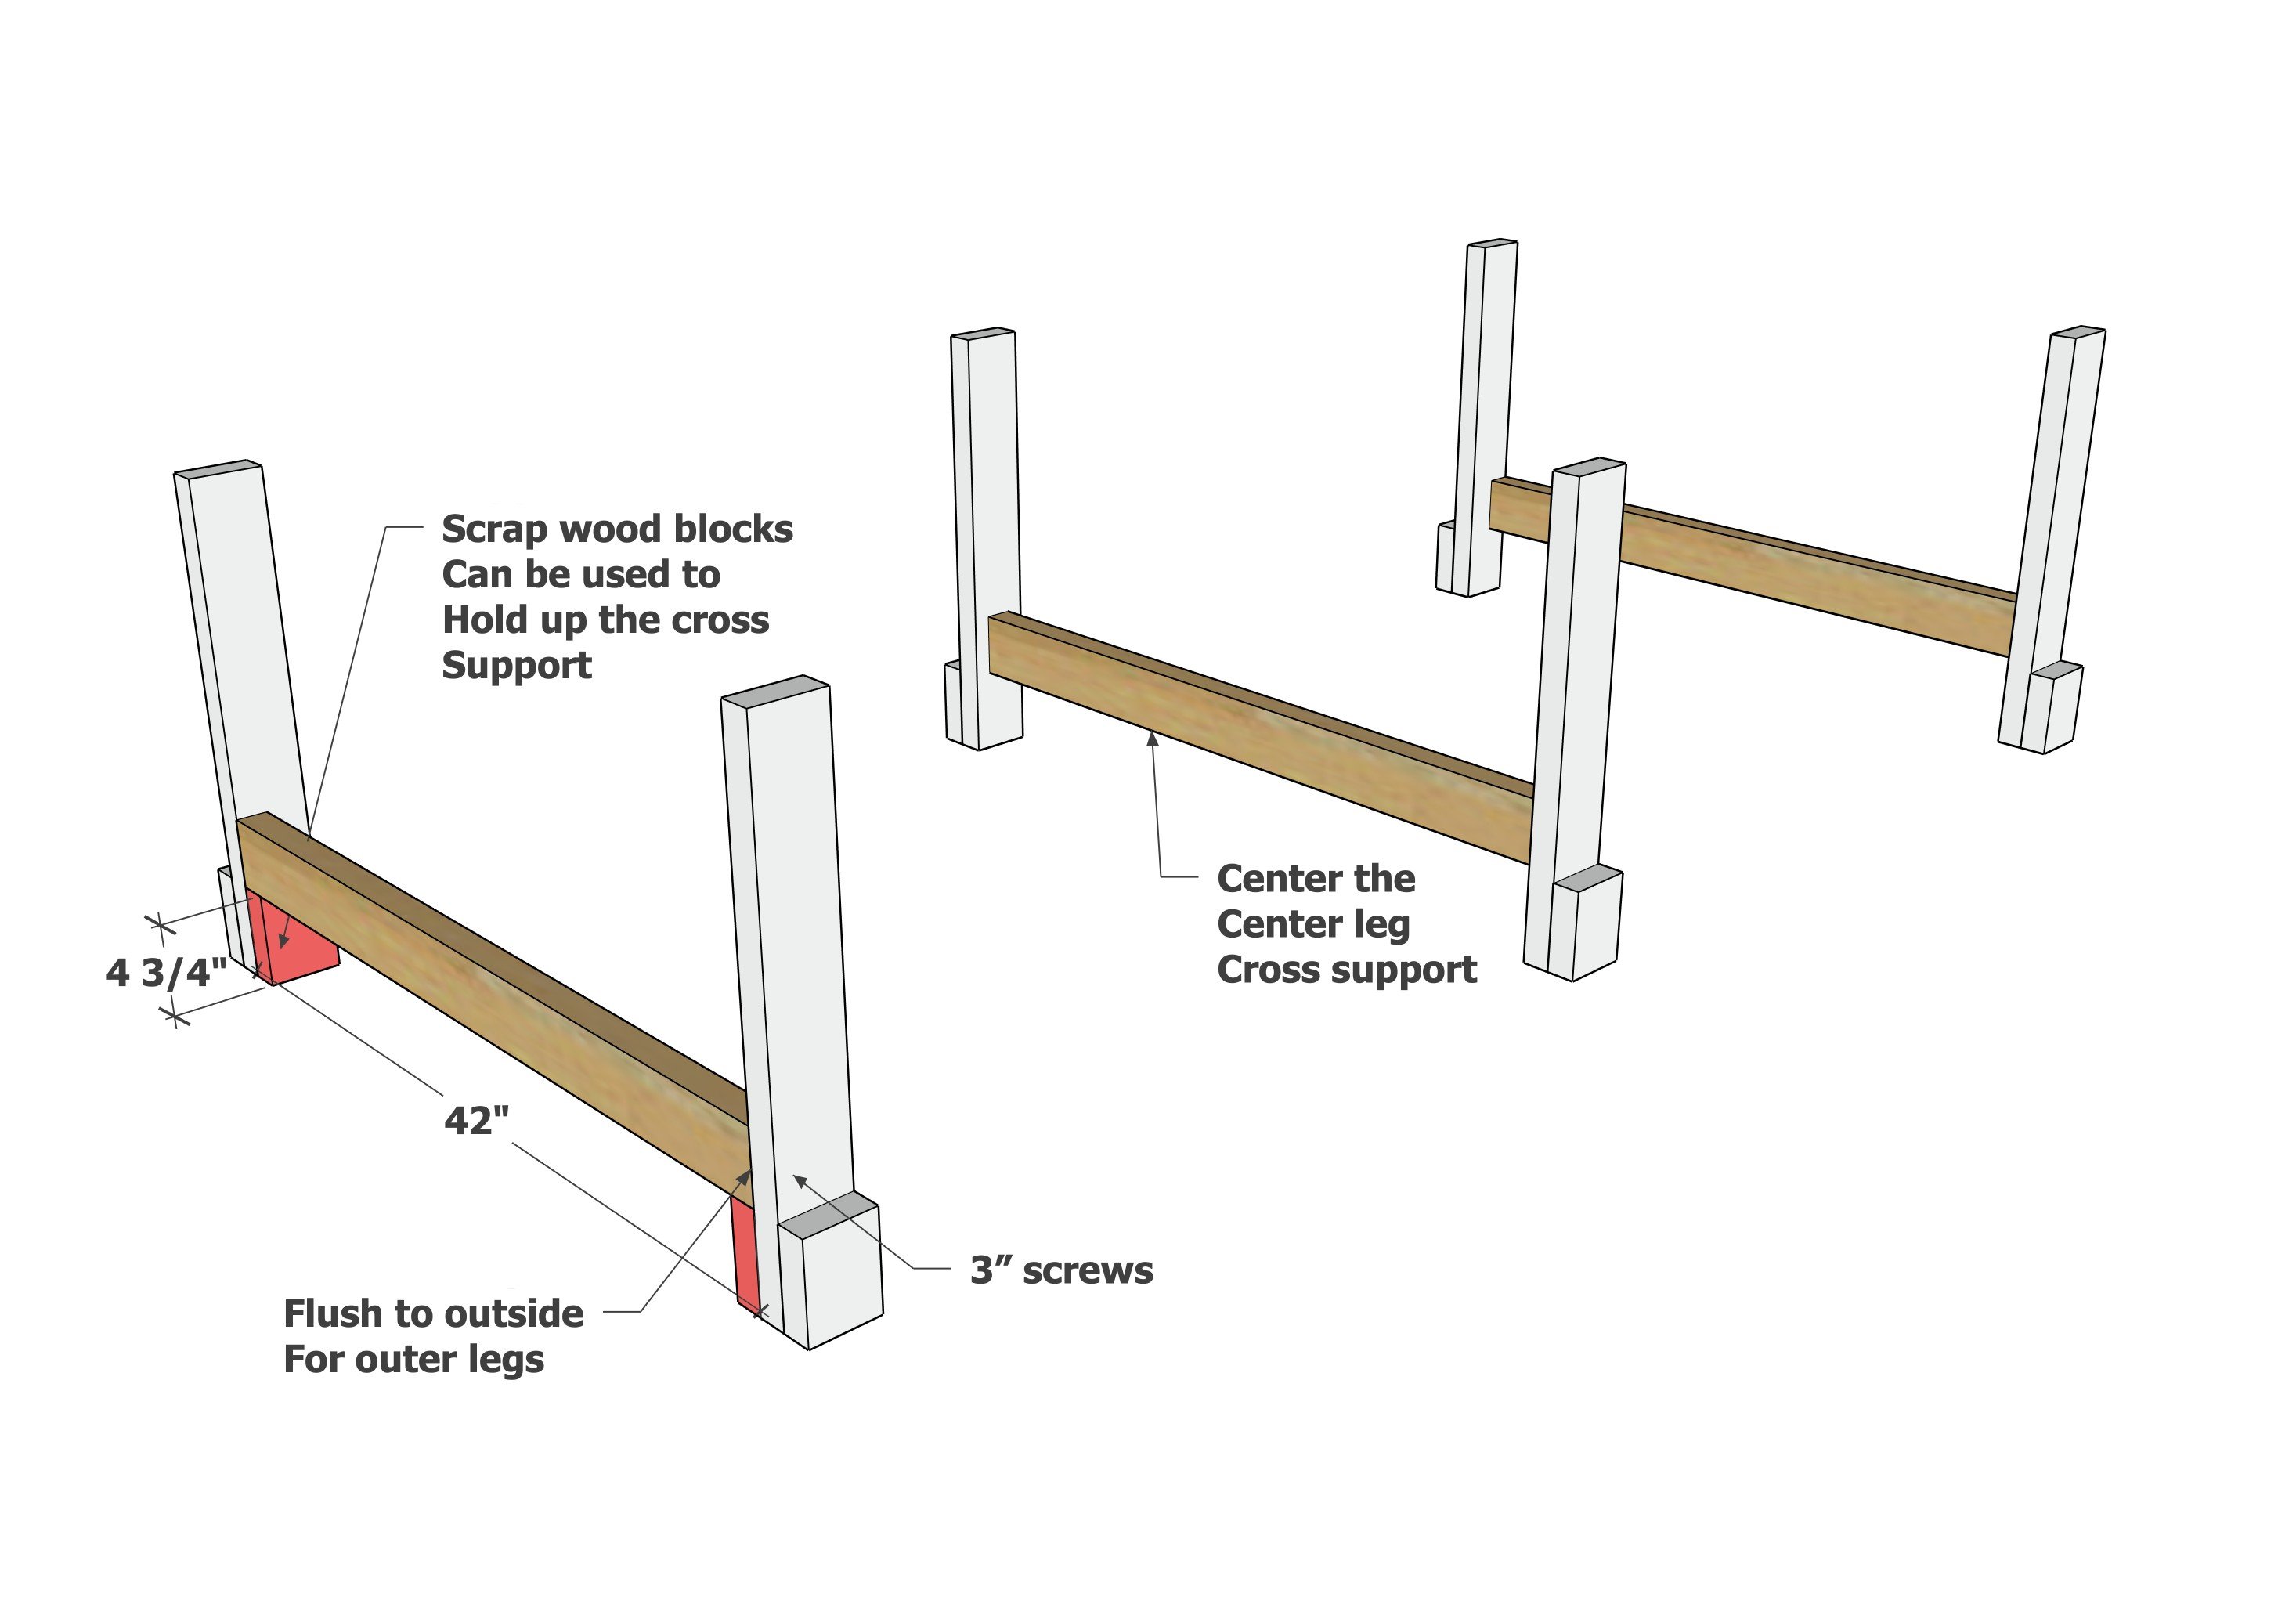
Attach the 2x4 cross supports as shown, two screws per joint.
Step 3
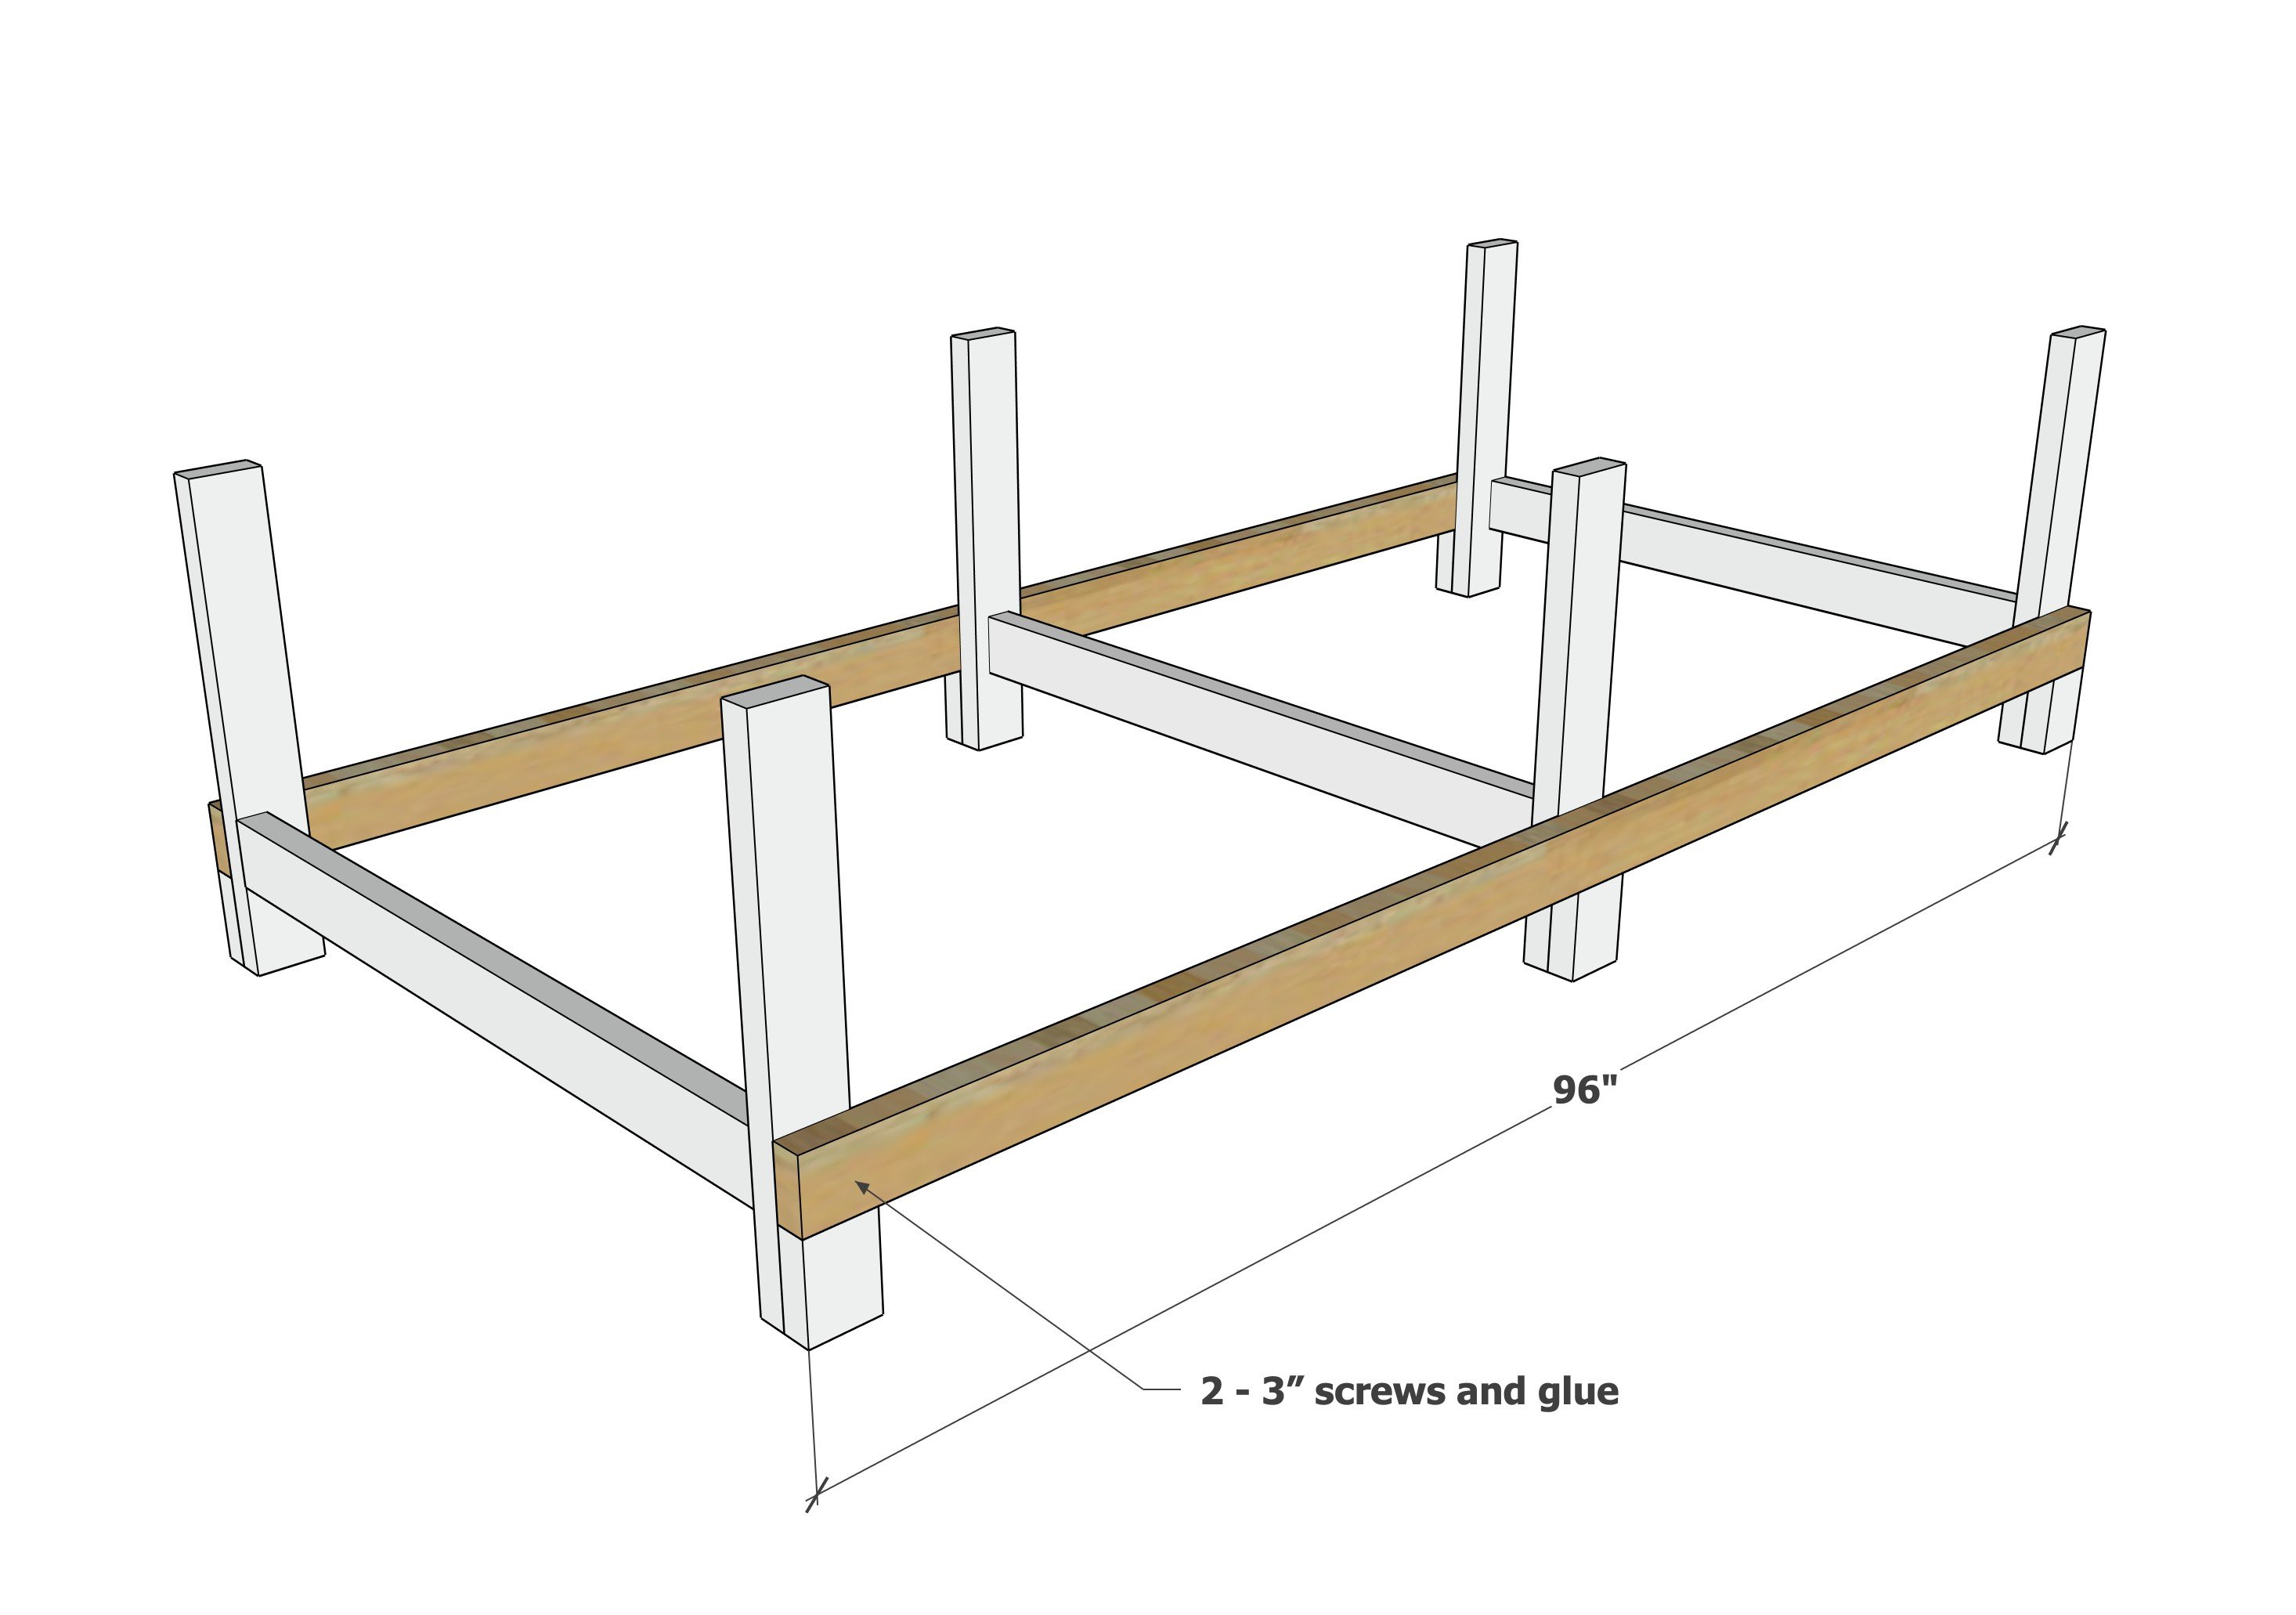
Attach the long 2x4s to the sides. Center the center leg set.
NOTE: Check the legs for level while attaching, and check that the legs are square to the 2x4s at 96" long.
Step 4
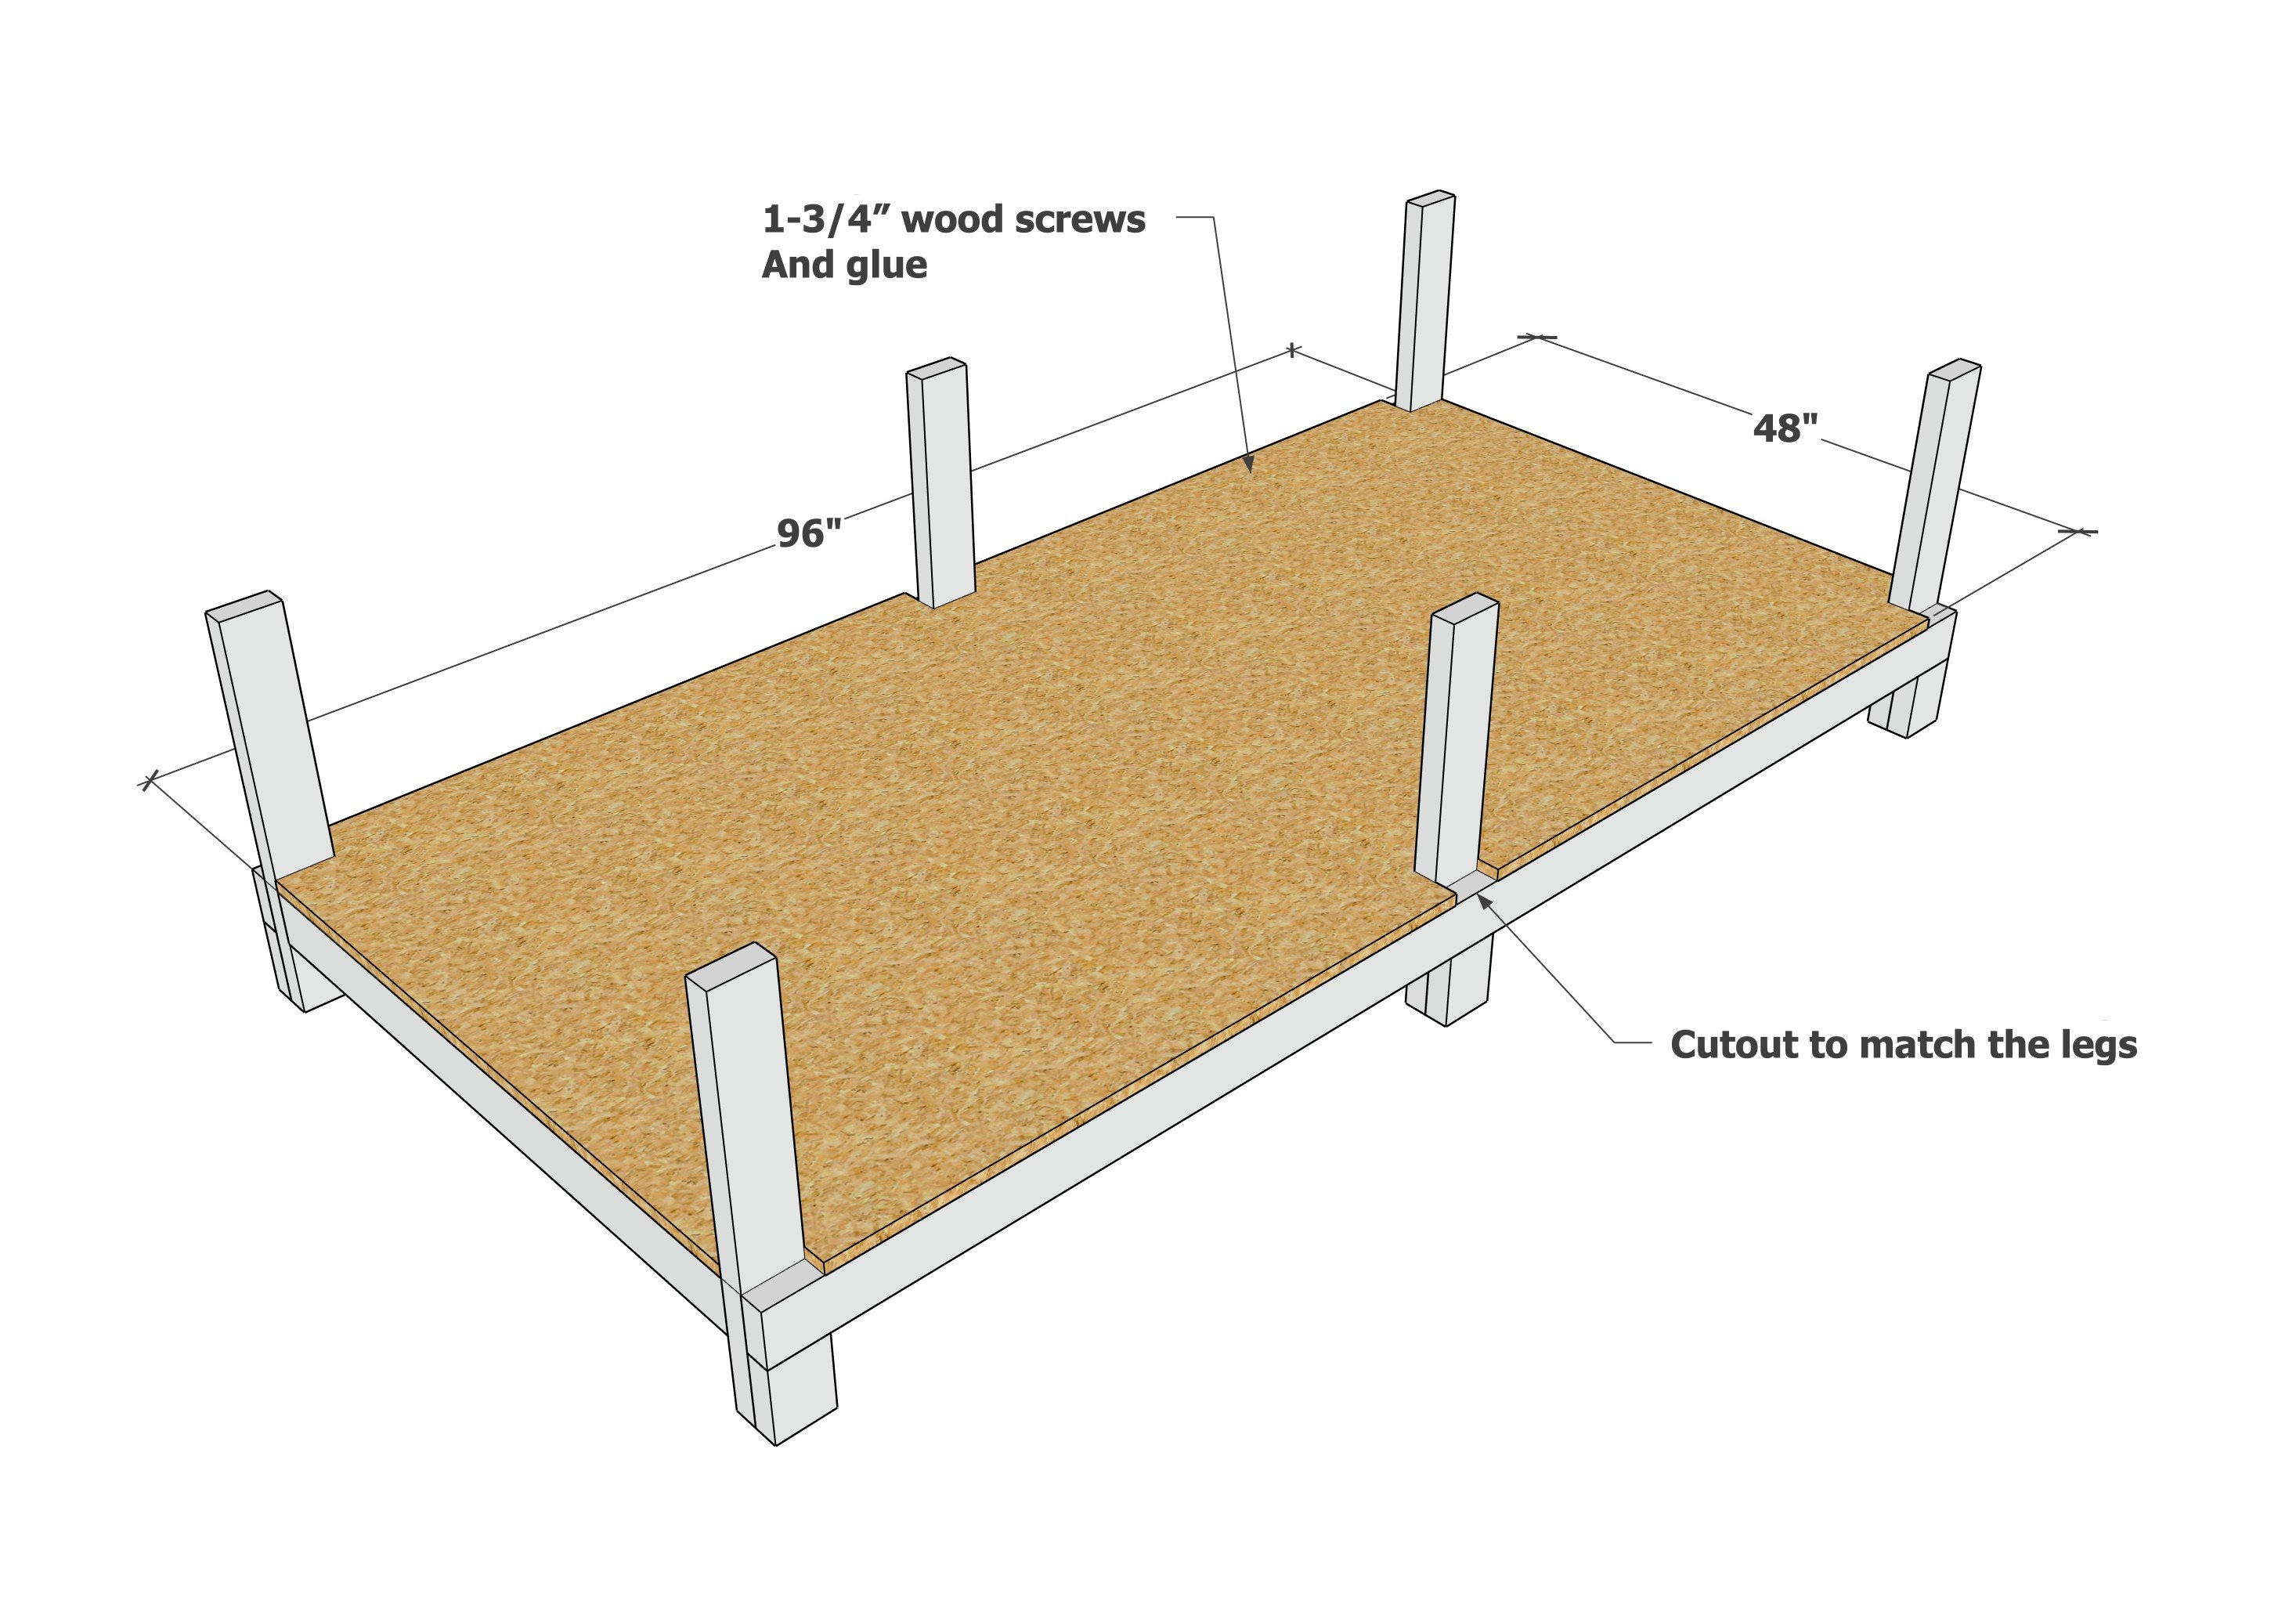
Cut the corners and the center pieces out of the plywood shelf piece, I cut about 1/8" big to allow the plywood to easily be moved into place.
Cutout sizes I used: 3-5/8" wide x 3-1/2" deep
Screw the plywood down to the framing with the 1-1/2" screws, using the plywood to square up the framing.
Step 5
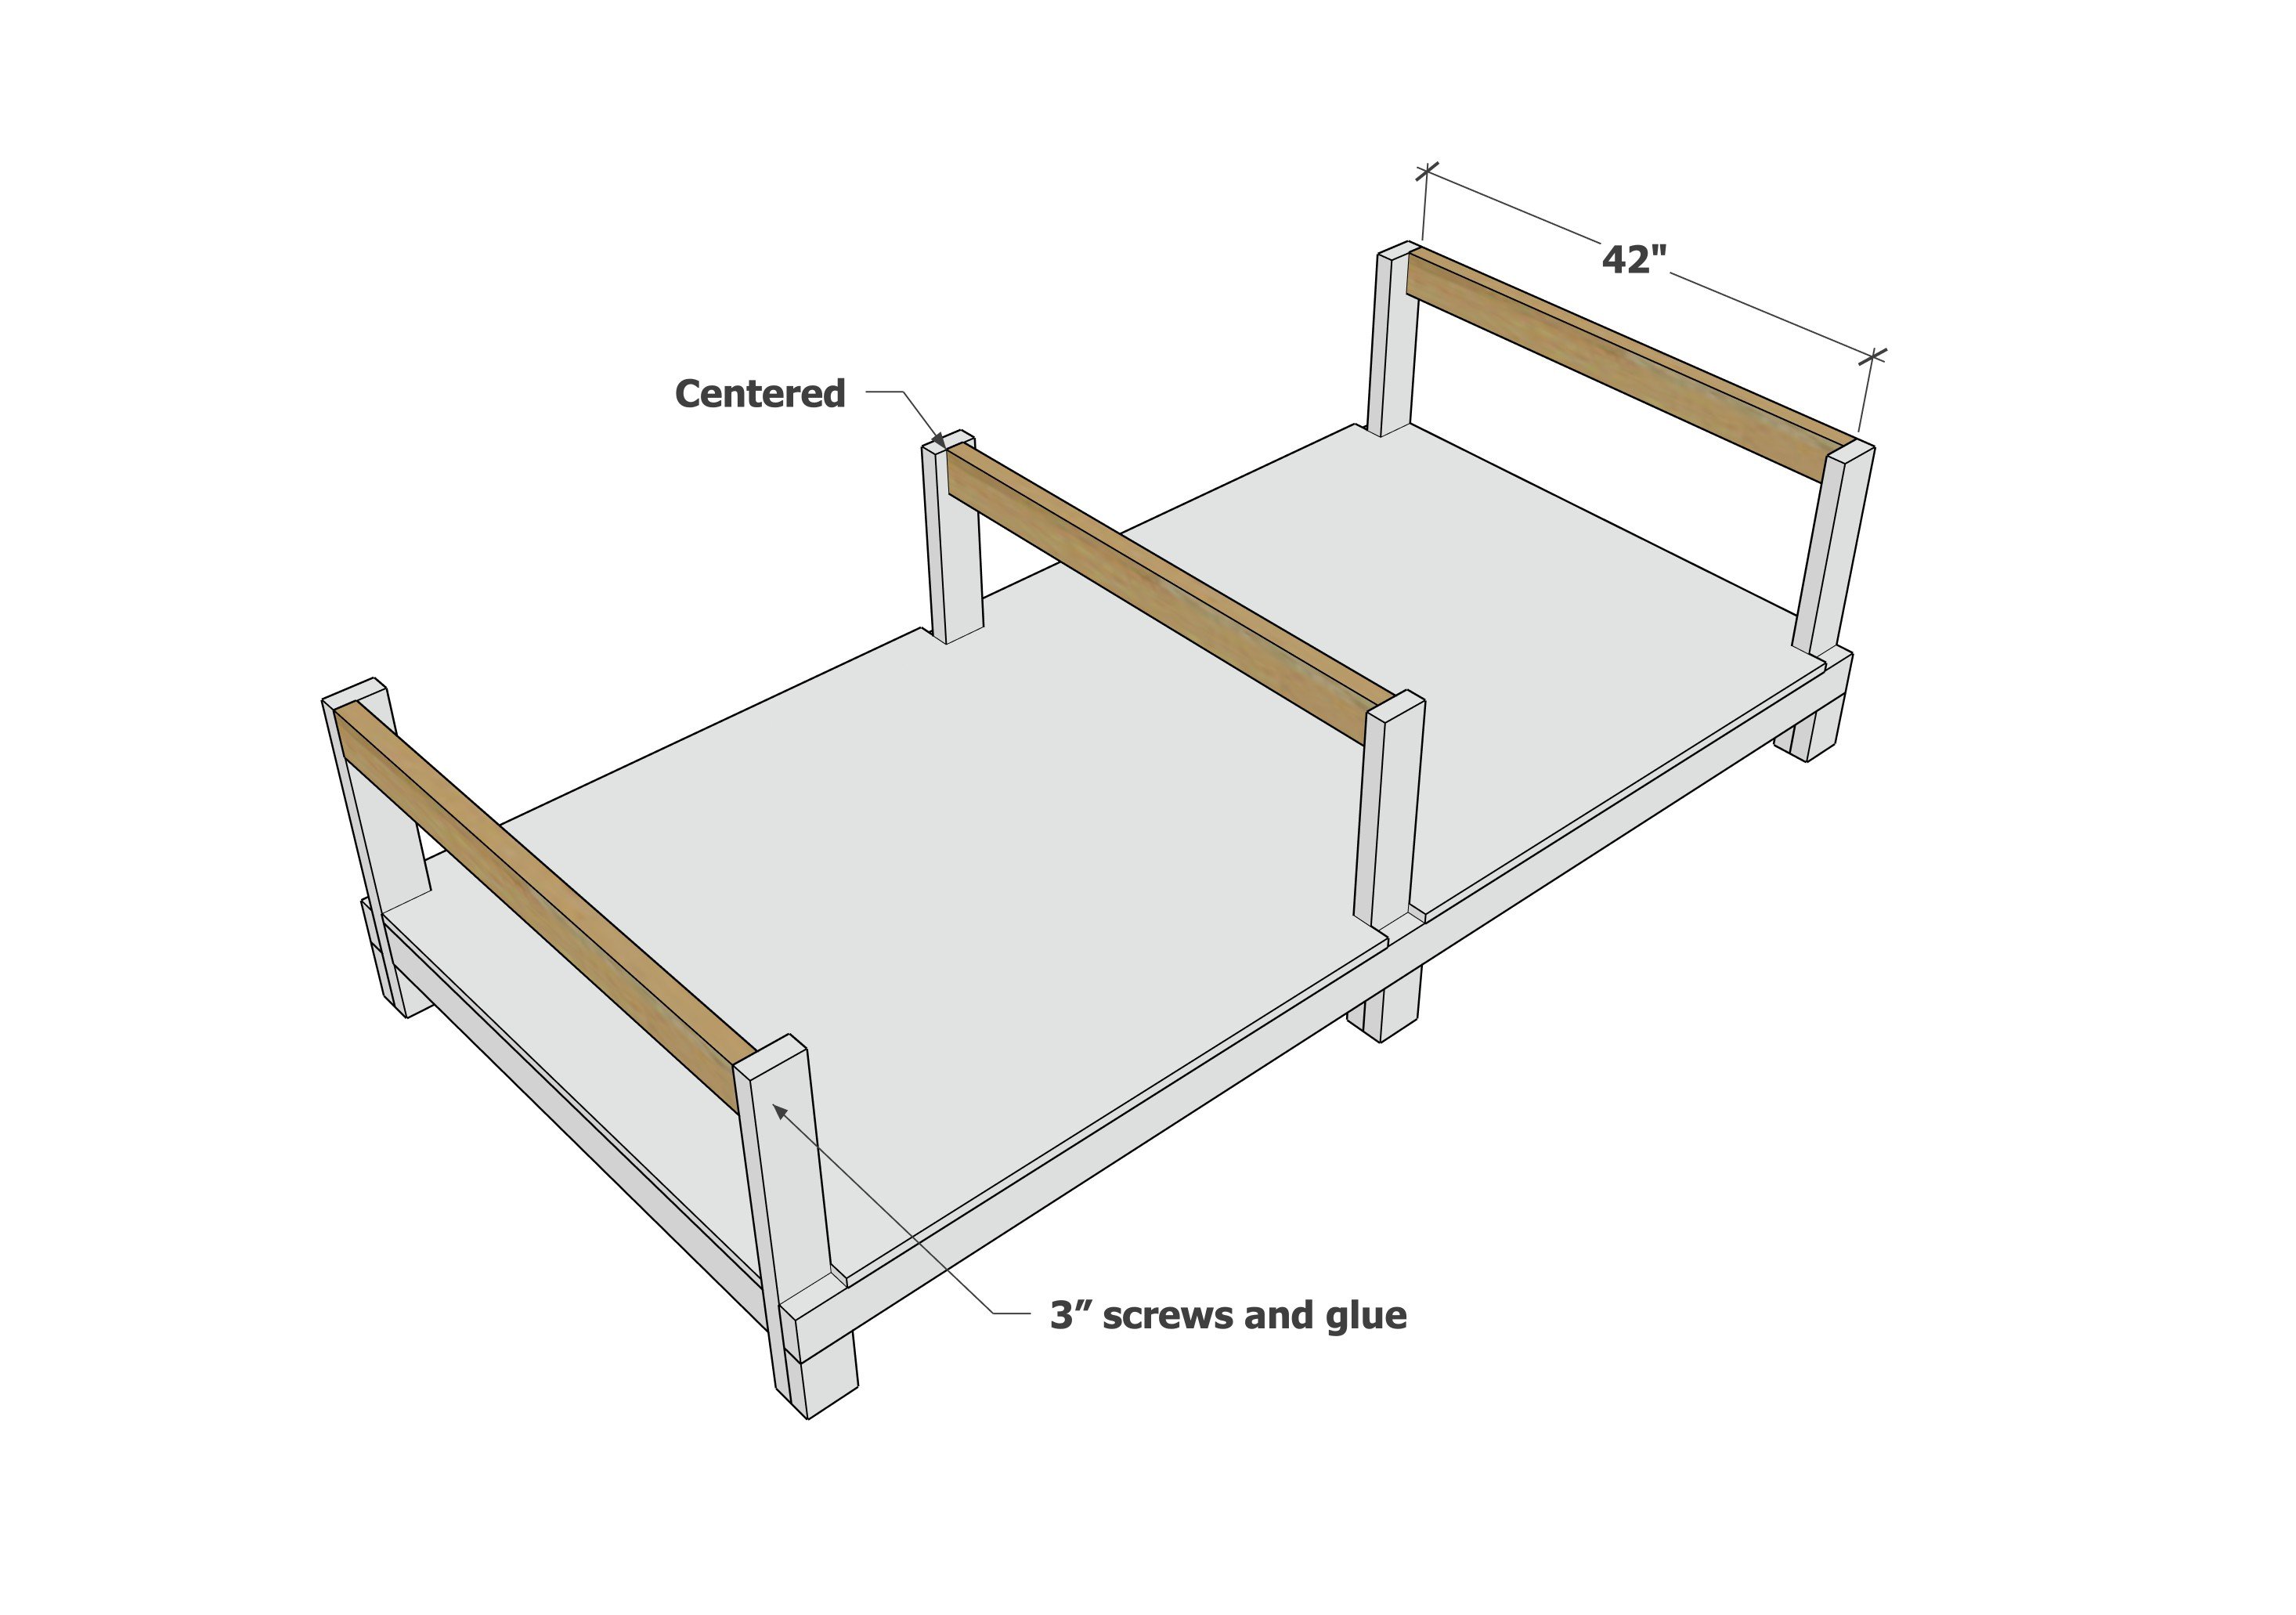
Attach the upper 2x4 pieces to the legs sets.
Step 6
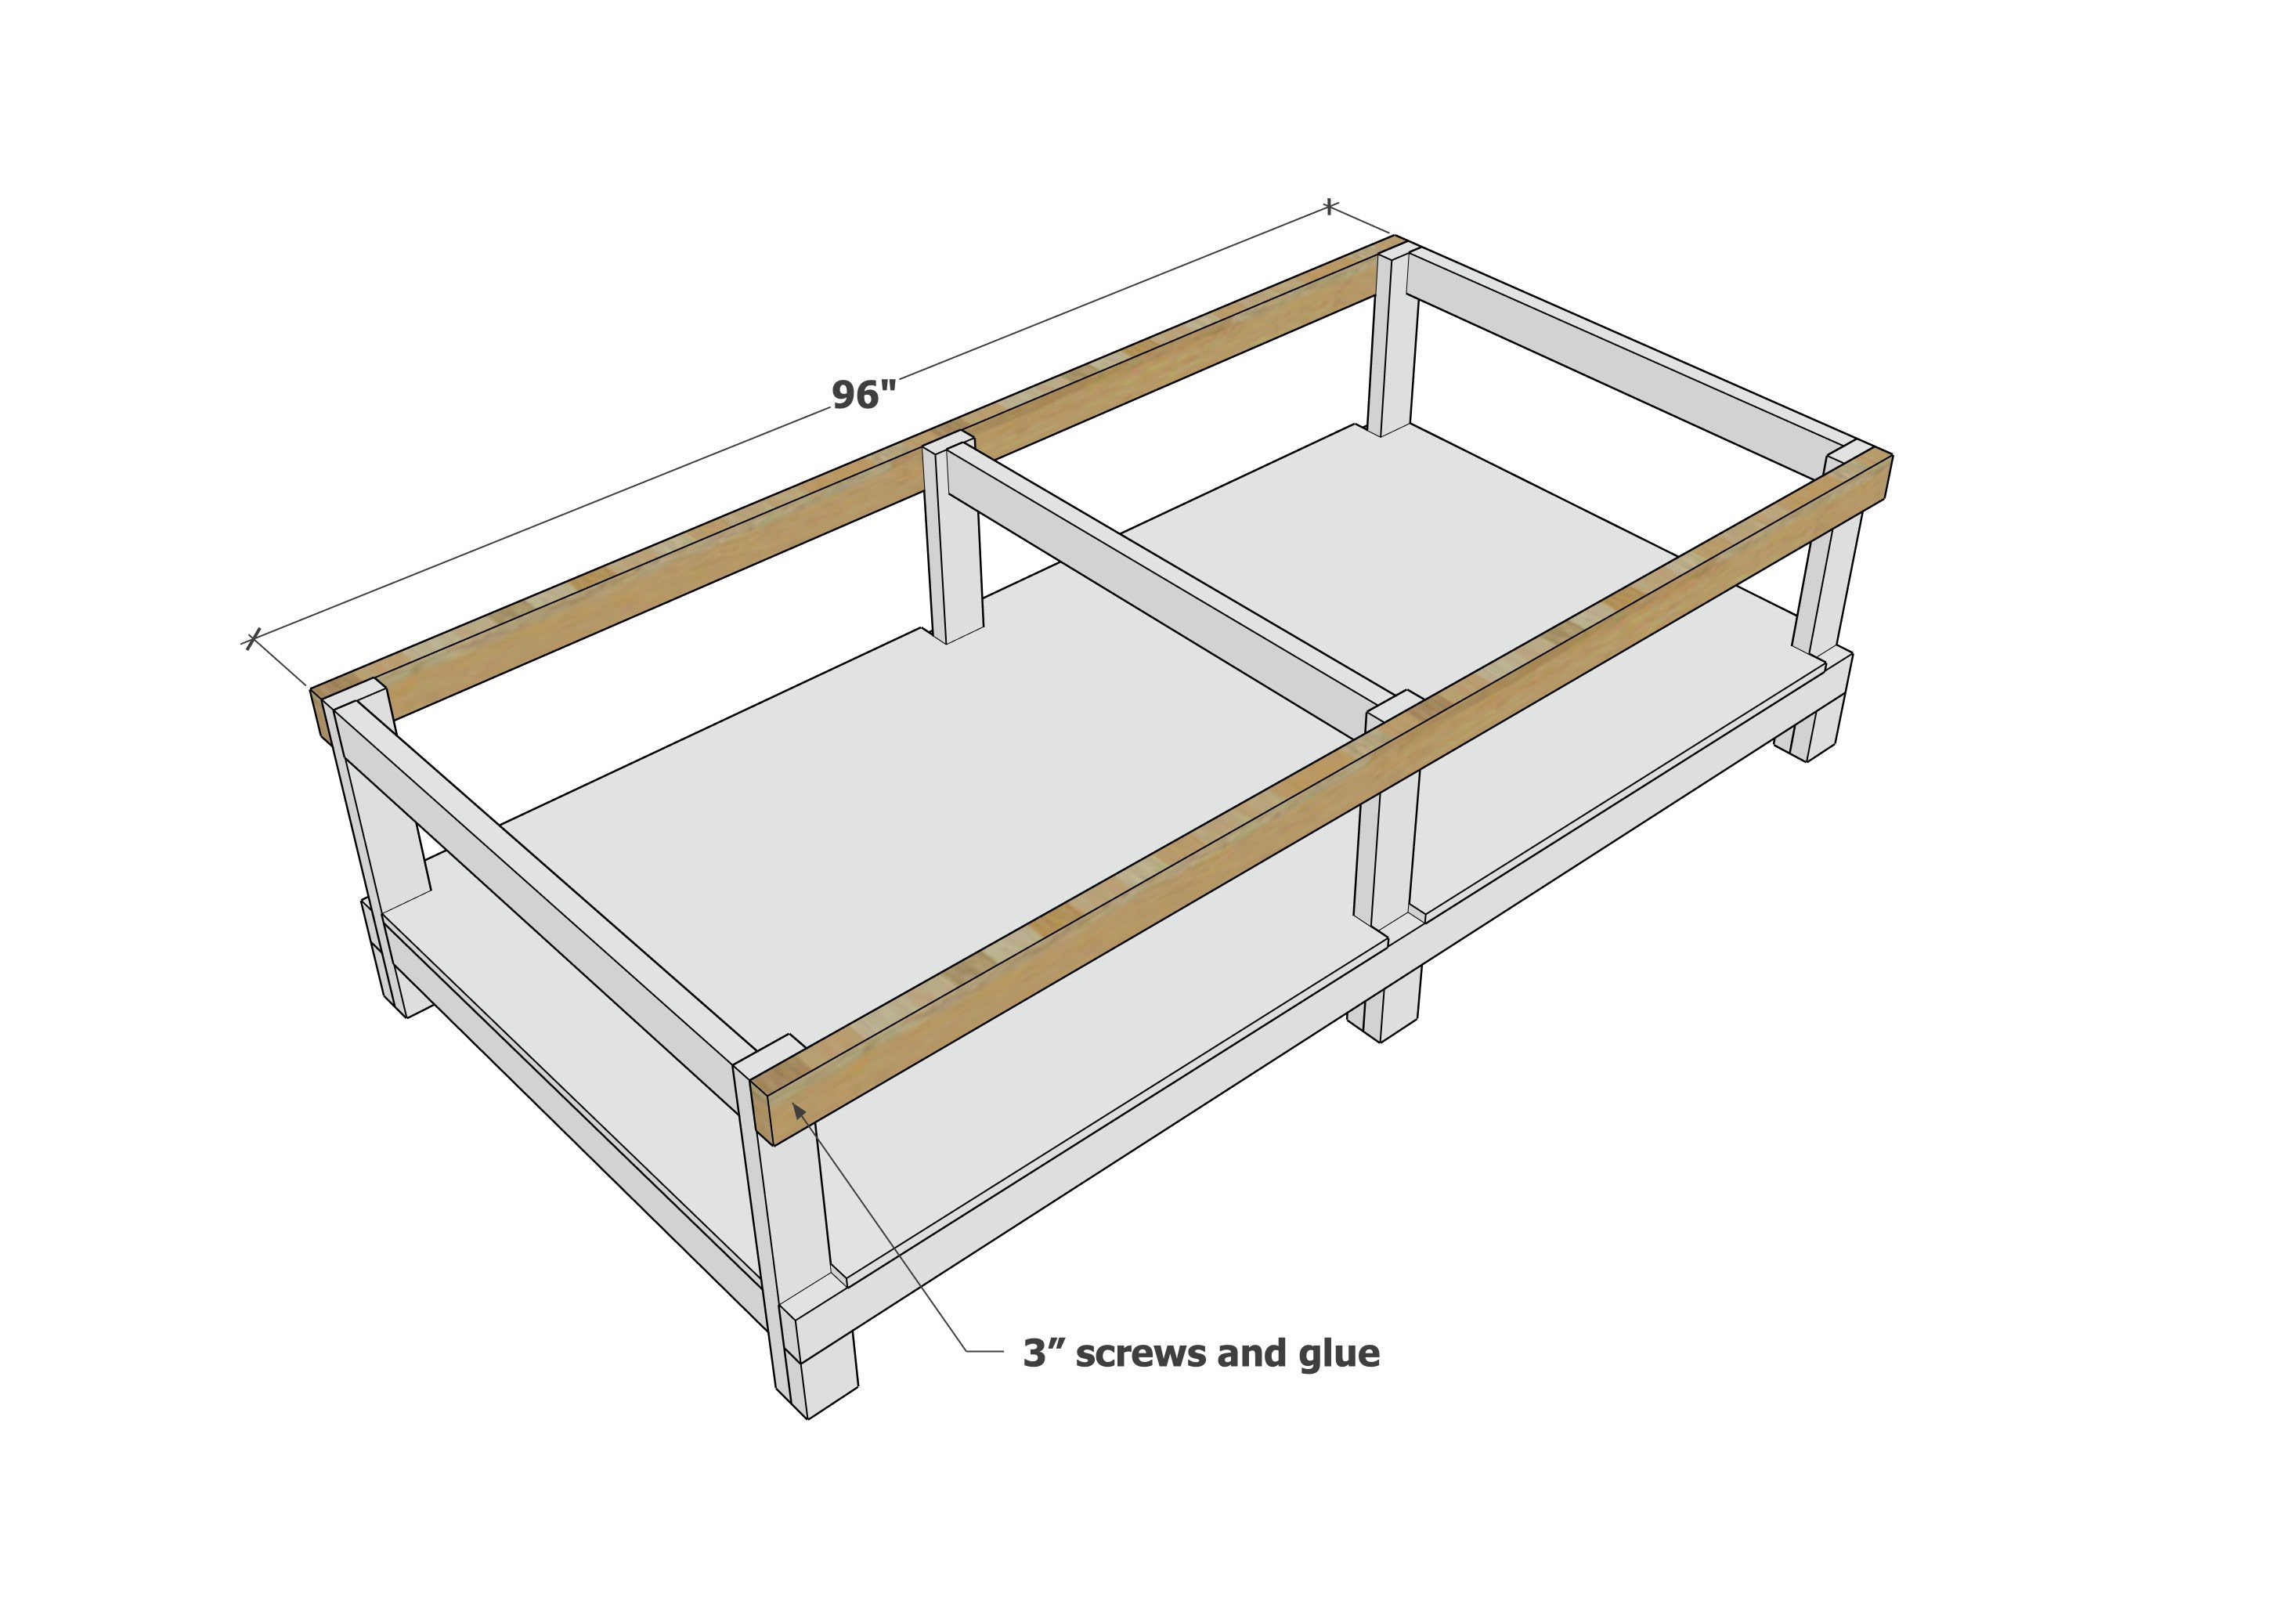
Clamp the upper full length 2x4 side pieces in place.
I did have trouble with one of my legs not being "square" and the 8' long 2x4 seemed to come up short. I simply loosened some screws, pulled the leg in, and then added the screws. It is important that the 2x4 at 8 feet long fits perfectly here, or your top MDF panel won't work out.
Step 7
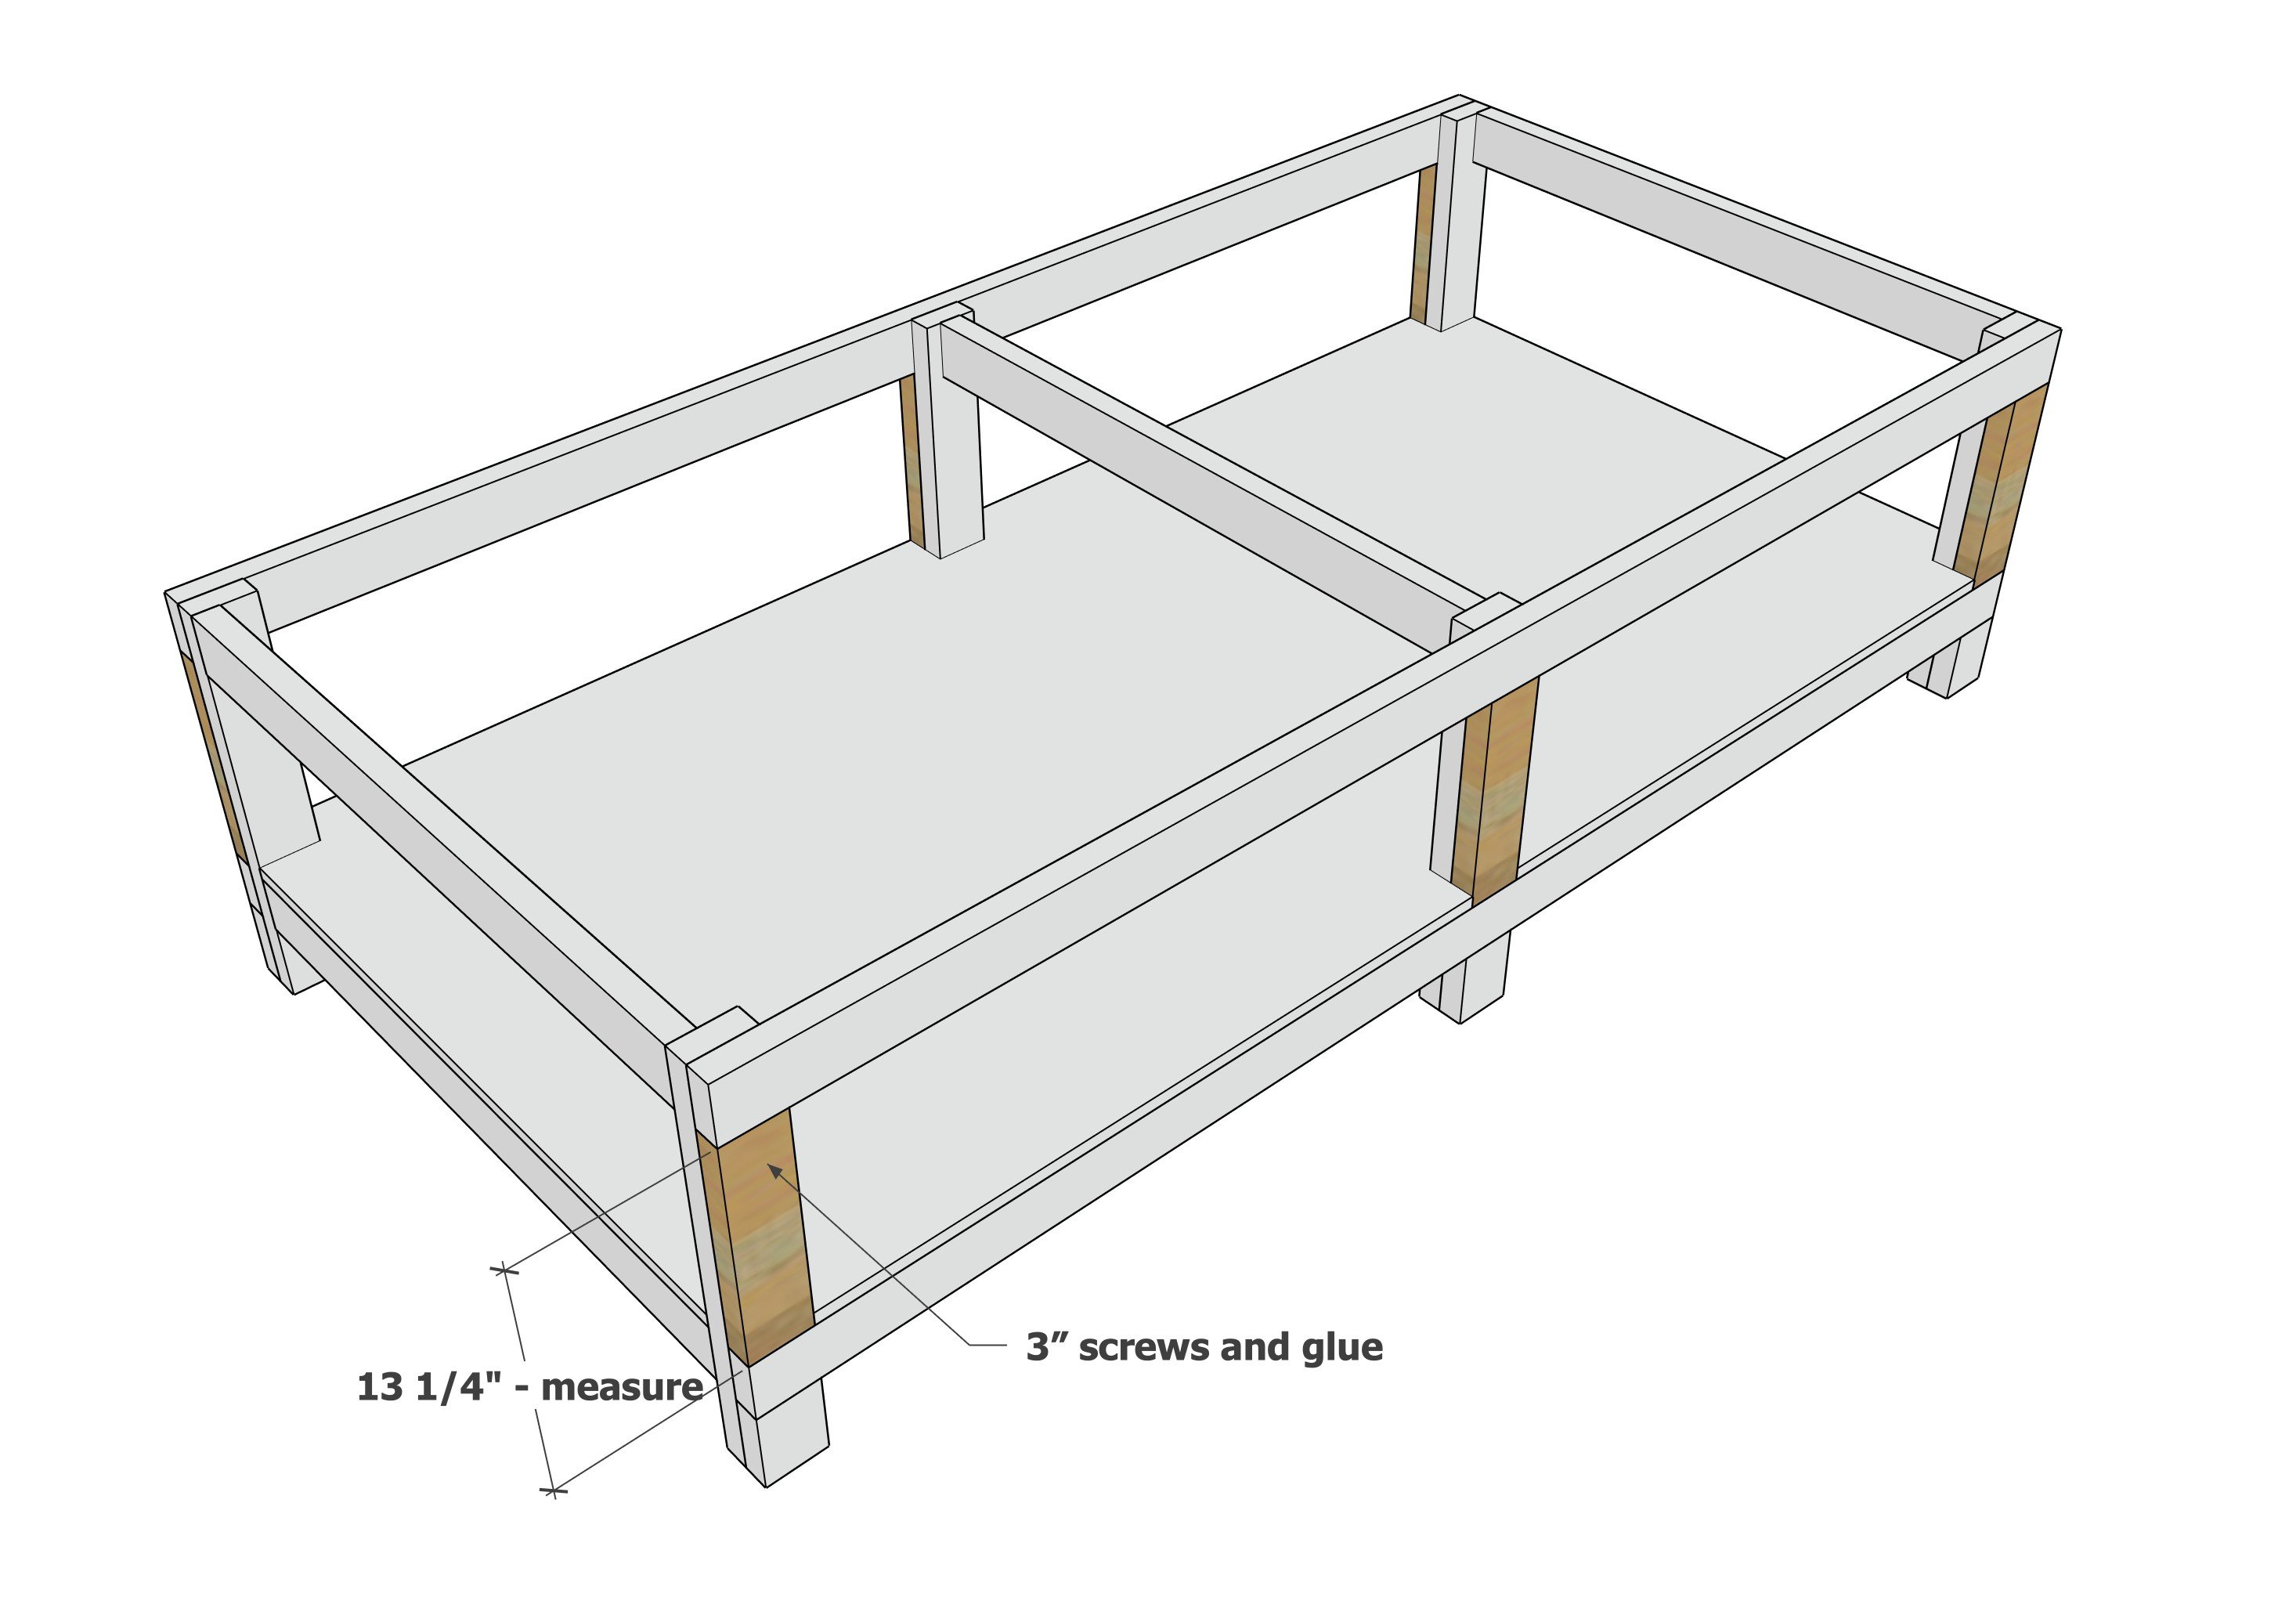
Fill in the leg pieces with 2x4s cut to fit. I screwed from the inside to minimize screws showing.
Step 8
Place the Melamine panel on top. My melamine panel was actually 97" x 49" - so I ave about a 1/2" overhang on all sides. The easiest method to attach is with a few 1-1/2" screws through the top. You can also attach from underneath, but will need to add some cleats.
NOTE: We haven't yet attached our top because I plan to add a clamping track to the top. I want to try attaching with silicone, similar to how a bath vanity top is attached to a bath cabinet.