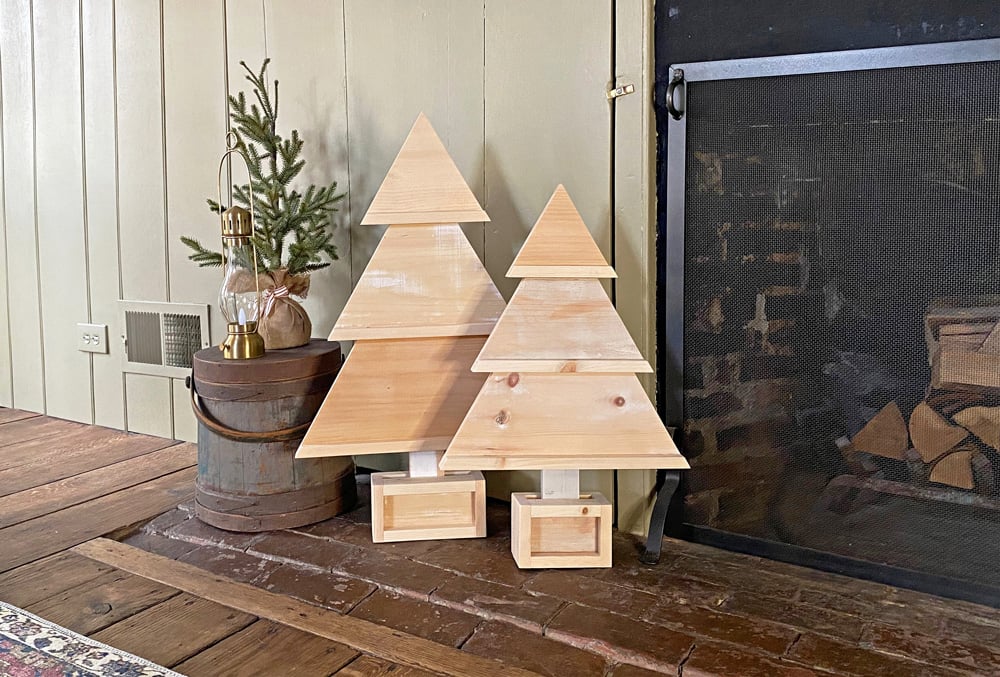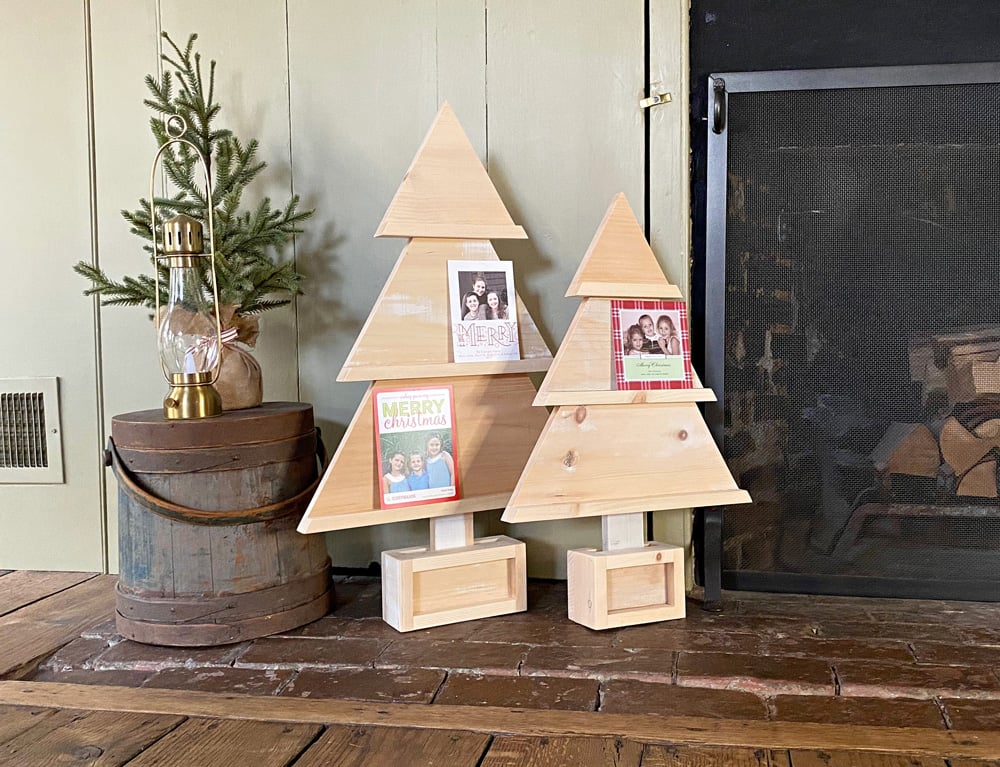
Here's a gorgeous way to display Christmas Cards - and it can even double as your Christmas tree for small spaces! Freestanding - so just set out and display your cards! Build your own Christmas Tree Card Holder with our free DIY plans.
Built by Jaime Costiglio for Handbuilt Holiday 2021.
Pin For Later!
Preparation
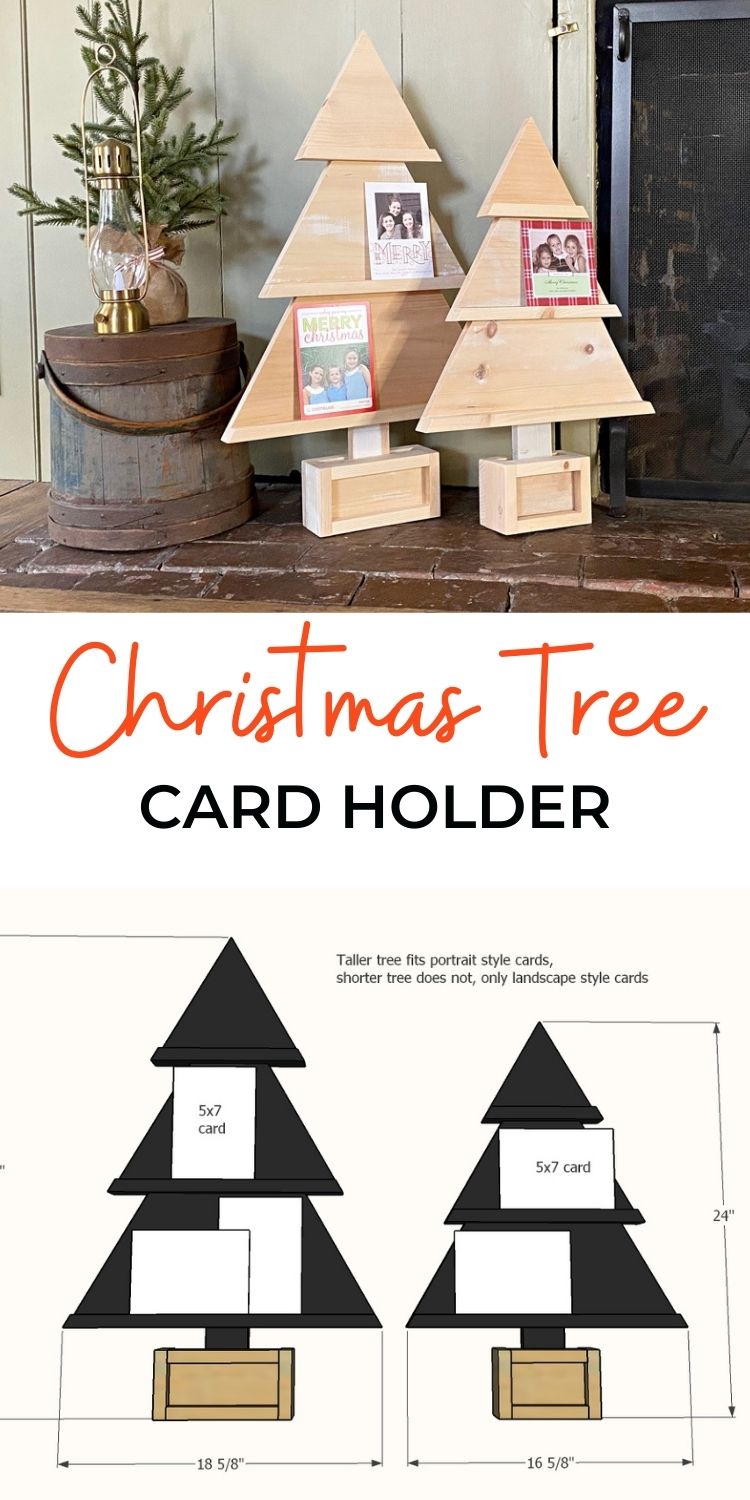
Shorter Tree Shopping List (WON'T FIT PORTRAIT STYLE CARDS)
- 1 - 1x6 @ 30" long
- 1 - 1x2 @ 4 feet long
- 1 - 1x3 @ 3 feet long
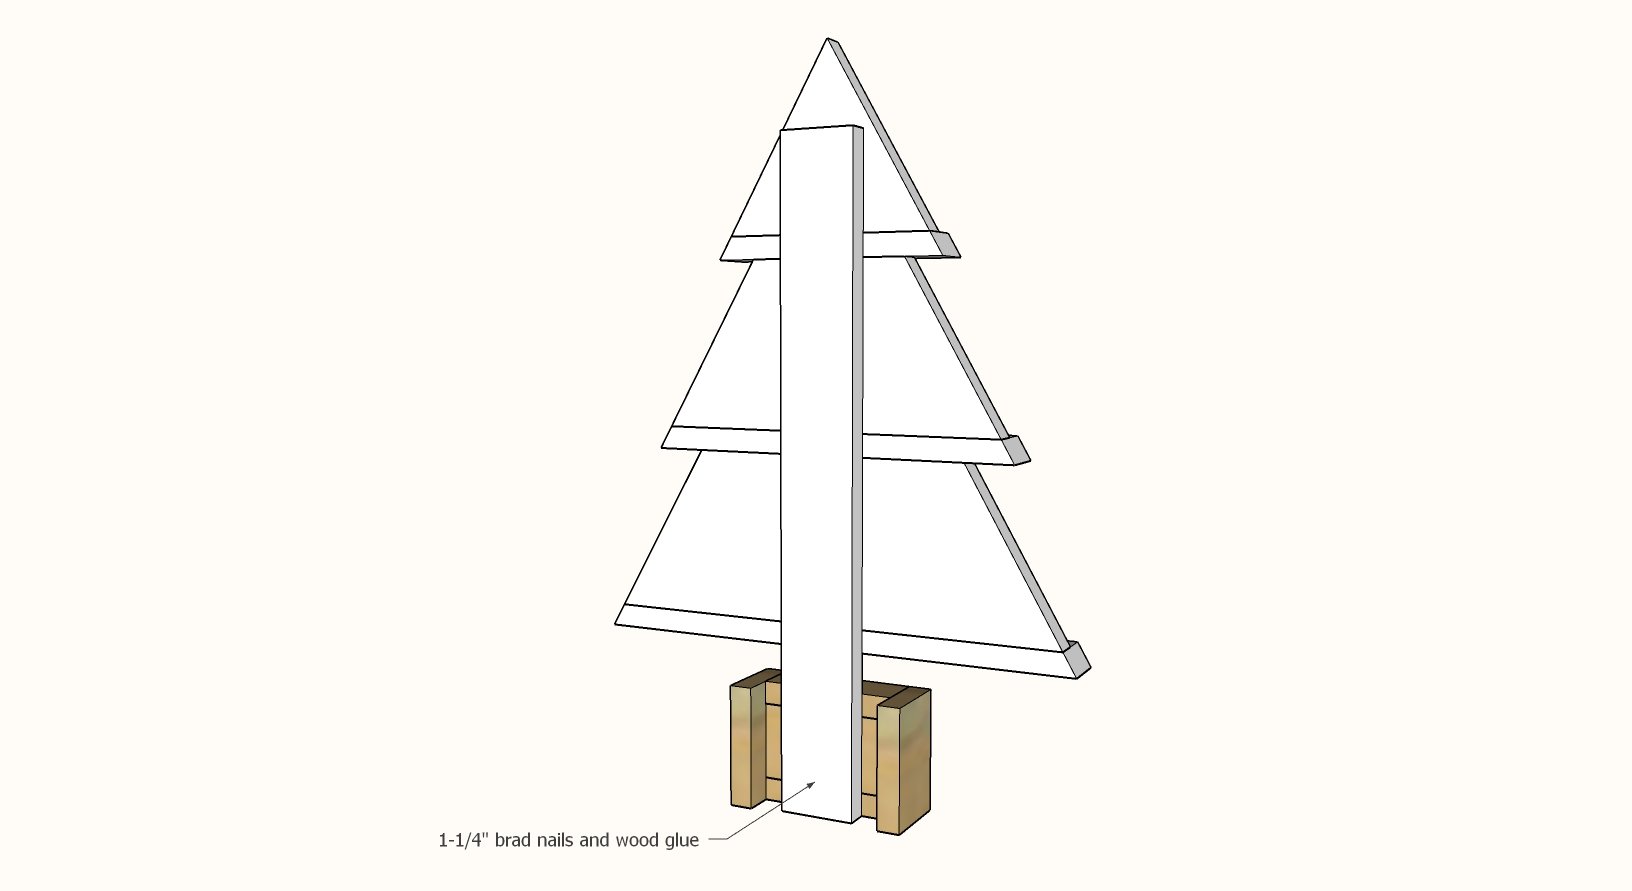
- 1-1/4" brad nails and wood glue
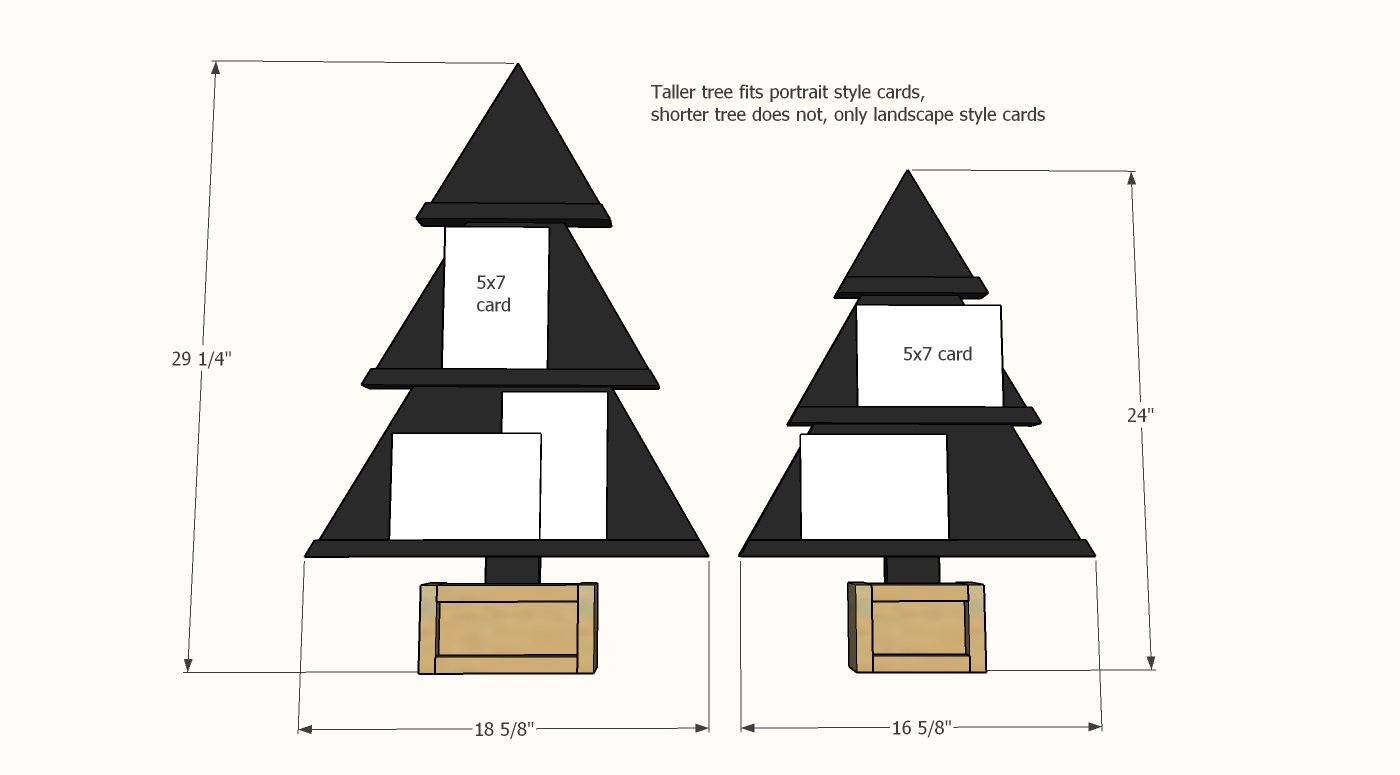
Taller Tree Shopping List (WILL FIT PORTRAIT STYLE CARDS)
- 1 - 1x8 @ 36" long
- 1 - 1x2 @ 5 feet long
- 1 - 1x3 @ 3 feet long
- 1-1/4" brad nails and wood glue
Shorter Tree - Ledge height up to 5-1/2" (WON'T fit cards in portrait format)
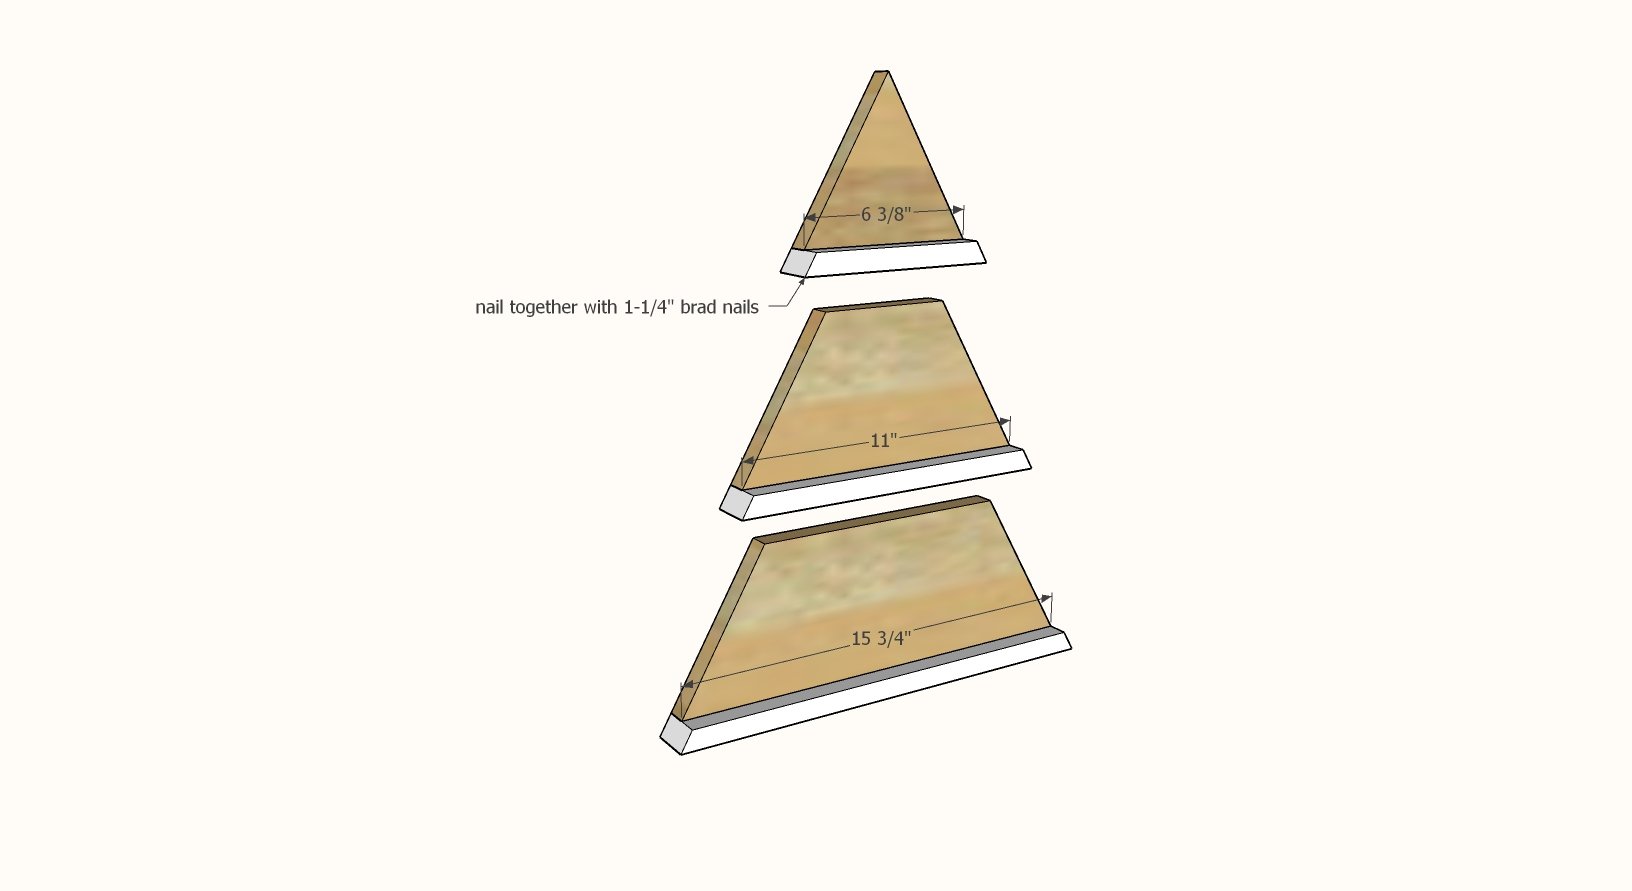
Tree branch parts
- 1 - 1x6 @ 6-3/8" - long point to long point measurement, both ends cut at 30 degrees off square
- 1 - 1x2 @ 6-3/8" - short point to short point measurement, both ends beveled at 30 degrees off square
- 1 - 1x6 @ 11" - long point to long point measurement, both ends cut at 30 degrees off square
- 1 - 1x2 @ 11" - short point to short point measurement, both ends beveled at 30 degrees off square
- 1 - 1x6 @ 15-3/4" - long point to long point measurement, both ends cut at 30 degrees off square
- 1 - 1x2 @ 15-3/4" - short point to short point measurement, both ends beveled at 30 degrees off square
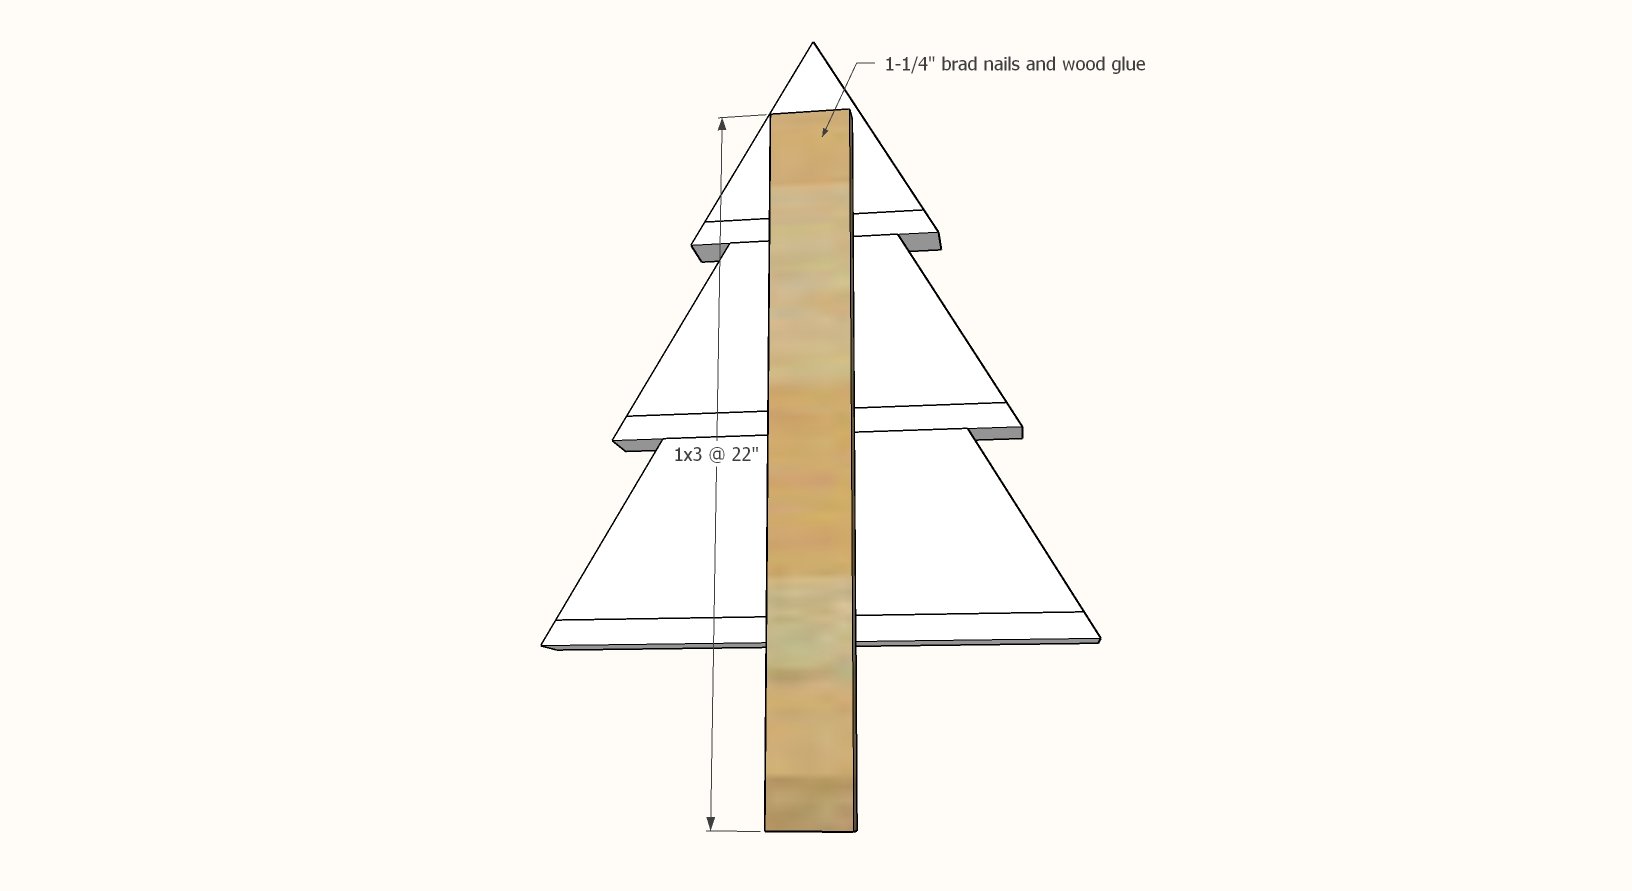
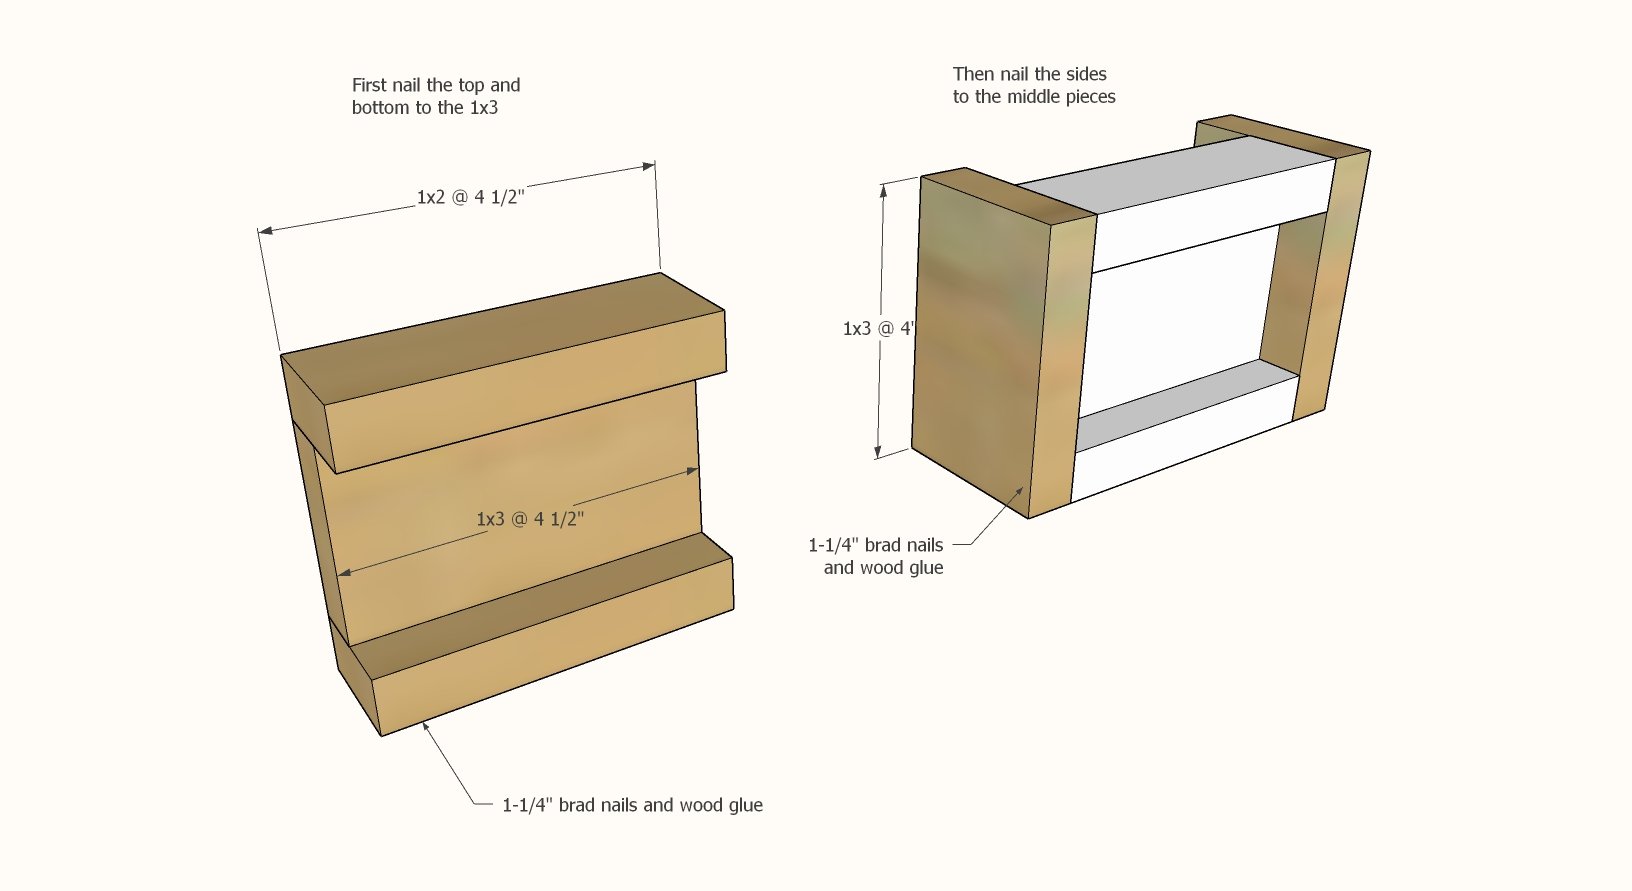
Tree trunk/base
- 1 - 1x3 @ 22"
- 1 - 1x3 @ 4-1/2"
- 2 - 1x2 @ 4-1/2"
- 2 - 1x3 @ 4"
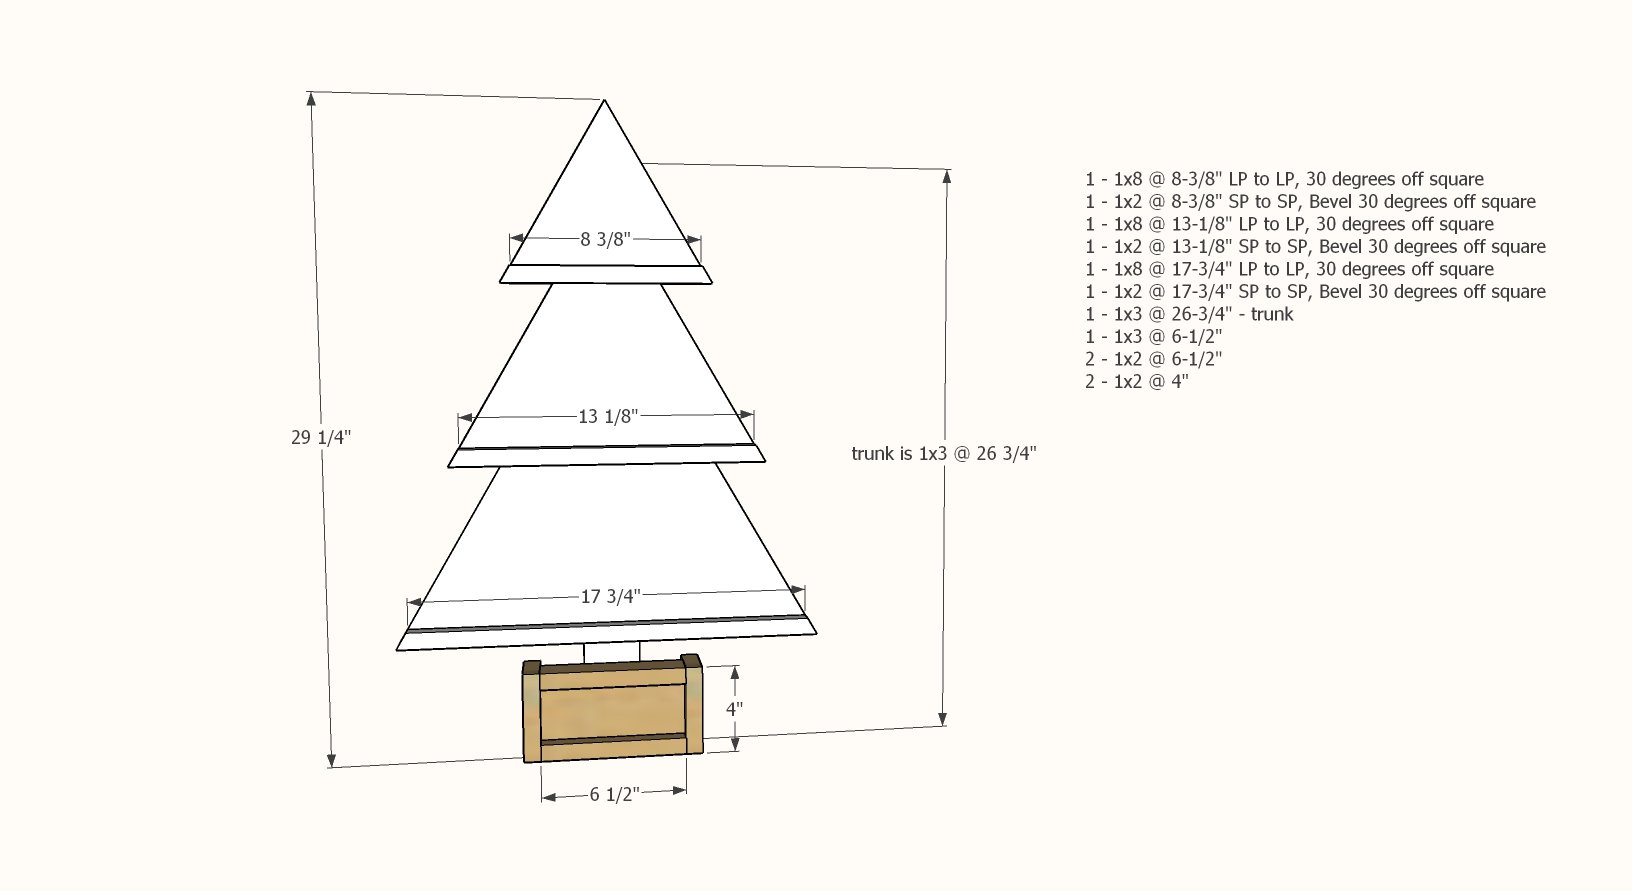
Taller Tree - Ledge height up to 7-1/4" (WILL fit cards in portrait format)
Tree branch parts
- 1 - 1x8 @ 8-3/8" - long point to long point measurement, both ends cut at 30 degrees off square
- 1 - 1x2 @ 8-3/8" - short point to short point measurement, both ends beveled at 30 degrees off square
- 1 - 1x8 @ 13-1/8" - long point to long point measurement, both ends cut at 30 degrees off square
- 1 - 1x2 @ 13-1/8" - short point to short point measurement, both ends beveled at 30 degrees off square
- 1 - 1x8 @ 17-3/4" - long point to long point measurement, both ends cut at 30 degrees off square
- 1 - 1x2 @ 17-3/4" - short point to short point measurement, both ends beveled at 30 degrees off square
Tree trunk/base
- 1 - 1x3 @ 26-3/4"
- 1 - 1x3 @ 6-1/2"
- 2 - 1x2 @ 6-1/2"
- 2 - 1x3 @ 4"
Instructions
Step 1
Follow same steps for larger and shorter trees.
Make cuts with compound miter saw, for the 1x6 or 1x8, cut miters (where the saw blade is rotated). For the 1x2 cuts, tilt the saw blade to make the cuts.
Attach the corresponding 1x2 to the 1x6/8 boards to make all the ledges using glue and 1-1/4" brad nails.


